



A stiff low back can make ordinary things feel weirdly expensive. Standing up from a chair. Reaching into the back seat. Getting out of bed without that little wince that makes you hate the whole morning.
Pilates workouts for lower back pain work best when they stay small, controlled, and honest. Not dramatic. Not sweaty-for-the-sake-of-it. The good stuff usually looks almost boring from the outside: breathing, pelvic control, hip strength, slow spinal movement, and a lot of attention to what your ribs are doing while your legs move.
That’s the part most people miss. A cranky low back is often doing extra work because the hips are sleepy, the core is bracing in all the wrong places, or the thoracic spine has gone stiff and handed the job to the lumbar spine. Small, precise Pilates moves can help share that load again.
One caution before the exercises: if your pain shoots down the leg, comes with numbness or tingling, shows up after a fall, or feels sharp and unrelenting, stop and get checked by a qualified clinician. The workouts below are meant for ordinary stiffness, recurring tightness, and the kind of back that hates sitting too long—not for guessing games.
1. Cat-Cow with Pelvic Rock for a Tight Low Back
This is usually where I’d start if someone’s back feels rusty. Cat-cow wakes up the spine without asking for a big range, and the pelvic rock adds the part many people need most: a reminder that the pelvis and ribs are supposed to move together, not fight each other.
What to Feel
Set up on hands and knees with your wrists under your shoulders and knees under your hips. If your wrists complain, drop to your forearms. Inhale as you let the belly soften and the tailbone lift slightly; exhale as you round the spine and gently draw the navel in.
Then make it even smaller. Rock the pelvis forward and back without forcing the neck or shoulders to do anything clever. The goal is smooth motion, not a big arch.
- Do 6 to 8 slow rounds.
- Keep your elbows soft, not locked.
- Move only as far as your back stays happy.
- Stop before the movement turns pinchy or sharp.
Tip: think of this as oiling a hinge, not stretching a rubber band. Tiny motion done well beats a huge range done badly.
2. The Pilates Breathing Reset
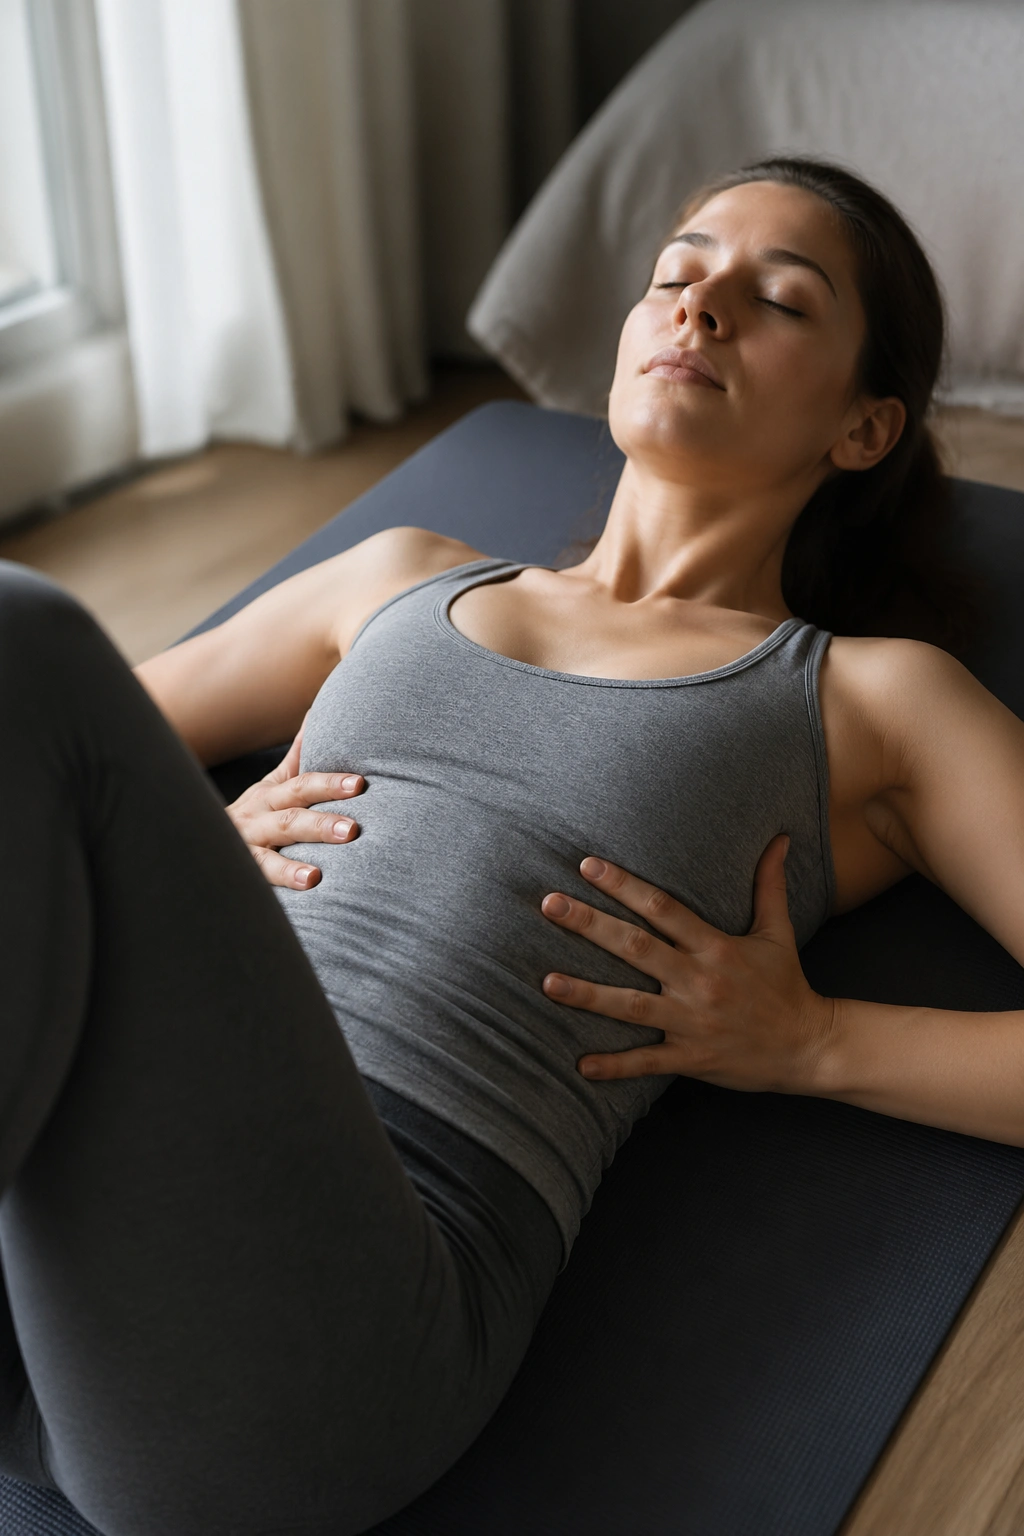
Can breathing count as a workout? For a sore low back, yes. It’s one of the few things that can calm a braced body fast without adding load, and it teaches your ribs to move instead of clamping down on your spine.
Lie on your back with your knees bent and feet flat. Put one hand on each side of the rib cage. Inhale through the nose and let the breath widen the sides and back of the ribs; exhale through the mouth like you’re fogging a mirror and feel the ribs settle. Don’t suck the belly in hard. That’s not the point.
The useful part is the exhale. A longer exhale often helps the deep abdominal wall wake up without a crunch, and that matters when the low back has been overworking for days or weeks.
How to Use It
Take 5 breaths before the rest of your session. Take another 5 if you notice your shoulders creeping up toward your ears. If you only have time for one thing on a rough day, make it this. A calmer torso usually makes every other exercise cleaner.
3. Pelvic Clock
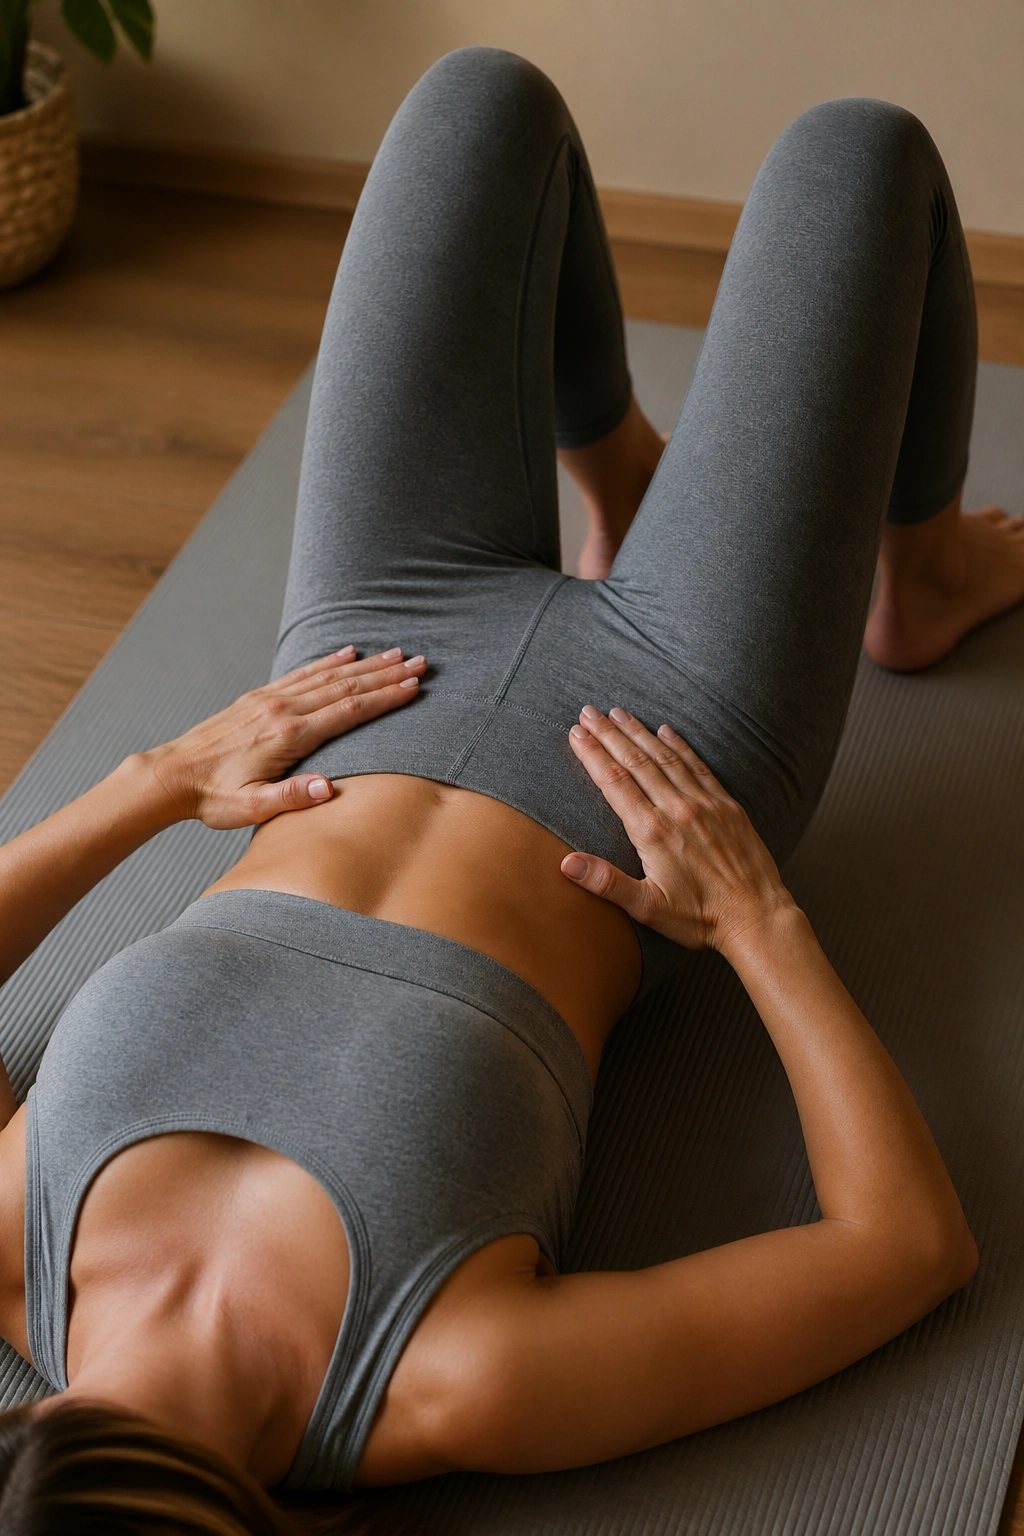
Picture your pelvis as a clock face lying on the floor. Twelve o’clock is the pubic bone tipping up, six o’clock is the tailbone heavy on the mat, and the side points are where one hip bone drops a little while the other climbs.
That mental image helps because a lot of back pain shows up when the pelvis moves as one frozen block. A pelvic clock gives you tiny, controlled motion instead of one big clumsy tilt.
Lie on your back with your knees bent. Slowly tip the pelvis toward 12, 6, 3, and 9 o’clock, then make a small circle in each direction. Keep your breath quiet and your jaw loose. If the motion is barely visible, good. That’s often exactly right.
How to Practice It
- Spend 30 seconds on each direction.
- Keep the rib cage heavy, not flared.
- Let the movement happen under your hands if you place them on the front hip bones.
- Skip any direction that pokes the pain.
A pelvic clock looks simple because it is simple. Don’t rush past it. The tiny control it teaches often pays off when you later sit, stand, or walk.
4. Knee Folds That Keep the Spine Quiet
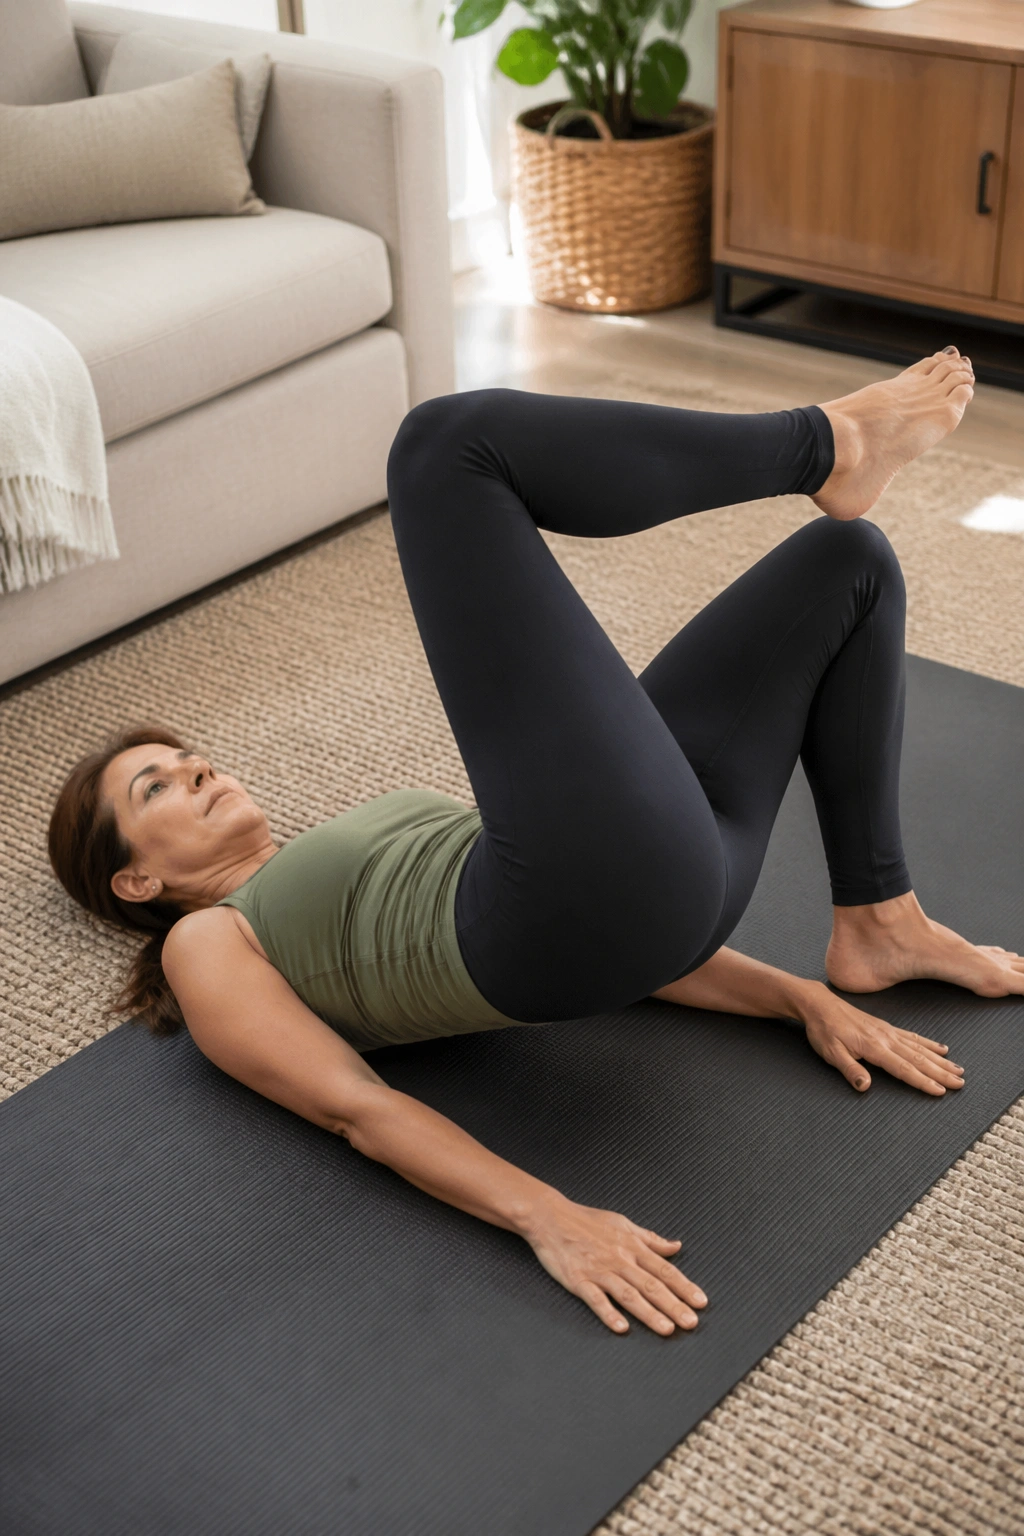
If your back grumbles during walking or stair climbing, knee folds are worth your time. They train the deep abs to hold the pelvis steady while one leg moves, which is a basic skill and a surprisingly useful one.
Start on your back, knees bent, feet on the floor. Exhale and float one foot off the mat until the knee comes over the hip, then lower it with control. The other side stays quiet. No twisting, no rib flare, no sneaky arch in the low back.
This is where people usually cheat. The hip flexor grabs, the ribs pop up, and the back takes over again. That’s not failure. It’s just a clue that the leg is going too high or the core is working too hard.
- Try 6 to 8 folds per side.
- Keep the lifted thigh no higher than the pelvis can handle.
- Exhale on the lift, inhale on the lower.
- If the back starts to lift off the mat, shorten the range.
I like this move because it tells the truth. If you can’t move one leg without losing the pelvis, that’s useful information, not a moral issue.
5. The Hundred Prep
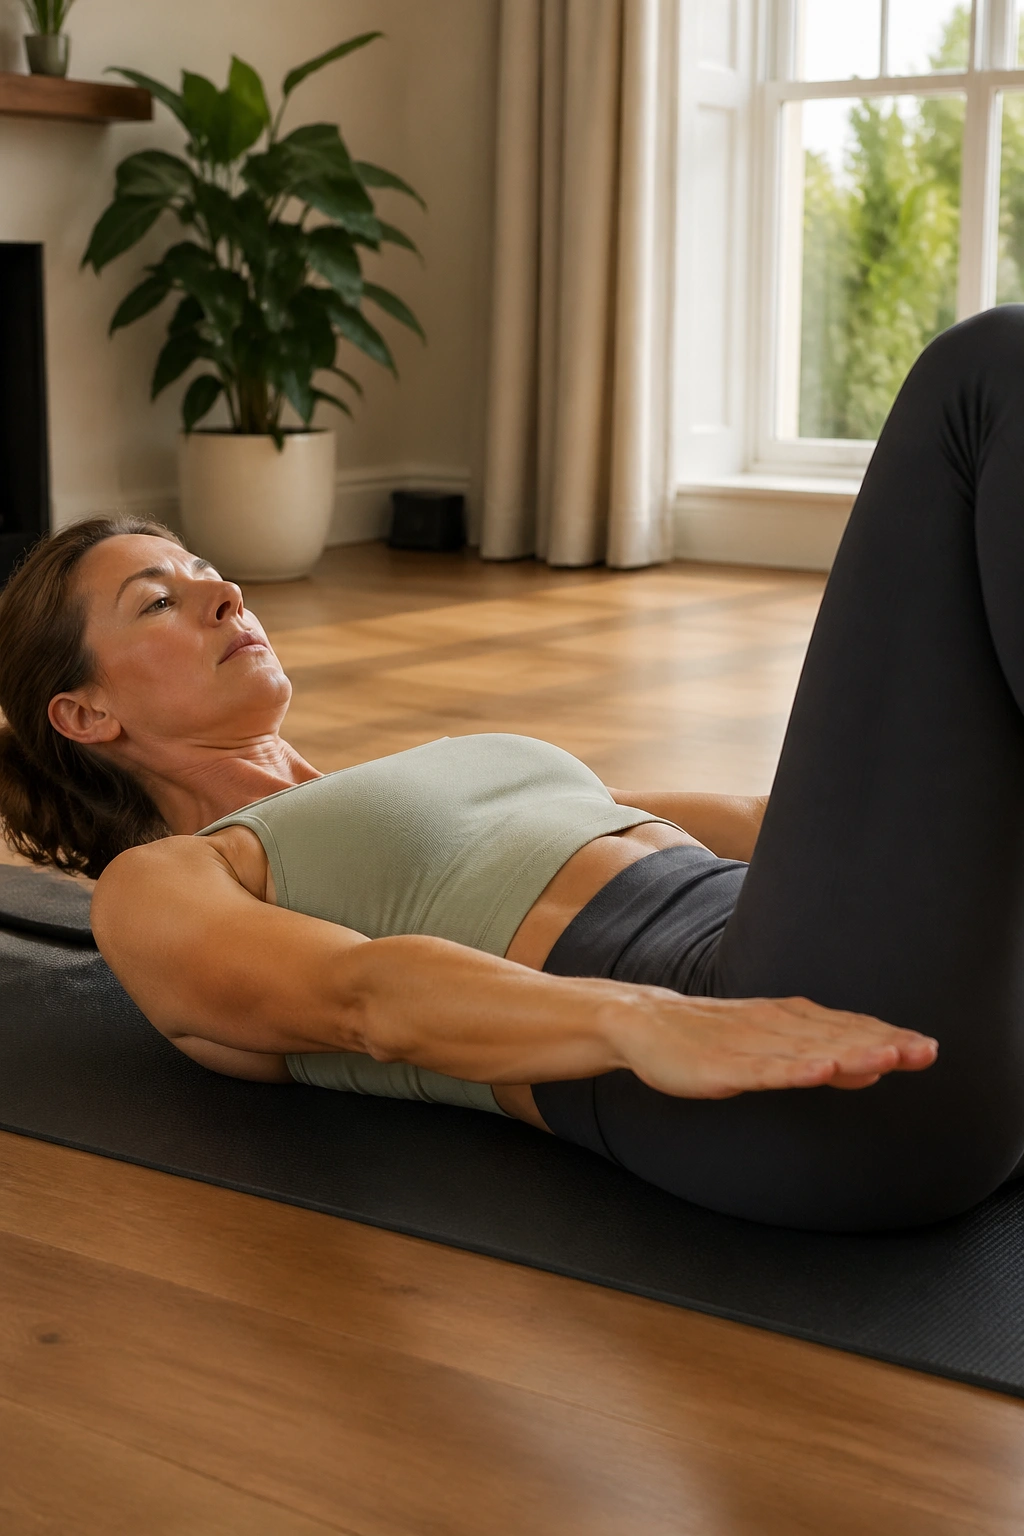
The full Hundred is a lot for a tender back. The prep version is more useful anyway. It teaches breath rhythm, trunk support, and arm work without making you feel like you’ve been folded in half by a gym machine.
Lie on your back with your knees bent and feet down, or bring the legs to tabletop if that feels stable. Lift the head only if your neck and back tolerate it. Reach the arms long by your sides and pump them in tiny, quick beats while breathing in for 5 and out for 5. Keep the ribs knit and the pelvis quiet.
That’s the real lesson here: the arms can work while the trunk stays calm. If your low back arches, put your feet back on the floor.
A lot of people want to rush to the flashier Pilates version. I wouldn’t. The prep is kinder, and kinder is often smarter when the back is already irritated.
6. Glute Bridges That Take Load Off the Lower Back
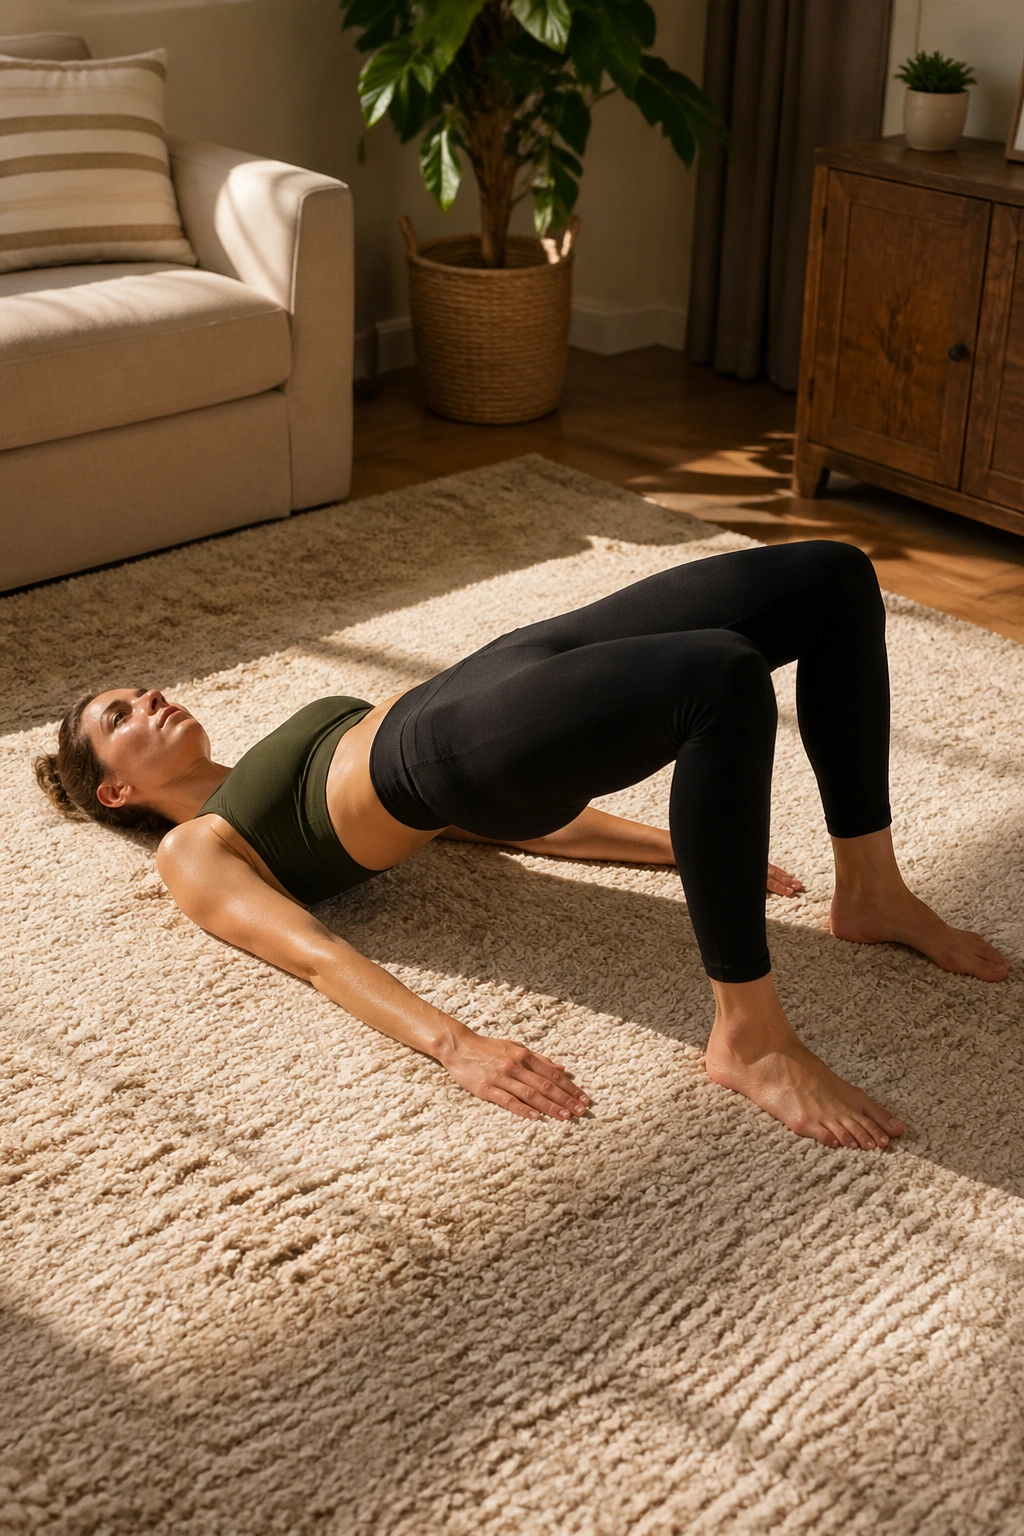
A bridge is one of those exercises that looks almost too basic, which is exactly why people skip it and then wonder why their back still feels cranky. Strong glutes help the pelvis stay steady, and steady pelvises usually mean less work for the lumbar spine.
Lie on your back with your feet hip-width apart, heels close enough that your fingertips can almost brush them. Exhale and lift the hips until your body forms a long line from shoulders to knees. Pause for one breath, then lower slowly, one vertebra at a time if you can do it without cramping.
The key detail is the ribs. Keep them soft. If they flare up, the low back usually starts doing the lifting. If your hamstrings cramp, walk your feet a little closer to your hips.
Quick Checks
- You should feel glutes first, not lower-back pinching.
- Your knees should stay roughly over your second toes.
- The lift can be low. It does not need to be huge.
- 8 slow reps is plenty to start.
My blunt opinion: if a bridge turns into a backbend, the bridge is too high. Lower it and keep the work in the hips.
7. Bridge March
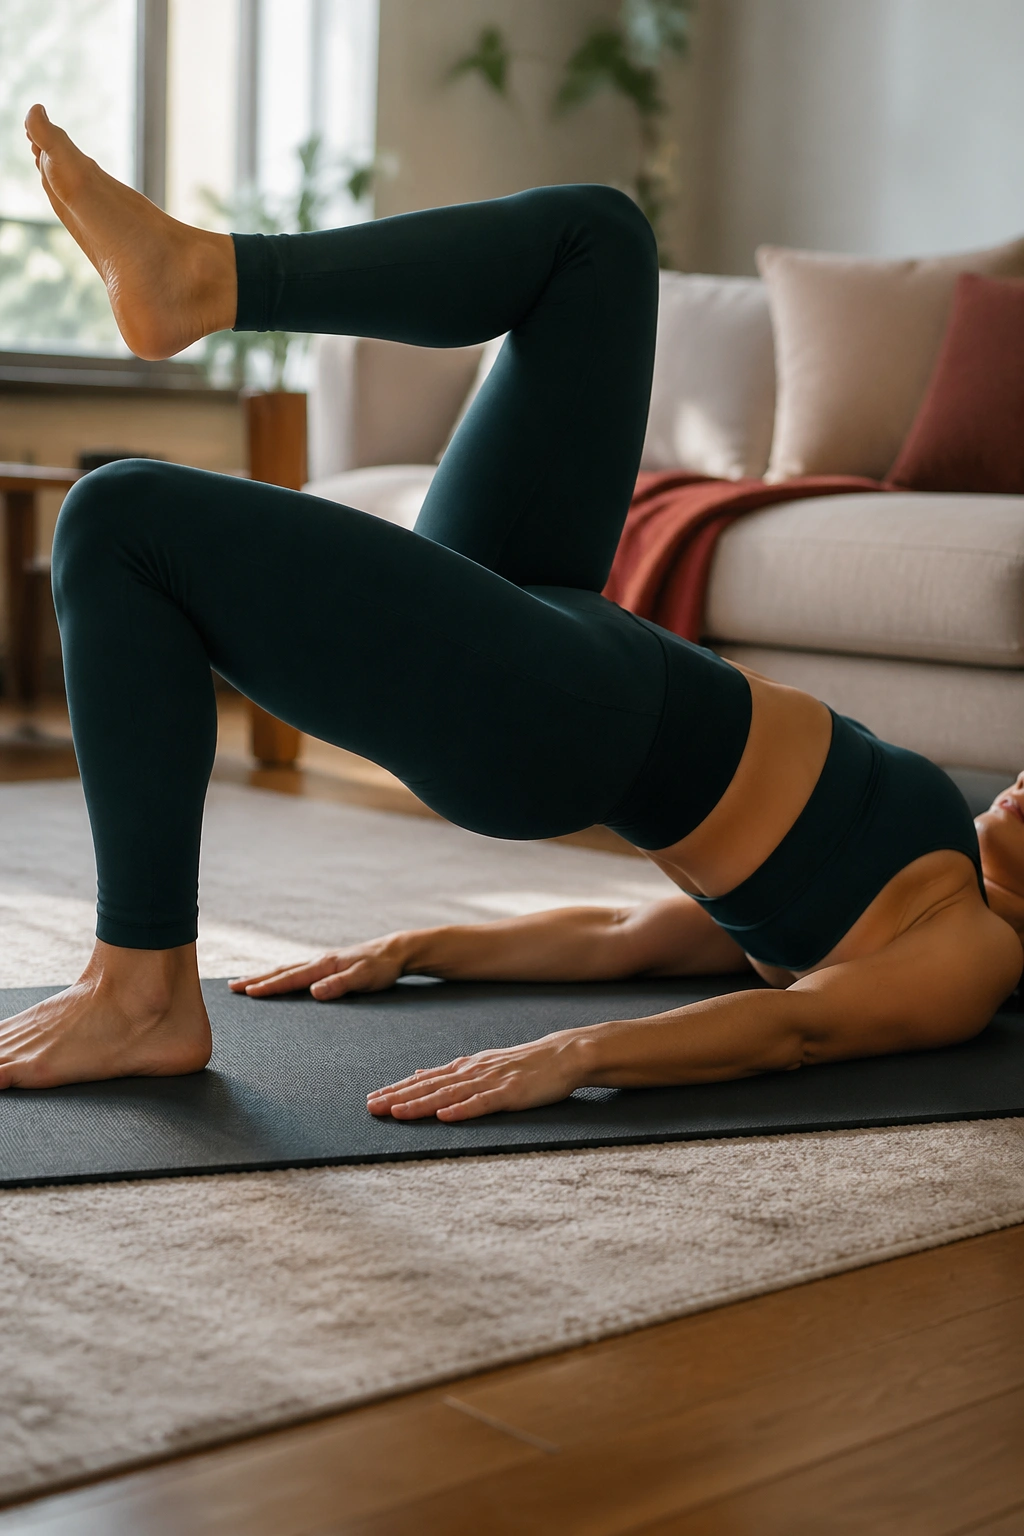
Once a regular bridge feels steady, the march adds a little test. One foot lifts, the pelvis stays level, and the trunk has to resist the urge to wobble. That’s gold for anyone whose back gets annoyed when one leg moves at a time.
Set up in the top of your bridge. Without dropping the hips, lift one foot a couple of inches off the floor, place it back down, then switch sides. The movement should feel almost ridiculous in its smallness. Good. Small is the point.
If the pelvis drops or the low back tightens, shorten the hold and make the march lighter. You can even keep the toes on the mat and just peel one heel away at a time.
Do 4 to 6 marches per side. Rest, then repeat once more if you feel solid. This is the sort of work that pays off later when you’re climbing stairs or carrying groceries and your back is not the thing doing all the complaining.
8. Single Leg Stretch Without the Crunch
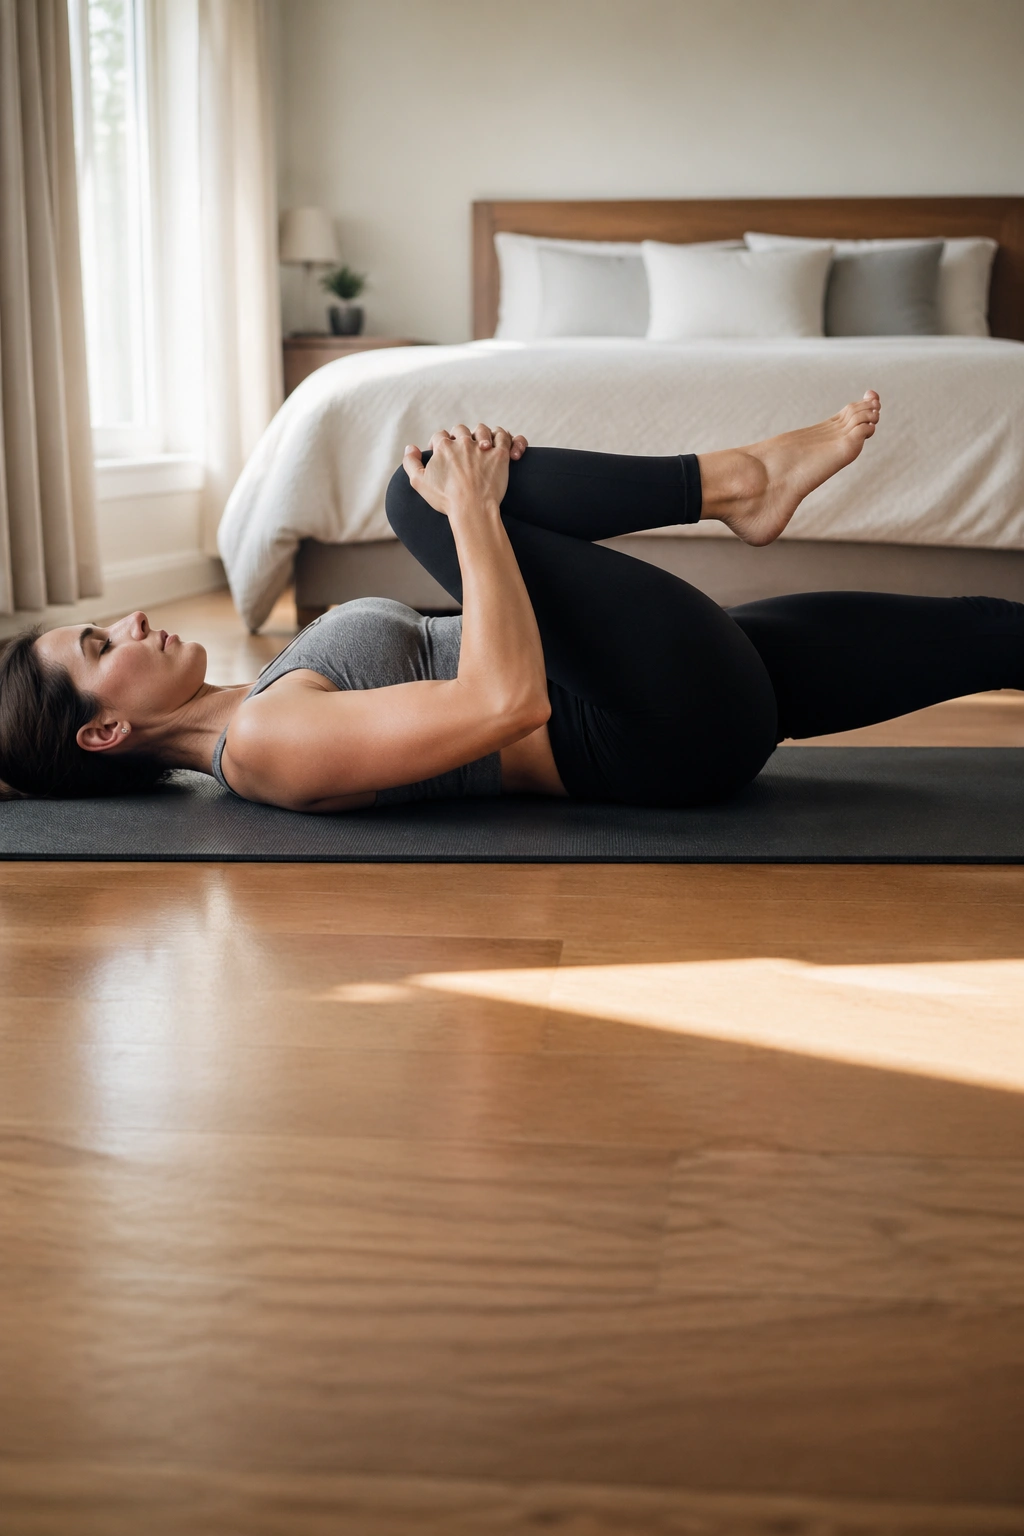
Why do so many people flare their backs on single leg stretch? Because they make it a neck exercise instead of a trunk-control exercise. Keep the version gentle and it becomes a far better back-friendly drill.
Lie on your back. Bring one knee in and let the other leg extend long, but not so low that your back arches. Hands rest on the shin or just below the knee. Alternate sides with a slow inhale and exhale, keeping the pelvis heavy and the ribs quiet.
Where to Stop
If you feel your lower back pressing hard into the mat, the range is probably too large. If your hip flexors are screaming, the extended leg is too low. If your neck is unhappy, keep your head down and call it a win.
- Do 6 to 10 switches.
- Keep the extended leg higher than you think.
- Move with the breath, not against it.
- Stop before form gets sloppy.
Lower does not mean better here. A smaller leg line with a stable pelvis beats a flashy version every time.
9. Toe Taps for Deep Core Control
Toe taps look plain. That’s the charm. They let the deep abdominals do their job without a bunch of drama, and that’s often what a painful low back is missing.
Start in tabletop with both knees bent at 90 degrees. Exhale, lower one toe toward the floor, tap lightly, then bring it back. Alternate sides while keeping the pelvis as still as a glass of water. If the lower back starts arching, lift the thighs a little higher.
What to Watch For
- Keep the rib cage from popping up.
- Use a slow, steady exhale on each lower.
- Don’t slam the foot down.
- Start with 4 taps per side if you’re new to it.
The dead-bug family of exercises gets praised a lot, and for good reason. But the useful part isn’t the name. It’s the anti-extension control—the ability to keep the spine from tipping into a deep arch when the legs move.
Best cue: imagine your waistband getting wider on the exhale, not your back getting flatter by force.
10. Clamshells for the Outer Hips
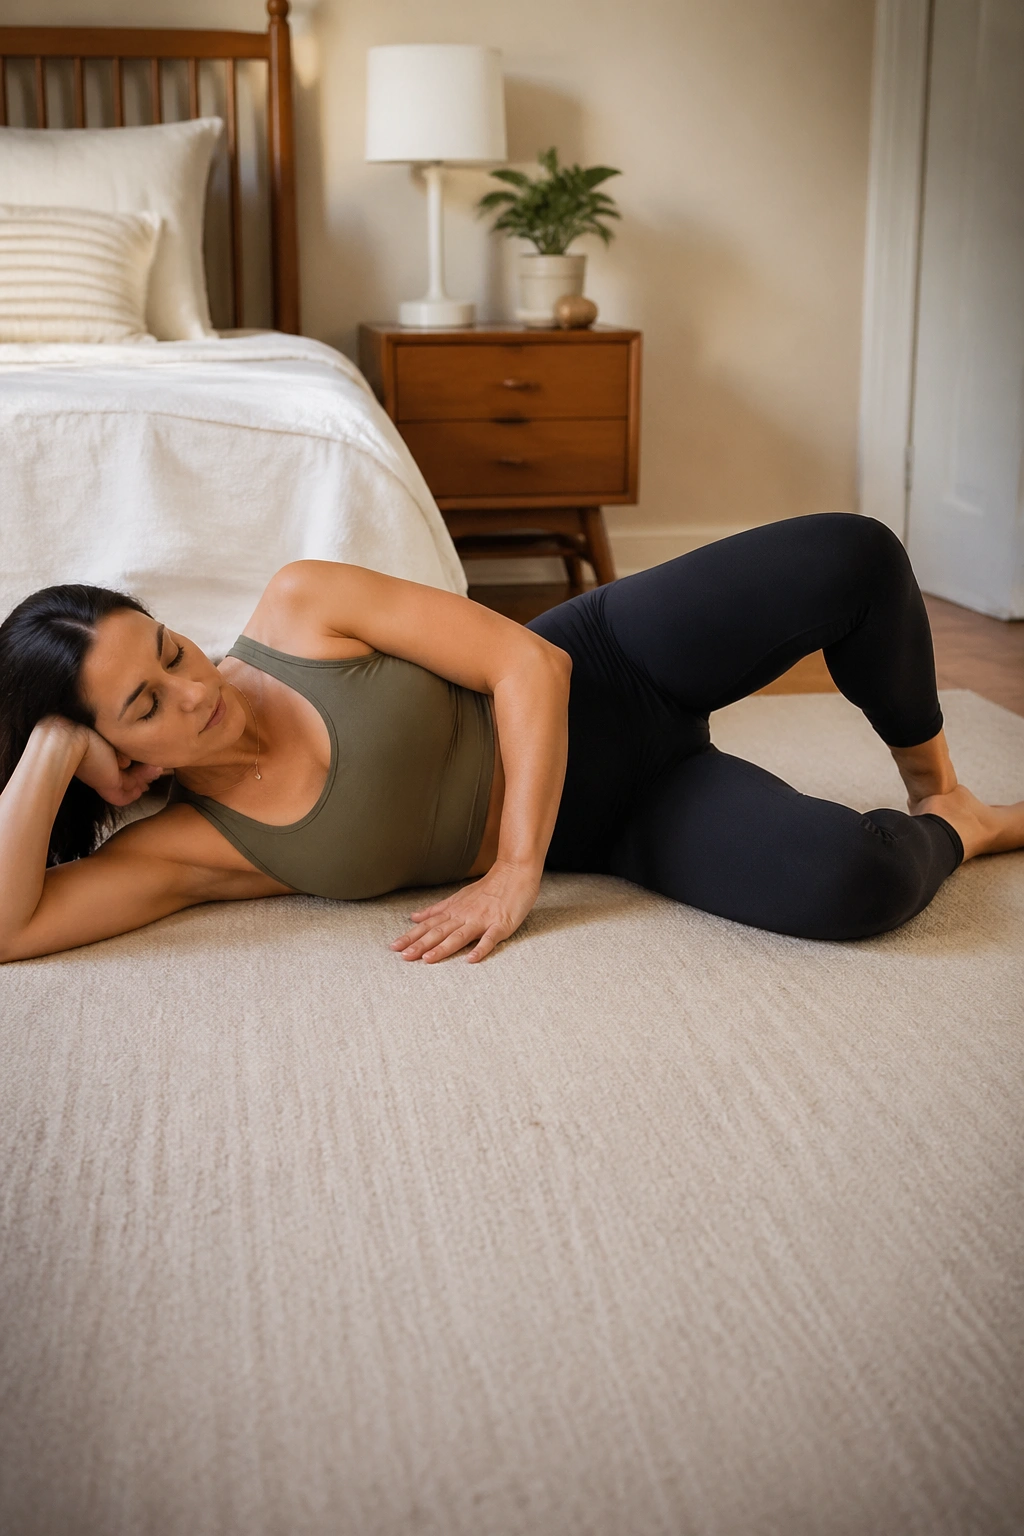
A weak or sleepy outer hip can feed right into low-back grumbling, especially if you sit a lot or stand with one hip hanging out. Clamshells target the glute medius, the muscle that helps keep the pelvis level when you walk.
Lie on your side with knees bent and heels together. Keep the hips stacked. Exhale and open the top knee like a clamshell without rolling backward. The pelvis should stay put. If your torso tips back, the range is too big.
Do 10 to 12 reps per side, maybe with a mini band if bodyweight feels too easy. A little burn in the side of the hip is fine. A pinch in the front of the hip or the low back is not.
The move is small, but the effect can be useful. I’d rather see someone do two clean sets of clamshells than twenty sloppy ones with the waist twisting all over the place.
11. Side-Lying Leg Lifts That Don’t Invade the Back
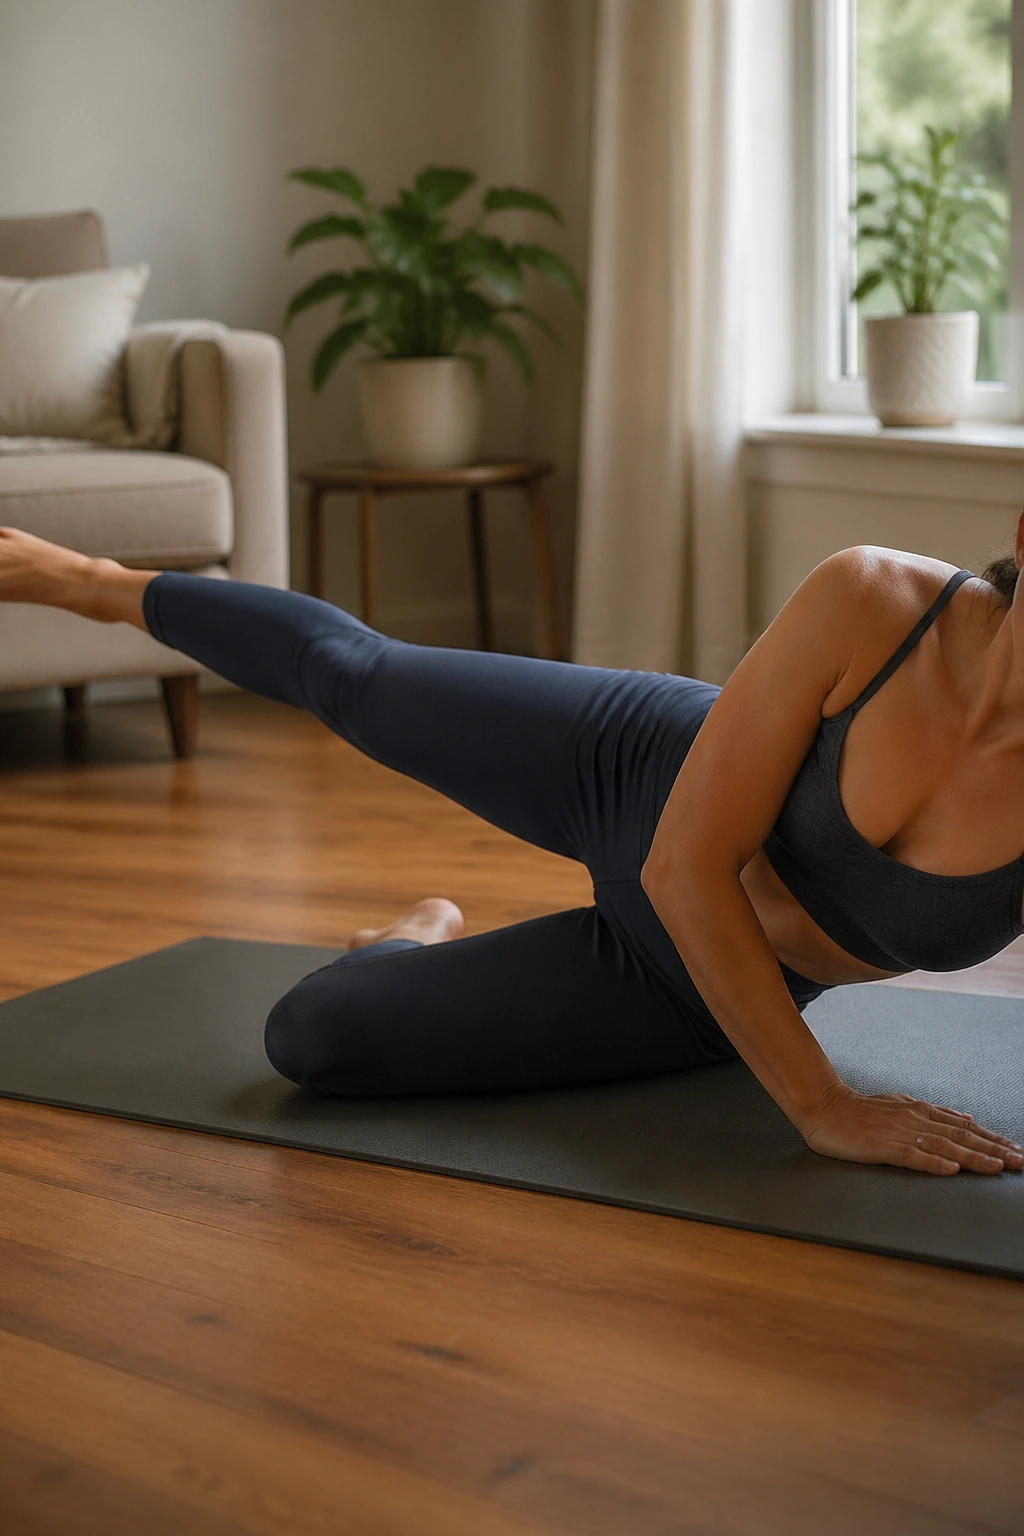
Unlike clamshells, side-lying leg lifts ask the whole outer hip to work through a longer lever. That makes them a bit harder, and also a bit easier to mess up if the lower back jumps in to help.
Stay on your side with the bottom knee bent for support or both legs long if that feels better. Keep the top toes slightly angled down and lift the top leg only 6 to 12 inches. You want the work in the side of the hip, not a twist through the waist.
A lot of people swing the leg high because it feels productive. It isn’t. A smaller lift with a steady pelvis often lights up the glute medius more cleanly, which is what you want for back support during walking and standing.
Keep This in Mind
- The waist should stay long.
- The top hip should not roll back.
- The leg should rise, not fling.
- 8 to 10 controlled lifts is a solid start.
If clamshells are the starter course, this is the slightly more serious follow-up.
12. Mermaid Stretch for Side-Body Relief
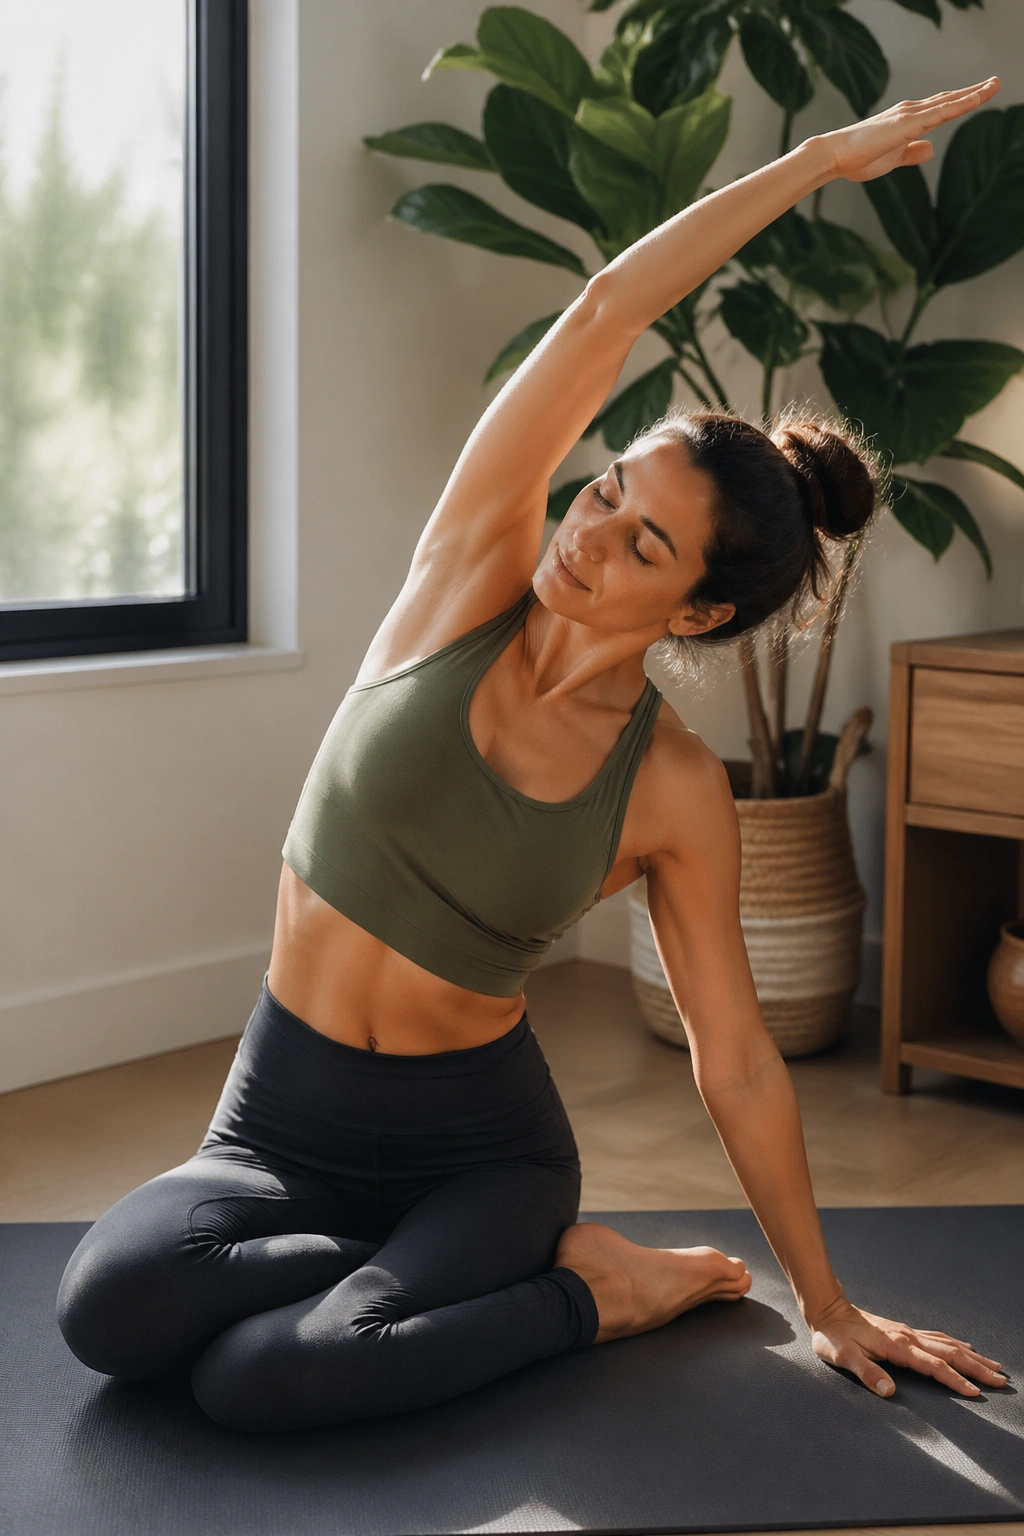
Side body tightness can tug on the low back more than people realize. A stiff waist, tight lat, or cranky rib cage changes how the spine stacks, and then the lumbar area gets asked to bend or hold when it would rather not.
Sit with your legs folded to one side or cross-legged on a cushion. One hand rests on the floor or mat, the other reaches overhead. Inhale into the ribs on the open side, then exhale and arc gently over. Keep the movement long, not collapsed. You’re reaching over a barrel, not folding yourself in half.
That side-breathing detail matters. The ribs should feel like they’re widening and then softening, especially on the side that’s lengthening. If the shoulder rises toward the ear, back off.
A mermaid stretch is one of my favorite choices after a long sitting spell. It can make the whole trunk feel less boxed in. Not flashy. Just useful.
13. Thread the Needle to Free the Upper Back
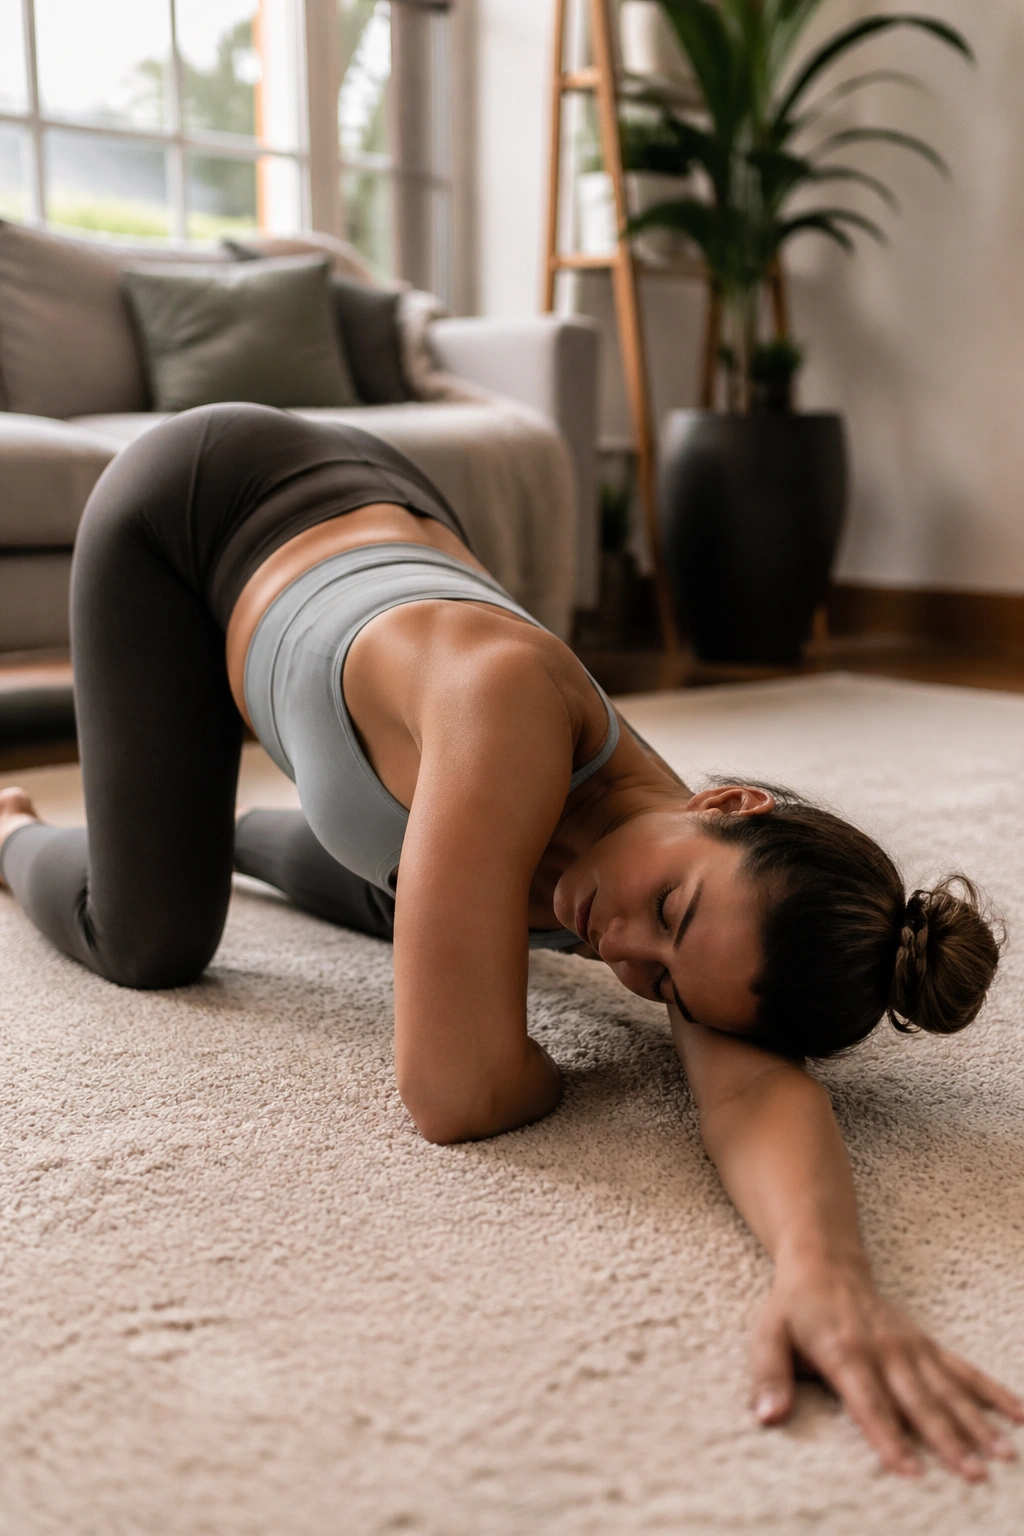
Rotation should come from the upper back, not the sore spot that’s already doing too much. Thread the needle gets you there in a controlled way.
From hands and knees, slide one arm under the body and lower the shoulder and head toward the floor. Keep the hips as square as possible. Breathe into the back ribs for 3 to 5 slow breaths, then unwind and switch sides. If the floor feels too far away, place a folded towel under the shoulder or head.
How to Keep It Easy
- Keep the movement slow enough that you can breathe through it.
- Don’t force the shoulder to the mat.
- If your knees don’t like pressure, put a pad under them.
- Stop if twisting makes the low back angry.
I use this one as a reminder that not every back problem lives in the back itself. Sometimes the missing piece is a stiff upper spine stealing motion from the lumbar area. Annoying, yes. Also useful.
14. Swan Prep for Gentle Extension
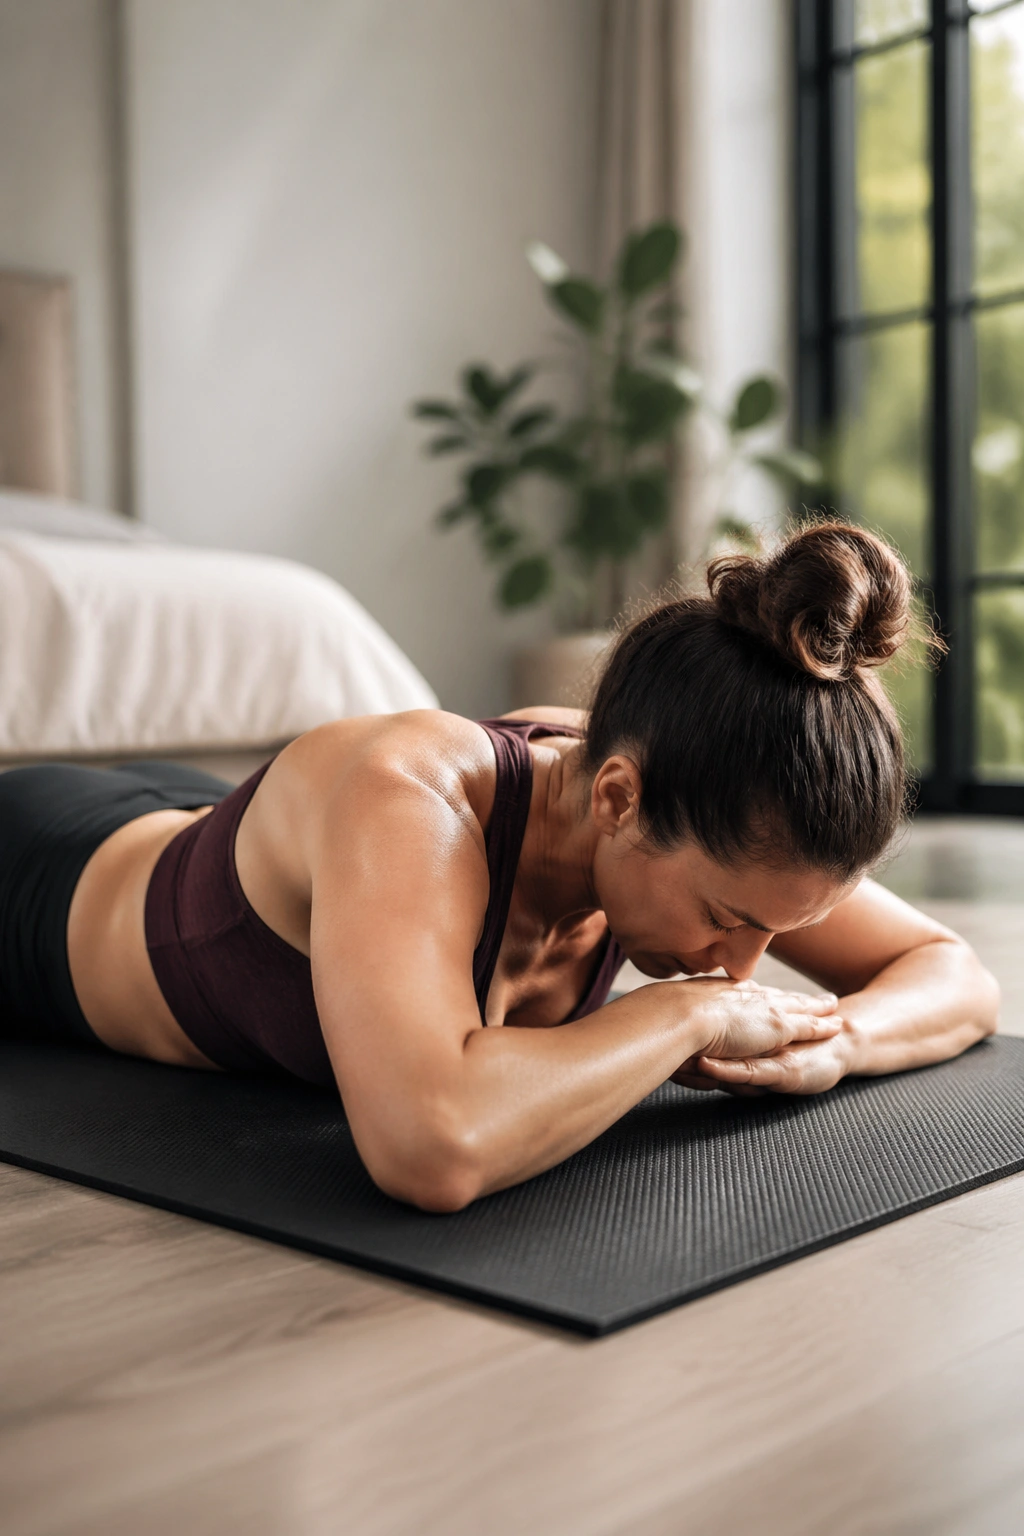
Not every sore back needs more curling. Some backs are stiff because they spend all day rounded forward, and a small dose of extension can feel like a relief. Swan prep is the careful version—small lift, long neck, no yanking.
Lie on your stomach with your forehead on your hands. Press the pubic bone softly into the mat, lengthen the tailbone away, and lift the chest just a couple of inches. Think of the sternum gliding forward more than the head going up. The low ribs stay heavy.
This one has a catch. If back extension makes your pain sharper, pinchy, or worse later in the day, skip it. And if you have symptoms that radiate down the leg, don’t guess your way through a prone backbend. Get assessed.
Do not chase height. Swan prep is about control, not a dramatic cobra pose. Five clean lifts are enough to remind the back how to extend without compression.
15. Bird Dog for Cross-Body Stability
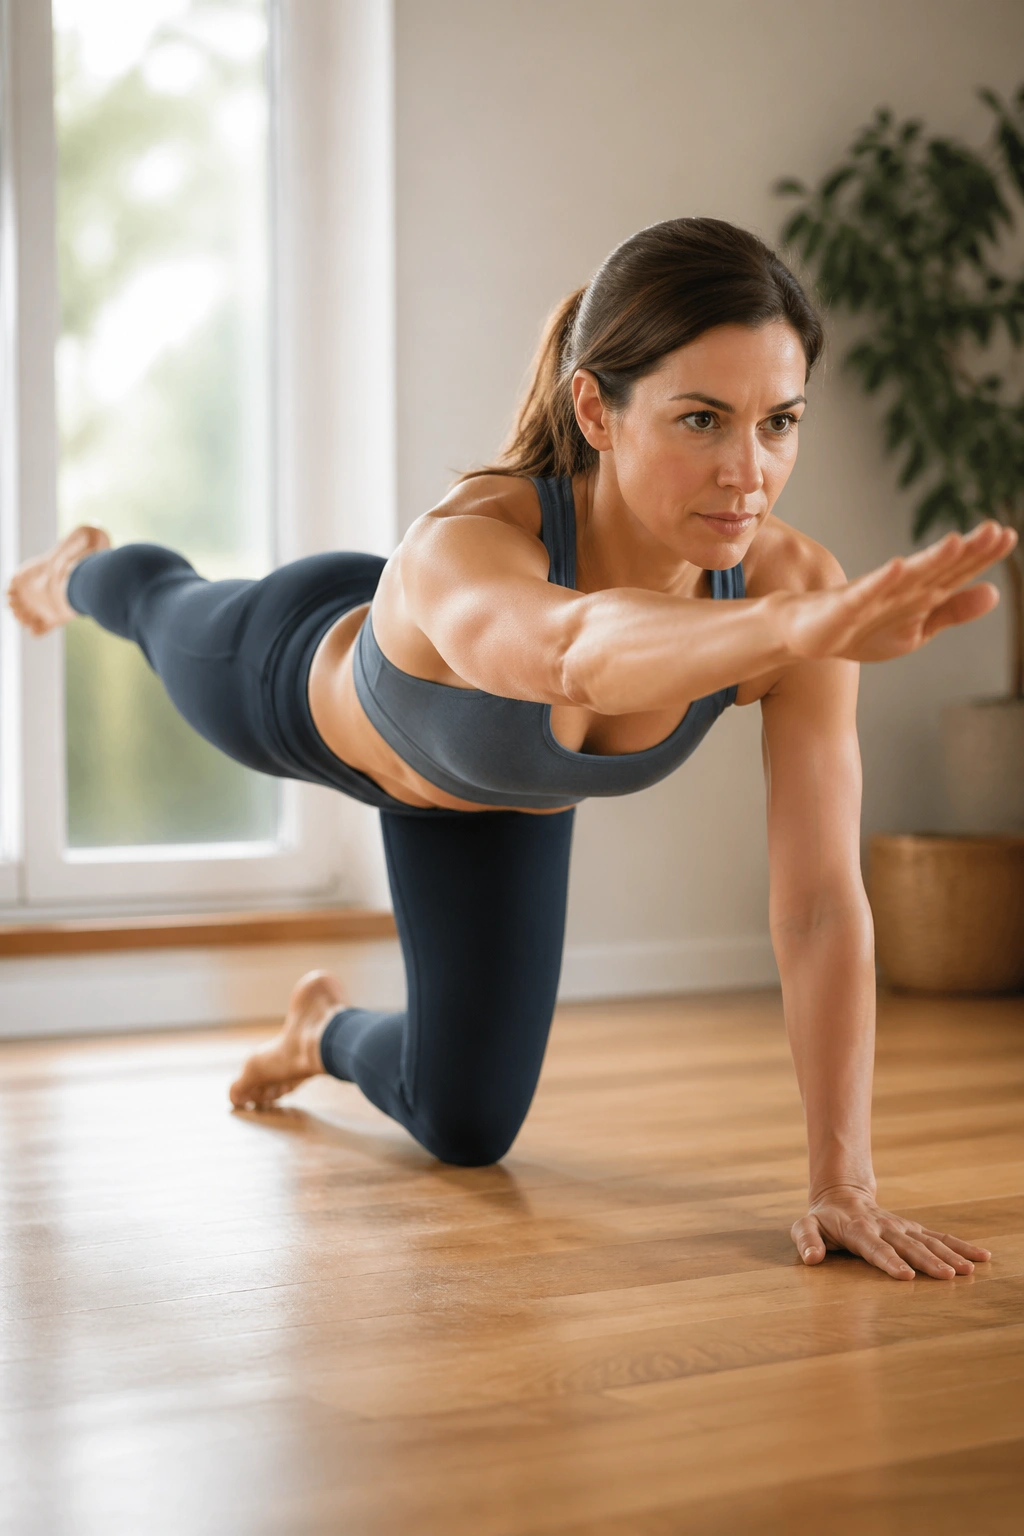
What happens when one arm and the opposite leg have to move at the same time? The trunk either holds steady or it leaks motion everywhere. Bird dog is one of the cleanest ways to find out.
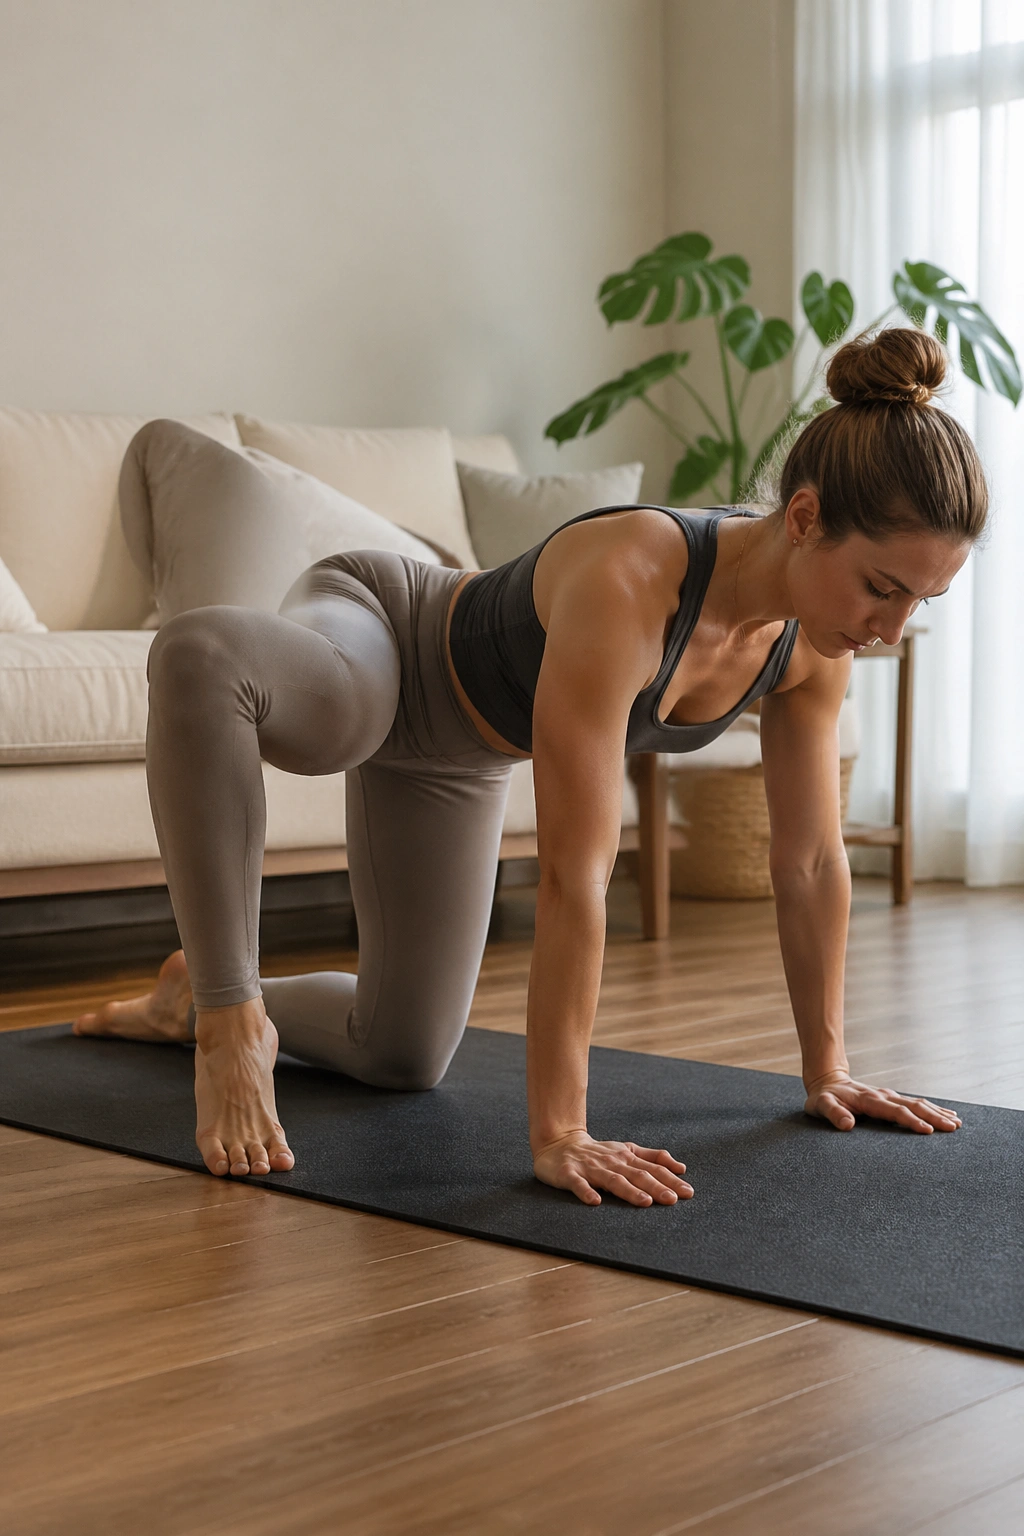
Start on hands and knees. Reach one leg back and the opposite arm forward until both lines are long. Keep the hips square, the belly gently supported, and the neck in line with the spine. Hold for 2 to 3 breaths or about 5 seconds, then return with control.
Why It Works
The exercise trains the body to resist twisting while limbs move. That matters for real life: reaching for a seat belt, carrying laundry, stepping onto a curb. The low back tends to calm down when the pelvis stops wiggling every time a limb leaves the floor.
- Keep the lifted leg no higher than hip level.
- Reach long, not high.
- Exhale to lift, inhale to hold.
- Try 5 reps per side to start.
A tiny wobble is normal. A full trunk sway is your cue to shorten the reach and slow the pace.
16. Wall Roll-Down for Standing Relief
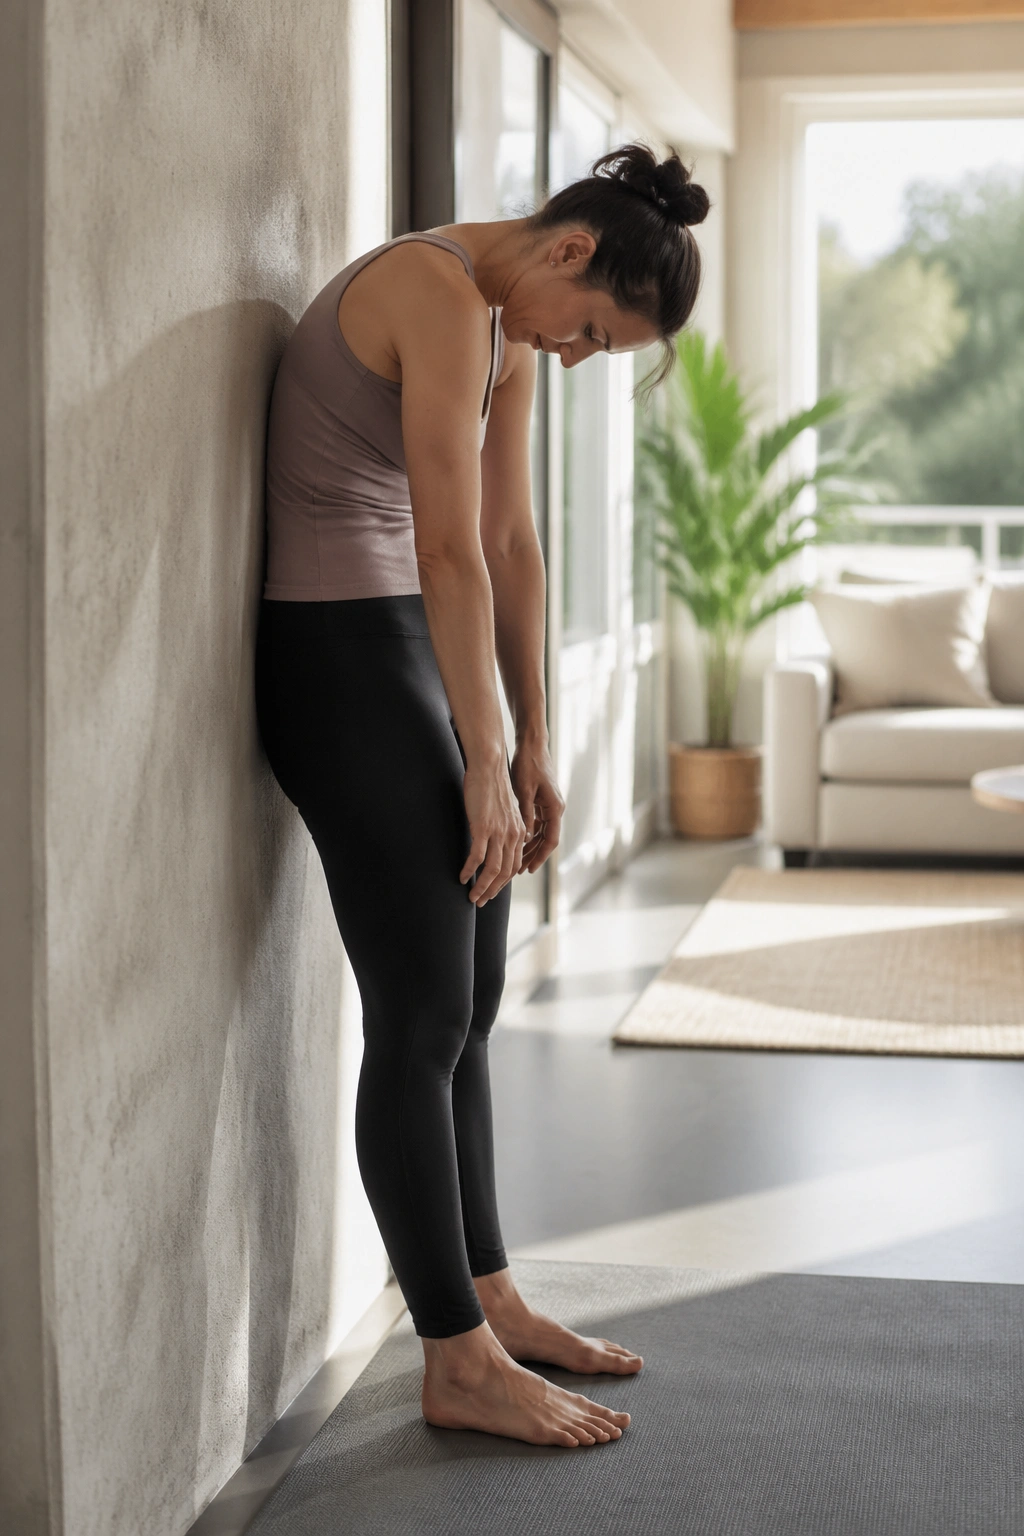
Standing work counts, especially for people who cannot or do not want to get on the floor every day. Wall roll-downs are a nice bridge between movement and posture, and they’re useful when your back feels stiff after a long car ride or desk stretch.
Stand with your heels a few inches from a wall, knees soft, arms hanging. Exhale and nod the chin, then peel the spine forward one section at a time. Let the arms hang heavy. Inhale at the bottom if it feels okay, then exhale and stack back up slowly, starting from the pelvis and finishing through the crown of the head.
The movement should feel like a controlled release, not a collapse. If the hamstrings are tight, bend the knees more. If the back hates full forward flexion, keep the roll small and stop halfway.
This is one of those moves that looks almost too mild to matter. Then you do it after sitting all day and realize your whole back wanted that exact kind of slow unfurling.
17. Open Book for Gentle Spinal Rotation
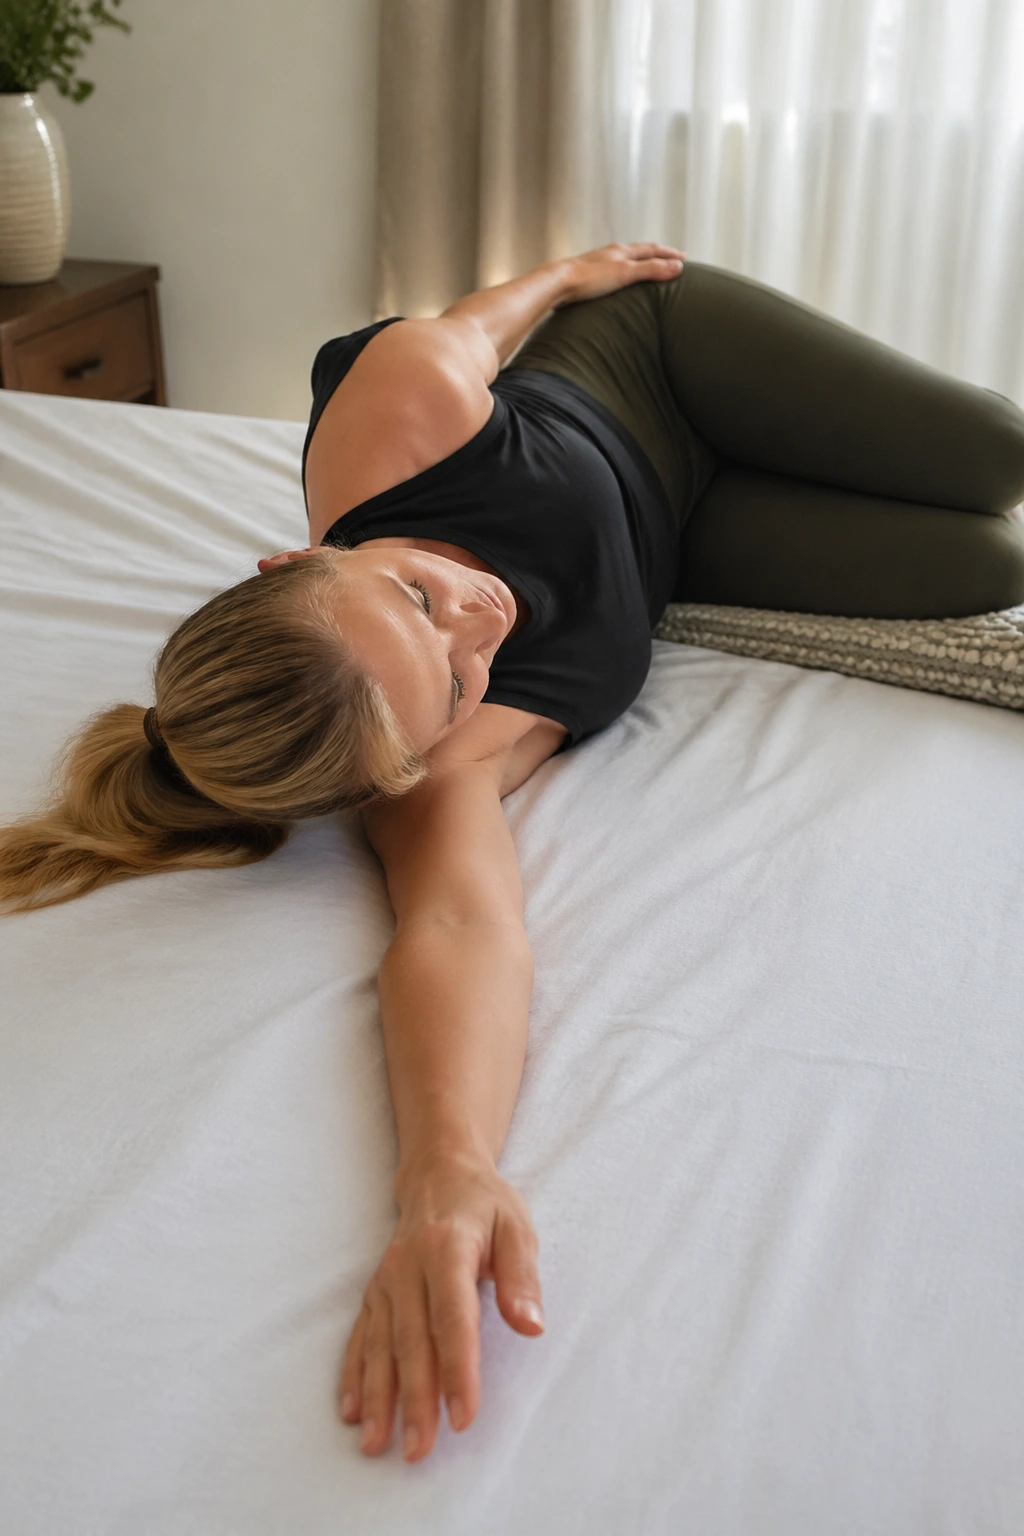
A twist can help, but only the gentle kind. Open book works well because the pelvis stays mostly grounded while the upper spine rotates, which keeps the motion from dumping into the low back.
Lie on your side with knees bent and stacked, arms stretched in front like you’re about to hug a huge beach ball. Open the top arm across the body and let the chest follow, stopping before the lower back complains. Keep the knees together or place a pillow between them if that feels better.
A Few Honest Rules
- If the twist feels pinchy in the low back, reduce the range.
- If the shoulder won’t open without strain, don’t force it.
- If your breathing gets shallow, you’ve gone too far.
- 3 to 4 slow reps per side is enough.
Open book is one of those exercises I like more for what it avoids than what it does. It gives you rotation without the ugly, rushed twisting that often irritates a sensitive spine.
18. A 10-Minute Pilates Flow for Lower Back Pain
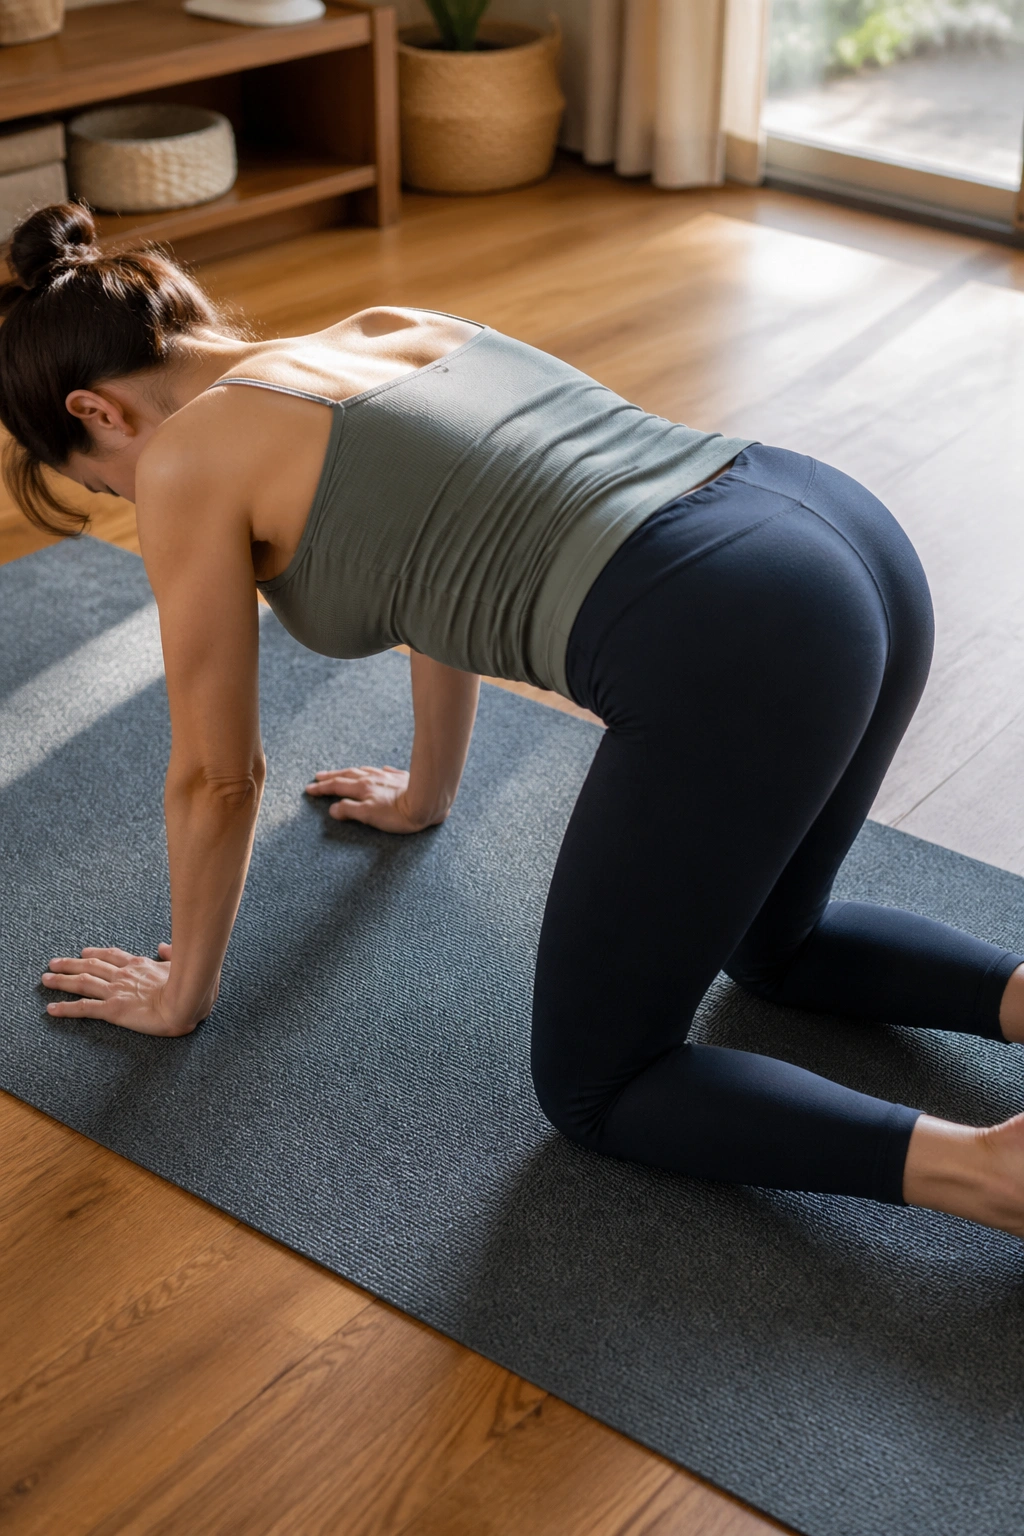
If you want a short session that doesn’t feel random, stitch a few of these together and keep the whole thing calm. That’s often the sweet spot for lower back pain: enough movement to loosen the system, not so much that you leave the mat guarding your back for the rest of the day.
Start with the breathing reset for 5 breaths. Move into pelvic clock for 30 seconds each direction. Then do cat-cow for 6 rounds, bridge for 8 reps, toe taps for 6 per side, and a mermaid stretch for 3 breaths each side. Finish with a slow wall roll-down or a gentle open book if the floor still feels good.
Short sessions tend to work better than heroic ones when the back is touchy. Ten focused minutes done three or four times a week usually beats one long, messy workout. That’s not glamorous, but it’s the truth.
If your body likes structure, keep the same order for a week and notice what changes first: morning stiffness, sitting tolerance, or how the low back feels when you bend to tie your shoes. The answer tells you which exercise deserves more time.
