



If your jeans feel a little tighter through the waist, hips, or upper thighs, Pilates can be a smart place to start at home. It won’t melt inches from one body part on command — nothing does — but it can change the way your body holds itself, which is a big part of how inch loss shows up in real life.
That’s the part people miss. A tighter midsection often comes from better core control, cleaner posture, stronger glutes, and less wobble through the hips, not from endless crunches or punishing cardio sessions.
A good mat routine can also expose weak spots fast. One side of your core shakes. Your ribs pop open. Your hip flexors try to do the work your abs should be doing. That feedback matters, because it tells you where your body is leaking effort.
If you want a fair read on progress, measure the same spots each time — usually the natural waist, the widest part of the hips, and the upper thigh — and do it under the same conditions. Small shifts show up there before they show up anywhere else.
1. The Hundred for Core Heat
The Hundred is the cleanest place to start because it teaches your breath and your deep core to work together. That matters more than it sounds. When the ribs stay controlled and the belly stops bulging out with every exhale, the whole waistline starts to look a little tighter.
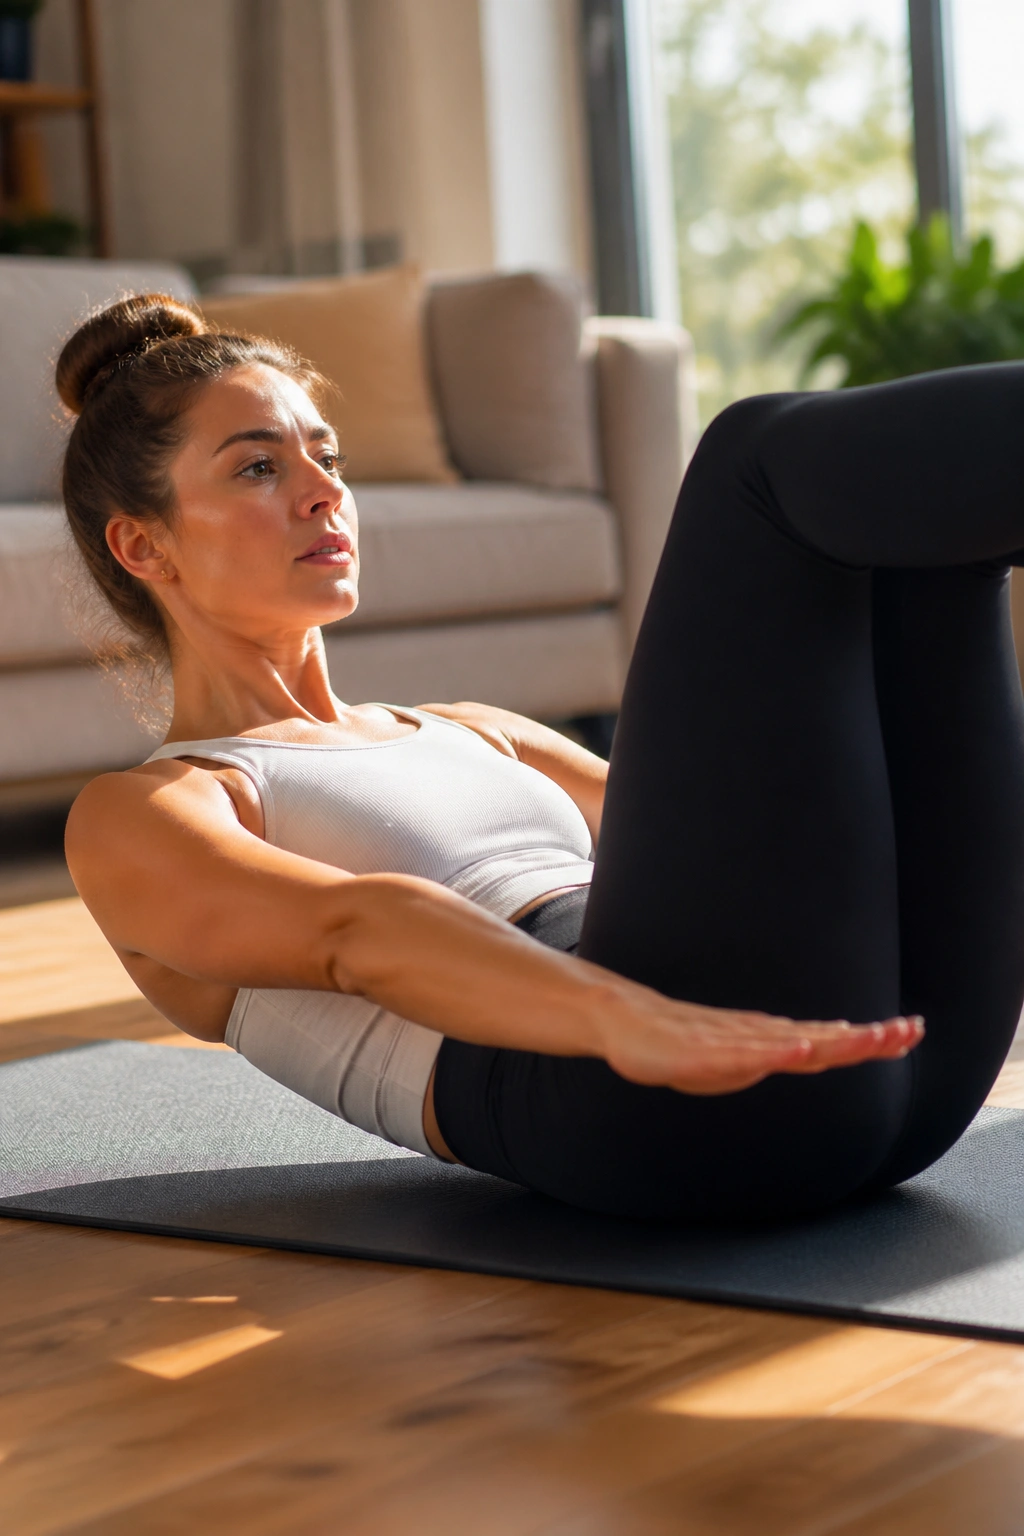
Lie on your back, bring your legs to tabletop, and lift your head and shoulders only as high as your neck can handle without strain. Pump your arms hard and fast for 5 counts in, 5 counts out, for 10 rounds. If your low back starts arching, place your feet down and keep the arm action going.
How to keep it honest
- Press your lower back gently into the mat before you start.
- Keep your chin slightly tucked, not jammed to your chest.
- Make the arm pumps small and sharp, about 4 to 6 inches.
- Stop if the neck starts doing all the work.
Best use: 1 round as a warm-up, or 2 rounds if you want the core to wake up before a longer session.
2. Roll-Up for a Longer Midsection
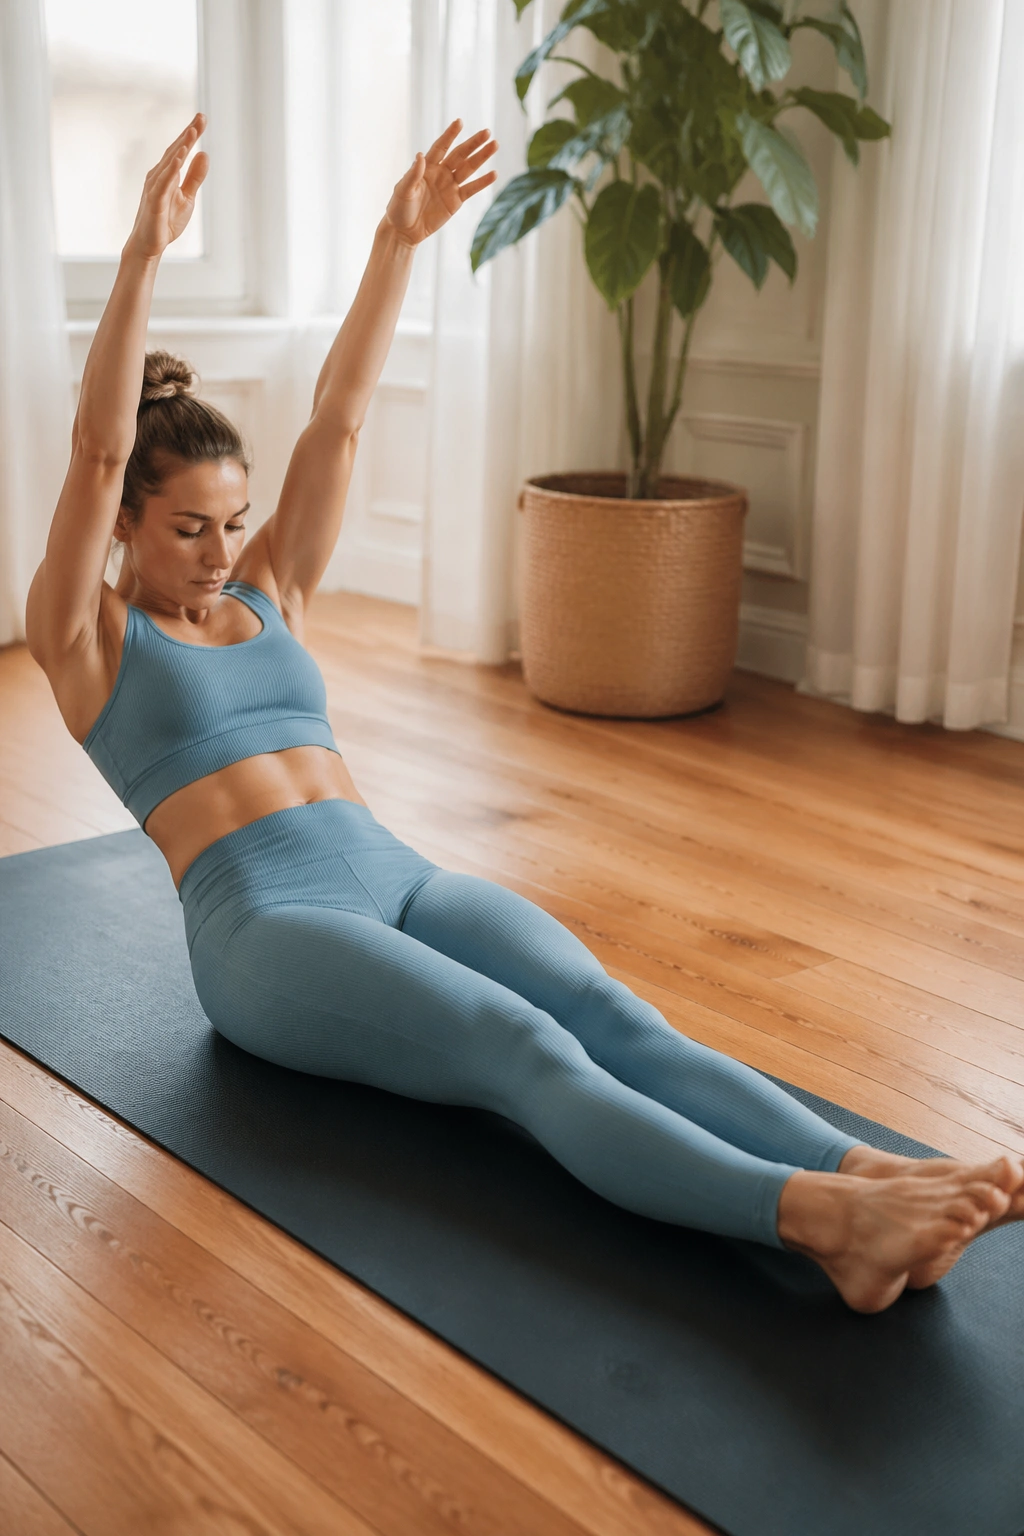
Why do people rush the roll-up? Because the slow version is humbling. It shows you whether your abs can peel you up one vertebra at a time or whether momentum is sneaking in and stealing the work.
Keep your legs long, reach your arms overhead, and use an exhale to curl up through the spine until you’re sitting tall. Then roll back down just as slowly, letting the lower ribs, mid-back, and shoulder blades meet the mat in order. If you yank yourself up, you miss the whole point.
The roll-up is great for inch loss because it trains the front of the body to stay organized. That kind of control improves how your torso sits in clothes, and it also makes every other mat move cleaner. Ten slow reps is plenty. If your hamstrings are tight, bend the knees a little and keep the spine smooth.
3. Single-Leg Stretch for Lower Ab Control
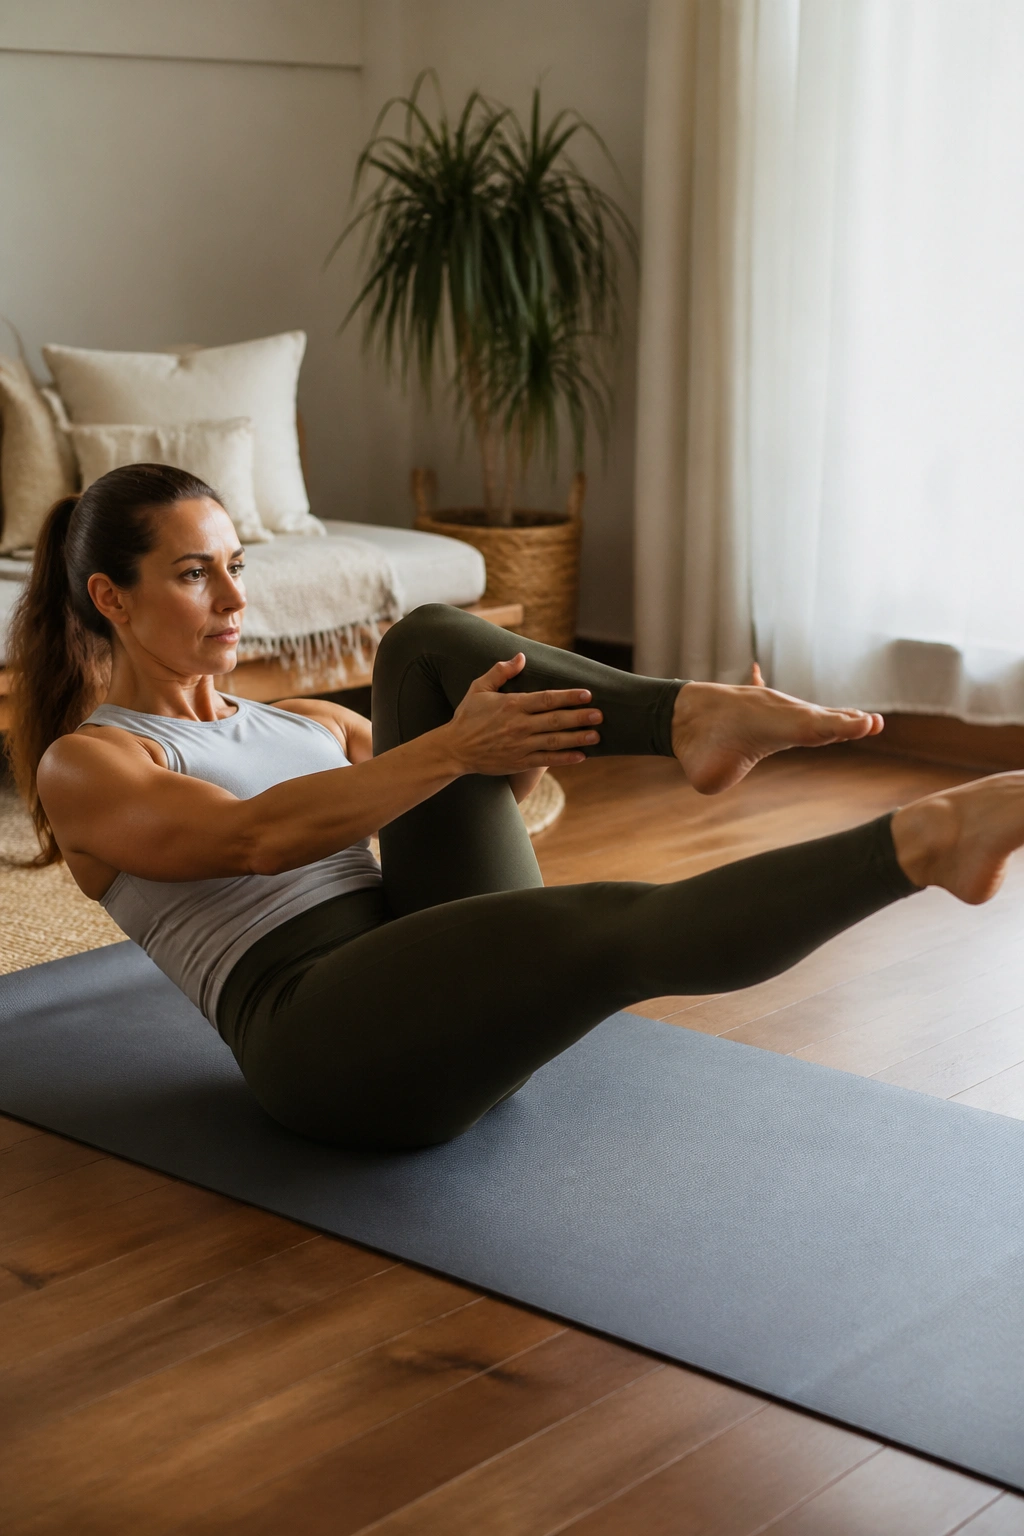
If your lower belly takes over and your hip flexors complain, the single-leg stretch is probably the move you need more than another endless crunch. It looks simple. It isn’t. The challenge is keeping the pelvis still while the legs switch.
Curl up into a chest lift, bring one knee in, and extend the other leg long at about a 45-degree angle. Switch sides with control, not speed. You want the working leg to feel long and active, while the pulled-in knee stays soft and close without tugging on the neck.
What to watch for
- Keep the ribs heavy instead of flaring up.
- Pull the leg in from the thigh, not the neck.
- Move at a pace where you can actually feel the switch.
- Do 8 to 12 switches per side.
A rolled towel under the head can help if your neck gets tired fast. So can lowering the head completely and working just the legs. That version still counts.
4. Double-Leg Stretch for Deep Core Stability
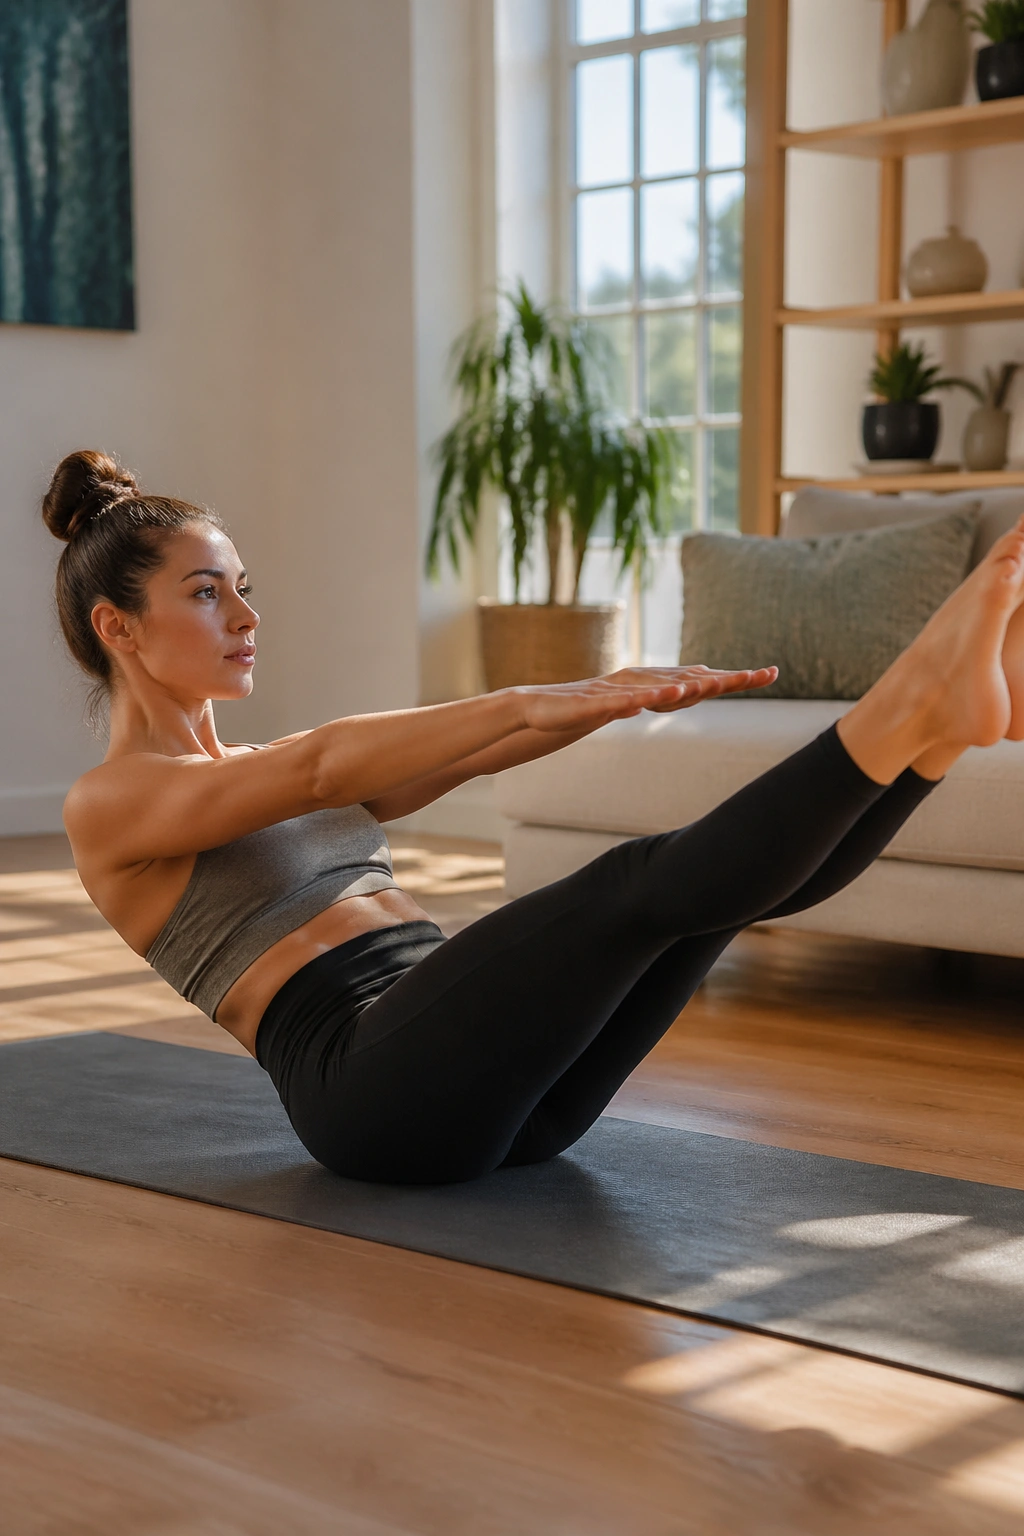
Double-leg stretch looks easier than the single-leg version. It is not. Both limbs leave the floor at once, which means the abdomen has to do the job without help from the hips or the lower back.
Start in the same chest-lift position, hug both knees in, then reach the arms and legs away together as you exhale. Circle the arms back around and pull everything in again. The trick is to keep the ribs from popping open when the legs extend. The lower back should stay quiet.
Do 6 to 10 slow reps, and stop the set the second your form turns sloppy. If the legs are too low, lift them higher. That is not cheating. It is smart. You want the abs working, not the hip flexors taking over and dragging the whole thing down.
5. Criss-Cross for Obliques and Waist Control
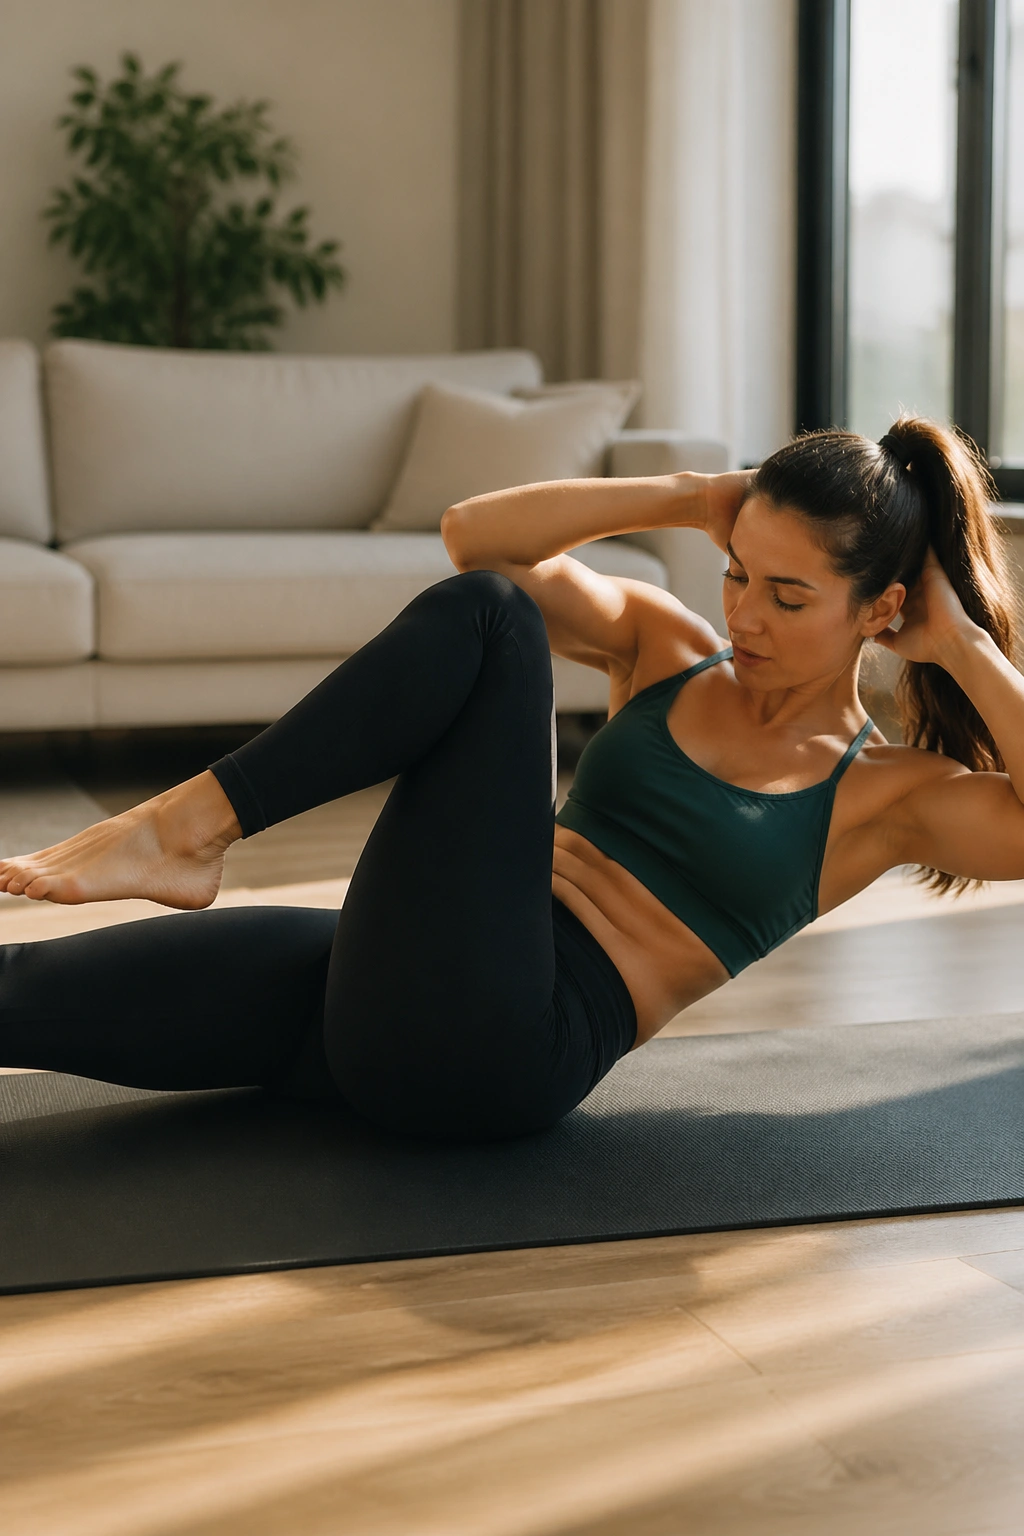
The first few reps of criss-cross should feel slow and a little rude. Good. If it feels easy, you are probably pulling on your neck or twisting from the shoulders instead of the waist.
Lift into a chest curl, bring one elbow toward the opposite knee, and lengthen the other leg out while keeping the pelvis steady. Rotate from the ribs, not the elbows. The point is not to touch knee to elbow as fast as possible. The point is to keep the trunk organized while it rotates.
What makes it work
- The rib cage should turn before the arms do.
- The chin stays lifted slightly, so the neck does not jam.
- The straight leg reaches long enough to challenge the core.
- 6 to 10 reps per side is enough if the form stays sharp.
This move is one of the best Pilates workouts for inch loss at home because it asks the waist to tighten while it turns. That combination is hard to fake.
6. Shoulder Bridge for Glutes and Hip Lift
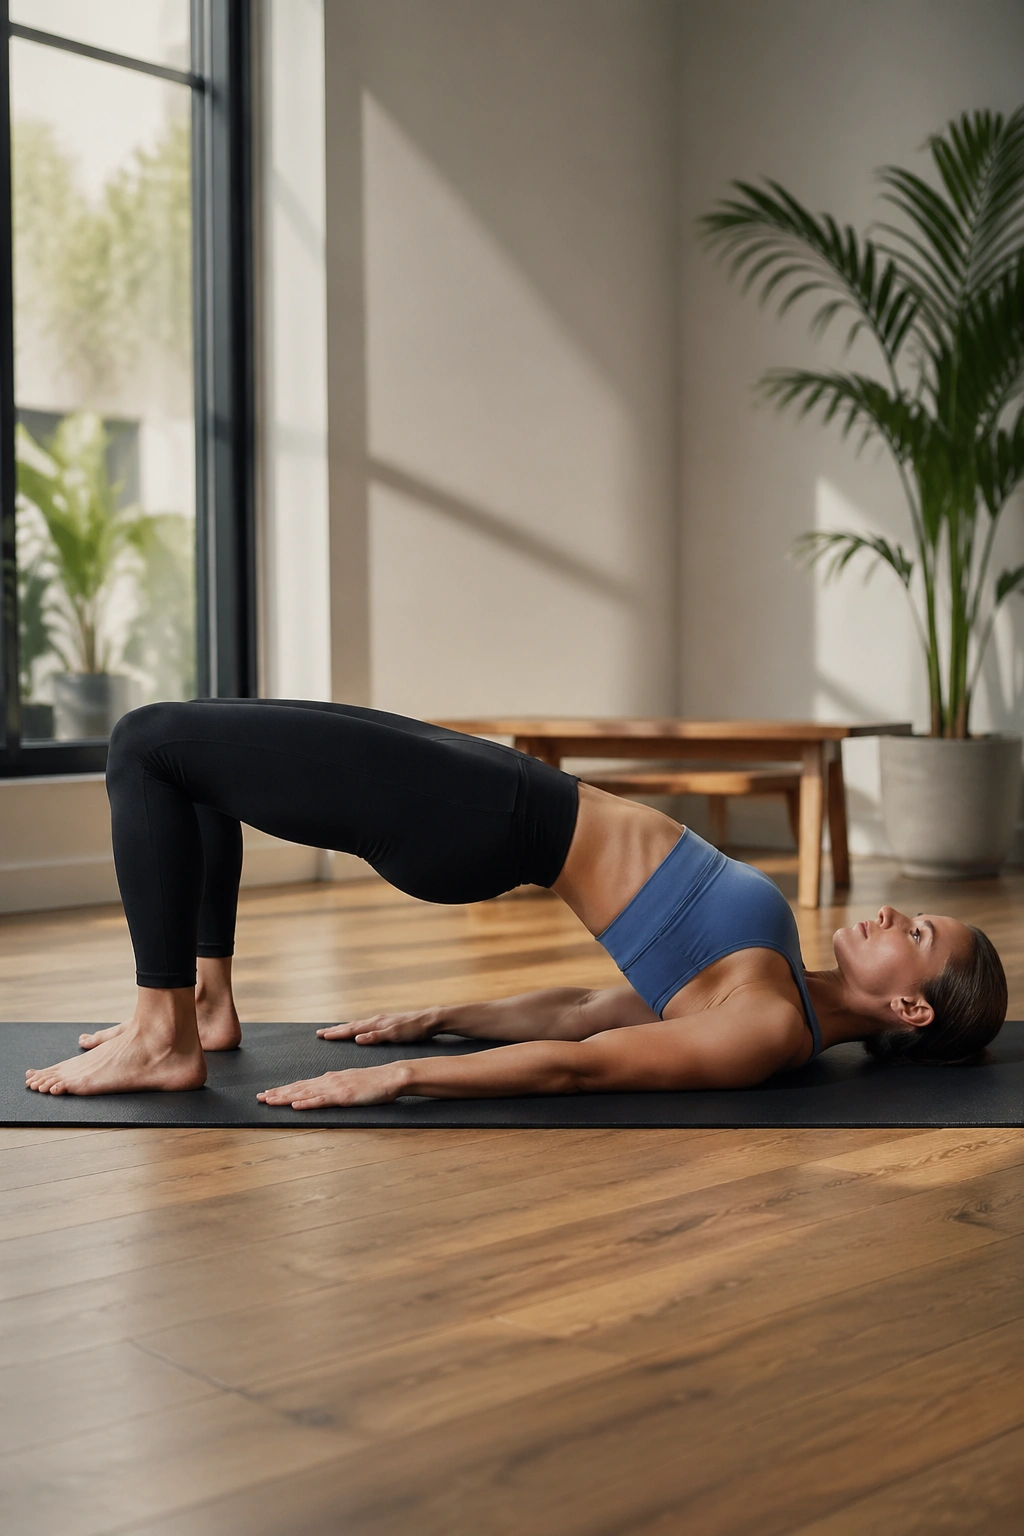
Three things matter in the shoulder bridge: foot pressure, tailbone lift, and patience.
Lie on your back with knees bent, feet flat, and heels about hip-width apart. Exhale, tuck the pelvis slightly, and peel the spine up until you form one long line from shoulders to knees. Hold for a beat, squeeze the glutes, then roll back down through the spine one section at a time. Rushing the descent steals half the benefit.
The bridge is one of the most useful home moves for inch loss because stronger glutes and hamstrings change the shape and support of the lower body. That does not mean the exercise “burns fat” from your thighs. It means the muscles under the skin start to hold things better, and your pelvis stops hanging lazily into the mat.
Try 10 to 12 reps, or hold the top for 20 to 30 seconds if you want more work. If your hamstrings cramp, walk your feet a little closer to your seat.
7. Side-Lying Leg Series for Hips and Outer Thighs
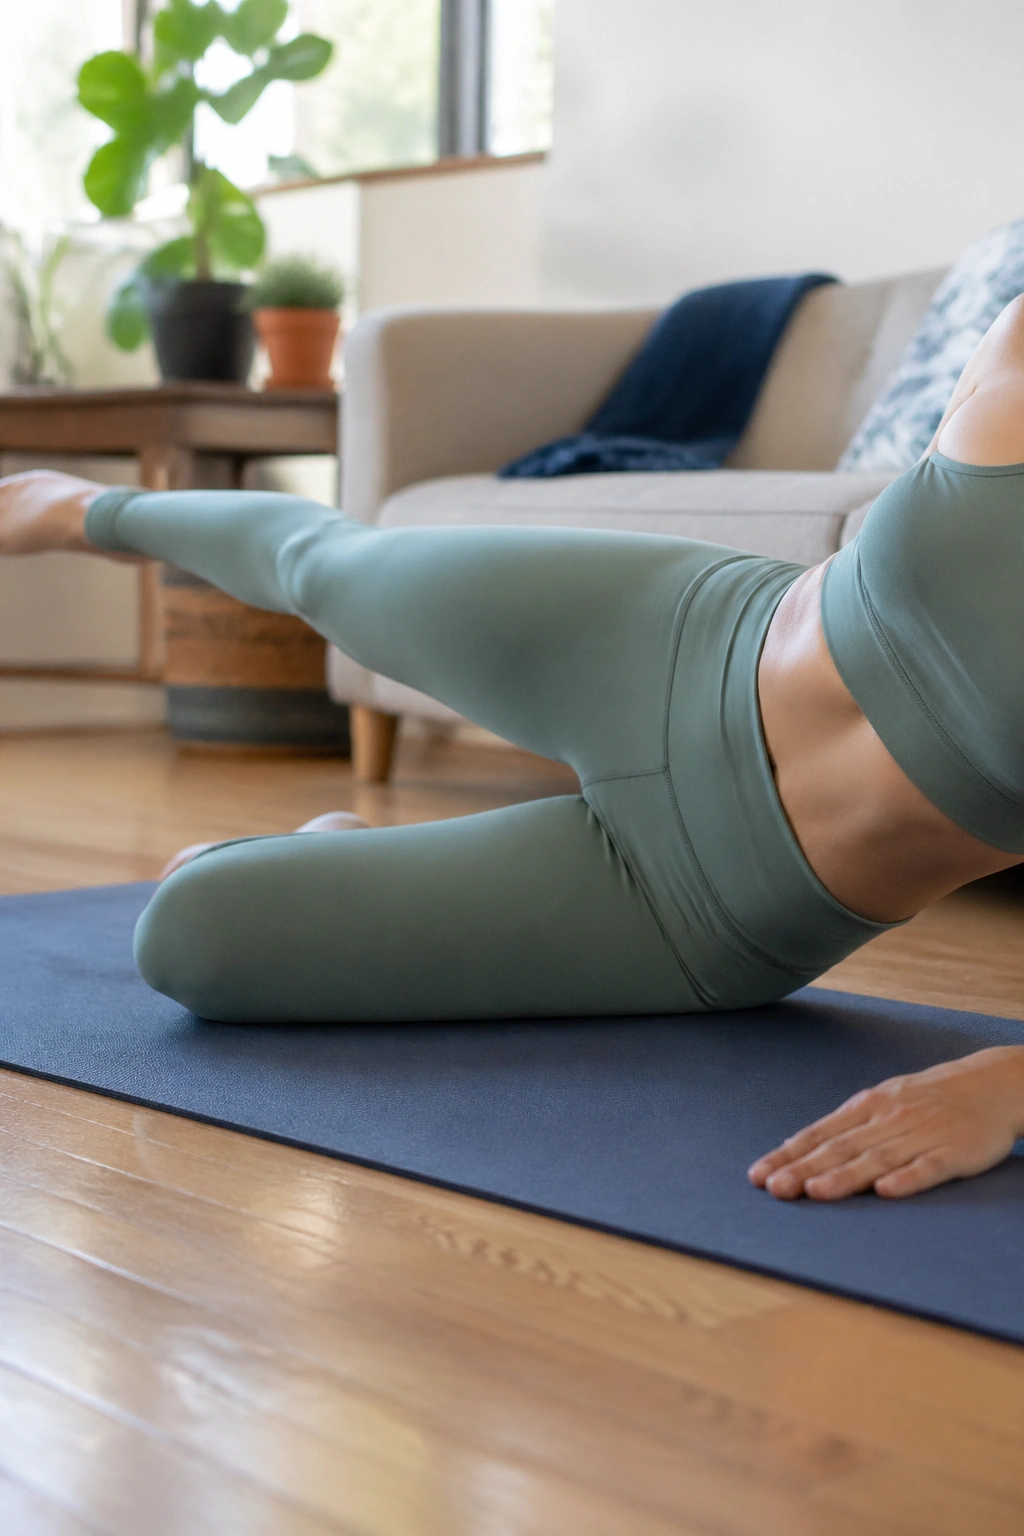
Side-lying leg work is where a lot of people notice how much their hips wobble. That wobble is the clue. Your glute med and outer hip muscles are supposed to keep the pelvis stable, and when they’re weak, the whole line down the leg looks softer than it needs to.
Lie on one side, stack your hips, and lift the top leg without rolling backward. Start with small lifts, then add tiny circles or a front-and-back kick. Keep the waist lifted away from the floor so the side body doesn’t collapse.
A simple mini set
- 12 straight leg lifts.
- 10 small pulses at the top.
- 8 front-and-back kicks.
- Repeat on the other side.
Small range, big burn. That’s the whole story here. If the leg is swinging so high that the pelvis tilts, the movement has gone off the rails.
8. Clamshells for Tight Hips and Better Alignment
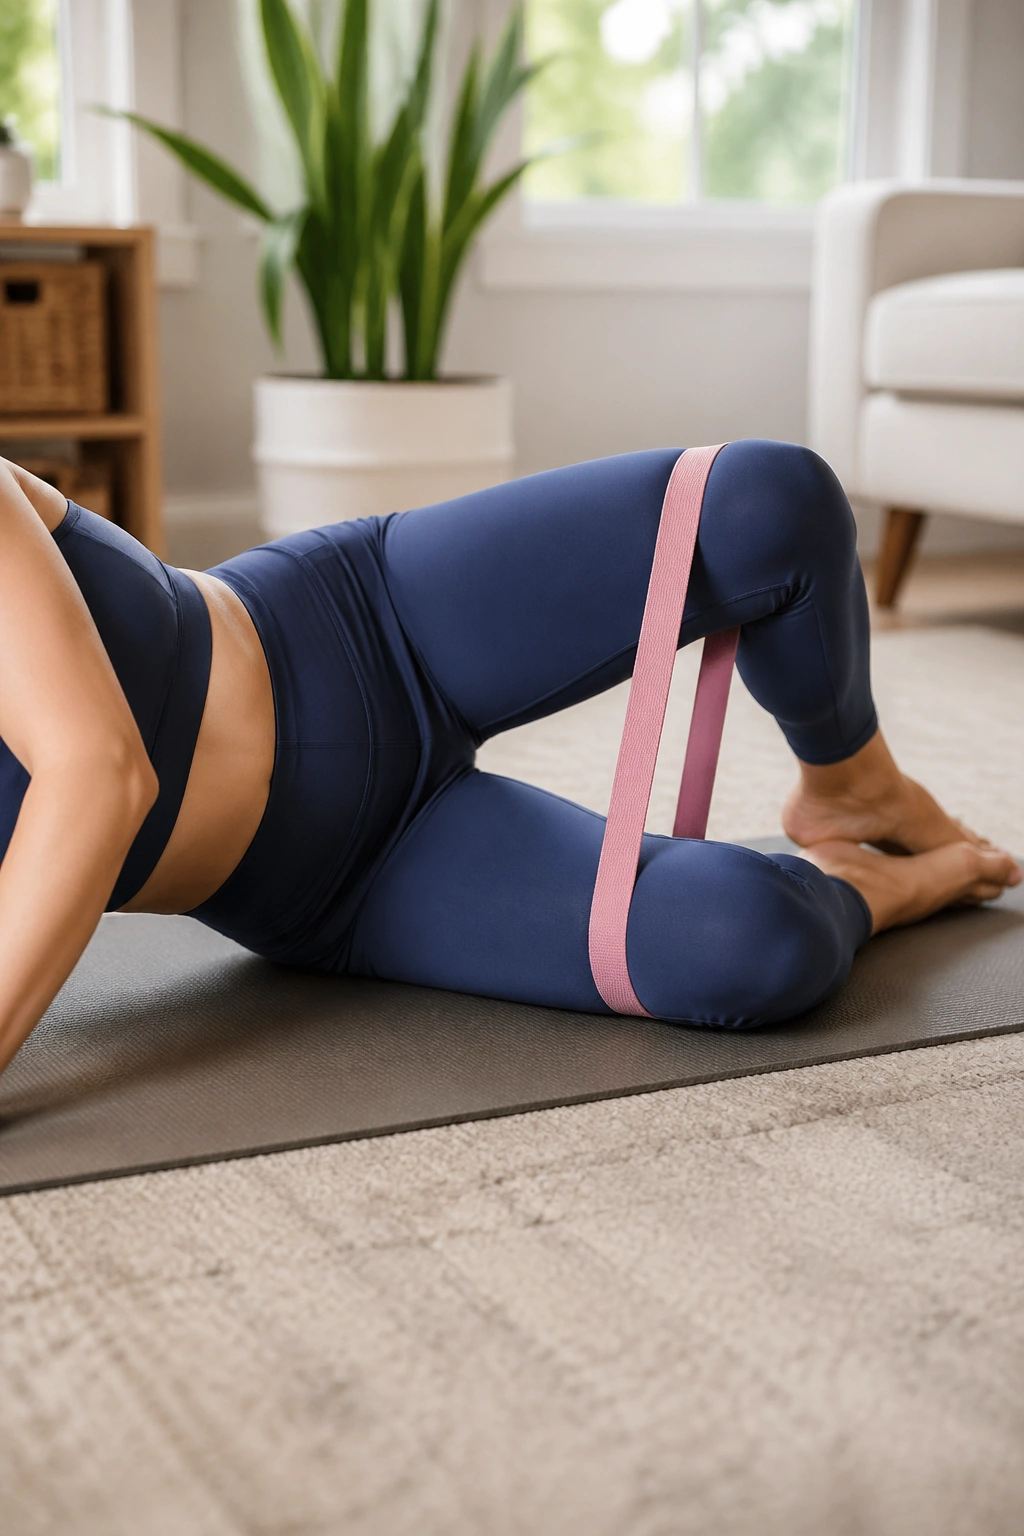
Unlike big glute moves, clamshells are tiny and sneaky. They look almost too easy until the side of the hip starts to catch fire.
Stack your hips, bend the knees, and keep the feet touching as you open the top knee like a shell opening on a hinge. The pelvis must stay still. If it rolls backward, the glutes lose the job and the low back starts helping, which is not what we want. Small motion beats a big sloppy one here.
Use 15 to 20 reps per side, or add a light loop band just above the knees if you want more resistance. This move helps with inch loss by improving hip shape and alignment, especially around the outer thigh and upper hip where posture shows up fast. It also pairs well with standing work because better hip control can change the way you walk.
9. Swimming for Back-of-Body Tone
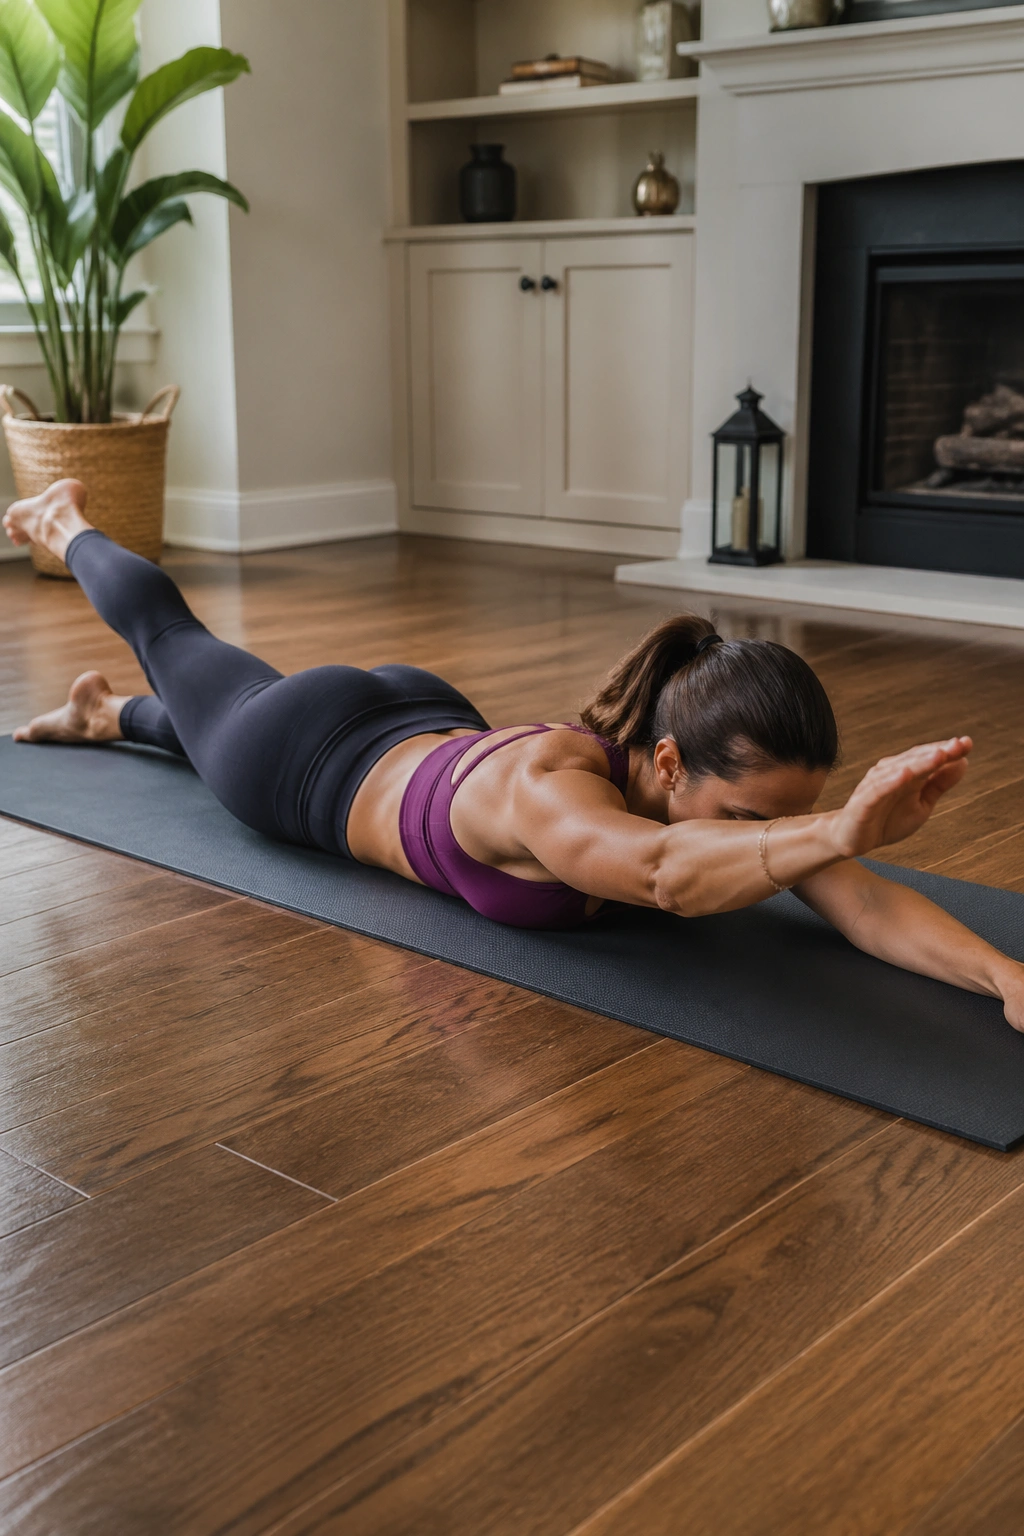
Lie face down and the whole back line has to wake up. That includes the glutes, upper back, and the small muscles that help your posture stay open instead of slumped over a laptop.
Lift opposite arm and leg a few inches, then switch sides in a steady flutter. Keep the neck long and the gaze down so the chin doesn’t crane up. You do not need giant lifts. In fact, giant lifts usually mean the low back is taking over. Tiny, clean movements win.
How to make it useful
- Reach long through the fingertips and toes.
- Keep the belly lightly lifted off the mat.
- Breathe in for two beats, out for two beats.
- Aim for 20 to 30 seconds, then rest.
Swimming is a quiet little posture fixer. It also balances out all the front-body work that tends to dominate home routines.
10. Pilates Plank Hold for Total-Body Tension
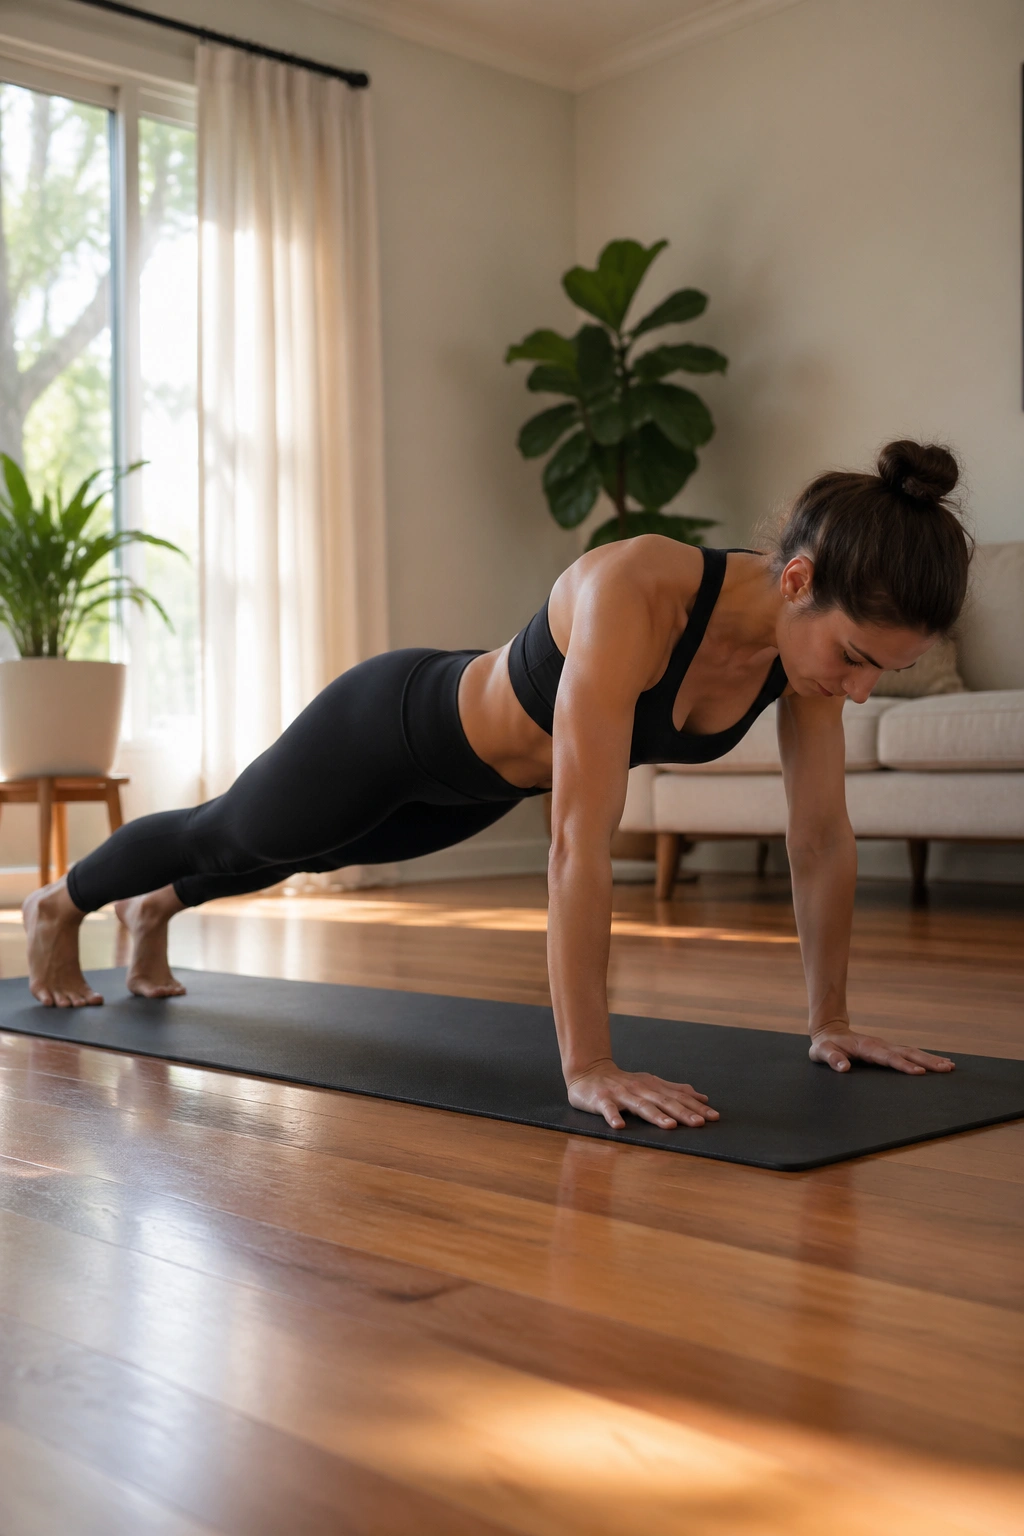
A real Pilates plank is not a push-up hold with a prettier name.
Set your hands under your shoulders, step the feet back, and spread the shoulder blades wide without collapsing between them. Draw the lower ribs in, press the heels back, and hold for 20 to 40 seconds. If that feels shaky, drop to the knees and keep the same body shape. Shape matters more than suffering.
The value here is tension. A good plank lights up the arms, shoulders, core, and legs at the same time, which is why it belongs on any home routine aimed at inch loss. You’re asking the body to stay long while it works, and that tends to carry over into standing posture too.
One clean hold is better than three ugly ones. Give me quality over grit every time.
11. Leg Pull Front for Shoulder Strength and Core Control
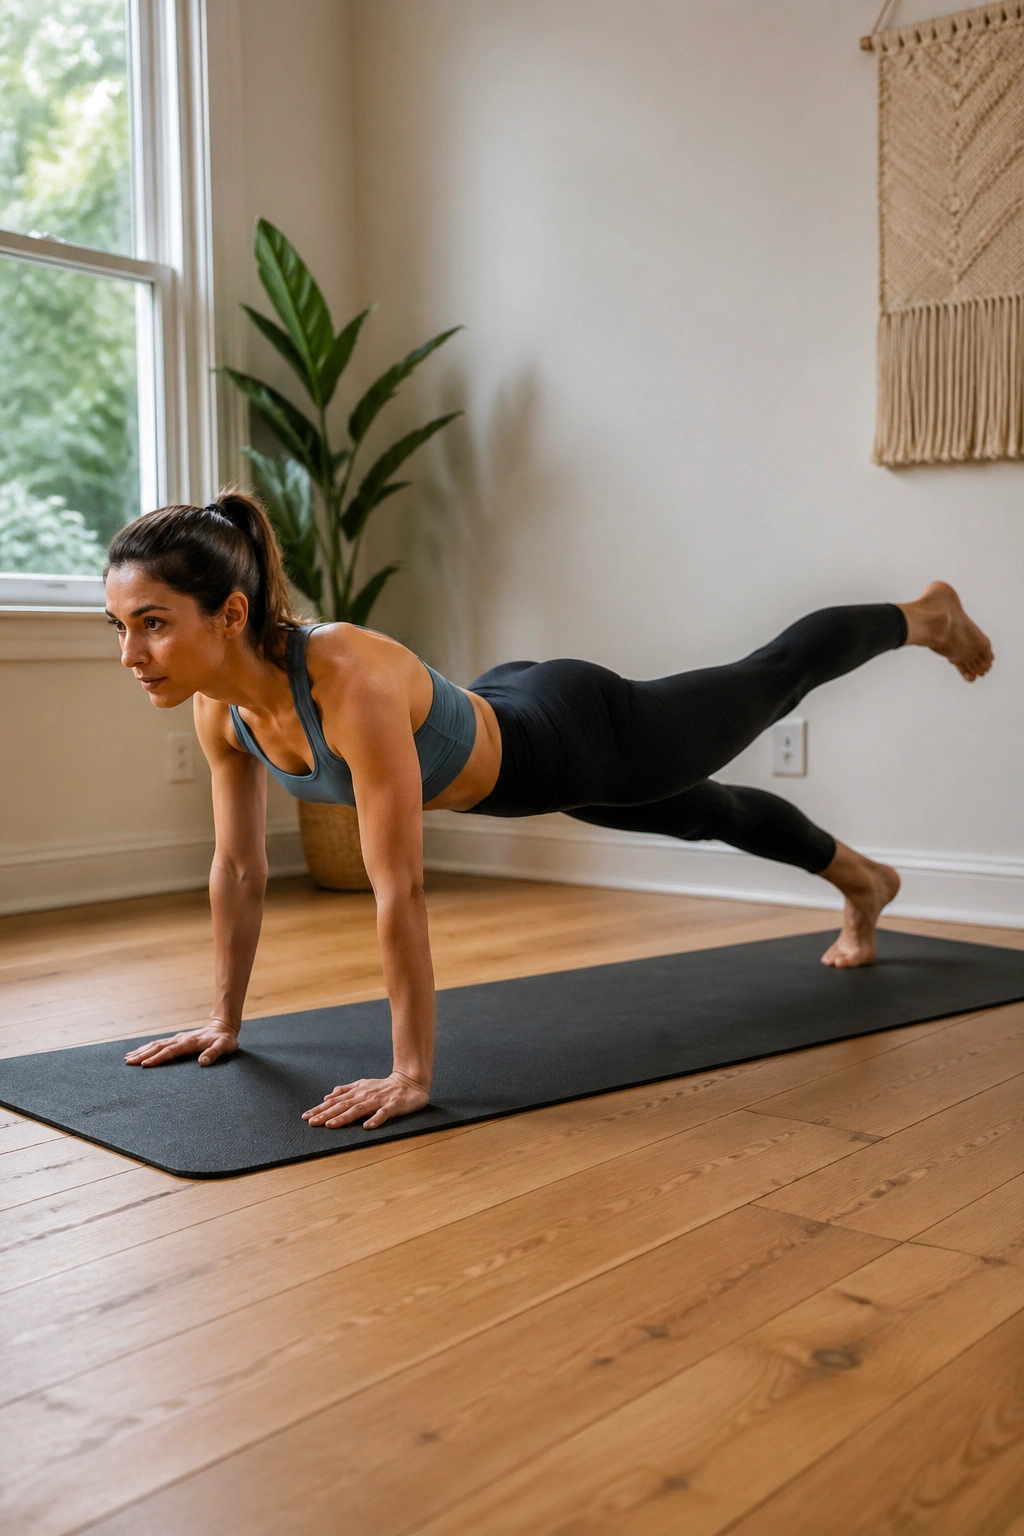
Want a plank variation that works harder without adding speed? Leg pull front is the move.
Start in a high plank, then lift one leg a few inches while keeping the hips level. Lower it with control, switch sides, and keep the shoulders steady. Feet a little wider than hip-width can help if your balance is shaky. If your wrists complain, do it on forearms first and earn the full version later.
This move is sneaky because it demands anti-rotation. Your torso has to resist the twist that happens when one leg leaves the floor, and that resistance is part of what tightens the midsection. The waist has to hold, not just the arms.
Do 6 to 8 lifts per side. Slow is the only speed that matters here. Fast leg swings turn it into chaos, and chaos doesn’t help the waist or the shoulders.
12. Leg Pull Back for Glutes and Posture
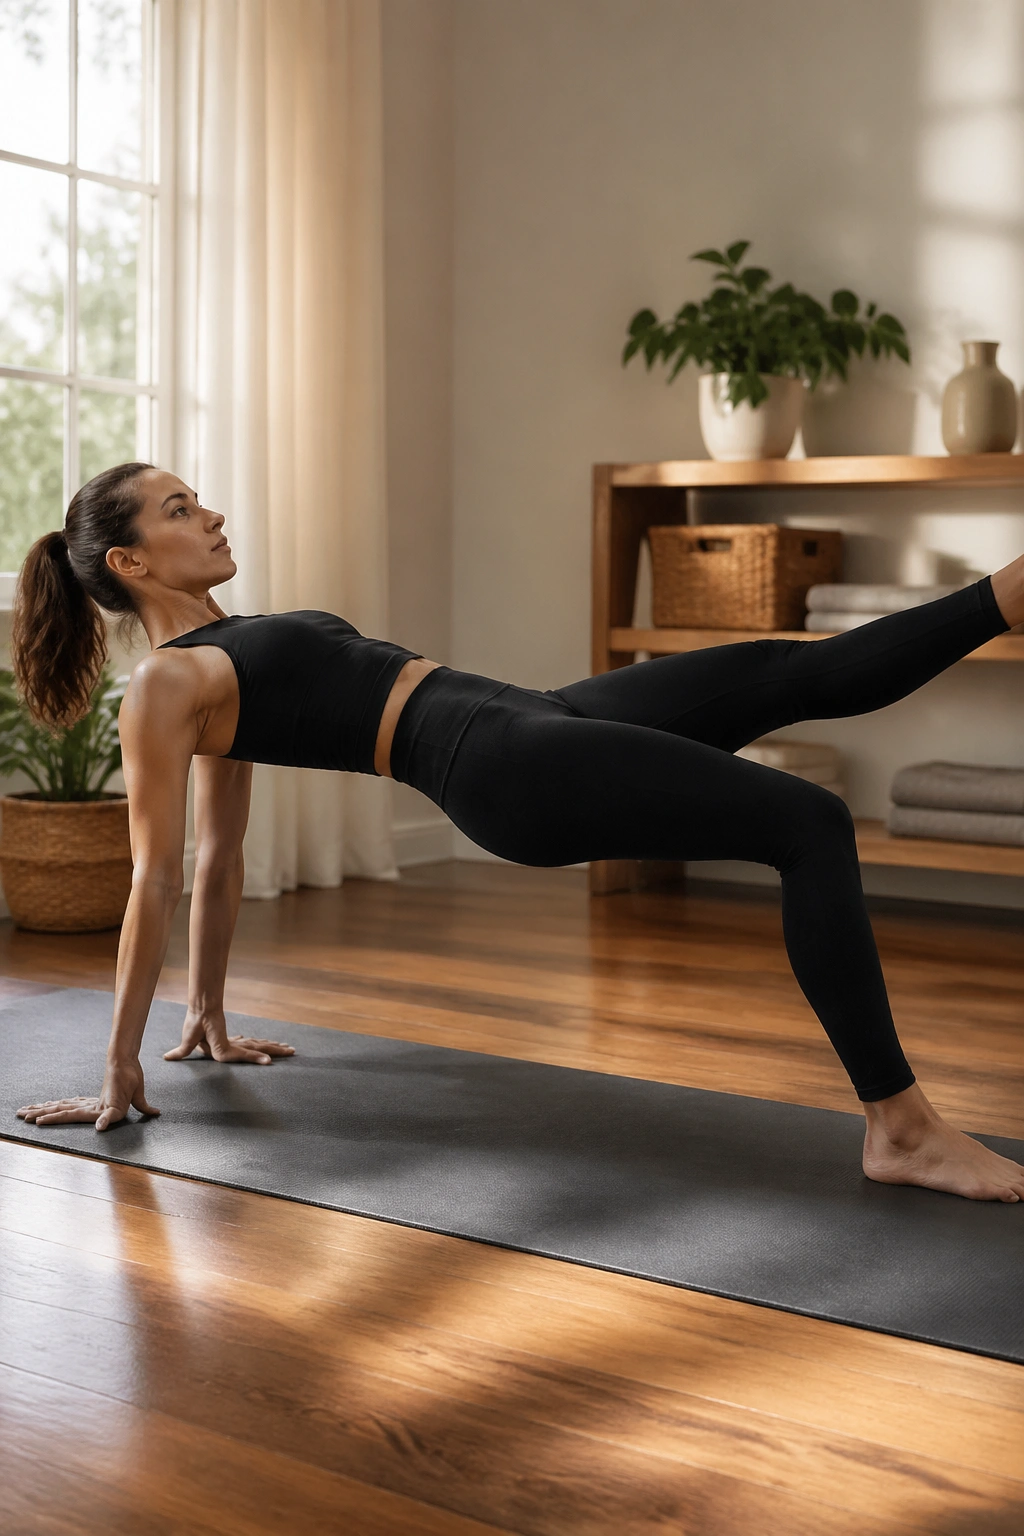
If your glutes disappear from the picture, leg pull back brings them back in.
Sit with your hands behind you, fingers pointing forward or slightly out, then lift into a reverse plank shape. From there, kick one leg up a few inches, lower it, and switch. Keep the chest open and the hips high. If your hamstrings are tight, bend the knees a little on the setup and clean up the shape first.
A lot of people avoid this move because it feels awkward the first few times. Fair enough. It asks for shoulder extension, glute strength, and some courage, all at once. But the payoff is real: better rear-chain strength, a stronger line through the back of the body, and more support for upright posture.
Take 5 to 8 lifts per side to start. The goal is to stay lifted, not to kick high.
13. Saw for Side Waist and Hamstrings
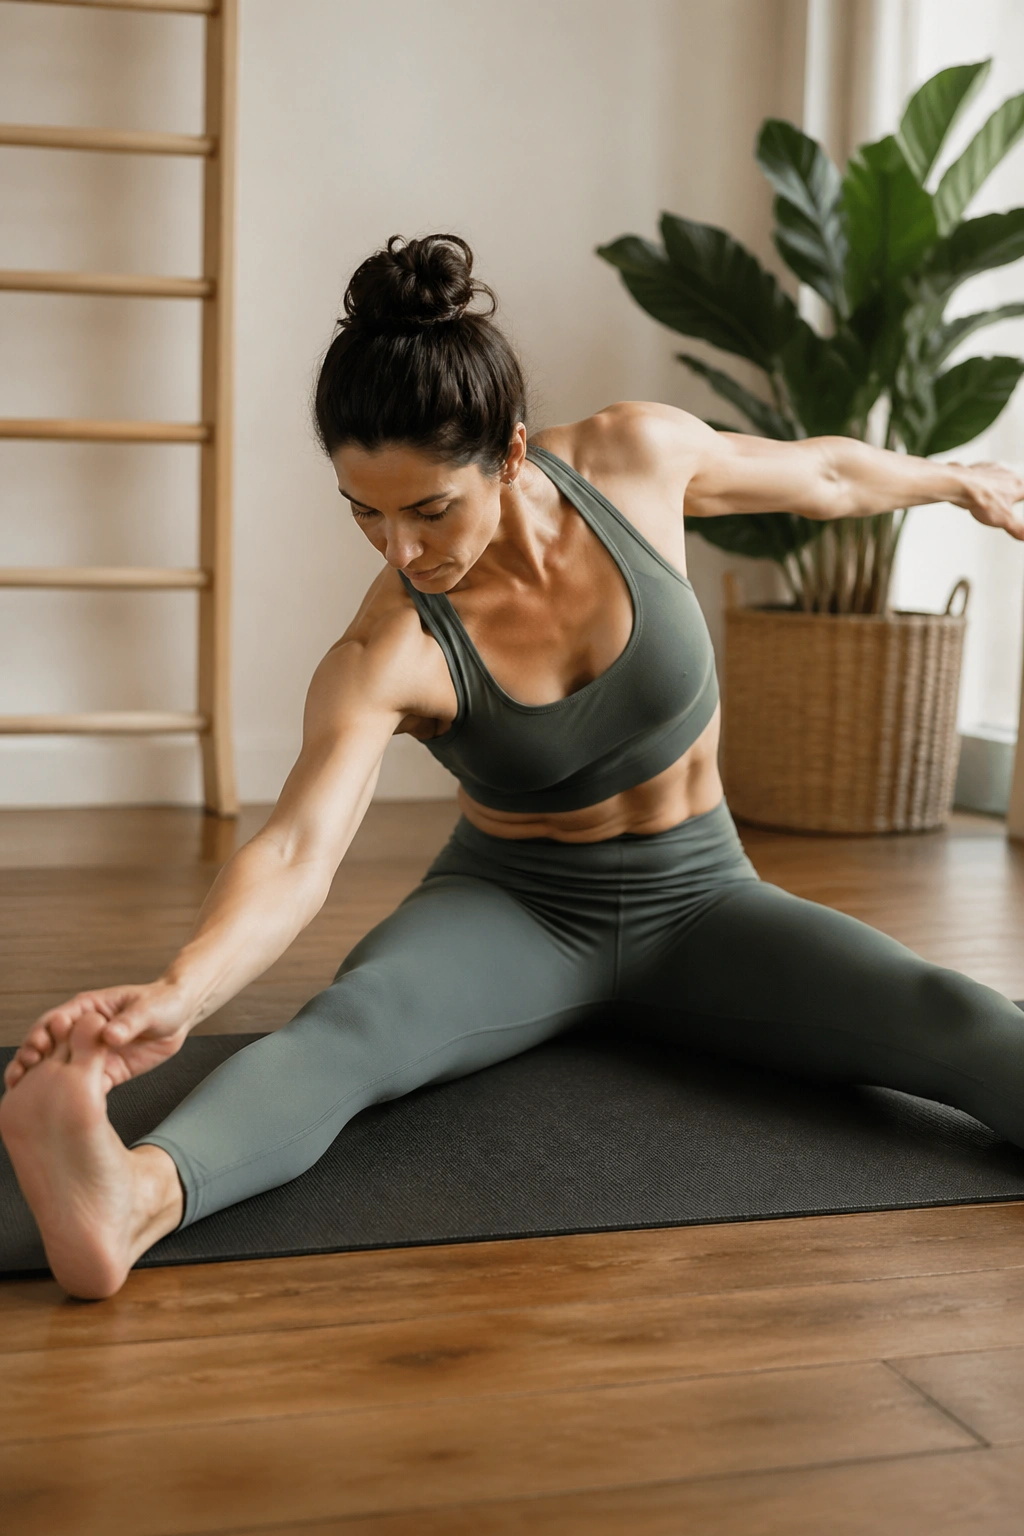
The Saw is half stretch, half control, and that split matters.
Sit tall with your legs open, arms stretched wide, and twist your torso toward one foot. Reach the opposite hand toward the pinky toe as if you’re trying to zip the side body closed. Then roll back to center with control and switch sides. The twist should come from the waist and ribs, not the shoulders alone. If the spine rounds instantly, the stretch has taken over the work.
It’s a smart choice for inch loss because it trains the side waist while opening the hamstrings, which often get tight from sitting. The long reach also encourages better posture through the upper back. Try 6 slow reps per side and keep the sit bones grounded as best you can.
Keep the movement clean
- Keep both hips heavy on the mat.
- Exhale as you twist and reach.
- Reach past the foot, not just to it.
- Stop before the lower back starts to pinch.
14. Spine Stretch Forward for a Tall, Flat Midsection Feel
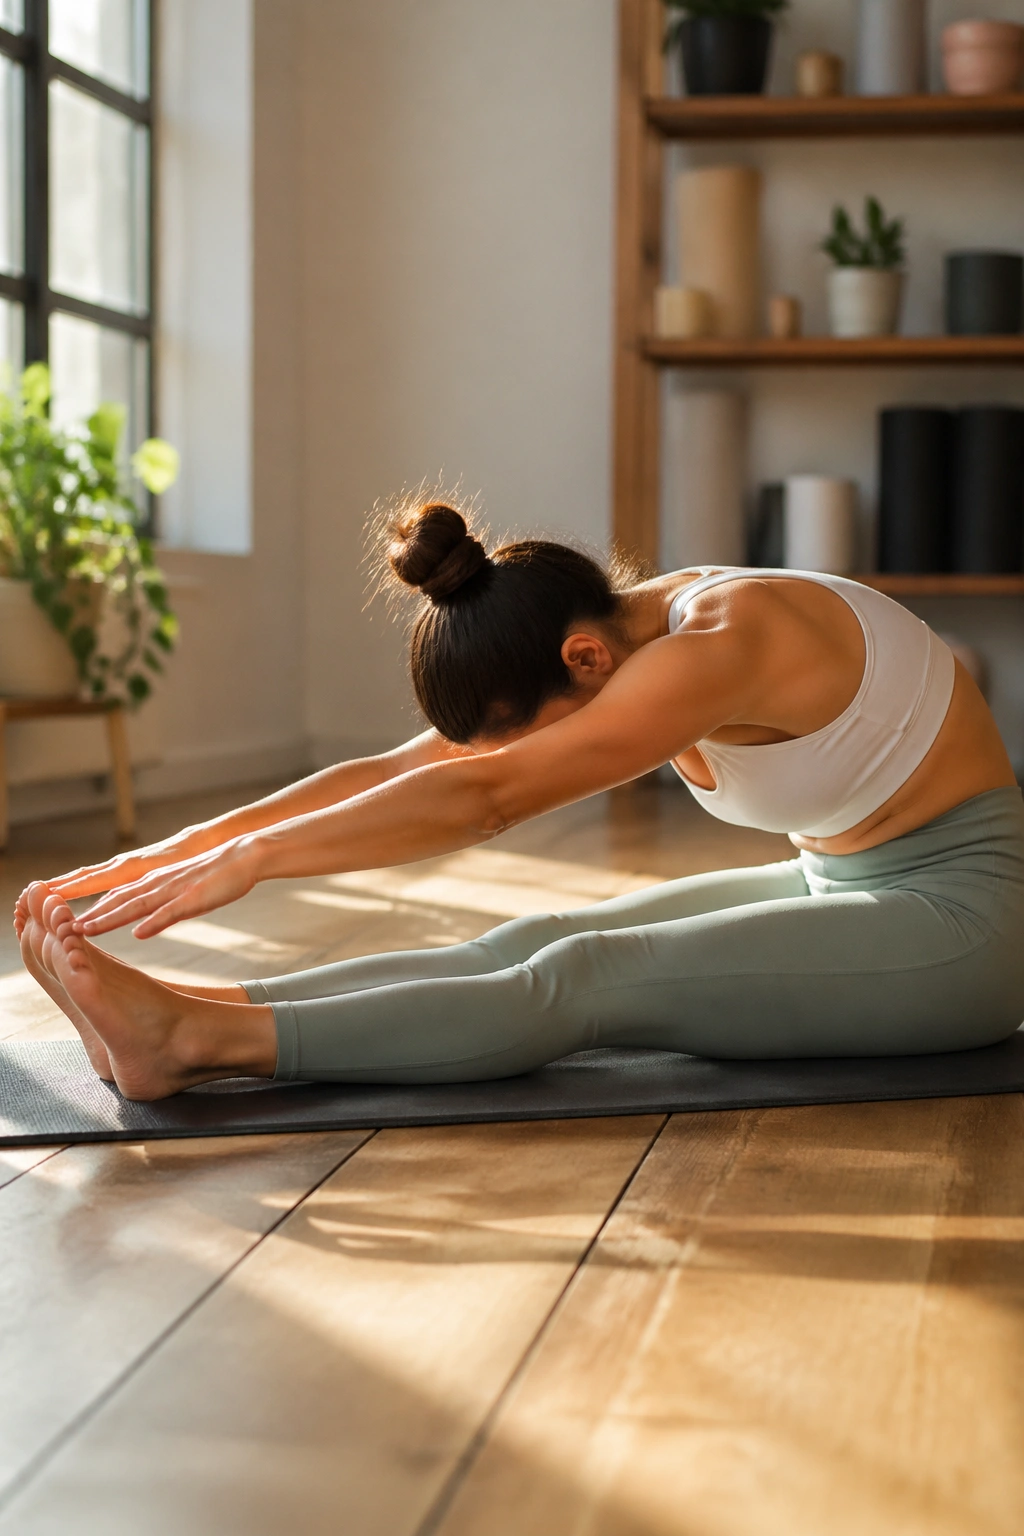
Spine Stretch Forward is one of the quietest moves on the mat, and one of the smartest.
Sit with your legs long and a little wider than hip-width, arms reaching straight ahead. Inhale to sit tall, then exhale to nod the chin and roll the spine forward one segment at a time, as if you’re folding over an invisible barrel. The point is not to collapse. It is to move the spine with control while the hips stay rooted.
That control changes the way the torso carries itself. A stacked rib cage and a long, open back can make the waist look cleaner even before body composition changes show up. Do 6 to 8 slow reps, and keep the abs gently pulling back on the return to sitting tall.
It’s a plain move. It works.
15. Mermaid for Side Body Length
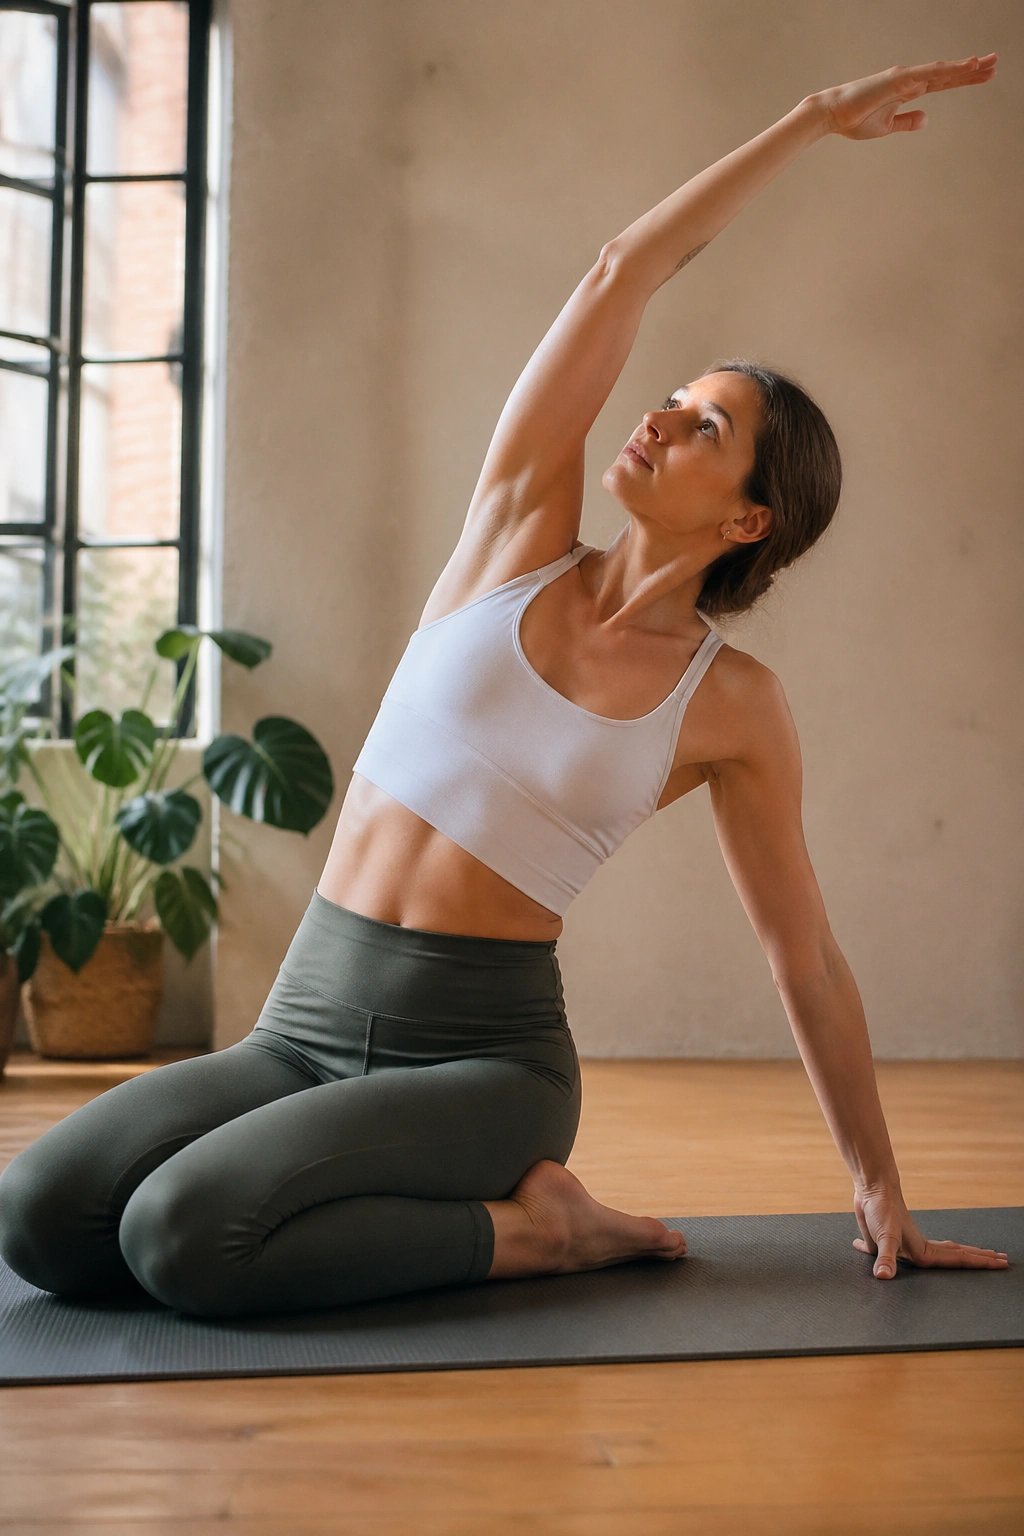
After a long day of sitting, Mermaid feels like wringing out the side body.
Sit to one side with your legs folded in a comfortable shape, one hand on the mat and the other arm reaching up and over. Inhale into the open side ribs, then exhale and deepen the arc. Keep both seat bones as grounded as you can manage without forcing the position. If your knees hate the setup, sit on a folded towel or small cushion.
Mermaid helps with inch loss in a less obvious way: it opens the ribs, stretches the obliques, and reminds the body that the waist is supposed to lengthen, not just brace. That matters if your middle tends to feel compressed from sitting, lifting, or holding tension all day.
Take 3 to 5 slow breaths per side. Let the reach be long, not floppy. The long line is the point.
16. Teaser Prep for Deep Ab Strength
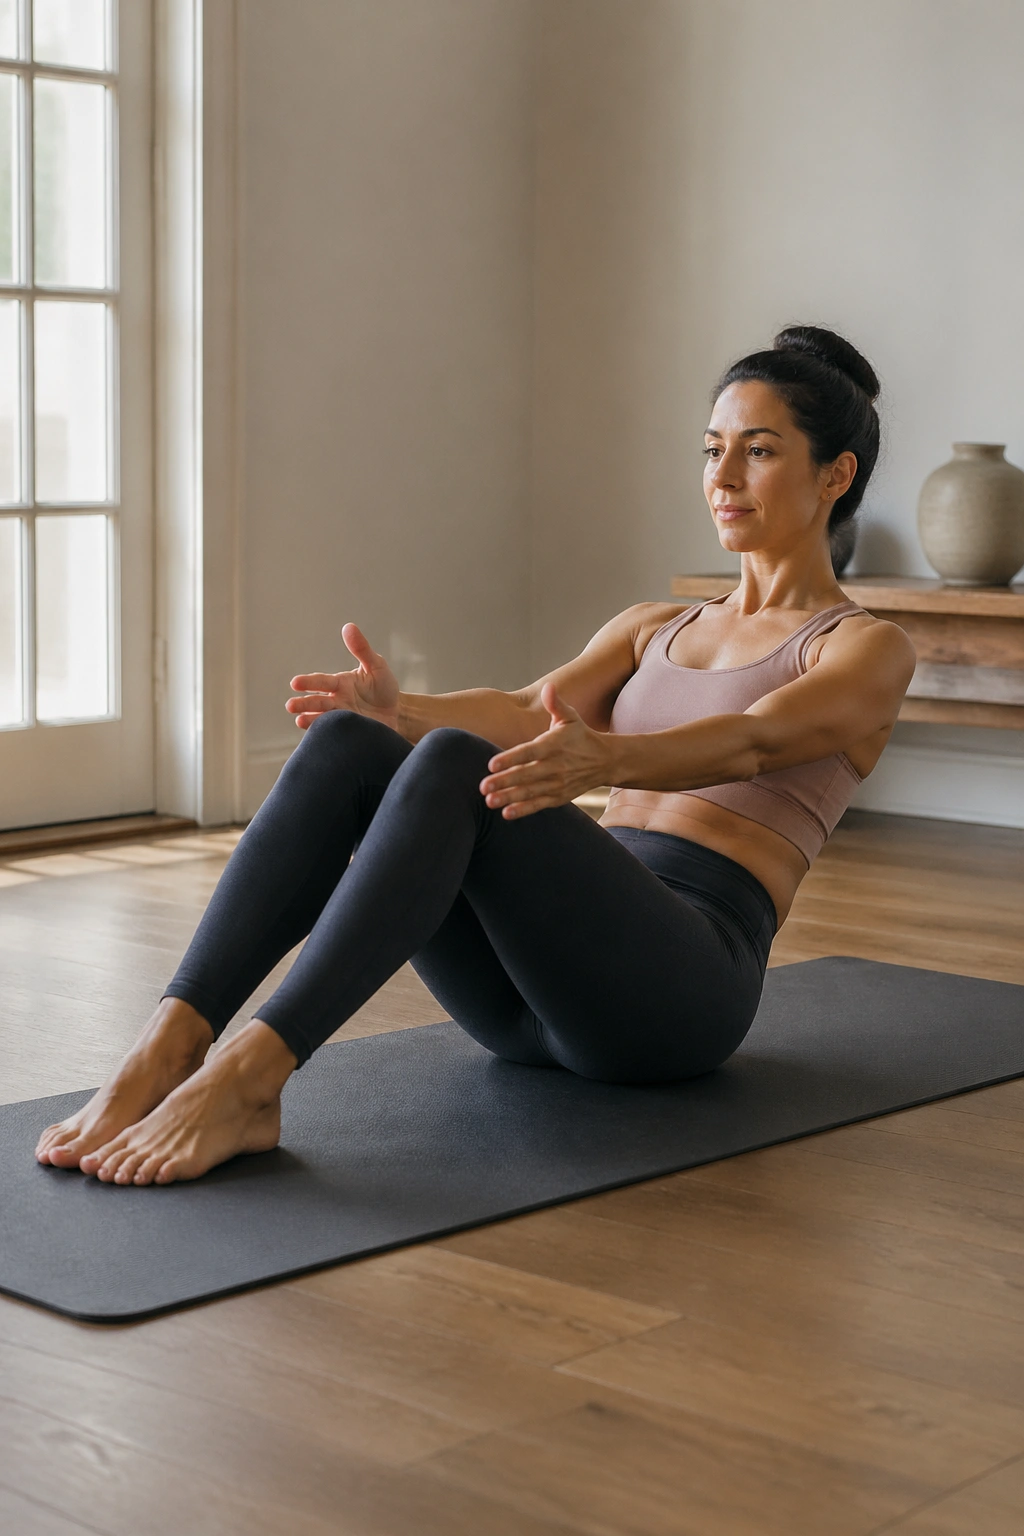
Teaser prep is where inch loss and control start to meet.
Sit with the knees bent, lean back slightly, and lift one or both feet from the floor if you can keep the spine long. Reach the arms forward and hold for 2 to 3 breaths. If that is too much, keep one foot down or keep both knees bent. No prize is given for wobbling through bad form.
The teaser family of exercises is gold for deep abdominal strength because it demands balance between the upper abs, lower abs, and hip flexors. It also teaches the body to fold and lengthen without collapsing through the chest. That’s a useful skill, especially if you want the midsection to look firmer in a standing position.
Try 4 to 6 controlled holds. If the neck tightens, back off immediately. A smaller version done well beats a full teaser done badly.
17. Roll Like a Ball for Control and Spinal Massage
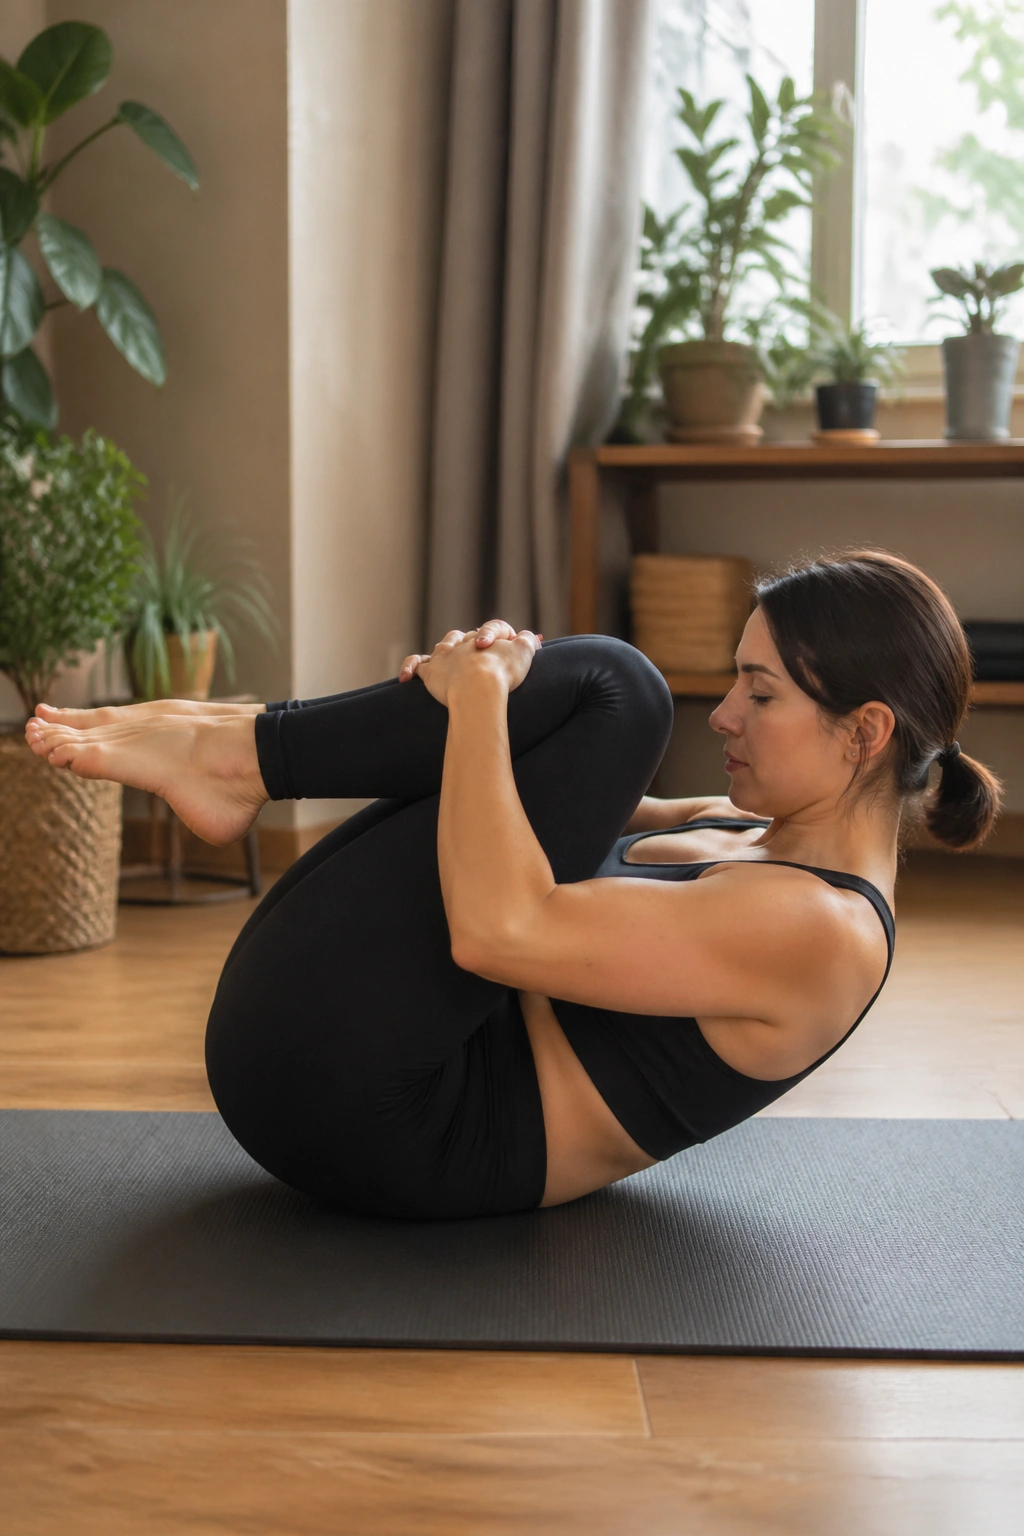
Why does a move that looks playful make the belly work so hard? Because it strips away every cheat. The body has to tuck, balance, and control the return without crashing into the mat.
Sit in a tucked shape, hold the shins, and roll back to the shoulder blades, then return to balance without letting the feet touch down hard. Keep the chin tucked a little so the neck stays safe. This is one of those exercises where the abs work hard even though the motion looks small.
Roll Like a Ball helps with inch loss by tightening the front body and teaching control through the spine. It also gives the back a gentle massage, which is a nice side effect if you sit a lot. Do 6 to 8 rolls, and stop if you feel it in the neck instead of the core.
That little pause at the top matters. Don’t skip it.
18. Standing Roll Down for Posture and Waist Awareness
Standing work matters more than most mat fans admit.
Stand tall with feet hip-width apart, then nod the chin and roll the spine forward one section at a time until your hands hang toward the floor. Exhale to stack back up slowly, letting the tailbone, low back, ribs, and head return to vertical in order. You can do this against a wall if you want feedback, which is a nice trick when you’re working alone at home.
This move is a quiet finisher because it teaches the body how to carry a taller, slimmer shape through everyday life. A strong core is useful on the mat. A stacked spine is what people actually see in a mirror, in jeans, and when you’re walking across a room.
Take 5 slow roll-downs, then stand for one breath and notice how different your midsection feels. That awareness is not fluff. It’s the whole point.
