



The off-season is when athletes find out what the season hid. Tight hips, sleepy glutes, a rib cage that never quite stacks over the pelvis, shoulders that climb toward the ears under pressure — all of it shows up once the scoreboard stops mattering.
That’s why Pilates workouts for athletes off season make so much sense. They don’t ask you to grind harder. They ask you to move cleaner, breathe better, and stop cheating the same way you’ve been cheating for months. Small movements can feel almost rude at first. Then they start exposing the weak links.
Good Pilates for athletes is not fluffy work. It can be brutally honest. A few slow leg lowers or a side plank with proper control will tell you more about your body than ten sloppy reps done fast, and that feedback matters when you’re trying to come back stronger instead of just more tired.
The list below leans into that idea. Some of these sessions are short and corrective, some are tougher than they look, and a few are the kind of work you’ll hate while you’re doing them and thank yourself for later.
1. Rib-Stack Breathing Reset
A lot of athletes think their core is weak when the real issue is that their ribs are flared and their pelvis is tipped forward. Fix the stack first. Once the rib cage settles over the pelvis, everything from planks to jumps tends to feel more grounded.
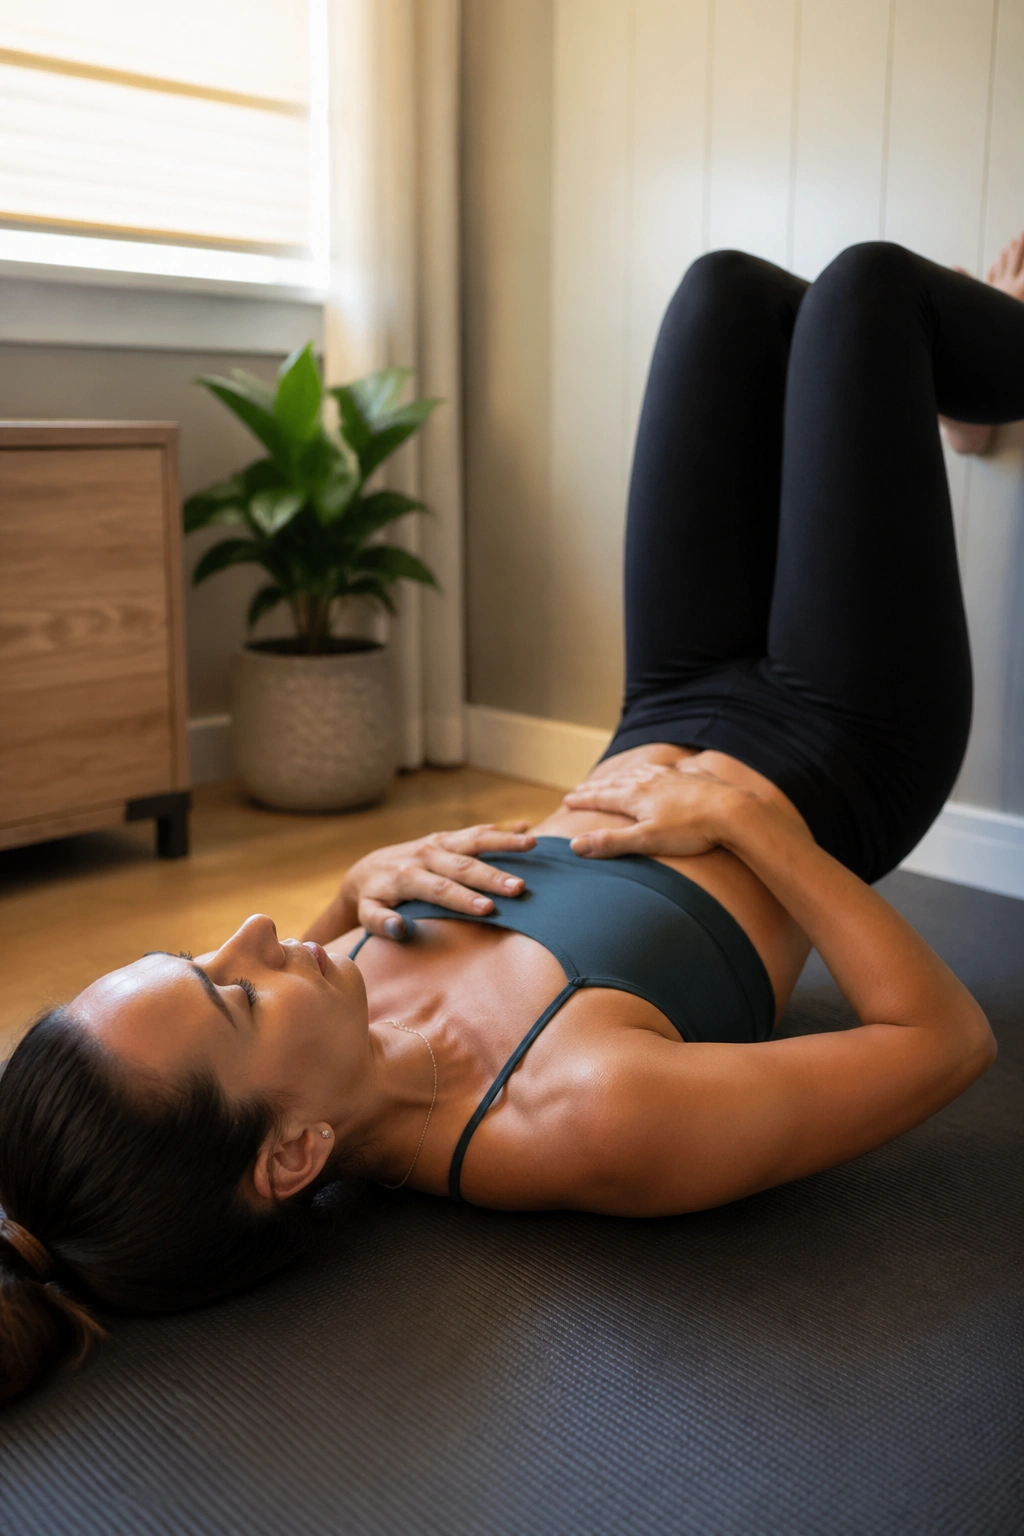
Lie on your back with your feet on a wall or on a bench, knees and hips bent about 90 degrees. Put one hand on your lower ribs and one hand on your belly. Exhale through the mouth until the front ribs soften down, then pause for a beat before you inhale quietly into the back and sides of the rib cage.
How to feel it work
- Keep your neck soft.
- Let the exhale be longer than the inhale.
- Think about the ribs melting toward the floor, not smashing down.
- Use 5 slow breaths for 2 to 3 rounds.
One small cue changes a lot: if your low back arches, raise your feet higher or bend your knees more.
2. The Hundred With Dead-Bug Legs
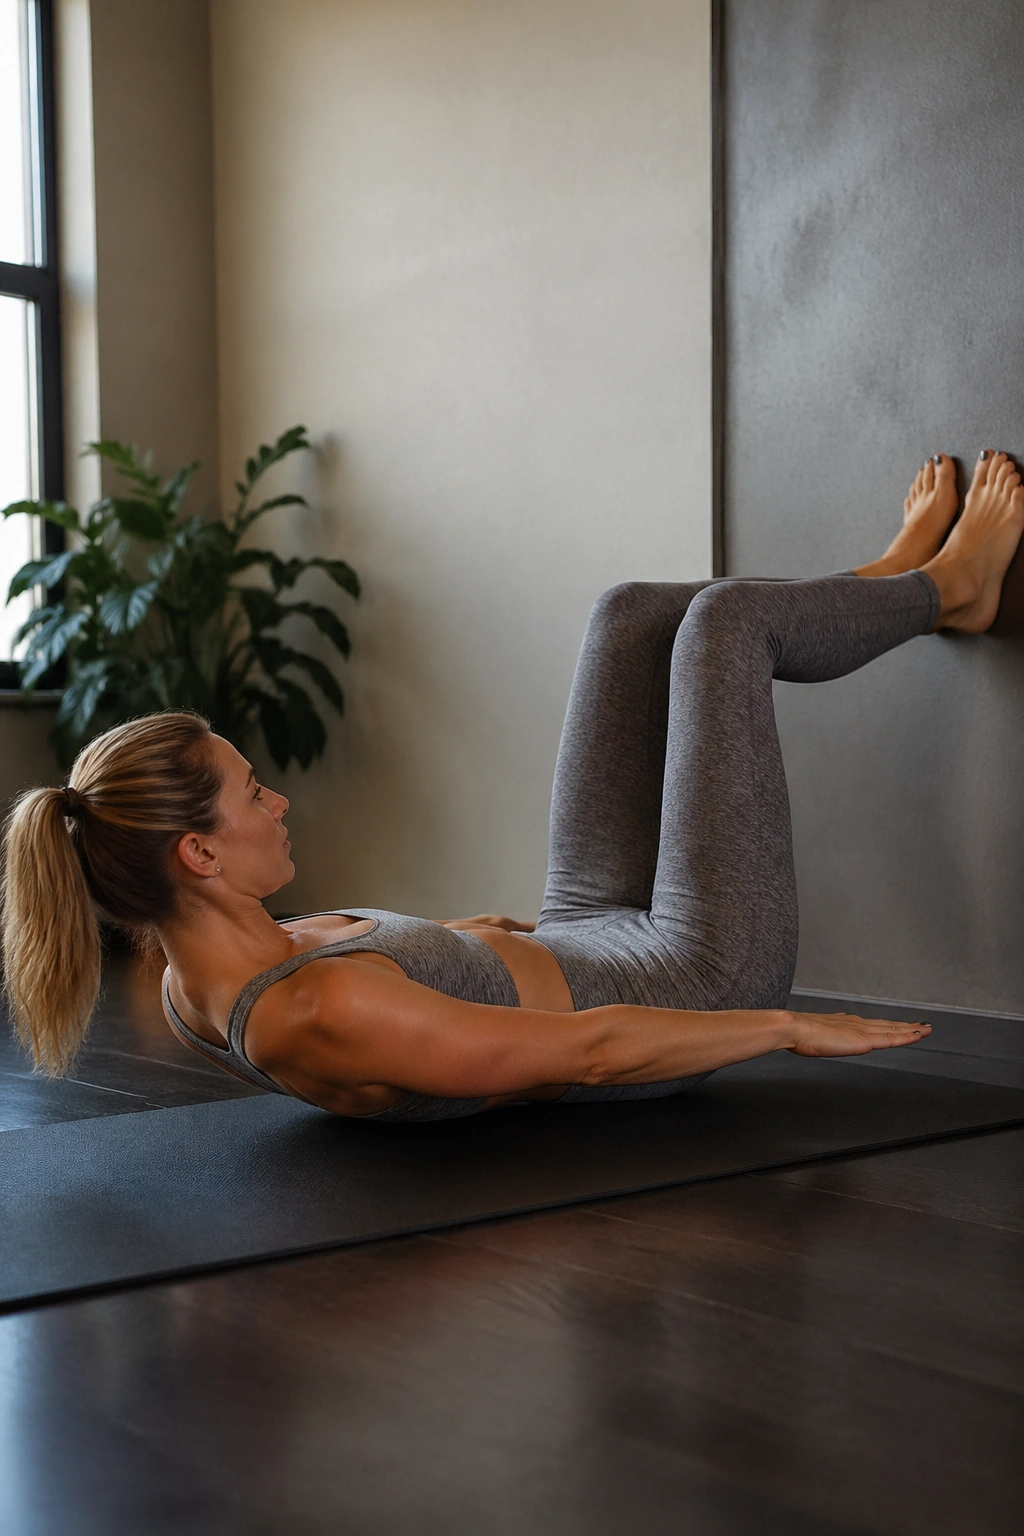
Why does the hundred still show up in athletic training? Because it forces the trunk to stay steady while the arms and legs keep moving. That is the whole game in sport, whether you’re cutting, sprinting, throwing, or absorbing contact.
Start with tabletop legs or keep one heel lightly on the floor if you need a friendlier version. Lift the head and shoulders only as high as you can manage without yanking on the neck. Pump the arms beside your hips in a small range, five counts on the inhale and five counts on the exhale.
How to use it
- Do 5 rounds of 20 pulses instead of chasing a perfect 100 right away.
- Keep the pelvis heavy and the ribs quiet.
- If your hip flexors cramp, lower the legs or bend the knees more.
- If your neck tires first, place a folded towel under the head and stay there.
This one looks easy from a distance. It isn’t.
3. Single-Leg Stretch for Hip Control
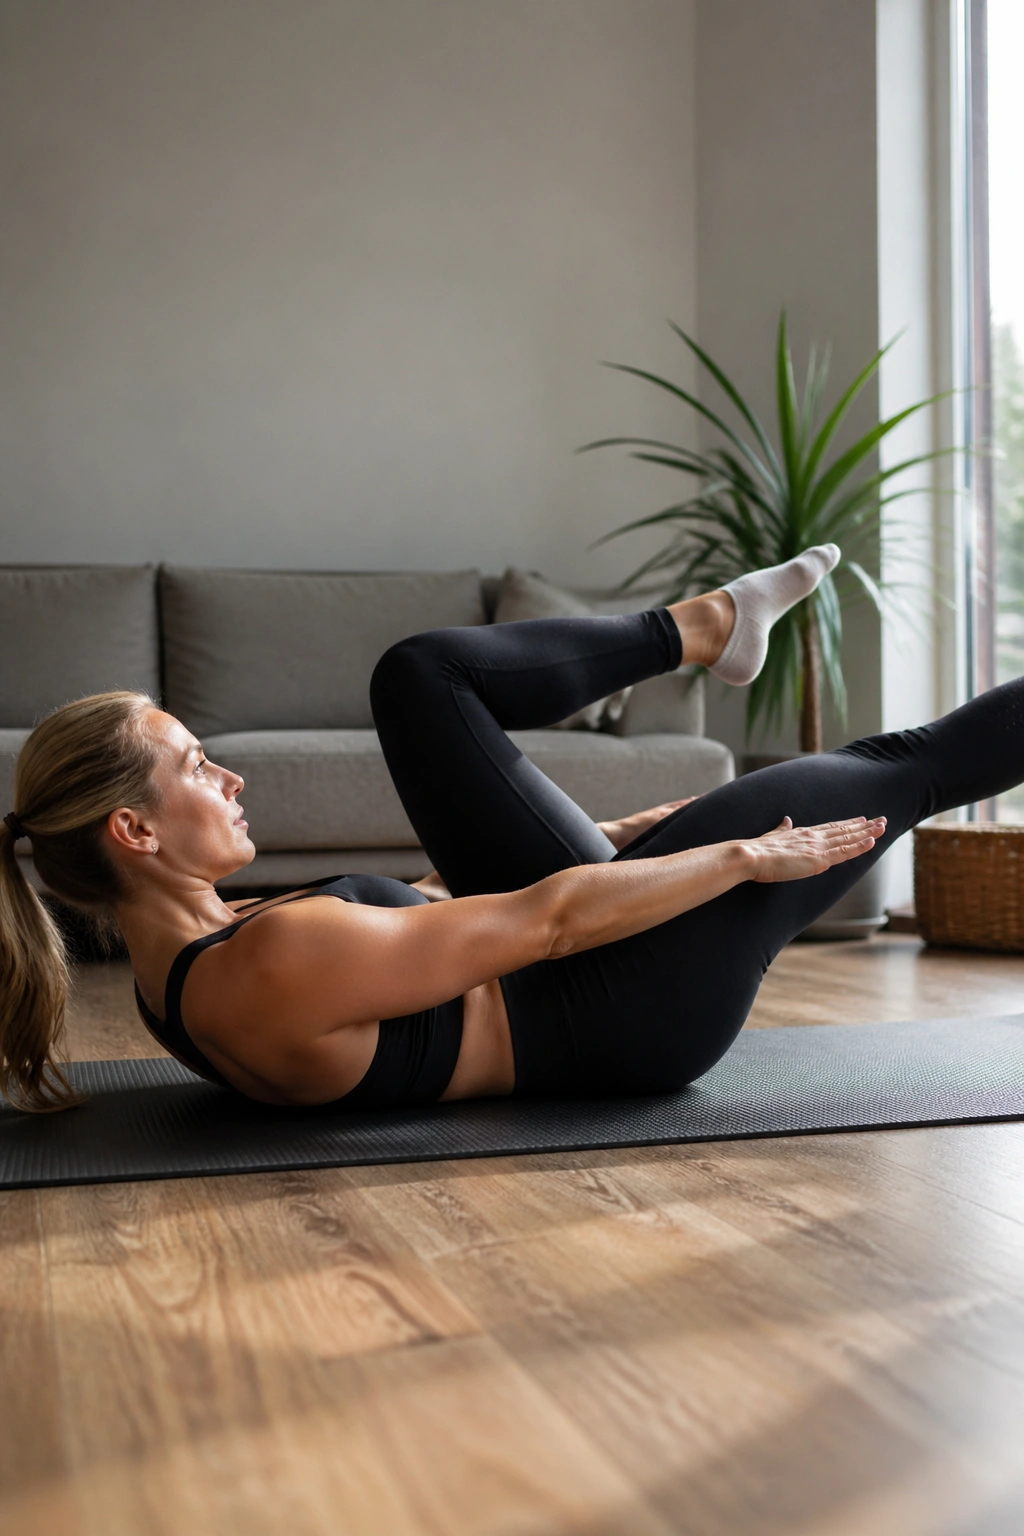
One side of the body usually carries more of the load. A runner may pull harder with one hip. A basketball player may favor one plant leg. A pitcher, a skater, a golfer — same story, different sport. Single-leg stretch shows you which side wants to dominate and which side keeps getting shoved around.
Lie on your back, curl up lightly, and bring one knee in while the other leg reaches away at a low angle. Switch sides with a smooth rhythm, not a bicycle sprint. The reach should stay long and low, and the pelvis should look boring. That’s the point.
What to watch for: if the lower back starts to arch or the front of the hip grips hard, shorten the reach and slow the pace. Ten controlled reps per side is a solid start.
4. Side-Lying Leg Series for the Outer Hips
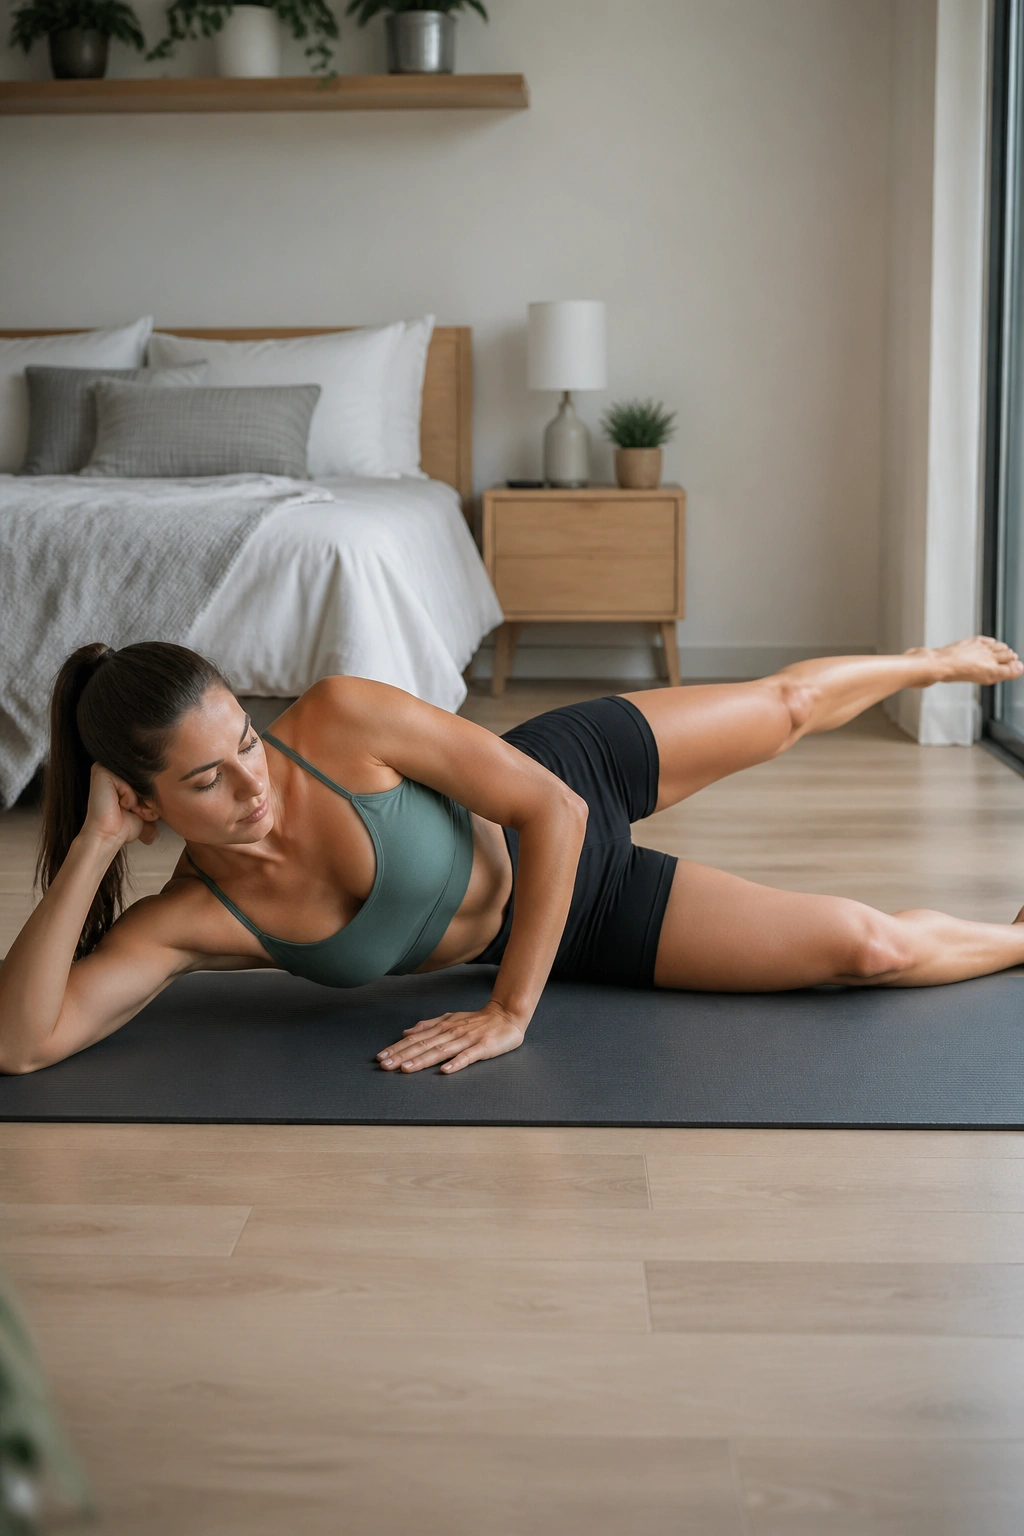
The outer hip gets ignored until it starts failing on landing, cutting, or changing direction. Side-lying leg work is one of the cleanest ways to wake it up without noise or load. It hits glute medius, glute minimus, and the stabilizers that keep the femur from collapsing inward.
Lie on one side with the hips stacked and the waist long. Lift the top leg just a few inches, then lower with control. Add small front-back swings, tiny circles, and a lifted hold if the basics stay clean. Big range is not the point. Clean range is.
What makes it different
- The torso should stay still.
- The toes can angle slightly down to keep the front of the hip from taking over.
- Slow tempo matters more than height.
- Two sets of 10 to 12 reps per movement is enough to make the muscle wake up.
If you feel it in the low back, you’re swinging too high.
5. Shoulder Bridge for Glute Drive
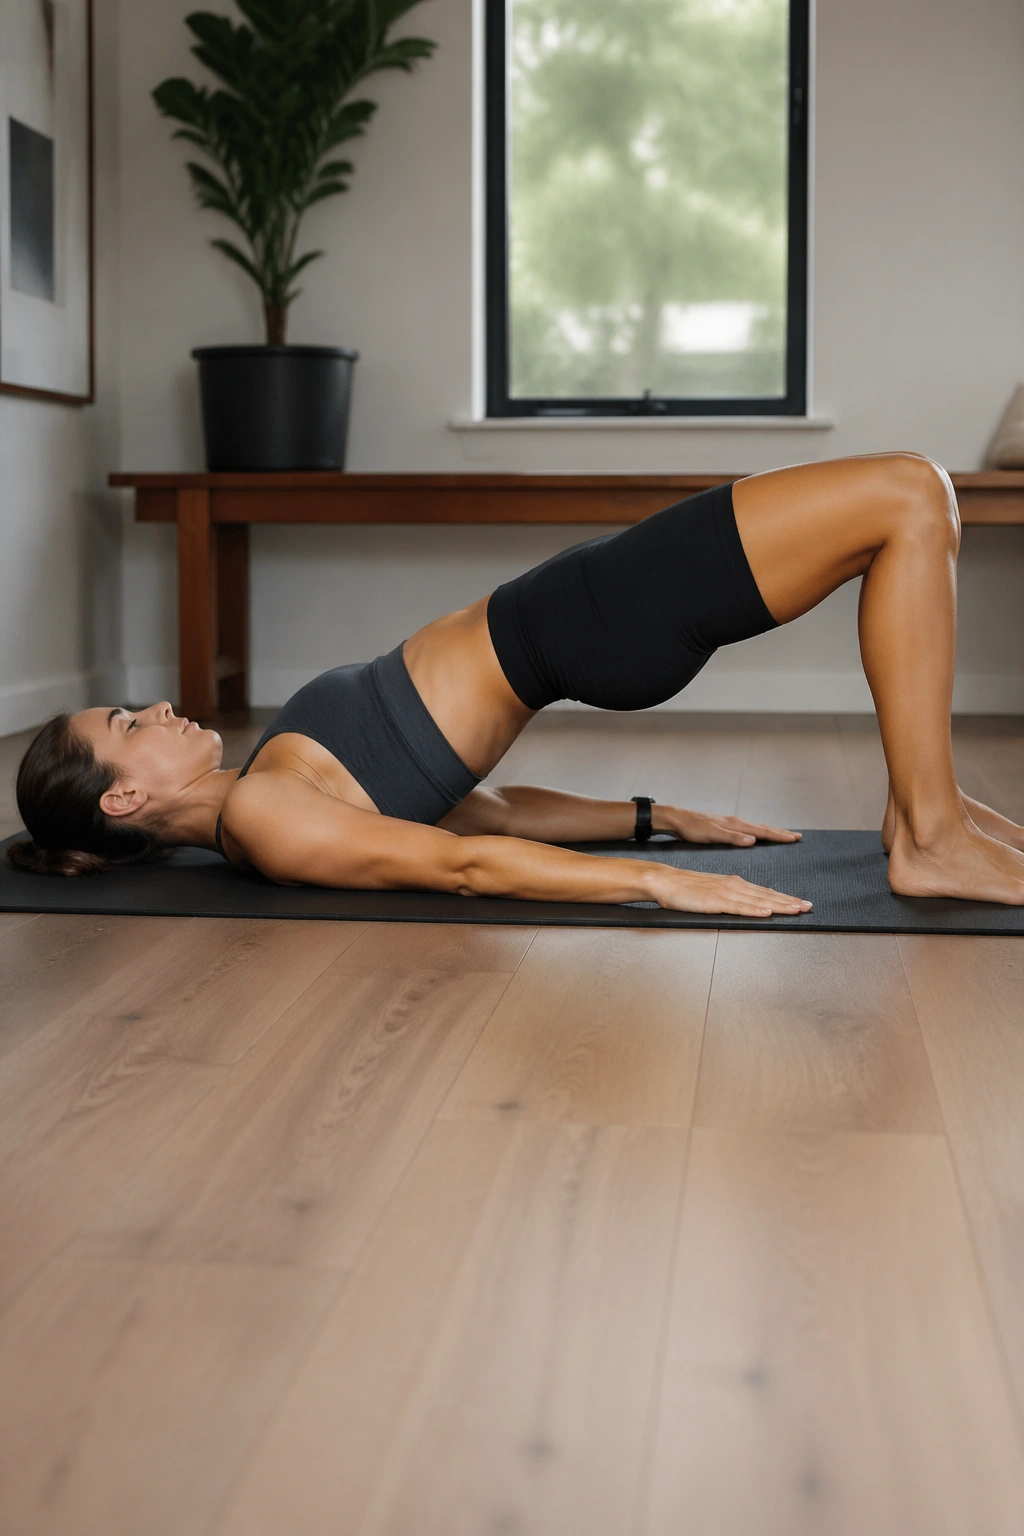
A bridge is simple right up until it isn’t. A clean Shoulder Bridge teaches you how to fire the glutes without turning the hamstrings into the only workers in the room. For athletes who squat, sprint, or jump, that matters more than people think.
Start on your back with knees bent and feet hip-width apart. Exhale, peel the spine off the floor one segment at a time, and stop when the body forms a long line from shoulders to knees. Hold for two breaths, then lower with control. If that feels too easy, add a small march by lifting one foot a few inches without letting the pelvis tip.
A few good reps beat a sloppy burn-fest. Eight to ten slow lifts is plenty. If your hamstrings cramp, slide the feet a little farther away and shorten the range.
6. Swimming for Back-Line Endurance
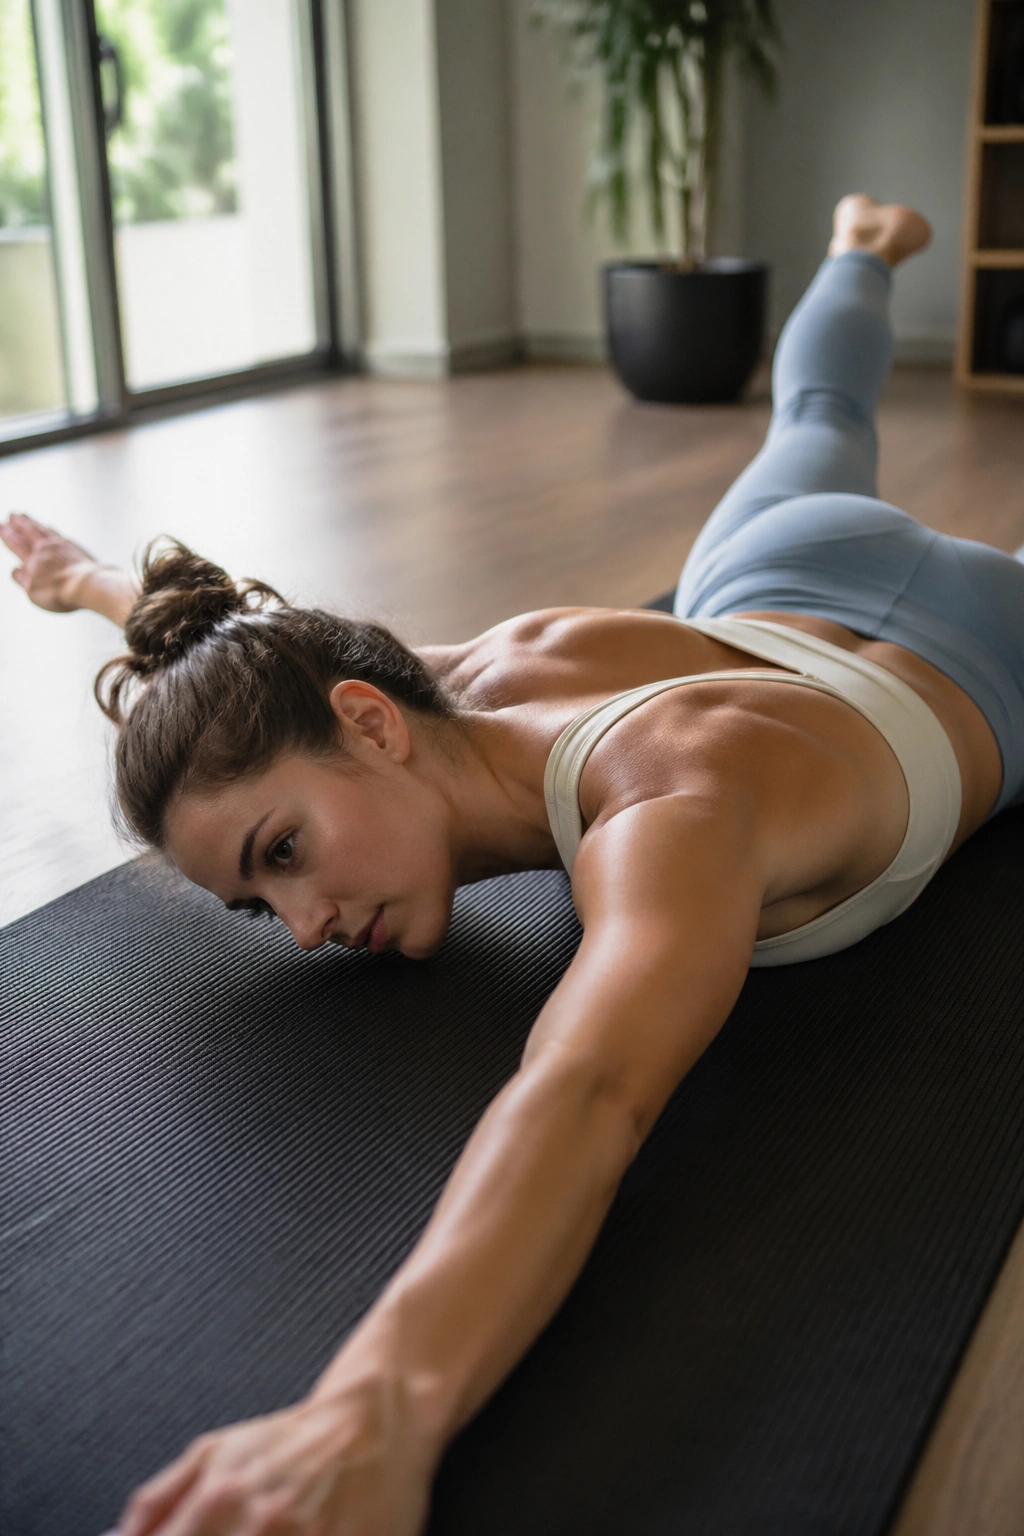
This one is underrated, and I mean that in the plainest way. Swimming wakes up the back body — spinal extensors, glutes, shoulders, the whole line that keeps you upright when fatigue starts leaking into your posture.
Lie face down with your arms stretched long. Lift opposite arm and leg in a tiny hover, then switch with a steady rhythm. Don’t kick high. Don’t whip the chest off the mat. The lift should be small enough that your low back stays calm and your neck stays long.
What you should feel
- Work across the upper back, not the neck.
- Keep the belly lightly braced against the floor.
- Breathe in a short, controlled pattern.
- Aim for 20 to 30 seconds, then rest.
What usually goes wrong
- The legs lift too high.
- The shoulders creep toward the ears.
- The lower back takes over because the glutes quit early.
Keep it quiet. Quiet is hard.
7. Forearm Plank With Knee Hover
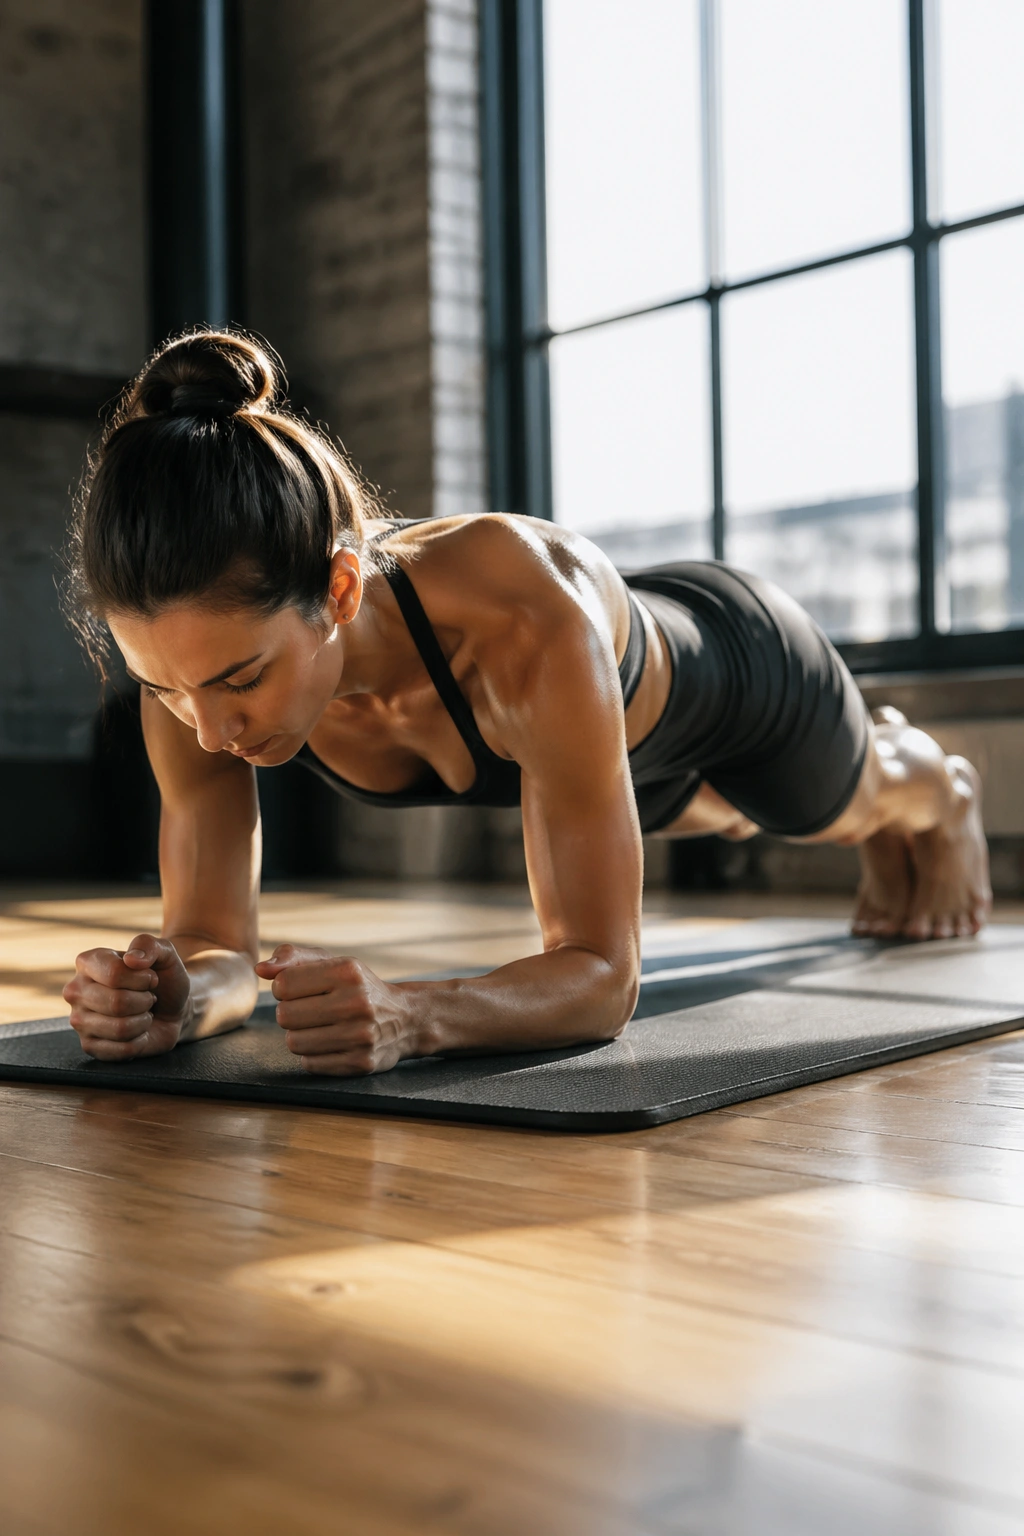
A plank becomes more athletic when you stop treating it like a punishment and start treating it like a control drill. The knee hover version asks for anti-extension, shoulder stability, and enough lower-body tension to keep the whole chain connected.
Set up on the forearms with the knees on the floor or with the knees hovering an inch above the mat. If you choose the hover, the body should feel long and organized, not saggy. Breathe behind the shield of your ribs. That means you keep the exhale going even while the abs are working.
Do 3 rounds of 15 to 25 seconds. Short and strict beats long and messy. If your low back sags, raise the hips a touch and take the ego out of it.
8. Teaser Prep for Hamstrings and Midline
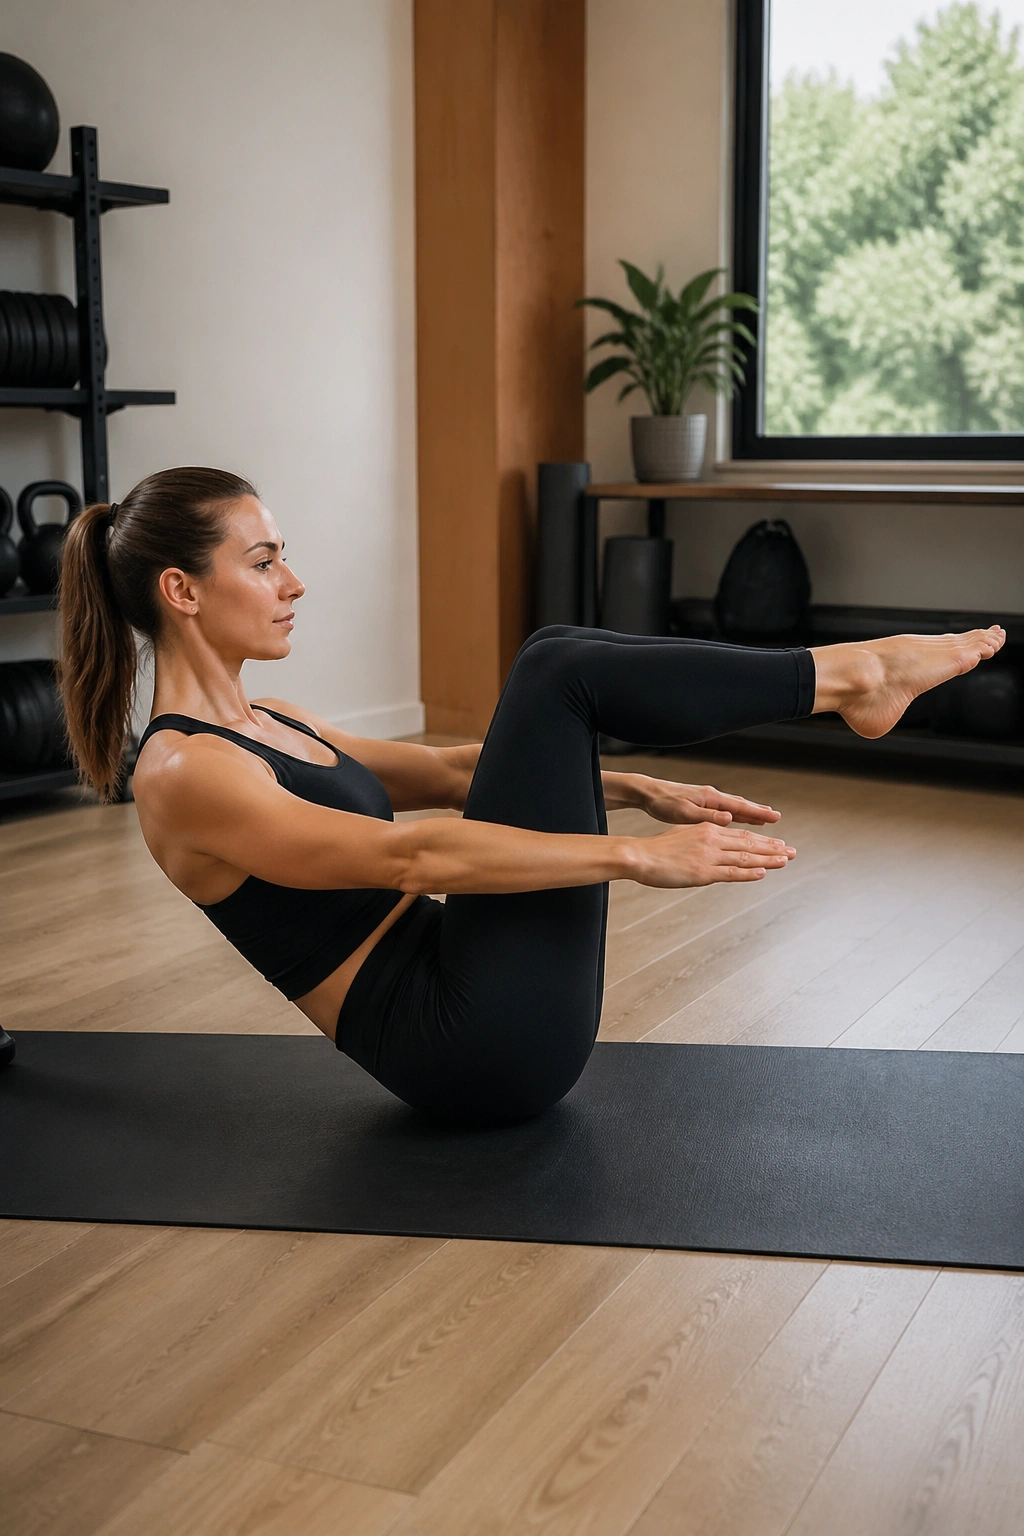
Can a teaser help a sprinter? Yes, if it’s used as preparation instead of a circus trick. The best teaser variations connect the deep abs, hip flexors, and hamstrings without letting any one piece boss the rest around.
Start with bent knees and roll back halfway, or hold one leg in tabletop while the other hovers low. Keep the chest open and the gaze soft. If the lower back wants to round hard, reduce the lever. If the hamstrings cramp, bend the knees and slow down.
Use this as a control drill, not a performance. Five clean reps can light up the entire midline, which is exactly why it earns a place in an off-season block.
9. Side Plank With Top-Leg Lift
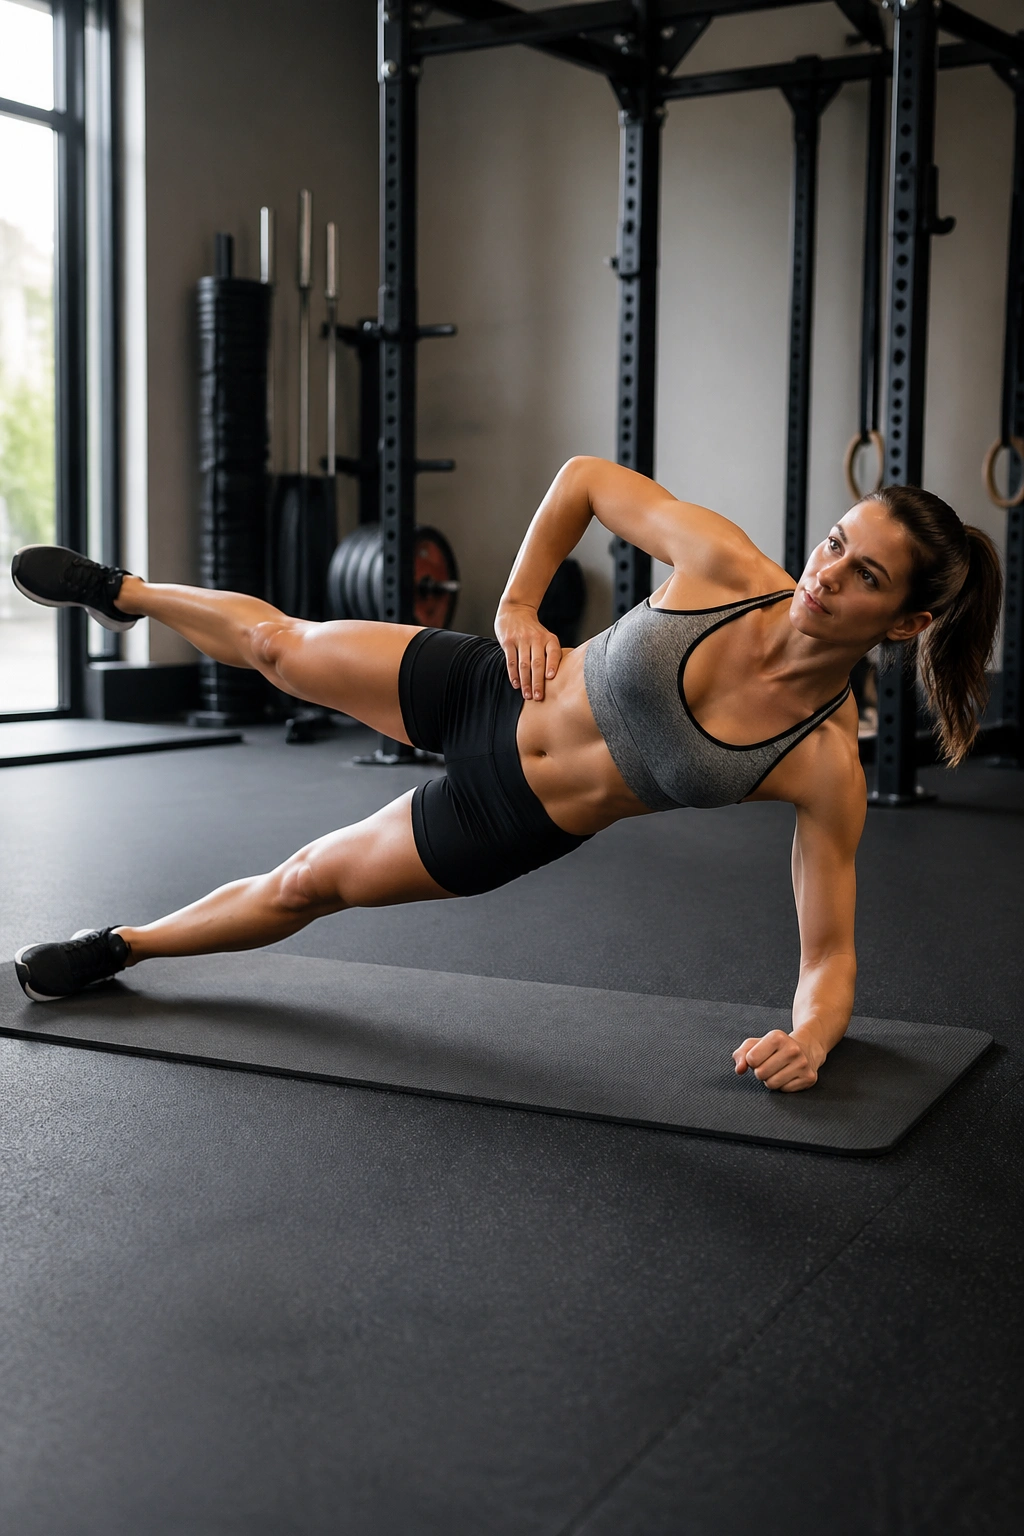
Side planks are where weak links get rude. Add a top-leg lift and you turn the drill into a test of the lateral chain — glutes, obliques, adductors, shoulder stability, all of it.
Set up on the forearm or the hand, stack the feet, and lift into a straight line. Once the position holds, raise the top leg a few inches without rolling the torso backward. That little lift should feel controlled and deliberate, not wobbly and desperate.
This is money for athletes who spend a lot of time on one leg. Guards. Tennis players. Skaters. Anyone who has to absorb force while moving sideways.
- Try 4 to 6 lifts per side.
- Keep the bottom shoulder pressed away from the floor.
- If the neck tightens, lower the shoulder and reset.
- If balance disappears, bend the lower knee and build up again.
10. Mermaid for Thoracic Rotation
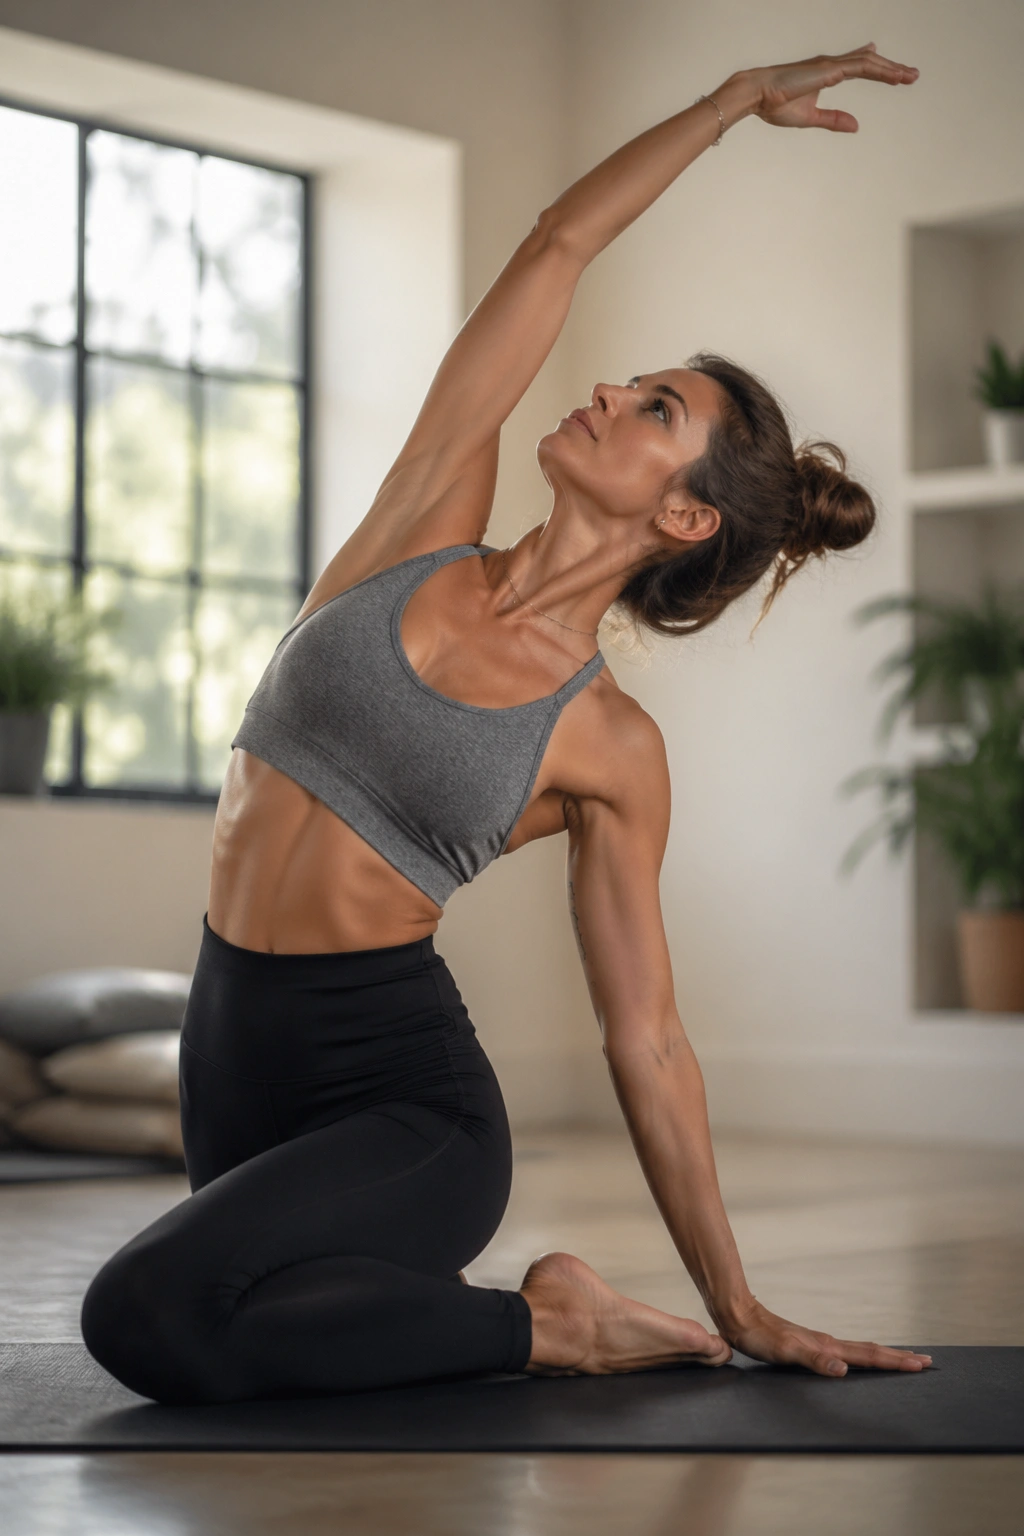
Mermaid is one of those moves people rush through because it looks like a stretch. That’s a mistake. Done well, it restores side-bending and rotation through the thoracic spine, which is the part of your back that should move while the low back stays mostly quiet.
Sit in a side-sit position or kneel with one hip dropped to the side. Reach one arm overhead and bend toward the anchored side, then come back up with a breath that fills the side ribs. The reach should feel roomy, not forced. A good mermaid leaves you taller, not looser in a vague way.
Why athletes need it
- Throwers need cleaner rotation.
- Lifters need the ribs to stop flaring during overhead work.
- Runners and cyclists need the upper back to stop locking into one shape.
Three slow breaths per side is enough if you do it honestly.
11. Quadruped Arm Reach for Scapular Control
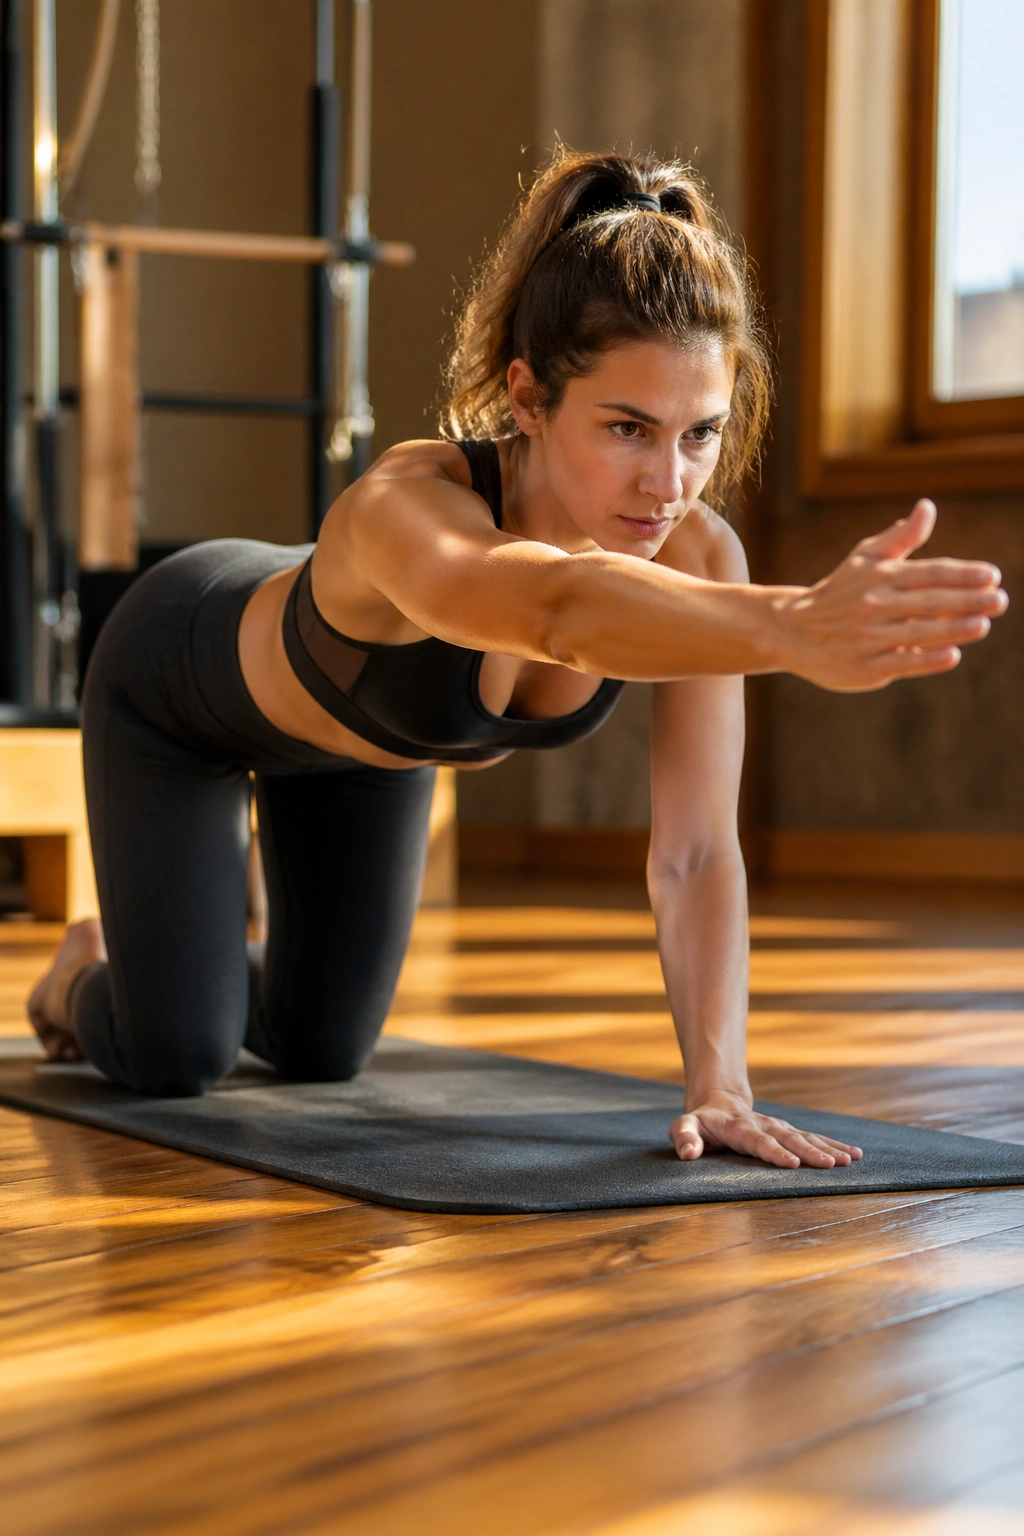
If your shoulders live near your ears, quadruped arm reaches will tell on you fast. This drill teaches the shoulder blade to glide without the trunk collapsing, which matters for overhead athletes and anyone who presses, rows, or carries loads.
Get on hands and knees. Reach one arm forward until the fingertips are long and the neck stays level. Hold for three to five seconds, then return with control. If that feels stable, add the opposite leg for a longer lever. Not because it looks fancy. Because it forces the trunk to work while the limbs do their job.
How to keep the shoulders quiet
- Push the floor away lightly with the support hand.
- Keep the ribs from dumping toward the mat.
- Reach farther, not higher.
- Work 5 reps each side, then switch to the other side.
This is one of those drills that seems small and shows up everywhere later.
12. Clamshells With a Mini-Band
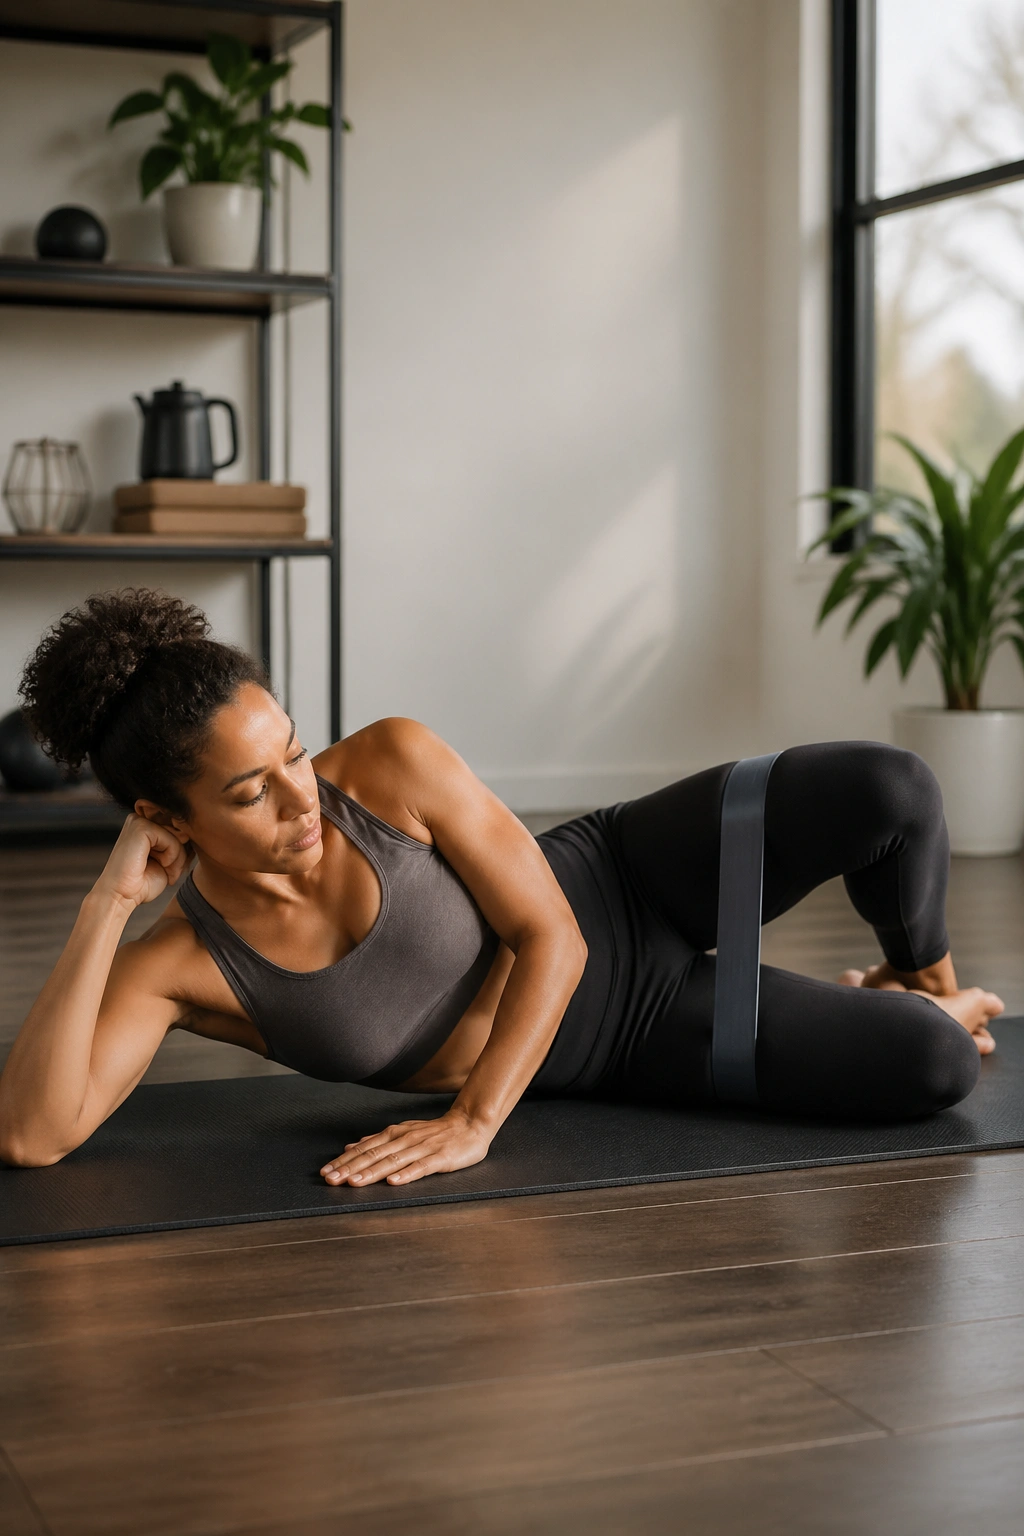
Clamshells do not win style points. They do, however, wake up the deep hip rotators and the side glute that keep your knees tracking well when fatigue shows up. Put a mini-band just above the knees, lie on your side, and open the top knee without rolling the pelvis back.
Keep the feet together and the waist long. If the movement turns into a hip hike, the band is probably too heavy or the range is too big. Start with 12 to 15 reps per side and keep the last three looking just as tidy as the first three.
Use this between lifting days, after runs, or before a more explosive session if your hips need a little reminder. Tiny movement. Real effect.
13. Corkscrew for Pelvic Stability
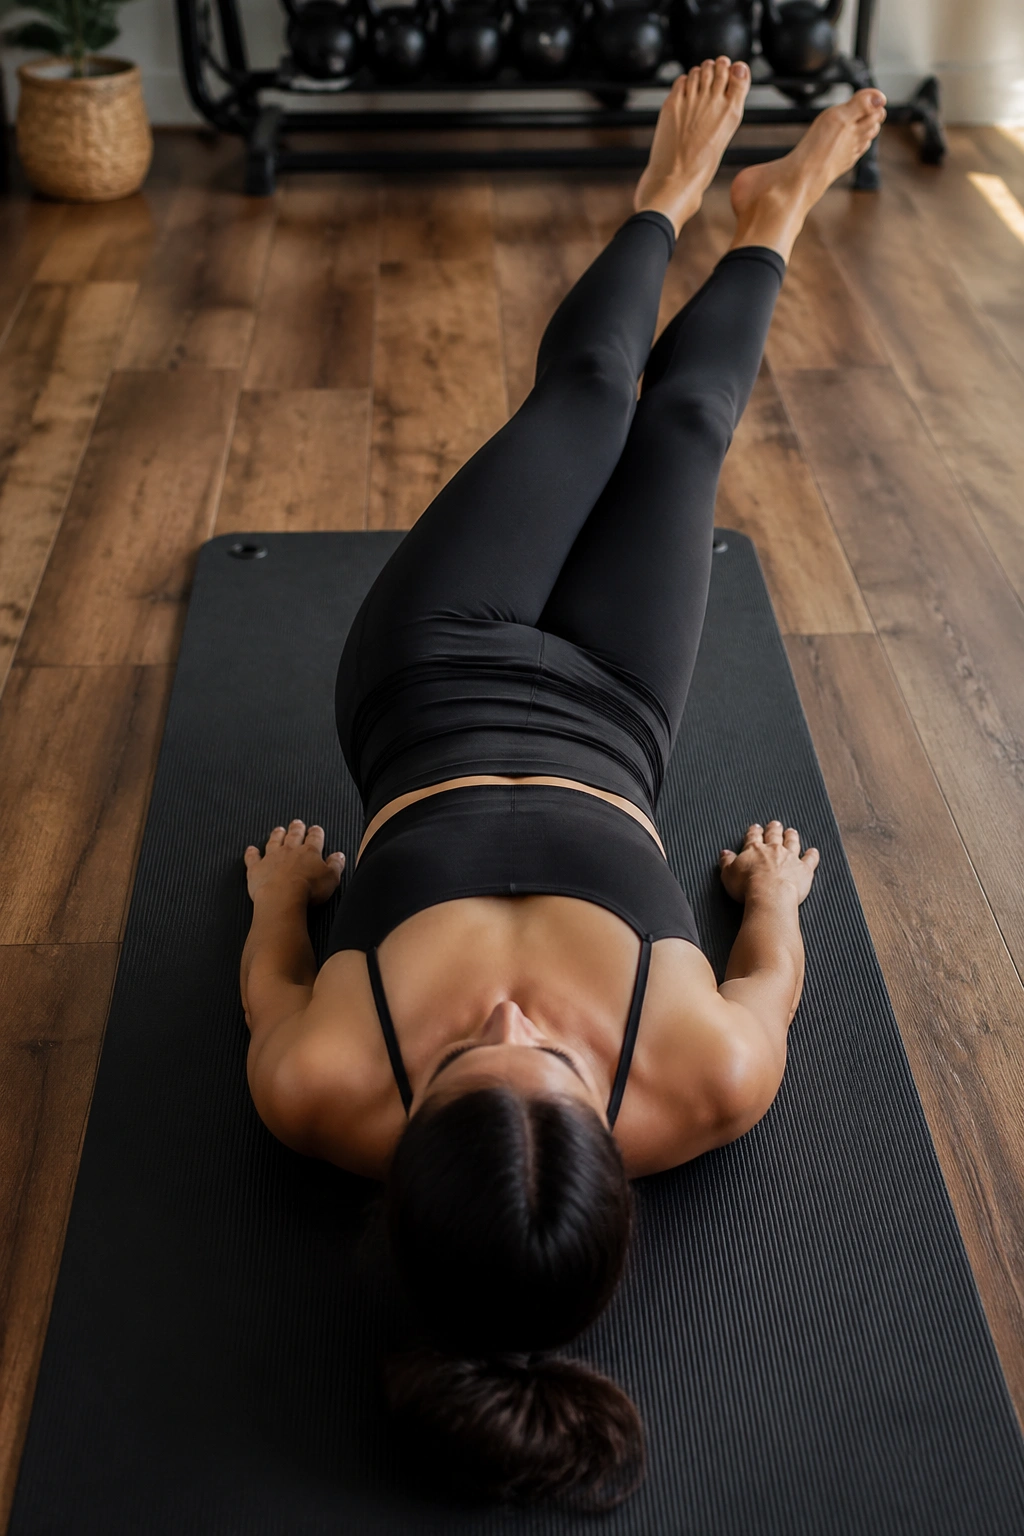
Corkscrew is one of the sneaky hard ones because the legs look like they’re doing the work while the pelvis tries to wander off. That wandering is exactly what the drill is trying to stop.
Lie on your back with the legs lifted, then draw small circles in the air while keeping the pelvis steady. If that feels too aggressive, bend the knees and make the circle smaller. Way smaller. The goal is to control the rotation, not chase a big range that turns into low-back chatter.
Why tiny circles beat huge ones
- Small circles force the trunk to stay honest.
- The abs have to keep the pelvis from tilting.
- The hips learn to move without the spine doing all the work.
Use 5 circles each direction. If the low back pops or the legs shake wildly, shrink the pattern and try again.
14. Standing Footwork and Balance Matrix
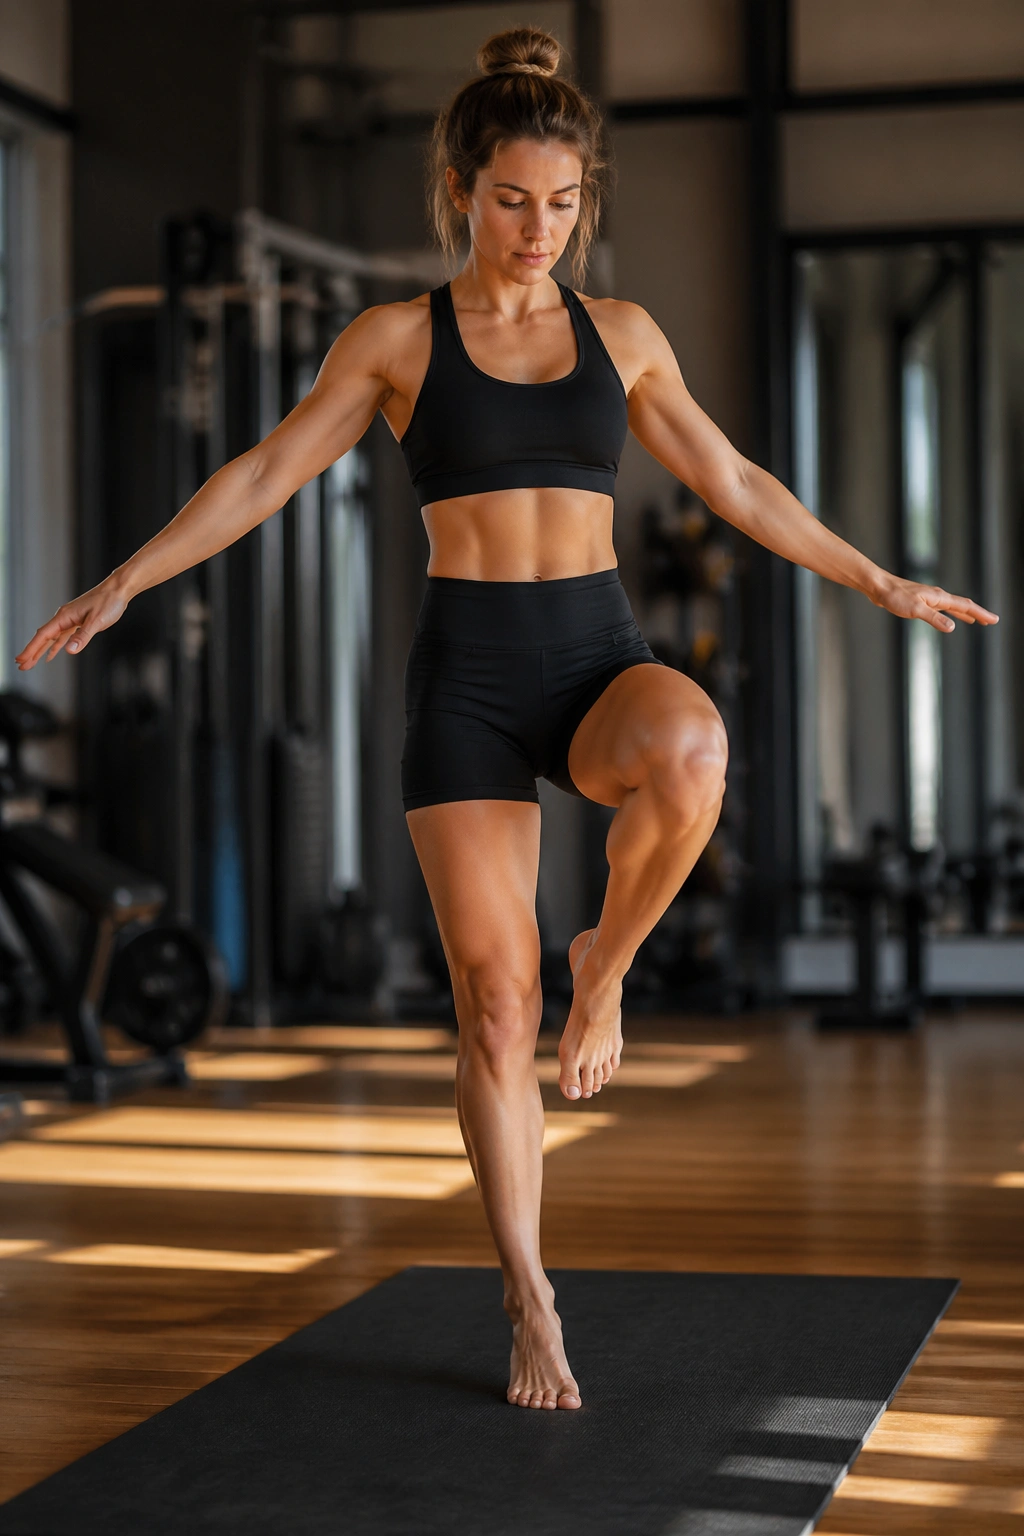
A lot of Pilates happens on the floor, but athletes live on their feet. Standing work brings the lesson back into the shape you actually use in sport. Balance, foot pressure, ankle control, hip alignment — they all show up here.
Stand tall on one leg and press through a three-point foot: base of the big toe, base of the little toe, heel. From there, try small reaches forward, sideways, and diagonally while keeping the stance knee from caving in. Add a tiny calf raise if the balance stays clean. If not, skip it and own the basic pattern first.
What to look for: the arch should stay alive, the ankle should not collapse inward, and the pelvis should stay level. Five reps in each direction is enough to expose the weak spots without turning it into a circus act.
15. Roll Down Series for Spinal Segmentation
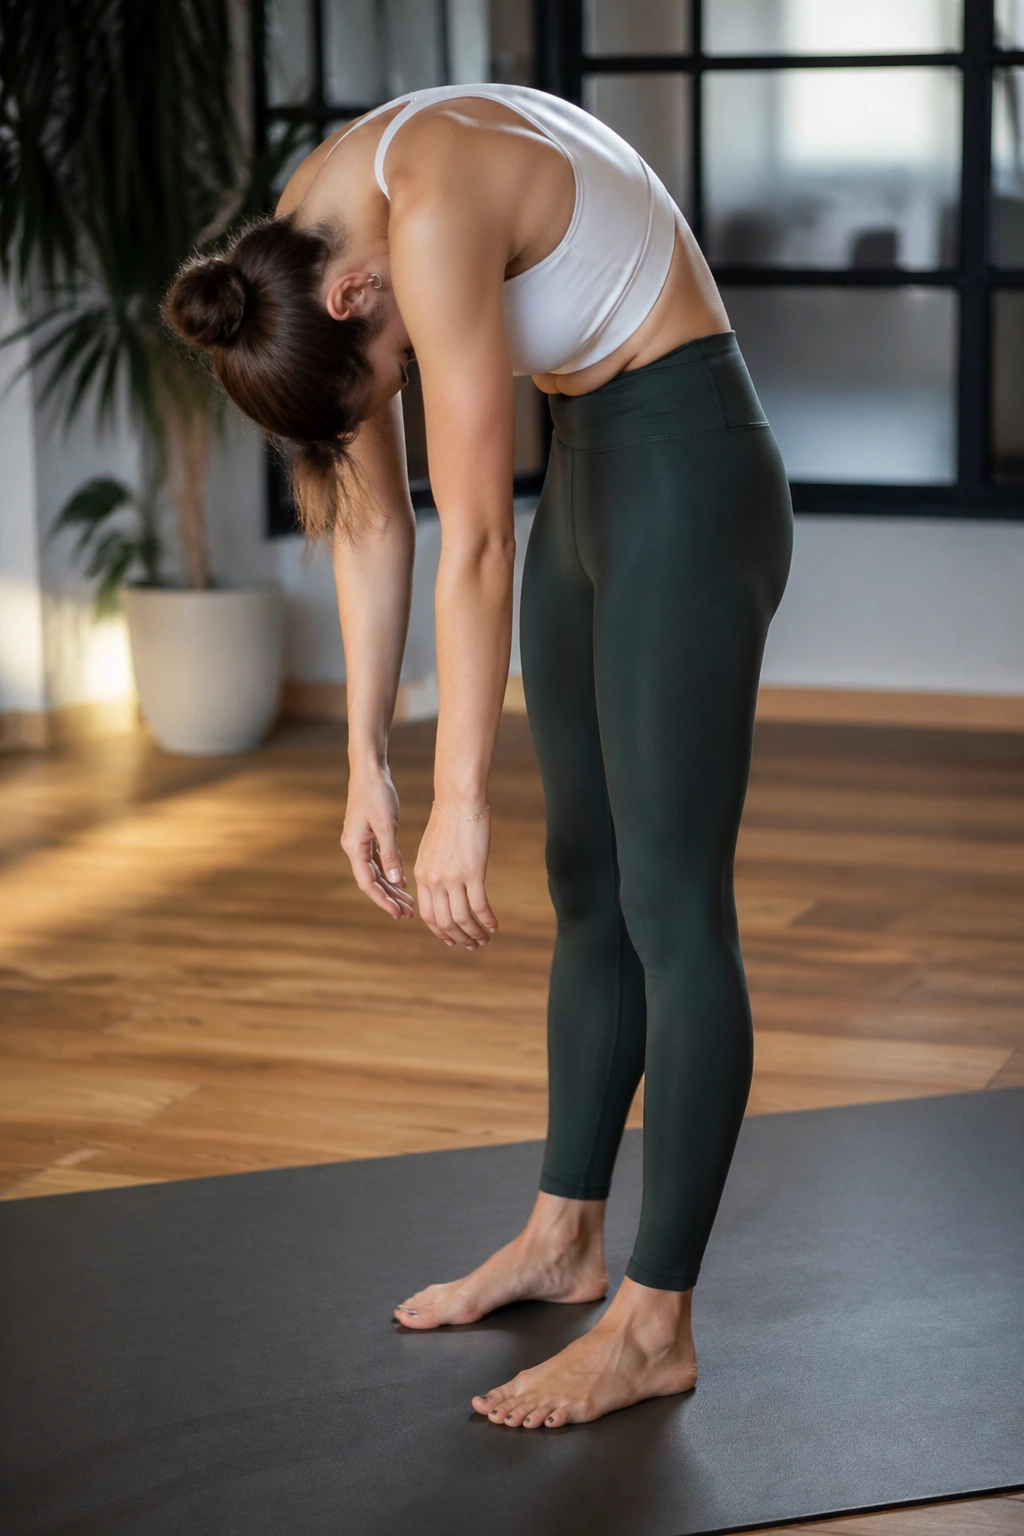
Rolling down one vertebra at a time is one of the best ways to remind an athlete that the spine is not a single stiff rod. It should bend in pieces. When it doesn’t, you get the classic mix of tight hamstrings, cranky low backs, and movement that looks more forced than fluid.
Stand tall, soften the knees, and let the chin nod. Exhale as you roll down slowly, stacking the spine toward the floor. Pause where the hamstrings start to resist, then roll back up with the same control. If your hands never touch the floor, that is fine. Range is not the prize. Segmentation is.
What to watch for
- The shoulders should not yank forward.
- The knees can stay bent.
- The descent should feel slower than you expect.
- Three to five rounds is enough.
This one is simple. It still matters.
16. Leg Pull Front and Back
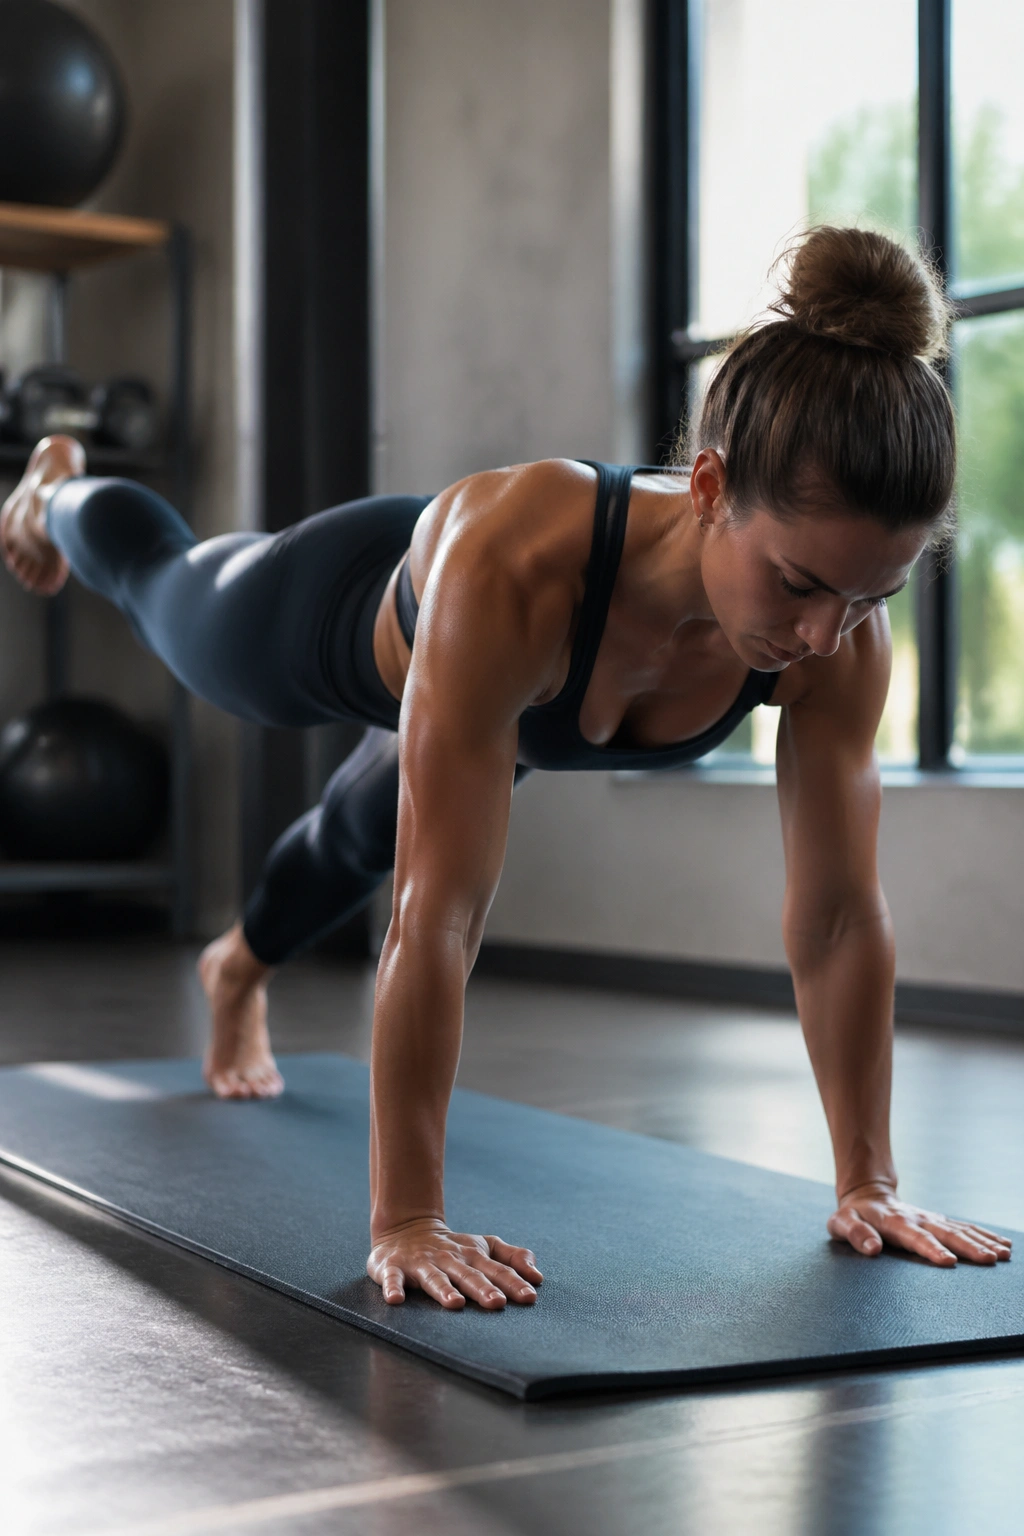
Leg pull front and leg pull back are Pilates versions of long-line strength work, and athletes usually respect them once they feel how much they demand from the shoulders, glutes, and trunk at the same time. They’re tougher than standard planks because the body can’t hide as easily.
In the front version, hold a plank and lift one leg a few inches without twisting. In the back version, face up in a reverse plank and lift one leg while keeping the hips high. Both versions ask for shoulder stability and pelvic control. Both versions punish lazy middle sections.
A useful starting point is 3 holds per side for 5 seconds each. If the wrists dislike the front version, drop to forearms. If the reverse plank feels like a hamstring cramp waiting to happen, bend the knees and shorten the hold.
17. Lunge-and-Rotation Flow
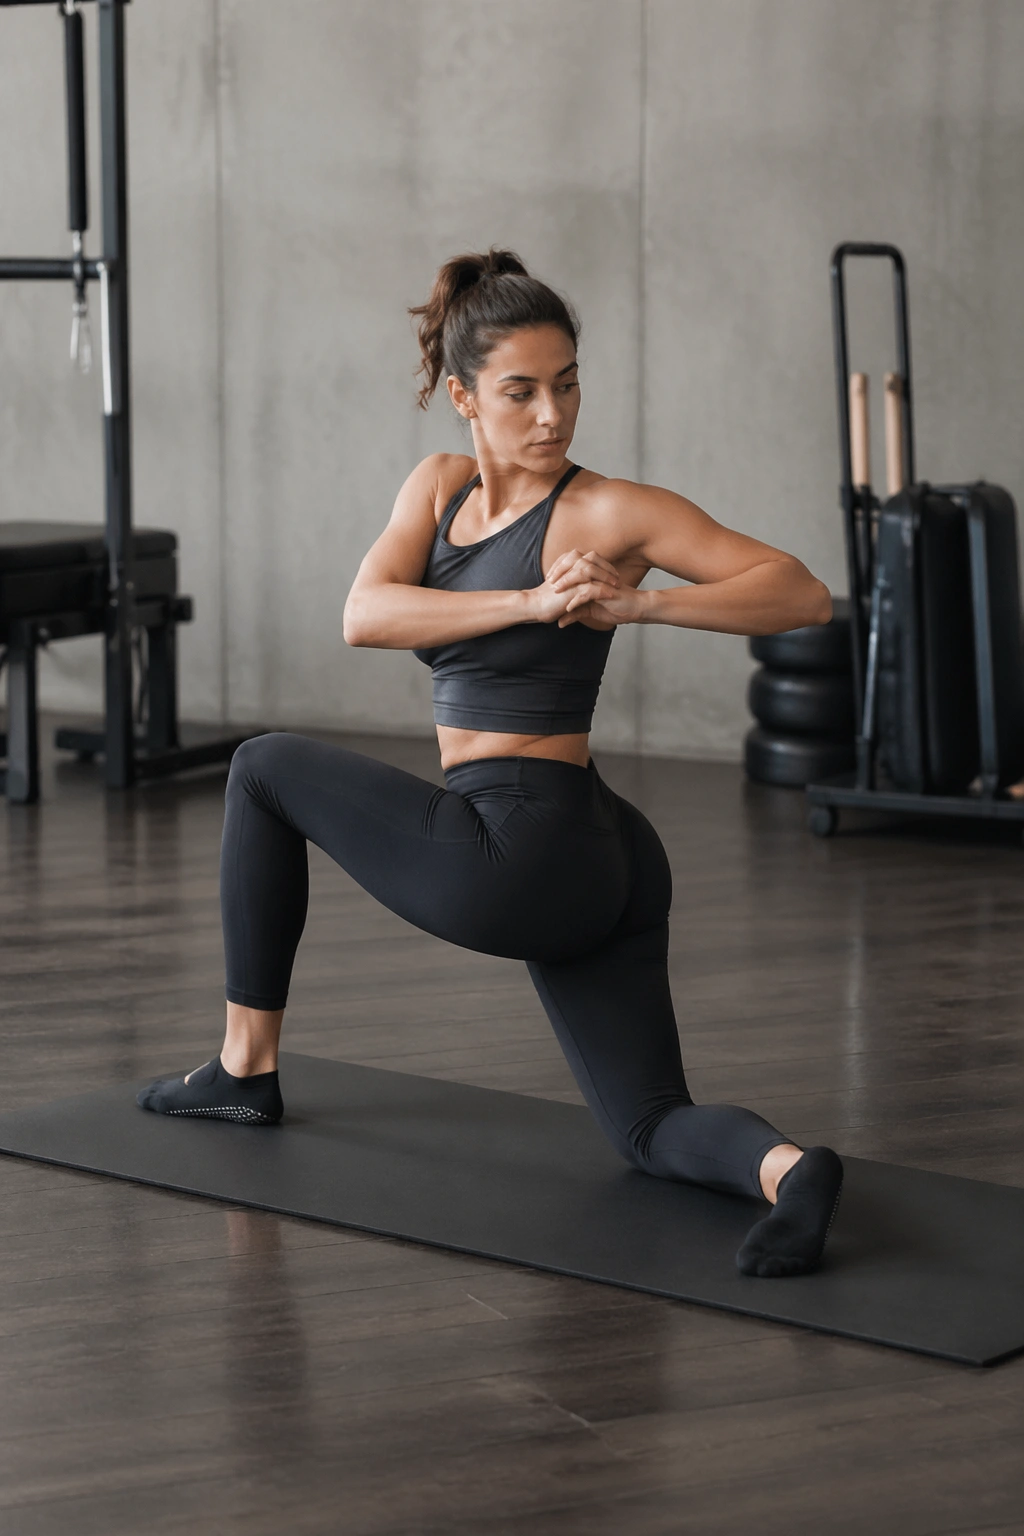
This is where Pilates starts to look more like sport. A lunge-and-rotation flow asks the body to stabilize in a split stance, rotate without dumping into the low back, and then come back to center under control. That mix shows up in almost every field sport and racket sport.
Step one leg back into a half-kneeling lunge. Square the hips, then rotate the torso toward the front leg with the arms reaching at chest height. Come back to center, press up to standing, and repeat. If balance gets shaky, keep the feet planted and just work the rotation first.
Why it earns a place off-season
- It exposes side-to-side differences.
- It teaches the torso to rotate over a stable pelvis.
- It bridges core work and movement you actually use on the field or court.
Try 5 cycles per side. The side that feels awkward is usually the one worth repeating, not skipping.
18. The 20-Minute Off-Season Circuit
If you want one session that threads the whole idea together, this is the one I’d use. It’s long enough to matter and short enough that athletes will actually do it between lifts, runs, or skill sessions. That combination is rare.
Do two rounds of the following:
- 5 rib-stack breaths
- 8 shoulder bridges
- 10 single-leg stretch reps per side
- 20 seconds of side plank per side
- 5 roll-downs
- 20 seconds of swimming
- 5 standing balance reaches per side
Keep the pace smooth and the rest short. The session should leave you warm, organized, and a little more aware of where you leak force. It should not leave you flattened.
That’s the real point of Pilates workouts for athletes off season. You’re not trying to turn Pilates into a second sport. You’re using it to make the rest of your training cleaner, calmer, and easier to absorb. If you come out of these sessions feeling taller, steadier, and less cranky in the joints, you’re on the right track.
And if one side keeps misbehaving, go back to it. That side has been talking the whole time.
