



If your Pilates leaves you sweaty but somehow unchanged, the problem is usually not effort. It’s load, tempo, and honesty.
Pilates routines that build real strength ask for the boring-looking stuff: slow lowers, long holds, stacked joints, clean breath. They also ask you to stop cheating with momentum, which is why they feel harder than they look.
That’s the sweet spot. Your core should brace. Your hips should stabilize. Your shoulders should stop wandering around like they’re not part of the body.
What follows leans on mat work, small props, and a few sharper variations that make Pilates feel less like a warm-up and more like strength training with excellent posture.
1. The Hundred With a Slow Lower-Leg Pattern
The Hundred gets treated like a breathing drill, but it earns its keep when you slow it down and make the legs do actual work. Straight arms and quick pumps are fine. The part that changes the game is the lower-leg pattern, because that’s where the low abs have to hold the pelvis steady instead of flinging it around.
Why It Works
Keep the torso curled, ribs heavy, and one leg hovering in tabletop while the other lowers 6 to 8 inches. Switch sides without letting the low back arch. Five to eight exchanges per side is plenty if you’re honest about form.
A lot of people rush this one and call it core training. It isn’t, not really. The exercise only builds strength when the exhale stays long and the neck stays relaxed enough that you can keep going for 5 full breath cycles without jaw tension.
Try this: start with the legs higher if your back pops off the mat, and pump the arms only once the pelvis stays quiet for the first three breaths.
What to Feel
- Deep lower abs drawing inward on the exhale
- Hip flexors working, but not gripping hard
- Front ribs staying closed instead of flaring
- A warm, tired feeling across the center line, not the neck
Tip: if your shoulders creep toward your ears, lower the arms and do the same pattern with the hands resting by your sides for one round.
2. Shoulder Bridge With Marches
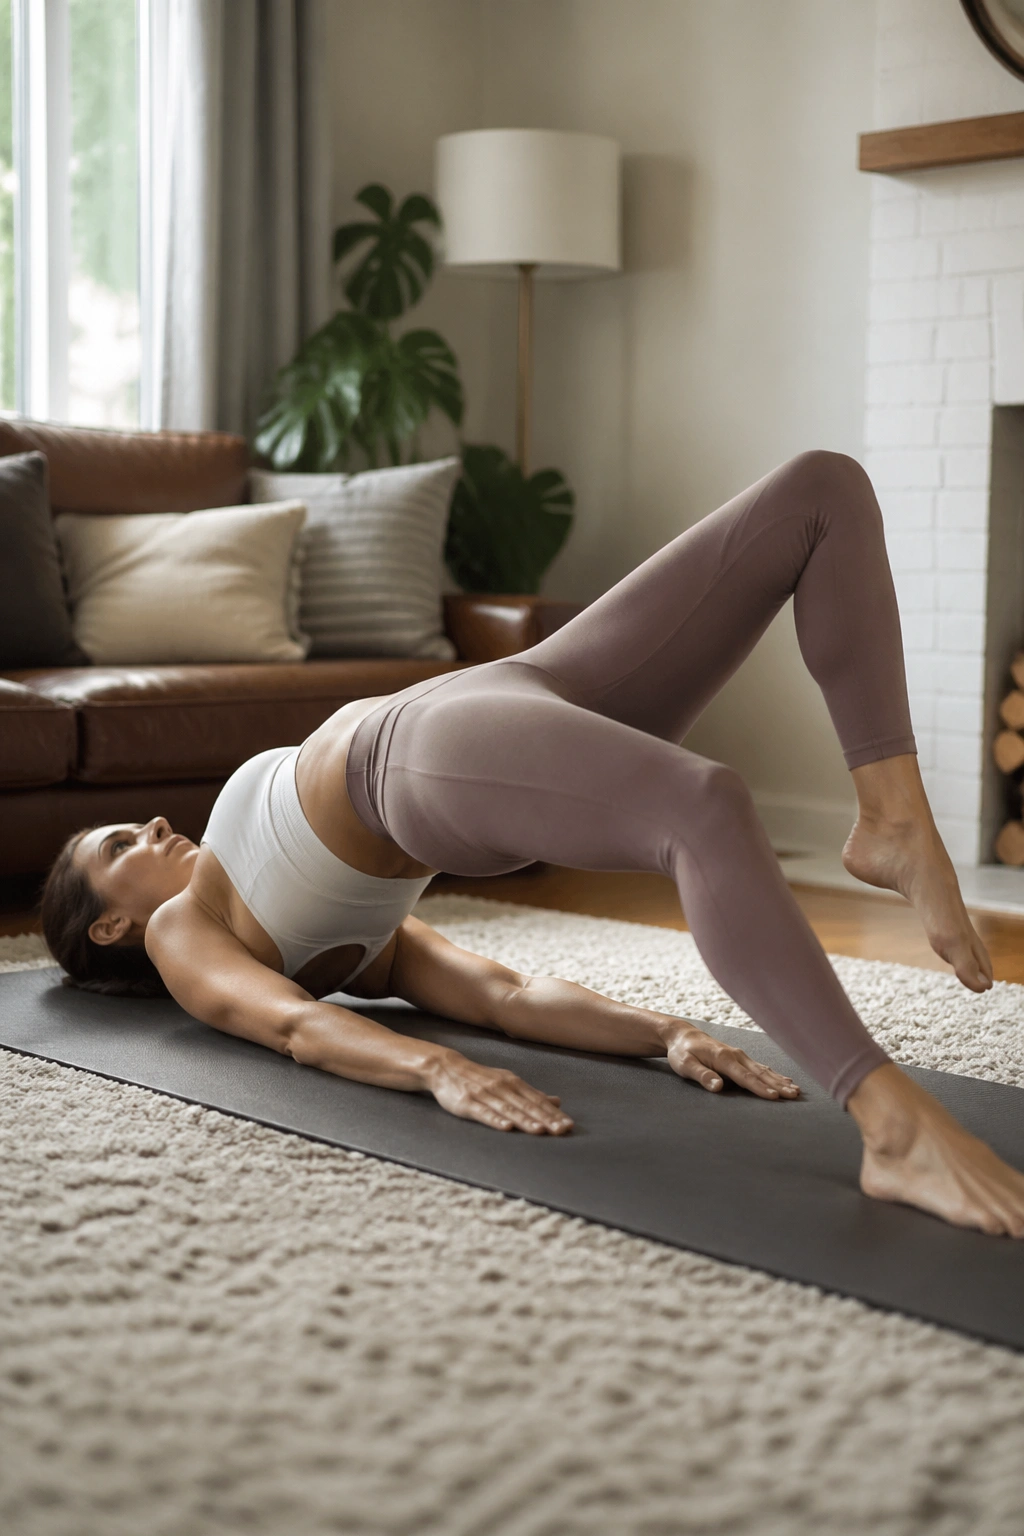
Why does a bridge feel easy for the first 20 seconds and miserable after that? Because the glutes show up fast, then the hamstrings try to take over and the pelvis starts drifting. The marching version fixes that by asking one leg to stay honest while the other moves.
Lie on your back with feet hip-width apart. Press up into a bridge, find a long line from shoulders to knees, and lift one foot an inch off the floor without dropping the hips. Alternate marches for 6 to 10 reps per side, then hold the bridge for 3 breaths before lowering.
What Makes It Useful
The march adds a small balance challenge, and that little wobble is where the strength work happens. The standing leg glute has to keep the pelvis level. The opposite side of the waist has to resist twisting. And if you go slowly enough, your hamstrings will stop being the loudest thing in the room.
How to Get More From It
- Place your heels close enough that fingertips can graze them.
- Exhale before each march, not during the wobble.
- Keep the chest soft; do not jam the ribs upward.
- Lower only if you can control the last inch.
A bridge like this is plain-looking. Good. Plain-looking is useful when the work is real.
3. Side-Lying Clamshells Into Leg Lifts
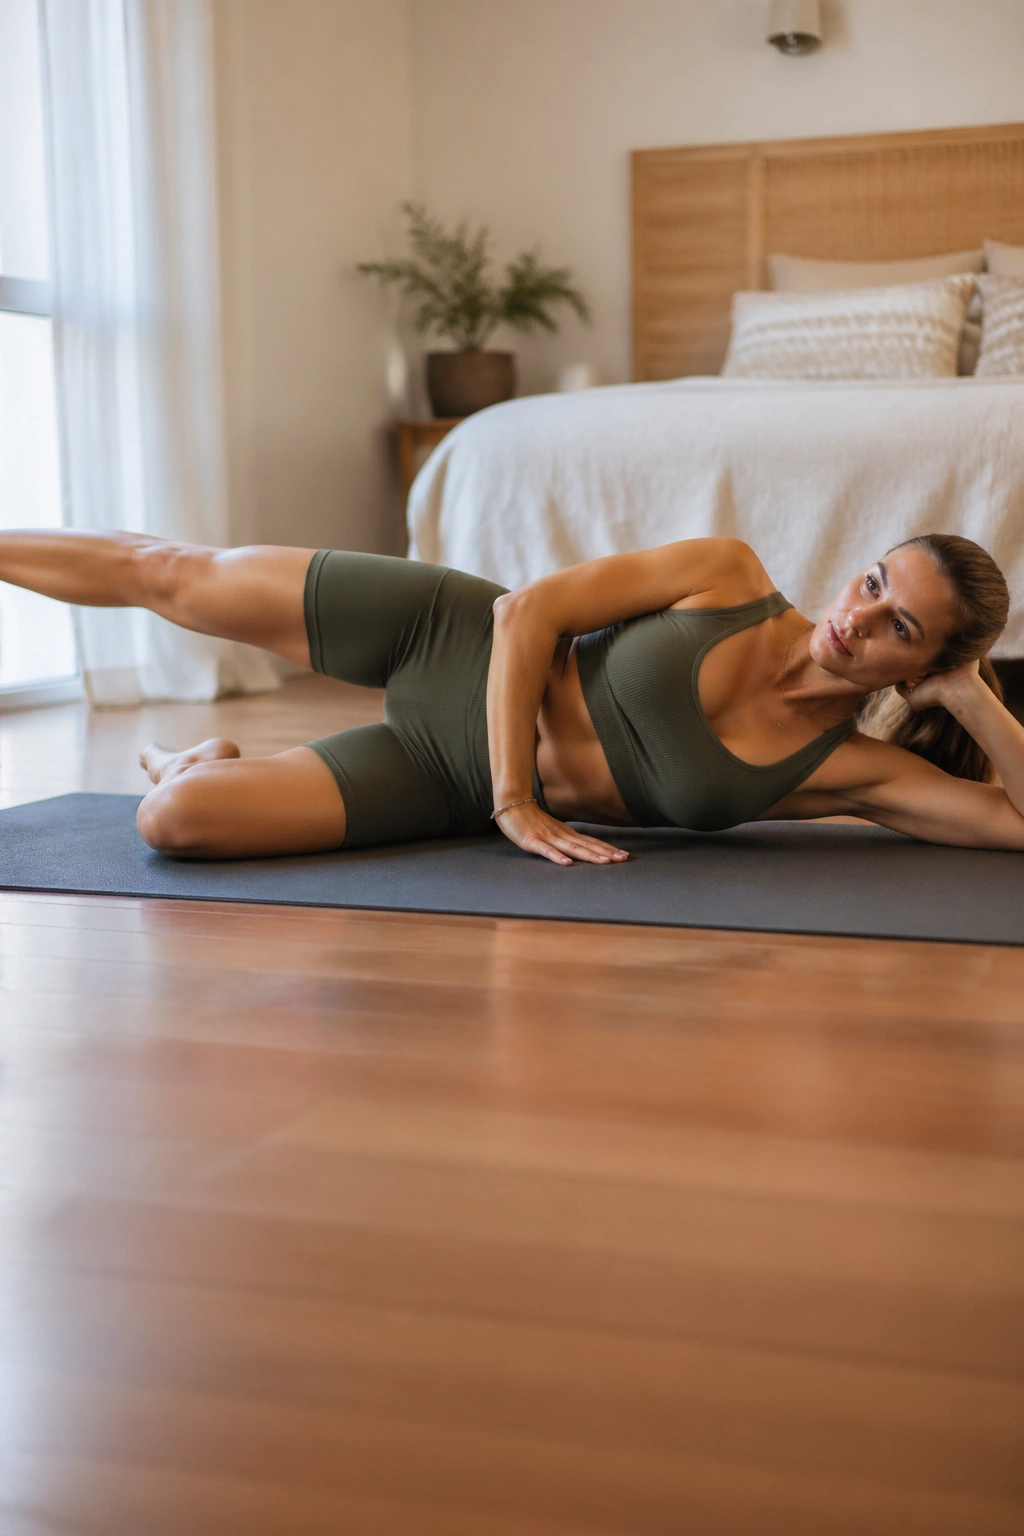
If your outer hips feel weak in squats, lunges, or even long walks up stairs, this side-lying sequence usually exposes the truth fast. Clamshells wake up the deep glute muscles. The leg lifts teach them to hold that work when the thigh moves farther away from the body.
Lie on your side with knees bent, hips stacked, and a small pillow under your head if your neck gets cranky. Open the top knee for 10 slow clamshells, keeping the feet touching, then straighten the top leg and lift it 8 to 12 inches for 8 to 10 reps. Finish with 10 tiny circles each direction.
The useful part is the stillness. Don’t roll backward just to get a bigger range. The pelvis should stay stacked, the waist lifted away from the mat, and the top hip slightly forward so the movement comes from the side glute instead of the low back.
Bold truth: if you feel this in the front of the hip more than the outer butt, your top leg is probably drifting too far behind you.
One round per side is enough for a warm-up. Two rounds turns it into a real side-body session.
4. Forearm Plank With Knee Hovers
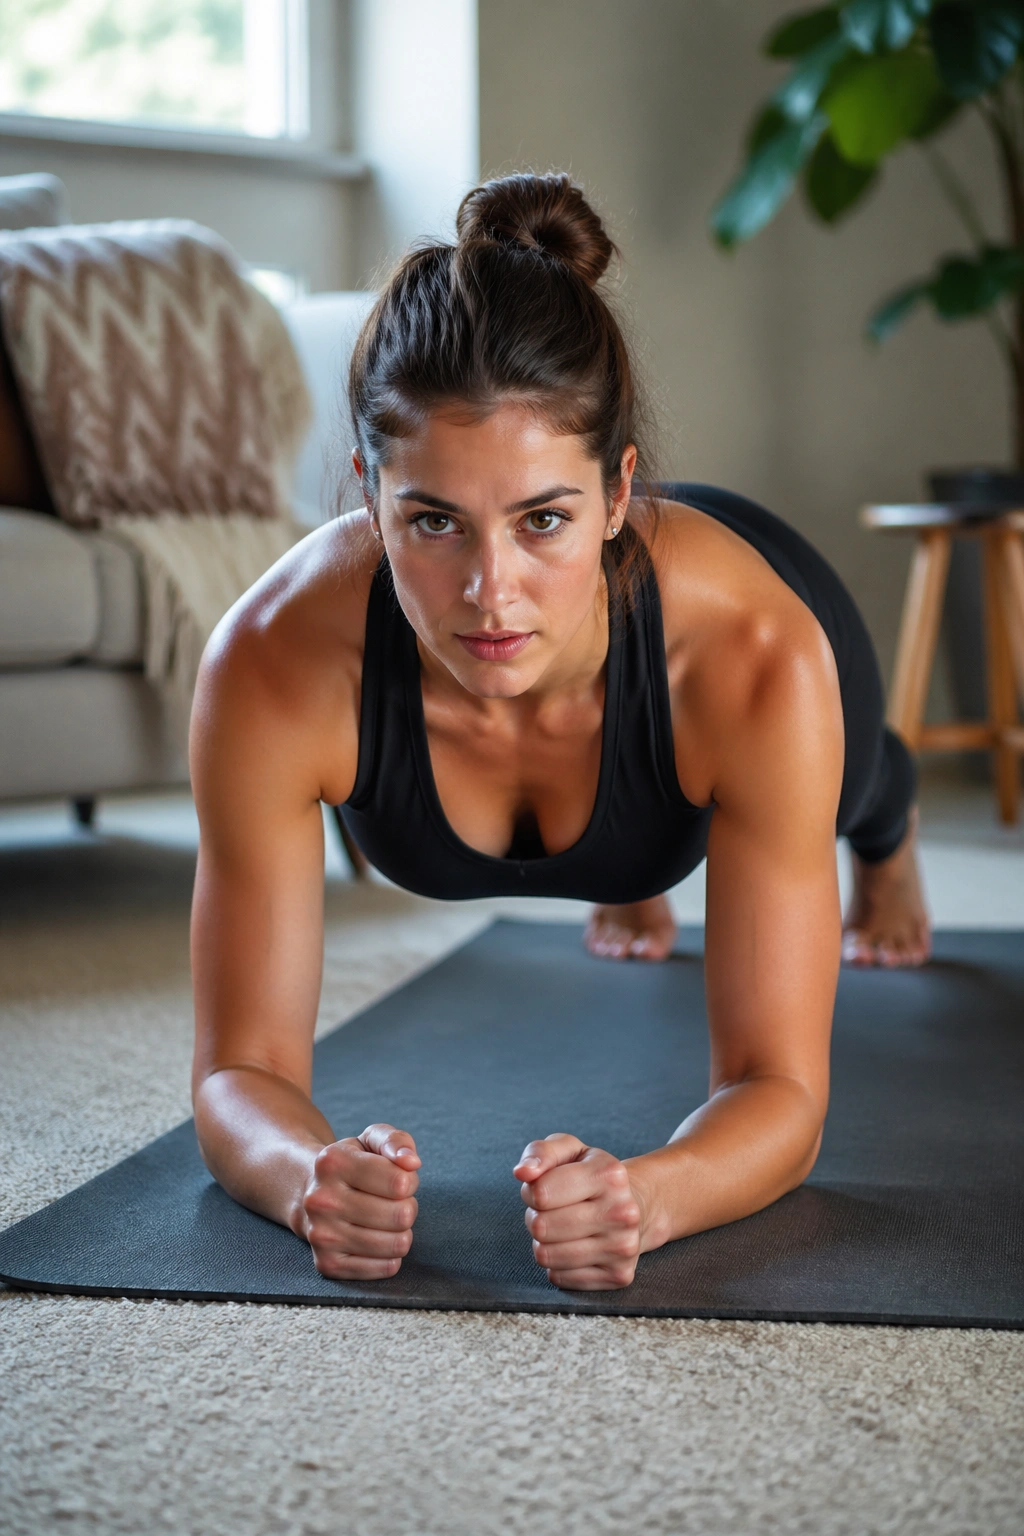
This is the routine that tells you the truth about your shoulders. A plank on the forearms is already hard enough for most people. Add tiny knee hovers, and suddenly you find out whether your rib cage stays organized or spills toward the floor.
Start on forearms and toes, elbows under shoulders, legs long. Hold for 15 to 20 seconds first. Then lower one knee toward the mat by 1 inch and lift it back up without shifting the hips. Alternate for 6 to 8 hovers per side.
What to Watch For
The goal is not a dramatic range. The goal is almost nothing happening except the exact movement you asked for. That means the lower back stays long, the belly stays lifted, and the neck doesn’t crane forward like it’s trying to escape.
If It Feels Too Spicy
- Drop to the knees and keep the hover pattern.
- Separate the feet a little wider for more balance.
- Hold the plank for 10 seconds between hover sets.
- Stop before the shoulders slump.
A lot of Pilates core work falls apart because people chase burn instead of position. Here, the burn is the byproduct. The position is the point.
5. Single-Leg Stretch With a Three-Count Exhale
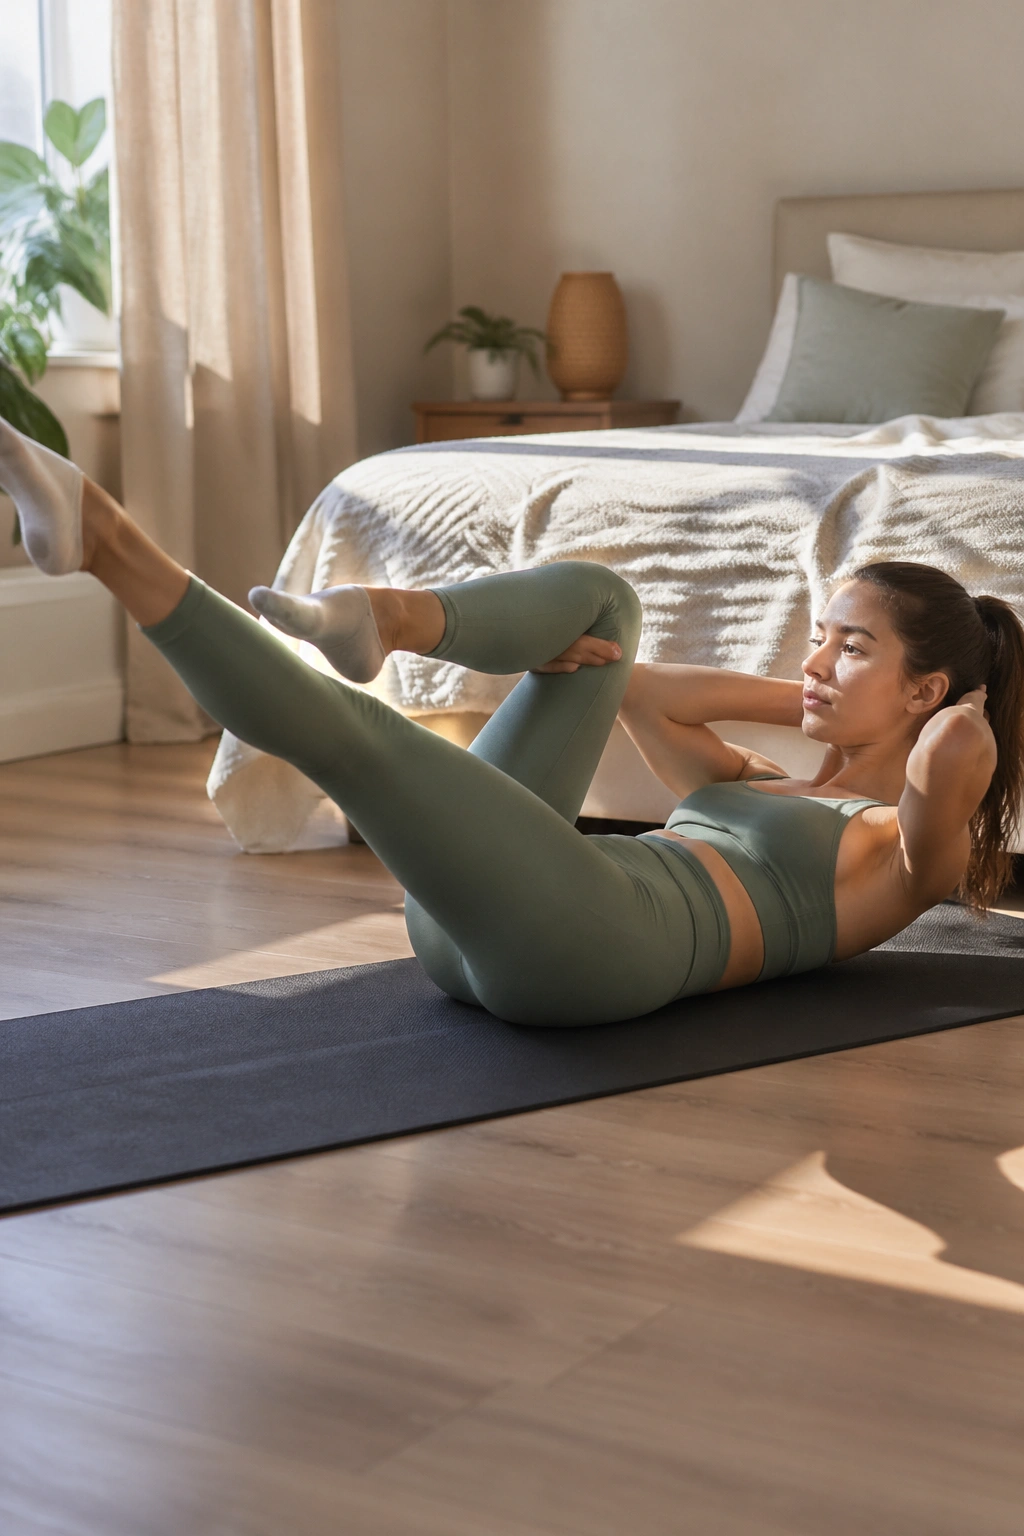
Single-leg stretch is one of those exercises that can look tiny and feel enormous. That happens when the breath gets rushed. Slow the exhale, and the whole thing turns into a lesson in bracing without stiffness.
How to Do It
Lie on your back and curl the head and shoulders up if your neck tolerates it. Pull one knee in, extend the other leg to a long diagonal, and switch legs on a three-count exhale. Keep the switches smooth for 8 to 12 total reps per side.
Why the Slow Exhale Matters
A long exhale helps the ribs knit down and gives the deep abs time to do their job. If you blast through the movement, the hips do the work and the back arches. That’s not strength. That’s cheating with speed.
Keep the reach of the extended leg modest. No heroics. If the leg drops so low that the low back pops up, bring it higher and hold the pelvis still. You can make this hard without making it messy.
How to use it: pair one set with a dead bug or toe taps, then come back to this one as the finisher. It stays honest when your abs are already tired.
6. Swan Prep and Swimming
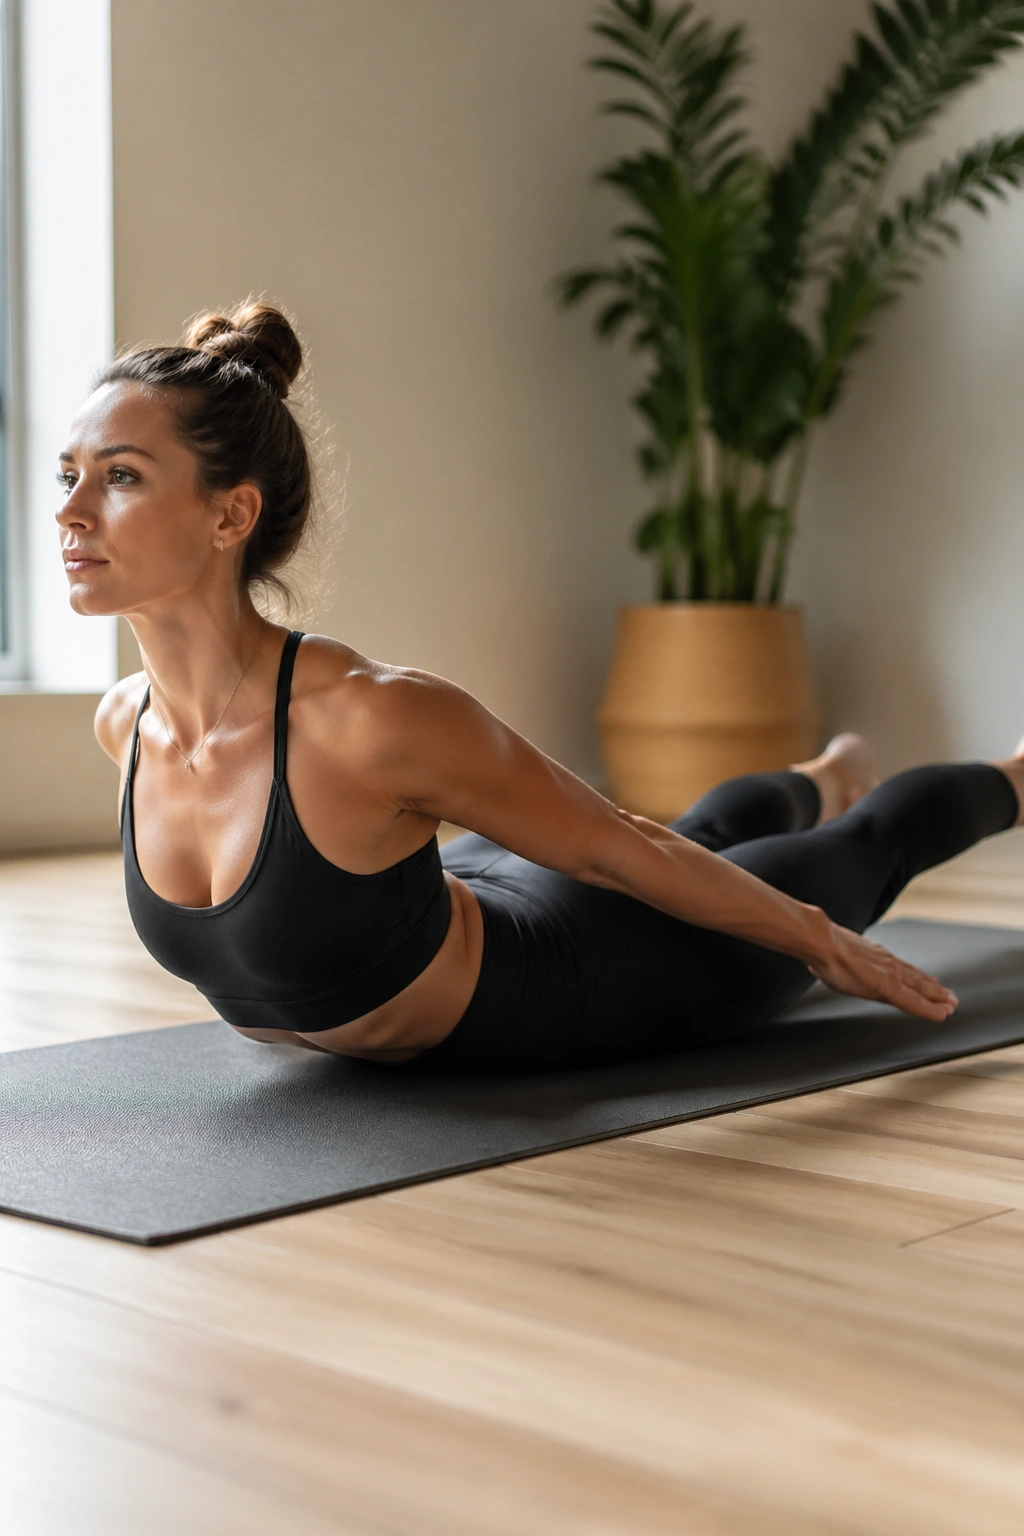
Your back body needs its own work. Pilates gets mislabeled as all abs, all the time, and that’s a bad habit because people end up bracing through life with weak glutes, sleepy hamstrings, and a back that never learns to extend cleanly.
Swan prep is the gentle doorway. Lie face down, hands by the ribs, and press the chest forward and slightly up without dumping into the low back. Lift for 3 counts, lower for 3 counts, and repeat 6 to 8 times. Then move into swimming: opposite arm and leg lift for 20 to 30 seconds, rest, and repeat once.
The sensation should be warm through the upper back and the back of the hips. If you feel pinching in the low spine, the lift is too big or the ribs are shooting forward. Smaller is better. Much smaller.
One good cue: imagine the sternum gliding forward over the mat while the tailbone stays long.
That image keeps the movement in the right place. It also makes the exercise feel less like a backbend contest and more like actual strength.
7. Teaser Prep From a Hollow Curl
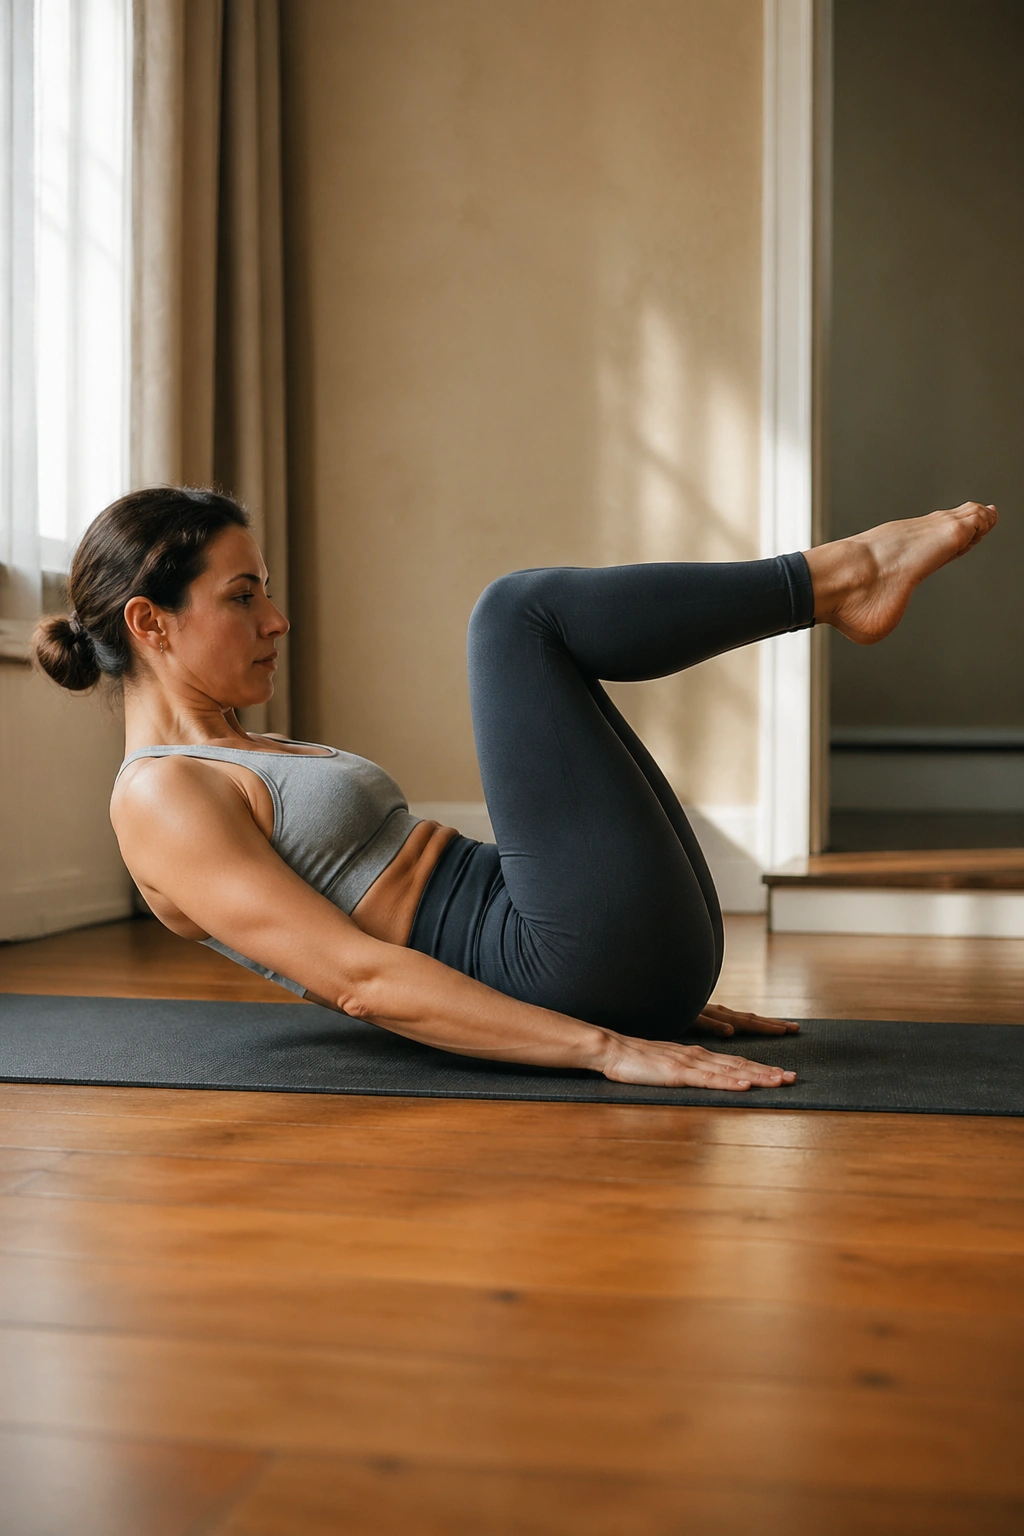
The teaser gets treated like a party trick. It isn’t. It’s a brutal test of whether your trunk can stay hollow while your hips and spine negotiate a longer shape.
Why It’s Hard
Unlike crunches, teaser prep asks the hips to stay controlled while the torso unfolds and folds with precision. That means the abdominal wall has to resist the pull of the hip flexors, and the lower ribs have to stay from flaring open just because the legs got longer.
Start with knees bent and shins parallel to the floor. Curl up into a hollow shape, hold for 2 breaths, then lower halfway without collapsing. If that works, lengthen one leg at a time. Three to five reps is enough. No need to chase fatigue when the position already demands a lot.
How to Know You’re Ready to Progress
- The neck stays quiet.
- The low back does not yank off the mat.
- You can lower slowly for at least 3 counts.
- Your breathing stays smooth, not panicked.
This is one of those routines where a smaller range looks more advanced because it’s cleaner. The full teaser will come later if the prep is serious.
8. Kneeling Side Kick and Oblique Lift
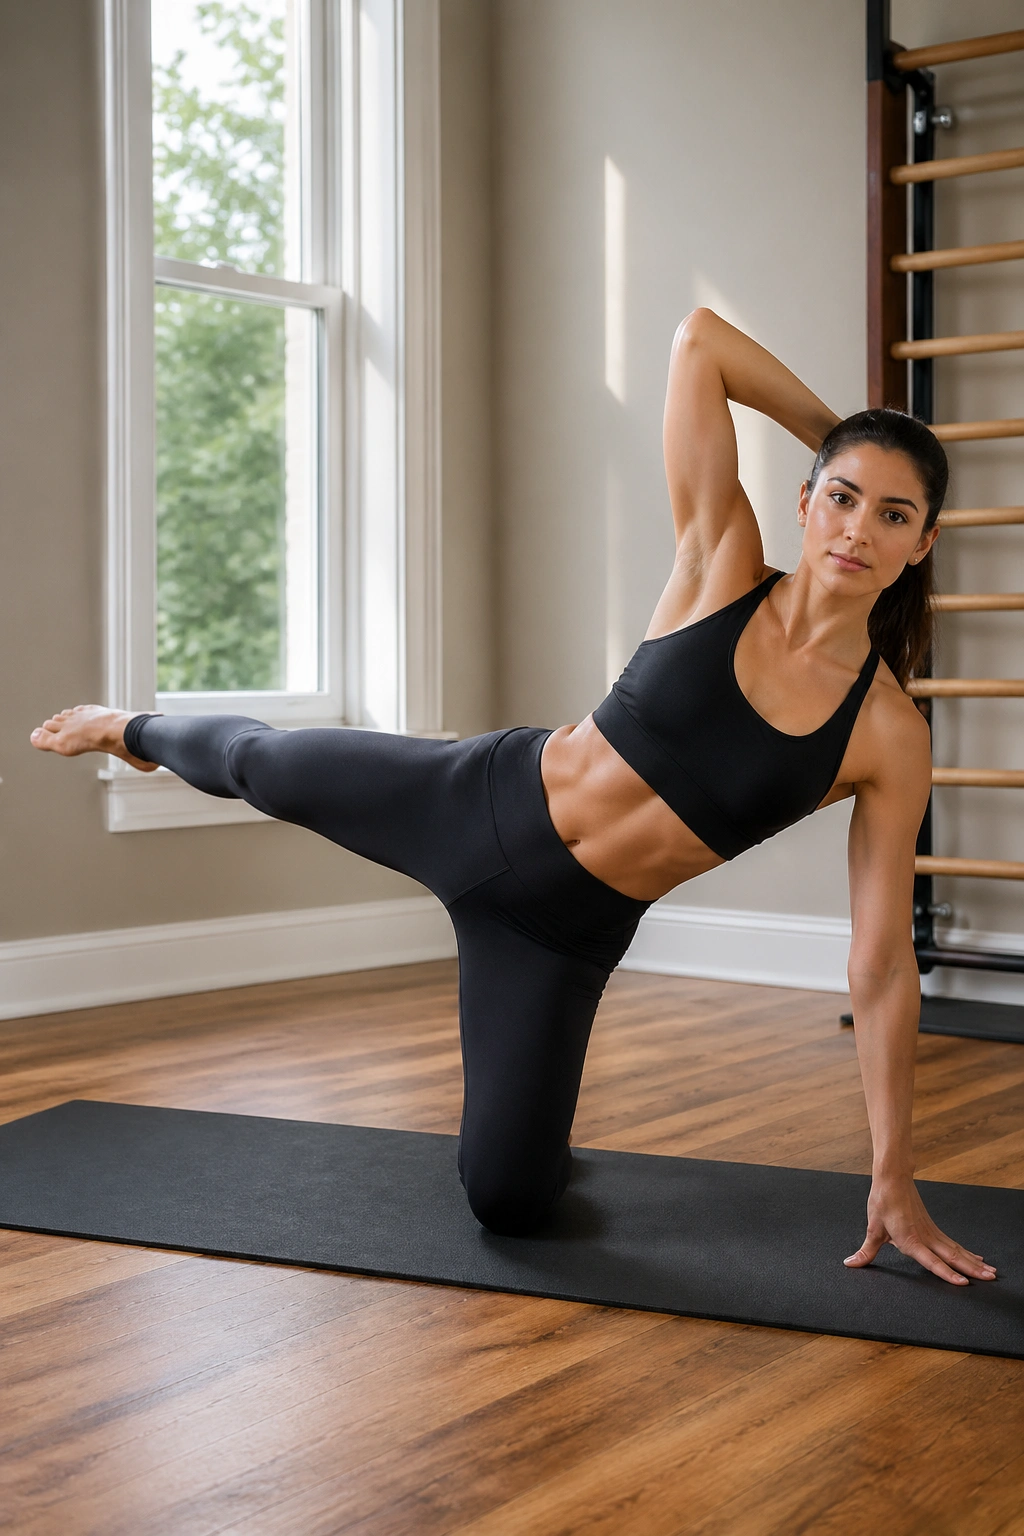
Desk posture loves to shorten one side of the waist and leave the hips feeling glued to the floor. The kneeling side-kick sequence fixes that without asking for fancy equipment.
Start in a kneeling side plank setup or tall kneel with one hand on the floor. Lift the outer leg to hip height, kick it forward twice, sweep it back twice, then add a small oblique lift if you can keep the shoulder stacked. Five to eight rounds per side is enough.
The side body should do the work here. Not the neck. Not the lower back. If the torso swivels every time the leg moves, shorten the kick and slow the pace. Tiny range, clean line.
A loop band above the knees makes the side glute work harder, but it also exposes sloppy alignment fast. Use one only if your knee and hip line stay stable through the whole set.
This routine has a sneaky payoff. It makes standing work feel steadier because the ribs learn to sit over the pelvis instead of drifting off to one side.
9. Mermaid to Side Bend Flow
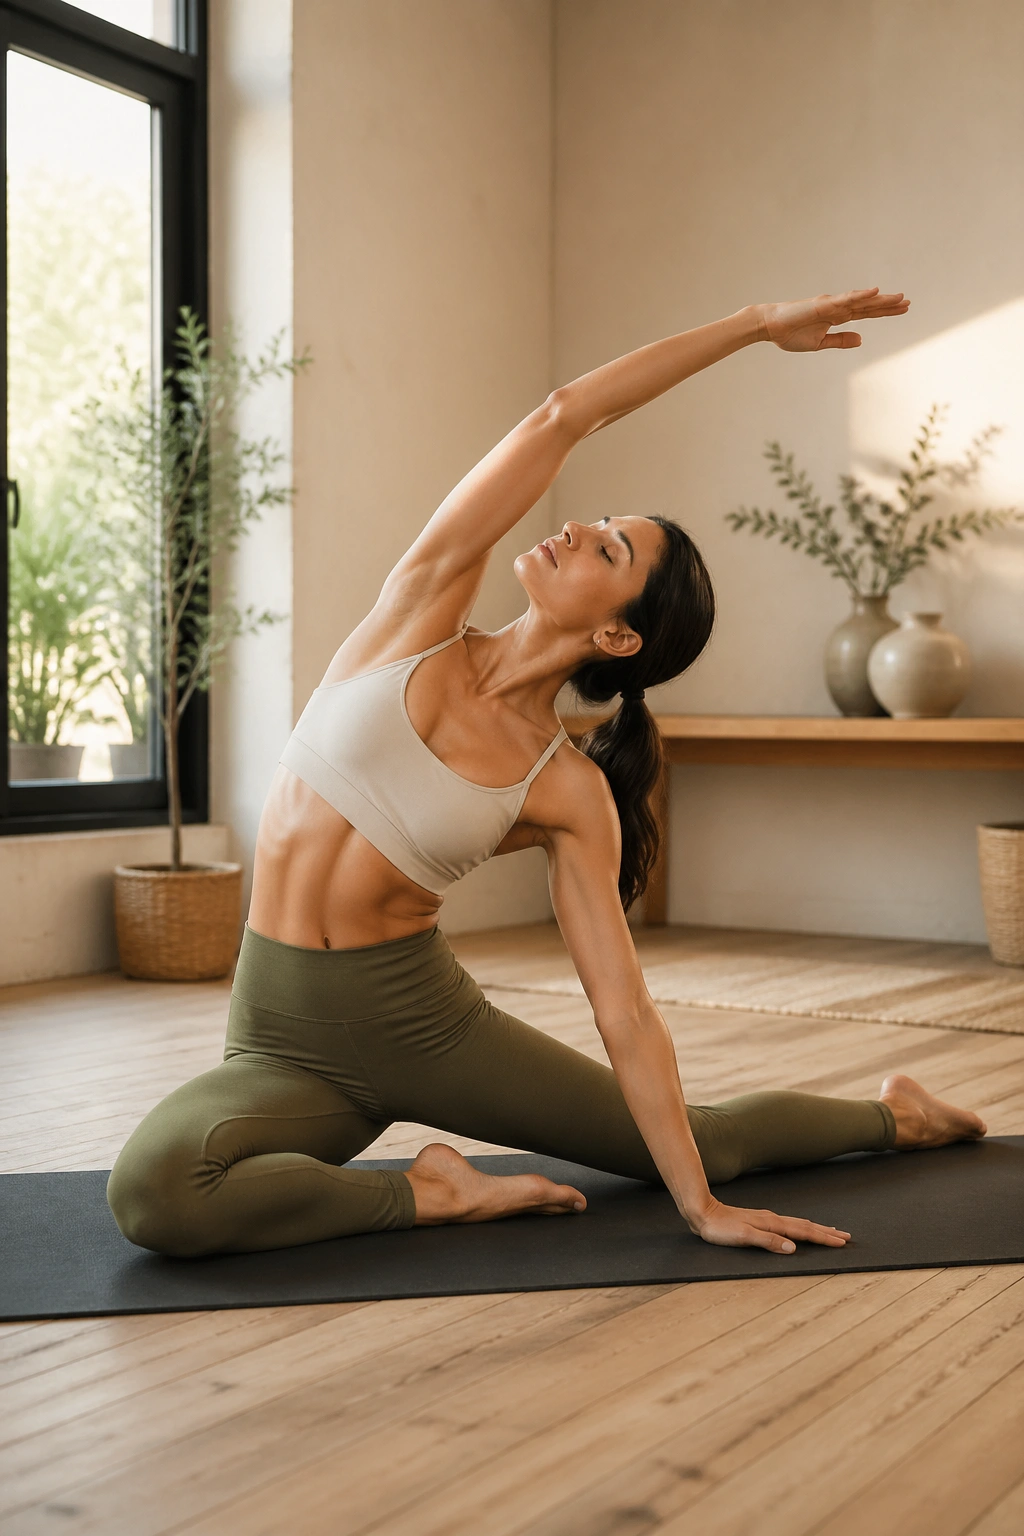
Mermaid often gets filed under “stretching,” which is a shame. Done well, it’s a strength drill for the ribs, obliques, and the long line along the side of the body.
Sit in a mermaid position, one shin folded in front, the other leg tucked behind or to the side depending on your hips. Reach one arm overhead, side-bend away, then return with control. Add a small lift from the waist on the way back up. Three to five breaths per side is a fine dose.
The feeling should be long, not loose. There’s a difference. A loose side bend flops. A strong one keeps the pelvis heavy while the ribs open and the waist does the work. That’s the bit most people miss when they race through it.
What to Pair It With
- Saw for rotation
- Side plank for load
- Spine stretch forward for counterbalance
- Diaphragmatic breathing if your ribs feel jammed
I like this sequence on days when the torso feels compressed. It doesn’t just lengthen the side body; it teaches it to support you when you come back upright.
10. Standing Sit-Back and Reach Series
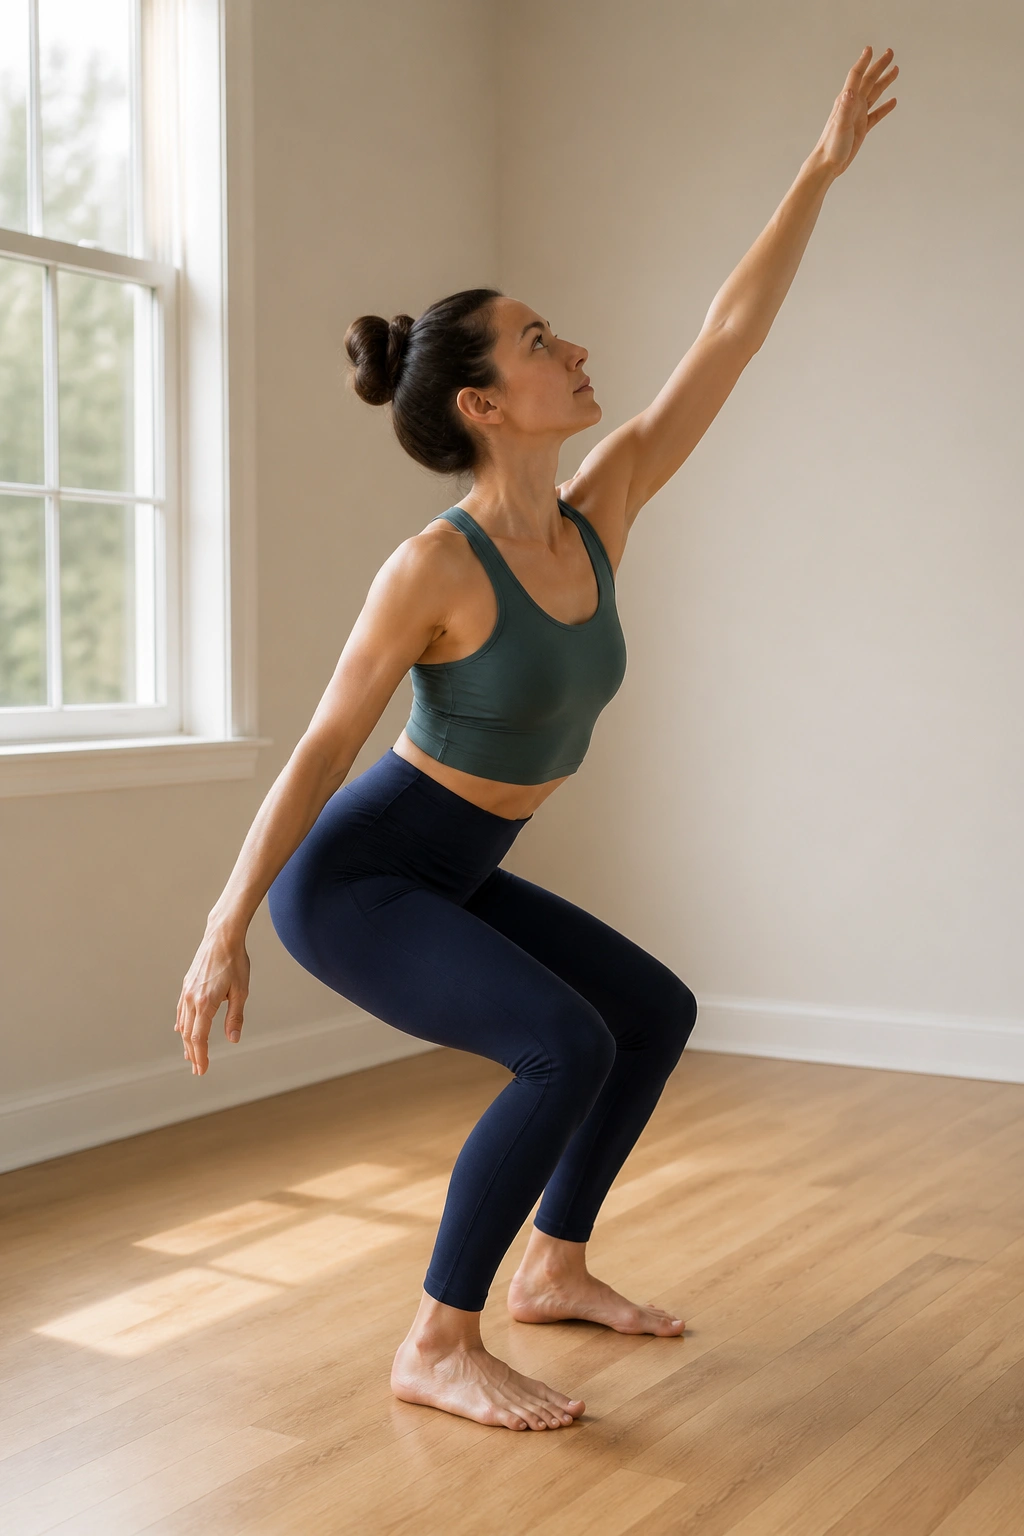
Strength does not have to stay on the mat. In fact, if it never leaves the floor, you can end up very good at Pilates and still wobble when life asks you to stand, carry, or reach for something on a top shelf.
The Setup
Stand with feet parallel and about hip-width apart. Sit the hips back as if you’re finding the edge of a chair, then drive through the heels to stand. Add a diagonal reach with one arm as you rise, then switch sides. Eight to 12 repetitions is a clean working set.
What to Feel
The glutes should load on the way down, and the lower abs should help you come back up without tossing the chest forward. If the knees collapse inward, widen the stance a little or slow the descent to a 4-count.
A mirror helps here. So does a wall behind you. The wall gives you a hard limit, which is useful because most people sit back too little and bend forward too much. That’s a squat, not Pilates.
Try this: hold a 2- to 5-pound weight in the reaching hand only if the shoulder stays down and the trunk doesn’t lean with it.
11. Dead Bug Pilates Press Series
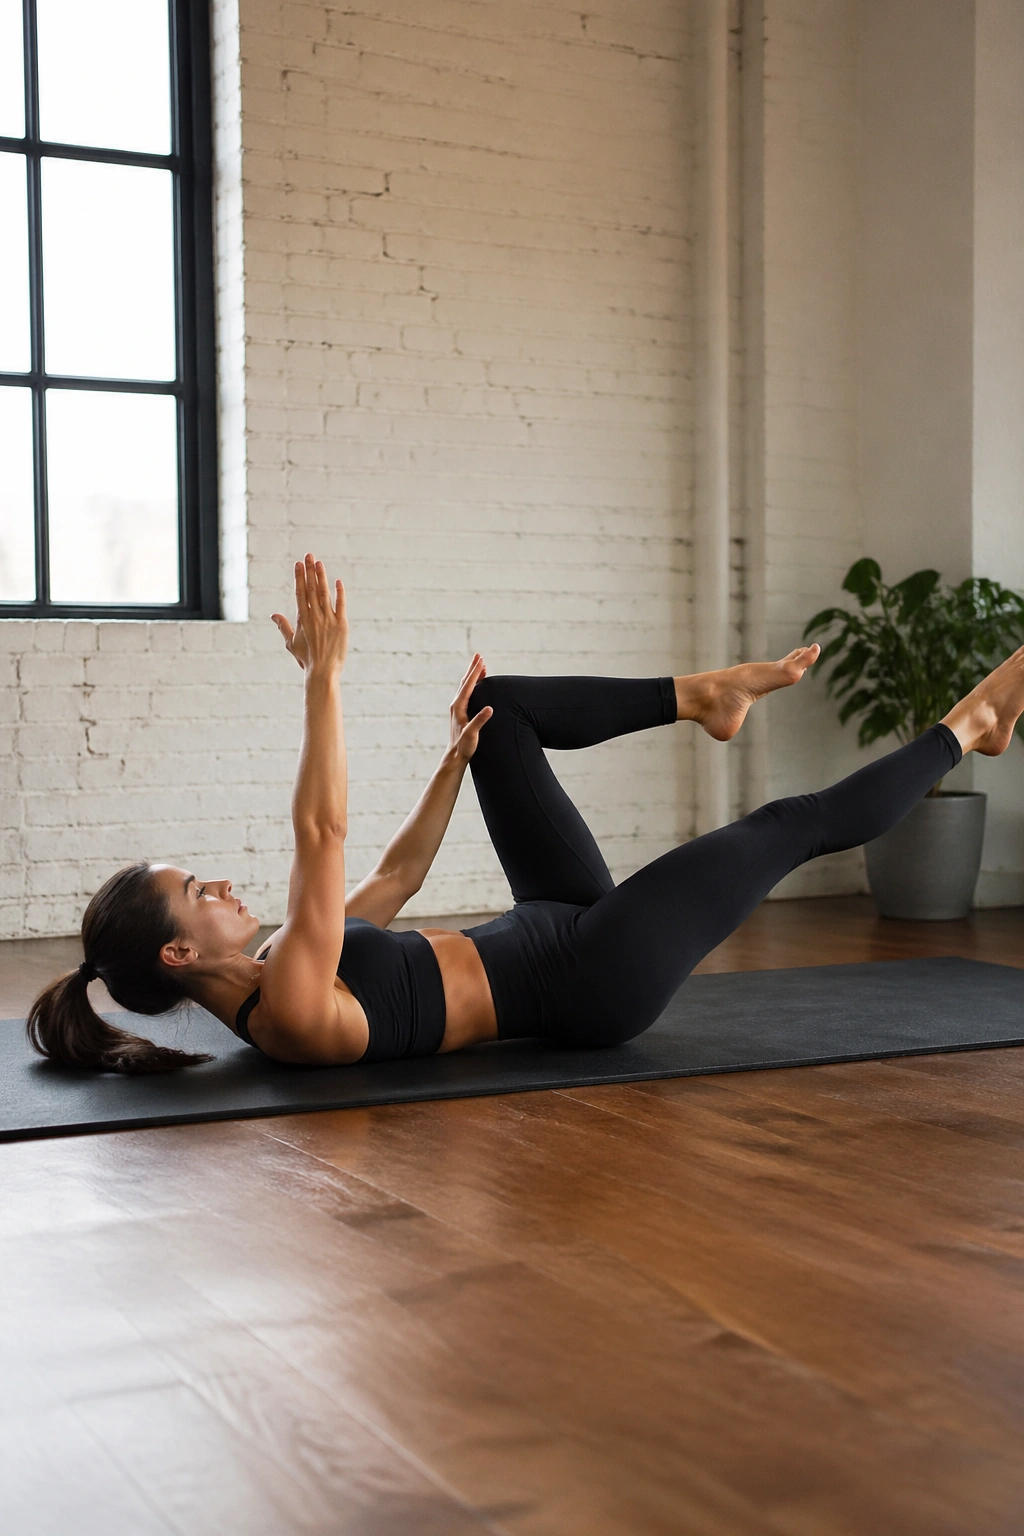
Why does dead bug show up in serious Pilates plans so often? Because it teaches the spine to stay calm while the limbs move, which is a cornerstone of real core strength.
Why It Works
Lie on your back with knees over hips and arms pointed to the ceiling. Exhale, press one hand into the opposite knee, and extend the free leg long on a diagonal. Hold for 2 to 3 counts, return, and switch sides for 6 to 10 reps each side.
The rule is simple: the rib cage stays heavy. If the lower back arches, the leg is too low or the reach is too long. Bring the range in. There’s no prize for making the movement bigger than you can control.
Common Mistakes
- Crunching the neck toward the chest
- Letting the lower ribs pop up
- Moving too fast to feel the brace
- Pressing so hard the shoulders tense
A dead bug set done well feels almost too calm. Then your abs start shaking and the calm disappears. Fine. That’s the point where the real work begins.
12. Long Stretch Plank to Pike Prep
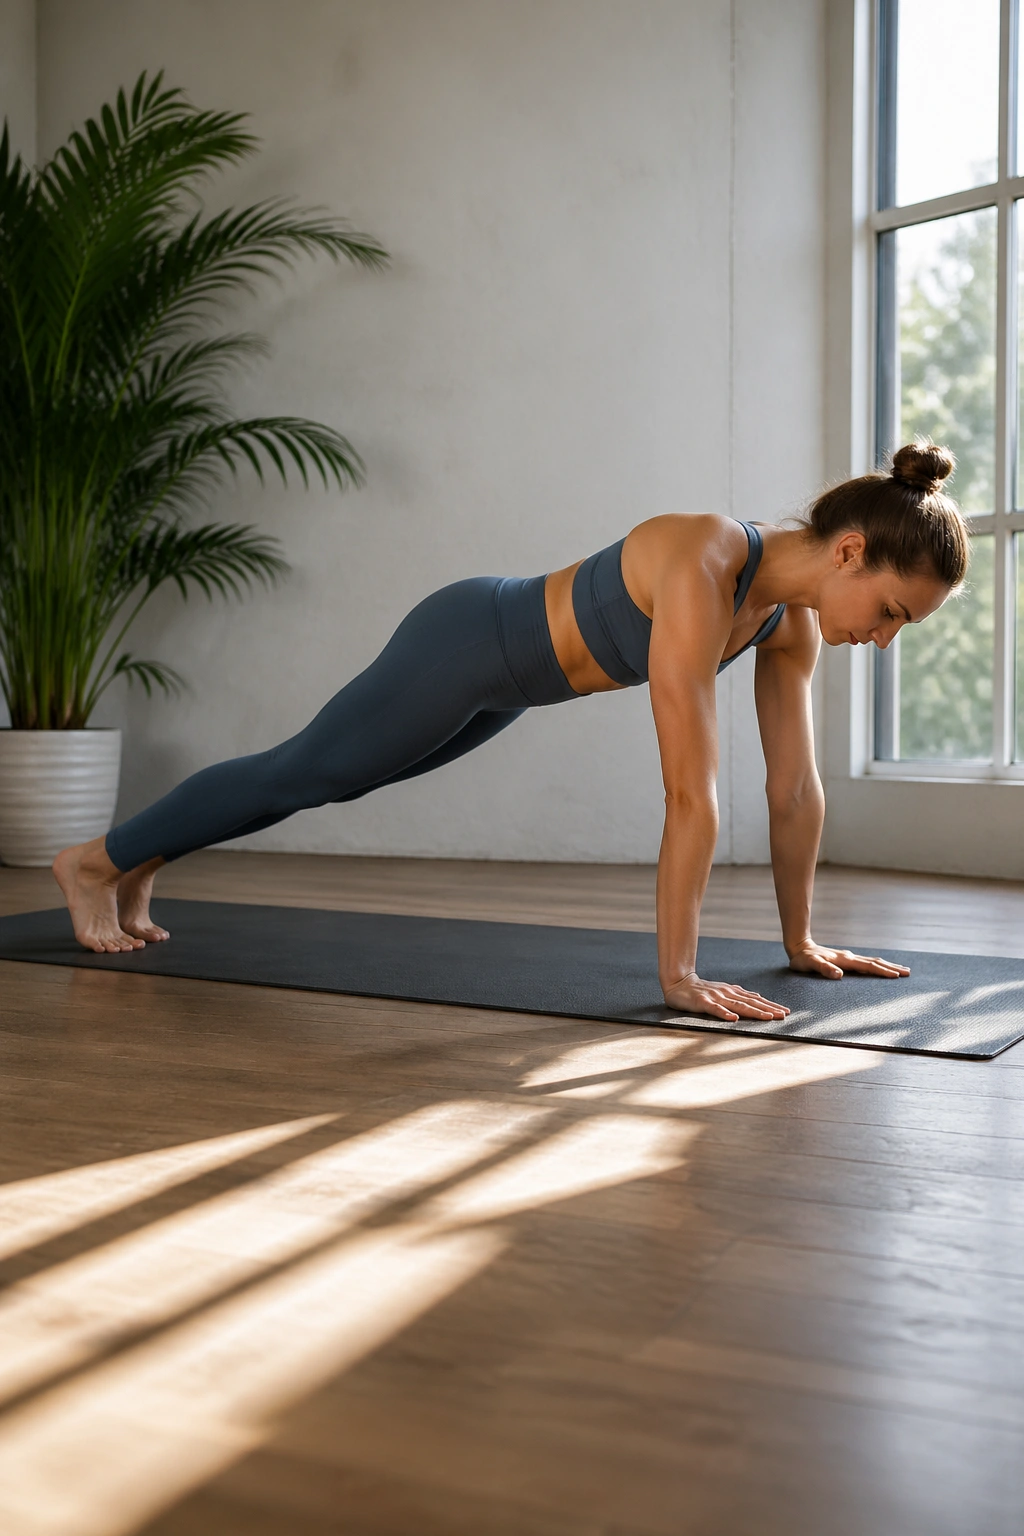
This is not a yoga plank with a Pilates label slapped on it. The long stretch version makes your shoulder girdle, deep abs, and hip flexors negotiate a much bigger conversation.
Place the hands under the shoulders and walk the feet back so the body forms one long line. From there, shift slightly forward, then draw the hips back a few inches into a small pike prep. Five to six reps is enough at first, with a 10- to 20-second hold between rounds.
The shoulders need to stay broad. The ribs need to stay tucked. The hips should move like they’re on rails, not swinging around. If the wrists complain, drop to the forearms and use the same forward-back pattern.
A lot of people chase the full pike too soon. I’d skip that until the plank can stay smooth for at least 20 seconds without the low back sagging. Clean line first. Fancy shape later.
This one pays off when you want strength that shows up in push-ups, carries, and even getting out of a chair without grunting.
13. Inner Thigh Ball Bridge Series
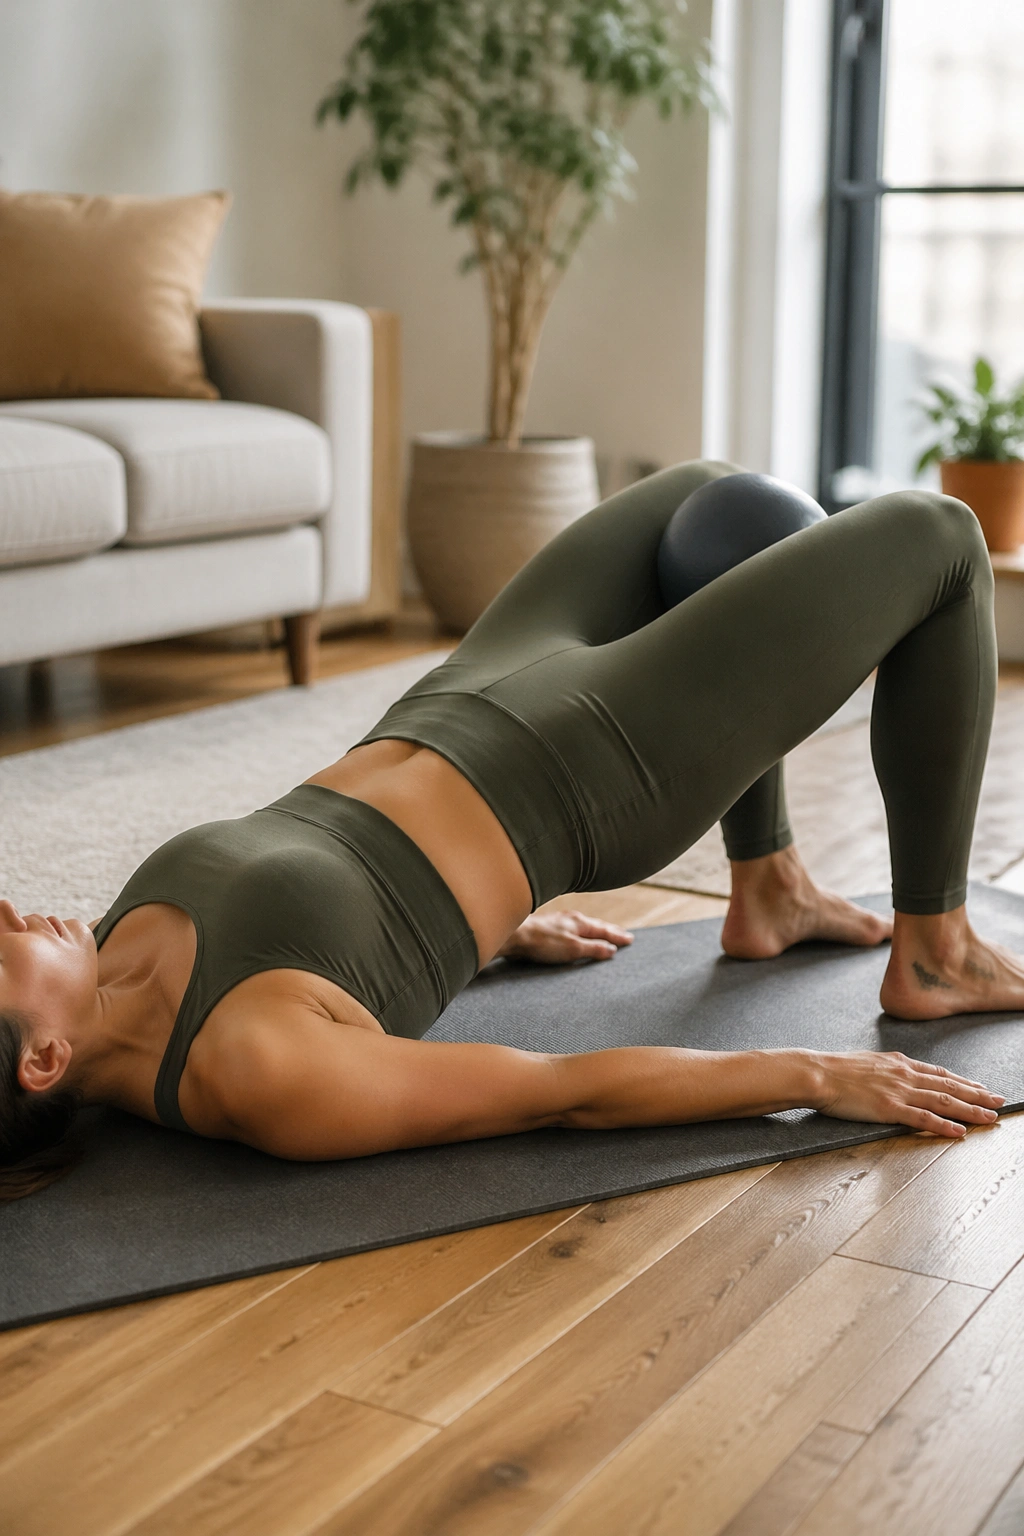
A small ball between the knees changes a bridge in a useful way. The glutes still work, but now the inner thighs and deep pelvic support have to stay in the game too.
Lie on your back, feet planted, and place a Pilates ball or firm cushion between the knees. Lift into a bridge, squeeze the ball at about 20 to 30 percent effort, and hold for 5 counts. Lower with control. Eight reps is a strong set, and you can finish with 10 small pulses at the top.
What the Ball Does
It gives the adductors a job. It also keeps the knees from drifting outward, which helps the pelvis stay square. If you squeeze too hard, the hip flexors jump in and the low back may arch. Keep the pressure moderate. That matters.
No ball? A folded towel works. A pillow works too, though it’s softer and a little less precise.
This is one of my favorite lower-body Pilates routines because it looks gentle and often creates a deep, annoying fatigue right where you want it: inside the thighs, under the seat, and through the center of the pelvis.
14. Spine Twist Tall Sit Control
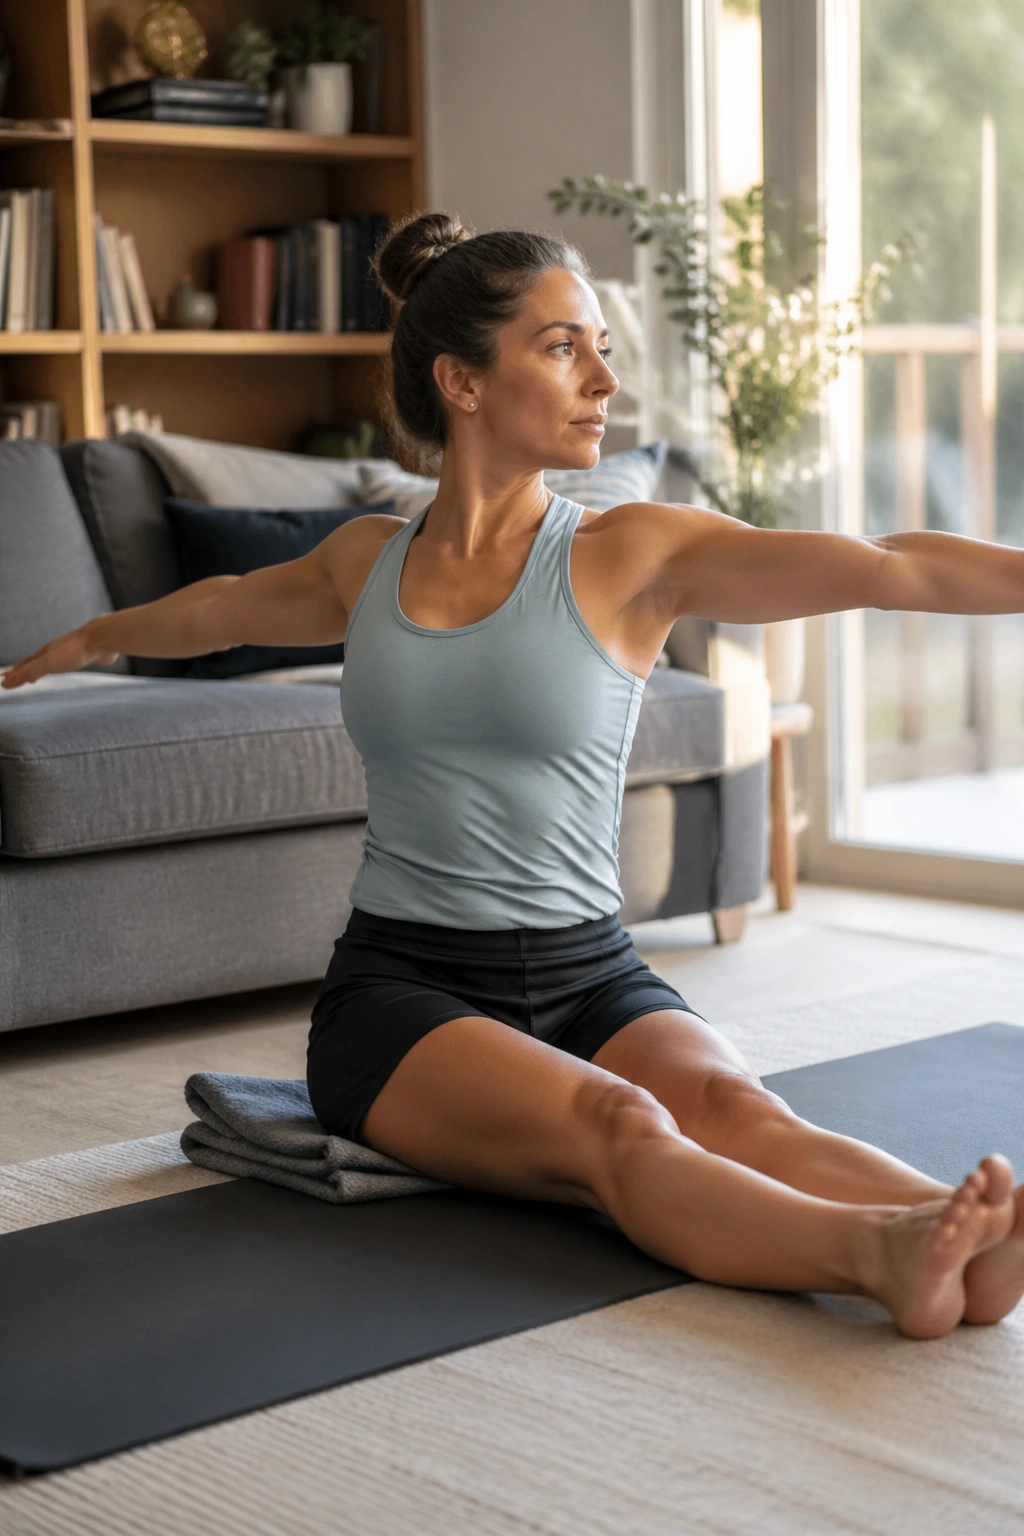
Spine twist can feel like a mobility exercise if you rush it. Slow it down, and it becomes a rotation drill for the obliques, spine, and postural muscles that keep you from collapsing through the middle.
Sit tall with legs extended or crossed, arms out to the sides, and grow upward before you twist. Rotate one side on an exhale for 2 counts, come back to center on an inhale, then switch. Three to five turns per side is enough if you stay honest about height.
The trick is not to yank from the shoulders. Keep the pelvis rooted. Think of the rib cage spiraling over a still bowl. That little image matters because most people initiate the twist by flinging the arms, which gives you motion but not control.
A folded blanket under the sit bones helps if the hamstrings pull you backward. That lift can make the difference between a rounded spine and a clean vertical line.
Simple exercise. Serious effect. That’s the good stuff.
15. Quadruped Bird Dog With Reach
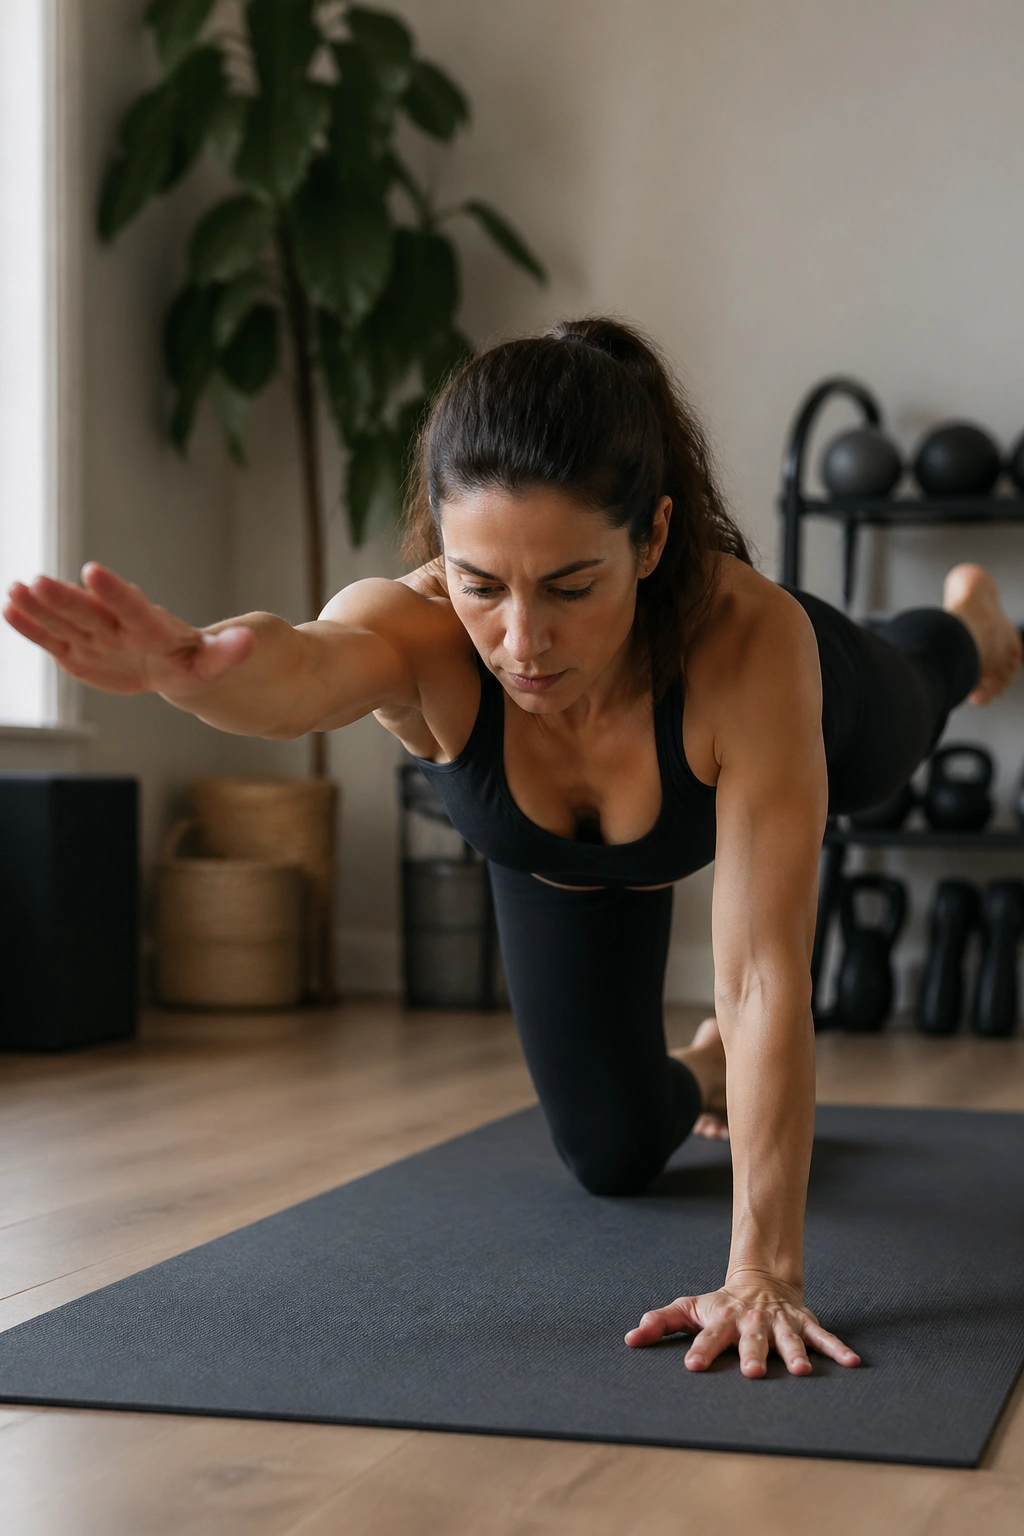
Hands-and-knees work gets dismissed all the time. Then you try bird dog with a 3-second reach and realize the whole back line has opinions about balance.
Start on all fours with wrists under shoulders and knees under hips. Reach the opposite arm and leg long, pause, then draw them back in without shifting the pelvis. Six slow reps per side is a solid start. If you’re steady, extend the reach to 5 seconds.
What To Keep Quiet
- The low back
- The hips
- The ribs
- The neck
That list sounds strict because it is. The point of bird dog is not to balance like a flamingo. The point is to move opposite limbs while the middle stays nearly still. That cross-body pattern matters in walking, running, carrying groceries, and pretty much any day that involves being upright.
Good sign: you feel the glute of the lifted leg and the shoulder blade of the reaching arm working together.
If your wrist gets sore, drop to fists or place your hands on dumbbells to reduce the extension. A small change like that can keep the whole set usable.
16. Kneeling Arm Weights Posture Set
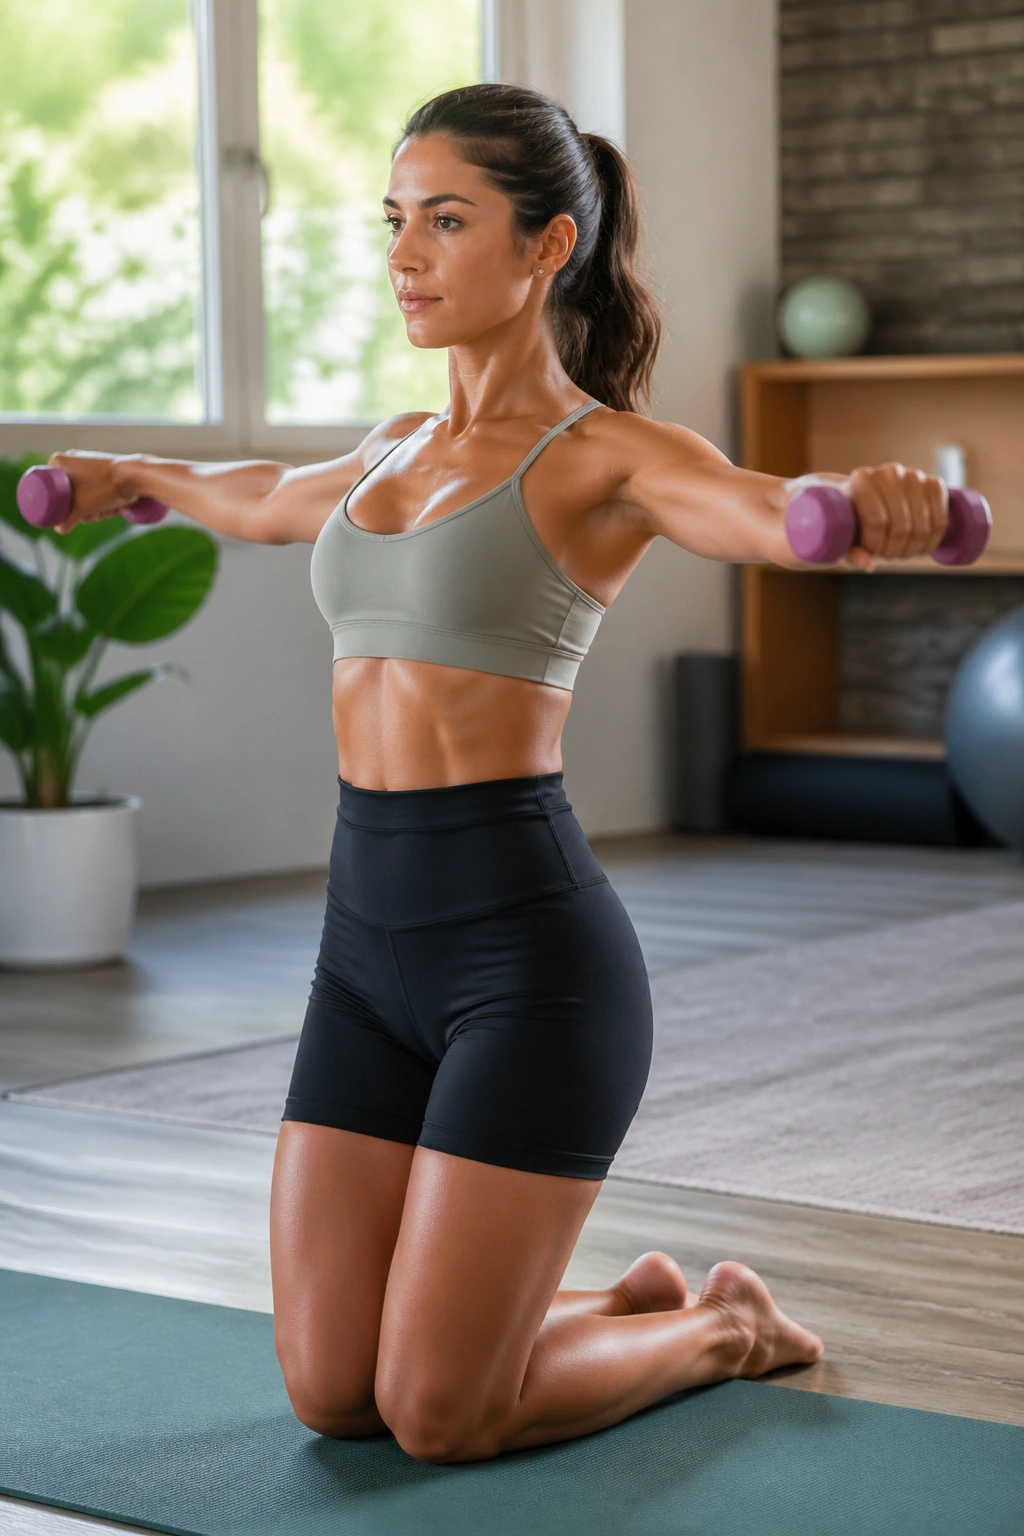
The upper body needs real work, too. Pilates can train the arms without turning every session into a shoulder shrug contest, and kneeling with light weights is one of the cleanest ways to do it.
The Sequence
Use 1- to 3-pound dumbbells. Start in a tall kneel, ribs stacked over pelvis, and do 8 biceps curls, 8 overhead presses, and 8 lateral raises with a tiny bend in the elbows. Keep the movement slow, especially on the way down.
What You Should Not Do
Do not arch the low back just because the weights feel light. Do not let the shoulders creep toward the ears. And don’t swing the arms like you’re trying to throw the weights across the room. The resistance is small on purpose. The control is where the strength lives.
This set is excellent after core work because it tests whether your trunk can keep the upper body organized while the arms move independently. If you want a little more challenge, kneel on a folded mat and add a 2-second pause at the top of each press.
The best part? Your posture feels different afterward. Not magic. Just muscles doing their jobs.
17. Side Plank Knee Drive Flow
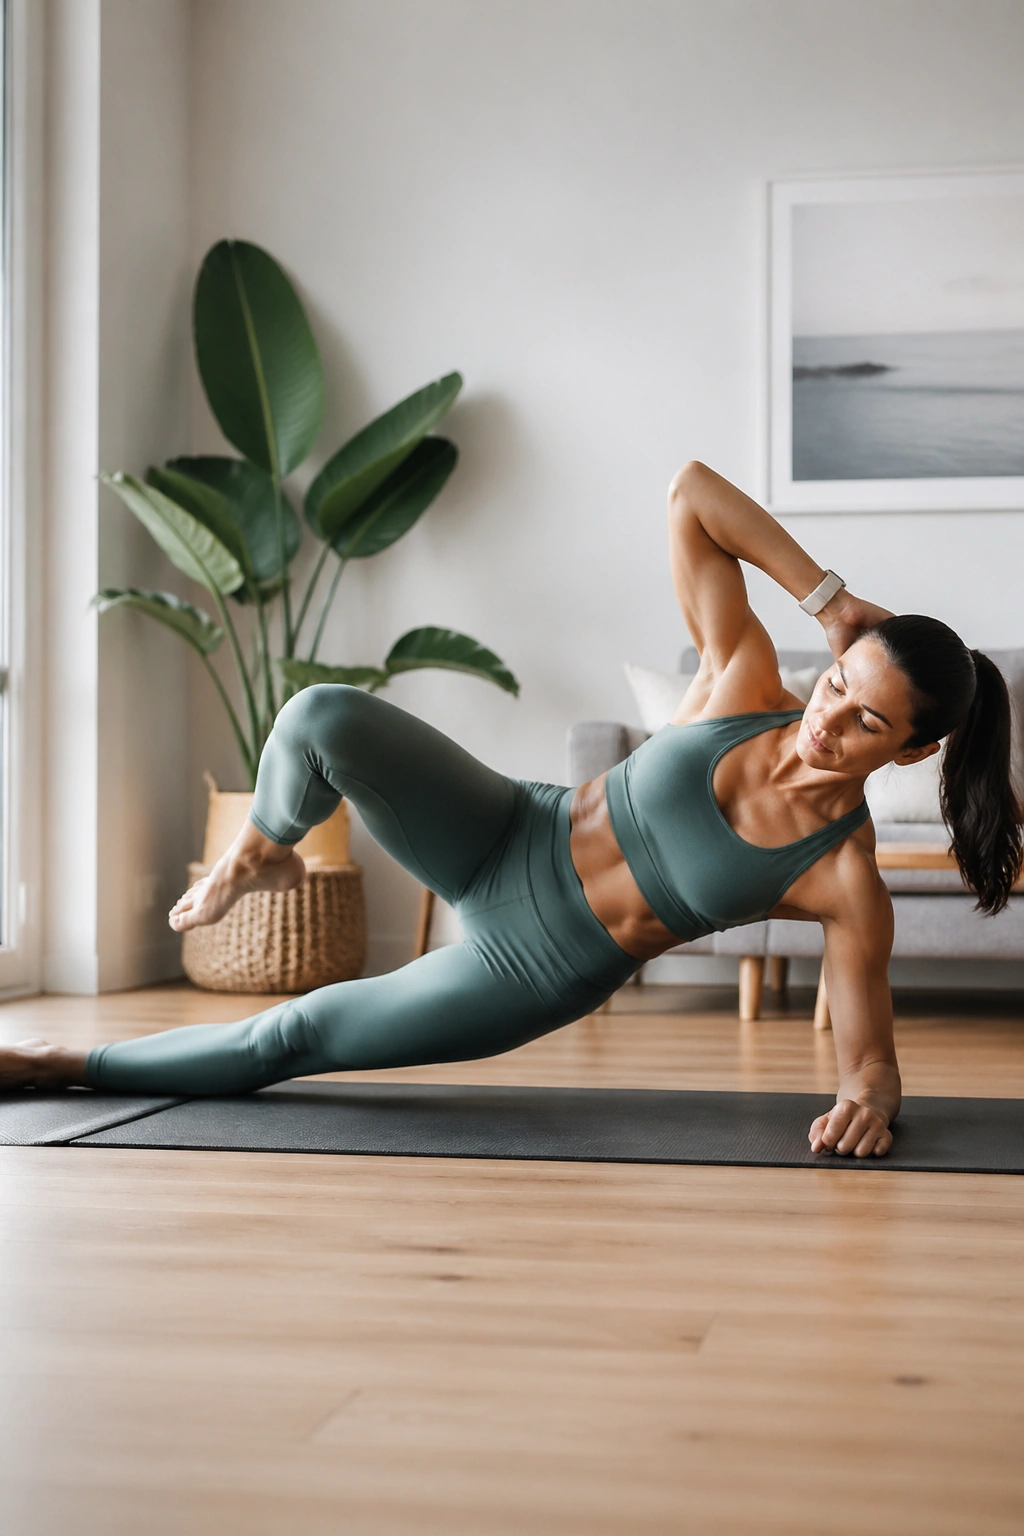
Side plank is where side-body strength stops being theoretical. It shows you whether the obliques, glute med, and shoulder are actually cooperating or just posing.
Set up on the forearm with the bottom knee down if needed, then lift the hips into a side plank line. From there, draw the top knee toward the chest and extend it back out for 5 to 8 slow reps. Hold the top position for one full breath between reps if you want a harder version.
The shoulder should stay packed, not jammed. The waist should lift away from the floor. If the neck starts to tense, shorten the set and drop the top hand to the hip so you can keep the rib cage quieter.
Key Details
- Bottom elbow under shoulder
- Feet stacked or staggered
- Hips lifted first, then the knee drive
- Stop before the lower waist collapses
I like this one because it looks simple and feels mean in the best way. There’s no hiding in it. If the line breaks, you know exactly where.
18. Full-Body Flow That Ties It Together
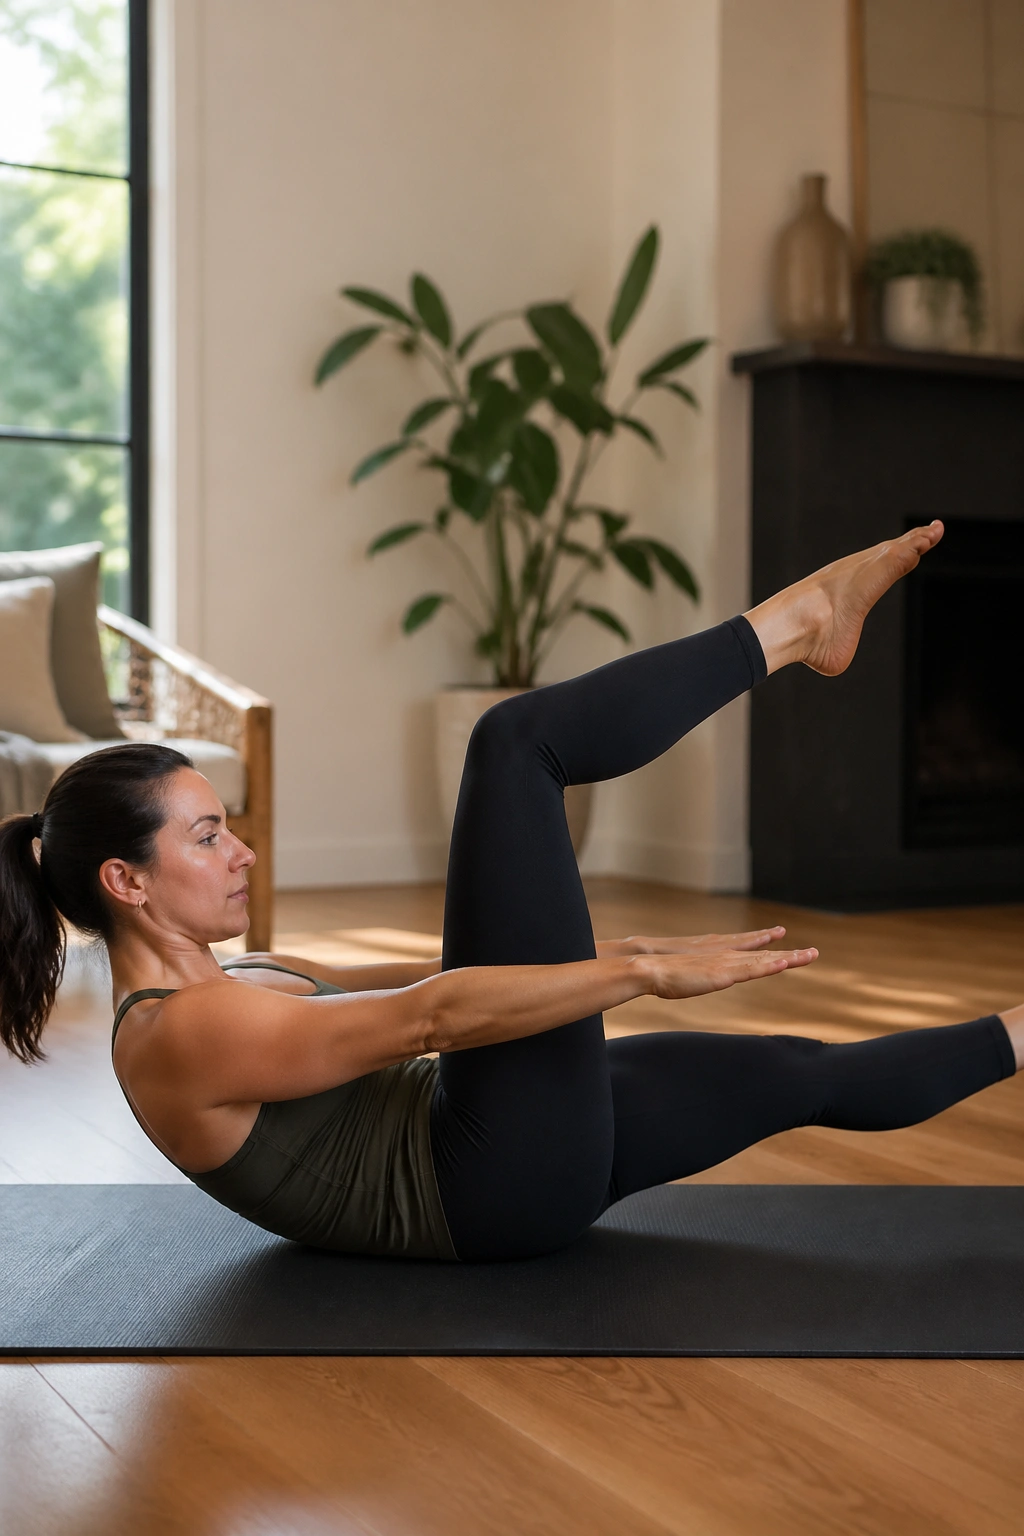
A strength routine works better when the pieces talk to each other. That’s where a short circuit comes in handy: core, hips, shoulders, back body, done in one sequence before your attention drifts.
Simple Weekly Template
- The Hundred for 5 breath cycles
- Shoulder bridge with marches for 6 reps per side
- Dead bug press series for 8 reps per side
- Swan prep for 6 lifts
- Side plank knee drive for 5 reps per side
- Standing sit-back and reach for 8 reps
Repeat the circuit twice. Rest 30 to 45 seconds between moves if needed, or move straight through if your form stays sharp. The whole thing takes about 12 to 18 minutes, which is enough to create real work without turning the session into a slog.
What I like about this kind of flow is the balance. The mat work wakes up deep control. The standing work reminds the body how to carry that control into everyday movement. That mix matters more than squeezing every last drop out of one exercise.
Pick four or five of these routines, rotate them across the week, and keep a note of which one makes you shake in a good way. That’s usually the one your body needs most.
