



Your hip flexors light up. Your lower belly stays quiet. And the mat does not lie.
That’s the moment most Pilates lower ab workouts for women separate the people who are actually controlling the pelvis from the people who are just swinging their legs around and hoping for the best. Lower-ab work is rarely about how hard you crunch; it’s about how cleanly you can move your legs without letting the ribs flare, the low back arch, or the front of the hips take over.
The tricky part is that the “lower abs” are not a little button you press with a hundred fast reps. They’re part of a bigger system: the deep core, the pelvic floor, the obliques, the diaphragm, and the transverse abdominis — that corset-like muscle that helps hold everything in place. When that system works well, your stomach often looks flatter, your posture feels tidier, and moves like leg lowers stop feeling like a tug-of-war.
If you’ve had babies, if you sit all day, if your back likes to arch the second your feet leave the floor, this kind of work matters. It’s also the kind of work that rewards patience. Start with the quietest versions first, earn the harder ones, and keep your eyes on the pelvis instead of the burn.
1. Pelvic Tilt Hold
Start here if your lower belly disappears the second your legs move. A pelvic tilt sounds boring on paper, and honestly, that’s why it’s so useful. It teaches your body the exact feeling of bringing the pelvis back under control without bracing so hard that you hold your breath.
Why It Matters
Lie on your back with your knees bent and feet flat. On the exhale, gently tip the top of your pelvis toward your ribs so your low back feels a little heavier against the mat. Do not smash your spine down. The move should feel small, almost stubbornly small.
- Reps: 8 to 10 slow tilts
- Hold: 3 to 5 seconds on each tilt
- Best cue: “Ribs soft, zipper up the middle”
- What you should feel: Low abs, not quads
Pro tip: If your thighs start shaking, you’re not doing it wrong; you’ve probably just made the movement too big. Shrink it by half and slow the exhale.
2. Tabletop Toe Taps
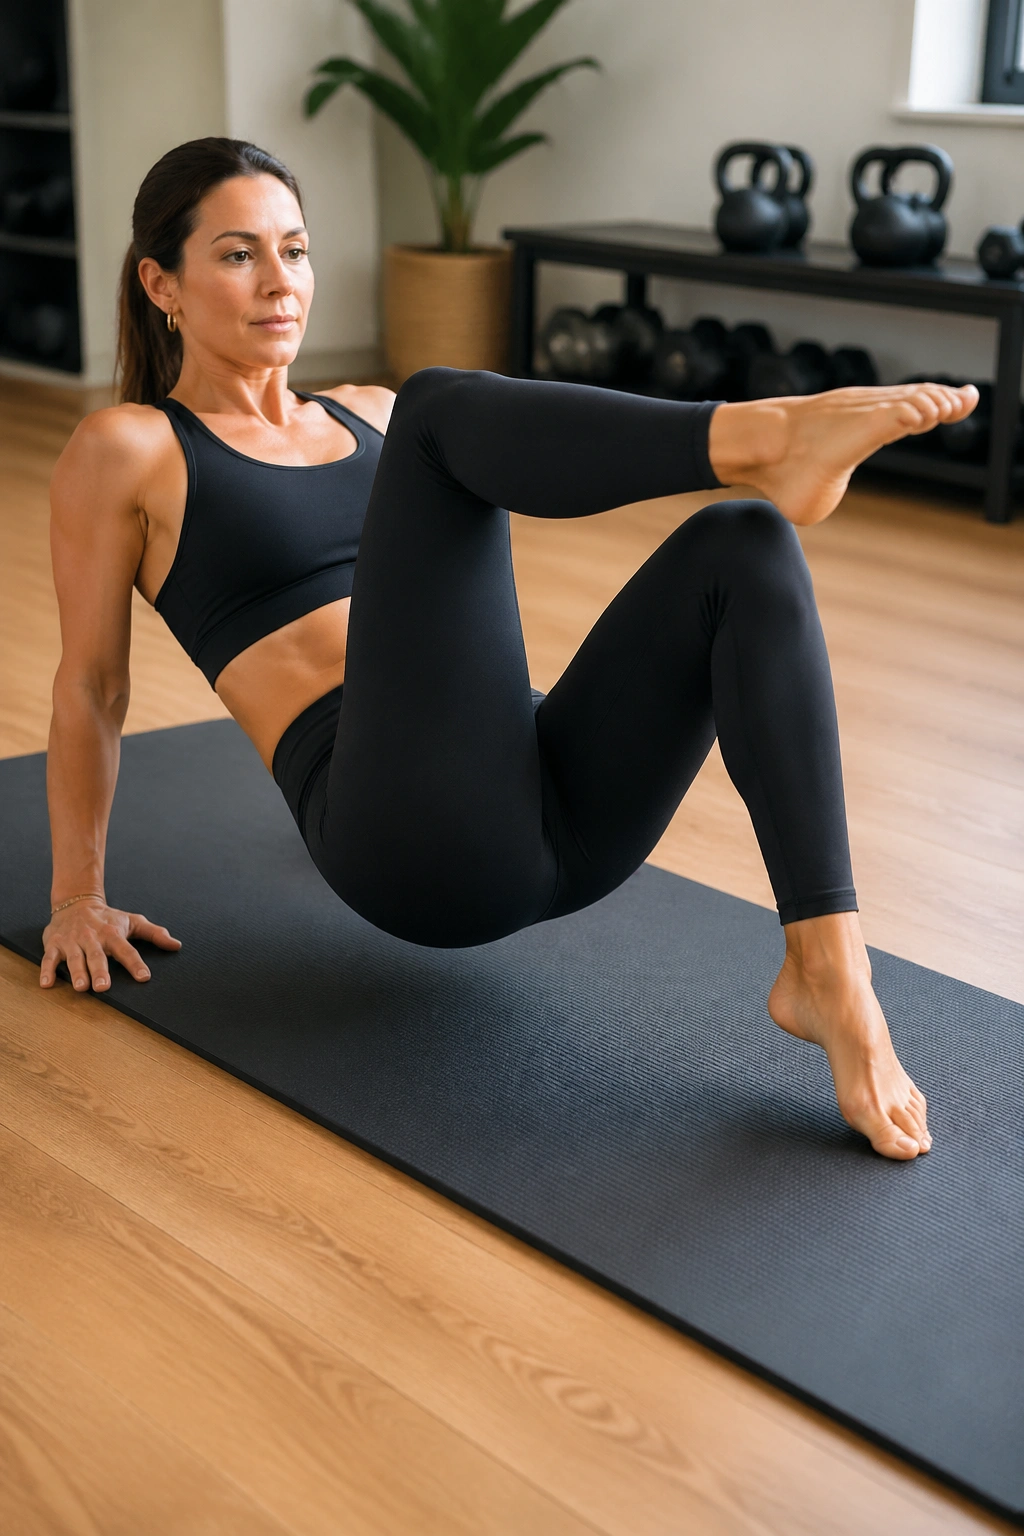
This one looks easy. It isn’t. Tabletop toe taps expose every bit of sloppy rib control, which is exactly why they work so well.
Bring both legs into tabletop, knees over hips, shins parallel to the floor. Lower one toe toward the mat while keeping the pelvis steady, then bring it back up and switch. The whole point is to keep the lower belly from doming or pushing outward when the leg moves.
The mistake I see most often is people dropping the leg so low that the low back arches off the mat. That turns the exercise into a hip-flexor contest. Keep the tap shallow. One inch is fine. Two inches is fine. Floor-level is not the goal.
A lot of people feel these most when they exhale on the lower phase. That’s the cleaner version. The breath helps the ribs stay quiet, and the belly wall has less room to bulge.
3. Dead Bug with Pilates Breath
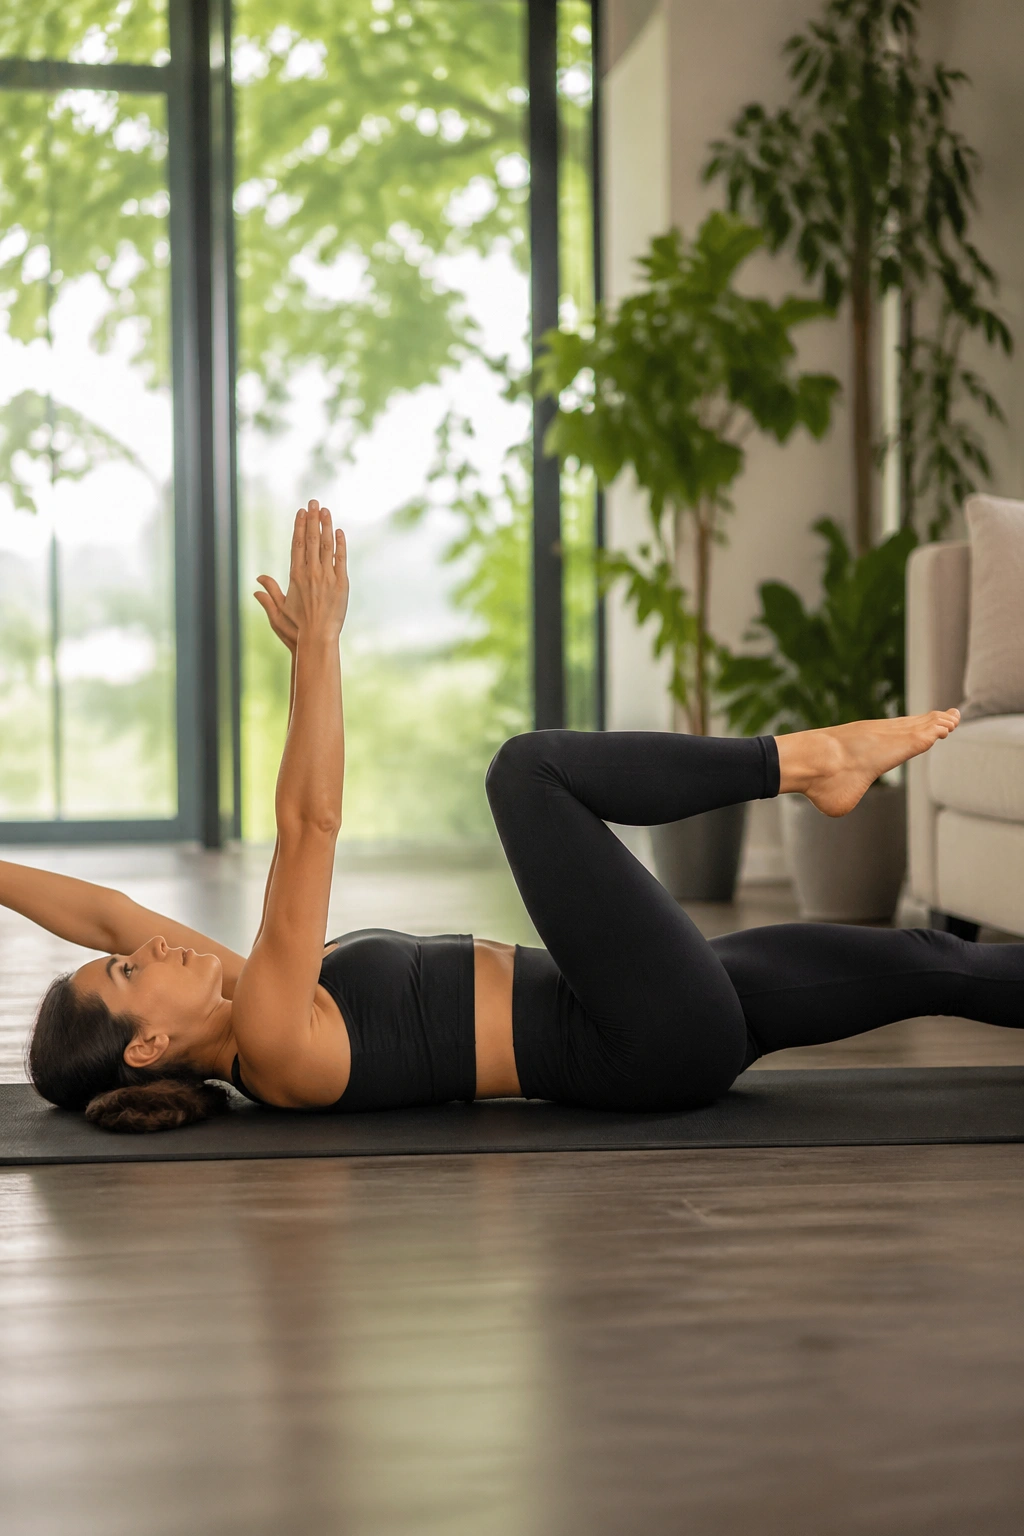
Why does such a plain-looking move make people sweat so quickly? Because the dead bug punishes lazy core control in the nicest possible way.
Start on your back with arms reaching to the ceiling and knees in tabletop. On a long exhale, extend one arm and the opposite leg away from you, stopping before the back arches. Return to center and switch sides. The movement is slow on purpose. Fast reps turn this into chaos.
How to Use It
Keep the reaching leg a little higher than you think you need to. That tiny adjustment saves the back and keeps the work in the lower abs instead of the front of the hip. If your neck gets tight, rest your head down and keep the arms only.
- Set size: 6 to 8 reps per side
- Tempo: 3 seconds out, 2 seconds back
- Cue: Exhale as the limbs extend
- Stop when: The back starts to arch or the ribs pop up
This is one of those moves that gets better when you stop trying to impress it.
4. Heel Slides
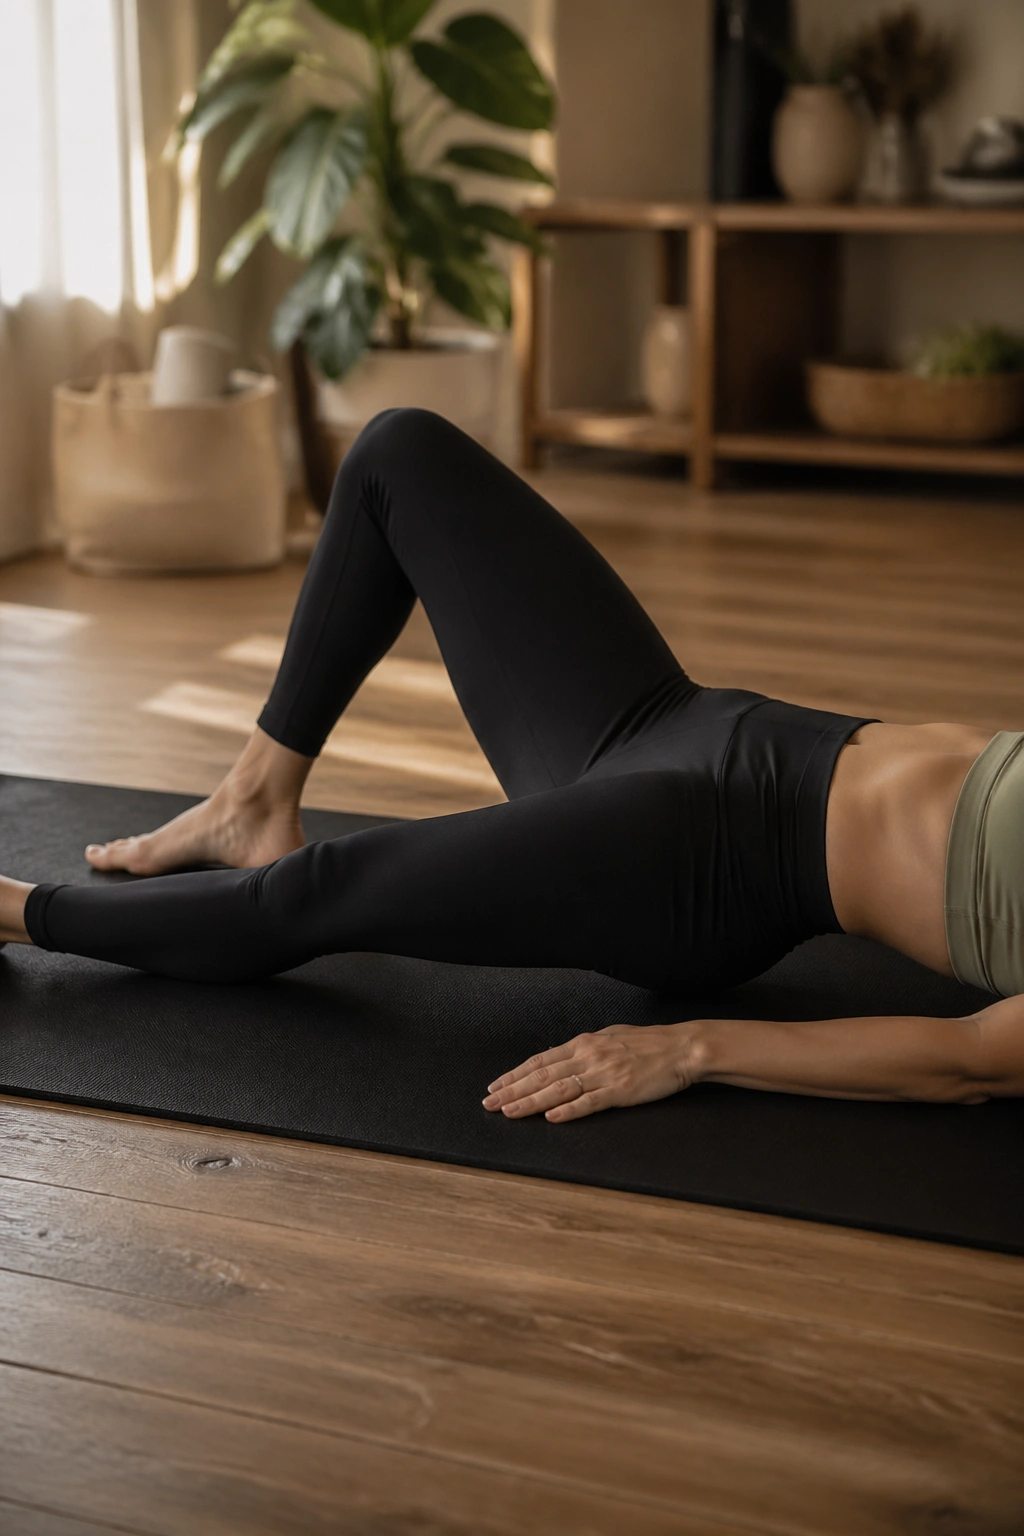
If toe taps make your back arch, heel slides are the calmer cousin you probably need first. They keep one heel in contact with the floor, which gives your core a built-in brake.
Lie down with both knees bent. Slide one heel away from you until the leg is almost straight, then drag it back in without letting the pelvis rock. That’s the whole game. The heel never leaves the mat, and that matters more than it sounds like it should.
What you want to feel is the lower belly drawing inward as the leg lengthens. What you do not want is the front of the thigh doing all the work. If the hip flexor grabs, shorten the slide and slow the pace.
A quiet heel slide can be harder than a flashy leg lower. That’s not a contradiction. It’s just what happens when the body can’t hide behind momentum.
5. Single-Leg Stretch
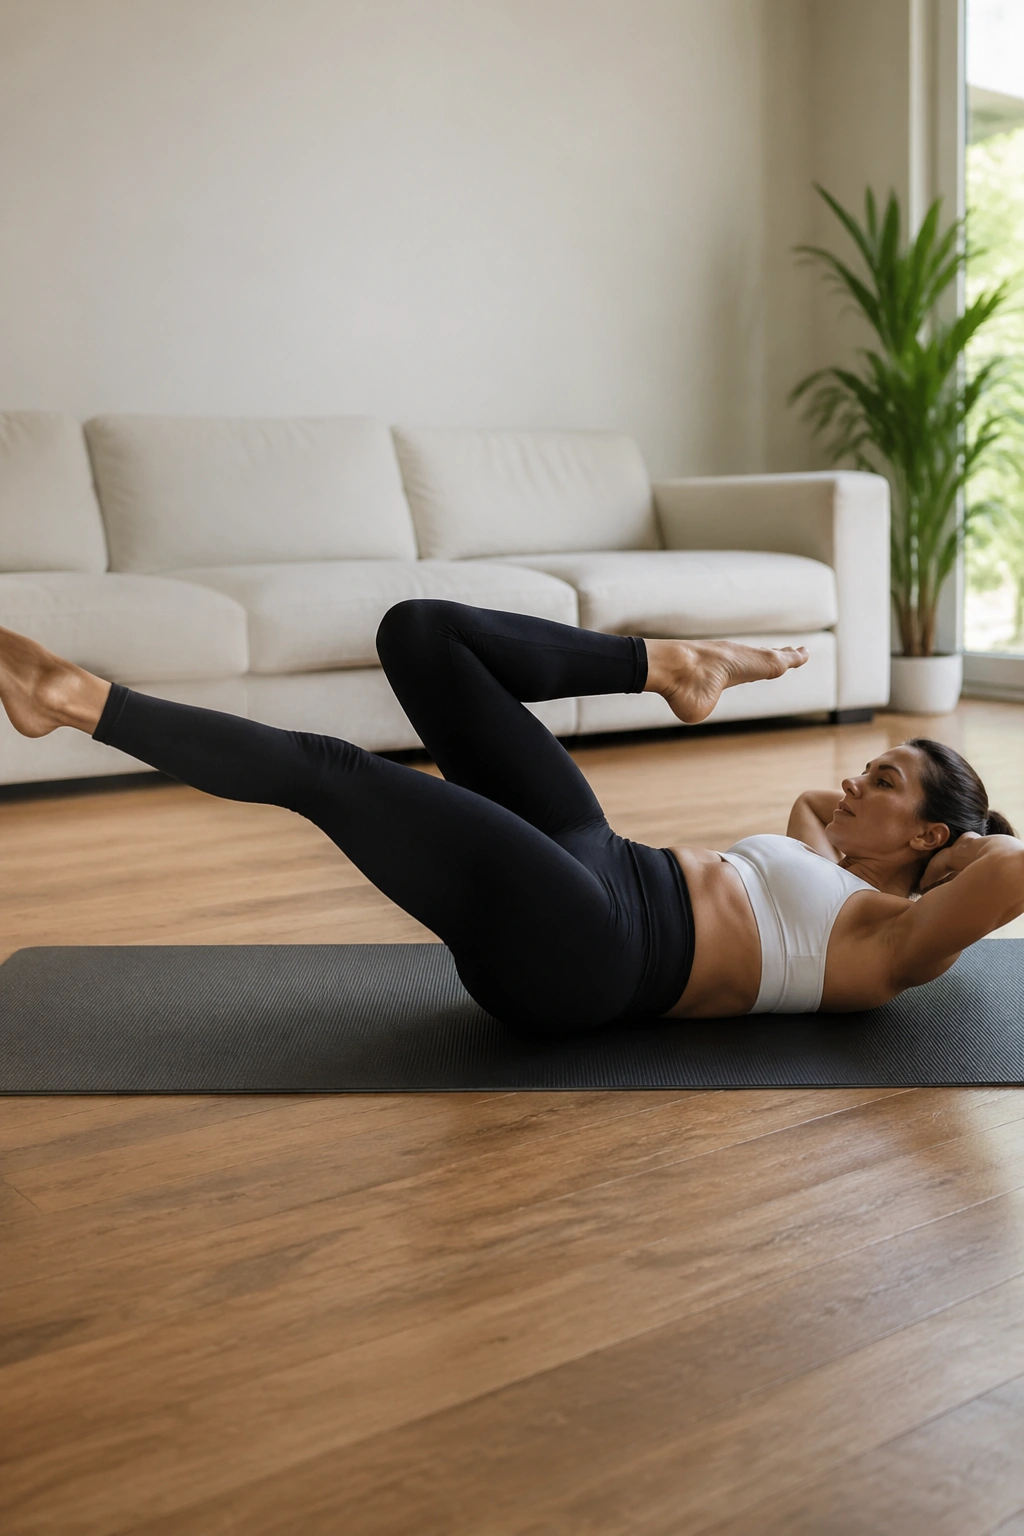
This is where the work starts to feel a little more alive. Single-leg stretch asks your abs to hold the pelvis steady while one leg folds in and the other reaches away, and that alternating pattern exposes weak spots fast.
Keep your head supported if your neck complains. Clasp one shin, extend the other leg long, and switch with control. The extended leg should stay active, not floppy, but it does not need to hover a mile off the floor. Lower is not better if the back is straining.
I like this move because it teaches length without losing shape. The stretched leg gives you feedback. If it wanders too low, the pelvis follows. If it stays too high, you may feel less challenge, but the exercise still works while you build control.
Two sets of 8 to 10 switches is plenty for most people. More is not automatically better here. Crisp reps beat sloppy ones every time.
6. Double-Leg Stretch
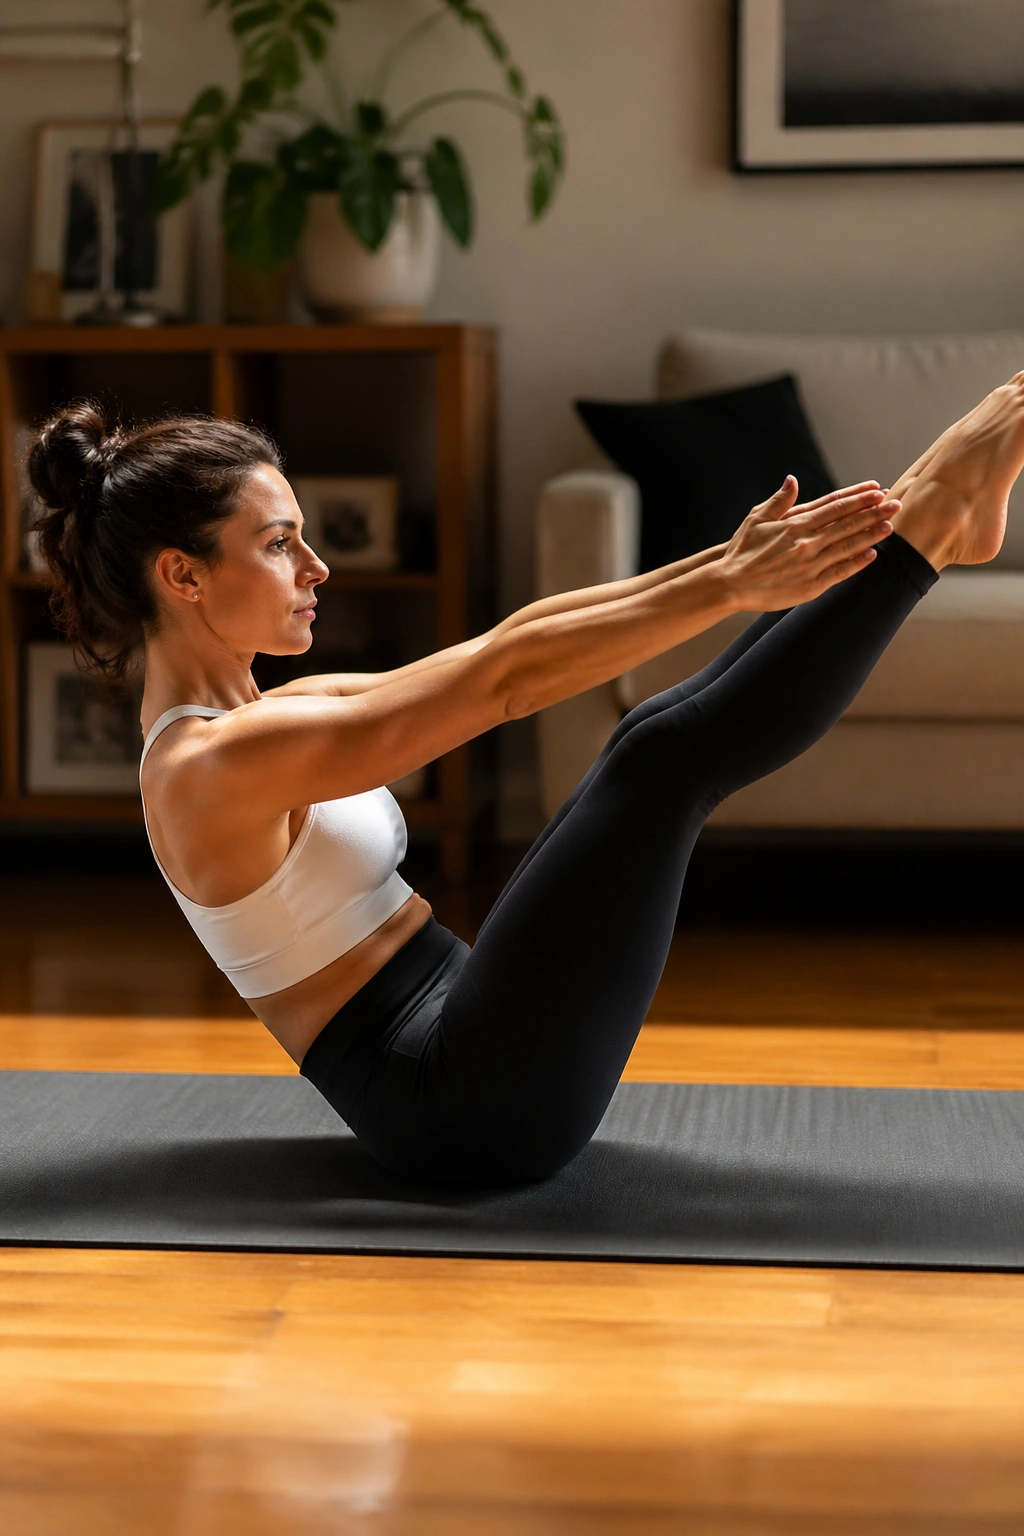
Unlike crunch-heavy ab work, the double-leg stretch trains you to keep the torso organized while both legs move away at once. That makes it sneaky, and sneaky is useful.
Start in a curled-up position with knees in tabletop. Reach the arms back and the legs forward on the same exhale, then circle them back to the center. The body should feel long for a second, but not loose. If your low back peels off the mat or your ribs flare, the range is too big.
This is best for someone who already has a decent grip on the smaller moves. If you jump here too early, your hip flexors will steal the show. That’s not a moral failure. It just means you need more time with heel slides and toe taps.
My bias? Keep the knees bent a little and reach only halfway until the pelvis stays quiet for the full set.
7. Hundred Prep with Bent Knees
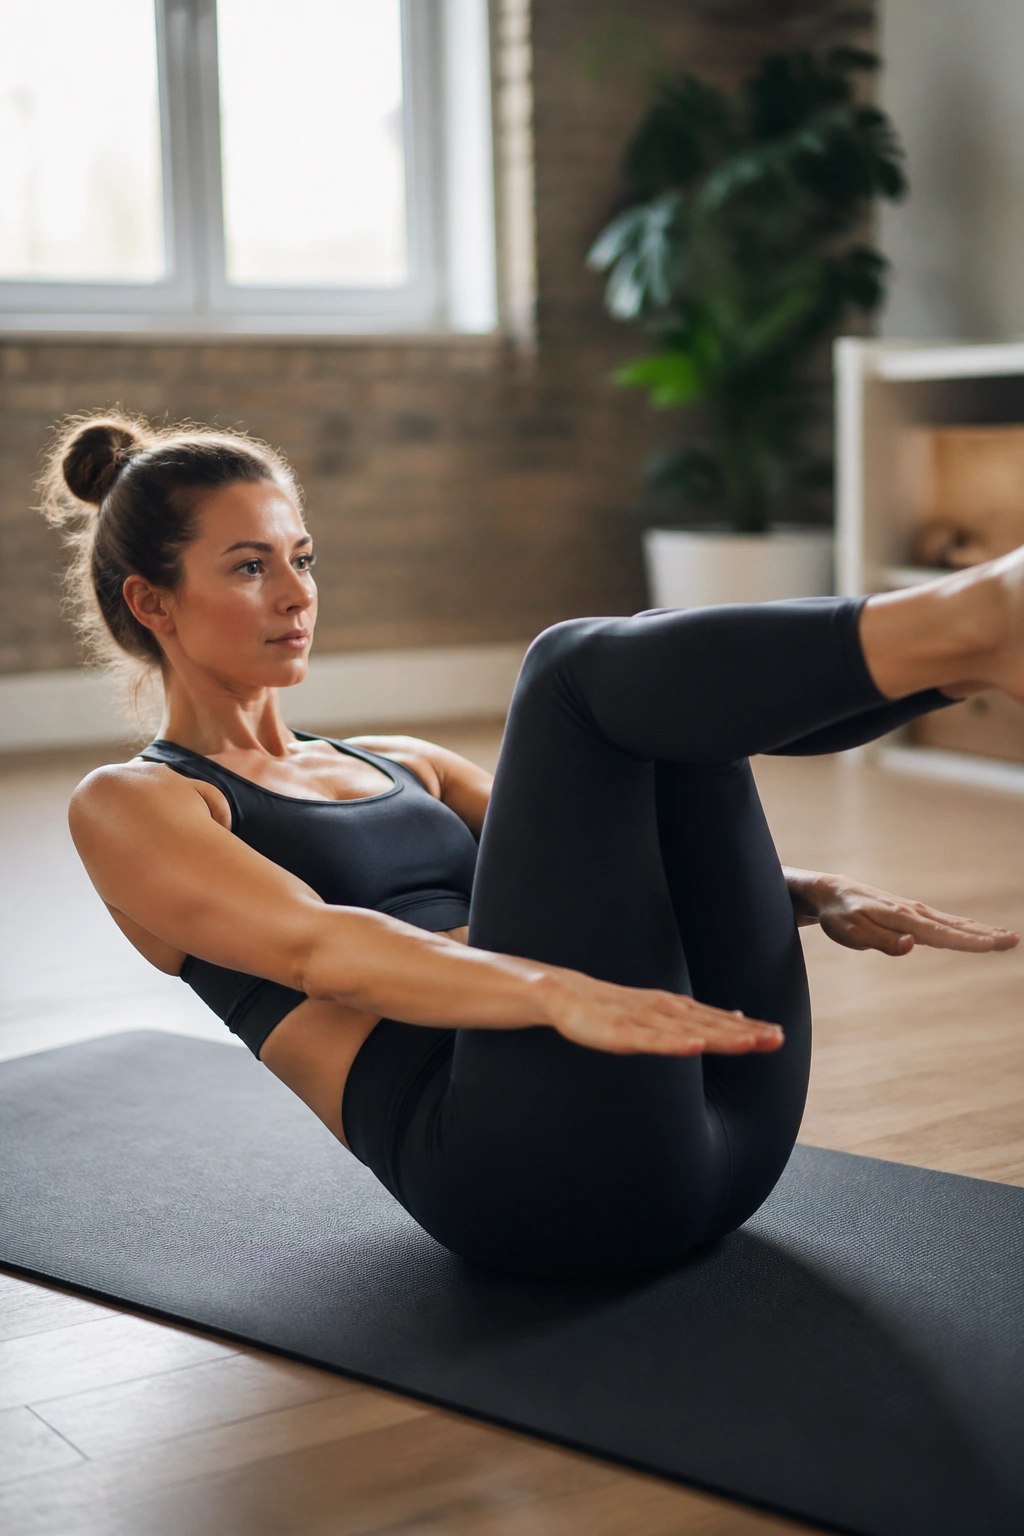
The full Hundred gets all the attention, but the bent-knee prep is the version I’d give most people first. It keeps the legs at tabletop without demanding too much from the hip flexors, and it still lights up the lower belly.
Breath Rhythm
Lift the head and shoulders only if your neck can stay long. Pump the arms a few inches up and down while you take a rhythmic inhale for 5 counts and exhale for 5 counts. Five rounds is enough to start. Ten is plenty for a full set.
- Arm range: Small, not swingy
- Leg option: Feet on the mat if tabletop is too much
- Feel: Deep core holding steady while the breath keeps moving
- Watch for: Rib flare and jaw tension
The mistake is chasing a hard burn by lowering the legs too far. That usually turns the lower back into the casualty. Keep the legs where the pelvis can stay put, and the exercise becomes a lot more honest.
8. Reverse Curl
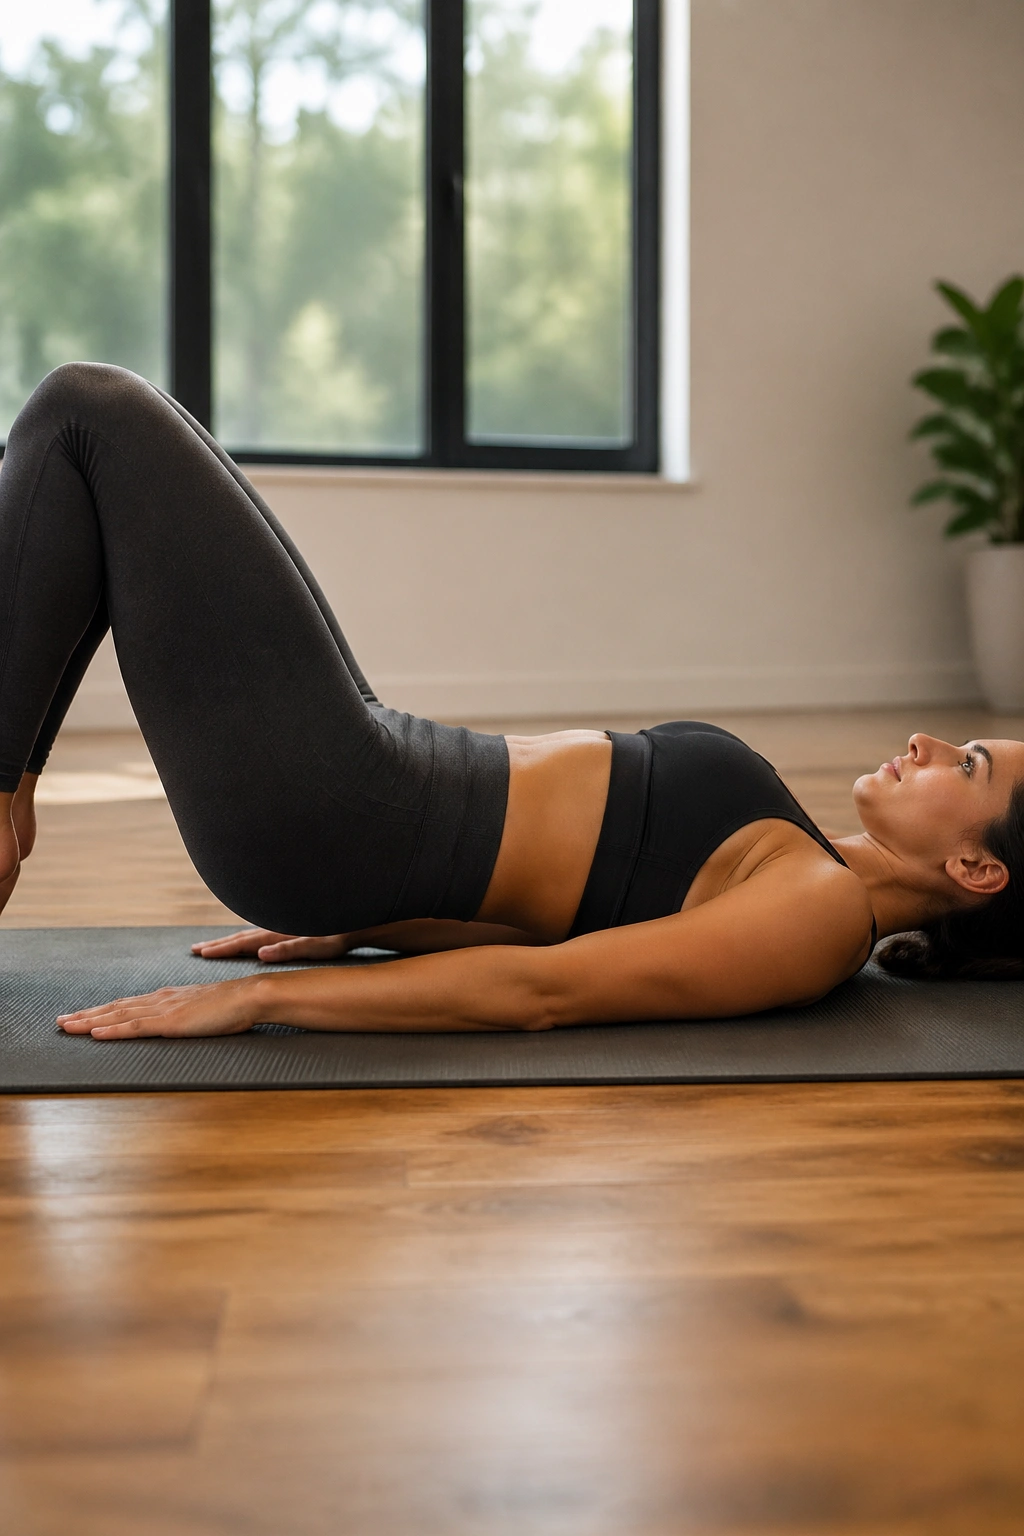
A tiny curl beats a big crunch when your goal is lower-ab control. That’s the part many people miss.
Place your feet on the floor or in tabletop, then exhale and gently curl the tailbone off the mat just enough to lift the pelvis an inch or two. Think of the pelvis rolling up, not the knees coming to the chest. The motion is small, deliberate, and almost rude in how little it gives you.
The lower belly should feel like it’s shortening from the bottom up. If you feel your neck or upper abs doing all the work, reduce the height. A reverse curl done well is a subtle thing. It does not need to be dramatic to be effective.
I like this one for days when you want direct lower-ab feedback without the fatigue that comes from endless leg raises.
9. Scissors
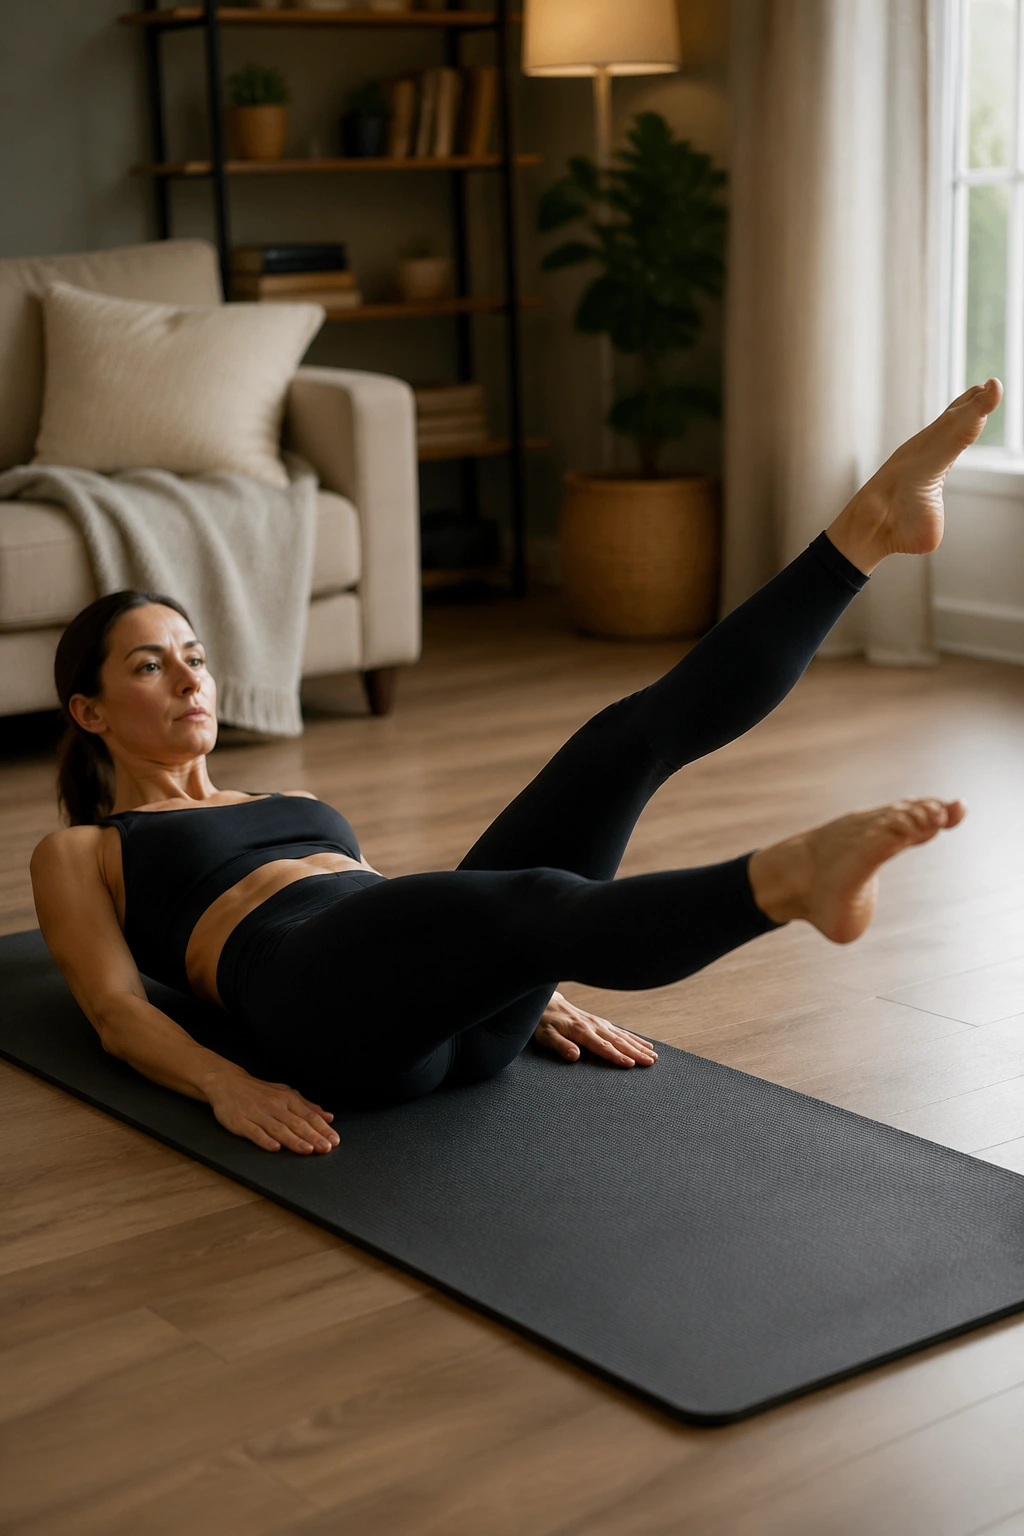
Do scissors feel elegant when they’re done right? Yes. Do they also expose a wobbly pelvis instantly? Also yes.
Lie on your back, lift both legs, and gently lower one while the other stays high. Then switch with control. The upper body can stay down, or you can keep a small Pilates curl if your neck is happy. The key is keeping the hips level while the legs trade places.
Keep Your Pelvis Quiet
The moving leg should never drag the low back with it. If the back arches, the legs are too low or the lever is too long. Bend the knees slightly, raise the working leg, or take the head and shoulders down.
- Reps: 6 to 8 switches per side
- Cue: “Long legs, calm ribs”
- Best fix: Shorten the range before you shorten the breath
- Common mistake: Locking the knees hard and yanking from the hip
Scissors can feel graceful, but only after they feel controlled.
10. Double-Leg Lower and Lift
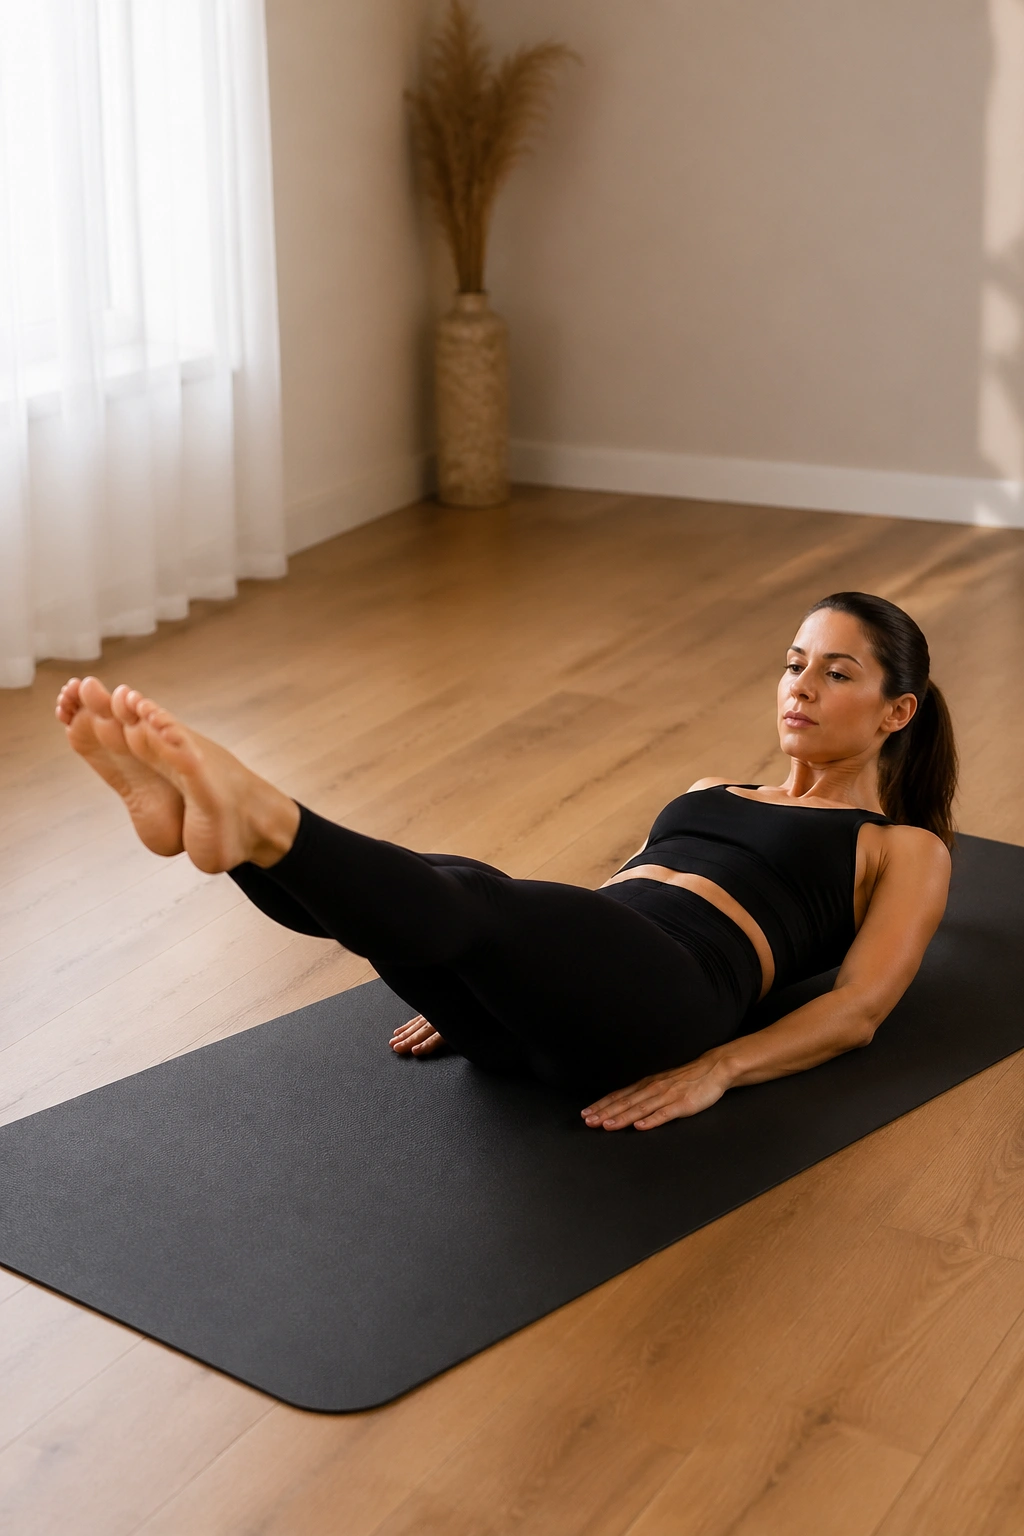
This is the move that tells the truth. If your lower abs are ready, they’ll keep the back from popping up. If they’re not, the floor will let you know.
Hold both legs together and lower them only as far as you can while the low back stays heavy. Then lift them back up without bouncing. That’s it. Simple. Brutal enough.
A lot of people think the answer is to force the legs lower. It isn’t. The answer is to own the smallest lower range you can control for 6 to 8 reps. That might be 45 degrees above the floor. It might be higher. Fine.
Do not chase a flat-back pose if your spine starts to arch. A smaller, cleaner range builds more useful strength than a heroic-looking one that leaves your back complaining later.
11. Bear Hover Hold
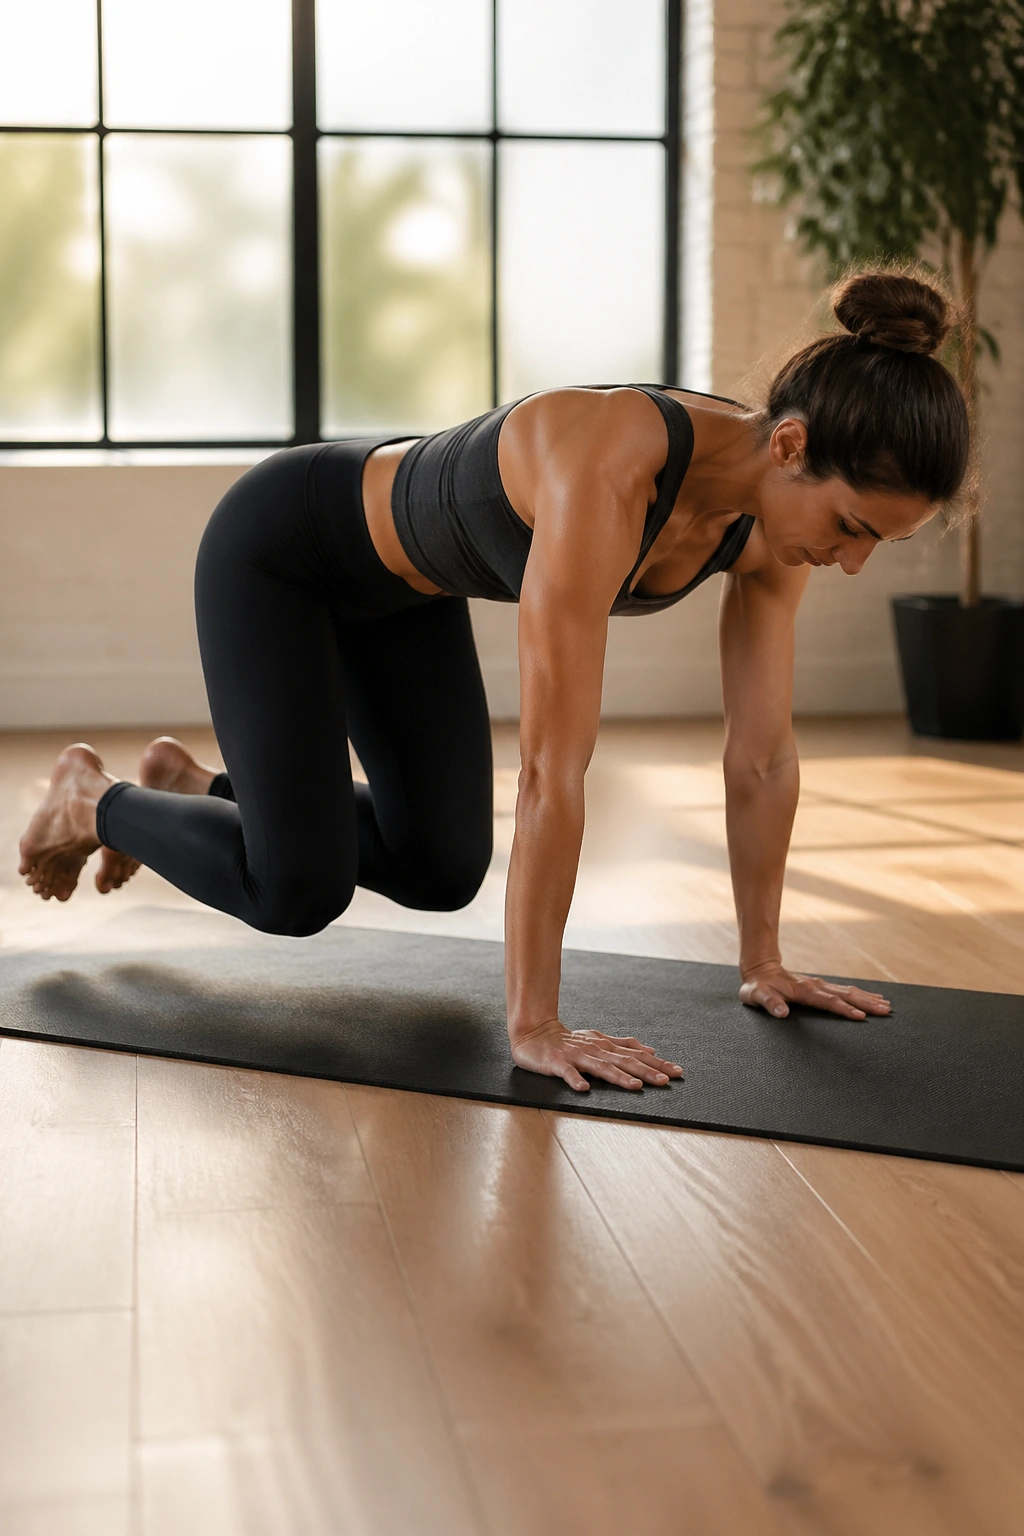
If you want your lower abs to work with your whole body, the bear hover is a good place to be rude to yourself in a productive way.
Come onto hands and knees, tuck the toes, and lift the knees about an inch off the floor. The body should feel like a table floating just above the ground. Hold for 10 to 20 seconds at first. Breathe. That part matters more than people think.
The work shows up fast because the core has to resist both arching and sagging. Your thighs will probably join the conversation, and that’s fine. But if your wrists ache or your shoulders collapse, reset and shorten the hold.
No fancy trick here. Keep the knees light, the back broad, and the exhale smooth. That’s the move.
12. Plank Knee Tucks
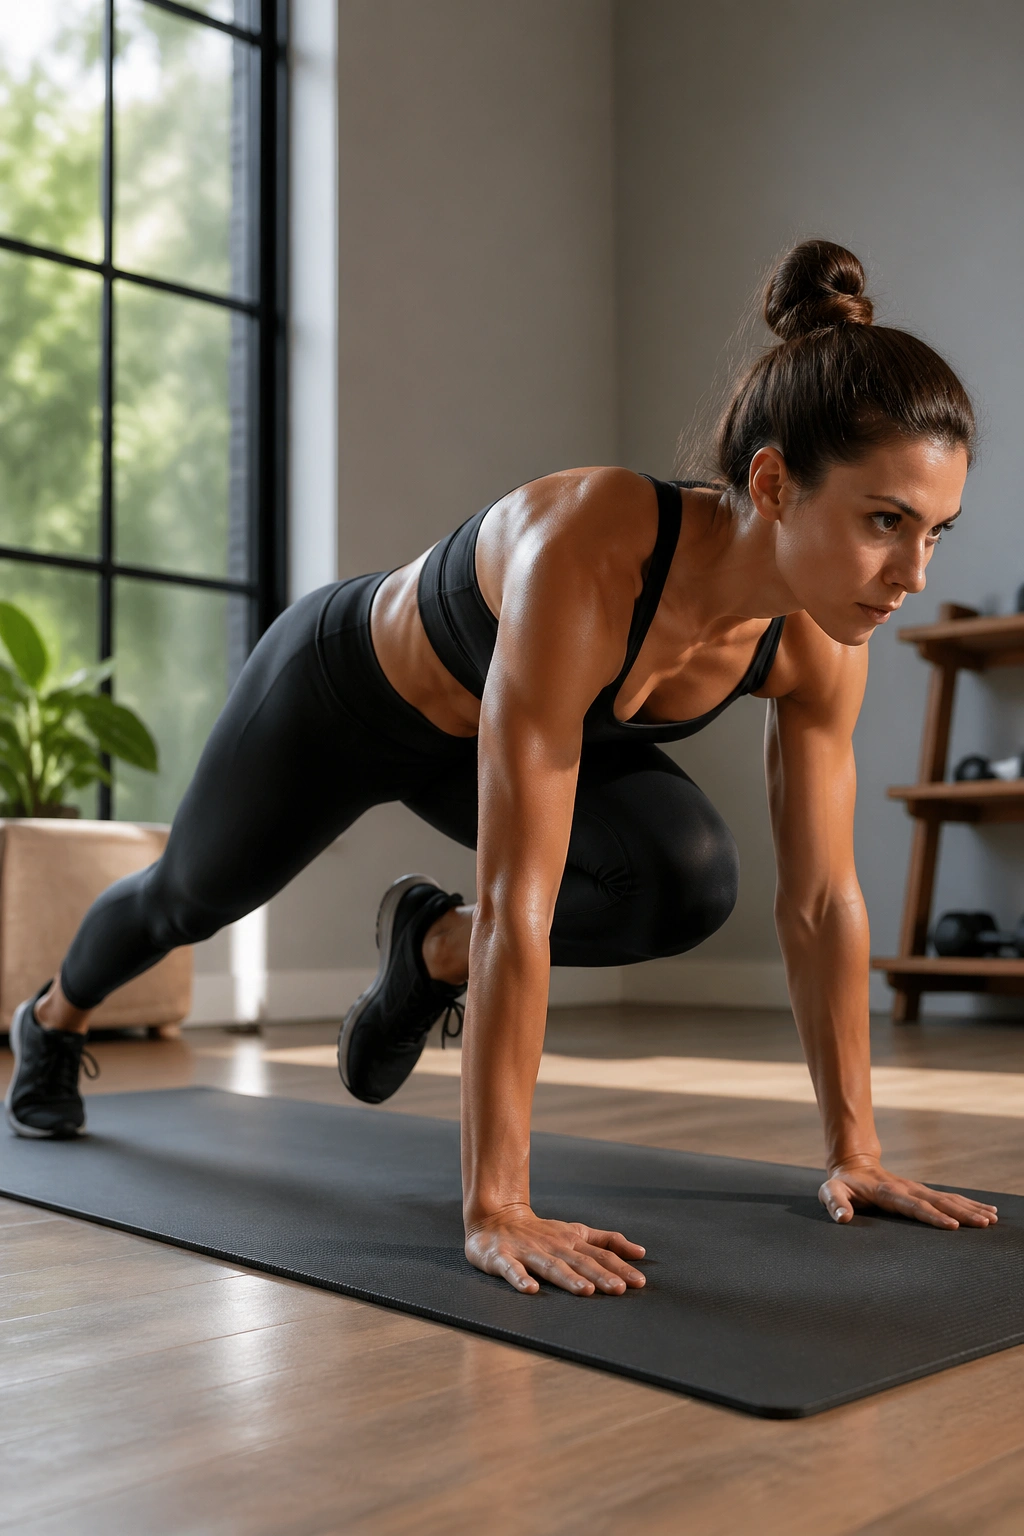
A plank knee tuck is a different animal from a floor-based ab move. It asks for anti-extension strength, meaning your midsection has to stop the torso from spilling forward while the knees move in.
Set up in a strong plank, shoulders stacked over wrists. Draw one knee toward the chest without letting the hips pike or the ribs dump. Return it, then switch. Slow enough to control. Fast enough to stay honest.
This is best for someone who already owns the lower-mat work and wants a harder challenge without jumping straight to mountain climbers. The floor version and the plank version look similar to the casual eye, but the load hits differently. In plank, the whole front line has to stay active.
I’d use 6 to 10 tucks per side, no more than that at first. When the shoulders start to shake, the form usually gets messy. That’s your cue to stop, not push through.
13. Bridge March
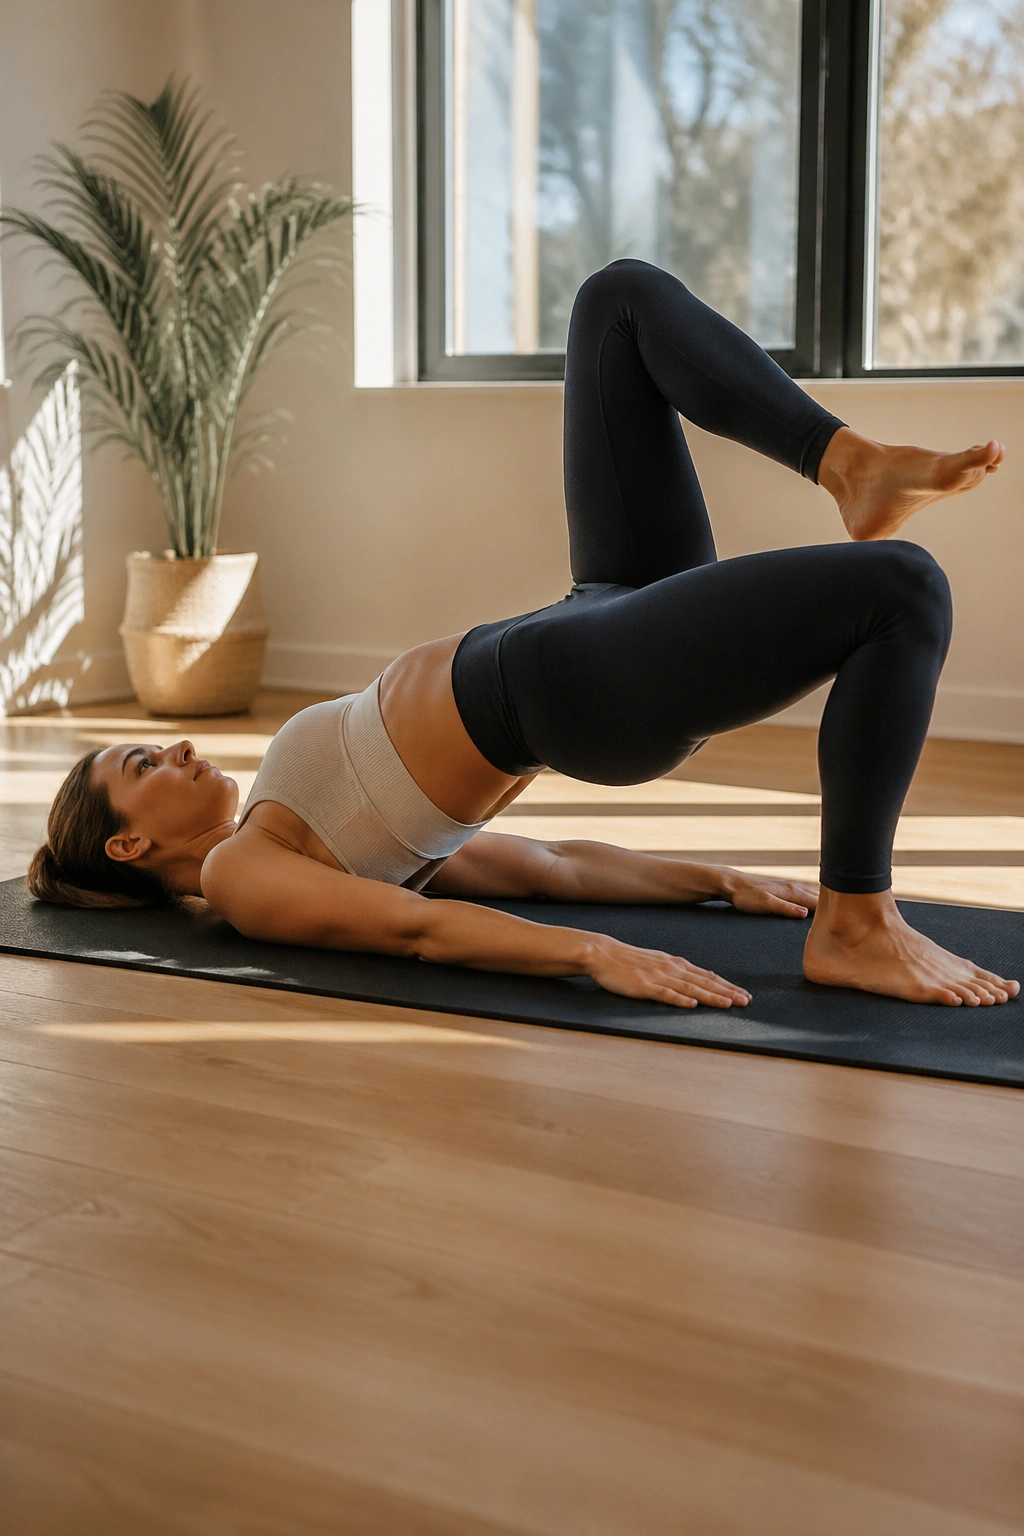
Bridge march is one of my favorite “don’t trust the pelvis” drills. The glutes help, the hamstrings help, and the lower abs keep everything from wobbling around.
Lift into a bridge, feet grounded hip-width apart. Without dropping the hips, lift one foot a few inches, place it back down, then switch sides. The pelvis should stay level like a tray. If it tilts, the march is too big or the bridge is too high.
Why It Helps
The move teaches the core to resist shifting when one leg leaves the ground. That matters in real life more than it gets credit for. Walking up stairs. Carrying a bag. Standing on one leg while you pull on pants. All of it.
- Bridge height: Low to medium, not a giant arch
- Tempo: One slow march every 2 seconds
- Focus: Keep the back of the ribs heavy
- Upgrade: Add a mini band above the knees if your knees cave inward
The bridge should feel warm, not crammed. If your low back is working harder than your glutes, come down a notch.
14. Frog Legs on the Mat
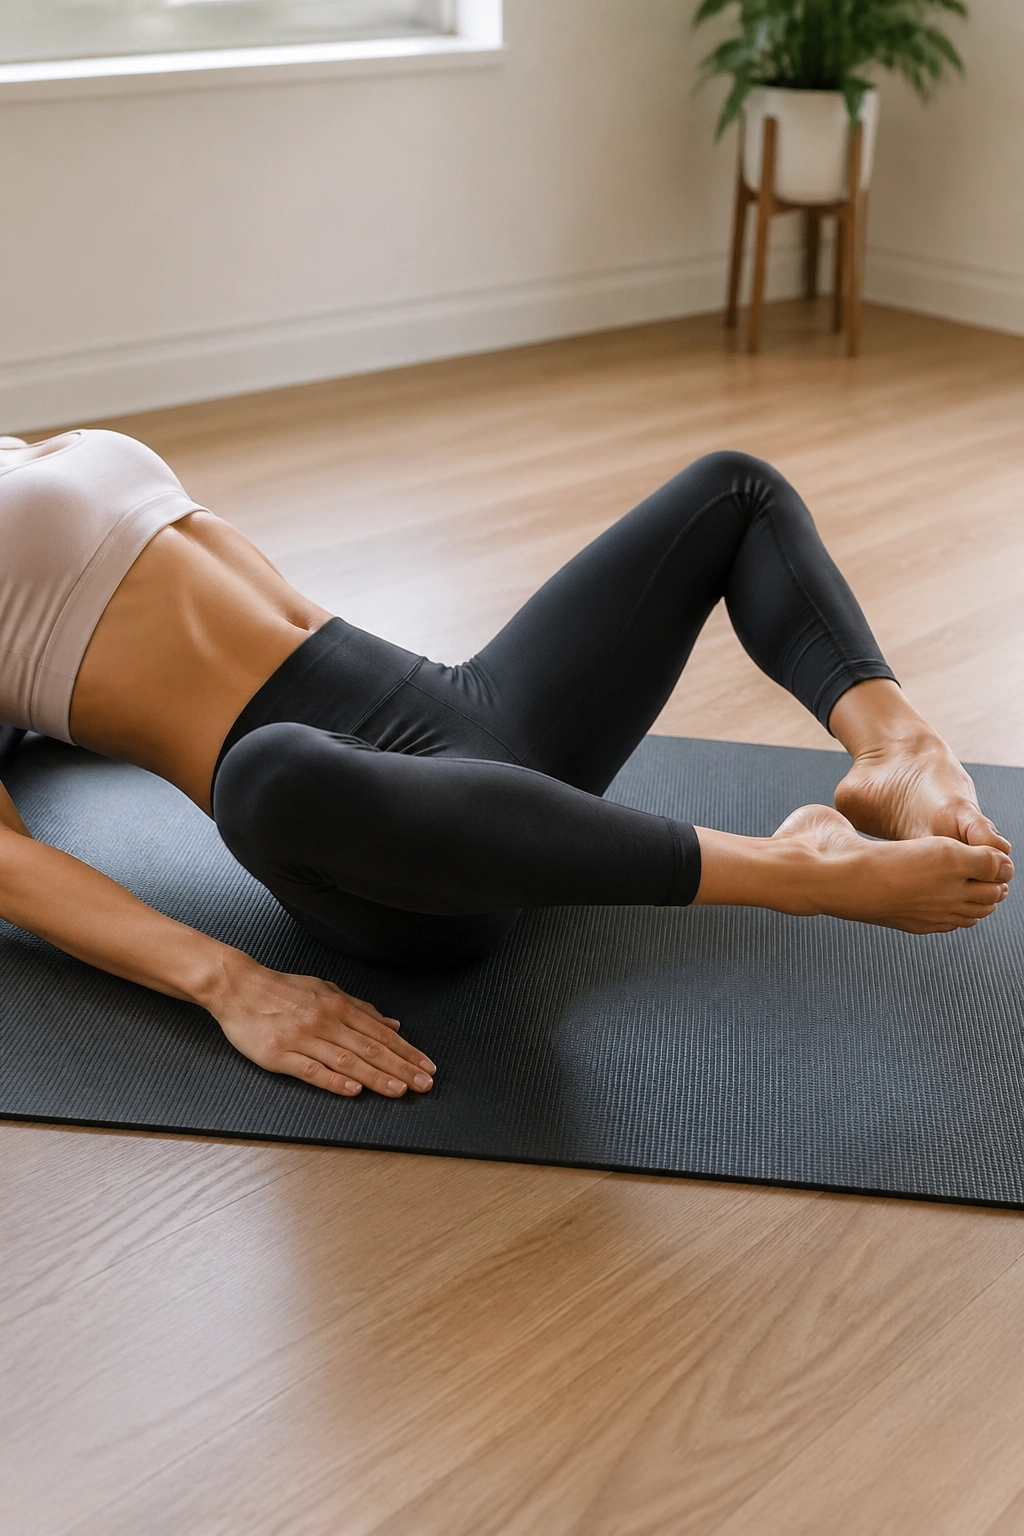
Frogs are strange in the best way. They look soft, then they hit the lower belly from a different angle than straight leg lowers do.
Start on your back with the knees bent and turned out, heels together. Extend the legs away on the exhale, then fold them back in. Keep the movement small if your pelvis likes to tip. The turnout should come from the hips, not from twisting the knees.
Why does this help? Because the frog position can take some pressure off tight hip flexors while still asking the deep core to keep the spine steady. That makes it a smart choice for people who feel every straight-leg move in the front of the thighs.
How to Keep the Work in the Core
Don’t kick the legs out like a swimming stroke. Press them away as if you’re sliding through thick water. The return should feel even slower than the reach.
If you want a little more challenge, add a small Pilates curl and keep the chin slightly tucked. If your back doesn’t like that, leave the head down. Nothing about this move requires heroics.
15. Teaser Prep with One-Leg Reach
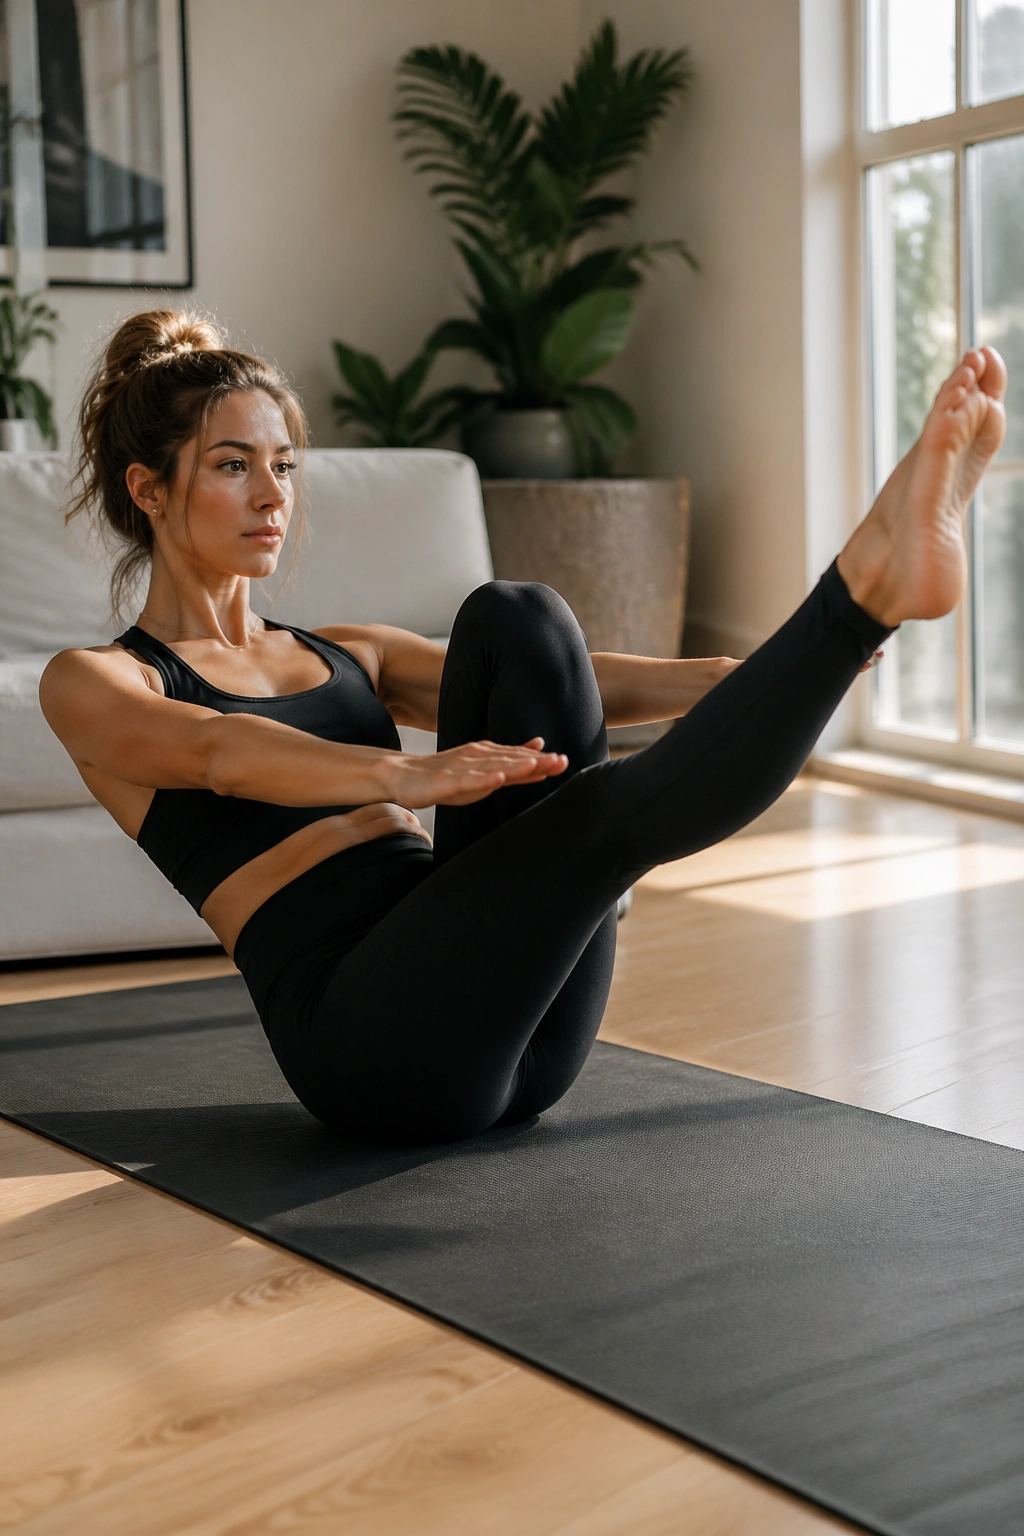
This is the kind of move that reveals cheating fast. Teaser prep asks the lower abs to hold the body in a curled shape while one leg extends, and there’s nowhere for momentum to hide.
Sit, lean back into a balanced V-shape, and bring one knee in while the other leg reaches long. Then switch. The torso stays lifted. The ribs stay knitted. The lower belly stays drawn back instead of puffing out. Simple description. Hard work.
A lot of people try to make this pretty. Bad idea. Make it small instead. A tiny reach and a tiny return will teach more control than a wild leg sweep that forces the shoulders to grip.
- Sets: 5 to 8 switches per side
- Hold: 1 to 2 seconds at the top
- Cue: “Chest open, belly hollow”
- Modify: Keep both knees bent if balance gets shaky
When this starts feeling smooth, you’ve earned it. Until then, the prep is enough.
16. Side-Lying Leg Lift with Rib Control
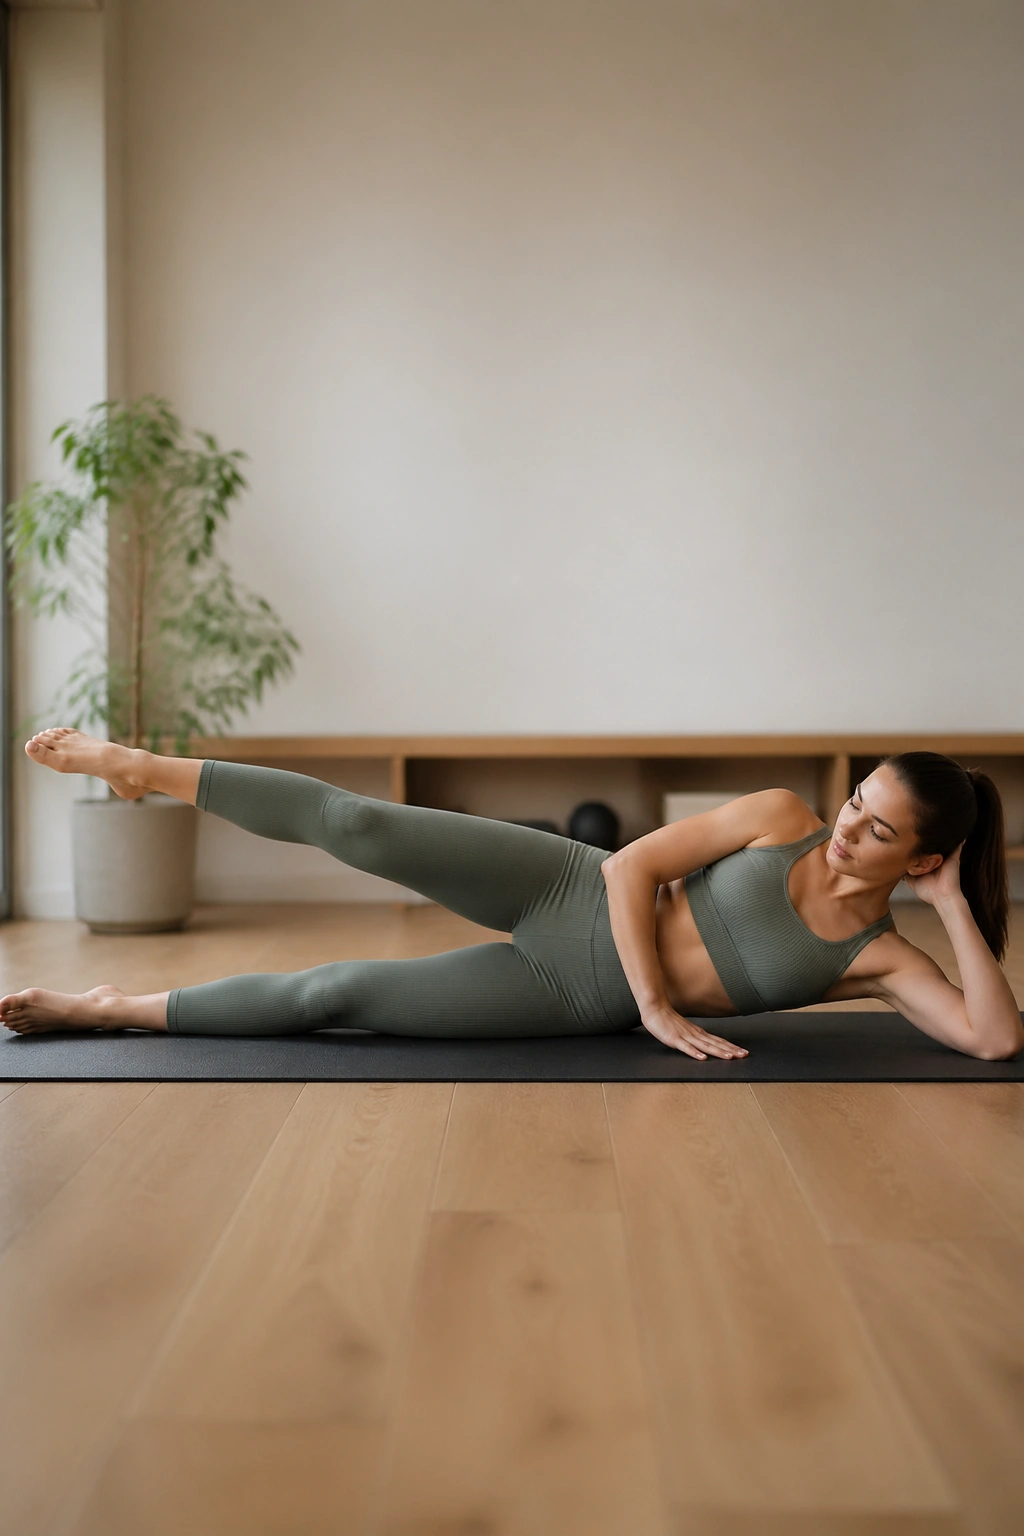
Side-lying work gets underestimated because it doesn’t look as dramatic as floor crunches. That’s a mistake. When the ribs stay stacked and the waist stays engaged, side-lying lifts teach the lower torso to stay organized under movement.
Lie on one side, legs long, and lift the top leg with control. Keep the pelvis from rolling backward. The bottom waist should feel lightly lifted away from the floor, not crushed into it. That tiny space matters.
I like this position for people whose neck or hip flexors hate traditional ab work. It gives you a cleaner shot at stability without the same strain. You’ll still feel the lower belly fire if the ribs stay knit and the leg doesn’t swing.
Do 10 to 12 controlled lifts on each side. Slow down the lowering phase. That’s where the work lives.
17. Standing Knee Lift with Scoop
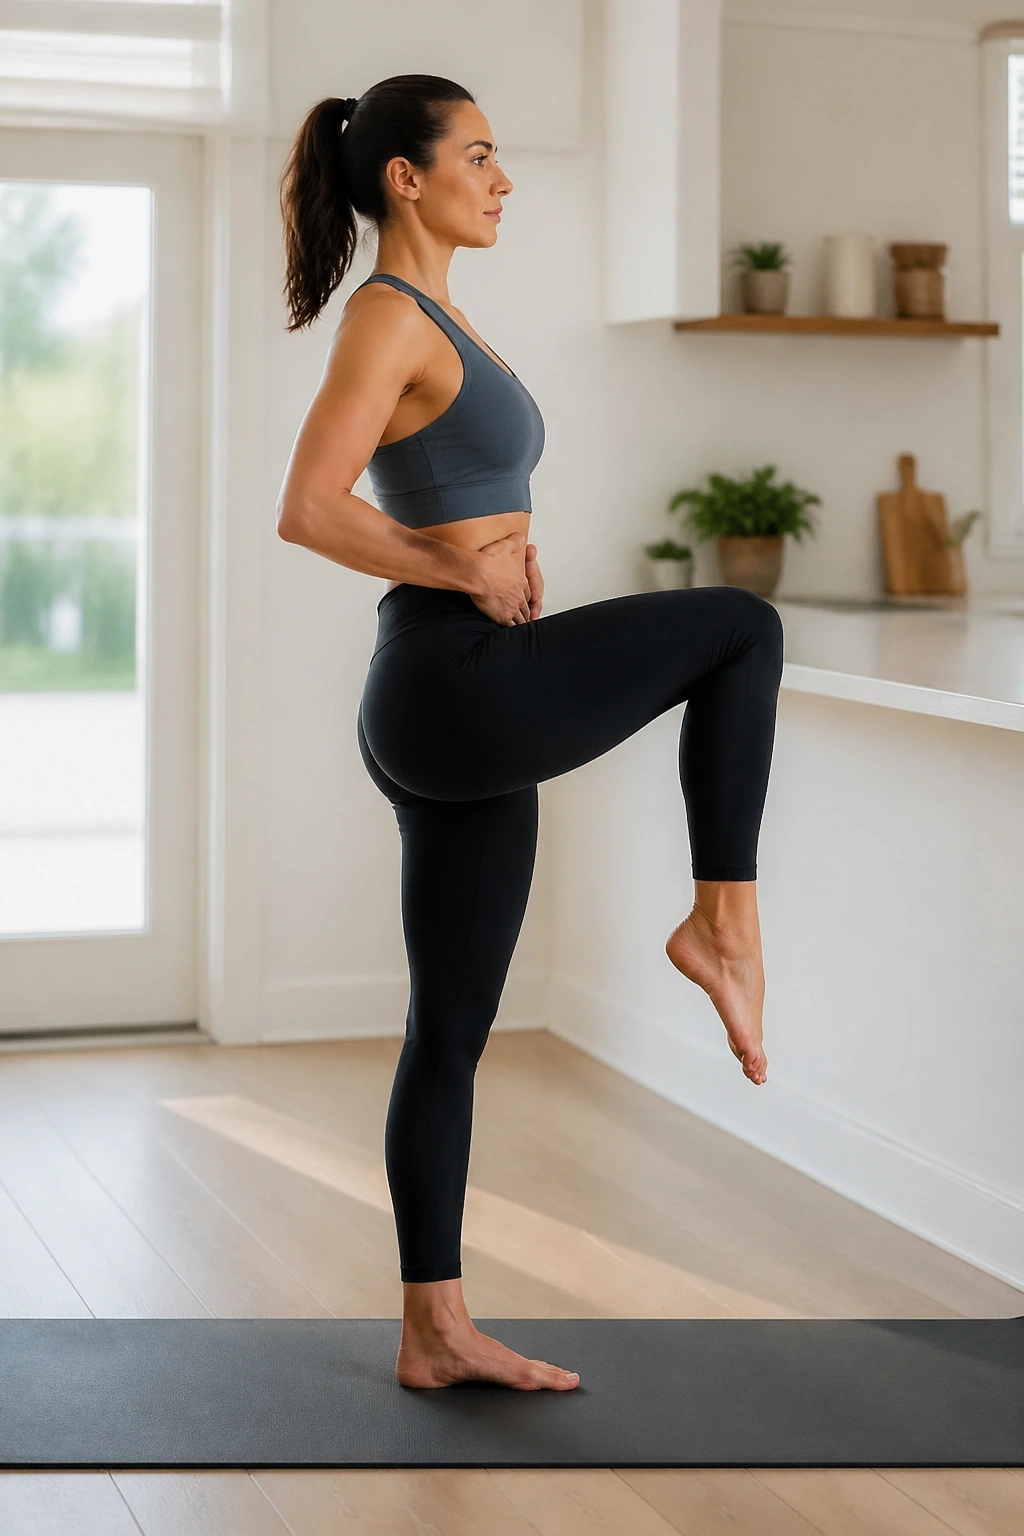
Not every lower-ab workout has to happen on the floor. A standing knee lift with a Pilates scoop can be a lifesaver when you want to train your core without lying down or when your body feels stiff from too much sitting.
Stand tall, exhale, and pull one knee up while drawing the lower belly slightly inward and upward. Lower the foot with control. The pelvis should stay level, and the standing leg should feel grounded. If you lean back, the abs lose the job and the low back picks it up.
This move is especially good as a warm-up before mat work. It also works well with a light ankle weight or mini band, though I’d start without either one. Clean movement beats extra load.
Use 8 to 10 lifts per side. If you want more challenge, hold the top position for a full breath before lowering. That tiny pause is a nice test of control.
18. Hollow Hold Pilates Style
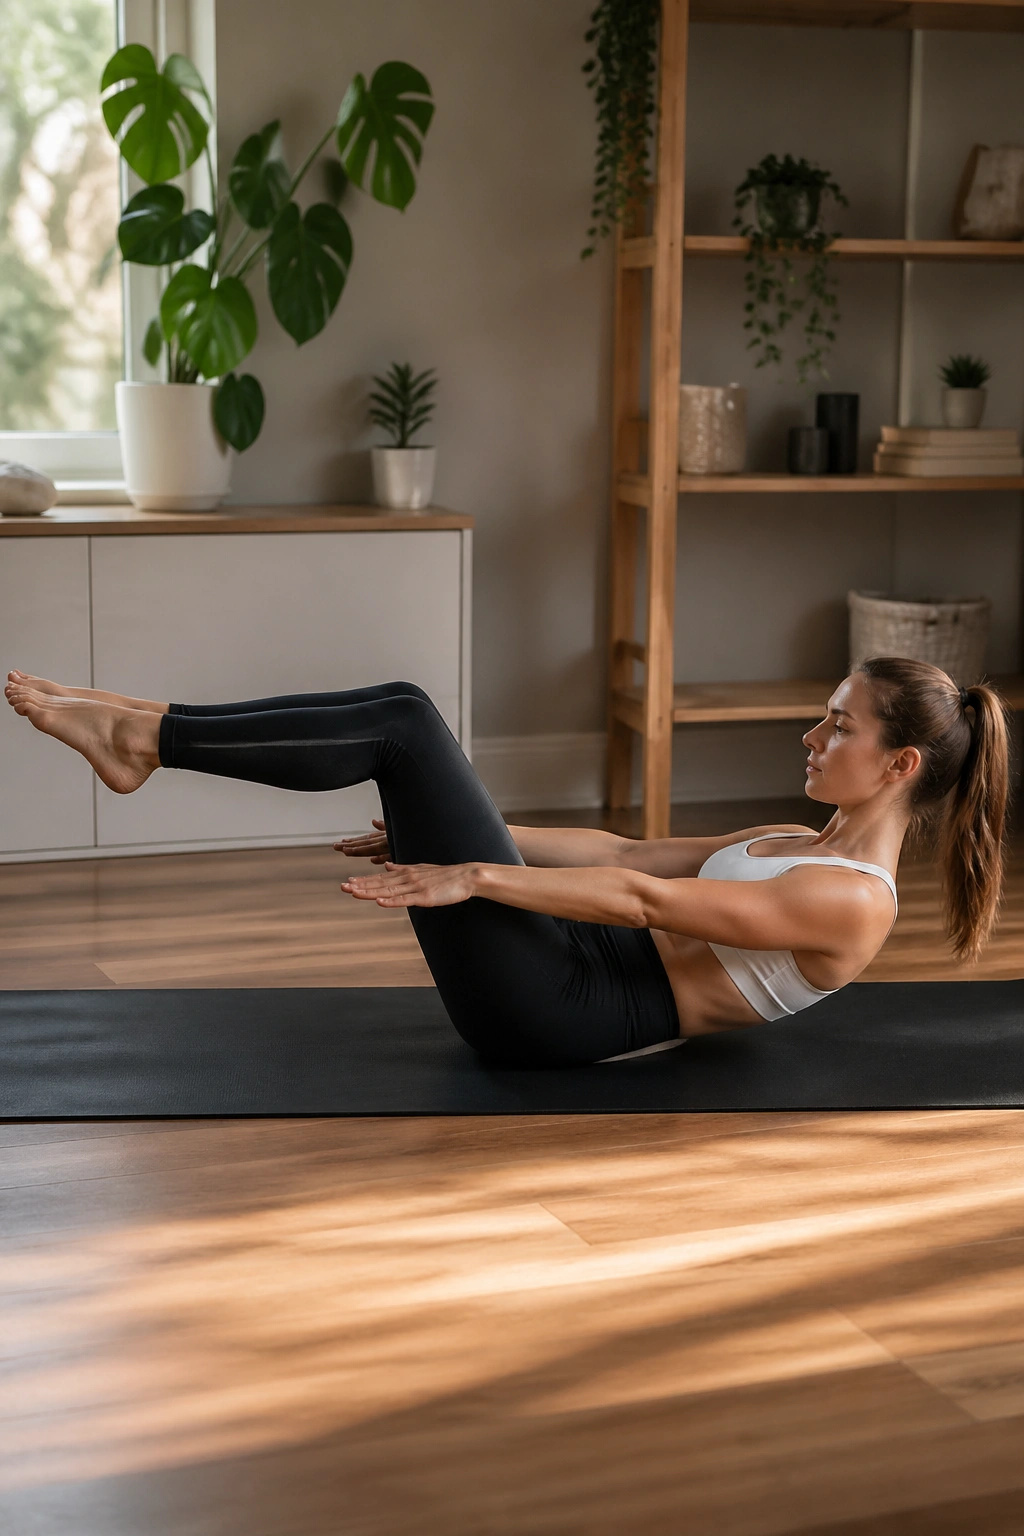
A true hollow hold is not for the impatient. It asks the front body to stay long and low while the legs hover and the ribs keep their shape. If you rush it, the low back complains. If you scale it well, it builds serious lower-ab stamina.
Start with knees bent and feet lifted a few inches off the floor. Press the lower back lightly toward the mat, reach the arms long, and hold for 10 to 20 seconds. If that feels solid, lengthen one leg at a time. The goal is not to see how low you can go. It’s to keep the torso from changing shape while the limbs get longer.
Bend the knees first. That is the smartest version for most people, especially if the back is touchy or the hip flexors dominate every other move. There’s no prize for making it harder than it needs to be.
Do two or three short holds. Stop before form slips. That’s the move that pays you back.
Final Thoughts
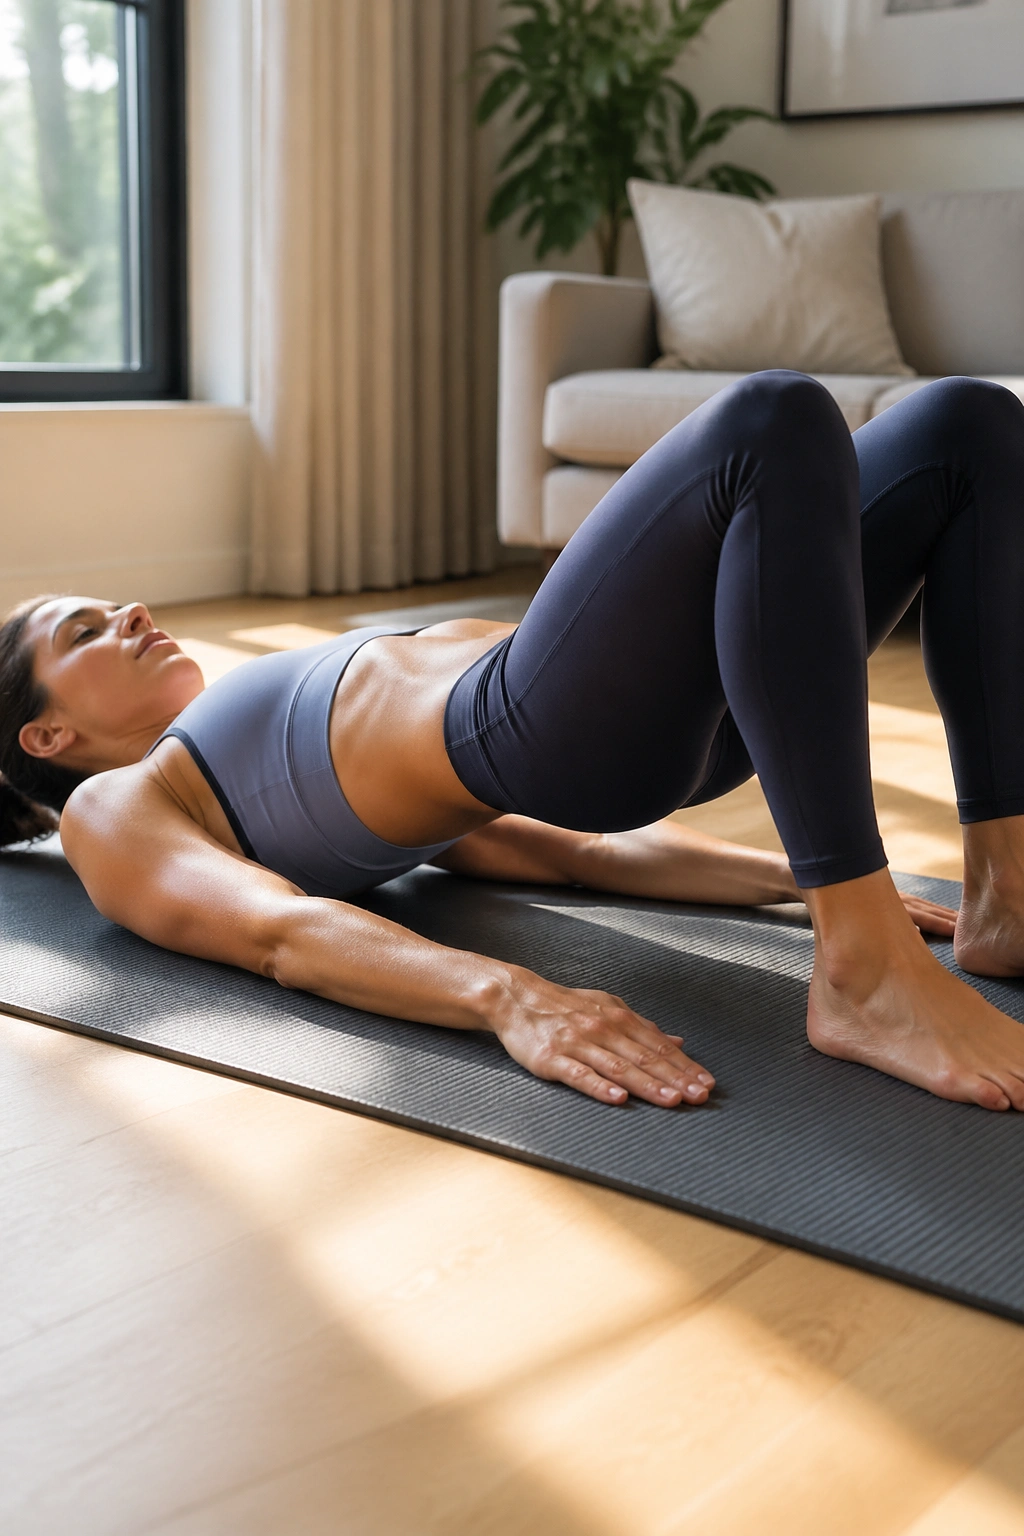
The best Pilates lower ab work is quiet. No jerking, no frantic reps, no pretending that a fast burn equals good control. The real win is when your pelvis stops wobbling and your lower belly starts doing its share.
If you want a clean session, pair one beginner move, one mid-level move, and one harder hold. A sequence like pelvic tilts, heel slides, and double-leg lowers is a lot more useful than throwing yourself straight into the fanciest variation in the room.
One last thing: if a move keeps sending everything into your hip flexors or low back, scale it down without apology. That is not a downgrade. It’s how stronger, cleaner core work gets built.
