



The phrase “belly fat exercises after C section recovery” sounds tidy on paper. The body you get back after surgery rarely feels tidy. It feels soft in places, tight in others, and oddly disconnected in the middle — like your abs and your lower back are having a private argument you were not invited to.
That’s why the usual advice to “just do more crunches” is poor advice here. A C-section is abdominal surgery. The incision, the deep tissue layers, the pelvic floor, and the way you breathe all matter, and they matter together. If your midline domes when you move, if your incision tugs, or if a move leaves you feeling sore in a sharp, wrong way, that is your signal to back off. Not to push harder.
A smarter approach is slower and, frankly, more useful. Start with breathing and deep-core control. Layer in hips, glutes, and standing strength. Then add walking and light resistance so your body can burn more energy without feeling punished. The visible belly changes people want usually come from that combination, not from one magic ab move done in a loop until you’re exhausted.
If you have not been cleared for exercise yet, wait. If you have heavy bleeding, worsening pain, redness around the incision, fever, or a feeling that something is pulling open, check in with your clinician before you do anything else. Once you’re cleared, these 15 moves give you a practical way to rebuild strength, protect your core, and move toward fat loss without being reckless about it.
1. Diaphragmatic Breathing After C-Section Recovery
Start here. Not because it looks impressive — because it helps everything else work better.
When your breathing is shallow, your ribs stay locked, your belly stays braced all day, and your pelvic floor tends to hold tension where it should be sharing load. Diaphragmatic breathing changes that. You want the breath to expand into the sides and back of your ribs, then soften the belly on the exhale without forcing it flat. That last part matters. Do not suck your stomach in hard. That turns a recovery drill into a strain drill.
How to Feel the Right Muscles
Lie on your back with knees bent, or sit tall in a firm chair if lying down feels awkward. Put one hand on your lower ribs and one hand on your belly. Inhale through your nose for about 4 seconds, then exhale slowly through your mouth for 6 to 8 seconds. On the exhale, imagine your ribs narrowing and your lower belly gently drawing inward.
A good rep feels quiet. Almost boring. That’s fine.
- Do 5 slow breaths per set.
- Repeat for 2 to 4 sets spread through the day.
- Keep your shoulders relaxed.
- Stop if you feel pressure pushing down into the pelvis.
The point is to reconnect, not to burn calories in one session. But this move still matters for weight loss workouts after C-section recovery because a calmer, better-functioning core makes the rest of your training cleaner. And cleaner training usually means you can do more of it, which is where the real change starts.
2. Pelvic Tilts on the Bed or Mat
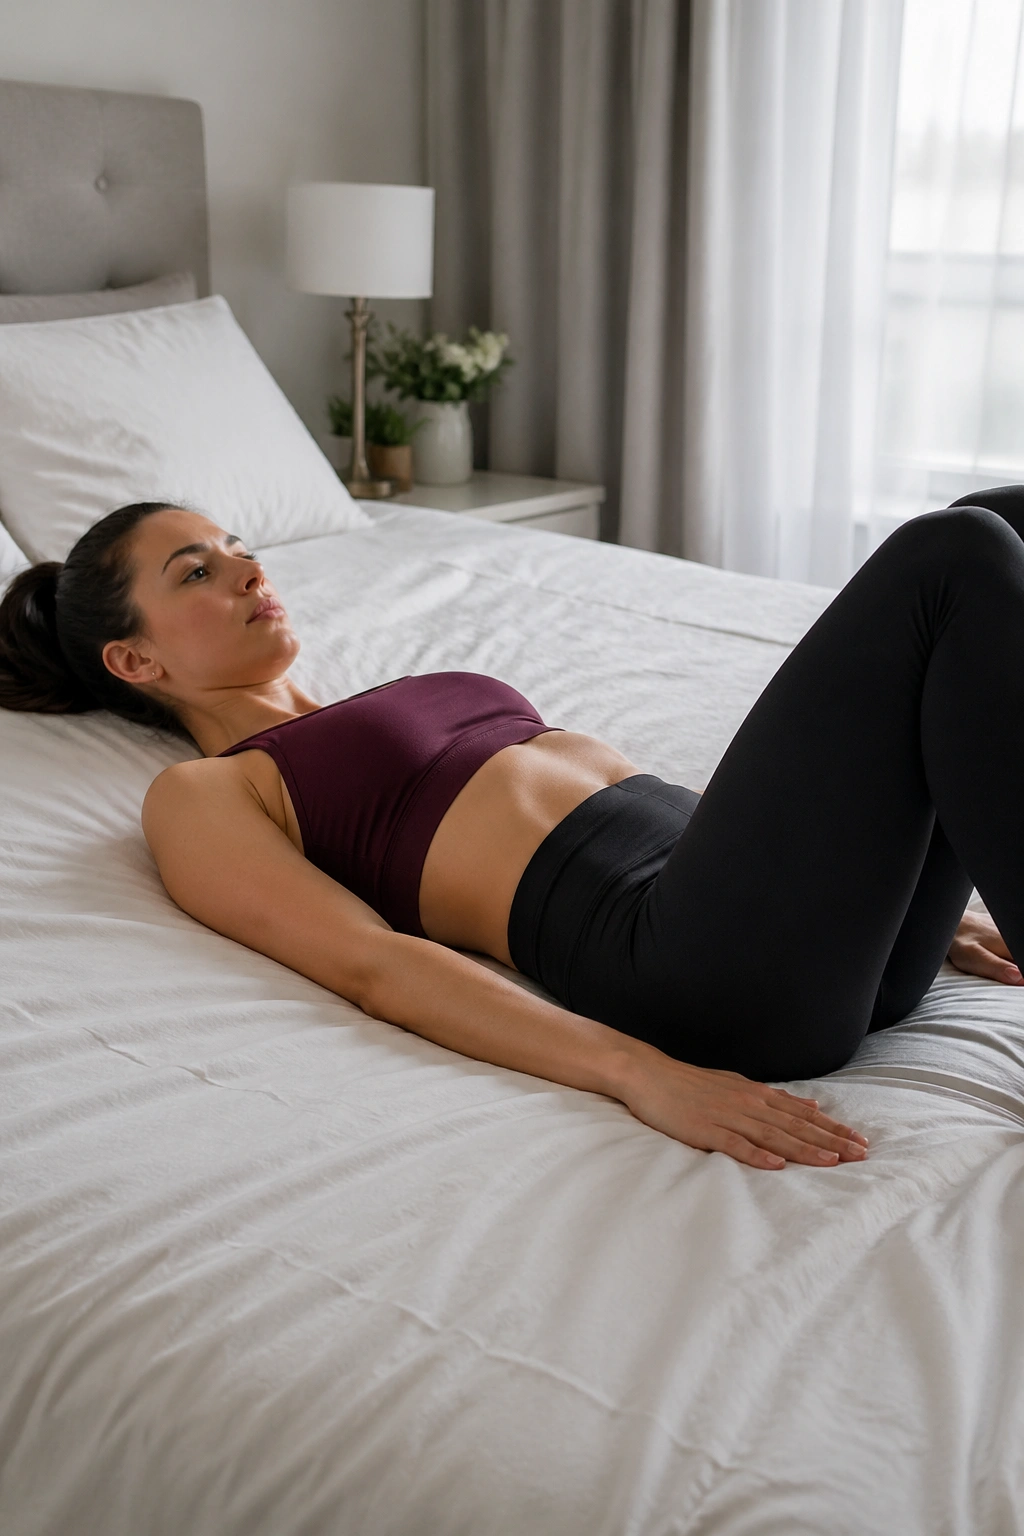
A pelvic tilt looks tiny. It is. That tiny movement can teach your lower abdomen to fire without overdoing it.
Lying on your back with knees bent, gently flatten your lower back toward the bed by tipping your pelvis backward. Then release to a neutral curve. Think of the motion as about one inch, not a dramatic crunch. If you feel your incision pulling, shrink the range even more. If you feel doming along the center line, you’re moving too aggressively.
This is one of those postpartum core exercises that people skip because it seems too simple. Bad call. Pelvic tilts help restore control between the rib cage and the pelvis, and that control is a big piece of what makes the belly look and feel firmer over time. They also calm the lower back, which tends to complain when the abs are still asleep.
Do 8 to 12 slow reps and rest. Keep the exhale long on the tilt and let the inhale bring you back to neutral. You’re training precision here, not speed.
No bouncing. No squeezing the glutes like crazy. Just a controlled tilt, a pause, and a return. If you only have energy for one floor move on a rough day, this is a solid pick.
3. Heel Slides for Deep Core Control
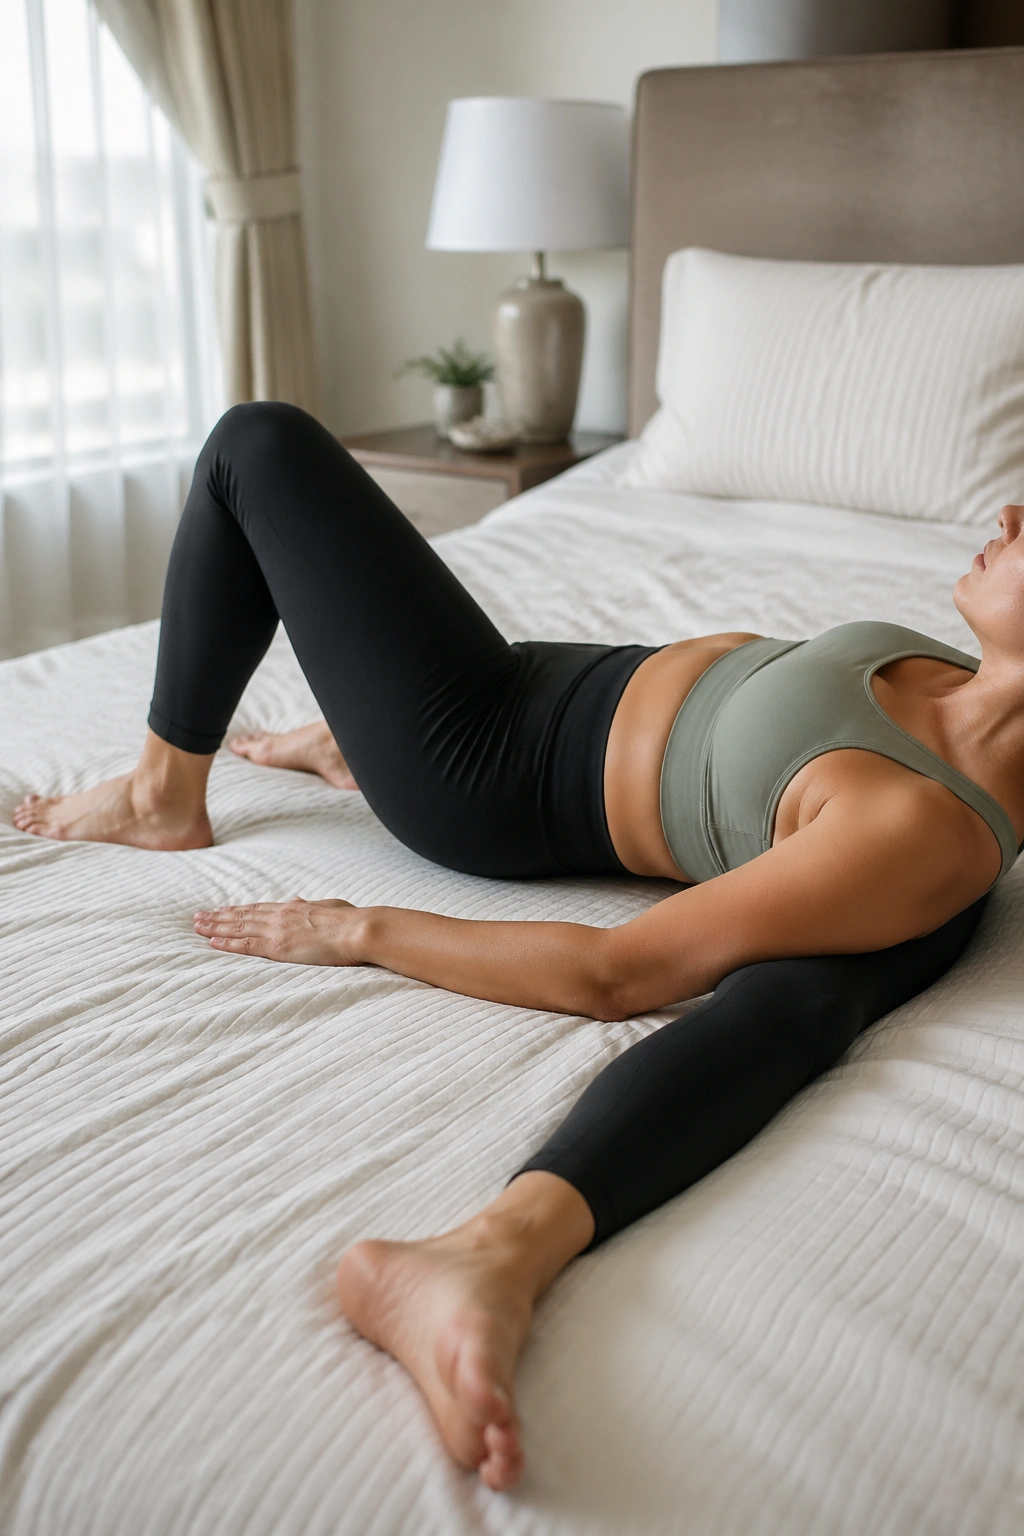
Why does a heel slide matter when you cannot imagine doing a full ab workout yet? Because it teaches the core to hold steady while the legs move.
That is the whole game after surgery. Your body has to relearn stability before it can handle harder work. With heel slides, you lie on your back with knees bent, slowly slide one heel away from your body, then bring it back. The belly should stay quiet. The ribs should not pop up. The back should not arch.
How to Use It
Start with 6 to 8 slides per side. If your midsection domes, shorten the slide to just a few inches. If one side feels harder than the other, that is normal. Most people have a favorite side and a lazy side, especially after weeks of guarding the incision.
A few cues make this move a lot better:
- Exhale as the heel slides away.
- Keep the movement smooth, not jerky.
- Press the opposite foot lightly into the mat for extra control.
- Stop before the lower back lifts.
Heel slides are a quiet kind of hard. They do not leave you panting, but they ask your deep core muscles to wake up and stay online while your leg moves. That is useful for walking, standing, lifting a baby seat, and all the other real-life things that happen between workouts.
4. Glute Bridges to Wake Up the Back Side
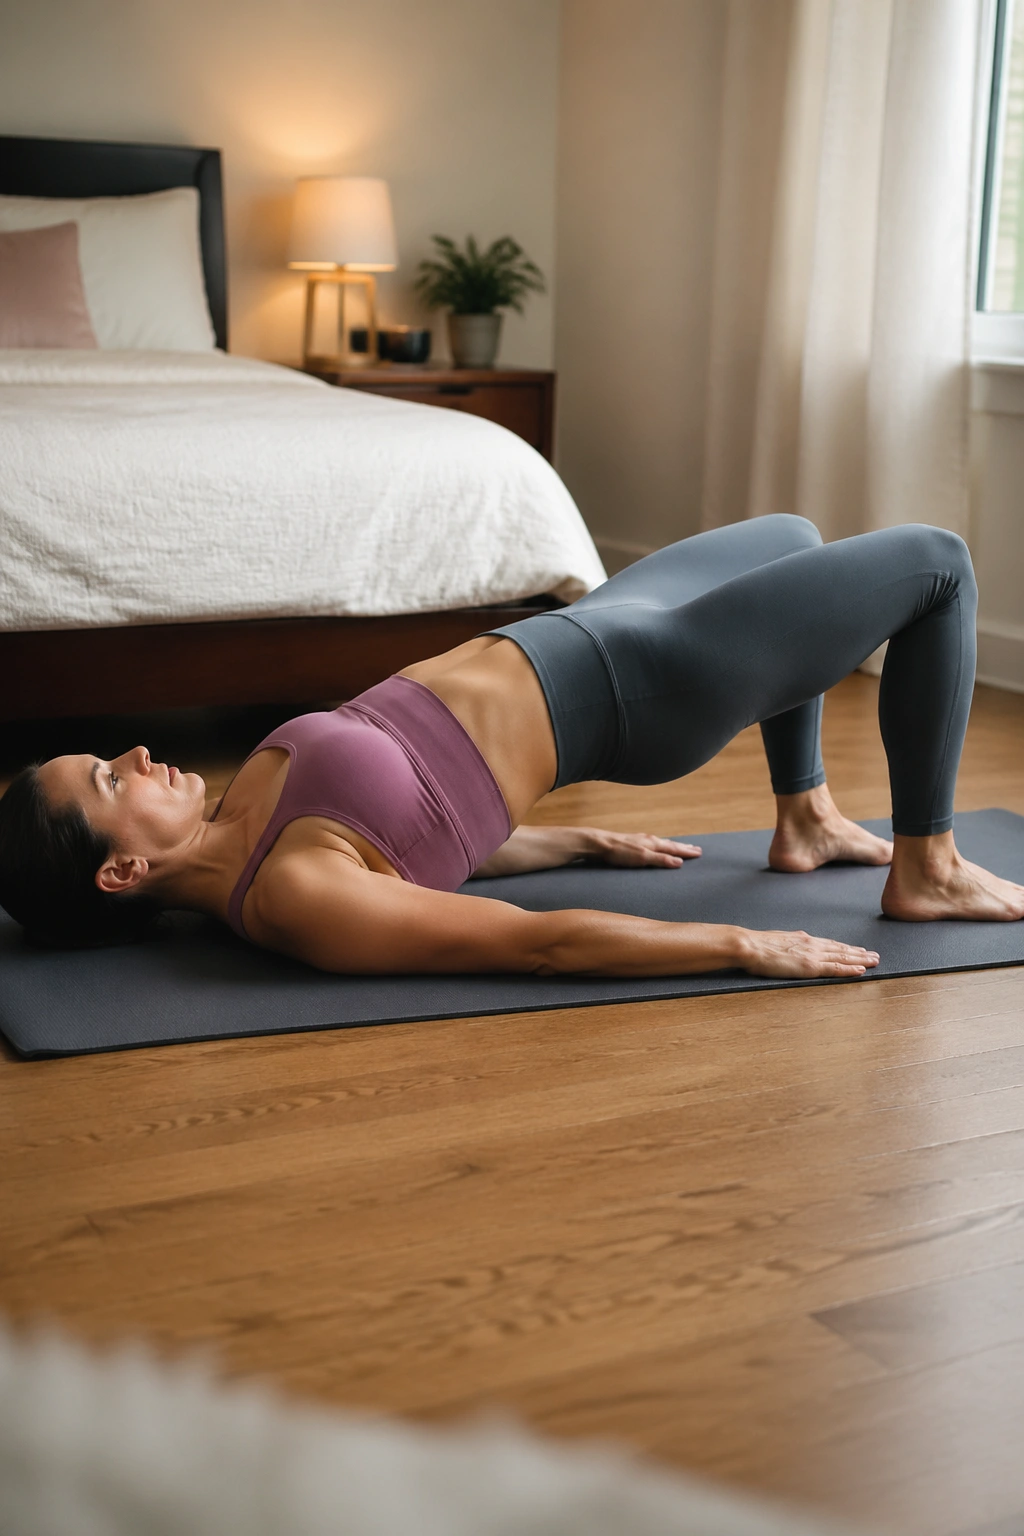
If your lower belly feels weak, your hips are often part of the problem.
Glute bridges bring the backside back into the picture. Lie on your back with knees bent, feet flat, and heels about a foot from your hips. Exhale, press through your heels, and lift your hips until your shoulders, hips, and knees make a straight line. Then lower with control. The movement should feel strong in the glutes, not jammed in the lower back.
This is where a lot of people get sloppy. They throw the hips up too high, arch the spine, and call it done. Nope. Keep the ribs stacked over the pelvis. Think “lift from the hips,” not “crank the spine.”
- Start with 2 sets of 8 to 10 reps.
- Pause for 1 to 2 seconds at the top.
- Keep the knees tracking forward, not falling wide.
- If the floor feels too low, do a smaller bridge on the bed.
The reason this helps a belly-fat goal is simple: stronger glutes support better walking, better posture, and better training capacity. A stronger backside also takes load off the low back, which lets your core do its job instead of bracing for dear life all day.
5. Marching Bridges for Anti-Rotation Strength
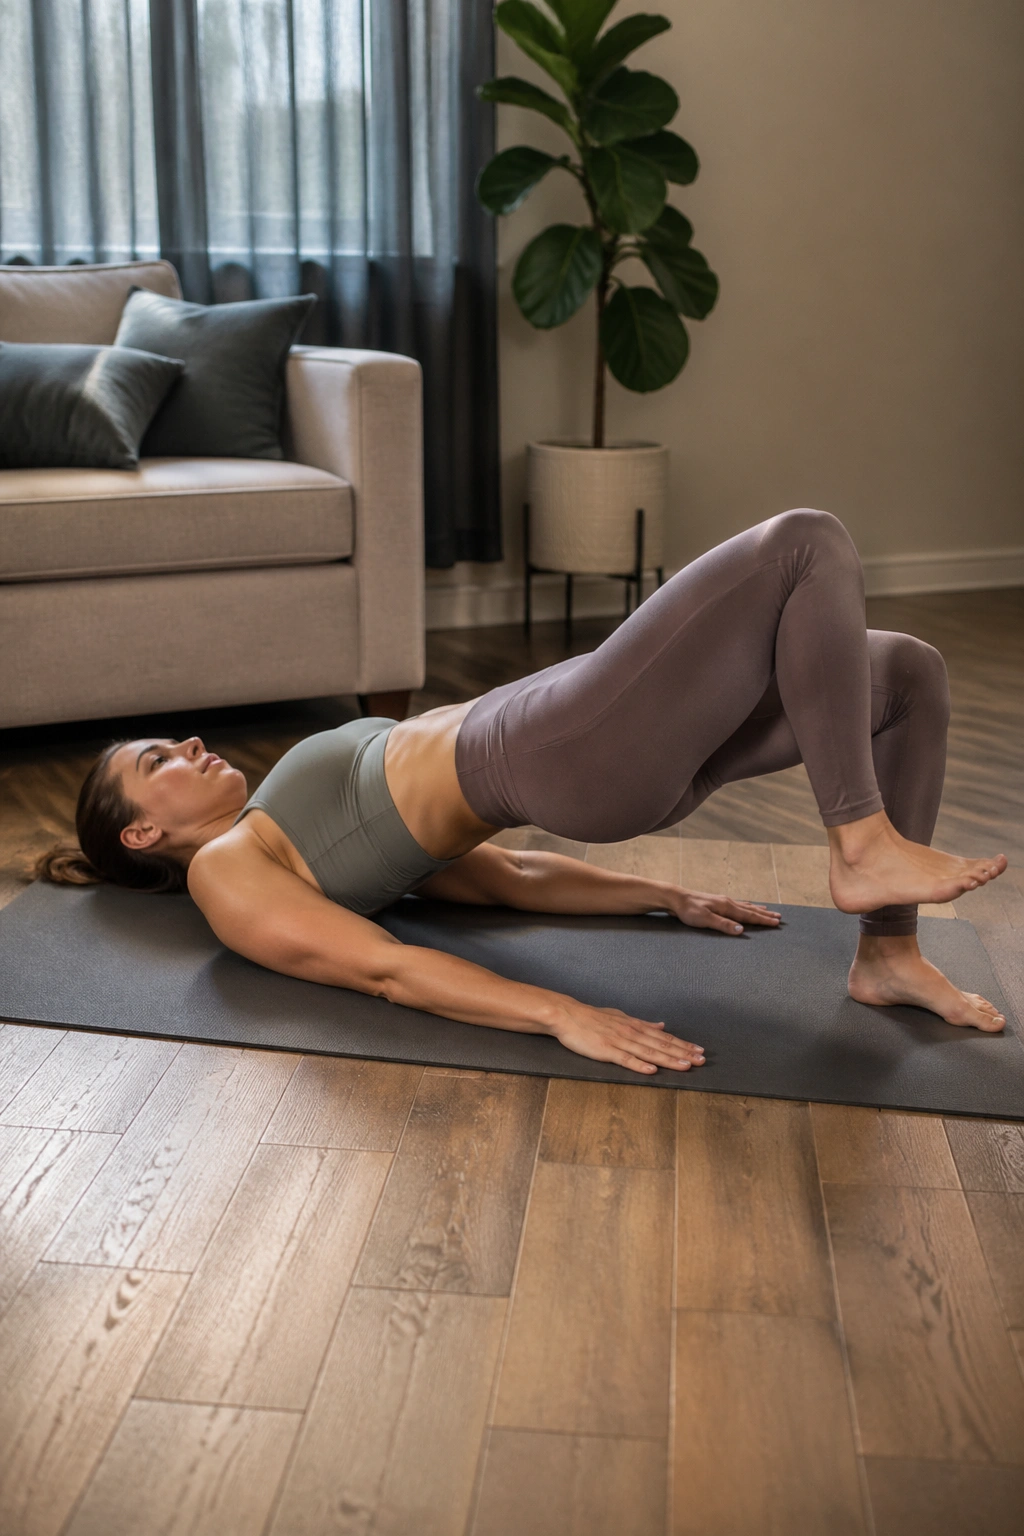
This move is the point where your core starts acting like a real team instead of a bunch of separate parts.
Begin with a normal bridge. Once you’re lifted and steady, hold the hips level and slowly lift one foot an inch or two off the floor, then set it down and switch sides. The challenge is not the lift itself. The challenge is keeping the pelvis from rocking side to side like a boat on a rough lake.
A lot of people discover their weak side here. Good. That feedback is useful.
What to Watch For
- If your hips drop, shorten the hold.
- If your belly domes, go back to regular bridges.
- If you feel strain in the incision, skip the march and build more bridge strength first.
Do 5 to 6 marches per side after 8 steady bridges. Keep the pace slow enough that you can control every inch. This is one of the better exercises for rebuilding the kind of core stability that supports standing, carrying, and twisting without that fragile feeling in the middle.
I like this move because it feels grown-up. Not flashy. Just effective.
6. Bird Dog on Hands and Knees
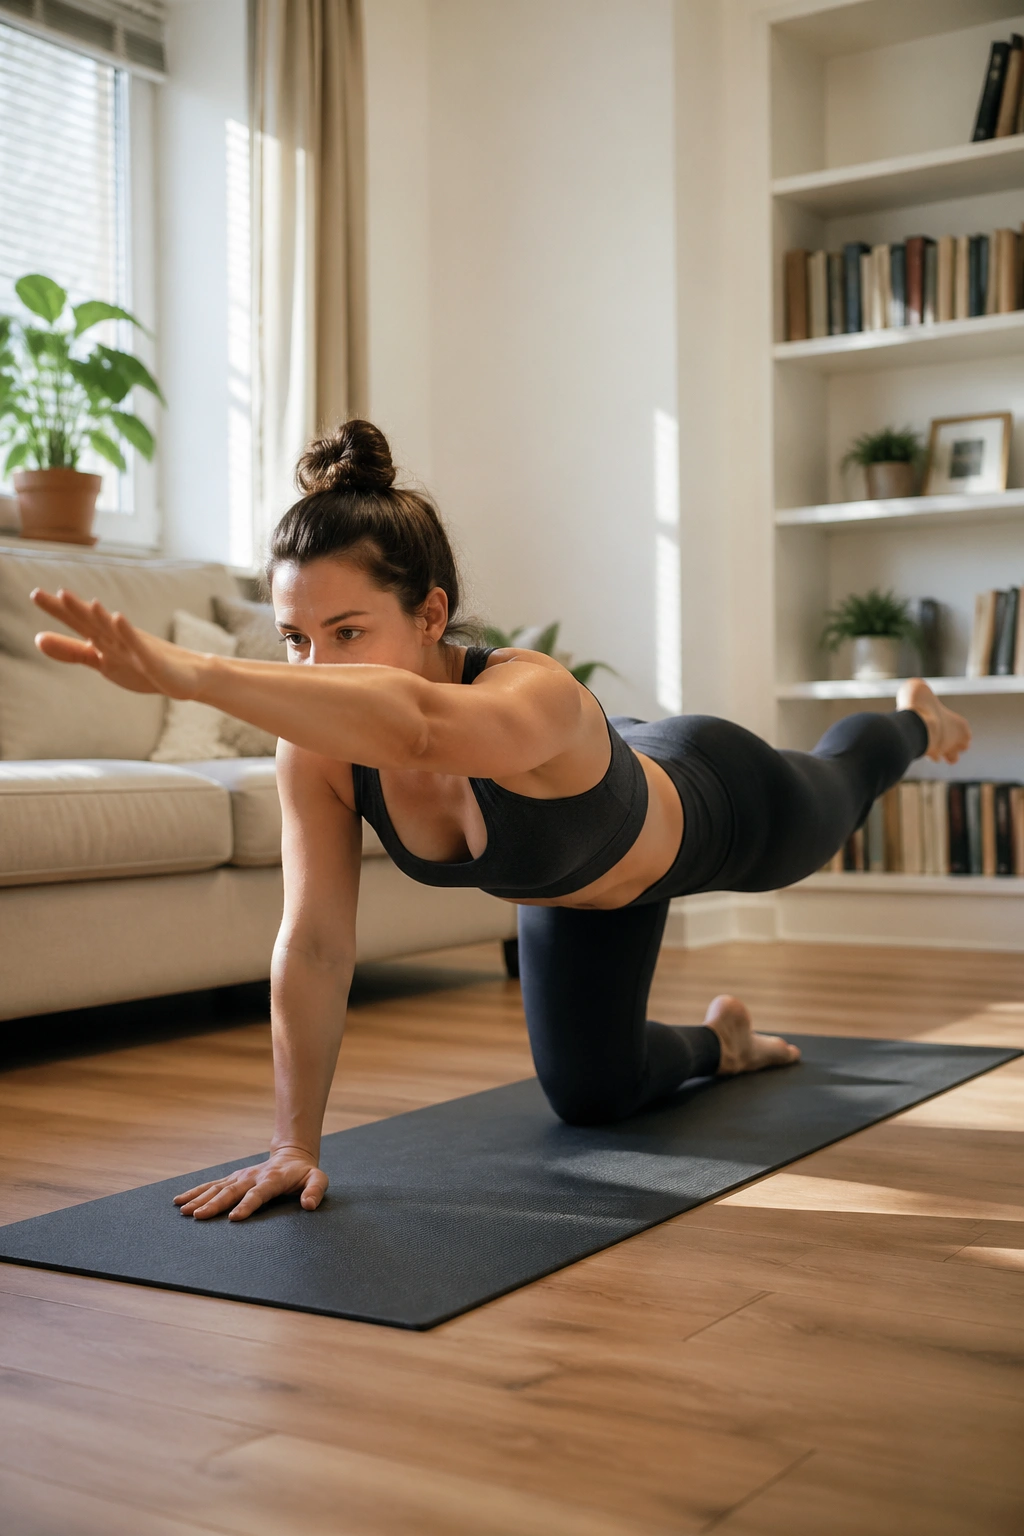
Bird dog looks simple, and then it gets honest fast.
On hands and knees, reach one leg straight back while the opposite arm reaches forward. The goal is not height. The goal is a long, steady line from fingertips to heel without the ribs flaring or the belly sagging toward the floor. If the full version feels like too much, start with just the leg or just the arm.
That small adjustment saves a lot of frustration.
Post-C-section recovery often leaves the front of the body cautious and the back of the body underused. Bird dog helps both. The deep core has to keep you from twisting, and the glutes have to keep the lifted leg from throwing the pelvis off balance. It is a sneaky little strength move.
How to Make It Feel Stable
Use a folded towel under the knees if the floor is hard. Exhale as you extend. Hold for 2 to 3 seconds, then return with control. Do 6 reps per side at first.
One useful cue: imagine a glass of water on your lower back. Don’t spill it. That image is better than trying to “tighten your core” because it tells you what to do, not just what to feel. If your incision still feels sensitive in quadruped position, stay on a higher surface or skip this until it feels less awkward.
7. Modified Dead Bug With Heel Taps
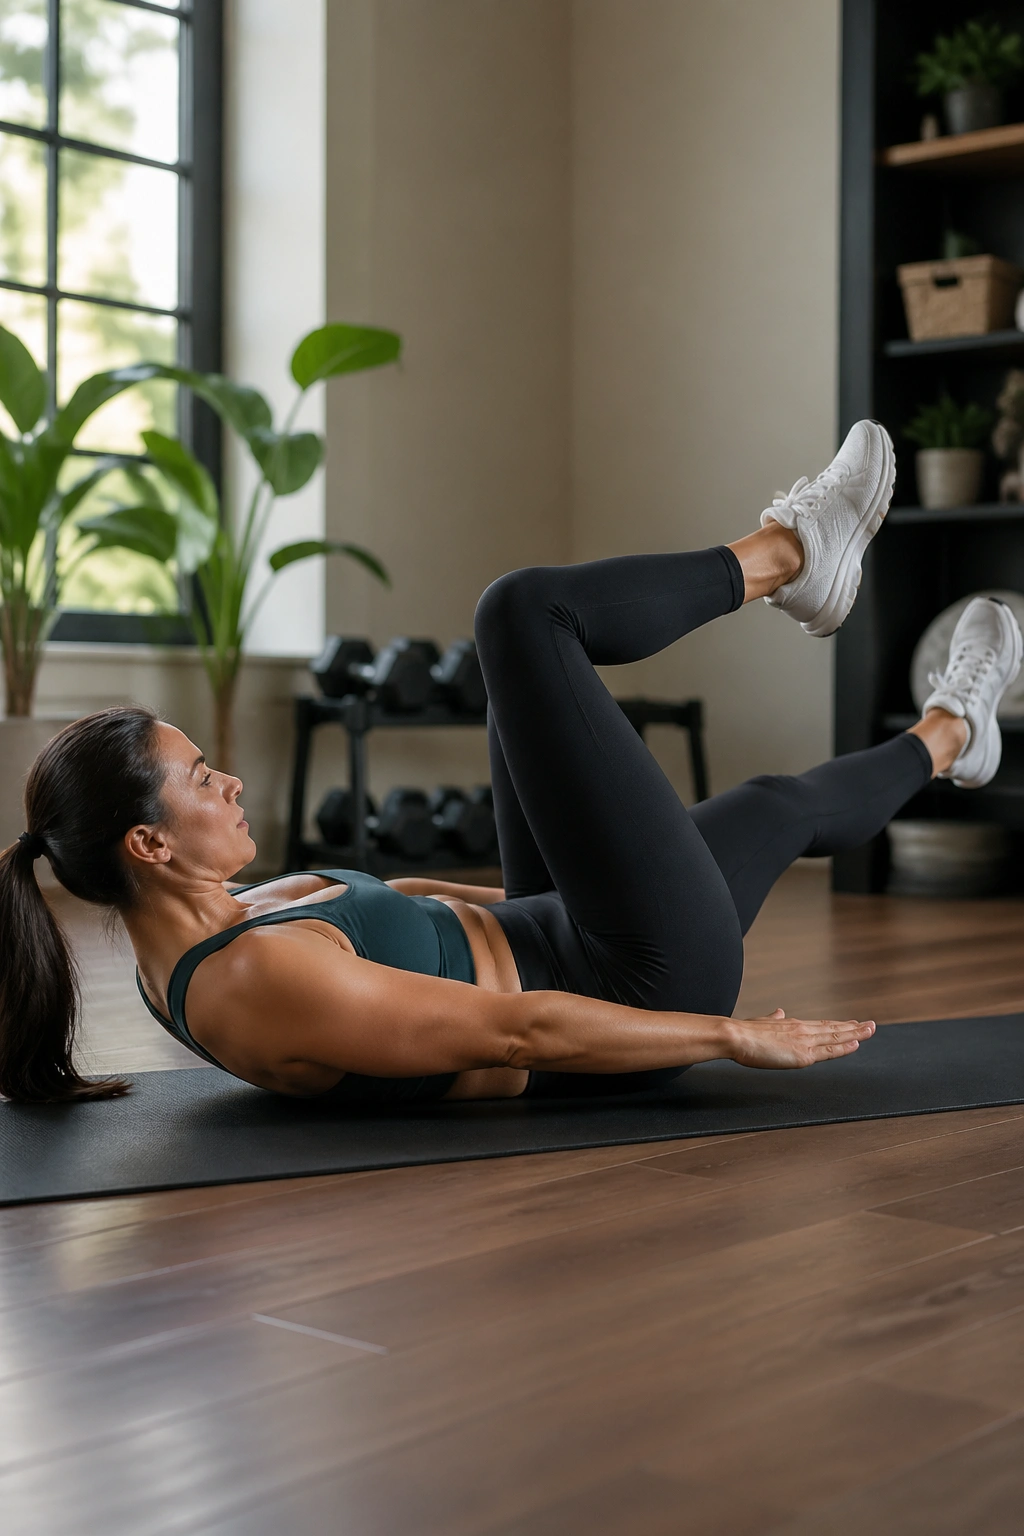
Can you do a dead bug after a C-section? Yes — but only the modified version, and only if the body is ready.
Lie on your back with knees bent. Lift one leg at a time into a tabletop position, or keep both feet on the floor and tap one heel out at a time if that feels safer. The moment your lower back arches hard or your belly pushes upward in a ridge, you’ve gone too far. The movement should look smooth, almost slow-motion.
Dead bug is one of my favorite core exercises after C-section recovery because it trains the abs to resist motion instead of collapsing under it. That matters more than endless crunches. Crunches squeeze the front; dead bug teaches control.
How to Keep the Back Flat
- Exhale before the leg moves.
- Keep the ribs heavy.
- Lower the leg only as far as you can control.
- Stop the set the second your form slips.
Do 5 to 8 reps per side. That may not sound like much. It is enough. If you feel tempted to race through it, slow down. The slow pace is where the work lives.
And yes, if you have diastasis recti — that midline separation many postpartum bodies deal with — this is usually friendlier than classic ab work. Friendlier does not mean mindless, though. Every rep still needs attention.
8. Side-Lying Leg Lifts and Clamshells
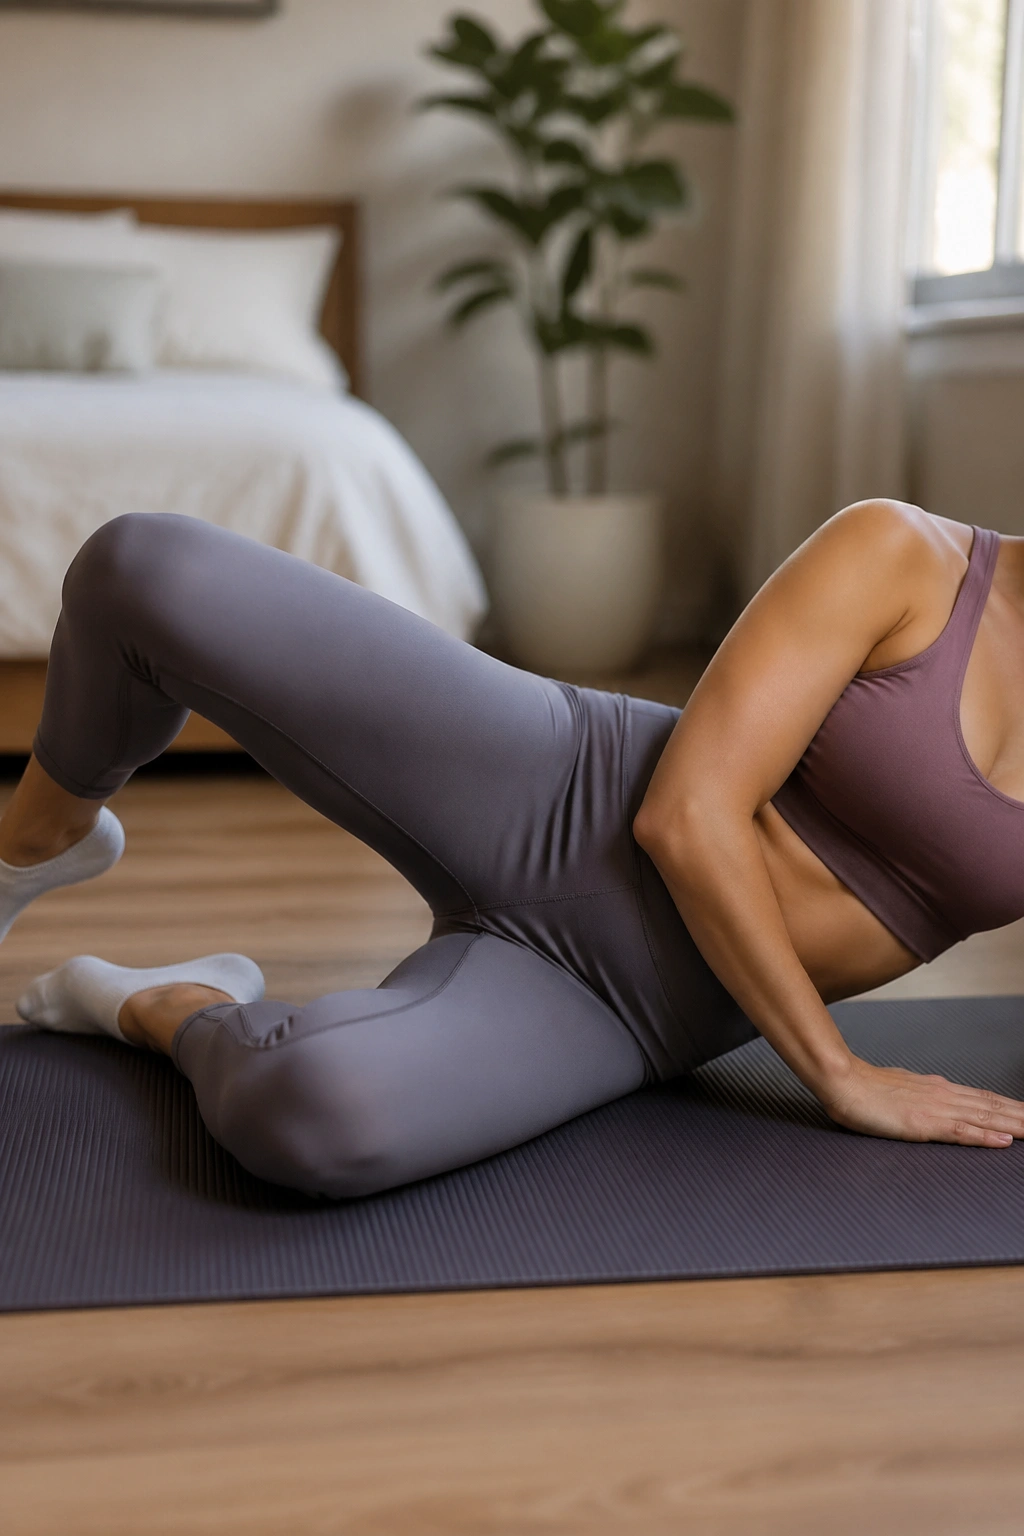
Sometimes the belly needs less direct attention and more support from the hips.
Side-lying work gives you that. Lie on one side with your knees bent for clamshells, or keep the top leg straight for a leg lift. Both versions train the outer hips, especially the glute medius, which helps stabilize the pelvis when you walk, climb stairs, and carry a baby on one side for the hundredth time.
These moves do not look like abdominal work. They absolutely matter for the midsection anyway. Weak hips make the torso work harder than it should. Stronger hips make the waist feel more anchored.
Clamshell or Straight-Leg Lift?
Use clamshells if your core still feels shaky. Use straight-leg lifts if the pelvis stays stacked and you can keep the top hip from rolling backward. Either way, move slowly.
- Do 10 to 15 reps per side.
- Pause for a second at the top.
- Keep the waist long, not scrunched.
- Use a mini-band only if bodyweight feels easy.
I like this section of the workout because it gives the abdominal wall a break while still supporting fat loss and core recovery. That’s not lazy. It’s smart training.
9. Seated Knee Lifts and Posture Reset
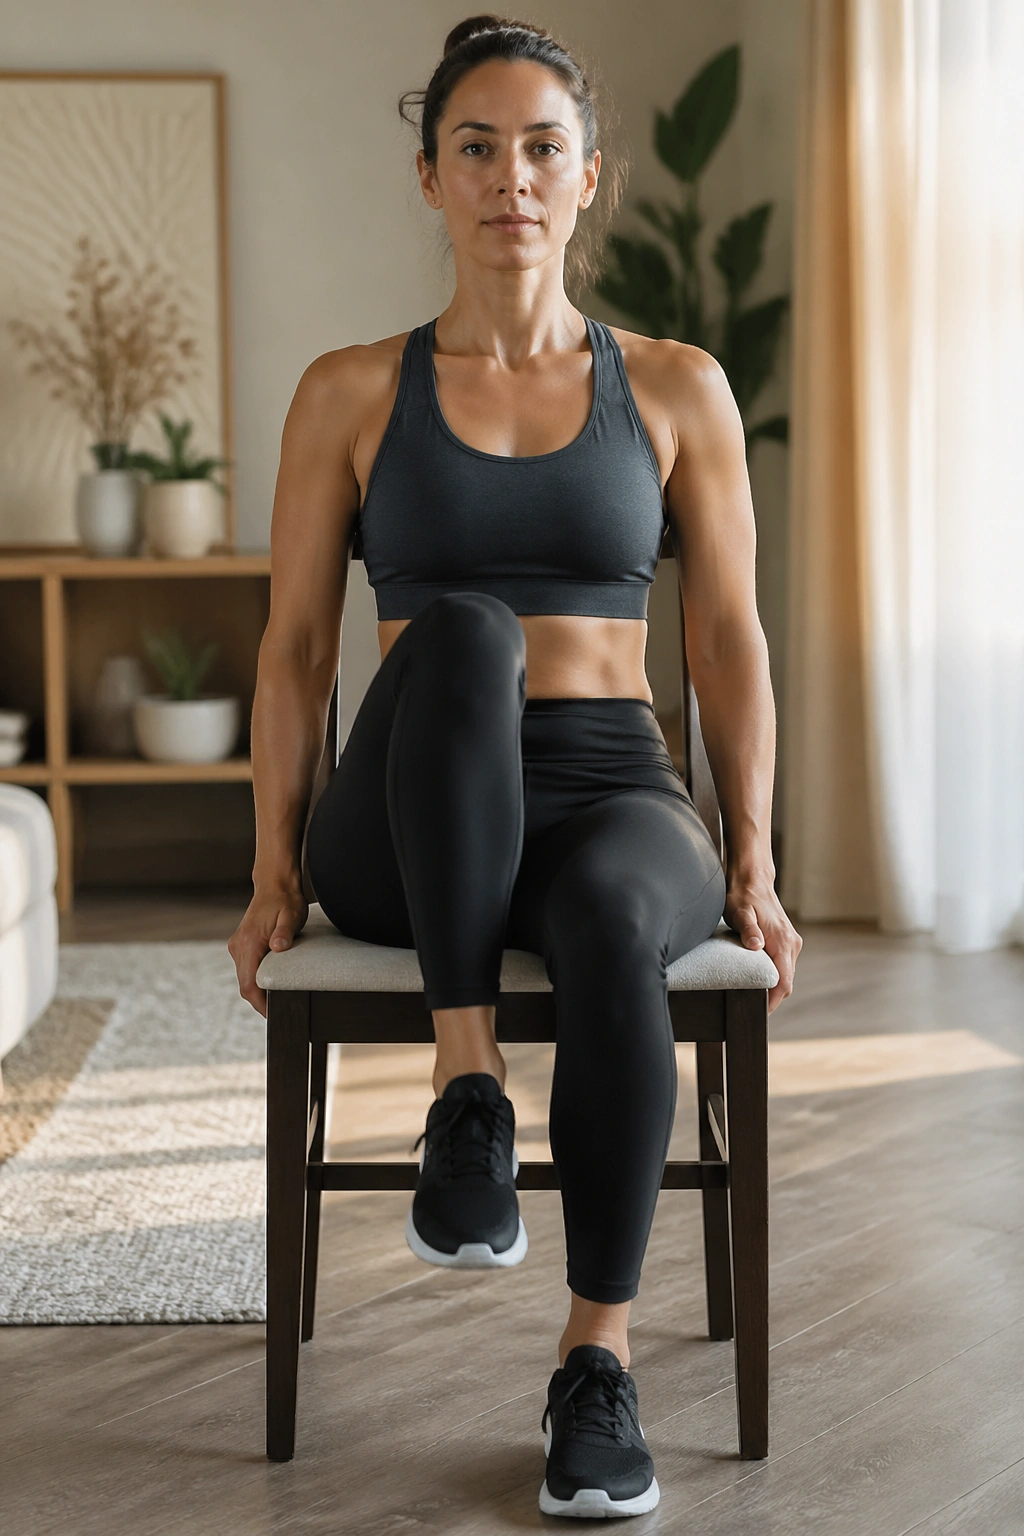
Not every good exercise has to happen on the floor.
Seated knee lifts are a clean option for the days when getting down and up again feels annoying or painful. Sit tall near the edge of a sturdy chair, feet flat, chest relaxed. Exhale and lift one knee a few inches, lower it, then switch. The work comes from keeping the torso steady while the legs move.
That posture piece matters more than it sounds. A rounded upper back and collapsed ribs make the belly look softer, even when fat loss is happening. Sitting tall resets the shape of the trunk and teaches the abs to hold you in a better position.
Try pairing the knee lift with a gentle shoulder blade squeeze. Nothing aggressive. Just enough to keep your upper body from slumping into the chair like a tired commuter.
- Aim for 10 lifts per side.
- Keep the feet grounded between reps.
- Move slowly enough that the belly does not pop outward.
This is a nice choice when you need something quiet, simple, and easy to fit into a busy day. It also works well between feeding, napping, and stroller wrangling. Real life. That’s the point.
10. Wall Push-Ups for Post-C-Section Recovery
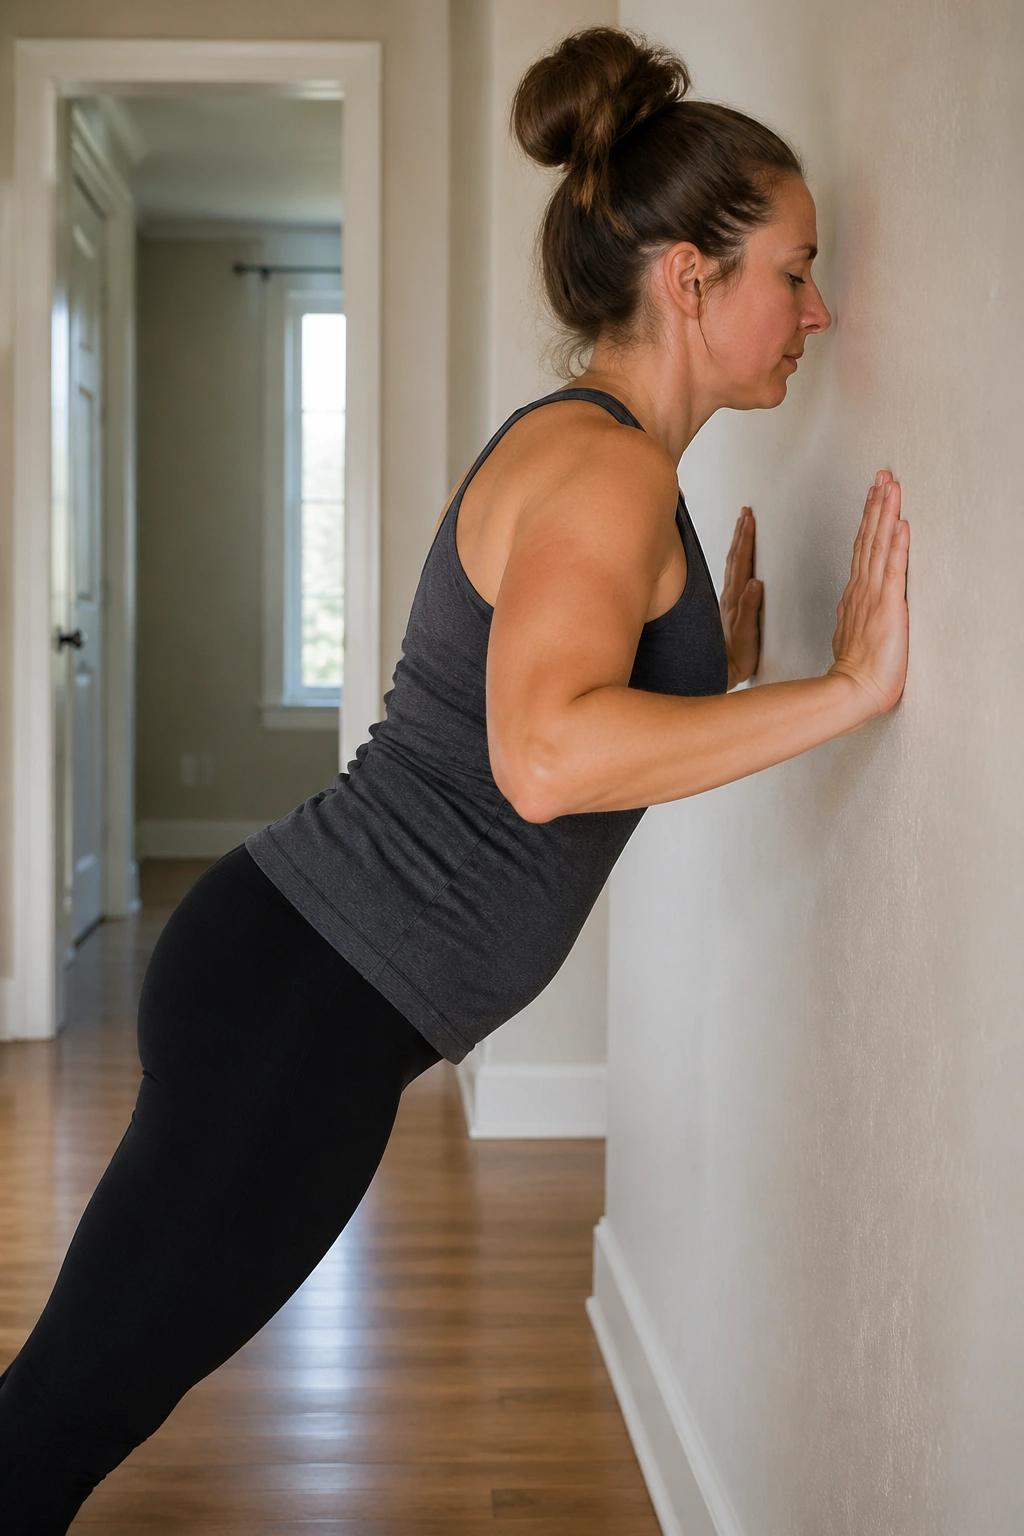
Wall push-ups are not just an arm exercise. They are a standing core drill wearing an upper-body disguise.
Stand a little farther than arm’s length from a wall. Place your hands on the wall at chest height, body in one long line from head to heels. Bend the elbows to bring your chest toward the wall, then push back. Keep your ribs from flaring and your hips from sagging. The whole body should move like one unit.
If floor push-ups feel too intense, wall push-ups are a much better place to start. They still ask the core to stay firm while the arms work, which is exactly the kind of load you want after C-section recovery. Plus, pushing motions help with everyday tasks like lifting a car seat, moving laundry, and setting a baby down without collapsing through the middle.
How to Scale It
Move your feet farther from the wall to make it harder. Move closer if you need to reduce strain. Do 2 to 3 sets of 8 to 12 reps and keep the motion smooth.
A small warning: if you feel pressure in the pelvic floor or your incision tugs, shorten the range. There is no prize for turning a wall push-up into a chest press contest.
11. Sit-to-Stand Squats From a Chair
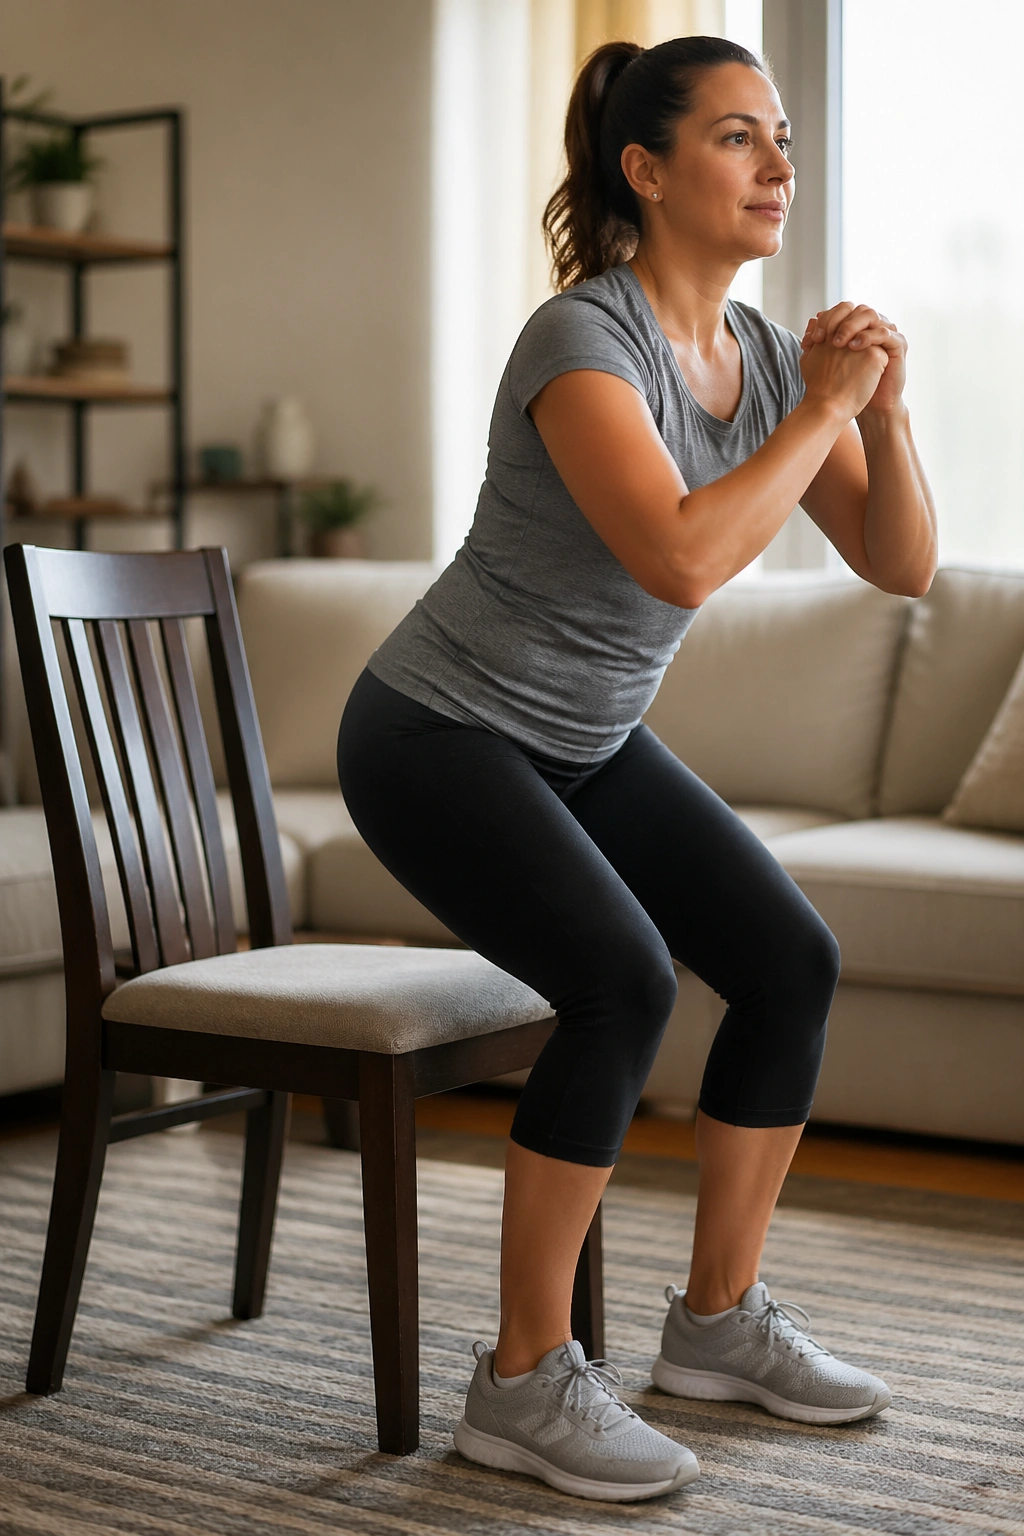
This is one of the most useful exercises in the whole list because it matches real life.
Sit-to-stand squats build leg strength, glute strength, and trunk control in a way that carries over to standing up from the sofa, the car seat, the floor, or a low couch while holding a baby. Start seated on a firm chair with feet about hip-width apart. Lean forward slightly from the hips, press through your heels, stand up, then sit back down with control.
Do not plop. The lowering phase matters.
If your belly feels tired, keep your hands on the armrests or on your thighs for support. That is fine. The point is to build strength without making your core brace so hard that your breathing gets weird.
- Start with 2 sets of 8 reps.
- Raise the chair height if needed.
- Keep knees tracking over the second and third toes.
- Exhale as you stand.
This move burns more energy than floor-based core work because it uses more muscle mass. That makes it useful for fat loss, too. Not magical. Just efficient.
12. Low Step-Ups
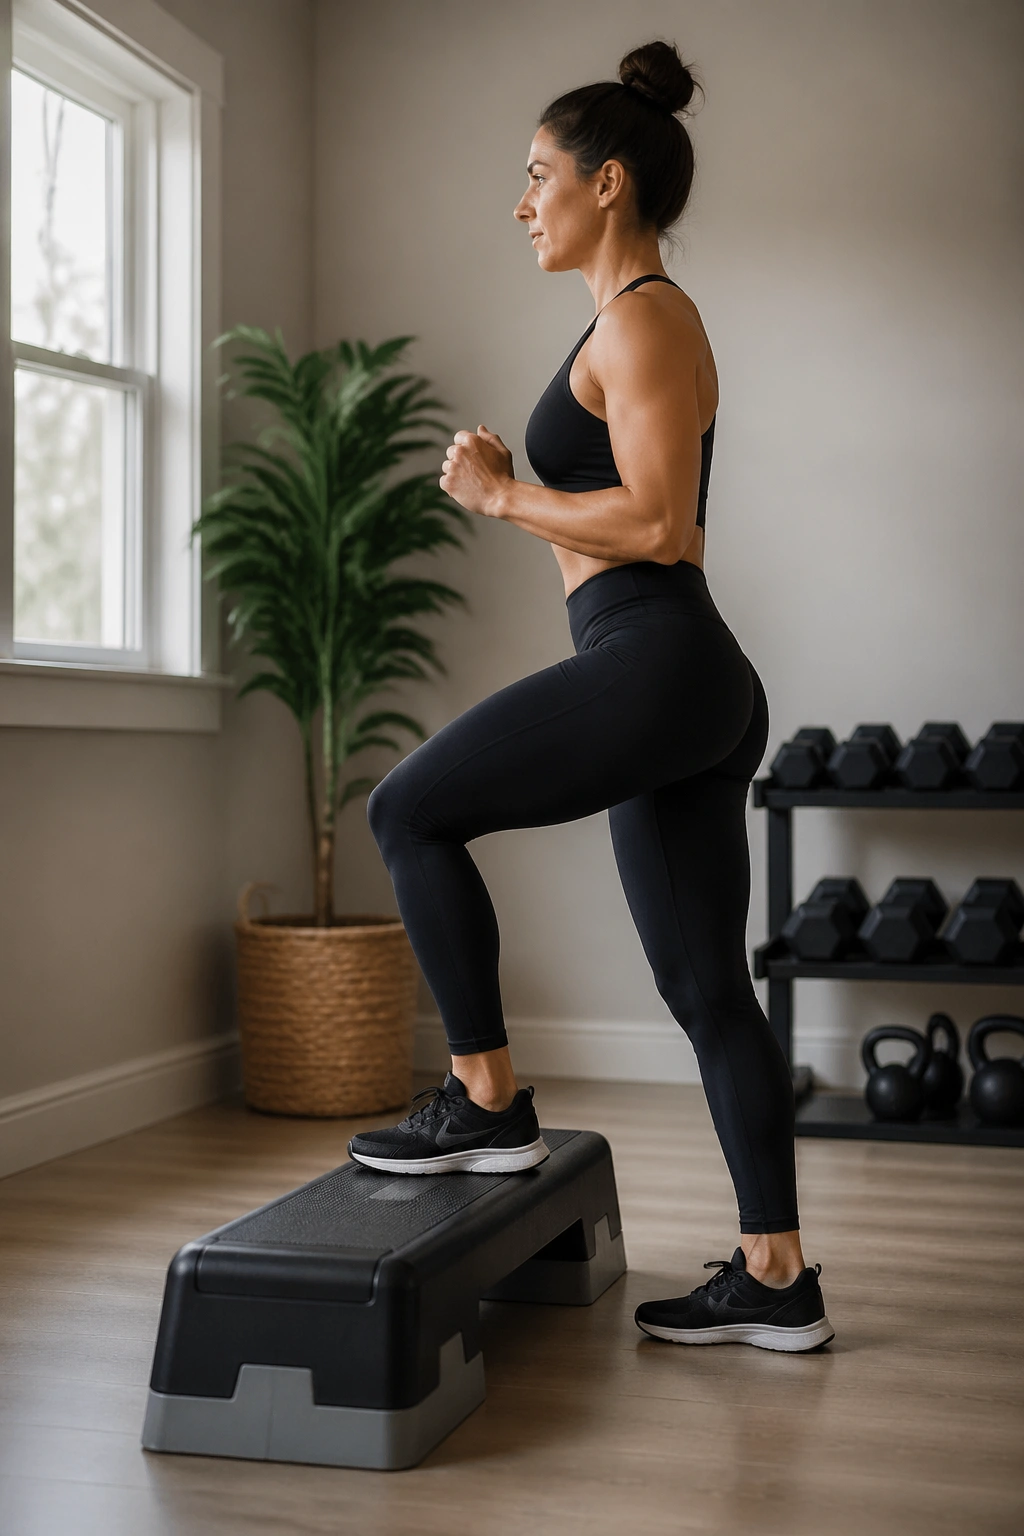
A low step-up feels ordinary. That is part of why it works so well.
Put one foot on a sturdy low step, curb, or aerobic platform. Press through that front foot to stand up, bring the other foot to meet it, then step back down slowly. The body should stay tall, with the pelvis level and the chest calm. If you rush the descent, you lose half the benefit.
Step-ups are excellent for building the kind of single-leg strength that walking and stair climbing demand. They also nudge the heart rate up without the pounding that comes from running or jumping. That matters if you want exercise that supports fat loss without irritating your healing tissues.
What Good Form Looks Like
- Front foot stays fully planted.
- Knee tracks forward, not inward.
- Torso stays slightly forward, not collapsed.
- Use a rail or wall for balance if needed.
Start with 6 to 8 reps per leg. Use a step that feels almost too low at first. You can always move up later. If your pelvis twists or your incision feels tugged, lower the height or slow the pace. The best step-up is the one you can repeat cleanly.
13. Incline Plank on a Countertop
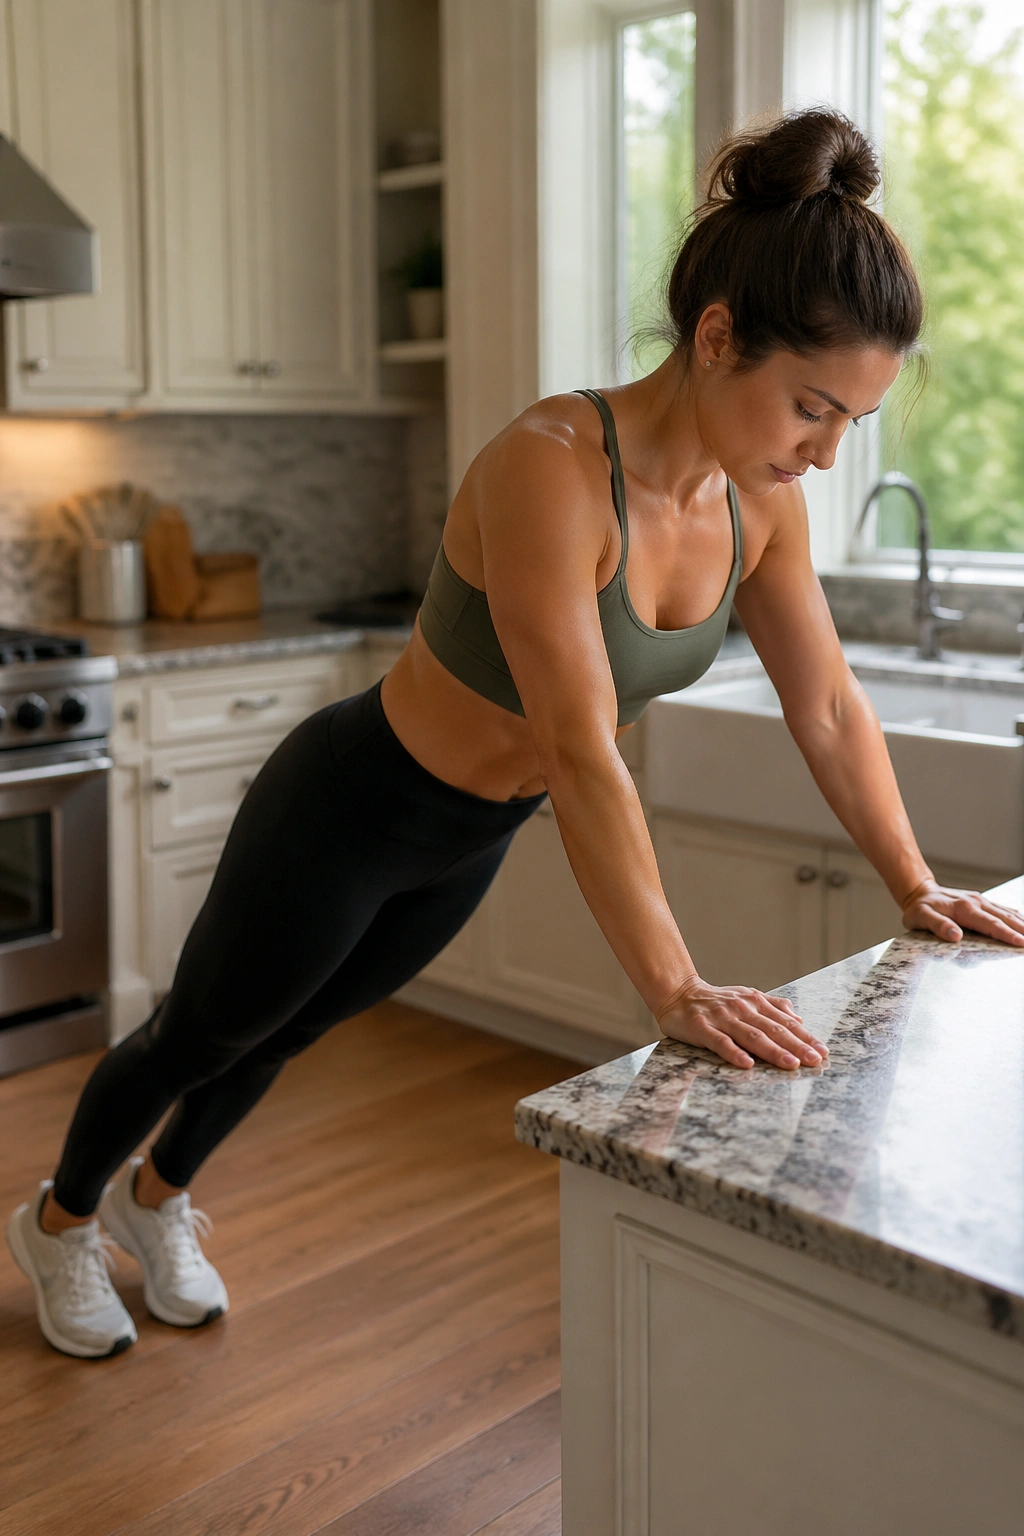
A floor plank after C-section recovery can be too much too soon. An incline plank is the smarter cousin.
Place your hands on a countertop, sturdy bench, or wall. Walk your feet back until your body forms a straight line. Gently draw the lower ribs in, keep the neck long, and breathe. If your lower belly domes, raise the surface. If the hold feels easy and stable, you’re in the right place.
I like incline planks because they teach bracing without the drama of full floor work. They also expose weak spots fast. If you can’t keep the ribs stacked, the surface is probably too low or the hold is too long.
How to Build It Safely
Hold for 10 to 20 seconds at first. Rest, then repeat for 3 to 5 rounds. If your form is solid and breathing stays smooth, extend the hold a little over time.
Do not let the hips sag.
Do not race for a longer hold if your incision still feels tender or if you notice that little midline ridge. That ridge is a message, not a challenge. Listening to it saves you from turning a good exercise into a bad one.
14. Farmer Carries With Light Weights
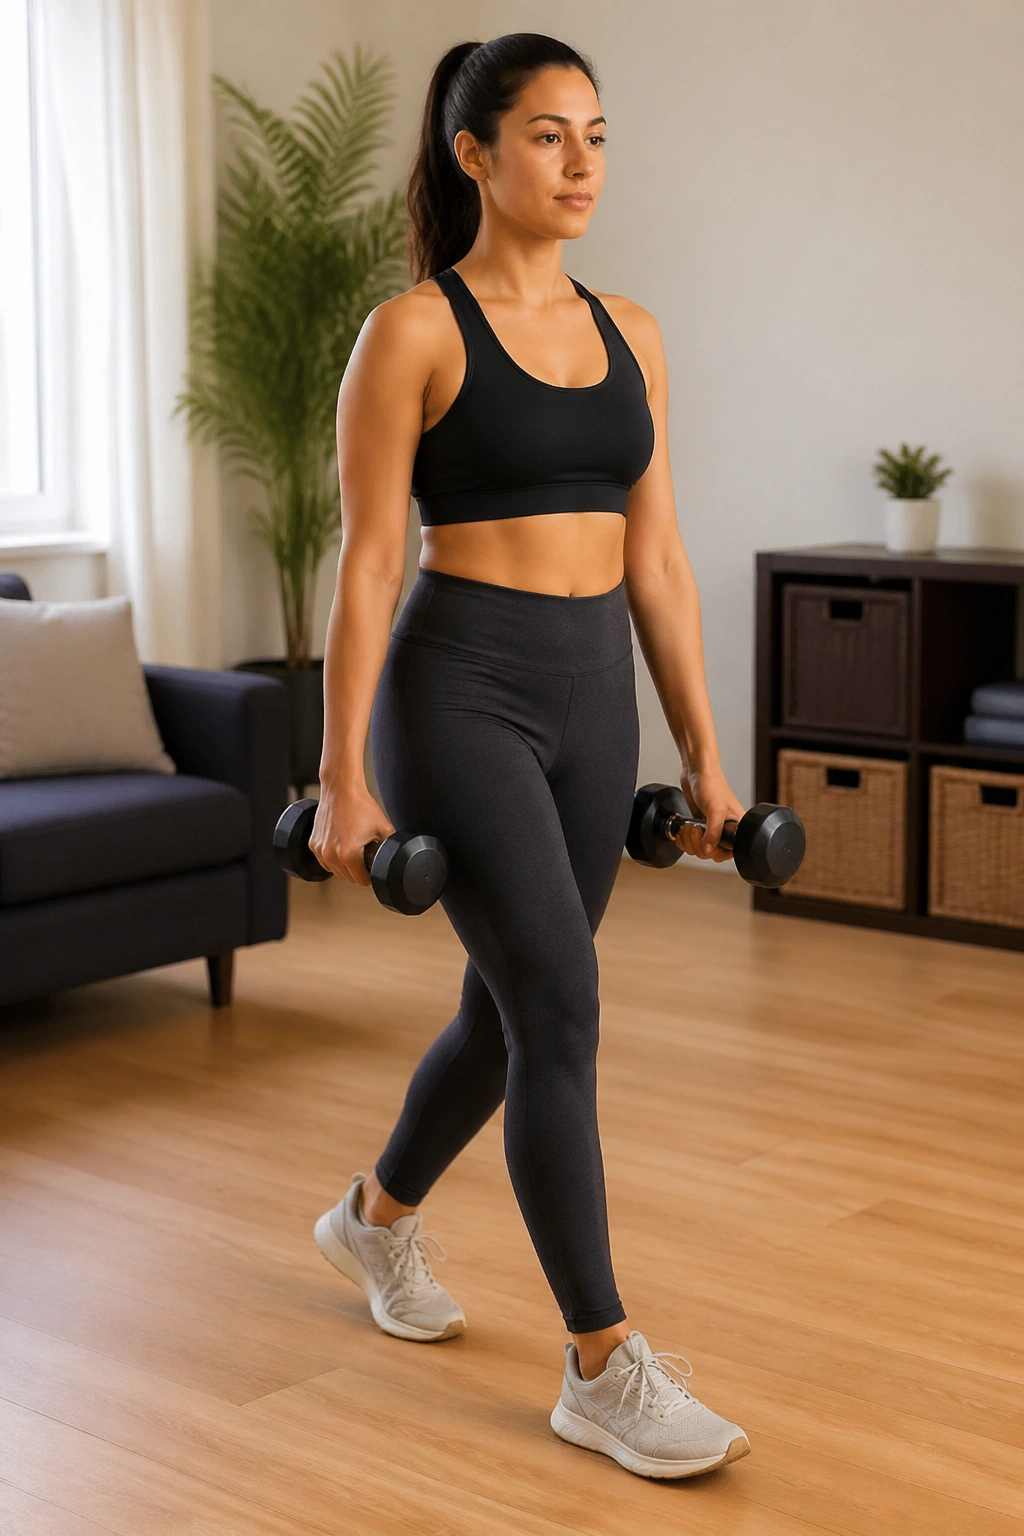
This one surprises people. Carrying weight can train the core better than some crunches ever will.
Hold a pair of light dumbbells, kettlebells, or even grocery bags and walk with good posture for a short distance. Keep the ribs stacked over the pelvis, shoulders relaxed, and steps smooth. The body has to resist side bending and twisting, which makes the core work hard in a very real way.
Farmer carries are useful because they feel like life. You carry diaper bags, laundry, groceries, and baby gear all the time. Learning to do it with better posture protects your back and helps your midsection stay organized under load.
A Few Smart Details
- Start with 20 to 30 seconds of walking.
- Keep the weight light enough that you can breathe normally.
- Turn around, rest, and repeat for 3 to 4 rounds.
- If one hand feels too awkward, keep both hands loaded first.
A suitcase carry — one weight in one hand — can come later if your pelvic floor and core feel steady. For now, two hands is plenty. The goal is control, not bragging rights.
15. Walking Intervals
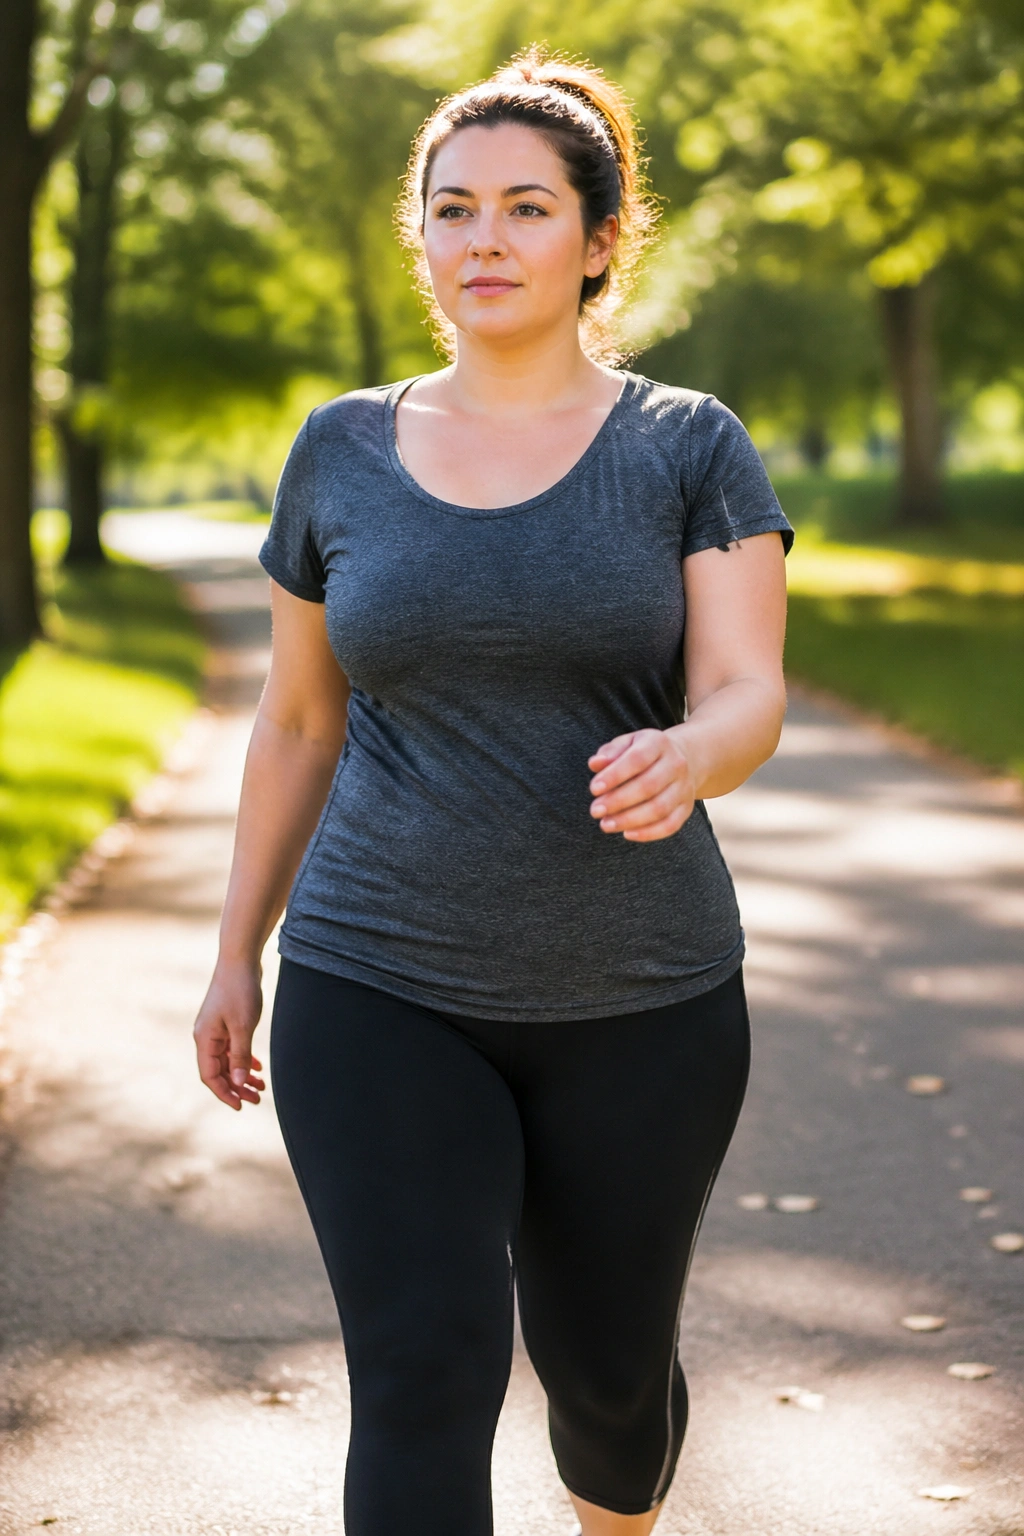
Walking is the quiet workhorse of postpartum fat loss.
You do not need to punish yourself with long, sweaty sessions to get value from it. Brisk walking raises daily energy use, helps circulation, and gives your core a chance to work in a real-life pattern: upright, breathing, moving, recovering. After C-section recovery, that matters. A lot.
Start with a simple interval pattern: 1 minute brisk, 2 minutes easy, repeated for 15 to 20 minutes. If that feels too much, begin with a steady 10-minute walk. If that feels too easy, add a stroller, a gentle hill, or a few longer brisk segments. The pace should leave you a little warmer and a little out of breath, not wrecked.
How to Put the Moves Together
A practical session might look like this:
- 5 diaphragmatic breaths
- 10 pelvic tilts
- 6 heel slides per side
- 8 glute bridges
- 6 bird dogs per side
- 8 sit-to-stands
- 15-minute walk
That is enough. Honestly, it often beats a longer workout done half-asleep and half-guarding the incision. If you can repeat that kind of session most days of the week, you will get farther than if you do one heroic workout and then spend two days recovering from the workout itself.
And that’s the part people miss. Belly fat comes off through consistency, not punishment. Keep the incision happy, keep the core honest, keep the walking steady, and let the small wins stack. That method is slower on paper. In real life, it holds up.
Final Thoughts
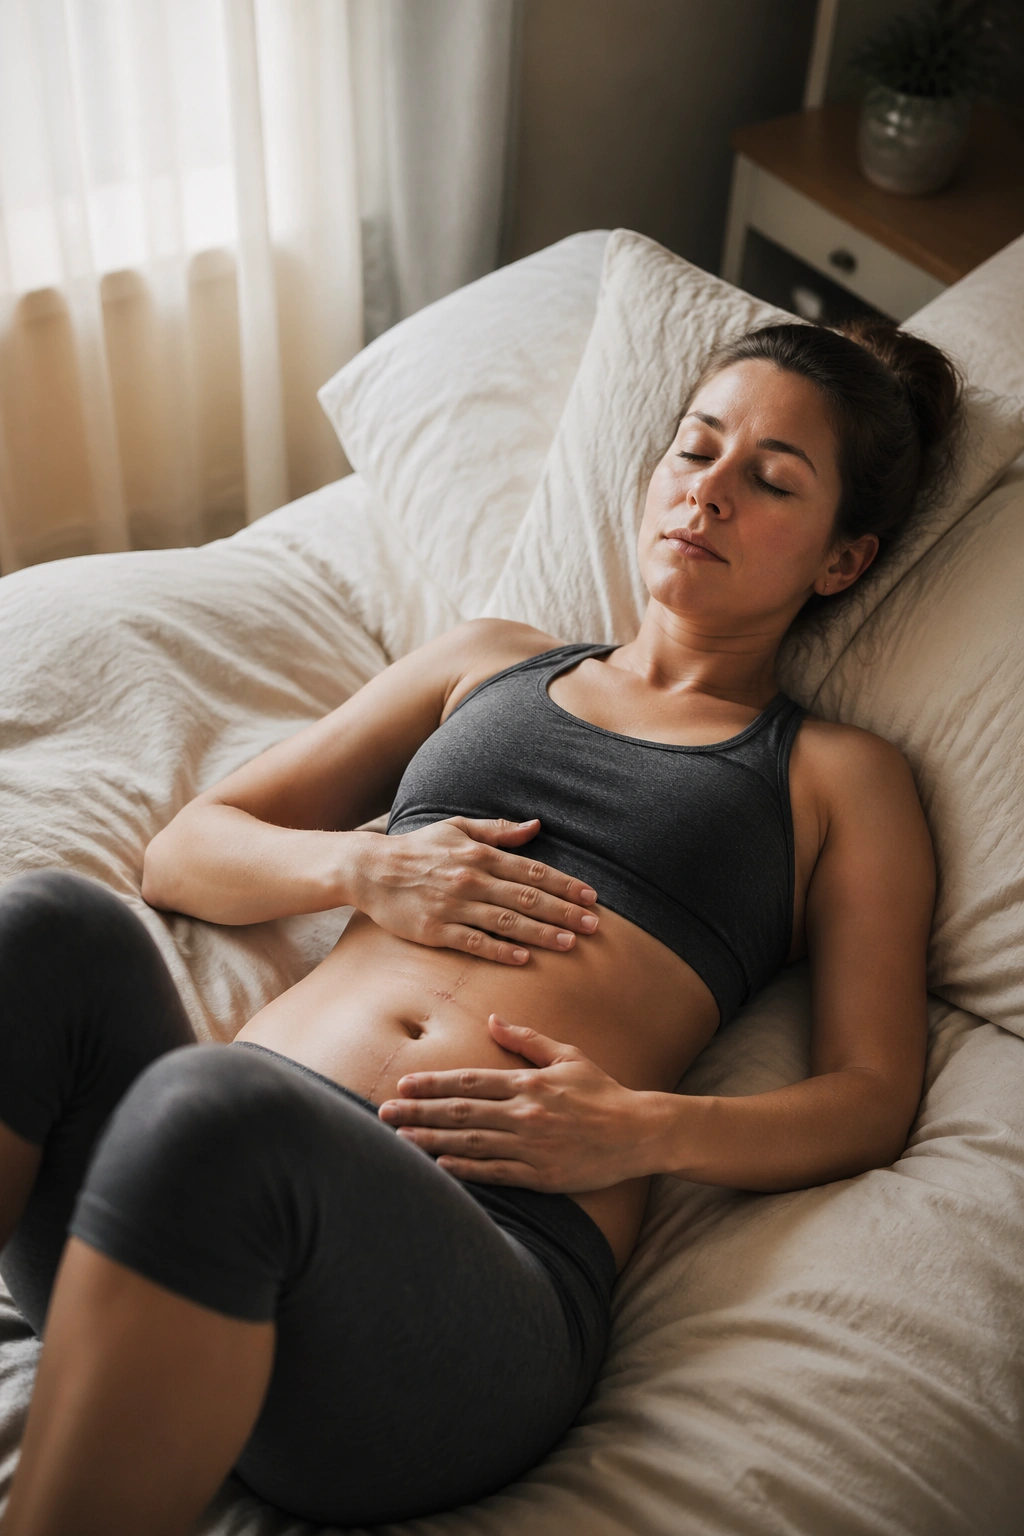
The safest C-section recovery workouts are usually the least dramatic ones at first. Breathing, pelvic control, hips, standing strength, and walking do more for your waistline than a pile of rushed ab work ever will.
If one move causes doming, pulling, or a sharp tug near the incision, back up a step. That is not failure. That is pacing. The people who do best with postpartum belly fat exercises are usually the ones who can be patient for long enough to build a body that feels sturdy again.
