



A weak backside shows up in boring ways first. The chair feels lower than it used to. Stairs ask for more effort. A long walk leaves your hips tight instead of free.
Pilates glute moves for women over 50 are useful because they train the muscles that keep you steady, not just the muscles that look nice in a mirror. The glute max helps you stand, climb, and rise from a chair. The glute med keeps your pelvis from wobbling when you step onto one leg, which matters more than most people think.
The catch is that a lot of classic “butt exercises” turn into lower-back work or hamstring work if the form gets sloppy. I see this all the time: people lift higher, squeeze harder, and end up feeling everything except the glutes. Small, careful reps usually beat big flashy ones. Much better.
Start on the floor. Then earn the standing work.
1. Mat Glute Bridge
If you only had room for one move, this would be the one I’d keep.
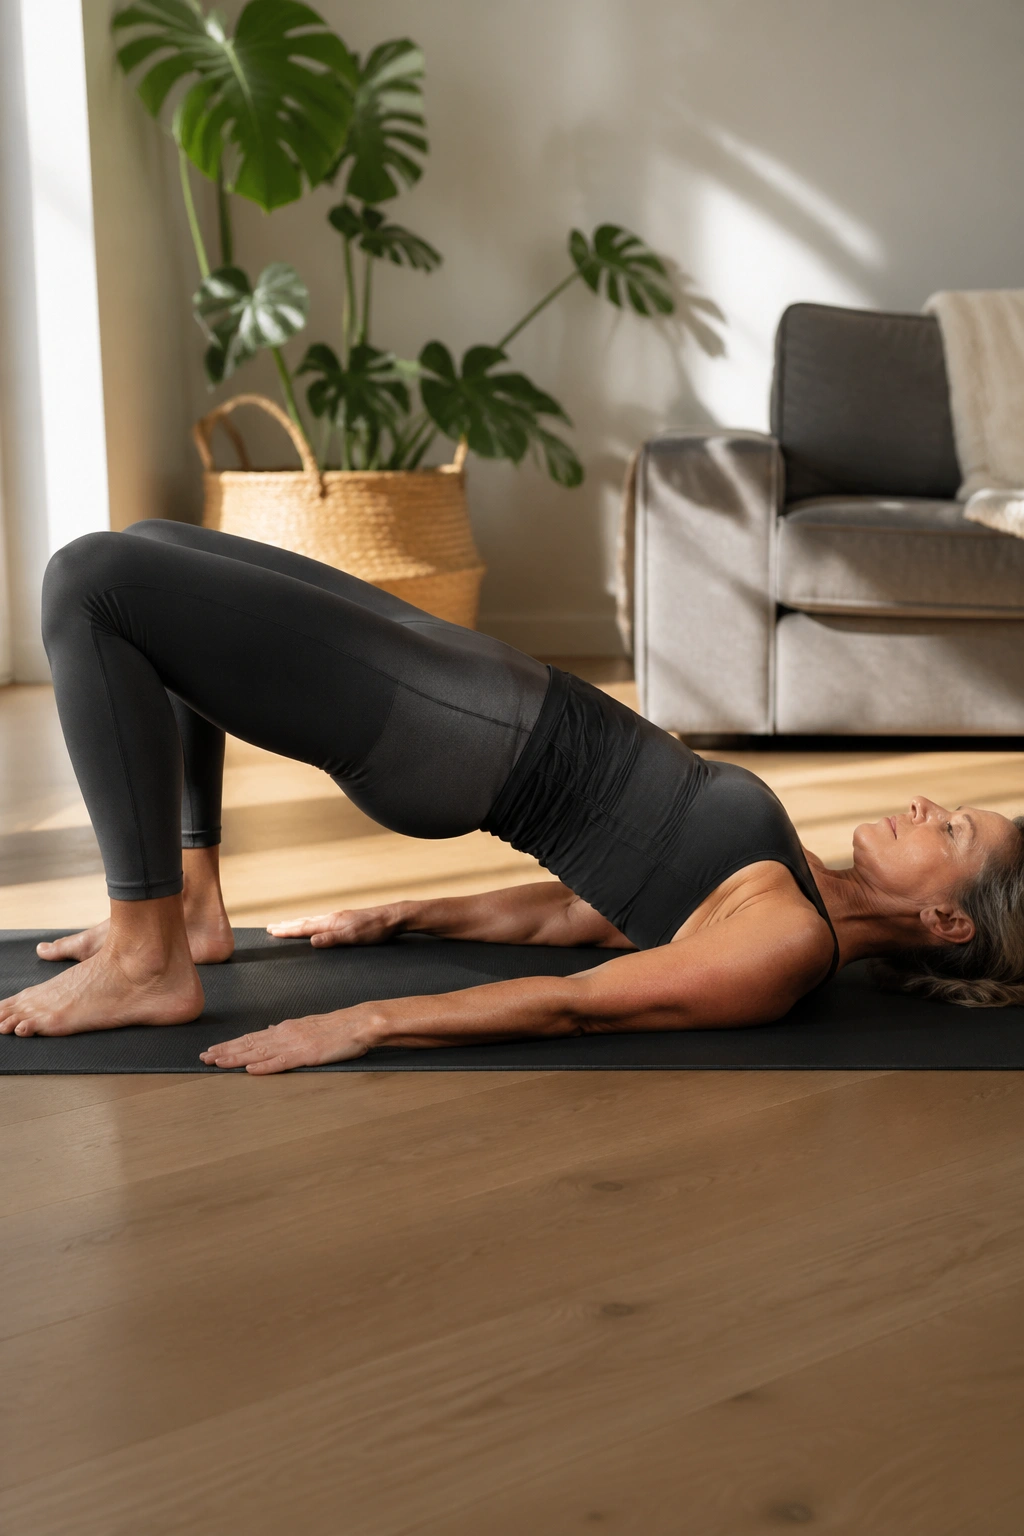
The mat glute bridge is simple, but simple does not mean easy. Lie on your back with your knees bent and feet flat, about hip-width apart. Press through your heels, lift your hips until your body forms a long line from shoulders to knees, then lower with control. You should feel the work in the back of the hips, not a cramp in the hamstrings and not a pinch in the low back.
Aim for 8 to 12 slow reps for 2 to 3 rounds. Pause for 2 seconds at the top if you want more glute work without adding strain.
What to feel for
- Heels stay heavy.
- Ribs stay quiet.
- The lift starts from the seat, not the belly pushing outward.
- Your lower back should feel supported, not compressed.
A small lift is enough. Really. If your knees drift forward and your hips barely rise, move your feet a little closer to your seat and try again. If the hamstrings take over, walk the feet a touch farther away. Tiny adjustments matter here.
Best cue: think “press the floor away” rather than “throw the hips up.”
2. Pelvic Curl
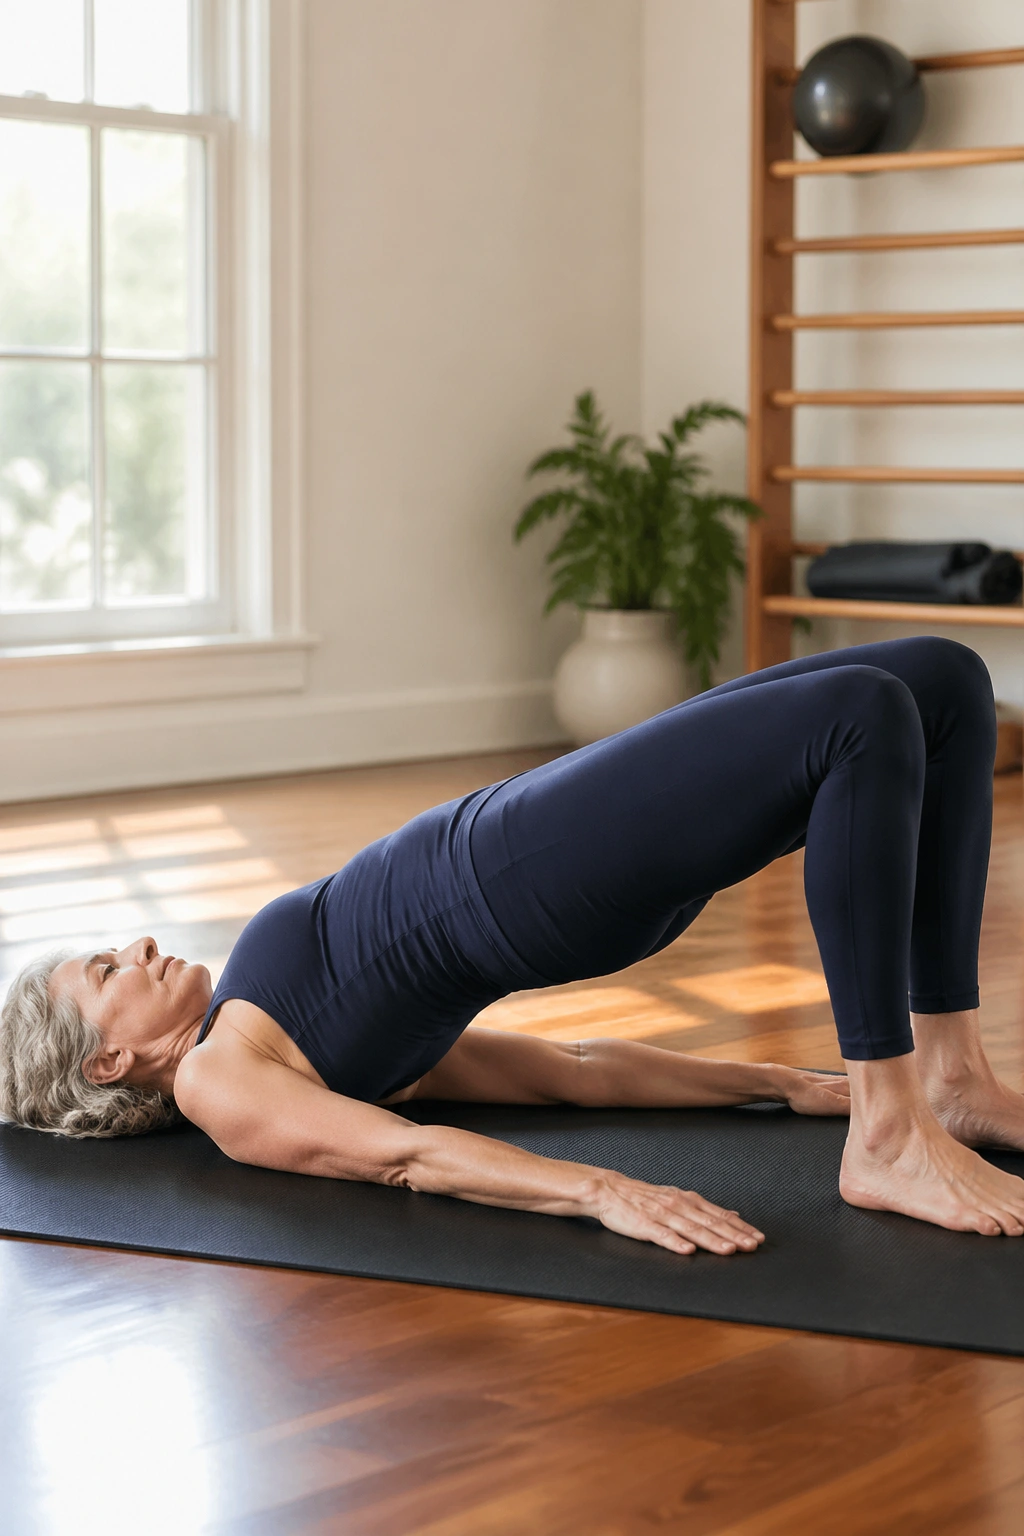
What’s the difference between a pelvic curl and a regular bridge? Mostly control.
The pelvic curl rolls the spine up one piece at a time, which is why so many Pilates teachers love it for older bodies that have gotten a little stiff through the middle. Start in the same setup as a bridge. As you exhale, tip the pelvis and peel the tailbone up, then the lower back, then the middle back. At the top, you should feel length through the front of the hips and a clean squeeze in the glutes. Roll back down slowly, one vertebra at a time.
How it differs from a bridge
The bridge is more direct. The pelvic curl is more segmented. That slower action can be kinder when you want to wake up the glutes and the spine at the same time.
If your back does not like deep rounding, keep the range smaller. You do not need to make a perfect rainbow with your spine. You need smooth movement and good breathing. A short, tidy curl done well beats a huge one done badly.
Try 6 to 10 reps and keep the lowering phase slower than the lift. That’s where a lot of the work lives.
3. Bridge March
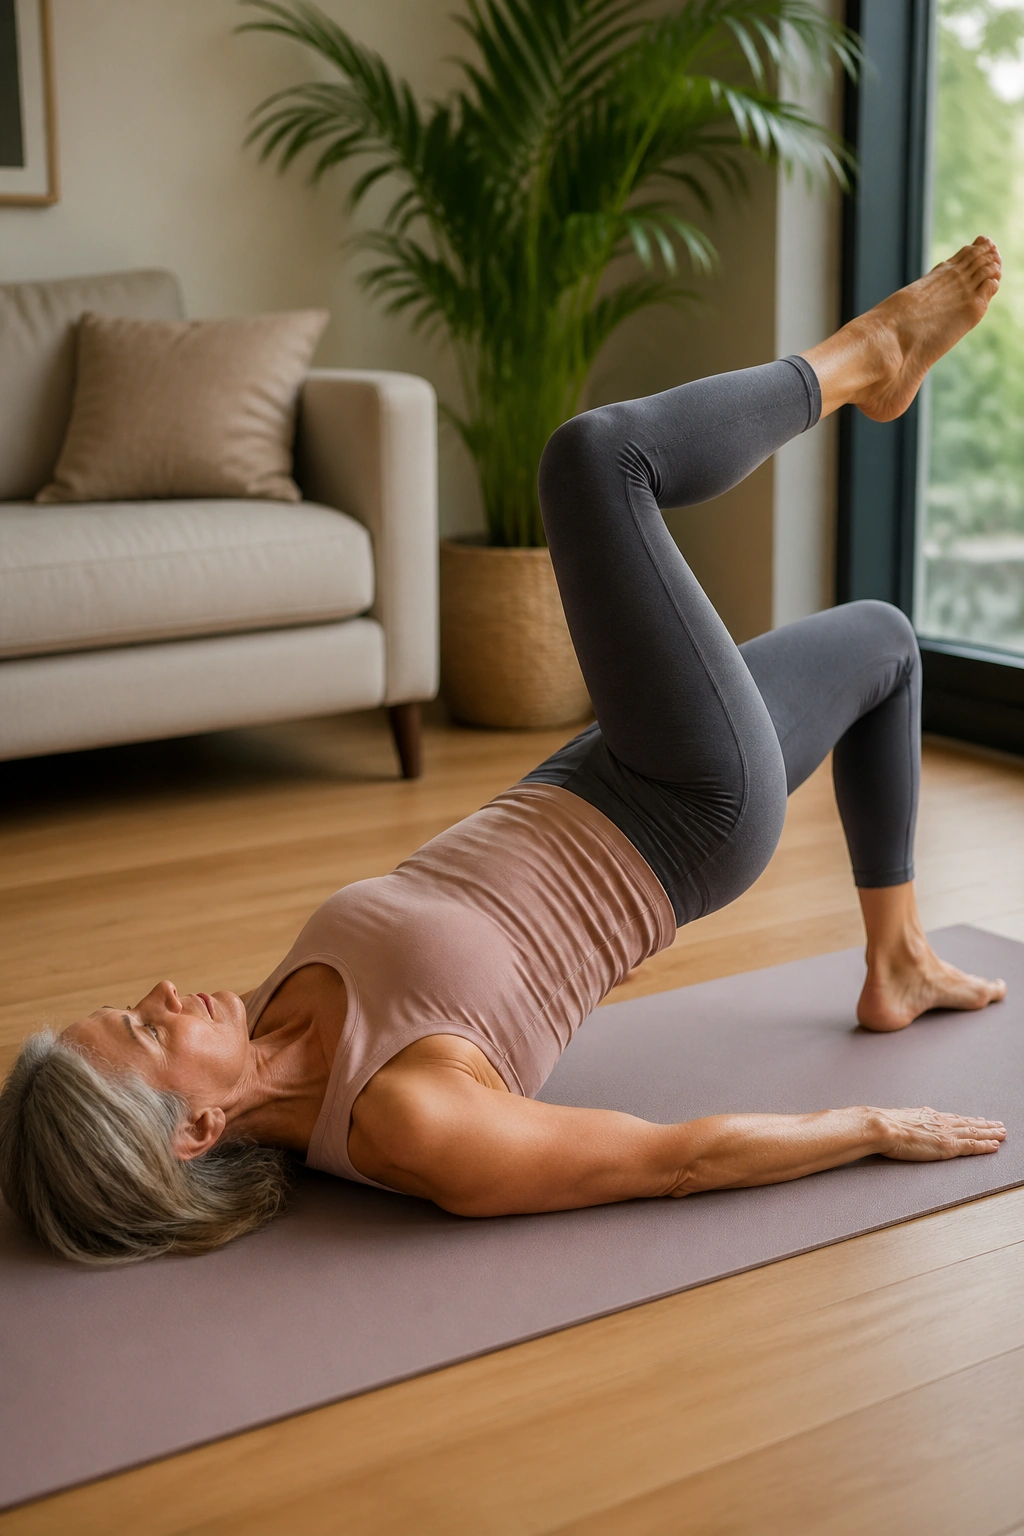
If you can bridge well but wobble the second one foot leaves the floor, this move tells the truth fast.
Bridge march looks modest. It isn’t. Lift into a stable bridge, then slowly raise one knee a few inches without letting the pelvis tip. Lower it, switch sides, and keep the hips as level as you can. The whole point is to keep the glutes working while the body wants to shift and cheat. That’s the real-life part of it.
- Keep the lifted knee bent.
- Move the foot only a few inches.
- Keep the pelvis level like a tray of water.
- Stop if your low back starts to arch.
I like this one for women who can bridge easily but still feel shaky on stairs or when stepping over something. That little single-leg demand shows up everywhere in daily life. And yes, it can feel annoyingly hard at first.
Do 6 marches per side. Slow down the lowering phase. If your hips start dancing side to side, reduce the size of the lift before you reduce the effort.
4. Bridge with Heel Lift
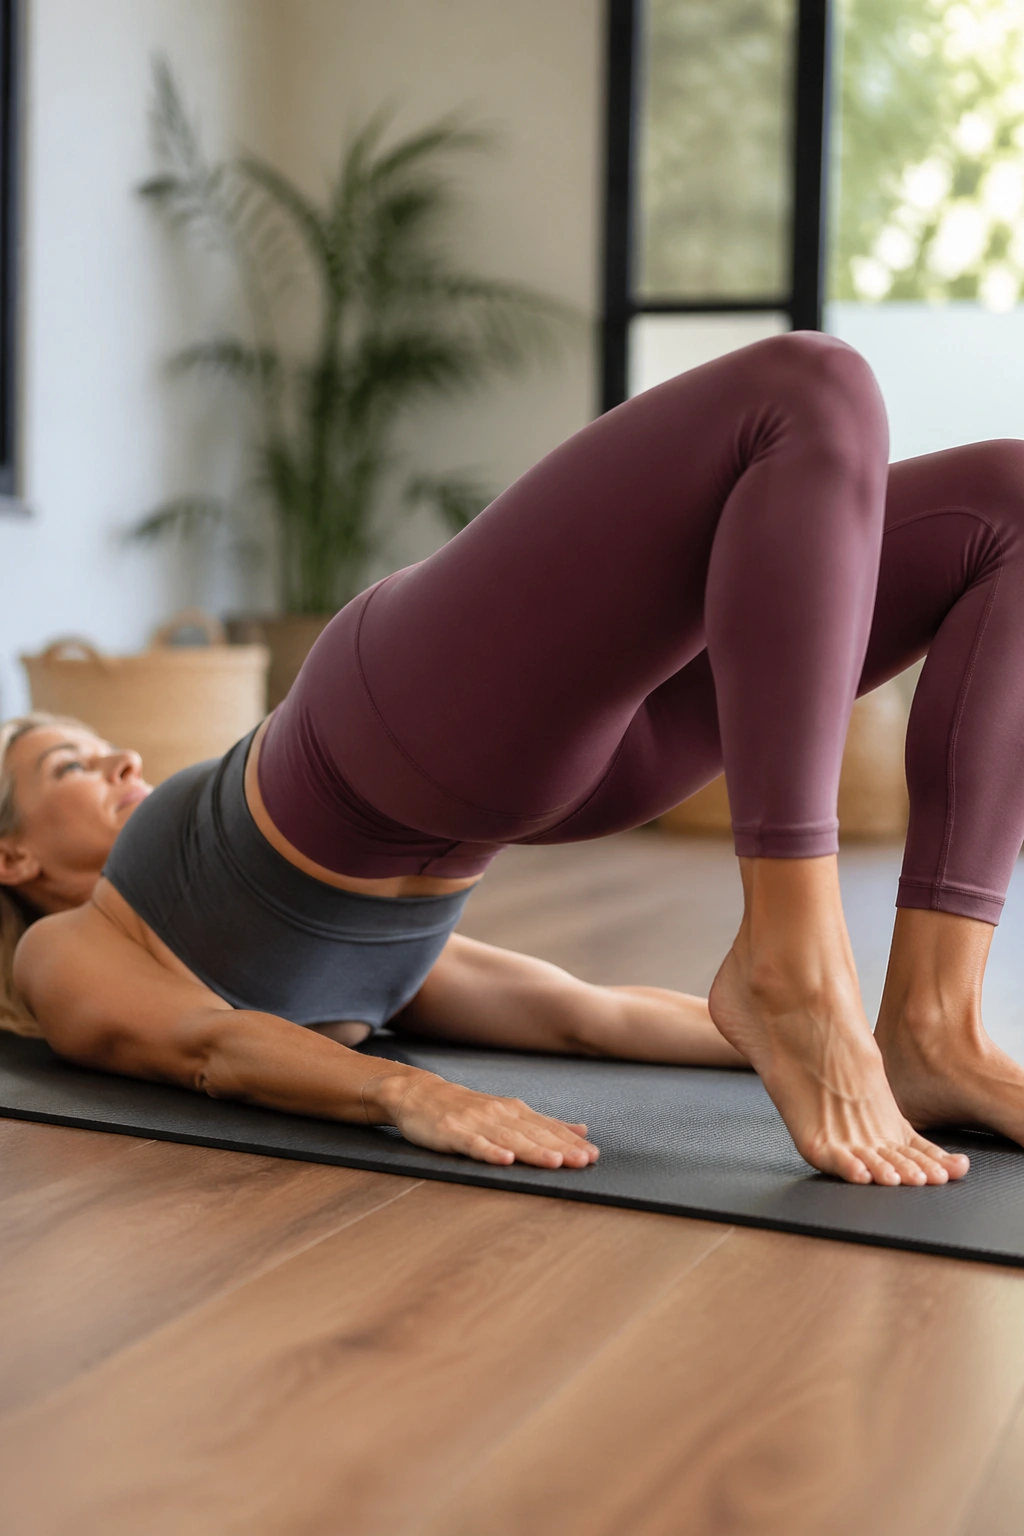
Toe-gripping is a cheat. Heel lifts show you whether your glutes are doing the real work.
Set up in a bridge, hold the pelvis steady, and lift one heel a small amount off the mat while the other foot stays planted. Lower it and switch. The movement is tiny, which is exactly why it works. You are forcing the hips to stay level while the base under you changes. That pulls the glutes into the job instead of letting the lower body hide the effort.
If your hamstrings cramp, move your feet a little farther from your hips and make the lift smaller. The fix is usually boring and simple. It works.
What to watch for
Your ribs should not flare. Your pelvis should not twist. Your lifted foot should hover with almost no drama.
This is a good bridge variation for women who want a stronger single-leg feel without jumping straight into a full one-leg bridge. Try 6 to 8 heel lifts per side and keep the movement slow enough that you can count to two on the way up.
One more thing: don’t chase height. Chase steadiness.
5. Clamshell
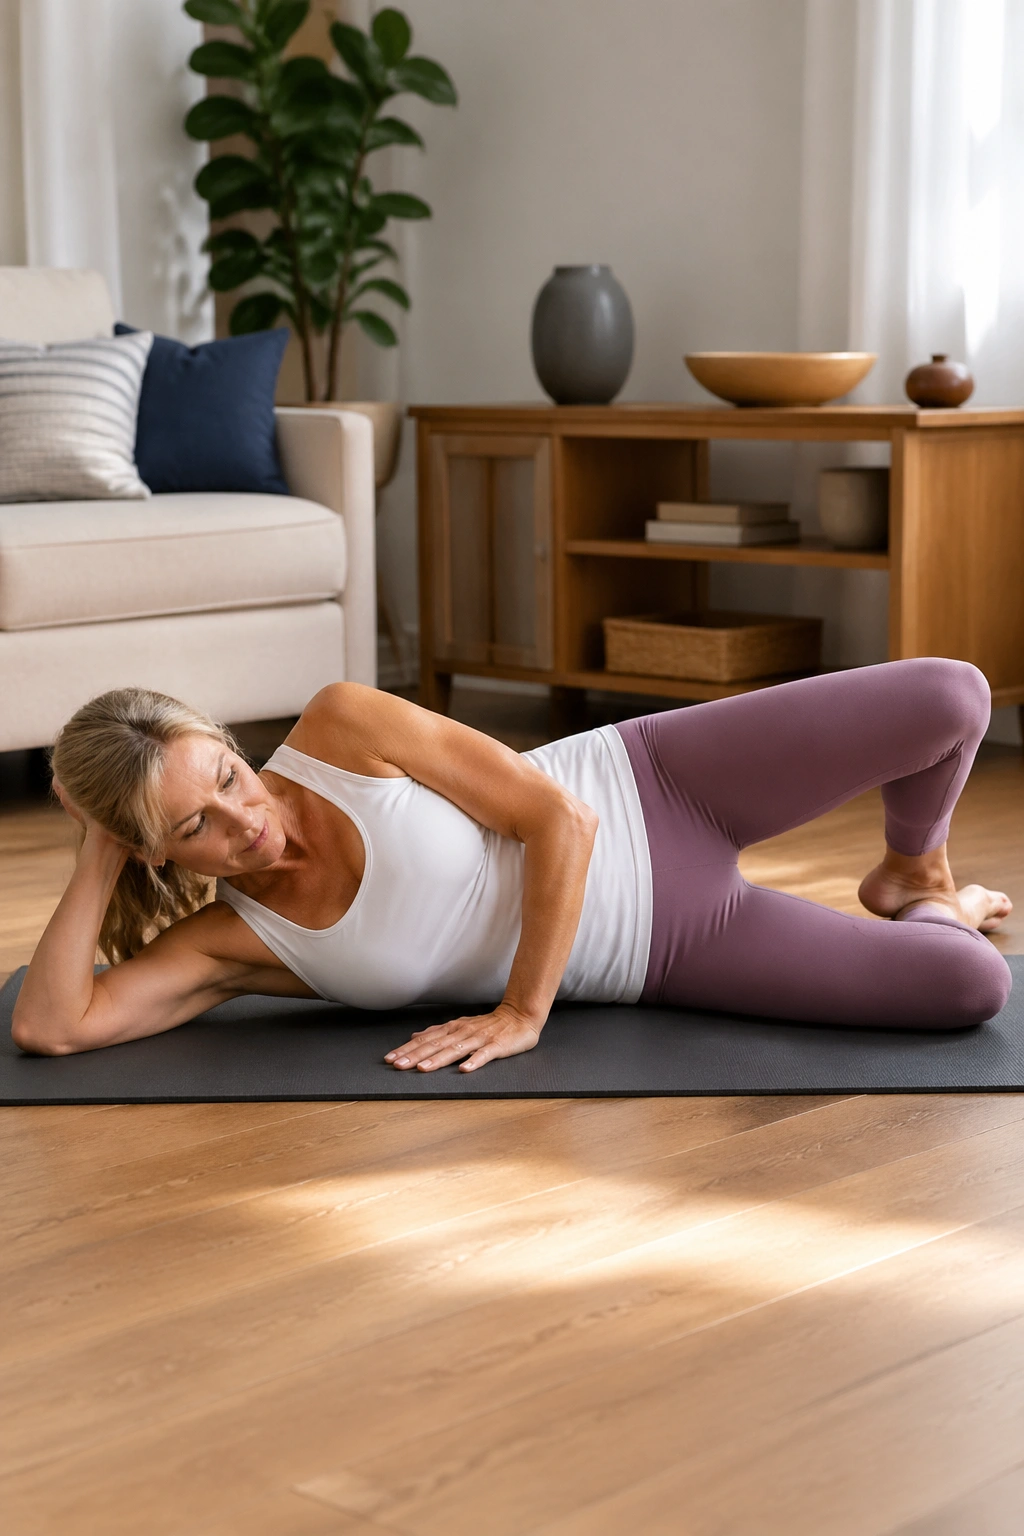
The clamshell is small, and that is the whole point.
Lie on your side with knees bent, heels together, and hips stacked. Open the top knee like a shell without rolling the pelvis backward. You should feel the outer side of the upper hip working, especially near the glute medius. If you feel the front of the hip doing all the talking, the knee has probably opened too wide or the pelvis has tipped.
Why it matters after 50
The glute medius is a boring muscle on paper and a very useful one in real life. It helps hold the pelvis steady when you walk, stand on one leg, or step sideways. That matters for balance and for knees that get cranky when the hips are lazy.
I prefer clean reps without a band over sloppy reps with one. A mini band can be useful later, but only if you can keep your torso quiet. Start with 12 to 15 reps per side and keep the movement small enough that your low back stays out of it.
If you want extra challenge, pause at the top for one slow breath. That’s enough.
6. Side-Lying Leg Lift
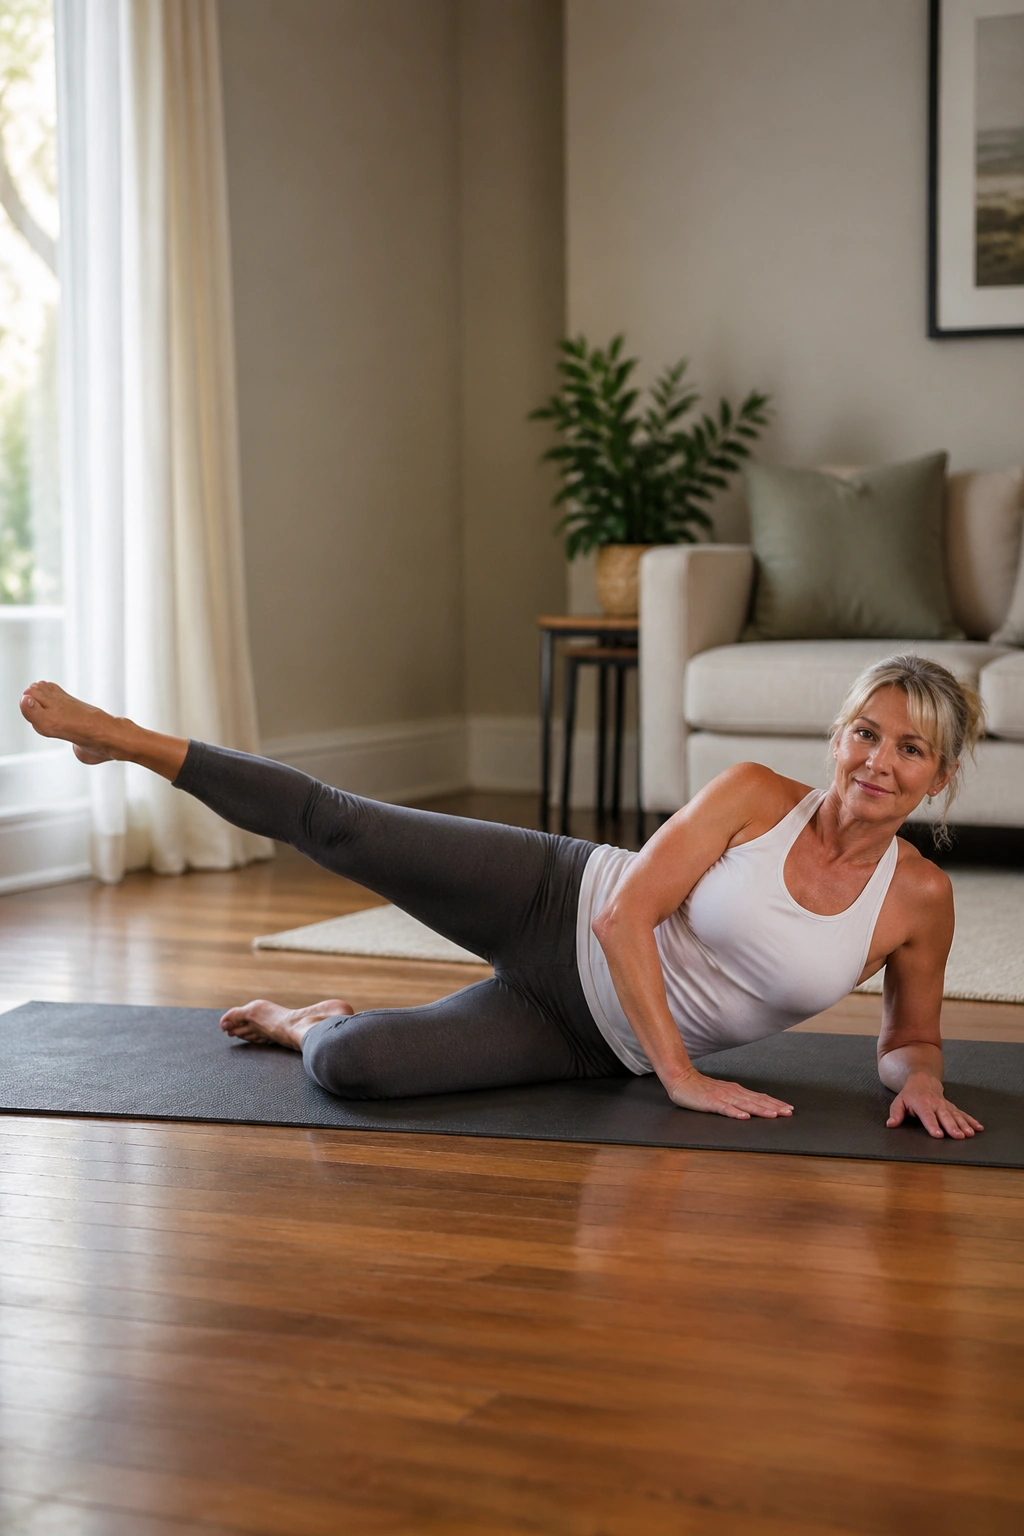
When the side of one hip feels weak on stairs, this is the move I reach for first.
Lie on your side, bottom knee bent if that feels steadier, top leg long and slightly behind your body line. Lift the top leg only 6 to 12 inches, then lower it with control. The trick is not height. The trick is keeping the pelvis stacked and the toe pointed a little down so the front of the hip does not steal the whole party.
- Top leg stays long.
- Toes point slightly down.
- Lift from the outer seat, not the low back.
- Keep the waist lifted away from the mat.
This one is especially useful if your glutes feel dormant after a lot of sitting. The first few reps can feel awkward, and that’s normal. What you do not want is a swinging leg that moves like a pendulum. That usually means the body is recruiting momentum instead of muscle.
Work 10 to 12 controlled lifts per side. If you feel the top hip flexor burning more than the outer glute, make the lift smaller and slow the lowering down.
7. Side Kick Front and Back
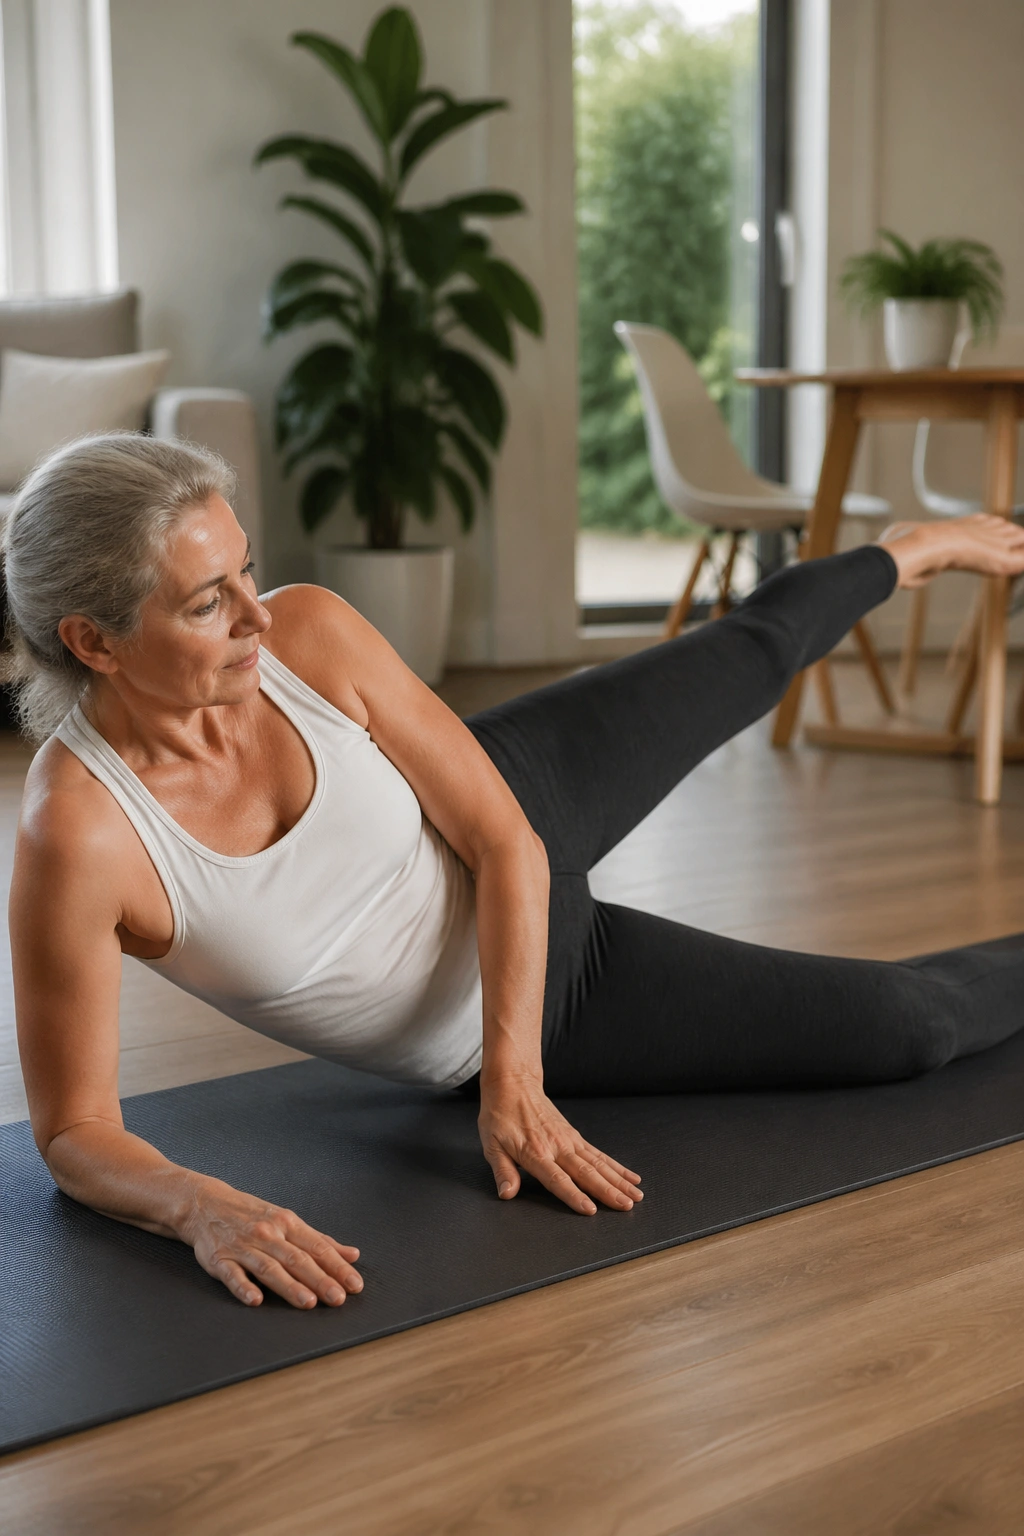
Why does this move matter? Because it teaches the hip to move through space without the torso swaying around it.
Lie on your side with the lower waist gently lifted off the mat, top leg long, and hips stacked. Swing the top leg slightly forward, then back to just behind your body line. The motion should come from the hip joint, not the low back. The body stays mostly still. That’s the whole exercise.
How to use the range
- Kick forward only to a comfortable point.
- Kick back only until you feel the glute wake up.
- Keep the pelvis quiet.
- Move slowly enough that you can stop the leg anywhere.
I like this for women who feel stiff through the front of the hips but also want stronger glutes for walking. The front-and-back motion helps remind the hip that it has more than one job. Do not turn it into a big swing. Big swings look busy and often do less.
Try 8 to 10 kicks in each direction. If you feel pinching in the front of the hip, shorten the forward reach right away. That fix is often enough.
8. Side-Lying Circles
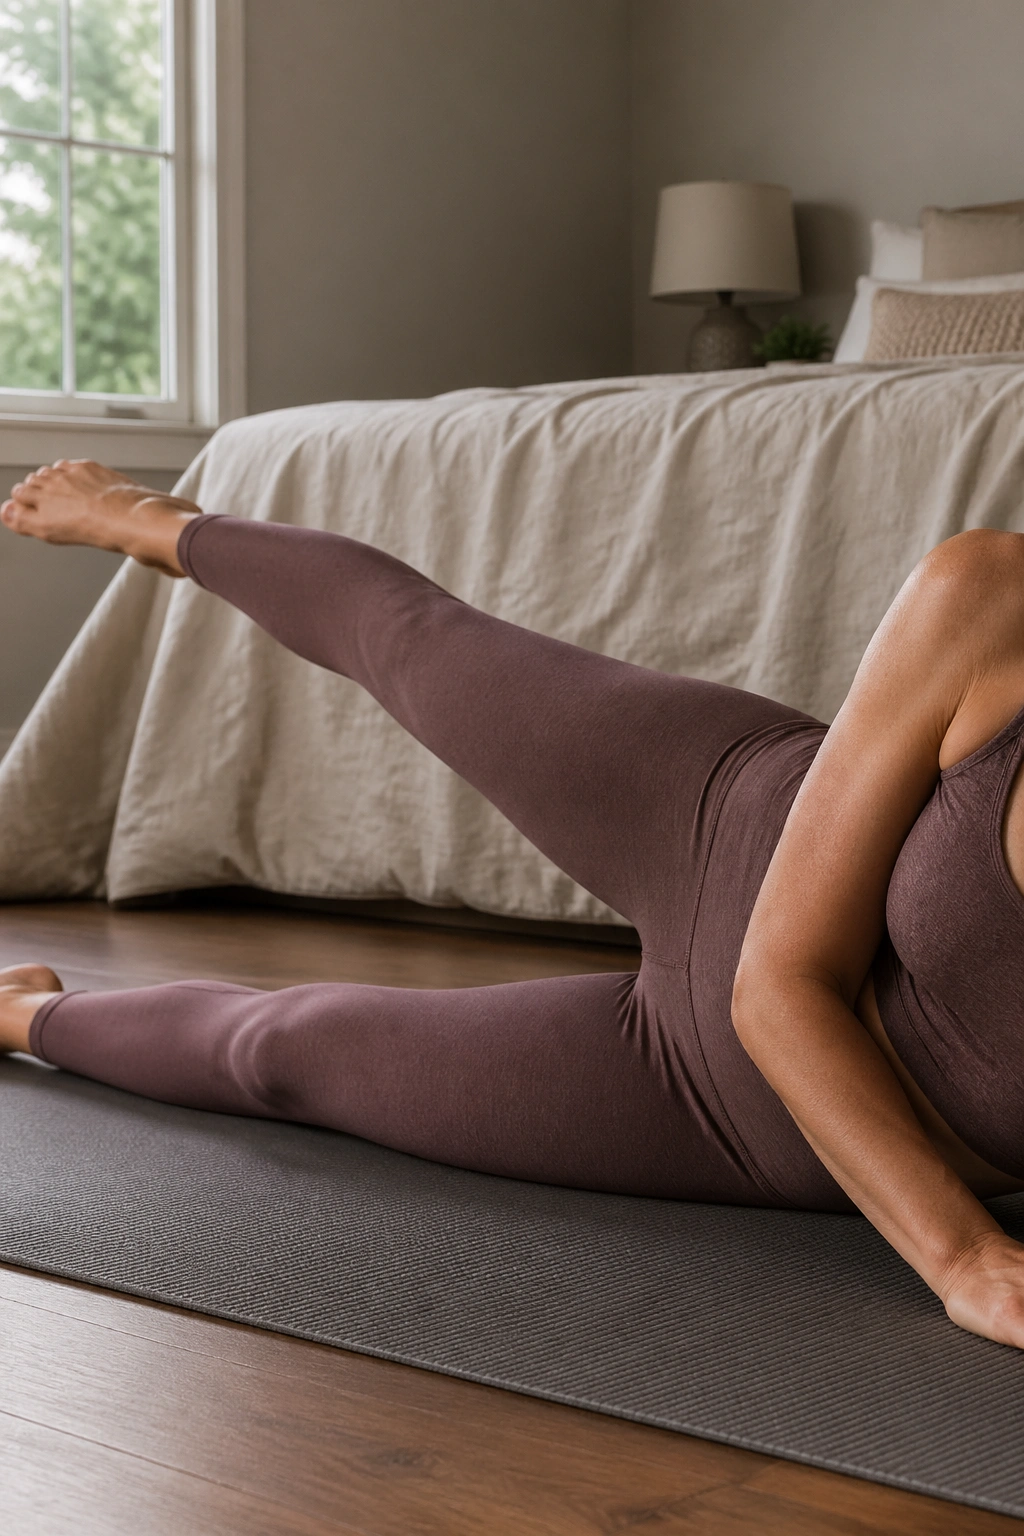
Small circles beat giant ones every time.
Lie on your side with the top leg lifted a little, then draw tiny circles in the air. Make them about the size of a dinner plate, not a beach ball. Big circles make people feel clever for about 10 seconds, then the pelvis starts rolling and the hip flexors move in. Tiny circles keep the work cleaner and make the outer hip stay honest.
After a few reps, reverse the direction. The reverse side usually feels worse for a few seconds. That’s normal, and it’s useful. The body cannot hide from a small circle that’s done slowly.
Do 5 to 8 circles each way per side. If your leg shakes, good. If your lower back twists, the circle is too big.
This one is especially nice on days when you want glute work without a lot of load. It’s also a sneaky way to find imbalances. One side often feels steadier, higher, or smoother. The other side tells a different story. Listen to that.
9. Quadruped Fire Hydrant
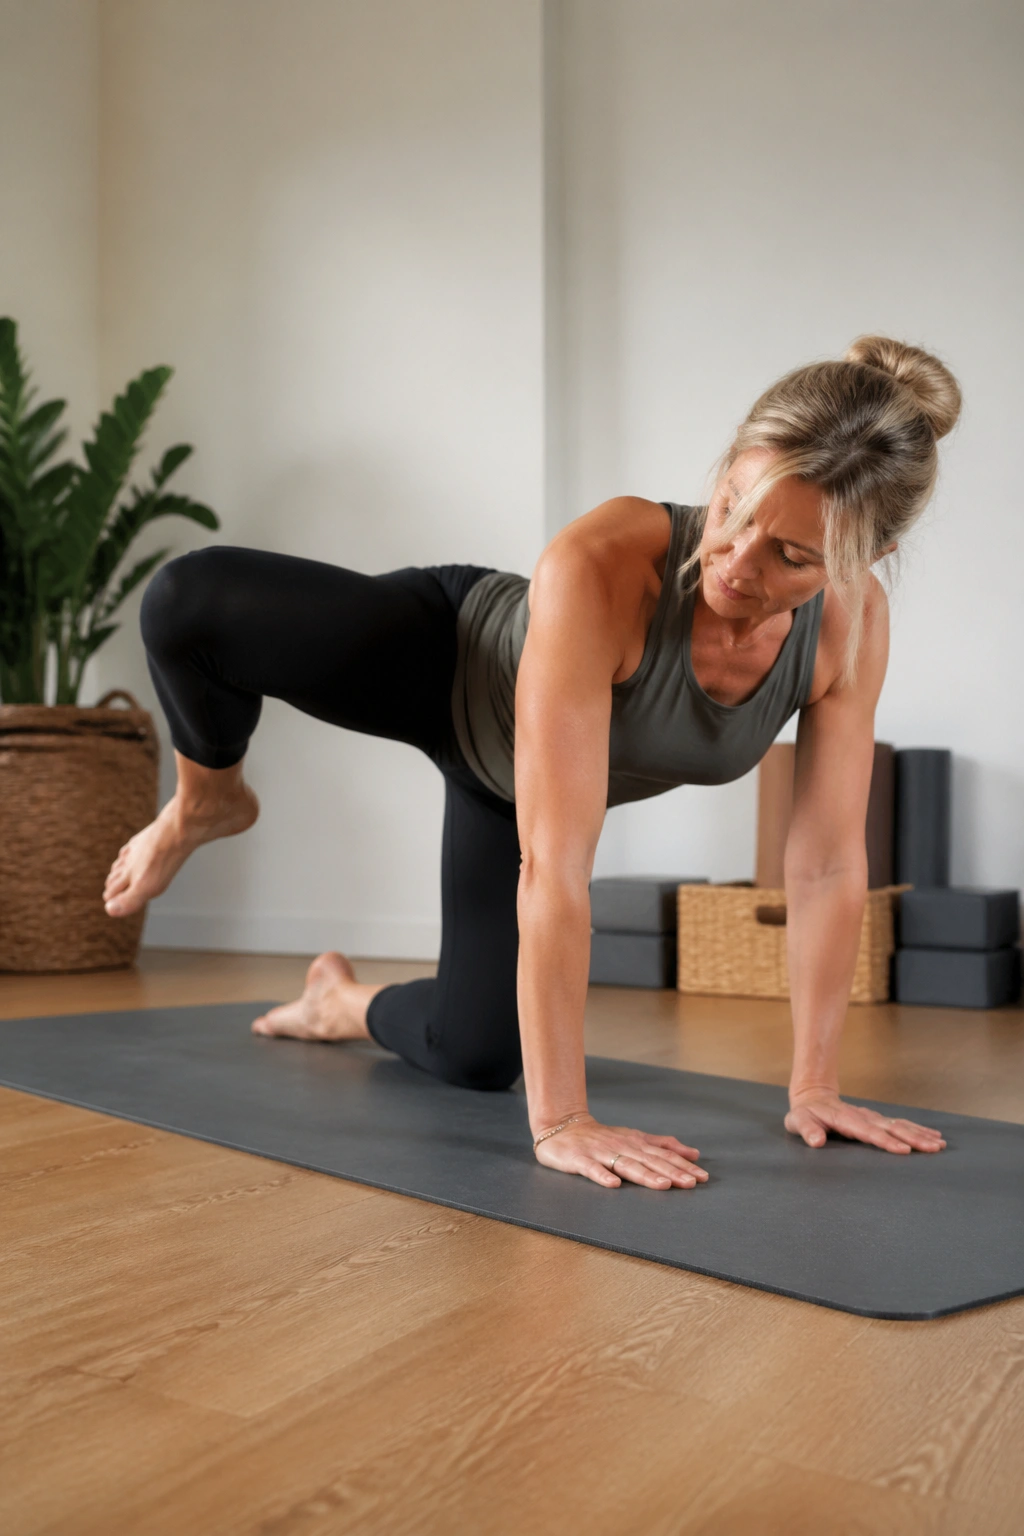
If you have ever watched your pelvis twist the second one knee lifts, you already know why this move earns its spot.
Get on hands and knees with wrists under shoulders and knees under hips. Keep one knee bent and lift it out to the side like a dog at a lamppost, then lower it with control. The motion is short. Short is good. You are training the glute medius to work without letting the trunk wobble around.
A folded towel under the knees helps a lot. So do hands on yoga blocks if your wrists complain. No need to make the setup miserable just to feel serious.
Quick form checks
- Hips stay level.
- Belly stays lightly braced.
- The lifted leg does not swing high.
- The neck stays long, not jammed upward.
Try 8 to 12 reps per side. The best version feels tidy and contained, with the side of the hip burning before the low back gets involved.
If you want to make it harder, add a 2-second hold at the top. Not a kick. A hold. That changes the whole feel.
10. Donkey Kick
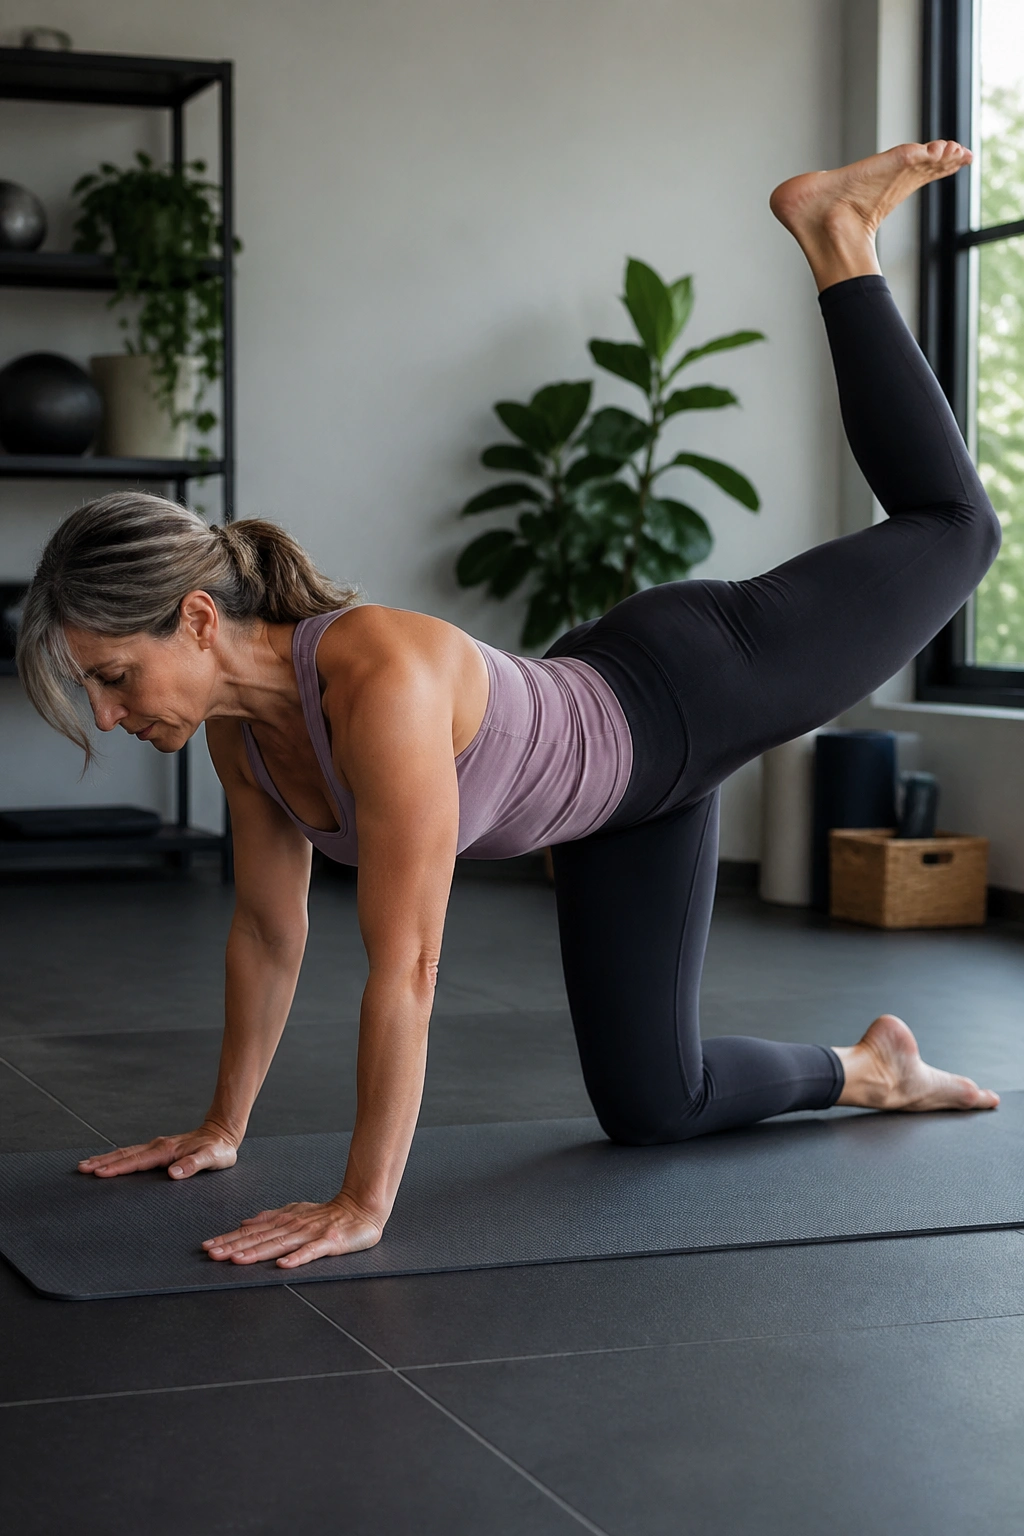
The higher the leg goes, the less the glute often works.
That sounds backwards, but it’s true. In a donkey kick, you start on hands and knees, bend one knee, and press the heel toward the ceiling without arching the spine. The leg does not need to travel far. If the low back arches to make the leg look bigger, the glutes usually lose the job.
What not to do
Do not toss the leg upward. Do not turn it into a hamstring curl. Do not let the ribs hang low toward the floor.
Keep the foot flexed, knee bent, and movement slow. A tiny lift with a hard glute squeeze is better than a big kick that lands in the wrong place. This is one of those moves that gets more honest the slower you go.
Use 8 to 10 controlled lifts per side. If your wrists hate the setup, drop to forearms on the mat and keep the same leg action. If your back pinches, stop sooner.
This is not the most glamorous Pilates move. It is useful, though, and useful wins.
11. Bird Dog with Glute Reach
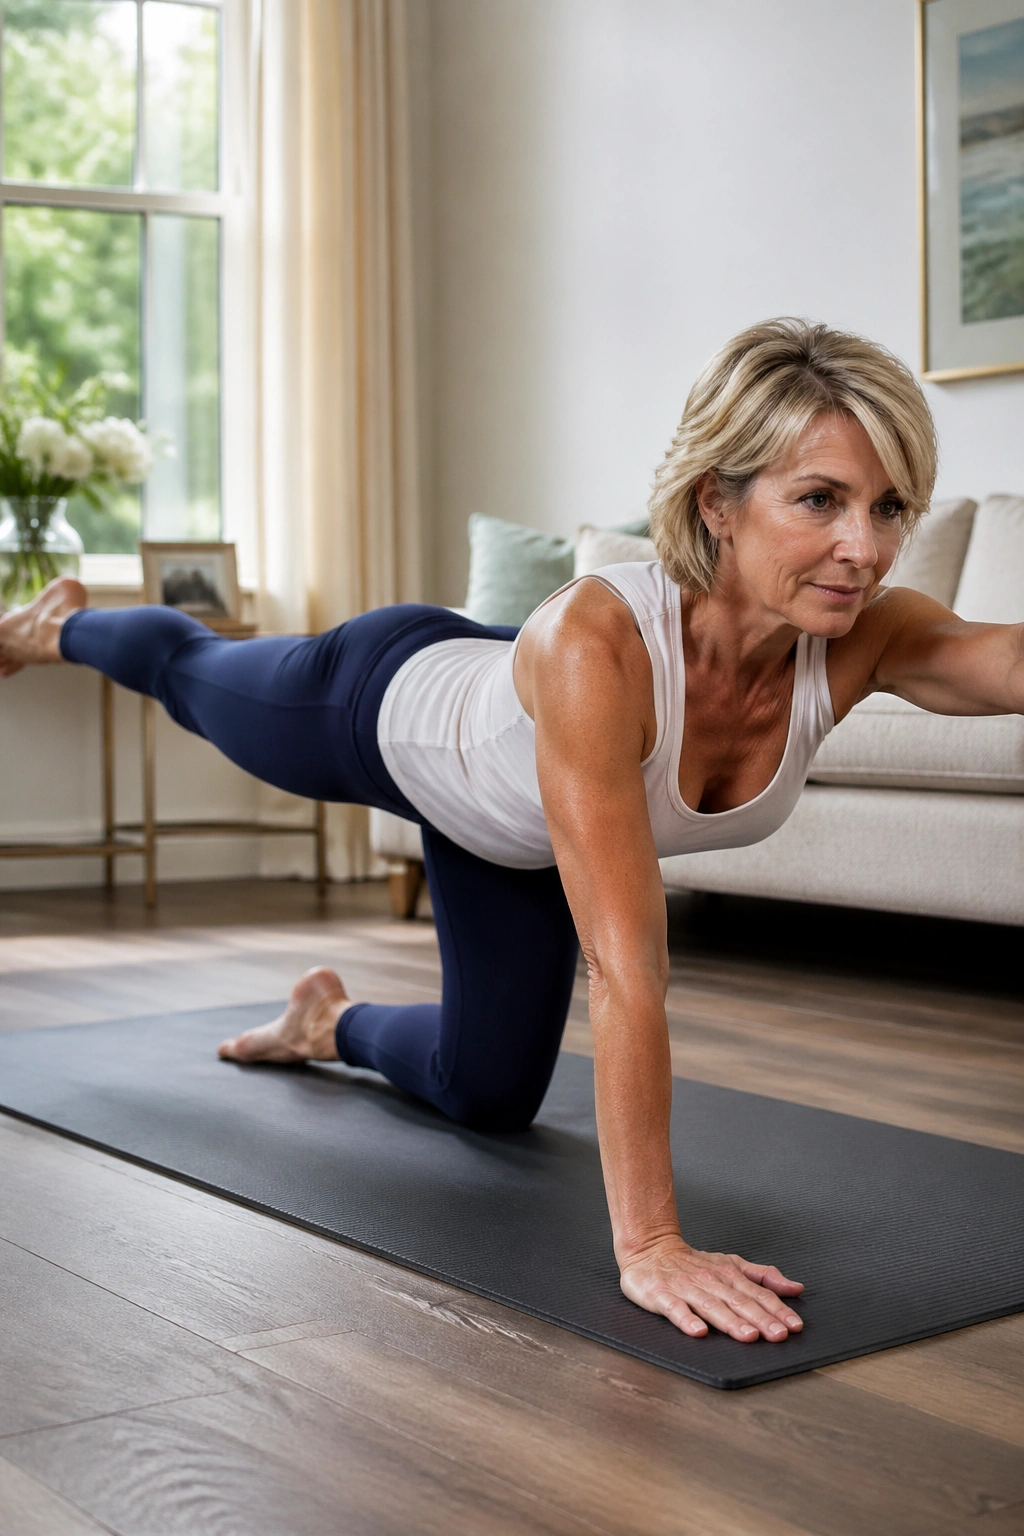
Bird dog is not a balance contest.
Start on hands and knees. Reach one leg back long while the opposite arm reaches forward, or keep the hands down if you want a simpler version. The lifted leg should feel active through the back of the hip, not loose and floppy. Hold for a breath or two, then return with control. The goal is to keep the pelvis square and the torso quiet while the limbs extend.
A lot of people fling the leg too high. Don’t. A hip-height leg is usually enough, and sometimes even lower is better. The glute works hardest when the body is not trying to pretend it’s a yoga poster.
How to make it cleaner
- Reach long, not high.
- Keep the belly gently engaged.
- Avoid twisting the pelvis.
- Think “length” more than “lift.”
Do 6 to 8 reps per side with a 2-second pause at full extension. If your wrists are sore, place your hands on blocks or lower to forearms and keep the leg work only.
This one is nice because it trains the glutes and trunk together, which is how the body actually moves outside the mat.
12. Kneeling Side Kick
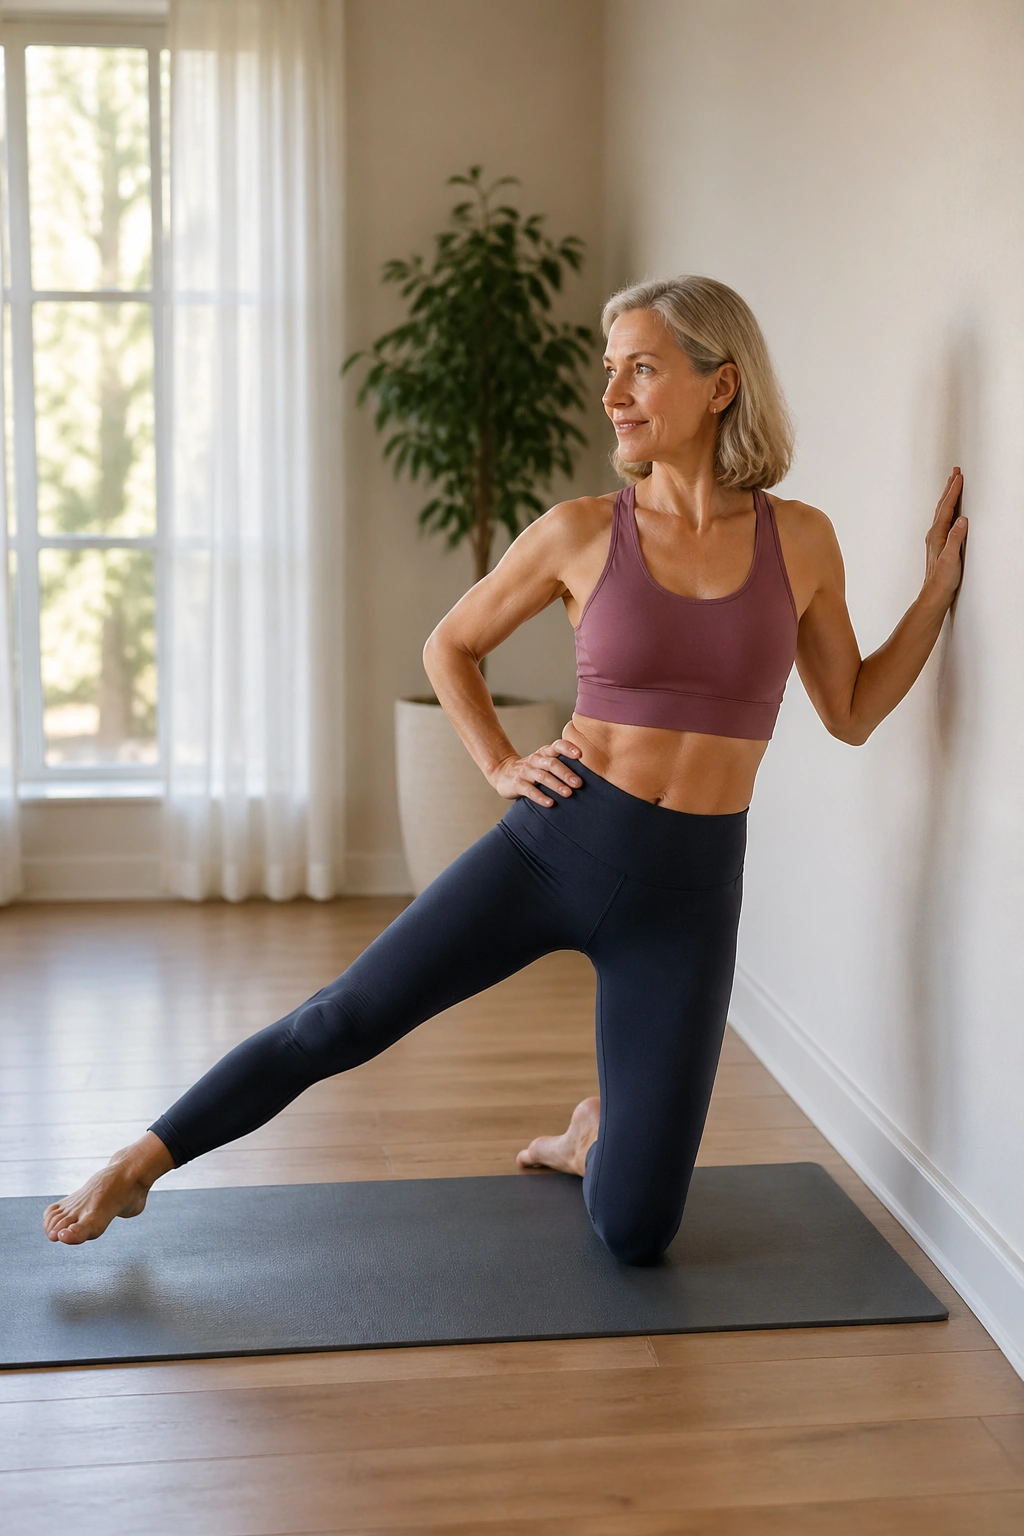
You’ll feel this in the outer seat before you see much happening.
Set up in a tall kneel with one hand lightly holding a chair, wall, or barre for support. Extend one leg out to the side and lift it a few inches, then lower it with control. The support matters. Balance should not be the main event here. You want the glute med to fire while the body stays tall and calm.
Set-up that saves your knees
A thick folded mat or blanket under the kneeling knee makes this friendlier. If the kneeling position feels awkward, switch sides sooner or use a firmer cushion.
The leg out to the side can stay straight or slightly bent, depending on what feels cleaner. Straight is a little harder. Bent is often kinder on tight hips.
Work 8 to 10 lifts per side. Keep the standing hip from leaning away, because that is the shortcut people take when the outer glute gets tired.
This is a strong choice for women who want a glute exercise that also teaches standing stability. It feels more like real life than some floor drills do.
13. Standing Kickback
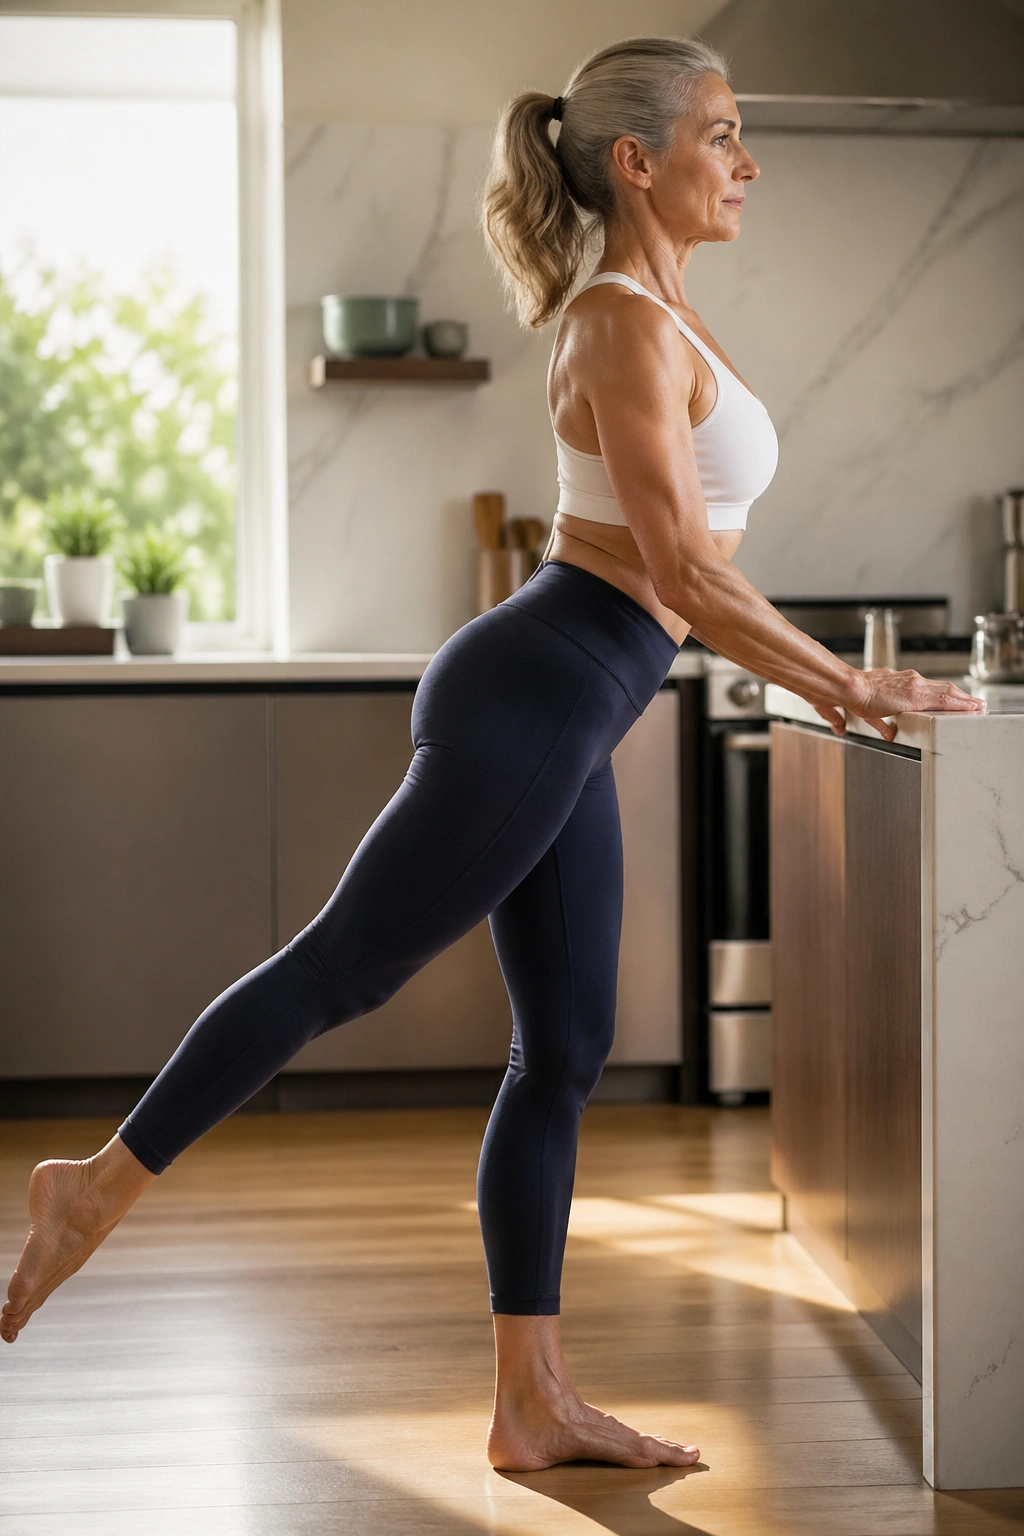
Do you want a glute move that doesn’t require you to get down on the floor? This is the one.
Stand tall, hold a chair or countertop, and shift a little weight into one leg. Send the other leg straight back a few inches, keeping the torso mostly upright. The kickback should come from the hip, not from swinging the whole body. If you feel it in the low back, the range is too big or the ribs have popped open.
I like to keep the working foot flexed. That helps people stop cheating with the toes and keeps the effort where it belongs. Think of it as a controlled back reach, not a dramatic leg toss.
Try 10 to 12 reps per side. A 1-second squeeze at the back end is plenty.
This move is especially handy if kneeling bothers your knees or if floor work feels like too much some days. It is one of those plain, unflashy exercises that sneaks up on you. Good standing glute work usually does.
14. Standing Side Leg Lift
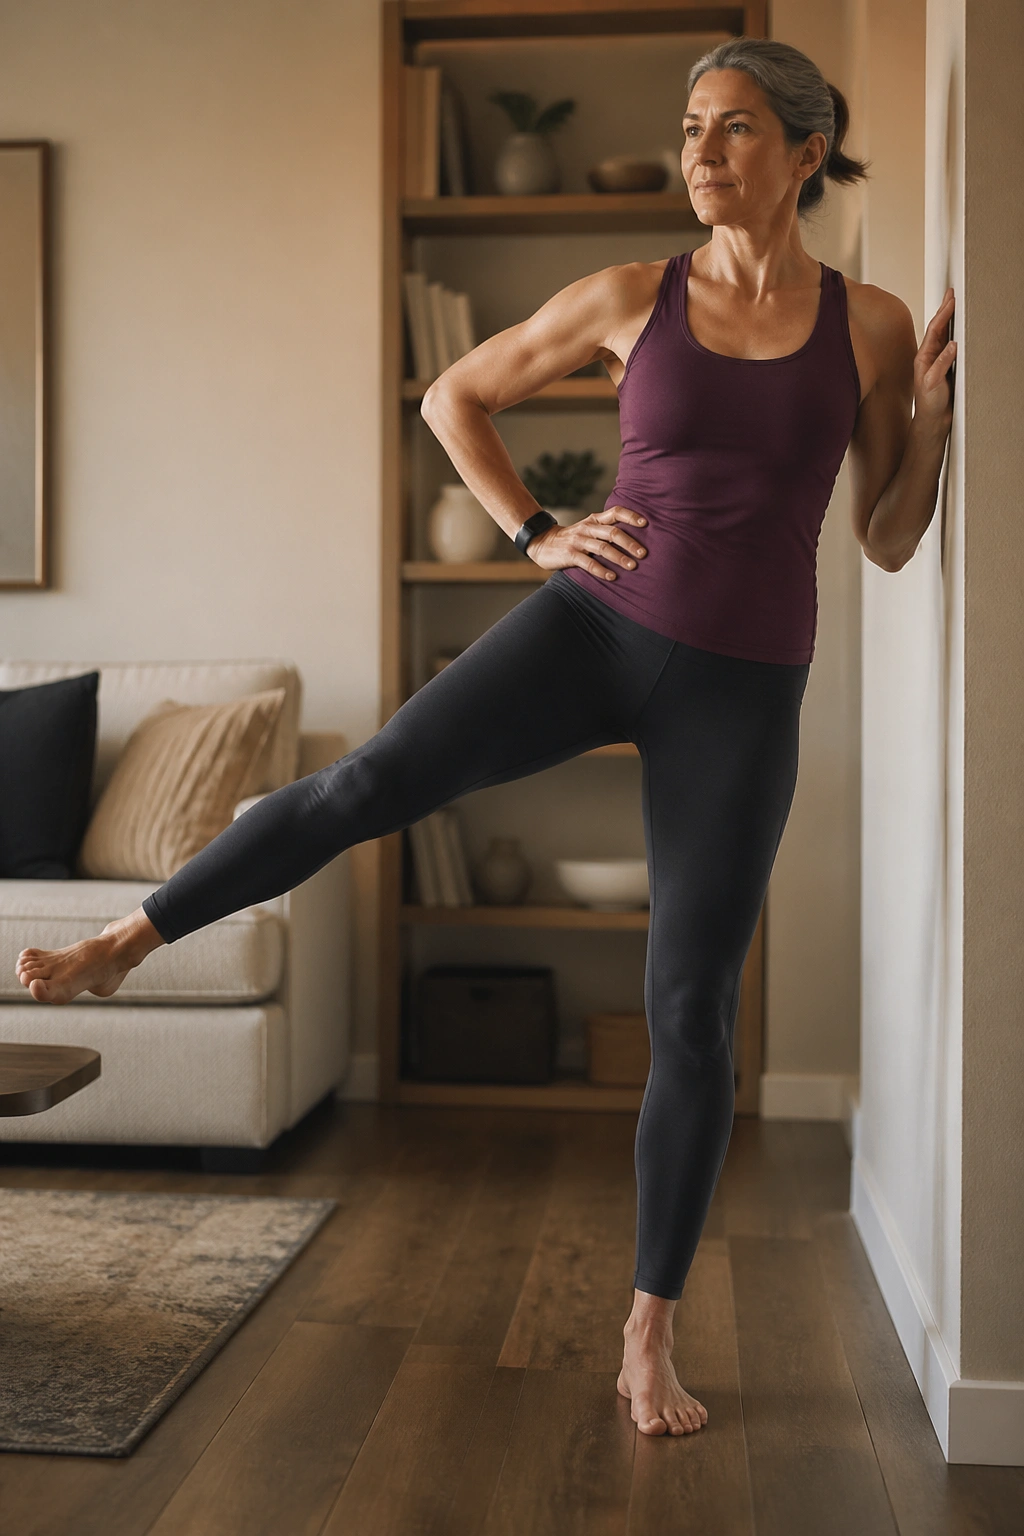
This is one of the cleanest glute medius moves you can do upright.
Stand tall with a hand on a wall or chair. Shift your weight onto one leg, then lift the other leg a few inches out to the side without leaning your torso the other way. Keep the lifted foot facing forward or slightly turned down. If the hip hikes upward, lower the leg and make the motion smaller.
Why I like it
It trains the side glute in the same position you use for walking, standing, and turning. That makes it more useful than endless floor-only work if balance and stability are your main goals.
You do not need a huge lift. A few inches is enough. A tiny side lift with a steady pelvis can feel harder than a wild one, which says a lot about where the real work lives.
Do 8 to 12 reps per side. If you want to progress, hold the top for 2 seconds before lowering. That pause makes cheating much harder.
This move is a nice bridge between mat work and standing strength. It belongs in a balanced routine.
15. Wall Sit with Mini Lift
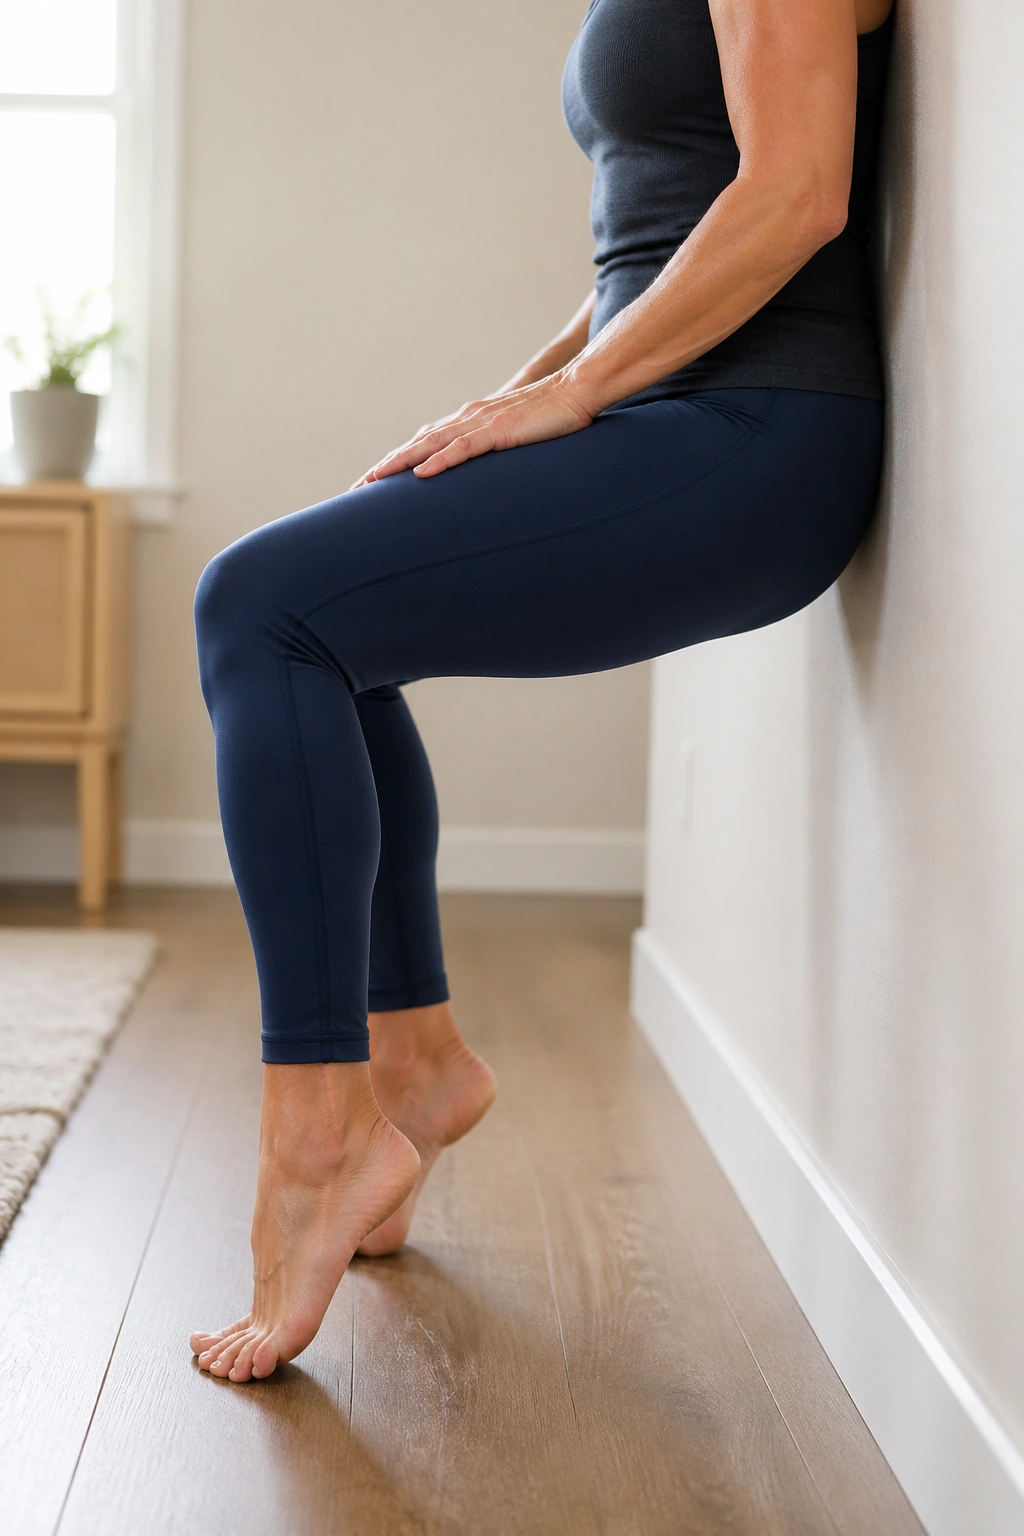
Unlike a deep squat, this keeps the body a little more contained while still making the lower body work.
Slide down a wall until your knees are bent only about halfway, not all the way into a hard sit. Press your back into the wall and keep your feet about a foot or so out from it. From there, lift one heel a tiny bit or gently shift weight from one leg to the other without losing the wall contact. The glutes, quads, and inner thighs all have to stay awake.
If your knees complain, stand a little higher. That is not failure. That is smart editing.
What to focus on
- Keep the chest relaxed.
- Keep the knees tracking over the feet.
- Avoid sinking too low.
- Stop before the thighs turn to jelly.
Hold for 20 to 30 seconds, or do 6 to 8 tiny alternating lifts if you want movement. This is a nice option for women who want glute work that also builds stamina for getting up from a chair, waiting in line, or climbing stairs.
A wall makes the exercise feel safer. That alone helps people work better.
16. Pilates Chair Squat
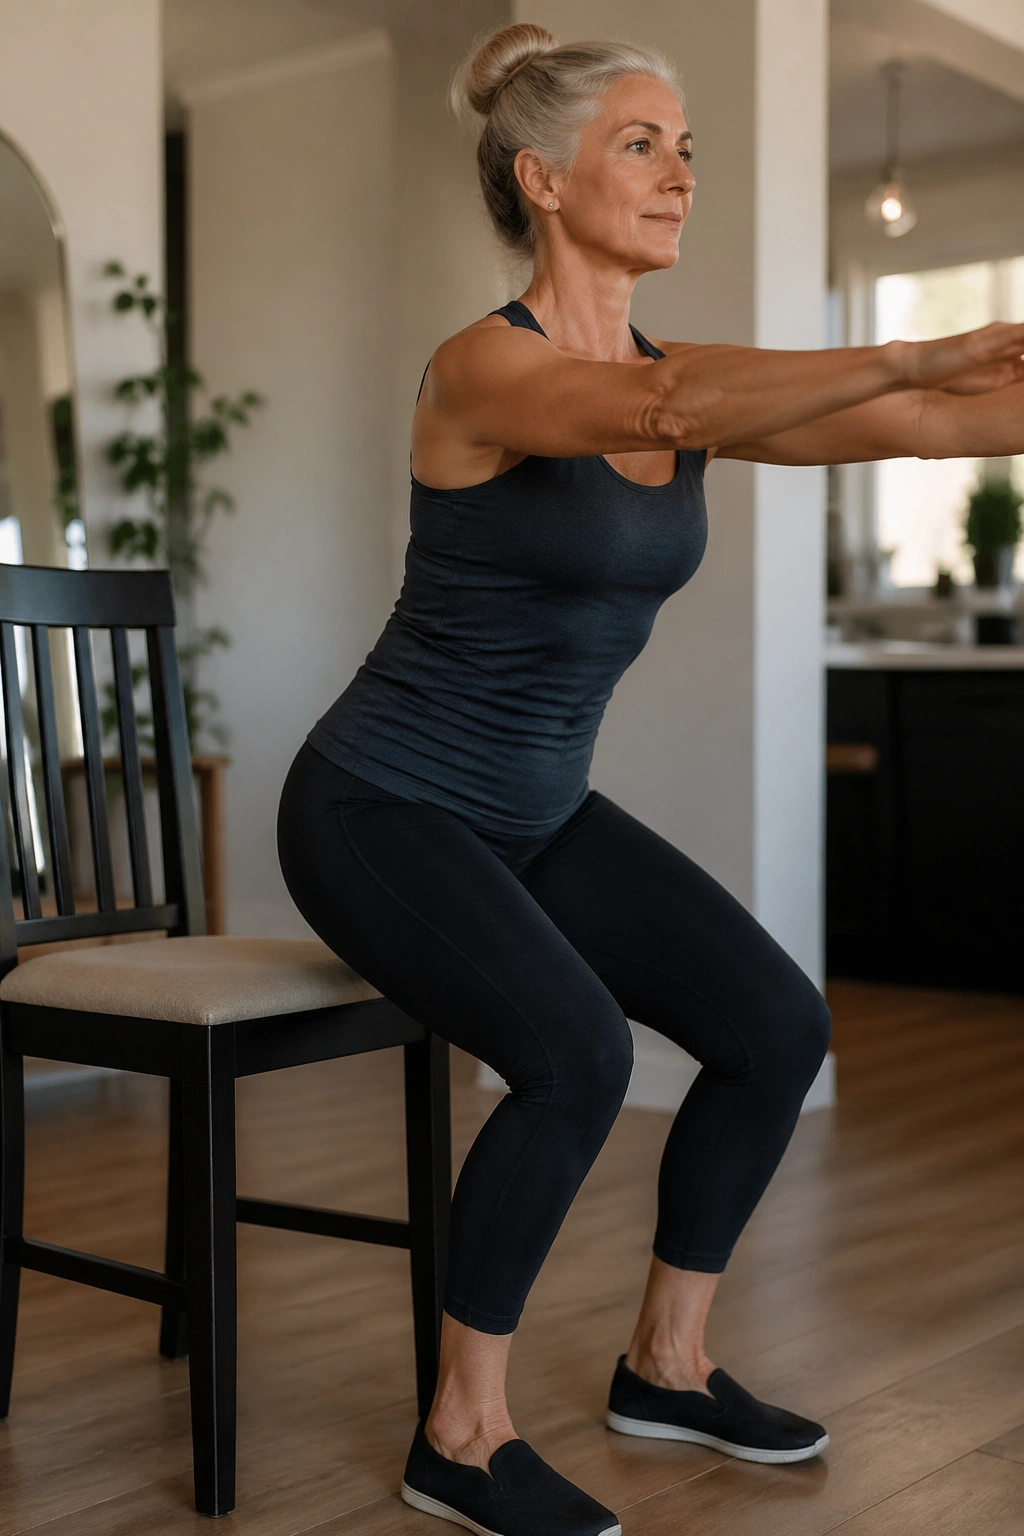
Think of the kitchen chair, not the gym squat rack.
Stand in front of a sturdy chair and lower your hips back until you lightly tap the seat, then stand back up by pressing through the heels and squeezing the glutes at the top. The tap should be light. You are not collapsing into the chair and bouncing up. You are practicing a clean sit-to-stand pattern, which is one of the most useful lower-body skills a body can have.
Use your arms out front if balance feels shaky. Raise the chair seat with a firm cushion if the depth feels too low. Small changes make this move much kinder.
Do 8 to 10 reps for 2 rounds. Keep your knees from caving inward on the way up. That tiny knee track matters more than people think.
This one is a favorite for women over 50 because it carries straight into real life. Getting off a sofa, rising from a low bench, stepping up from a garden chair — all of that gets easier when this pattern improves.
17. Curtsy Step-Back
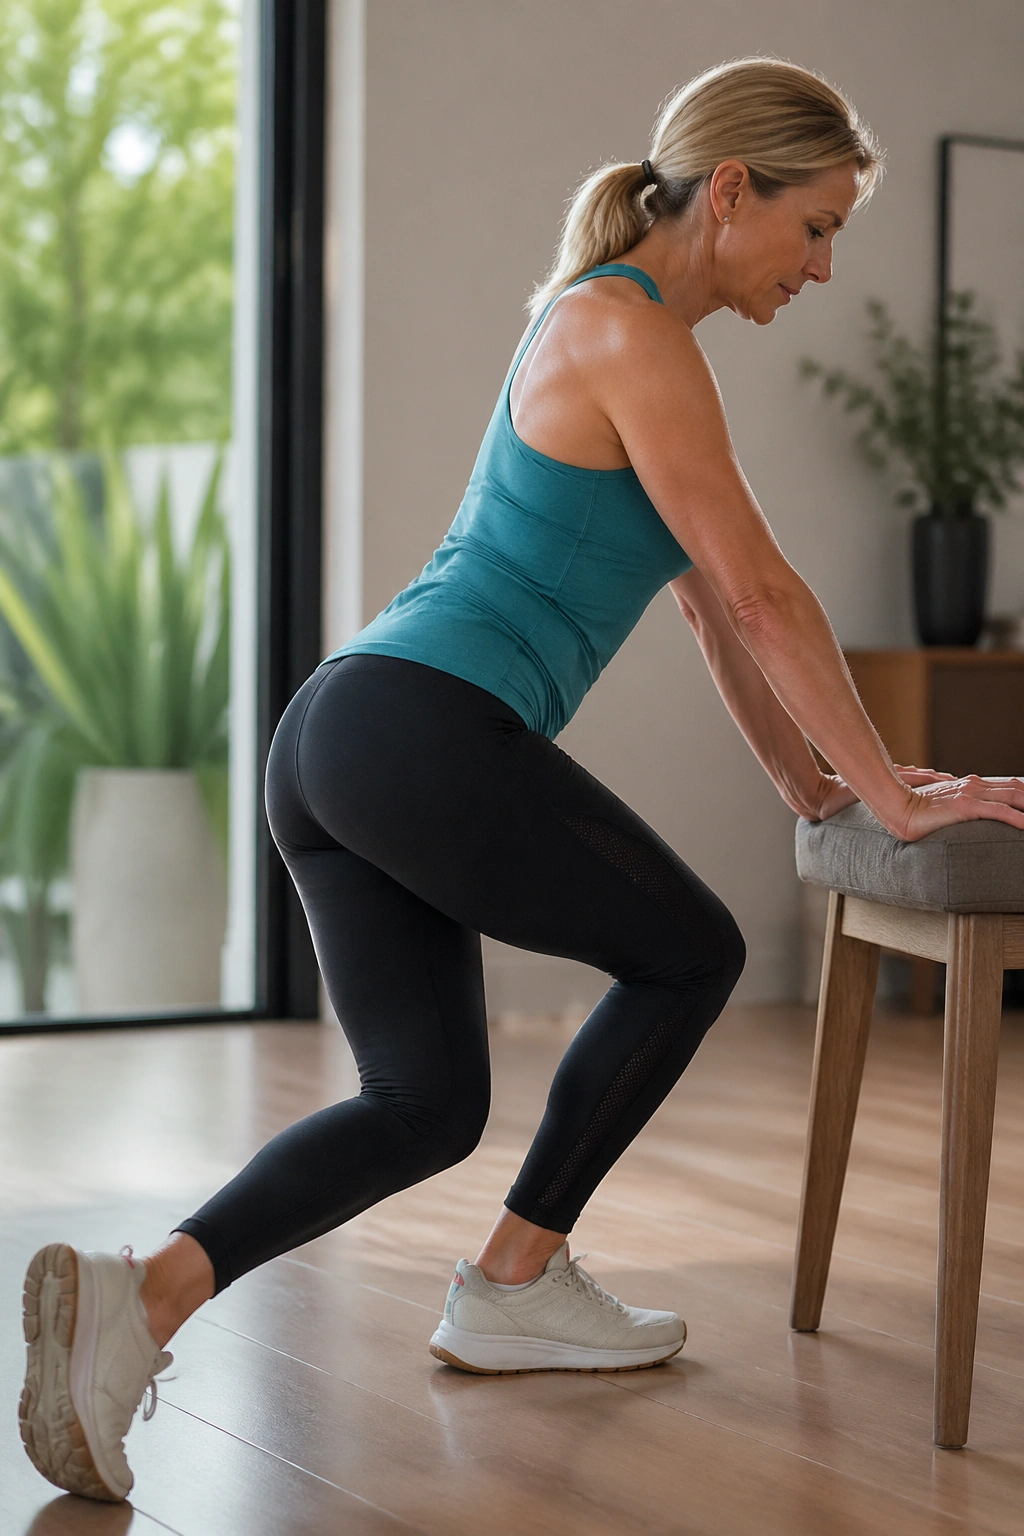
Curtsy lunges are not everyone’s friend, and that is worth saying out loud.
When they’re done carefully, the curtsy step-back can light up the outer glute and challenge balance at the same time. Stand tall, step one leg back and slightly across behind the standing leg, then return to center. Keep the step small. A huge crossover often feels sketchy on the knees and doesn’t add much. A short, clean step is better.
Hold onto a chair if balance is shaky. No medal is given for wobbling through a fancy variation.
Who should keep it small
If your knees dislike twisting, keep the cross-back tiny or skip this move entirely. A regular reverse lunge or standing kickback may be a better fit. There’s no prize for forcing it.
Try 6 to 8 reps per side and watch the front knee. It should stay steady, not collapse inward.
This move earns a place because it trains the glutes in a side-to-side way that bridges the gap between mat work and everyday movement. Just respect the knees while you do it.
18. Single-Leg Bridge Hover
This is the move I save for after the basics are solid.
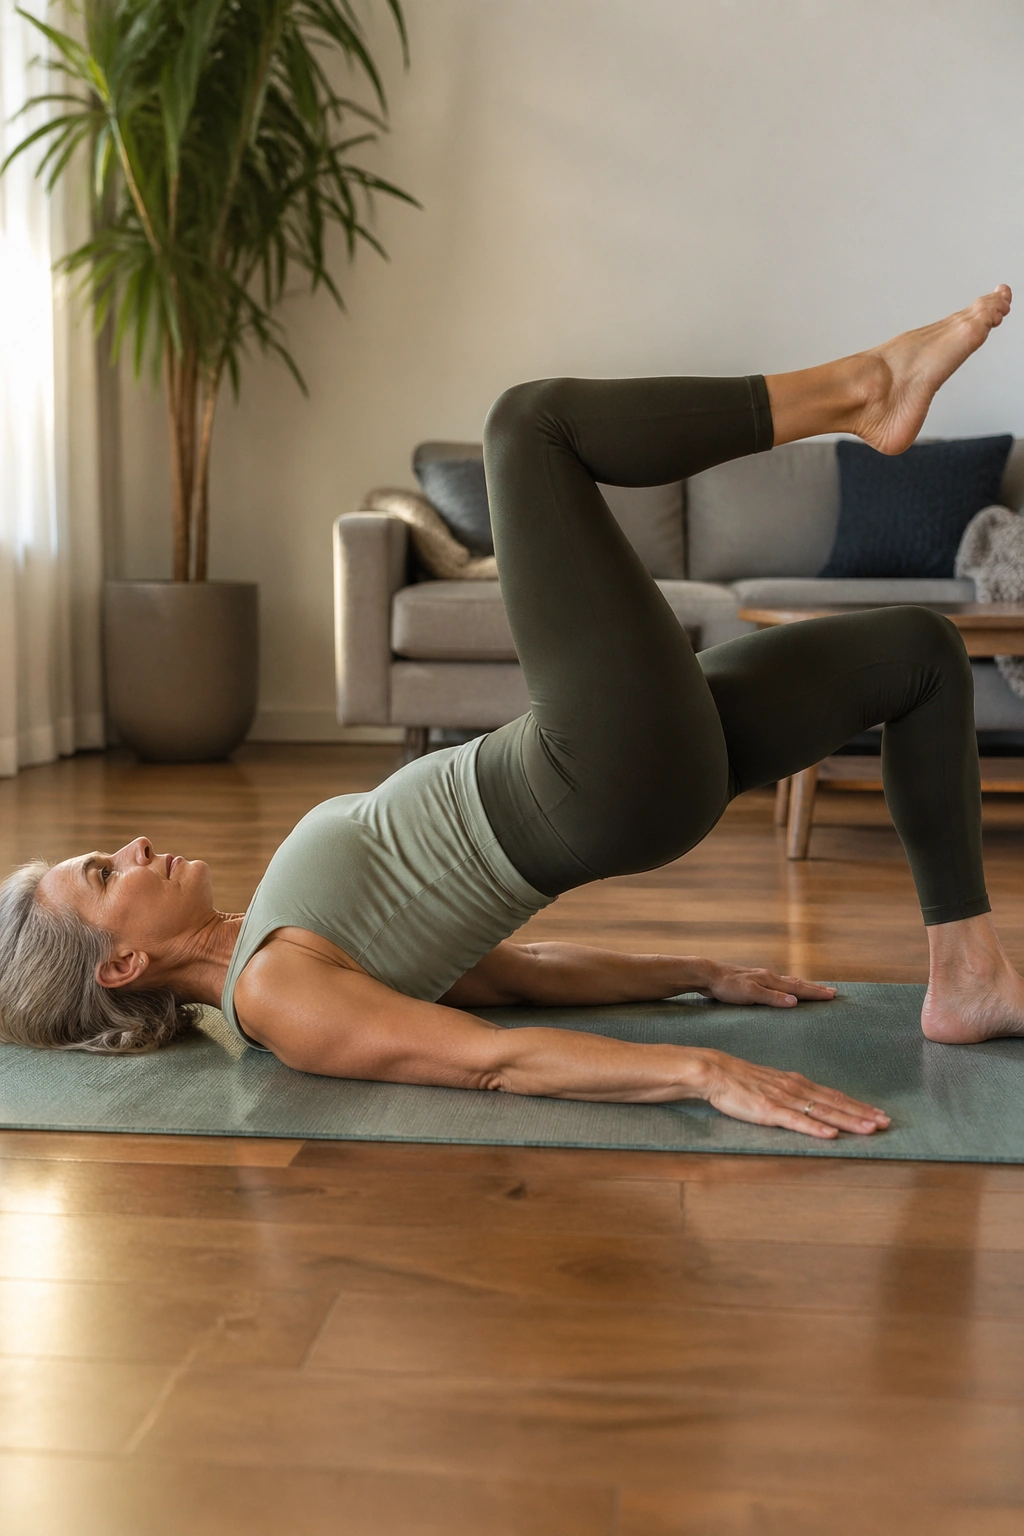
Set up for a bridge, lift one leg so the thigh stays lined up with the other, and hover the hips only as much as you can without twisting or cramping. Some people hold the lifted leg bent. Others straighten it. Bending the knee is usually kinder and easier to control. The goal is not height. The goal is level hips and a working standing leg that feels like it’s doing the heavy lifting.
Why it’s a good finish
The single-leg bridge hover asks the glute max to work hard while the pelvis stays calm. That combination is gold for stair climbing, walking, and getting up from low seats.
If the hamstring cramps, move the grounded heel closer to your seat and shorten the hold. If the low back takes over, come down and return to the standard bridge for a few more rounds.
Hold for 5 to 10 seconds per side, or do 5 slow hover reps. Clean form matters more here than anywhere else in the list.
This is the move that tells you the glutes are back online. Not perfect. Just awake.
Final Thoughts
You do not need all 18 moves in one session. Honestly, that would be overkill for most people. Pick 2 or 3 floor exercises, 1 standing move, and repeat them well.
If your hips are stiff and your glutes feel sleepy, start with bridges, clamshells, and side-lying work. If balance is the bigger issue, spend more time on standing kickbacks and side leg lifts. The best routine is the one you can do with clean form and enough consistency to matter.
Small work adds up. Quietly, then all at once.
