



The “shake” is the gold standard of any legitimate barre workout. You know the feeling: your muscles are screaming, your legs are quivering uncontrollably, and you are fighting the urge to stand up straight. That involuntary tremor is exactly where the change happens. It means you have pushed your slow-twitch muscle fibers to their absolute limit, recruiting the deeper stabilizers that standard cardio or heavy lifting often ignore.
Many people mistakenly believe that you need a wall-mounted wooden rail, a set of resistance bands, or light weights to get that signature fatigue. That is simply not true. While those props can add variety, the core mechanics of the barre method are rooted in isometric holds, high-rep pulses, and targeted anatomical focus. If you can hold your body weight against gravity and maintain perfect, agonizing alignment, you can transform your physique without spending a dime on equipment.
You do not need a studio membership or a home gym setup to experience this. In fact, training without the support of a barre actually forces your core to work twice as hard to maintain balance. It turns every standard movement into a stability challenge, making your abdominal wall, back extensors, and deep pelvic muscles fire in concert. The following movements are designed to be performed entirely with your own body weight, turning your living room floor or bedroom carpet into the most effective studio you have ever visited.
1. The Classic Plié Squat
The plié is the foundation of almost every barre session. Unlike a standard squat, which targets the glutes and hamstrings, the plié is all about the inner thighs and pelvic floor. You start by standing with your heels together and toes turned out about forty-five degrees, forming a narrow “V” with your feet.
How to Execute for Maximum Burn
Bend your knees, tracking them directly over your toes, and lower your hips straight down. Do not lean forward. Your back must remain flat against an imaginary wall behind you. Pulse at the lowest point of your squat—that is where the muscle engagement lives.
Form Cues for Success:
- The V-Shape: Keep your heels glued together. If they separate, you lose the inner thigh connection.
- The Spine: Keep your torso perfectly upright. If you tilt forward, you shift the load to your quads; keep it back to hit the glutes.
- The Range: Stay in the bottom third of the movement. You do not need to stand all the way up.
Why This Works
By keeping your heels together, you force your hips into external rotation. This recruits the deep rotators of the hip and engages the adductors (the inner thighs) in a way that parallel squats never can. It is simple, effective, and brutal if you hold it long enough.
2. Relevé Calf Raises
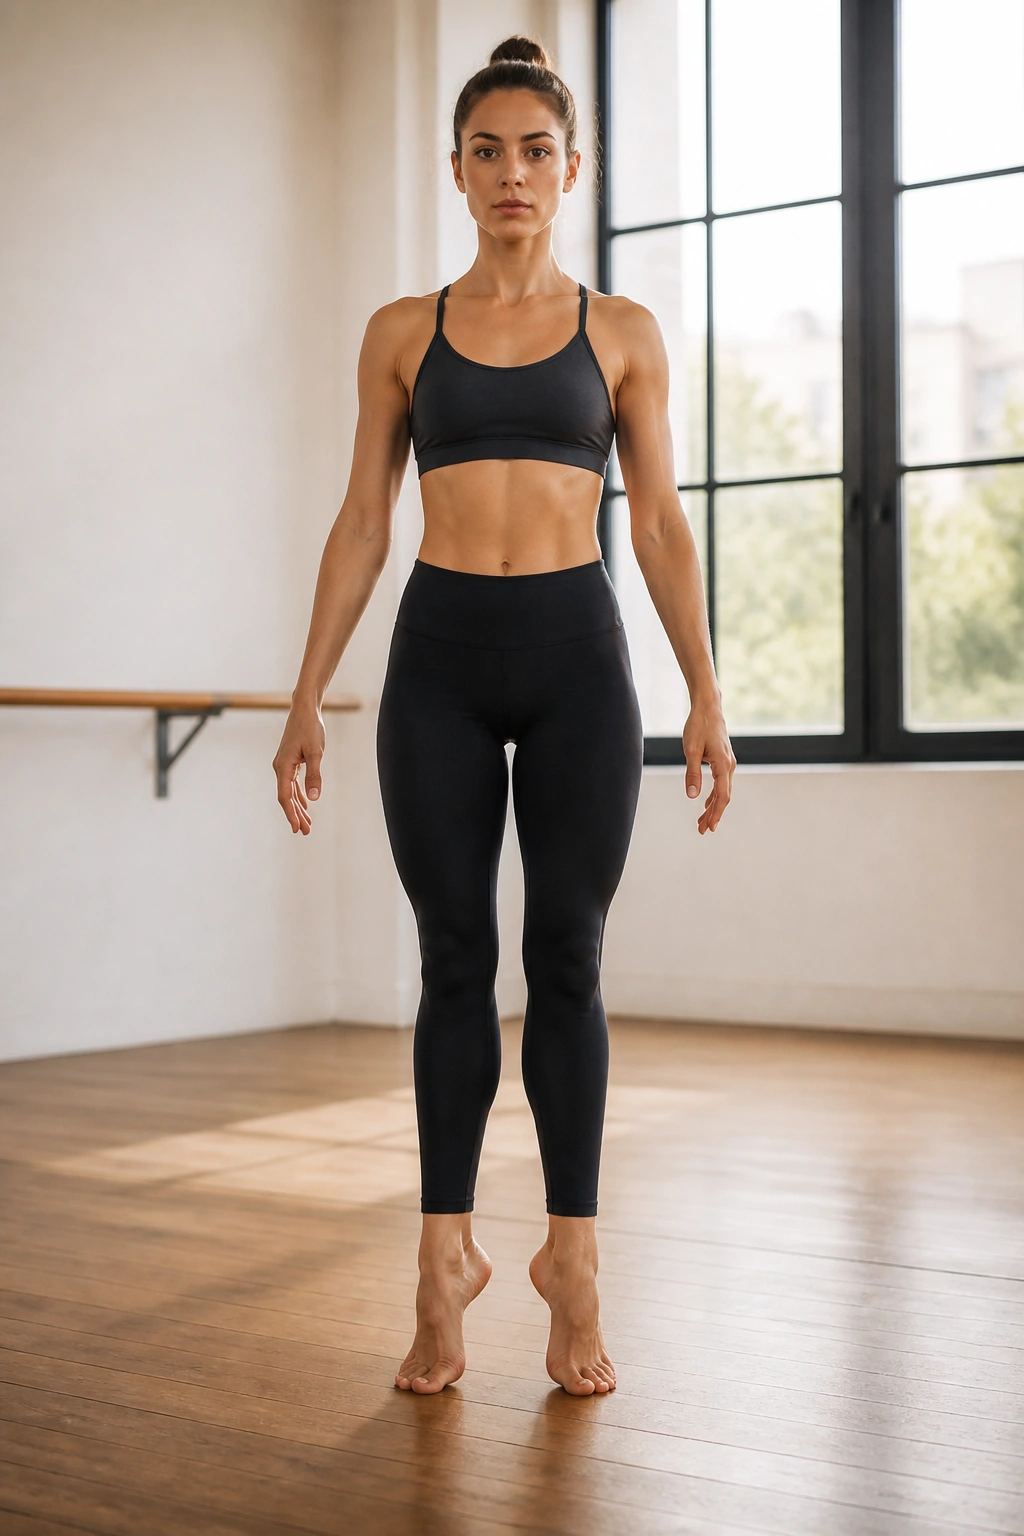
If you want that sculpted, tapered look in your lower legs, you have to prioritize the calves. In the barre world, we call this a relevé—the act of rising onto the balls of your feet. When you do this without a wall to hold onto, your ankles, feet, and core muscles have to stabilize you, turning a simple calf raise into a full-body balance act.
Executing the Perfect Relevé
Stand with your feet parallel, hip-width apart. Rise up onto the balls of your feet as high as you can, squeezing your glutes and drawing your navel toward your spine. Lower your heels with control, but do not let them touch the floor—stop just a millimeter above the ground before rising again.
Common Mistakes:
- Rolling the Ankles: Do not let your ankles roll outward (sickling) or inward. Keep your weight centered on the big toe and the second toe.
- Hyperextending the Knees: Keep a micro-bend in your knees if you tend to lock them out, as locking joints puts unnecessary stress on the ligaments.
The Benefit of Stability
Doing this without holding onto a chair forces your deep core muscles to fire to prevent you from wobbling. You will feel your obliques working just as hard as your calves. If you can do 50 of these without dropping your heels, you have earned your rest.
3. Standing Glute Kickbacks
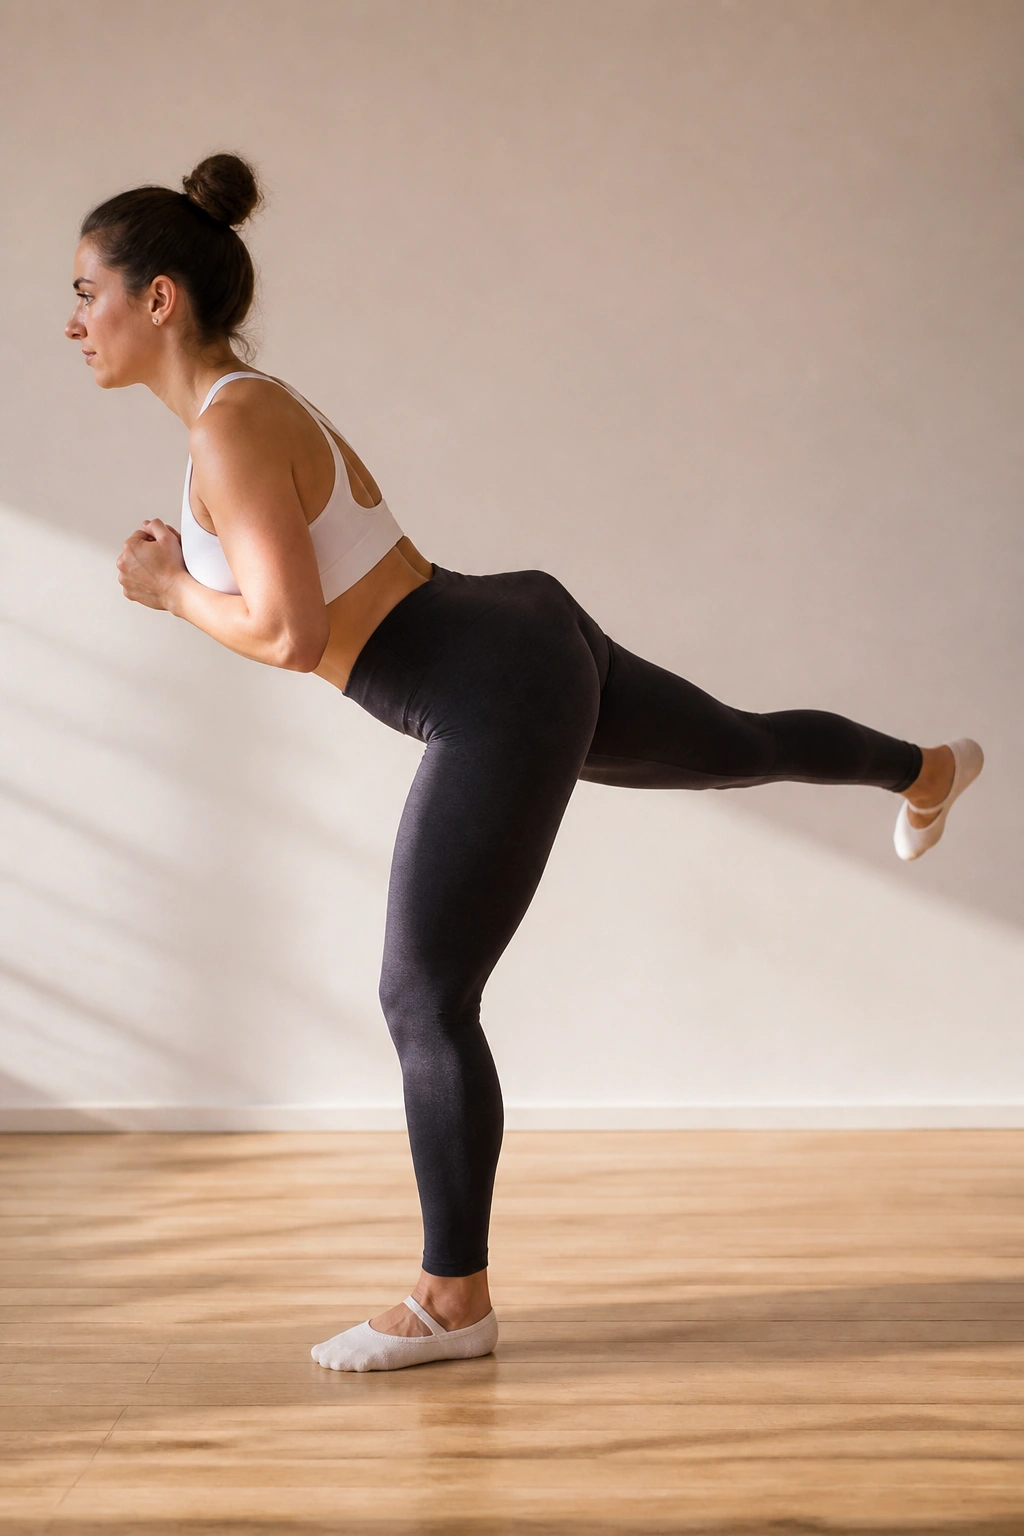
Most leg exercises focus on the front of the body, but barre is obsessed with the “seat.” The glute kickback is a targeted isolation movement that creates that lifted, sculpted look by attacking the gluteus maximus directly.
The Mechanics
Stand tall on your left leg. Point your right toes behind you, keeping your leg straight but not locked. Hinge slightly forward at the hips, keeping a long, flat back. Lift your right leg just a few inches off the floor, squeezing your right glute. Pulse the leg upward, making small, controlled movements.
Key Anatomical Focus
This movement is not about momentum; it is about mind-muscle connection. You are not trying to kick the ceiling. You are trying to squeeze your glute hard enough to lift the leg. Focus on the pocket of muscle where the glute meets the hamstring.
- Keep your supporting knee slightly soft to prevent strain.
- Do not open your hips to the side. Keep your hip bones pointing directly toward the floor to ensure the glute remains the primary mover.
4. Second Position Isometric Hold
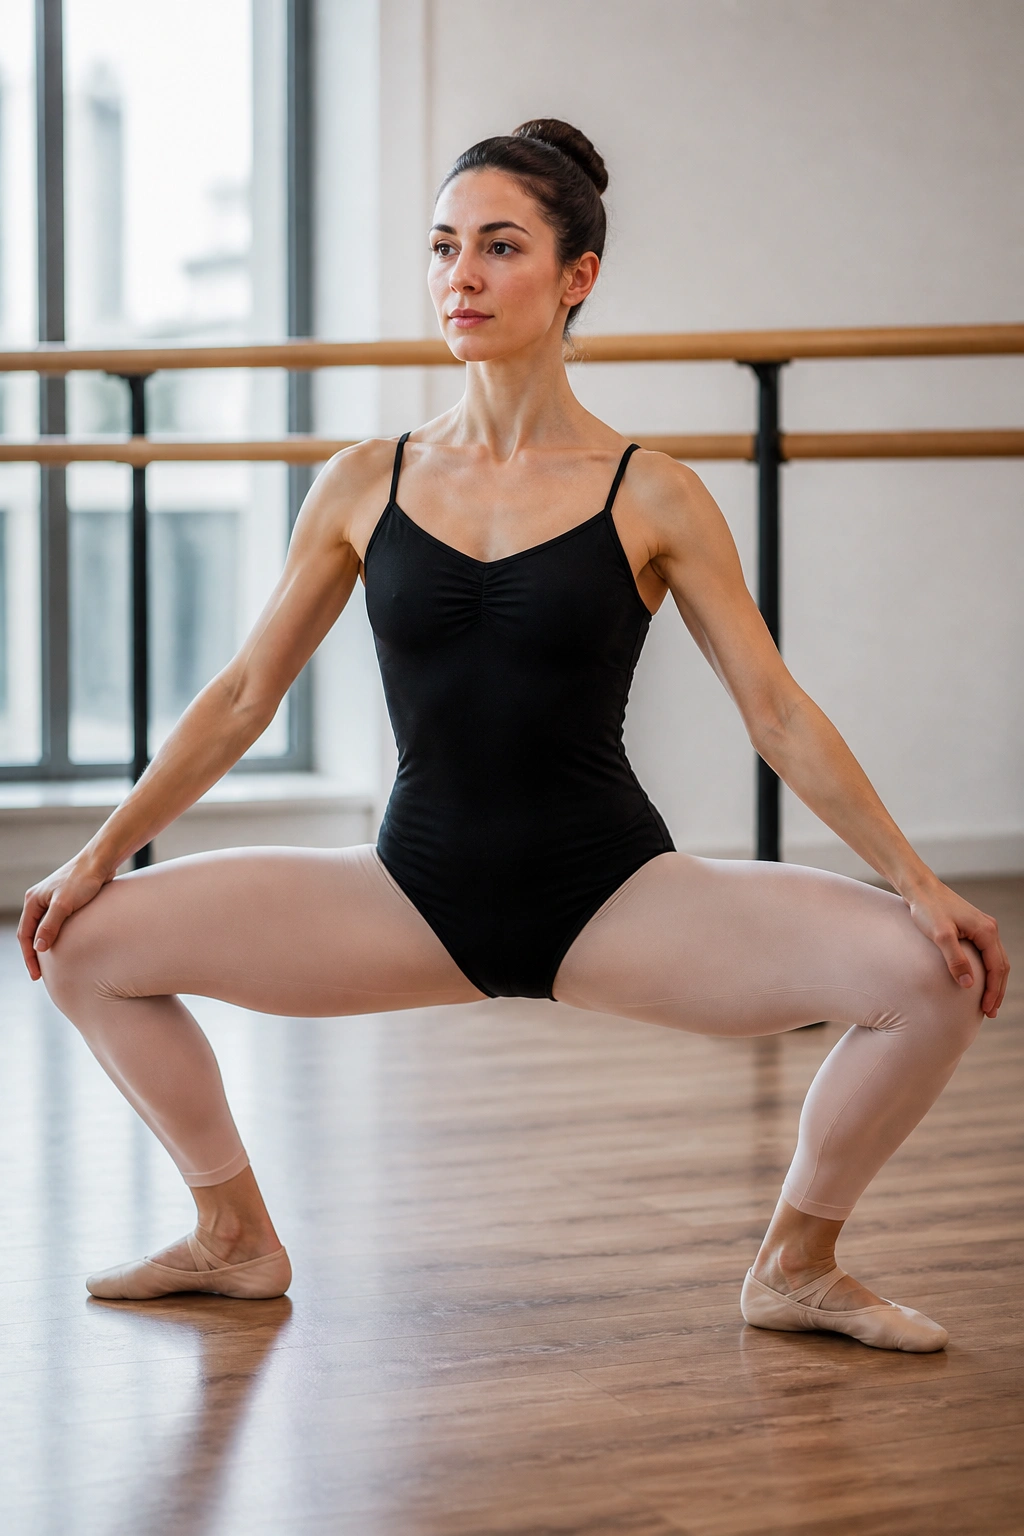
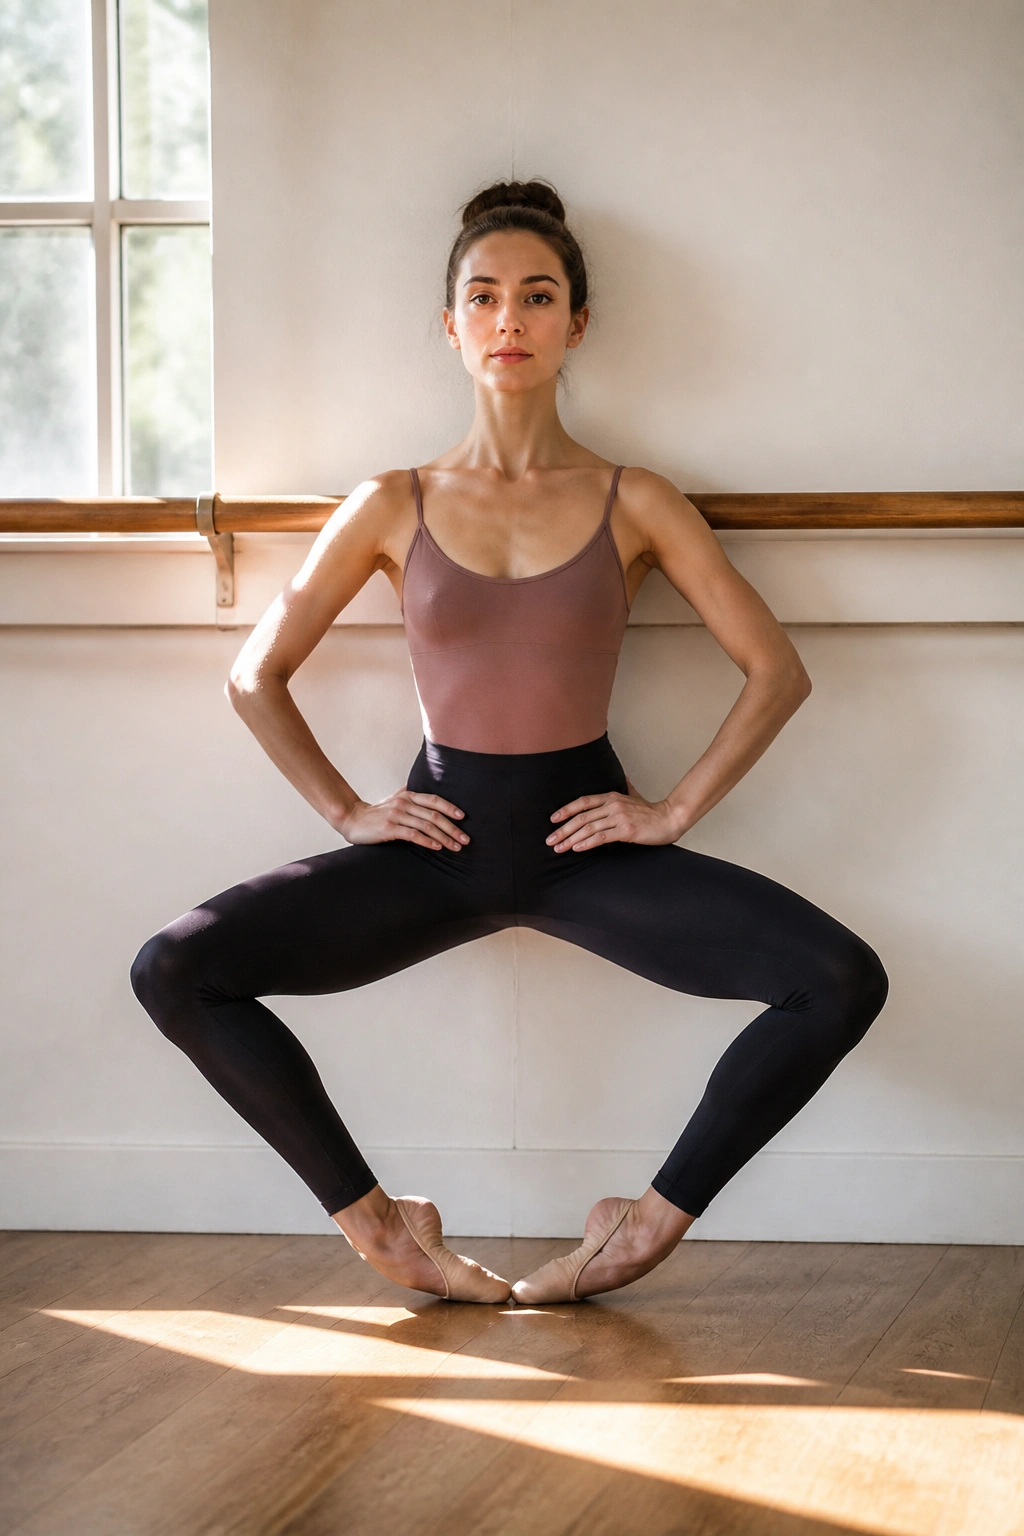
Second position is the wide-stance variation of the plié. It requires significant hip mobility and endurance. This is often the exercise that makes people quit, which is exactly why it is the most effective.
Mastering the Stance
Step your feet out wide, wider than shoulder-width, with toes turned out. Sink into a deep squat, ensuring your knees are tracking wide over your toes. You want to create a diamond shape with your legs. Now, hold it.
Adding the Pulse
Holding the static position is hard, but adding a pulse makes it transformative. Pulse down one inch, up one inch. Do this for a full minute, and you will feel an uncontrollable burn in your quads and glutes.
- Pro Tip: If your quads are shaking, you are doing it right. Do not come out of the squat to “rest.” Breathe through the shake and sink an inch deeper. This builds the mental stamina that defines barre training.
5. Curtsy Lunges
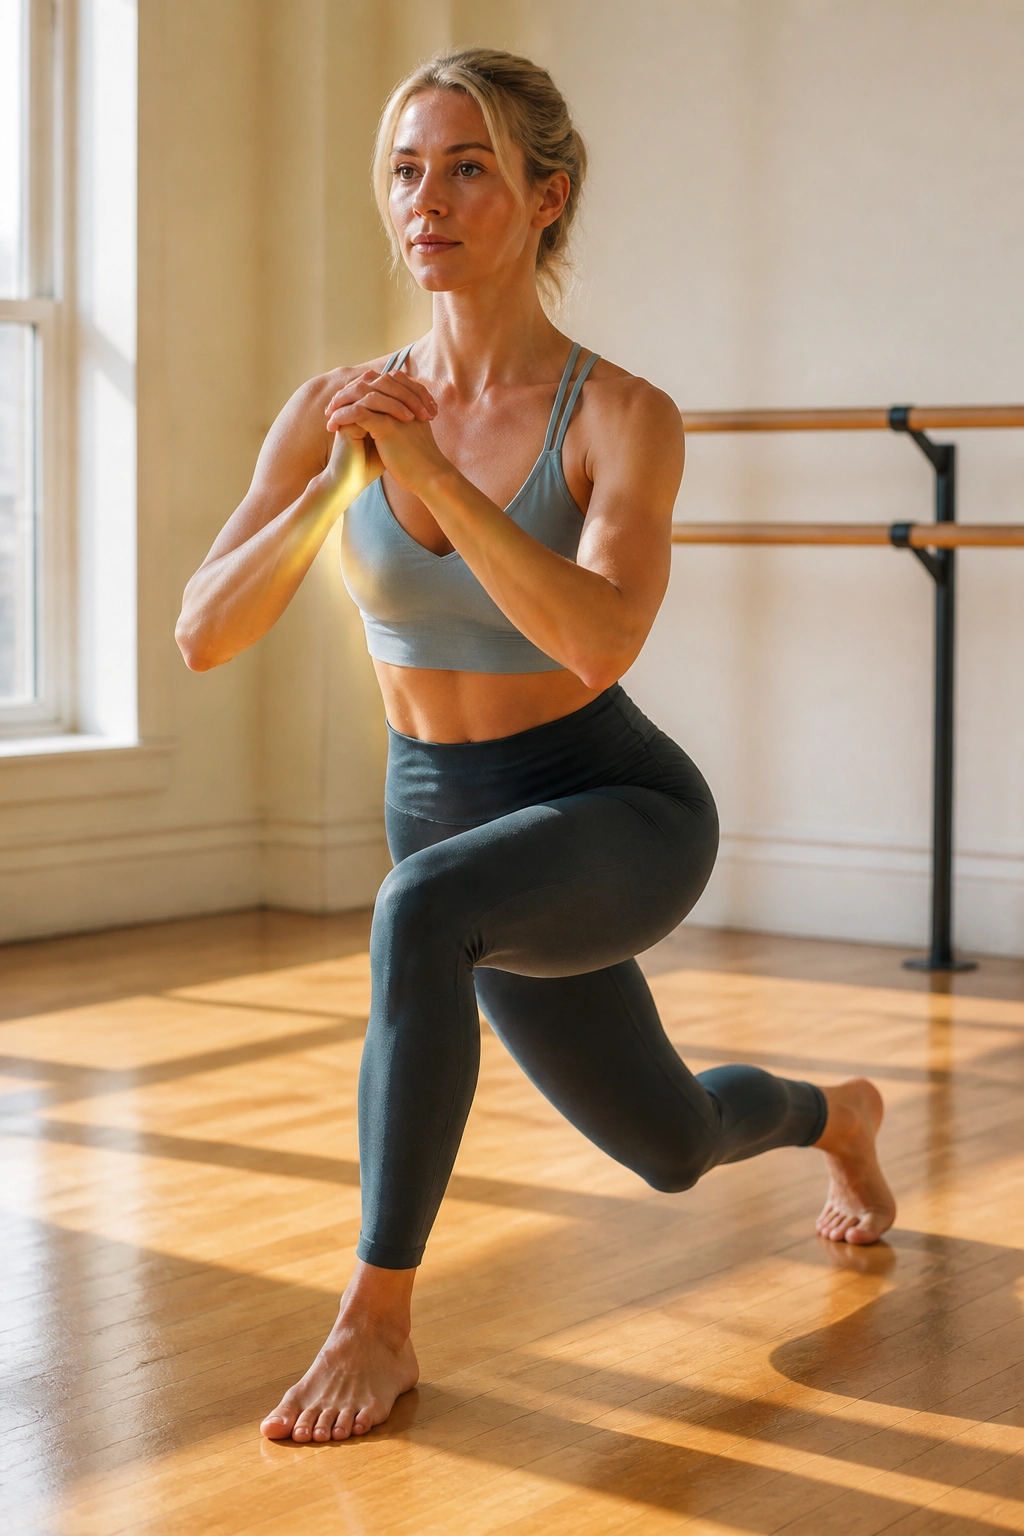
Curtsy lunges are exceptional for the gluteus medius—the muscle on the side of your hip that gives you stability. Unlike a standard reverse lunge, the curtsy involves crossing your back leg behind your front leg, putting your hips into a unique position of tension.
The Movement Pattern
Stand with feet parallel. Step your right foot behind and across your left, placing the ball of your foot on the floor. Sink down as if you are curtsying to royalty. Keep your chest up and square to the front. Return to center and repeat on the other side.
Why the Crossover Matters
By crossing the leg behind, you are effectively lengthening the gluteus medius and putting it on stretch. When you rise out of the lunge, you are forcing that muscle to contract from a lengthened position. This is the secret to building lateral hip strength and balance.
- Ensure your front knee stays behind your toes to protect the joint.
- Keep your torso upright—do not hunch over your front knee.
6. Arabesque Pulses
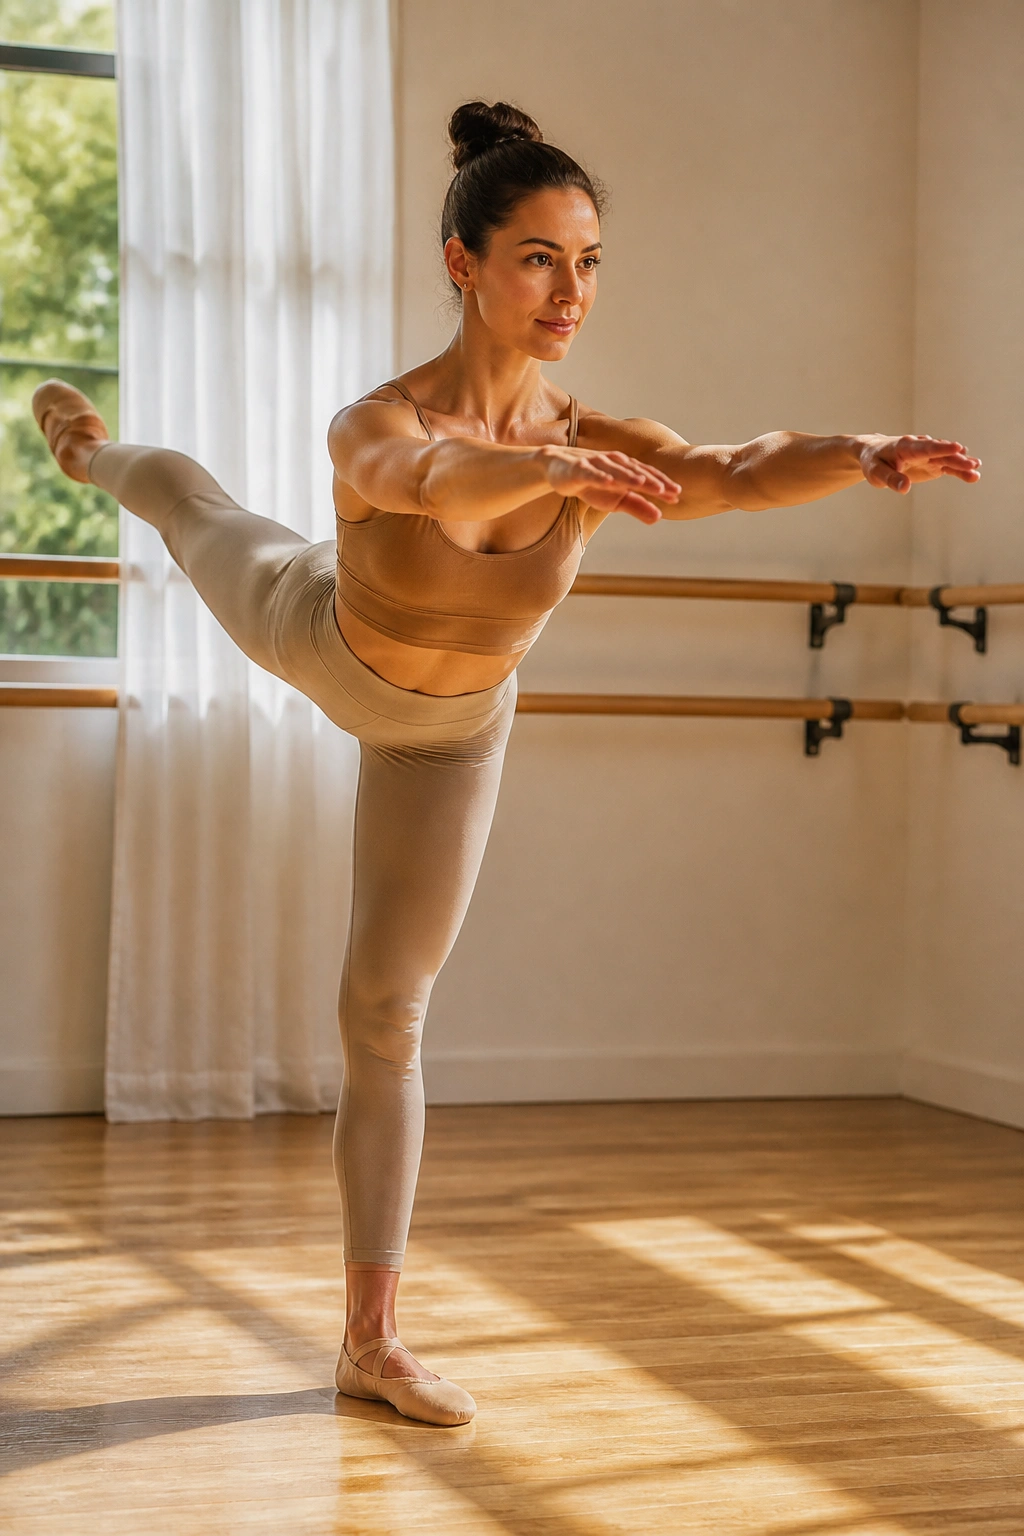
The arabesque is a classic ballet move that we borrow for its ability to strengthen the entire posterior chain. It targets the lower back, the glutes, and the hamstrings simultaneously.
Finding Your Balance
Stand on your left leg. Hinge forward, extending your right leg long and straight behind you. Lift the right leg up as high as it will go without arching your lower back to compensate. Reach your arms forward for counterbalance.
The Pulse
Once you find that shaky balance point, pulse the back leg up toward the ceiling. Every time you pulse, think about squeezing your back muscles and your glutes.
- Stability Warning: Without a barre to hold, this is essentially a single-leg deadlift hold. If you find yourself falling, tap your toe to the ground, reset, and lift again. The “falling” is just your stabilizer muscles learning how to work.
7. Floor-Based Inner Thigh Squeezes
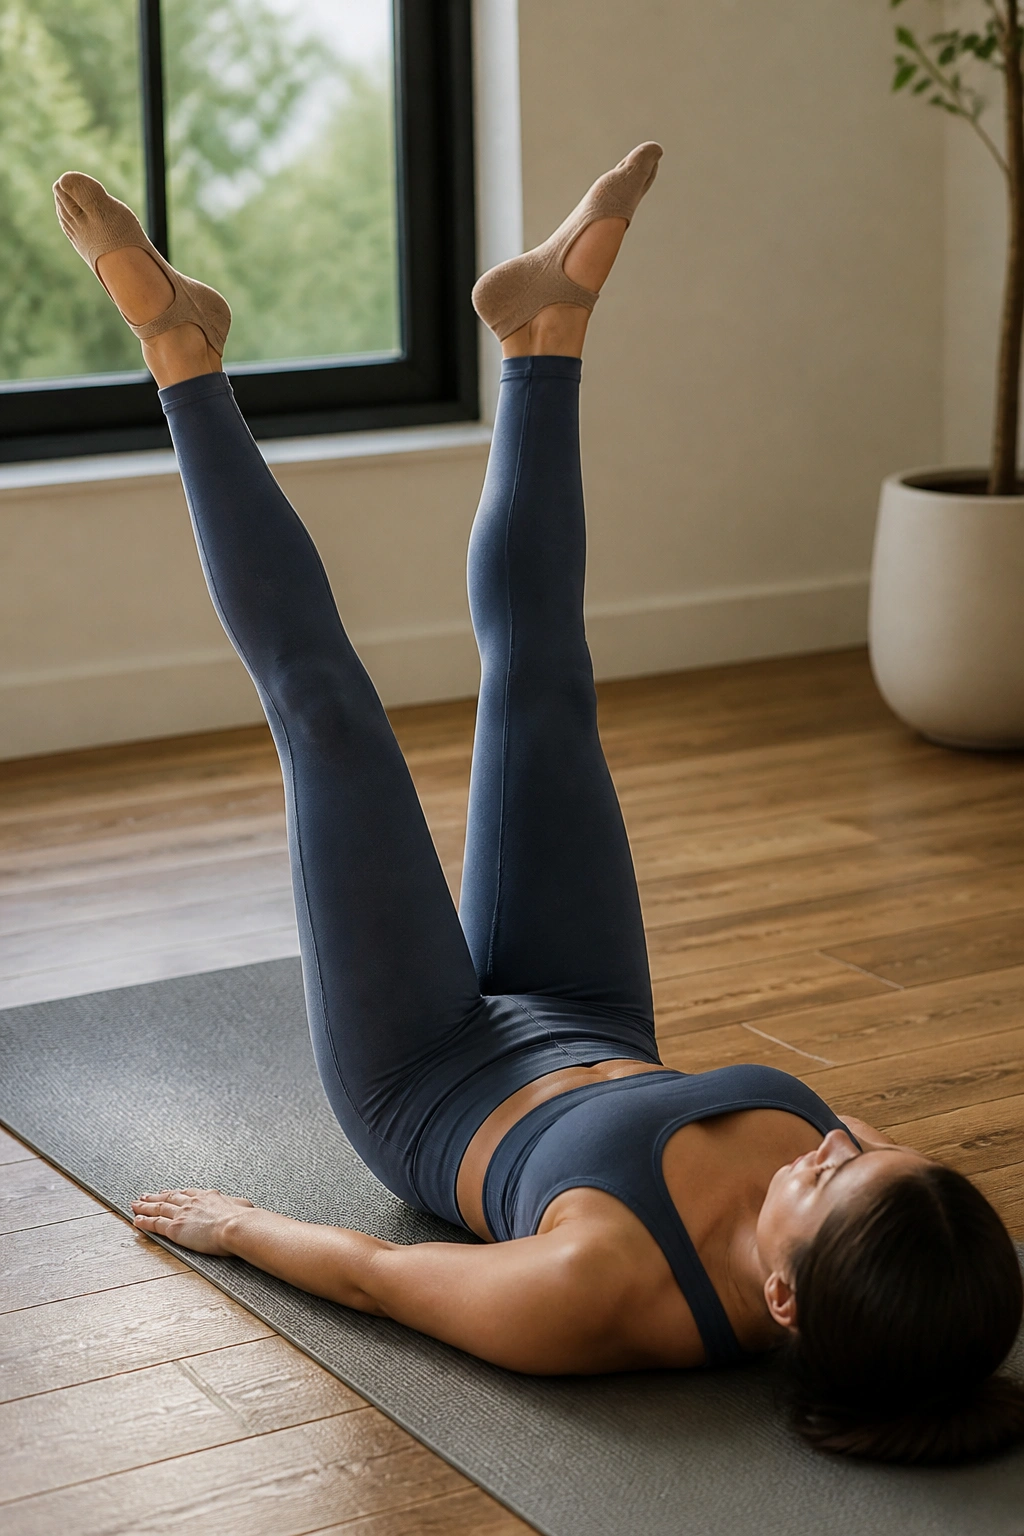
We often spend so much time on our feet in barre that we forget the floor is a massive tool. You do not need a soft pilates ball for this. Your own resistance—or simply the lack of support—is enough.
The Execution
Lie on your back, legs extended straight up toward the ceiling, heels together, toes turned out. This is your “V” position in the air. Lower your legs about 45 degrees, or as low as you can go while keeping your lower back pressed firmly into the floor.
Adding Intensity
From this position, beat your heels together. Imagine you are trying to crush a grape between your heels. Do small, rapid pulses, squeezing your inner thighs together with every beat.
- Crucial Core Warning: If your lower back arches off the floor, your legs are too low. Lift them higher toward the ceiling. Protecting your spine is more important than the intensity of the inner thigh work.
8. Side-Lying Leg Lifts
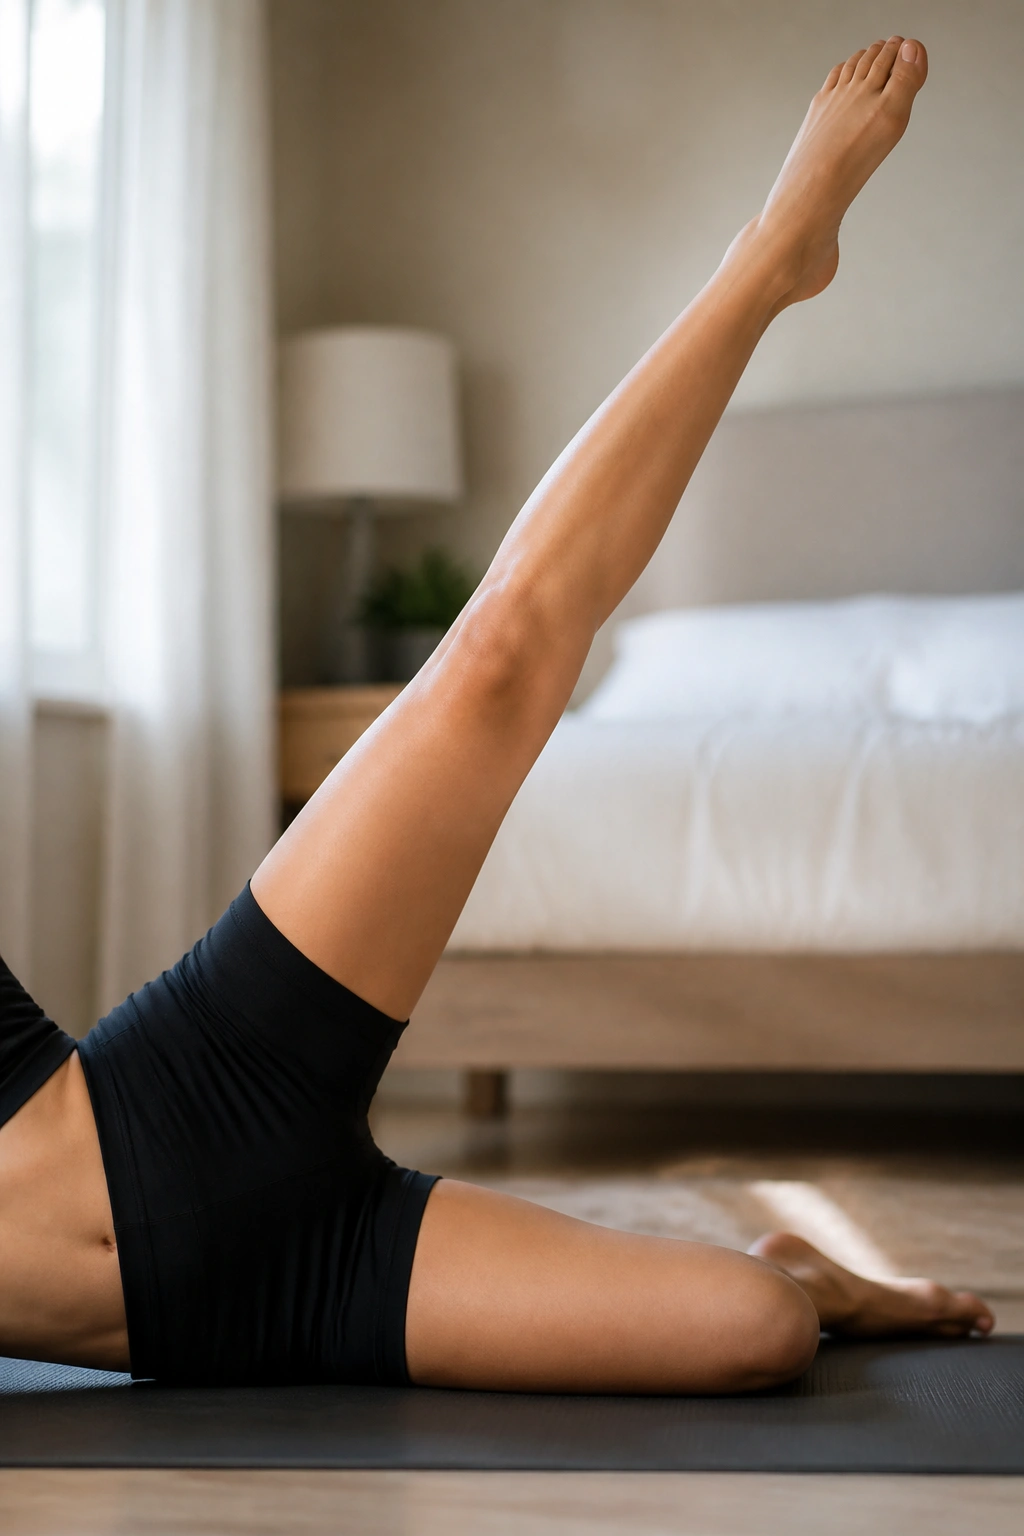
This is the ultimate exercise for the “shelf” of the glutes—that area where the back of the leg meets the hip. It is simple, but the burn is intense.
Setting Up
Lie on your side. Stack your hips perfectly—do not let your top hip roll back. Extend your top leg out straight. Point your toe.
The Movement
Lift the leg toward the ceiling, then lower it with control. Do not let it “drop.” Feel the resistance on the way down. After 20 reps, hold the leg up and perform small, tight circles.
- The “Burn” Factor: If your hip starts to feel like it is on fire, that is the goal. That feeling is the lactic acid buildup, which signals that you are challenging the muscle. Keep going for another 10 reps, even if you want to stop.
9. Clamshells
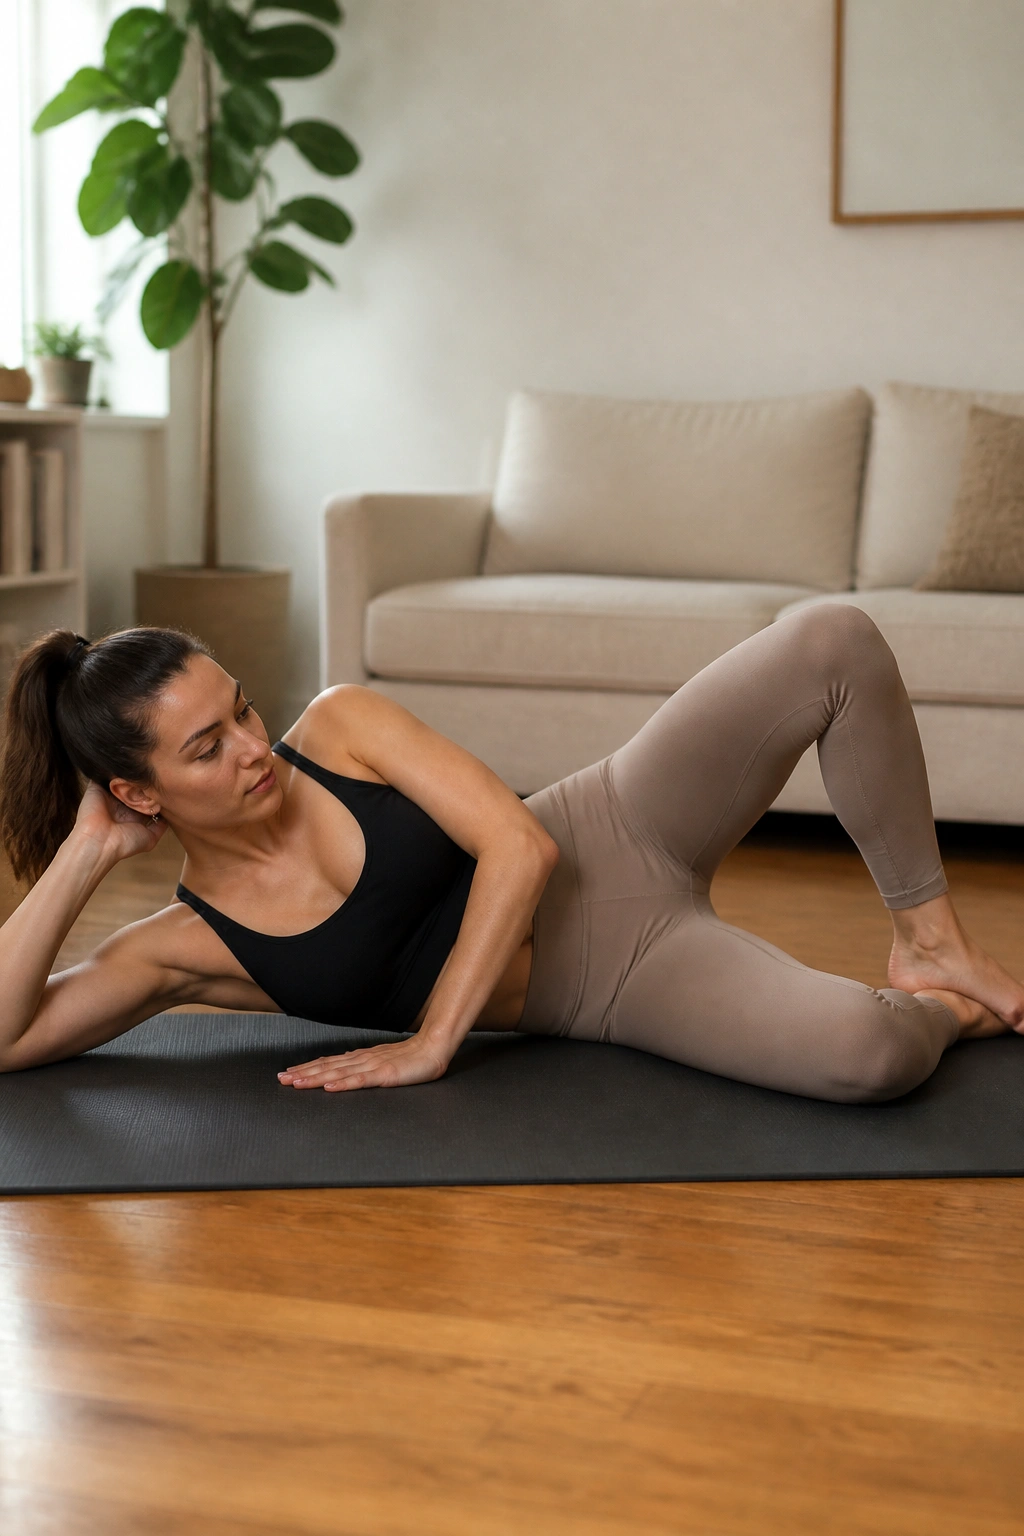
Clamshells are deceptively simple, but when done with slow, intentional control, they exhaust the hip abductors. This is essential for preventing knee pain and stabilizing your gait.
The Position
Lie on your side with your knees bent at a 45-degree angle. Keep your feet touching. Open your top knee upward, like a clam opening its shell, while keeping your feet glued together.
Why Speed Kills Progress
People often rush this move, using momentum to swing the leg open. Stop. Move slowly—take two seconds to open, two seconds to close. The friction and resistance of your own muscle are the “weights” here. You should feel the burn deep in the side of your hip within ten reps.
10. Plank to Pike
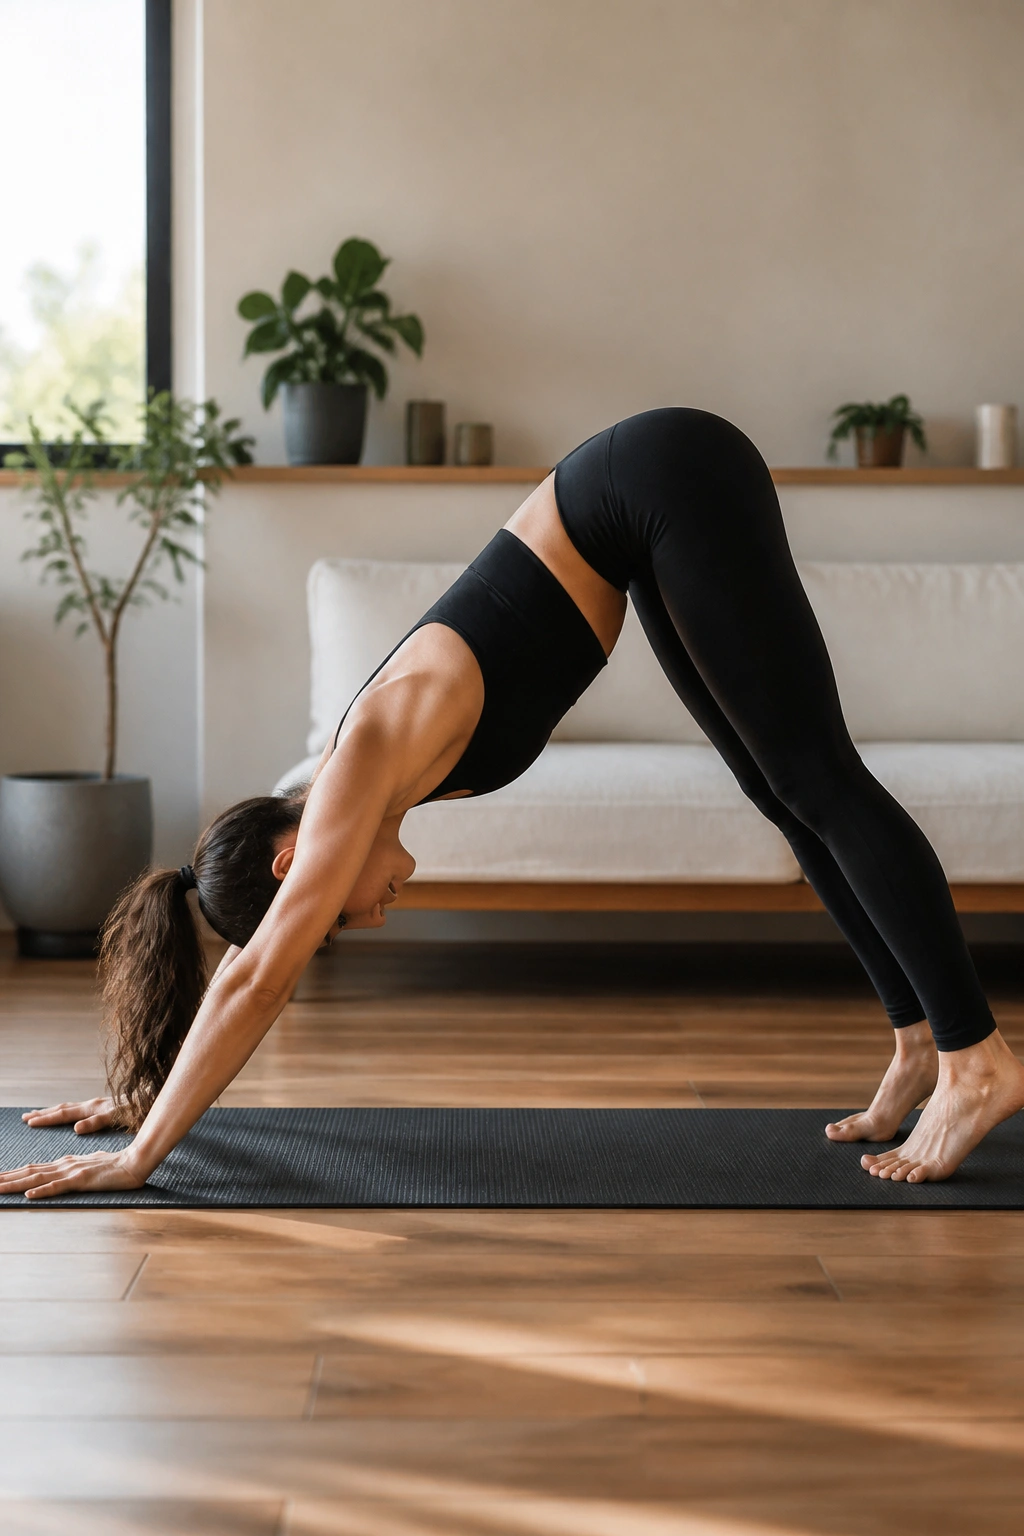
Barre is not just about the lower body; it is about core control. A plank-to-pike movement works the shoulders, the abs, and the hamstrings, all while maintaining the grace of the ballet method.
The Flow
Start in a high plank position. Press your hips up and back toward the ceiling, forming an inverted “V” shape. This is the pike. Pause for a second, feeling the stretch in your hamstrings, then slowly articulate your spine back down into the plank position.
- Controlled Articulation: Do not just drop your hips. Think about rolling through your spine, one vertebra at a time, until you hit the plank. This engages the deep core muscles (the transverse abdominis) that protect your back.
11. Glute Bridges
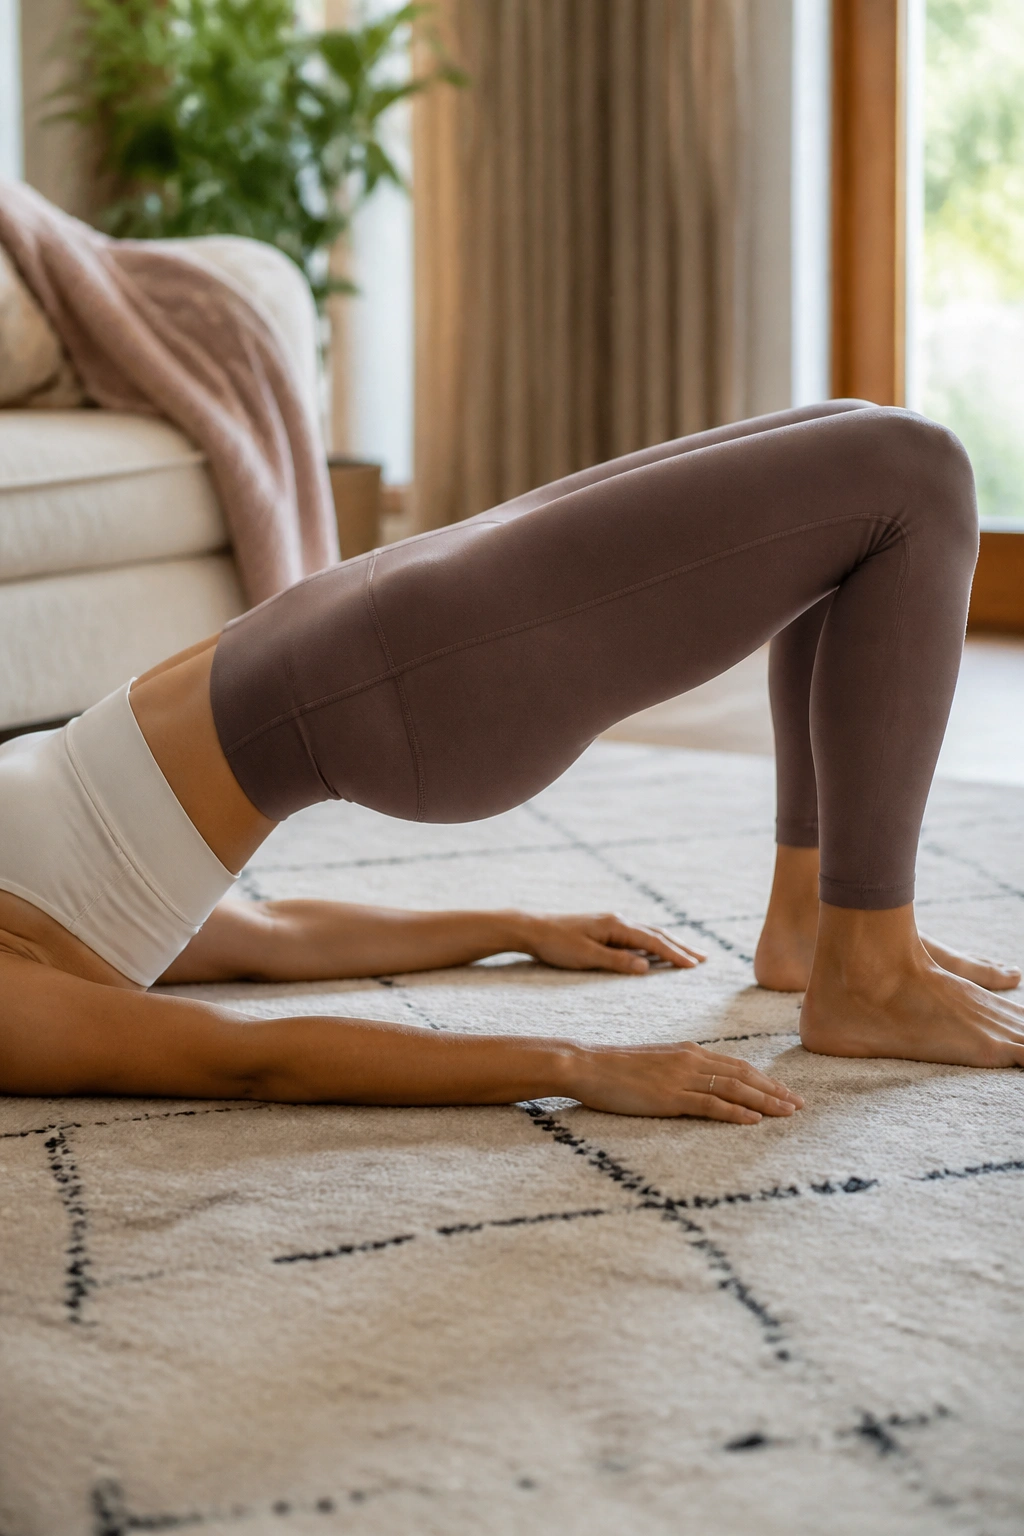
Glute bridges are a staple, but we are going to do them “barre style.” That means we are ditching the heavy weights and focusing on the squeeze at the top.
The Setup
Lie on your back with knees bent and feet flat on the floor, hip-width apart. Squeeze your glutes to lift your hips toward the ceiling. Your body should form a straight line from knees to shoulders.
The Barre Twist
At the very top, pulse your hips up one inch. Squeeze at the peak for two seconds. Lower your hips down, but stop an inch before they touch the floor. Keep the tension on the glutes the entire time.
- Neck Safety: Keep your gaze fixed on the ceiling. Do not tuck your chin into your chest or let your head roll back. Keep your neck long and neutral.
12. Swan Dive Extension
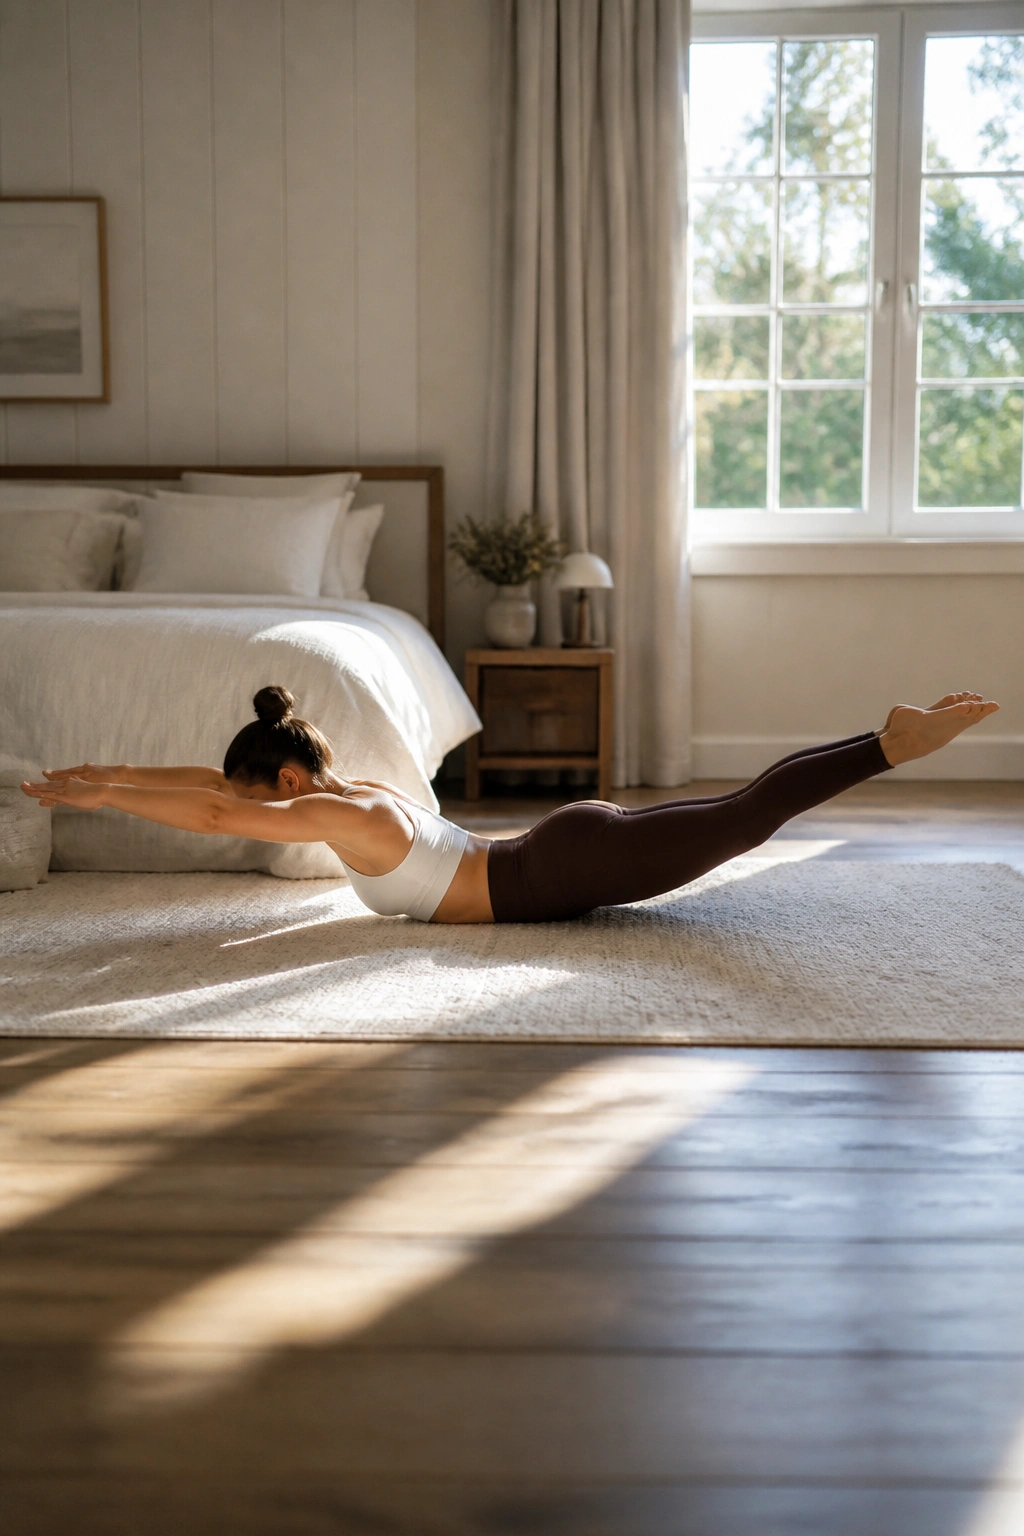
Barre helps with posture by strengthening the back chain—the muscles that keep you standing tall. The Swan Dive is perfect for this.
The Motion
Lie on your stomach, arms extended forward. Simultaneously lift your chest and your legs off the floor. Your body should form a shallow arc, like a swan. Hold this extension, then lower back down.
Mind-Body Connection
Focus on lifting from your lower back and glutes, not by yanking your neck up. Keep your gaze toward the floor so your neck stays in line with your spine. This isn’t about how high you can go; it’s about activating those postural muscles between your shoulder blades.
13. Tabletop Leg Extensions
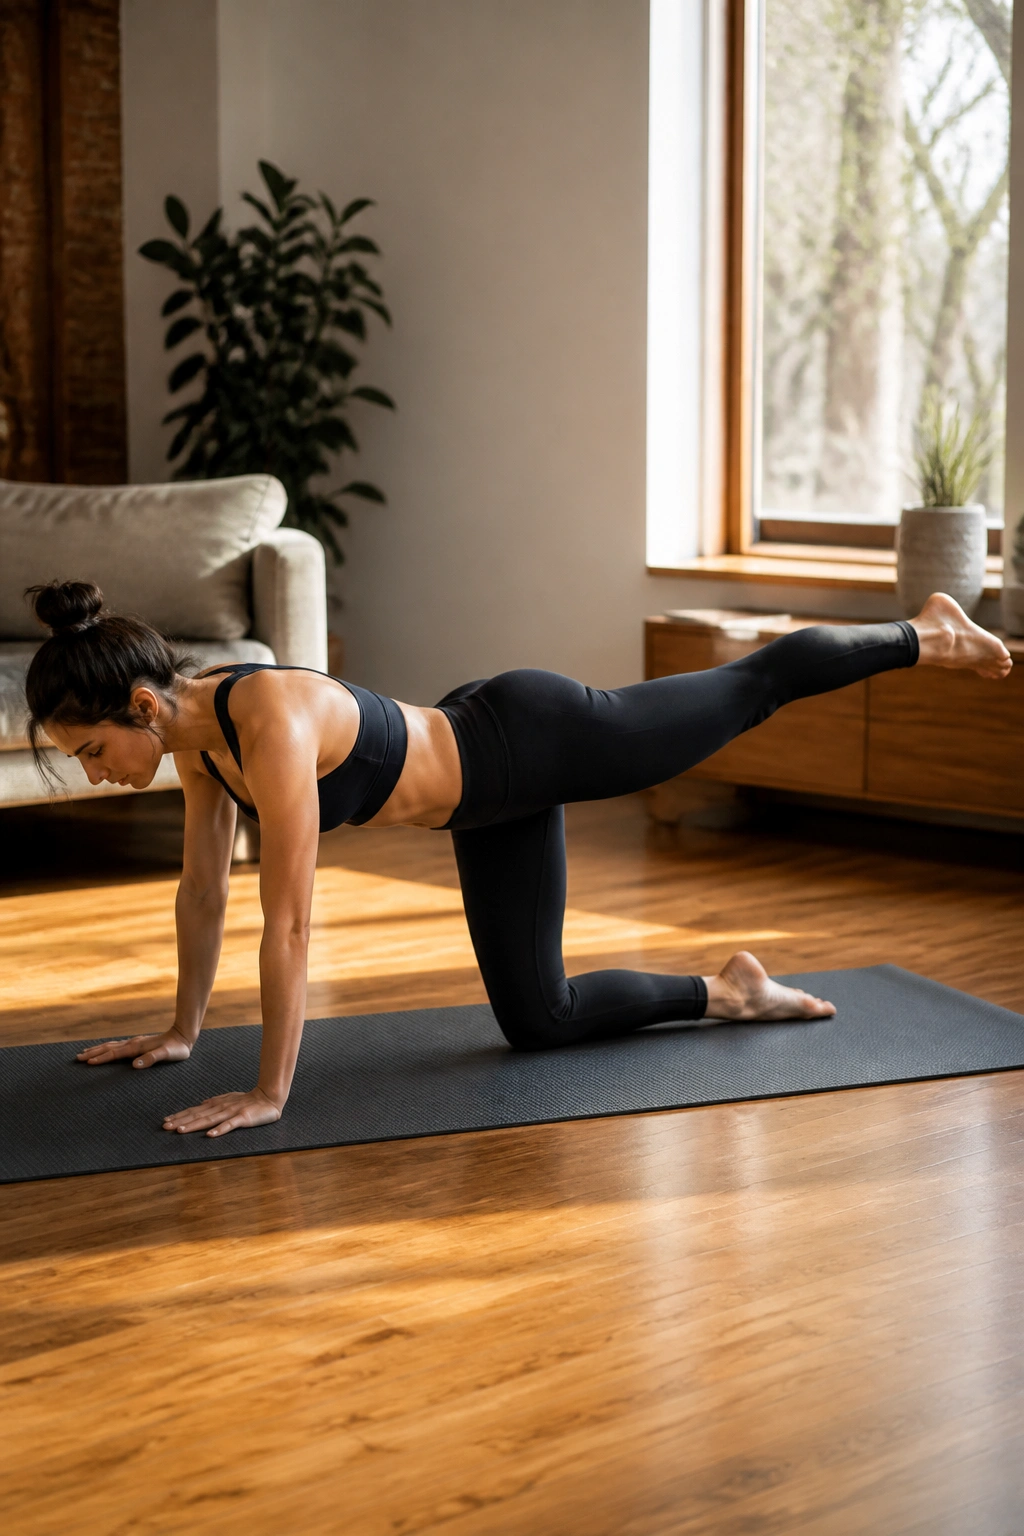
This exercise is excellent for core stability and glute strength. It mimics movements often done with a barre or a machine, but it is just as effective on the floor.
The Starting Point
Get into a tabletop position on your hands and knees. Ensure your wrists are under your shoulders and knees under your hips. Extend your right leg straight back behind you, toe pointed.
The Lift
Lift the leg until it is parallel to the floor, then tap your toe down. Keep your torso completely still. If your body is rocking side to side, you are moving too fast. Your core should be so tight that not a single muscle in your torso moves while your leg is in motion.
14. Side Plank Dips
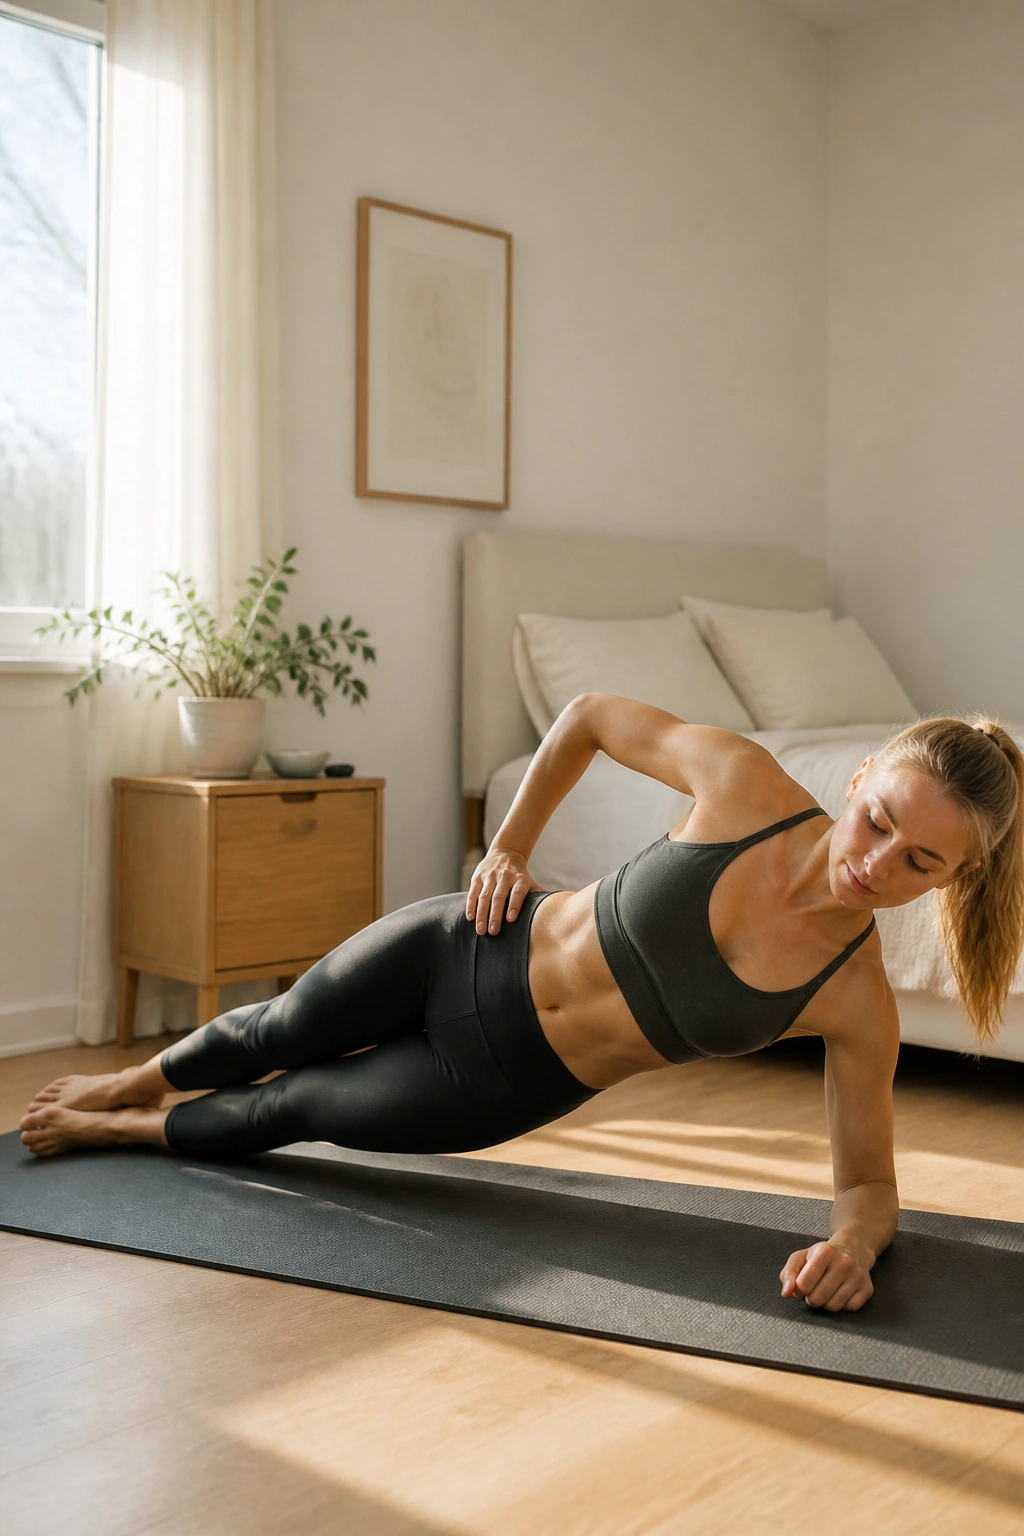
Obliques define the waist, and side planks are the best way to target them. Adding a “dip” turns a static hold into a dynamic, calorie-burning endurance exercise.
The Setup
Prop yourself up on your side with your elbow directly under your shoulder. Stack your feet. Lift your hips so your body forms a straight line.
The Dip
Lower your hip toward the floor—just tap it—then push back up to the starting position. This small range of motion targets the muscles on the side of your waist immediately.
- Shoulder Health: If this hurts your shoulder, you can perform it with your bottom knee on the floor. It is just as effective for the obliques, provided you keep your core tight.
15. Bicycle Crunches (Barre Tempo)
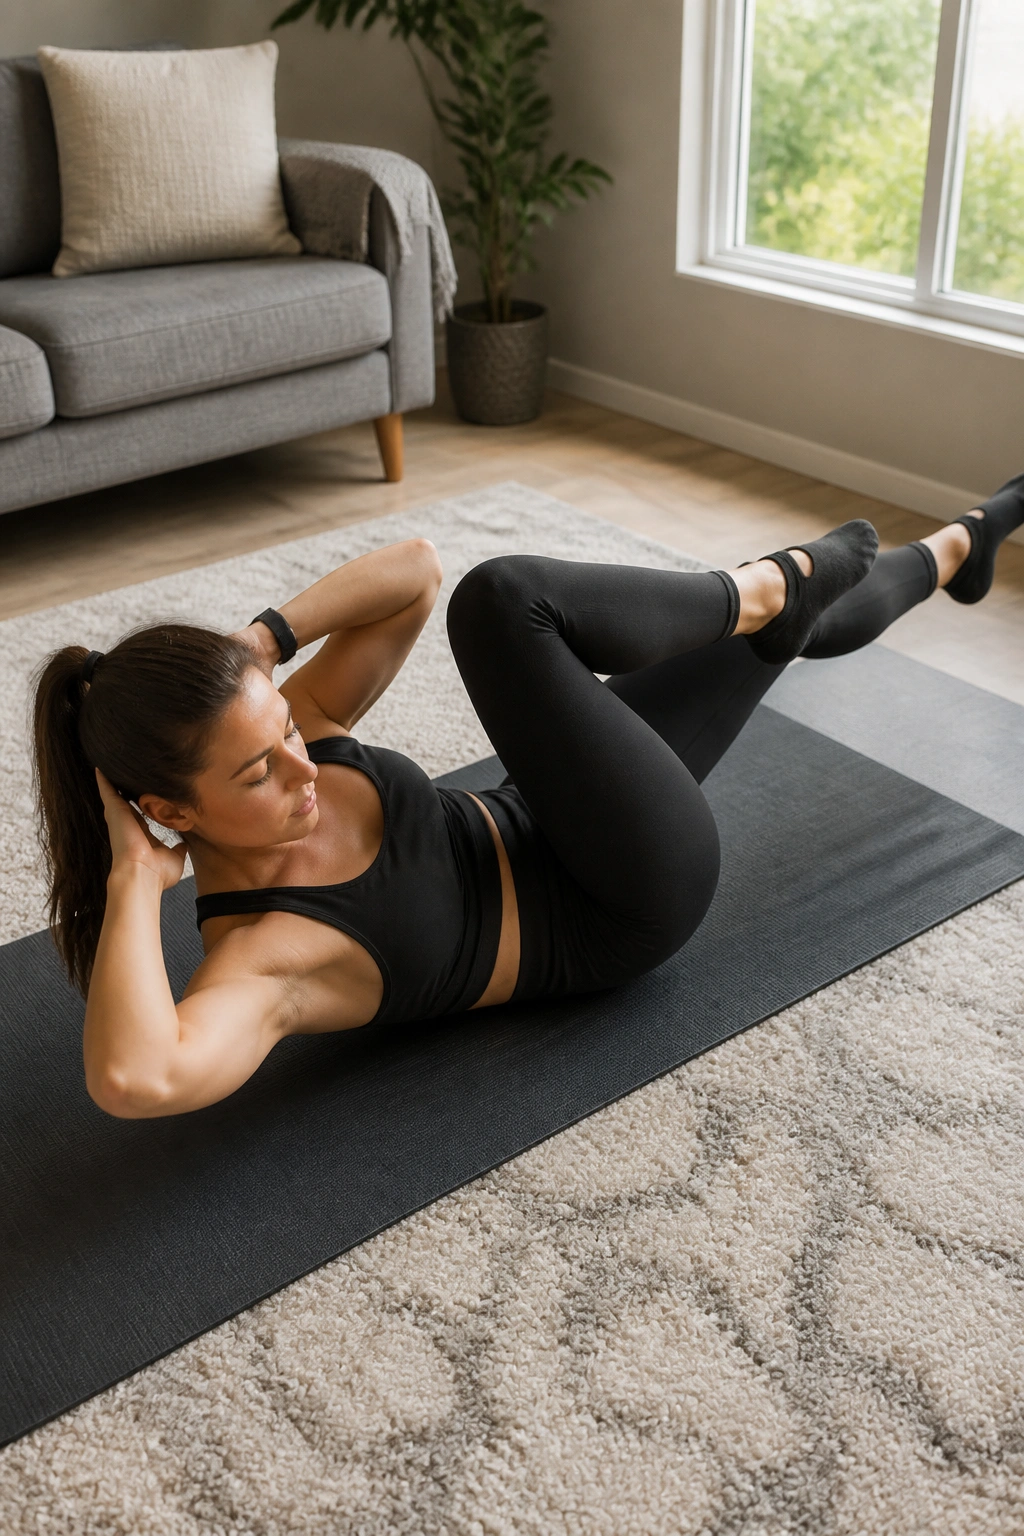
We all know bicycle crunches, but most people do them way too fast. In barre, we slow it down. The speed creates the tension, and the tension creates the change.
The Slow Method
Lie on your back, hands behind your head (but not pulling on your neck). Lift your legs to tabletop. Extend one leg while bringing the opposite elbow to the bent knee. Hold the twist for two seconds. Switch sides.
Why Tempo Matters
When you move slowly, you cannot use momentum. You are forced to use your abs to rotate your torso. If you are rushing through these, you are missing the point. Slow down until you feel your obliques shaking.
16. Donkey Kicks
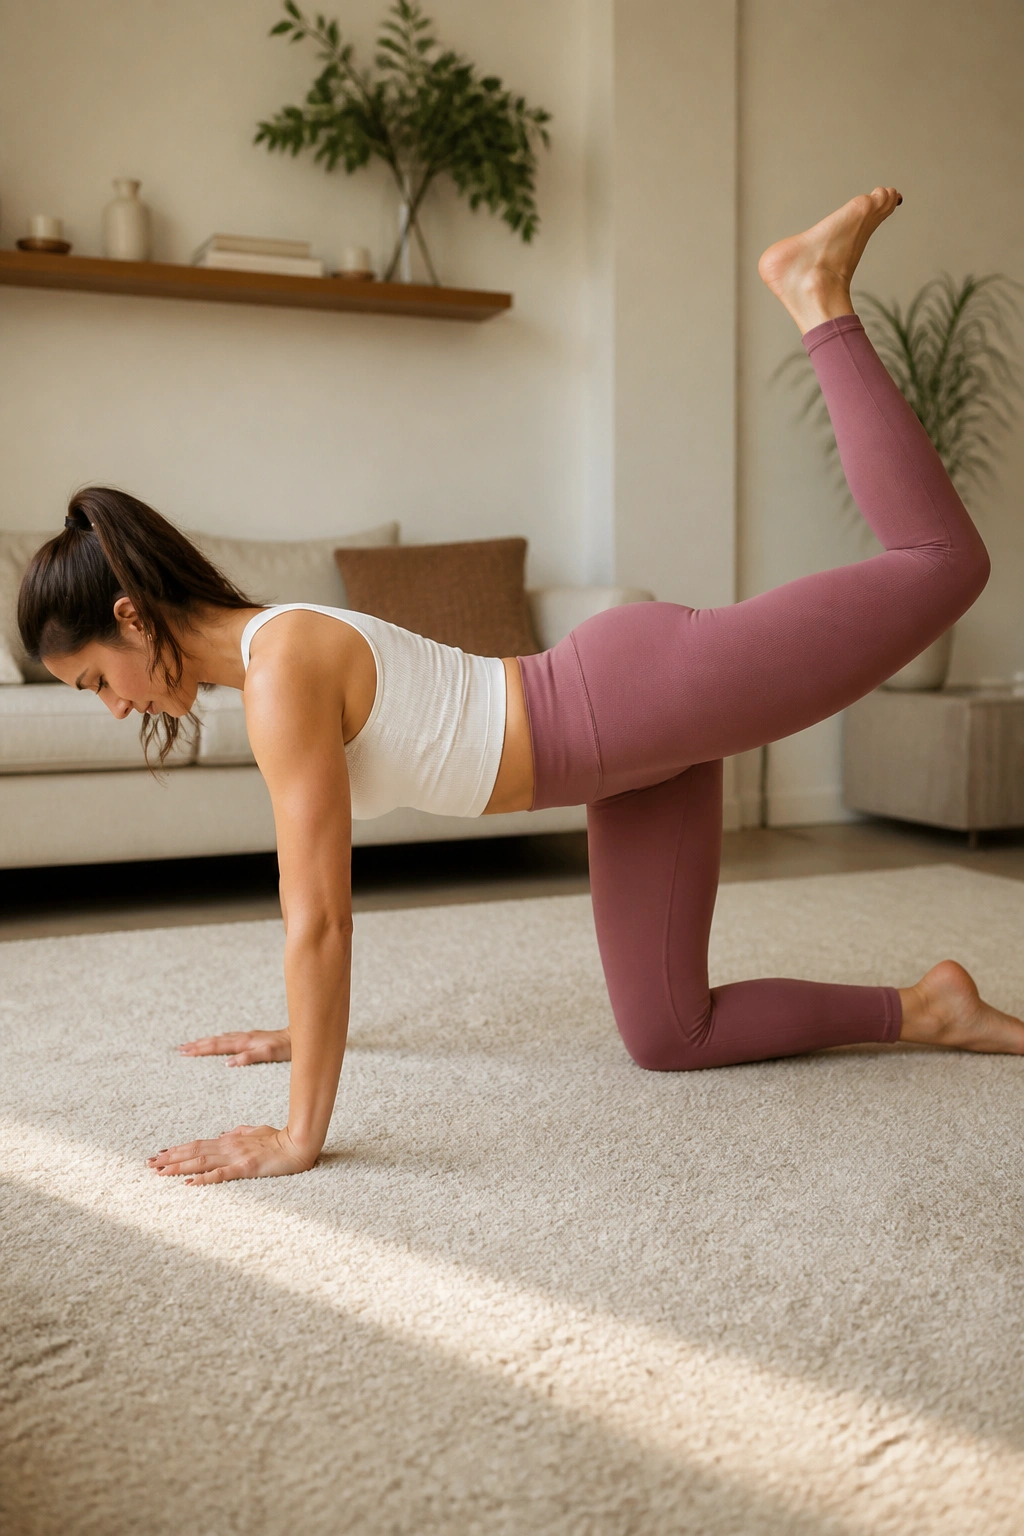
Donkey kicks are a classic for a reason: they isolate the glutes perfectly. When you have no gear, this is one of the most reliable ways to tire out the backside of your legs.
The Execution
Start in your tabletop position. Keep your right knee bent at a 90-degree angle. Lift your leg, pushing the sole of your foot toward the ceiling. Squeeze your glute at the top of the movement.
- Avoid the Arch: It is very common to arch the lower back as you lift the leg. Fight this. Keep your back flat as a table. If your back arches, you are using your lumbar spine, not your glutes.
17. Fire Hydrants
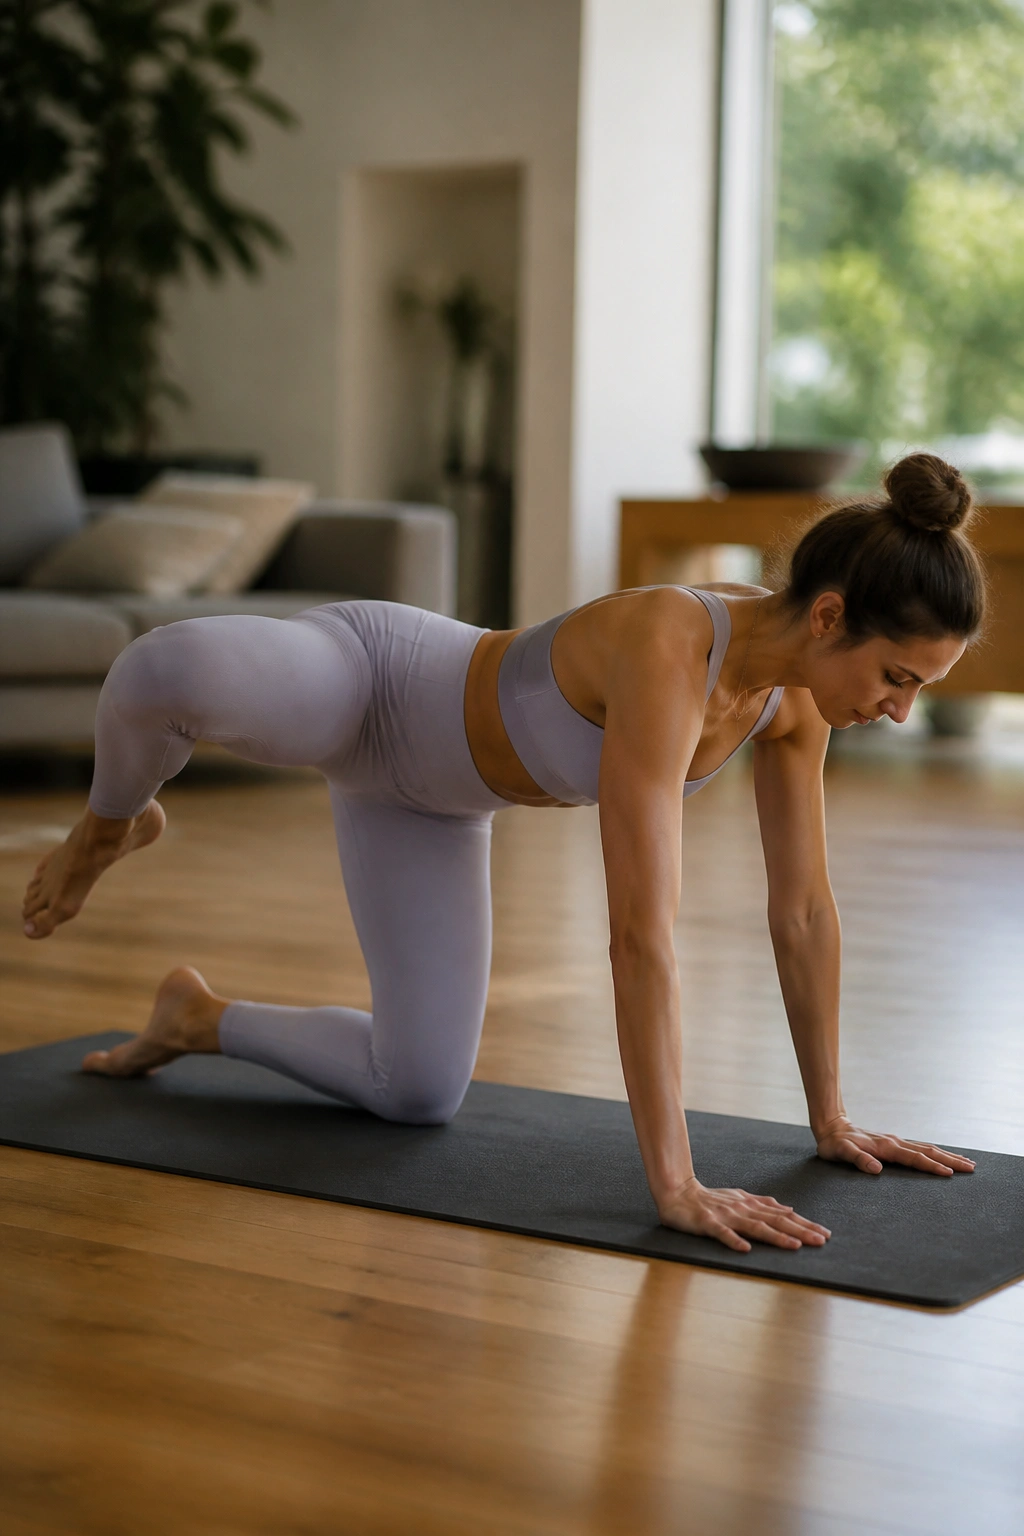
These target the gluteus medius, just like the clamshells, but from a different angle. They are crucial for hip strength and help stabilize the pelvis.
The Movement
From your tabletop position, lift your right knee out to the side, keeping it bent, like a dog at a fire hydrant (hence the name). Lower it back down without letting your knee touch the floor.
Focus on Control
This is not about how high you can lift the knee; it is about keeping your pelvis level. As you lift the knee, you will naturally want to tilt your entire body to the side. Do not let that happen. Use your abs to pin your hips in place, moving only the leg.
18. Mermaid Stretches
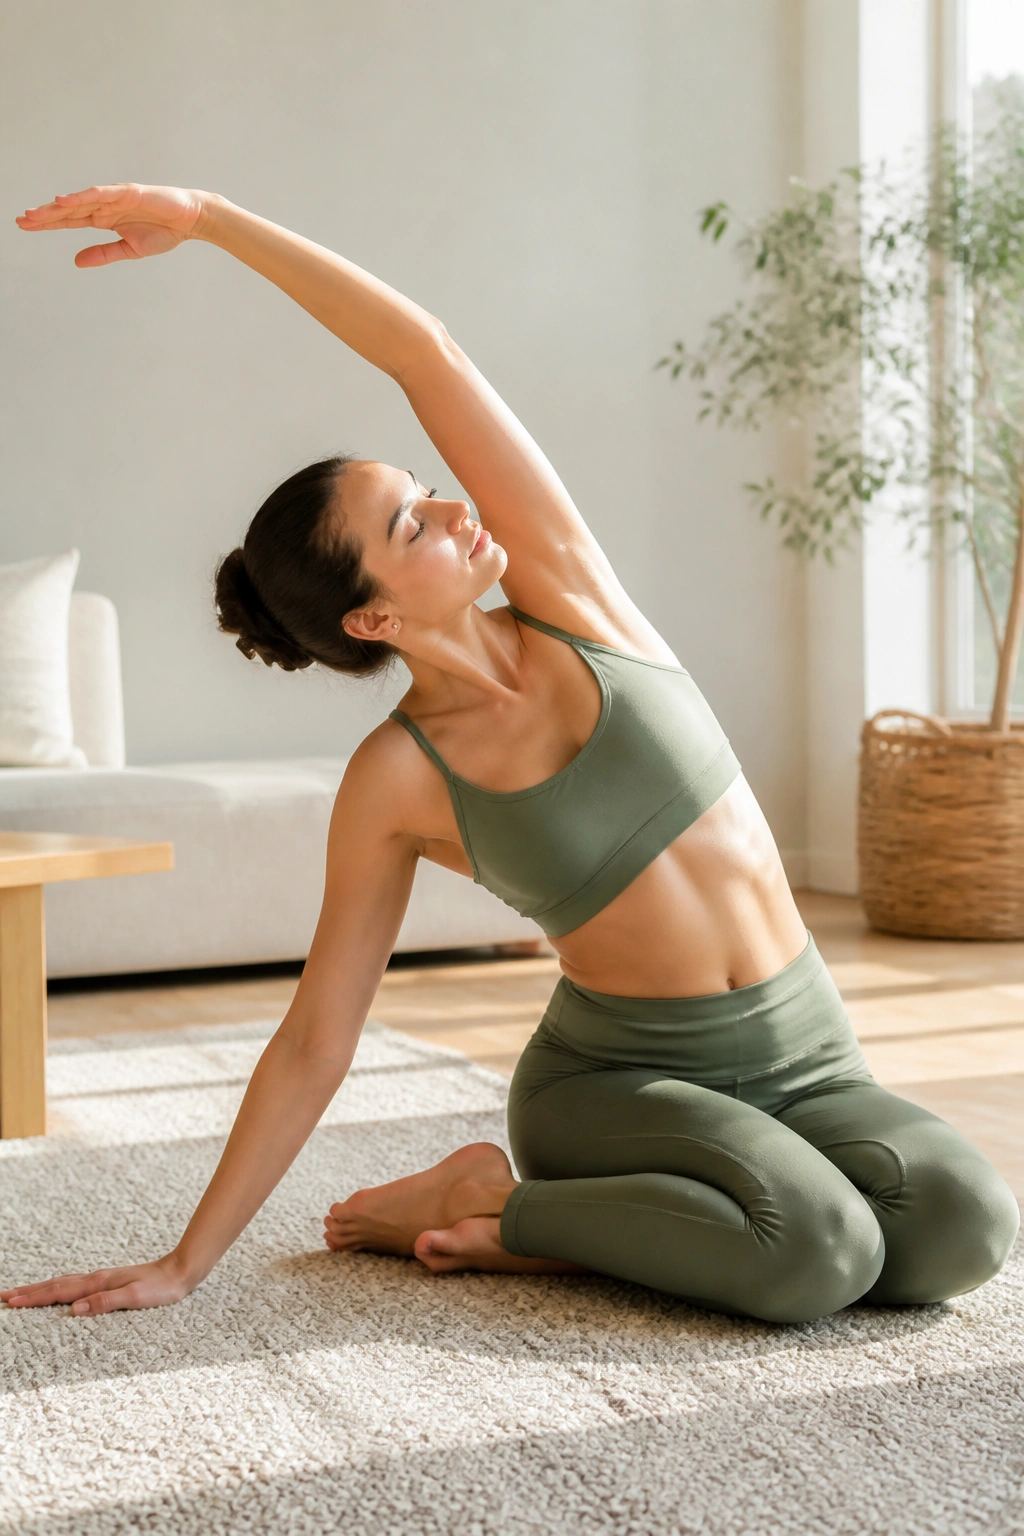
No barre workout is complete without mobility work. You have just fatigued your muscles; now you need to lengthen them to promote recovery and flexibility.
The Stretch
Sit on the floor with your legs tucked to one side. Place your left hand on the floor and reach your right arm up and over, creating a deep curve in your spine. Feel the stretch all along your side body, from your hip to your armpit.
Why This Matters
Barre workouts involve a lot of contraction. This can leave muscles feeling tight or “bunched.” Stretching them out immediately afterward helps you maintain a long, lean posture and prevents that feeling of being “stiff” the next day. Take deep breaths here. Inhale to expand the ribs, exhale to sink deeper into the stretch.
Final Thoughts
Barre is fundamentally about precision. It is about understanding that you do not need heavy iron plates or complicated machinery to create a challenging, transformative workout. Your body provides all the resistance necessary, provided you have the discipline to maintain perfect form.
When you remove the gear, you remove the excuses. You can do these eighteen movements in a hotel room, a park, or your own living room. The results come down to your commitment to the “shake”—that moment of fatigue where you choose to continue instead of quitting. That is where the muscle changes. That is where the posture improves. That is where the work actually begins. Keep your movements controlled, your core engaged, and your focus entirely on the muscles you are targeting. You don’t need a studio; you just need to show up for yourself.
