



Most pelvic floor Pilates exercises for women go wrong for one simple reason: people treat the pelvic floor like a tiny muscle that should be squeezed all day. That’s not how it works. It needs timing, breath, and enough mobility to both lift and let go.
That matters more than most people realize. A pelvic floor that never fully releases can feel just as unhappy as one that is weak. You might notice leaking when you cough, a heavy feeling after standing, a tight lower back, or hips that seem to grab every time you move. Those signs don’t automatically mean “do more Kegels.” Sometimes they mean your body wants coordination first.
The best Pilates work for the pelvic floor starts with the deep system: breath, ribs, lower belly, hips, glutes, inner thighs. When those parts stop fighting each other, the pelvic floor usually gets a much better job description. Less gripping. More support.
If you’ve had a baby, deal with bladder leaks, feel pressure during exercise, or simply want a smarter way to build core strength, the details matter. Start with the one piece most people skip: breathing.
1. 360-Degree Breathing with Pelvic Floor Drop
If your only cue is “tighten,” park it for a minute. Breathing is the foundation of pelvic floor Pilates, because the diaphragm and pelvic floor move together like two ends of the same bellows.
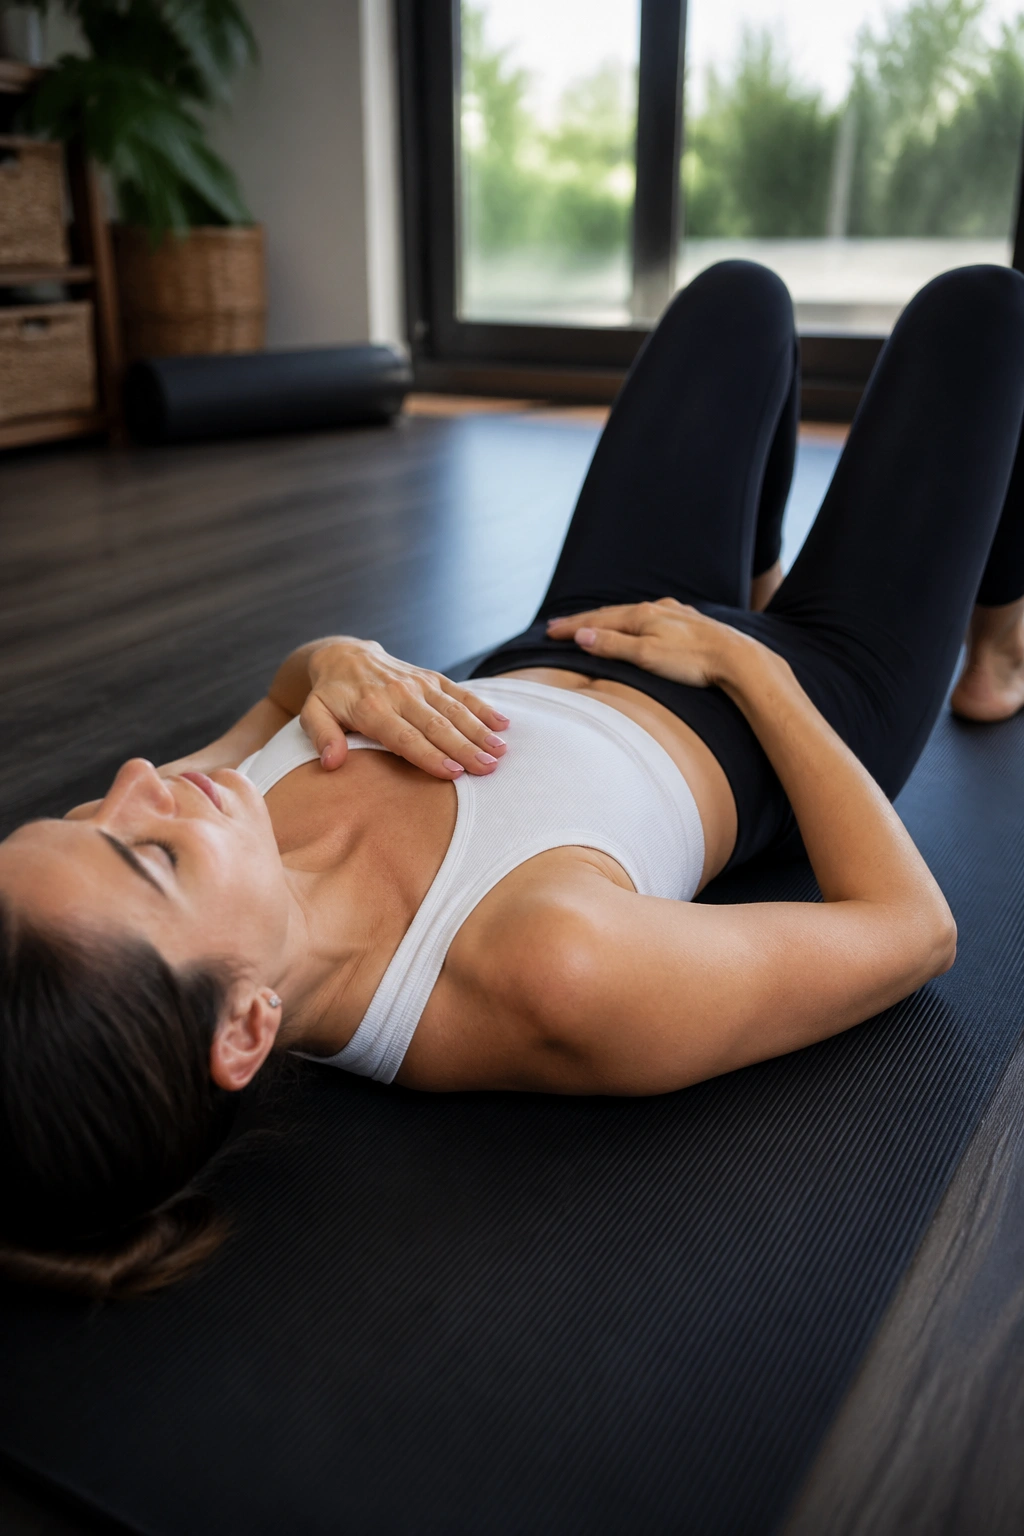
Lie on your back with knees bent and feet flat. Put one hand on your ribs and one on your lower belly. Inhale through your nose and let the ribs widen side to side and into the back body. On the exhale, imagine the pelvic floor gently drawing up, then softening again on the next inhale.
Why it matters
- The pelvic floor often responds better to pressure management than brute-force squeezing.
- A full inhale helps you notice whether you’re gripping your jaw, glutes, or inner thighs.
- A slow exhale gives you a clean moment to add a gentle lift without clenching.
Pro tip: think “soften down, lift up” rather than “push hard.” If you’re bearing down, you’re doing too much.
2. Pelvic Tilts on the Mat
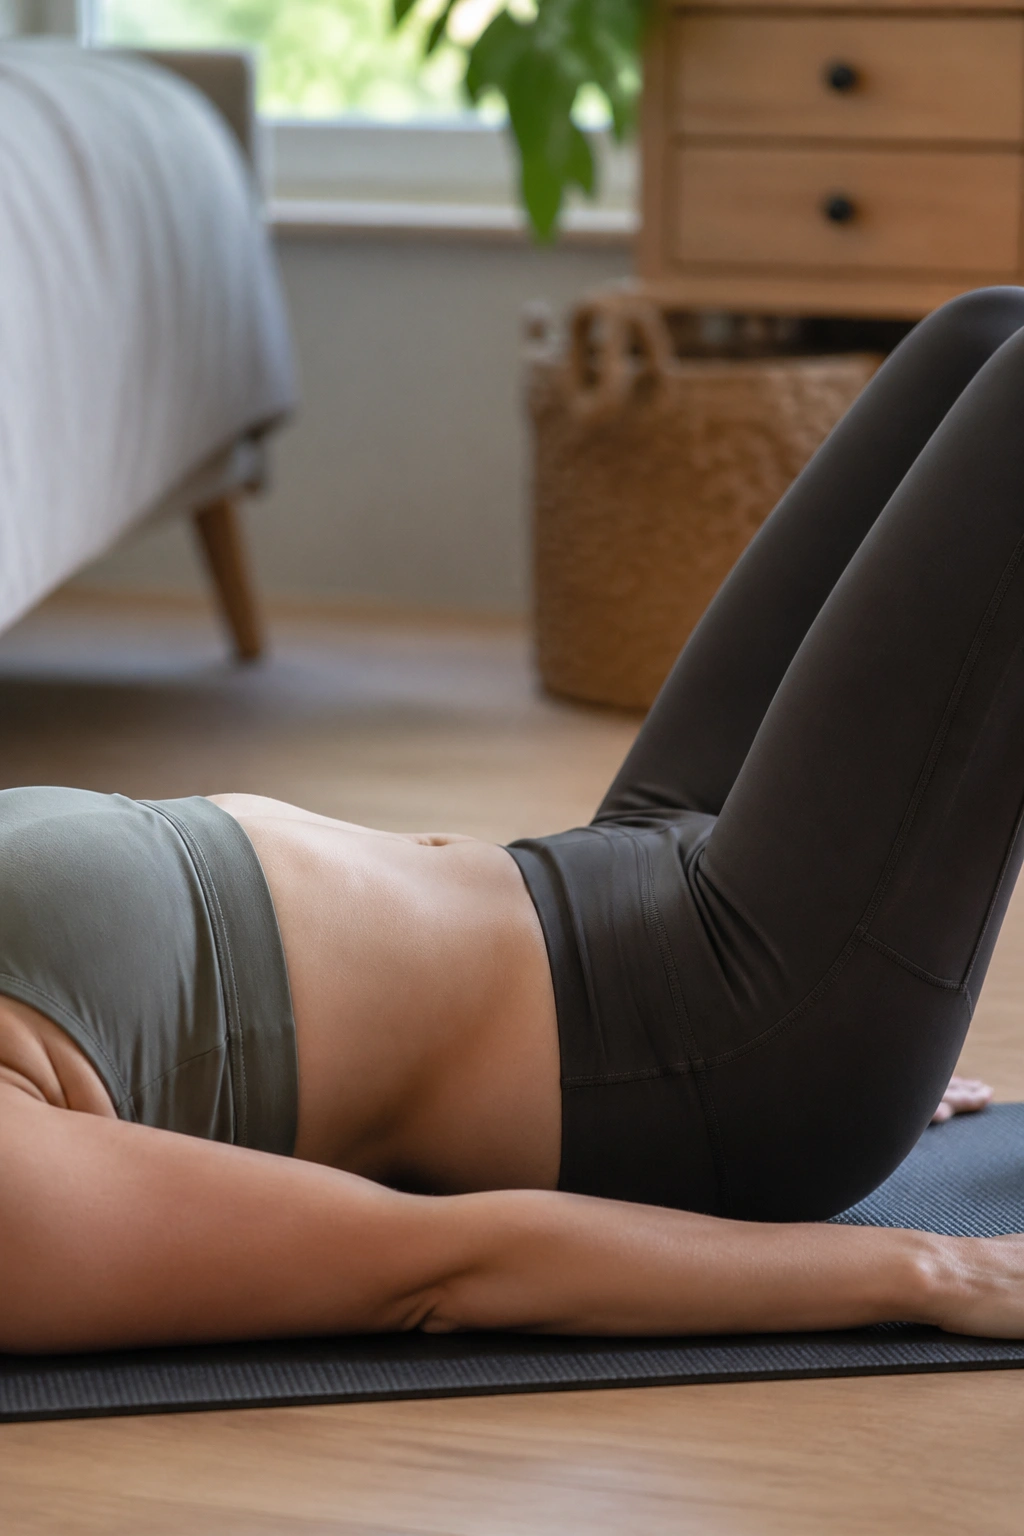
Pelvic tilts are boring in the best way. They teach your pelvis how to move without your rib cage doing a dramatic takeover, and that’s huge for core and pelvic floor control.
Start on your back with knees bent. On the exhale, tip the pelvis so the low back gently presses toward the mat. On the inhale, return to a neutral curve. The movement is tiny. Good. Tiny is enough.
The mistake I see most is turning this into a crunch. Don’t. Your shoulders should stay heavy, your neck relaxed, and your abs should feel like they’re waking up, not staging a protest.
If you’ve had a baby or you tend to tuck your tailbone all day, this move helps you find the middle ground again. That middle ground is where the pelvic floor usually likes to work.
3. Pelvic Clocks for Gentle Mobility
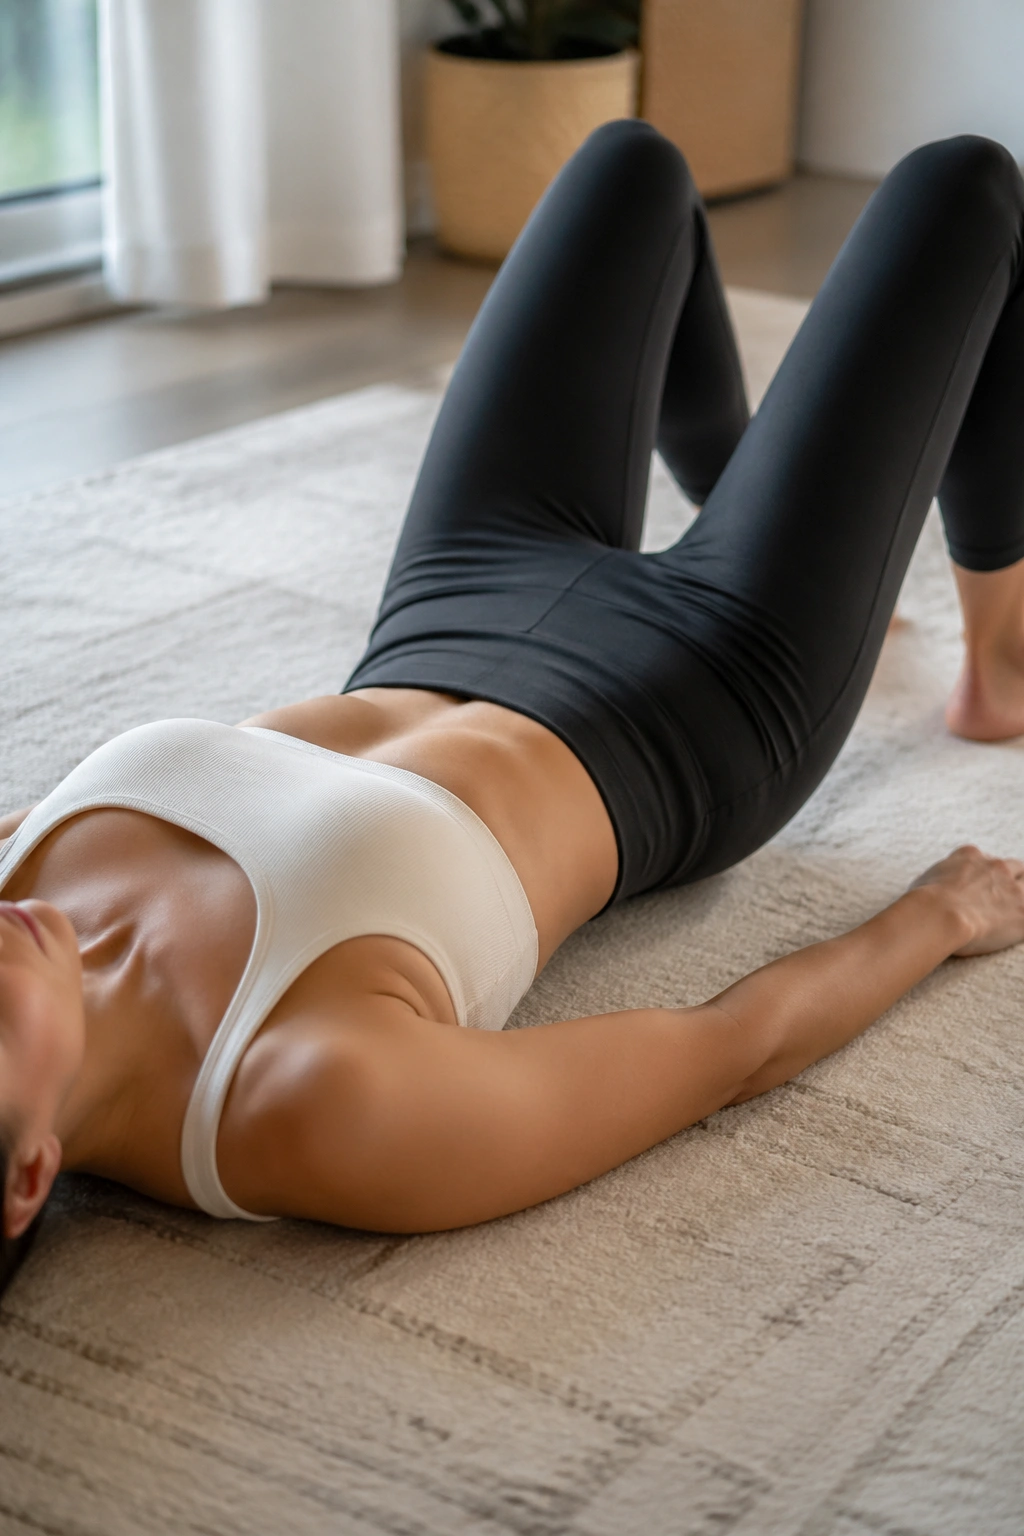
Picture your pelvis as the face of a clock. Pelvic clocks help you explore movement in multiple directions instead of locking everything into one tight, braced position.
Lie on your back and imagine 12 o’clock at your pubic bone, 6 o’clock at your tailbone, and 3 and 9 at your hip points. Slowly tip toward 12, then 6, then side to side. After that, draw a small circle in both directions. Keep it smooth. No jerking.
What makes it different
A lot of women live in one of two places: stuck in a posterior tilt all day, or hanging in the low back. Pelvic clocks teach your nervous system that both ends of the range are safe. That matters if your pelvic floor feels guarded, tight, or uneven.
You’ll probably notice one side feels easier than the other. That’s normal. Stay curious, keep the motion small, and let the lower belly stay soft while the pelvis moves underneath it.
4. Bridge Lifts with Exhale and Lift
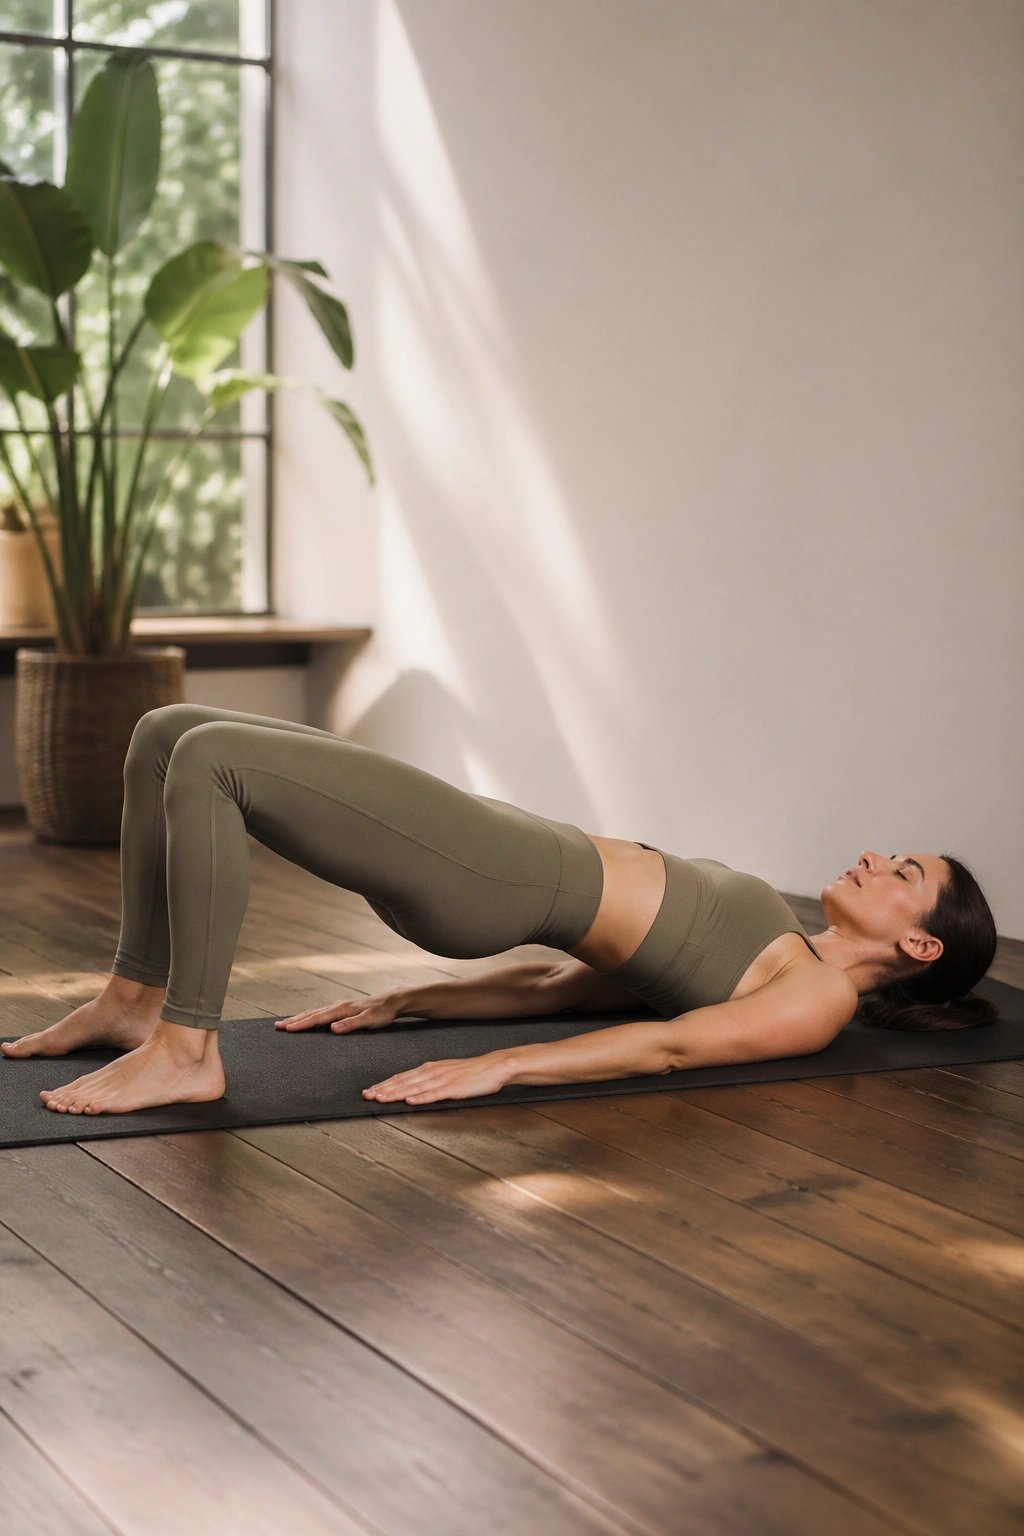
The bridge is a classic for a reason. It connects the glutes, hamstrings, deep abs, and pelvic floor in one clean movement.
Lie on your back with feet hip-width apart. Exhale, gently lift the pelvic floor, then peel the spine up one section at a time until you’re in a straight line from shoulders to knees. Inhale at the top. Exhale again as you roll down slowly.
What I like about the bridge is that it teaches effort without strain. If your ribs flare up or your low back does all the work, lower the height and try again. You do not need to throw yourself into a giant arch to get the benefit.
A good bridge feels like the back of your legs and your seat are helping, while your belly stays connected and your breath stays smooth. That’s the sweet spot.
5. Bridge Marches for Stability
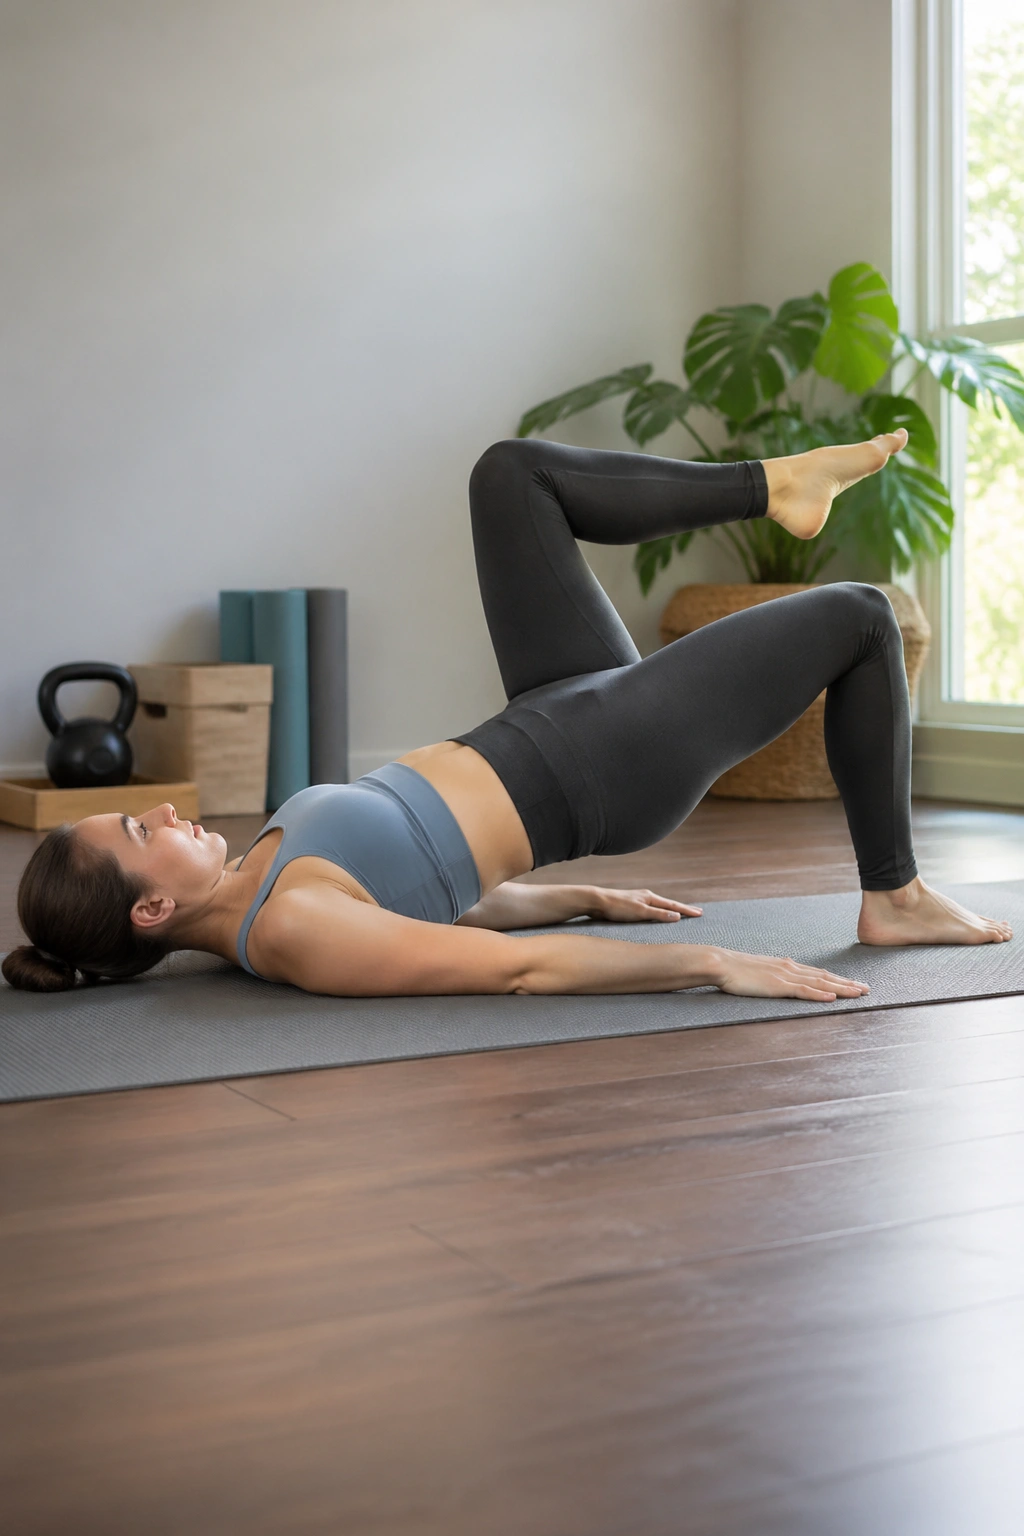
Bridge marches are the grown-up version of the bridge. They ask your pelvis to stay level while one leg moves, which is exactly the kind of control the pelvic floor loves.
Set up in a bridge and keep the hips steady. Lift one foot a few inches, lower it, then switch sides. The motion is small. If your pelvis wobbles or drops, the march is too big. Shrink it down.
This exercise is a sneaky little teacher. It shows you whether your core can keep the trunk quiet while the hips do their job. That matters for walking, carrying a child, climbing stairs, and standing on one leg to get dressed.
Try four to six slow marches per side. If you feel pressure, leaking, or a tugging sensation downward, return to regular bridges for a while. There’s no prize for forcing the harder version.
6. Clamshells for Side Hips and Pelvic Support
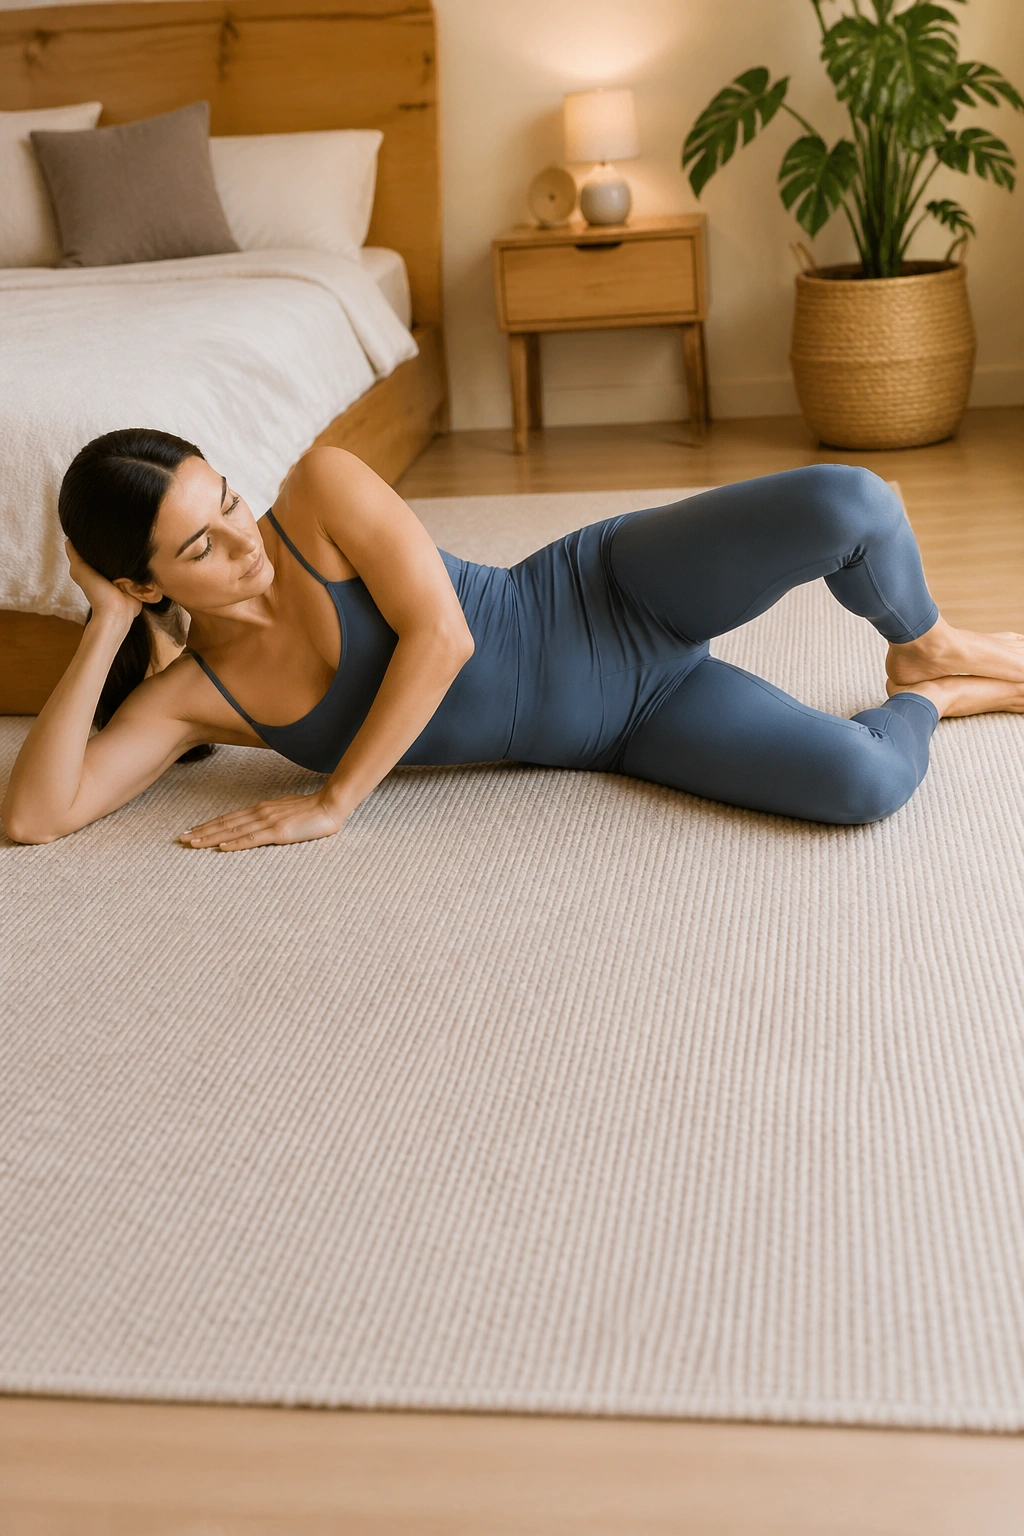
Unlike squats, clamshells let you train the side body without a lot of load. That’s useful if your pelvic floor gets cranky with standing work or if your glutes have gone a little sleepy.
Lie on your side with knees bent and feet together. Keep your hips stacked, then open the top knee like a clamshell shell opening just a few inches. Close it slowly. The pelvis should stay still the whole time.
What to watch for
- Don’t roll backward to cheat the lift.
- Keep the feet touching.
- Use a small, controlled range; bigger is not better here.
This move wakes up the glute medius, which helps keep the pelvis steady when you walk or stand on one leg. That steadiness takes some load off the pelvic floor. Not all of it. Just enough to matter.
If your outer hip burns after six or eight reps, you’re probably in the right neighborhood.
7. Heel Slides to Train Deep Core Control
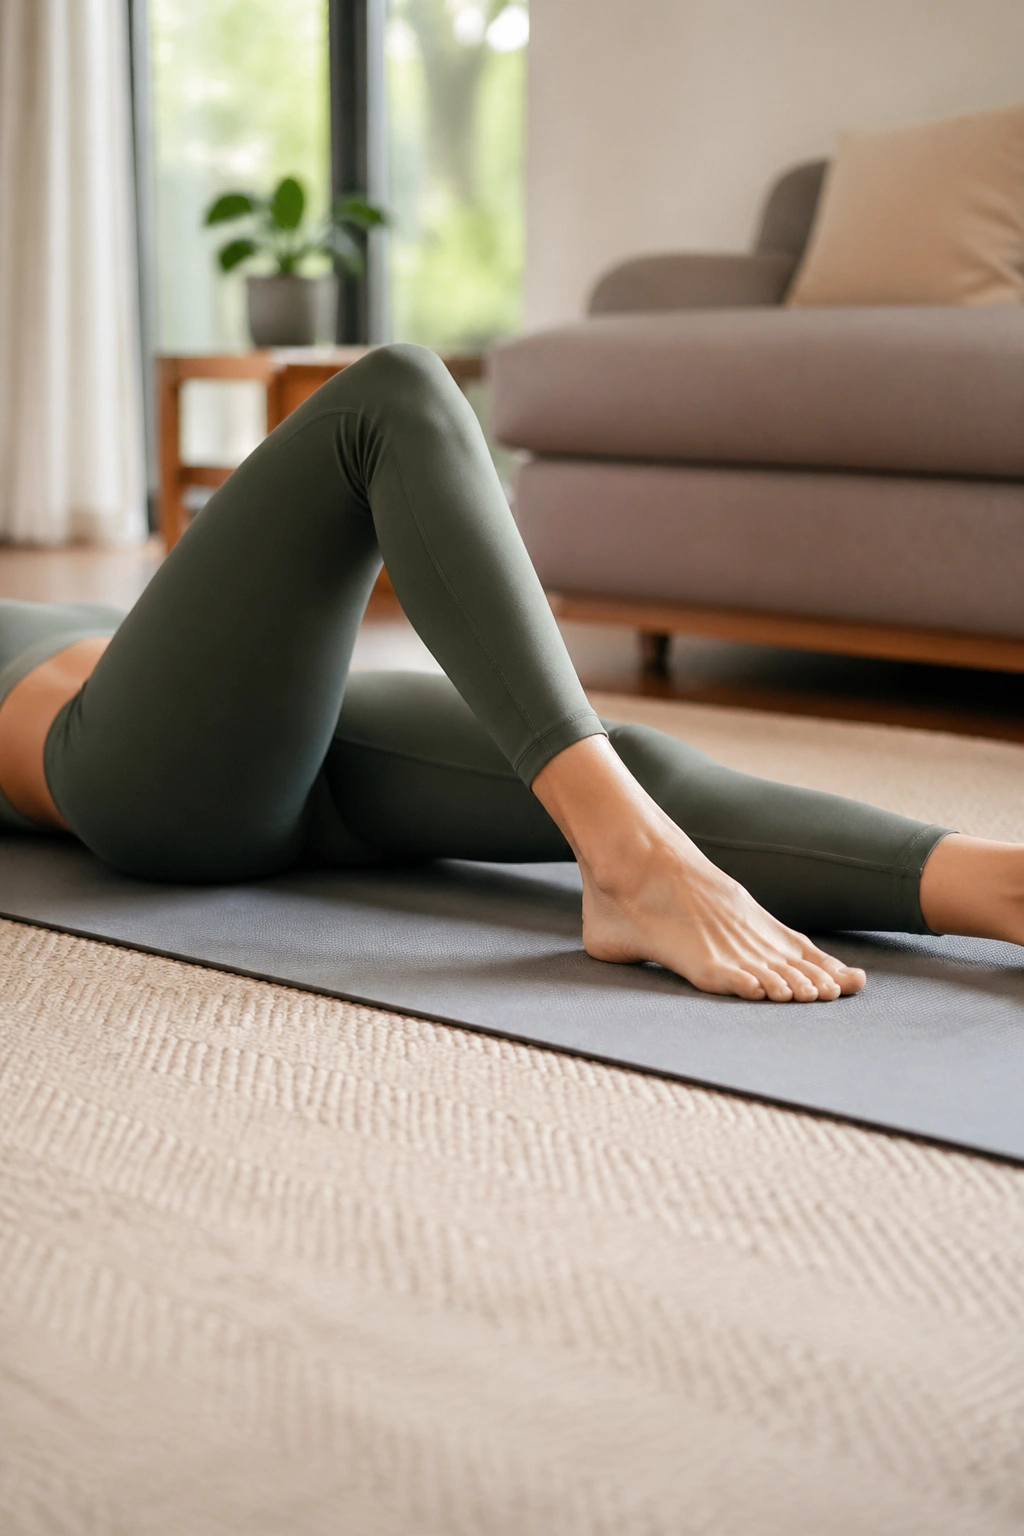
Heel slides are one of the cleanest ways to find abdominal control without pressure. They’re a favorite for postpartum work for a reason.
Lie on your back with knees bent. Exhale, gently engage the deep core, and slowly slide one heel away until the leg is long enough for you to keep the pelvis quiet. Inhale there. Exhale to slide the heel back in. Alternate sides.
The point is not speed. The point is stillness. If your low back arches or your ribs pop up, the heel is going too far. Shorten it. A smaller slide with good control beats a bigger slide with chaos every time.
I like this one for women who feel “out of sync” in their middle. It reconnects the lower abs to the pelvis without demanding strength they don’t have yet. Quiet work. Useful work.
8. Toe Taps in Tabletop
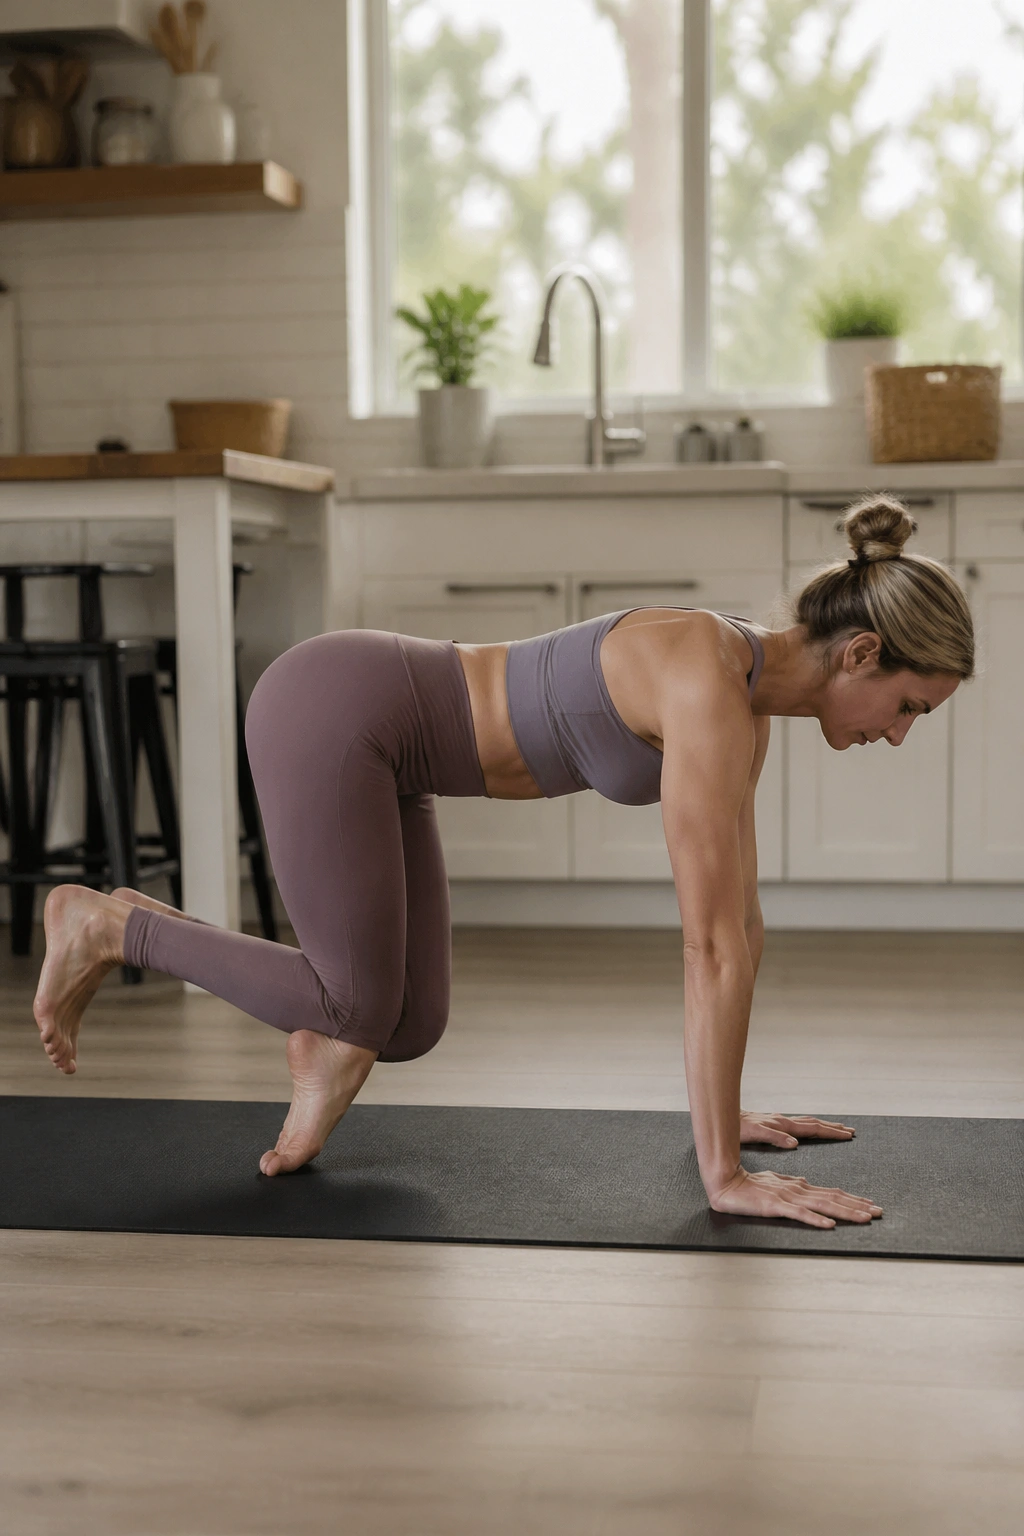
Toe taps turn deep-core training into a balancing act. That makes them a good next step after heel slides, especially if you want more challenge without jumping straight into advanced Pilates moves.
Bring both legs into tabletop, knees over hips, shins parallel to the floor. Exhale, lower one toe to tap the mat lightly, then return it to tabletop. Switch sides. The lower back should stay calm. If it arches, stop lowering the leg so far.
How to get the most from it
- Keep the exhale long and steady.
- Tap the toe, don’t slam it.
- Move only as far as you can keep the ribs from flaring.
This exercise teaches pressure control, which is one of the biggest hidden pieces of pelvic floor health. A lot of leakage problems show up when the body loses that control during movement, not when it’s lying still. Toe taps help bridge that gap.
9. Dead Bug for Cross-Body Core Control
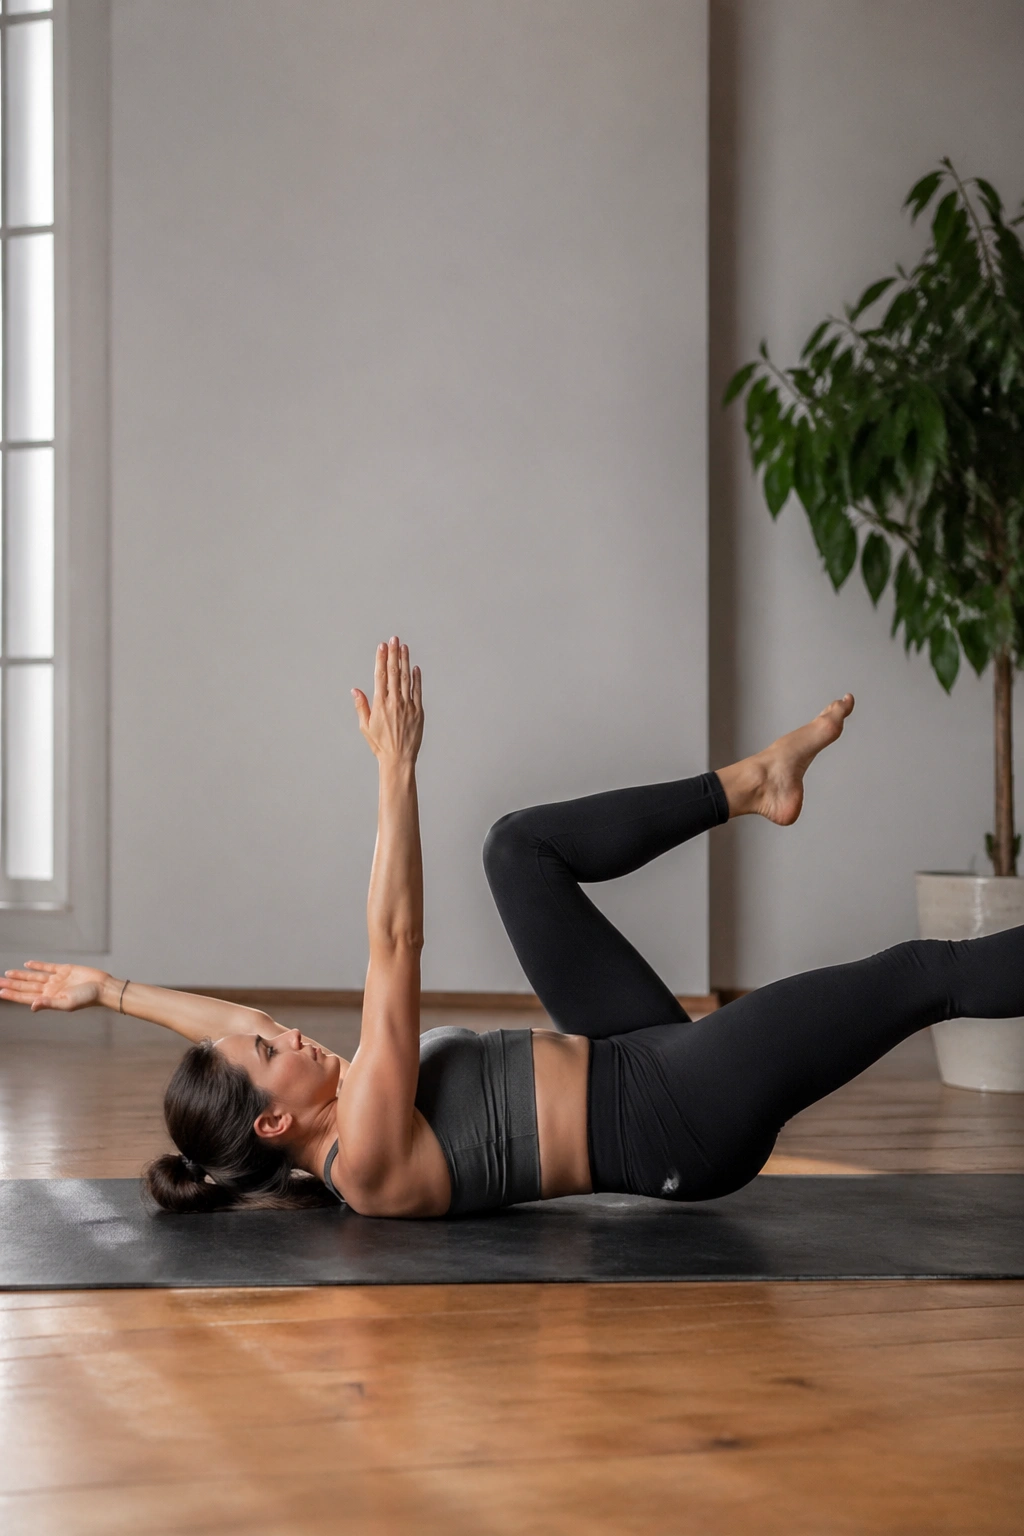
Dead bug looks simple. It isn’t. It asks your ribs, pelvis, and pelvic floor to stay organized while opposite limbs move.
Start on your back with legs in tabletop and arms reaching to the ceiling. Exhale as you lower one arm and the opposite leg, keeping the movement small and the low back heavy. Inhale to return. Switch sides.
The science behind the feel
The deeper core works best when the trunk stays steady and the limbs move around it. That’s the whole point here. If your back arches or your neck tightens, the load is too much. Bend the knees more, shorten the leg reach, or keep only the arms moving for now.
I like to think of this one as “controlled mess.” The limbs are moving, but the center doesn’t panic. That’s a useful skill for picking up groceries, reaching into the back seat, or getting off the floor without a clumsy twist.
10. Cat-Cow with Breath
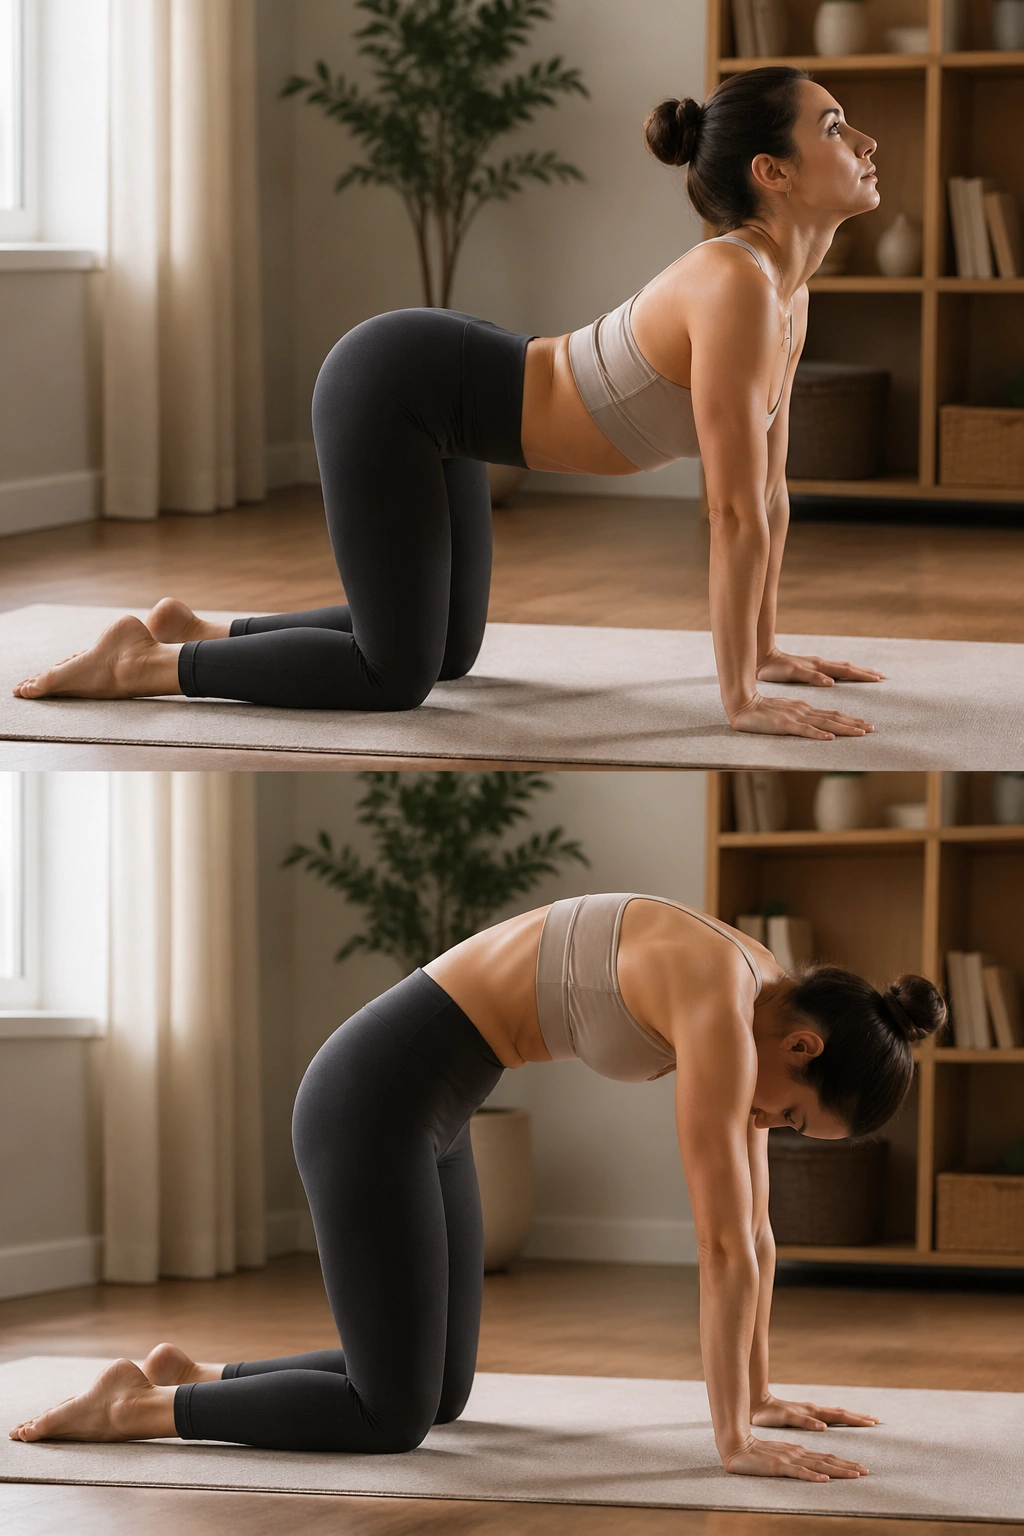
Cat-cow is the reset button when your low back feels stiff and your pelvis feels glued in place.
Start on hands and knees. Inhale, tip the tailbone up and let the belly soften as the chest opens. Exhale, round the spine gently and draw the pelvic floor up without clenching. Keep the motion smooth enough that you could do it in a slow motion video and still look relaxed.
What makes this move useful for pelvic floor Pilates isn’t just the spine movement. It’s the pairing of breath with spinal flexion and extension. That pairing gives your body practice moving pressure through the trunk instead of trapping it in the belly or pelvic floor.
If your wrists dislike quadruped work, place your hands on blocks or come down to forearms. Small adjustment. Big difference.
11. Bird Dog Reach
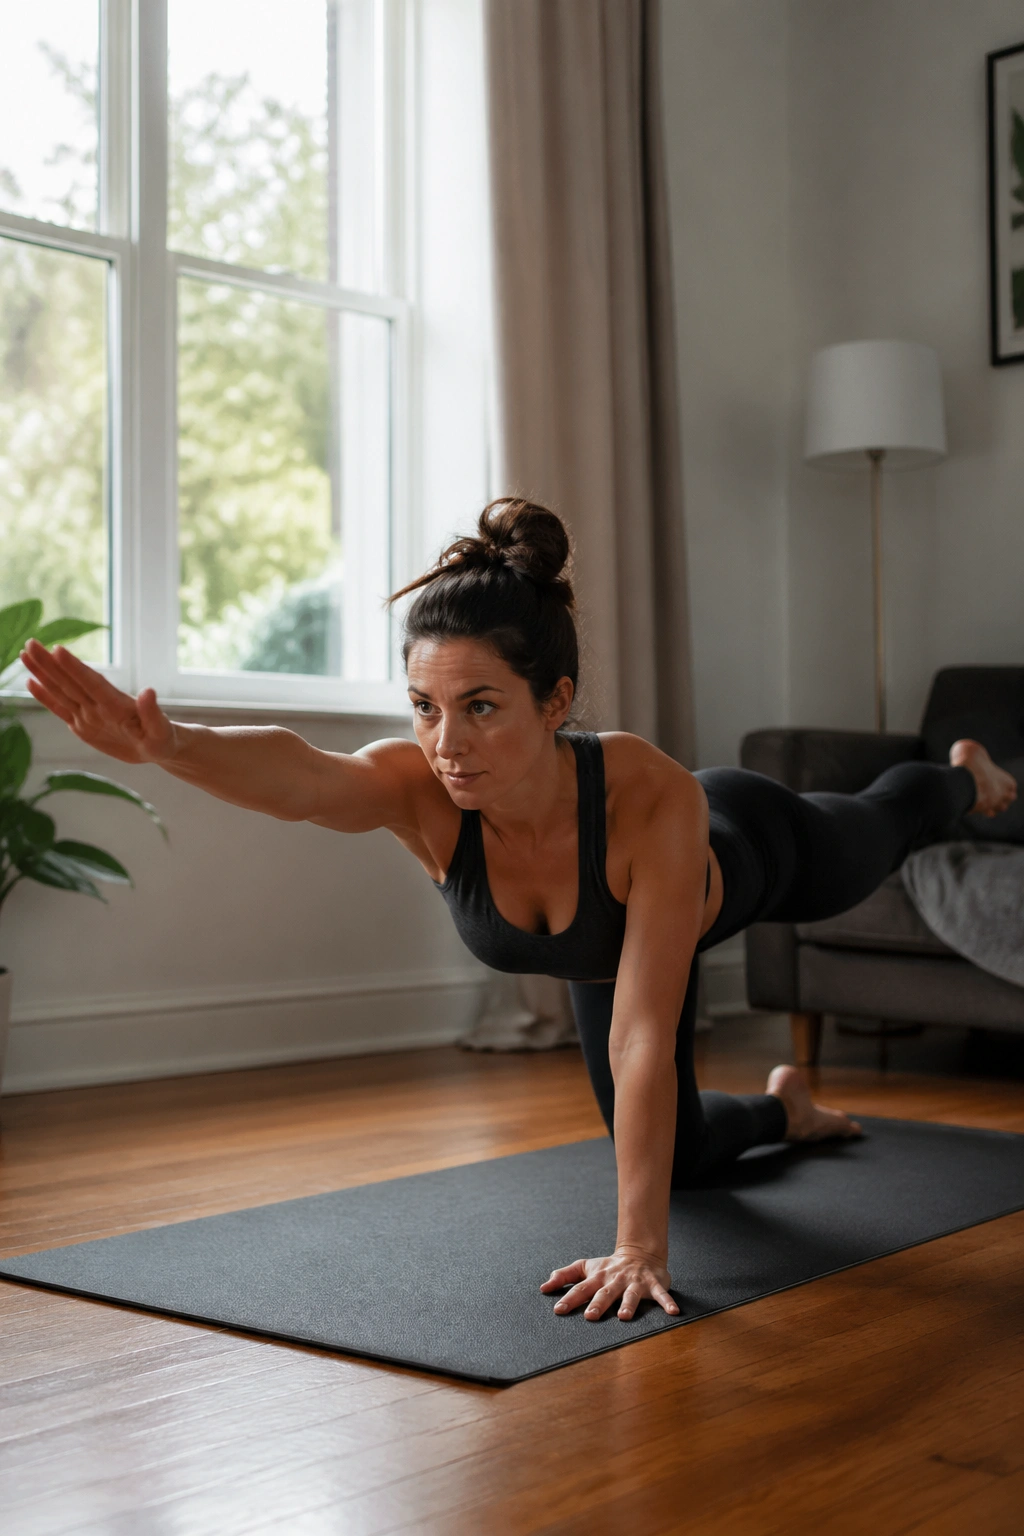
Bird dog is where things start to feel athletic. It trains the pelvic floor to stay supportive while the body reaches long in two directions at once.
From hands and knees, extend one leg back and the opposite arm forward. Keep the hips level and the ribs quiet. Don’t lift the leg sky-high. Reach it long instead. Hold for one breath, then switch sides.
A good bird dog should feel steady, not dramatic. If your weight shifts hard to one side, widen your knees a little or lift only the arm first. Control comes before range. Always.
This one is excellent for women who need help translating mat work into real life. Reaching for a toddler, carrying a laundry basket, steadying yourself while stepping over something—those are bird-dog moments in disguise.
12. Side-Lying Leg Lifts
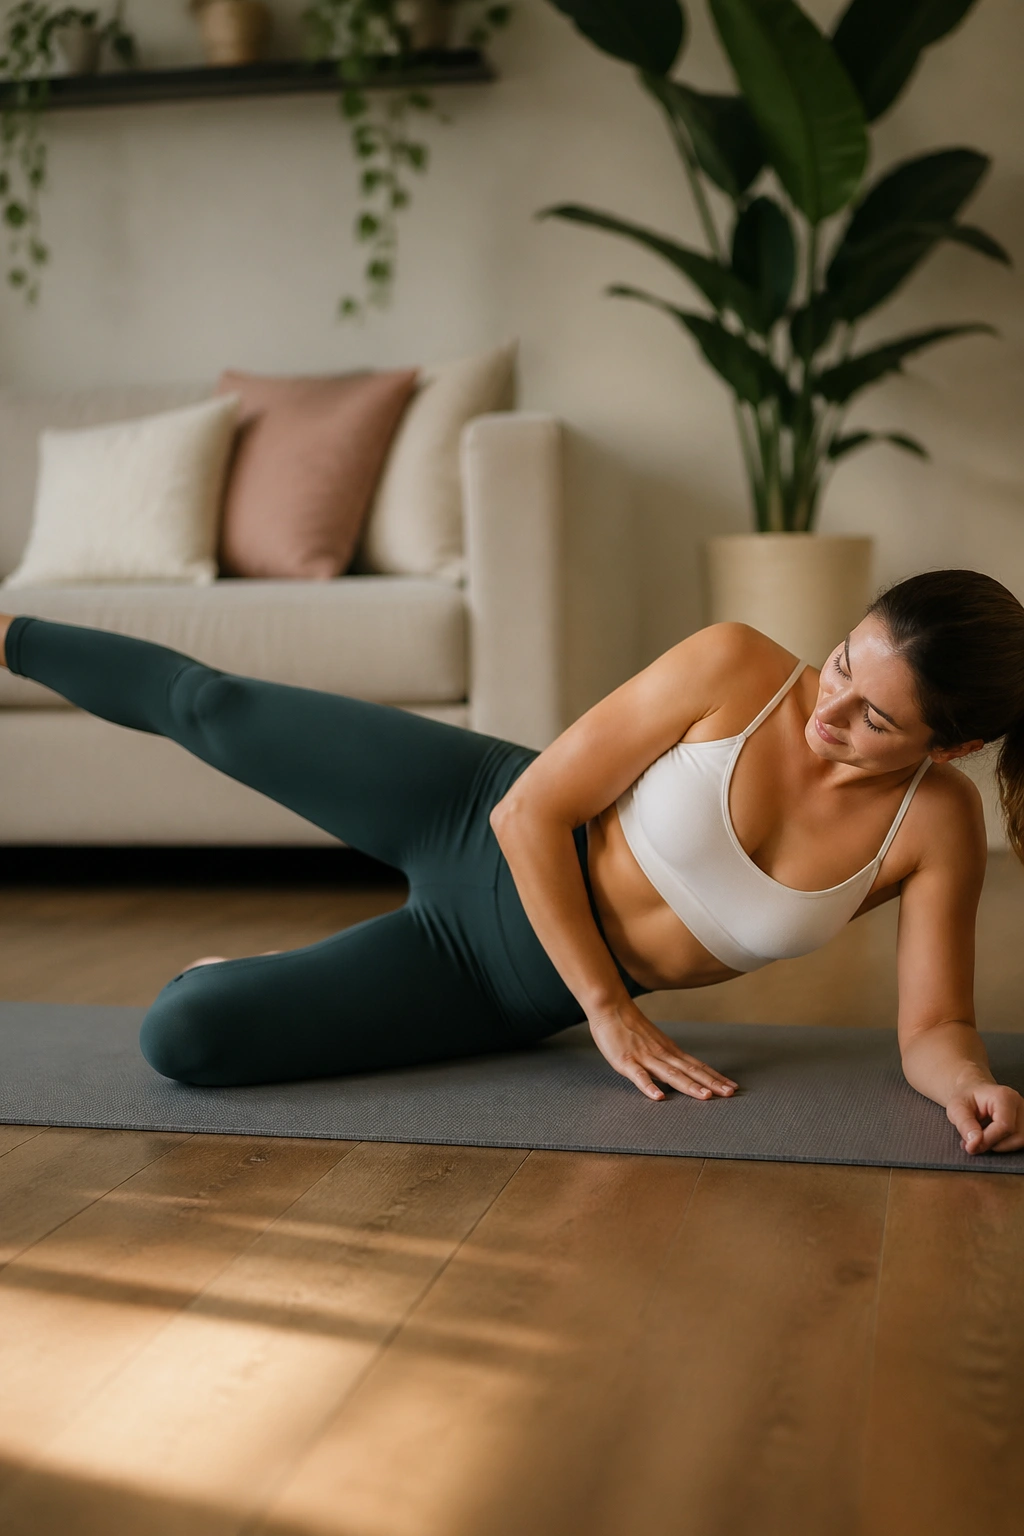
Side-lying leg lifts are the understated workhorse of hip and pelvic support. They hit the outer hip, which helps the pelvis stay centered when you stand, walk, or climb.
Lie on one side, bottom knee bent for balance, top leg straight. Keep the toes pointing forward or slightly down. Lift the top leg a few inches, lower slowly, and resist the urge to swing from the waist. The movement should come from the side hip, not from your back.
How to feel it
- You should feel the outer hip, not the low back.
- The pelvis stays stacked.
- The lift is small, slow, and clean.
If you’ve been doing a lot of sitting, this one often wakes up fast. That can be a good thing, but don’t chase a giant burn. Two sets of eight controlled lifts are better than one sloppy set of twenty.
13. Adductor Squeeze with a Pillow or Ball
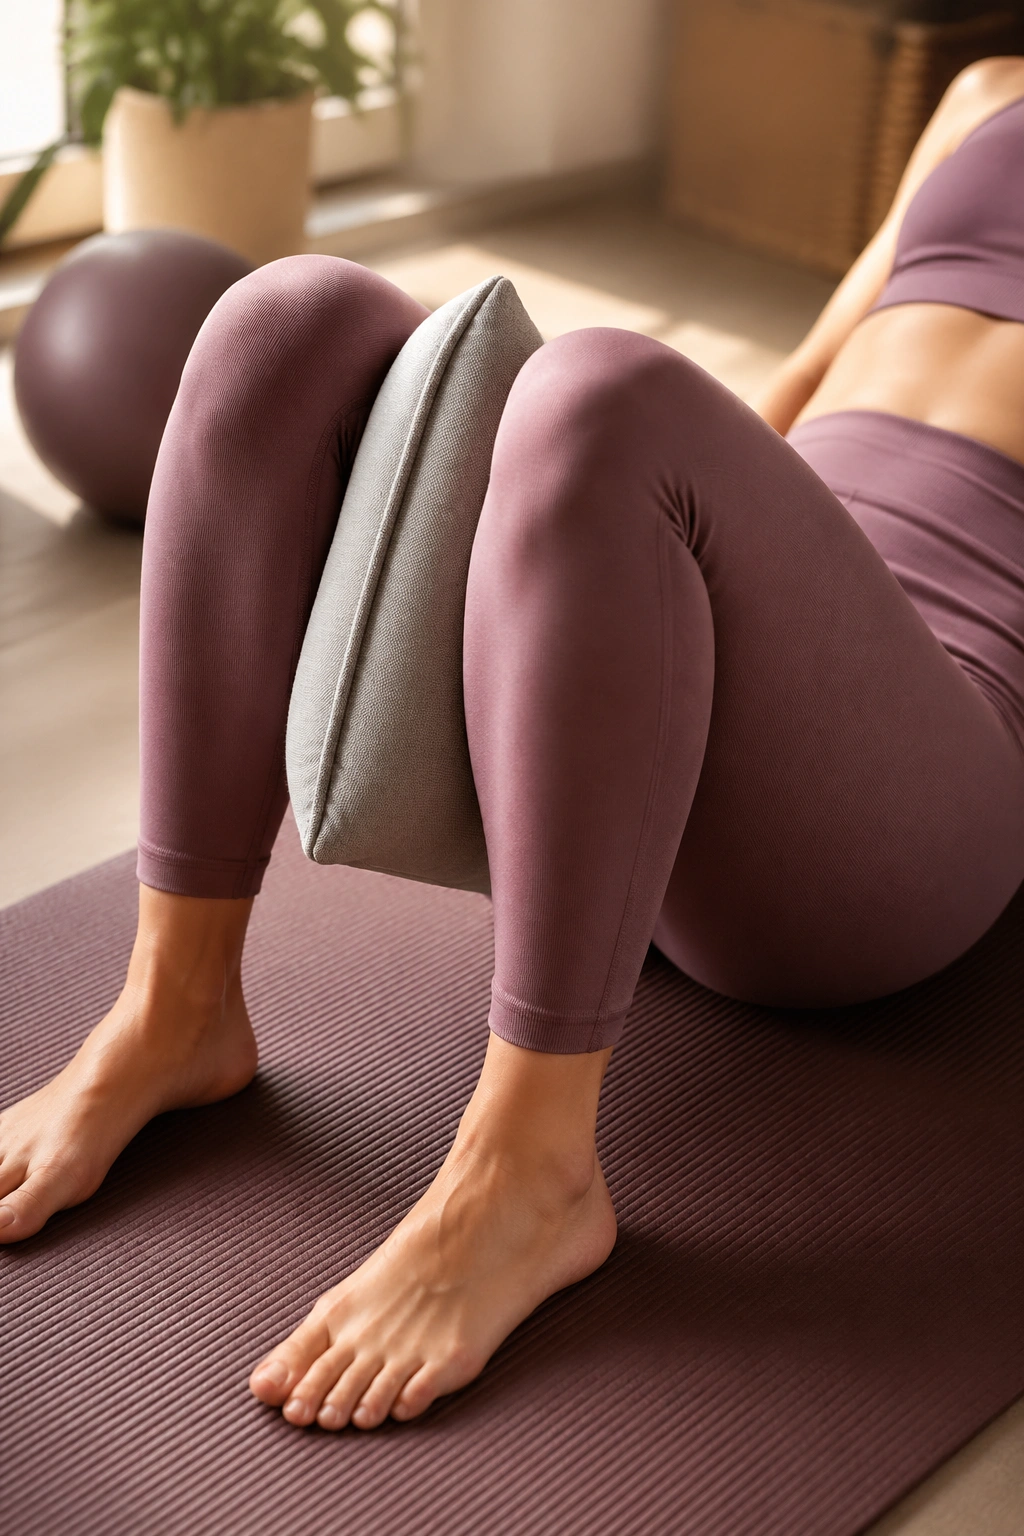
The inner thighs and pelvic floor talk to each other. This move lets you feel that connection without guessing.
Lie on your back with knees bent or sit tall on a chair. Place a small pillow, yoga block, or ball between the knees. Exhale and gently squeeze, about 20 to 30 percent effort, then release on the inhale. The squeeze should feel organized, not desperate.
This is a great exercise if you tend to feel disconnected from your lower core. The inner thighs can help create a sense of support, but only if you avoid clamping down hard. Hard squeezing can make some pelvic floors tighter, not stronger.
If you’re postpartum or dealing with heaviness, keep the range soft and short at first. Think “assist,” not “crush.”
14. Squat to Chair with Pelvic Floor Lift
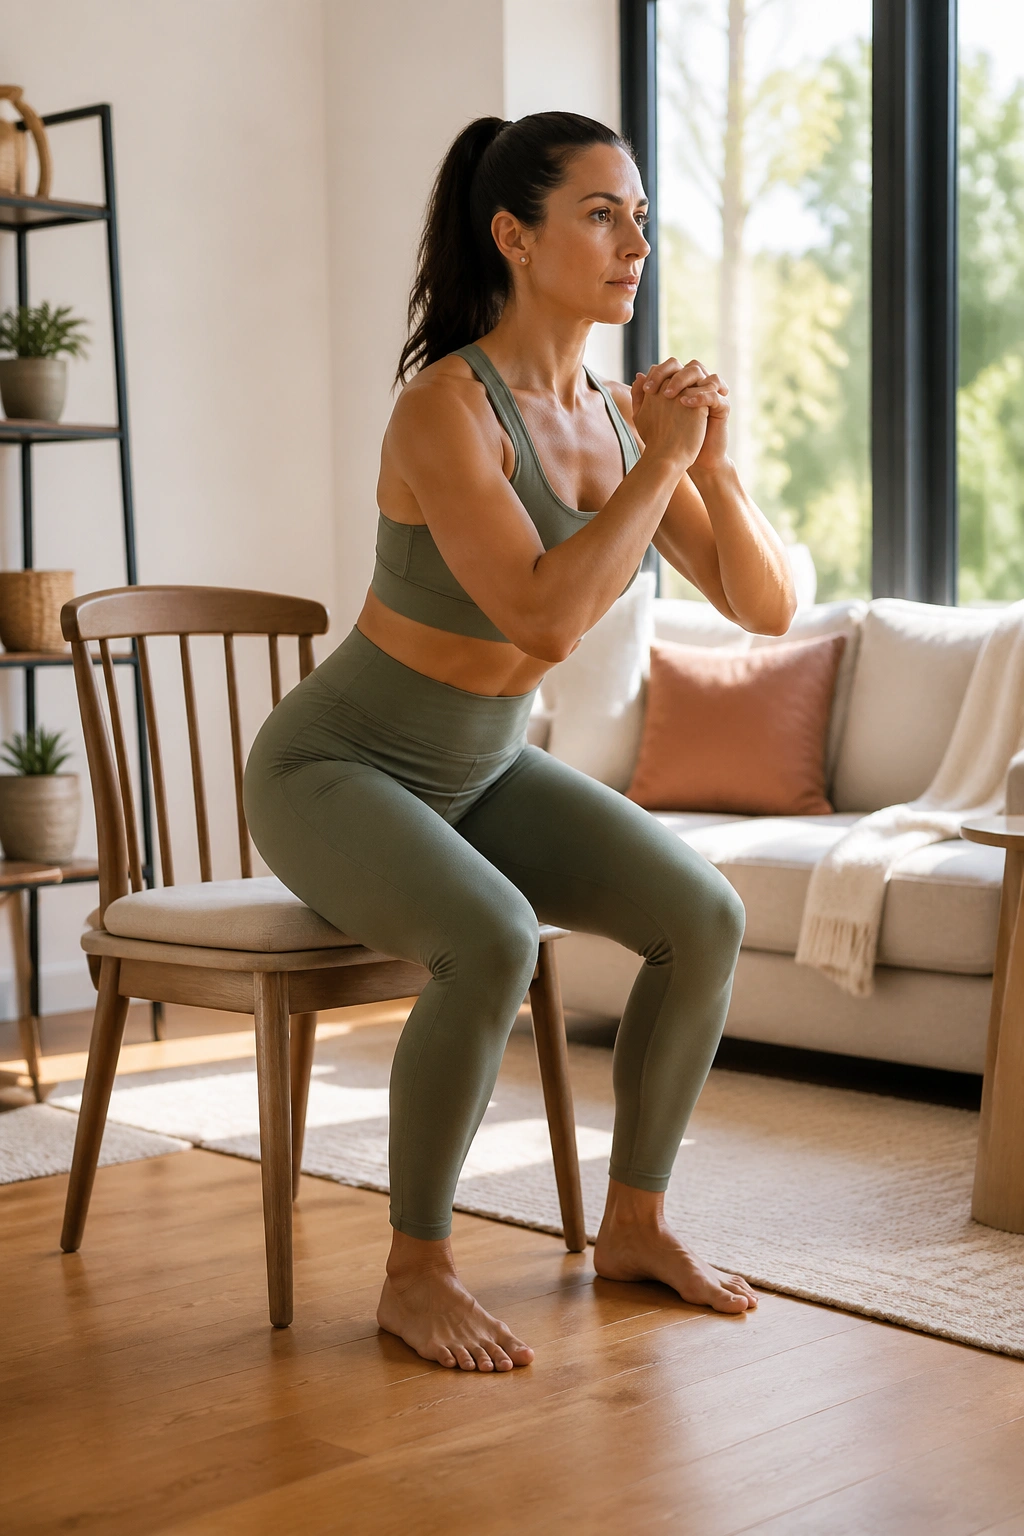
A squat to a chair is one of the most practical pelvic floor Pilates exercises for women because it looks like real life. Sitting down, standing up, picking something off the floor—those are squat patterns.
Stand in front of a chair with feet about hip-width apart. Inhale to lower with control, tap the chair lightly, then exhale and stand while gently lifting through the pelvic floor and lower abs. Keep the chest open and the knees tracking over the toes.
If a full squat feels too deep, raise the chair or hold onto a countertop. That’s not cheating. That’s smart training. The goal is to make the movement useful without creating pressure.
This is also a good place to notice habits. Do your knees cave in? Does your breath freeze? Do you jam your weight into your toes? Small corrections here pay off fast.
15. Wall Sit with Breath Control
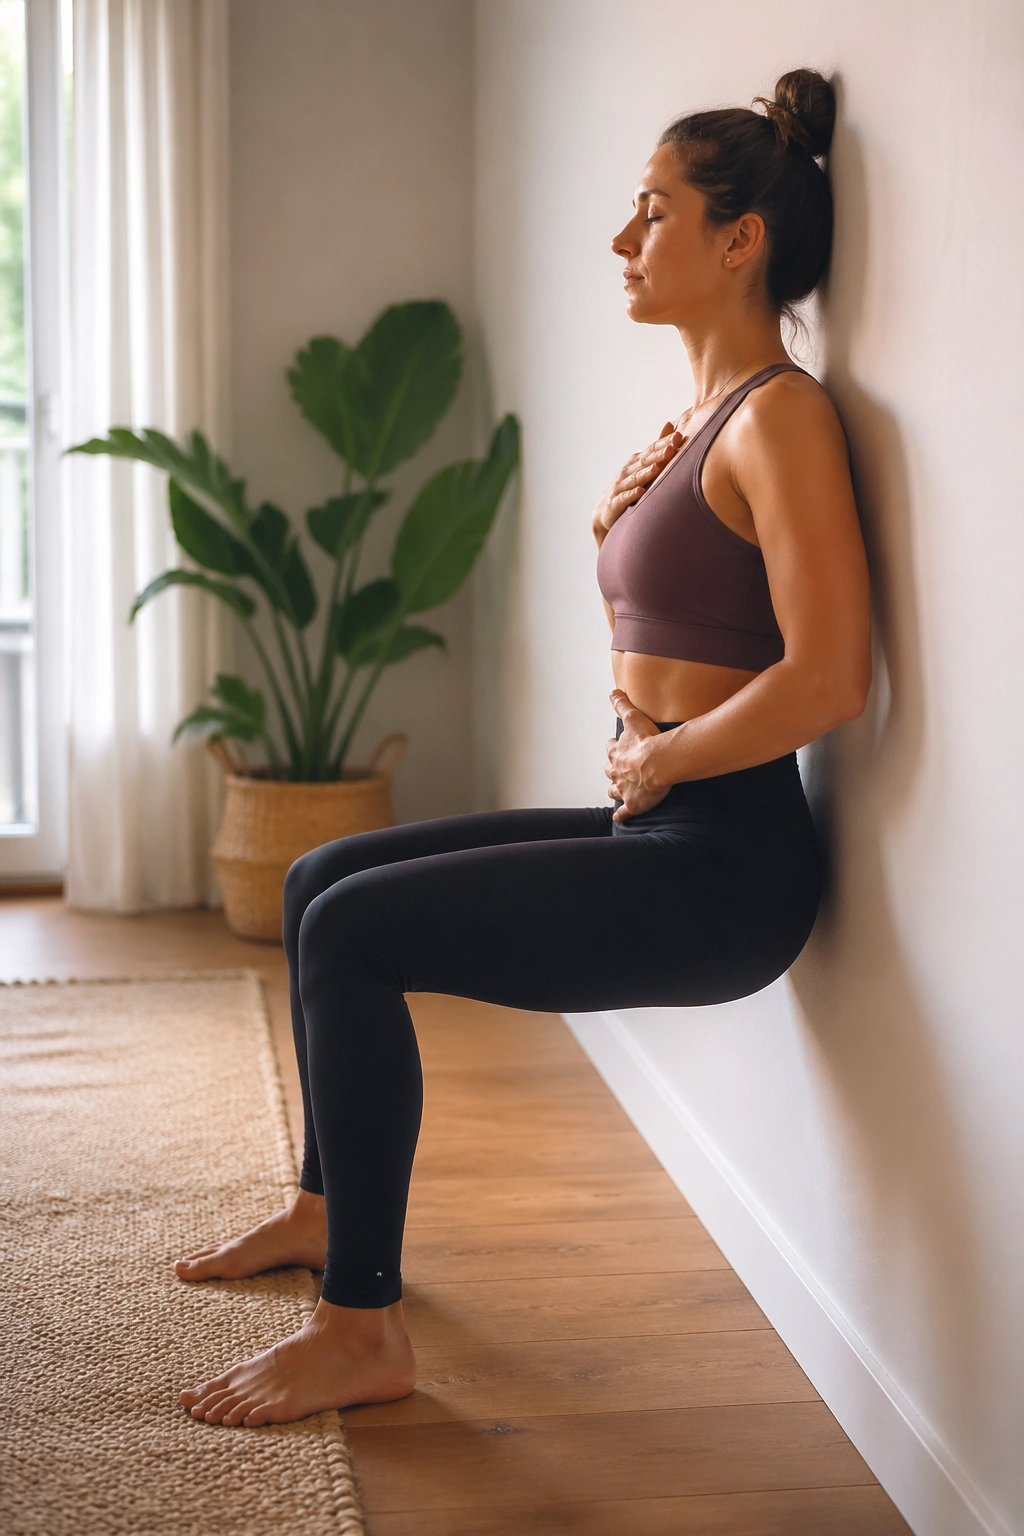
Wall sits are underrated for pelvic floor endurance. They build leg strength while forcing you to keep breathing, which is the whole trick.
Stand with your back against a wall and walk your feet forward until you can lower into a mild squat. Hold the position for 15 to 30 seconds while breathing steadily. Keep the ribs from flaring and the pelvic floor from clenching up like it’s hanging on for dear life.
A wall sit works well for women who need strength but don’t love jumping, running, or heavy loaded work yet. It gives the thighs and glutes a job while the core practices calm control under effort.
If your knees complain, raise the sit higher. If you feel a strong downward pull, shorten the hold. The aim is steadiness, not suffering.
16. Standing Hip Hinge
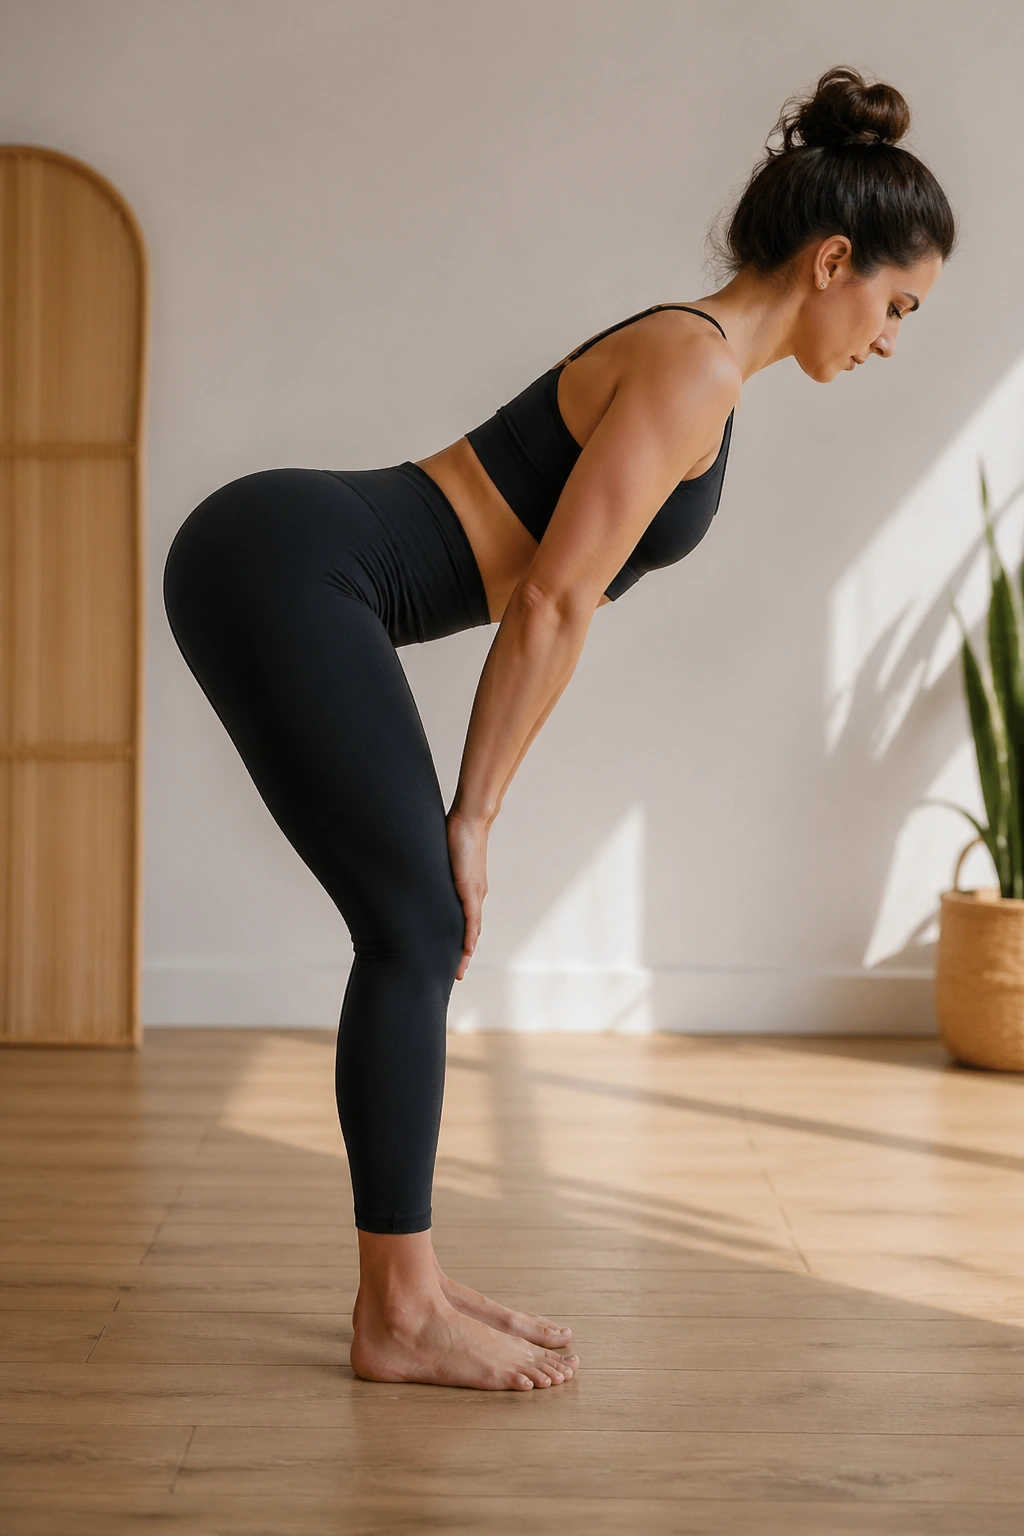
The hip hinge teaches you to bend without collapsing. That matters for pelvic floor health because so many daily tasks happen from this pattern: lifting, folding laundry, picking up a bag, reaching into a car.
Stand with soft knees and shift your hips back while keeping the spine long. The torso tips forward as if you were closing a car door with your seat. Then stand back up by driving the hips forward and exhaling gently.
The common mistake is rounding the back and calling it a hinge. It isn’t. The movement should come from the hips, not the spine. Keep the weight in the heels and the neck long.
I like this one because it quietly improves the way everything else feels. Better hinges mean less pressure dumped into the belly, less strain on the back, and more control when you move fast in real life.
17. Single-Leg Balance with Arm Reach
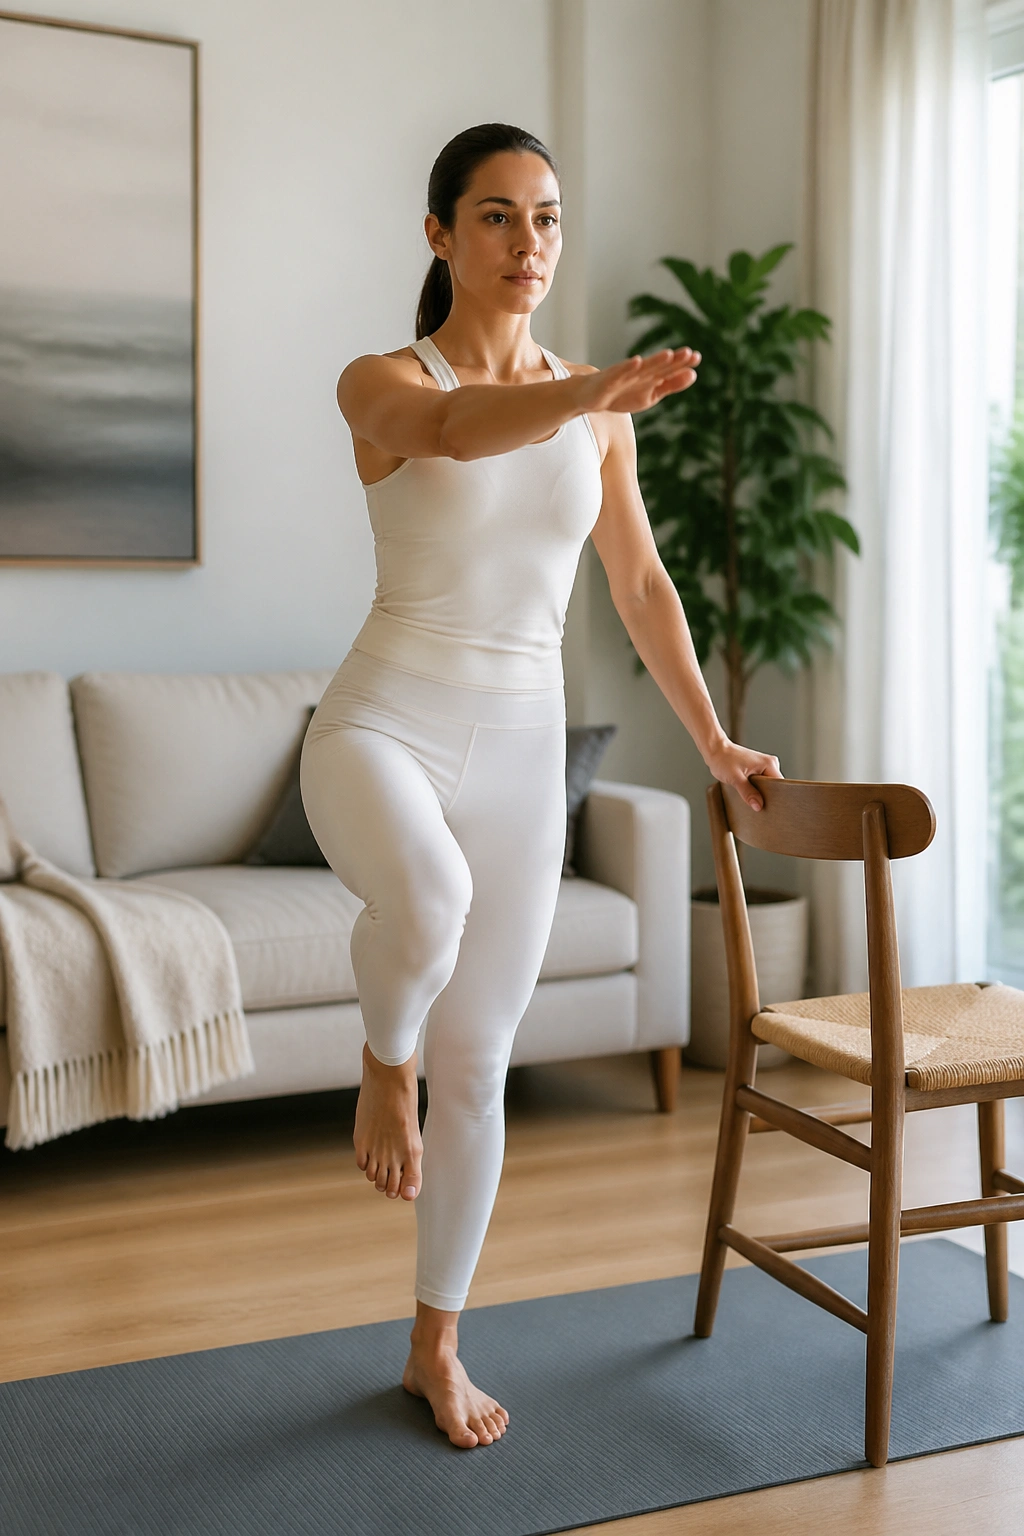
One leg on the floor, one body trying not to wobble. That’s the whole story, and it’s a useful one.
Stand near a wall or chair. Shift your weight onto one leg, then reach the opposite arm forward, overhead, or slightly across the body. Keep the standing hip steady and the foot grounded. Hold for two or three breaths, then switch sides.
This move is smaller than it looks. That’s good. You’re training coordination, not circus balance. If the standing knee locks or the pelvis hikes up, soften the knee and shorten the reach.
Women often underestimate how much pelvic floor control depends on balance. But balance is part of daily support. Every step is a tiny single-leg task. Every curb. Every stair. Every awkward turn while carrying groceries.
18. Happy Baby with Gentle Rocking
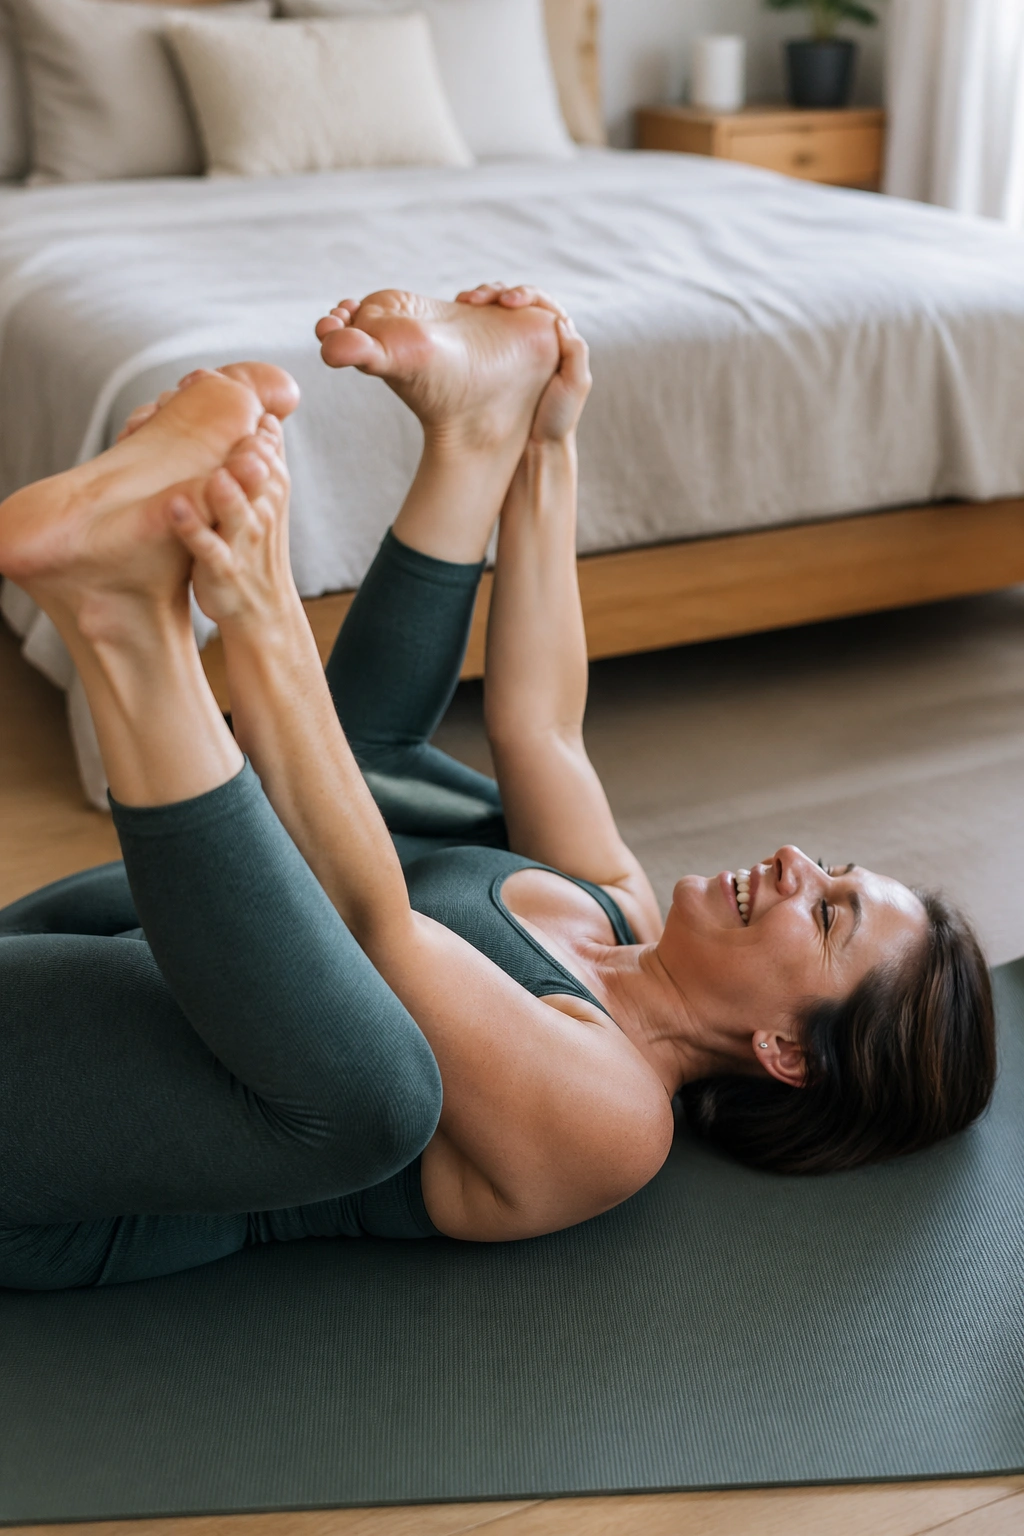
Happy baby is where a lot of tight pelvic floors finally get a chance to breathe. It opens the hips, eases the low back, and gives the inner thighs permission to unclench.
Lie on your back, bring the knees toward the ribs, and hold the outer edges of the feet or the thighs if that’s easier. Let the knees open slightly toward the armpits and rock a little side to side. Keep the breath slow and the jaw loose.
If this feels too deep, skip the feet and hold behind the thighs instead. If your knees hate it, take a wide-child’s-pose variation with the knees apart and the hips sinking back toward the heels. Same goal. Less strain.
This is a nice ending exercise because it reminds you that pelvic floor training is not only about lifting. A relaxed floor is part of good function too. Always has been.
Final Thoughts
Pelvic floor Pilates works best when it stops being a gritted-teeth job and starts feeling like coordinated movement. Breath, hip strength, mobility, and gentle load all matter. If one piece is missing, the whole system tends to get noisy.
One smart session can be short: a few minutes of breathing, two strength moves, one balance drill, and one release position. That’s enough to change how your pelvis feels over time, especially if you practice with patience instead of chasing a burn.
The quiet skill here is not force. It’s control you can actually use when life gets messy.
