



Most people assume that building strong, durable legs requires a rack full of heavy plates and a barbell that costs more than a decent used mountain bike. While heavy lifting is effective, it is not the only path to functional leg strength. In fact, relying solely on heavy external loads can sometimes mask imbalances. You might be squatting massive weight, but if your glute medius is weak or your hip stabilizers are asleep, your performance will eventually plateau—or worse, result in a nagging knee or lower back issue.
Mini bands provide a constant, uniform resistance that forces your muscles to stay engaged throughout the entire range of motion. Unlike a dumbbell or a machine, which might only challenge you at the top or bottom of a movement, a band demands stability from the start to the finish. This is called constant tension. It is the secret weapon for waking up “sleepy” glutes and correcting those subtle tracking issues that cause so much frustration in the gym.
You do not need an entire hour or a fancy facility to reap these rewards. These bands are portable, affordable, and brutally effective when used with intention. The key is not to race through these reps. If you are just swinging your leg back and forth, you are missing the point. You want to feel the specific muscle group fire, fight the resistance on the eccentric (lowering) phase, and maintain that tension even when you think you are “resting.”
1. Lateral Walk
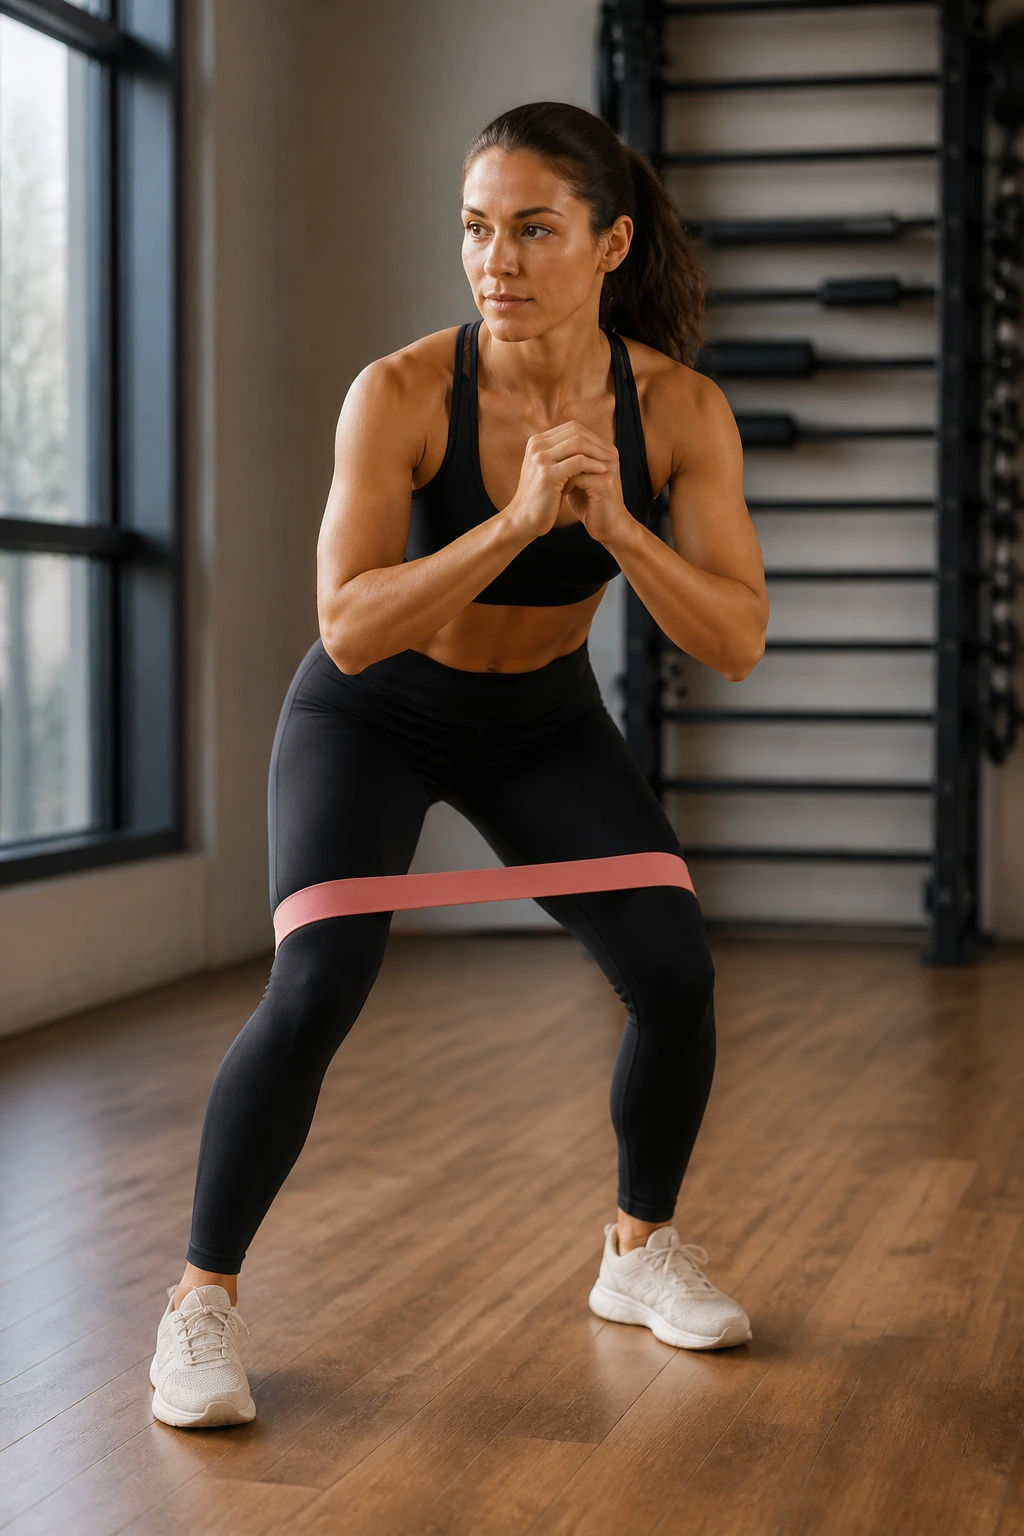
The lateral walk is the gold standard for glute medius activation. If you have ever felt like your knees cave inward during a heavy squat, this exercise is likely what you have been missing. Place the mini band just above your knees for a more manageable lever, or around your ankles to increase the difficulty significantly.
Mastering the Athletic Stance
Start with your feet shoulder-width apart, knees slightly bent, and your hips pushed back as if you are preparing to guard someone in basketball. This is your athletic base. Keep your toes pointed straight forward. Do not let your feet turn outward, or you will shift the work from your glutes to your hip flexors.
The Movement Pattern
Take a controlled step to the side. Then, bring your trailing foot in, but stop before it touches your starting foot. You want to keep the band tight the entire time. If you bring your feet all the way together, you lose the tension for a split second. Keep that fire burning in your hips.
Pro tip: Imagine you are stepping over a small hurdle with every single stride. This visual cue prevents you from dragging your feet and forces you to lift slightly, engaging the glutes more aggressively.
2. Glute Bridge
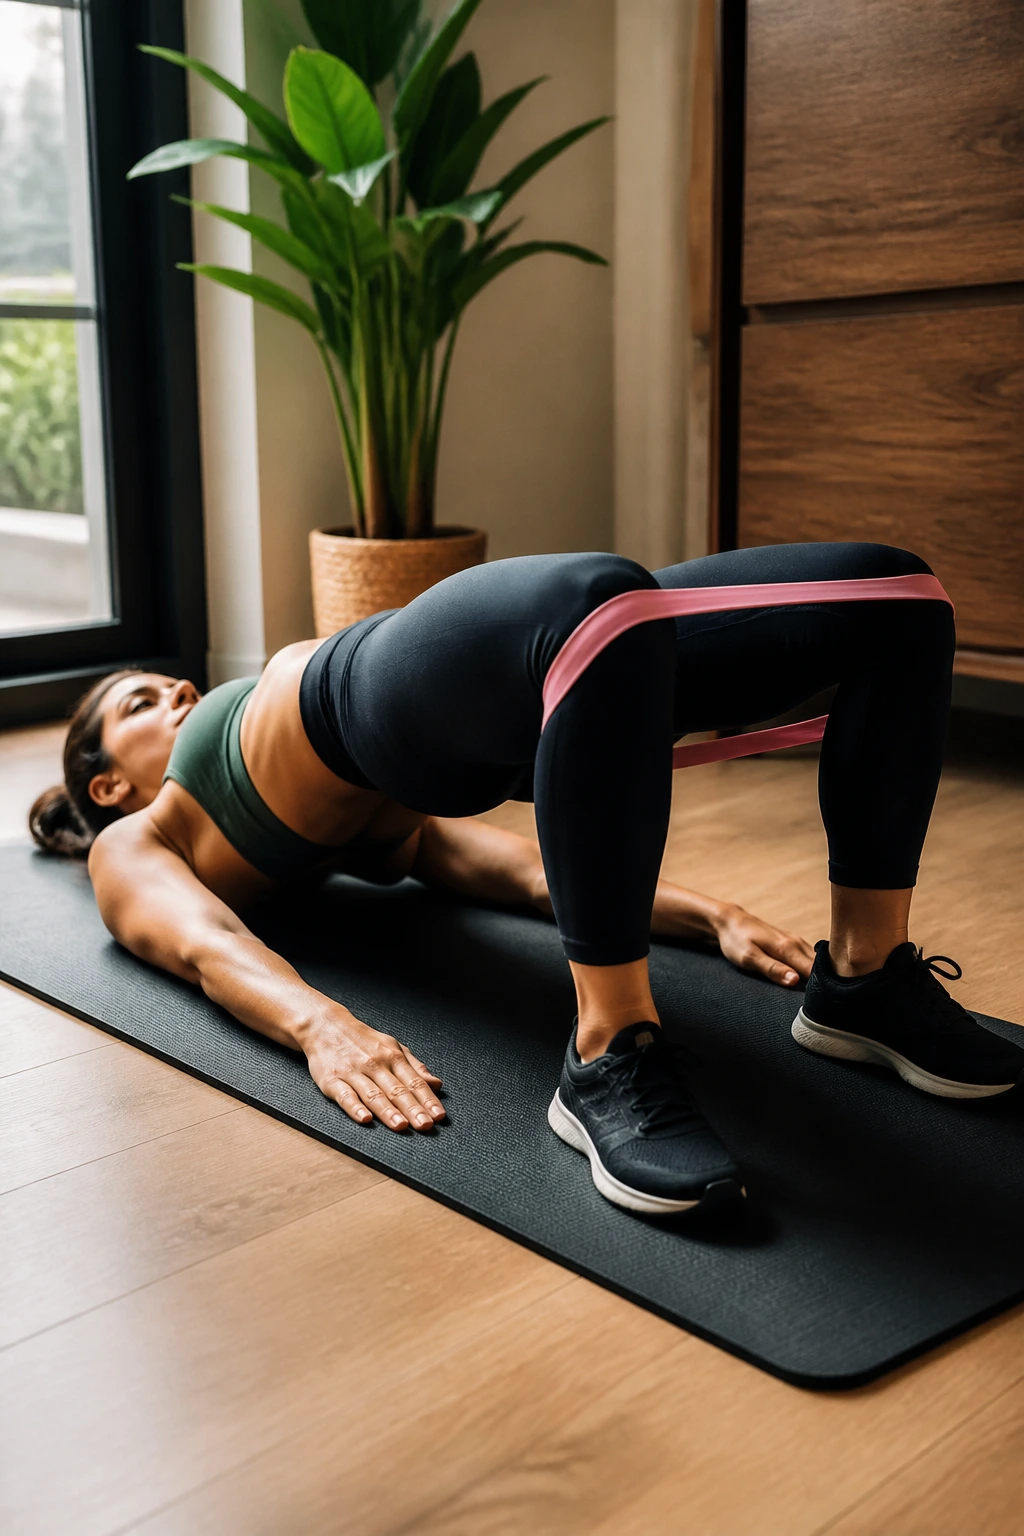
The bridge is a fundamental movement, but most people treat it like a simple lift-and-drop. With a mini band positioned just above your knees, you turn a standard movement into a potent tool for lateral hip stability. The band wants to pull your knees together; your job is to push them out, fighting that resistance the entire time.
Lie on your back with your knees bent and feet flat on the floor, about hip-width apart. As you drive your hips toward the ceiling, push your knees outward against the band. You should feel an intense contraction in the outer glutes at the very top of the movement. Hold that peak squeeze for two full seconds before slowly lowering back down.
Why This Matters
If you do not force your knees out, you are leaving muscle activation on the table. By fighting the band, you ensure the glute medius and glute maximus are both firing simultaneously. It is not about how high you can arch your back—it is about how hard you can squeeze your glutes.
3. Clamshells
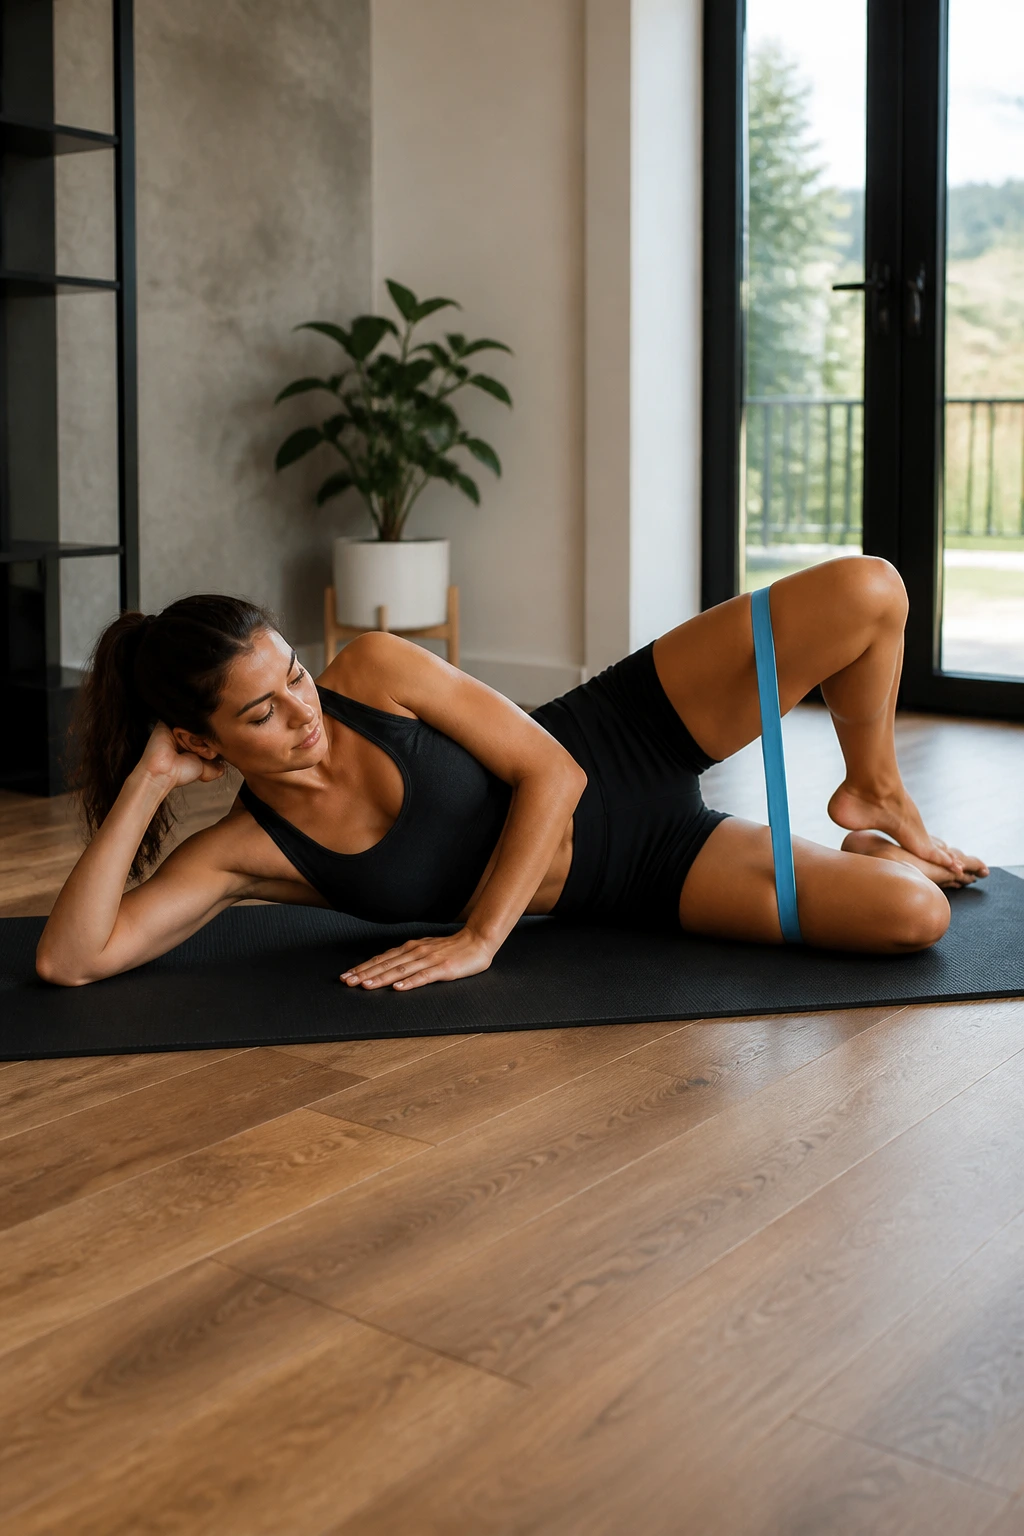
Clamshells look deceptively easy, but they are notorious for exposing poor hip mobility. Lie on your side with your legs stacked, knees bent at a 45-degree angle. Place the band just above your knees. Your hips should be stacked perfectly vertically—do not let your top hip roll backward to get a wider range of motion.
The Mechanism
Keep your heels glued together. That contact is vital. Slowly rotate your top knee upward, stretching the band. You are rotating from the hip joint, not just lifting the knee. If your pelvis starts to rock, you have gone too far.
Why It Works
This move isolates the glute medius, a crucial muscle for pelvic stability and knee health. When you stop the movement the moment you feel your pelvis wanting to roll, you guarantee that the glute is doing the work. It feels like a dull ache, then a burn—that is exactly where you want to be.
4. Standing Hip Abduction
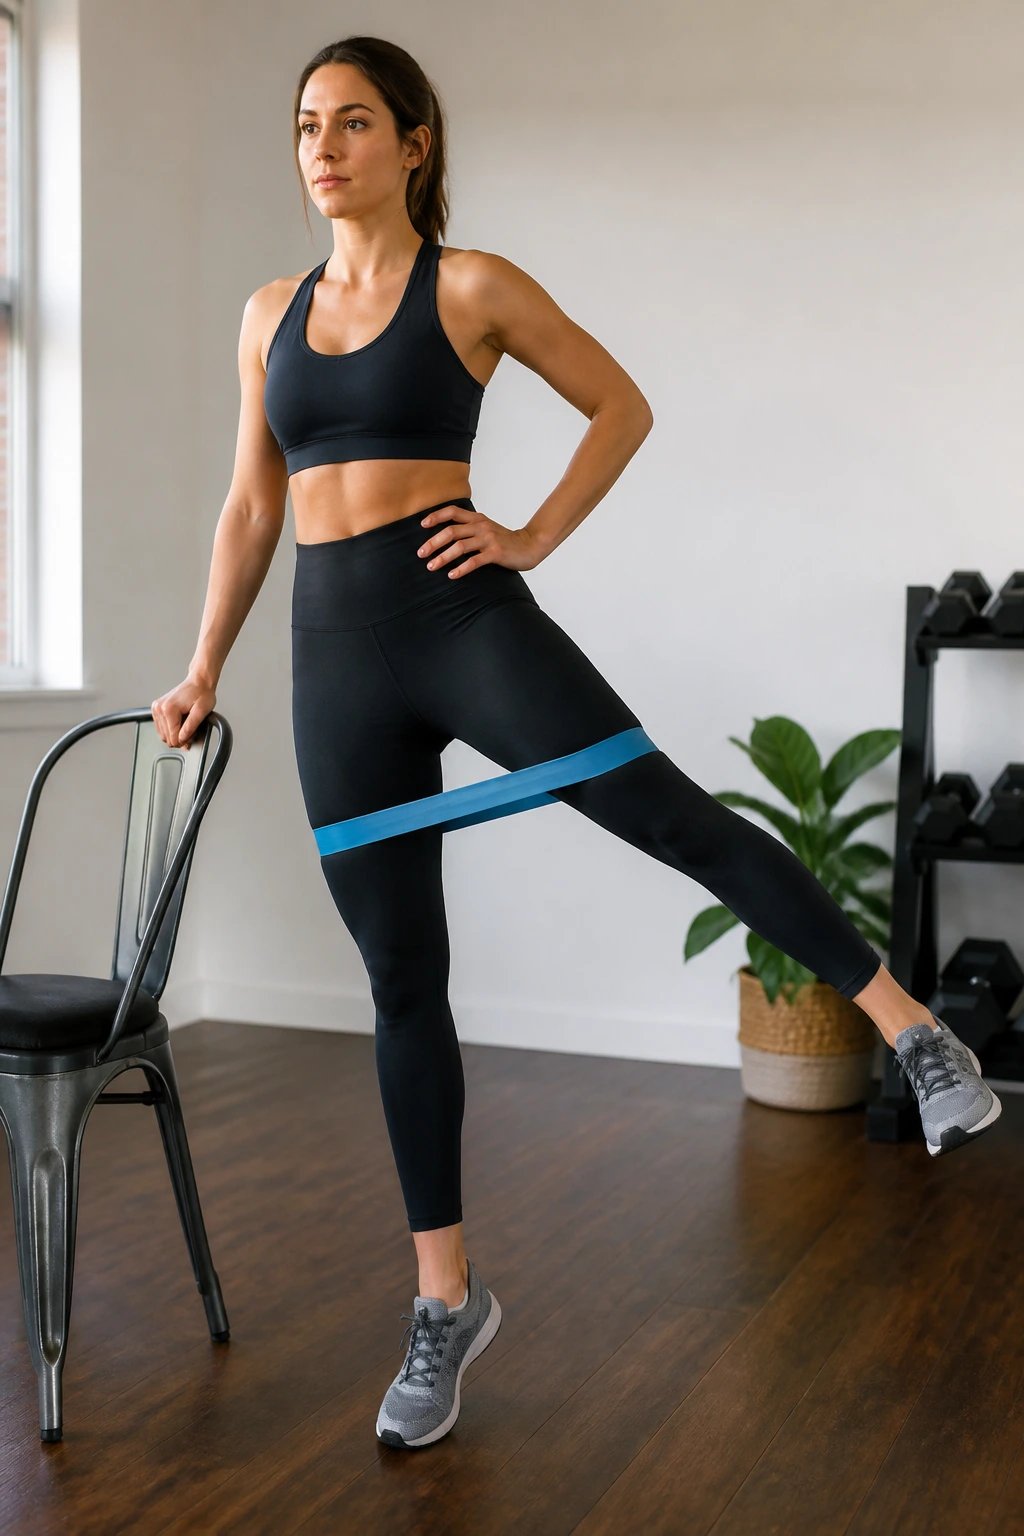
This is a fantastic exercise for balance and lateral hip control. Stand tall with your feet together, core braced. You can hold onto a wall or a sturdy chair for balance, but do not lean your entire body weight into it. The goal is to keep your torso upright and stable.
The Execution
Keep one leg perfectly straight and lift it out to the side against the band’s resistance. Lead with your heel, not your toe. If you point your toe up, you engage the hip flexor. If you lead with the heel, you isolate the glute medius.
Watch for: Most people tend to lean their upper body in the opposite direction to get the leg higher. Fight this. Keep your spine neutral. A smaller, controlled range of motion with a vertical torso is significantly better than a larger range of motion with poor posture.
5. Squat to Lateral Walk
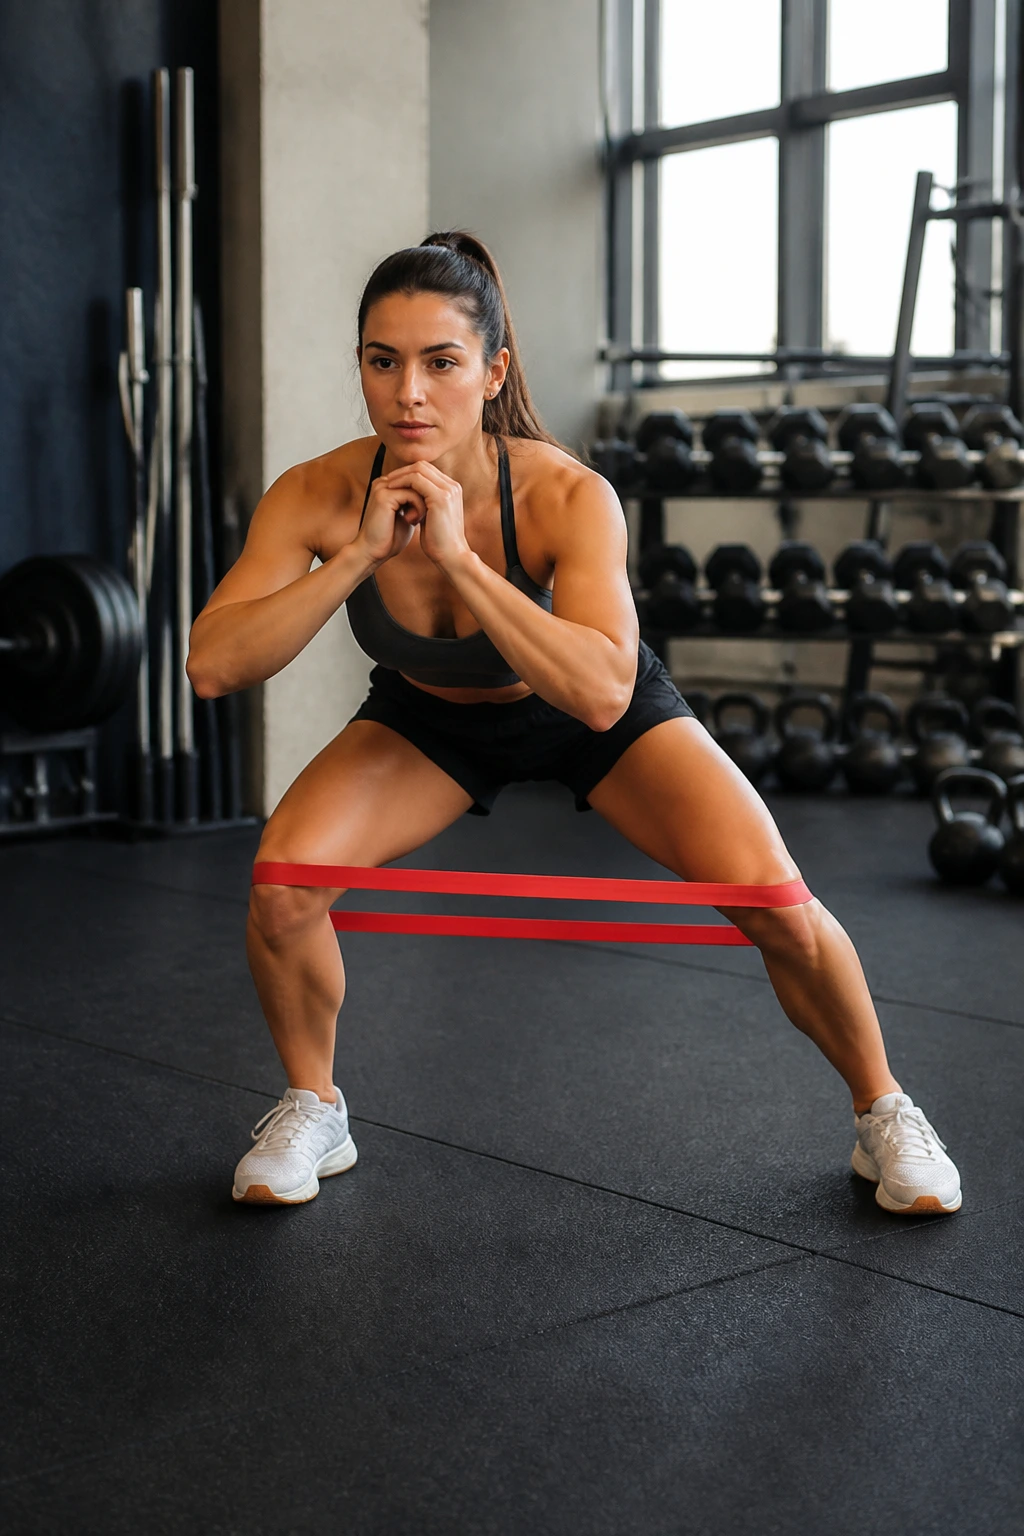
Combining a static squat with a lateral walk is a brutal way to ramp up time-under-tension for your quads and glutes. Drop into a squat—not all the way to the floor, but to a comfortable depth where your thighs are roughly parallel to the ground. Hold this position.
Staying Low
The temptation is to stand up as you step. Resist that urge. You should be in a “frozen” squat position the entire time. Step out with the right foot, then the left, keeping your knees wide against the band’s resistance.
The Burn
By the time you hit ten steps to the right and ten to the left, your quads will likely be screaming. Do not stand up to “shake it out.” Force yourself to stay in the low position for the entire set. This is where the conditioning happens.
6. Donkey Kicks
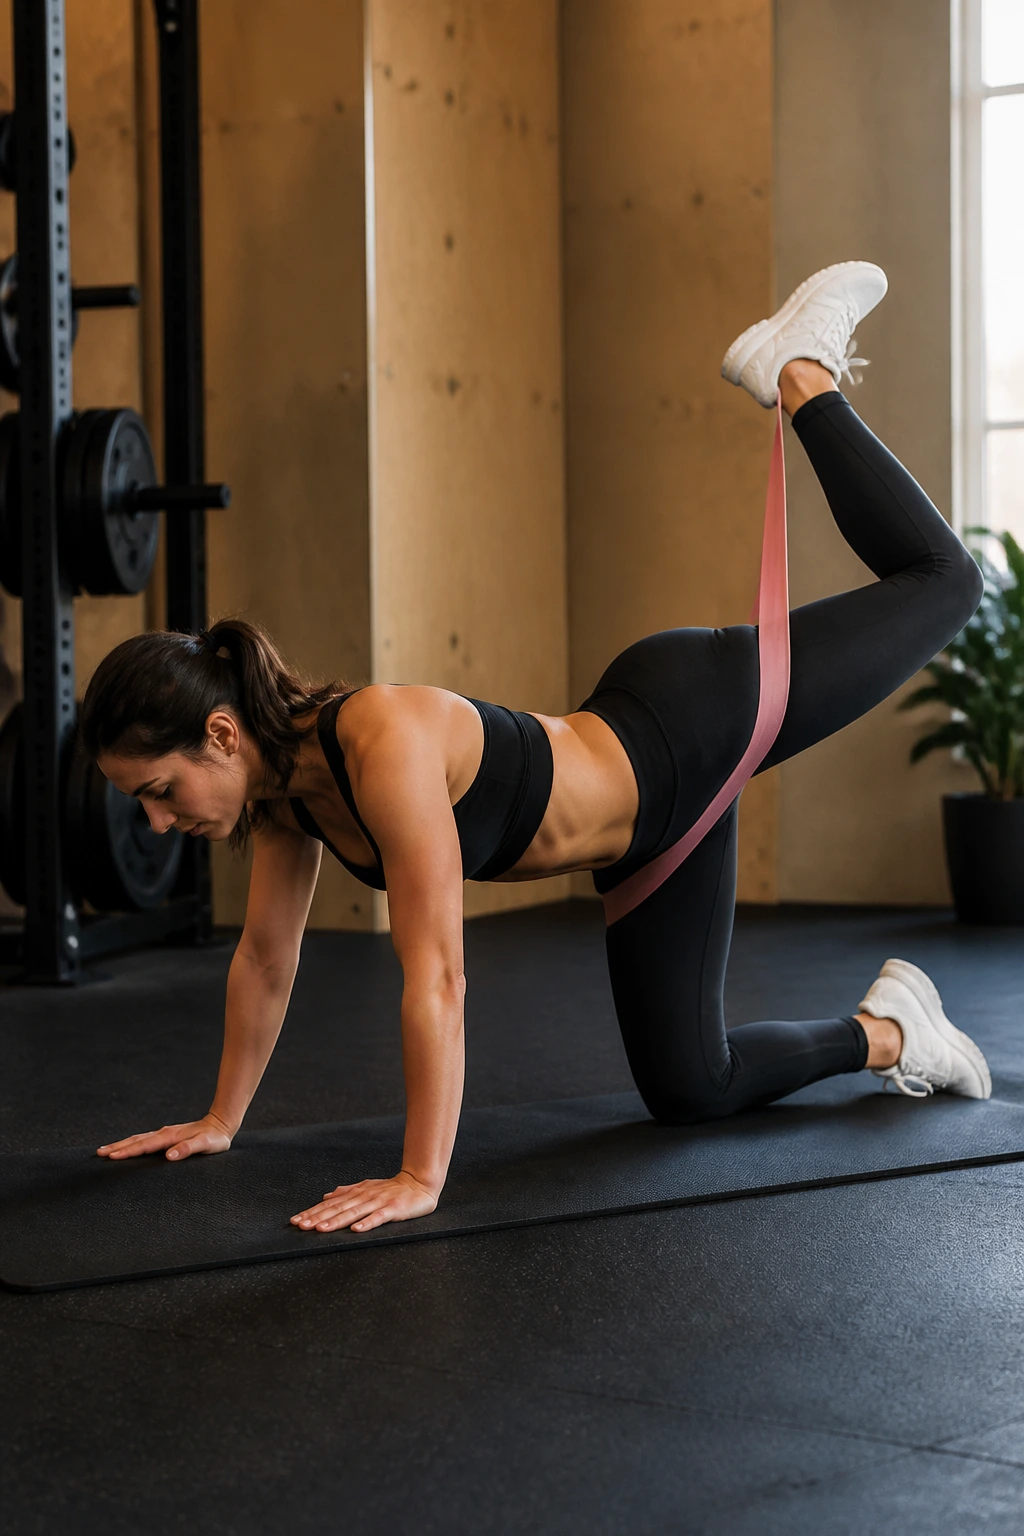
Donkey kicks are excellent for hitting the glute maximus without putting any pressure on your spine. Get on your hands and knees in a tabletop position. Place the band around the arch of one foot and just above the opposite knee. This provides resistance as you kick up.
The Form
Keeping your knee bent at a 90-degree angle, kick your foot toward the ceiling. Focus on driving through the heel. Do not arch your lower back. The movement should come entirely from the hip joint. If your lower back is doing the lifting, you are asking for pain.
Note: Control the return. Lower your knee slowly until it is just an inch off the floor. Don’t let it crash down. The slow, controlled descent is where the muscle fibers actually tear and rebuild stronger.
7. Fire Hydrants
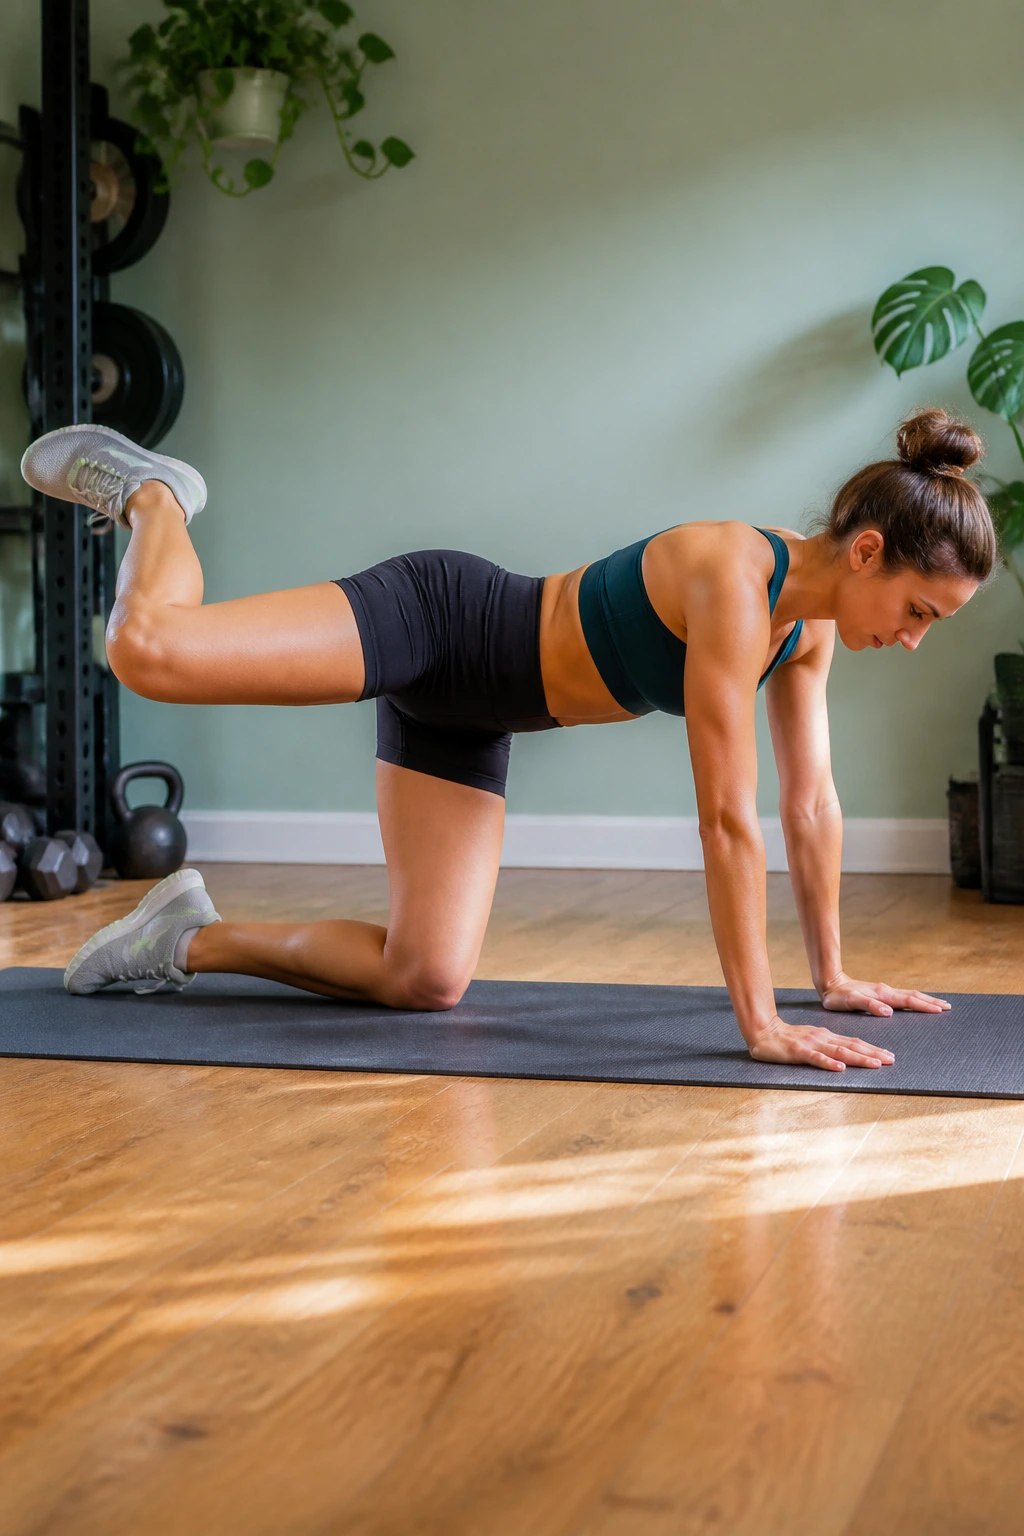
Named for the obvious reason, fire hydrants target the glute medius from a stable, four-point position. Start in your tabletop stance. Keep your knee bent at 90 degrees and lift your leg out to the side, similar to the clamshell but on all fours.
Stabilizing the Core
Your primary challenge here is not letting your hips tilt as you lift. If you find your body leaning hard to the side to help the leg go higher, tighten your core and reduce the range of motion. It is better to lift the knee only four inches with perfect form than to lift it ten inches with a tilting, unstable spine.
Why It’s Unique
Because you are on all fours, you cannot use momentum. This forces the glute to do all the heavy lifting. You will notice the burn hits much faster than in standing exercises.
8. Curtsy Lunge
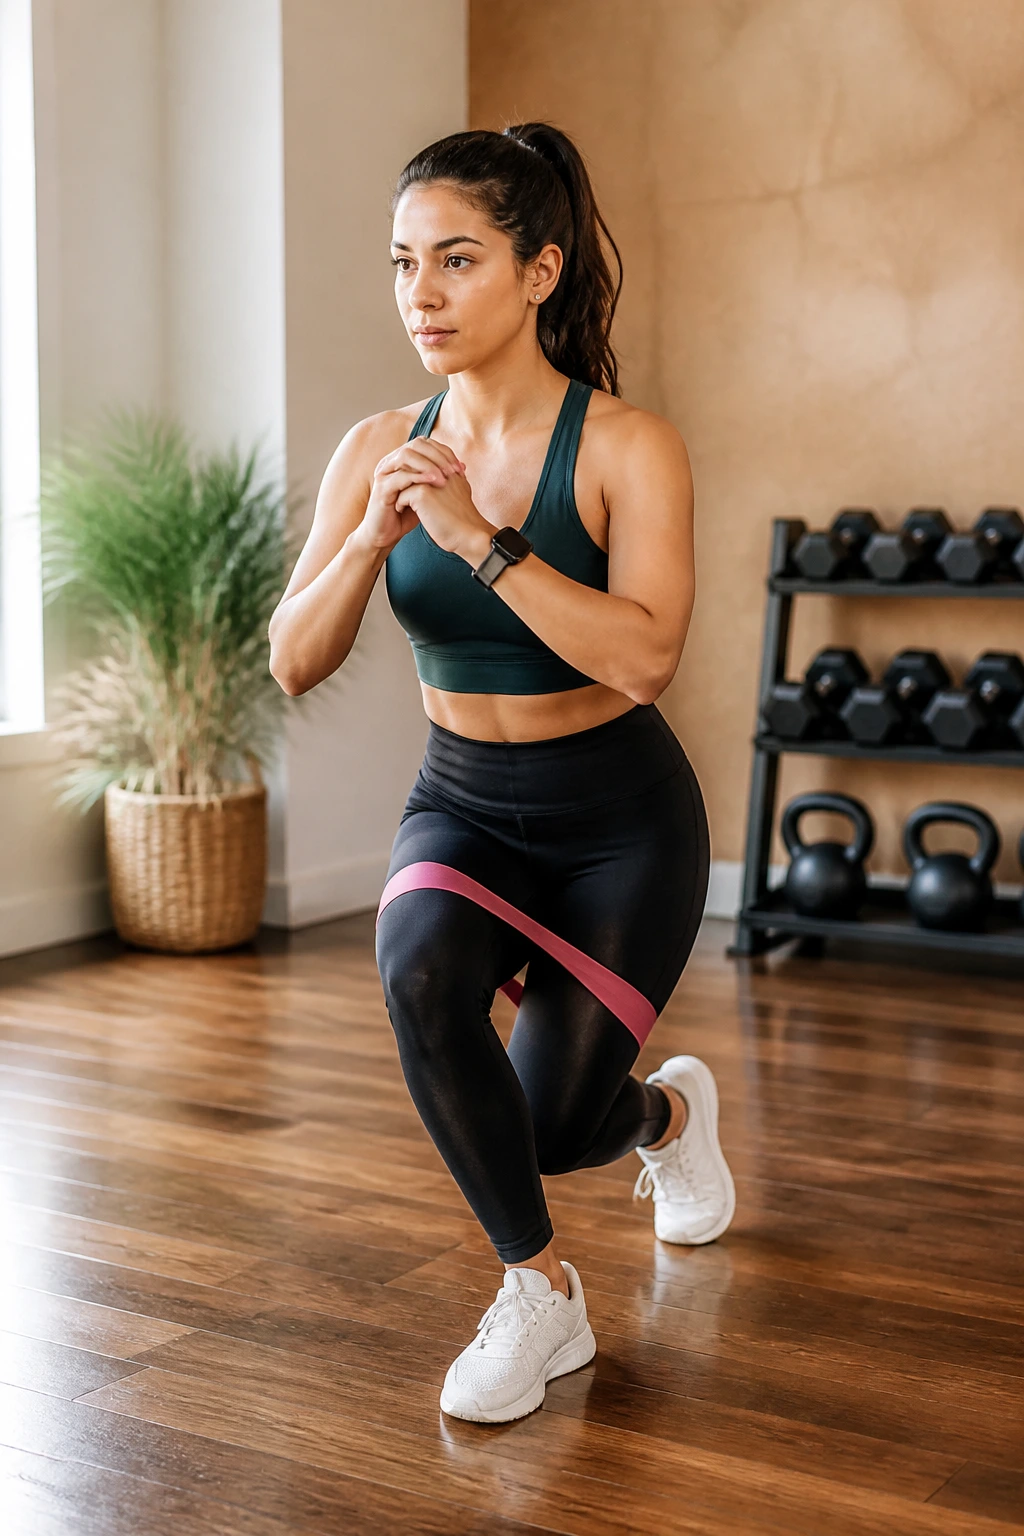
Curtsy lunges are a slight variation on the standard reverse lunge, but they shift the focus significantly toward the glute medius. Stand with the band just above your knees. Step one foot back and across behind the other, as if you are performing a curtsy.
The Angle
Your front knee should track directly over your front ankle. Do not let it collapse inward—the band will actively try to pull it that way, so you must consciously press that knee outward. This is a multi-planar movement, which is essential for healthy, functional knees.
Pro Tip
Do not worry about how far back you step. Focus on the depth of the lunge. As you come back up, drive through the heel of the front foot. You will feel this in the side of your glute almost immediately.
9. Standing Kickbacks
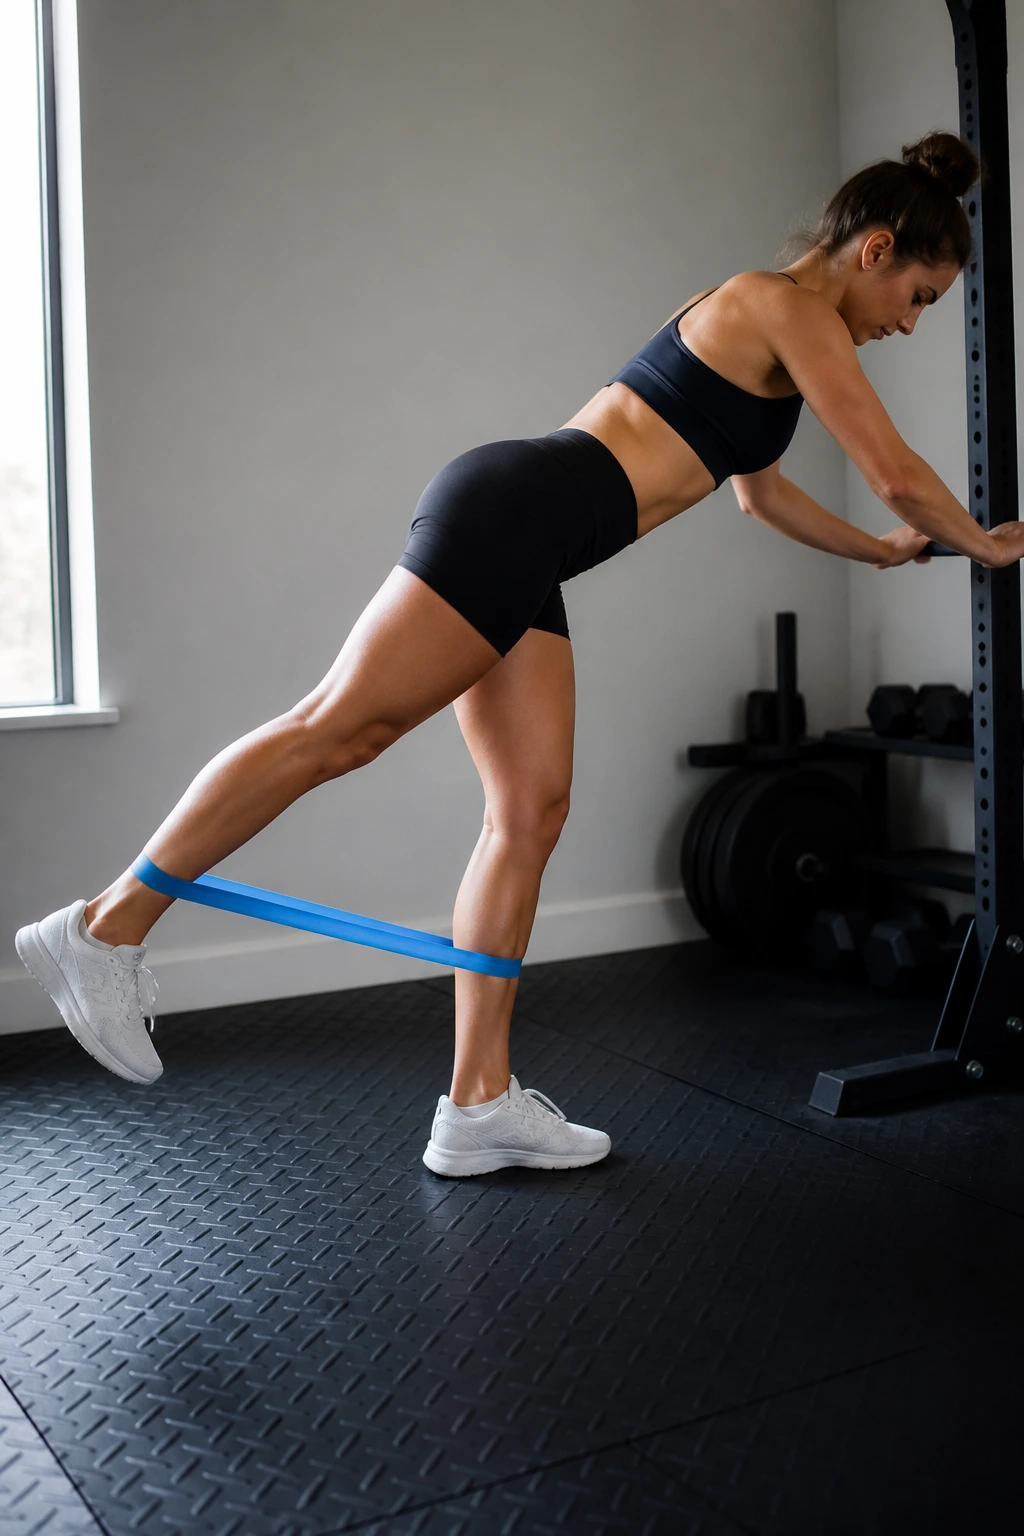
This is the isolation king for the glute maximus. Stand holding onto a wall or a heavy object. The band should be around your ankles. Lean forward slightly, keeping a flat, neutral back.
The Stroke
Kick one leg straight back behind you. Do not let your foot touch the floor between reps. Keep the glute squeezed at the top of the movement for a full second.
Avoid the arch: The most common mistake is arching the lower back to get the leg higher. That is not a glute kickback; that is a lower back strain. Keep your pelvis tucked slightly and your core rock-solid. You only need to move the leg back a few inches to feel a massive contraction in the glute.
10. Glute Bridge Hold with Abduction
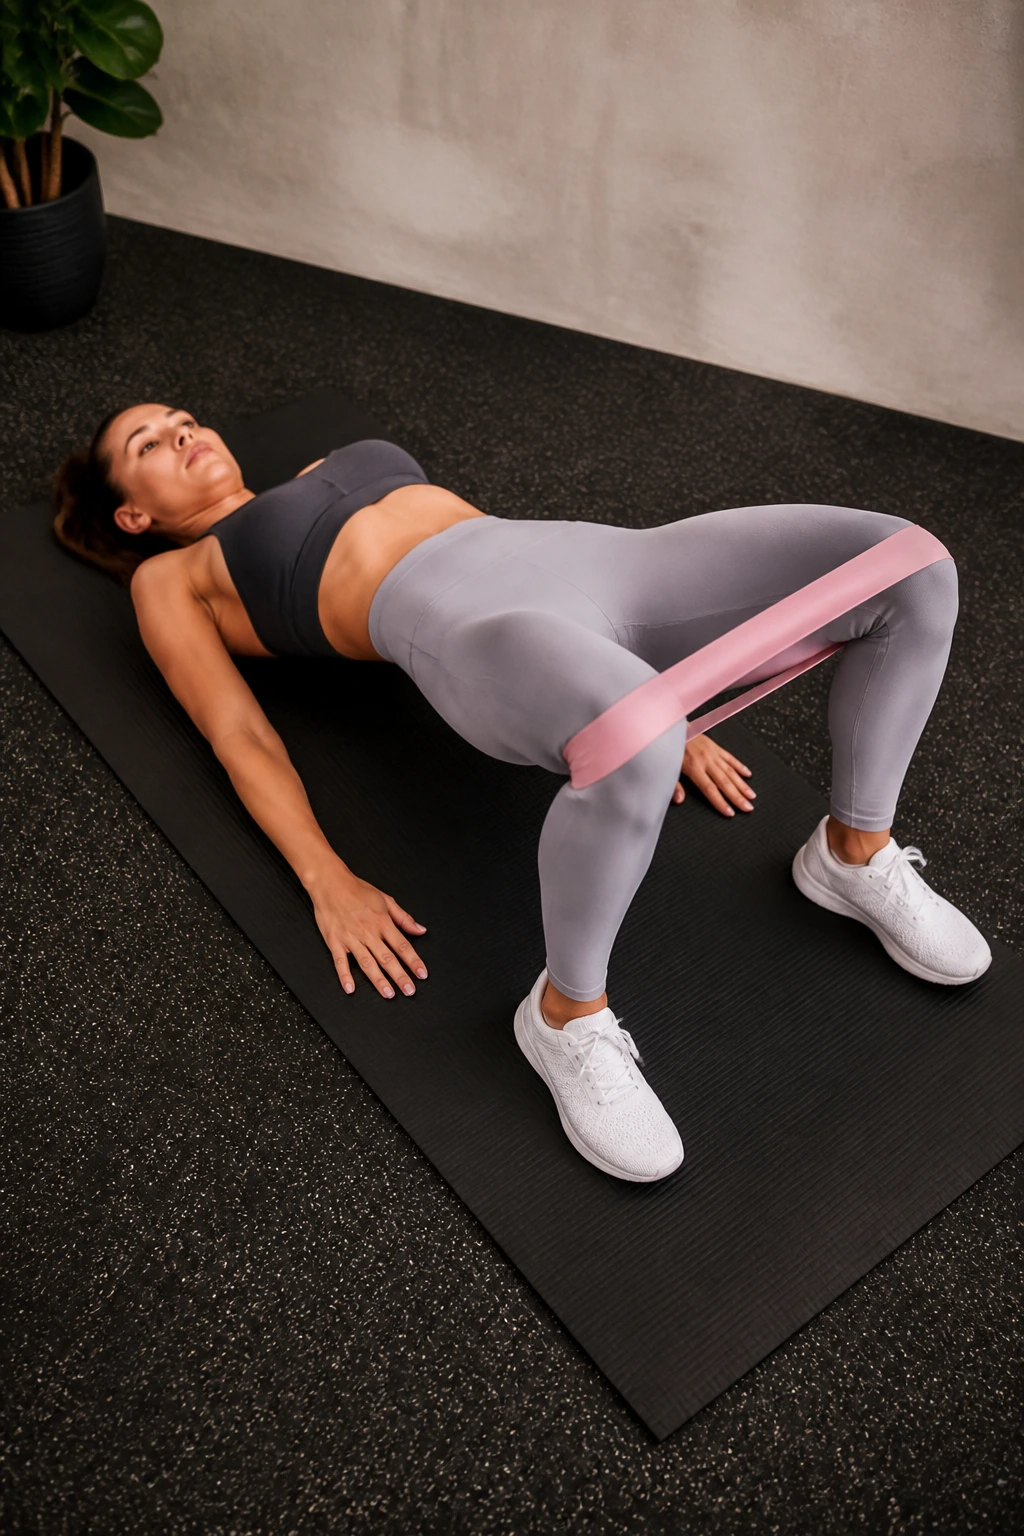
This move combines an isometric hold with dynamic movement. Set up a standard glute bridge, hips pushed high, knees pushing out against the band. Once you are in that top position, keep your hips lifted high and pulse your knees outward.
The Pulsing Phase
The bridge hold works your glute maximus, while the pulses (abduction) fry the glute medius. Keep your ribs pulled down—do not flare them toward the ceiling. Your focus should be entirely on the hips. If your hamstrings start cramping, it usually means your glutes aren’t taking the full load; push through your heels, not your toes, and readjust your feet.
11. Side Lying Leg Raise
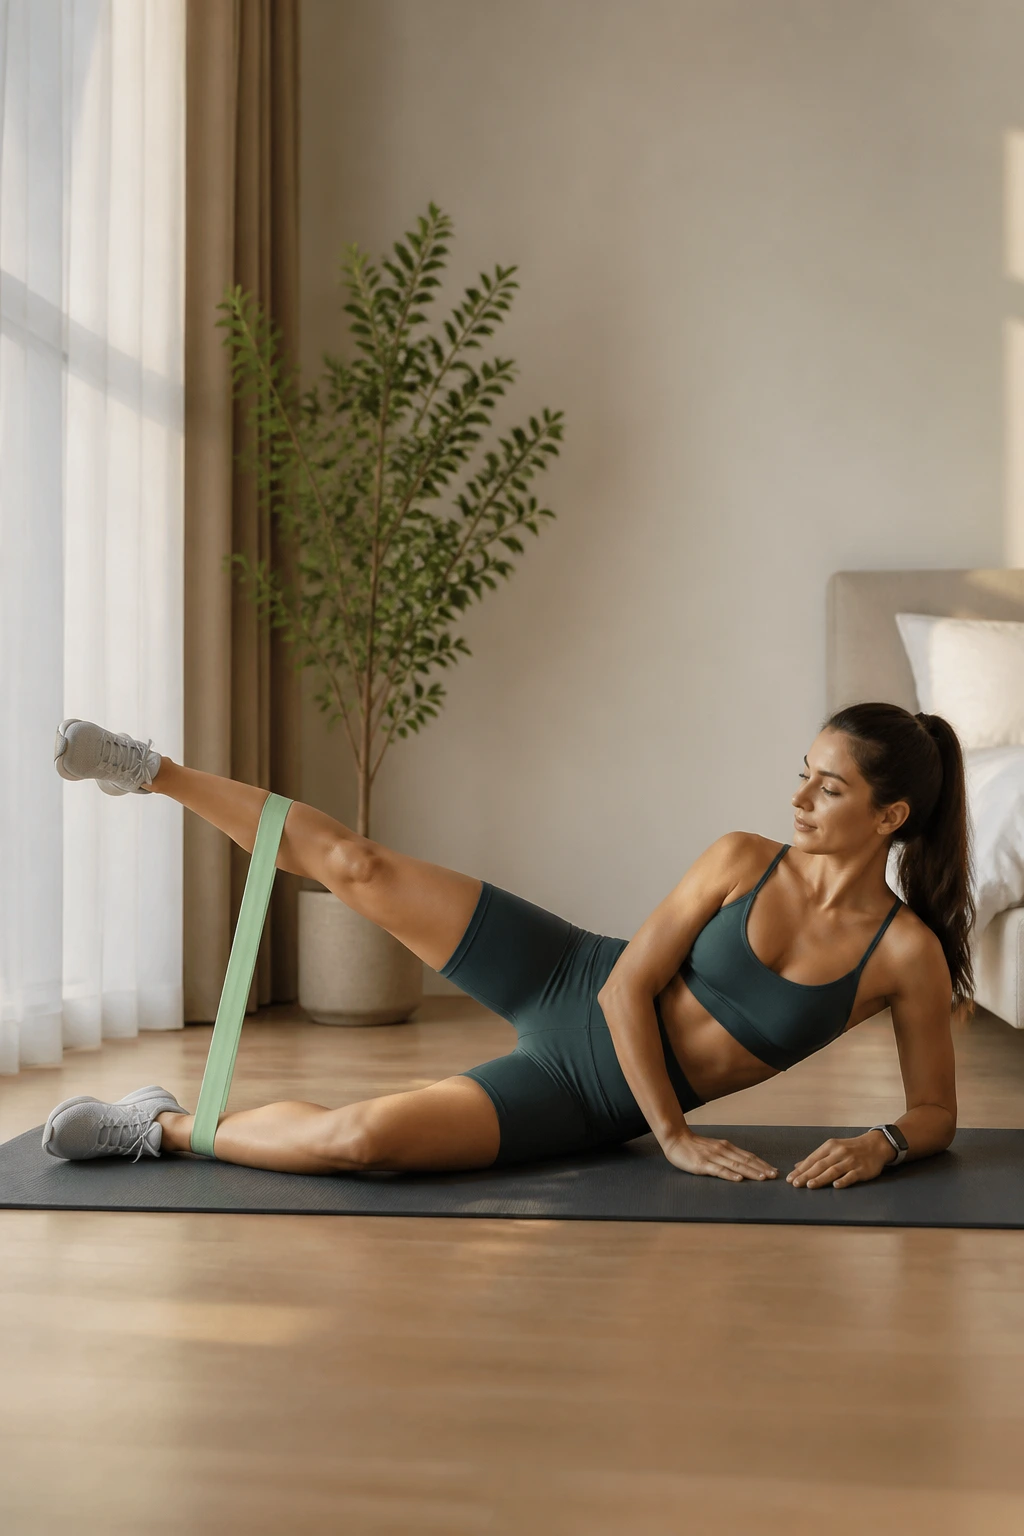
If you find fire hydrants too unstable or donkey kicks too complex, the side-lying leg raise is your best friend. Lie on your side, legs completely straight. Stack your hips perfectly. Raise the top leg toward the ceiling against the resistance of the band.
The Subtle Detail
You do not need to lift your leg very high. In fact, lifting it too high often causes the hip to rotate upward. Keep the leg straight and lead with the heel. If you keep your toe pointed slightly downward (internal rotation of the hip), you will light up the upper glute medius even more effectively.
12. Sumo Squat
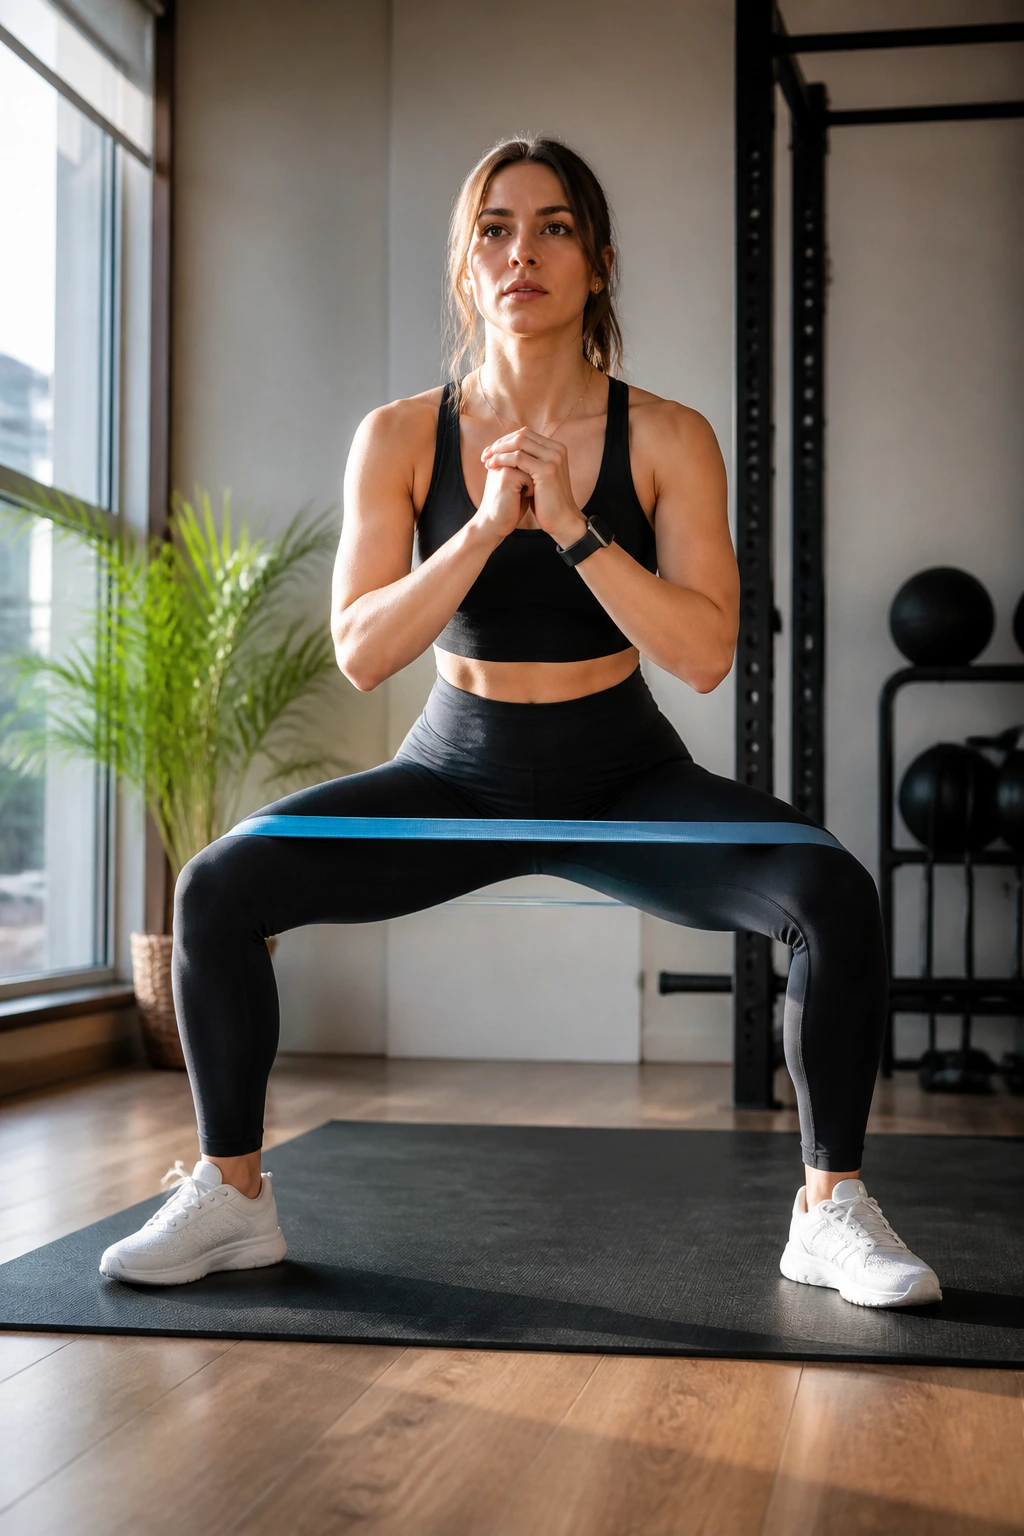
A sumo squat utilizes a wider stance than a traditional squat, putting more emphasis on the inner thighs (adductors) and the glutes. With the band around your knees, take a wide stance, turning your toes slightly outward.
Lowering Down
As you lower into the squat, the band will try to pull your knees together. Fight that urge aggressively. Your knees must track directly over your toes. If you cannot keep your knees out, you need to widen your stance or use a lighter band.
Why This Matters
Building strength in the inner thighs is crucial for knee stabilization. Most people have strong quads but weak adductors, leading to knee pain. The band here forces those adductors to work twice as hard to maintain your form.
13. Forward Walk
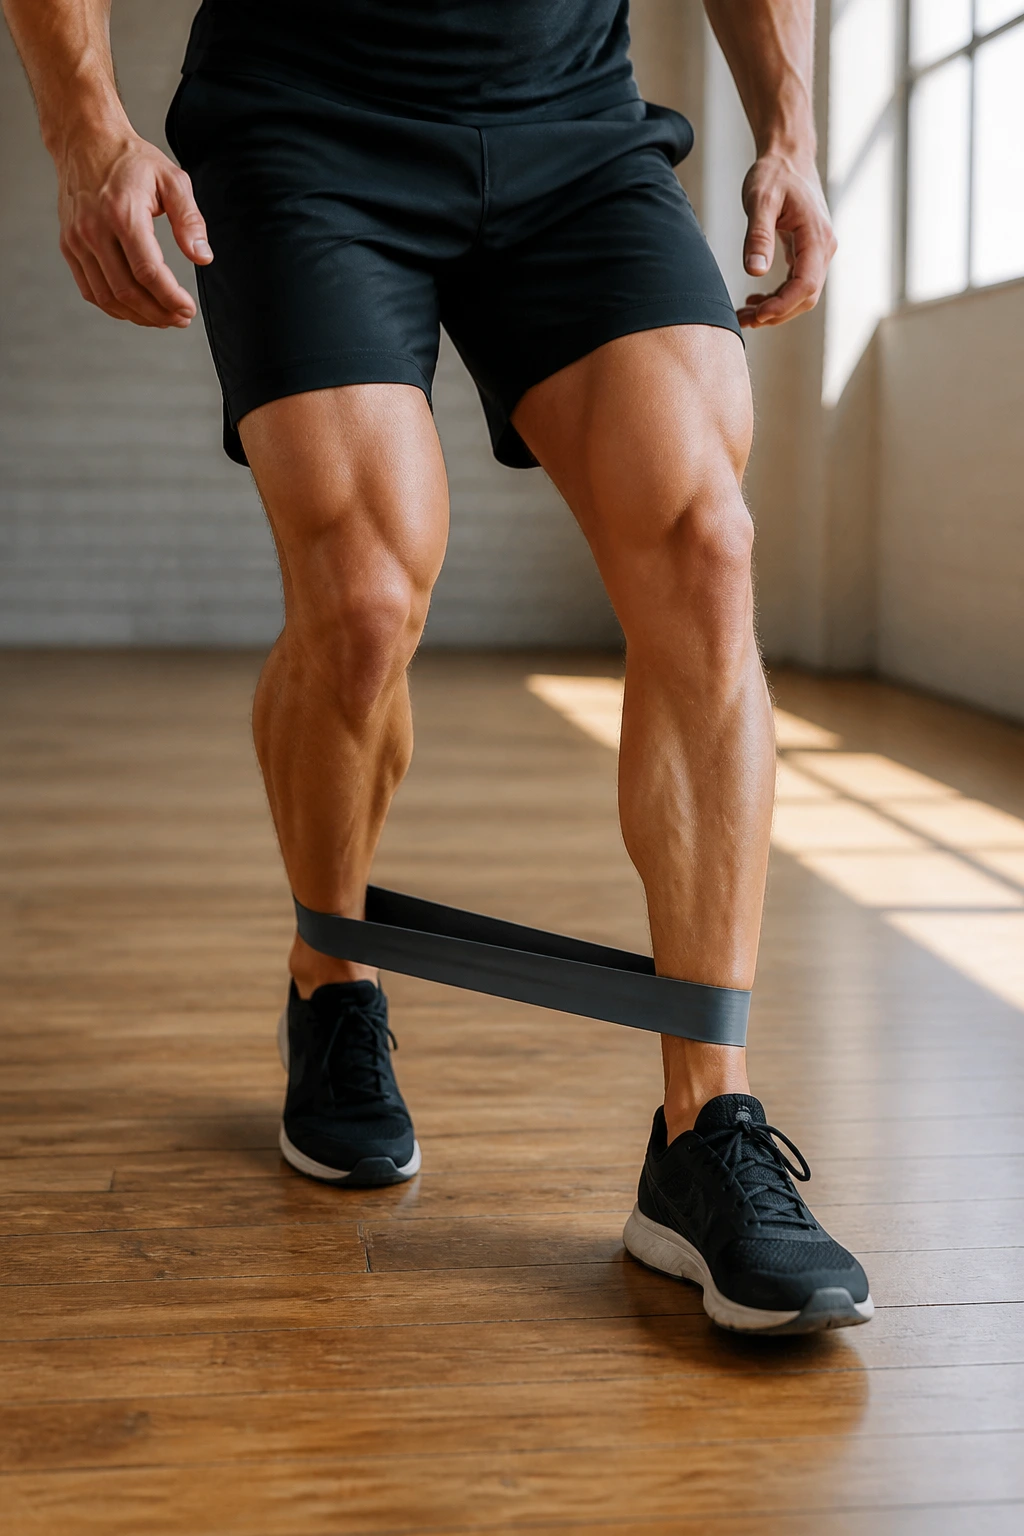
Most people focus on the lateral walk, but the forward walk is an underrated move for hip flexor and glute coordination. Place the band around your ankles. Get into your athletic stance—hips back, knees bent.
The Walk
Instead of moving sideways, step forward. Keep your toes pointed straight ahead. You will feel a strong pull on your hips as you try to advance. This move forces you to maintain external rotation at the hip while moving through a forward plane, which is exactly how we move in real life. It is awkward at first, but that’s the point. It is challenging because it is hitting stabilizers that are often ignored.
14. Monster Walk
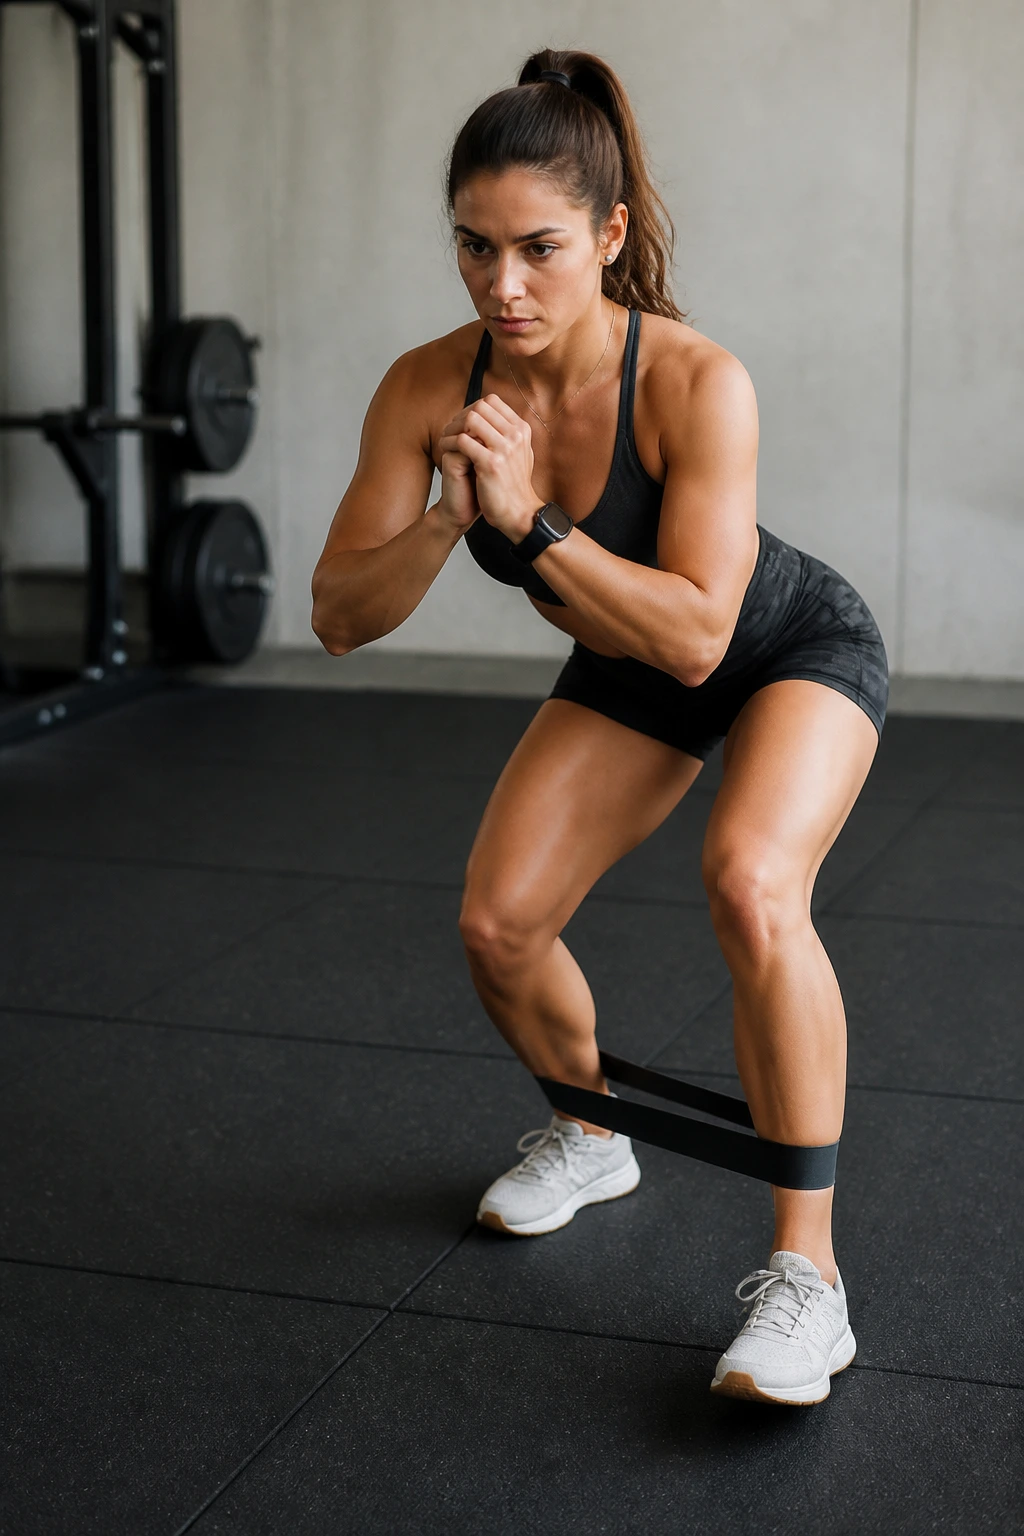
The monster walk is the lateral walk’s more intense cousin. Place the band around your ankles. Get into a deep, low squat—the lower, the better. Now, walk forward at a 45-degree angle. Step forward and out, forward and out.
Keeping Tension
Because you are stepping at an angle, the band stays under constant, high-tension demand. You never reach a point of “unloading.” If you stand up, you lose the effect. Stay in that deep squat. This creates a burn in the hips and quads that is difficult to replicate with any other bodyweight movement.
15. Knee-In/Knee-Out
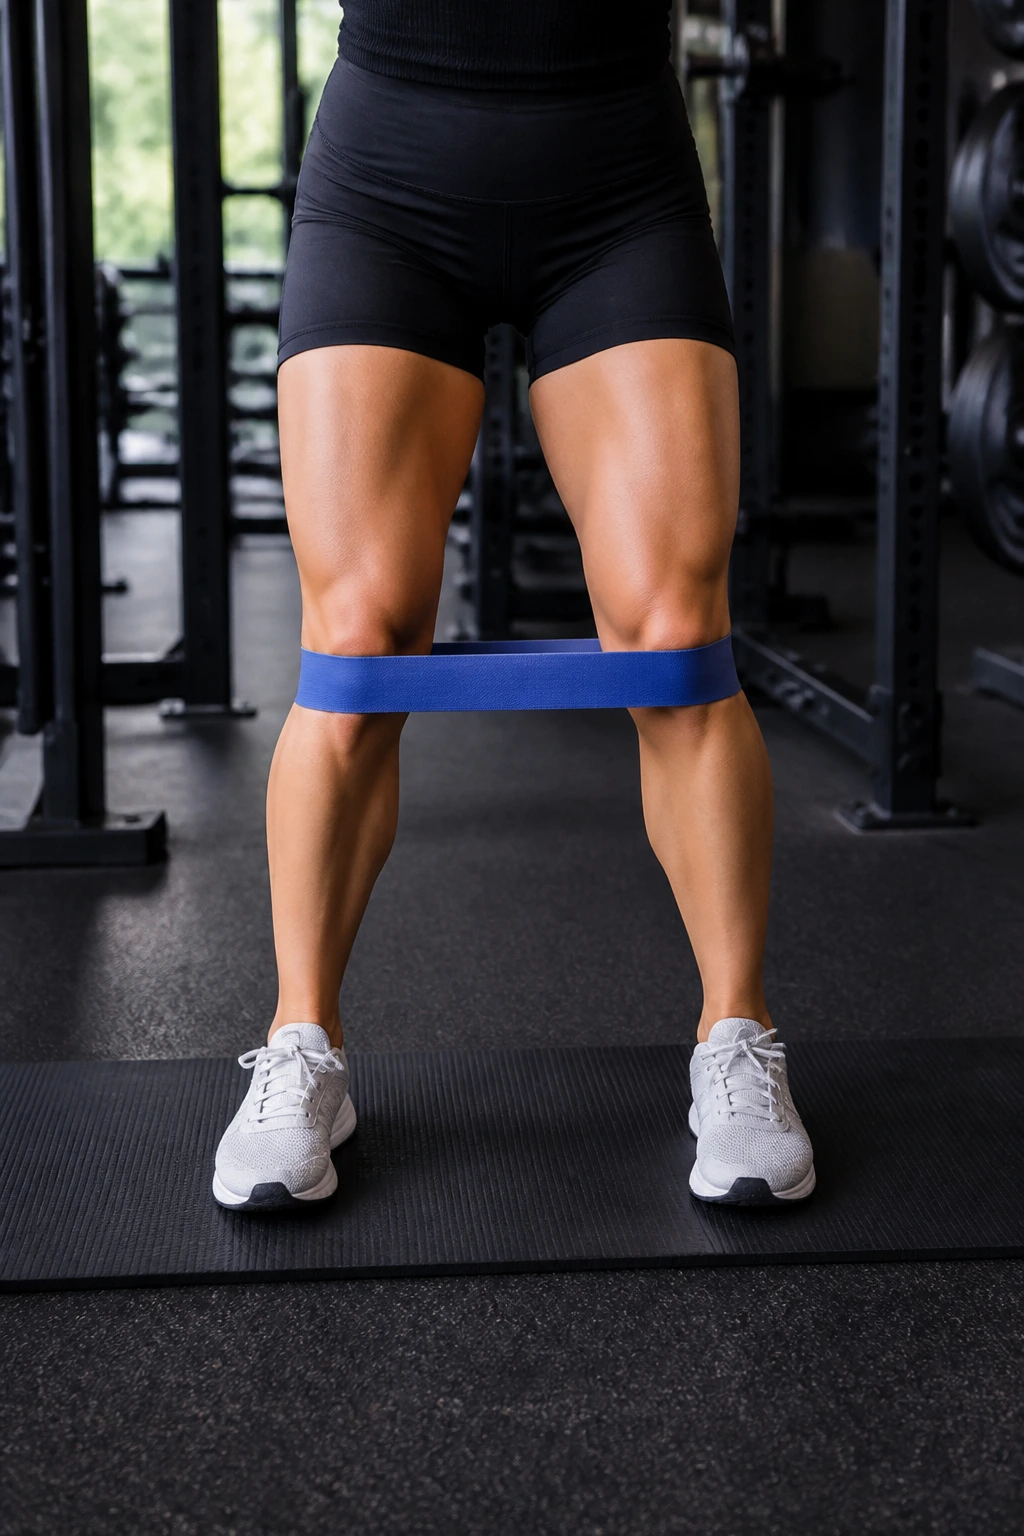
This is a great finisher or warm-up exercise. Stand with your feet hip-width apart and the band around your knees. Your hips are stationary. Your focus is moving the knee joint itself.
The Pattern
Without moving your feet, drive your knees inward, then forcefully drive them outward against the band. It is a small, pulsing movement. It is not about how big the motion is—it is about the speed and the resistance. You are actively training your glutes to prevent knee valgus (that inward cave) by repeatedly forcing them to engage.
16. Single-Leg Glute Bridge
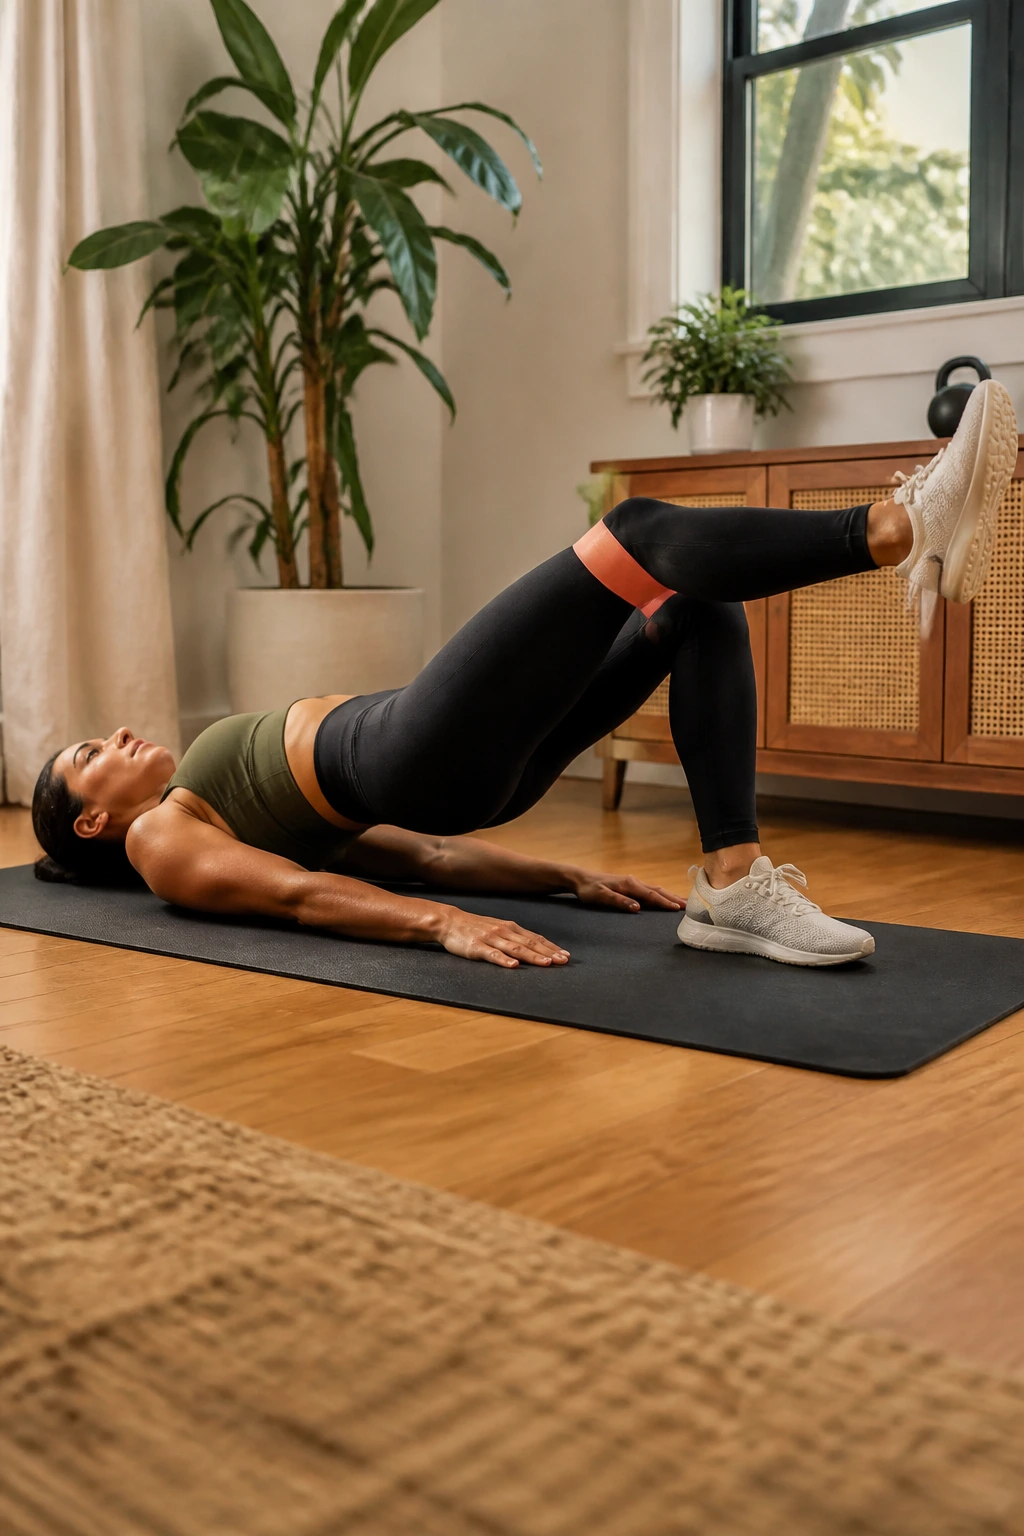
If the standard glute bridge has become too easy, this is the logical progression. Lie on your back, knees bent. Lift one leg off the floor, extending it out straight or keeping it tucked to your chest. Keep the band around your knees.
Maintaining Stability
Now, drive through the heel of the planted foot to lift your hips. The band will want to collapse your planted knee inward because it has no counter-force. You must work overtime to push that knee out. This unilateral work is essential for fixing imbalances between your left and right sides. If you can do 15 reps on the right but only 8 on the left, you know exactly where your training needs to focus.
17. Standing Hip Extension
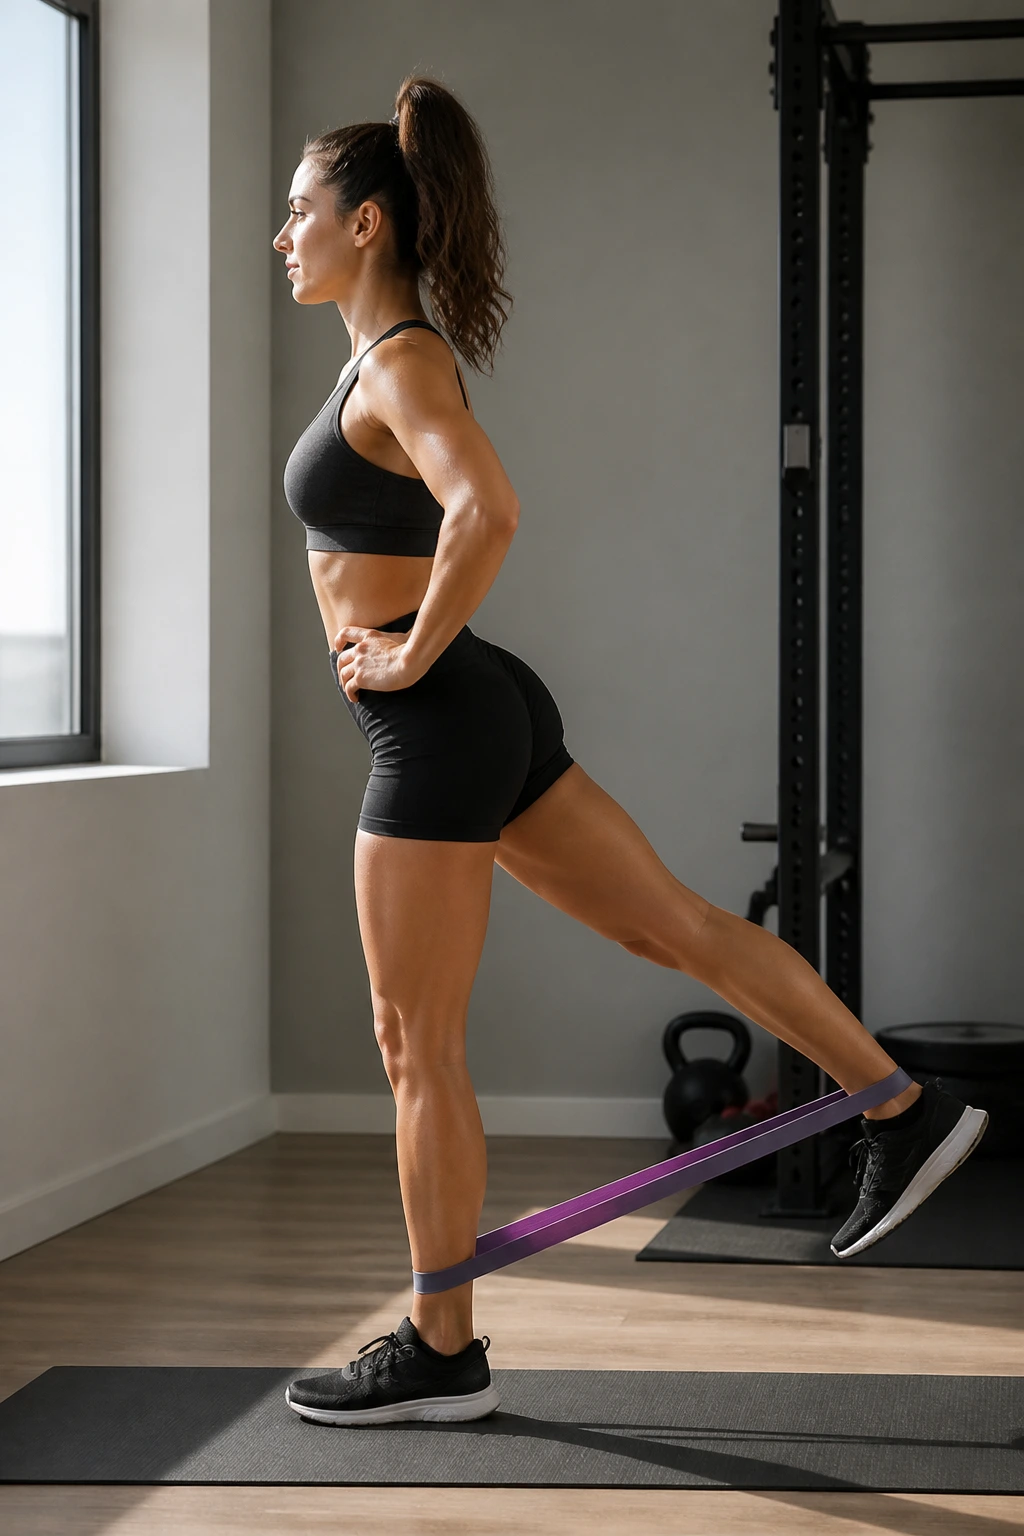
This exercise is similar to the standing kickback, but it uses a slightly different range of motion and often feels more natural. Stand upright, band around your ankles. Instead of kicking back in a lean, keep your torso perfectly vertical.
The Squeeze
Extend one leg straight back behind you, keeping the knee straight. Focus on the glute squeeze. The key here is the “standing” leg. It has to work incredibly hard to stabilize your entire body while the other leg is moving. You will notice your supporting glute gets just as tired as the moving one. It is a two-for-one deal for your balance and strength.
18. Reverse Lunge with Resistance
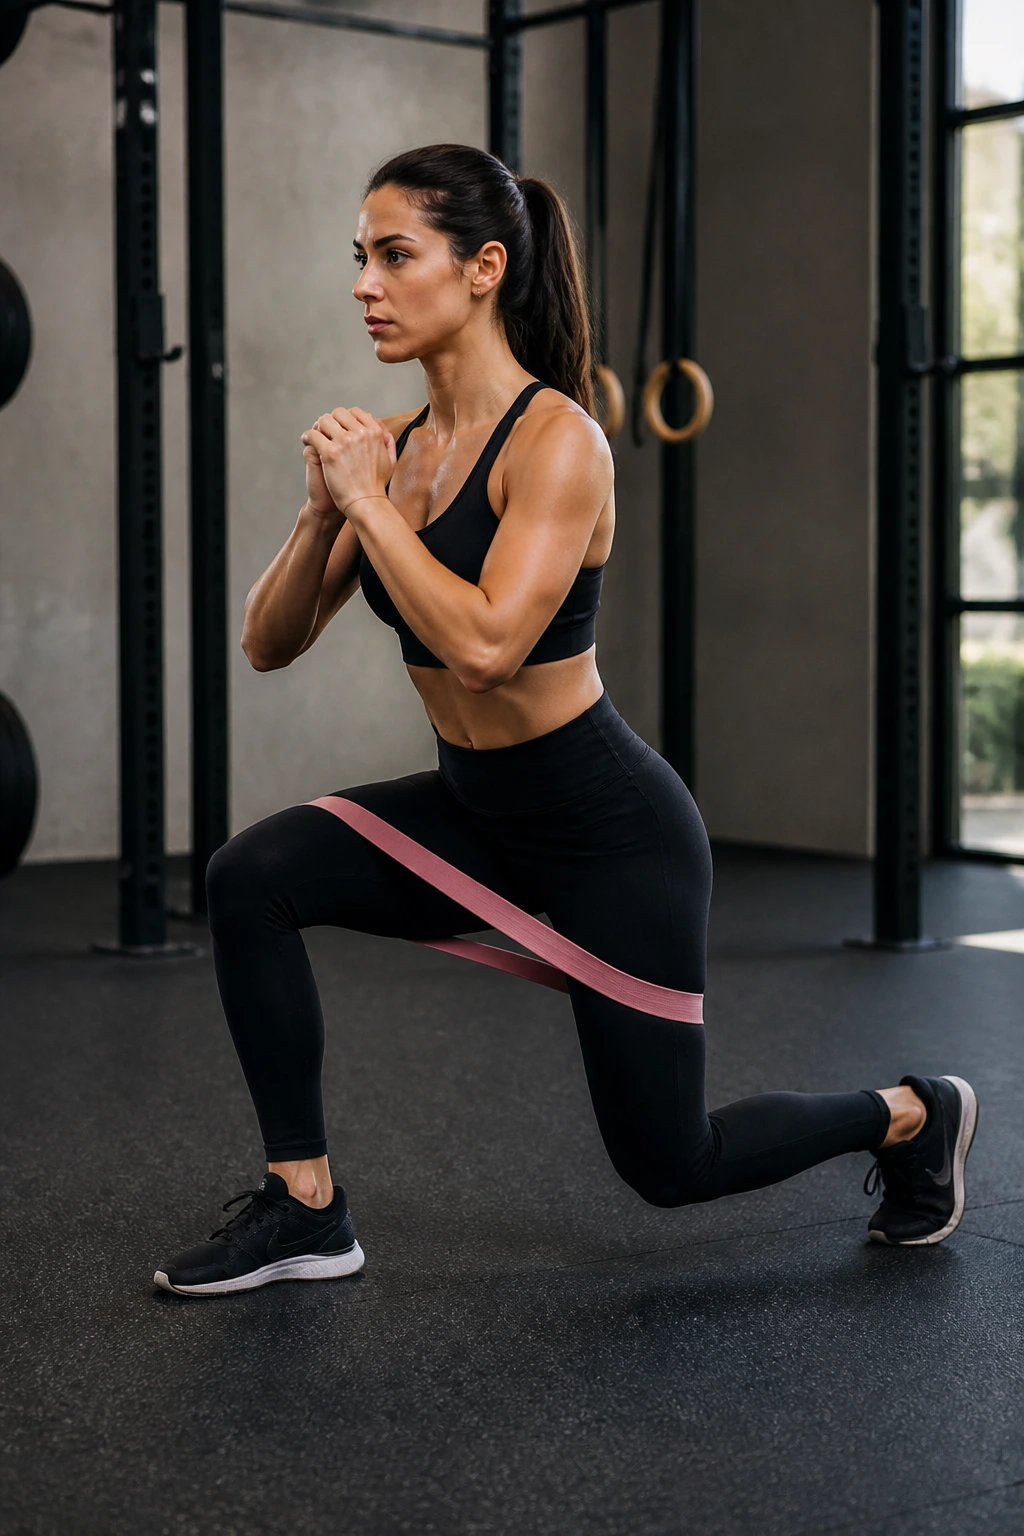
The reverse lunge is perhaps the best leg exercise for general knee health. Adding a mini band makes it even better. Place the band around your knees. Step back into a lunge. As you lower, you have to fight the band to keep your front knee from collapsing inward.
The Dynamics
When you stand back up to the starting position, don’t just snap your legs together. Use control. The resistance of the band throughout the entire lunge ensures your hips stay engaged. If you feel shaky, hold onto something for the first few sessions. It is better to have stable form than to wobble through a rep.
Final Thoughts
Building strong legs with mini bands is not about finding the hardest exercise; it is about finding the ones that allow you to feel the muscle working properly. If you are doing a movement and only feel your lower back or your quads, stop. Adjust your foot position, check your knee alignment, or reduce your range of motion.
The goal of resistance band training is to create a constant, unwavering mind-muscle connection. You are teaching your glutes to fire on command. You are training your stabilizers to protect your joints during more complex, higher-load movements later on. Whether you are using these for a standalone session, a warm-up, or a finisher, the consistency matters more than the intensity. Master the form, keep the tension high, and you will find that these small, elastic loops are capable of building serious, functional strength.
