



Isometric workouts are the training tool people underestimate until a joint starts feeling sketchy. Hold a shape hard enough and the body has to organize itself around that position — knees stop drifting, ribs stop flaring, shoulders stop shrugging. There is no cheating a 30-second hold.
That matters because stable joints are not stiff joints. You want control under load, clean alignment, and enough muscular tension to keep the joint from wobbling when life gets messy: stairs, carries, presses, sprint starts, getting off the floor. The best isometric exercises train that control with almost no equipment and very little setup.
A good hold feels honest. You know within 10 seconds whether your hip is drifting, your arch is collapsing, or your shoulder blade is winging away from the rib cage. That instant feedback is why these moves show up in warm-ups, rehab plans, and hard strength sessions alike.
Start with the wall sit. It is plain, a little rude, and far more useful than it looks.
1. Wall Sit Hold for Knee Stability
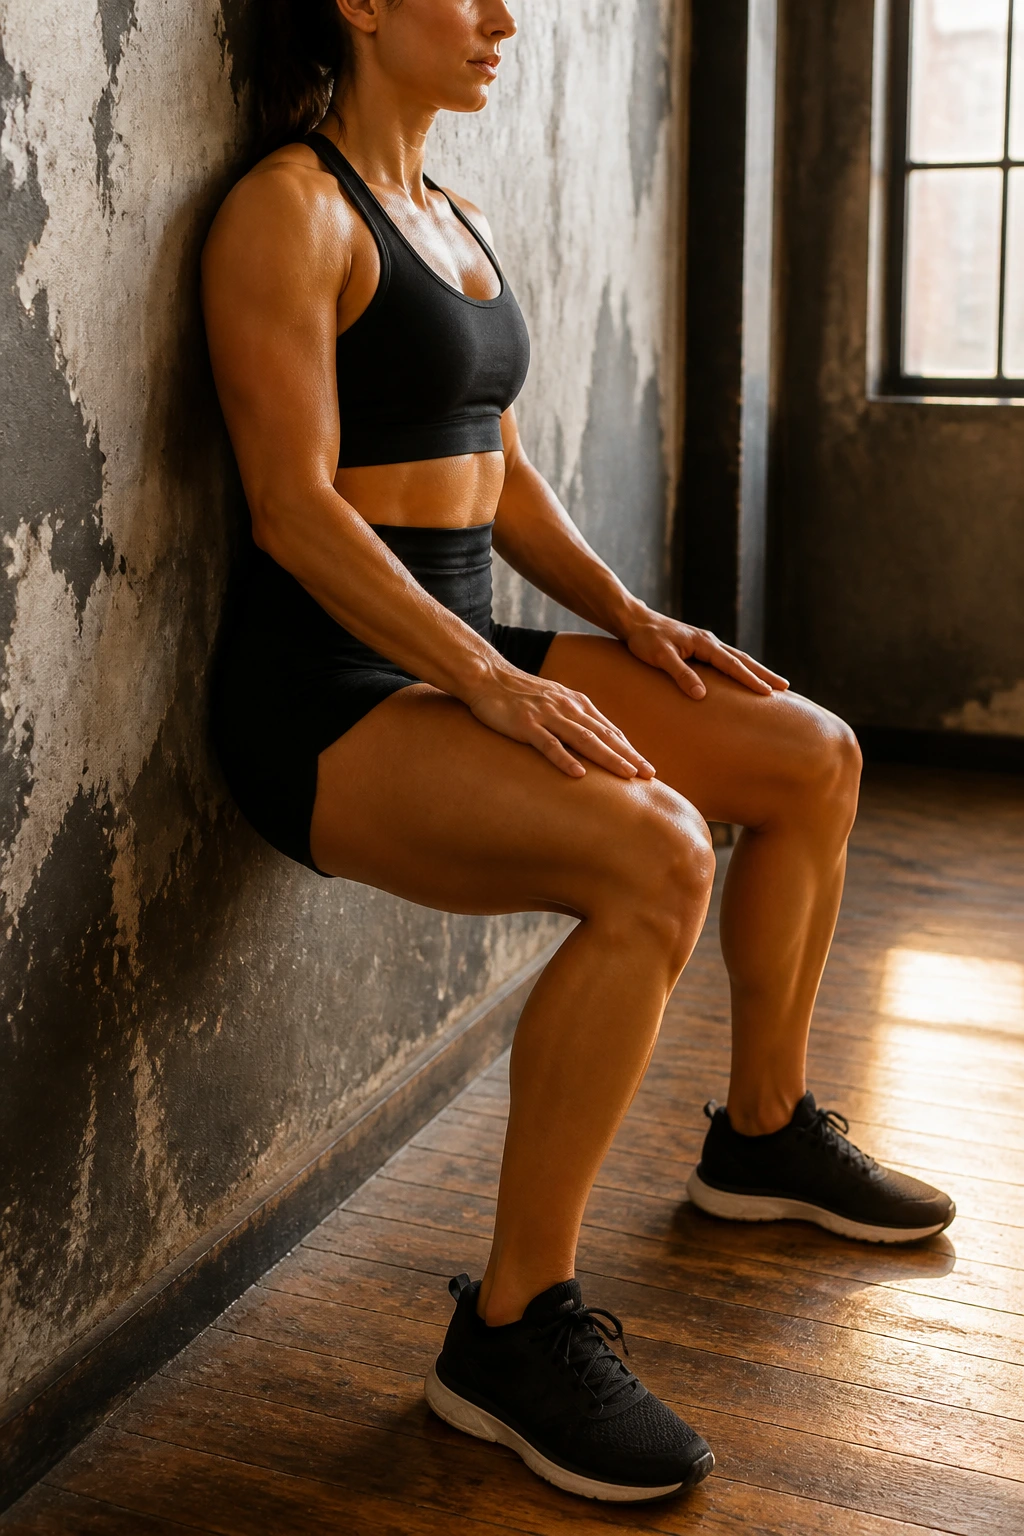
The wall sit is where a lot of people first learn that static work can be savage. Your quads light up fast, but the bigger value is what happens at the knee: the joint gets practice staying centered while the thigh muscles work hard at one angle. That makes it a smart pick for runners, lifters, and anyone whose knees get annoyed by sloppy stairs or deep squats.
Set your feet about one to two foot-lengths away from the wall, slide down until your knees land near 90 degrees, and keep your back flat. Press your whole foot into the floor, not just the toes. If the knees cave inward, shorten the hold and fix the stance before chasing time.
Form checkpoints
- Knees track over the second or third toe.
- Heels stay planted.
- Ribs stay stacked over the pelvis.
- The low back stays in contact with the wall.
A good starting dose is 2 to 4 holds of 20 to 40 seconds. If the quads shake like crazy at 15 seconds, that is fine. Shake is not the problem; collapsing shape is. The wall sit earns its place because it teaches the knee to stay put while the muscles around it do honest work.
2. Spanish Squat Hold for Patellar Tendon Support
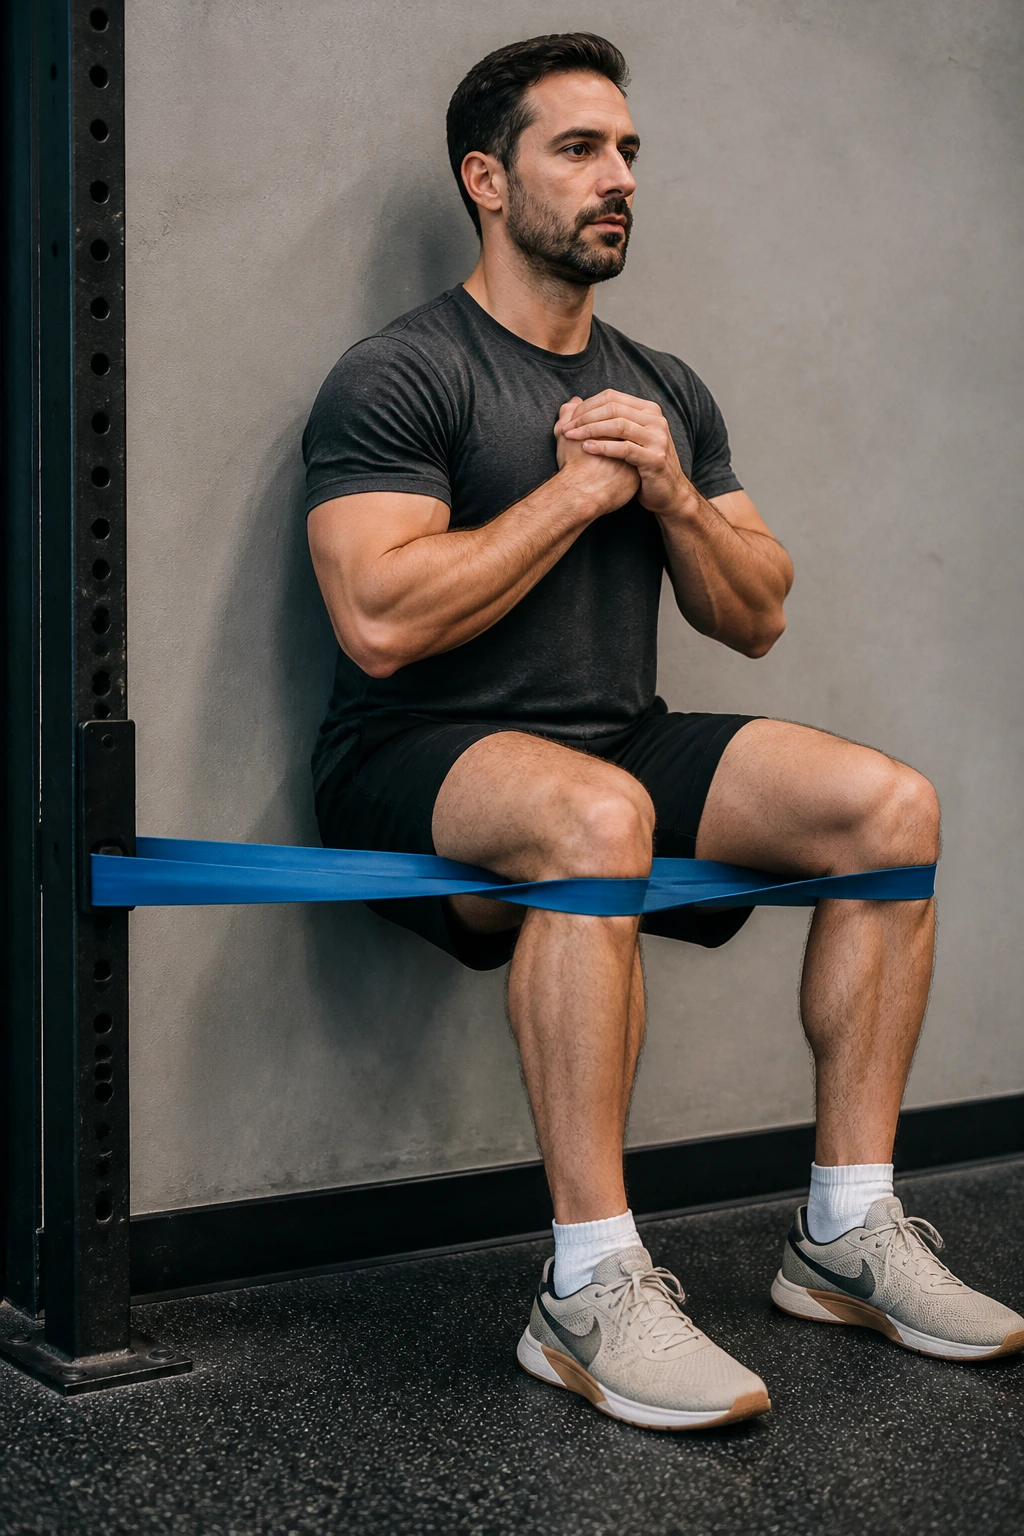
What makes the Spanish squat different? The shin stays more upright, which shifts a lot of the load into the quads without asking the hips to fold deeply. That setup is one reason coaches like it for cranky knees and for people who need strong quads but do not want a deep bend right away.
Loop a heavy band or strap behind the knees and anchor it to something solid. Sit back until the straps take some of your body weight, then hold the position with a tall chest and vertical shins. You should feel the quads burn before the knees feel pinched. If you feel pinching in the front of the knee, adjust the angle or reduce the depth.
The hold works well for 2 to 5 rounds of 20 to 45 seconds. Keep the feet planted and avoid rocking forward onto the toes. I like this one because it gives you a lot of quad tension without the same lower-back fatigue you can get from other squat variations.
3. Split Squat Hold for Hip and Knee Control
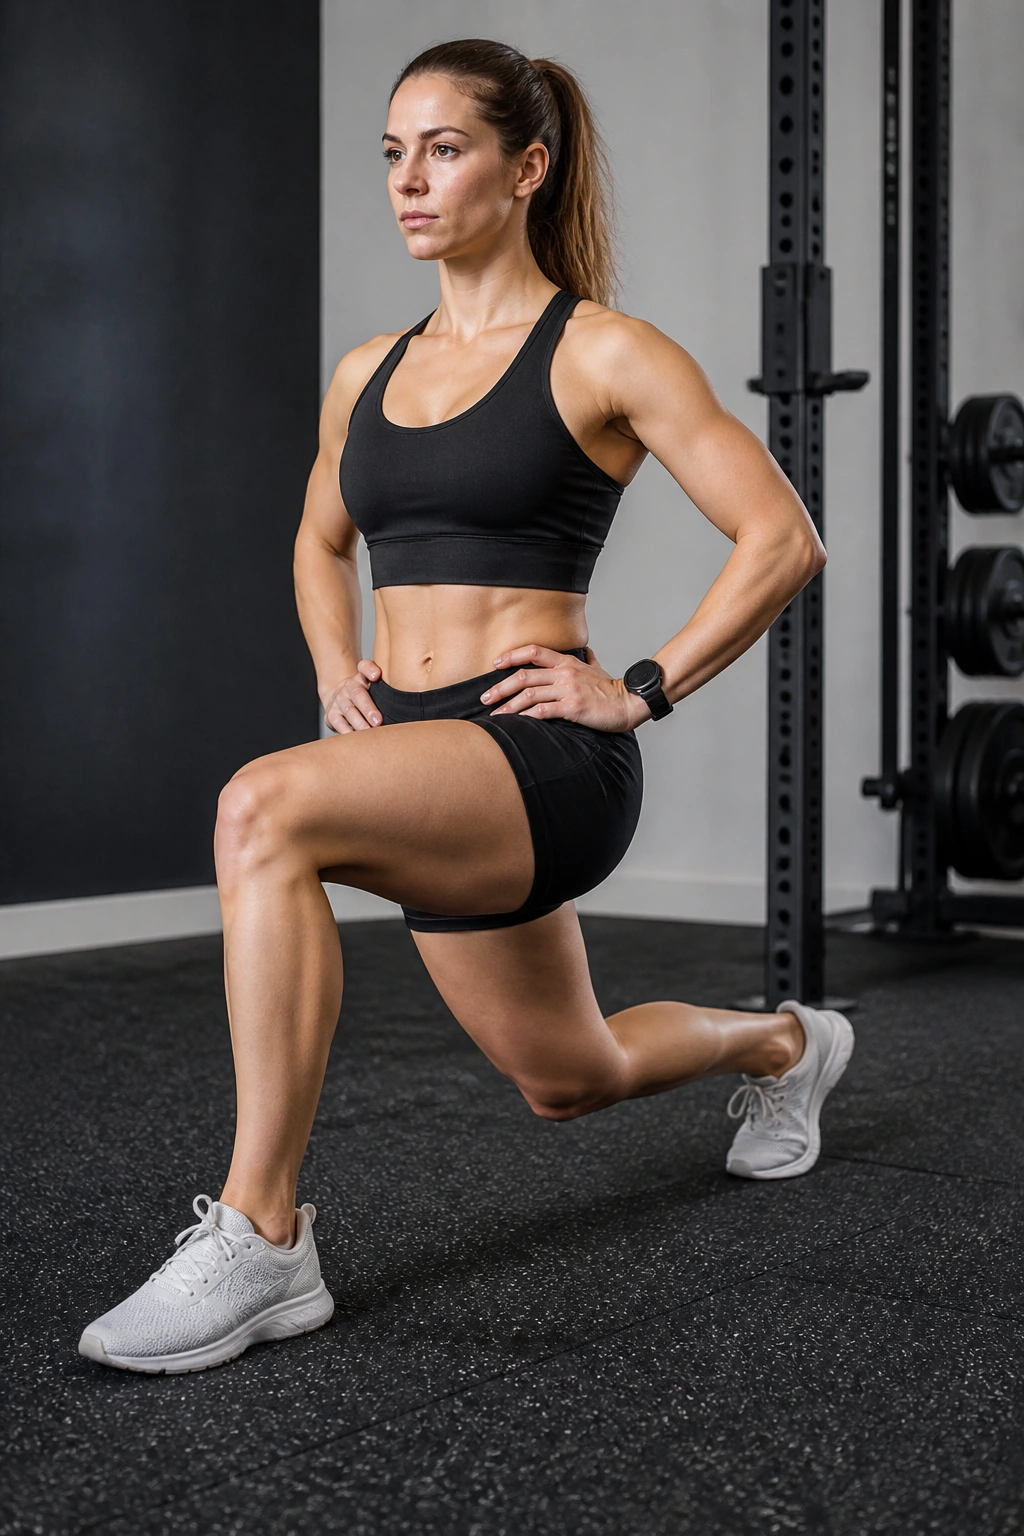
A split squat hold looks simple until you try to keep the pelvis square. Then it becomes a little test of honesty. The front leg works hard, the back leg stabilizes, and the knee gets to learn what straight-ahead force feels like without a wobbling torso stealing the show.
Take a staggered stance and lower until the back knee hovers an inch or two off the floor. Keep most of your weight in the front foot, especially the heel and midfoot. Do not let the front knee cave inward or drift wildly outside the toes. A slight forward knee travel is fine; a collapsed arch is not.
What to feel
- Front glute and quad working together.
- Back leg lightly loaded, not doing all the work.
- Torso tall, not folded over.
- Hips facing straight ahead.
Hold for 15 to 30 seconds per side and treat each side separately. One side will usually feel messier. That is the one you need. The split squat hold is great for building control in the exact position where a lot of knees and hips start to wobble.
4. Glute Bridge Hold for Pelvic Stability
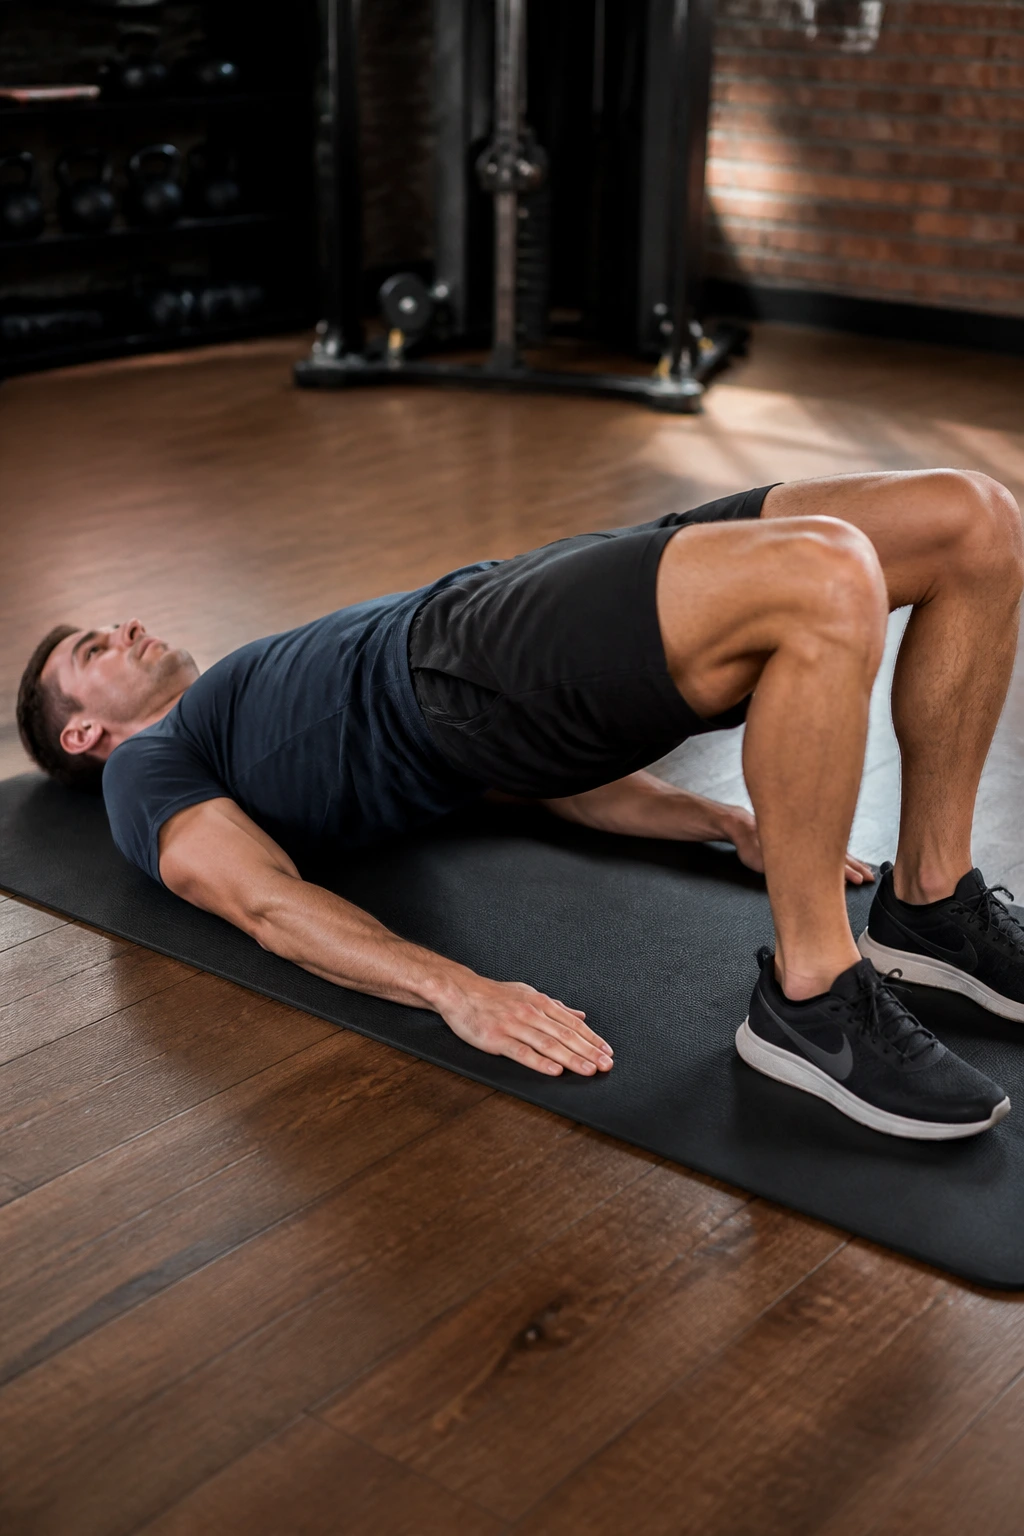
Glute bridge holds are boring in the best possible way. They teach the hips to extend without turning the lower back into a hinge, and that helps a surprising number of people who feel unstable in standing work, running, or loaded squats.
Lie on your back with your feet flat and close enough that your fingertips can graze your heels. Tuck the pelvis slightly, squeeze the glutes, and lift until the body makes a clean line from shoulders to knees. Stop the lift when the ribs start to flare. That flare is the lower back trying to take over.
You can hold this for 20 to 45 seconds, or make it harder by marching one foot at a time while keeping the hips level. If your hamstrings cramp, move your feet a little closer to your hips and squeeze the glutes harder before you lift. This one does more than people think, especially when the hips feel sluggish after too much sitting.
5. Single-Leg Glute Bridge Hold for Side-to-Side Control
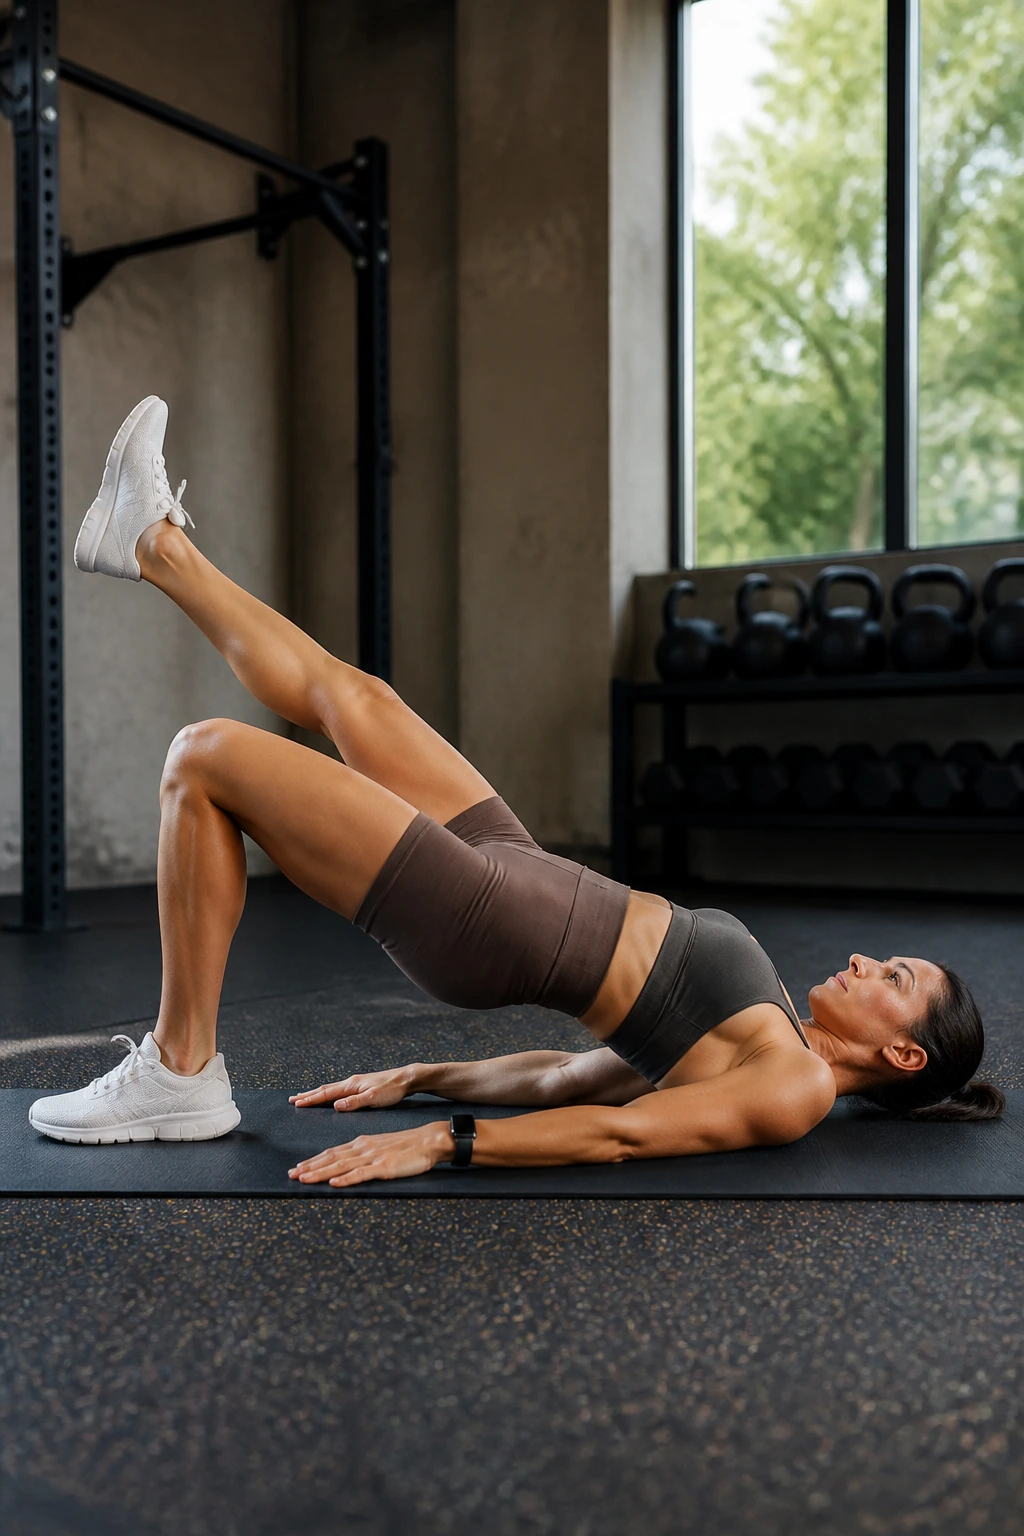
If one leg always feels shakier, the single-leg glute bridge is usually worth your time. It exposes the weak side fast. No hiding, no momentum, no cheating with the other foot.
Set up like a normal bridge, lift one foot, and keep the lifted leg bent or straight out in front. Push through the grounded heel and keep the pelvis level. If one hip drops, lower the hold and shorten the range before you try again. A tiny wobble is normal. A big hip twist means the load is too much.
How to use it
- Hold 10 to 25 seconds per side.
- Do 2 to 4 rounds.
- Start with the weaker side.
- Match the stronger side to the weaker one, not the other way around.
This is a smart pick for runners, field sport athletes, and anyone who feels one glute doing the work while the other one watches. It also has a nice carryover to step-ups, lunges, and one-legged landings. Small exercise. Big payoff.
6. Calf Raise Hold for Ankle Stiffness and Push-Off Power
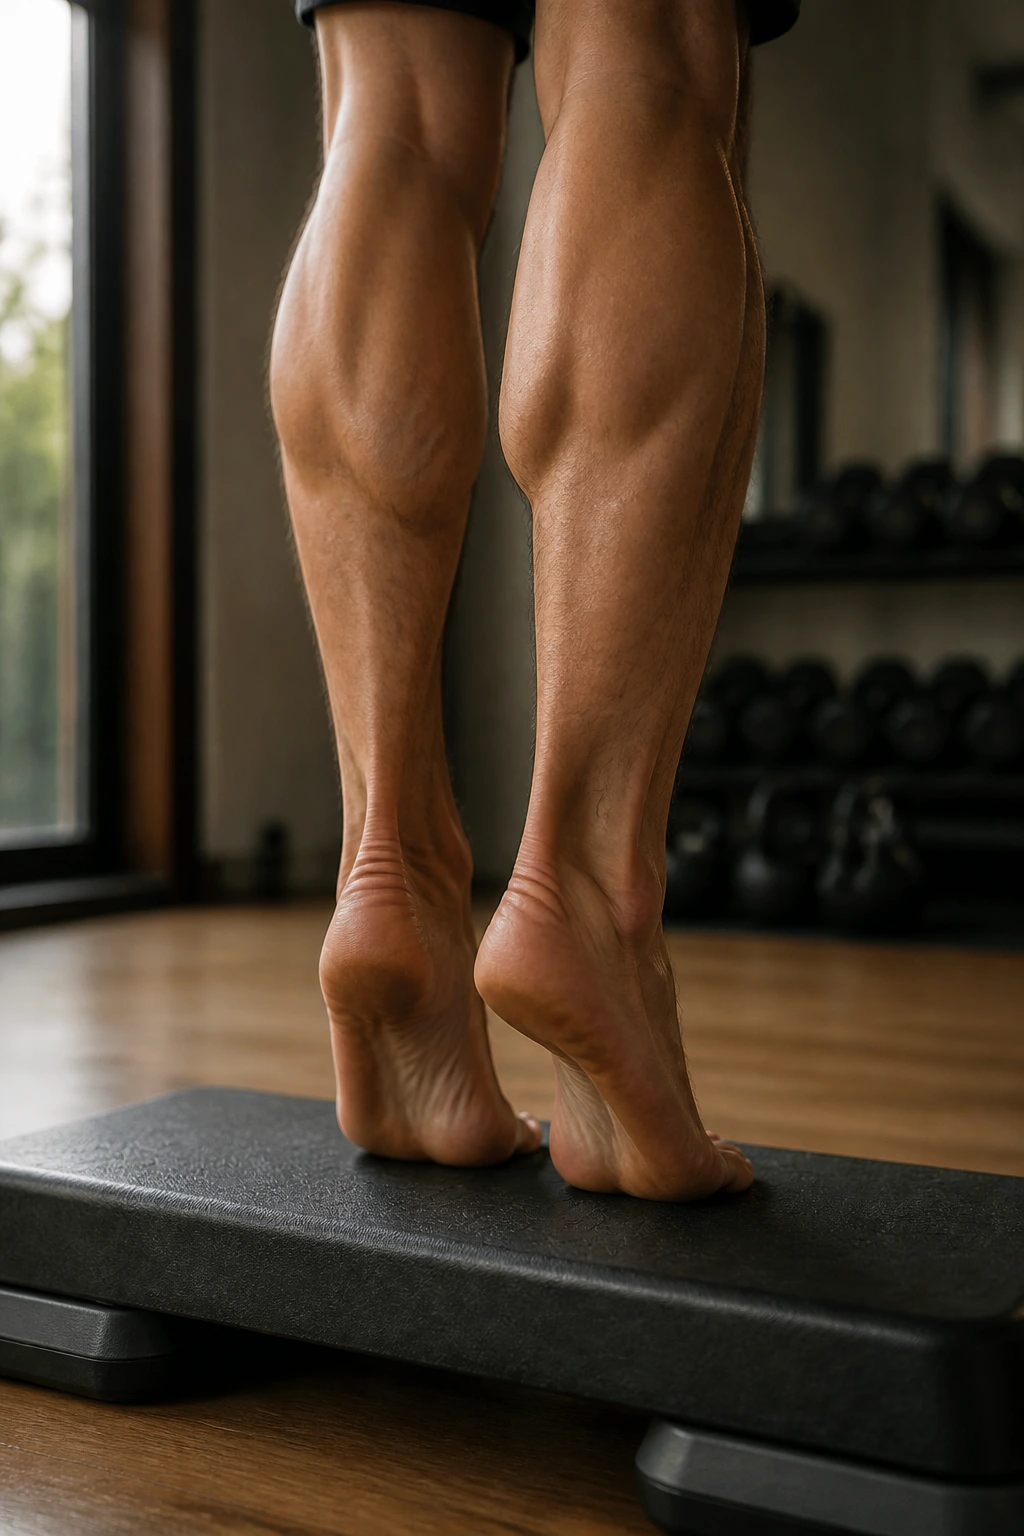
Calf raises get dismissed a lot, which is a mistake. The calves and Achilles tendon are major players in ankle stiffness, landing control, and the force you get when you push off the ground. A hold at the top of the calf raise teaches the ankle to stay tall instead of collapsing under load.
Stand on flat ground or on the edge of a step, rise up onto the balls of your feet, and hold the top position with the ankle fully extended. Keep the big toe down and the heel lifted evenly. If one ankle rolls out or in, reset before the hold gets longer. That little drift matters more than people think.
I like 15 to 30 seconds for 2 to 4 sets. On a step, let the heel drop a few inches below level before you lift, then freeze at the top. The calf should feel tight, not crunched. This is a simple way to build more resilient ankles without needing a pile of fancy gear.
7. Tibialis Raise Hold for Shin and Ankle Balance
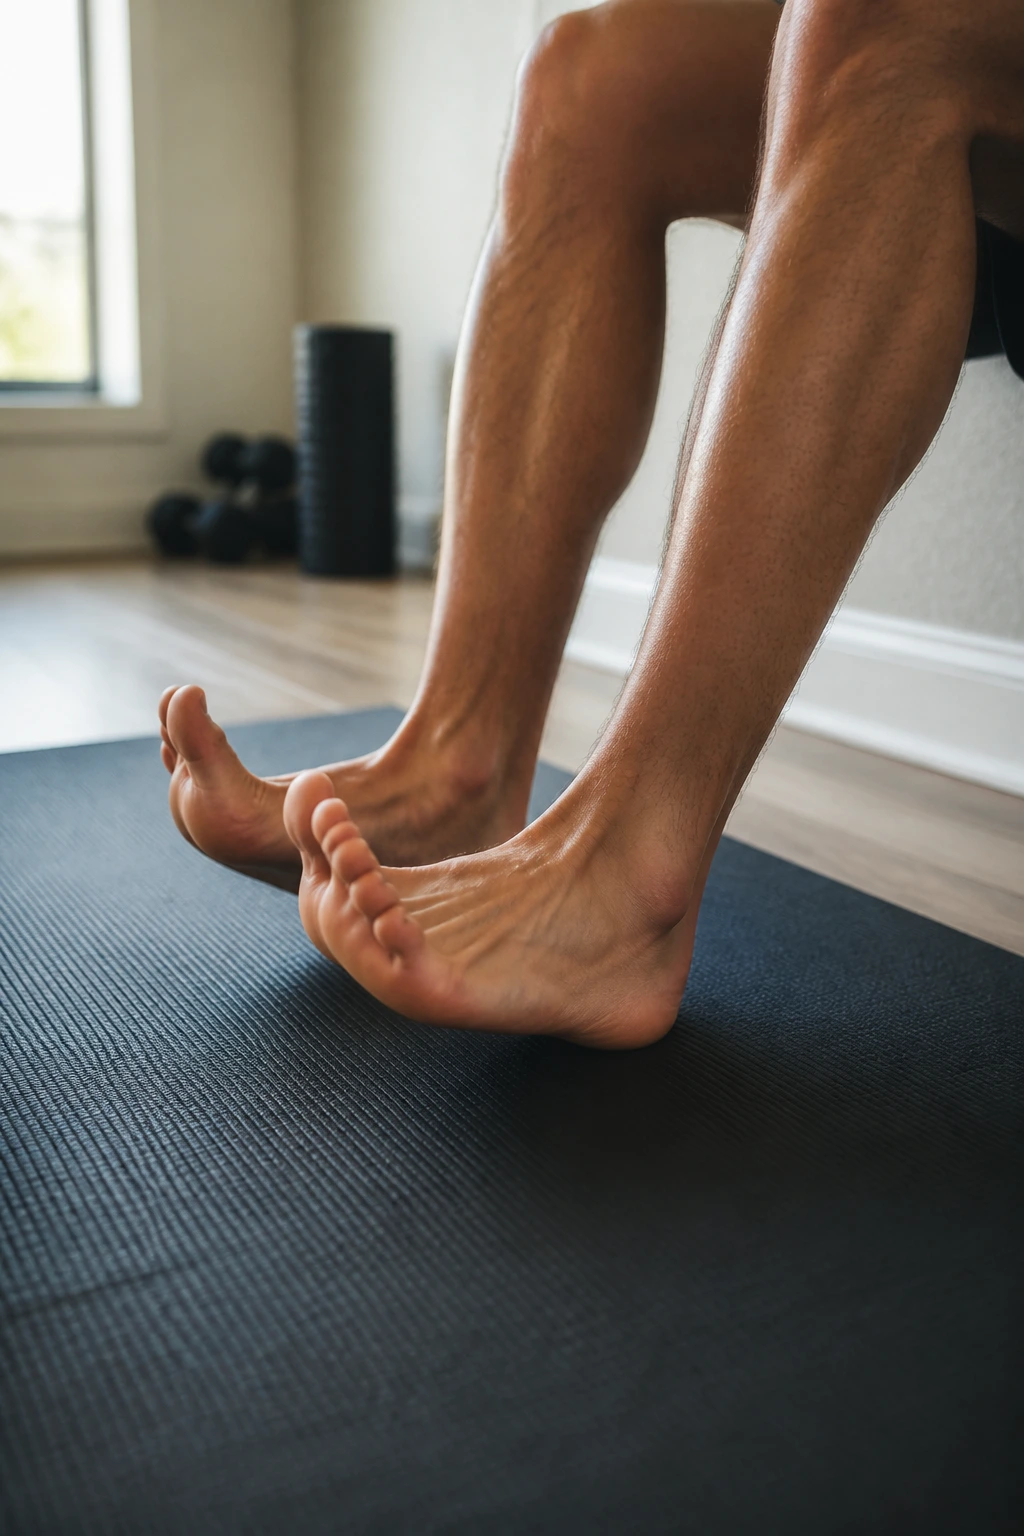
The tibialis raise is the ugly duckling of lower-leg work, and it deserves better. The muscle on the front of the shin helps control foot slap, deceleration, and the transition from heel strike to toe-off. Hold it hard and the ankle starts feeling more balanced, less like a loose hinge.
Lean your back against a wall and place your heels a few inches in front of you. Lift the toes toward the shins and hold that dorsiflexed position as high as you can without rocking the knees. The front of the shin should burn before the hip flexors take over. If your feet cramp, shorten the hold and focus on the lift, not on maxing out the angle.
Quick setup cues
- Toes pull upward.
- Knees stay soft but still.
- Heels stay planted.
- Torso stays quiet.
Try 20 to 40 seconds for 2 to 4 rounds. This one pairs well with calf holds, because the ankle likes both sides of the equation. Strong calves without strong tibialis work can feel lopsided. A better balance usually feels more stable under foot, plain and simple.
8. Forearm Plank for Trunk Bracing
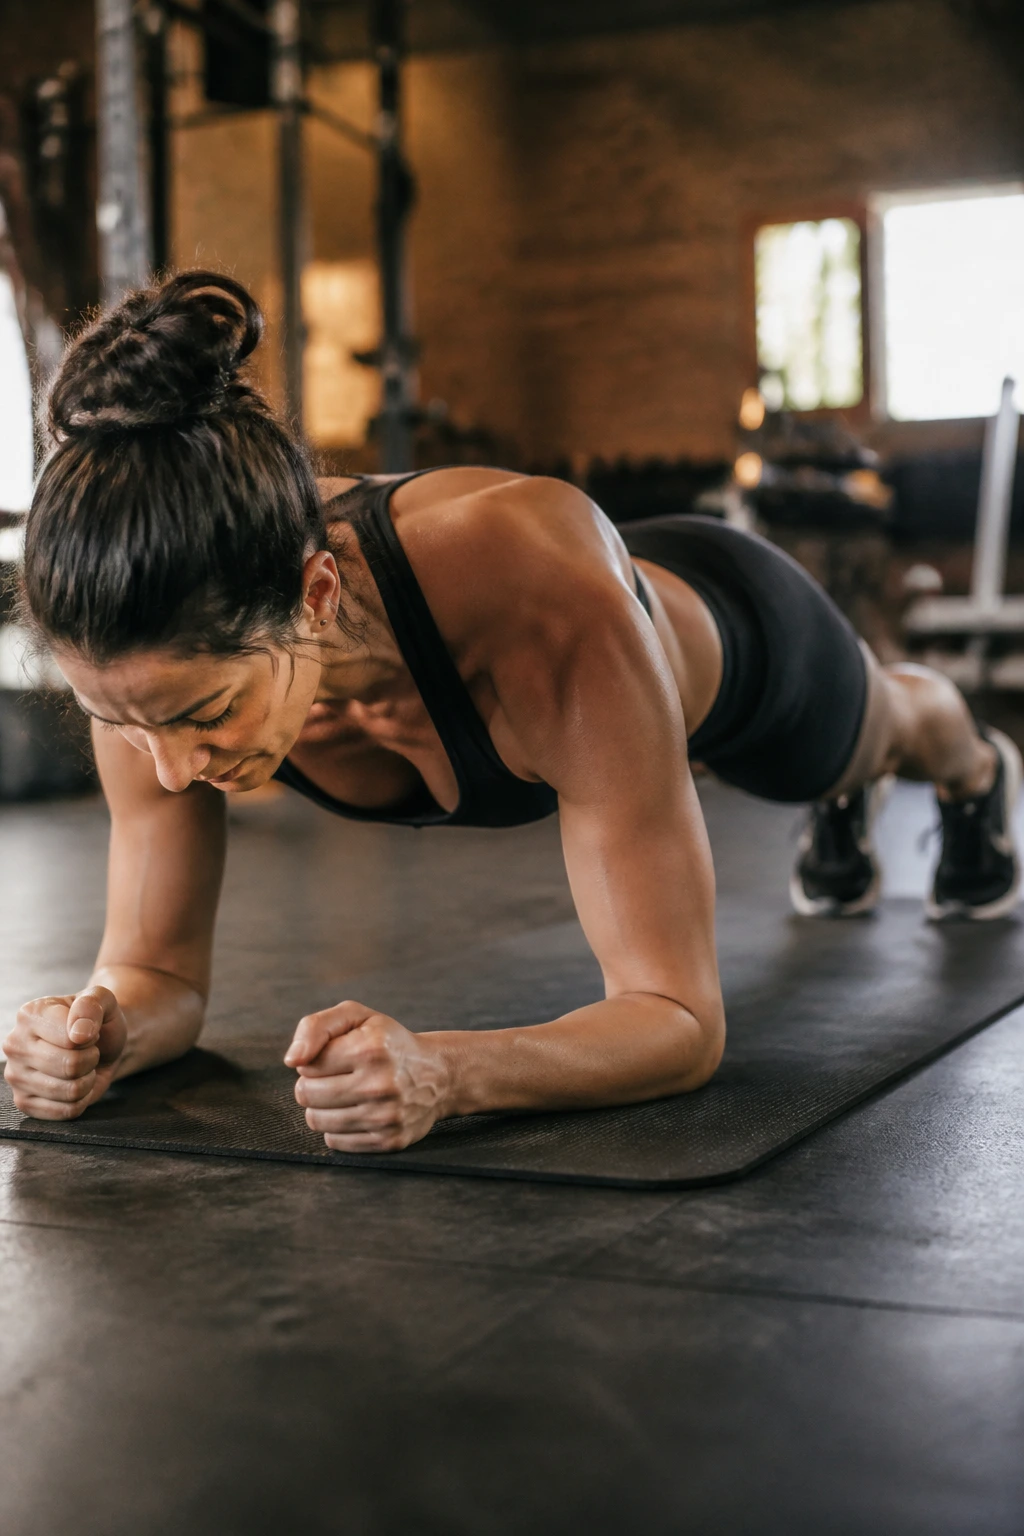
The forearm plank still earns a place because it teaches the trunk to resist sagging under pressure. A lot of people treat it like a time contest. Bad idea. The useful version is about body shape, not just clock-watching.
Set your elbows under your shoulders, press the forearms into the floor, and squeeze the glutes and thighs. Your body should feel like one straight plank from head to heel. If your low back dips, end the set. A perfect 20-second hold beats a sloppy 60-second grind every time.
What makes it worth doing
- It trains ribcage and pelvis control.
- It shows you if your shoulders are shrugging.
- It builds bracing for presses, carries, and deadlifts.
- It is easy to scale by dropping to the knees.
Use 2 to 5 sets of 15 to 45 seconds. Breathe behind the brace; do not hold your breath the whole time. The best planks feel firm and quiet. The worst ones look like a hammock.
9. Side Plank for Obliques and Hip Stability
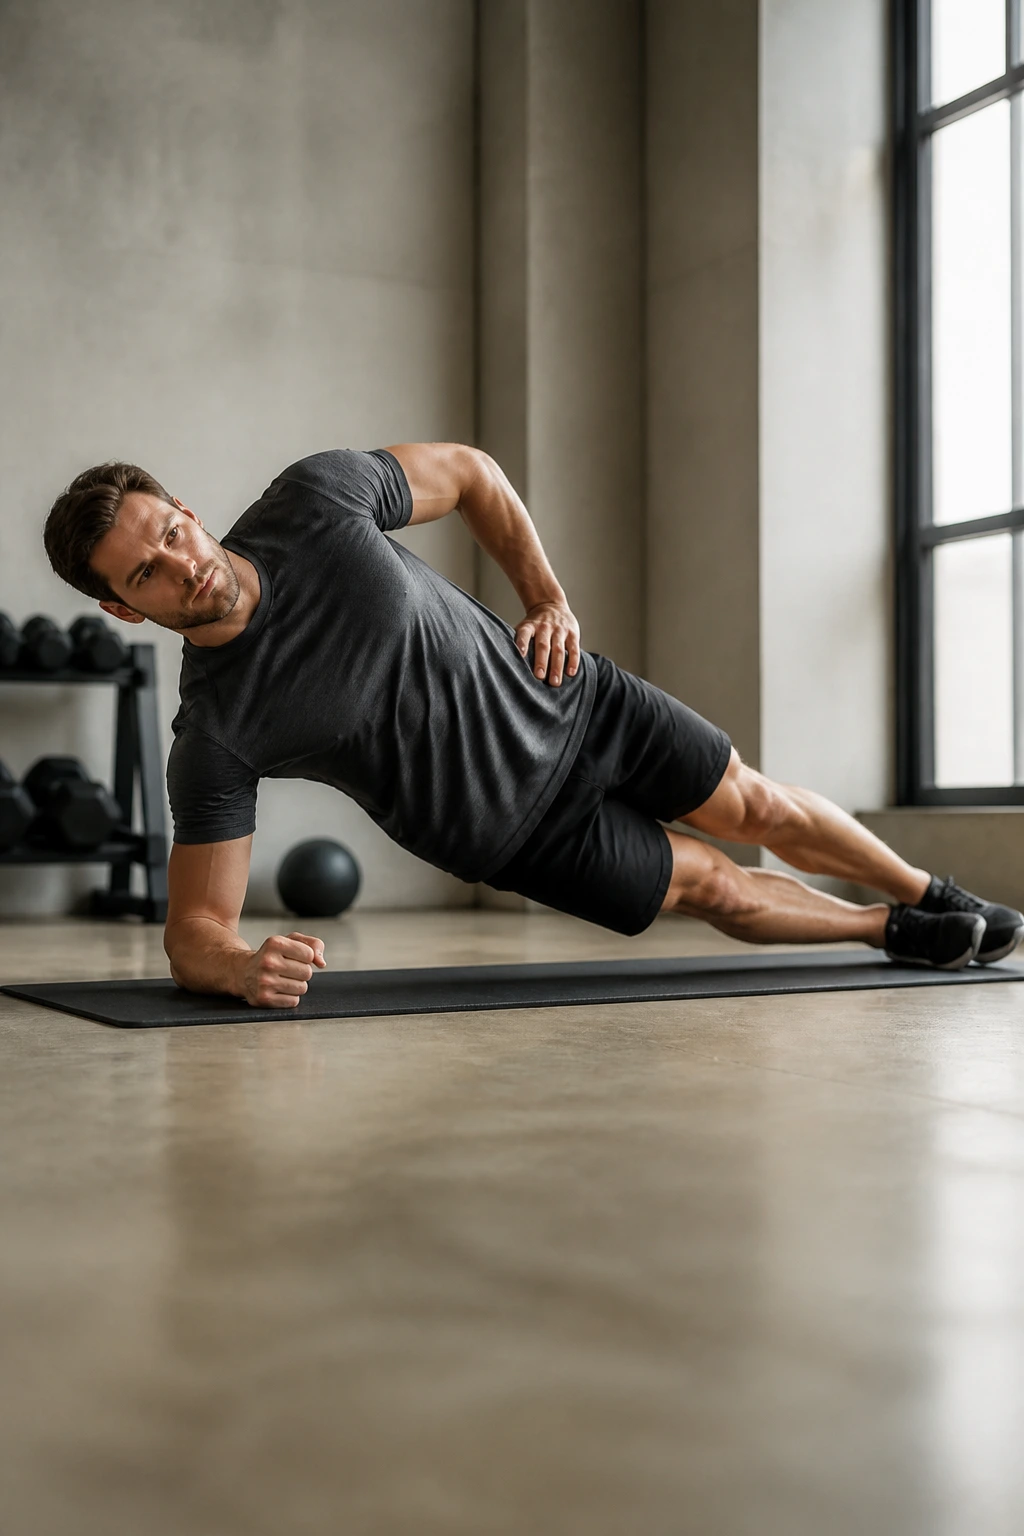
Side planks are one of the cleanest ways to train the body not to fold sideways. That sounds simple, but side-to-side control matters in walking, running, carrying groceries, and nearly every one-legged task you do without thinking.
Set the elbow under the shoulder, stack the feet or drop the bottom knee for an easier version, and lift the hips until the body forms a straight line. Keep the top shoulder away from the ear. If the shoulder shrugs up, the neck starts stealing work from the trunk.
A lot of people cut this hold short because the obliques fire fast. Fair enough. Start with 10 to 20 seconds per side and build from there. The goal is not to suffer for sport; the goal is to stay aligned while the side body has to work. When done well, it feels like a neat, hard squeeze from ribs to hip.
10. Dead Bug Hold for Low-Back Control
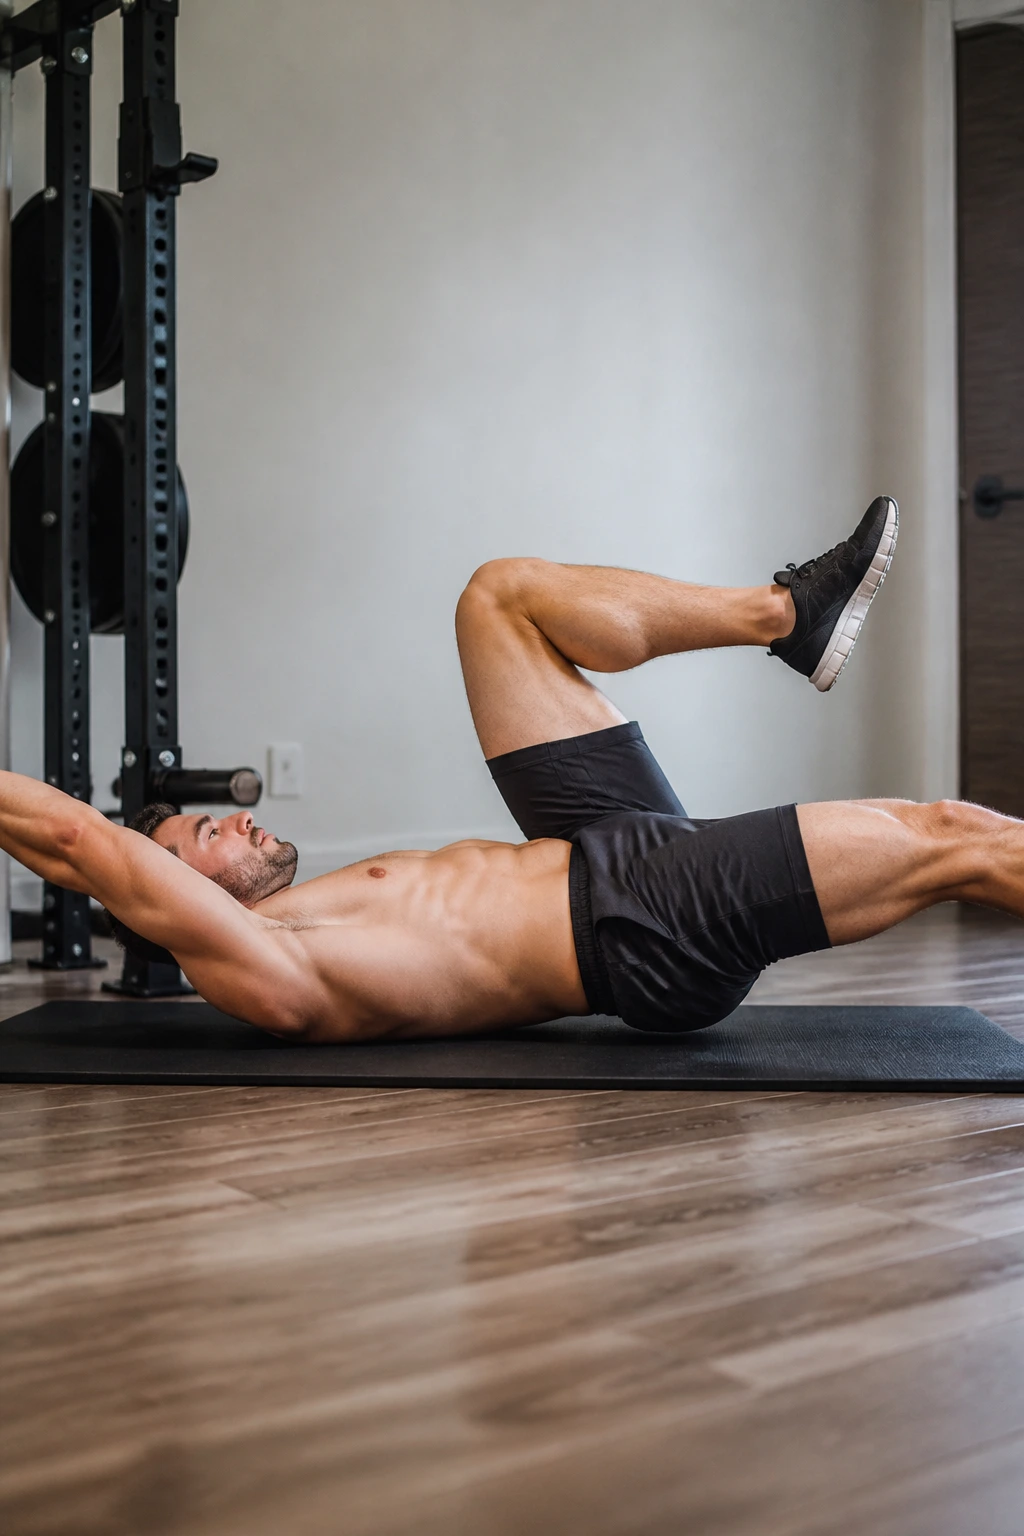
Dead bugs are not glamorous. They are, however, one of the best ways to teach the spine to stay quiet while the arms and legs move around it. That makes them useful for anyone whose low back arches the moment the core gets tired.
Lie on your back, lift the legs into a tabletop position, and reach the arms toward the ceiling. Press the lower back gently into the floor, then extend one leg and the opposite arm without letting the back pop up. That back contact is the whole point. Lose it, and the hold stops being a dead bug.
A slow count of 5 to 10 seconds per side works well. Repeat for 2 to 4 rounds. You can make it easier by keeping one knee more bent, or harder by lowering the limbs farther without losing position. It is a small move, but it teaches a big lesson: the core is supposed to hold shape while the limbs do their job.
11. Bird Dog Hold for Cross-Body Stability
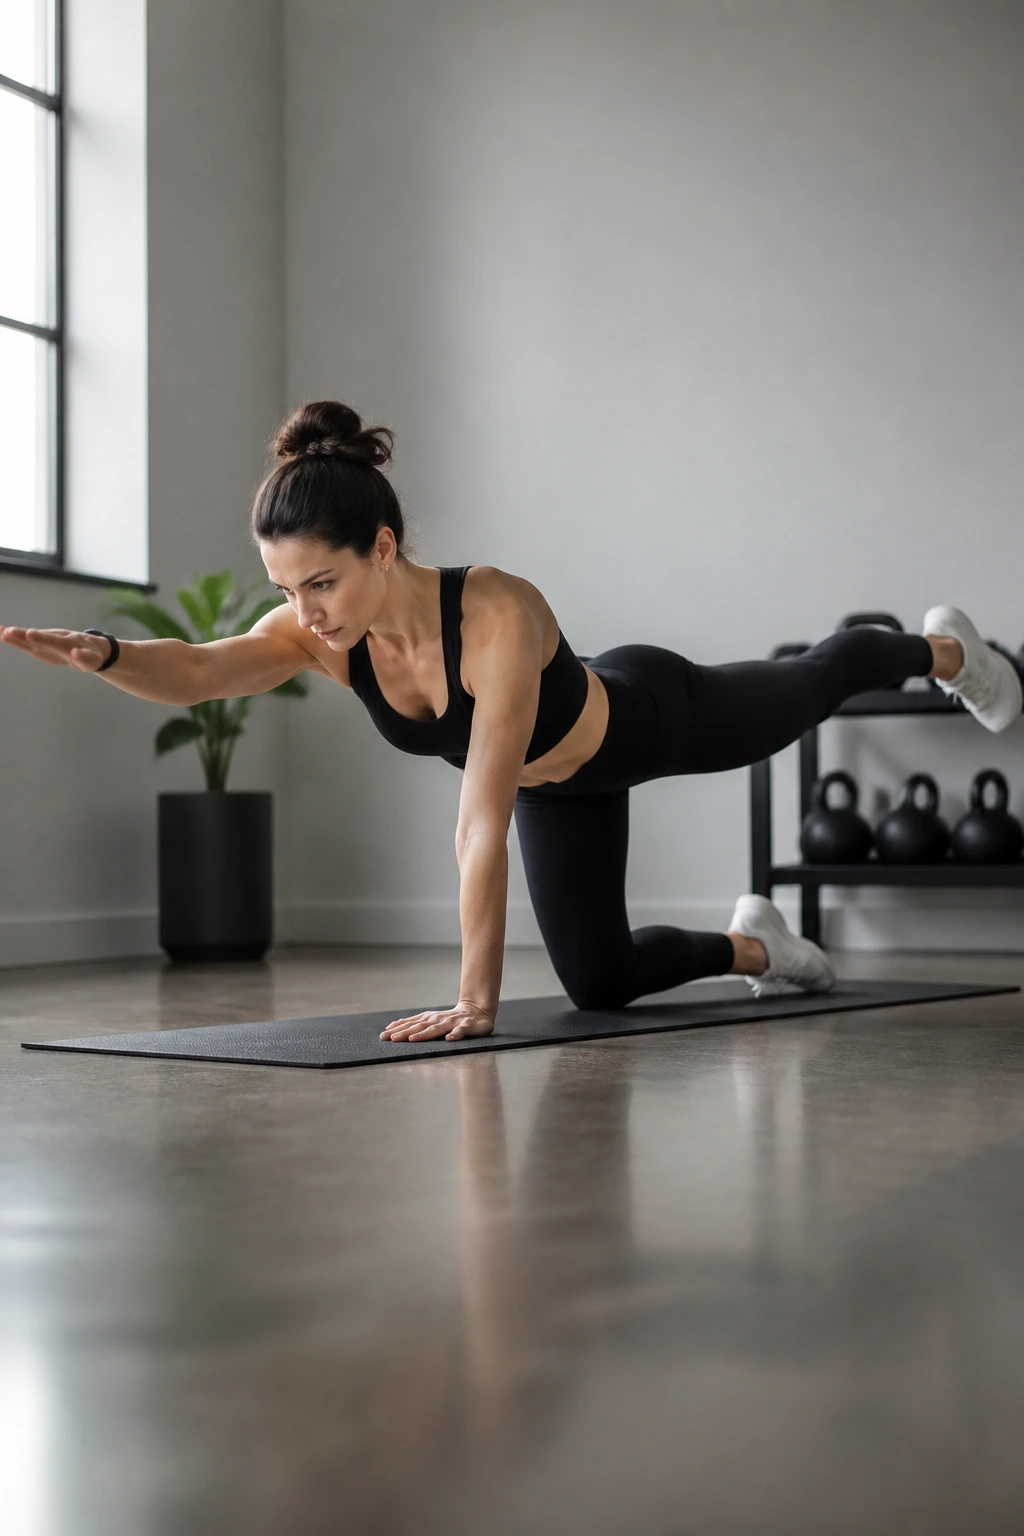
Bird dogs are one of those exercises that looks gentle until the balance challenge shows up. Extend opposite arm and leg from a hands-and-knees position, and the whole torso has to resist twisting. That makes it a useful bridge between floor work and standing strength.
Start on all fours with hands under shoulders and knees under hips. Reach one leg straight back and the opposite arm forward, then freeze. Keep the hips level and the lower back long. If you yank the leg too high, the lumbar spine arches and the exercise turns into something else.
How to get more from it
- Hold 5 to 8 slow breaths per side.
- Keep the movement small and clean.
- Pause before switching sides.
- Add a light band only after the basic version feels easy.
This hold is especially handy when the back feels cranky but you still want to train. It teaches cross-body stiffness without pounding the joints. Quiet exercise. Useful exercise.
12. Dead Hang for Shoulder and Grip Decompression
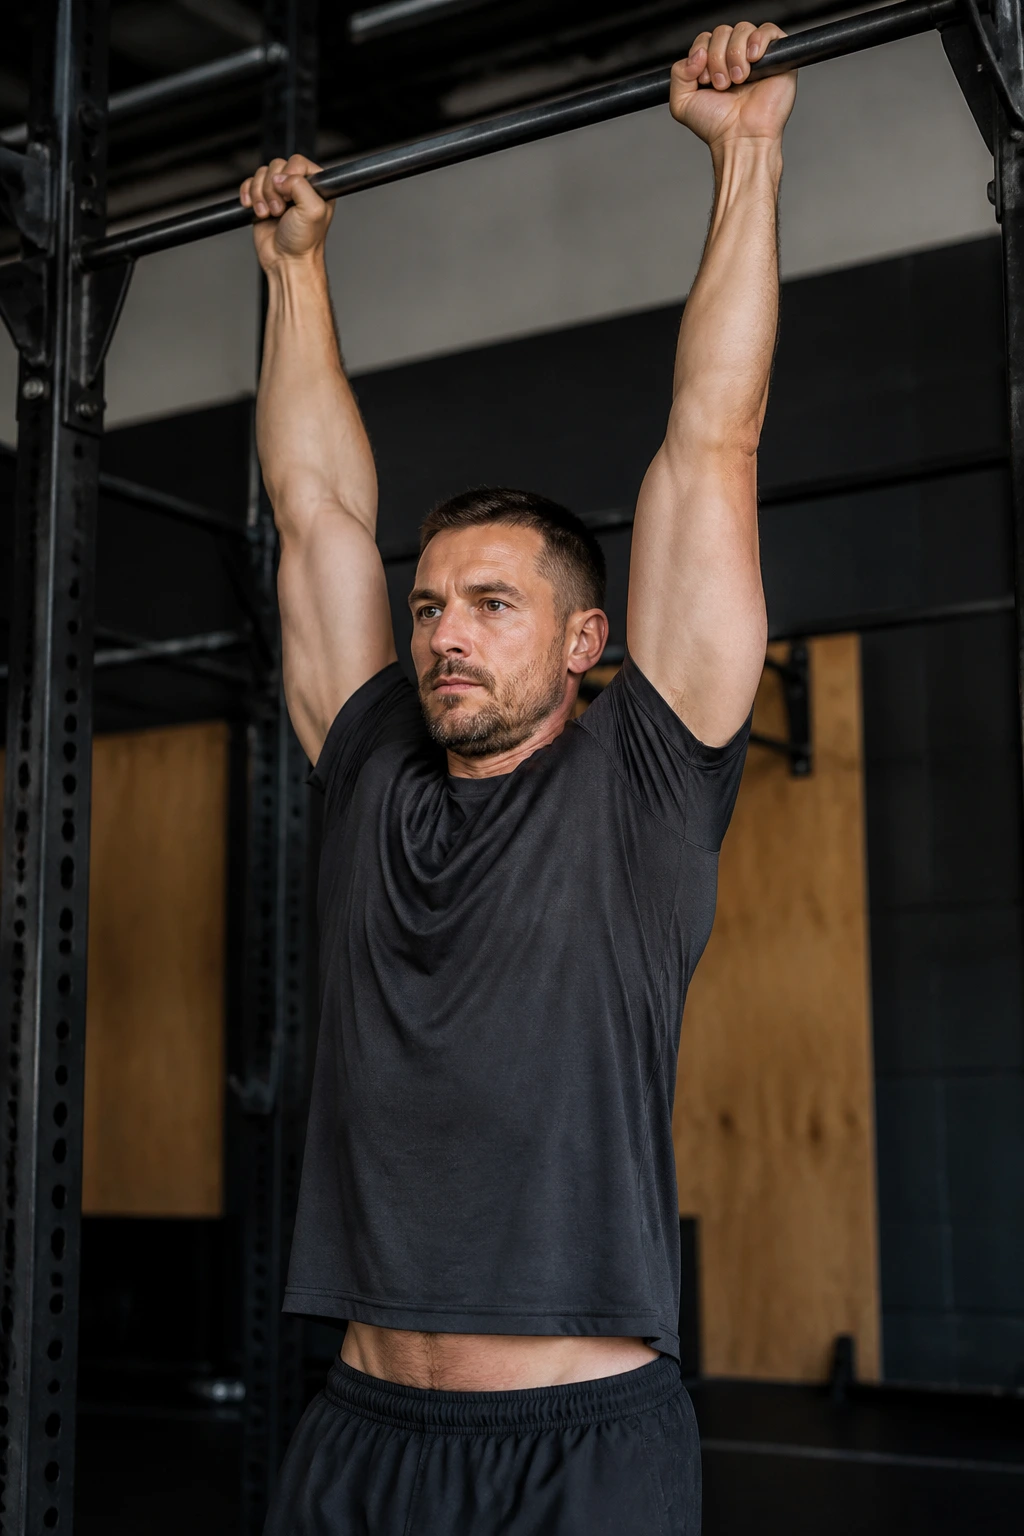
A dead hang can feel like a relief, and it can also humble your grip in about 12 seconds. Hanging from a bar loads the shoulders, hands, and upper back in a way that is hard to fake. For many people, it is the first time they notice how much the shoulder blade wants to move when the arm is overhead.
Grab a pull-up bar with an overhand grip and let the body hang. You can keep it passive, or make it an active hang by gently pulling the shoulder blades down away from the ears. If passive hanging irritates the shoulder, use the active version or shorten the hold. No hero points for grinding through pinchy joints.
A simple start is 10 to 20 seconds for 3 to 5 rounds. Over time, many people build longer holds, but longer is not always better if the shoulders start shrugging. The point is to give the grip, elbows, and shoulder complex a clean static load. It is harder than it looks. That is exactly why it works.
13. Band Face Pull Hold for Scapular Control
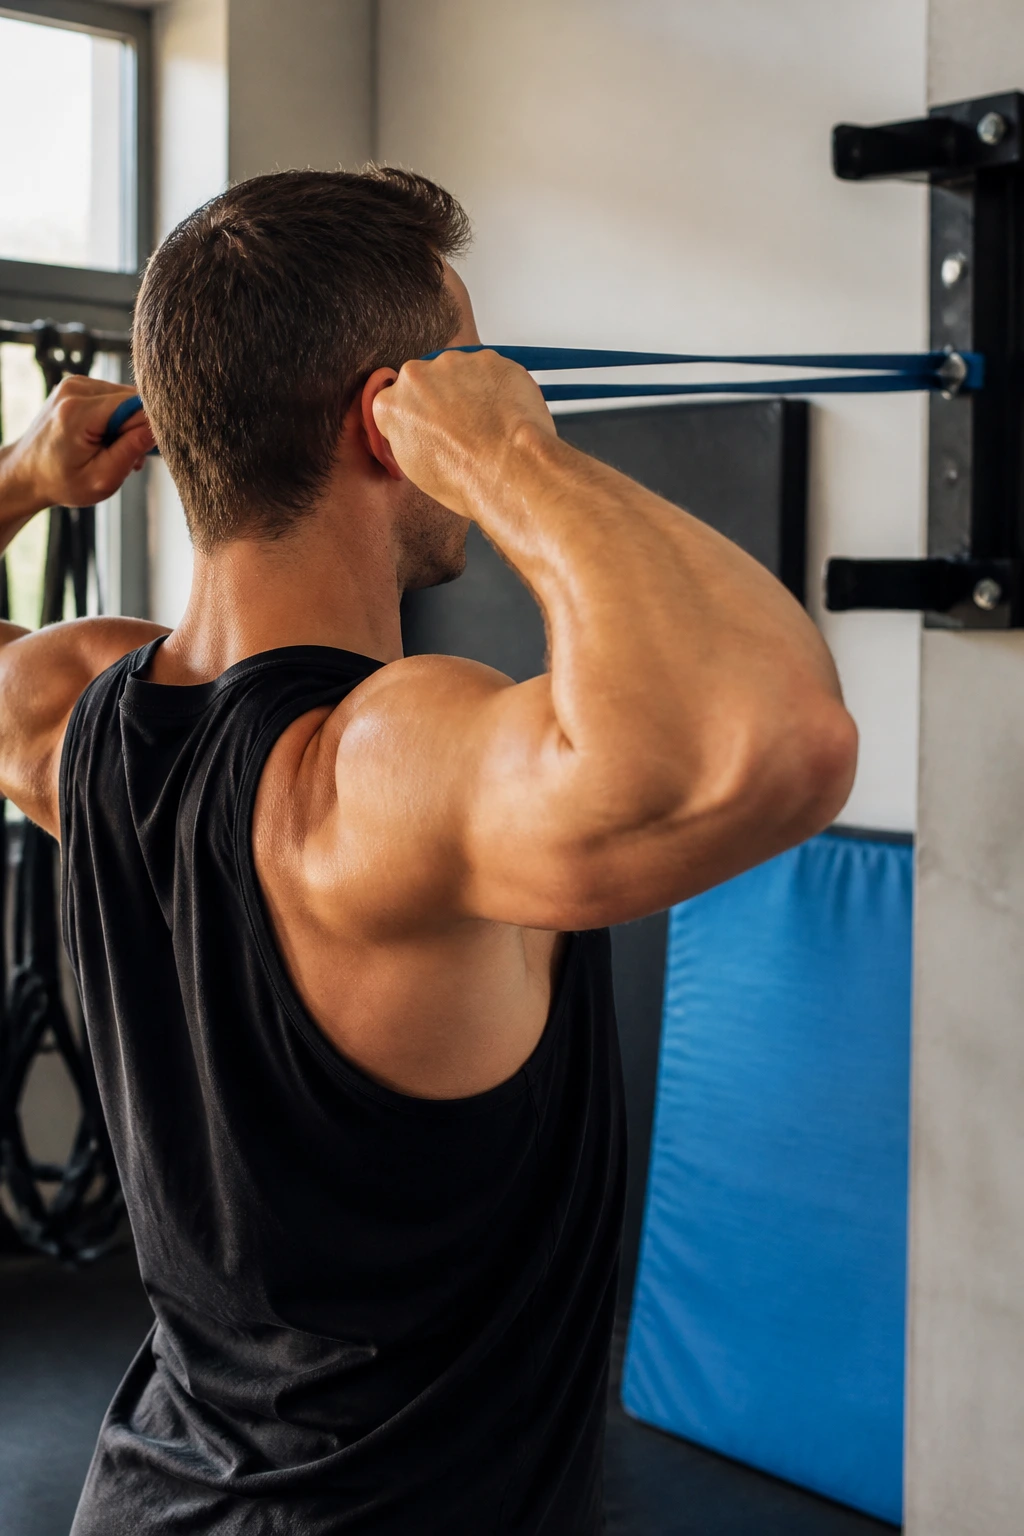
Band face pulls get better when you stop rushing the pull and start holding the end position. That end-range pause teaches the shoulder blades to sit where they should instead of drifting forward and up under load.
Anchor a band at face height, pull the handles toward the upper face, and finish with elbows high and wrists near the temples. Then hold. The chest stays lifted without puffing the ribs out. If the lower back arches to fake the position, the hold is too sloppy to count.
What to watch for
- Hands end near eye level.
- Elbows stay a little higher than the wrists.
- Neck stays long.
- Shoulder blades move back and down, not jammed together hard.
Use 2 to 4 holds of 10 to 25 seconds. This one is gold for desk shoulders and for lifters who need better upper-back control on presses and rows. It is not flashy. It is just useful, and there is a difference.
14. Push-Up Bottom Hold for Shoulder and Elbow Strength
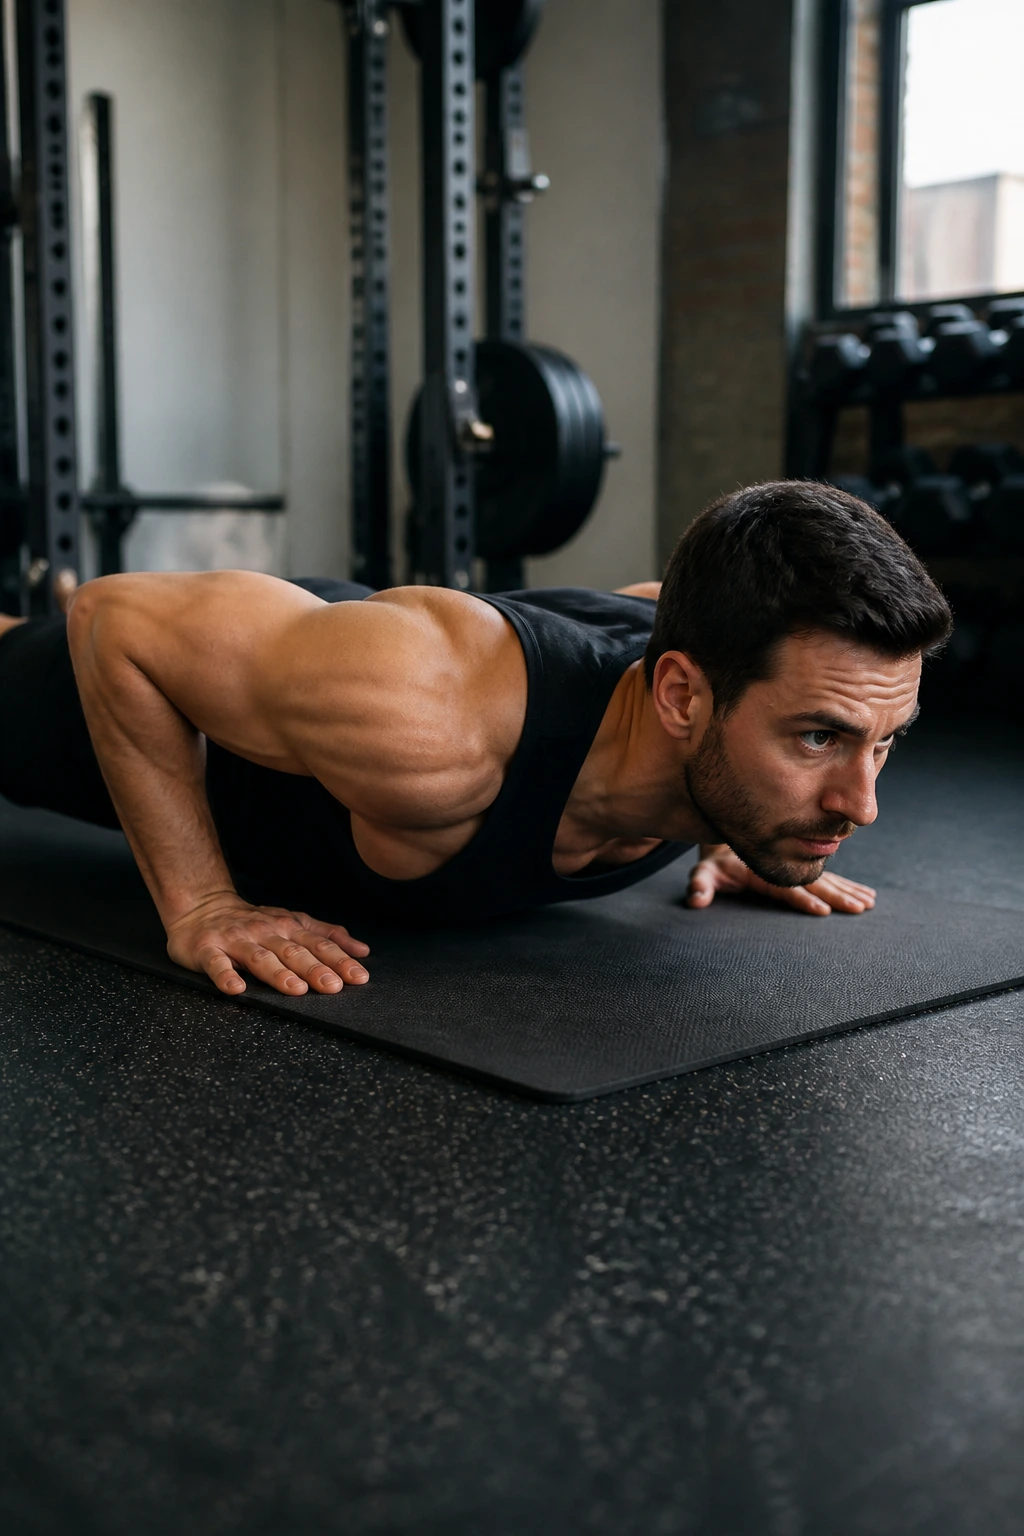
The bottom of a push-up tells the truth. At that depth, the shoulders, elbows, chest, and trunk have to stay organized while the body sits close to the floor. You cannot fake that position with momentum.
Lower into a push-up until the chest is a few inches above the floor, or until the elbow angle is where you want it, then freeze. Keep the elbows about 30 to 45 degrees from the ribs. Do not let the shoulders crawl up toward the ears. If that happens, raise the hands on a bench or do the hold from the knees.
This hold works well for 8 to 20 seconds for 2 to 4 sets. It is a strong option for building pressing confidence and shoulder stability without the full grind of repeated reps. The chest will feel it. The triceps will feel it. The shoulders will complain in the productive way.
15. Half-Kneeling Overhead Press Hold for Shoulder Stack
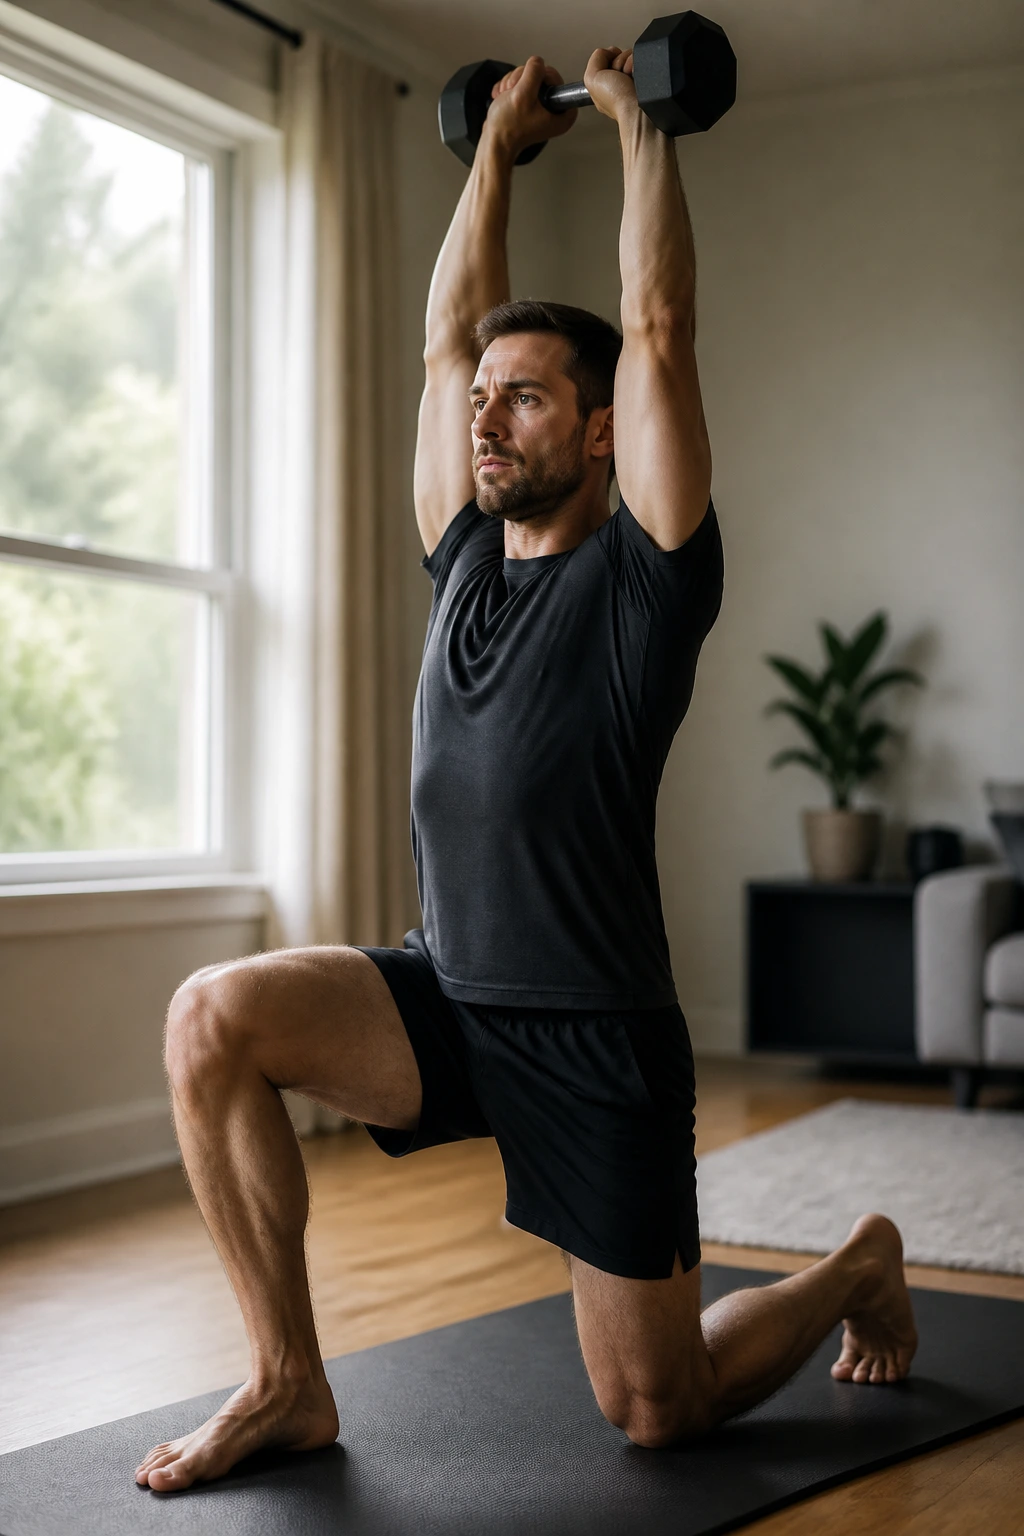
Half-kneeling overhead holds are a clean test of shoulder position because they remove a lot of cheating. One knee down, one foot up, ribs stacked, dumbbell or kettlebell overhead. If the load drifts forward, the whole line gets messy fast.
Set up in a half-kneeling stance with the same side knee down as the arm holding the weight, then press overhead and freeze. Keep the wrist over the elbow, elbow over the shoulder, and shoulder over the hip. The glute on the down-side leg should stay on. That little squeeze keeps the pelvis from tilting.
A good hold lasts 10 to 20 seconds. If the weight feels shaky, make the load lighter before you make the hold longer. This is one of my favorite choices for people who need shoulder stability without a lot of movement. It teaches the body to stack itself, which is the whole game overhead.
16. Suitcase Hold for Anti-Tilt Core Work
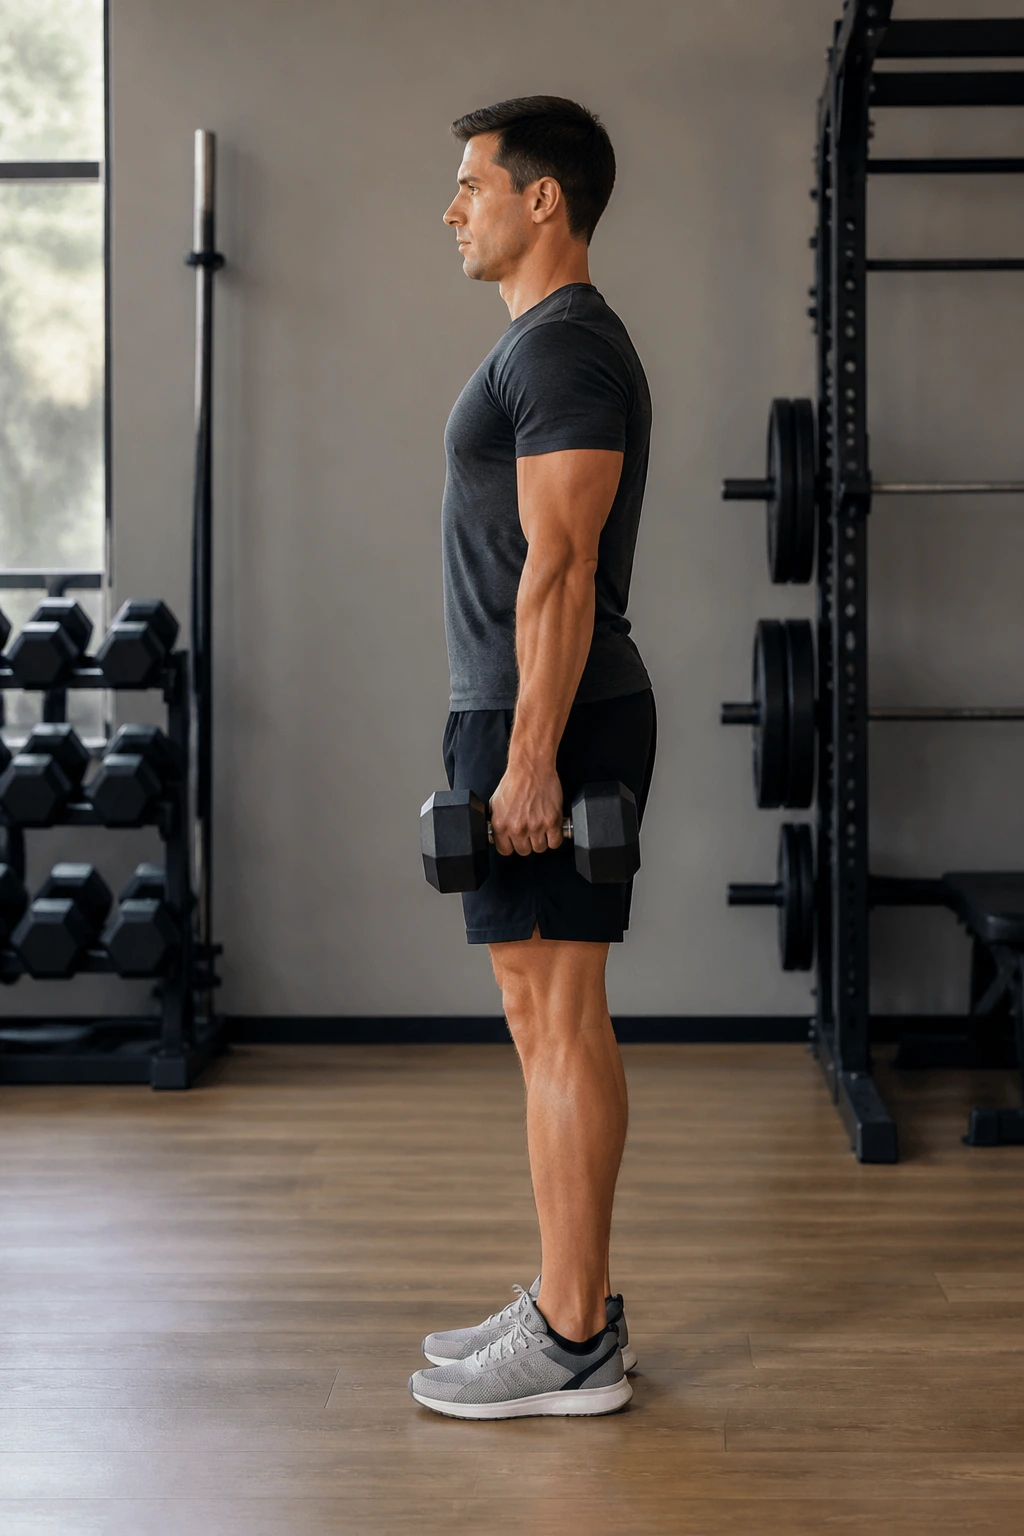
Suitcase holds are simple and brutally honest. One hand holds a heavy dumbbell or kettlebell at your side, and the trunk has to stop the body from leaning toward the weight. That anti-tilt demand makes the obliques, glutes, and deep core muscles work in a way that carries over to real life fast.
Stand tall, hold the weight in one hand, and keep the shoulder from collapsing downward. Stay level through the hips and ribs. If you start leaning, the load is too heavy or the hold is too long. The goal is control, not a sideways collapse with a brave face.
Good ways to use it
- Hold for 20 to 45 seconds per side.
- Walk only after the static version feels clean.
- Match the weaker side with the stronger side.
- Keep the free hand relaxed, not clamped into a fist.
This is a favorite for people who want core work that does not feel like endless crunches. It also teaches the shoulder to carry load without hiking up toward the ear. Nice and plain. Very effective.
17. Pallof Press Hold for Anti-Rotation Strength
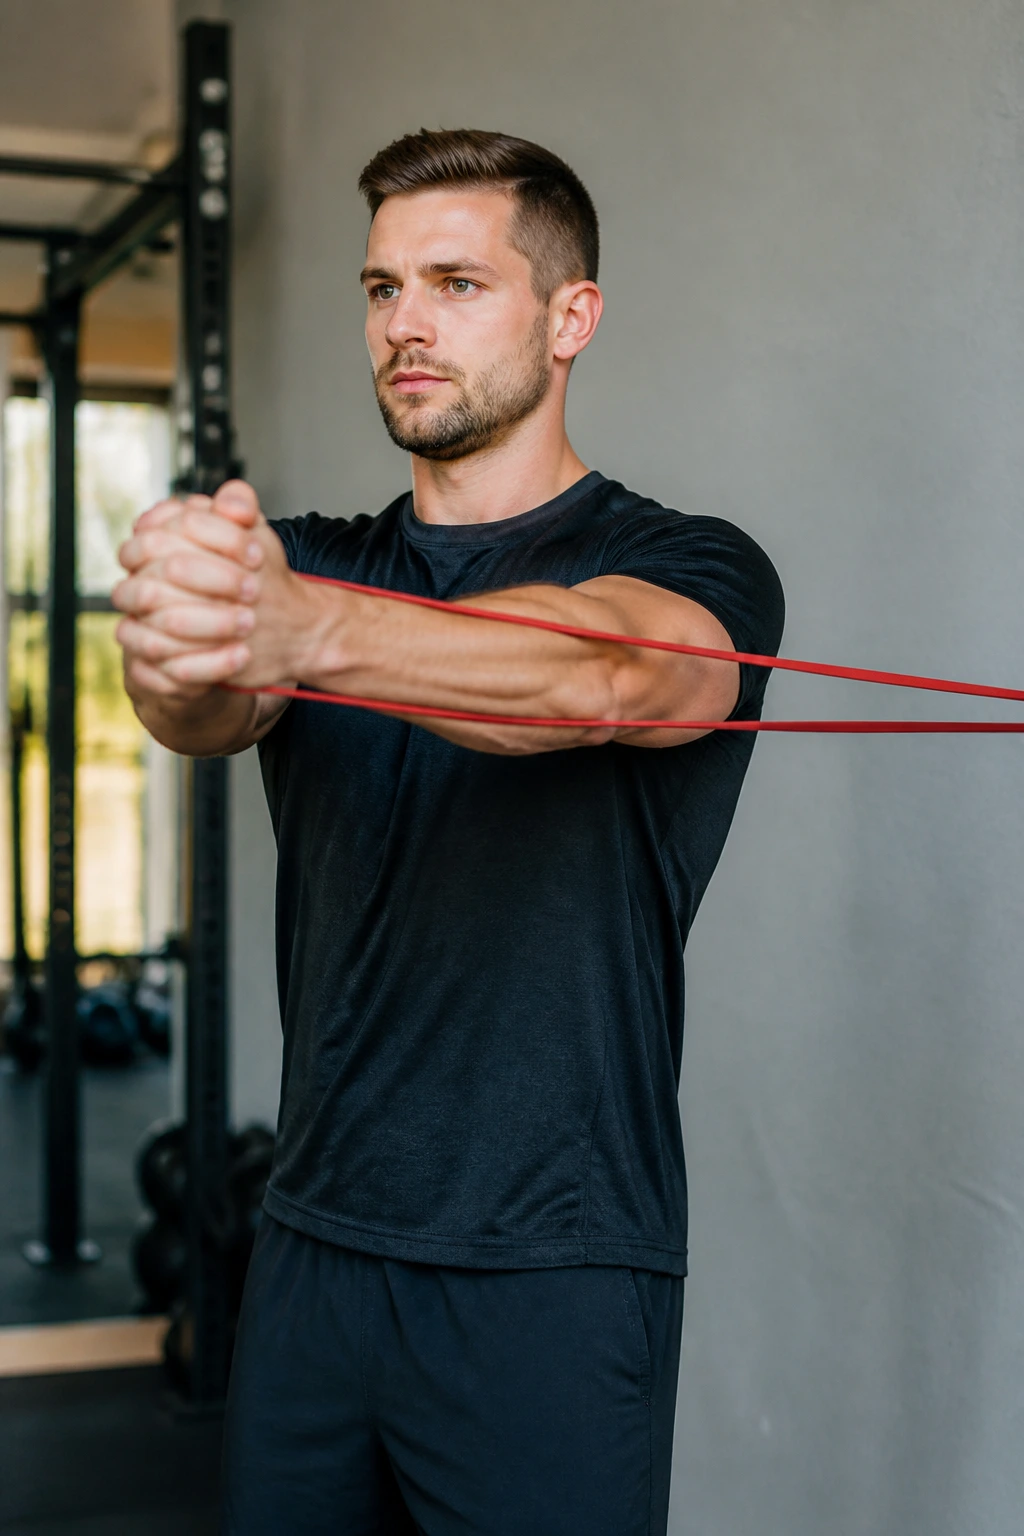
Pallof holds are the quiet antidote to twisting. You press a band or cable straight out from the chest and resist the pull that wants to turn you sideways. That anti-rotation strength matters in sports, lifting, and any task where one side gets tugged while the torso is supposed to stay square.
Stand perpendicular to the anchor point, bring the band to the chest, press it straight out, and hold. The hips stay facing forward the whole time. If the body turns, the band wins. Lower the resistance and clean up the position before you chase time.
The hold can be done from standing, half-kneeling, or split stance. I like 10 to 20 seconds of steady pressure for 2 to 4 rounds. The beauty of it is the low drama: one clean press, one clean hold, no spinning, no jerking, no nonsense. It trains the torso to keep shape when force tries to pull it apart.
18. Copenhagen Plank for Adductors and Hip Stability
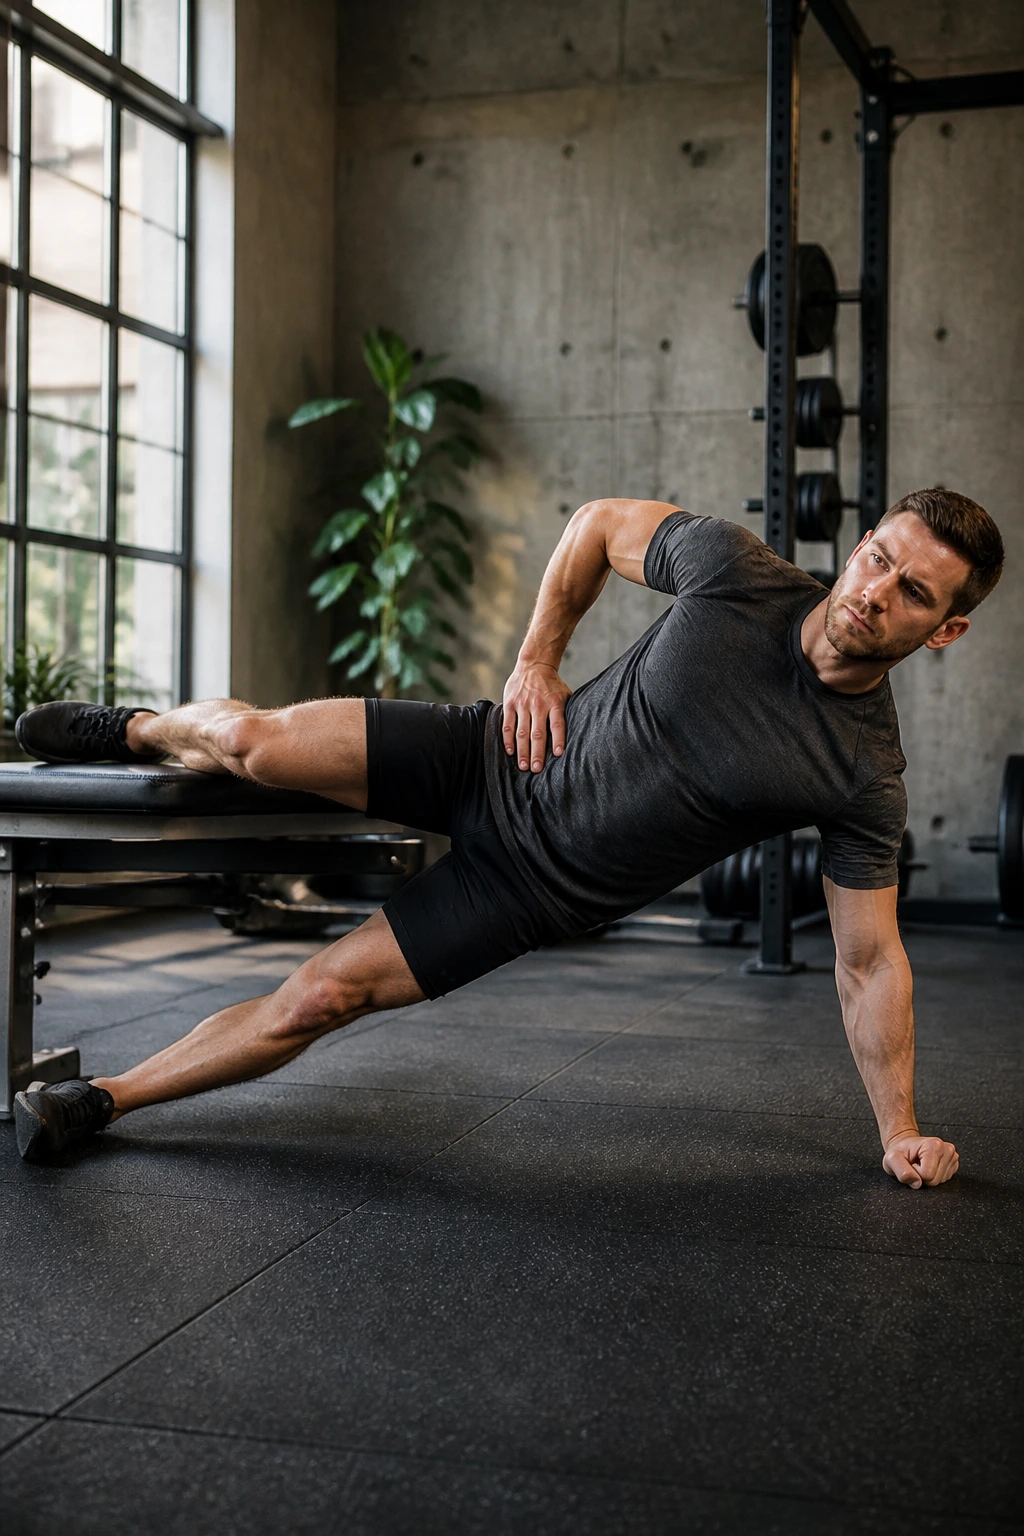
The Copenhagen plank is the one people avoid until they need groin strength, pelvis control, or a sturdier inner thigh. It is a demanding side plank variation with the top leg supported on a bench or box, and it loads the adductors in a way that basic core work does not.
Start with the top knee or ankle on a bench, then lift the hips off the floor and hold the side plank position. Begin with the bent-knee version if the full lever feels too wild. That short lever is still plenty hard, and it lets you learn the position without your hip dropping like a stone.
A few key points matter here:
- Keep the ribs from flaring.
- Keep the bottom shoulder packed and steady.
- Lift through the side waist, not the neck.
- Start with 5 to 15 seconds per side.
The first time you do it well, the inner thigh can light up like a fuse. That is normal. The Copenhagen plank is not there to impress anyone. It is there to make the hips and groin harder to break under real load, and it does that job with almost rude efficiency.
Final Thoughts
Stable joints usually come from boring-looking work done well. Holds force you to own the position, and that is where a lot of strength actually lives. Not in the flashy rep. In the pause.
If you want a simple way to build these into training, pick 4 to 6 holds, keep the sets short at first, and stay strict about shape. Muscle burn is fine. Sharp joint pain is not. That difference matters more than the clock.
I’d pair a lower-body hold, a trunk hold, and one upper-body hold in the same session, then repeat that mix a few times a week. Clean positions add up fast when you keep showing up.
