



A wall sit can set your legs on fire in under a minute, and nothing about it looks dramatic from across the room. That’s the charm of isometric exercises: the work happens inside the body, not in some big swinging motion that makes a lot of noise and little sense.
Strength without movement sounds almost too simple. Lock a joint in place, keep tension on the muscle, breathe under control, and stay there long enough for the body to stop bluffing. Done well, static holds build useful strength in a way that feels clean, hard, and oddly honest.
They also cover gaps that regular reps miss. Some holds train quads, some light up the deep core, some teach the shoulders how to behave overhead, and some make your grip feel like it belongs to someone who actually lifts. A few are beginner-friendly. A few are rude. That’s fine.
Start with the simplest one. Then keep going until the shaking tells you the position is doing its job.
1. Wall Sit for Quads
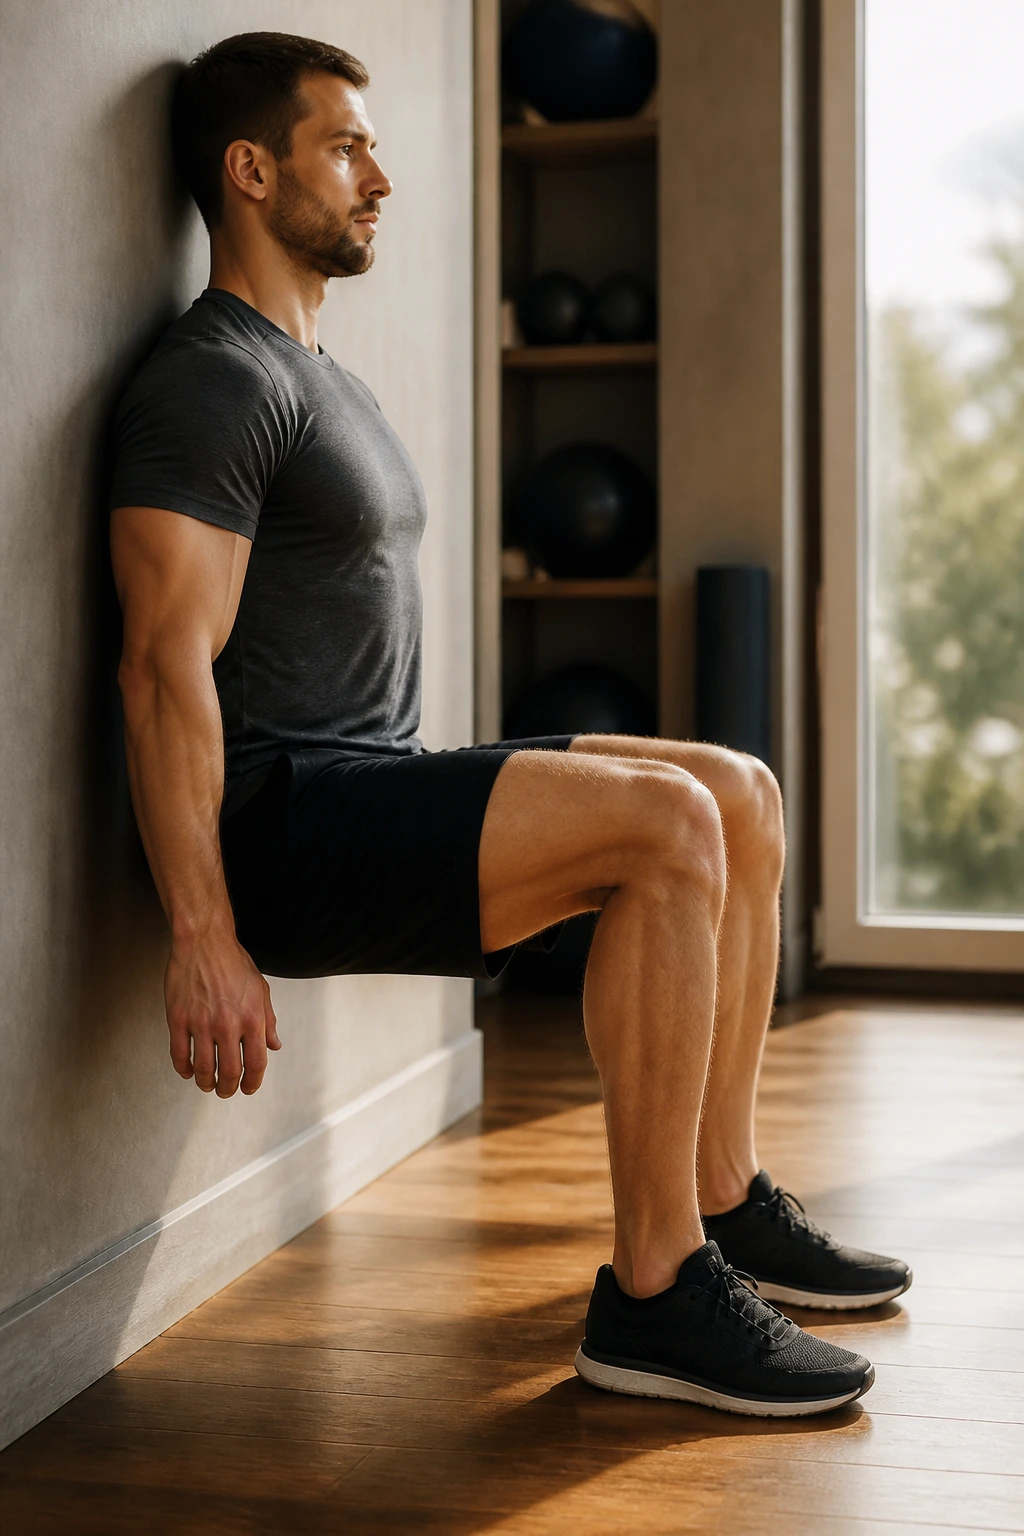
Brutal, in the best way.
A wall sit is the first isometric exercise I’d hand to almost anyone because it is easy to understand and hard to fake. Slide down the wall until your thighs are close to parallel with the floor, keep your back flat, and let the quads do the complaining. If your knees are touchy, you can sit a little higher and still get a real dose of tension.
How to make it useful
The details matter more than people think. Your feet should sit far enough from the wall that your shins stay close to vertical, not jammed forward like you’re trying to squat through a doorframe. Press the whole foot into the floor, especially the heel and big toe.
- Hold for 20 to 45 seconds if you want a hard but manageable set.
- Go to 45 to 60 seconds if you’re using it as a finisher.
- Keep the ribs down and the chin neutral.
- Stop when the thighs start losing shape, not when you can no longer stand.
One smart tweak: move your feet a few inches farther from the wall if your knees feel cranky. That small change usually takes pressure off the joint and shifts the work where it belongs.
2. Forearm Plank for Strength Without Movement
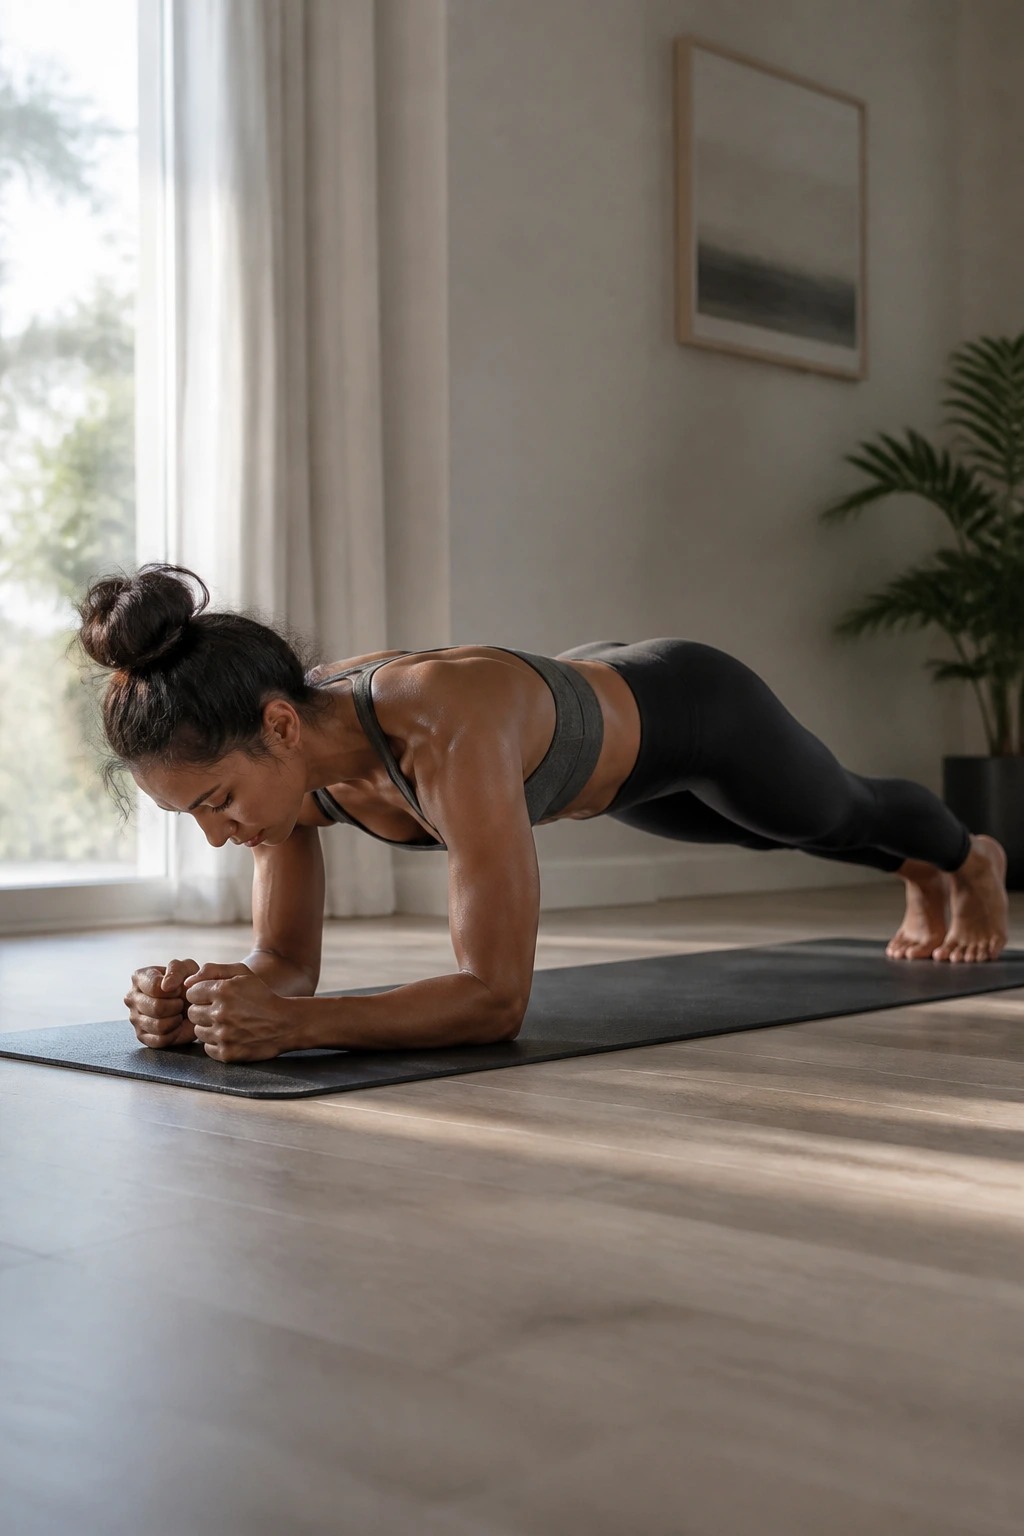
A forearm plank is not a rest position.
It looks calm because the body is still, but the best planks are fierce. Your abs, glutes, shoulders, and even the muscles around your ribs have to work together so the low back does not sag like a hammock. That makes the plank one of the cleanest examples of strength without movement.
The trap is turning it into a pose instead of a hold. If your hips shoot up, your core gets a vacation. If your low back drops, the whole thing turns into a lumbar endurance test you did not ask for. A strong plank feels like you are pushing the floor away while keeping the body in one straight, stubborn line.
That line should look boring and feel hard. Those two things go together.
What to watch for
- Elbows under shoulders.
- Forearms flat, palms down or lightly clasped.
- Glutes squeezed just enough to stop the lower back from dipping.
- Neck long, eyes a few inches in front of your hands.
Hold for 15 to 30 seconds if you want real tension. Longer is fine, but only if the shape stays honest.
3. Side Plank for Obliques
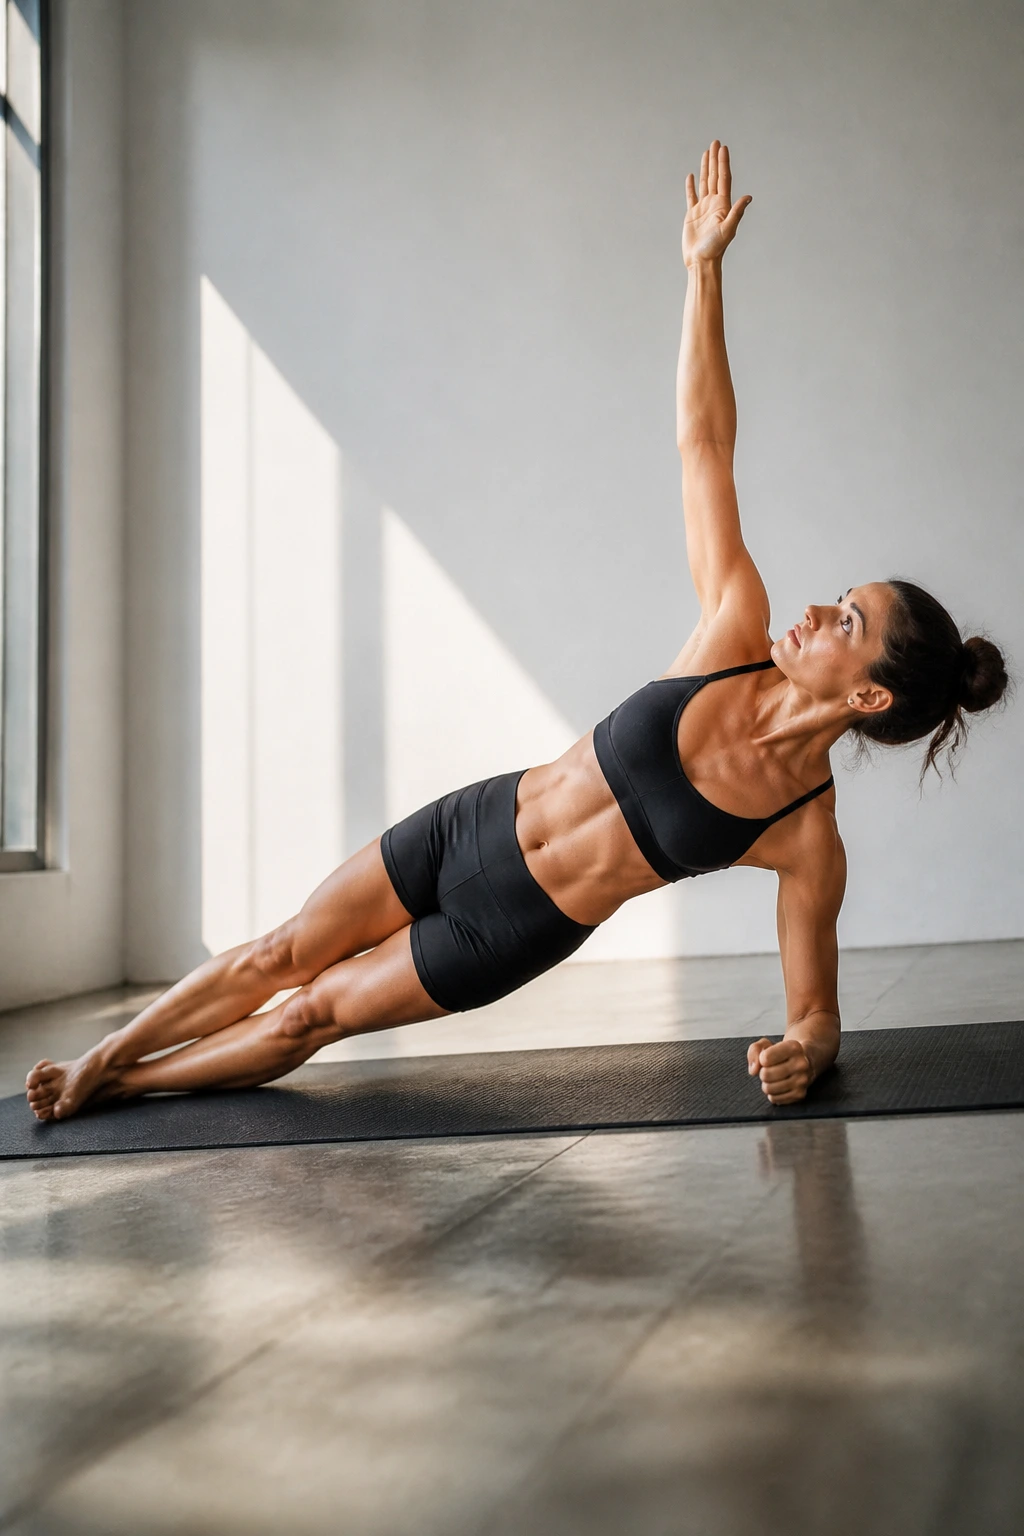
Why does a side plank feel harder than it looks?
Because the body hates being bent sideways under load. The obliques, glute med, shoulder stabilizers, and the little muscles around the hip all have to pitch in at once, and there is nowhere to hide. A side plank is also one of the best holds for teaching the torso to resist collapse.
Start with the elbow directly under the shoulder and the feet stacked if you can manage it. If that’s too much, drop the bottom knee to the floor and keep the top leg straight. Either way, the goal is a straight line from head to heel, or head to knee if you’re scaling it down.
How to use it
- Hold 20 to 40 seconds per side.
- Keep the top shoulder from rolling forward.
- Think about lifting the bottom ribs away from the floor.
- If the neck gets tense, you’re probably shrugging.
To make it harder: reach the top arm toward the ceiling, then slowly bring it across the body and back. That tiny shift makes the trunk work harder without turning the exercise into a circus trick.
4. Glute Bridge Hold for Glutes
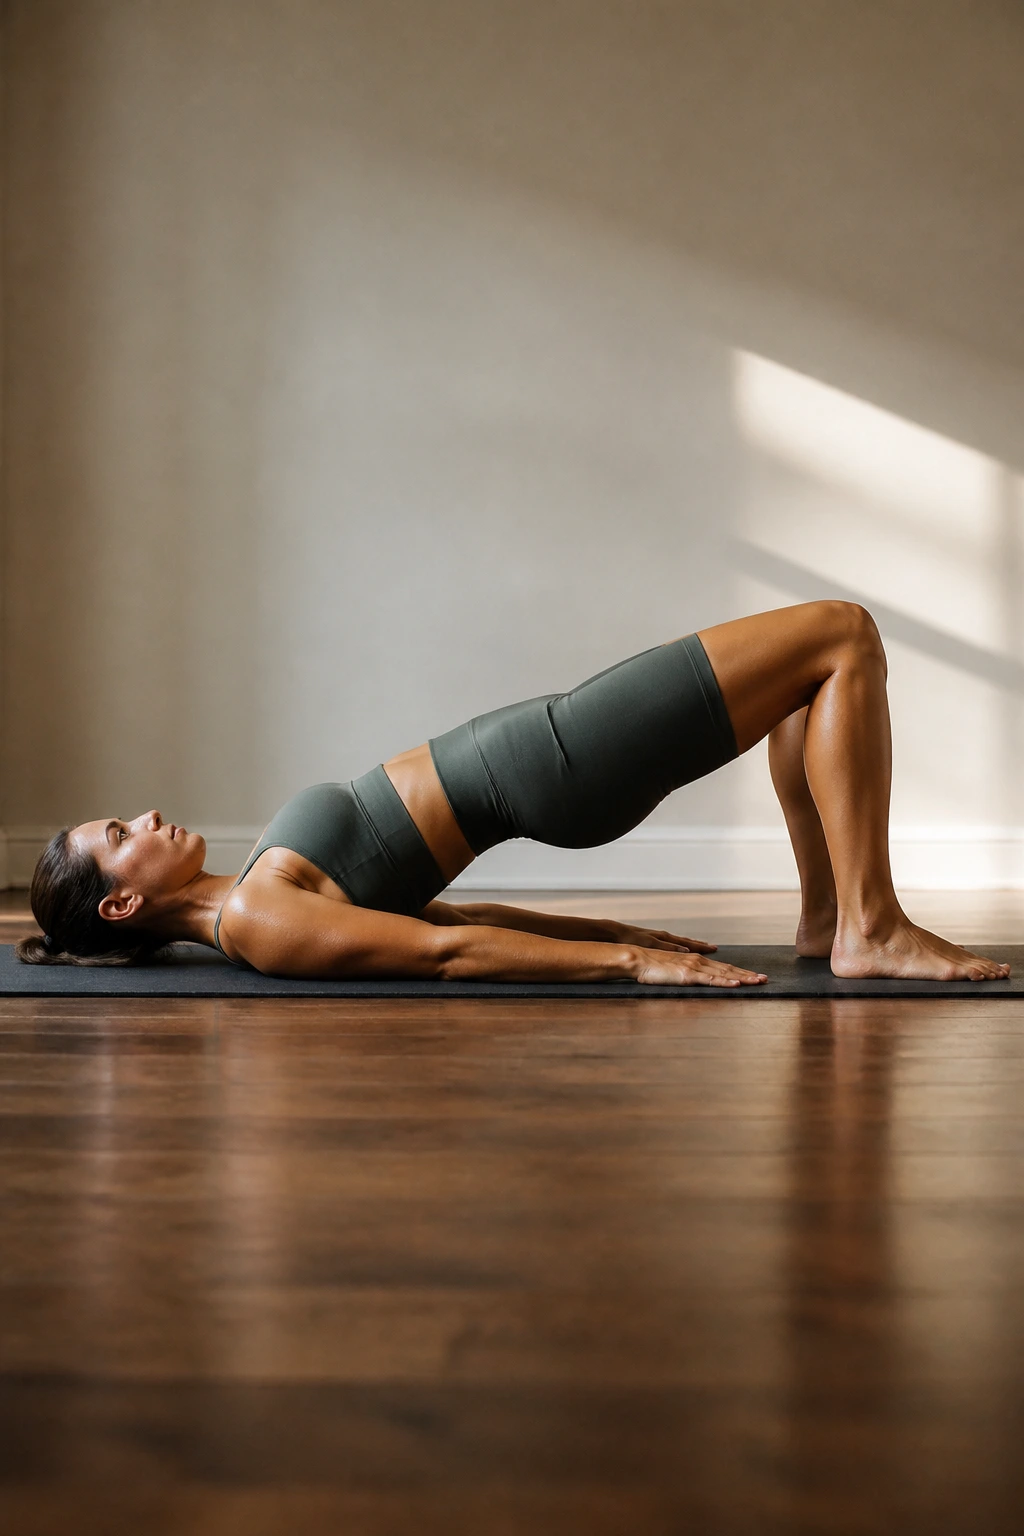
If your lower back steals work from your glutes, this one exposes it fast.
Lie on your back, bend your knees, and set your feet flat about hip-width apart. Lift the hips until the body forms a straight line from shoulders to knees, then hold that line without cranking the low back into an arch. The best version feels like the glutes are doing the lifting and the hamstrings are tagging along, not leading the whole job.
A lot of people rush this and end up dumping the effort into the spine. That’s the opposite of what you want. The ribs should stay down, the pelvis should stay controlled, and the pressure should sit across the back of the hips. If you feel it mostly in the lower back, lower the hips a bit and tuck the pelvis slightly before you lift again.
The bridge hold is one of my favorites because it looks harmless until the third breath. Then it starts to sting in a way that tells you the posterior chain is awake.
A good starting point is 20 to 30 seconds, but even shorter holds can be useful if you are learning to control the pelvic tilt.
5. Split Squat Hold for Single-Leg Strength
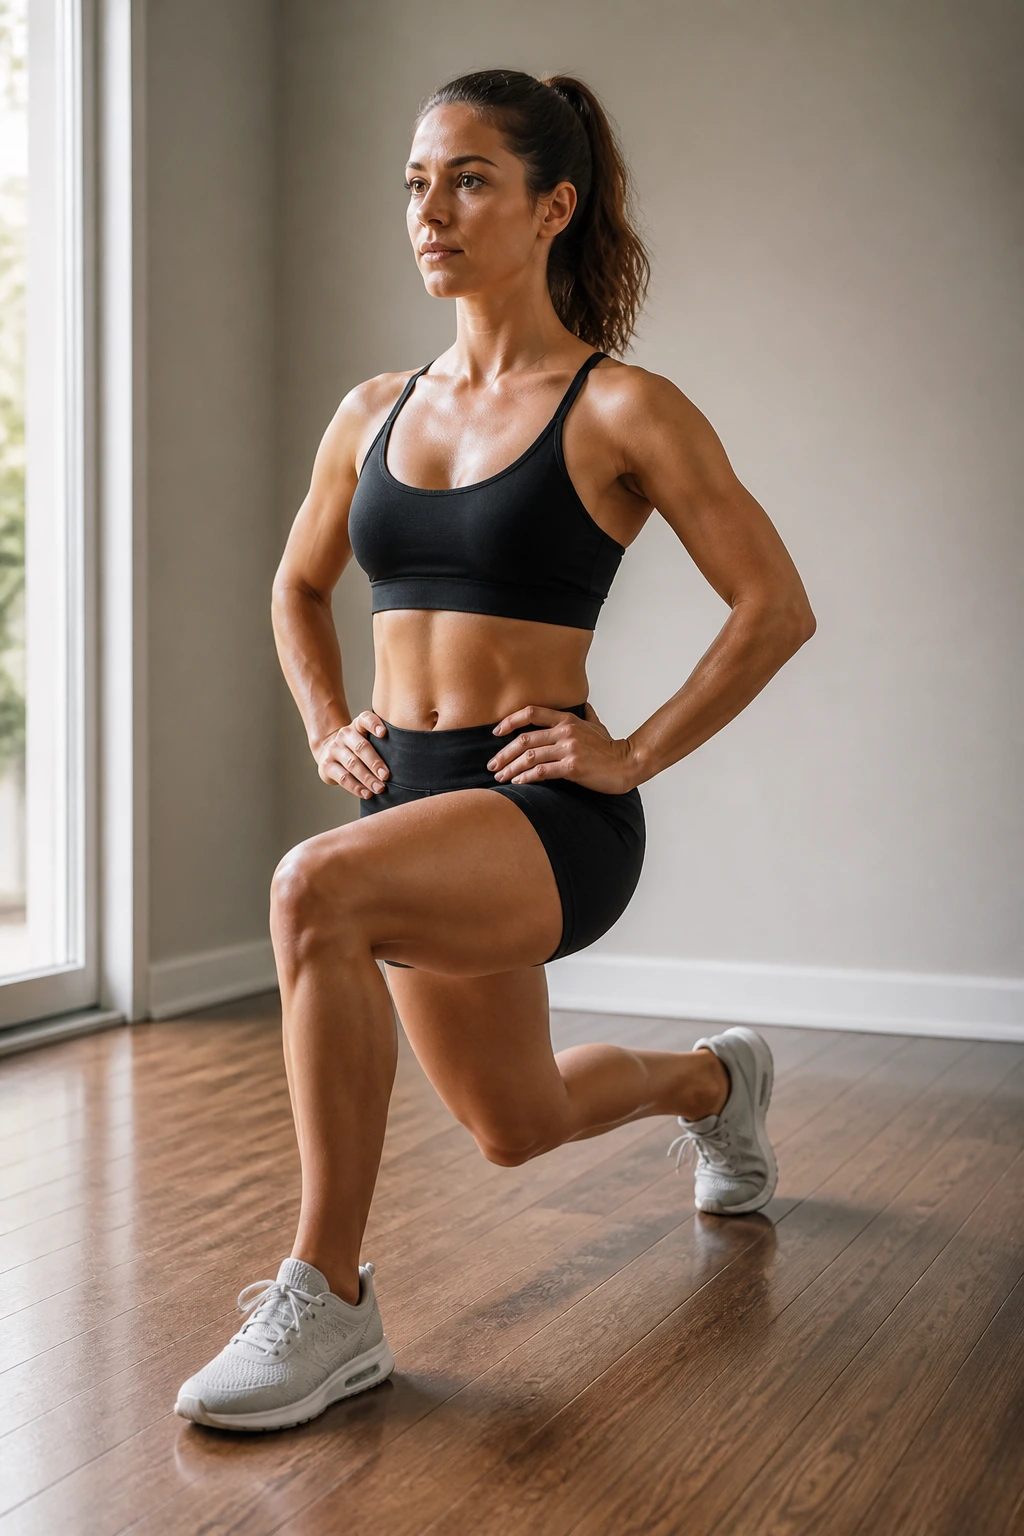
A split squat hold is not the same thing as a lunge.
The feet stay planted, the legs stay in one staggered stance, and the body sinks into a fixed position that loads one leg much harder than the other. That makes it one of the best isometric exercises for single-leg strength, especially if you want quads and glutes without the joint chatter that sometimes comes with repeated reps.
What changes with stance length
A shorter stance puts more load on the front quad and tends to keep the torso upright. A longer stance shifts more work to the glute and hamstring on the front leg, and it often feels friendlier for people with cranky knees.
- Short stance: more knee bend, more quad burn.
- Long stance: more hip load, more glute work.
- Front foot flat: steadier and usually easier.
- Back knee hovering: harder, but useful for control.
Hold the bottom position for 15 to 30 seconds on each side. If the knee caves inward, reset. That leak matters more than how low you are.
6. Push-Up Bottom Hold for Pressing Strength
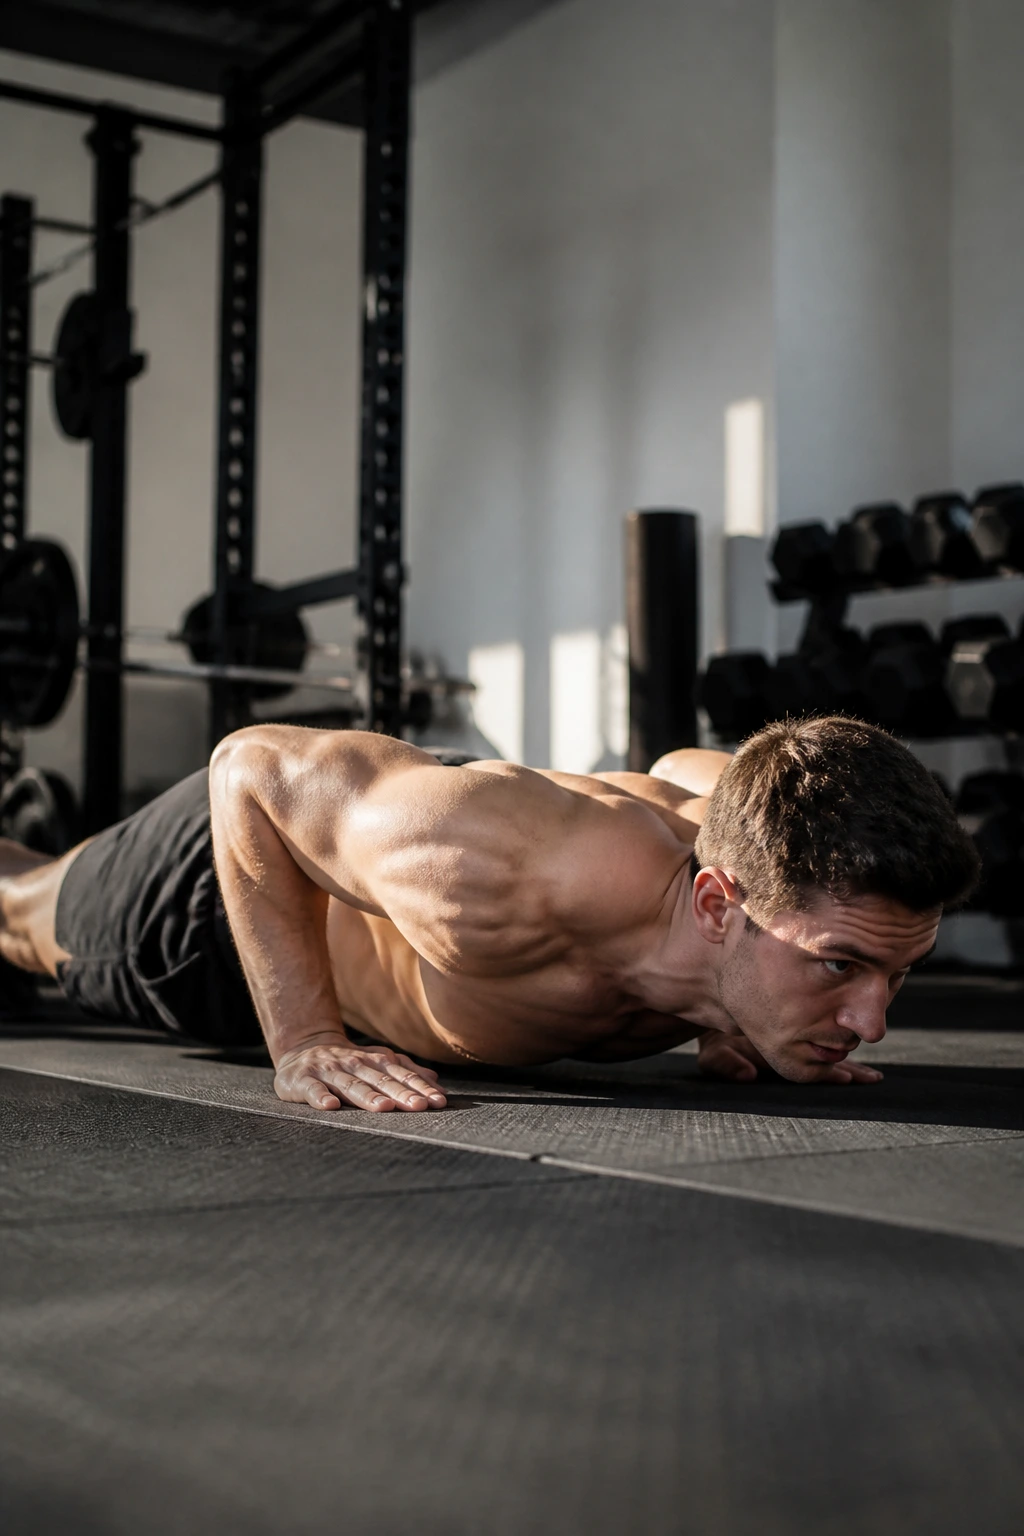
The bottom of a push-up is where sloppy strength shows up.
Drop into the lowest safe push-up position and freeze there with the chest hovering an inch or two above the floor. Elbows should angle back at roughly 30 to 45 degrees, not flare wide like chicken wings. The body stays rigid from head to heel, and the shoulders do not shrug up toward the ears.
This hold is gold for pressing strength because the hardest part of a push-up is often the start. That low position demands chest, triceps, shoulders, and core tension all at once. If you can own the bottom without sagging or collapsing, your regular push-ups usually get cleaner.
It also tells you a lot about your shoulders. If one side dumps lower, or if the elbows drift unevenly, the hold exposes it right away. That is annoying. It is also useful.
Try these versions
- Knees-down bottom hold for a friendlier entry point.
- Hands on a bench or box for a less aggressive angle.
- Pause for 5 to 10 seconds inside a normal push-up set if you want a strong finisher.
7. Dead Hang for Grip Strength
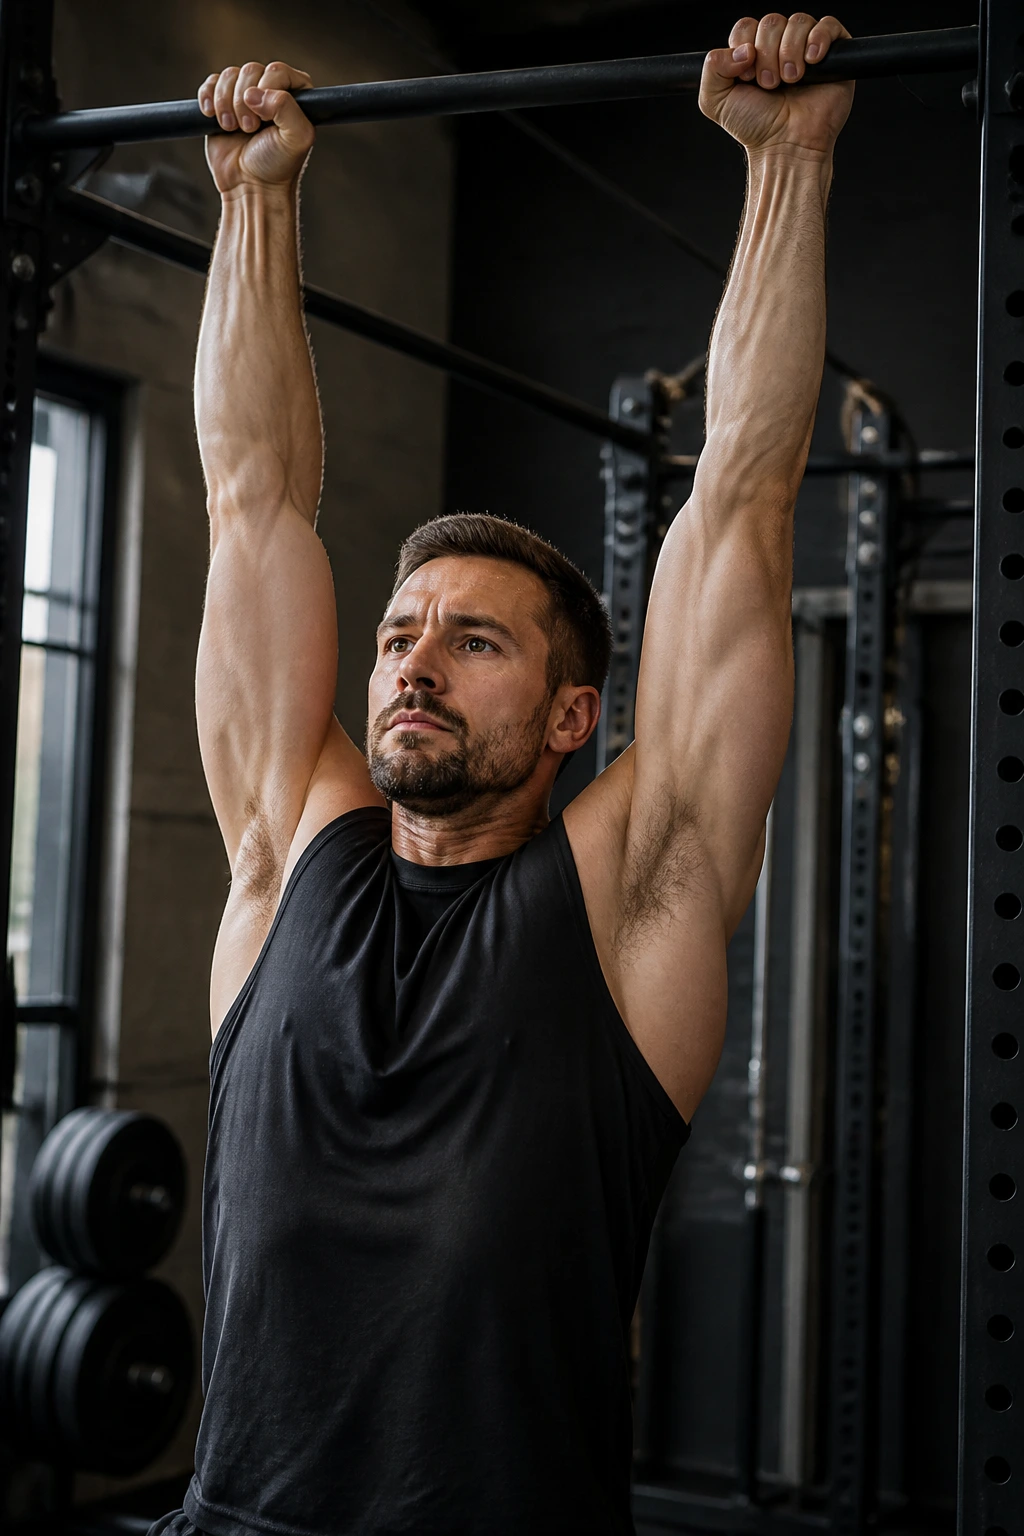
Can simply hanging from a bar build real strength? Yes, and the answer is less mysterious than people make it sound.
A dead hang works the hands, forearms, lats, shoulders, and the small tissues around the scapula. It is also one of the easiest ways to find out whether your grip is ahead of your back strength or the other way around. If you have ever opened a jar with one hand and thought nothing of it, then let go of a pull-up bar after ten seconds and felt your forearms light up, you already know the basic idea.
There are two versions worth knowing. A passive hang lets the shoulders rise a little, which can be useful if you’re building tolerance and grip endurance. An active hang keeps the shoulders gently packed down, which asks more from the upper back.
Grip options
- Overhand grip for classic hang strength.
- Mixed grip if you’re training it lightly, though I would not make that your default.
- Towel hang for a meaner forearm challenge.
- One-arm-assisted hang if you want to ease into it.
Start with 10 to 20 seconds. If your shoulders feel pinchy, stop and reset instead of forcing more time.
8. Hollow Body Hold for Deep Core Control
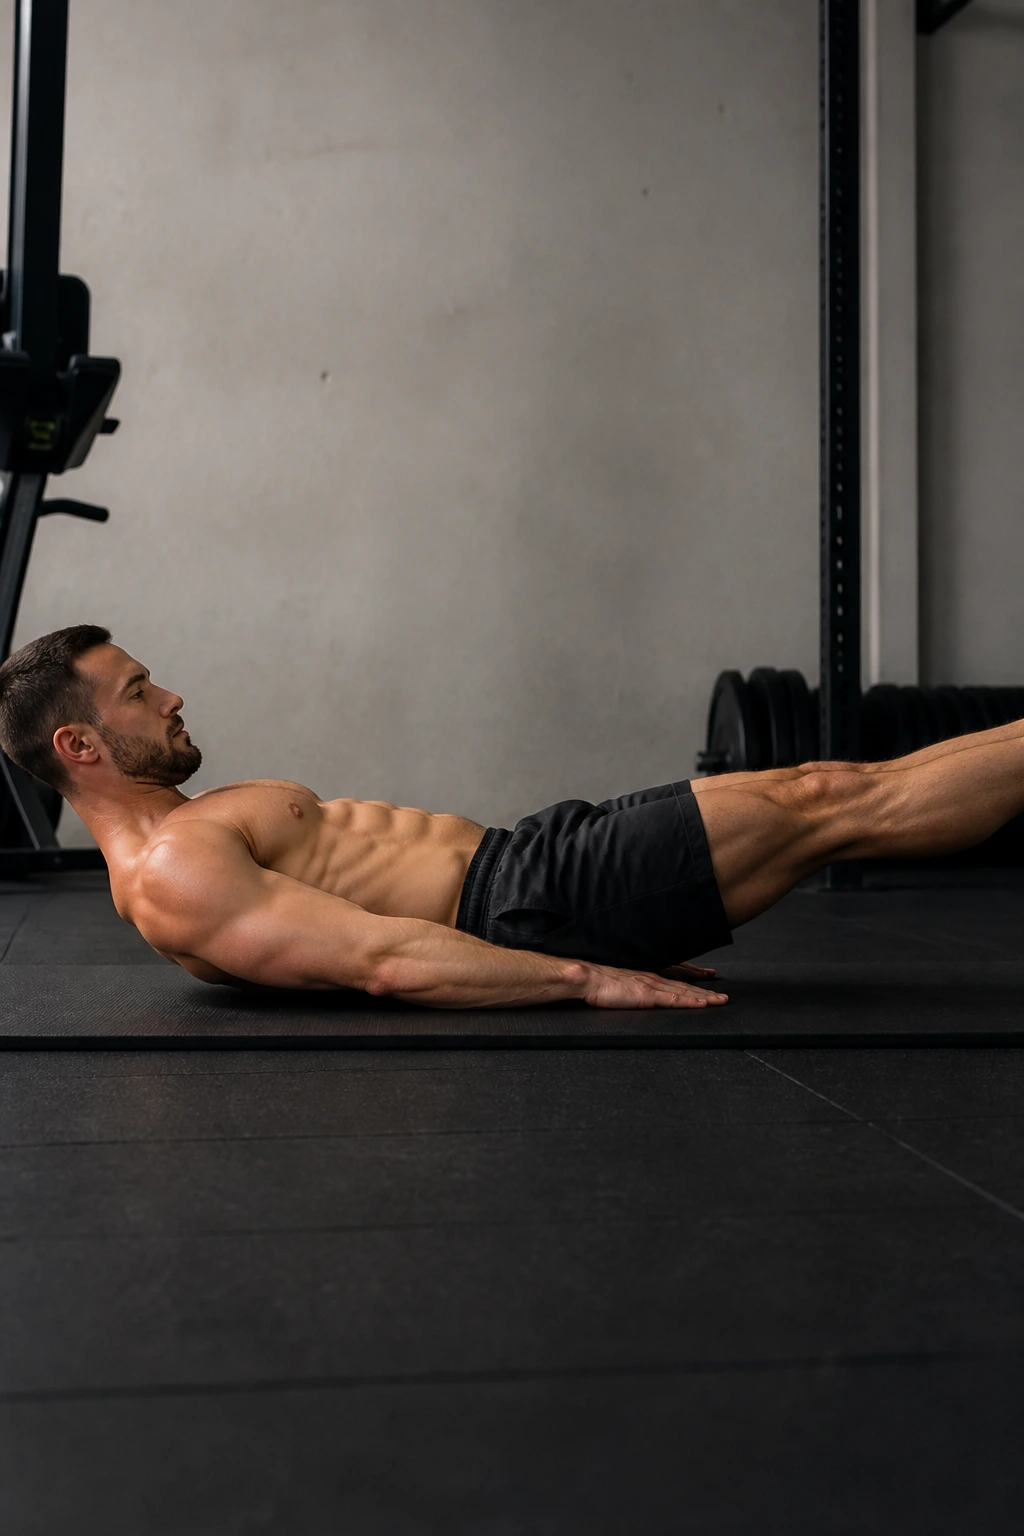
The low back on the floor. That’s the whole game.
A hollow body hold is one of the nastiest little core drills because it strips away momentum and leaves you with pure position work. Lie on your back, press the low back into the floor, lift the shoulders, and extend the legs only as low as you can without losing that contact. The body should feel like a slightly curved banana, not a broken banana.
Gymnasts love this hold for a reason. It teaches the front of the body to stay tight while the limbs stretch away from center, which is exactly what a lot of lifts and everyday tasks ask for. If your back arches the second your legs extend, the hold is too hard right now.
No shame in bending the knees.
How to scale it
- Tuck one knee at a time.
- Keep both knees bent at 90 degrees.
- Raise the arms toward the ceiling instead of overhead.
- Stop the set the second the lower back peels off the floor.
Hold for 10 to 25 seconds. Quality matters more than time on this one.
9. Boat Pose Hold for Abs and Hip Flexors
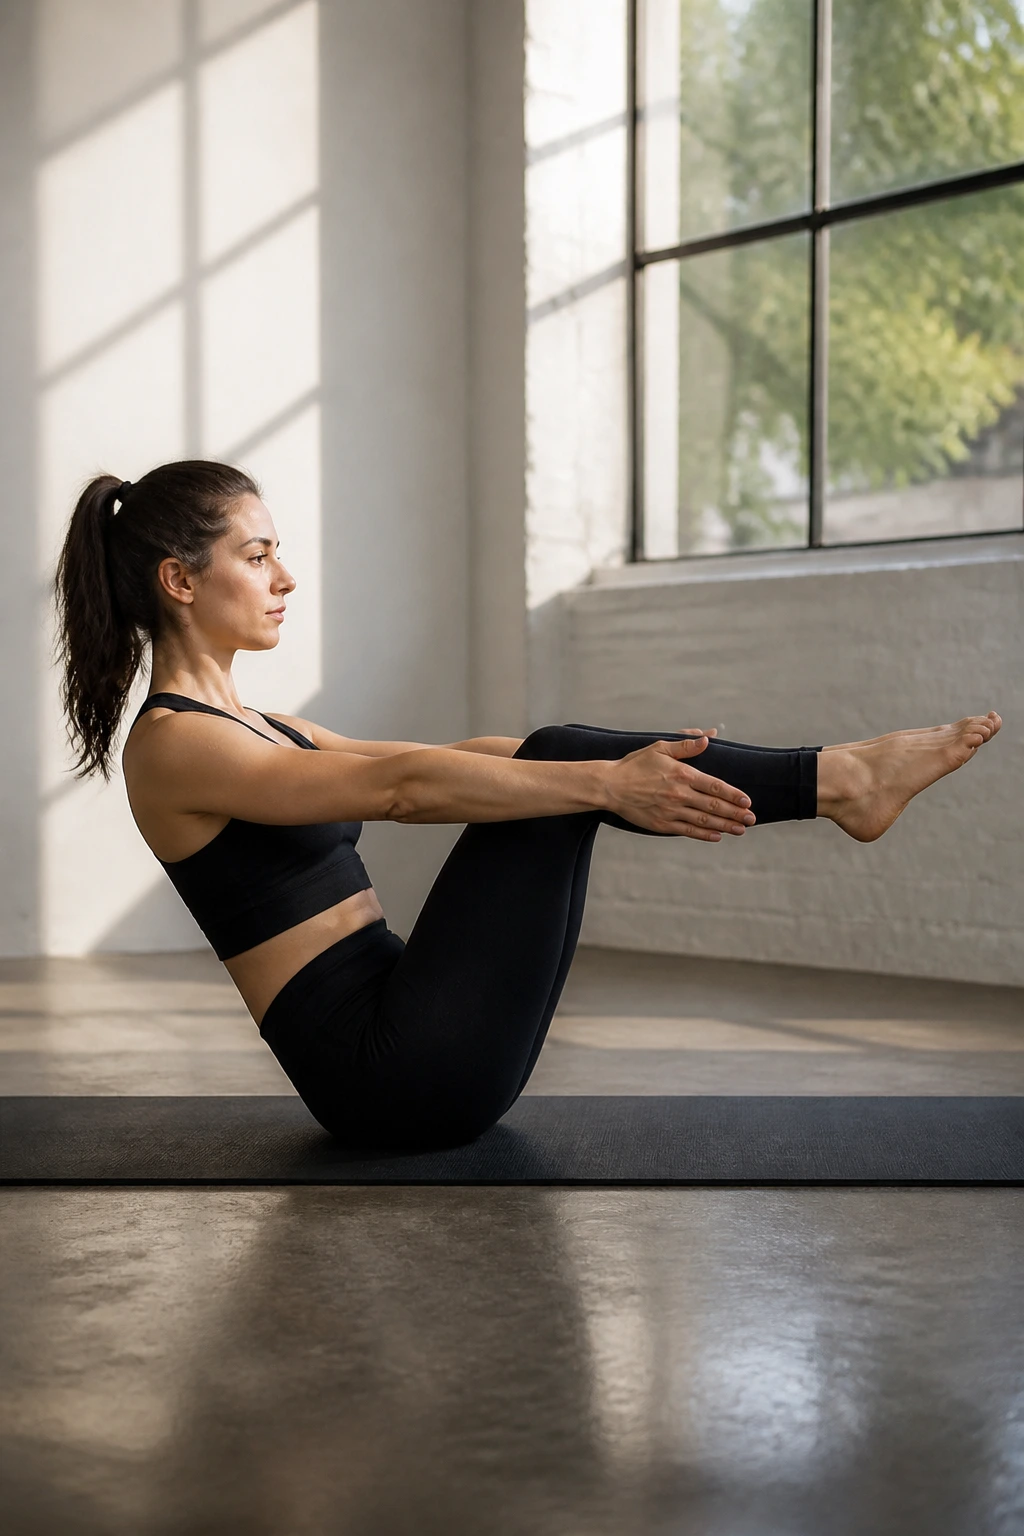
Boat pose looks calm until the tremble starts.
Sit on the floor, lean back a little, and lift the feet so the shins hover. The torso stays tall, the chest stays open, and the abs have to keep the spine from turning into a collapsed C-shape. It is not a fancy yoga performance. It is a core hold that happens to live in a yoga-shaped body position.
Compared with the hollow body hold, boat pose asks more from the hip flexors and often feels friendlier for people who struggle with fully flat low-back pressure on the floor. The flip side is that people sometimes lean back so far that the torso gives up and the whole thing becomes a balance stunt. Keep the ribs in line with the pelvis. That sounds small, but it changes the exercise.
If your neck starts taking over, the chest is probably too closed and the chin too jammed down. Open the collarbones a bit, breathe through the sides of the ribs, and let the abs do the heavy lifting.
A solid set is 15 to 30 seconds. Longer is possible. Cleaner is better.
10. Calf Raise Hold for Ankle Strength
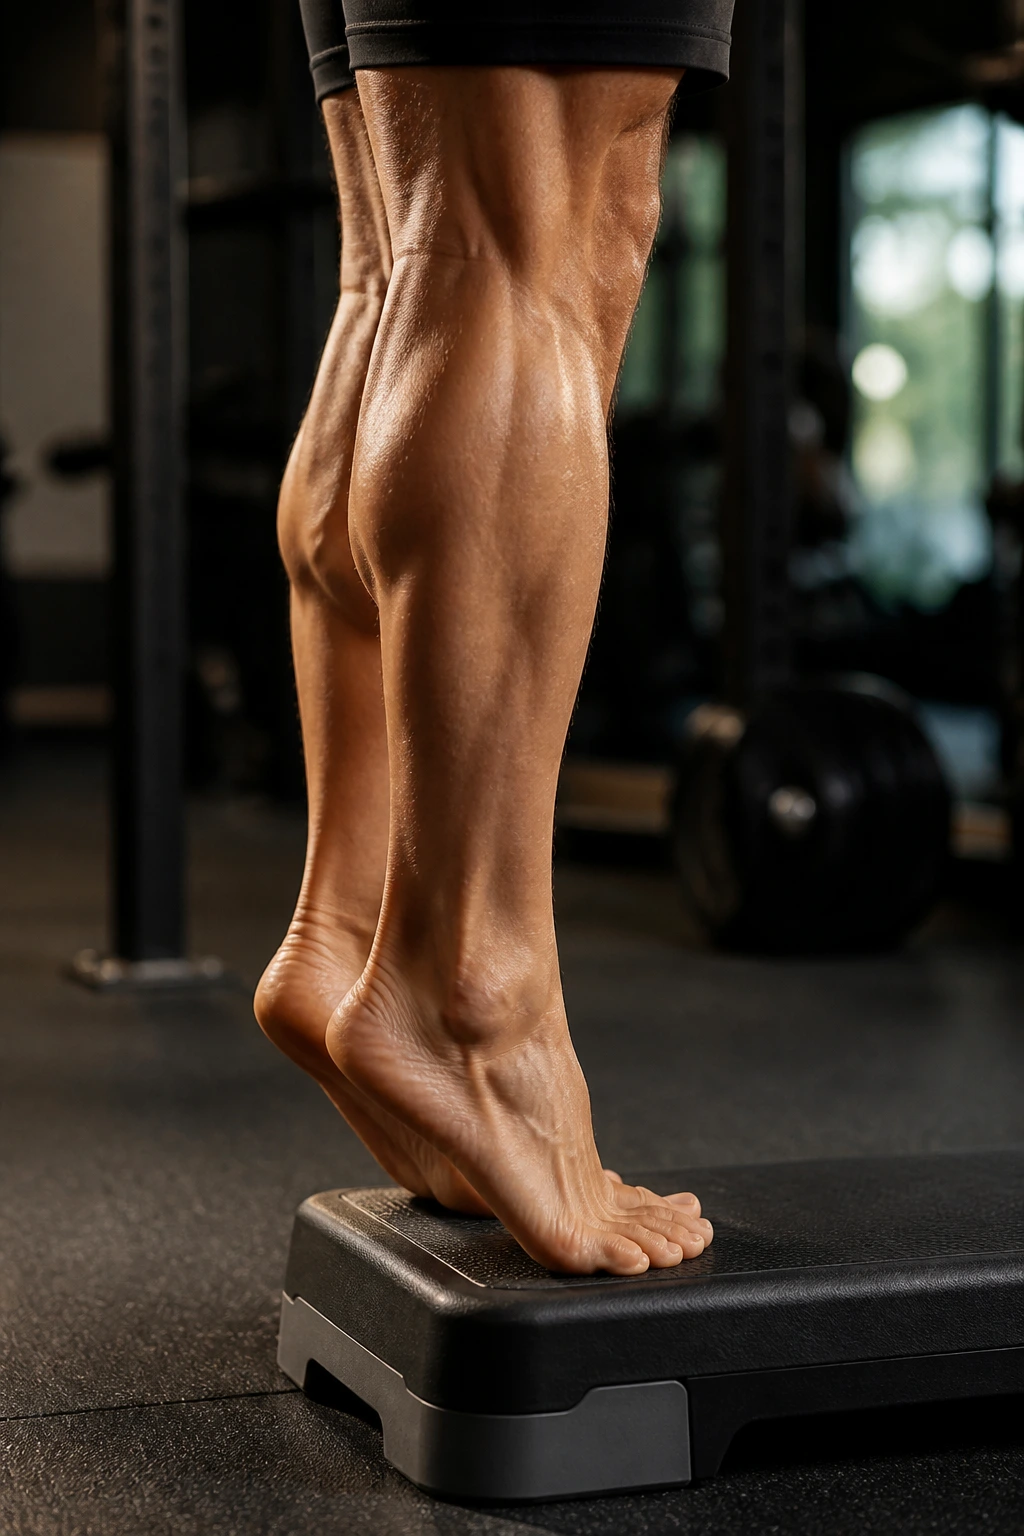
Calves are not just for walking.
A calf raise hold can be done on the floor, on a step, or on one leg if you want to make it much nastier. Rise onto the balls of the feet and pause at the top, or hold halfway through the range if you want to load the Achilles and the lower calf a little differently. The point is not to bounce. The point is to keep tension where most people usually rush through.
This hold helps with ankle stiffness, foot control, and the little bit of lower-leg strength that keeps running, jumping, and even basic squatting more stable. It also reveals asymmetry fast. One heel drops a little sooner. One foot rolls out. One calf burns twice as hard. That information is useful.
Good places to start
- Two feet on flat ground for 20 to 40 seconds.
- One foot on a step for a stronger stretch under load.
- Hold mid-range if the top position cramps your feet.
- Keep pressure through the big toe, not just the outside edge.
Tiny muscles. Big annoyance. Worth it.
11. Overhead Press Hold for Shoulder Stability
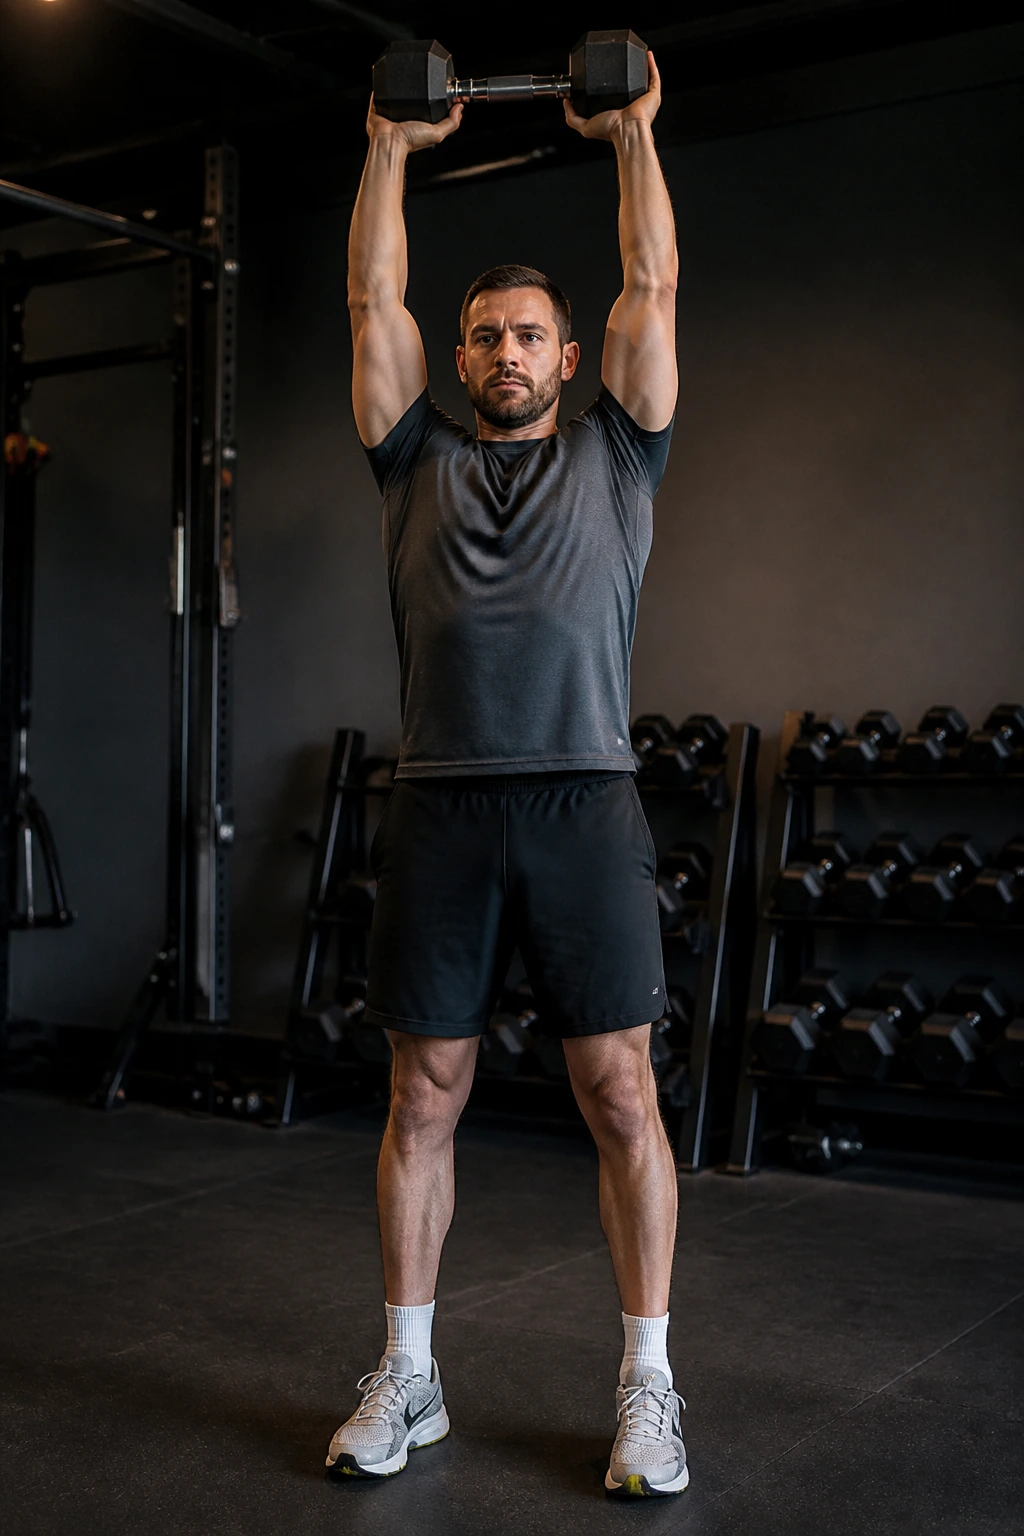
Holding weight overhead looks simple until the ribs start flaring.
Stand tall with dumbbells, a kettlebell, or a barbell locked out overhead. The elbows stay extended, the shoulders stay active, and the rib cage does not pop up like a tent. If the lower back arches to help the lift, the shoulders are not really holding the load — the spine is.
This is one of the best static holds for teaching the shoulders to stay stacked over the body. It’s especially useful if you press overhead, do carries, or spend time in positions where the arms have to stay above the head for more than a second. The half-kneeling version is a good teaching tool because it makes cheating harder.
Half-kneeling version
- One knee down, the other foot flat.
- Press the weight overhead and hold for 10 to 20 seconds.
- Keep both glutes on.
- Breathe without letting the lower ribs flare out.
The hold should feel secure, not strained in the low back. If the shoulder is fine but the spine is bending, the load is too much or the position is off.
12. Band Row Hold for Upper-Back Tension
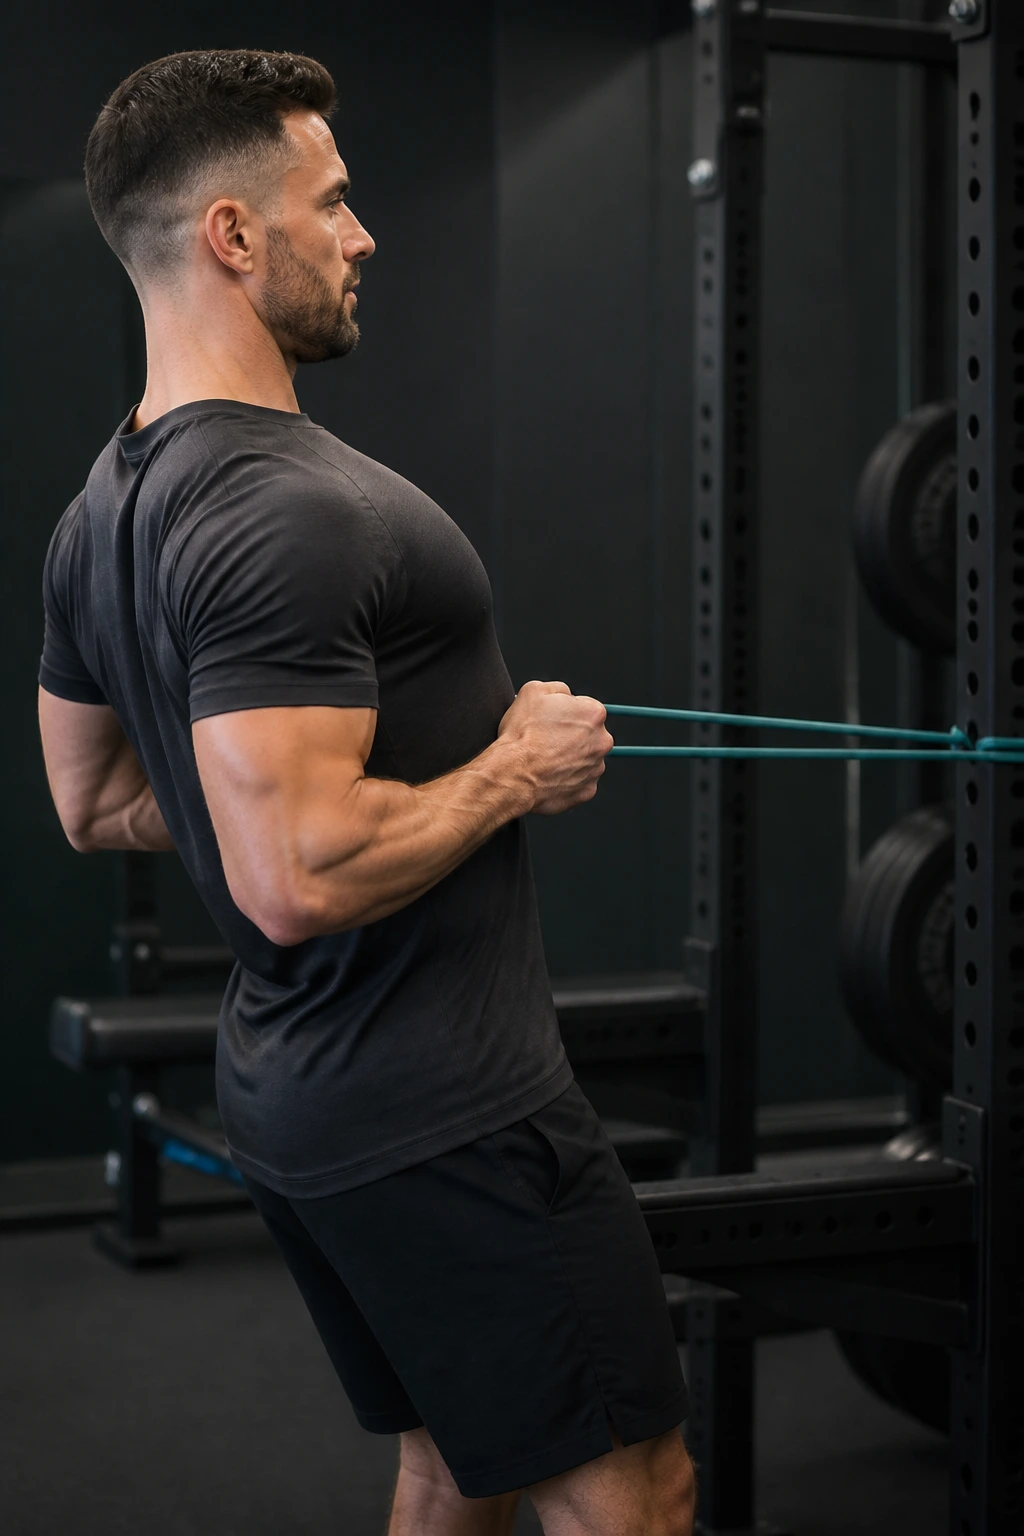
A band row hold is the quiet answer to rounded shoulders.
Anchor a resistance band at chest height, pull the handles or band ends toward your ribs, and freeze with the shoulder blades gently back and down. The elbows stay near the body, the neck stays relaxed, and the upper back has to keep tension without letting the chest collapse.
This one is useful because rowing usually gets rushed. People yank, squeeze, release, repeat. A hold strips out the hurry and makes you actually own the position. That matters for posture, pulling strength, and keeping the shoulders from living in a forward roll all day.
Use a band that challenges you in the last few inches of the pull. If the band is too light, the hold feels ornamental. If it is too heavy, the ribs flare and the shoulders shrug. Neither is useful.
Try this setup: pull for 15 to 30 seconds with your elbows fixed, then release slowly. The slow release matters almost as much as the hold itself.
13. Farmer’s Hold for Grip and Posture
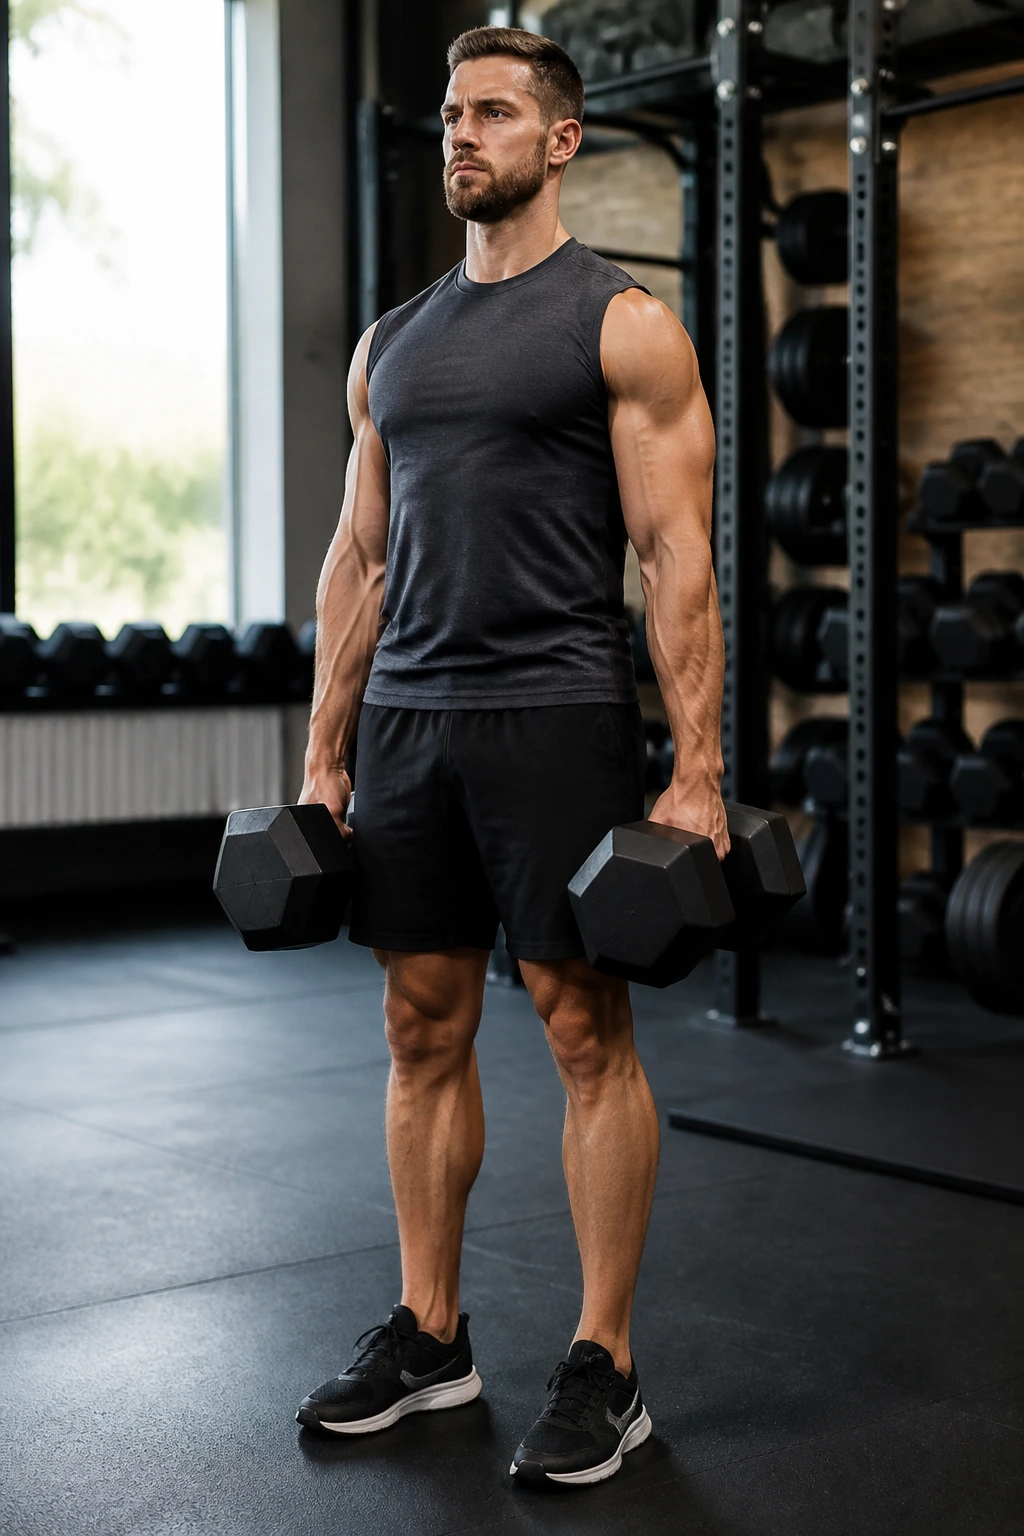
Heavy in the hands. Heavy in the trunk.
A farmer’s hold is simple: pick up two heavy dumbbells or kettlebells, stand tall, and keep holding without swaying or shrugging. It trains grip, traps, obliques, and the kind of body tension that makes carrying groceries or loading boxes feel less stupid. If you only want one loaded isometric that feels useful in daily life, this is a strong pick.
What makes it different from a dead hang is the upright posture. You are not hanging from the shoulders here; you are teaching the whole body to stack under load while the hands are working hard. If the rib cage flops, or the weight bangs against the legs, the load is too much.
One hand or two?
- Two-handed hold: best for total load and simple posture.
- One-handed suitcase hold: better for anti-side-bend control.
- Walk-free version: stay planted if you want pure static work.
- Short timed sets: 20 to 40 seconds is a sweet spot for many people.
The one-handed version is sneaky. It looks tame and feels lopsided almost immediately.
14. Biceps Curl Hold for Elbow Flexion
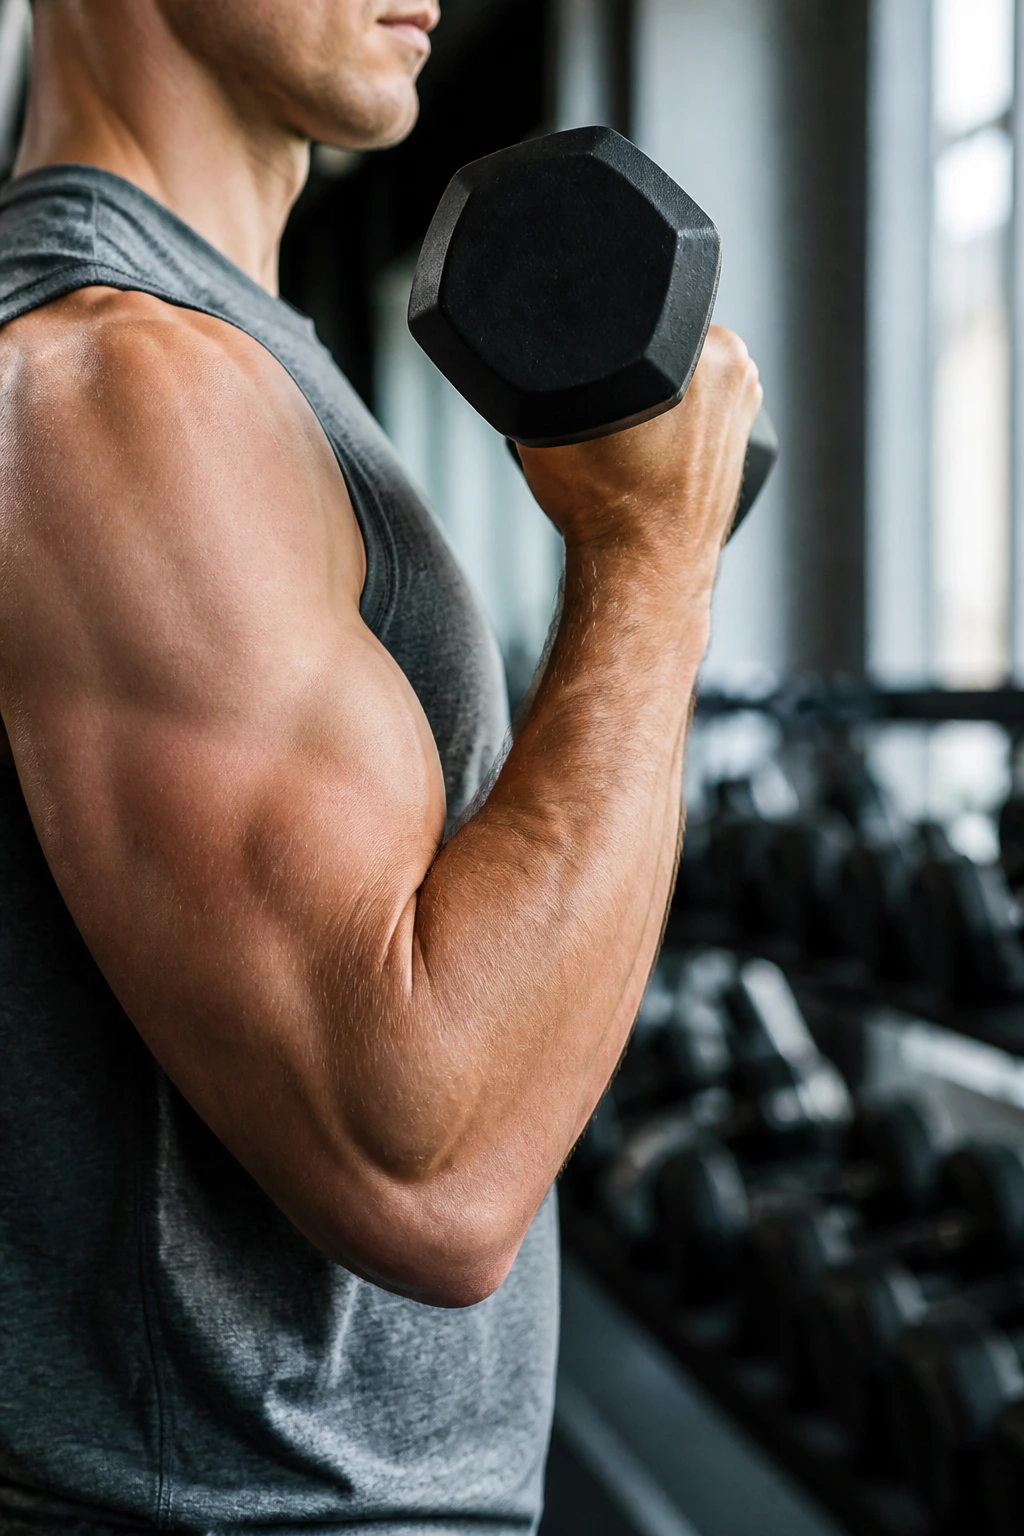
Unlike a normal curl, a curl hold tells you exactly where the weak point sits.
Hold a dumbbell or cable handle with the elbow bent around 90 degrees, wrist neutral, and upper arm still. That mid-range position is where a lot of people lose tension because the shoulder starts helping or the wrist breaks back. Freeze there and the biceps have to own the load without a lot of help from momentum.
This hold is useful for climbers, lifters, and anyone whose elbows get cranky when pulling strength is weak. It also works well as a rehab-friendly drill if you keep the load modest and the range clean. You do not need a monster dumbbell here. You need a position you can control without twisting.
The best sets are boring in the right way. No swinging. No torso lean. No wrist collapse.
A good target is 10 to 20 seconds per side, with a brief pause before you switch arms. If the elbow feels sharper than a normal muscle burn, stop there.
15. Triceps Pressdown Hold for Lockout Strength
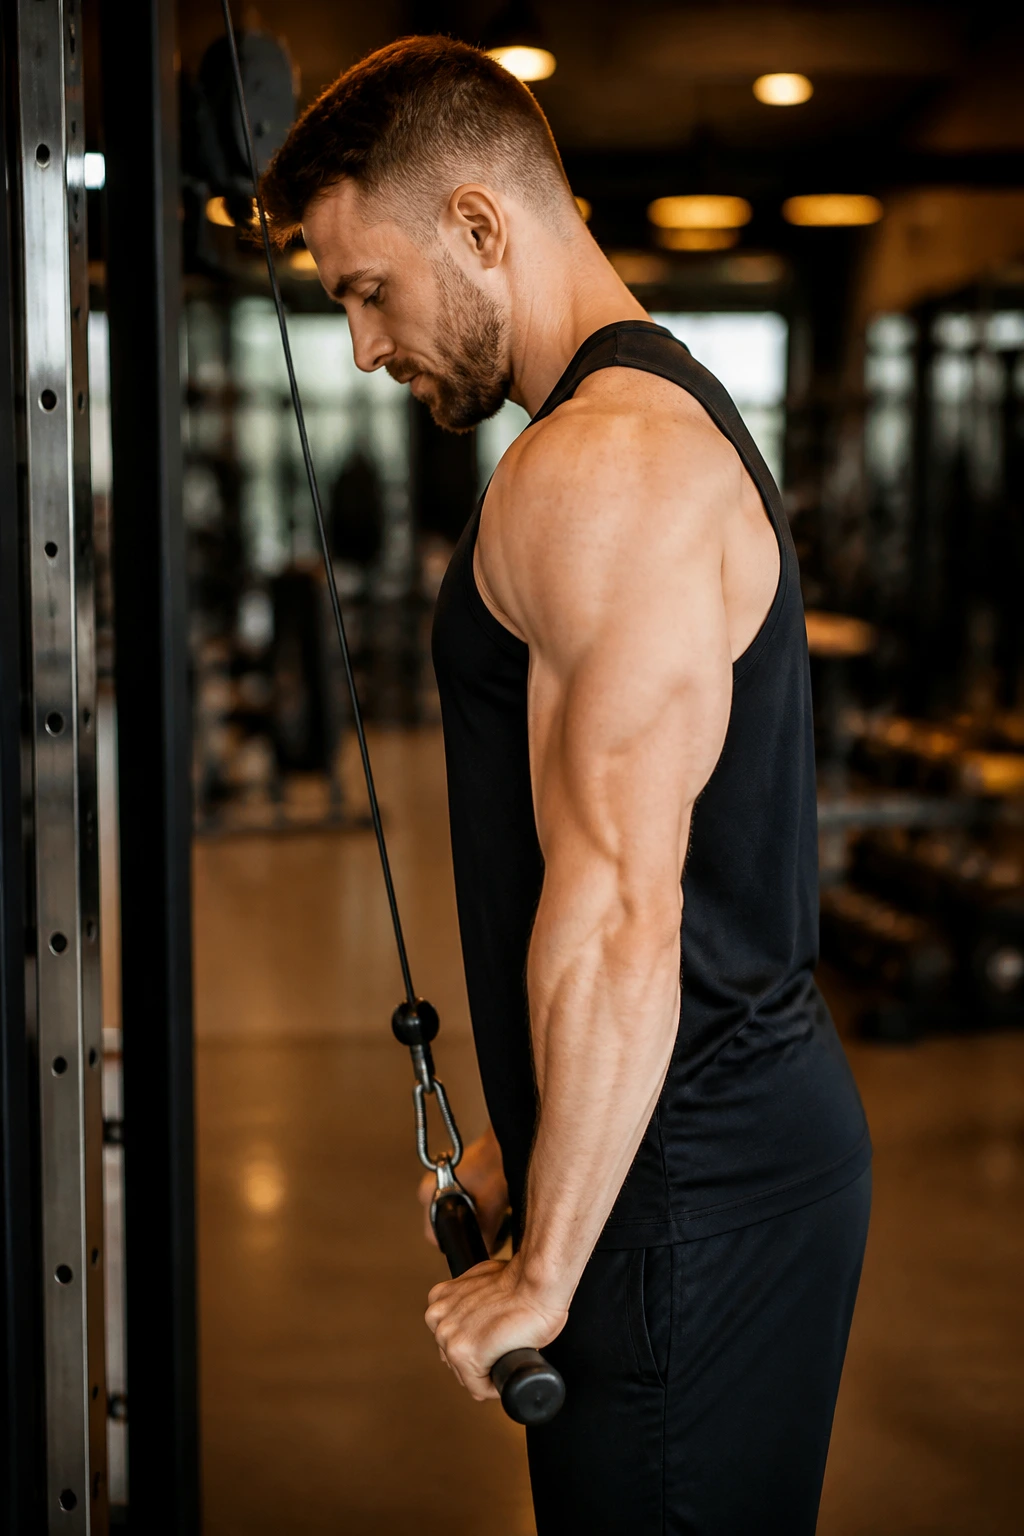
The triceps do a lot more than people give them credit for.
A pressdown hold with a cable or band locks the elbows into near-full extension and makes the back of the upper arm work hard without the chatter of repeated reps. It is a strong choice if your pressing lockout feels weak, if push-ups stall near the top, or if the elbows want some focused load without heavy joint stress.
Keep the shoulders down. That part matters. If the shoulders creep up toward the ears, the triceps are no longer the star of the show. You can also do this with an overhead band extension hold, but the pressdown is usually easier to learn because the setup is clearer and the position is less awkward.
What to feel
- Tension behind the upper arm.
- Elbows pinned near the torso.
- Wrists straight, not bent back.
- A clean stop at the end range, not a hard joint slam.
Use a load that lets you hold the lockout for 15 to 30 seconds while keeping the elbow line steady.
16. Romanian Deadlift Hold for Hamstrings
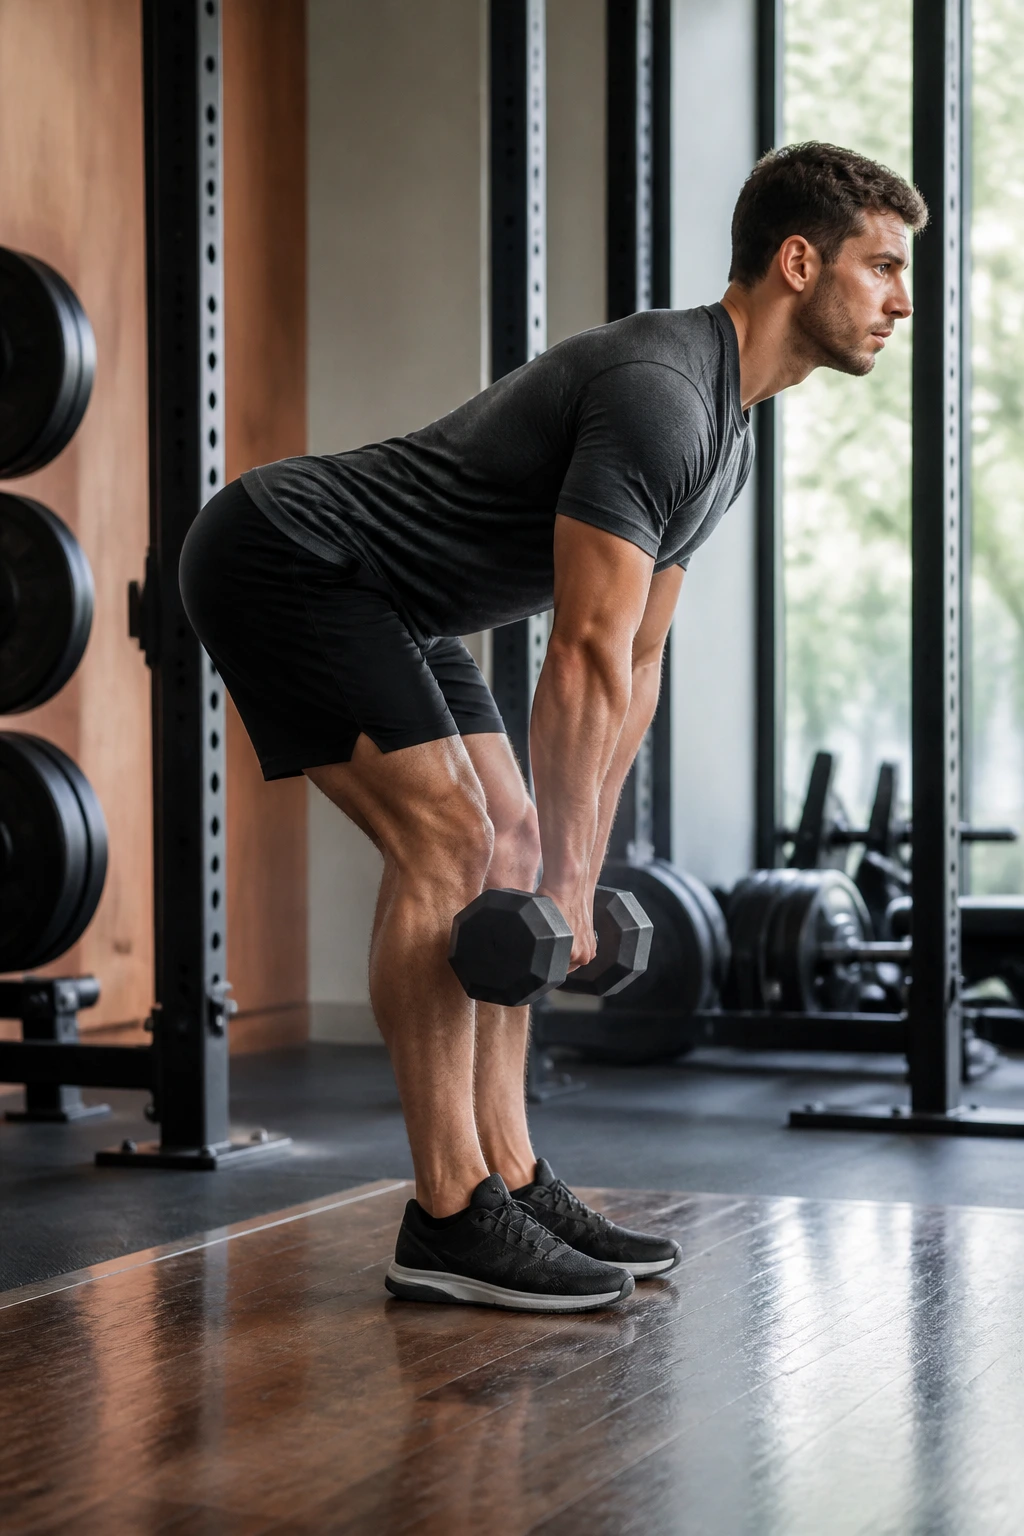
This is the hold that makes your hamstrings politely file a complaint.
Set up with dumbbells or a barbell and hinge at the hips until the weight sits around mid-shin or just below the knees. The knees stay soft, the spine stays neutral, and the hips travel back as if you’re closing a car door with your backside. Freeze there and let the hamstrings and glutes carry the tension.
A Romanian deadlift hold is one of the best ways to teach hip hinge shape without the distraction of speed. If you lose the hinge and turn it into a squat, the hamstrings unload. If you round the back, the strain shifts somewhere you probably do not want it. The position should feel long in the back of the legs and strong through the trunk.
Common mistakes
- Bending the knees too much and turning it into a squat.
- Dropping the chest instead of sending the hips back.
- Letting the weight drift away from the legs.
- Chasing depth instead of tension.
Hold for 10 to 20 seconds at first. Small range, clean hinge, honest load.
17. Copenhagen Plank for Inner-Thigh Strength
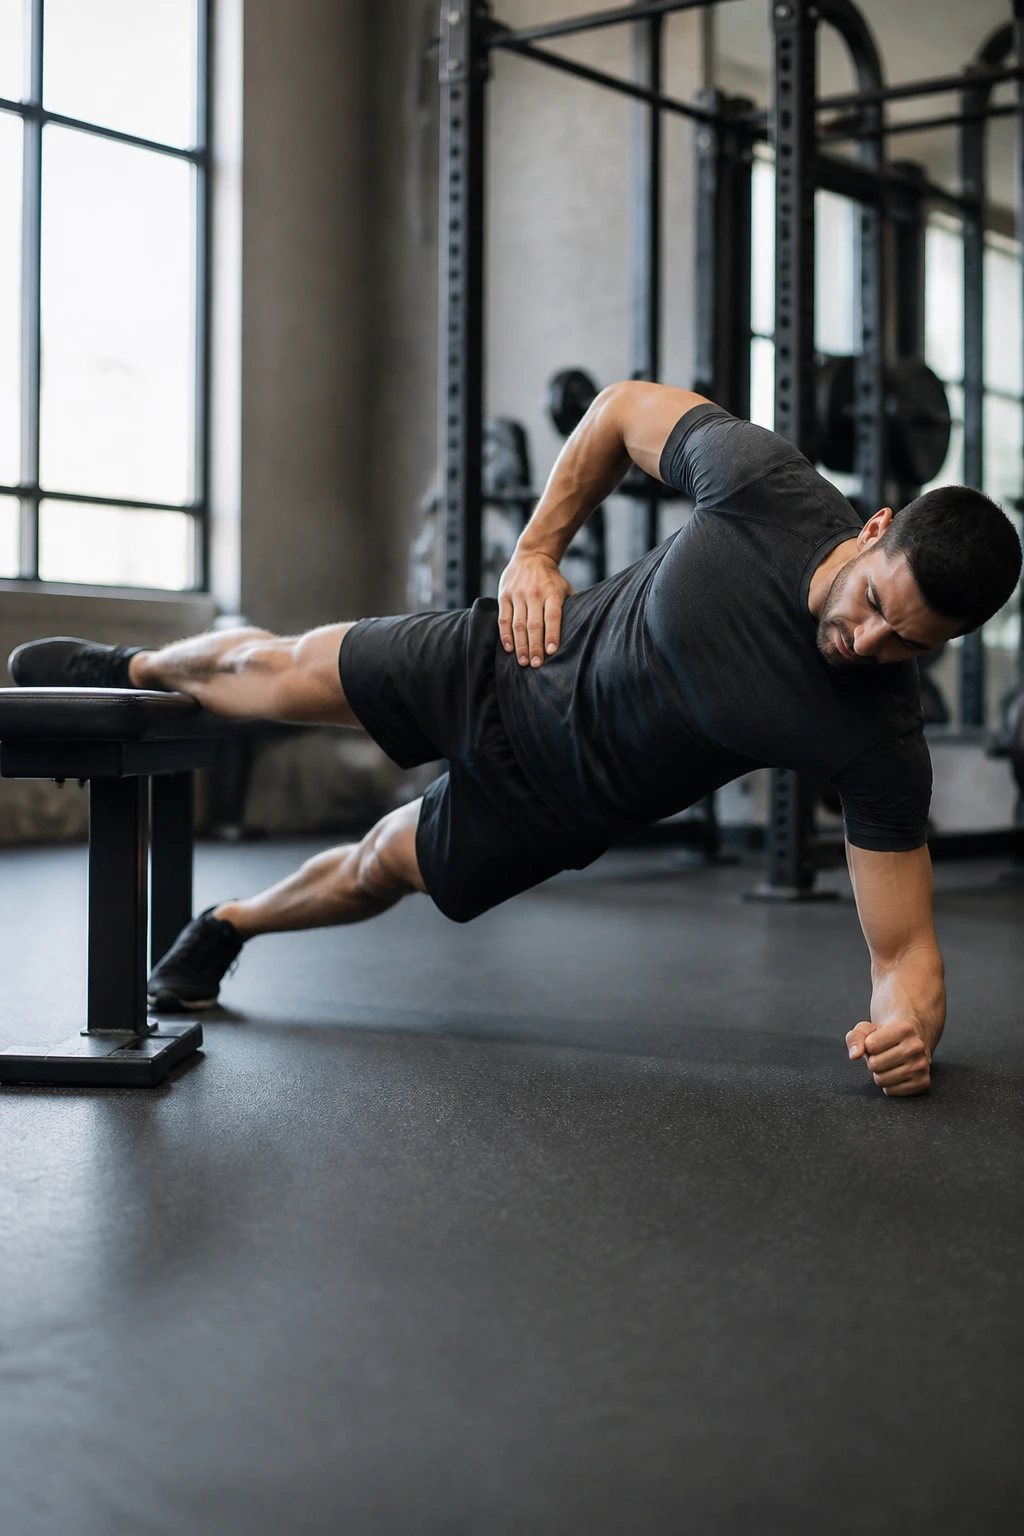
The Copenhagen plank is the mean cousin of the side plank.
Place the top leg on a bench or box and lift the hips so the inner thigh of the lower leg has to help support the body. That adductor load is the whole point. It also wakes up the obliques and the side of the glutes, which is why this hold shows up in a lot of smart lower-body programs.
Start with the short-lever version: knee on the bench, not the ankle. The long lever is a savage little thing and does not belong in your first week unless you already know the position well. Keep the torso from rotating toward the floor. Keep the neck calm. And do not chase height at the cost of control.
Better starting points
- Short lever: knee on the bench, easier on the groin.
- Long lever: ankle on the bench, much harder.
- Floor assist: keep one hand on the ground if needed.
- Time: 10 to 20 seconds per side is plenty at first.
This one is not flashy. It is also not optional if you want strong inner thighs and better side stability.
18. Pallof Press Hold for Anti-Rotation Core
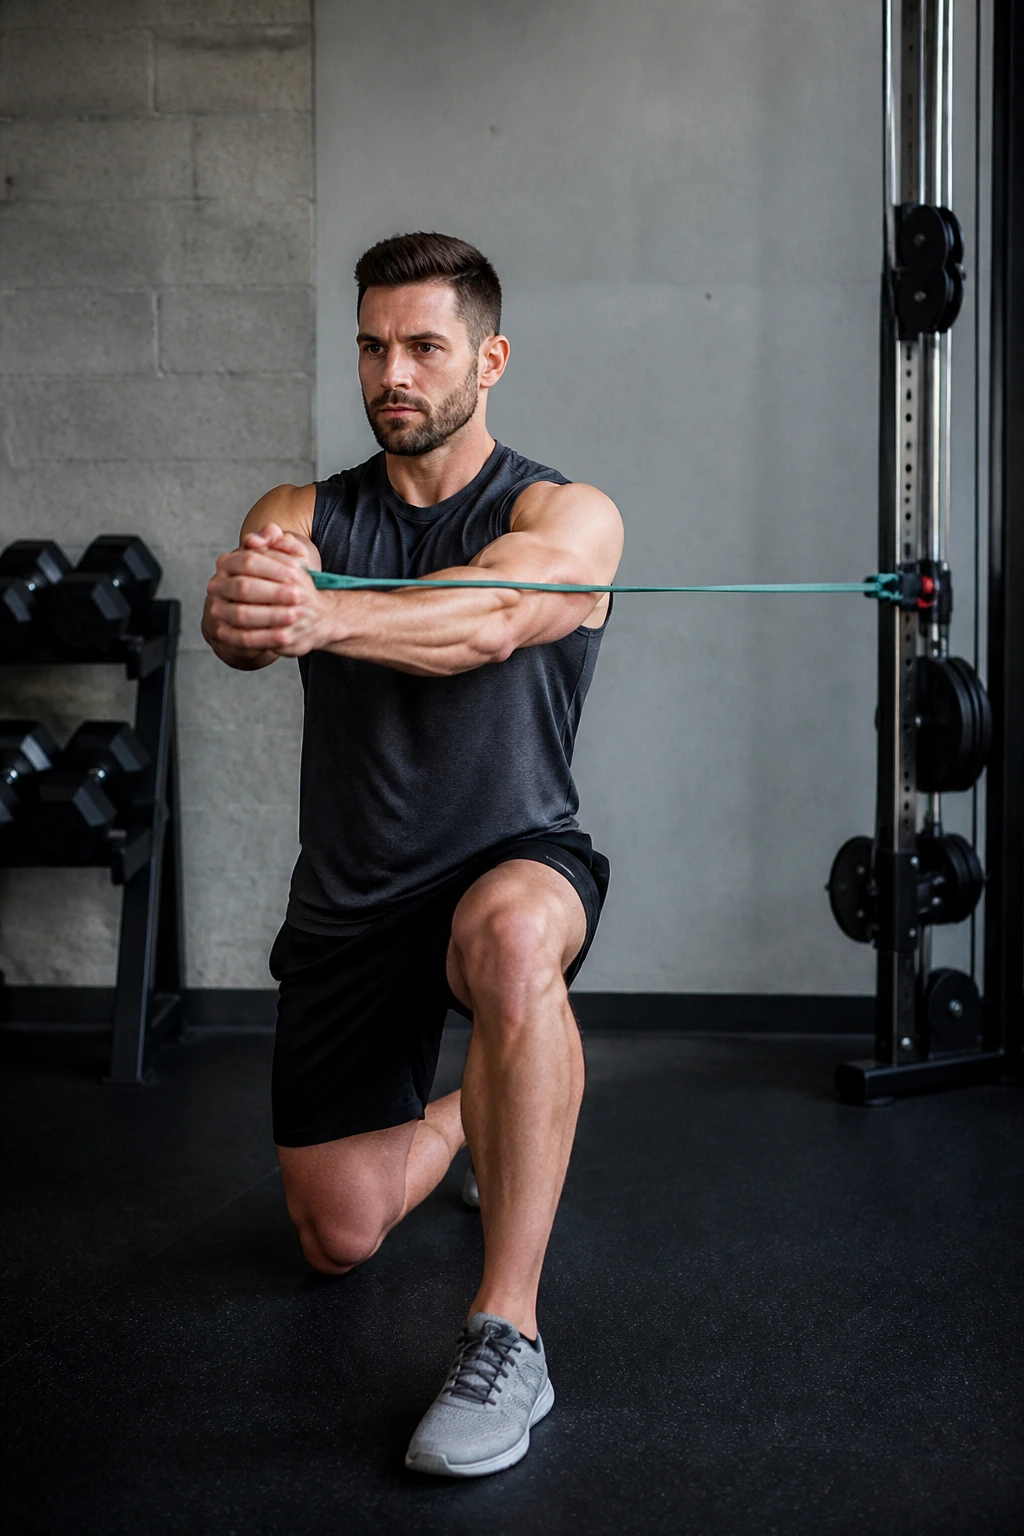
If I had to keep one core hold from this entire list, it would be this one.
A Pallof press hold teaches the body to resist twisting while the arms extend away from the chest. Set a band or cable at sternum height, stand in a split stance or half-kneeling position, press the handle straight out, and hold while the torso stays square. The band tries to rotate you. Your job is to look rude to that idea.
That anti-rotation demand is what makes the exercise so useful. It trains the torso to stay organized when the limbs are working, which carries over to presses, carries, hinges, and even messy real-world stuff like dragging bags or catching yourself on slippery ground. There’s no big burn at first. Then the ribs start to wander, and you know the hold is doing exactly what it should.
A half-kneeling version is clean and easy to read. A split stance version is a little more athletic. Both work.
Clean cues
- Keep the hips level.
- Exhale gently as the arms extend.
- Do not let the band pull the hands off center.
- Hold for 10 to 20 seconds before resetting.
Boring-looking. Extremely useful.
