



Many people walk into a gym, head straight for the heavy racks, and assume that real leg strength can only be forged under a massive iron barbell. They are missing a massive opportunity. The truth is that your own body weight offers an incredibly versatile resistance tool that—when manipulated correctly—can build serious size, explosive power, and rock-solid stability. You do not need thousands of dollars in equipment to train your lower body effectively. You just need to understand how to leverage gravity, tempo, and unilateral stress.
Training legs at home requires a shift in mindset. When you cannot add more weight to a bar, you must add complexity to the movement. This means slowing down the descent to increase time under tension, pausing at the bottom of a repetition, or shifting the load to one leg to force your muscles to work twice as hard. If you are diligent, you will find that these movements can fatigue your quads, glutes, and hamstrings just as thoroughly as any machine-based workout, often with the added benefit of improved functional mobility.
1. The Classic Air Squat
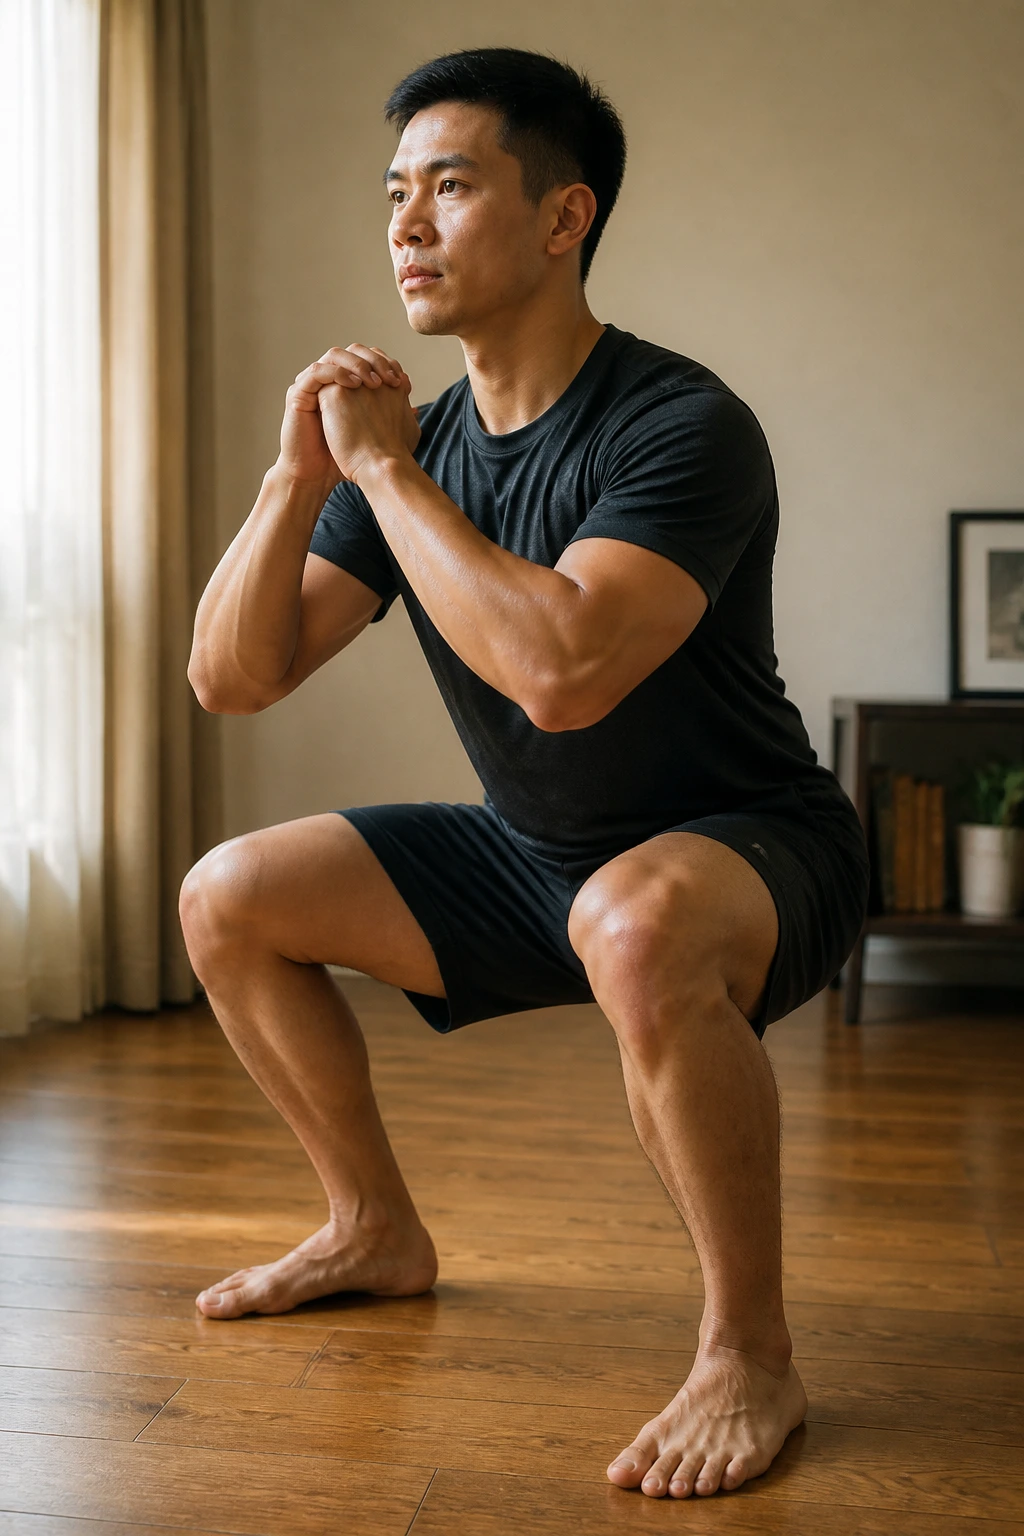
This is the foundational movement of all lower-body training. If you cannot master a perfect air squat, adding weight—even your own body weight in a more complex variation—is just building on a shaky foundation. Stand with your feet about shoulder-width apart, toes pointed slightly outward. The movement begins not by bending your knees, but by pushing your hips back as if you are sitting into a chair behind you.
Getting the Mechanics Right
- Keep your chest upright: Many people fold forward at the waist. Imagine you have a broomstick against your spine; keep your back flush against it.
- Knee tracking: Your knees should track directly over your middle toes. If they cave inward, you lose stability and risk joint strain.
- Depth matters: Aim to get your hip crease below the top of your knee. If you can’t reach that depth, widen your stance slightly or work on ankle mobility first.
Pro tip: Slow down the descent. Take a full three seconds to lower yourself, pause for one second at the bottom, and then drive up explosively. This changes a simple movement into a serious strength builder.
2. Reverse Lunges
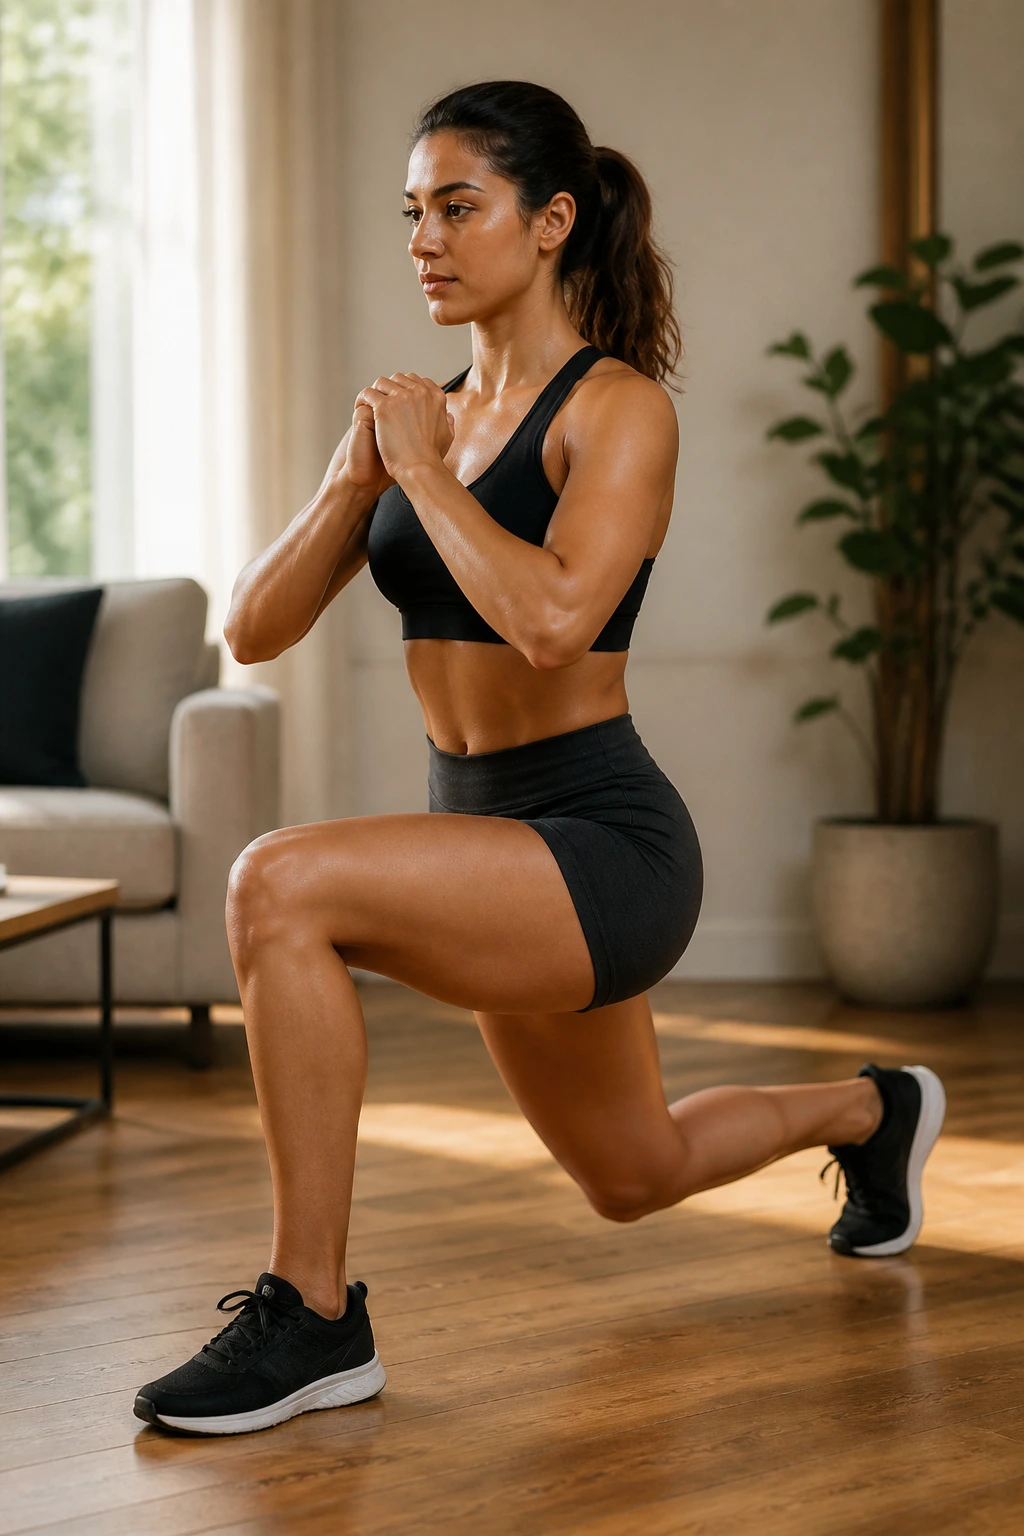
Forward lunges often feel awkward because the momentum of your body carries you forward, potentially putting excessive stress on the knee joint as it decelerates. Reverse lunges eliminate this. By stepping backward, you keep your front shin vertical, which is significantly friendlier on the knees while still placing a massive demand on the glutes and quads.
Why They Feel Different
When you step back, your center of gravity stays centered over your front leg. This makes it easier to keep your torso upright, allowing for a deeper stretch in the lead glute. Because you aren’t fighting momentum, you can really focus on squeezing the glute of the front leg as you stand back up.
How to Execute Properly
- Stand tall with feet together.
- Step one foot back, landing on the ball of your foot.
- Lower your hips until both knees are bent at roughly 90-degree angles.
- Drive through the heel of your front foot to return to standing.
- Alternate legs for a balanced workout.
3. The Glute Bridge
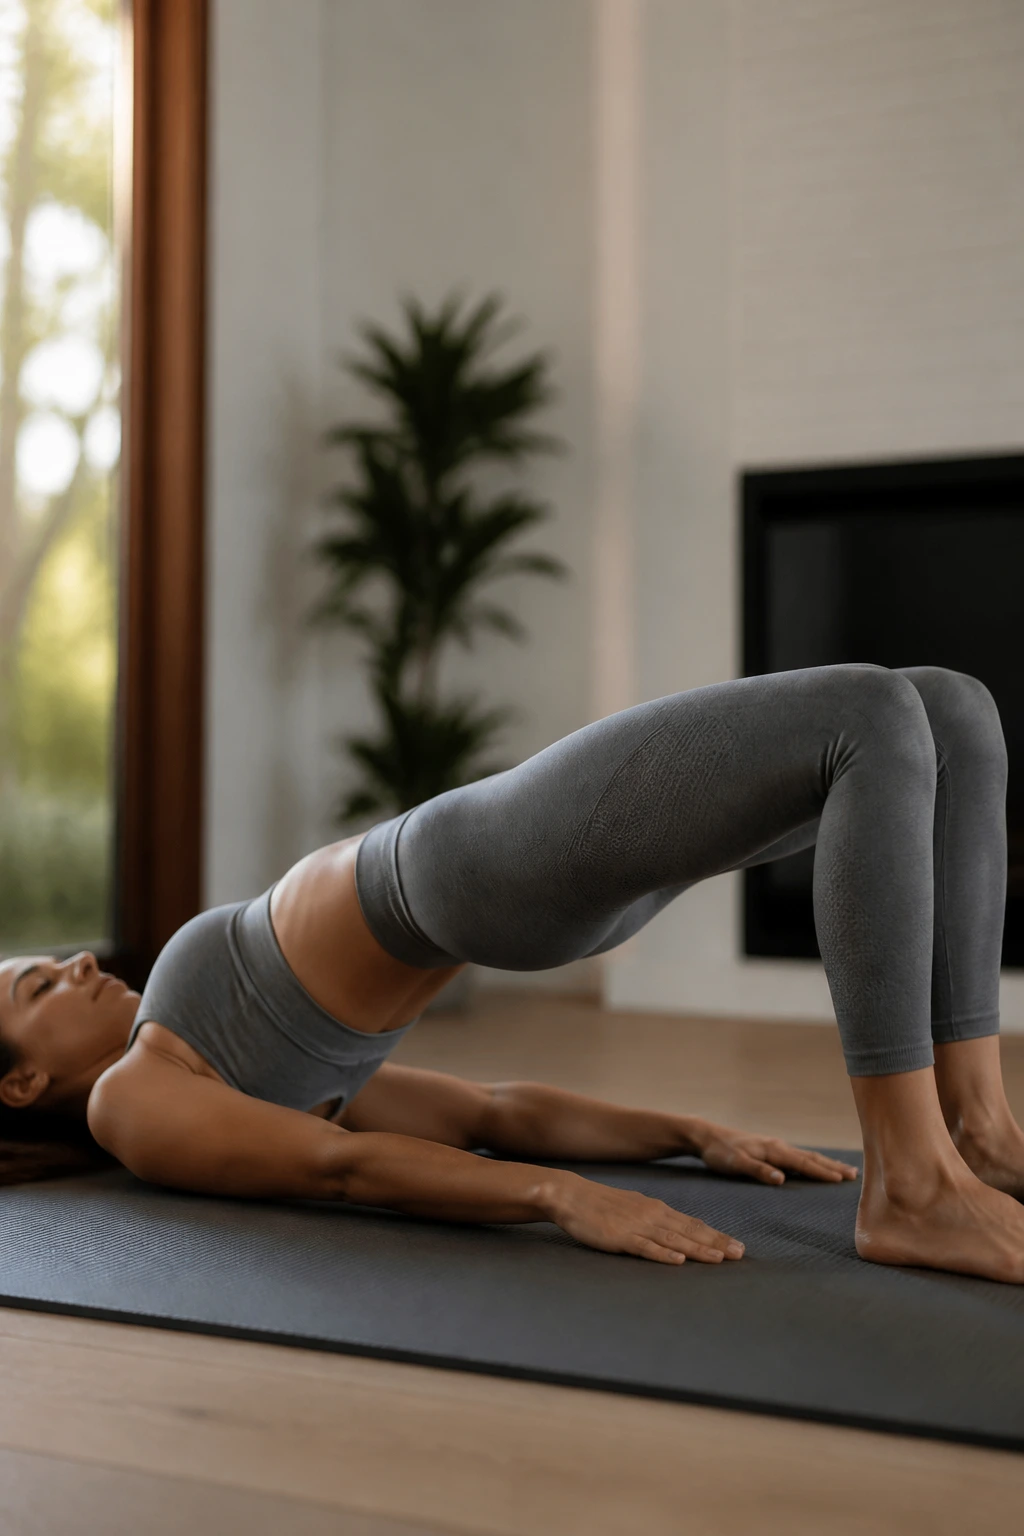
Floor-based work is the secret weapon for posterior chain development. The glute bridge isolates the muscles that are often underutilized in everyday life, especially for those who spend hours sitting at a desk. You are looking for a complete contraction of the glutes at the top of the movement, not an arch in your lower back.
The Mind-Muscle Connection
Lie on your back with your knees bent and feet flat on the floor, about hip-width apart. As you lift your hips, visualize driving your heels through the floor. It helps to tuck your pelvis slightly—pulling your belly button toward your spine—to ensure the glutes are doing the heavy lifting rather than your lumbar spine.
Refinements for Maximum Burn
- Pause at the top: Squeeze your glutes for two full seconds before lowering.
- Do not overextend: You do not need to push your hips to the ceiling; aim for a straight line from your shoulders to your knees.
- To make it harder, place a small weight (like a heavy book or a water bottle) on your hips.
4. Bulgarian Split Squats
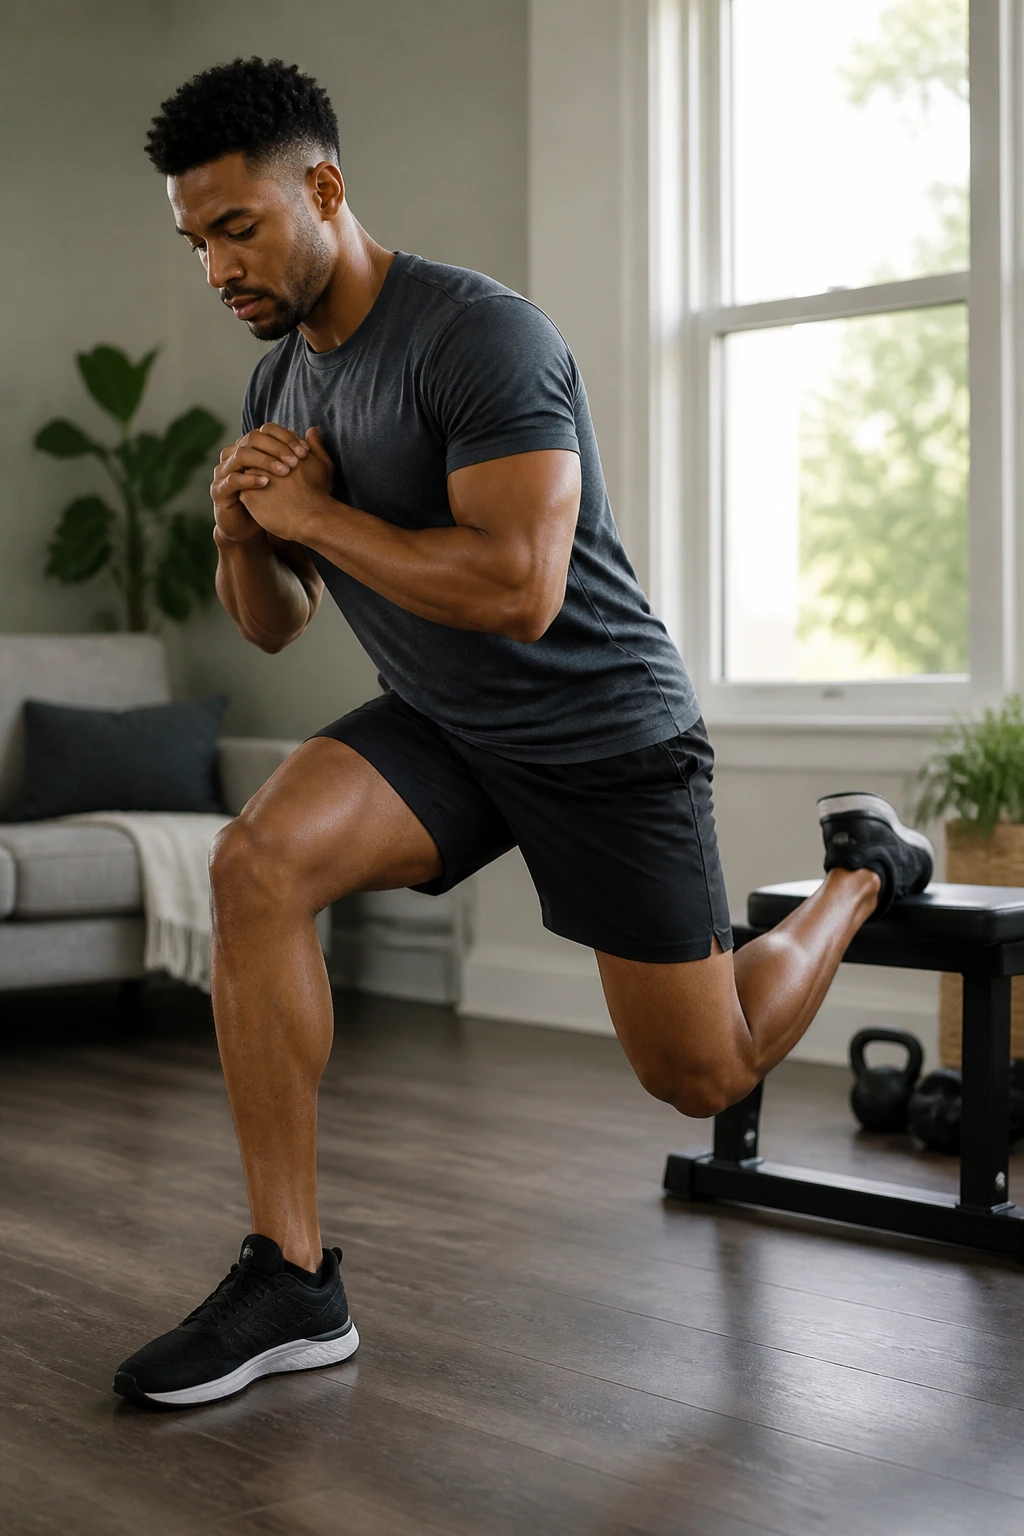
If there is one exercise that makes people hate (and love) home workouts, it is this one. It is a unilateral nightmare in the best way possible. By elevating your rear foot, you place almost all the load on the front leg, effectively doubling the work your quads and glutes have to do. It forces stability and reveals imbalances between your left and right sides.
The Setup
Find a chair, sofa, or sturdy coffee table. Place the top of your back foot on it. Step your front foot out far enough so that when you descend, your front knee doesn’t drift way past your toes. If you feel like you are tipping over, widen your stance slightly.
Execution Strategy
- Keep your weight in your front heel.
- Lean your torso slightly forward to bias the glutes, or stay upright to bias the quads.
- If balance is an issue, perform these near a wall and keep one hand lightly touching it for stability. This isn’t cheating; it’s a way to ensure you can reach muscle failure without falling over.
5. Lateral Lunges
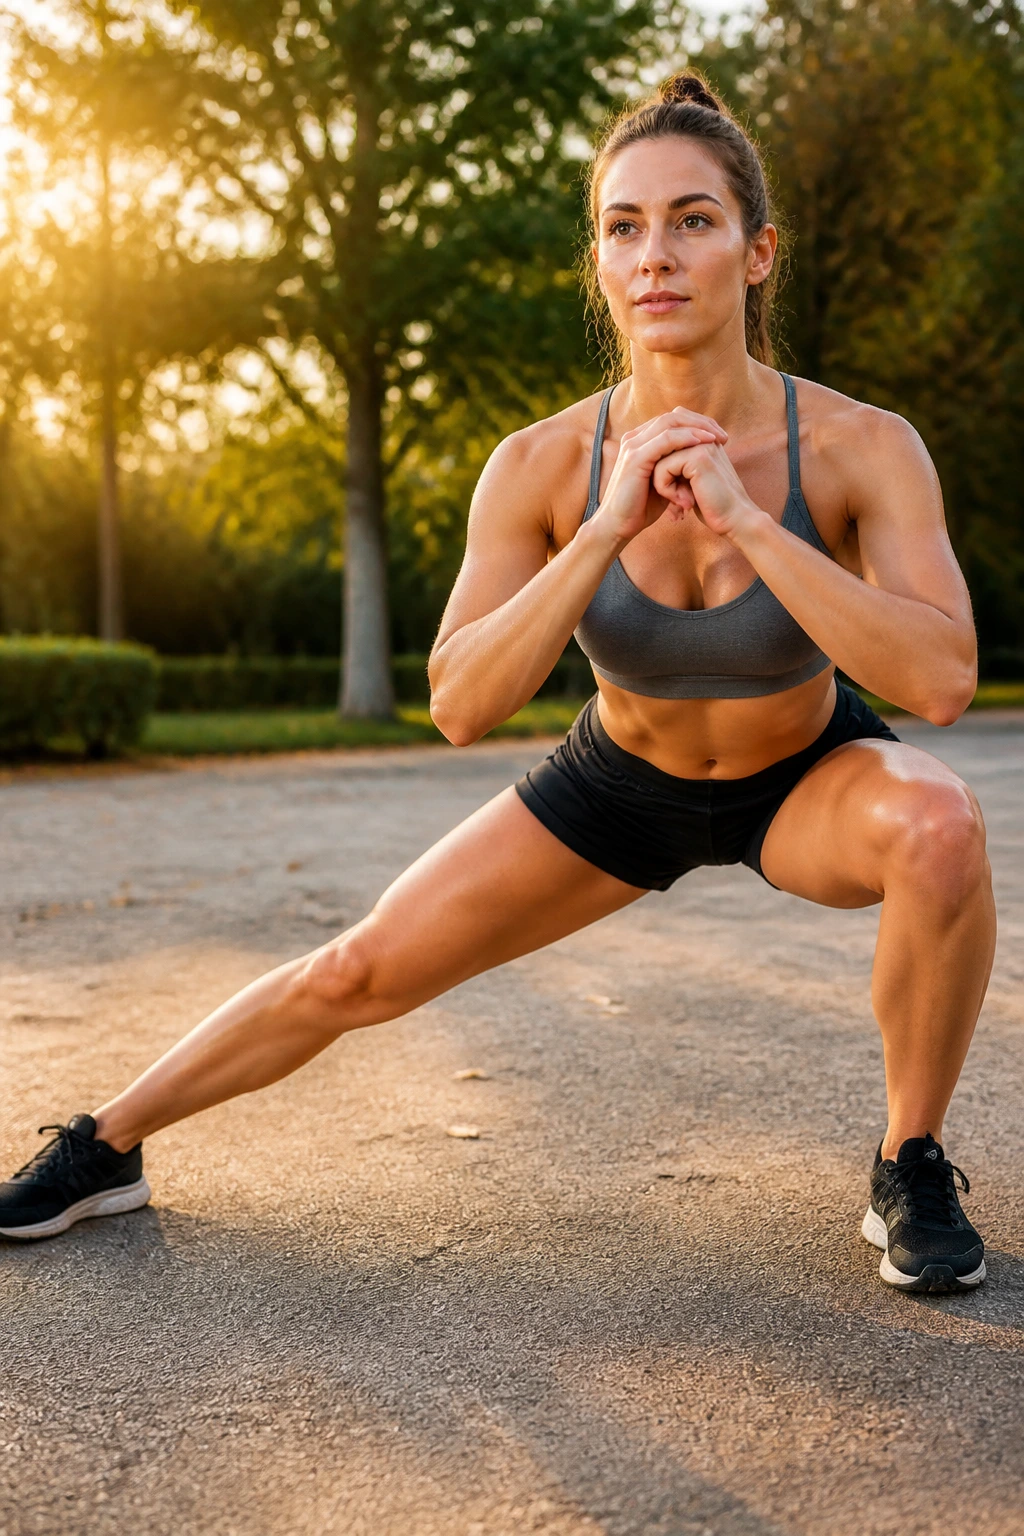
We spend most of our lives moving in the sagittal plane—straight forward and backward. But real-world movement involves side-to-side action. Lateral lunges train your inner and outer thighs (adductors and abductors) while teaching your hips to stabilize under tension in a different plane of motion.
Anatomy of the Movement
Start with a wide stance, much wider than shoulder-width. Shift your weight completely to your right leg, bending the right knee while keeping the left leg perfectly straight. Your hips should go back and down. Push off the right foot to return to the starting position, then shift to the left.
Common Pitfalls to Avoid
- Don’t let the bent knee collapse inward.
- Keep the straight leg firmly planted; don’t lift your heel off the ground.
- Keep your chest proud. If you find yourself slouching, you are likely rushing the movement.
6. Calf Raises
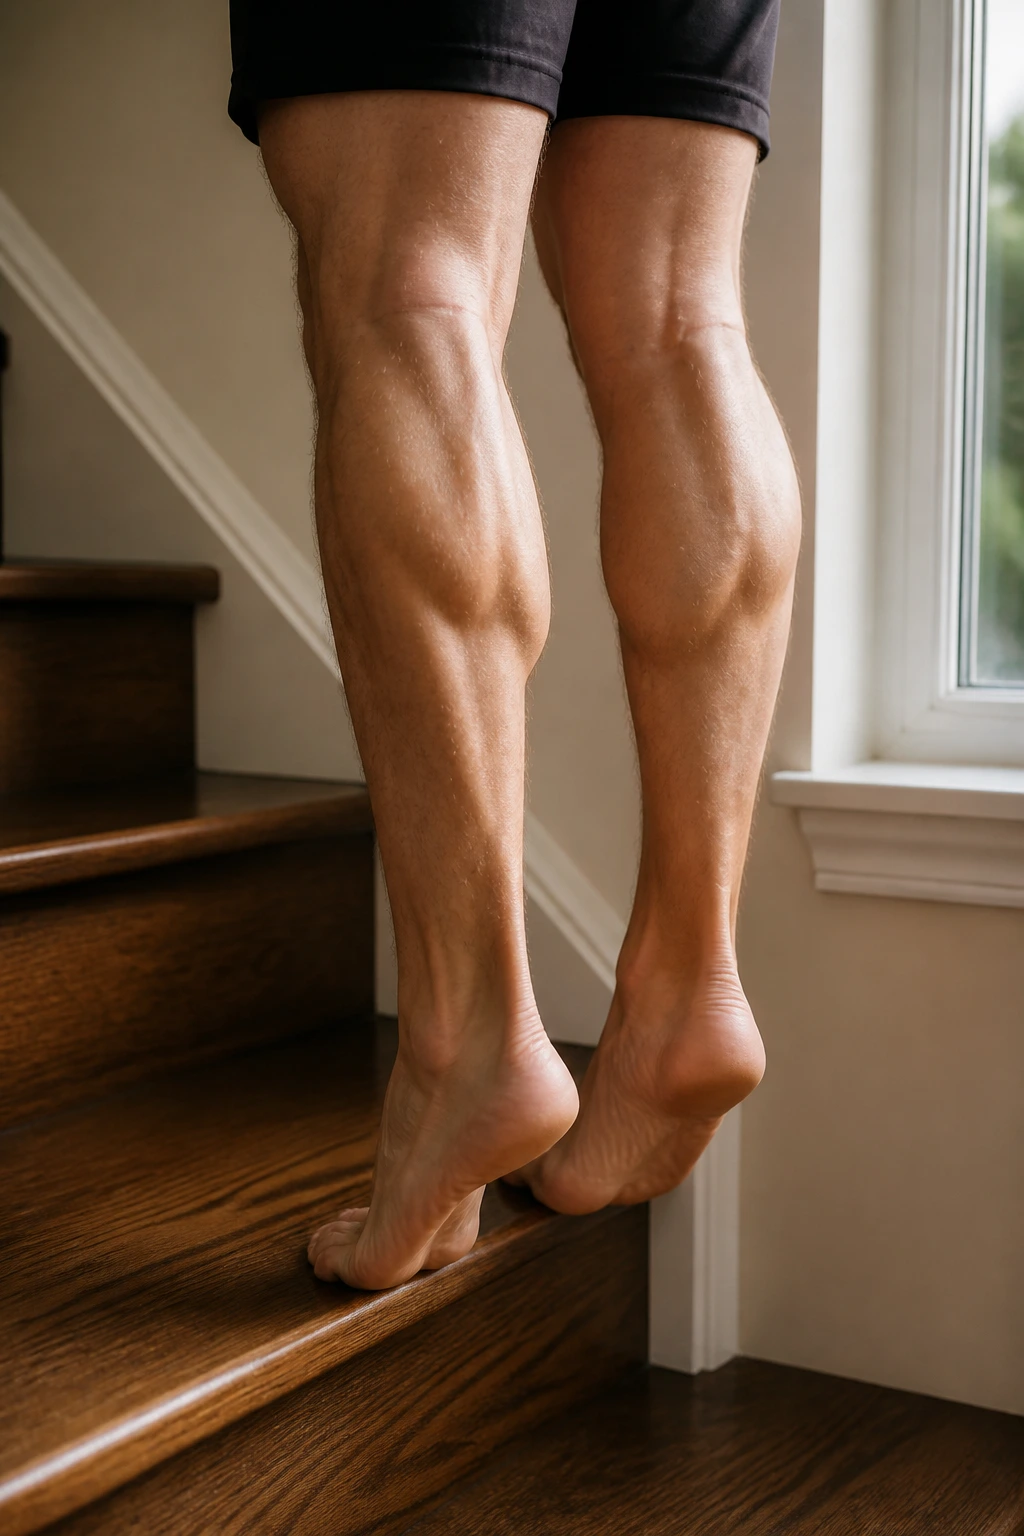
The calves are stubborn muscles. They are built for endurance because we use them every time we take a step, so they require high volume and a solid range of motion to actually grow or get stronger. Doing these at home is simple, but most people do them too fast, essentially bouncing through the reps.
How to Do Them Right
Find a step or the edge of a sturdy book. Stand with the balls of your feet on the edge, heels hanging off. Lower your heels until you feel a deep stretch in your calf. Pause. Then, drive up onto your tiptoes.
Why Variation Matters
Perform two sets with toes pointed straight, two sets with toes pointed out, and two sets with toes pointed in. This slight shift changes which head of the calf muscle (the gastrocnemius or the soleus) gets the most emphasis. It sounds subtle, but over time, it makes a significant difference in muscle definition.
7. Sumo Squats
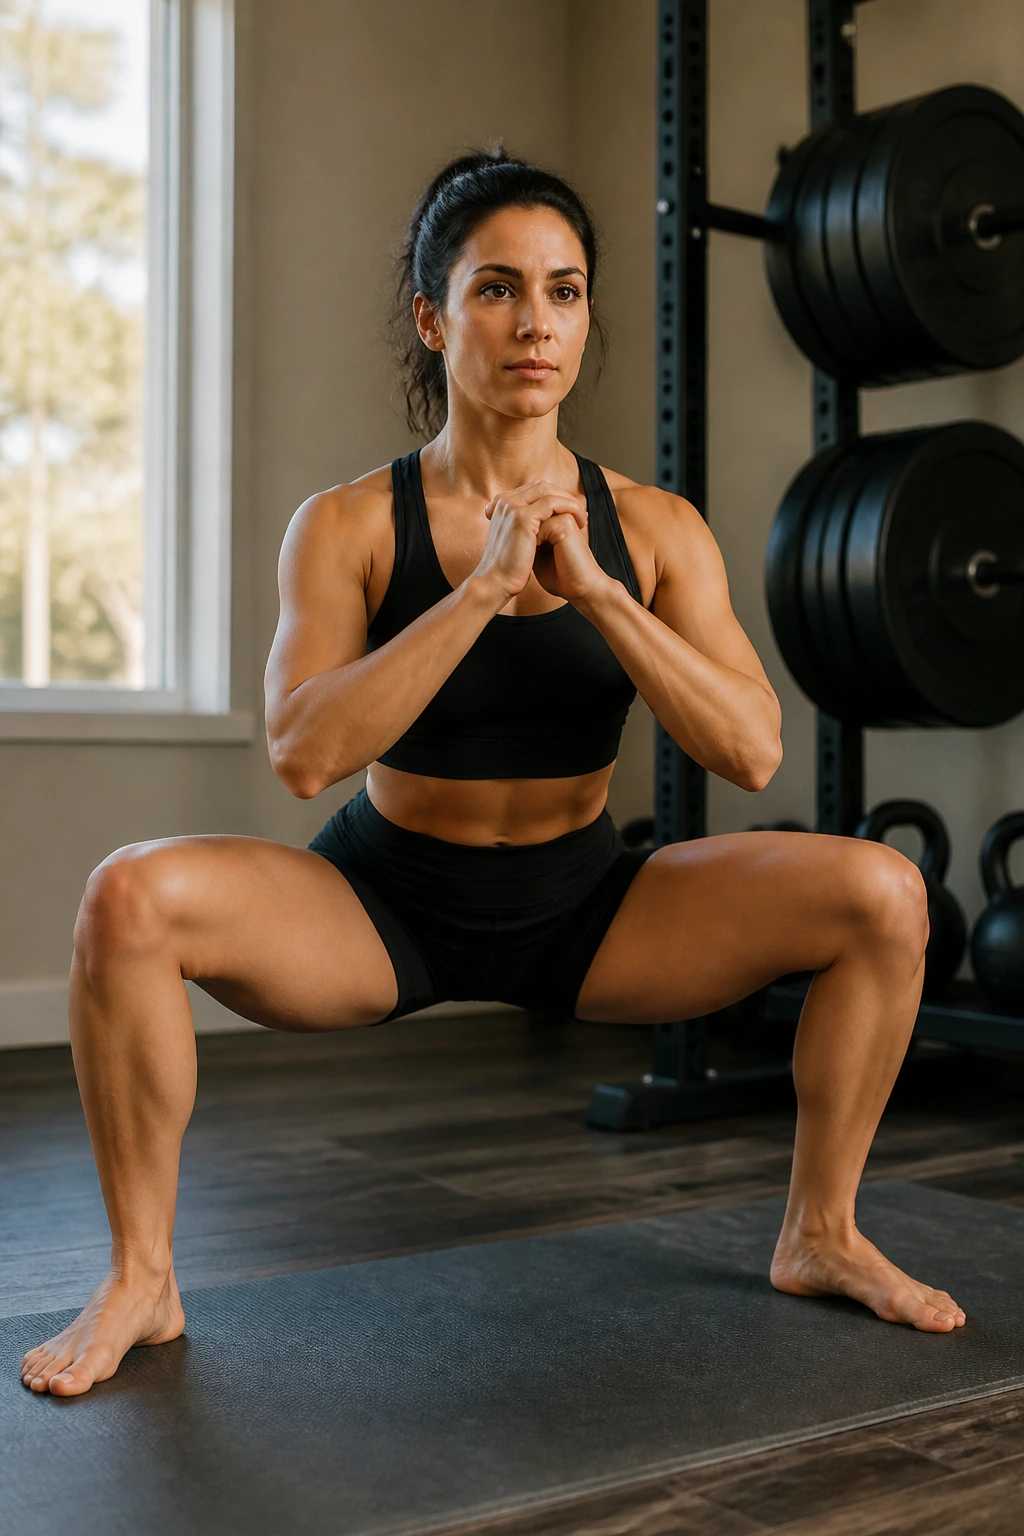
The wide stance of a sumo squat shifts the emphasis away from the outer quads and targets the adductors—those muscles on the inside of your thighs that are notoriously hard to hit. This is also a fantastic movement for opening up tight hips.
Establishing the Base
Take a stance wider than shoulder-width and turn your toes out at a 45-degree angle. This orientation dictates where your knees go; they must track over your toes. If you keep your feet too close, your knees will feel restricted.
Performing the Reps
Descend with control, keeping your torso as upright as possible. You should feel a distinct stretch in your inner thighs. Drive through your heels to stand back up. You can add intensity by holding a household object like a gallon jug of water against your chest to provide some extra resistance.
8. Single-Leg Step-Ups
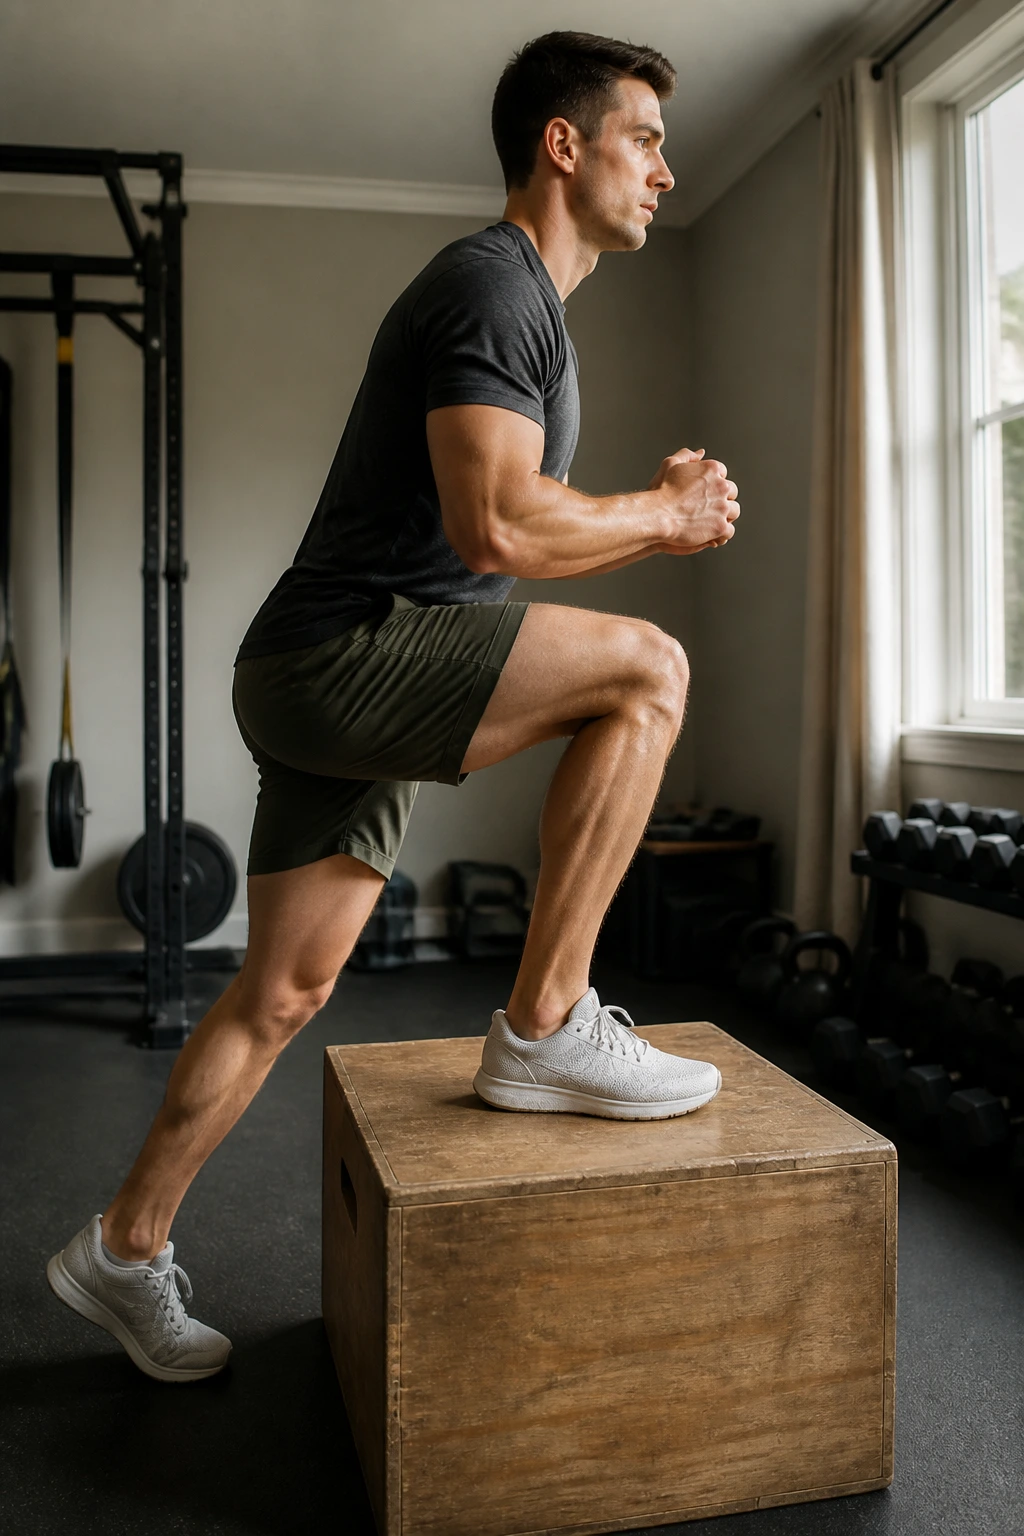
This is a functional strength move that mimics climbing stairs or navigating uneven terrain. Using a sturdy chair or a sturdy box is essential here. The key is to rely entirely on the leg that is on the surface, preventing the “back” leg from helping you cheat by pushing off the floor.
The Focus
- Place your full foot on the platform.
- Lean your torso slightly forward as you stand up.
- Slowly lower yourself back down—the eccentric (lowering) phase is where the real strength is built. Do not just drop down; resist gravity on the way back to the floor.
Note: If your knee tends to wobble, focus on gripping the platform with your toes and engaging your core. A strong, braced core often stabilizes the entire leg movement.
9. Single-Leg Romanian Deadlifts
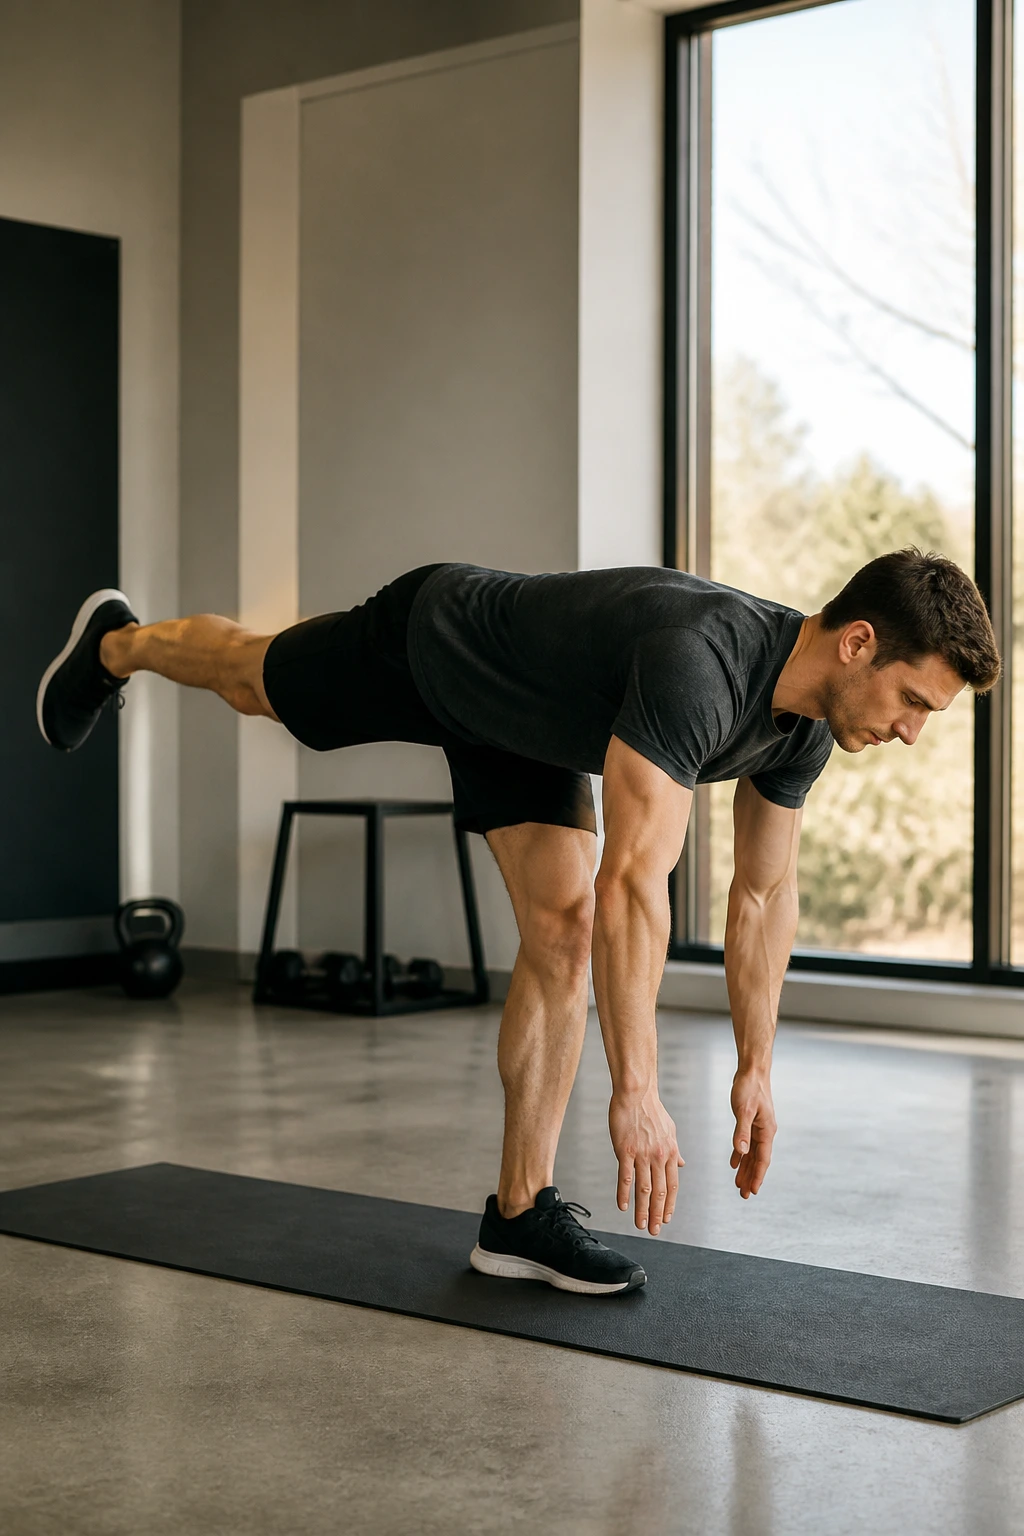
This is arguably the king of posterior chain stability. It targets the hamstrings, glutes, and lower back, while simultaneously testing your balance. You are hinging at the hips, not squatting.
Mastering the Hinge
Stand on your right leg with a slight bend in the knee. Hinge at your hips, sending your left leg straight back behind you as you lower your torso toward the ground. Your body should form a “T” shape at the bottom. Return to the starting position by engaging your right glute.
Why This Is Different
Unlike a regular deadlift, you have no external weight to pull you down, so you have to move slowly and with intention. If you lose your balance, tap your back toe to the floor, reset, and keep going. Do not rush; this is a precision movement.
10. Cossack Squats
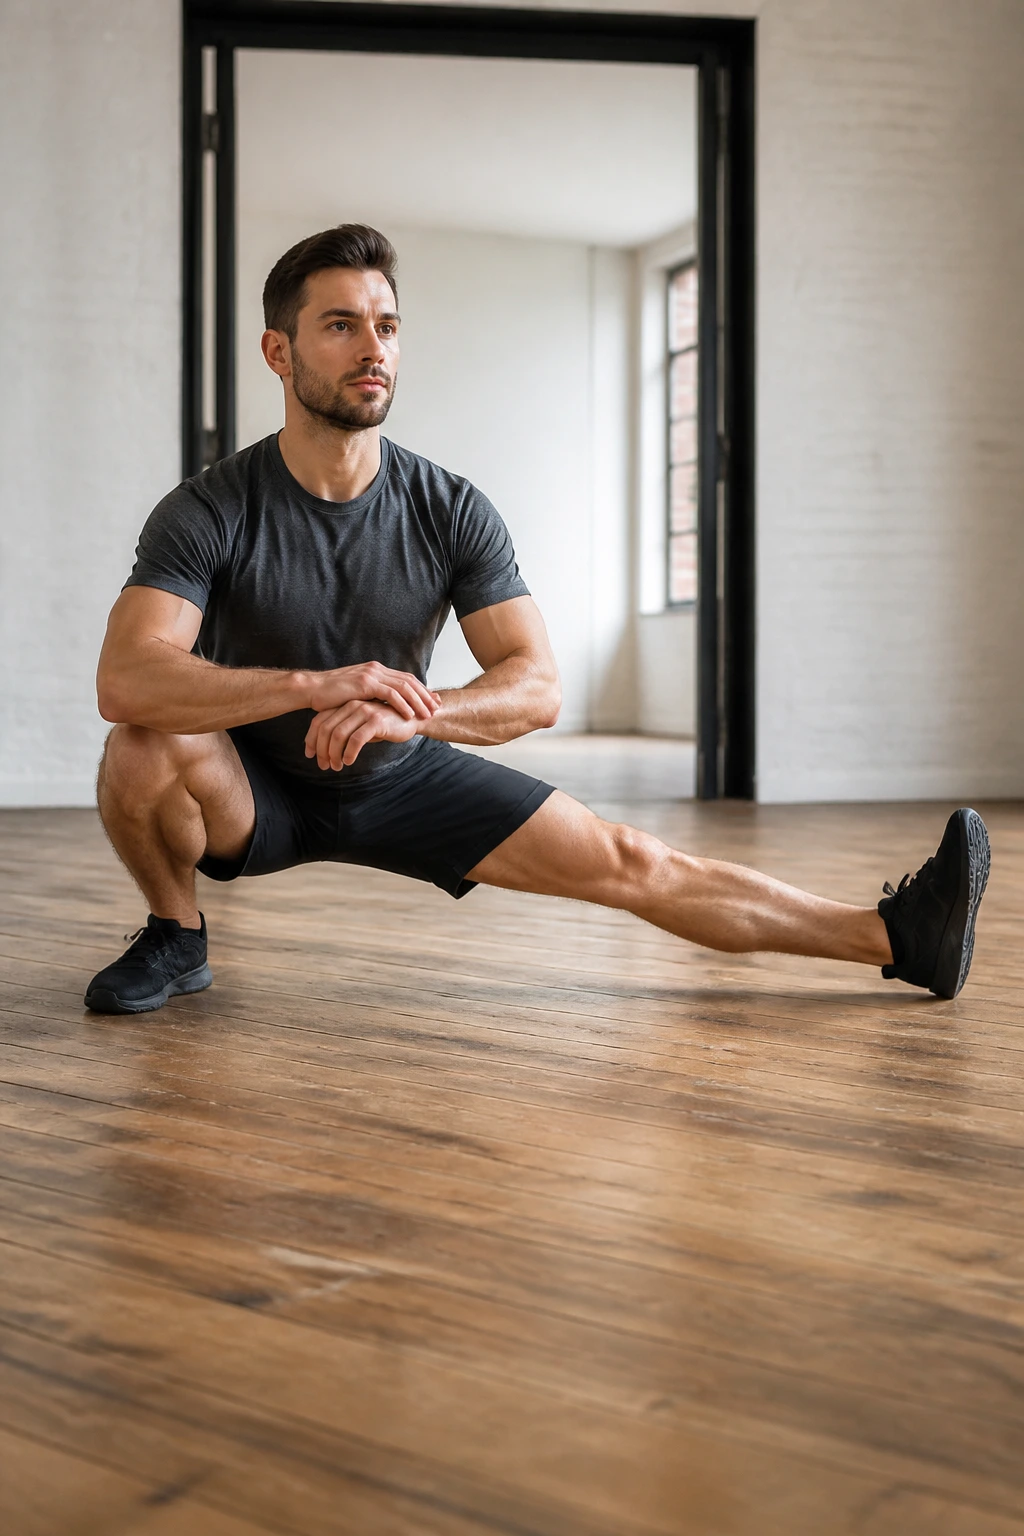
If you want to combine mobility training with strength, the Cossack squat is your go-to. It is essentially a side lunge taken to the absolute extreme. It requires decent ankle and hip flexibility, so be patient with yourself the first time you attempt this.
The Movement Pattern
Start in a wide stance. Shift your weight to one side, descending into a deep squat on that leg while keeping the other leg fully extended with the heel on the floor and toes pointing up. The goal is to sit as low as possible on the bent leg.
Who Is This For?
This is perfect for anyone who feels “stiff” or immobile. It stretches the groin and challenges your balance on the bottom position. If you can’t get low, hold onto a doorframe for support as you practice the depth.
11. Pistol Squats
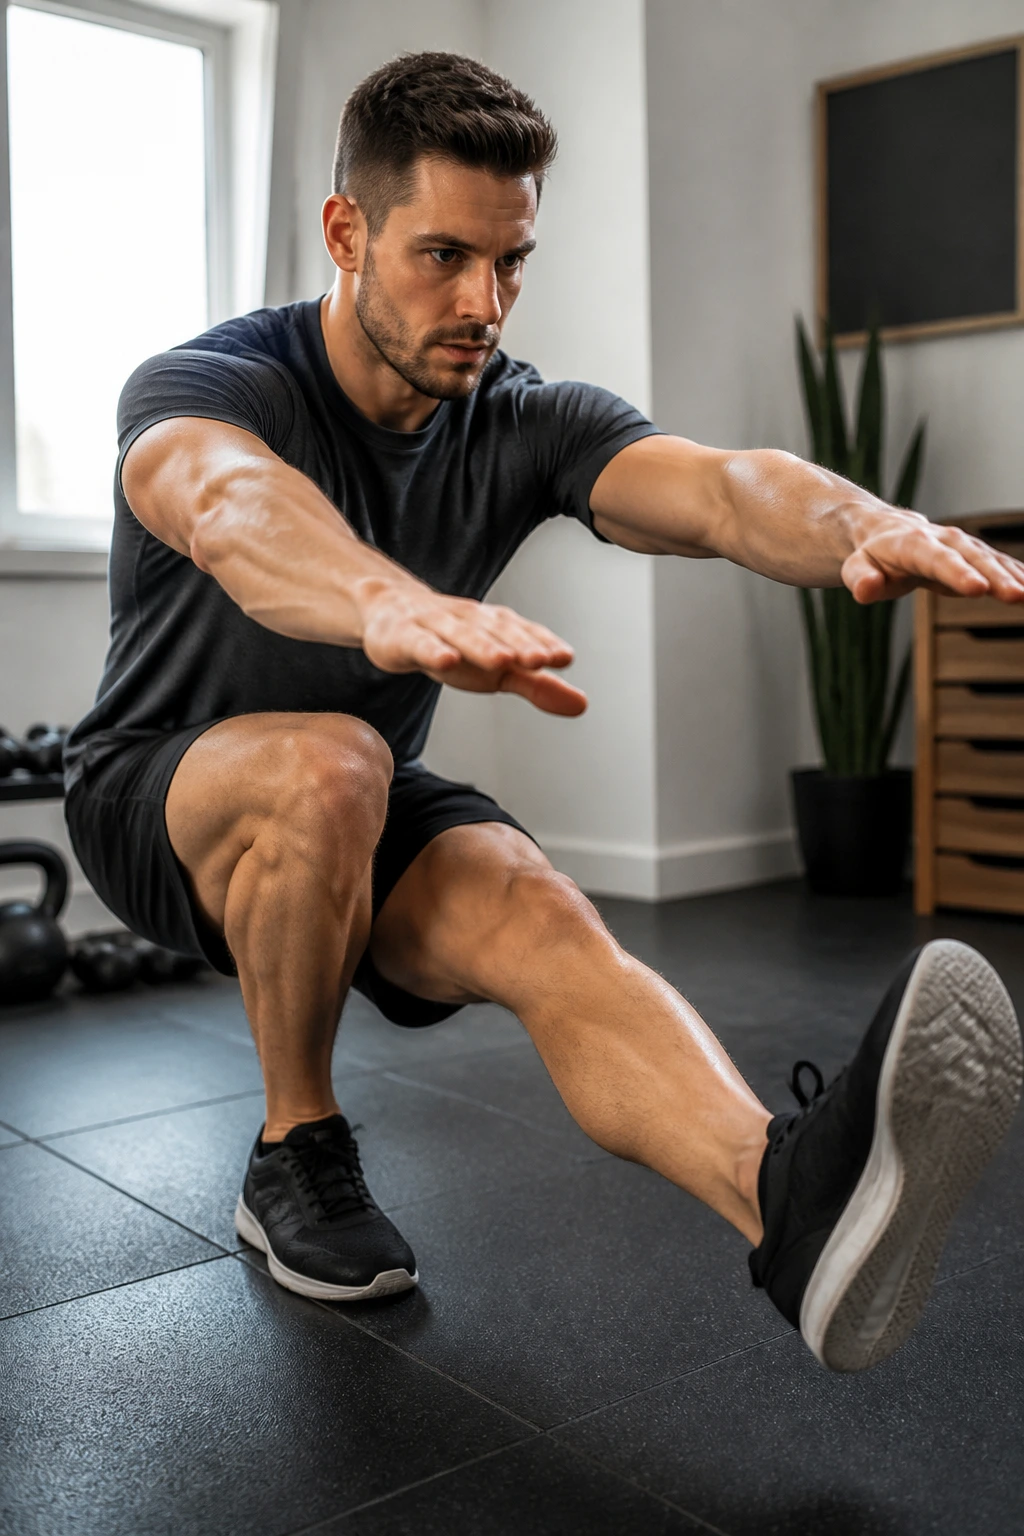
The pistol squat—a one-legged squat—is the ultimate test of lower-body strength and skill. Many people cannot do this right away, and that is completely normal. It requires a specific combination of quad strength, balance, and ankle mobility.
How to Practice
Do not force a full range of motion if you don’t have it. Start by sitting down onto a chair on one leg and standing back up. As you get stronger, reduce the height of the chair (perhaps by stacking cushions) until you can perform the full squat without any assistance.
Key Technique
Reach your arms straight out in front of you for counter-balance. Keep your non-working leg straight out in front of your body as you descend. It is a humbling movement, but mastering it is a major accomplishment.
12. Wall Sits
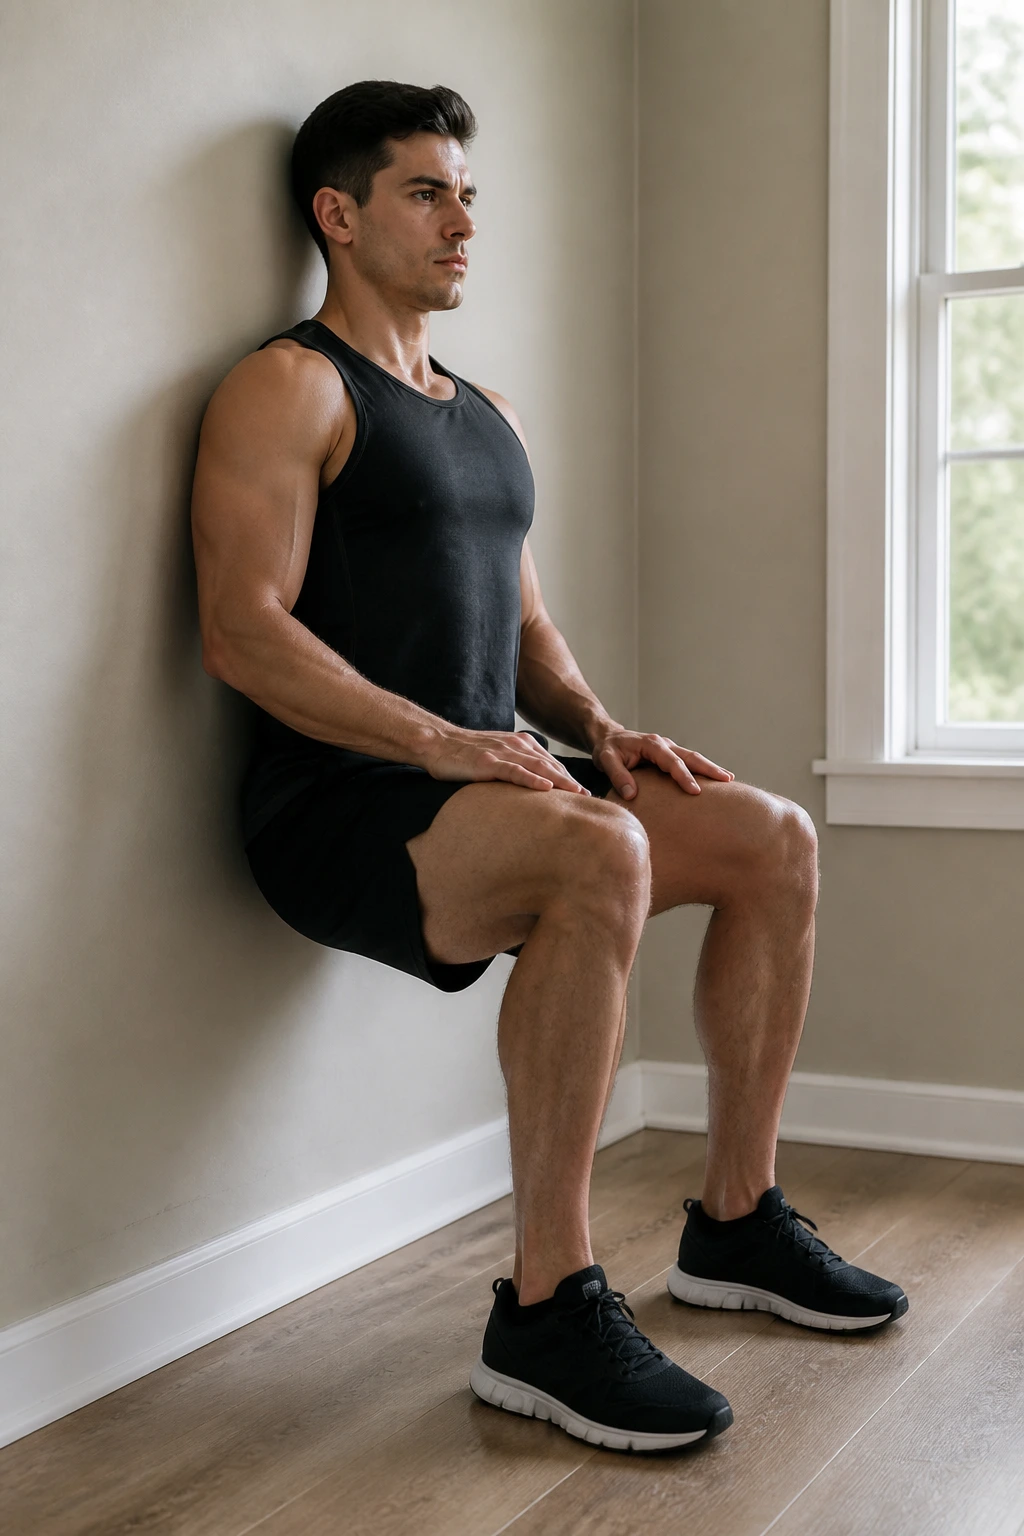
Sometimes the simplest ideas are the most painful. Wall sits are an isometric exercise, meaning there is no movement at the joint, which allows for incredible time under tension. This is the definition of “muscle burning” fatigue.
The Setup
Lean your back against a wall and slide down until your knees are bent at a 90-degree angle. Your feet should be hip-width apart. Press your lower back into the wall; do not let it arch.
Endurance Challenge
- Hold for 30 seconds to start.
- Try to add 5 seconds every time you perform this workout.
- If your legs aren’t shaking by the end, you aren’t holding it long enough. This builds mental toughness just as much as physical endurance.
13. Curtsy Lunges
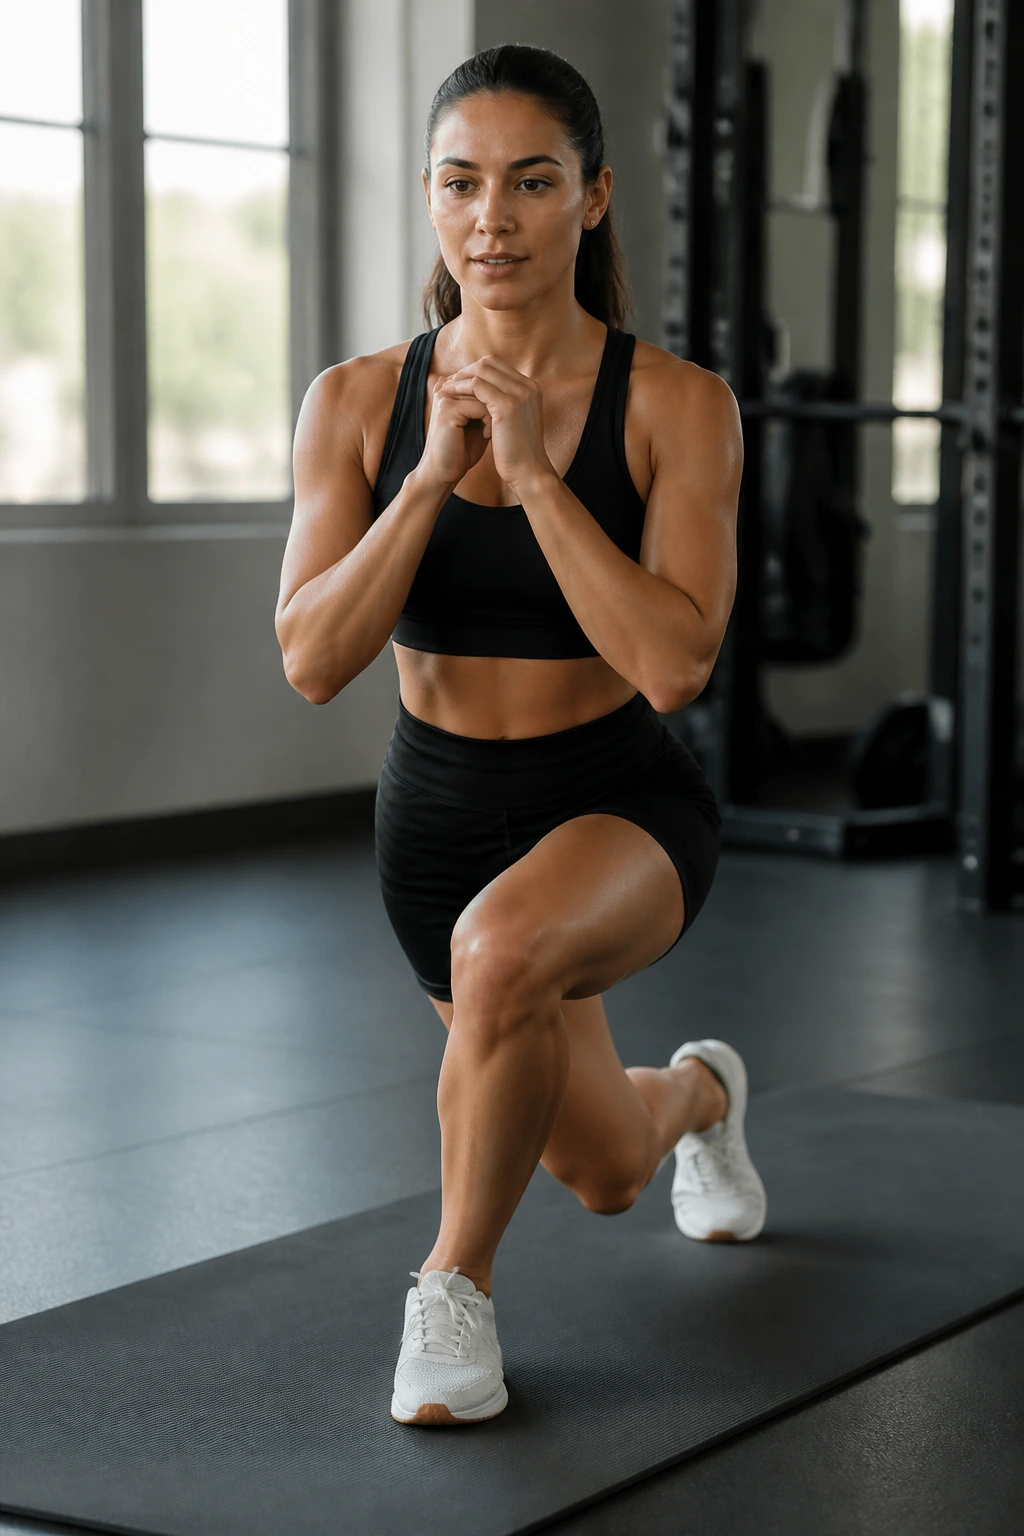
This variation targets the glute medius—a muscle on the side of your hip that is crucial for stability. By crossing your back leg behind the front leg, you force the muscles on the outer hip to fire in a way that standard lunges and squats just don’t capture.
Why This Works
The cross-over motion creates a unique stretch and tension pattern. It feels awkward at first, but that is exactly why it is so effective. It forces you to engage your stabilizing muscles, which often get neglected in standard straight-line movements.
Proper Alignment
- Step your right foot back and across behind your left leg.
- Lower your hips as if you were bowing or curtsying.
- Keep your hips facing forward throughout the movement; don’t twist your torso to follow the back foot.
14. Jump Squats
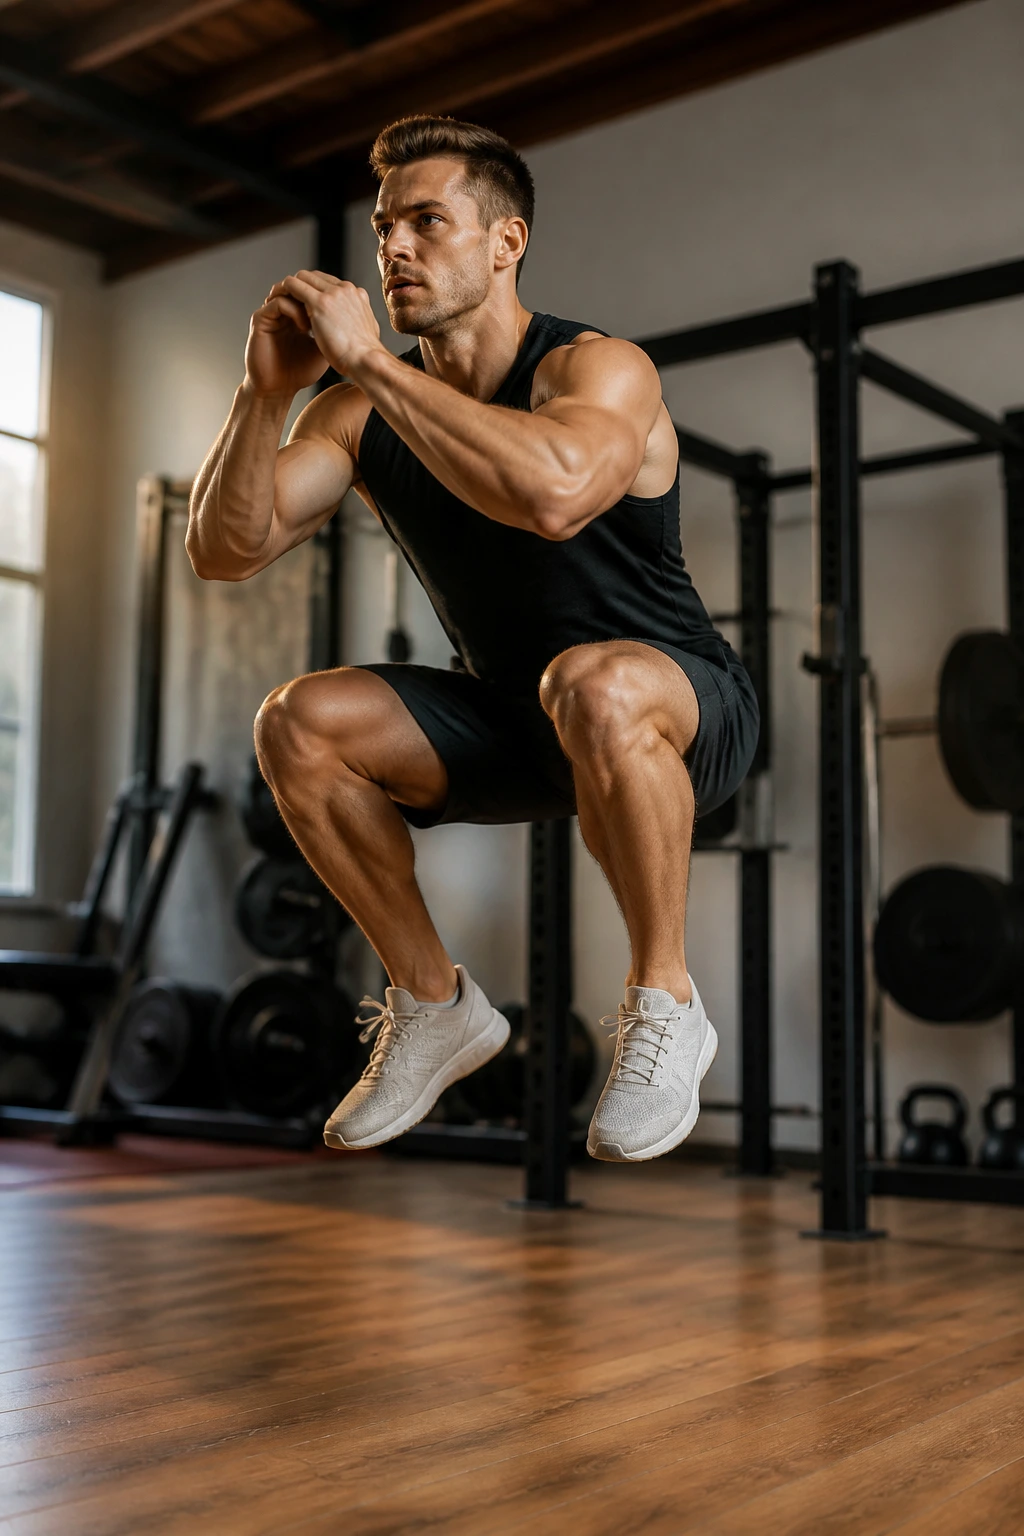
We have focused a lot on strength and stability; now it is time for explosive power. Jump squats get your heart rate up and train your fast-twitch muscle fibers. This is about power output, not just muscle fatigue.
Explosive Execution
Perform a standard air squat, but as you come up, explode through your heels to jump off the ground. Land softly—do not let your feet slap the floor. Use your legs to absorb the landing, immediately sinking into the next squat.
Safety Warning
If you have bad knees or are new to high-impact movements, keep the jumps small. You do not need to leap three feet in the air to reap the benefits. The focus should be on the landing mechanics; keep those knees stable and aligned.
15. Single-Leg Glute Bridges
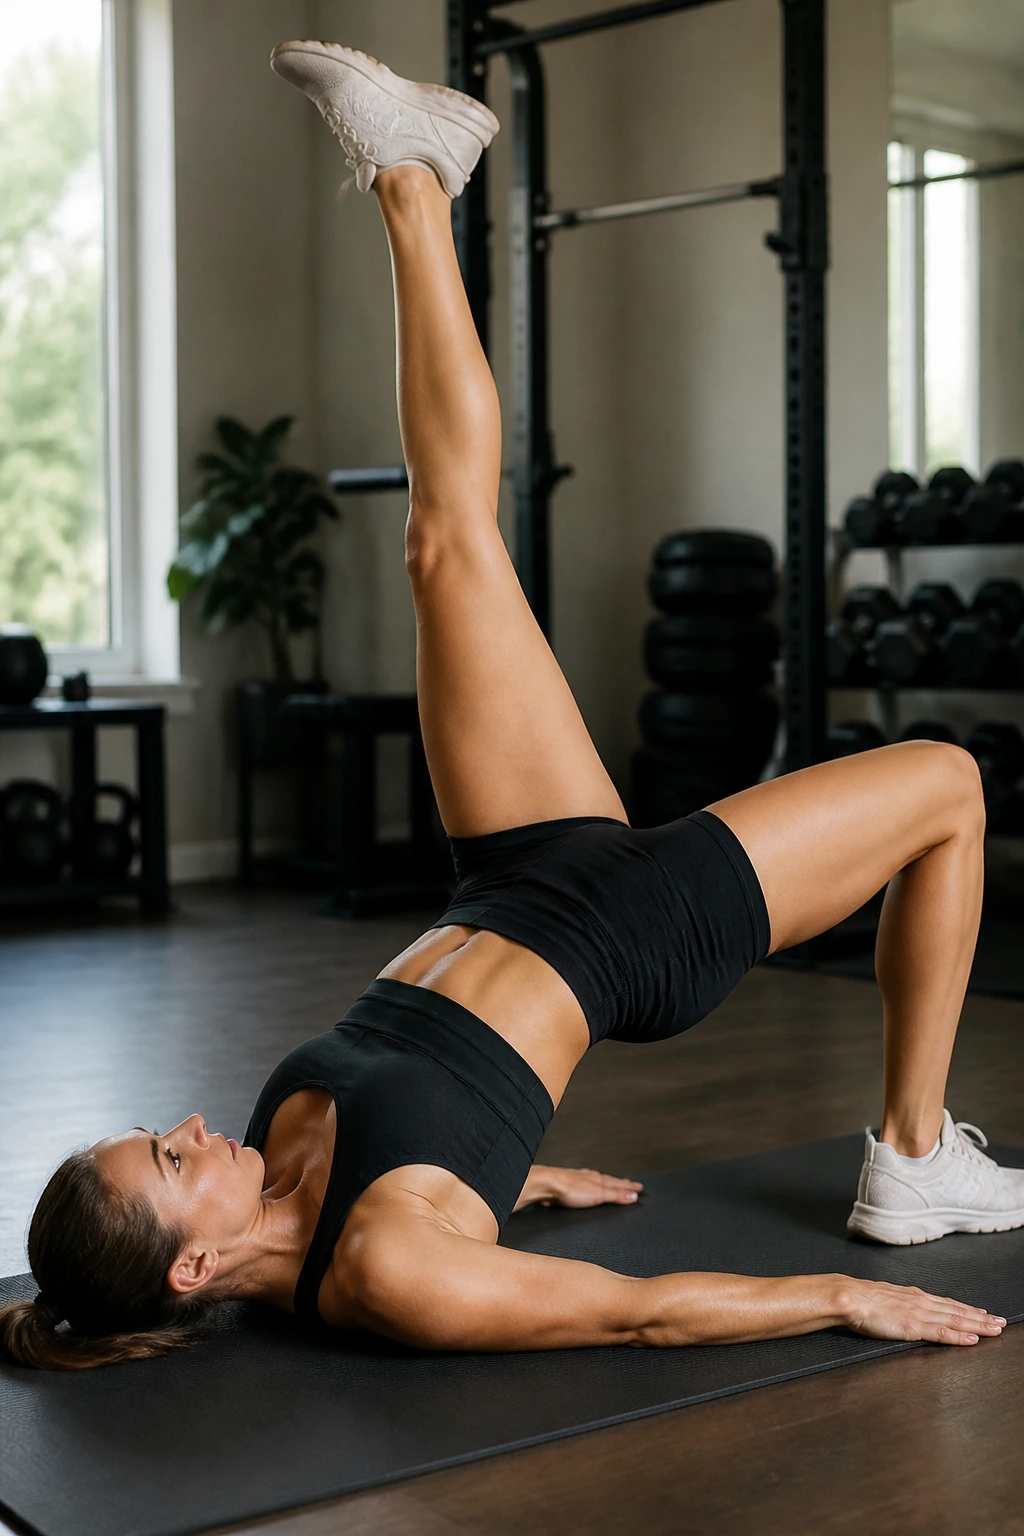
Once you have mastered the standard two-legged glute bridge, it is time to progress. The single-leg variation doubles the load on the working glute and adds a core-stability challenge because your hips will naturally want to tilt toward the side of the leg that is lifted.
The Control Factor
Lie on your back, one knee bent, foot flat. Extend the other leg straight into the air. Push through the heel of the bent leg to lift your hips. The goal is to keep your hips level throughout the entire lift. Do not let your pelvis dip on the side of the straight leg.
Why This Wins
It eliminates any “dominant side” assistance. If your right glute is stronger than your left, you will notice it immediately when you do the left side. This is excellent for correcting imbalances.
16. Skater Hops
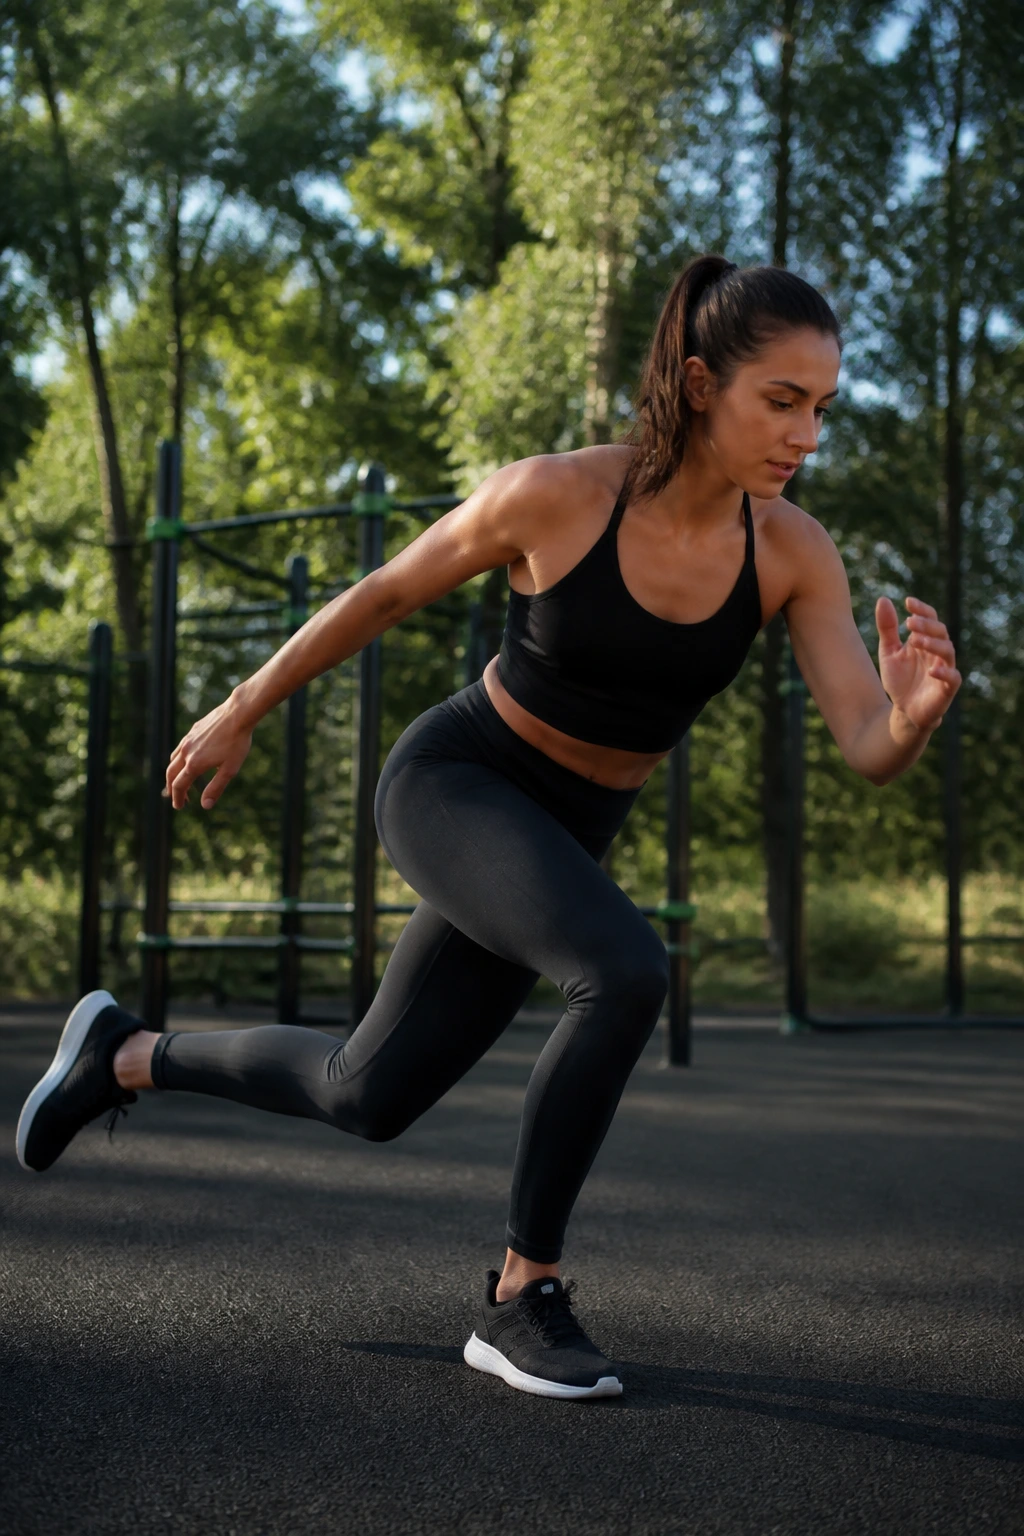
Skater hops are excellent for agility and lateral power. This movement simulates the side-to-side push-off used in ice skating. It is a fantastic burner for the glutes and improves your proprioception—your body’s ability to know where it is in space.
Mastering the Motion
Hop to the right, landing on your right foot with a slight bend in the knee. Instantly bound to the left, landing on your left foot. You want to focus on a wide, controlled jump rather than a frantic, short-distance shuffle. The further you jump side-to-side, the more muscle fiber you recruit.
The Stability Component
When you land, try to stick the landing for a split second before hopping again. This pause builds control and prevents you from just using momentum to flail from side to side.
17. Frog Pumps
If you want to target the glutes with almost zero lower-back involvement, frog pumps are the solution. The setup is slightly unconventional, but once you feel the squeeze, you will understand why glute-focused trainers love this move.
The Setup
Lie on your back. Bring the soles of your feet together, knees out to the sides (like a butterfly stretch position). Drive your feet together and squeeze your glutes to lift your hips off the ground.
Focus Area
You will feel this directly in the glutes, specifically the upper glutes near the lower back. Because your hips are externally rotated, the hamstrings are less involved, putting the full workload on the glutes. High reps are the name of the game here—aim for sets of 20 to 30.
18. Duck Walks
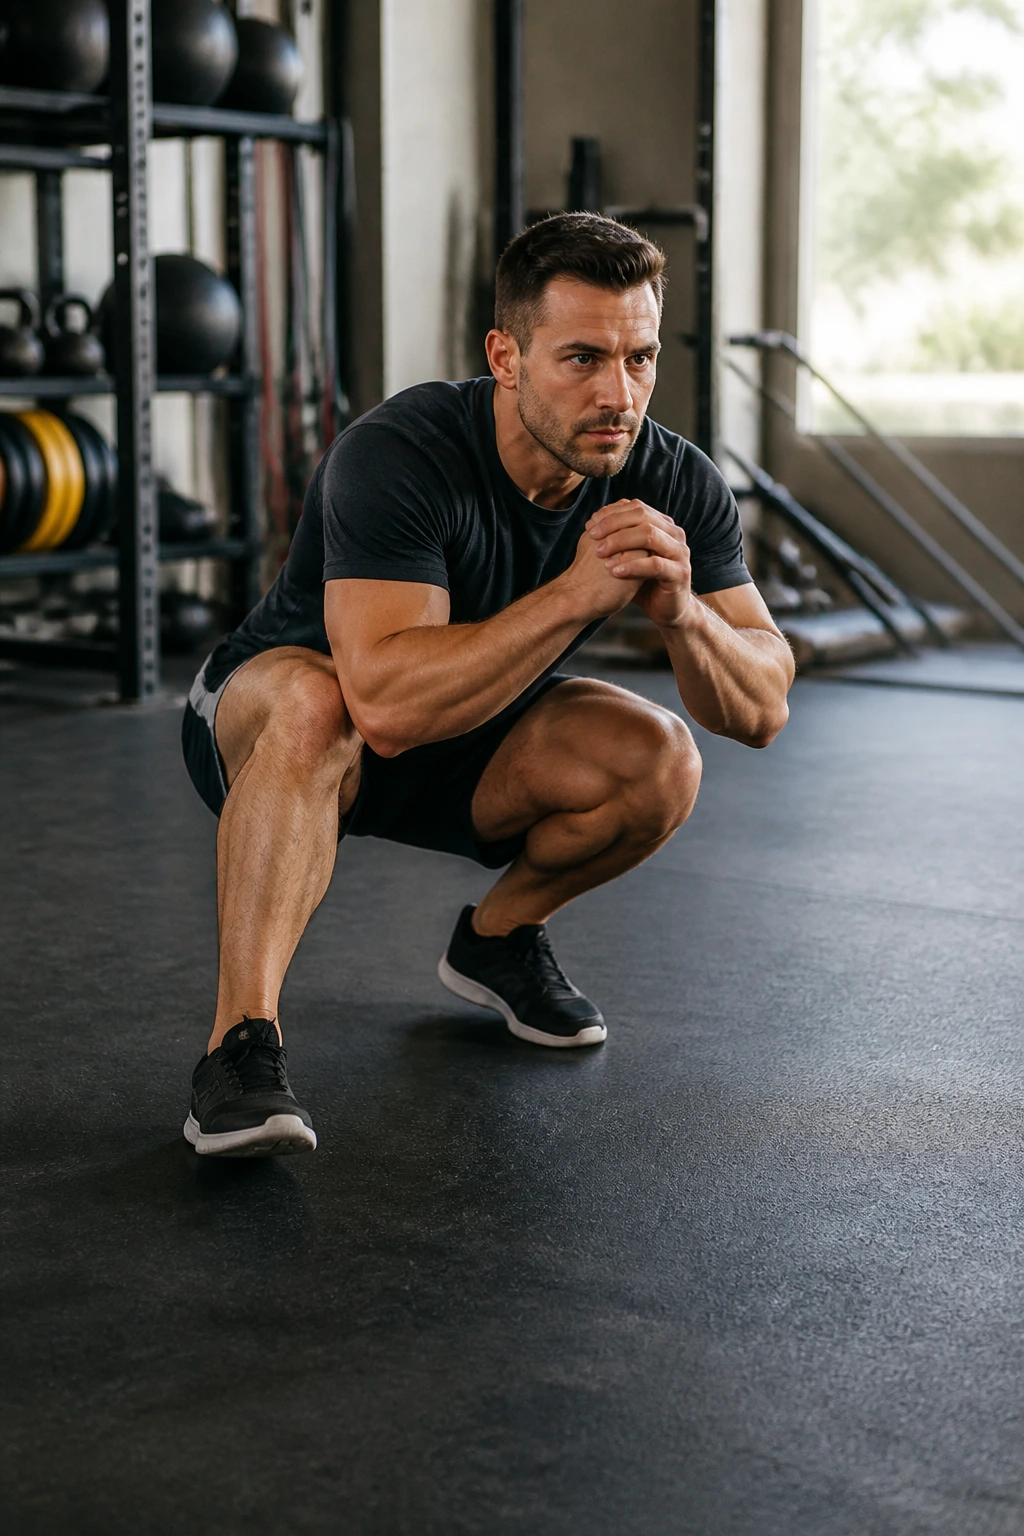
This is an endurance finisher. Duck walks force you to stay in the “danger zone”—the bottom of a squat—for an extended period. It builds incredible stamina in the quads and glutes and tests your mental ability to keep moving when the burn becomes intense.
How to Move
Get into a deep squat position. Stay as low as possible. Take a step forward, then another, keeping your hips parallel to the floor the entire time. Do not rise out of the squat.
The Painful Reality
You will want to stand up. You will want to take shorter steps. Fight that urge. Staying low, even if you are moving very slowly, is where the muscle-building stimulus happens. Just 30 seconds of this will leave your legs feeling like lead, in the best possible way.
Final Thoughts
Building a powerful, capable lower body without a gym is entirely possible, provided you are willing to embrace the discomfort. The list of movements here covers every plane of motion, every major muscle group, and provides plenty of room for progression. You do not need to do all 18 of these in one session. Pick four or five, rotate them, and focus on mastering the technique before you worry about adding more reps.
Consistency beats intensity every time. It is better to do a solid 20-minute bodyweight leg session three times a week than to do one massive, exhausting workout that leaves you unable to walk for five days. Listen to your body, respect the recovery process, and remember that when it comes to bodyweight training, the only equipment you truly need is the discipline to keep showing up and pushing through that final rep when your legs start to shake.
