



Most people assume that building strong, defined legs requires a heavy barbell, a squat rack, and a monthly membership to a crowded commercial gym. I spent years in that environment, waiting for equipment and watching the clock, only to realize later that some of the most effective lower-body sessions of my life happened in a quiet bedroom with nothing more than a yoga mat and a sturdy chair. The truth is that your muscles do not know the difference between a hundred-pound metal plate and the intense, trembling fatigue induced by a high-rep set of bodyweight movements. Gravity does not charge a monthly fee, and it is available whenever you have ten minutes to spare.
When you remove the external weights, you are forced to confront your own biomechanics. You cannot rely on momentum or the physics of a machine to do the heavy lifting for you. You have to learn how to control your body through a full range of motion, which is arguably the most important skill for long-term health and athletic performance. This shift in focus—from moving weight to moving your body with precision—is where the real magic happens for your physique and your joint health.
The following movements are designed to be performed anywhere, from a living room to a hotel suite. They prioritize movement patterns that humans were designed for: squatting, hinging, lunging, and balancing. If you commit to these movements and focus on the technical nuances I have laid out, you will find that “no equipment” does not mean “no results.” It simply means a different, often more challenging, path to the same destination.
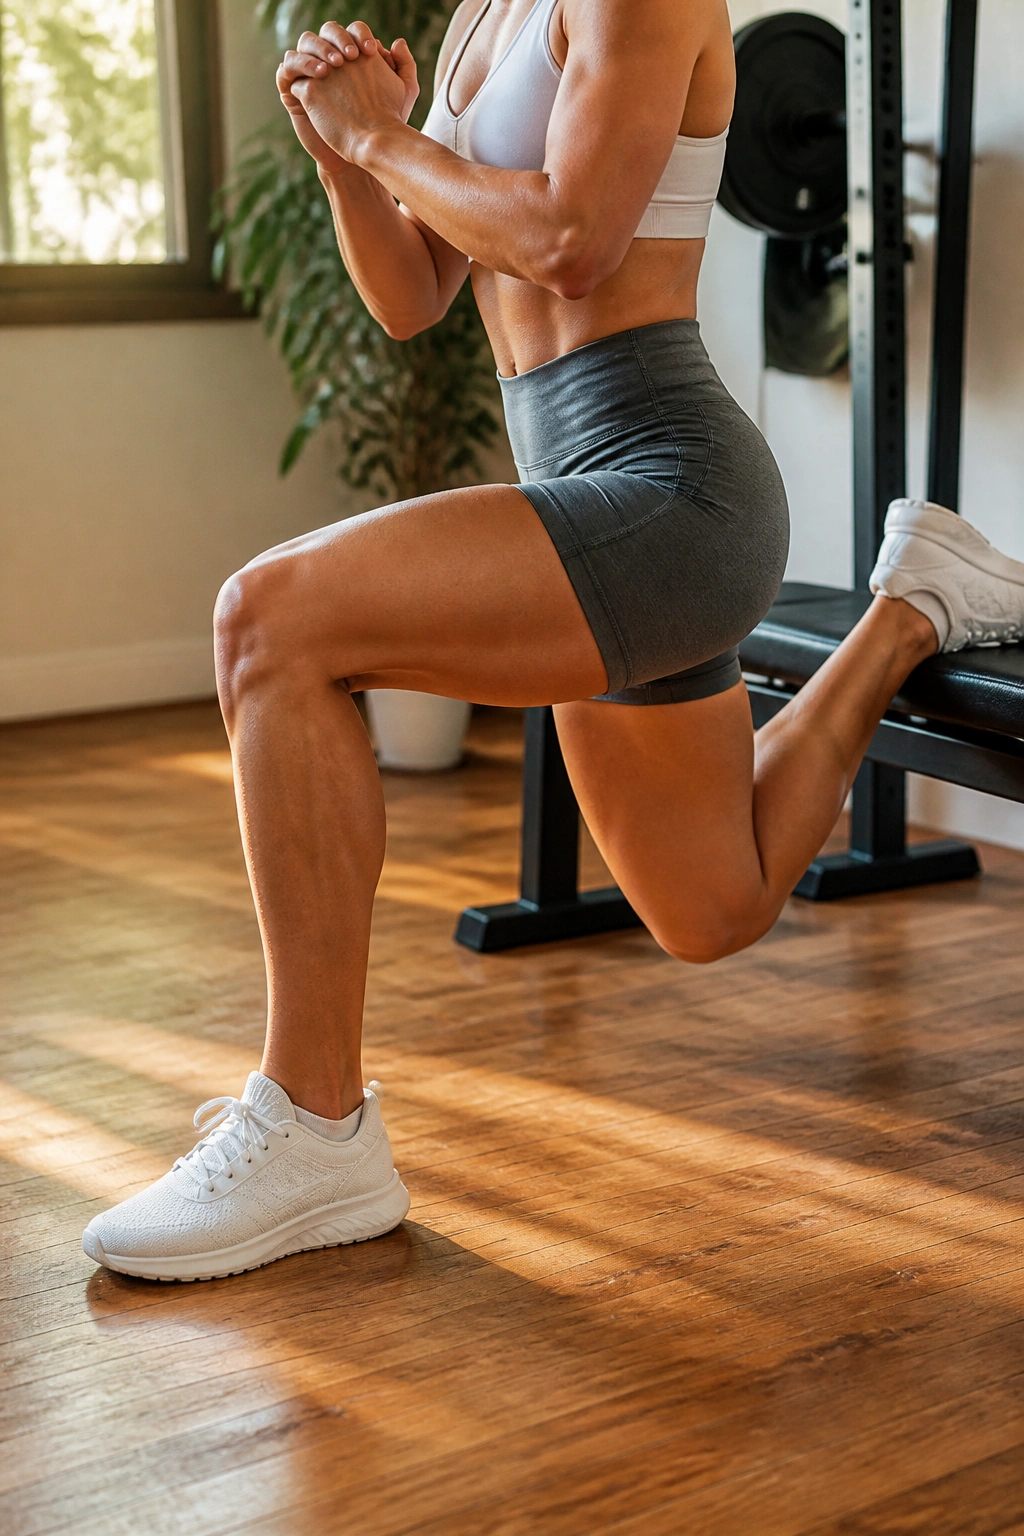
1. Bulgarian Split Squats
This is widely considered the king of unilateral leg training. If you have any sort of imbalance—where one leg is stronger than the other—this exercise will expose it immediately. You need a bench, a sturdy chair, or even a couch cushion to rest your back foot on.
The Setup and Execution
Stand about two feet in front of your bench. Reach one foot back and rest the top of your foot or your toes on the elevated surface. This is where most people get it wrong. If you stand too close, your front knee will travel way past your toes, which is fine if you have the mobility, but it often shifts the focus too heavily onto the knee joint rather than the glute and quad.
Take a slightly wider stance than you think you need. As you descend, think about pushing your hips back and down, rather than just dropping straight down. Your torso should have a slight forward lean. This small adjustment is the secret to hitting your glutes rather than just your quads. Drive through the heel of your front foot to return to the standing position.
Why It Builds Real Strength
Because you are loading 90% of your weight onto one leg, the stability requirements are immense. Your core has to fire to keep you from tipping over, and your glute medius—the small muscle on the side of your hip—works overtime to keep your knee from caving inward. If your knee caves in, reset. It’s a sign that your glute is disengaging. Keep that knee tracked over your middle toes for every single rep.
2. Glute Bridges
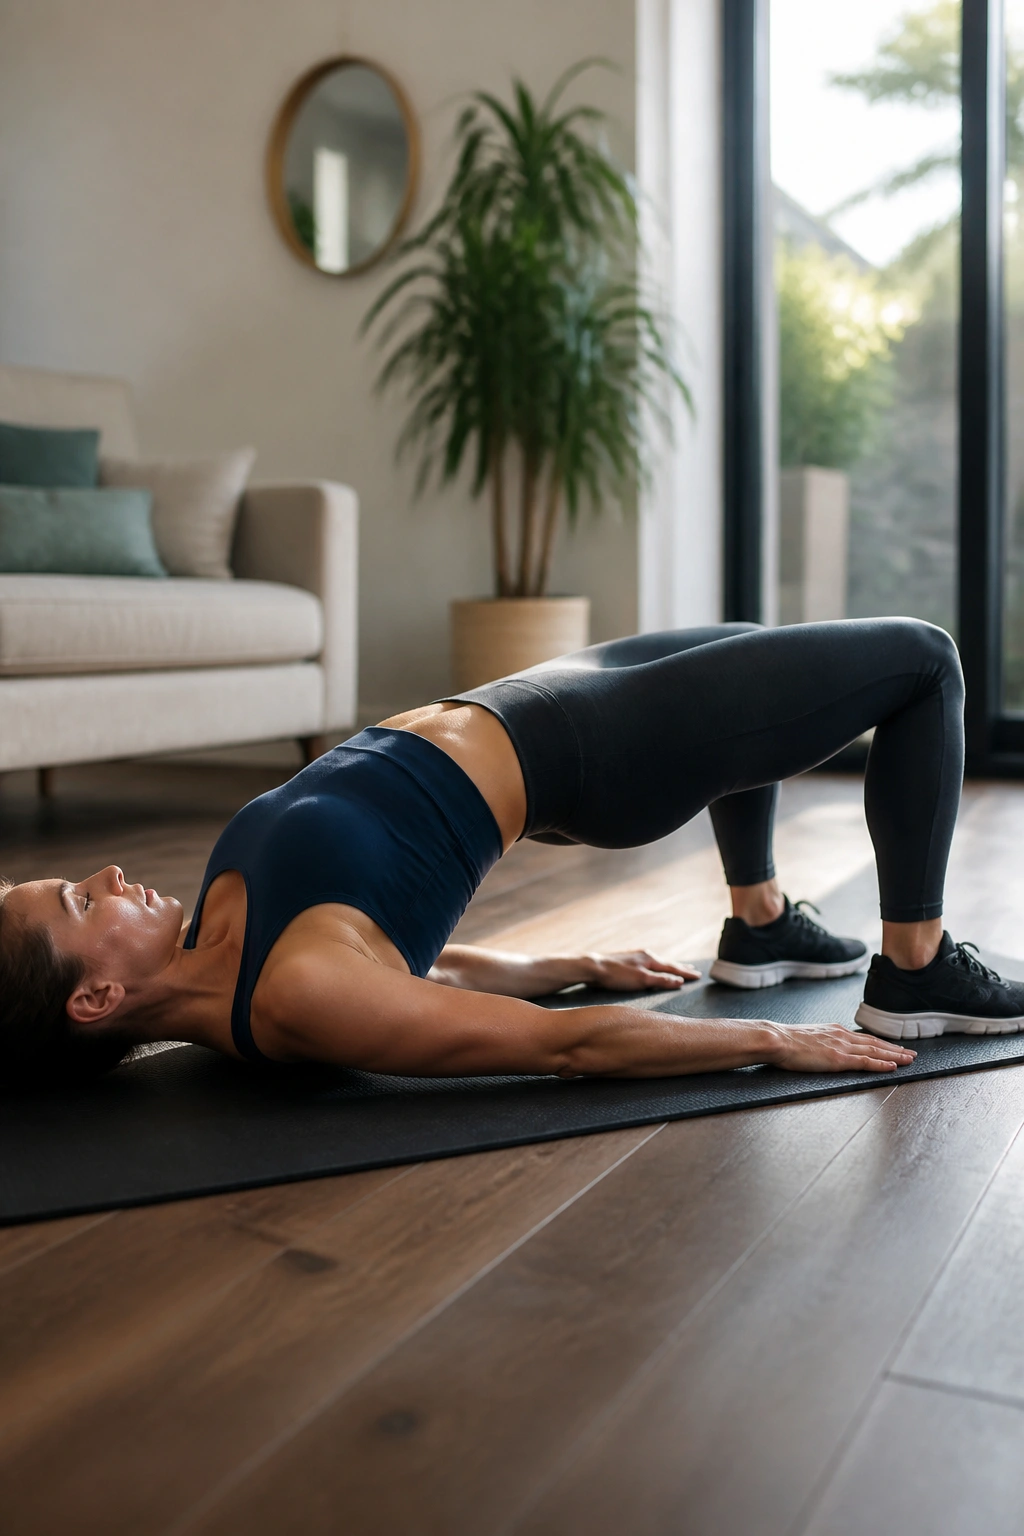
The glute bridge is a staple for a reason. It is the most direct way to isolate the posterior chain without putting any strain on your lower back. If you struggle with feeling your glutes work during squats or lunges, this is the corrective exercise you need to master.
Mastering the Mind-Muscle Connection
Lie flat on your back with your feet planted firmly on the floor, about hip-width apart. Your heels should be close enough to your glutes that you can almost touch them with your fingertips. Before you even lift your hips, perform a “posterior pelvic tilt.” This just means pressing your lower back into the floor by engaging your abs.
When you drive your hips upward, squeeze your glutes at the very top. Do not rely on your hamstrings or your lower back to hoist your hips up. If you feel this in your lower back, you are likely overextending your spine. Keep your ribs tucked down. At the top of the movement, imagine you are holding a grape between your glutes and you don’t want to crush it, but you don’t want to drop it either. Hold that contraction for a full two seconds before lowering back down with control.
Pro Tip for Intensity
To make this harder without equipment, transition to a single-leg glute bridge. Extend one leg straight out in front of you while performing the bridge with the other. This doubles the load on the working glute and forces your core to fight against the rotation.
3. Walking Lunges
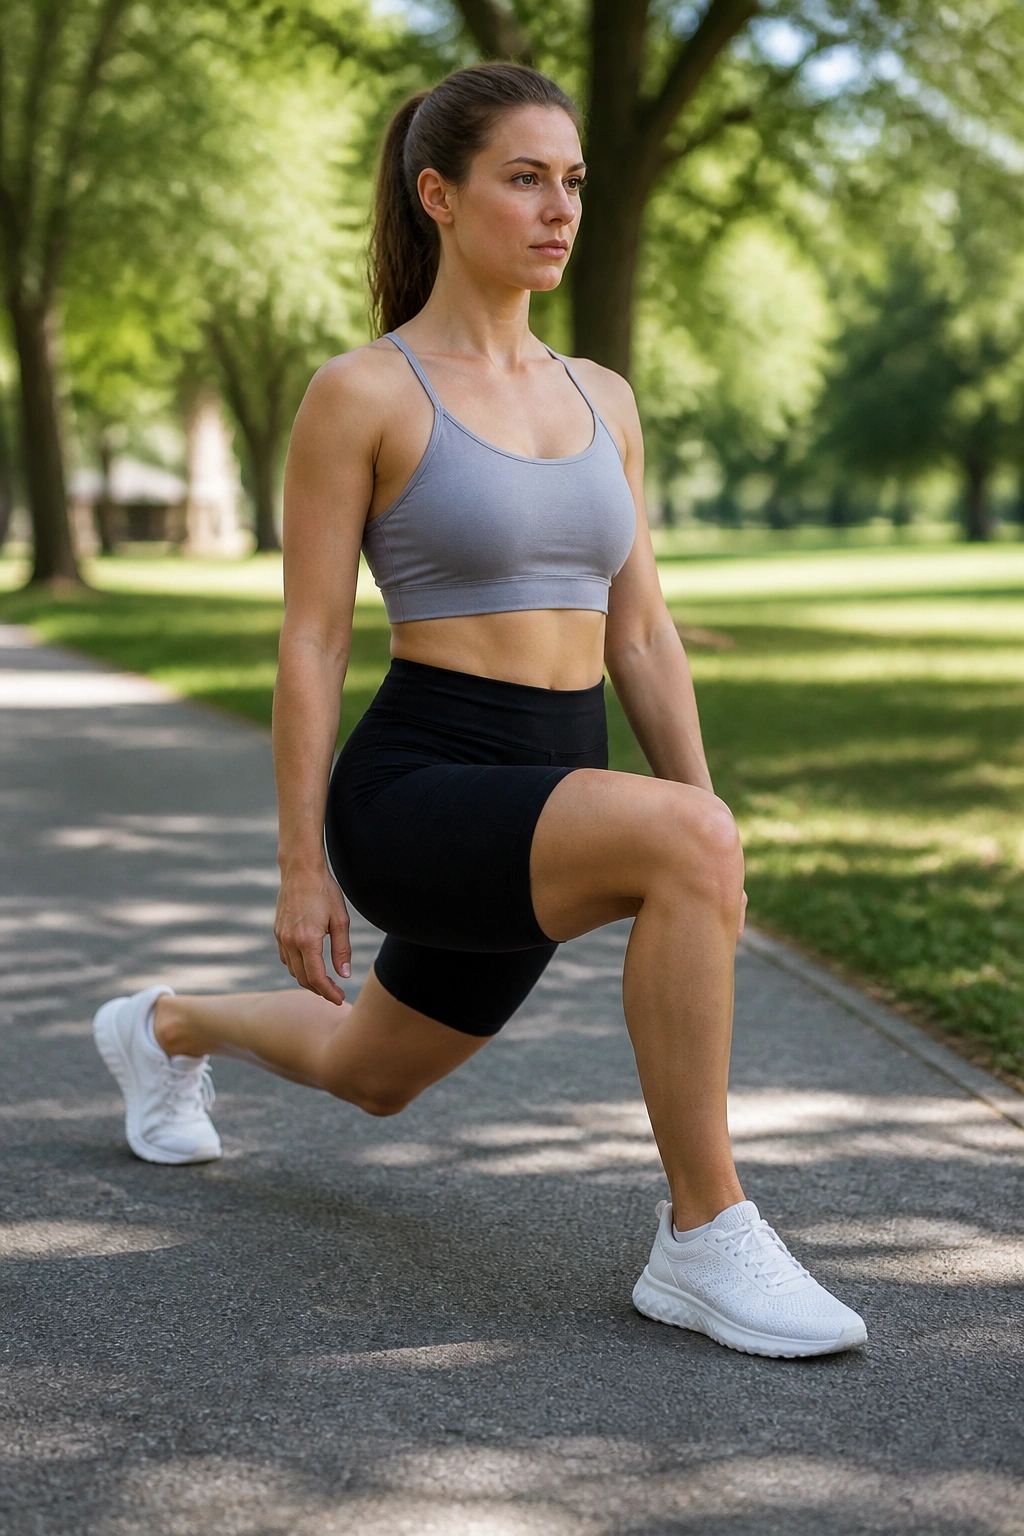
Walking lunges are deceivingly simple. You see people rushing through them at the gym, using momentum to swing their bodies forward, but that is a waste of time. When you perform them slowly, focusing on the eccentric (lowering) phase, they become an incredible tool for quad and glute development.
The Technique That Matters
Take a step forward that is long enough to create 90-degree angles at both knees when you drop down. If your step is too short, you put unnecessary pressure on the kneecap. If it is too long, you might overstretch your hip flexor. Keep your chest up—do not let yourself fold forward like a book.
As you step forward, land on your heel first, then roll through to the ball of your foot. This provides a stable base. The back knee should hover just an inch or two above the floor. Never slam your knee into the ground; control is the name of the game. If you want to increase the difficulty, perform these in place, but with a pulse at the bottom. Drop down, come up halfway, drop back down, and then return to standing. That “pulse” adds immense time under tension.
4. Sumo Squats
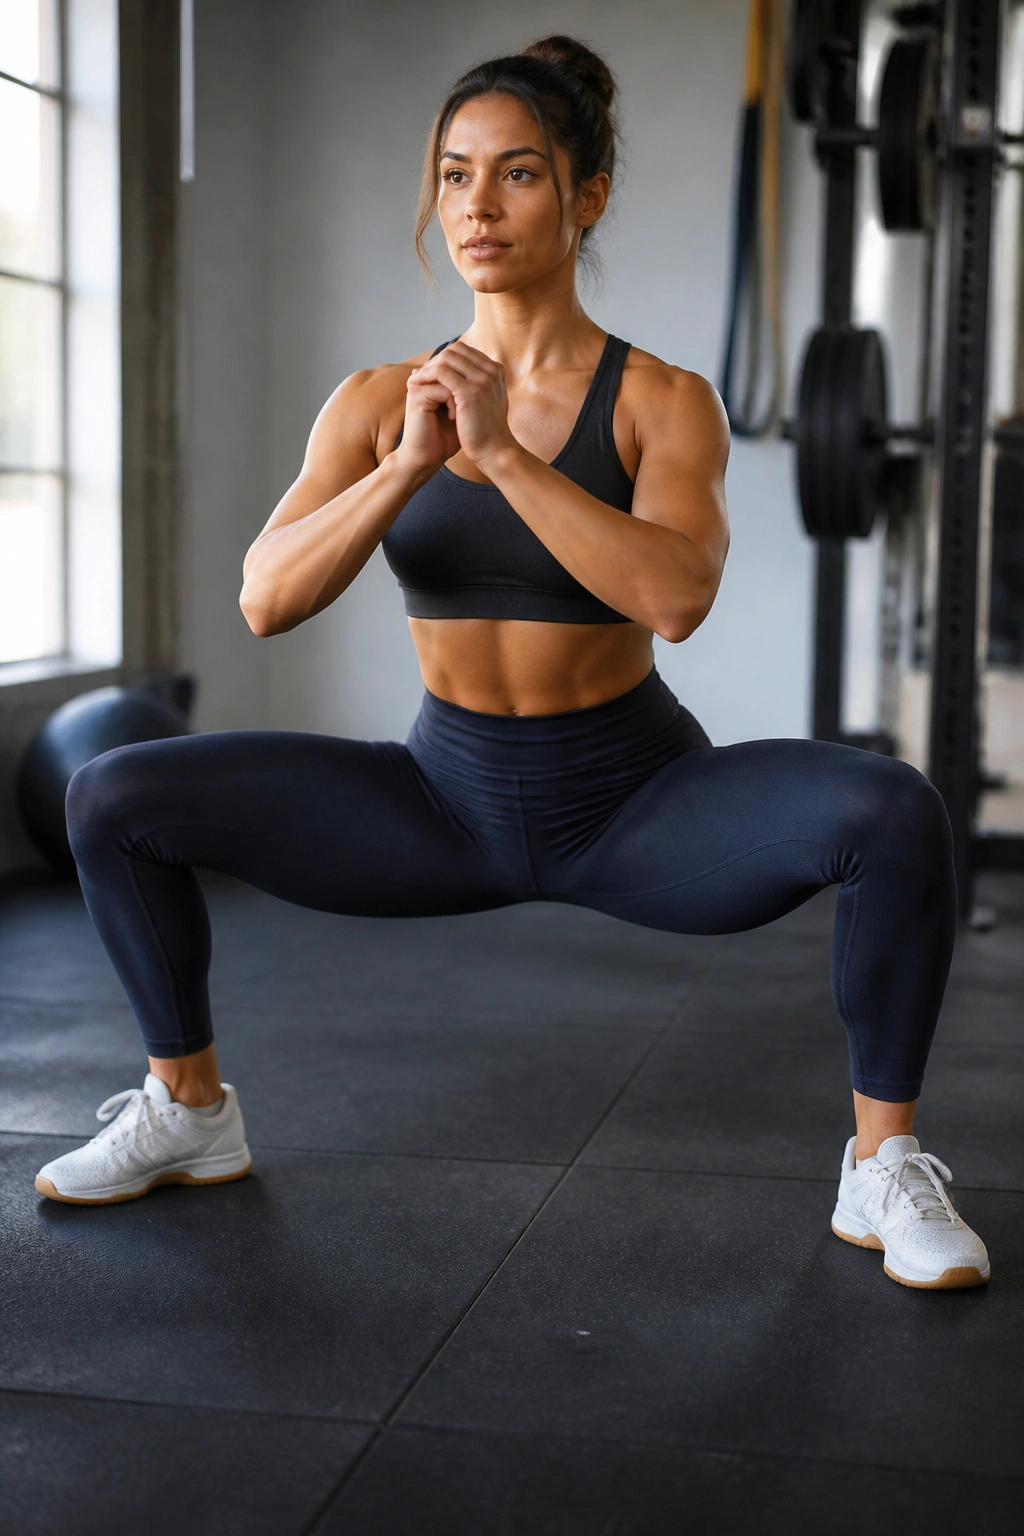
The sumo squat, sometimes called a wide-stance squat, shifts the emphasis away from the quads and onto the adductors (the inner thighs) and the glutes. It is a fantastic variation to include because it changes the angle of stress on your legs.
Wide Stance Basics
Set your feet wider than shoulder-width apart, with your toes turned outward at about a 45-degree angle. This toe-out position is crucial because it aligns with your femur’s rotation. If you keep your toes pointed forward, you will feel a painful pinch in your hips.
Lower your hips straight down, keeping your knees tracking in line with your toes. This is the most common failure point. If your knees start to collapse inward, your stance is too wide or your hips lack the necessary mobility. Bring your feet in an inch until you can keep those knees pushing outward throughout the entire range of motion. Think of it like a corkscrew: as you push into the floor, imagine trying to spread the floor apart with your feet.
Why This Variation Works
By widening your stance, you change the lever length of your legs, which effectively changes how the muscles are recruited. It is not necessarily “better” than a standard squat, but it is different, and rotating between these variations is how you prevent plateaus.
5. Step-Ups
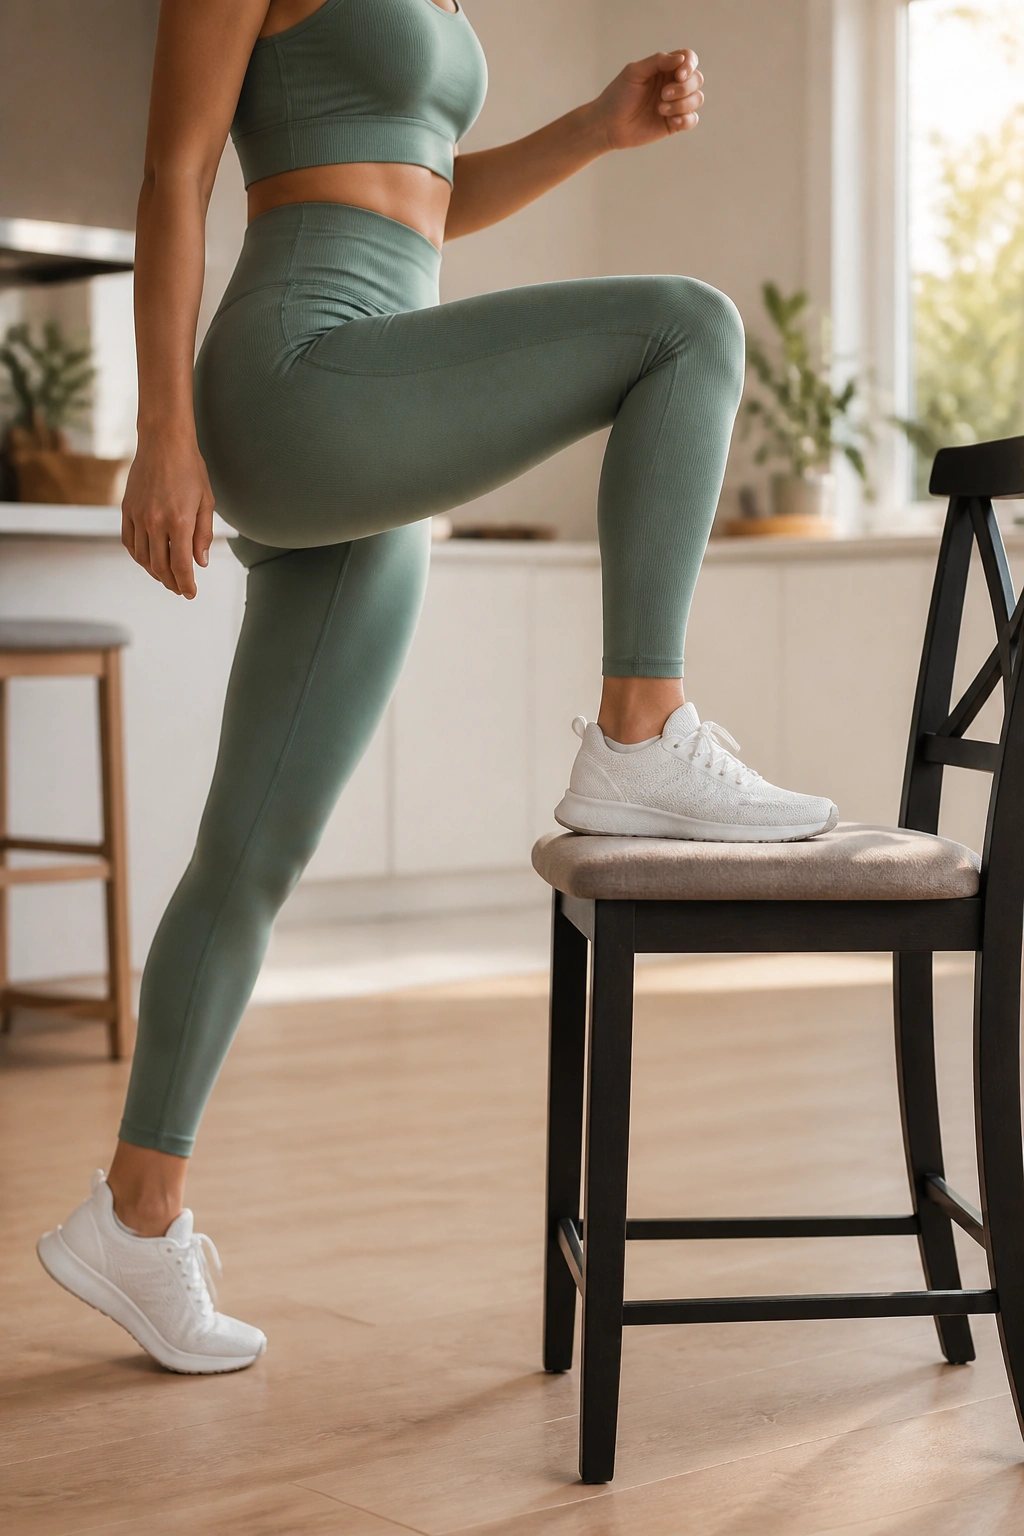
You do not need a fancy plyometric box for this. A sturdy kitchen chair, a coffee table, or the bottom step of a staircase will work perfectly. The key here is to remove the “jump” and focus on the “drive.”
The Slow and Controlled Ascent
Step onto your surface with your entire foot. Do not let your heel hang off the edge, as this destabilizes the ankle. Push down through the heel of the foot that is on the chair. Avoid using your back leg to push off the ground—that back foot should be like a feather, touching down just for balance, not for assistance.
If you find yourself lunging forward to get up, you are using momentum. Instead, keep your torso vertical. Imagine a string pulling the crown of your head toward the ceiling. When you reach the top, fully extend the hip of the standing leg, squeezing the glute before slowly lowering yourself back down. The descent should take twice as long as the ascent. Controlling the “down” phase is where you build the eccentric strength that prevents injury.
6. Side Lunges
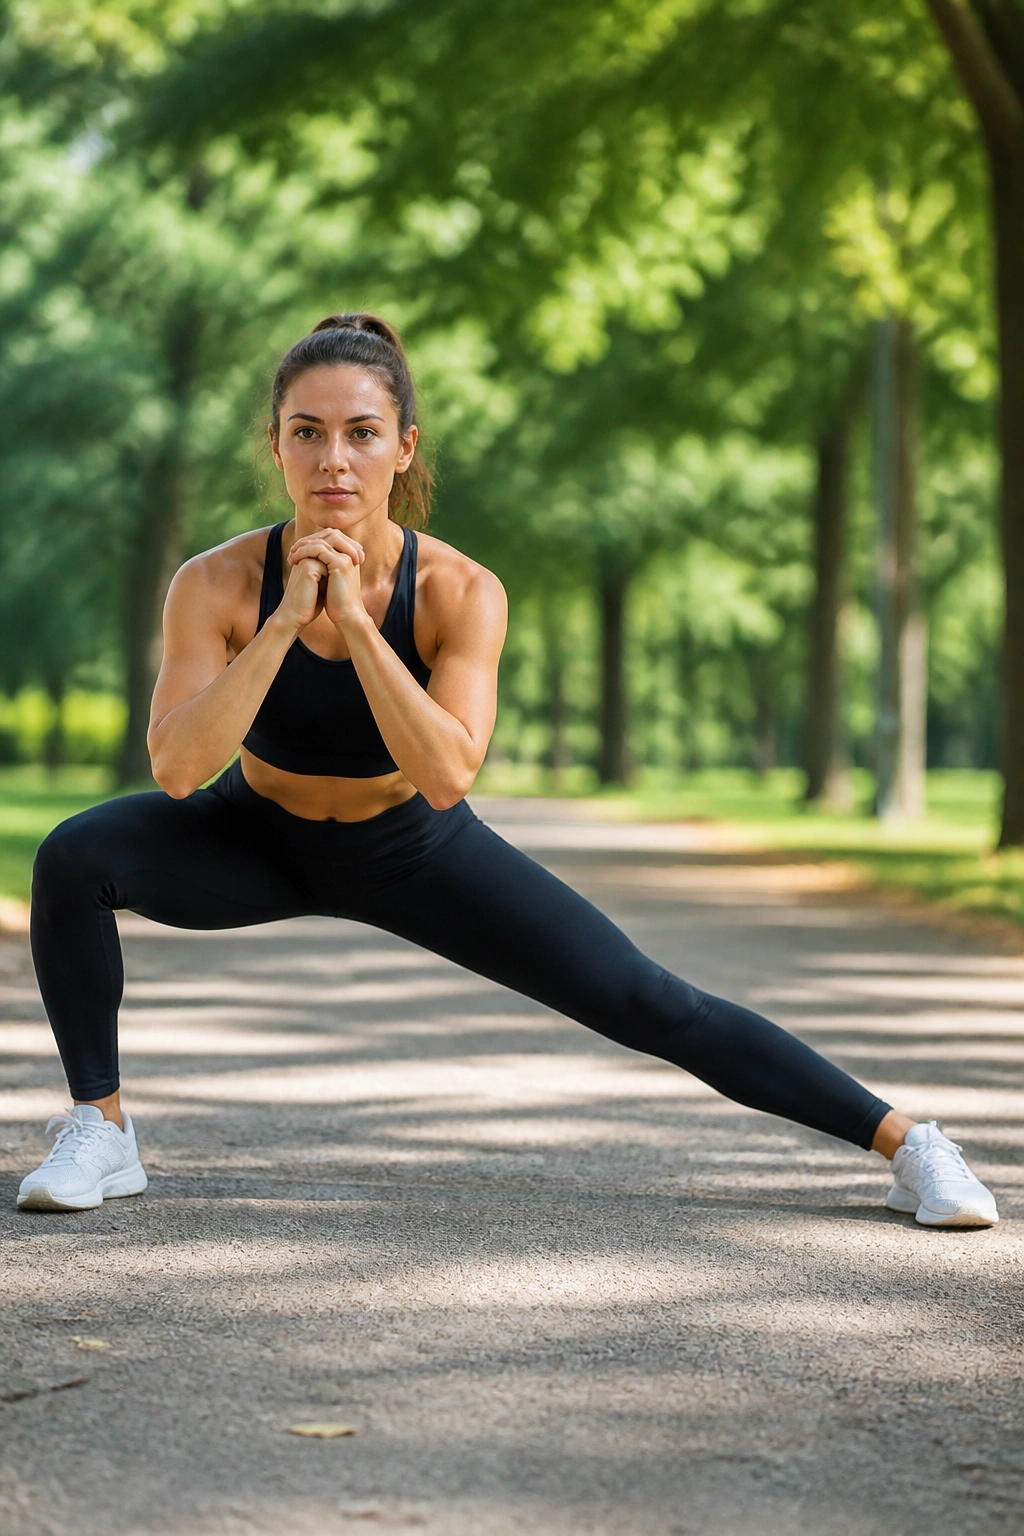
Most of our life is lived in the sagittal plane—moving forward and backward. Side lunges force you to move in the frontal plane, which is essential for lateral stability and working the muscles that prevent knee injuries.
Moving Laterally
Start with your feet together. Take a wide step out to the side with your right leg. As your foot hits the floor, push your hips back and bend your right knee, keeping your left leg perfectly straight. Your right heel must stay glued to the floor.
Push through that right heel to explode back to the starting position. It feels strange at first if you are used to only walking forward, but that is exactly why you need it. It builds stability in the hips and strengthens the glutes from a different angle. Keep your chest open and your gaze forward. If you hunch over, you lose the tension in the glutes. This is a deliberate, slow movement—never rush the transition from side to center.
7. Curtsy Lunges
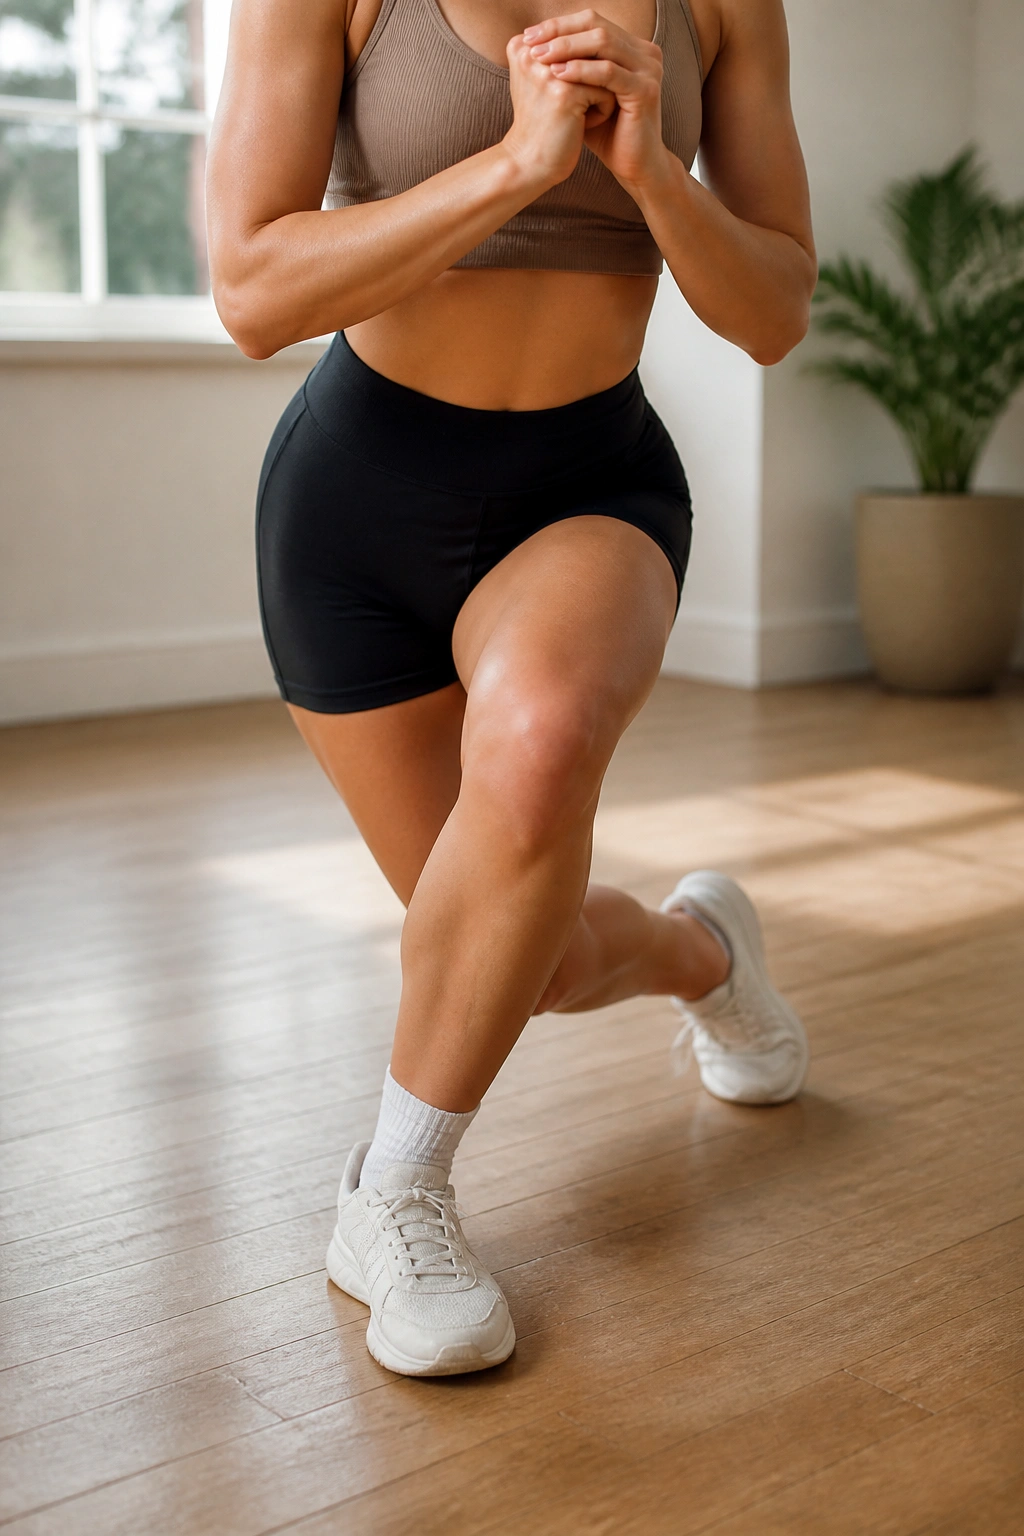
The curtsy lunge is essentially a lunge with a rotational component. It is fantastic for targeting the glute medius and minimus, the muscles responsible for hip abduction and stabilizing your pelvis.
The Mechanics of the Curtsy
Stand with your feet hip-width apart. Step your right leg back and across behind your left leg, as if you were performing a curtsy. Your back knee should aim to land just behind your left heel. Keep your hips facing forward as much as possible—do not let your whole torso twist to the side.
You will feel a deep stretch in the outer glute of the front leg. That is where the work happens. Drive through the front heel to return to standing. This movement is slightly more complex than a standard lunge, so start without any speed. Once you master the coordination, you can speed it up, but the glute activation comes from the depth of the lunge and the stability of the front leg, not the speed.
8. Single-Leg Deadlifts
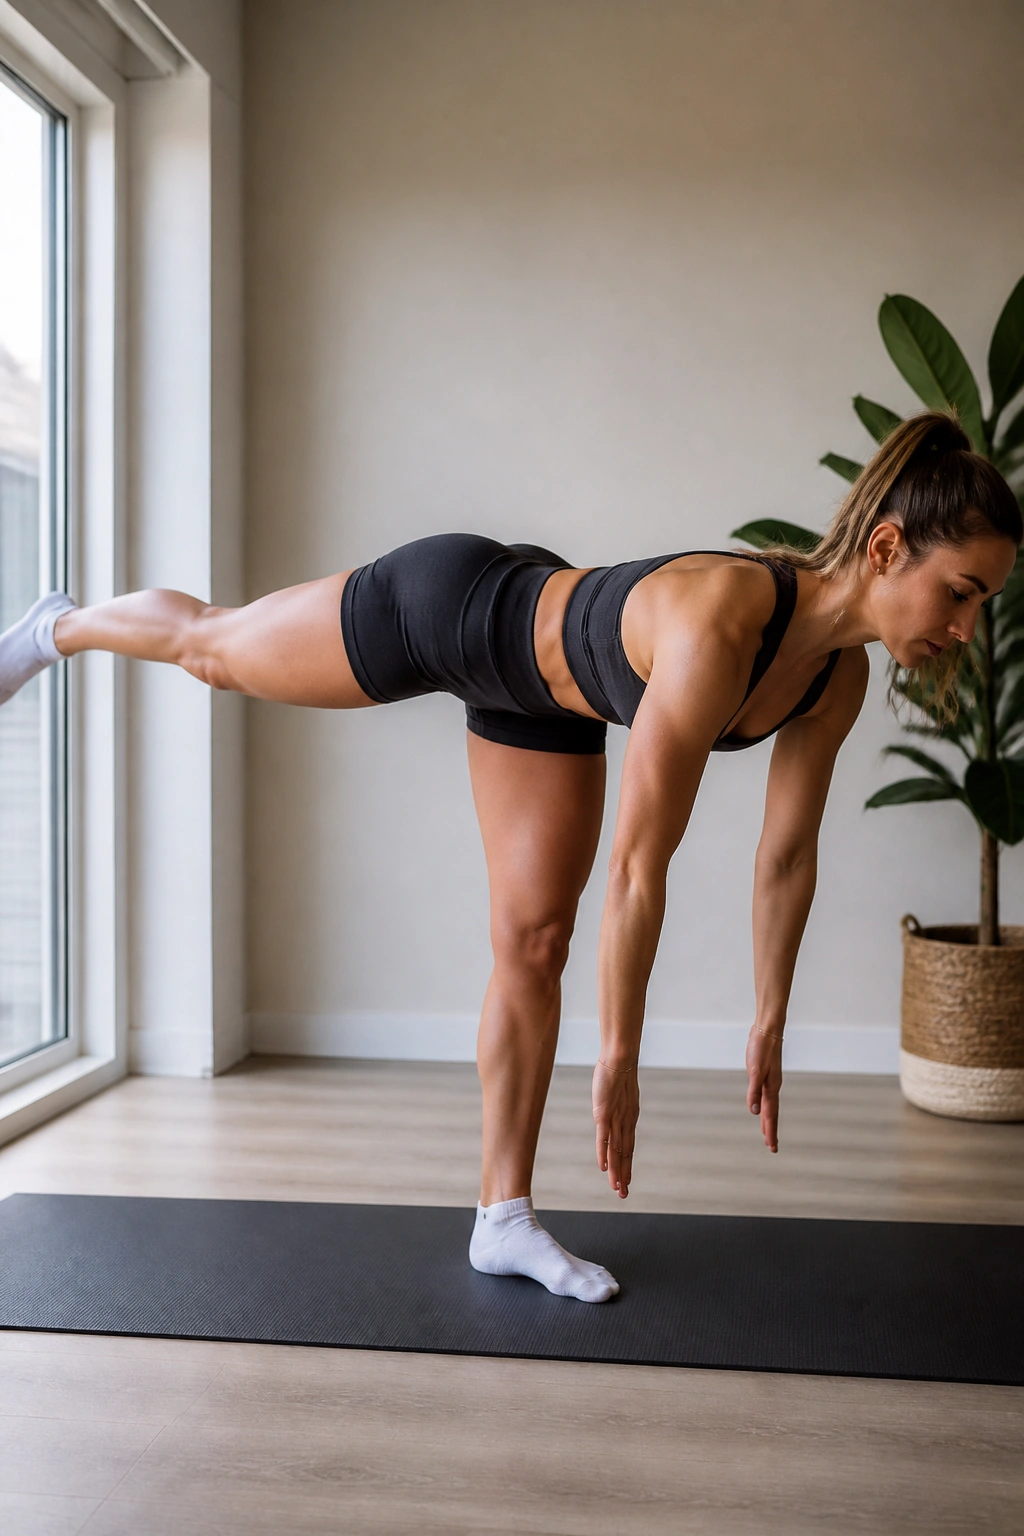
This is the ultimate test of balance and posterior chain strength. Many people think they need a heavy kettlebell for deadlifts, but if you do a single-leg deadlift correctly, your own body weight is often resistance enough.
Finding Your Balance
Stand on your left leg with a slight bend in the knee. Extend your right leg behind you as you hinge forward at the hips. Think of your body as a seesaw or a hinge—the leg going back should be the counterweight to your torso coming forward. Your hips should remain square to the floor. If one hip rotates up, you are losing the form.
Reach your hands toward the floor (you don’t need to touch it if your mobility doesn’t allow it), and feel the stretch in your left hamstring. The work comes from driving your heel into the ground and using your glute to snap your hip back into full extension. Do not reach with your shoulders; hinge from your hips. If you find yourself wobbling, tap the toe of your floating foot onto the ground lightly for stability, but try to use it less and less over time.
9. Calf Raises
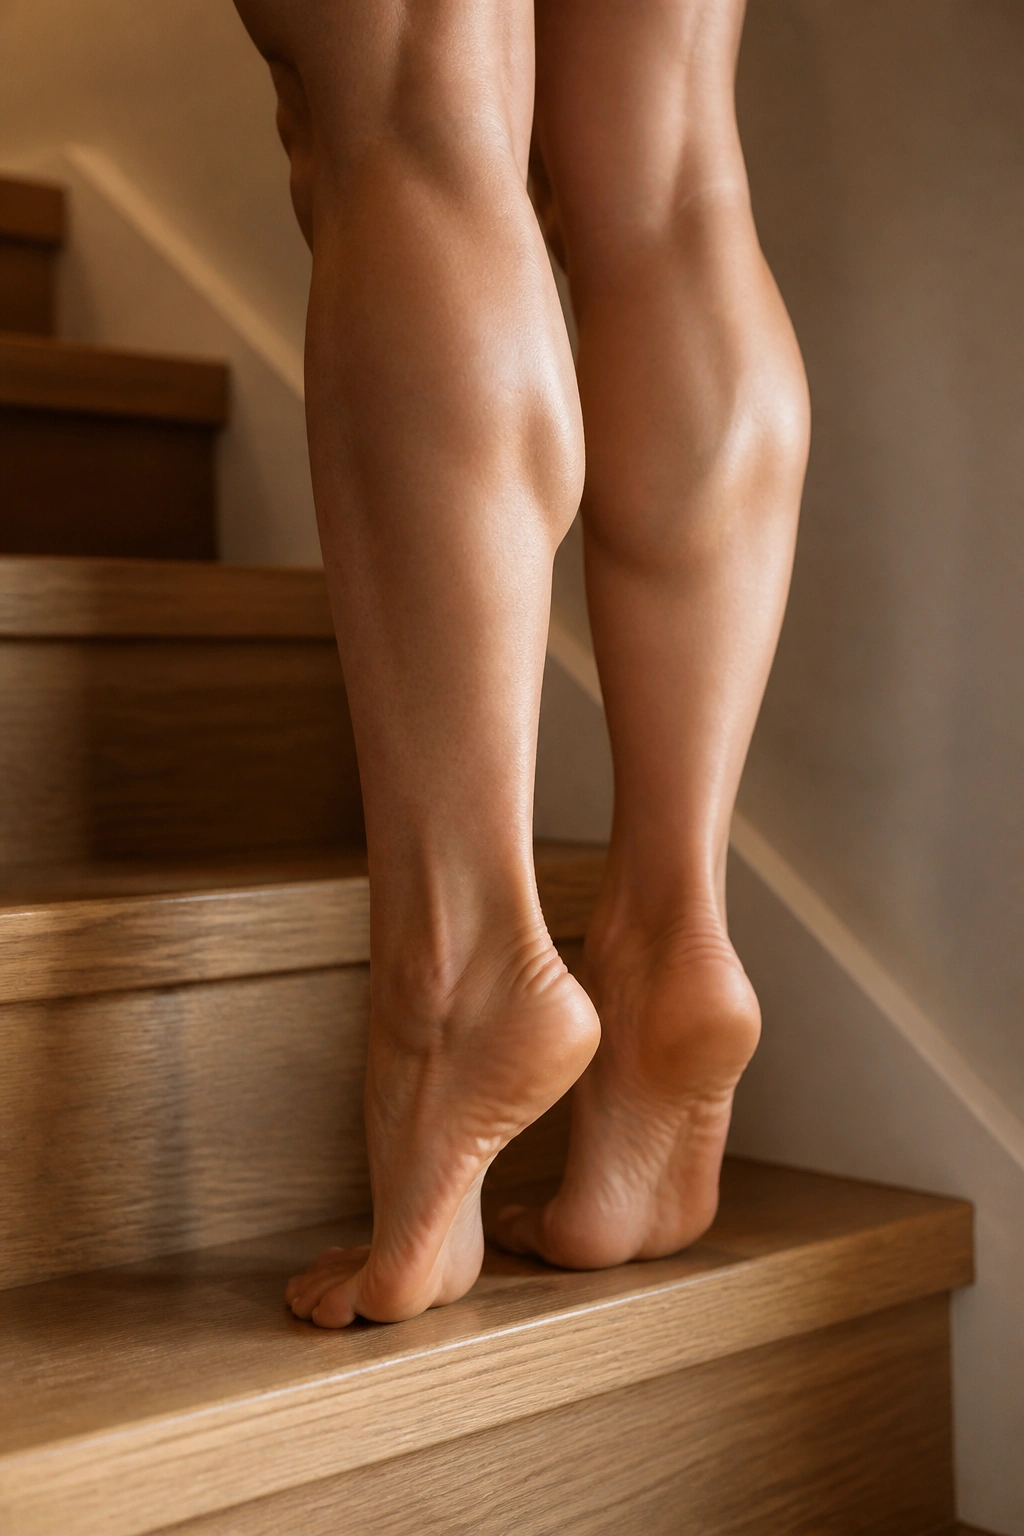
The calves are often the most neglected part of the lower body. They are incredibly resilient, meaning they often need higher volume or slower tempos to really stimulate growth. Do not just bounce through these.
Slowing Down the Tempo
Stand near a wall for balance. Rise up onto the balls of your feet, aiming to get as high as possible. Hold that peak contraction for a full second, squeezing the muscle. Now, lower your heels back down, but take a full three seconds to do it.
The descent is where you build the strength and the size. If you just drop your heels, you miss half the exercise. For an added challenge, do these on the edge of a stair. This allows you to drop your heels below the level of your toes, creating a much deeper stretch at the bottom of the movement. A deep stretch followed by a forceful contraction is exactly what these muscles crave.
10. Fire Hydrants
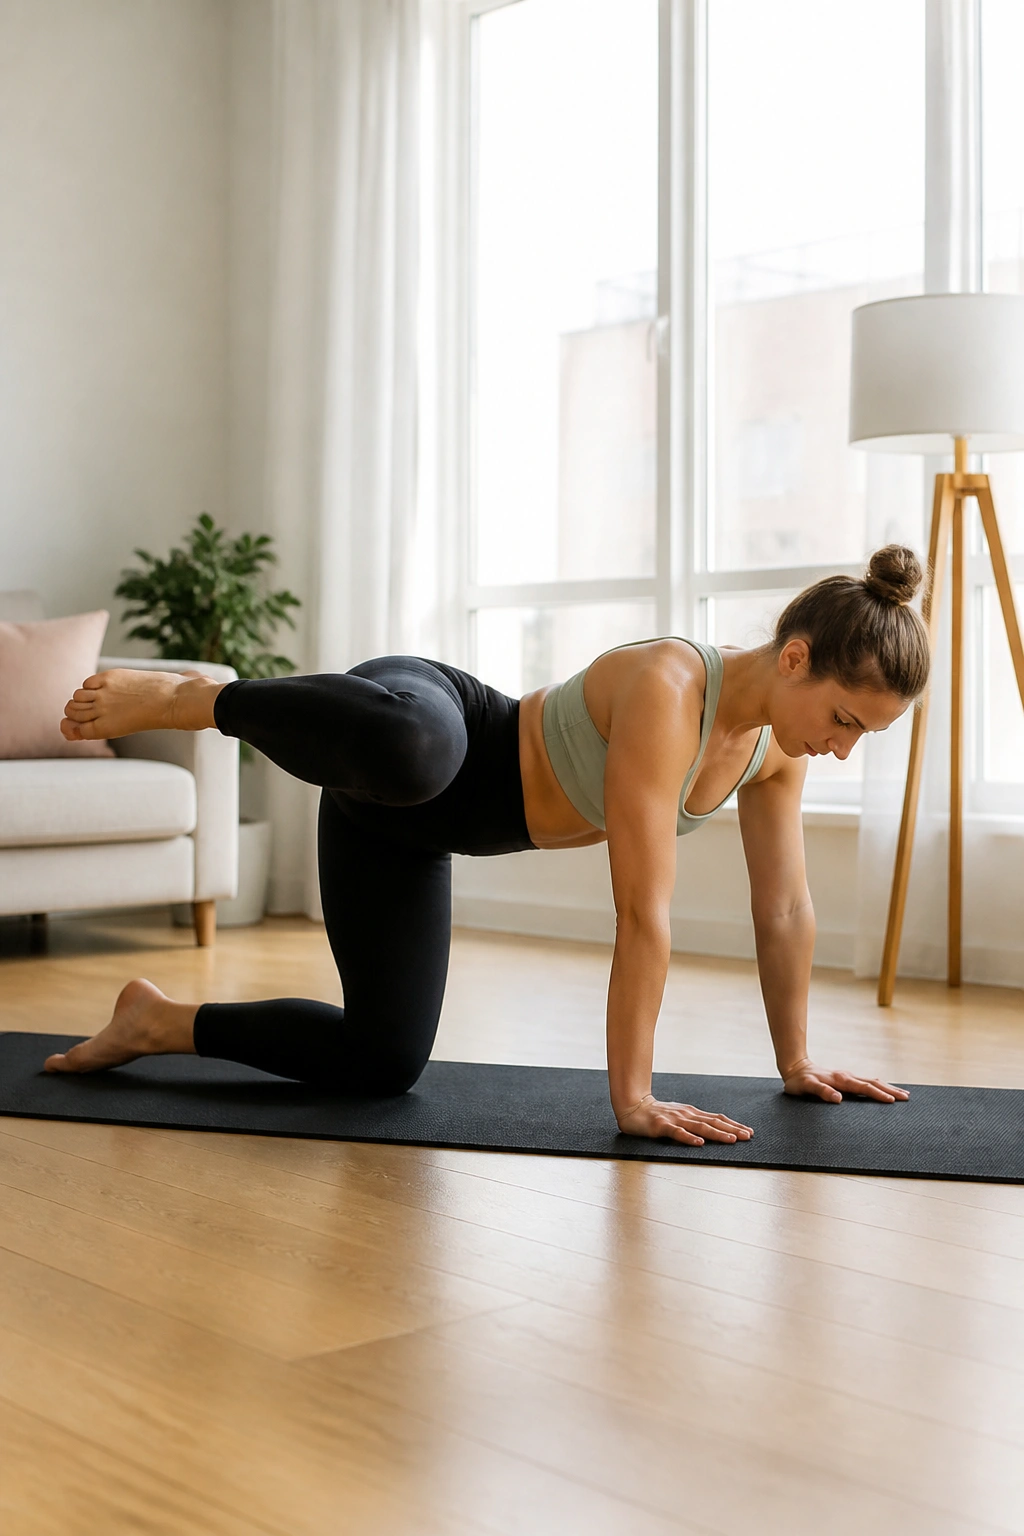
This exercise looks a bit odd, but it is one of the most effective ways to isolate the glute medius and fix “lazy glutes.” You will need a mat or a carpeted surface for this, as you will be on all fours.
Targeting the Glute Medius
Get into a tabletop position with your hands under your shoulders and knees under your hips. Keep your back flat—do not let your belly sag toward the floor. Maintaining a 90-degree bend in your right knee, lift your leg out to the side like a dog at a fire hydrant.
The goal is not height; it is isolation. You want to lift the knee as high as you can without tilting your pelvis or twisting your torso. If you are leaning to the left to get your right leg higher, you are cheating the movement. Keep the torso frozen. Squeeze the side of your glute at the top for a second, then lower with total control. This muscle is small, so you will feel the burn relatively quickly. It is an endurance-based movement.
11. Donkey Kicks
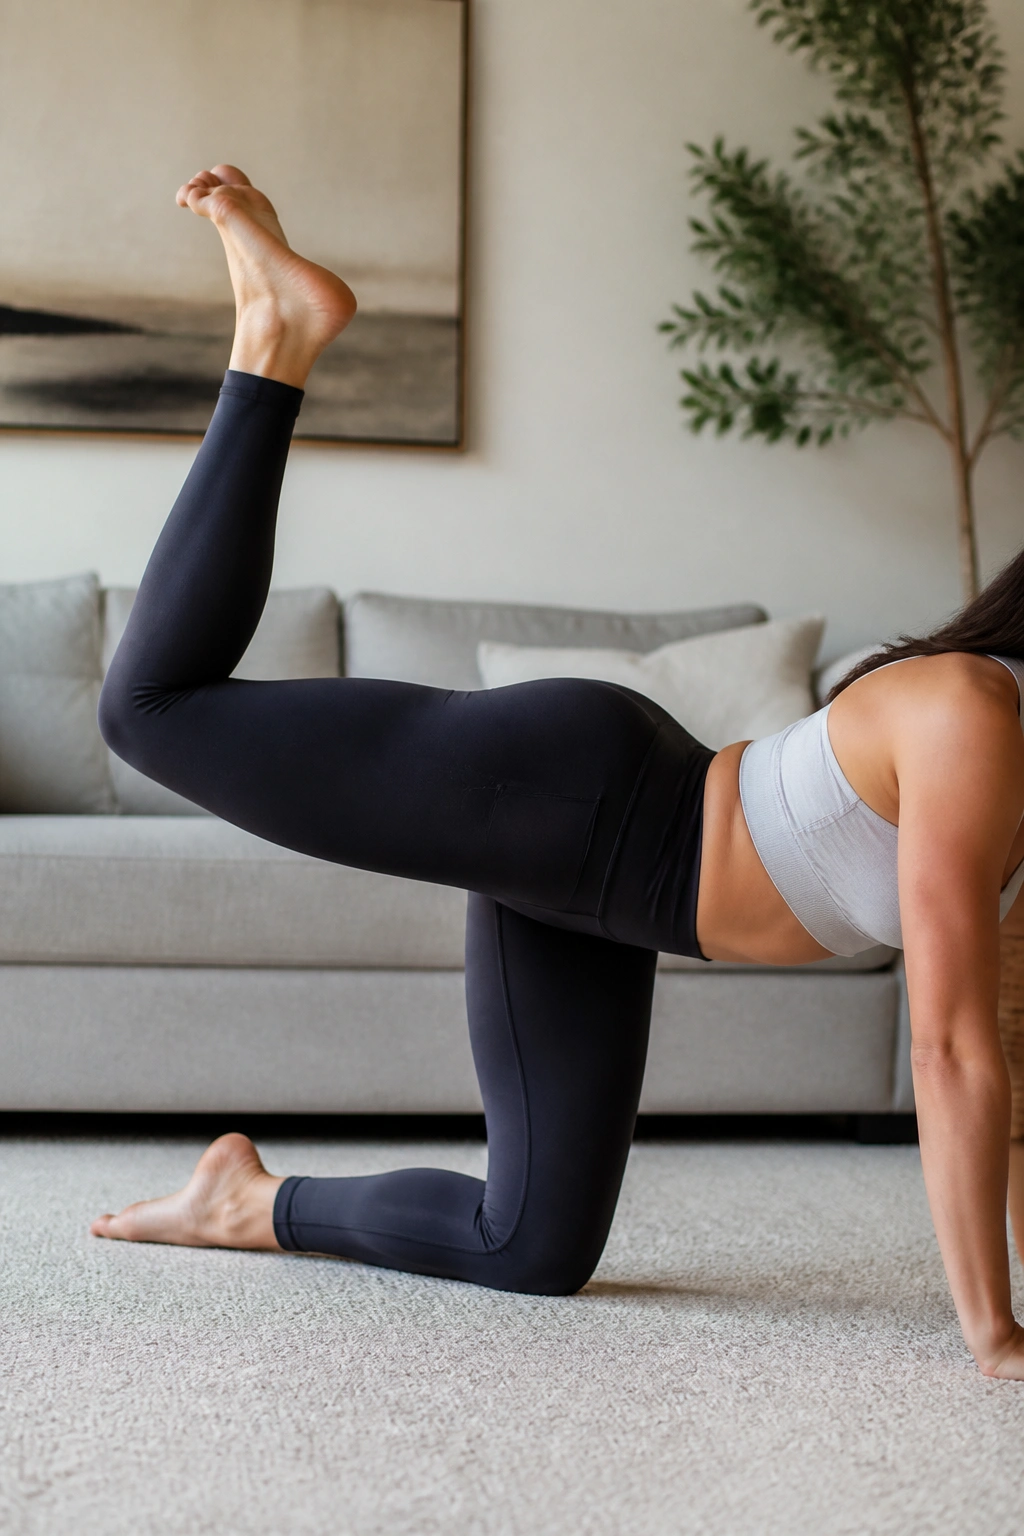
This is another all-fours classic that keeps the glute under constant tension. It is perfect for finishing off a leg workout because it requires minimal setup but provides maximum isolation.
Precise Hip Extension
Stay in your tabletop position. Keep your right knee bent at 90 degrees and kick your foot up toward the ceiling, as if you are trying to leave a footprint on the roof. Your lower back should remain perfectly still. If you arch your back to get the leg higher, you are using your lumbar spine instead of your glutes.
Think of it as pushing through your heel. The glute is the primary mover here. At the top of the movement, pause and give that muscle an extra squeeze. If you want to make it significantly harder, perform the repetitions using a “slow-fast” tempo: take three seconds to lift, and one second to lower. This forces the muscle fibers to recruit more efficiently and prevents the use of momentum.
12. Wall Sits
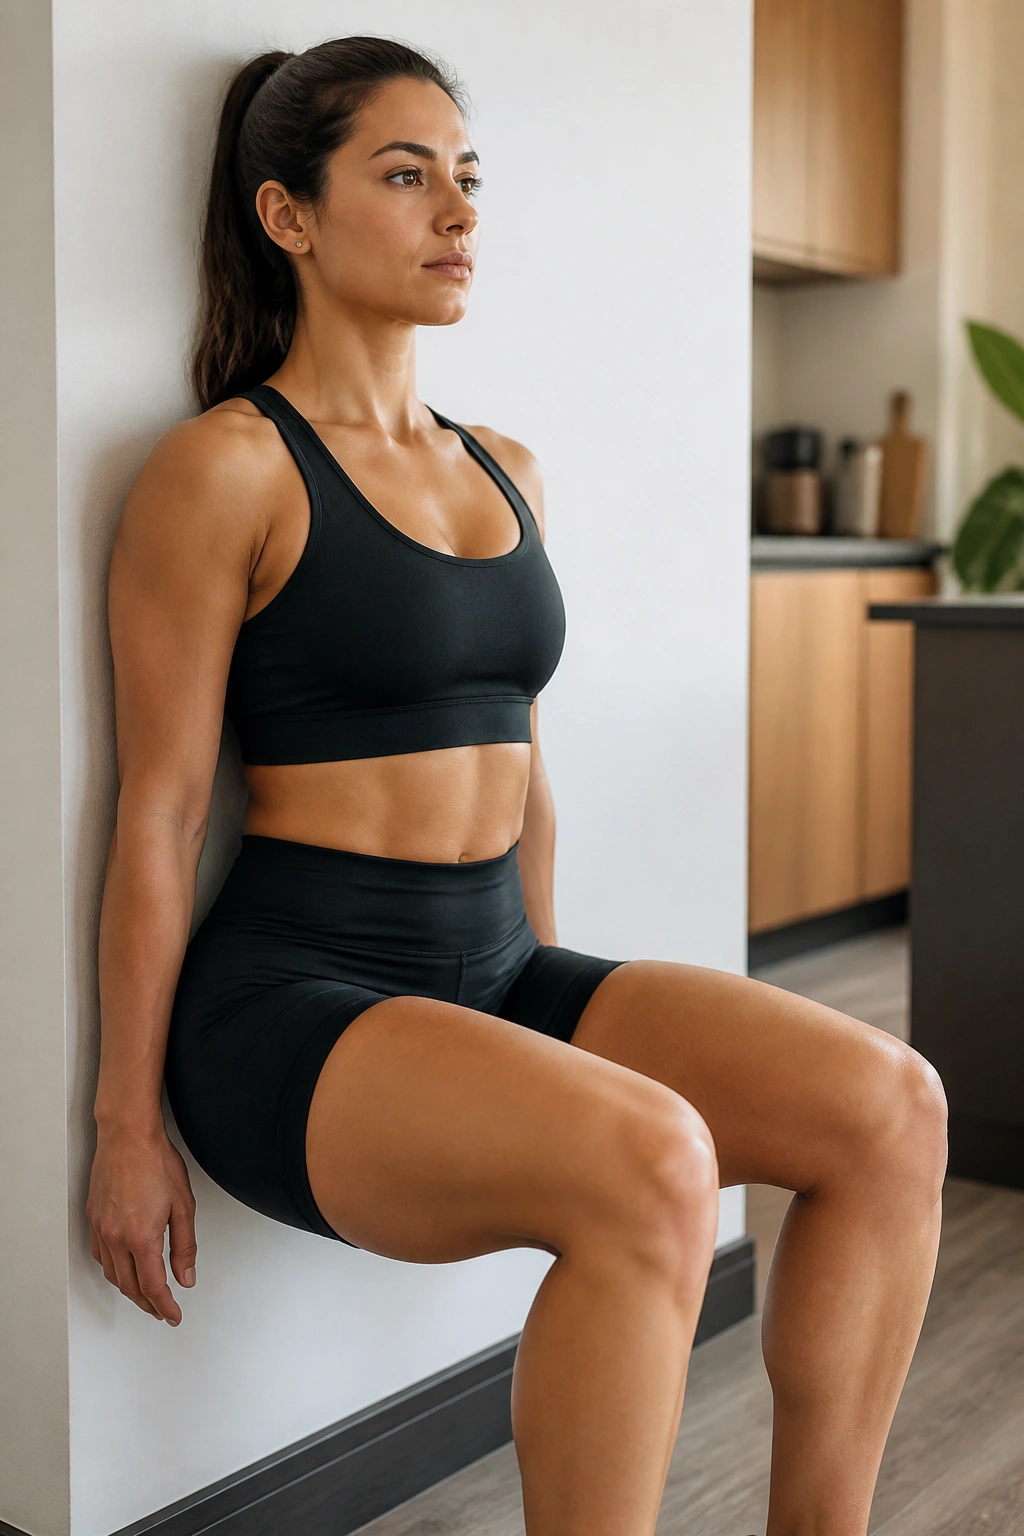
Sometimes the most effective workouts are the ones where you just have to endure. A wall sit is an isometric hold, meaning the muscle is working but not changing length. This builds incredible endurance and mental fortitude.
Maintaining the Proper Angle
Lean your back flat against a wall and slide down until your thighs are parallel to the floor. Your knees should be at a 90-degree angle. If your feet are too close to the wall, you will put too much stress on your knees. If they are too far out, you will feel it mostly in your hamstrings. Find that sweet spot where you feel the tension primarily in your quads.
Push your heels into the ground. This is a secret trick that helps engage the hamstrings and glutes as well, making the wall sit a full-leg exercise rather than just a quad burner. Hold for as long as you can. When the shaking starts, you are not failing—you are finally doing the work. Try to add five seconds to your hold each time you perform this movement.
13. Pistol Squat Progressions
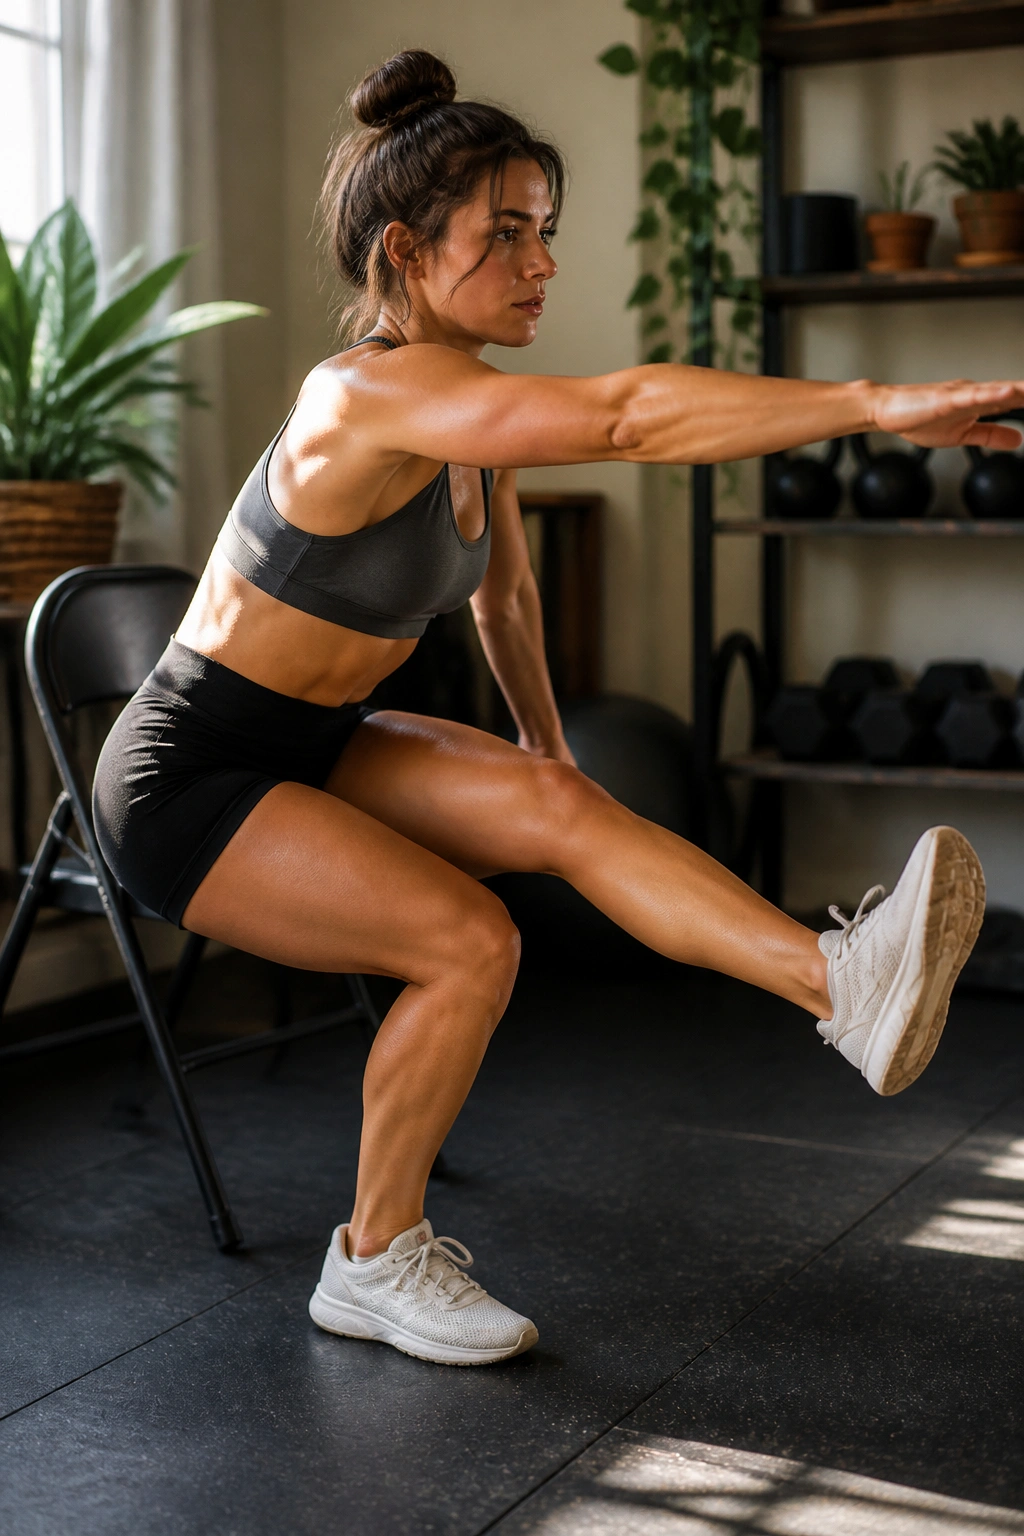
The full pistol squat (a one-legged squat) is an advanced move, but the progression toward it is incredibly effective for anyone. Do not be discouraged if you cannot do a full one immediately. Start by using a chair for support.
The Progression Path
Stand on one leg, extending the other straight out in front of you. Lower yourself toward a chair as if you are doing a one-legged sit-down. If you have the strength, stop just an inch before you touch the seat, hold, and drive back up. This is the “box pistol.”
The key is keeping the heel of your standing foot glued to the floor. If your heel lifts, your weight has shifted too far forward, and you are losing your center of gravity. Over time, you can lower the height of the surface you are aiming for until you can eventually go all the way to the floor. Even just doing the eccentric (lowering) part of the pistol squat slowly is enough to build massive leg strength.
14. Plank Leg Lifts
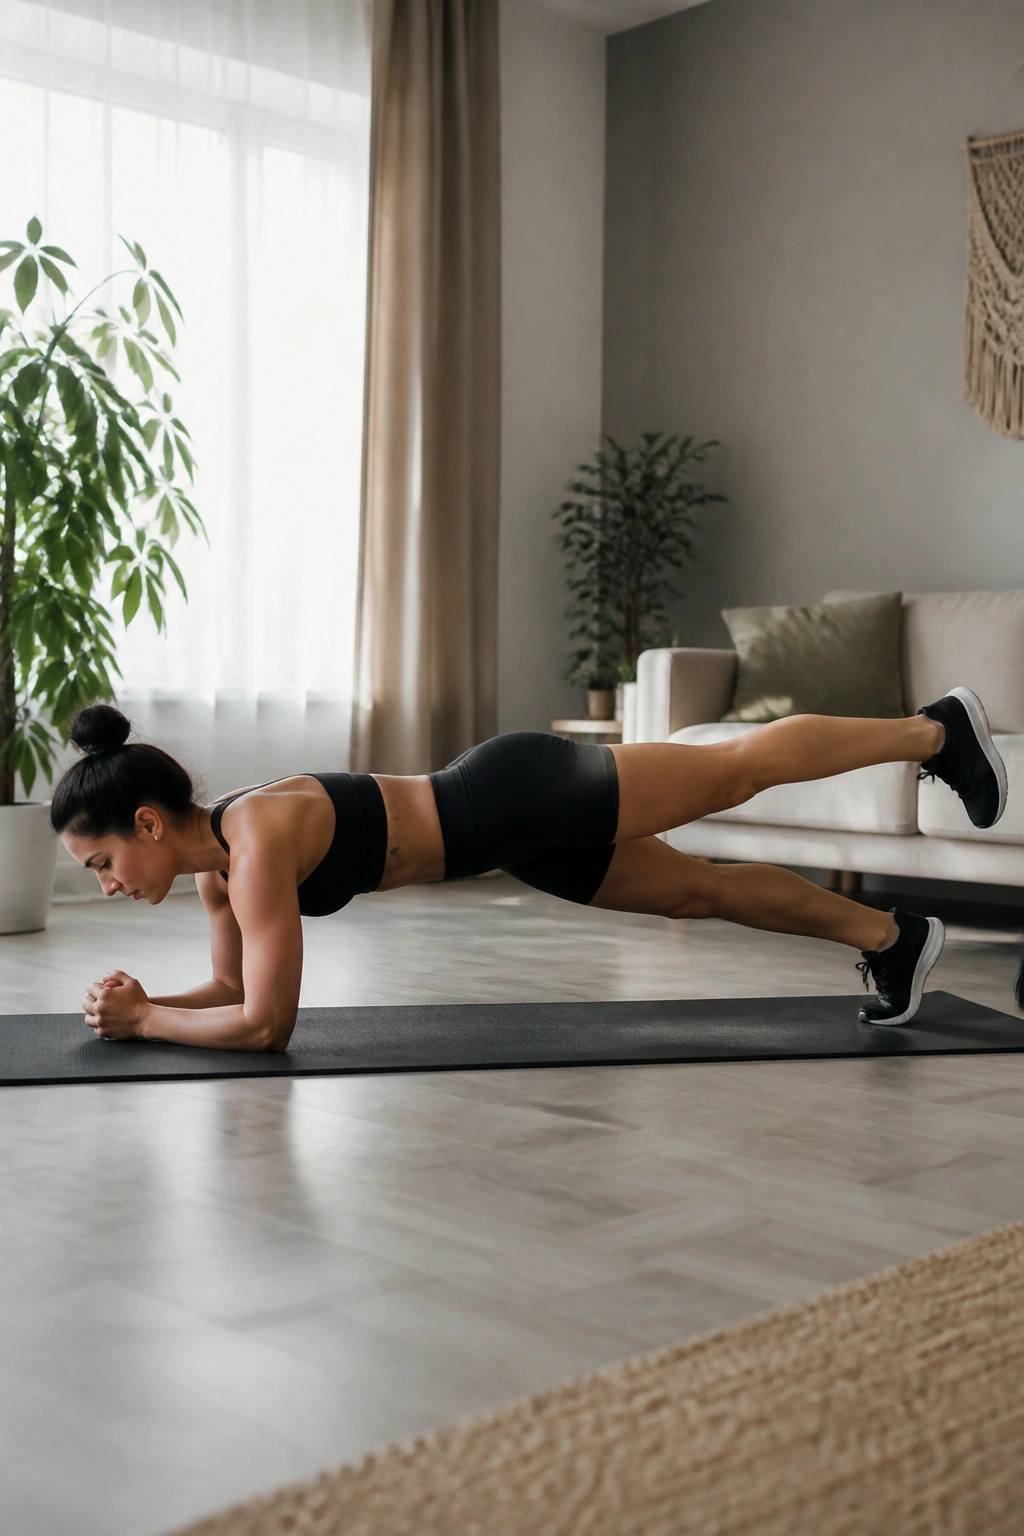
This is a two-for-one move. You get the stability benefits of a plank with the glute activation of a leg lift. It forces you to stabilize your core while your lower body performs a unilateral movement.
Core-Glute Integration
Get into a forearm plank position. Make sure your elbows are directly under your shoulders and your body forms a straight line from head to heels. Don’t let your hips sag or hike up into the air. While keeping your core braced and your back flat, lift one leg toward the ceiling.
You do not need to go high; just a few inches is enough to engage the glute. The most important thing is that your torso does not move. If you rock side-to-side, you are not tight enough in your core. Brace your abs like someone is about to punch you. This exercise is about controlled, rhythmic movement. Breathe through the holds and focus on the connection between your glute firing and your core stabilizing.
15. Glute Medius Kickbacks
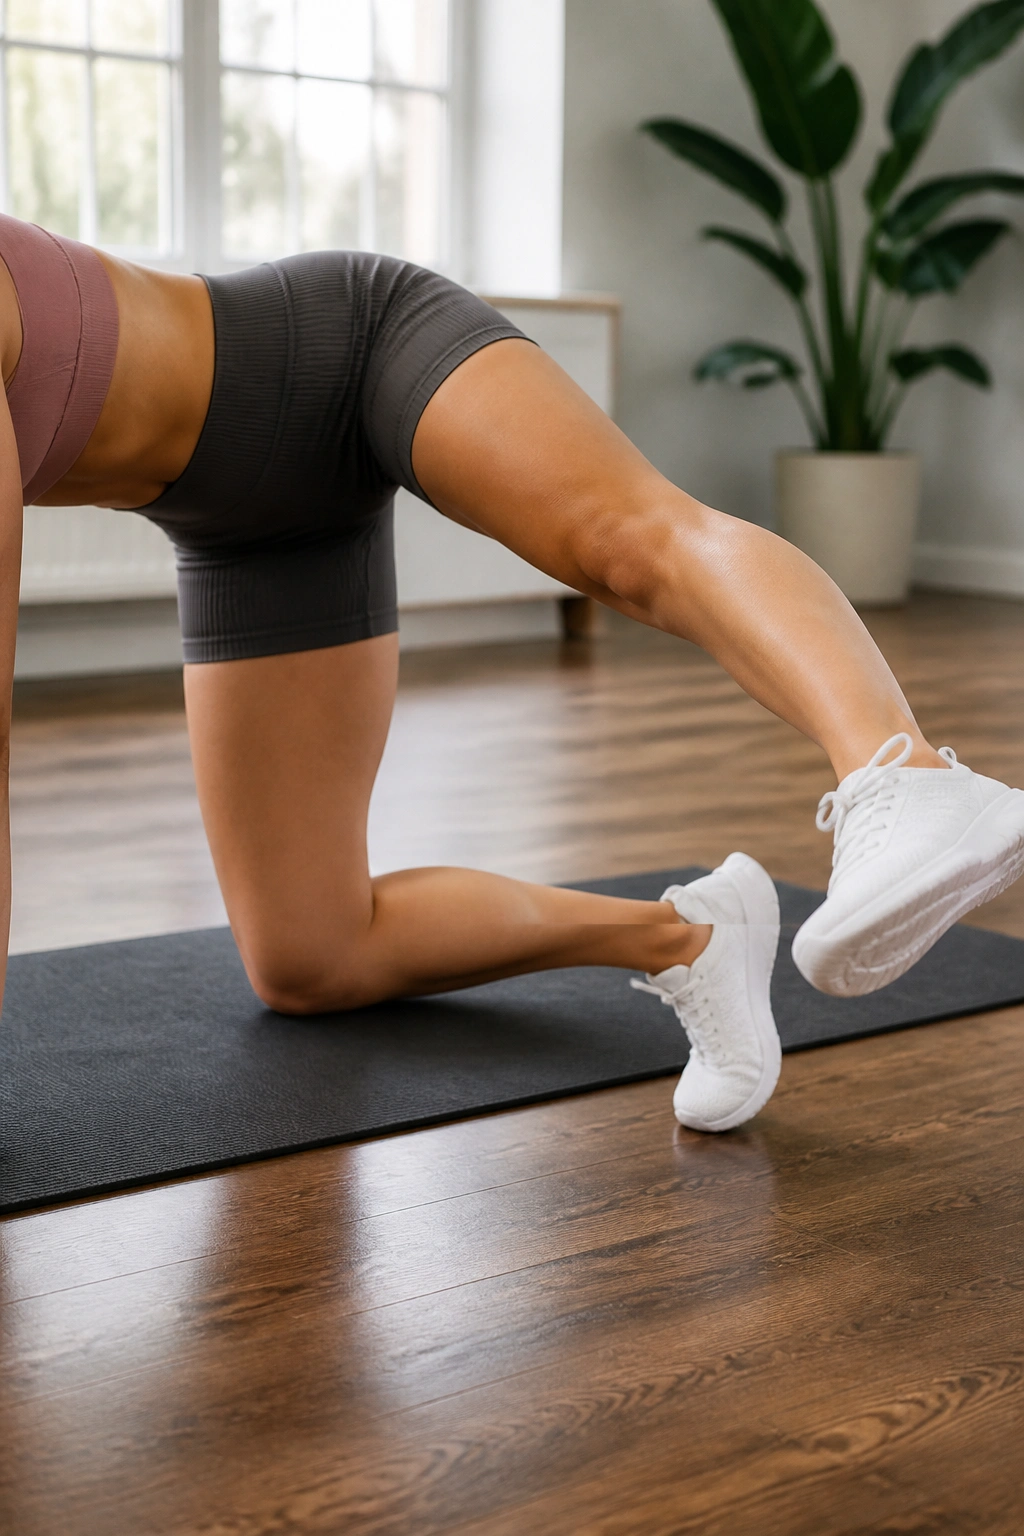
This is a subtle, almost invisible movement, but it targets the upper portion of your glutes—the area often responsible for that “shelf” look. It is a variation of the kickback, but with a slight twist to change the angle of recruitment.
The Subtle Angle
Get into your tabletop position on all fours. Extend your right leg straight back behind you, but instead of kicking straight up, tap your toe on the floor slightly to the outside of your left foot. Then, squeeze your glute to lift the leg and kick it out to the side, at a 45-degree angle.
You are effectively drawing a rainbow arc with your foot. This diagonal movement hits the glute medius much harder than a straight-back kick. Keep your hips facing the floor the entire time. If you rotate your hips to get the leg higher, you negate the benefit. It should be a small, controlled movement that burns surprisingly fast. Do 15 to 20 reps on each side, and you will understand why glute isolation matters.
Final Thoughts
The effectiveness of these leg workouts relies entirely on one factor: your intention. Without external weights, your focus must be internal. You have to be the one who creates the tension, the one who initiates the contraction, and the one who dictates the tempo. When you go to the gym, the machine often dictates the range of motion for you. At home, you are the architect of your own movement.
Consistency will always beat intensity, but intentional intensity beats mindless repetition every single time. If you do these exercises simply to “get them over with,” you will see limited results. If you perform them by truly squeezing the muscles, controlling every second of the descent, and maintaining perfect form when the fatigue sets in, you will build a pair of legs that are as functional as they are strong. Start slow, master the mechanics, and let your own body weight be the resistance that transforms you.
