



Glider workouts look small on paper. They are not. A pair of sliders under your hands or feet can make a bodyweight session feel like someone quietly turned up the difficulty on your joints, your core, and your patience at the same time. The first time people try them, they usually expect a little ab burn. What they get is shaky hips, hot shoulders, and hamstrings that suddenly have opinions.
What makes gliders so useful is the long lever. The moment one hand or foot starts to slide, your body has to control the movement instead of just surviving it. That means the smaller stabilizers around your hips, ribs, shoulders, and ankles have to earn their keep. Fast reps turn the whole thing into cardio. Slow reps turn it into strength. The slow version wins.
Hardwood, tile, carpet — each floor changes the feel. Furniture sliders work on most surfaces, paper plates can get the job done on low-pile carpet, and towels are a decent backup if you keep the range under control. The real trick is not chasing big, showy slides. It’s keeping your ribs down, your knees honest, and your movement smooth enough that the set still looks clean at the end.
That’s the sweet spot here: simple moves, nasty tension, and enough variety to train the whole body without a rack of weights. Start with the ones that make you brace hardest.
1. Glider Mountain Climbers
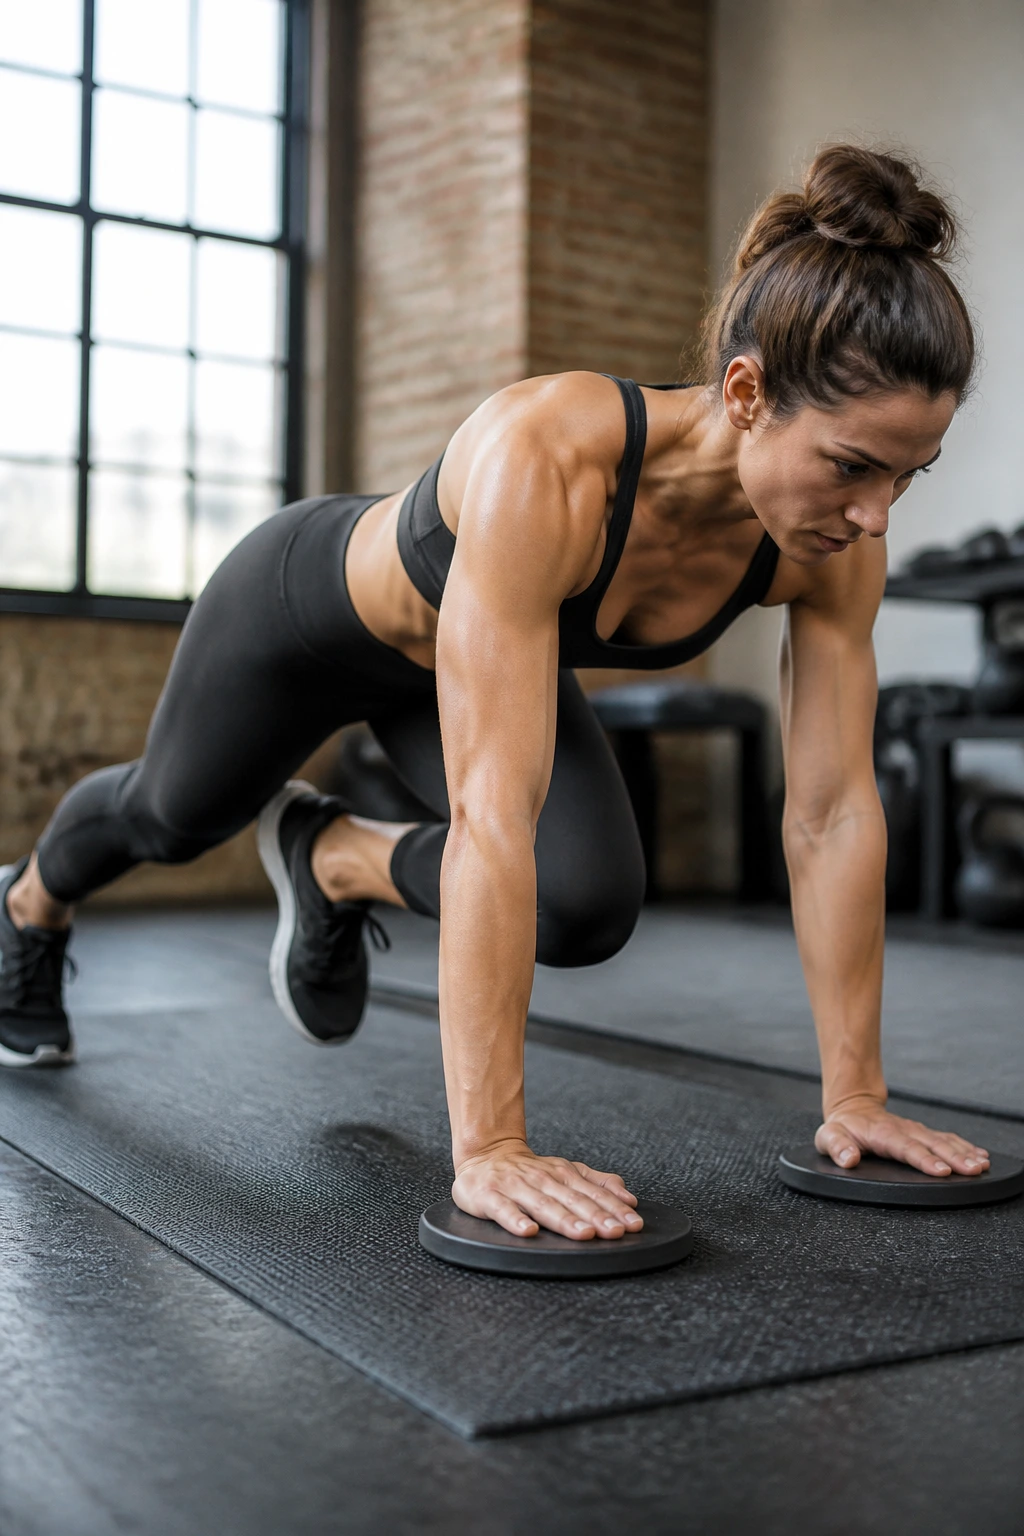
Mountain climbers get dismissed as a warm-up move. On gliders, they turn into a full-body test.
Why This Hits More Than Your Abs
Your shoulders have to stay stacked, your core has to stop the torso from wobbling, and your hip flexors have to pull cleanly without yanking your pelvis around. That is a lot to ask from one exercise. It also explains why sloppy climbers feel easy for the first five seconds and ugly right after.
Use 20 to 30 seconds per set if you want speed and conditioning, or slow them down to 8 controlled reps per side if you want more strength work. Keep your hands directly under your shoulders and slide one knee in at a time. The back leg should stay active, not lazy.
- Keep your hips low and quiet.
- Drive the knee forward without bouncing.
- Press the floor away through your palms.
- Stop the set when your lower back starts to arch.
Best cue: think “smooth and short,” not “fast and wild.”
2. Glider Reverse Lunges
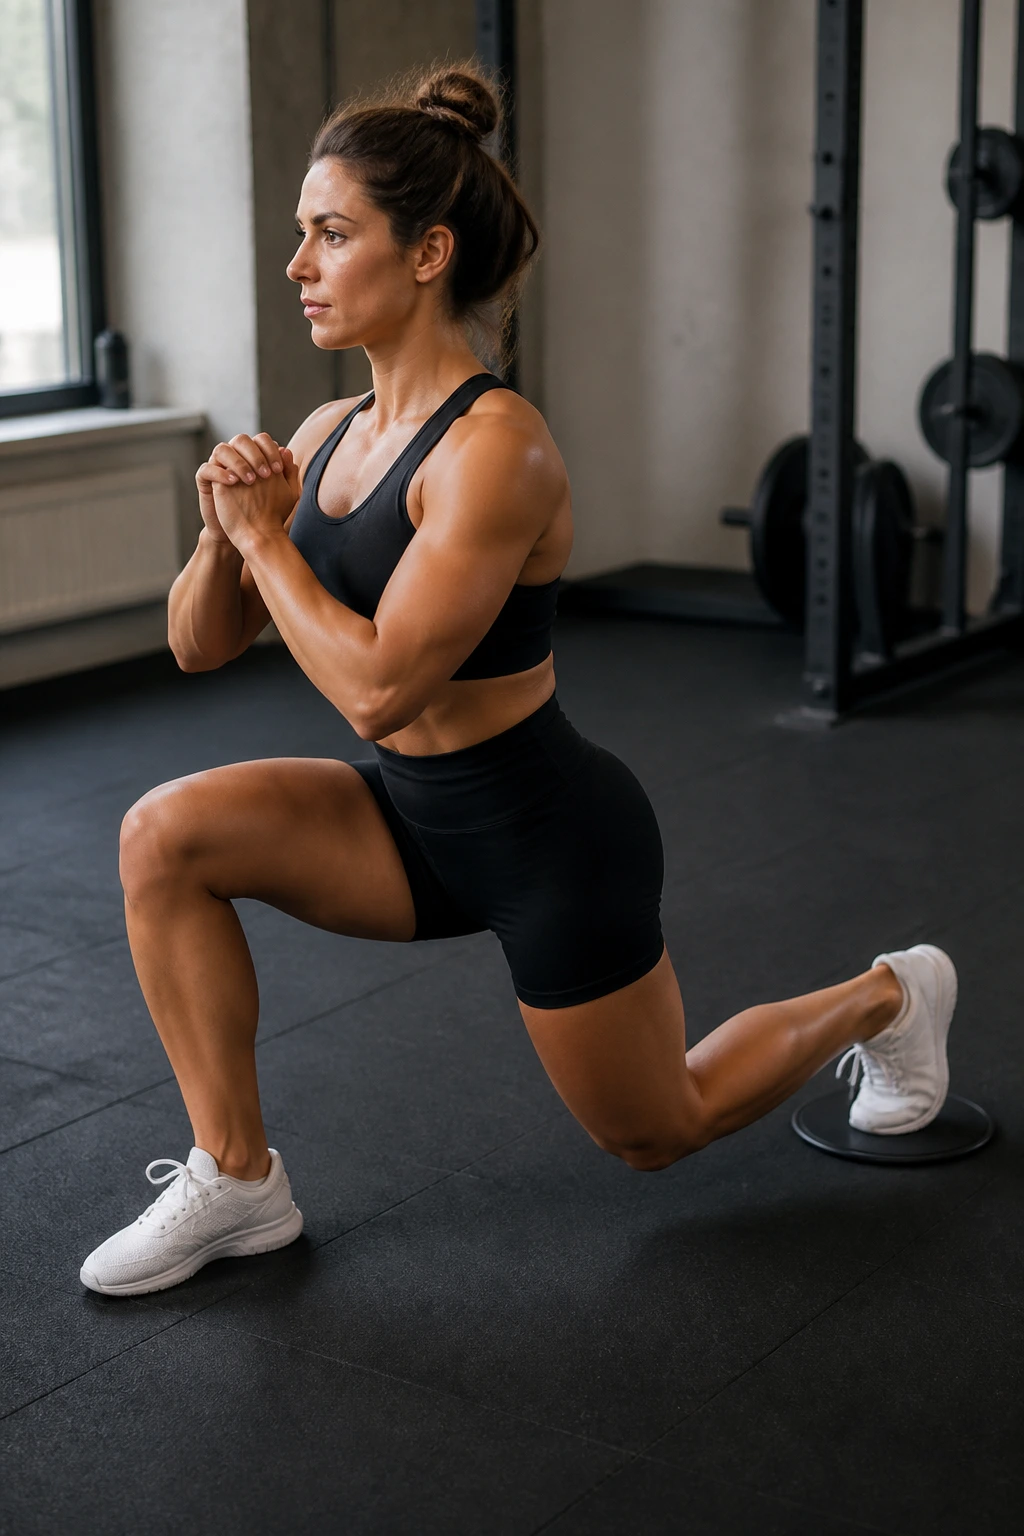
No extra load. Plenty of work.
A reverse lunge with the back foot on a glider makes the front leg do the real job. The front heel stays planted, the front knee tracks over the middle toes, and the sliding leg has to stay light all the way down and back up. That tiny change makes the movement feel cleaner than a lot of weighted lunge variations.
I like this one for people who want leg strength without pounding the knees. The sliding leg lets you control the descent, so you can get a deeper range without the usual stomp-step rhythm. Three sets of 8 to 10 reps per side is a solid start. Go slower than you think you need to. If you rush, the back foot starts dragging and the front knee takes over.
There’s a bonus here, too. Your glutes have to stabilize the pelvis while you move through the split stance, and that shows up later in squats, stairs, and even running. Quietly brutal.
3. Glider Hamstring Curls
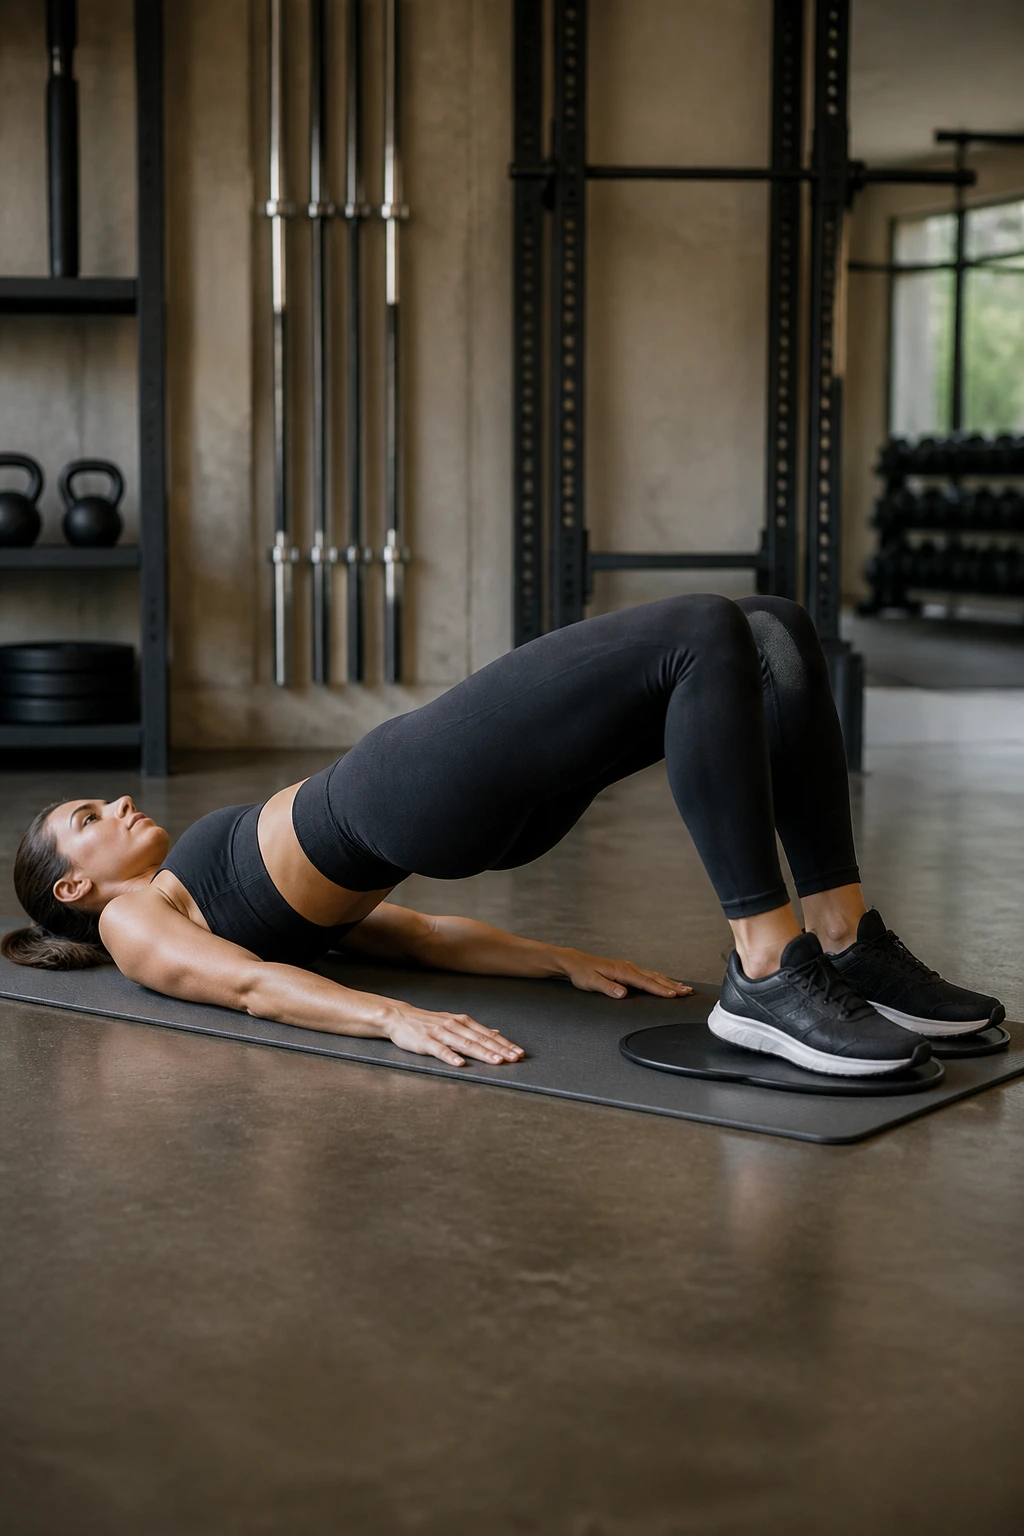
Why do so many people cramp on hamstring curls? Because they rush the bridge and let the hips drop before the legs do any real work.
Start on your back with both heels on the gliders. Lift your hips into a bridge first, then slide the heels away until your legs are almost straight. Pull them back in without letting the hips sag. That last part matters. If the pelvis drops, the movement turns into a low-back exercise with a fake hamstring finish.
How to Use It
Use 6 to 12 reps if you want strength, or 20 to 30 seconds if you want a hard core-and-leg finisher. On the first few reps, the range may be small. That’s fine. Small, clean reps beat long ugly ones.
If both legs cramp at once, shorten the slide and hold the bridge for a beat at the top. The hamstrings usually settle down once the movement gets more controlled. Do not let your feet flare out — keep them parallel so the tension stays where you want it.
This one looks simple. It isn’t.
4. Glider Push-Up Walkouts
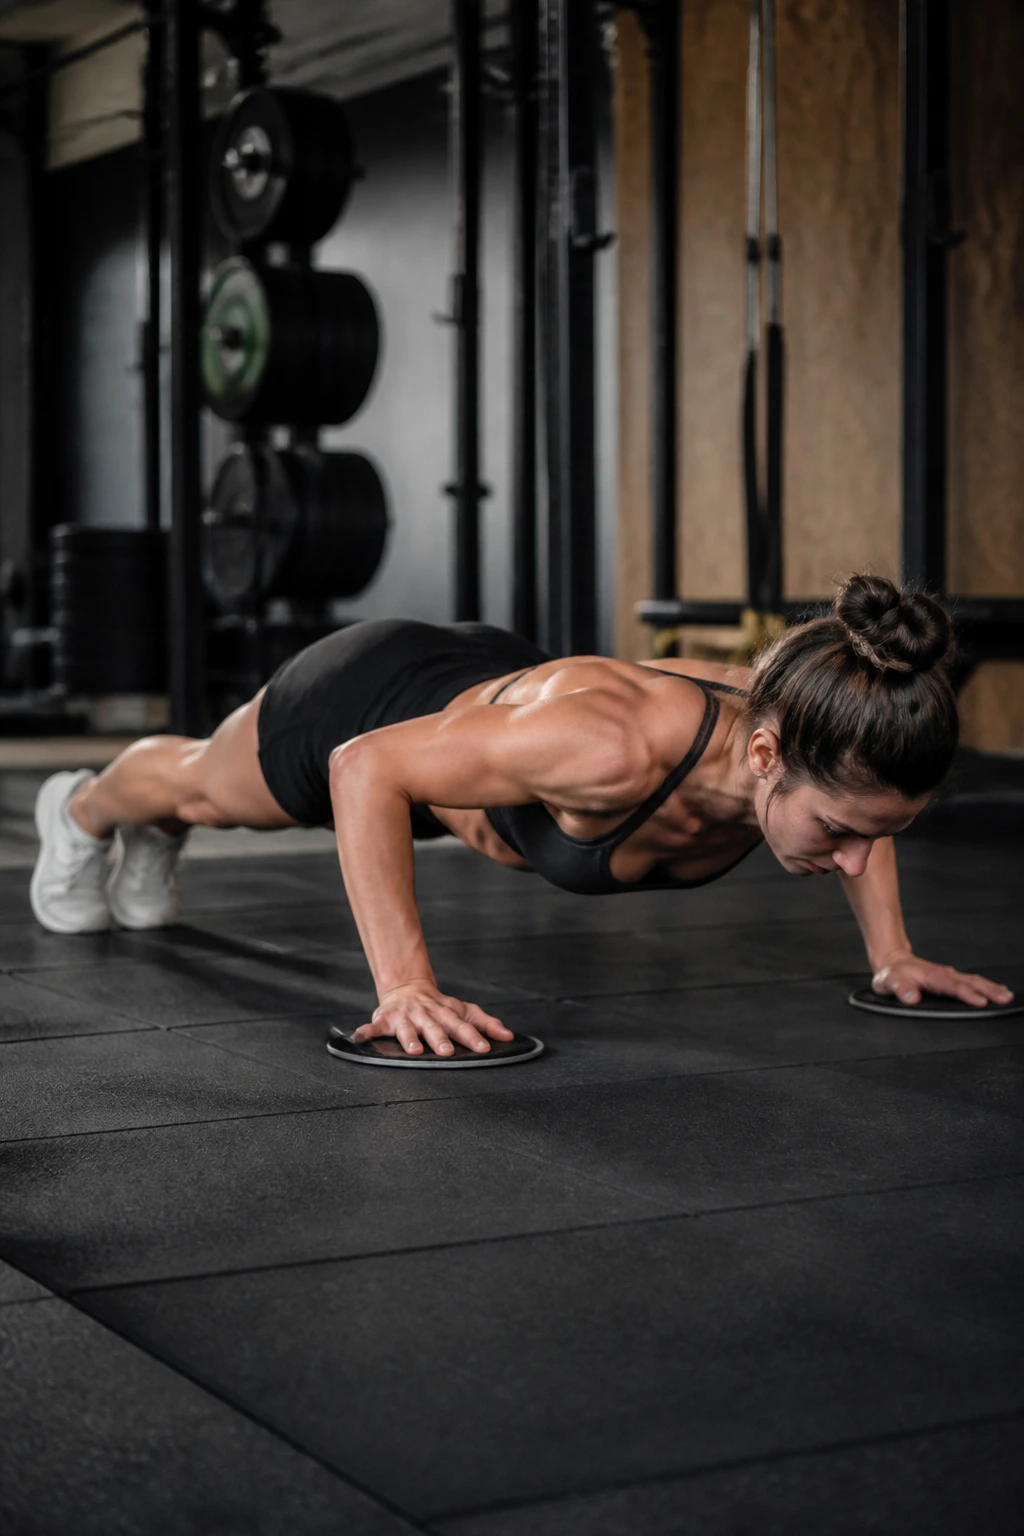
If your push-ups feel too easy, one slow walkout will change your mind.
Stand tall with the gliders under your hands. Hinge down, walk the hands forward until you reach a high plank, do one push-up if you can keep the line tight, then walk the hands back under your shoulders and stand. That’s the basic version. It hits the chest, shoulders, triceps, core, and the deep muscles that keep the ribs from flaring open.
A few cues make the difference between a strong rep and a floppy one:
- Keep the neck long, not craned forward.
- Squeeze the glutes before the hands leave the floor.
- Lower only as far as you can keep the ribs tucked.
- Walk the hands back under control instead of snapping them in.
Start with 5 to 8 reps. If that feels too easy, pause for one count in the plank before the push-up. The pause makes the whole thing honest.
5. Glider Body Saw Plank
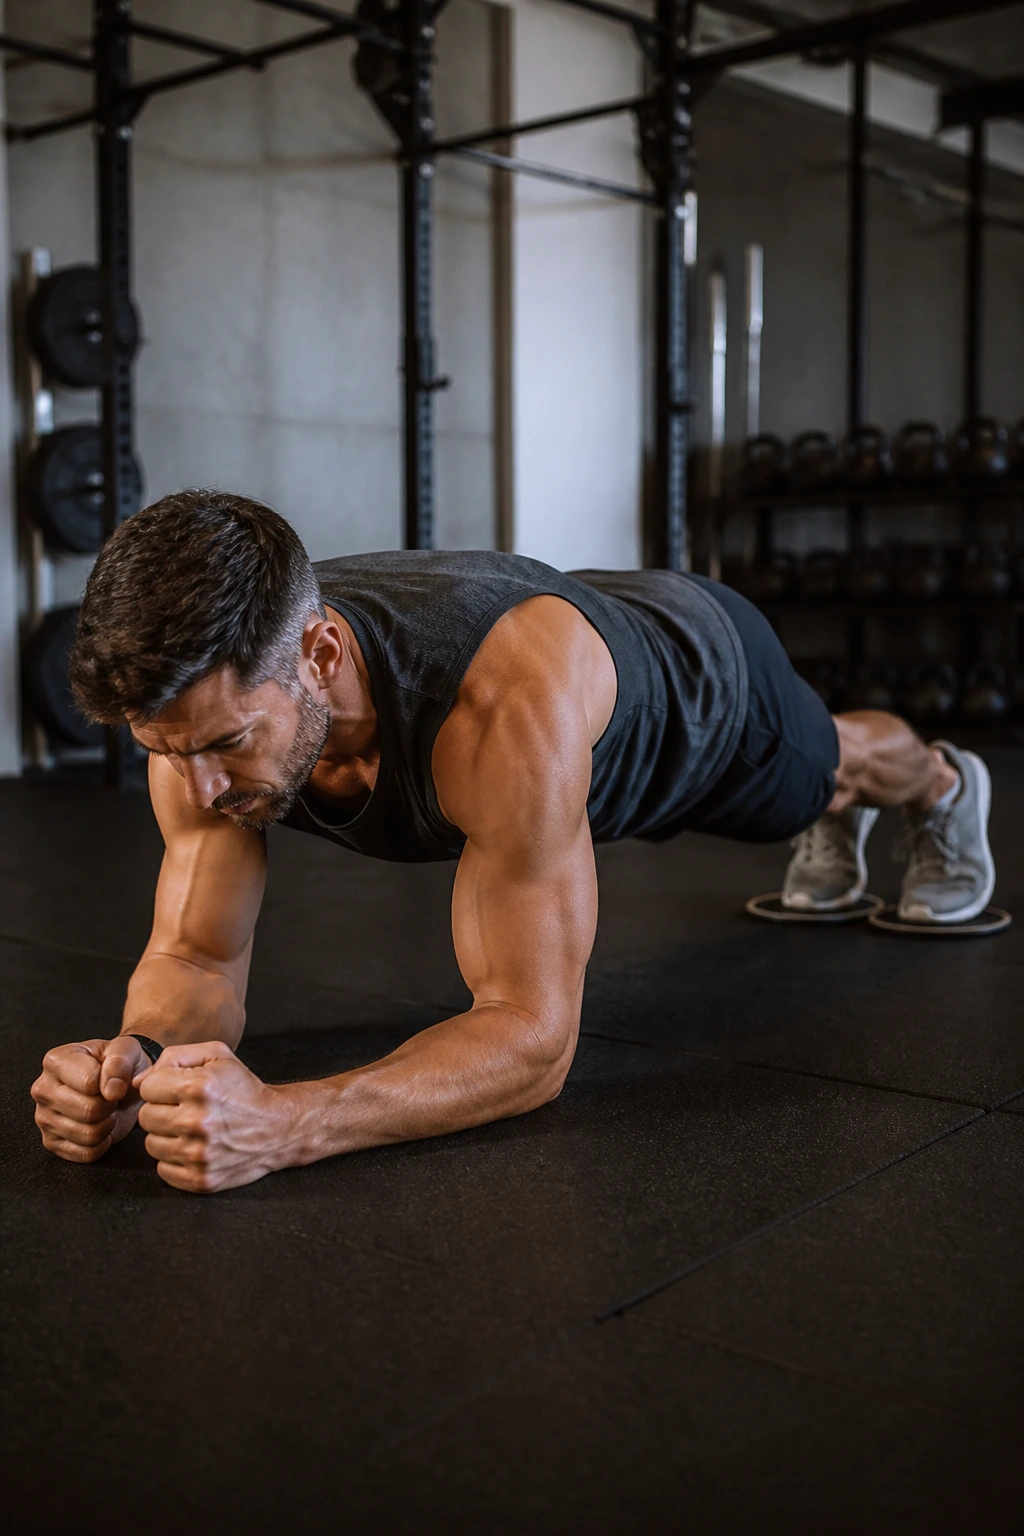
Forearm plank, feet on gliders, and then a tiny slide backward. That’s it. That’s the whole problem.
The body saw is one of those glider moves that looks almost too small to matter until your abs start shaking and your shoulders decide they’ve had enough. Because the body moves as one long lever, your core has to stop the torso from collapsing while the feet drift away from the elbows. The smaller the slide, the better the tension stays.
Keep your forearms flat, elbows under shoulders, and your glutes tight enough that your lower back doesn’t steal the work. A 2 to 4 inch slide is plenty for most people. More than that and the form usually gets sloppy. You are not trying to win a distance contest.
I like this move for people who train hard but still want better control through the trunk. Three sets of 8 to 12 saws is enough to make it useful. If your low back starts talking, shorten the range and slow down.
6. Glider Lateral Lunges
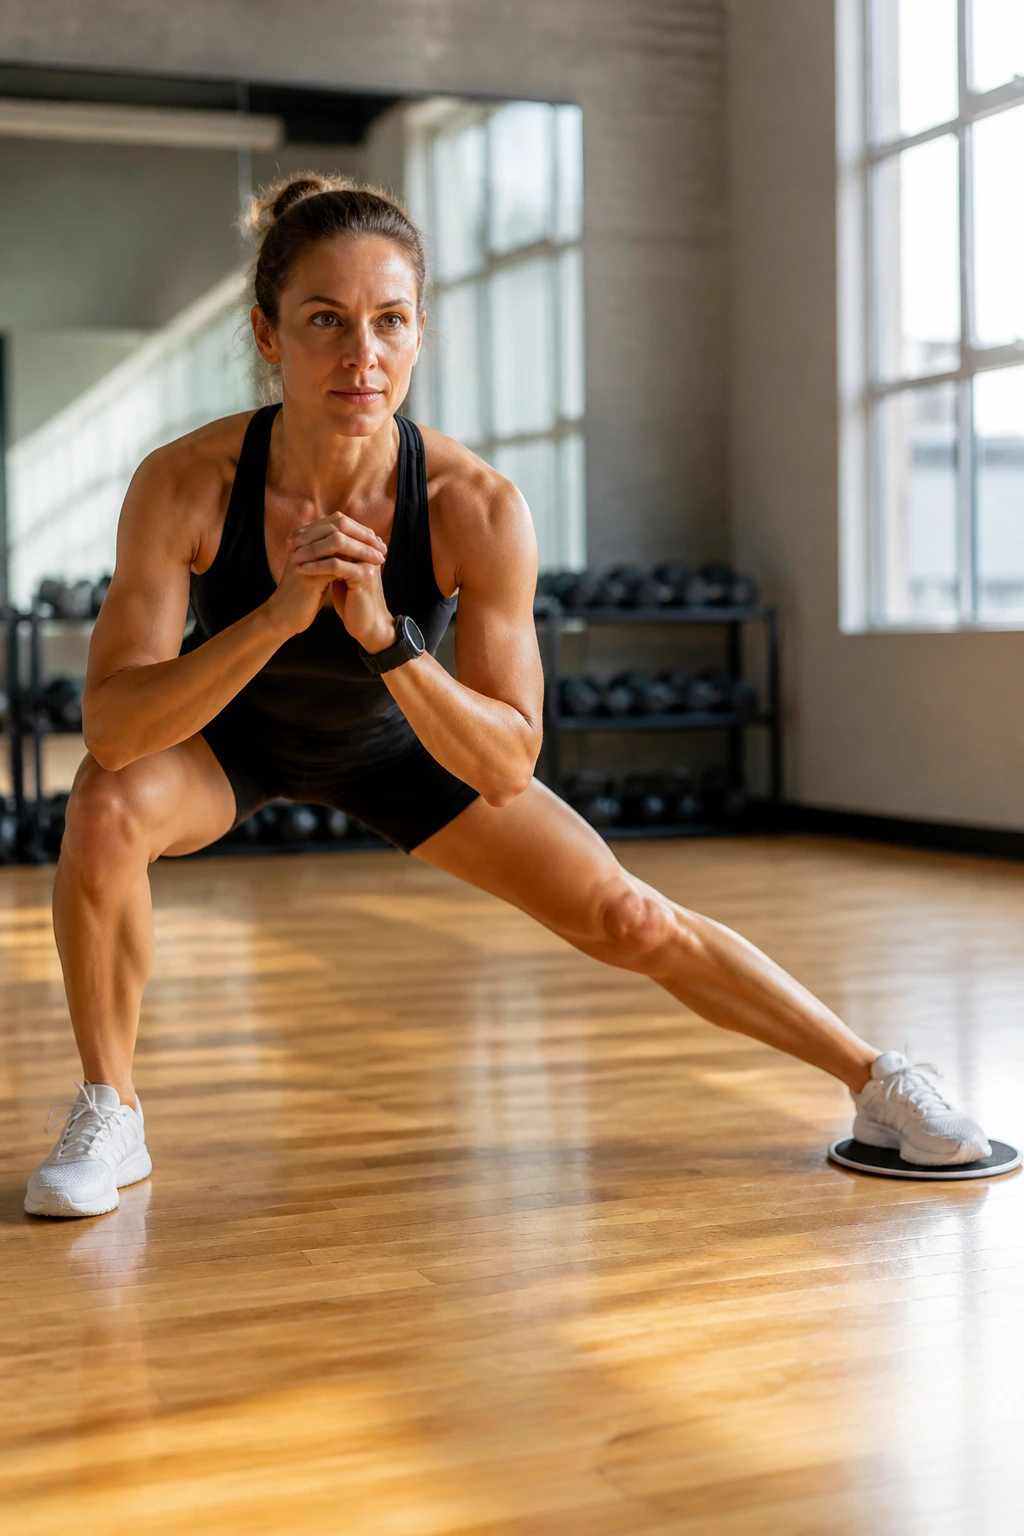
Most people live in forward-and-back movement. Their hips know it, and their knees pay for it.
A lateral lunge on a glider changes that fast. One foot stays planted while the other foot slides out to the side, which puts the inner thigh, outer hip, and standing leg all under real tension. The move is especially good if your side-to-side strength is the weak link. It usually is.
Why It Feels Different From a Reverse Lunge
A reverse lunge loads the front leg in a straight line. A lateral lunge asks that same leg to resist collapse from the side. That means more adductor work, more glute med work, and more control through the knee. You also get a longer pause at the bottom if you want it.
Use a slow slide out, a brief pause, then drive back in. Three sets of 6 to 8 reps per side is enough. Keep the chest lifted and sit the hips back, not straight down. If your standing foot caves inward, shorten the slide and clean up the line first.
This is one of my favorite glider workouts for people who sit too much. Tight hips hate it in the best way.
7. Glider Curtsy Lunge to Knee Drive
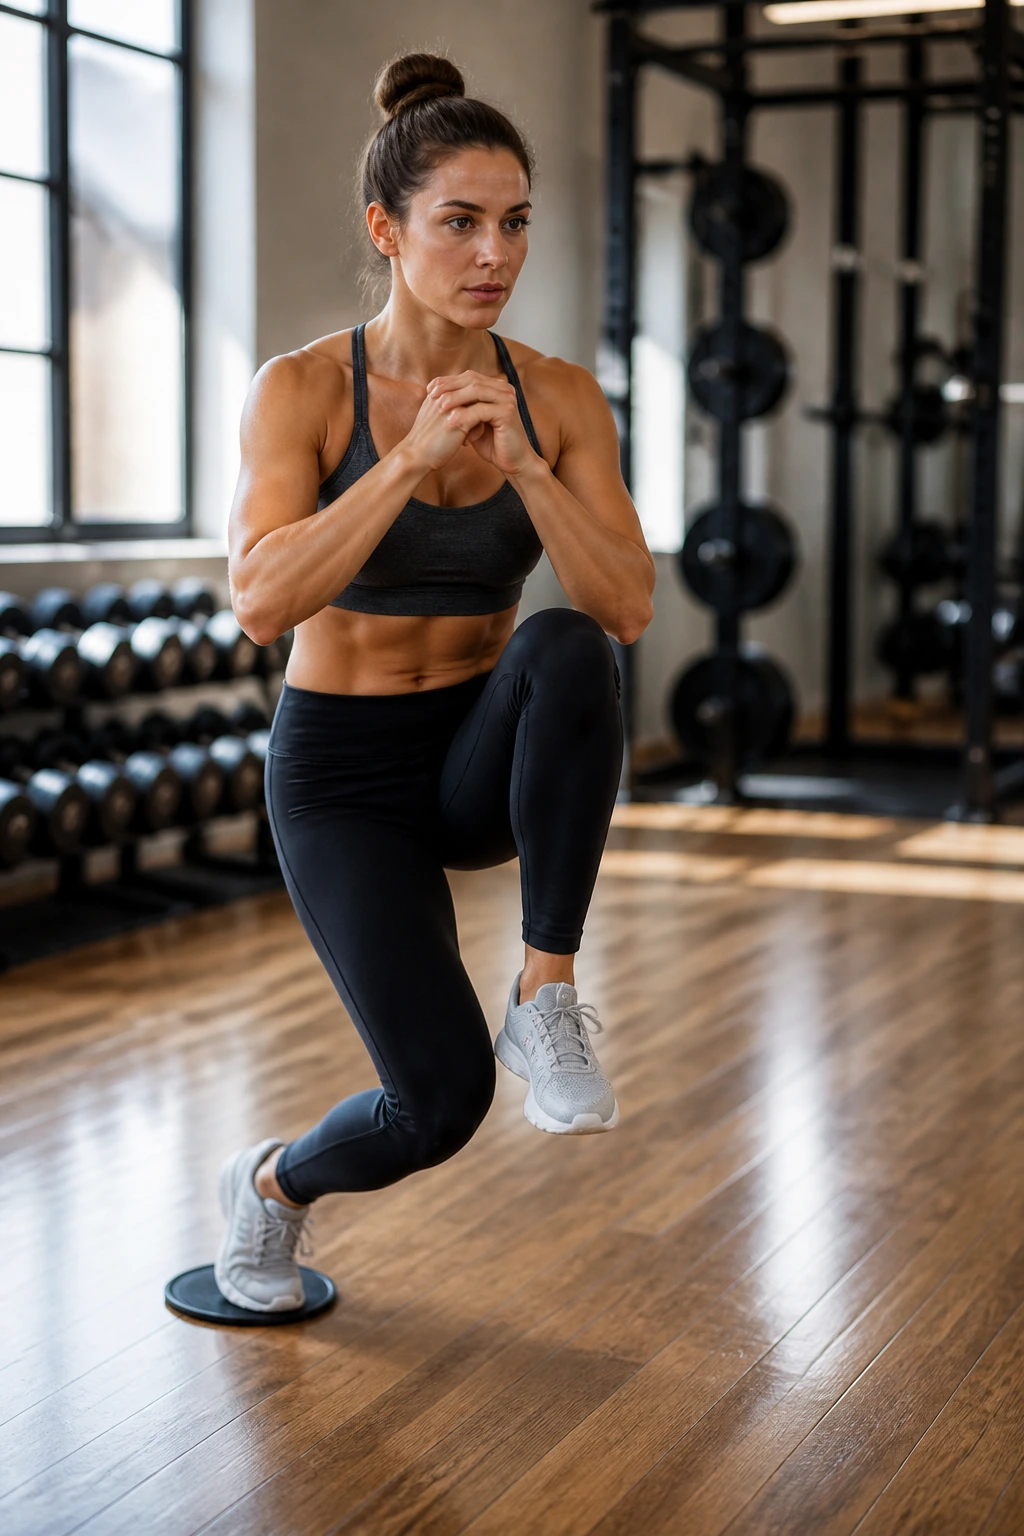
I don’t love curtsy lunges for everyone. I do like them when they’re slow, controlled, and done with a reason.
With a glider under the working leg, slide that foot behind and across the body into a curtsy position, then drive back up and bring the knee forward at the top. That little knee drive changes the feel a lot. It turns the exercise from a static leg move into something that asks for balance, hip control, and a bit of athletic snap.
The Tradeoff
You get more work through the glutes and outer hips, but the cross-behind path can bug some knees if the stance gets too narrow. Keep the step clean and the torso tall. If the knee feels pinchy, reduce the crossing angle. No heroics needed.
Two to three sets of 6 reps per side is enough to start. If the move feels good, build to 8 or 10. The knee drive at the top should feel crisp, not wild. Think control first, finish second. That’s the whole game here.
8. Glider Pike Slides
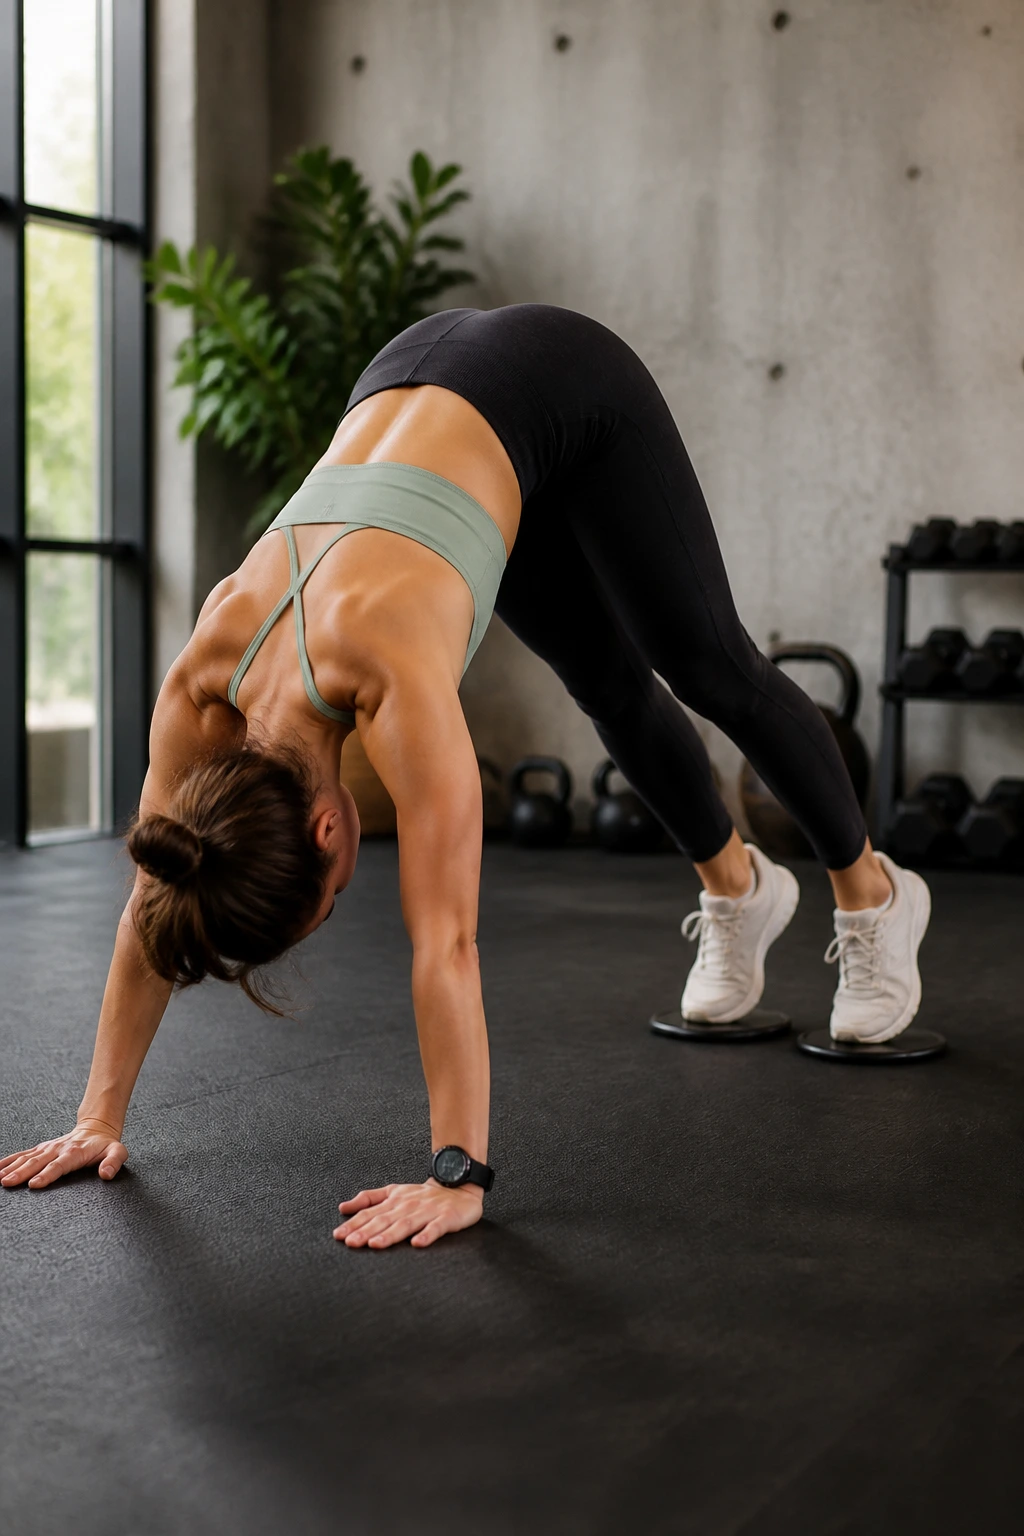
Pike slides are the kind of exercise that makes shoulders, abs, and hip flexors all complain at once.
From a high plank with feet on gliders, lift the hips up and slide the feet in toward your hands. Then press back out to plank. The body folds into a sharp V, then lengthens again. When it’s working, your shoulders stay active, your ribs stay tucked, and your hamstrings get just enough stretch to remind you they exist.
How to Keep the Hips Honest
Do not let the movement turn into a sloppy jump toward the sky. The pike should come from the abs and the pull through the hips, not from throwing the chest forward. Keep the hands planted and the shoulders steady over the wrists. If the neck cranes, you’ve gone too far.
Try 6 to 10 reps for a strength-focused set. If your hamstrings are tight, start with a shorter slide and hold the pike for one beat before coming back out. The pause tells you whether the core is doing the work or just tagging along.
9. Glider Bear Crawl
A bear crawl with gliders under the feet feels like a small apartment of chaos if you rush it.
Hands stay under shoulders, knees hover one to two inches off the floor, and opposite hand and foot move together. The sliders make the legs drift instead of stomp, so the trunk has to keep everything organized. That means more shoulder stability, more core control, and a lot more awareness than a regular crawl gives you.
Use it in short passes. 10 to 15 feet forward, then the same distance back works well. Keep the hips level and the steps small. If the body sways side to side, slow down until it stops. That sway is the whole point of the exercise, and also the thing you want to erase.
- Knees stay low.
- Hands press hard into the floor.
- Steps stay quiet.
- Hips stay square.
One clean crawl beats three sloppy ones. That rule saves a lot of good workouts.
10. Glider Single-Leg Deadlift Reaches
Can a bodyweight hinge really challenge your hamstrings? Yes. Add a glider and the answer gets louder.
Stand on one leg with the other foot lightly on the slider behind you. Hinge at the hips, send the free leg back, and slide it away as the torso tips forward. Then pull back to standing by driving through the grounded foot and squeezing the glute. The sliding leg should feel like a long lever, not a weight you drag around.
Programming Notes
Start with 6 to 8 reps per side. If balance is rough, keep one hand on a wall or rack for the first few reps. The trick is not to balance perfectly right away — the trick is to keep the pelvis square while the body folds and unfolds. That’s where the real work lives.
If you feel the movement in your low back, shorten the hinge and slow the return. The hamstring should load like a spring. The back should stay neutral. Those are not the same thing.
11. Glider Plank Knee Tucks
If you want core work without crunching, this is one of the best choices in the bunch.
High plank, feet on gliders, knees tucked toward the chest, then slide back out to a long plank. The abs have to stop the lower back from sagging, and the hip flexors have to pull the legs in without turning the set into a pike. That distinction matters more than people think.
Keep your hands a little wider than shoulder width if your wrists get cranky. Otherwise, stack them under the shoulders and press the floor away. Eight to 12 reps is a smart target. If you can only manage five clean ones, that’s still a real set. Sloppy reps don’t count for much here.
The move gets ugly when the shoulders drift behind the wrists. Fix that first. Then the knees.
12. Glider Skater Slides
Skater slides look a little playful until your outer hips start burning.
Stand on one leg and let the other leg slide diagonally behind you, then push back to center with control. It resembles a speed skater’s landing, only slower and heavier. That slower pace is the whole point. You’re training the body to absorb side-to-side force instead of just making a lateral hop and hoping for the best.
Why This Beats a Plain Side Lunge
A side lunge is useful. A skater slide asks for more deceleration. The standing leg has to catch your body, stabilize the knee, and keep the pelvis level while the other leg reaches away. That’s a different kind of strength. It shows up in running, field sports, tennis, and any workout where lateral control matters.
Use a controlled reach, not a fling. Three sets of 6 to 8 reps per side works well. If the standing knee caves inward, cut the range down and clean up the landing. The body learns from the shape you repeat.
13. Glider Squat Jacks
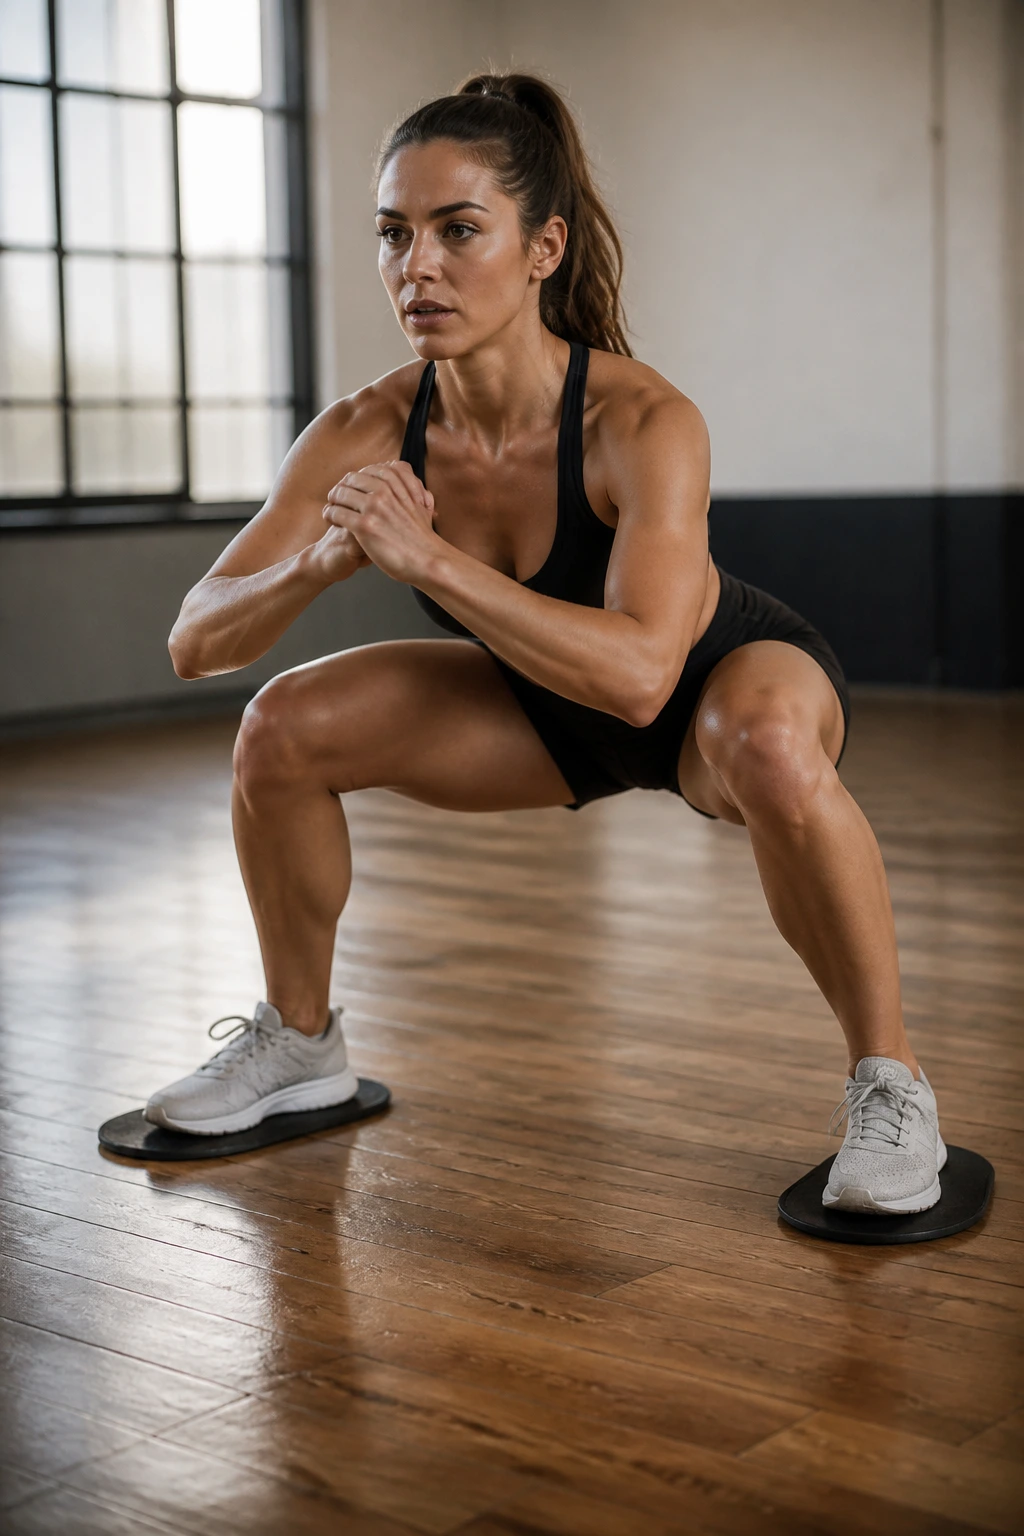
Squat jacks on gliders are a sneaky way to blend strength and conditioning without turning the set into a full jump workout.
Drop into a squat, keep the chest up, and slide the feet out and back in while staying low. The quads stay loaded the whole time, the glutes have to keep the hips from collapsing, and the inner thighs work harder than they do in a regular air squat. That constant tension is what makes the move useful.
The key is to keep the squat depth honest. If you rise halfway up every time the feet open, the exercise loses its point. Stay low. Keep the weight in the heels and midfoot. Use a 20 to 30 second interval or 10 to 16 total slides if you prefer reps.
A short round of squat jacks after lunges is spicy. After hamstring work, it feels even worse. I mean that as praise.
14. Glider Side-Plank Slides
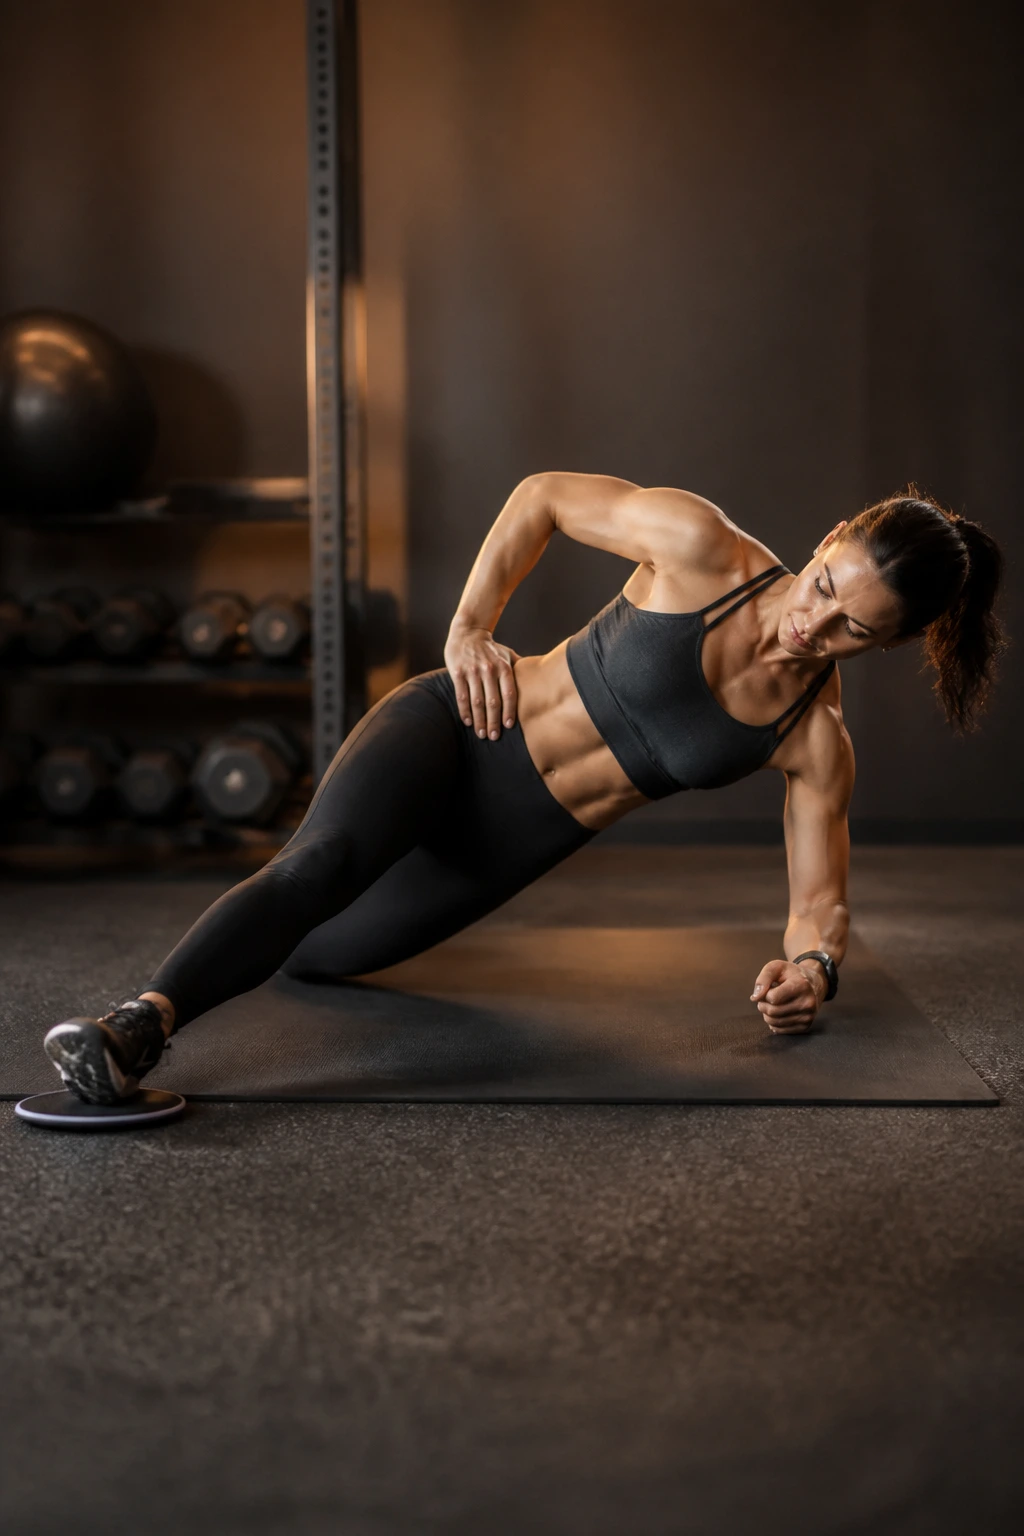
Side planks already demand patience. Add a glider and they stop being polite.
Set up in a side plank with the lower foot on the slider and the elbow under the shoulder. Slide the lower leg a few inches forward and back while keeping the hips lifted. The obliques have to hold the torso steady, the shoulder has to brace hard, and the outer hip gets dragged into the conversation whether it likes it or not.
The clean version is small and strict. Tiny slides, no sagging at the waist, no shrugging into the shoulder. If the bottom hip starts dropping, shorten the range before you quit the set. If that still feels too hard, drop the lower knee to the floor and keep the slide.
I like this move because it exposes side-body weakness fast. Not in a flashy way. In a very honest way. And that honesty is useful.
15. Glider Split Squat ISO to Drive
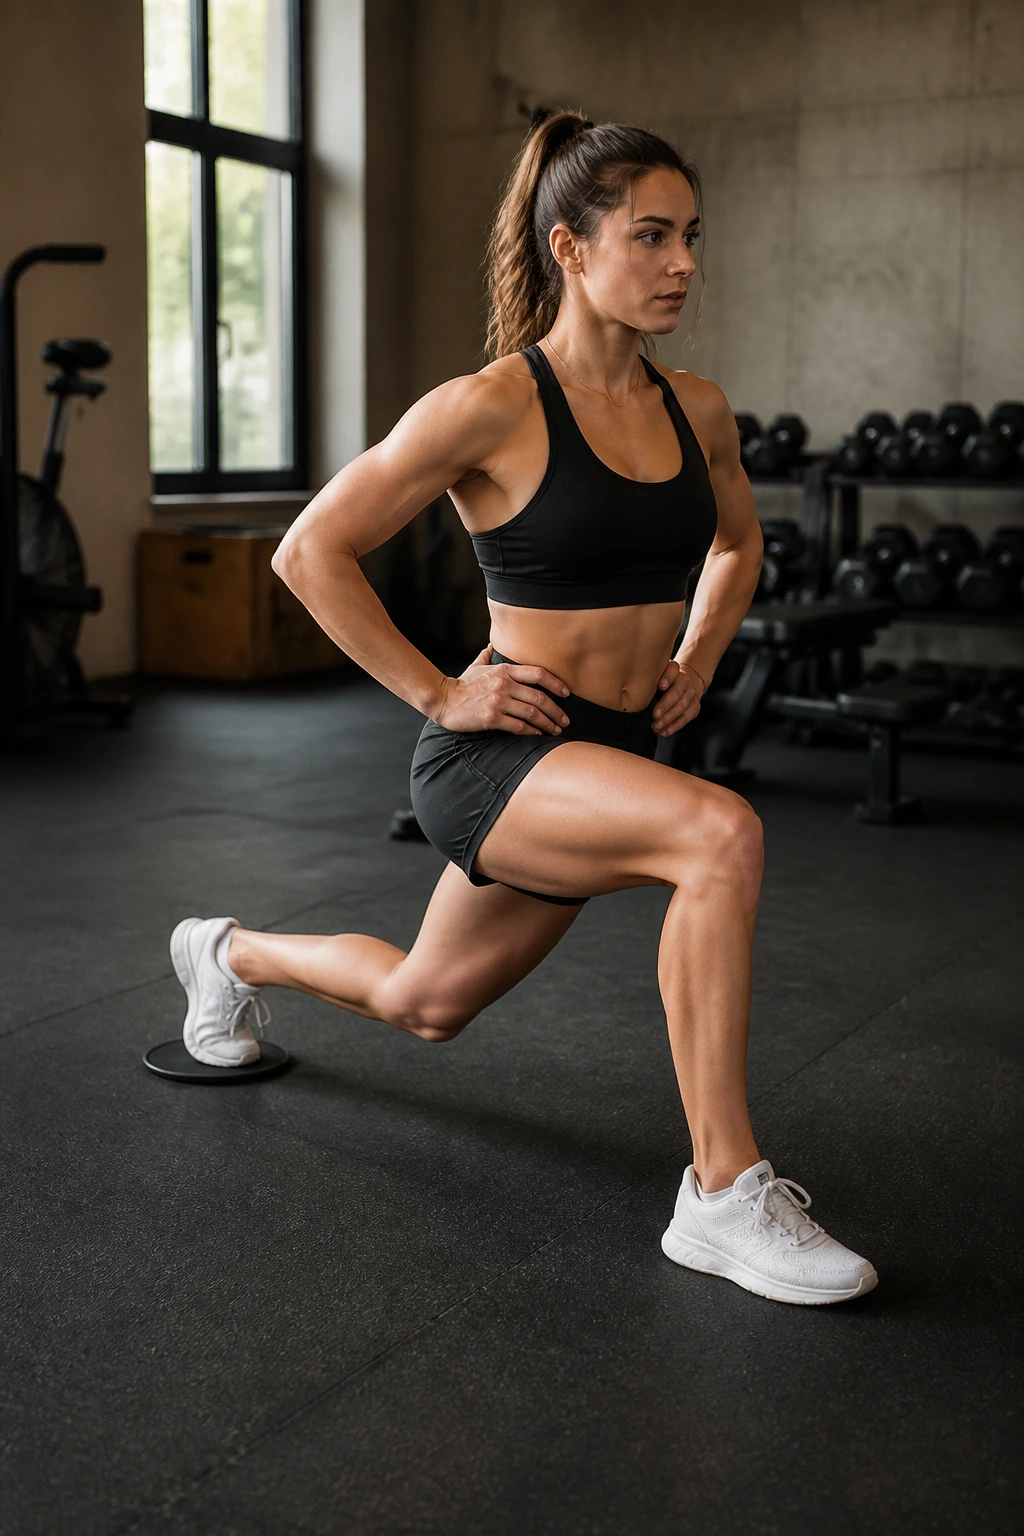
Why hold the bottom before you stand up? Because the hold makes the drive matter more.
Start in a split stance with the back foot on the glider. Lower into the lunge and hold the bottom position for 5 to 10 seconds. Then press up through the front foot and return to standing. That pause strips away momentum, which means the front leg has to create real force instead of borrowing it from a bounce.
The Best Way to Program It
Use 3 sets of 5 to 6 reps per side if you want strength. If you want more leg endurance, stretch the bottom hold to 15 seconds and keep the reps lower. The front knee should stay aligned over the middle toes, and the torso should lean only as much as the stance demands.
This one is rude in a good way. It exposes whether you actually own the bottom of the squat pattern or just pass through it. There’s a difference.
16. Glider Burpee to Slide-Out
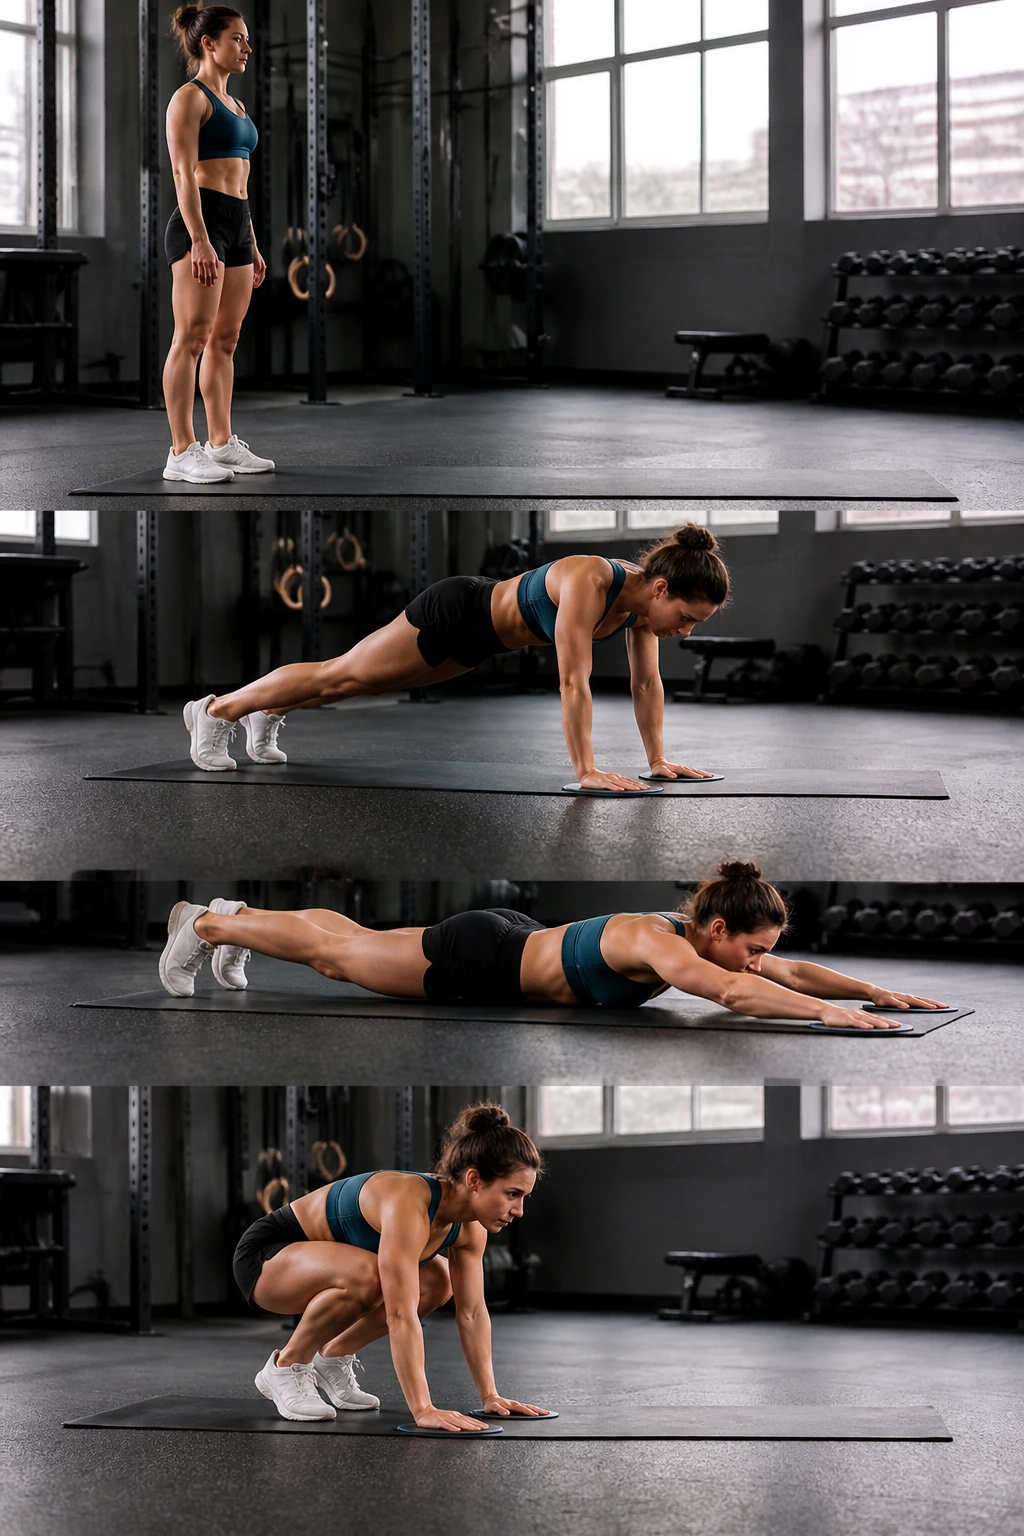
Burpees get sloppy fast. Sliding burpees punish sloppy fast.
From standing, drop hands to the floor, step or jump into a plank, then slide the hands forward a few inches before bringing them back under the shoulders. Pop the feet in, stand, and repeat. The slide-out adds a reach that taxes the core and shoulders before you even think about the next rep.
Keep the range modest. A small slide-out is enough. If the low back arches, shorten the distance and slow the pace. I’d rather see five clean reps than a dozen that look like a cat trying to escape a sink.
- Step back if your wrists are sore.
- Keep the chest from crashing.
- Breathe out as you slide out.
- Stand tall at the top.
Five to eight reps is plenty when the goal is strength with a conditioning hit. More than that, and form usually starts to leak.
17. Glider Dead Bug Slides
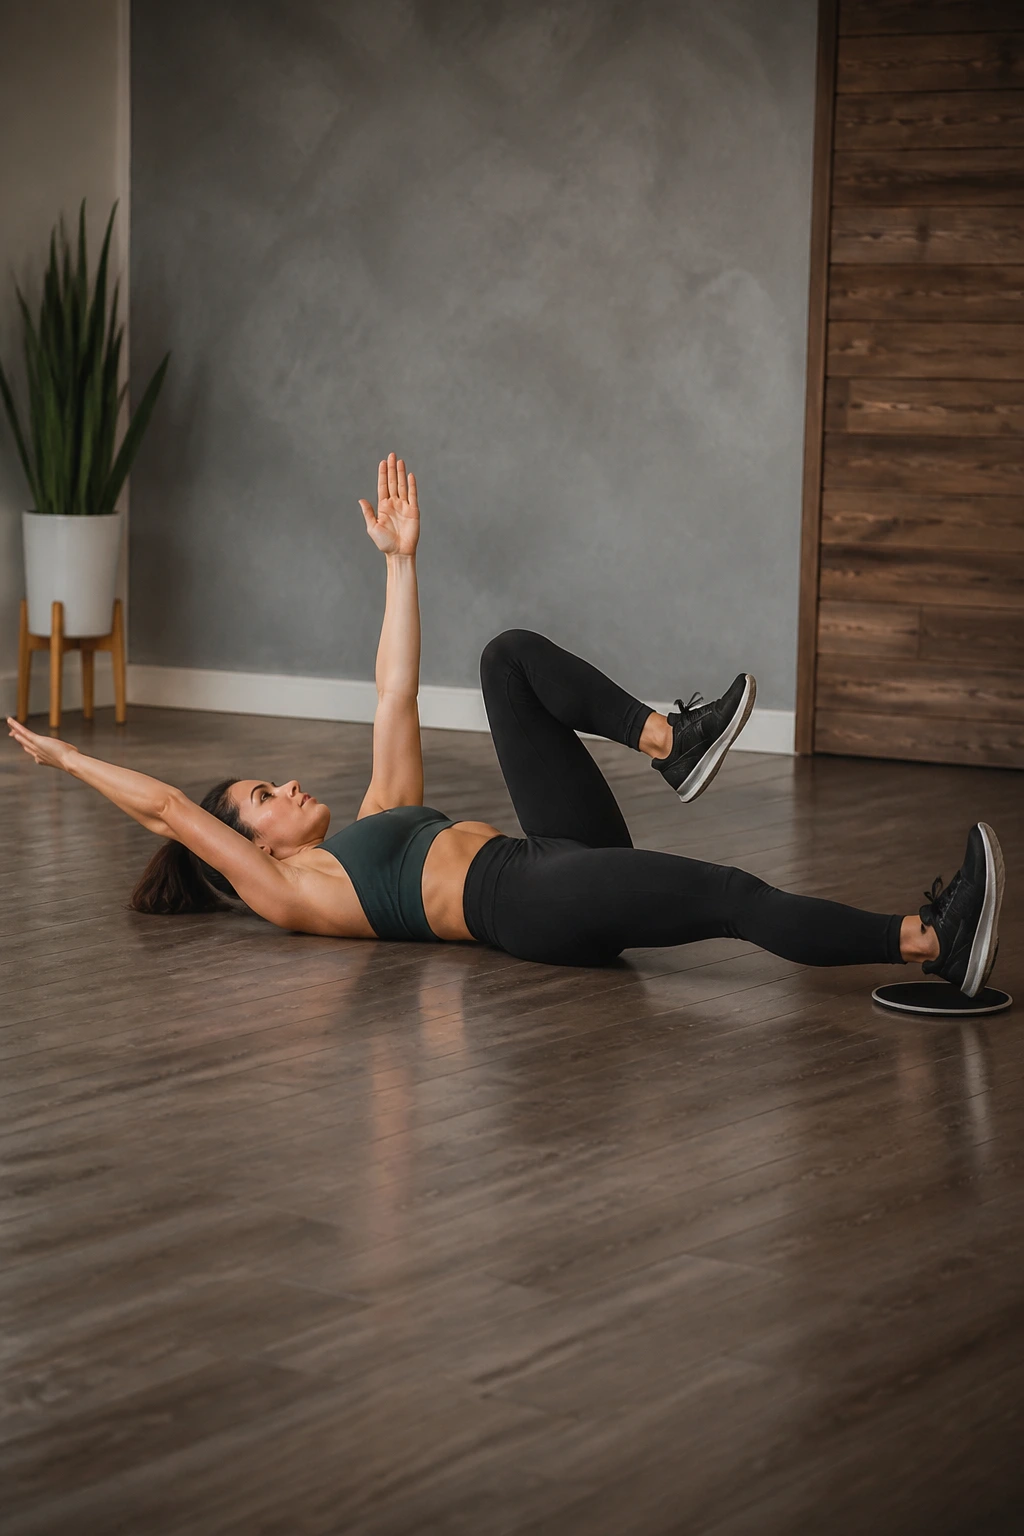
If your lower back likes to arch, this move will tell on it in about two reps.
Lie on your back with one heel on a glider and the other leg bent or lifted, depending on how hard you want the set to be. Reach the opposite arm overhead, brace the ribs down, and slowly slide the working leg away as the arm extends. Then return without letting the low back peel off the floor. Dead bug work is all about control, and the slider adds a long, demanding line.
What to Watch For
The pelvis should stay quiet. If it tips forward, shorten the slide immediately. If your neck tenses, keep the head down and breathe out as the leg lengthens. The movement is small, but the tension is real.
Use 6 to 8 reps per side and move slowly enough that you can feel each transition. I like this one late in a session, after the bigger leg and plank work, when the trunk needs a clean reminder of how to brace without cheating.
18. Glider Full-Body Ladder Finisher
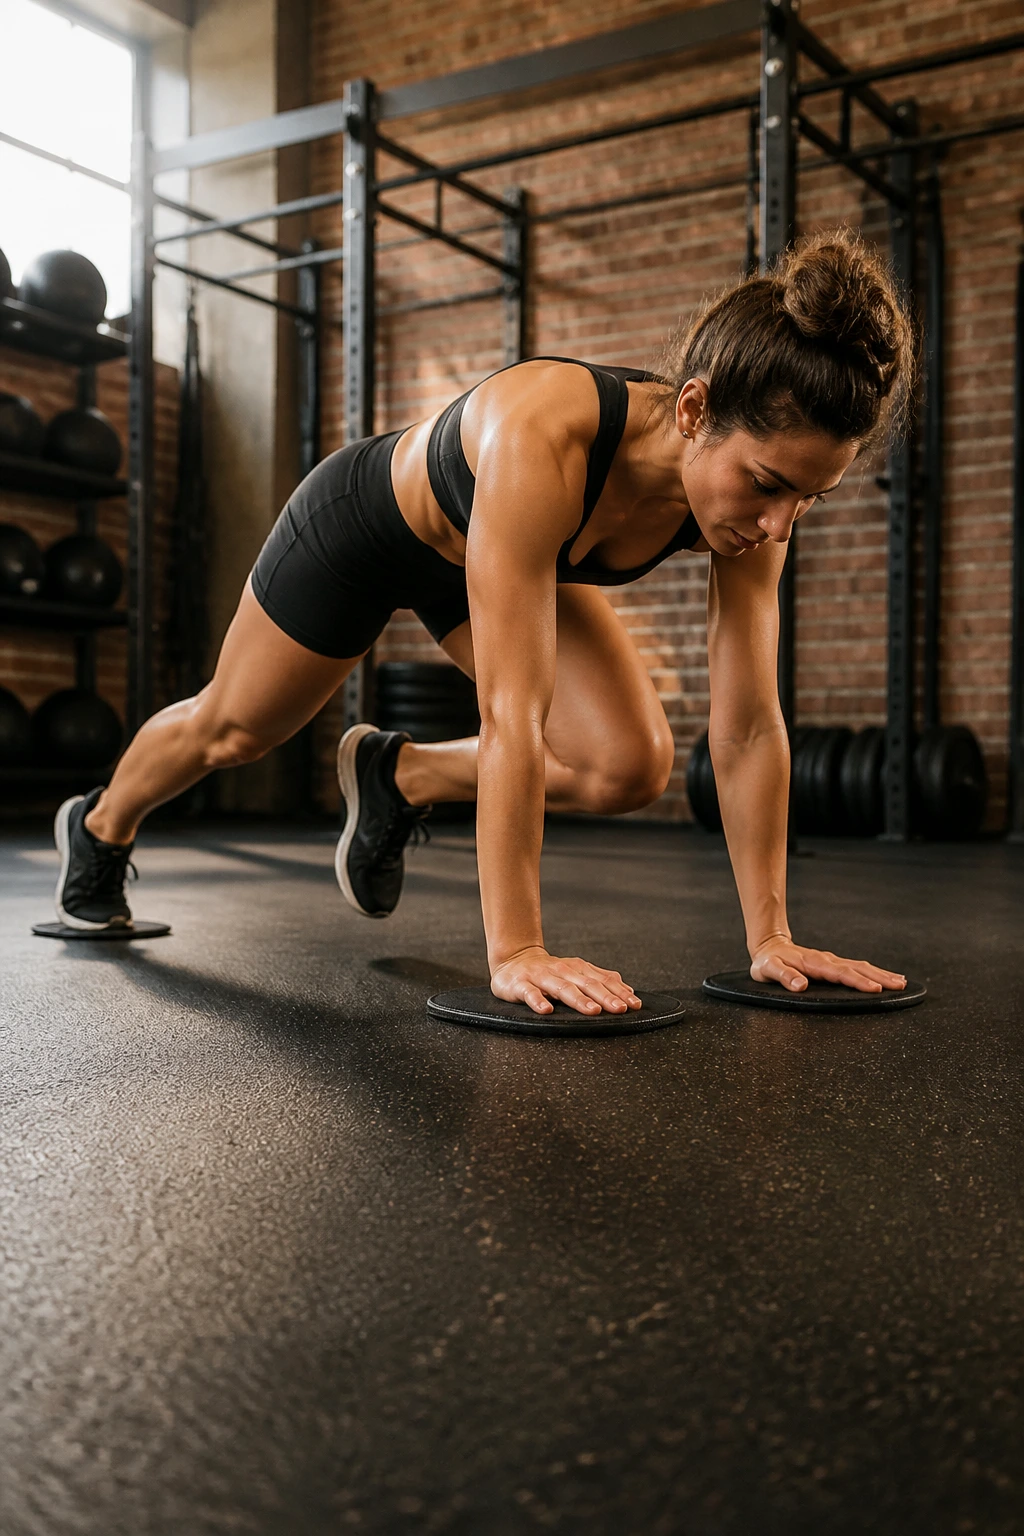
A good glider session does not need to end with a flourish. It needs to end with something you can repeat.
Ladder Setup
Try this simple ladder for 10 minutes:
- 30 seconds of glider mountain climbers
- 8 reverse lunges per side
- 10 hamstring curls
- 6 push-up walkouts
Rest 45 to 60 seconds, then repeat the circuit 3 to 4 rounds. If your floor is slick and your pace gets messy, cut the reps before you cut the form. The point is steady work, not a dramatic finish.
What It Should Feel Like
By round two, your shoulders should feel warm, your hamstrings should feel busy, and your core should be doing a lot of quiet work in the background. By round four, the clean rep starts to matter more than the fast rep. That is a good sign. It means the gliders are doing what they do best — exposing weak links without a barbell, a machine, or a lot of room.
Keep this finisher in rotation, and the individual moves stop feeling like random drills. They start to connect. That’s where the real strength shows up.
