



A beginner handstand is less about bravery than line. If the shoulders are sleepy, the ribs flare, and the hands are collapsing inward, the pose turns into a frantic kick instead of a clean inversion.
That’s why yoga handstand variations for beginners matter so much. They let you train the pieces one by one — wrist strength, shoulder push, core control, hip position, balance — without asking your body to solve the whole puzzle at once.
Some of these drills happen right at the wall. Some use a box, some keep the legs bent, and some barely leave the floor. Small stuff. Big difference.
Keep a mat under your hands, warm up your wrists, and use the wall like a teacher instead of a crutch. The wall gives you feedback fast, and that feedback is what makes the upside-down work start to make sense.
1. Wall-Facing Handstand Hold
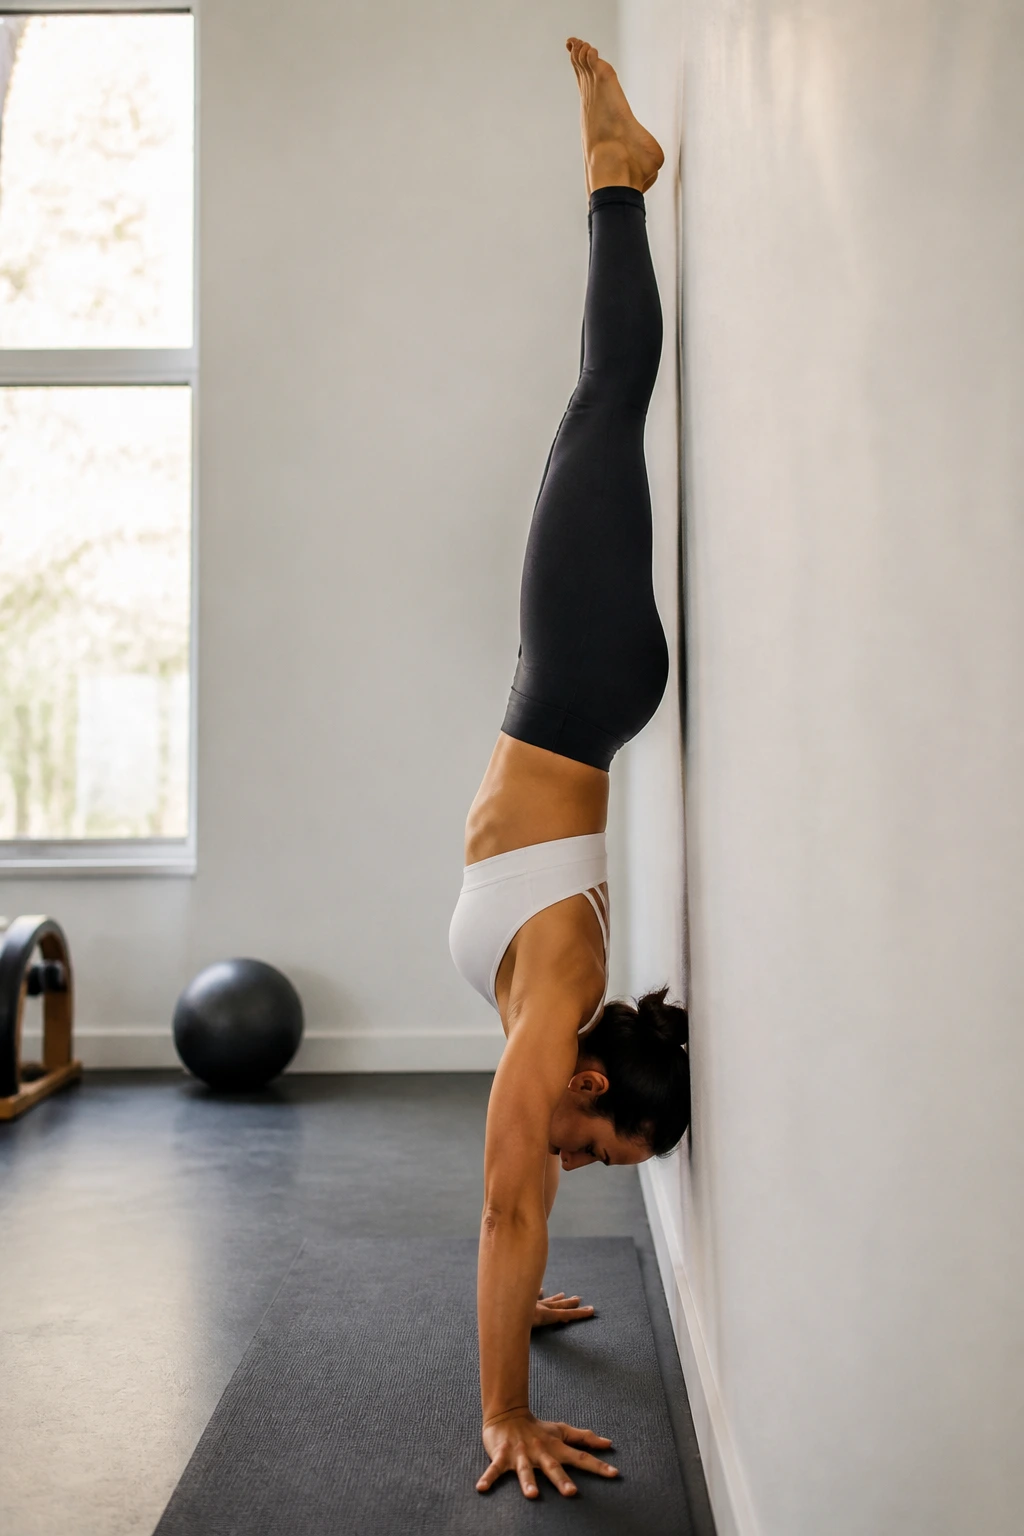
If you only do one beginner inversion drill, make it this one. A wall-facing hold teaches the straight line you actually need, because your chest, ribs, and face all have to stay honest instead of cheating with a banana back.
Set your hands about 6 to 10 inches from the wall, spread your fingers wide, and walk your feet up until your hips stack over your shoulders. Your nose should hover a few inches from the wall. Close enough to feel the line. Not so close that you start craning your neck.
What to Feel Here
Your shoulders should feel active, almost like you’re pushing the floor away. The belly stays gently in, not sucked up hard, and the heels reach long toward the ceiling. If the lower back arches, come down and reset. That arch is the body’s favorite shortcut.
- Hold for 10 to 20 seconds at first.
- Rest for 30 to 45 seconds between rounds.
- Aim for 3 to 5 holds with clean shape.
- Keep breathing through the nose if you can.
If you can’t keep your ribs tucked, you’re not ready to hold longer. Short, tidy reps beat a wobbly 30-second struggle every time.
2. Back-to-Wall Kick-Up Practice
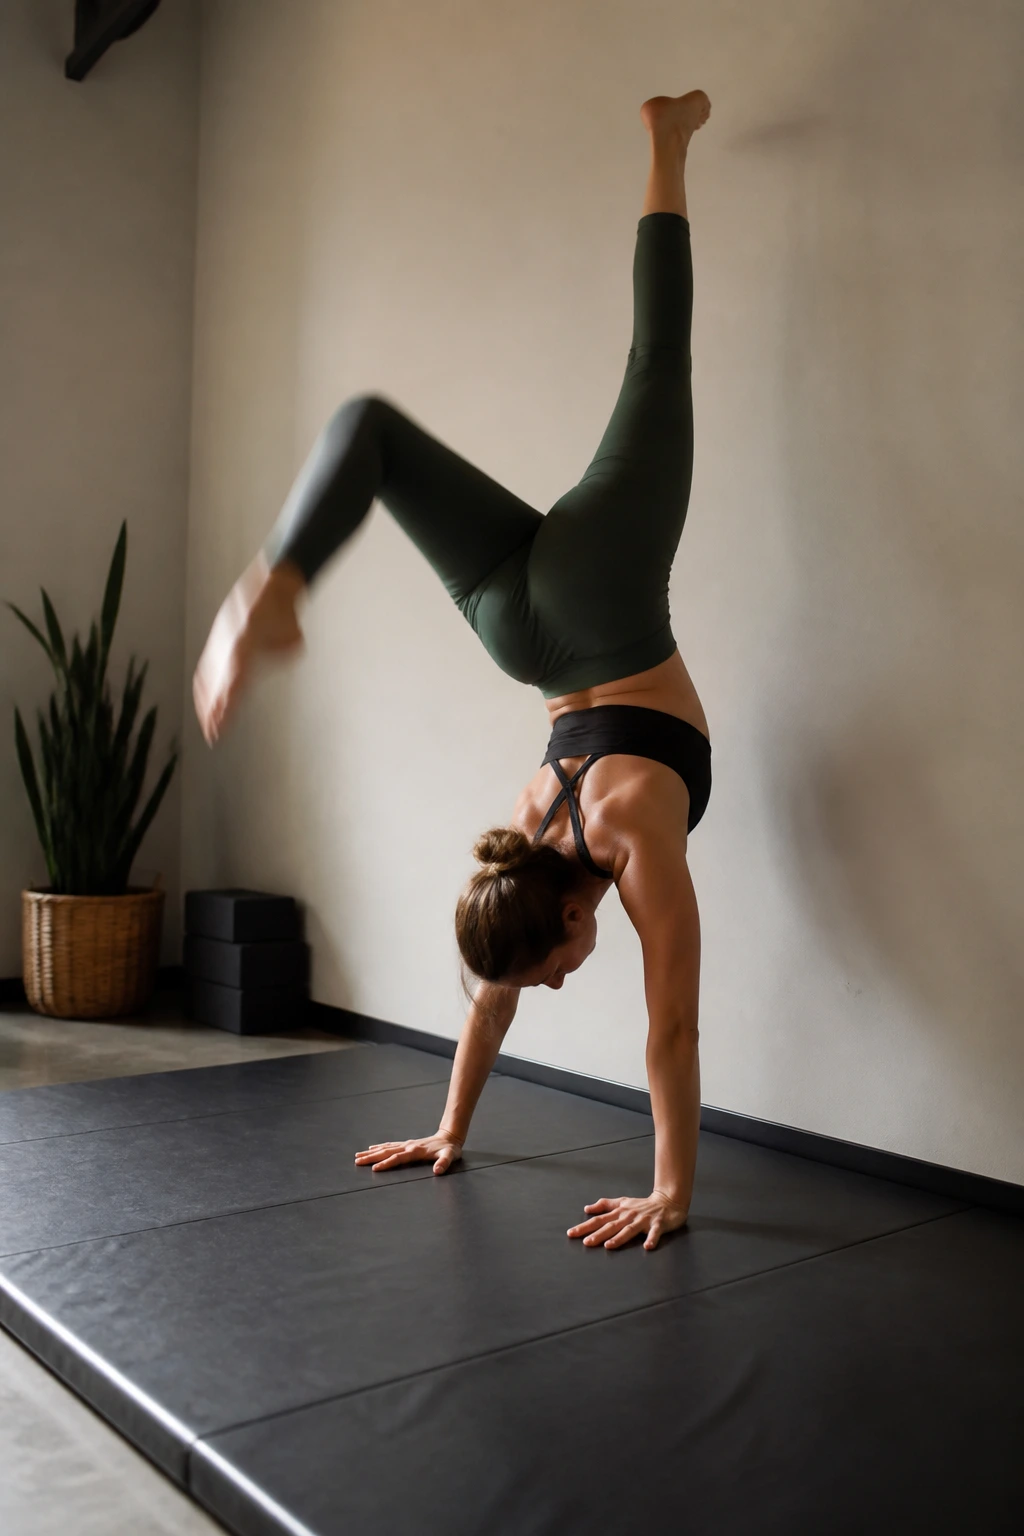
Standing with your back to the wall takes some of the drama out of the kick-up. You get a clear target, but you also get a safe place to land when the legs go a little too high or not high enough.
Place your hands on the floor roughly one forearm’s length from the wall, then lift one leg and give the other a small, controlled swing. The goal is not to launch. The goal is to land with enough control that the wall feels like a soft stop, not a collision.
How to Make It Work
- Start with a bent-knee kick instead of a straight-leg throw.
- Keep your eyes between your hands, not at the wall.
- Tap one heel to the wall lightly.
- Step down the same way you went up.
Soft contact beats a wild launch.
That’s the part most beginners miss. They kick hard because they think height is the answer, but height without control just turns into a wall slam, and nobody needs that. A small kick with a quiet landing teaches timing better than ten rushed attempts.
3. Box Pike Handstand
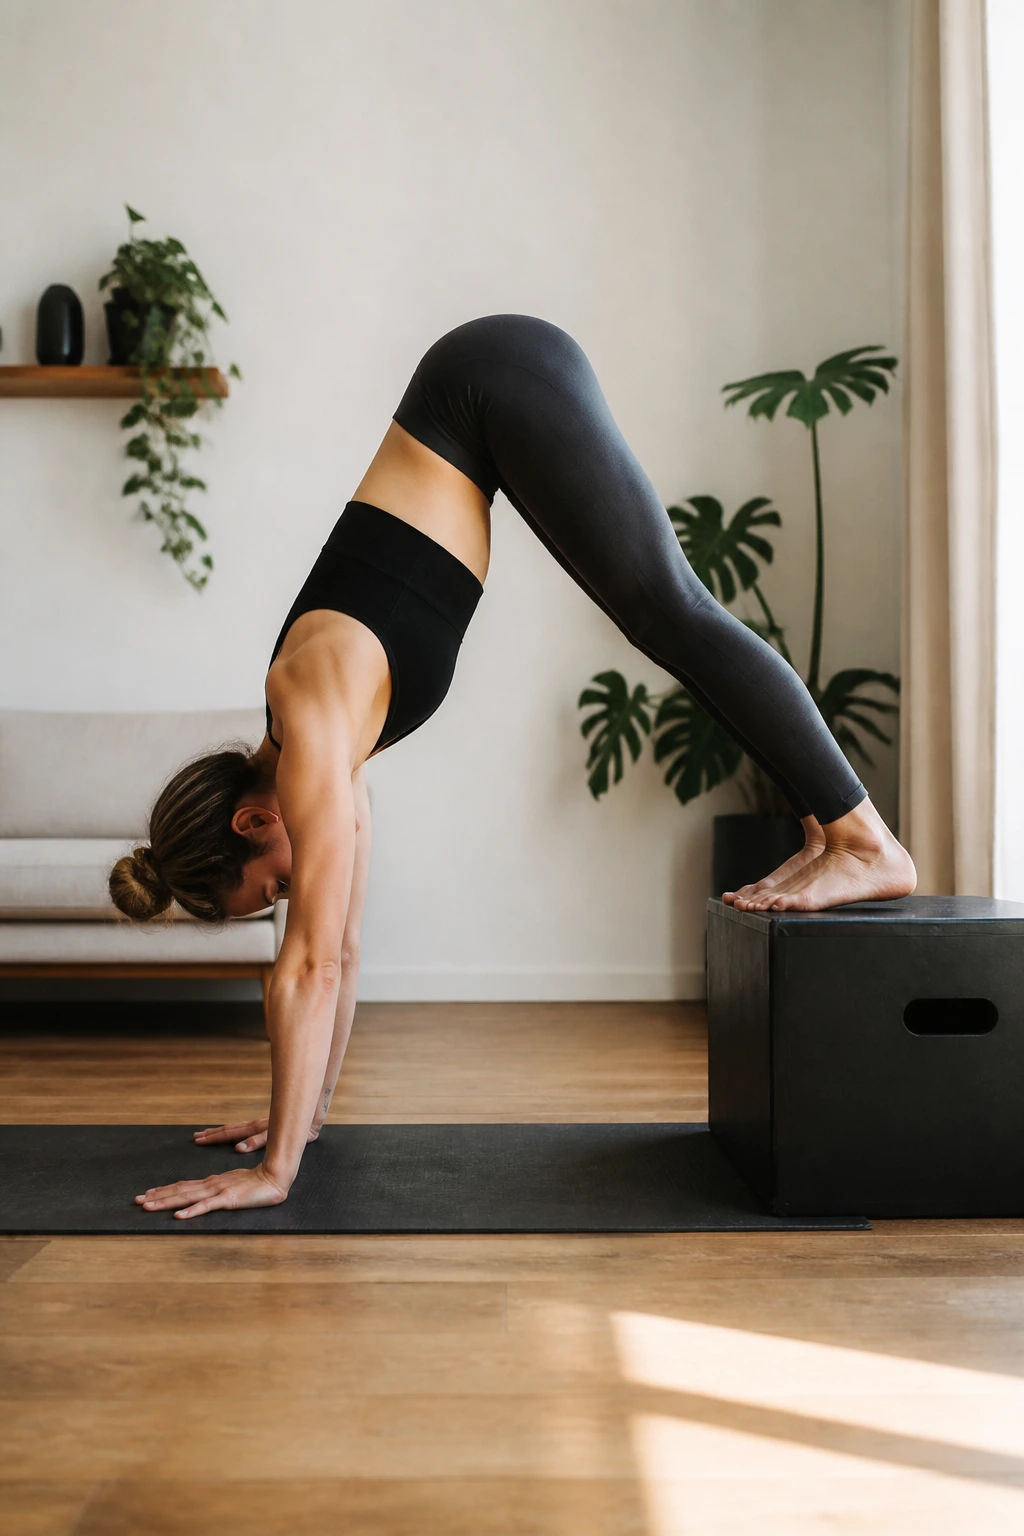
A box changes the conversation. Instead of asking your hamstrings to do circus work, you let them stay slightly bent or lifted while your shoulders and core take the load in a cleaner shape.
Put your feet on a sturdy box, bench, or couch edge about knee height, then walk your hands forward until your hips stack above your shoulders. The body makes an upside-down “V,” which sounds simple, and honestly, that’s why it works so well. The shape gives you room to learn pressure through the palms without fighting for full vertical balance.
The box pike is boring, and that’s why I like it. There’s no drama in it. You can feel exactly when your weight moves too far forward, and that little honest sensation is gold when you’re still figuring out handstand mechanics.
Keep the legs straight if your hamstrings allow it, but don’t force that part. Bent knees are fine. What matters is the shoulder angle, the hand pressure, and the quiet feeling that your feet are light on the box instead of hanging off it like dead weight.
4. Dolphin Pose Heel Lifts
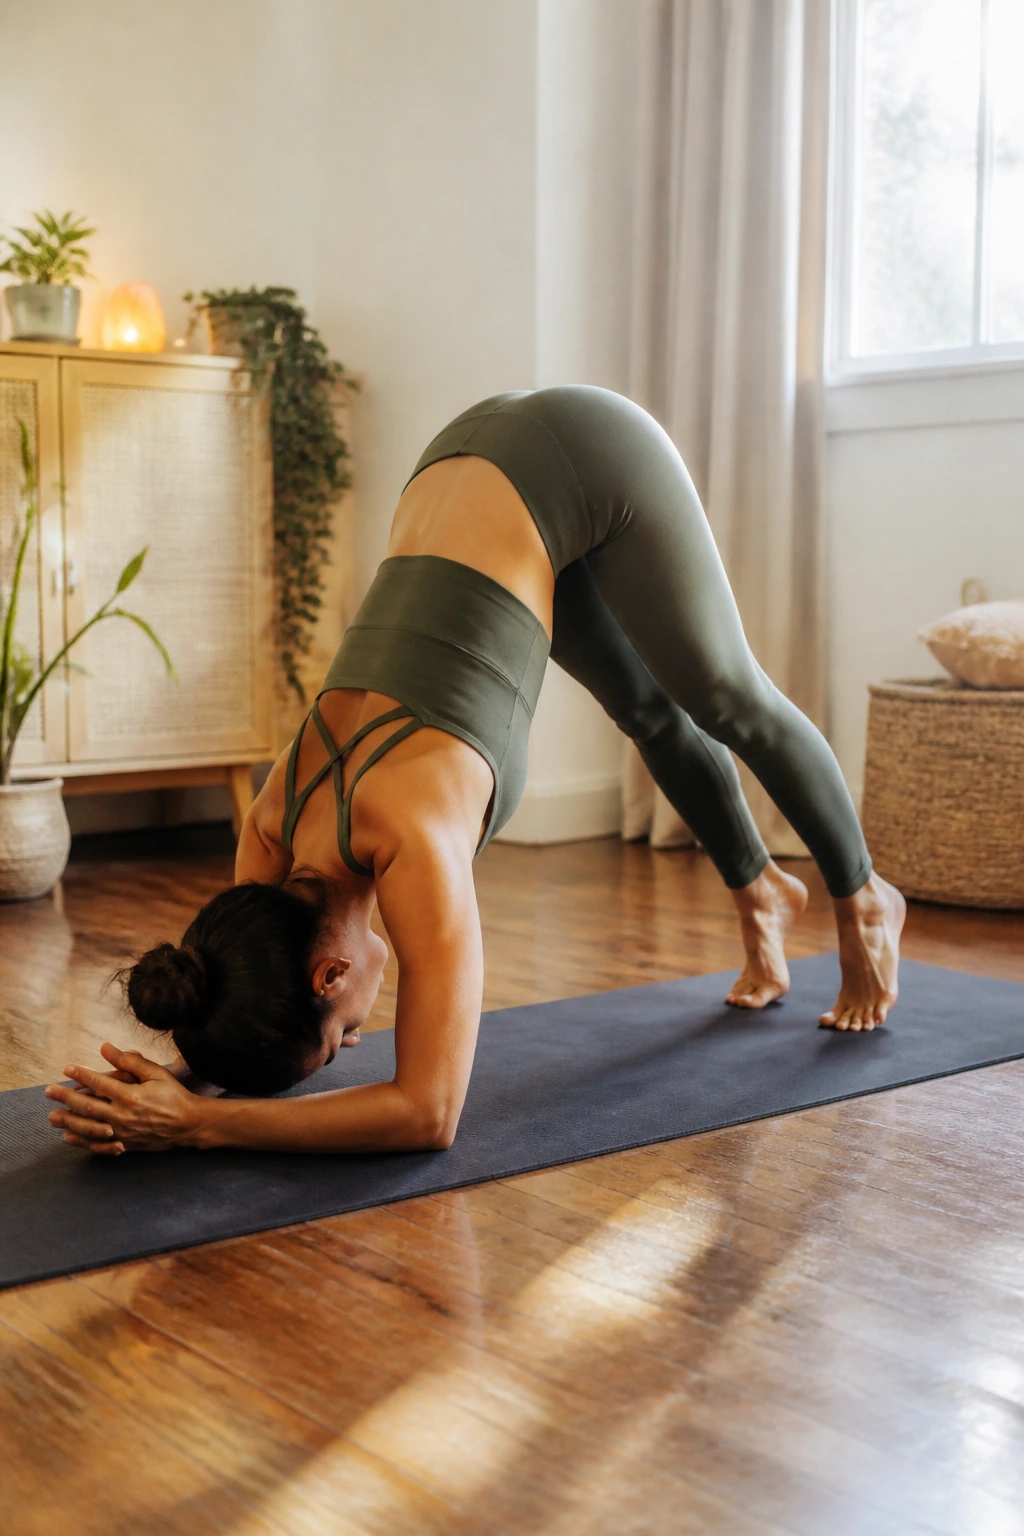
Can your shoulders take the load before your legs leave the floor? Dolphin pose answers that question fast, and the heel lifts add just enough movement to wake up the whole chain without making the drill chaotic.
Set your forearms down with elbows shoulder-width apart, tuck your toes, and lift your hips into dolphin. From there, take one heel off the floor, then the other, or lift both heels an inch or two and lower them with control. The point is not height. The point is pressure.
What This Drill Teaches
Your upper back starts to work harder, which is a good thing. Many beginner handstand attempts fail because the shoulders collapse, not because the legs are weak. Dolphin heel lifts train that “push away from the floor” feeling that handstands love.
- Keep the forearms parallel.
- Press the elbows down and slightly forward.
- Lift the heels slowly, not with a bounce.
- Do 6 to 10 reps or 3 short holds.
Watch your neck. If you’re jamming the head down to get more leverage, stop and reset the position. The pose should feel demanding in the shoulders and core, not pinchy in the neck.
5. L-Shape Handstand at the Wall
A perfect vertical line is not the first goal. The L-shape is kinder, and for a lot of beginners it’s the first time the body actually understands what being upside down can feel like without the panic.
Place your hands on the floor and walk your feet up a wall until your body forms a right angle: hands on the floor, torso reaching out, legs straight along the wall. Your hips stay open, your shoulders stay active, and your line gets longer without the full demand of stacking everything directly over the wrists.
This one is especially useful if your hamstrings are tight or your fear of falling forward makes you tense up. The wall keeps the shape honest, but the wider angle gives you room to breathe. You can stay in the hold longer, which matters because handstand strength is often built in these less glamorous holds.
I like this variation for people who rush. It slows them down. The body can’t fake an L-shape as easily as it can fake a kick-up, and that makes it a good teacher.
6. Wall Walks to Handstand
Wall walks look simple until you do three of them in a row. Then the shoulders start telling the truth.
Begin in a plank with your feet near the wall. Walk your feet up the wall one step at a time while your hands walk closer to the wall, stopping before your chest starts to sag or your lower back starts to dump. Hold for a breath or two, then reverse the path and come down with control.
A Clean Way to Practice
- Keep each hand step small.
- Move one foot at a time.
- Stop when the shoulders begin to feel shaky.
- Descend with the same control you used going up.
Wall walks build a kind of upper-body confidence that feels different from kick-ups. You are not hurling yourself into position. You are constructing it, one small shift at a time. That matters, especially for people who tense their jaw every time their feet leave the ground.
If the walk feels too steep, start with just two or three steps up the wall. A shallow angle still trains the shoulders, and honestly, it may teach you more than a full walk you can barely hold.
7. Split-Leg Wall Handstand
Open one hip, and the whole pose gets easier. That sounds backwards, but it’s true for a lot of beginners who feel stuck the second both legs have to line up perfectly.
In a split-leg wall handstand, one leg reaches up along the wall while the other extends forward or slightly downward. The split gives you a wider base and makes balance less twitchy. You can shift the legs back and forth slowly, which helps you find the center without losing the entire pose.
Which Leg Goes Where?
Either leg can lead. Try both sides, because one version will usually feel cleaner than the other.
- Keep the pelvis mostly square.
- Let the front leg stay active, not floppy.
- Press the back foot into the wall lightly.
- Hold for 15 to 25 seconds per side.
The split also helps if your lower back likes to overarch when both legs are together. With one leg slightly lower, you can feel the ribs stack down a little better. That doesn’t mean you should collapse the pose. It means you get a better shot at finding shape before you chase full symmetry.
8. Tuck Handstand Against the Wall
Picture a tiny cannonball shape, except your hands are on the floor and your hips are above your shoulders. That’s the tuck handstand, and it teaches compression better than almost anything else.
Bring your knees toward your chest while you kick up gently to the wall. Your back can round slightly here, which is part of the point. The tuck asks the abs to work hard, and it gives your center of mass a smaller, easier-to-manage shape.
I’d use this one with people who can hold a wall-facing line for a few seconds but still feel scattered the moment they try to move their legs. The tuck reduces that awkward long-lever feeling. Less leg. Less wobble. More control.
Be careful not to collapse into your shoulders. The chest still has to stay active, and the elbows should keep pointing forward, not splaying out. If the tuck becomes a hanging squat on your hands, come down and reset. That version teaches the wrong thing.
9. Heel Pull-Away Balance Drill
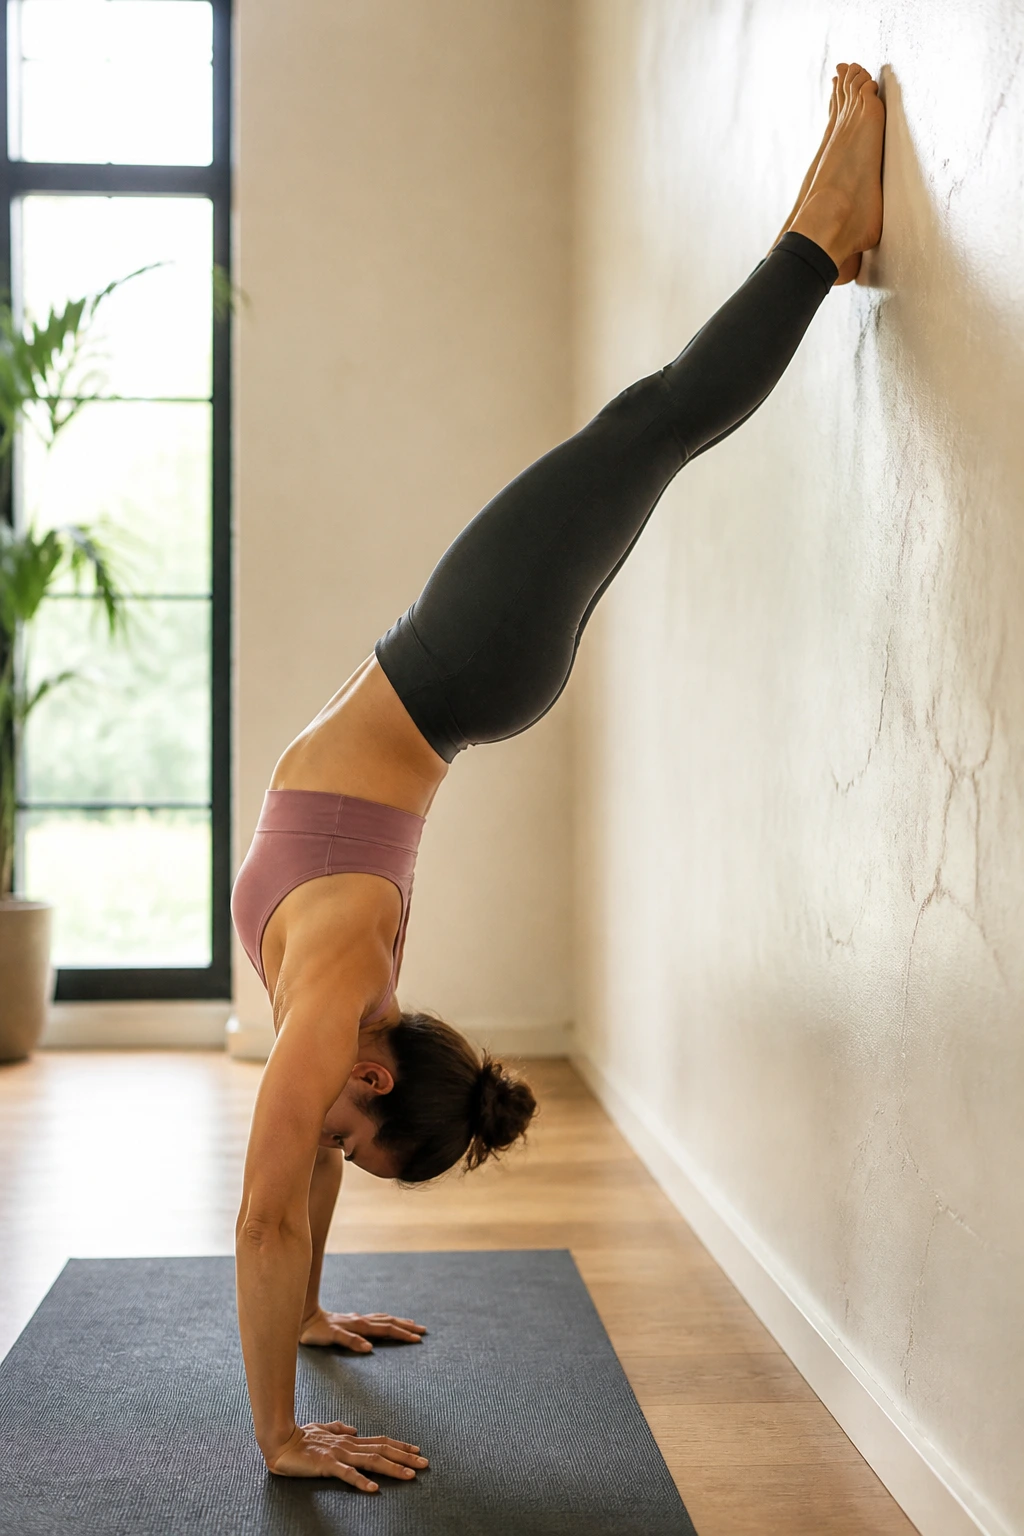
What happens when the wall stops doing all the work? That’s what this drill asks, and it’s a little sneaky in the best way.
From a wall-facing handstand or a back-to-wall hold, lightly peel one heel away from the wall for a second, then replace it. Later, try both heels leaving the wall for one brief breath before coming back. You’re not trying to balance free yet. You’re teaching the nervous system that leaving the wall doesn’t have to mean losing the pose.
Why It Matters
A lot of beginners stay glued to the wall because the body never learns the tiny shift of center that happens before a free balance. Heel pull-away work creates that missing middle step.
- Peel one heel, not both.
- Keep the hands active.
- Stay slow enough to notice the shift.
- Repeat 5 to 8 times.
This drill feels tiny. It is tiny. And tiny is good here. The smaller the change, the easier it is to feel where balance lives. Big swings hide the lesson.
10. Handstand Shoulder Shrugs
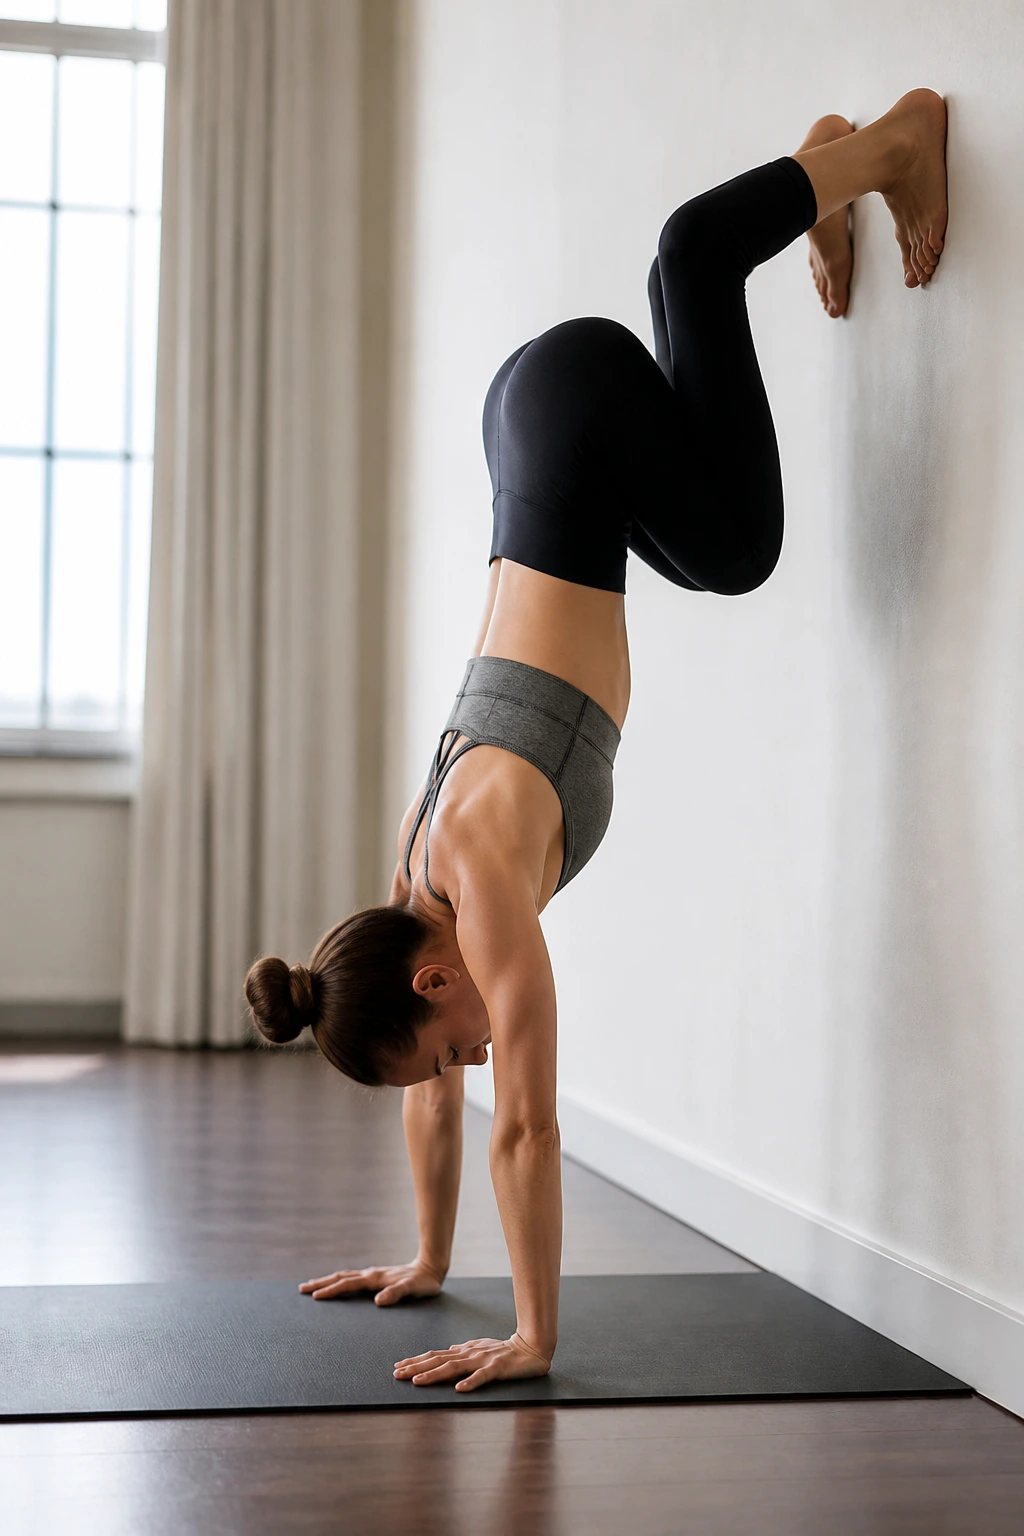
If your shoulders sink, the pose goes soft fast. Shoulder shrugs fix that by teaching you how to keep the upper body tall and active even when the weight is stacked upside down.
In a wall-facing handstand or a solid pike hold, push the floor away so the shoulders rise toward the ears a little, then lower them just enough to feel the movement. The action is subtle. You’re not doing full range reps like a gym lift. You’re waking up the muscles that hold the arm bones in a useful line.
The first time people try this, they often move too much. That’s normal. The trick is to keep the elbows locked and the ribs quiet while the shoulder blades glide. If the whole torso sways, the shrug is too big.
A few clean reps go a long way here. Try 8 to 12 shrugs in a hold, rest, then do another short round. The burn shows up fast, and that burn is useful. It means the support system is paying attention.
11. Toe Taps on the Wall
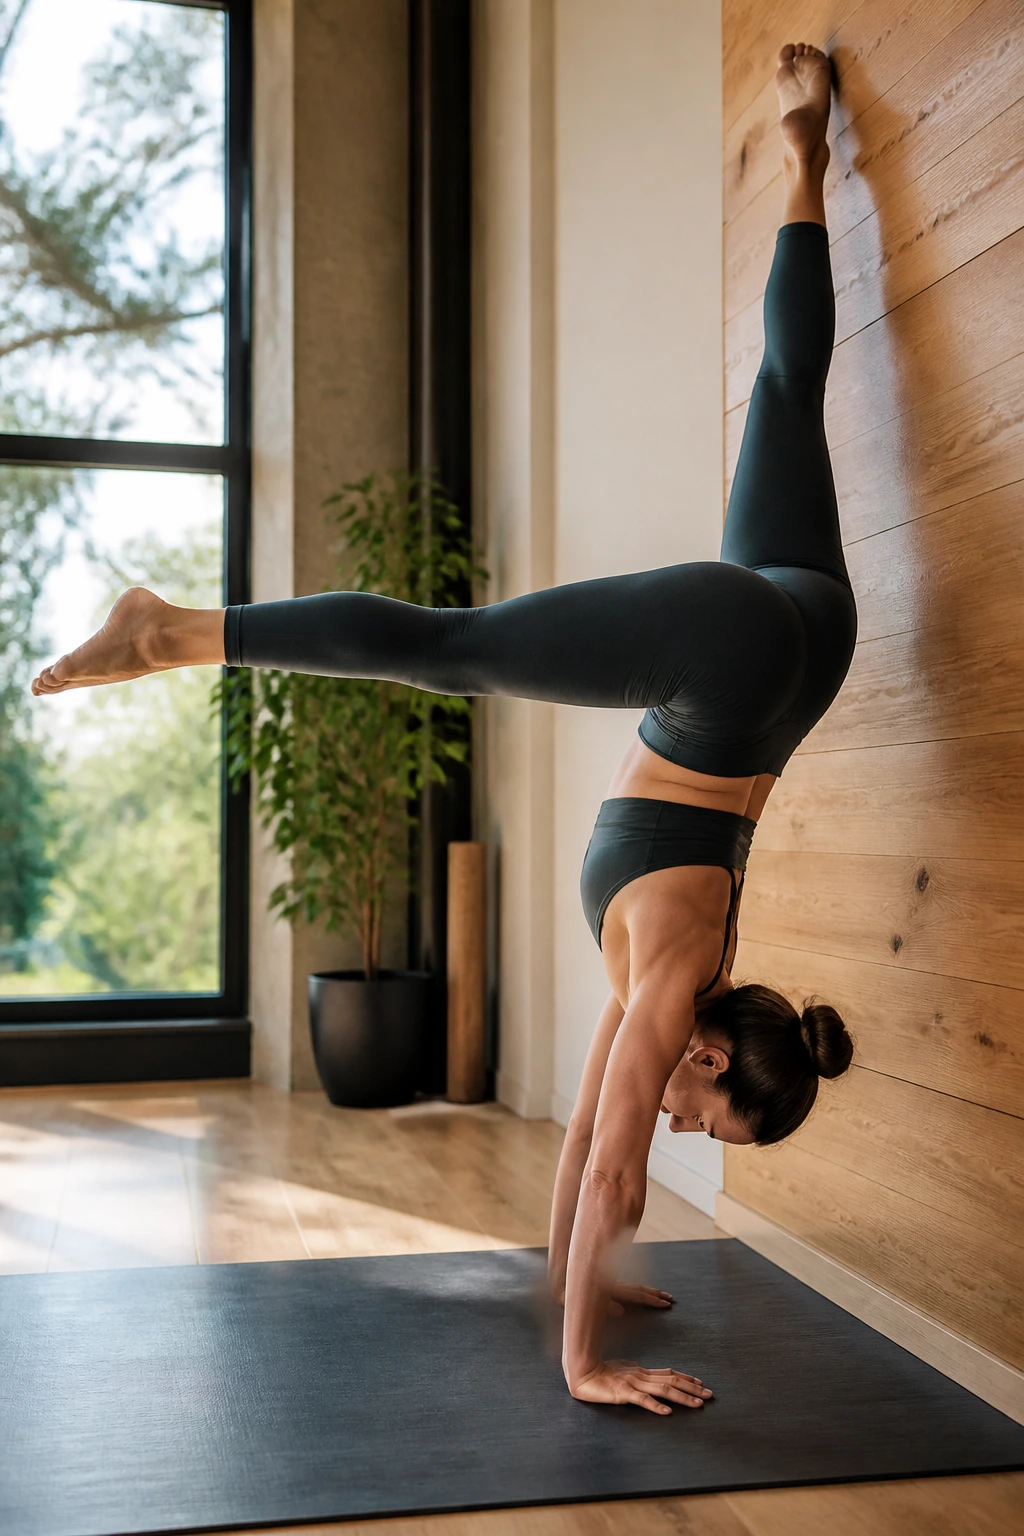
One foot taps off the wall. The other stays honest. That’s the whole game here, and it’s a beautiful little test of how much weight you can shift without tipping the entire inversion.
Start in a back-to-wall handstand or a split-leg wall hold. Once you feel steady, lightly take one toe off the wall and tap it back down. The movement should be so small that the rest of the body barely notices. If the kick is dramatic, you’ve gone too far.
How to Use It
- Choose your steadier side first.
- Tap the same toe 3 to 5 times before switching.
- Keep your shoulders pressed up.
- Exhale as the toe leaves the wall.
The magic here is not the tap itself. It’s the delay between effort and reaction. You begin to sense how little movement your balance actually needs, and that’s a big mental shift. People tend to overcorrect in handstands. This drill trims that habit down.
A quick note: if your wrists are already tired, skip this one for the day. Toe taps ask for a fair amount of wrist steadiness, and sloppy reps when the hands are cooked turn into noisy reps. Not worth it.
12. Single-Leg Kick-Up Attempts
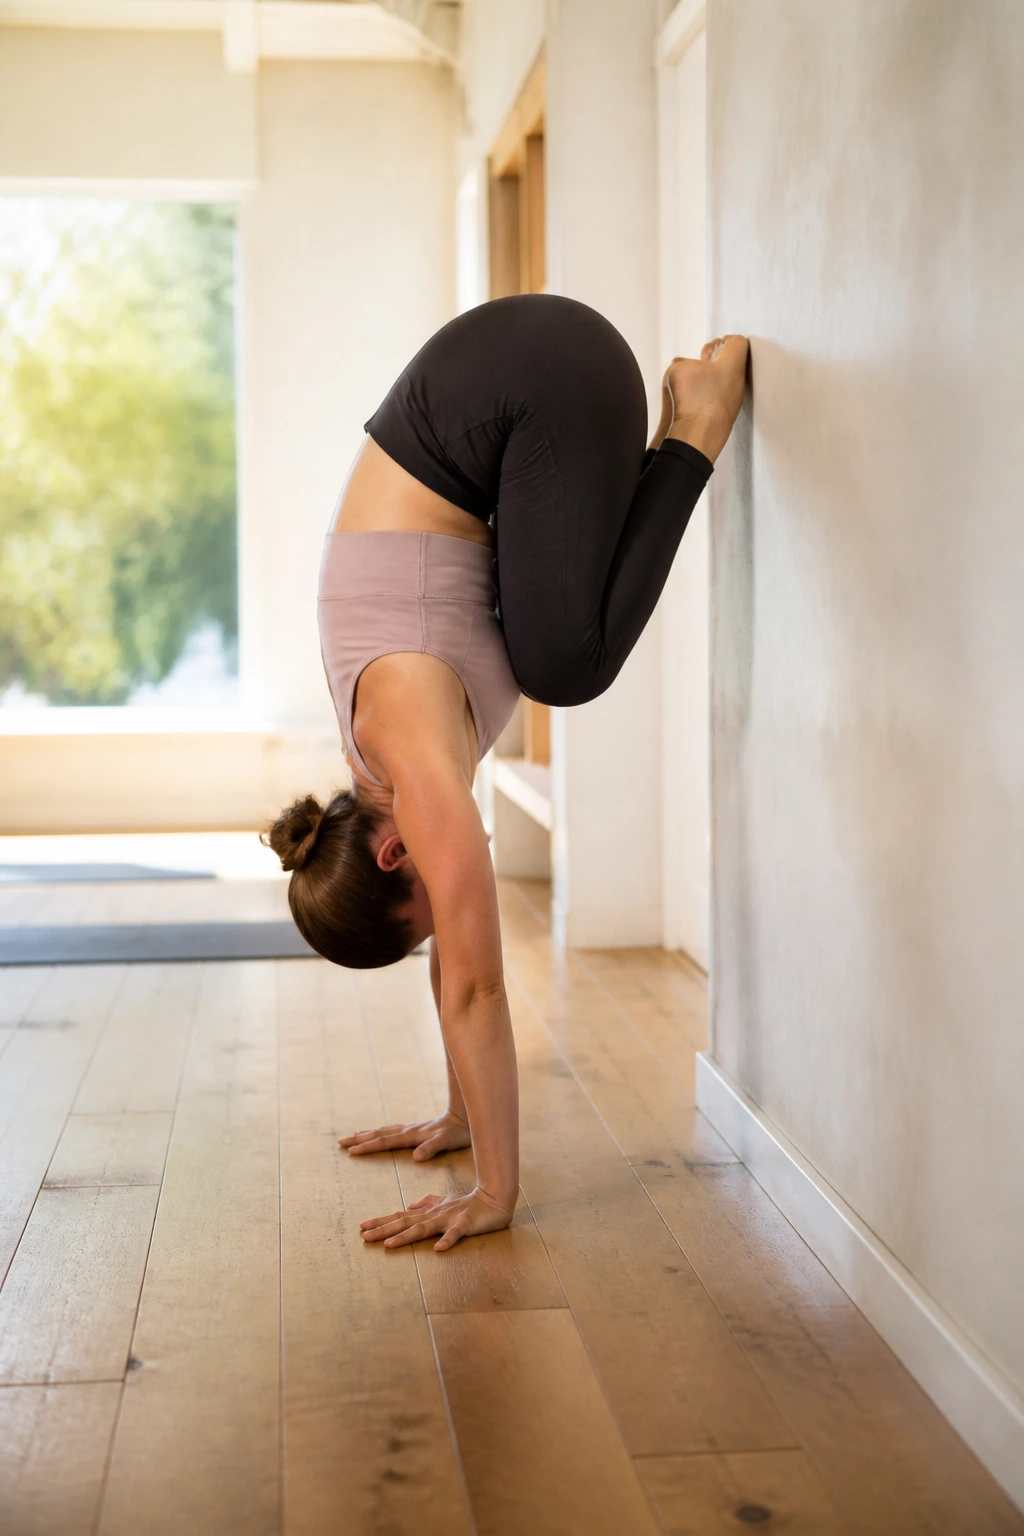
A two-leg kick can turn into chaos fast. A single-leg kick-up is cleaner, because one leg gives you lift while the other follows instead of both legs racing each other to the wall.
Stand a few inches away from the wall, place your hands firmly, and swing one leg up with a bent knee first. Let the trailing leg float rather than whip. The movement should feel like a small, controlled hop into a shape, not a jump for distance.
The best part of this drill is the feedback. If you kick too hard, you know it immediately. If you kick too softly, you know that too. It removes the guesswork, which is a relief when you’re still learning how much force actually belongs in the movement.
Common Pattern to Avoid
- Don’t start with a giant straight-leg swing.
- Don’t lock your neck.
- Don’t try to “save” a bad kick with your lower back.
- Do reset after every rough attempt.
Three to five attempts per side is enough for one set. Past that, the quality usually drops off.
13. Straddle Wall Handstand
A straddle is the opposite of precious. The legs are wide, the center of mass drops a bit, and the whole pose becomes easier to control.
Kick up or walk up into a wall-supported handstand, then open the legs into a straddle. You can keep them wide and active, with toes pointed or feet flexed depending on how your hips feel that day. The shape gives you more room to correct balance without dropping immediately out of the pose.
What Makes It Useful
The straddle helps in two ways. First, it makes the line easier to hold because the legs aren’t stuck together like one long lever. Second, it gives tight hips a break. If your hamstrings complain in a straight-leg handstand, the straddle is often the friendlier route.
- Keep the thighs active.
- Press the heels slightly back.
- Hold for 10 to 20 seconds.
- Bring the legs together only when the position feels stable.
Don’t let the straddle turn into a lazy split with floppy feet. That’s the trap. The legs need life in them, even when they’re wide.
14. Handstand Shoulder Taps at the Wall
When the wall stops being the hard part, one hand has to work alone for a beat. Shoulder taps ask for that shift, but they do it in a controlled way that still gives beginners a chance.
From a stable wall-facing handstand, shift a little more weight into one hand and tap the opposite shoulder with the free hand. The tap should be tiny. If your hips swing like a door, you’re using too much momentum and not enough control. Think of this as a precision drill, not a party trick.
What Not to Rush
- Keep the supporting arm straight.
- Resist the urge to twist the ribs open.
- Tap lightly and return the hand to the floor.
- Do 2 to 4 taps per side before resting.
This drill can feel rude at first. It exposes every weak spot in the shape. That’s useful, even if it’s annoying. The body gets honest fast when one point of contact disappears for a second.
If the tap feels impossible, stay with heel pull-aways and shoulder shrugs a little longer. No need to force the leap.
15. Freestanding Baby Kick-Up
Tiny kicks beat big ones. Every time.
A baby kick-up is a short, low-effort attempt at leaving the floor without fully committing to a full handstand. You swing one leg just enough to feel lift, catch yourself with the hands, and step back down before the whole thing gets messy. The goal is not to “make it.” The goal is to teach your body the shape of an honest, small takeoff.
I like this drill after wall work, not before it. The wall gives you the line, and the baby kick-up borrows that line for its first free attempts. If you try it cold, most people overkick, then panic, then arch, then wonder why the room suddenly feels upside down in a bad way.
A Good Attempt Usually Looks Like This
- One leg leads.
- The second leg follows softly.
- The hands stay planted.
- You step down before the lower back takes over.
Try 3 to 6 controlled attempts, then stop. If the last ones get sloppy, your body is done talking for the day.
A clean handstand rarely shows up as one giant breakthrough. More often, it sneaks in through these smaller shapes — wall holds, split legs, tiny taps, a little more patience than you wanted to give. That’s the useful part. The upside-down position stops being a stunt and starts feeling like a skill you can actually build.
A clean handstand rarely shows up as one giant breakthrough. It comes from repeatable work, steady wrists, and enough wall practice that your body stops treating inversion like a surprise. Keep the reps small, keep the shape honest, and let the skill get boring for a while. That’s usually when it starts to work.
