



Most people attack a foam roller like they are sanding a floor. Fast passes, clenched jaw, holding their breath, hoping the tight spot will surrender.
A better approach is quieter than that. The best foam roller Pilates exercises for recovery blend pressure, breath, and control, so you are not only working on sore tissue but also teaching your body how to settle, align, and move well again. That is the part random rolling sessions usually miss.
I like a medium-density 36-inch roller for this kind of work because it can handle both release and support. A short roller is fine for calves, glutes, and quads, though it does not give you the same spine feedback for breathing, chest opening, or balance drills. And yes, pressure matters—but more is not better. If the sensation turns sharp, hot, electric, or makes you brace, back off.
Pick 5 to 8 exercises from the list below and move slowly enough to notice what changes from one breath to the next. Ten to twenty minutes is plenty. Recovery does not need to feel brutal to work.
1. Supported Breathing to Start a Foam Roller Pilates Recovery Session
Start here.
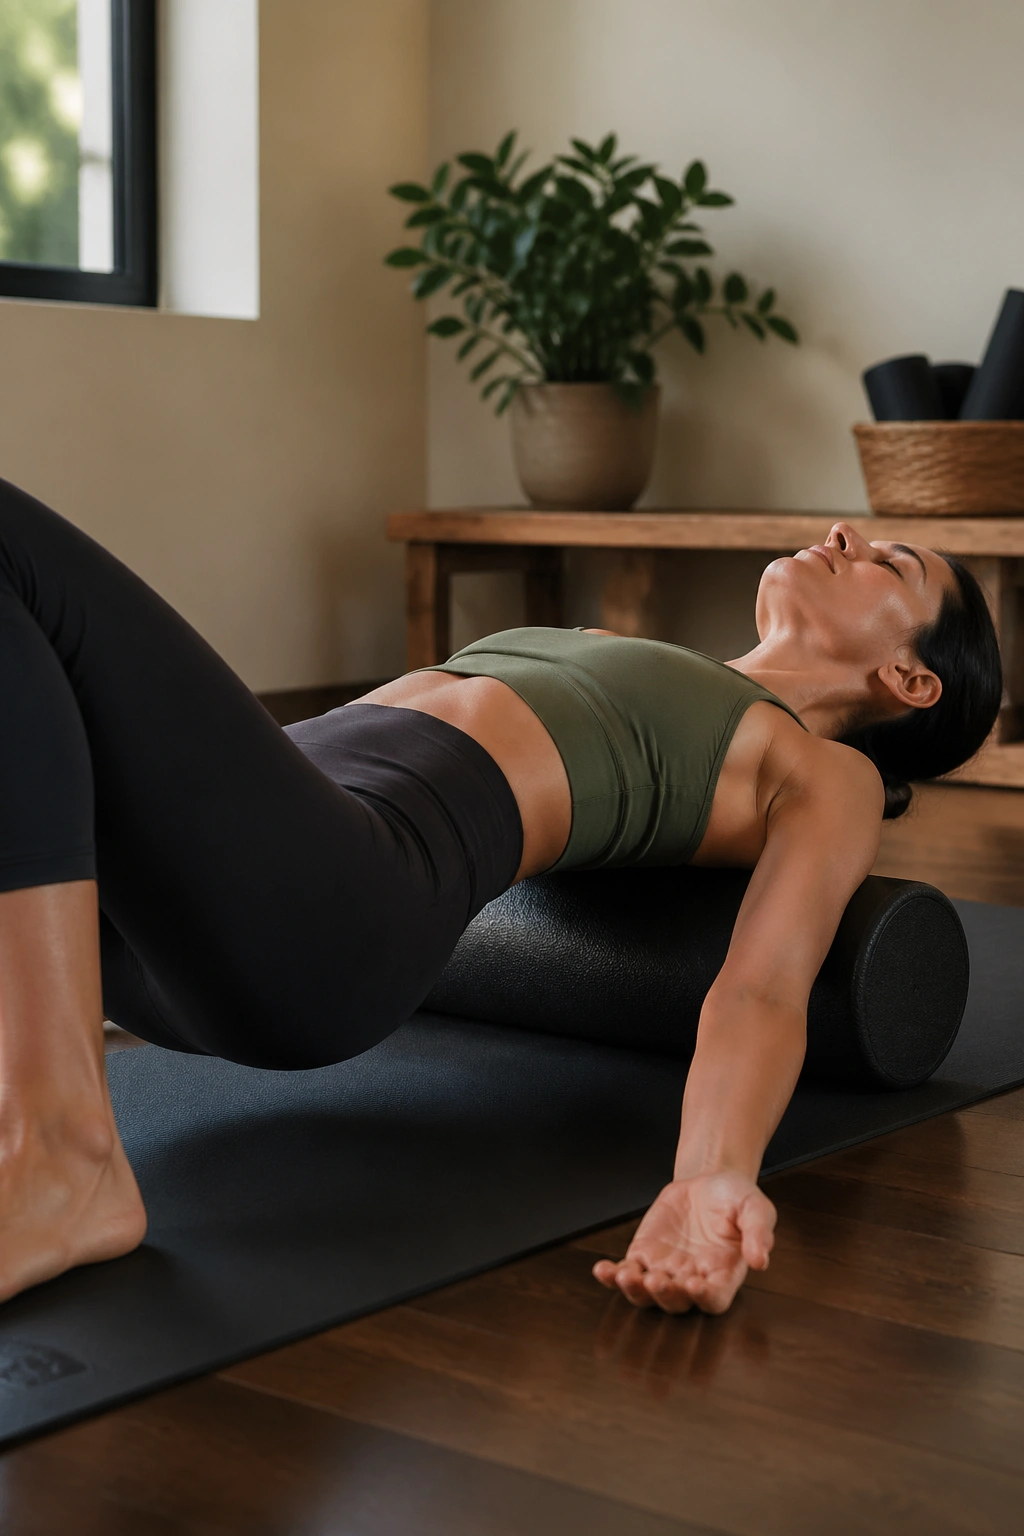
Lie lengthwise on the foam roller so your head, rib cage, and sacrum are all supported. Plant your feet a little wider than your hips, let your knees fall into an easy bend, and rest your arms out to the sides with your palms facing up. Stay there before you “do” anything.
This position tells on you fast. If your ribs flare, you will feel it. If one shoulder sits higher, the roller makes that obvious too. Instead of forcing yourself flat, let the back of your body drape around the roller and breathe into the side ribs.
What to do
Take a 4-count inhale through the nose and a 6-count exhale through the mouth for 5 to 8 rounds. Think of the exhale softening your chest, jaw, and belly rather than yanking the ribs down.
What it helps
- Chest tightness after long hours at a desk
- Shallow breathing after a hard ride, run, or strength session
- A stiff upper body that makes every other recovery move feel blocked
Small fix: if you feel wobbly, widen your feet and place your fingertips on the floor until your balance settles.
2. Thoracic Extension Arcs Over the Roller
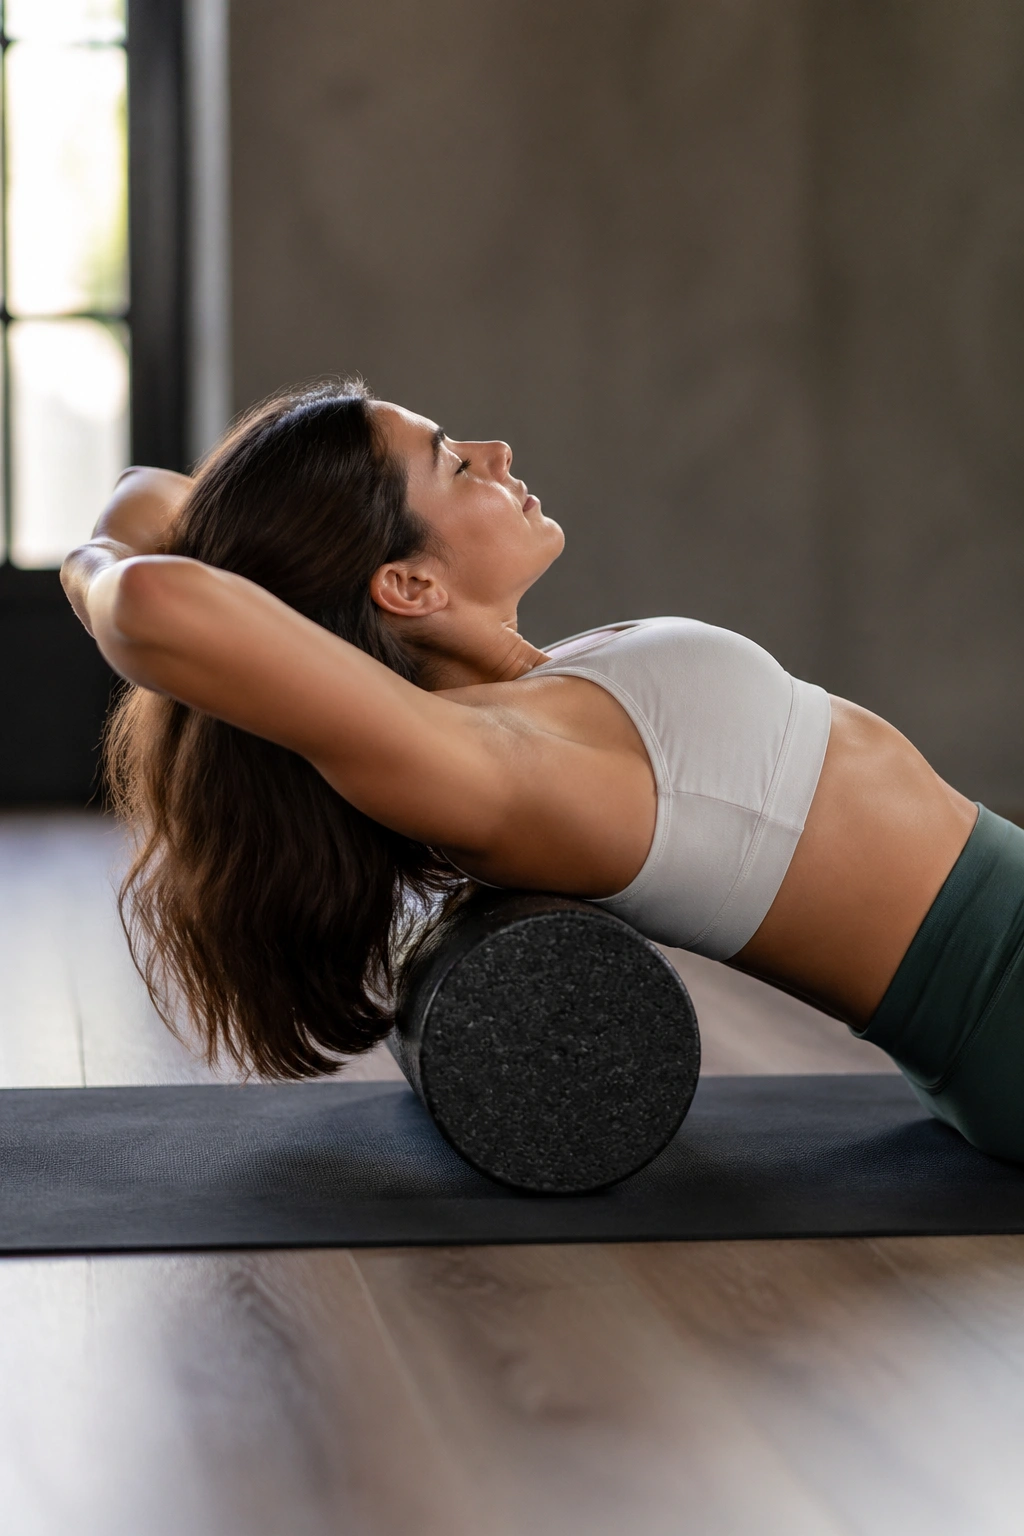
Why does mid-back work feel better than low-back stretching for so many people? Because the stiff spot is often higher than people think.
Place the roller crosswise under your thoracic spine—around bra-strap level is a solid starting point. Support your head with both hands, keep your elbows angled forward a little, and let your upper back drape over the roller on an exhale. Come back up on an inhale without yanking the neck.
Move the roller 1 to 2 inches up or down and repeat for 4 to 6 extensions in each spot. Two or three positions is enough. You are looking for a smooth arc through the mid-back, not a big hinge through the ribs.
Low backs love to steal this move. If you feel compression below the waist, pull your ribs in a touch, keep the range smaller, and think about lifting through the breastbone before you extend. A good rep feels like the front of the chest opens and the back of the ribs spread over the roller. No pinching. No crunching.
3. Snow Angel Arm Slides for a Tight Chest
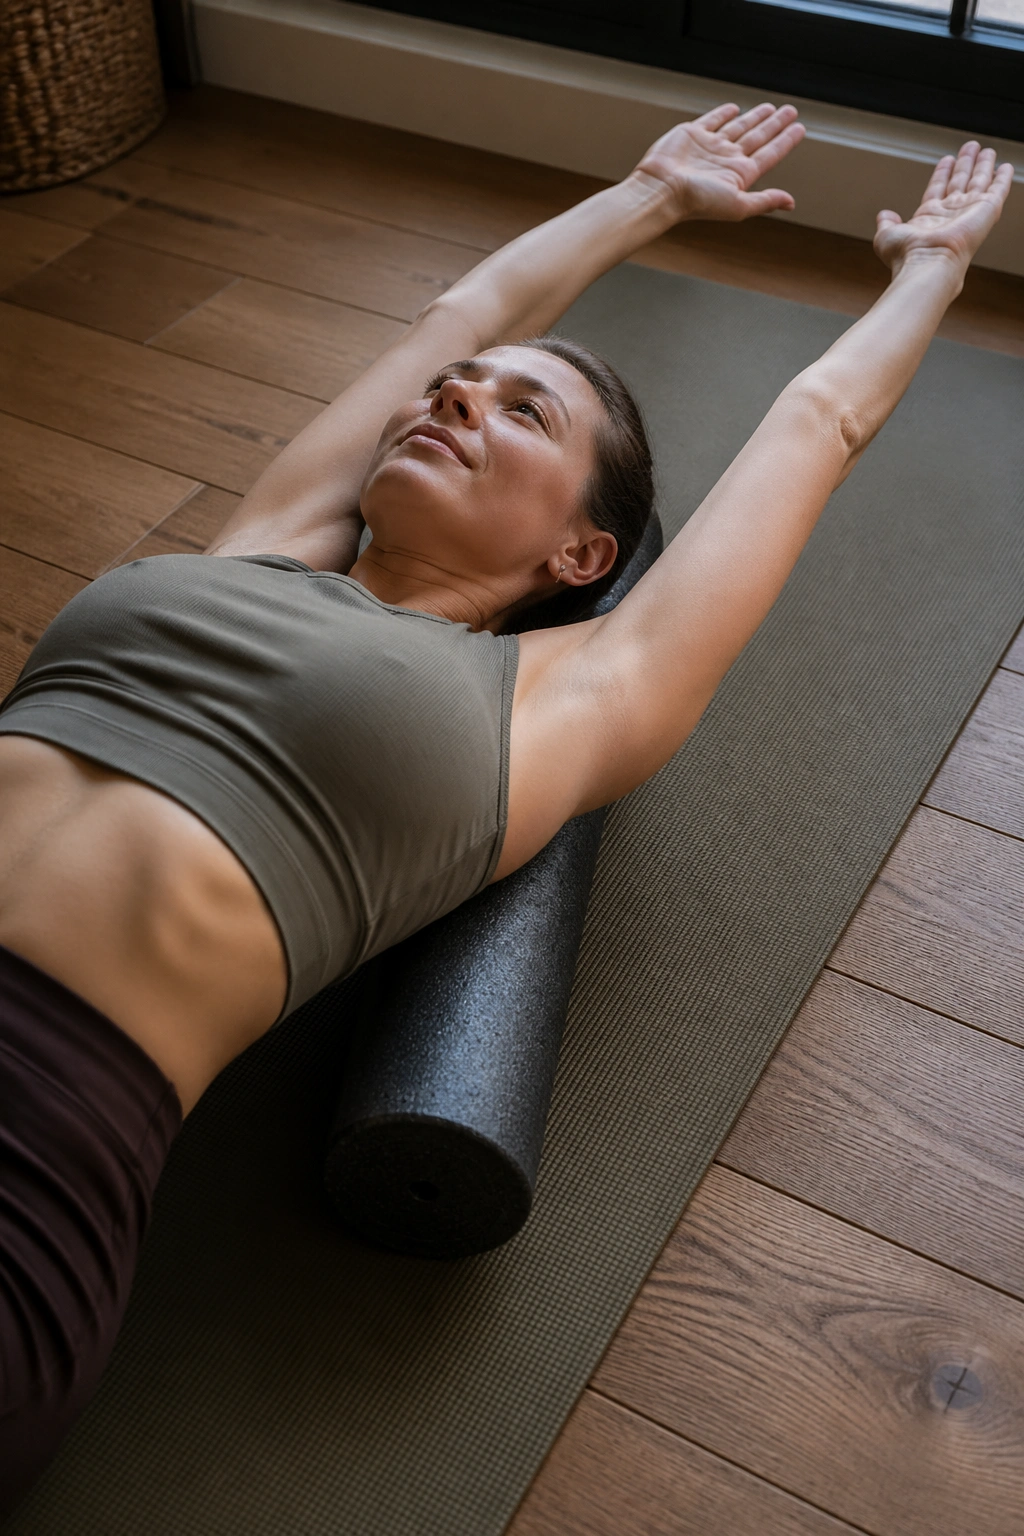
Desk shoulders have a look to them—arms slightly turned in, chest a little caved, neck doing work it never asked for. This drill is one of the cleanest ways to unwind that pattern.
Lie lengthwise on the roller again, with your spine supported and feet grounded. Start with your arms by your sides, palms up. Slide them out and overhead in a slow snow-angel shape, then return to the start. Go only as far as you can without your ribs popping up or your wrists peeling off their path.
What to watch for
Your range might be smaller than you expect. Good. That usually means you are in the right place. A controlled half-angel that keeps the ribs quiet does more than a big floppy one.
A solid dose
- Do 6 to 10 reps
- Pause for 1 full breath where you feel the first stretch
- Keep the shoulders heavy instead of shrugging toward the ears
The stretch should land across the pecs, front delts, and lats, with a mild opening through the ribs. If your hands tingle, bend the elbows a little and shorten the arc.
4. Scapular Reach and Glide Presses
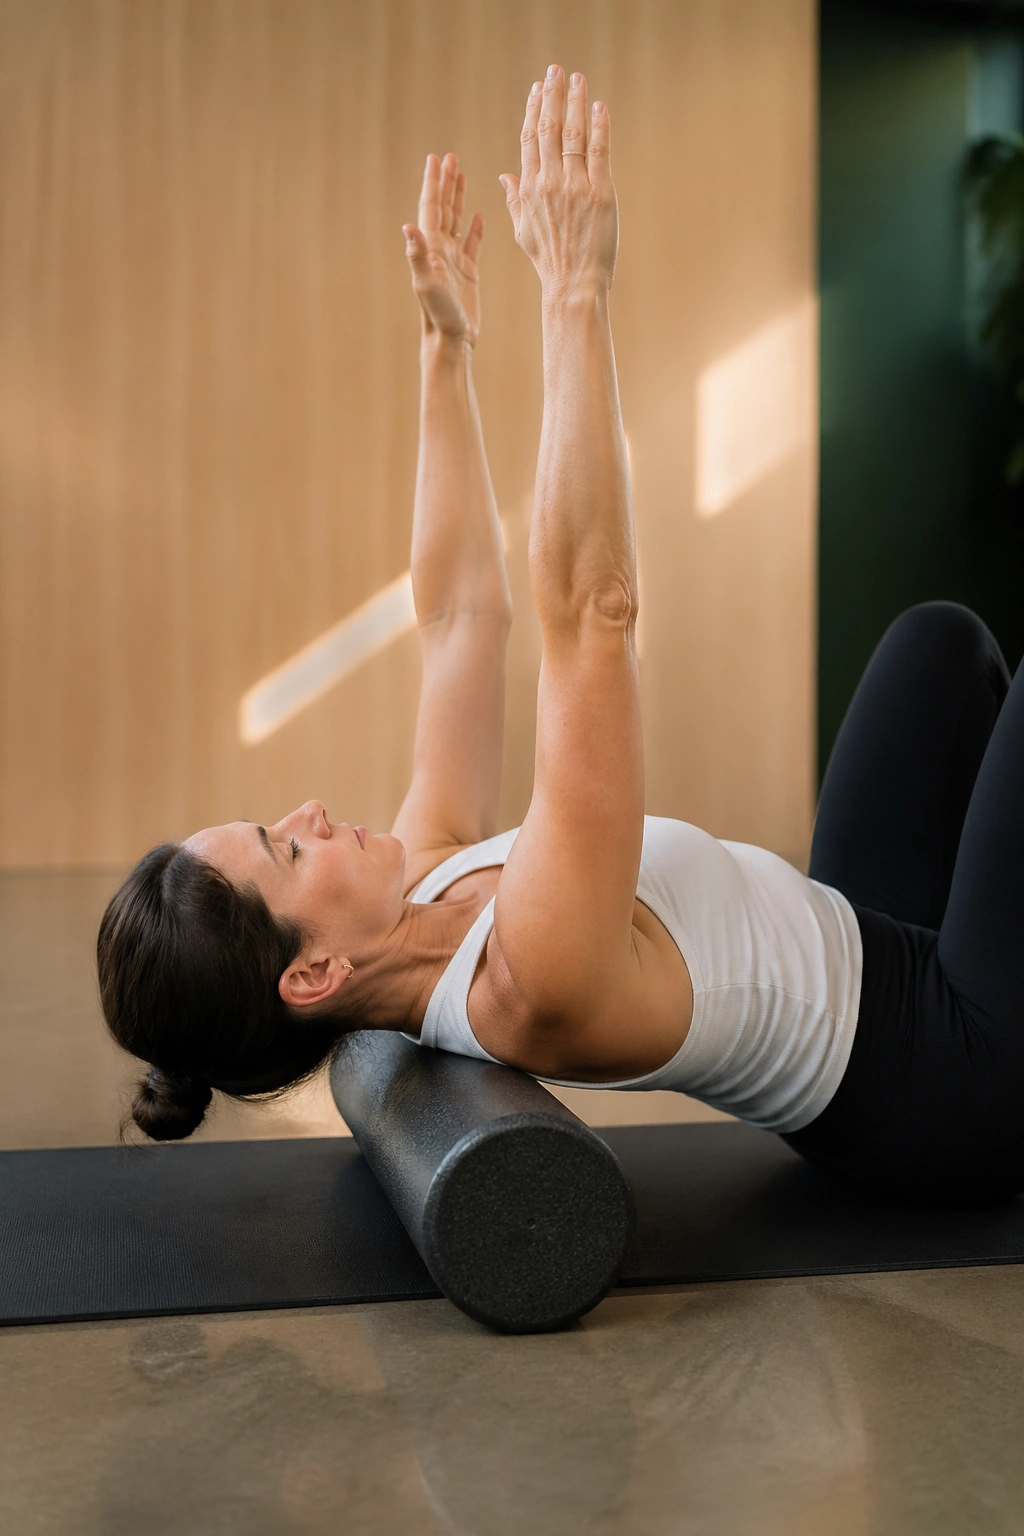
A lot of “shoulder tightness” is not the shoulder joint at all. It is often poor movement around the shoulder blades—too much shrugging, not enough glide.
Stay on the roller lengthwise and reach both arms straight up toward the ceiling. Without bending the elbows, let the shoulder blades spread apart so your hands float a bit higher, then let the blades settle back down around the roller. The motion is small. That is the point.
After 8 slow reaches, keep the arms long and slide them into a narrow “V,” then back over the chest. The roller gives you feedback on rib flare, which makes this feel much more Pilates than random arm waving. You are training support without loading the neck.
People rush this one. Skip speed. If the upper traps start to dominate, exhale on the reach and soften the front ribs. A crisp set of 8 to 12 reps can leave the shoulders feeling lighter than aggressive stretching ever does.
5. Pelvic Clocks to Reset a Stiff Lower Back
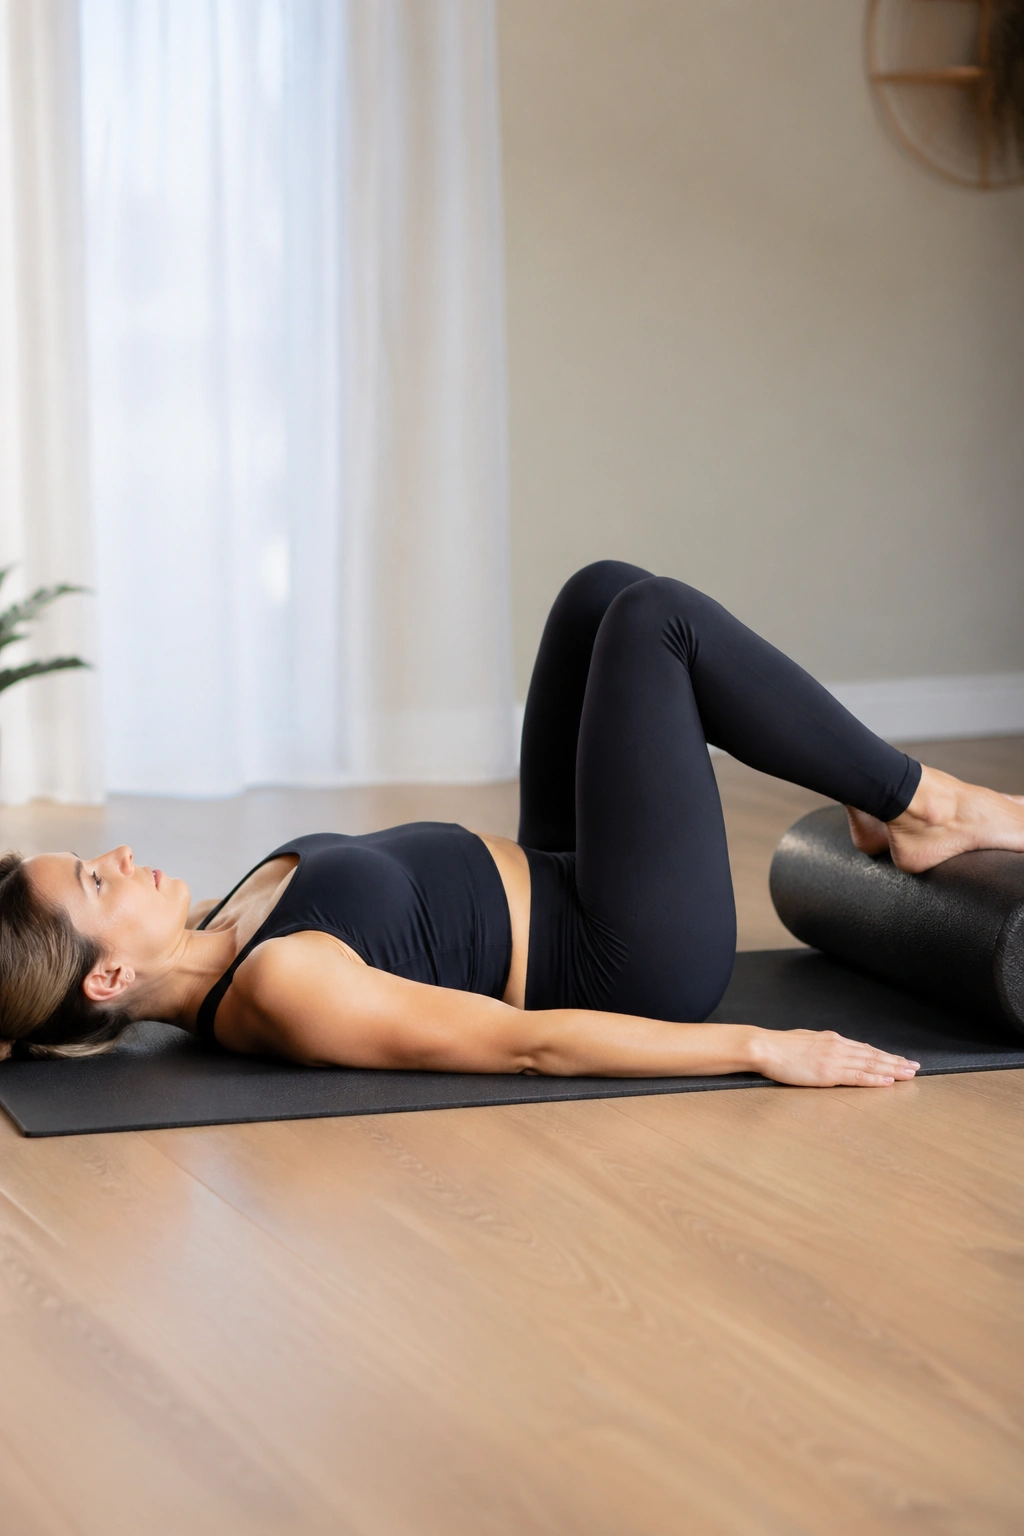
After a long drive or a heavy leg day, the lower back can feel glued together. Not injured, not dramatic—just stiff and annoyed. Pelvic clocks are a clean way to restore motion without cranking on the spine.
Lie on your back with your calves resting on the roller, knees and hips bent to about 90 degrees. Start with tiny pelvic tilts: exhale and let the low back melt toward the mat, inhale and return to neutral. Once that feels smooth, imagine your pelvis is a clock face. Tip toward 12 o’clock and 6 o’clock, then 3 and 9, then trace a small circle in each direction.
Small is better here. The movement should come from the pelvis gliding, not from your ribs heaving or your feet gripping the roller. If the hamstrings jump in too hard, bring the roller a little closer to you.
This one is sneaky. It looks easy and often feels odd for the first minute, then the low back starts to ease off. Do 4 tilts, 4 side-to-side shifts, and 3 slow circles each way. That is usually plenty.
6. Pilates Bridge Articulation with Heels on the Roller
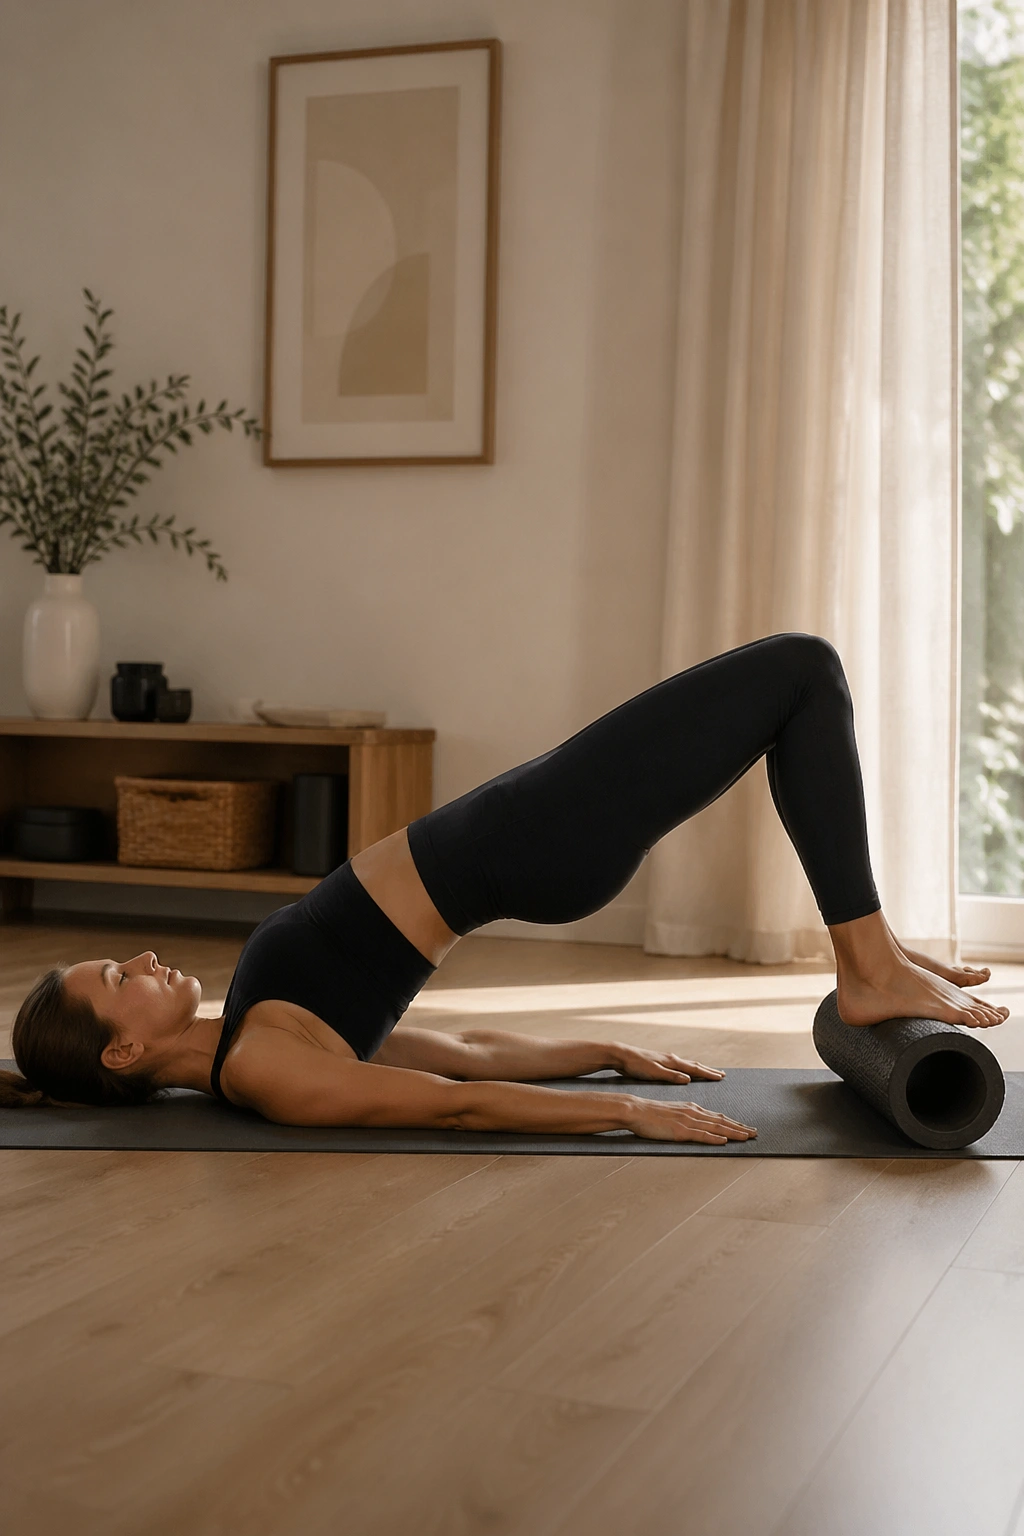
Unlike a bridge on the floor, a bridge with your heels on the roller exposes every shortcut. One hip hiking up. Hamstrings grabbing too early. Rib cage trying to leap ahead of the pelvis. The roller keeps you honest.
Lie on your back with your legs long enough that your heels rest on top of the roller and your knees are softly bent. Press the arms into the mat. Exhale, tip the pelvis, and peel the spine up one segment at a time until you reach a low bridge. Inhale at the top. Exhale and roll back down slowly, aiming for a 3- to 4-second descent.
Why it belongs in a recovery session
A good recovery move is not always passive. Sometimes tired bodies need gentle activation more than more stretching, and this bridge wakes up the glutes and hamstrings without loading you with a bar or dumbbells.
Best dose
- 6 to 8 reps
- Pause for 1 breath at the top
- Keep pressure even through both heels
If the roller shoots away, bring it closer and bend the knees more. If you feel the lower back first, lower the height of the bridge and think “tailbone to knees” instead of “lift as high as possible.”
7. Hamstring Curls from Shoulder Bridge
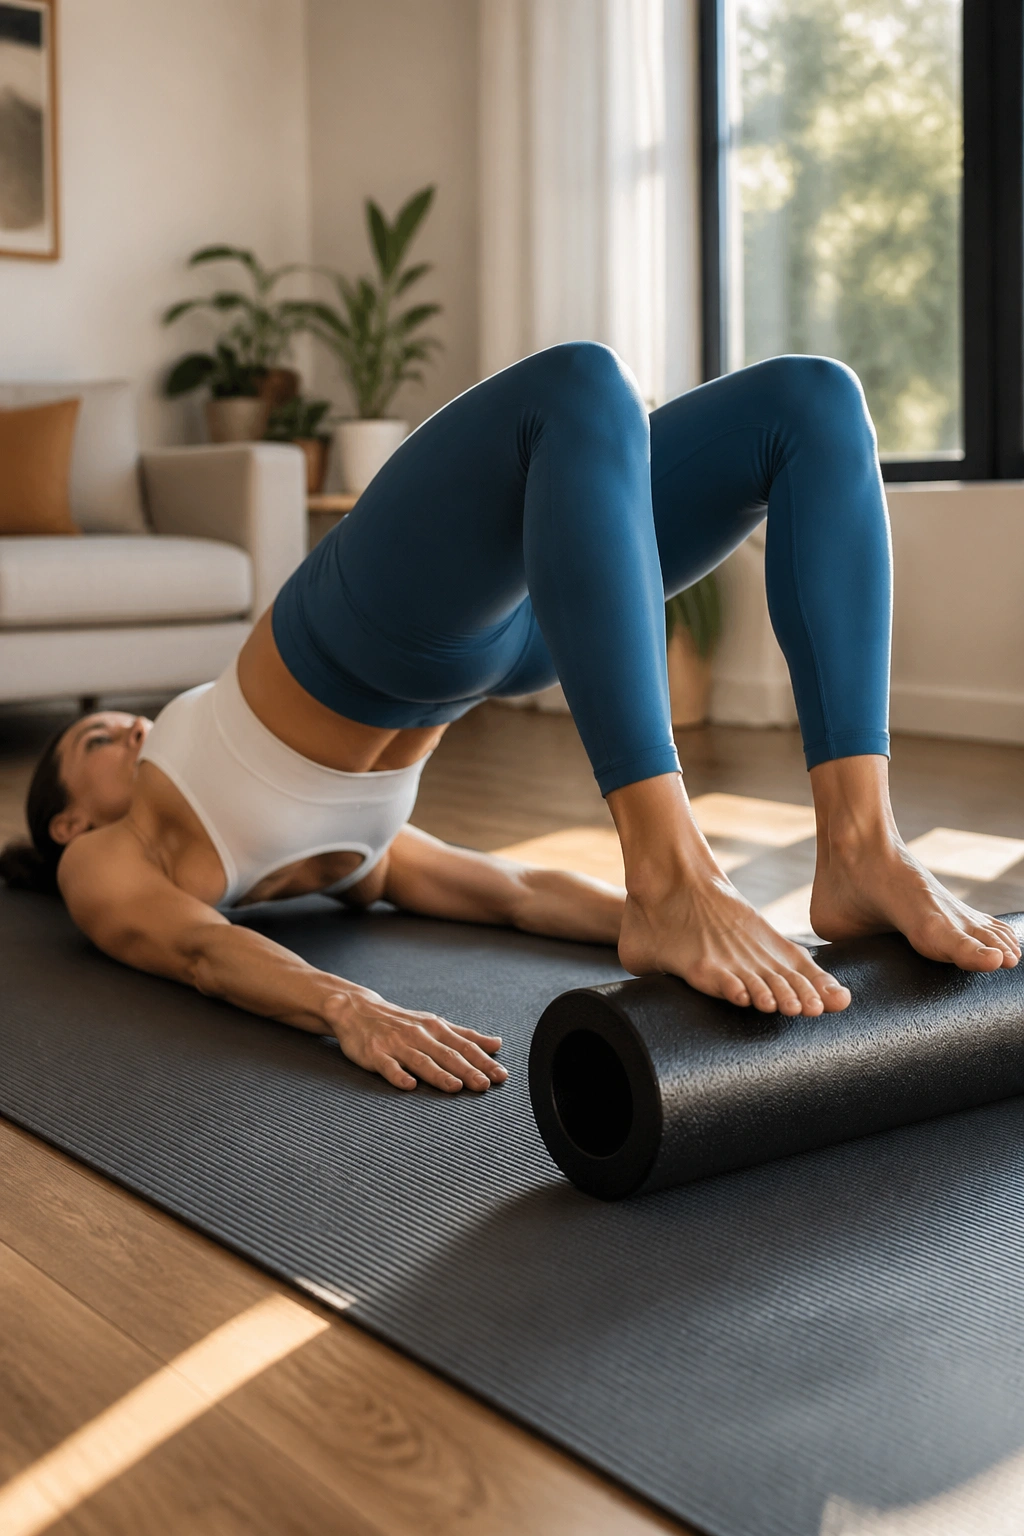
This one humbles people.
Start in the same position as the bridge, then lift into a low, steady bridge and keep the pelvis level while you roll the foam roller toward you with your heels. Slide it back out with control. That is one rep. Keep the range short at first—4 to 6 inches is enough.
Hamstrings like to cramp here, especially if you go big too soon. When that happens, lower your hips, shake the legs out, and restart with a smaller pull. Cramping does not mean you failed. It usually means those muscles are working in a cleaner way than they do during your normal day.
A set of 4 to 6 reps is enough for many people. Recovery does not need twenty ugly curls. Done well, this move leaves the backs of the legs warm, supported, and less “stringy” when you stand up.
- Keep the hips level
- Exhale as the roller comes in
- Stop before the knees drift apart
8. Calf Rolling with Point-and-Flex Ankles
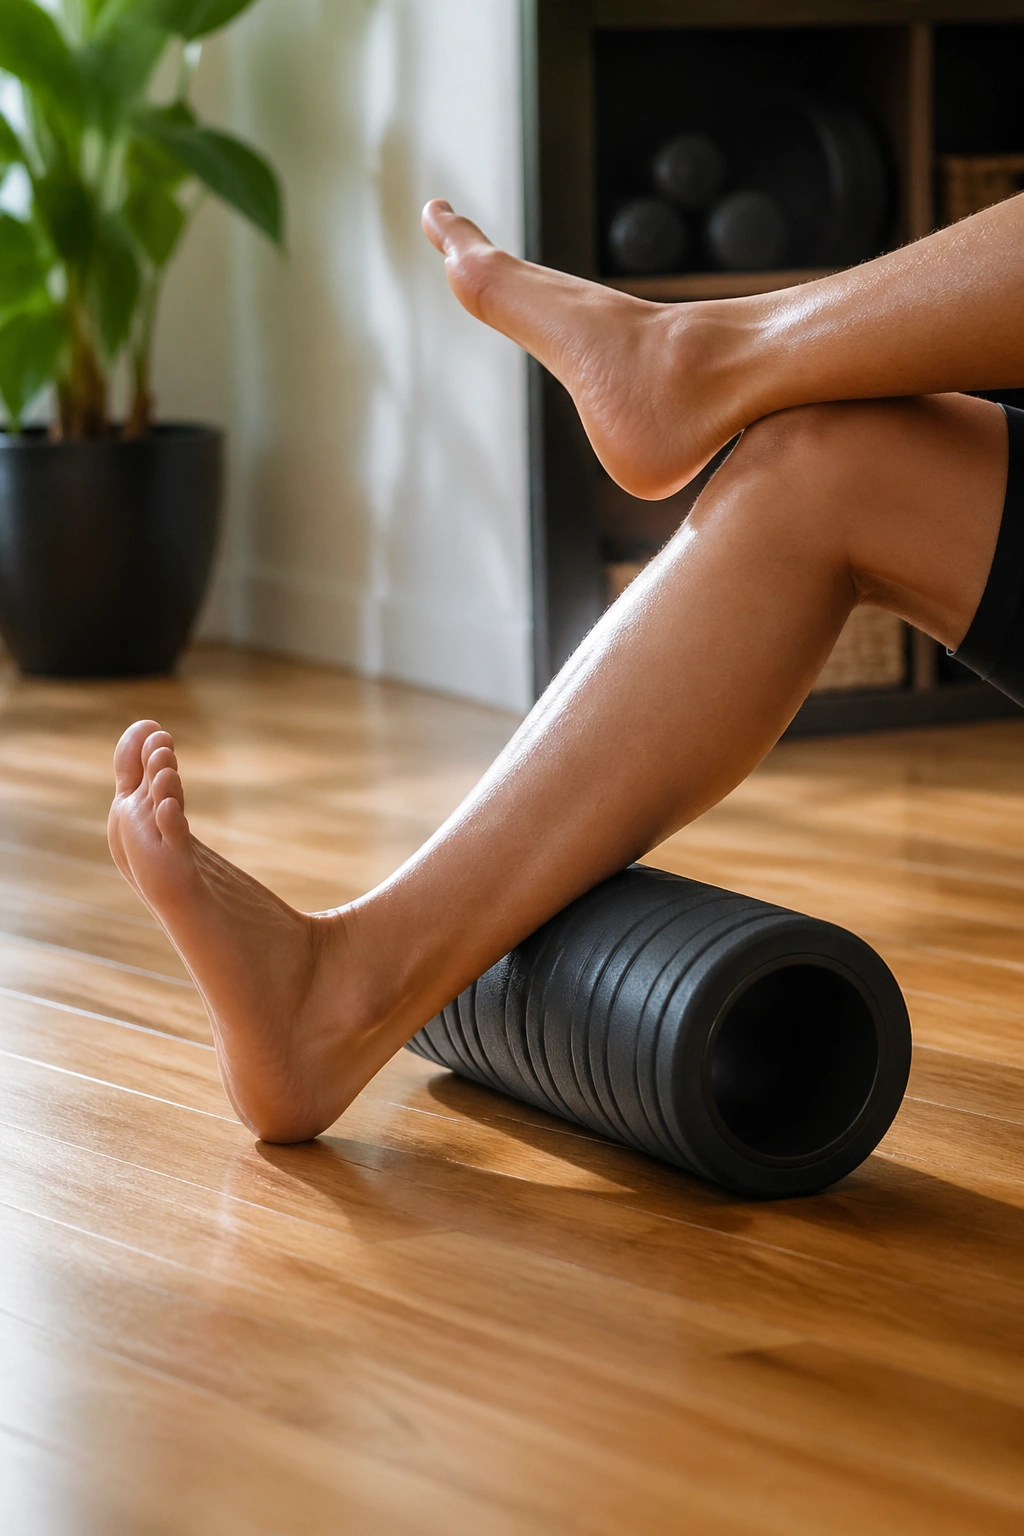
When calves feel like braided rope, plain rolling helps, but adding ankle motion works better. You are changing pressure while the tissue lengthens and shortens, which tends to free things up faster.
Sit on the floor with the roller under one calf and your hands behind you. Lift your hips enough to put some weight into the leg, then roll from above the Achilles to below the back of the knee. Pause on a tender spot and slowly point and flex the ankle 5 to 8 times.
A better way to dose it
Use 30 to 45 seconds per calf, then switch sides. If you want more pressure, cross the free leg over the working leg. If your wrists hate the support position, keep the hips lower and work smaller passes.
Runners, walkers, and people who spend all day in stiff shoes usually notice this one right away. The calf should feel warmer and less packed, not bruised. If you hit a spot that makes your toes curl and your face tense up, ease off by about 30 percent.
9. Figure-Four Glute Release
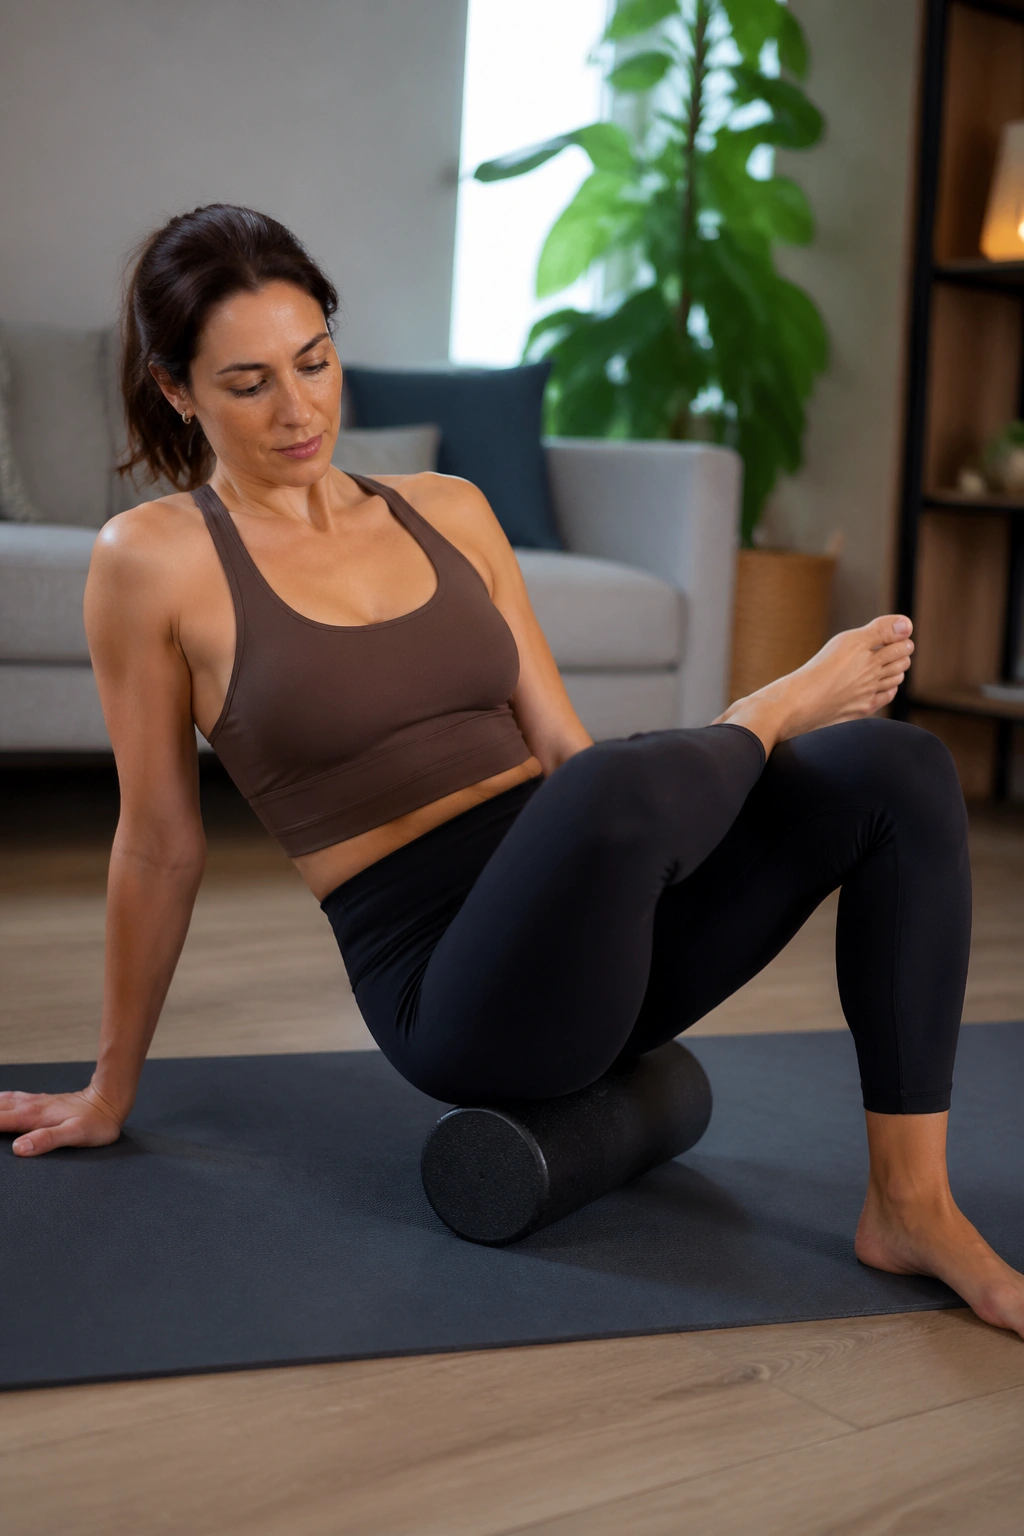
You do not need to crush the piriformis to get relief. In fact, that “dig in until you see stars” approach often makes the whole area guard harder.
Sit on the roller and lean slightly onto one glute. Cross the ankle of that side over the opposite knee to make a figure-four shape, then angle your body toward the crossed-leg side. Roll in short, slow passes over the meaty part of the glute, not the tailbone and not the low back.
Stay on one dense spot for 2 to 3 breaths, then shift an inch and explore another patch. Think more scan than smash. A mild ache is fine; numbness, zapping, or pain down the leg is your cue to stop and change angle.
This move earns its place after long sits, hill work, and any session with a lot of lunging or squatting. Spend 30 to 60 seconds per side. When you stand up, the hip should feel less jammed at the back.
10. Inner-Thigh Adductor Sweeps
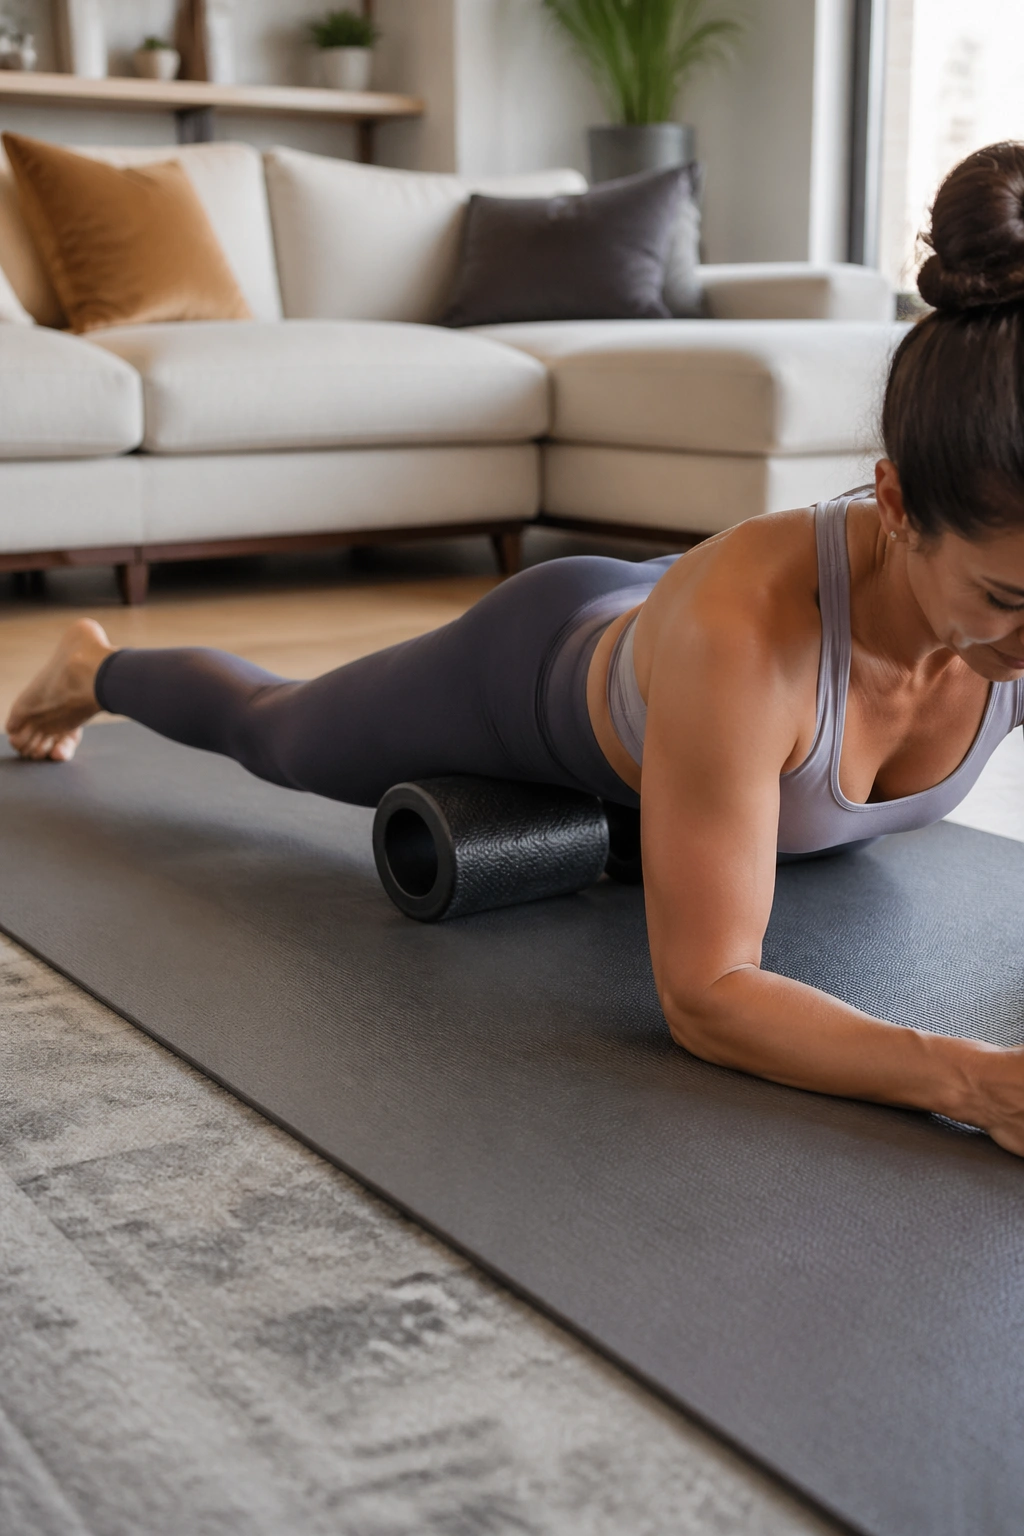
Why roll the inner thigh? Because adductors often stay tense long after the workout is over, and when they do, the pelvis and low back can feel oddly restricted.
Lie face down and place one leg out to the side like a frog, with the knee bent around 90 degrees. Set the roller under the inner thigh, starting closer to the knee. Use your forearms and free leg to guide the movement and roll upward toward the groin in short passes.
A lot of people discover this area has been shouting at them for days without them noticing. Go gently near the top of the thigh. There is no prize for mashing into the attachment points.
- Roll 4 to 5 slow passes
- Pause on one tender area for 2 breaths
- Keep the belly lightly lifted so the low back does not sag
Afterward, standing often feels more centered—less tugging through the inner knees and less stiffness across the front of the hips.
11. Front-Thigh Quadriceps Glides
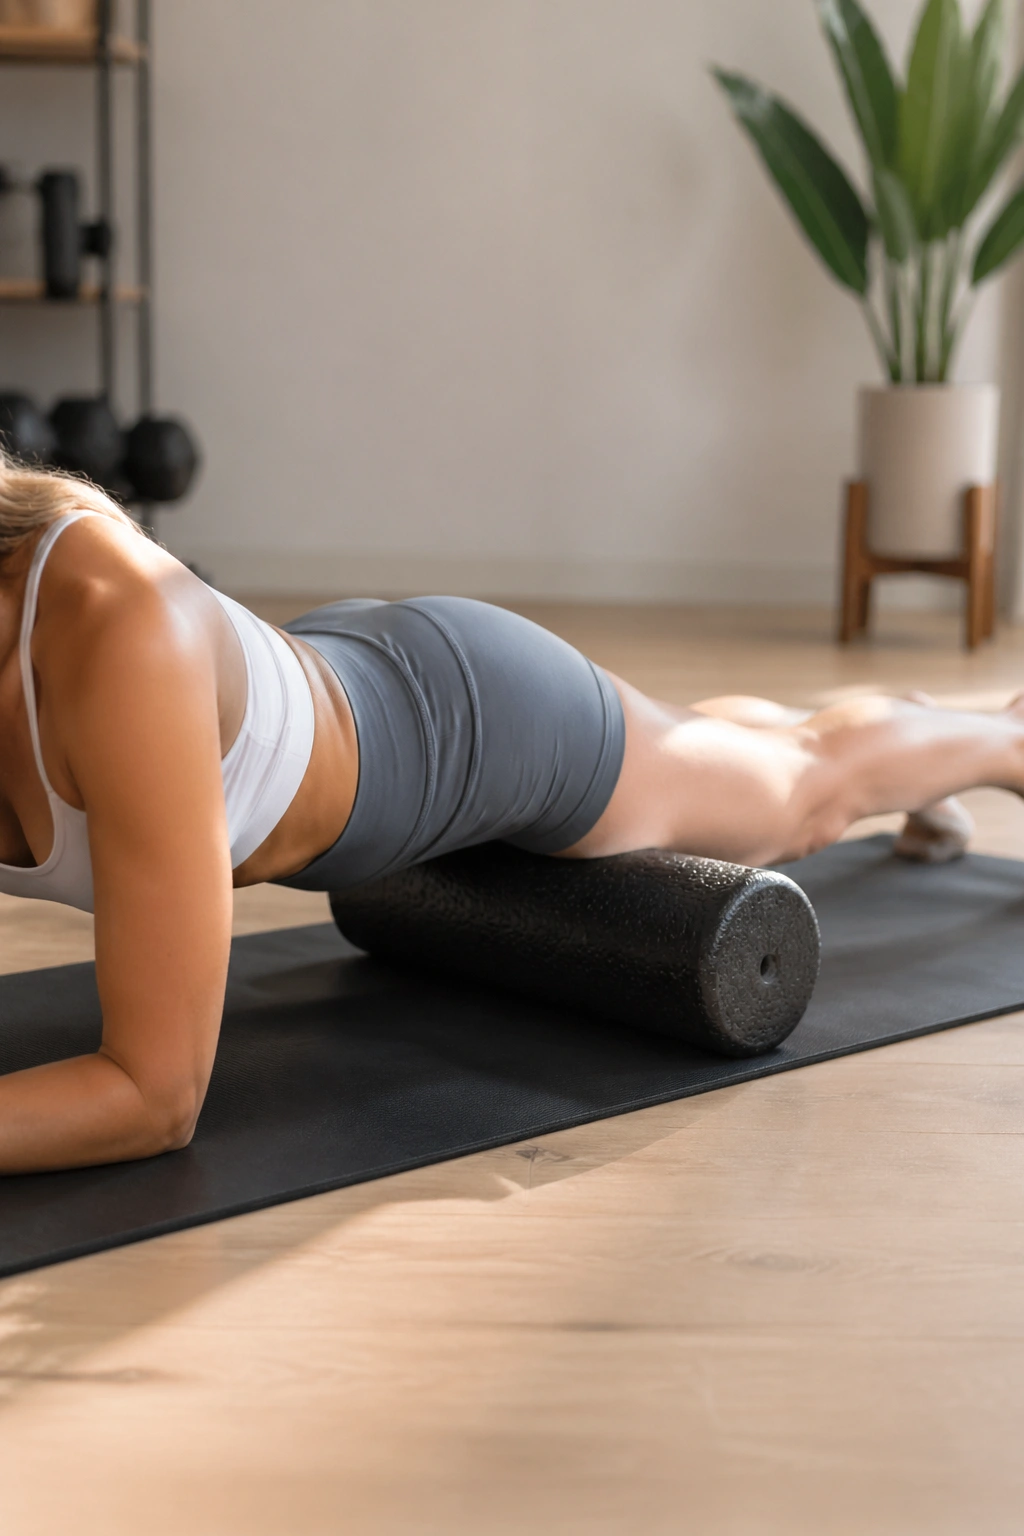
Front-thigh rolling works best when your core stays awake. Otherwise the low back sags, the pelvis dumps forward, and the pressure lands in all the wrong places.
Set yourself up face down on your forearms with the roller under both quads. Move from the top of the thigh to about 2 inches above the knee, then back again. Use small, controlled passes instead of racing from hip to knee in one second.
Two mistakes worth avoiding
First, do not roll directly over the kneecap or hip bone. Second, do not let the ribs drop toward the floor. A slight abdominal lift keeps the tissue under cleaner tension and makes the release feel more targeted.
One or two passes with both legs together is fine, though one leg at a time often gives you a better read on where the tightness sits. Try 20 to 30 seconds per side or 5 slow passes. Cyclists and people who live in a chair tend to feel this one in a hurry.
12. Hip Flexor Front-Pocket Release
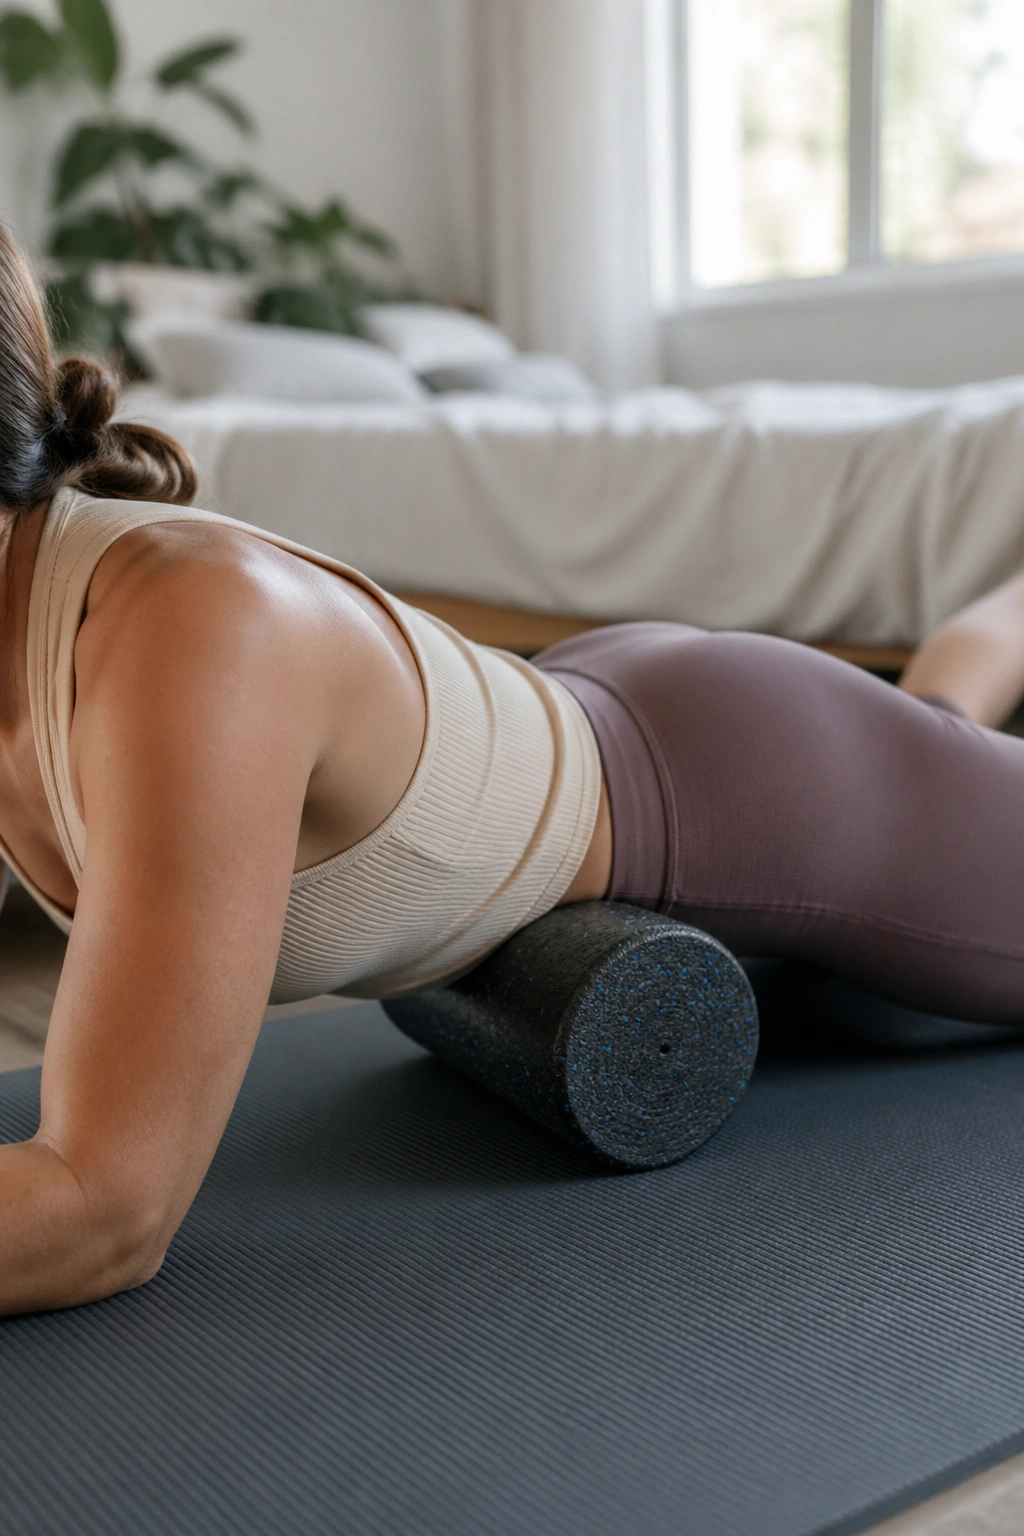
Runners know this ache—the stubborn tight spot at the top front of the thigh that feels as if it lives in your jeans pocket. It is not always one muscle, but the area around the hip flexors and TFL often gets overworked and under-relaxed.
Lie face down and place the roller under the upper front thigh, a little below the front hip bone. Angle your body slightly toward the side you are working so you catch the tissue, not the bone. Then make tiny forward-and-back shifts, no more than 1 to 2 inches.
This is not a big rolling zone. Stay precise. If you go too high, you will hit bony landmarks and hate life. If you go too low, you will drift into the quad and miss the point.
Use 20 to 30 seconds, then breathe in the position before you move away. When you stand, the front of the hip should feel less pinched during extension. That is the win you want.
13. Side-Lying Lateral Hip Roll
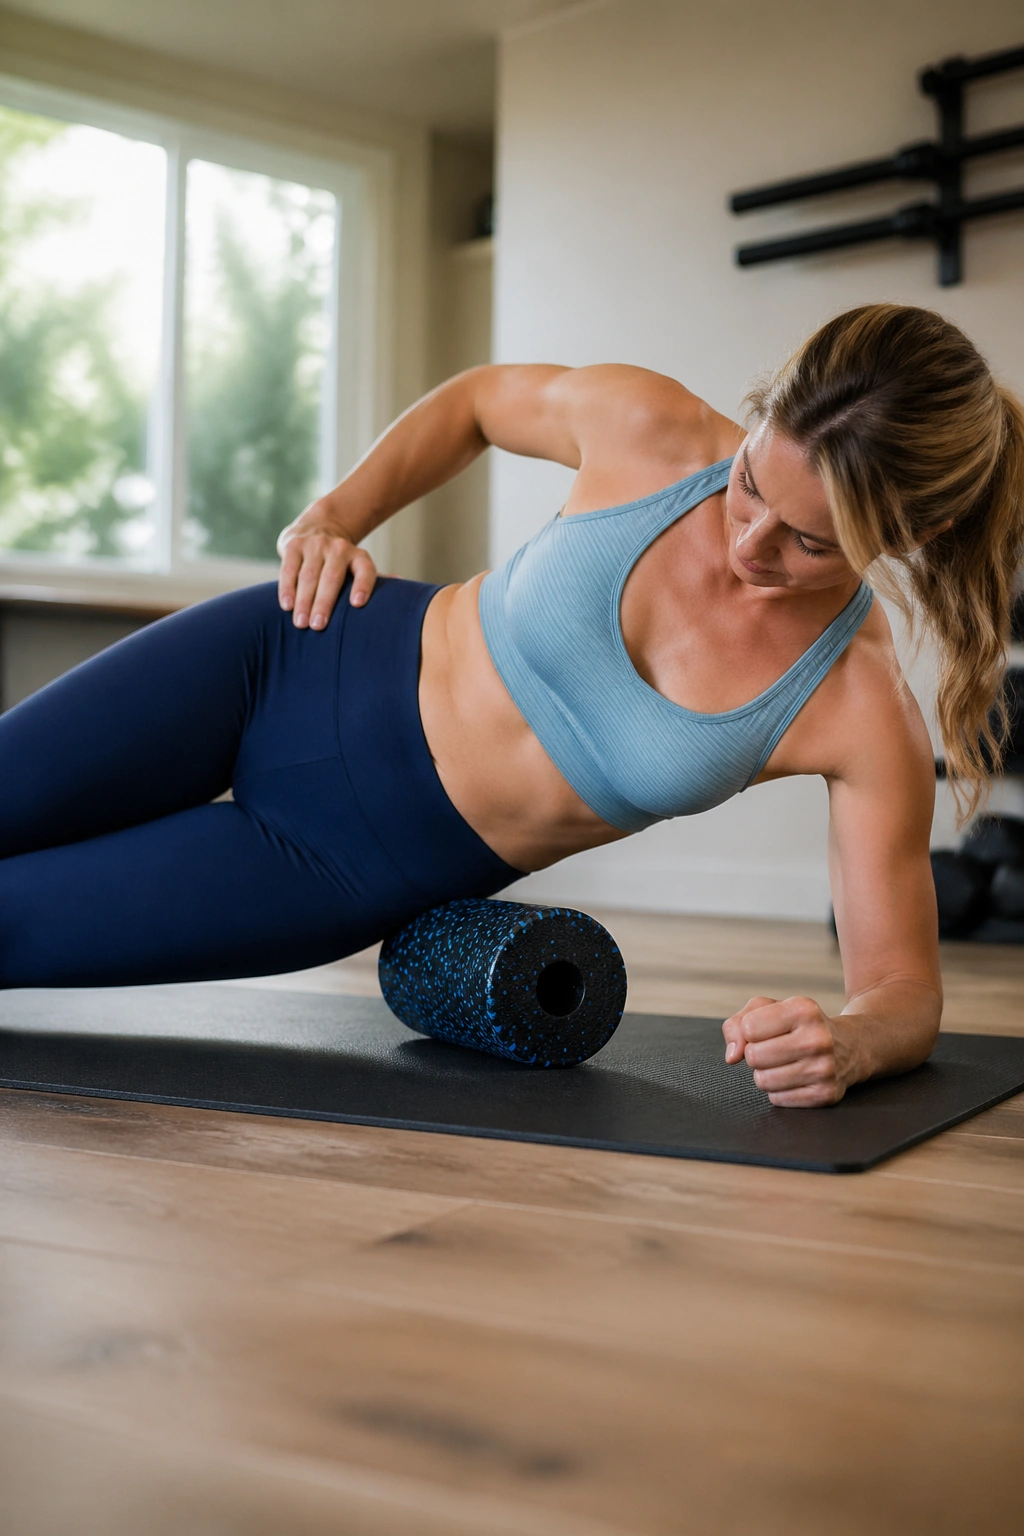
Skip the idea that you need to grind straight down the IT band. That strip of tissue is dense and not keen on being attacked. What usually helps more is working the muscles around it—especially the glute medius and TFL.
Lie on your side with the roller under the upper outer hip, then support yourself on your forearm and top foot. Instead of long dramatic rolls, make tiny rocks and short passes over the side hip.
What to target instead of the IT band
- The soft tissue above the greater trochanter
- The upper outer hip where the glute med sits
- The front-side pocket area where the TFL often gets cranky
Keep the pressure moderate. The side hip can get spicy fast, and too much force makes people brace. Stay for 20 to 40 seconds per side, then stand and walk a few steps. If the outside of the hip feels less stuck when you climb stairs or balance on one leg, you found the right zone.
14. Pilates Mermaid Side Bends with the Roller
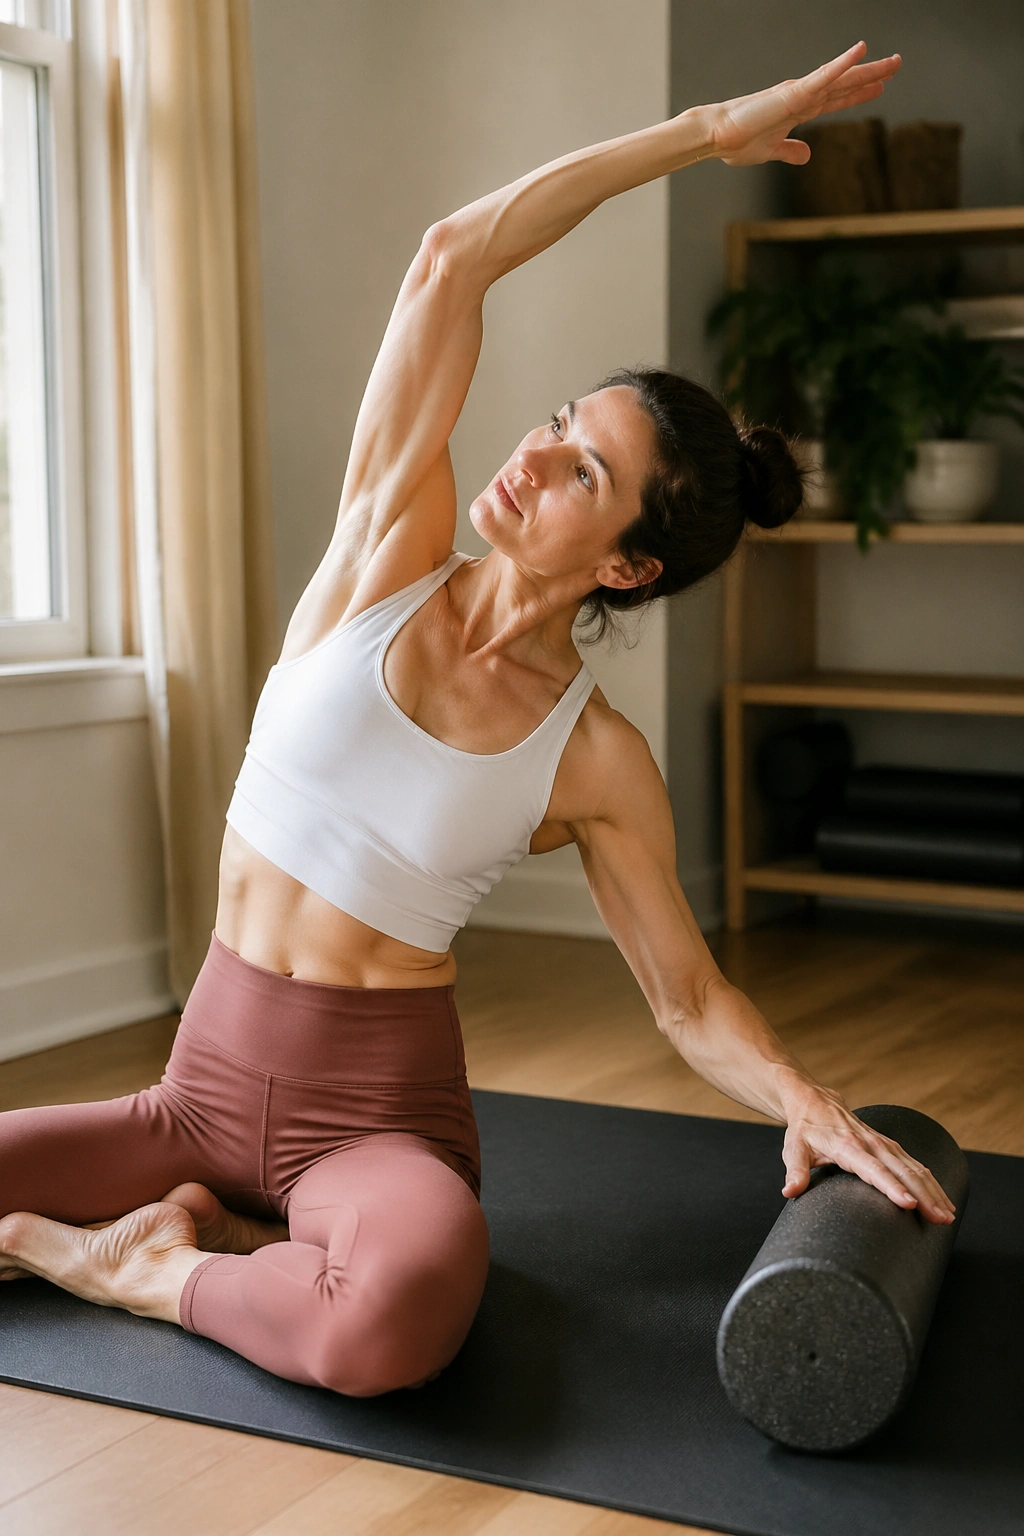
Five slow mermaids can do more for a side-body lockup than a minute of yanking on your arm.
Sit in a comfortable side-sit or cross-legged position with the roller beside you. Place the nearest hand on the roller and glide it away as the opposite arm arcs overhead. Think of lifting the ribs up and over rather than collapsing into the waist. Return with control.
This is where the Pilates part matters. The goal is not a giant side bend. The goal is length through both sides of the trunk, a steady pelvis, and easy breathing into the stretched ribs. Add a soft exhale at the peak and you will usually feel the lats, obliques, and the area near the quadratus lumborum start to let go.
A clean set
Do 4 to 6 reps per side, holding the farthest point for 1 full breath. If one sit bone lifts, shorten the range.
15. Child’s Pose Roller Reach
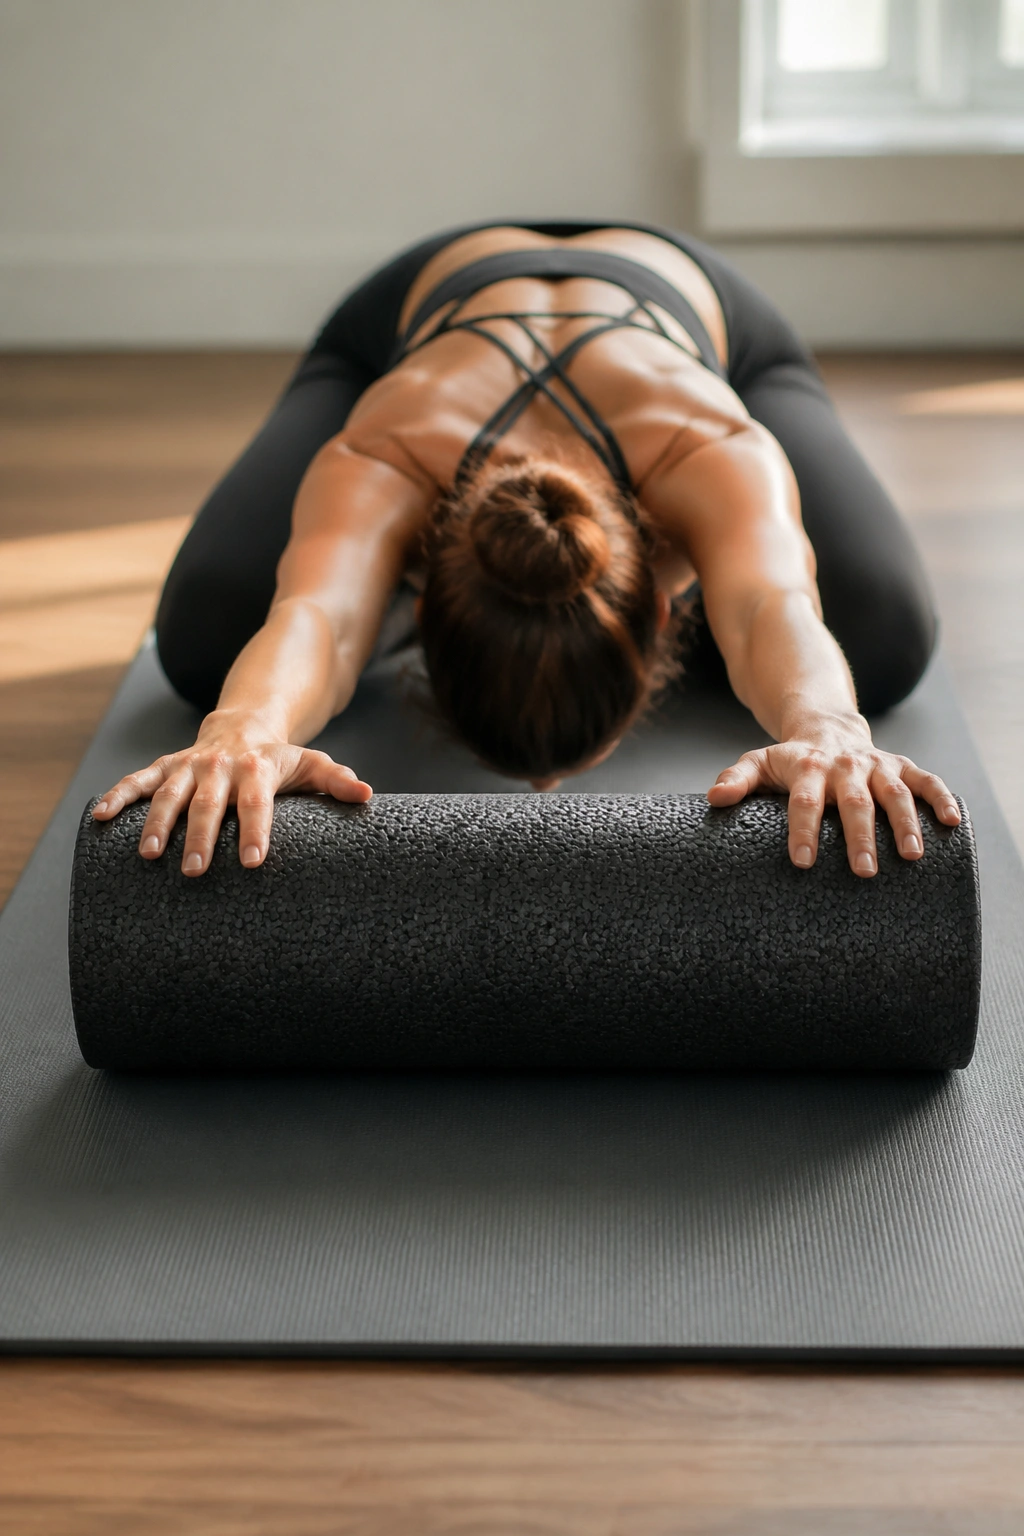
When the lats are stiff, child’s pose can feel blocked rather than restful. Put your hands on the roller and the stretch becomes smoother, longer, and easier to place where you want it.
Kneel on the mat, sit your hips back toward your heels, and place both hands on the foam roller in front of you. Roll the hands away until your arms lengthen and your chest drops between them. Keep the neck easy. Let the shoulder blades slide without pinching together.
Then change the angle. Roll the hands a few inches to the right to stretch the left side body, then a few inches to the left to stretch the right. Those small changes often find the tight strip under the armpit that standard child’s pose misses.
- Stay in the center for 3 to 5 breaths
- Add 2 to 3 breaths with the roller angled each way
- Keep the low ribs soft instead of flaring
This is one of my favorite “between sets” recovery drills after pulling work, swimming, or a day bent over a laptop.
16. Swan Prep Forearm Glides
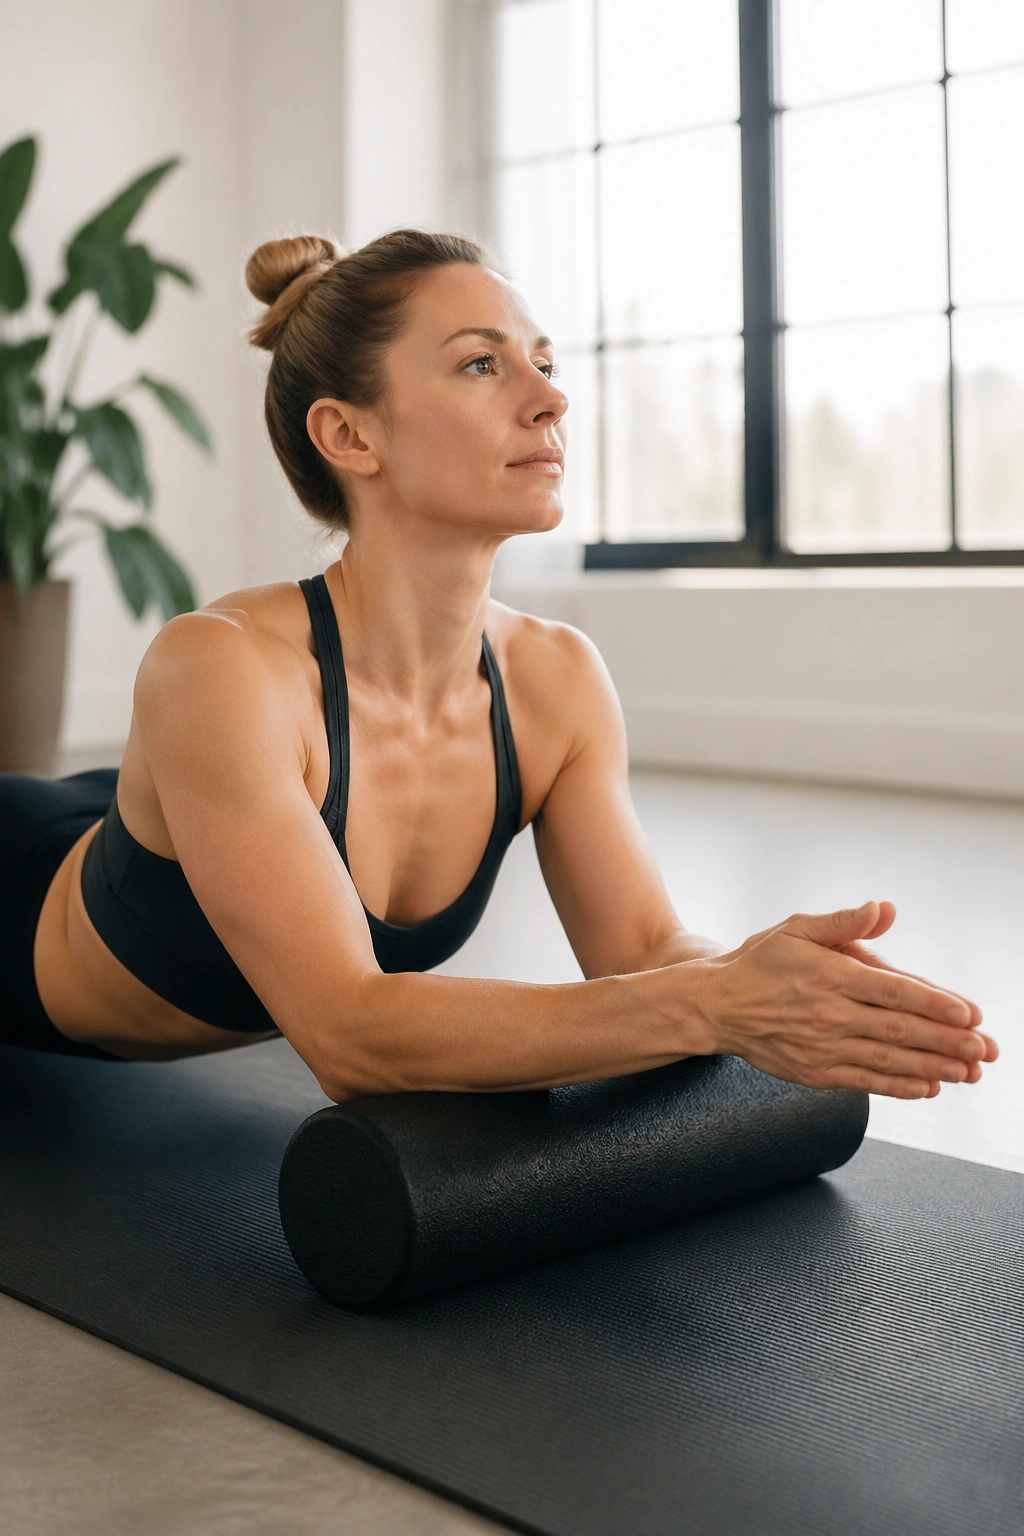
I keep coming back to swan prep because so many bodies spend the day folded forward. Sitting, driving, texting, lifting, cycling—flexion everywhere. A gentle extension pattern can feel like air getting back into the front of the body.
Lie face down with your forearms on the roller and elbows under your shoulders. Press lightly into the roller and slide it forward a few inches as your breastbone reaches ahead and up. Think long spine first, lift second. Then return to the floor with control.
People often overdo this and dump into the low back. Do not. A good swan prep feels spread out through the front of the hips, upper abs, and chest, with the back muscles sharing the work. The glutes can stay lightly on, though you do not need a hard squeeze.
Try 6 to 8 reps, moving with your breath. If you feel pinching in the lumbar spine, reduce the range and reach the crown of the head farther forward. Oddly enough, smaller swans are often the ones that help your posture most.
17. Kneeling Cat Stretch with Hands on the Roller
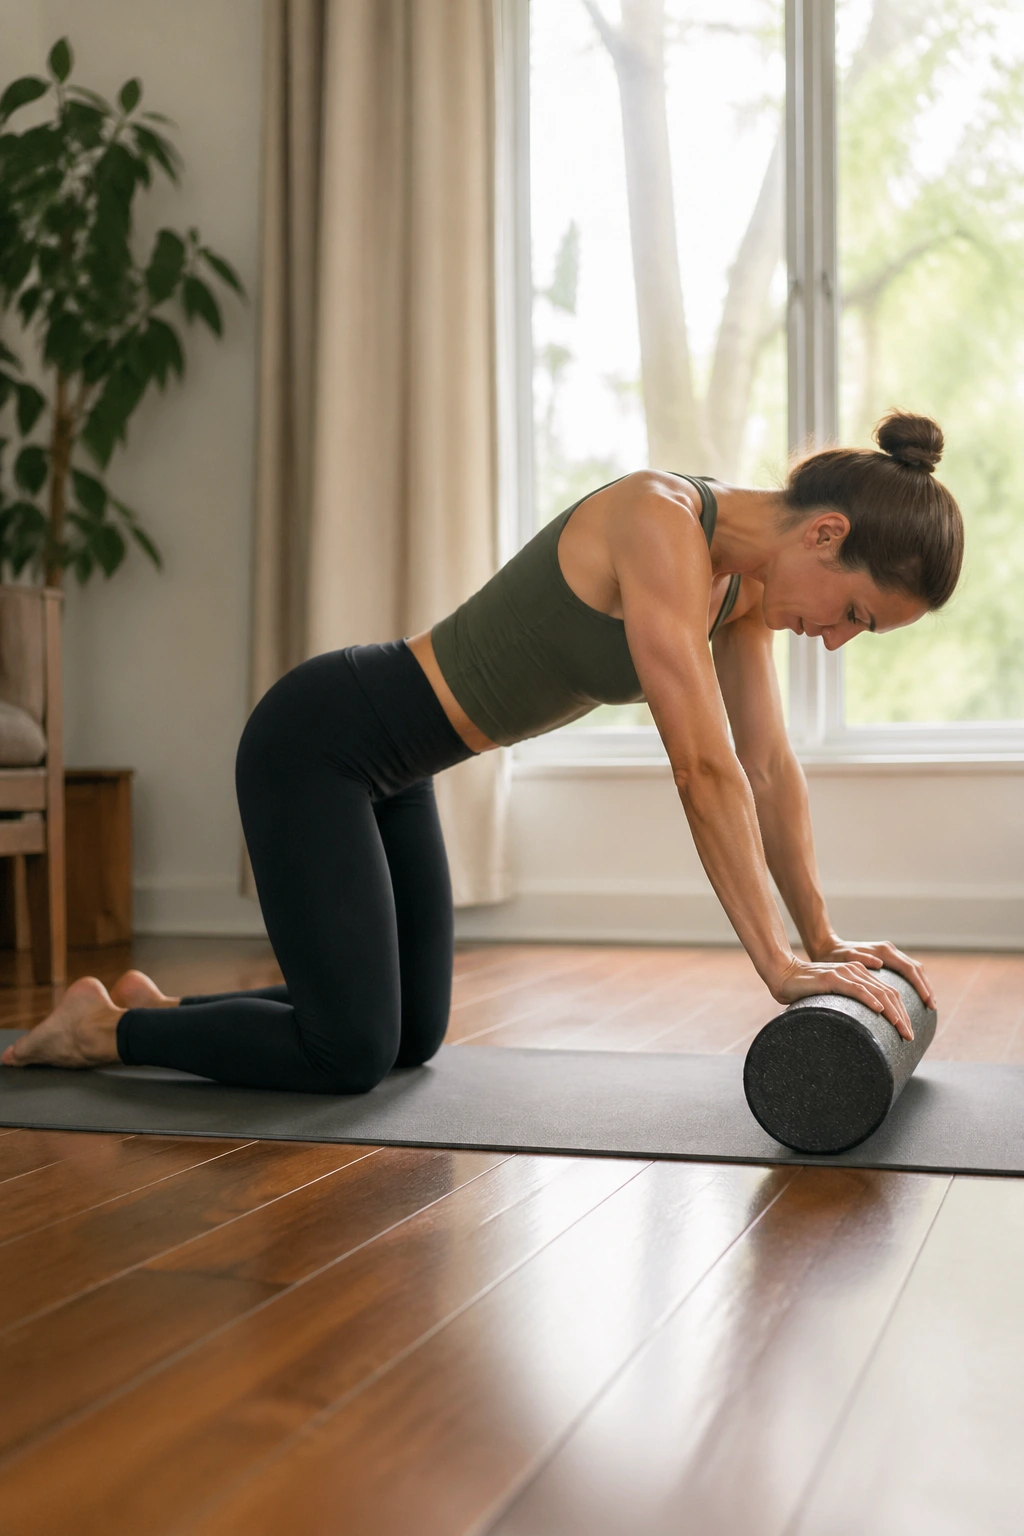
If regular cat-cow feels cramped through the wrists or shoulders, putting your hands on the roller changes the whole line of the movement. You get more reach, more upper-back motion, and less dumping into the low back.
Kneel on all fours and place both hands on the roller under your shoulders. Inhale to lengthen the spine. Exhale and roll the foam roller forward 2 to 4 inches as you round from tailbone to mid-back to neck. Inhale and come back to a long neutral line rather than a hard sag.
How to make it useful
Aim for 6 to 8 slow reps. Let the abdominals start the round, then let the breastbone soften back between the shoulder blades. The roller should glide; it should not shoot away from you.
This drill is gold on days when your back feels stiff but you do not want pressure on it. It is also a nice reset before bridge work if your spine feels like one block instead of many moving parts.
18. Legs-on-Roller Decompression Rest
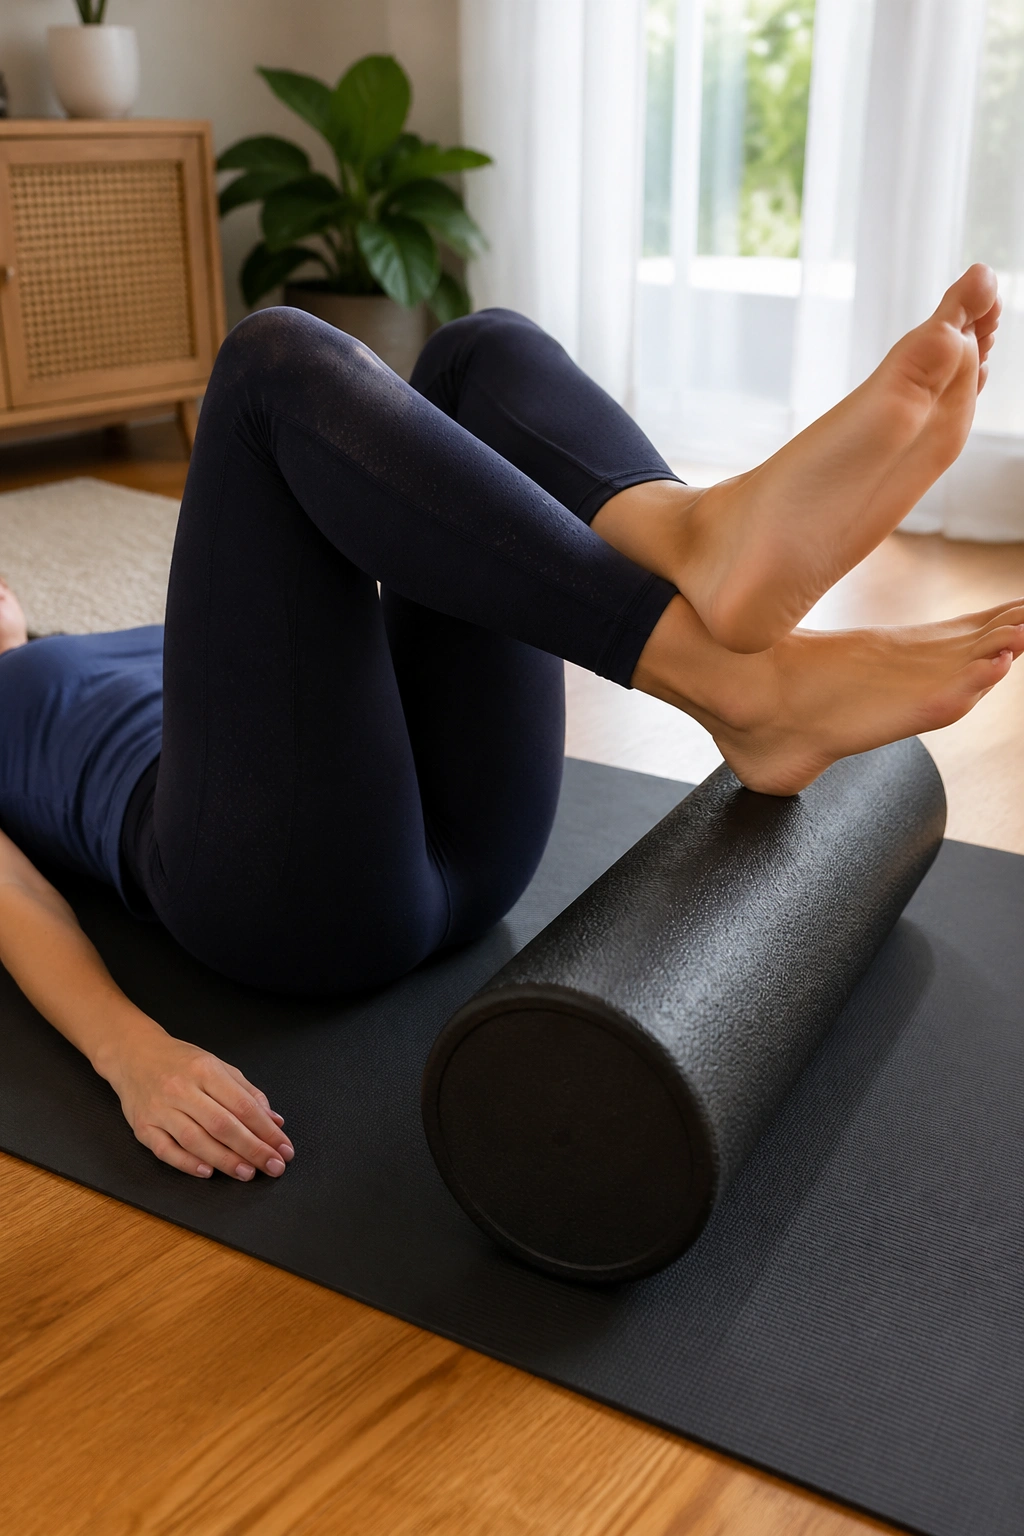
End here.
Lie on your back and place your calves on top of the foam roller so your hips and knees rest around 90 degrees. Let the arms fall out to the sides, palms up. Stay for 2 to 5 minutes and breathe low into the ribs and belly.
This position takes some load off the lower back, quiets down the hip flexors, and gives tired feet and calves a break. If you want a little movement, make tiny pelvic rocks or sway the knees an inch side to side. Tiny. Barely there.
A lot of people skip the easiest drill because it looks too simple to matter. It matters. If your whole body feels less defended when you get up—jaw softer, breath slower, low back less grabby—then the session did its job.
Final Thoughts
A foam roller is not magic, and it does not need to hurt to be useful. The best recovery sessions usually mix breath, small controlled motion, and brief pressure instead of endless grinding.
If I had to build a short routine from this list, I would start with supported breathing, add thoracic extension, pick one lower-body release that matches the day’s soreness, then finish with bridge work or legs-on-roller rest. That combination covers a lot.
One last piece of advice: do less than you think, then stand up and notice the difference. Recovery work earns its keep when your next walk, squat, reach, or Pilates class feels smoother—not when the roller leaves you feeling beat up.
