



Sand changes Pilates in a way a studio floor never does. Beach Pilates workouts feel different the moment your feet sink into packed sand and your balance has to earn its keep.
The first thing you notice is not the burn. It’s the wobble. Then the breeze shows up, your breath gets a little louder, and small muscles in your feet, ankles, and hips start doing jobs they usually get to skip on a flat mat.
That is the charm of beach Pilates, and also the trap. Deep, loose sand turns clean movement into a grind. Firmer sand near the waterline gives you enough give to wake up your stabilizers without turning every rep into a rescue mission. A thin towel or mat helps, but I like to keep it light; too much cushion can feel like trying to do precision work on a marshmallow.
A good outdoor Pilates session keeps the movements honest. Slow roll-downs, controlled side work, precise planks, and a few standing drills often beat a showy routine by a mile. Start with your feet. They tell the truth first.
1. Barefoot Foot Wake-Up on Packed Sand
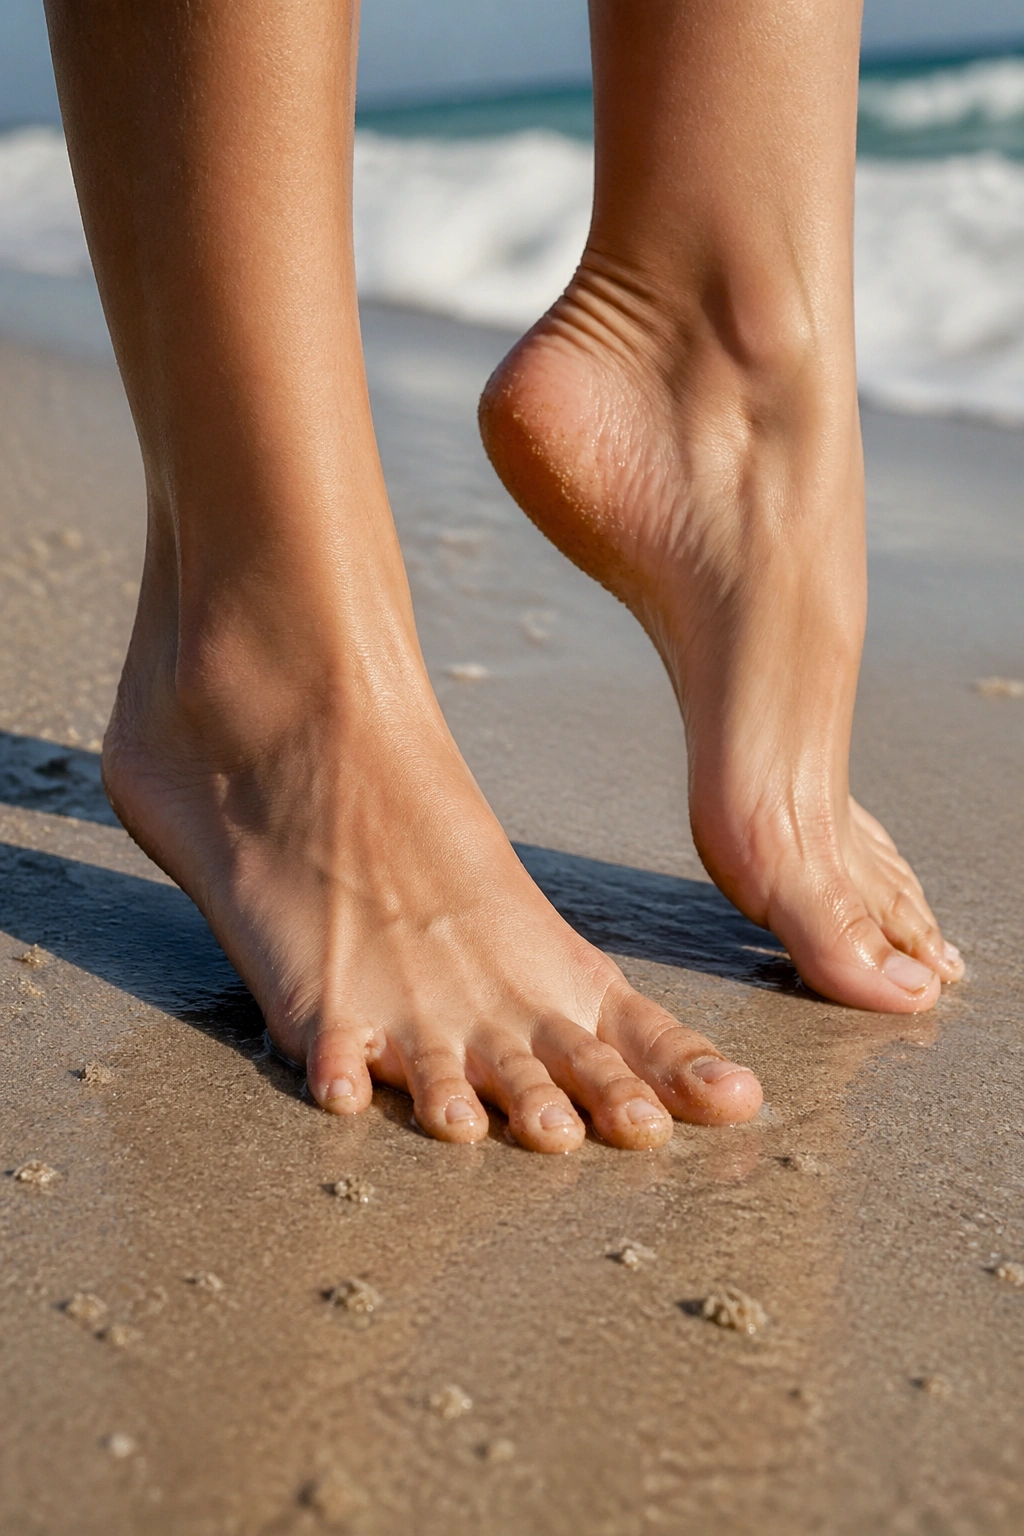
Your feet should be the first thing you train on the beach. That is not a cute warm-up; it’s the part that makes everything else work. Packed sand near the waterline gives just enough resistance to wake the arches, toes, and calves without making you feel like you’re sinking into pudding.
Why It Matters
Start with toe spreads for 20 seconds, then lift your heels slowly for 10 to 12 reps. After that, press the ball of the foot into the sand and make the arch lift, almost like you’re shortening the foot without curling the toes. That tiny action matters more than people think.
- Toe spreads: separate the toes wide, then relax them back down.
- Heel raises: rise for 2 counts, lower for 2 counts.
- Short-foot presses: keep the toes long while the arch gently lifts.
- Ankle circles: 5 slow circles in each direction per side.
Tip: If the sand feels hot or rough, stand on a folded towel. You want feedback, not a burn.
2. Slow Standing Roll-Downs with the Wind at Your Back
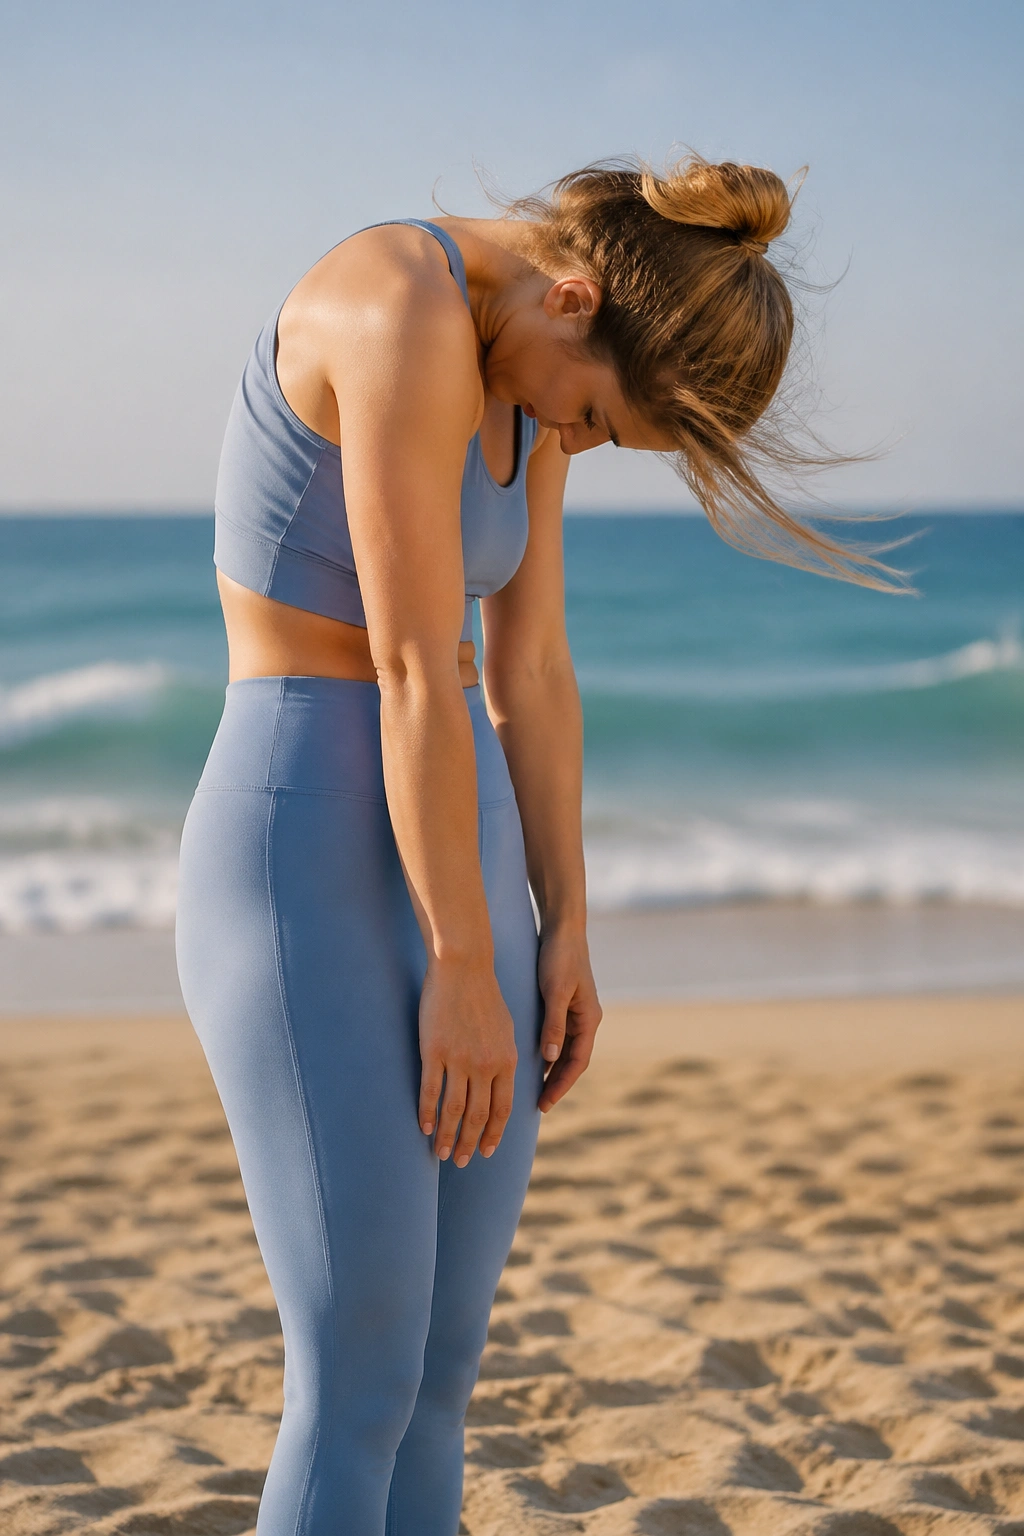
Standing work gets harder on sand fast. That extra wobble exposes lazy core control immediately. A roll-down that feels smooth on a hard floor can turn into a shrug-fest if you rush it outdoors.
Keep your feet hip-width apart and soften the knees just enough to stay grounded. Exhale, nod the chin, and peel the spine forward one vertebra at a time until your hands hang heavy toward the sand. Then stack the spine back up as if each bone has its own job. Five slow rounds are plenty.
The wind adds a useful nuisance here. If it pushes you around, that’s the point. Resist the urge to lock your knees or fling your arms forward for balance. A clean roll-down on the beach should feel deliberate, almost boring in the best way, because the work is happening deep in the trunk and behind the ribs.
3. Seated Mermaid Side Bends by the Waterline
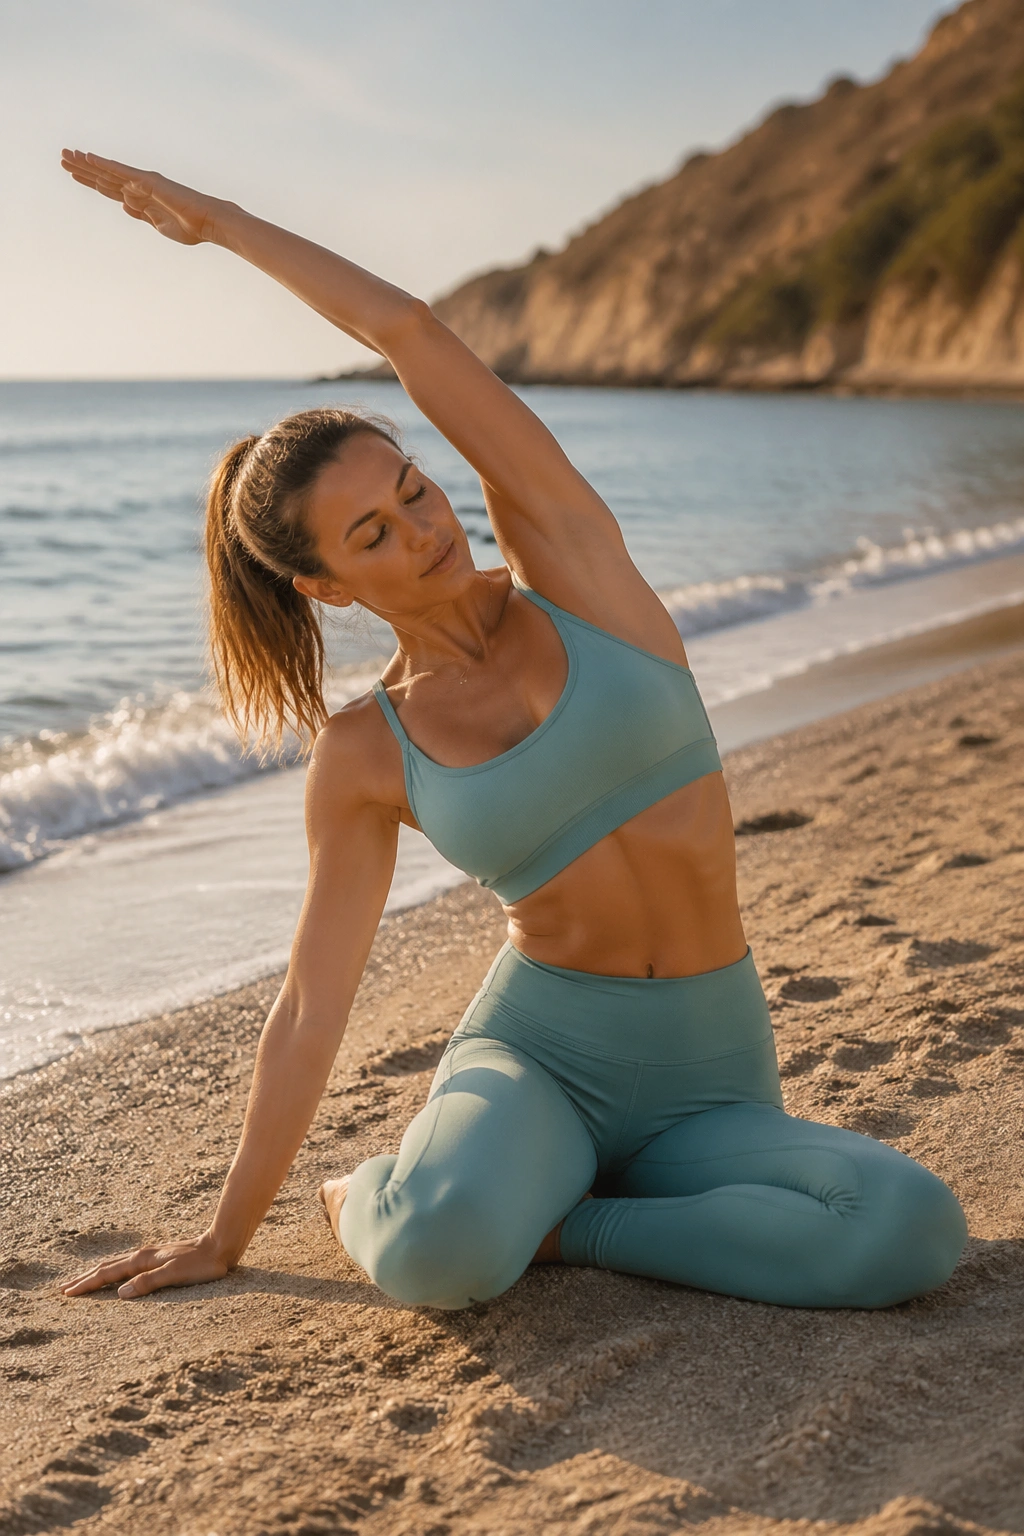
Want a move that opens your ribs without beating up your knees? Mermaid is the one I reach for. It’s a classic Pilates shape, and on the beach it feels softer and more open because the ground underneath you has a little give.
Sit on one hip with both knees folded to the side, or cross the shins if that feels easier. Reach one arm overhead and bend away from the seated side, keeping both sitting bones as rooted as the surface allows. Come back to center, then switch sides. Six slow bends per side is enough to feel your side body wake up.
How to Get More Out of It
- Stay tall through the spine before you bend.
- Let the lower ribs expand on the inhale.
- Keep the shoulder away from the ear.
- Move slowly enough that the beach air doesn’t rush you.
The move looks simple. It isn’t. If you rush through it, you miss the whole point, which is to lengthen the waist instead of collapsing into it.
4. Forearm Plank Shoulder Taps on a Thin Mat
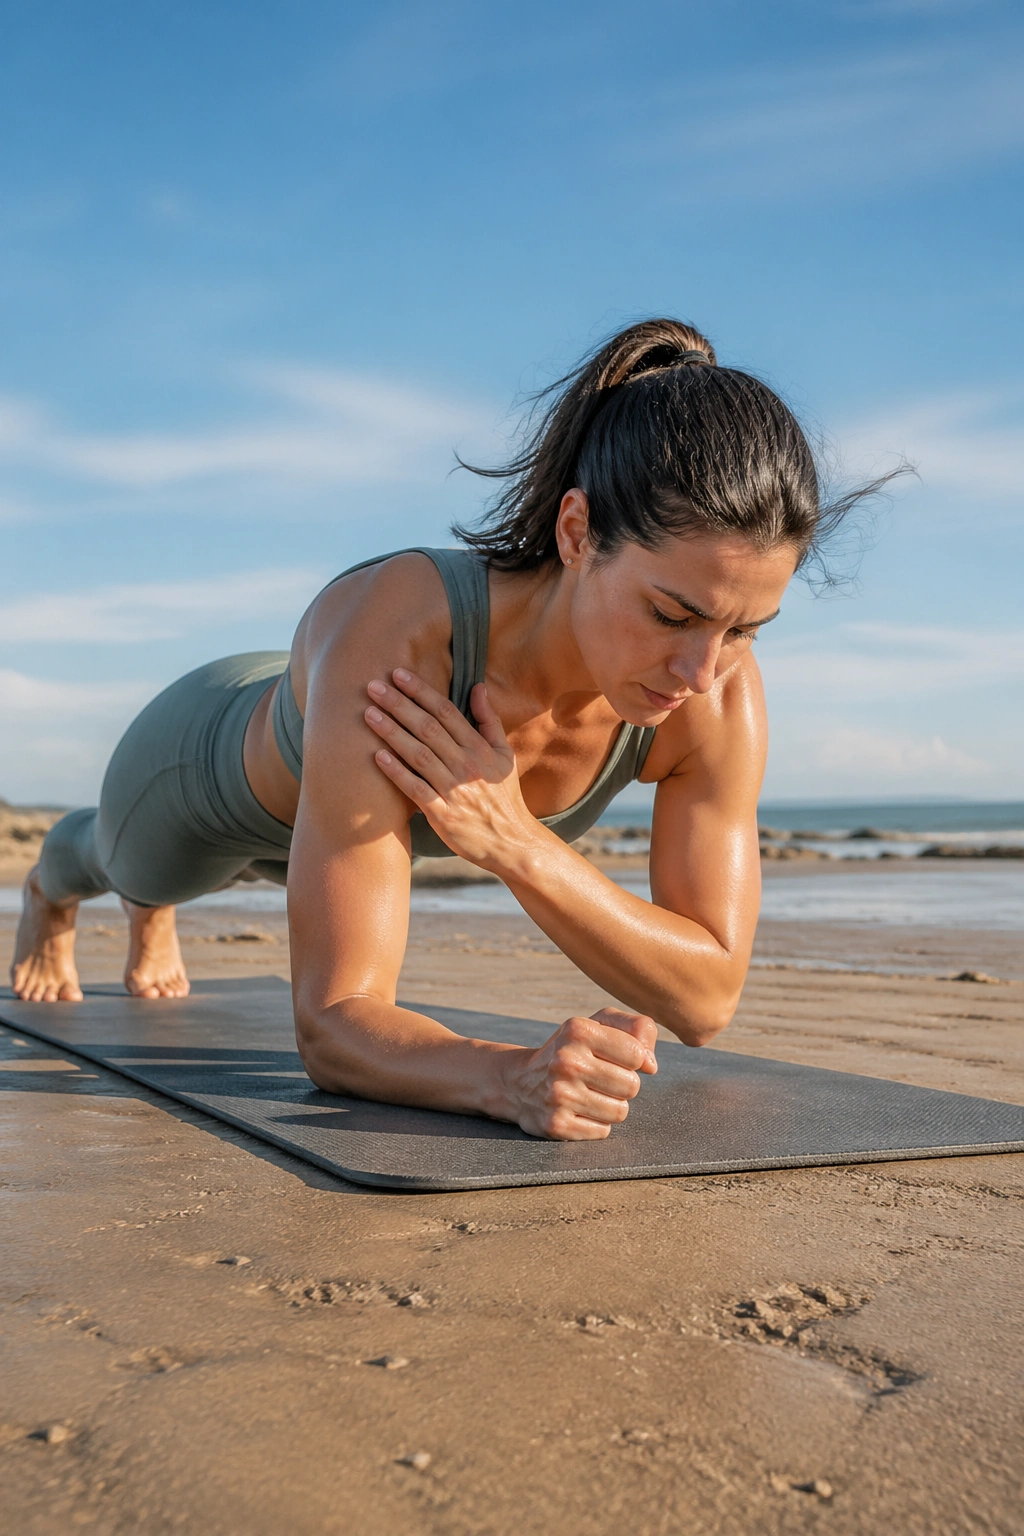
Picture a mat lying on firm sand, the tide still low, and your elbows set just under your shoulders. That is the setup. Nothing fancy. The magic comes from trying to keep the hips from swaying while one hand reaches to the opposite shoulder, then returns to the sand.
Forearm plank shoulder taps are one of the best beach Pilates moves for core control because the unstable base punishes sloppy bracing right away. Start with 6 to 8 taps per side, moving slowly enough that your pelvis stays level. If your low back sags, drop to your knees and keep going from there.
A thin mat works better than a thick one here. Thick cushioning can feel friendly at first, but it also lets you wobble more than you need to. The goal is not to fight the surface. The goal is to make the surface honest.
5. Side-Lying Leg Lifts That Wake Up the Outer Hip
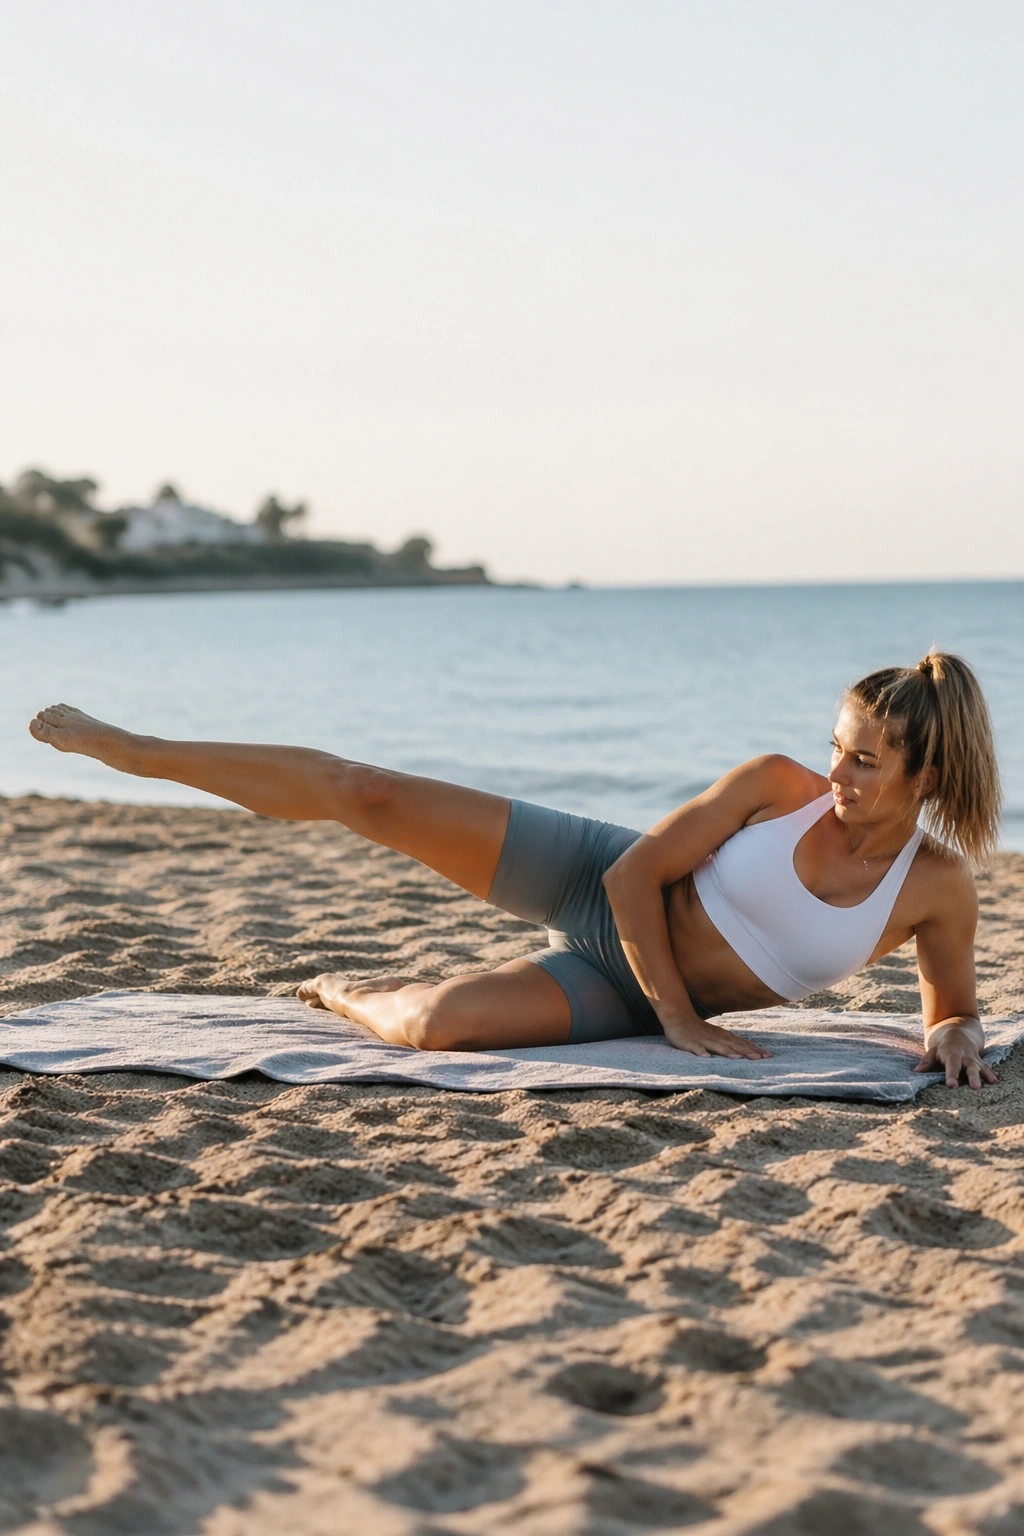
This is the one I reach for when the outer hip has gone sleepy. Side-lying leg lifts on sand feel cleaner than they sound, especially if you place a towel under your waist and ribs and keep the lower leg bent for a little more support.
Lie on your side with the top leg long and slightly behind the body line, not rolled forward. Lift the top leg 8 to 12 inches, pause for a beat, and lower it with control. Ten to fifteen lifts per side is enough if you’re keeping the movement small and steady. Bigger is not better here.
Small range. Big burn.
The beach adds a nice layer of challenge because the torso has to stay quiet while the ground gives way under the hip. Keep the bottom waist lifted slightly off the sand, press the lower side into the towel, and resist the urge to swing the leg. If your hip flexor starts taking over, move the leg a little farther back and slow down.
6. Glute Bridge Marches on Firm Sand
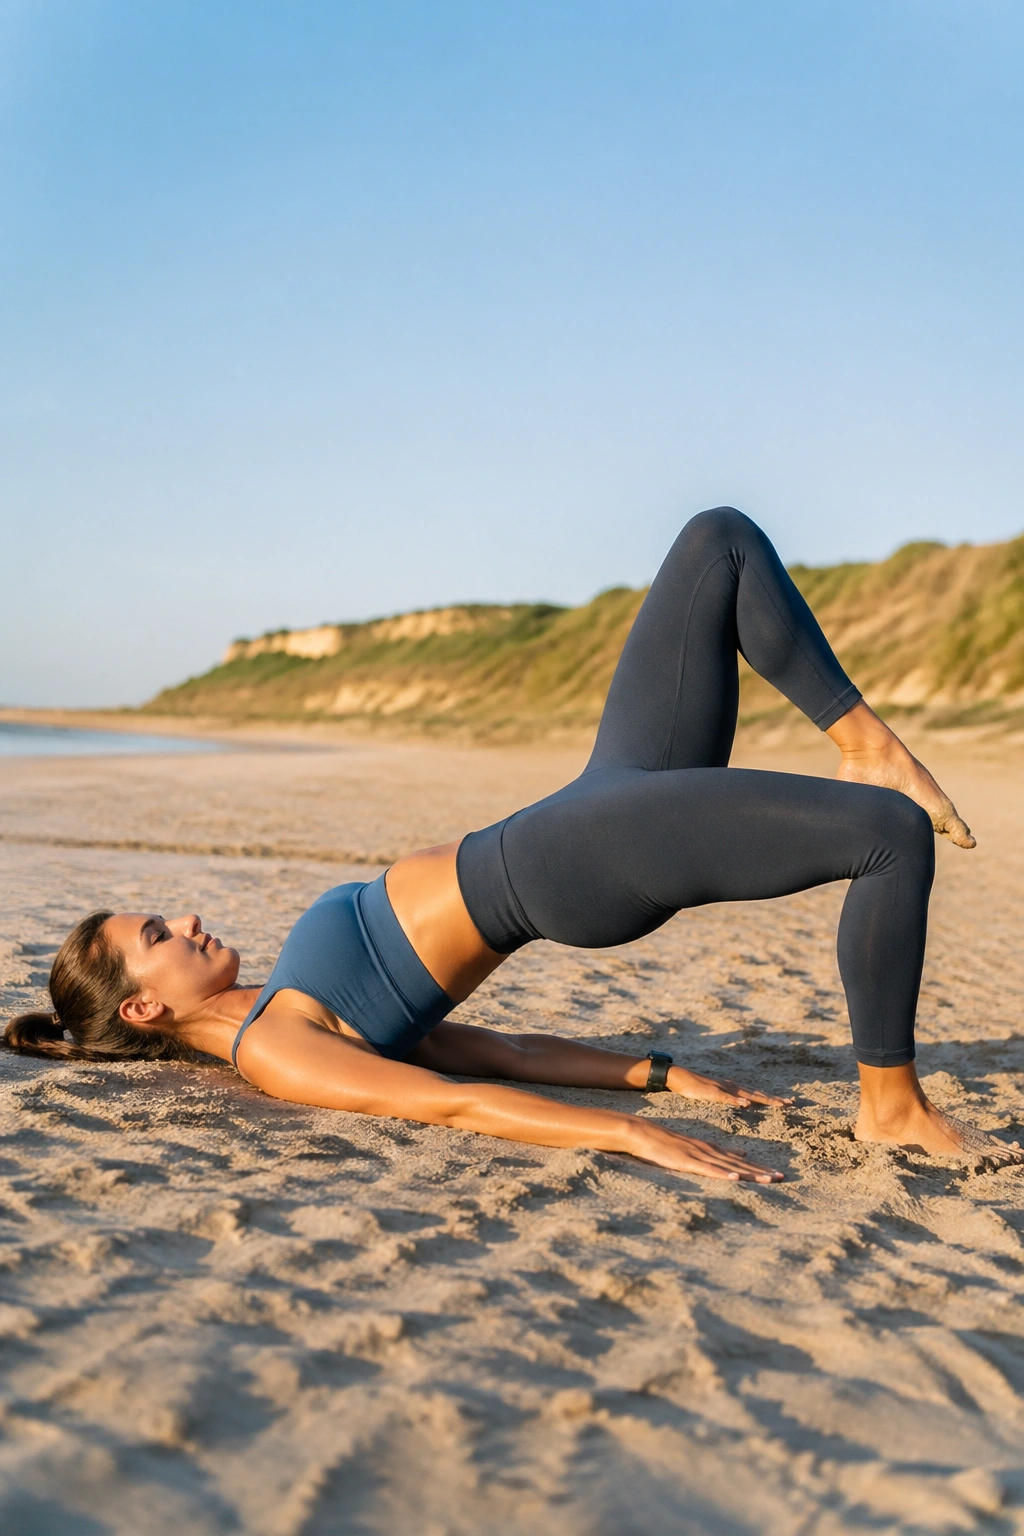
Unlike a bridge on a hard studio mat, a beach bridge asks your feet to stay calm while the ground shifts under them. That tiny instability makes glute bridge marches feel more demanding, and I mean that in a good way.
Lie on your back with knees bent and feet flat on firm sand or a thin towel. Lift the hips until your body makes a long line from shoulders to knees. Hold that shape, then lift one foot a few inches off the sand, set it down, and switch sides. Eight marches per leg is a tidy starting point.
Keep the ribs soft. That matters.
If your low back is doing the heavy lifting, bring the feet a little closer to the seat and lower the bridge height. People love to chase a high bridge, but on sand, a controlled medium bridge usually works better because the pelvis can stay quieter. You should feel the glutes, hamstrings, and lower abs sharing the job instead of one area stealing the show.
7. Single-Leg Balance with Arm Circles
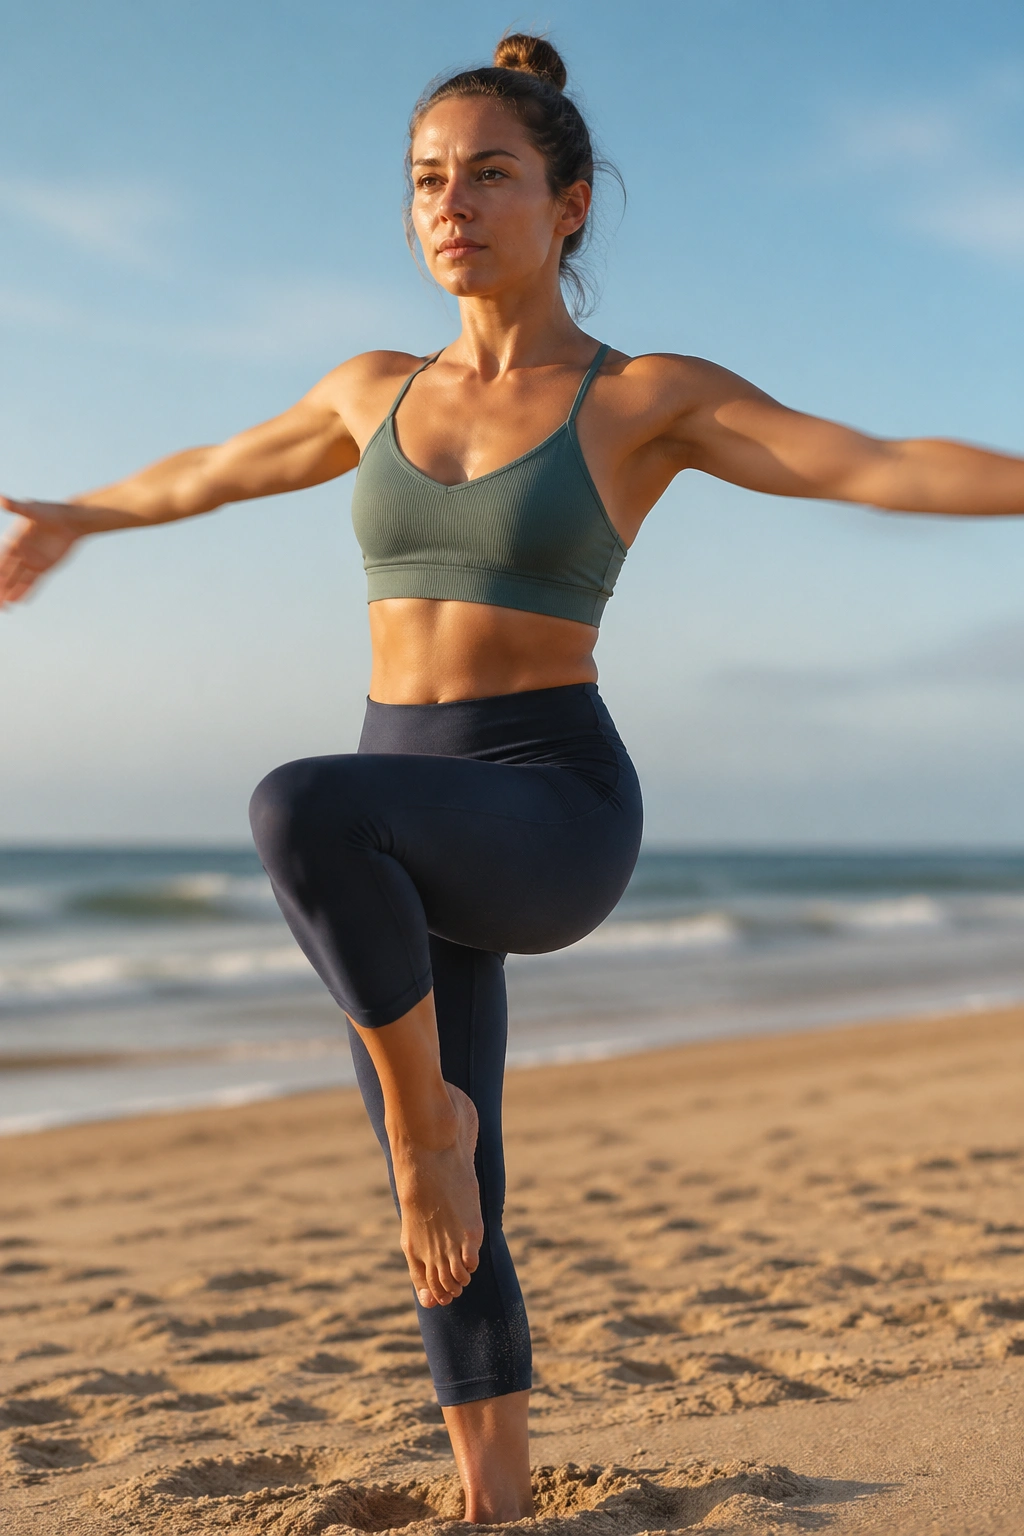
If you want to know whether your Pilates form is honest, stand on one foot on sand. There’s no way to fake it for long. The surface makes your ankle, calf, and hip talk to each other in real time.
What to Watch For
Stand tall, soften the standing knee, and lift the free foot just off the ground. Keep your gaze on one fixed point — a towel, a rock, a beach umbrella, anything that doesn’t move around. Then circle the arms slowly for 20 to 30 seconds before switching sides.
- Keep the standing foot spread wide.
- Keep the ribs stacked over the hips.
- Use smaller arm circles if the torso starts to twist.
- Touch the lifted foot down between sets if you need a reset.
A balance drill like this is one of the best reasons to do Pilates on the beach. It trains control without making you grind through endless reps. And if you wobble a little? Good. That means you’re paying attention.
8. The Hundred with Knees in Tabletop
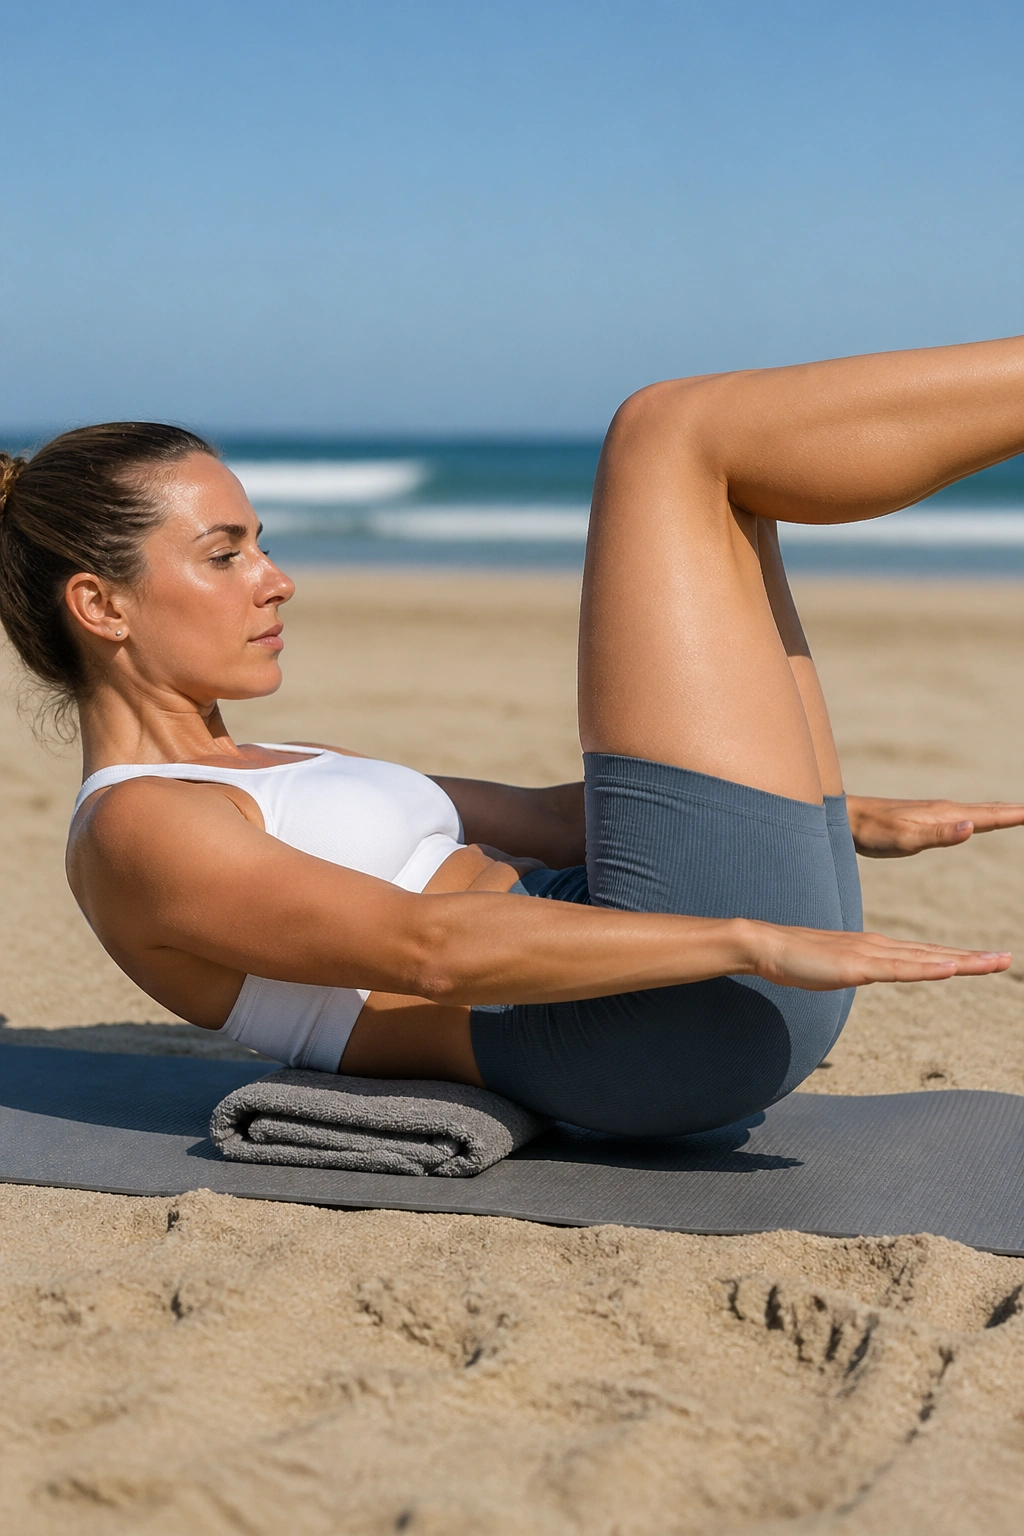
The Hundred gets humbler outdoors. On a beach mat, with the sand shifting under your back and the air moving across your face, the exercise stops being a neat studio ritual and becomes a real test of breath control.
Lie down with your knees in tabletop and your head lifted only if your neck is happy there. Pump the arms up and down in short, crisp pulses while you breathe in for five counts and out for five counts. Start with 30 to 50 arm pumps, or one full breathing cycle if that feels cleaner.
I like to keep a folded towel under the pelvis if the sand is uneven. That little bit of support keeps the spine from getting annoyed. If your lower back arches hard, lower the legs or keep the head down and work the arm pulses anyway. The point is not to win a spectacle contest. The point is to keep the trunk steady while the limbs move.
9. Bird Dog Reaches on a Beach Towel
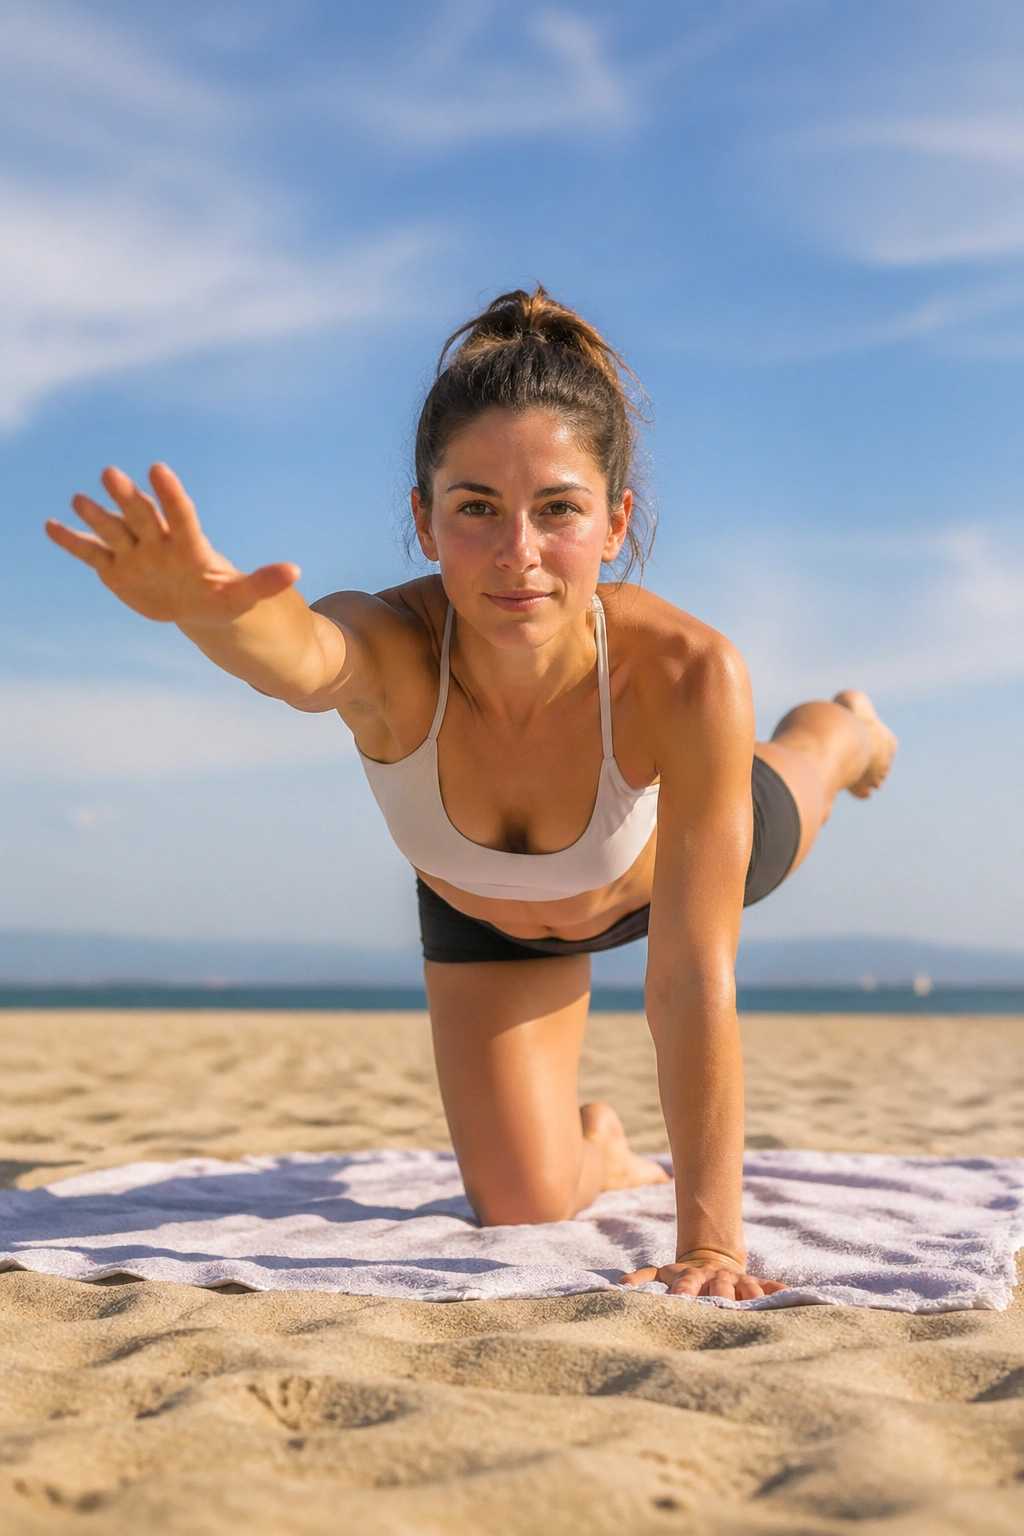
Can you still train core stability when the ground keeps shifting? Yes. Bird dog is one of the easiest ways to prove it without turning the session into a wrestling match.
Come onto hands and knees on a towel, with wrists under shoulders and knees under hips. Reach one arm forward and the opposite leg back, then hold for two or three slow breaths before returning to center. Six reps per side is enough if you move with care. If the towel slides, fold it once more or move to firmer sand.
How to Use It
- Reach long, not high.
- Keep the hips square to the sand.
- Press through the fingertips so the shoulder stays steady.
- Pause at full extension before you come back.
Bird dog is one of those exercises that looks polite and feels serious. The beach only makes that more obvious. The instability asks for a quieter core, a steadier pelvis, and less ego.
10. Side Plank Hip Lifts with the Shoreline as a Timer
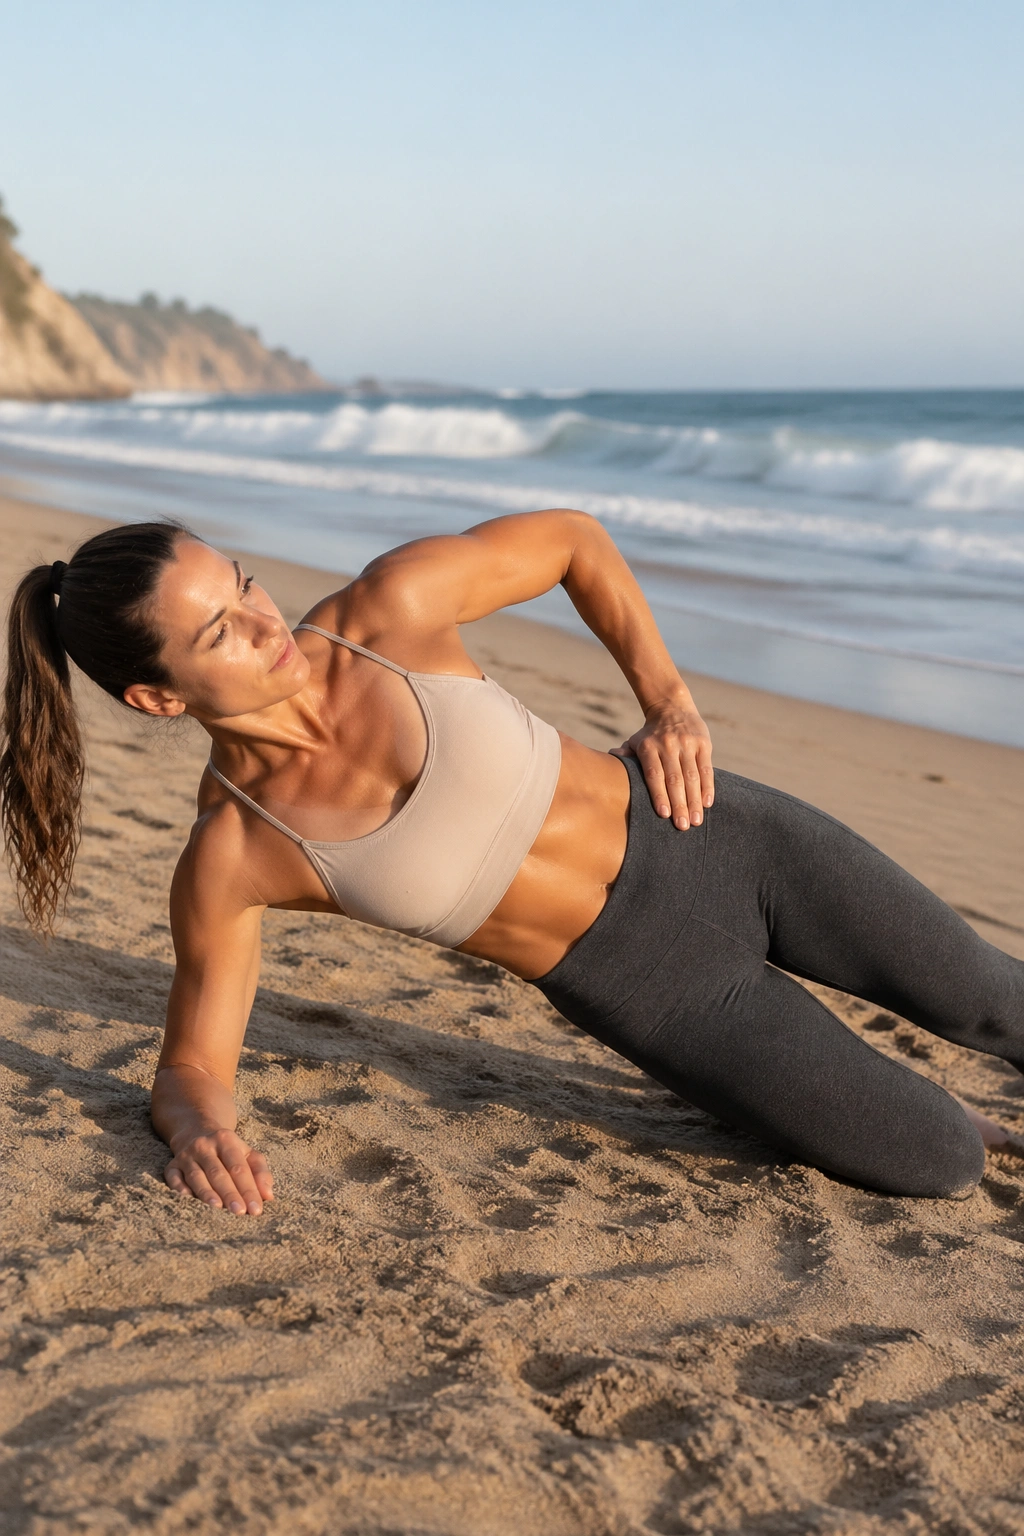
The beach has a way of making side plank feel less like an exercise and more like a negotiation. One elbow on the sand, legs stacked or staggered, and suddenly every little wobble is impossible to ignore.
Start with the lower knee down if you need that support. Lift the hips, then lower them a few inches and raise them again for 6 to 10 reps. If you want the full version, stack the feet and keep the whole body in one line. The top shoulder should stay rolled back instead of creeping toward the ear.
The side body loves this work. So do the glutes.
If your neck tightens first, stop before the set turns ugly. A clean, short set is better than a dramatic collapse. I also like to use the edge of a towel as a marker: if the hips start drifting backward on the sand, you’ve gone past your clean range and need to reset.
11. Teaser Prep with Bent Knees
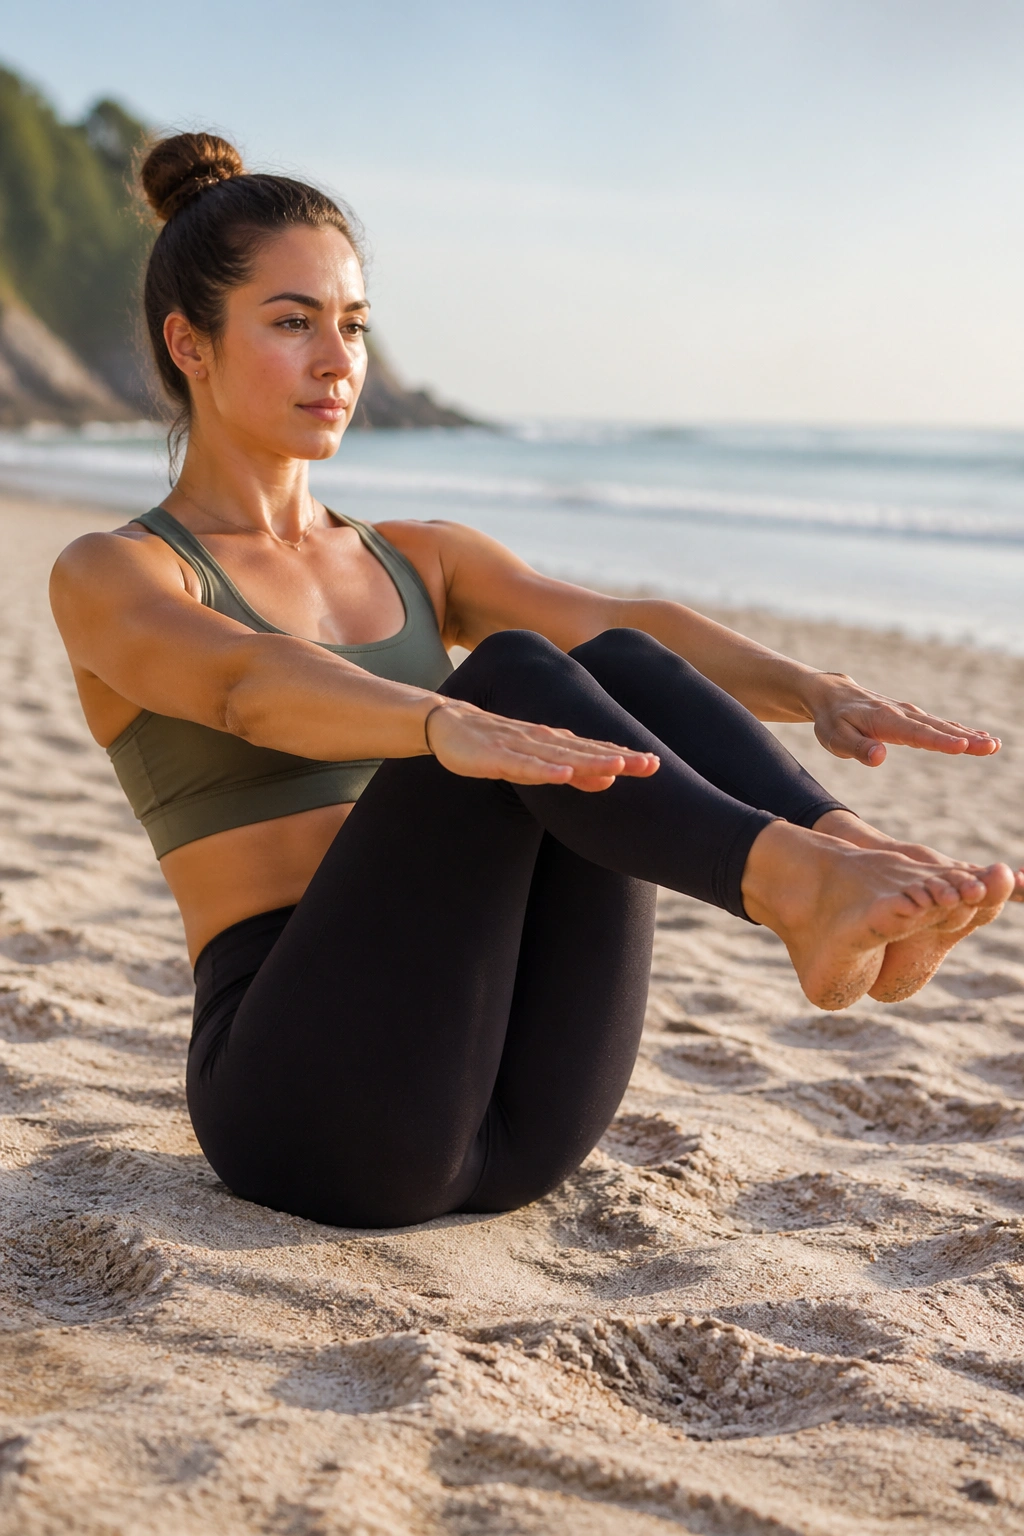
Teaser prep is the move that makes people either grin or groan, sometimes both. On the beach, I prefer the bent-knee version because the shifting ground makes the full shape a little too easy to rush.
Sit tall, lean back a few inches, and lift the feet so the shins stay parallel to the ground. Reach the arms forward, then roll back just enough to feel the abs shorten and lengthen without losing the curve of the spine. Five to six controlled reps is a good target. If the low back grips, shorten the range immediately.
Smaller is smarter here.
Use your exhale to come up and your inhale to settle back. That breath pattern keeps the effort from spilling into the neck. When teaser prep works, it feels like the center of the body is doing the lifting, not the hip flexors tugging the whole thing forward. When it goes wrong, it usually gets jerky fast. That is your cue to make it smaller, not to push through.
12. Kneeling Thread-the-Needle Rotations
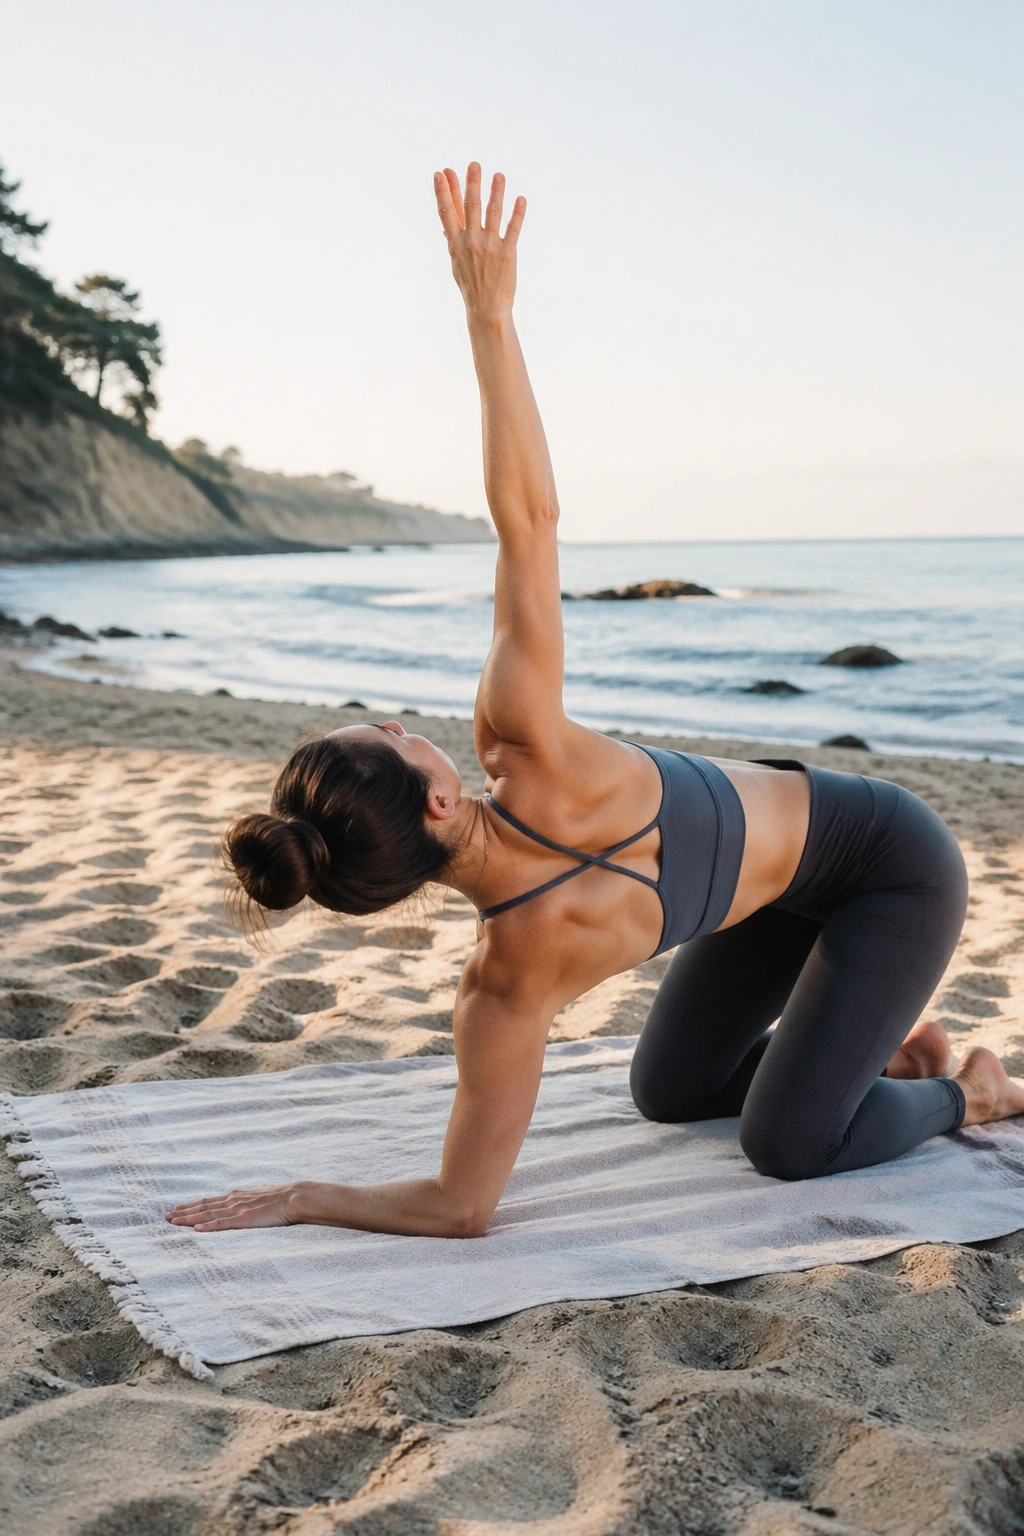
Unlike a standing twist, this one lets the ribs move without the hips cheating. That matters on sand, where standing work can get sloppy the second the ankles start searching for balance.
Kneel on a towel with the knees apart just enough to feel stable. Reach one arm under the body and rotate through the upper back, then open the arm back toward the sky. Five slow reps per side usually does the job. If your wrists are tender, keep one hand on the sand for support and move through the top arm only.
The chest should feel like it’s opening and closing in slow motion. That is the feeling you want.
This is one of the best beach Pilates exercises for anyone who sits too much, carries tension in the upper back, or feels stiff after a long walk on the sand. It’s gentle, but not empty. There’s enough load in the kneeling position to make your trunk work, especially if you keep the ribs from flaring.
13. Prone Swimming Lifts for the Back Body
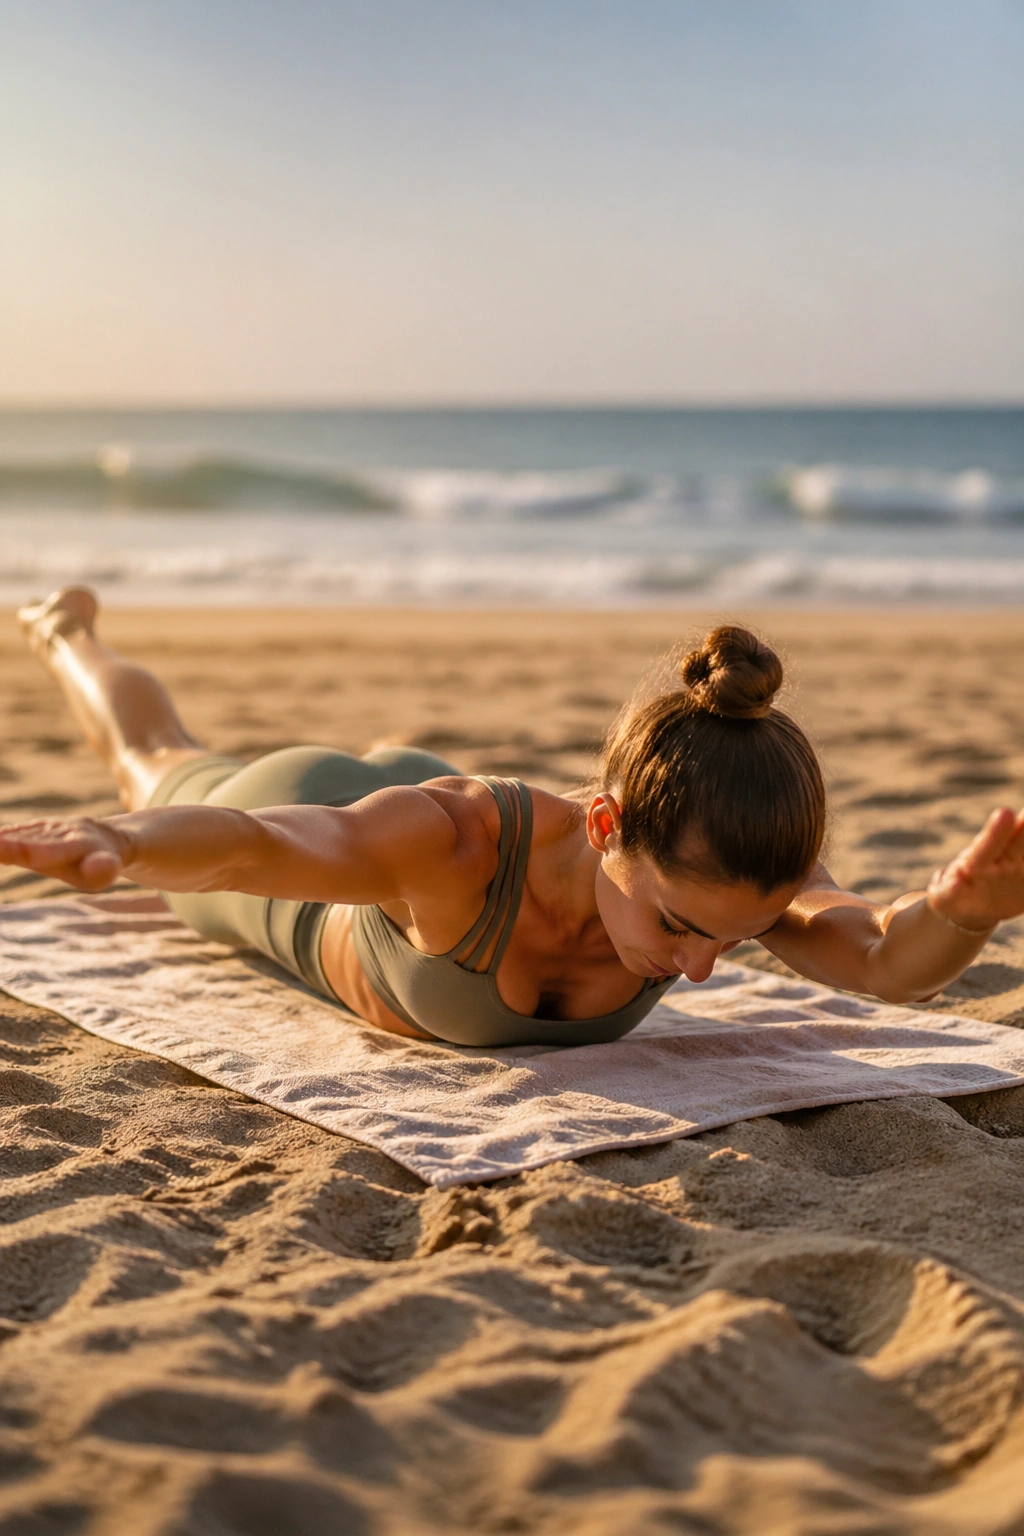
Lie face down and the beach goes quiet. The sound of the waves stays there, but your attention narrows fast because prone swimming lifts ask the whole back line to wake up at once.
Place a towel under the pelvis and ribs if the sand feels lumpy. Then lift the opposite arm and leg in small, fast pulses, or hold both arms and both legs hovering a few inches off the ground for 20 to 30 seconds. The neck stays long. The gaze stays down. The movement stays small.
You should feel the glutes, mid-back, and back of the shoulders doing the work. If the low back pinches, lower the limbs and make the lift shorter. That is not a failure. It’s smart editing.
I like this one after a lot of standing balance work because it flips the body upside down in a useful way. Your front body finally gets a break, and your back body gets to do the job it was built for.
14. Squat Pulses with Heel Raises
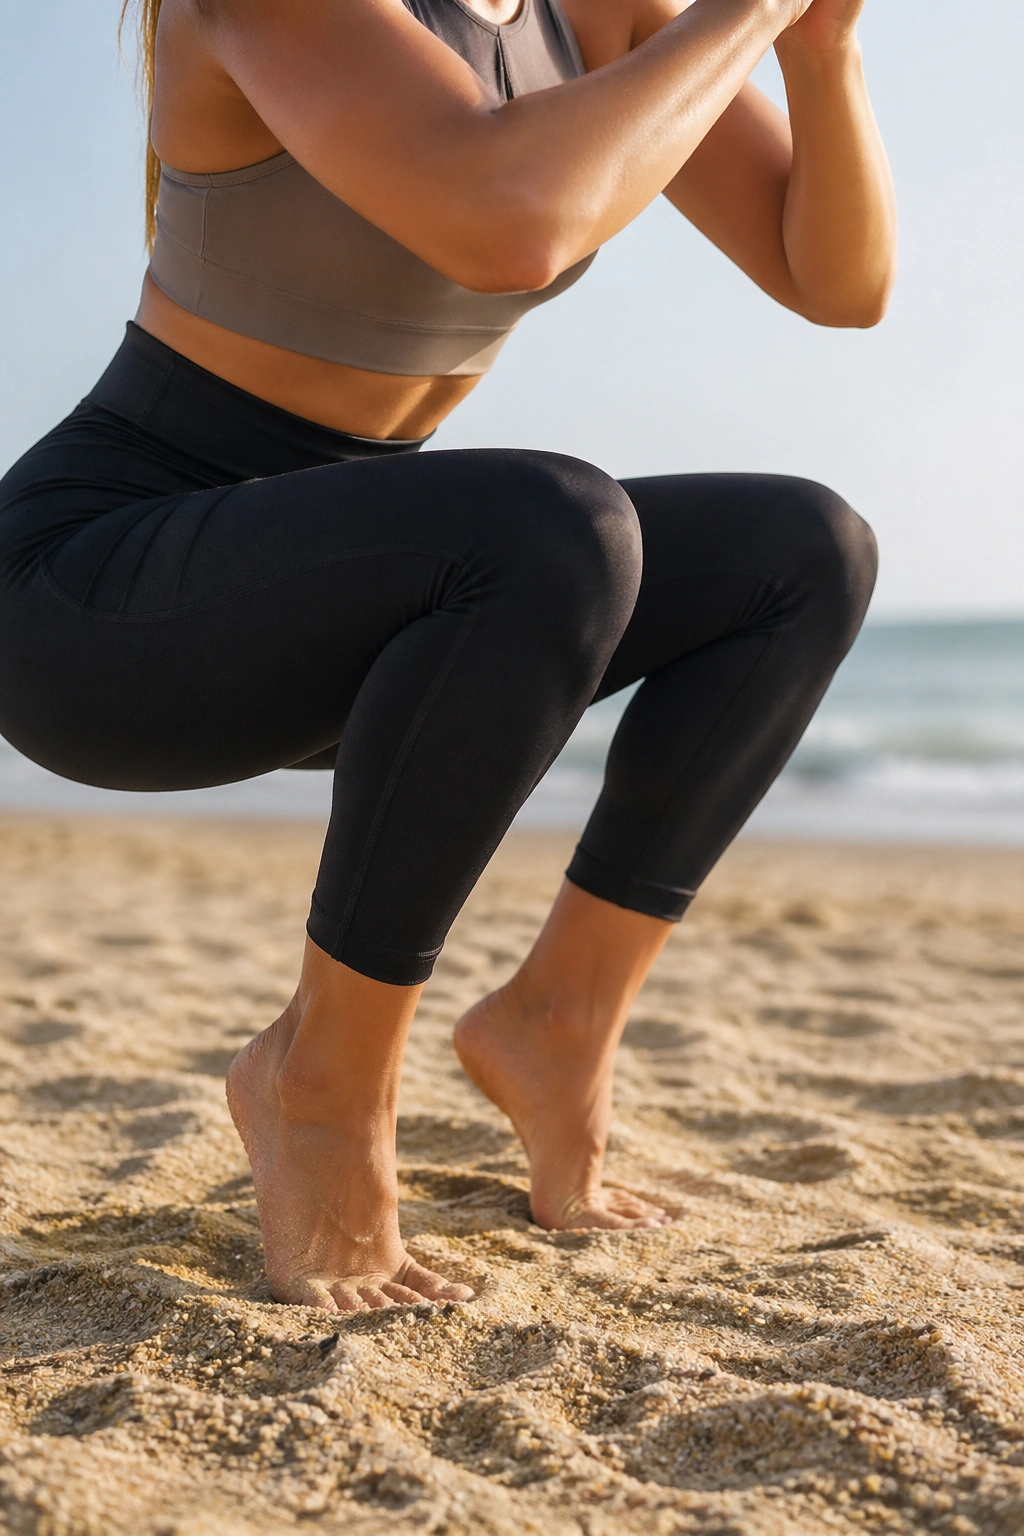
Beach squats are a lot less boring than they sound. Sand changes the game because the feet sink slightly, the knees have to track with more care, and the calves join the party the moment you add heel raises.
Stand with feet about hip-width apart, sink into a small squat, and pulse three times at the bottom. Then rise onto the balls of the feet for one count, lower, and repeat. Eight pulses and eight heel lifts make a tidy round, and two to three rounds is plenty for most people.
A Few Details That Matter
- Keep the weight in the heels during the squat.
- Let the knees travel over the middle toes.
- Stay low enough to feel the thighs, not so low that the back rounds.
- Use the arms for balance, but do not swing them around.
This move is especially useful if you want a lower-body burn without lying on the sand again. It also pairs nicely with a short walk back to your towel, which is a better finisher than people realize.
15. Standing Oblique Side Bends with Overhead Reach
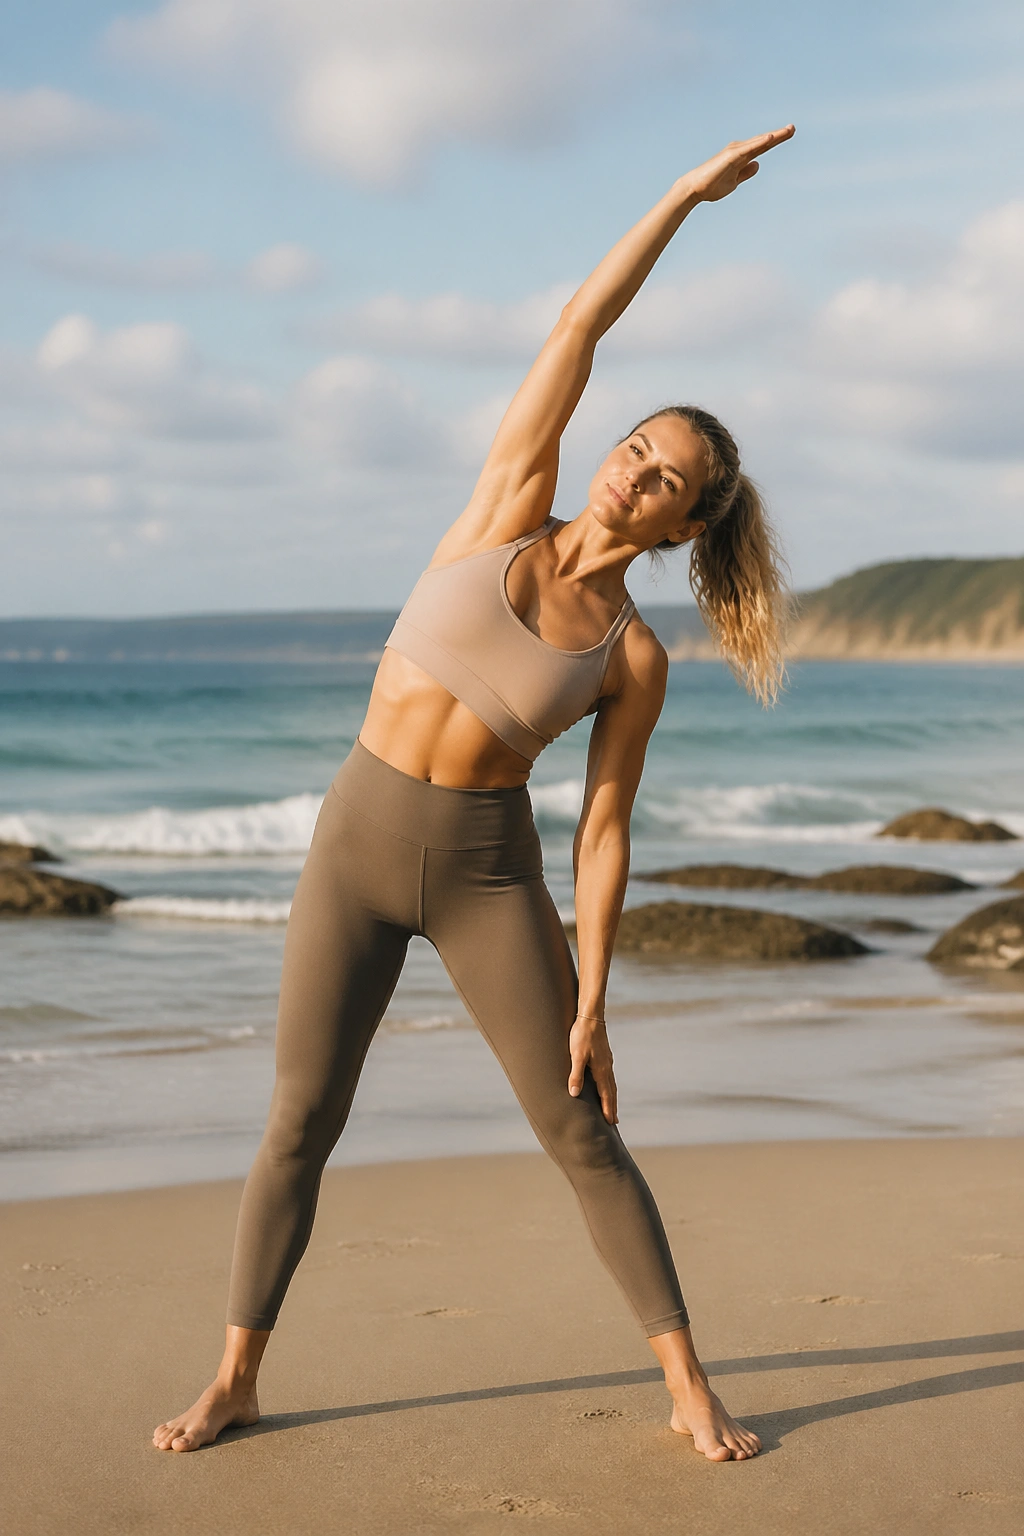
Want to train your waist without dropping to the ground again? Standing oblique side bends are the answer, and they play nicely with the beach because the unstable footing forces the standing side to work harder.
Stand tall, one arm overhead, the other hand resting lightly on the thigh or by the side. Slide the overhead arm across and bend to the side just enough to feel a long stretch through the ribs, then pull back to center with control. Eight reps per side is a solid number. If the sand is loose, use a firmer patch so the standing foot does not slide.
The key is not collapsing. I know that sounds obvious, but people do it all the time. Keep the chest open, keep the hips level, and let the side body lengthen instead of folding in half. The move is better when it feels roomy.
This one is also nice in breezy conditions because the body has to stay organized while the environment keeps tugging at your attention.
16. Reverse Tabletop Crab Reach
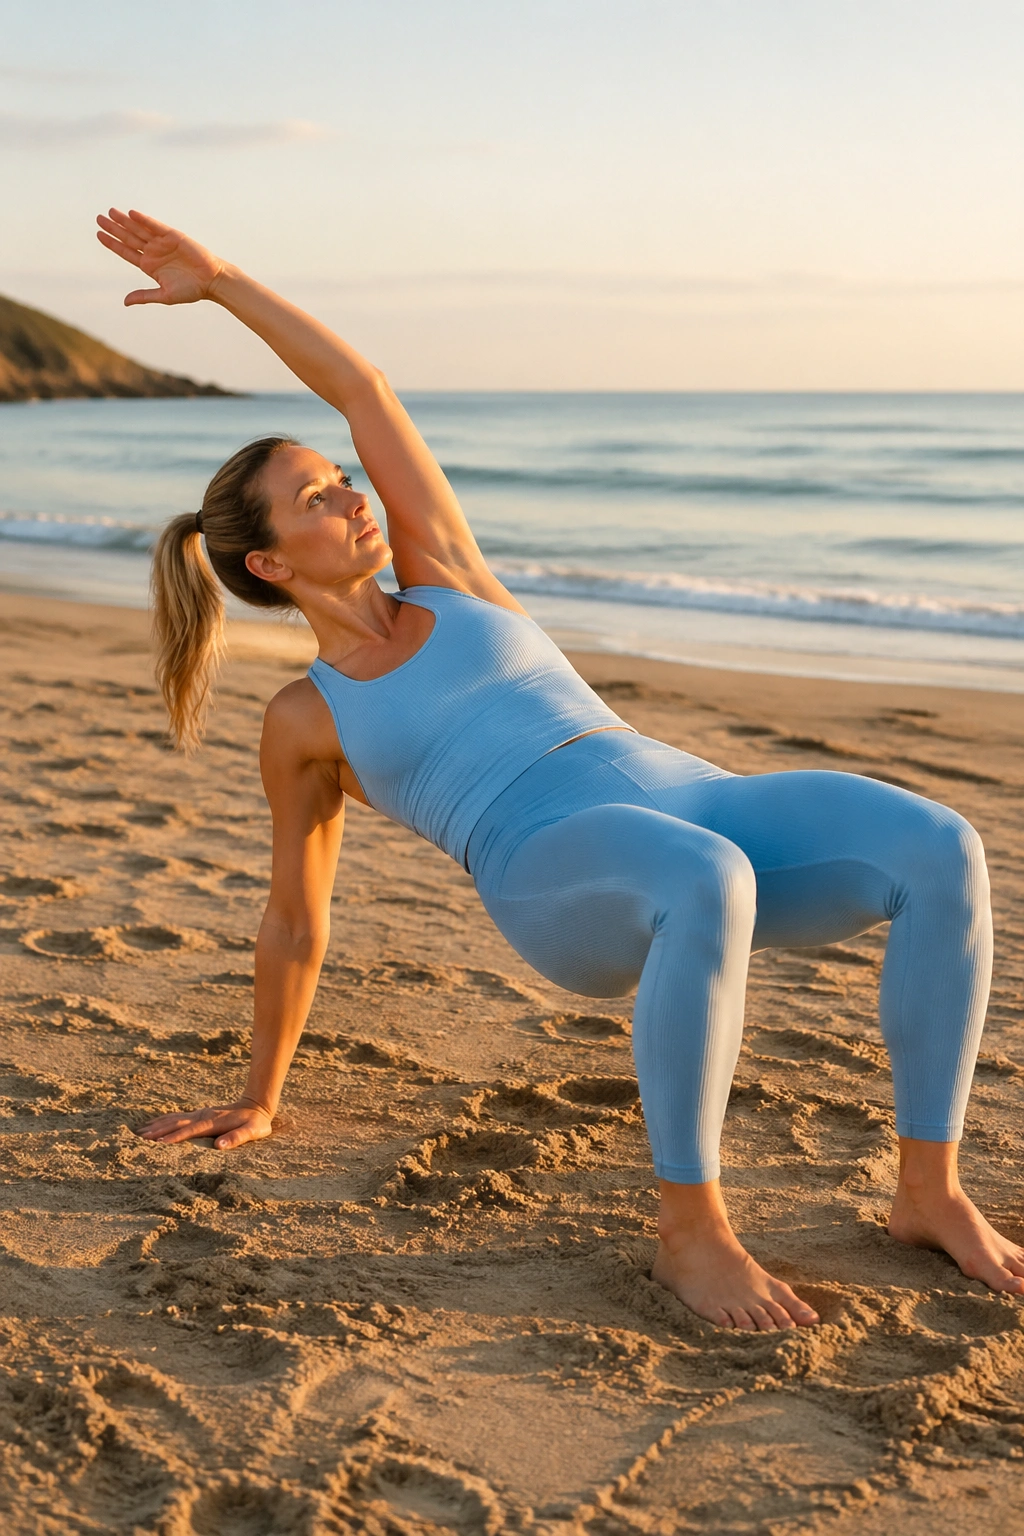
This is the move that makes people laugh first and then respect it. Reverse tabletop on the beach has a funny look to it, but the shoulder opening and posterior-chain work are no joke.
Sit with hands behind you, fingers turned slightly out or to the side if that feels friendlier. Press through the feet and hands to lift the hips, then reach one arm across or overhead in a slow, controlled crab reach. Lower, switch sides, and repeat for 5 to 6 reps per side.
What Makes It Worth Doing
- It opens the front of the hips.
- It loads the shoulders without heavy pressure.
- It wakes up the glutes in a way that bridge work sometimes misses.
- It forces the hands and feet to stay grounded at the same time.
If your wrists complain, turn the fingers a little outward or keep the hips lower. A beach surface that is too soft can make this feel unstable in the wrong way, so firmer sand is the better choice. The goal is a sturdy lift, not a dramatic wobble.
17. Walkout Push-Ups into Plank
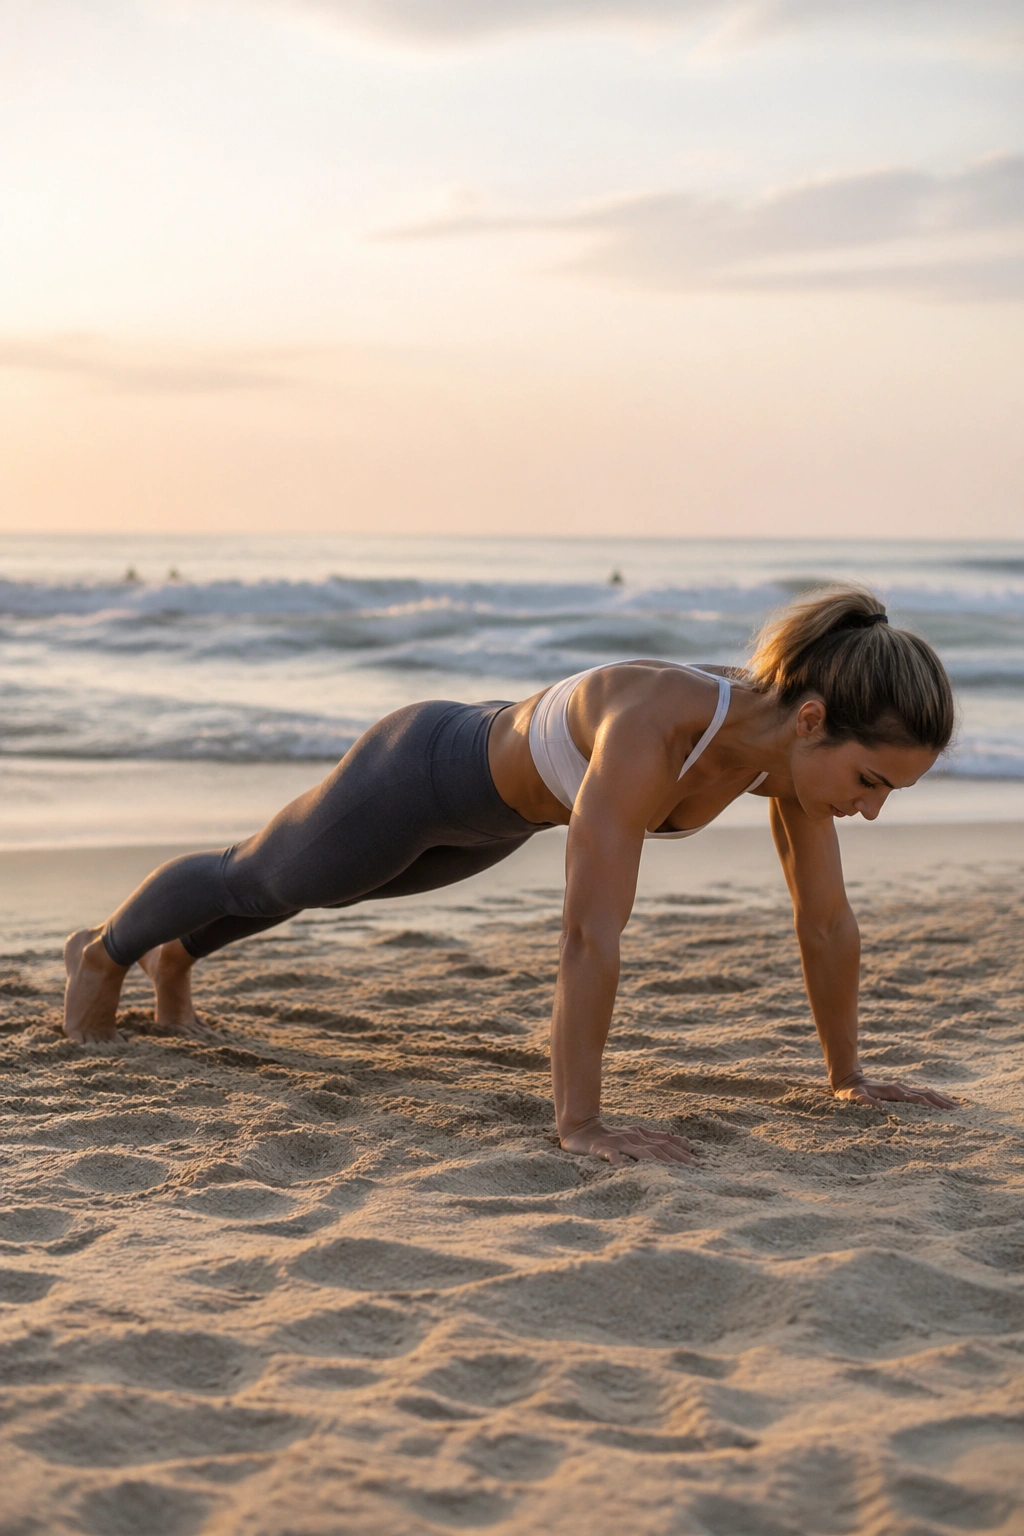
Start standing, walk your hands down the sand, and let the whole body wake up in one long line. That simple walkout is one of the cleanest ways to turn a beach Pilates session into a full-body challenge without needing a ton of space.
Once you’re in plank, lower for one push-up if that feels appropriate, or hold the plank for a slow three-count and walk back to standing. Four to six walkouts is enough for most people. Keep the elbows at about a 45-degree angle if you choose the push-up, and stop the moment the hips start to sag.
A Few Useful Notes
- Firm sand works better than loose sand.
- A thin mat keeps the palms from digging too deep.
- Knee-down push-ups are still real work.
- The return to standing should be as controlled as the way down.
This is a nice bridge between Pilates and bodyweight strength training. It keeps the core honest, opens the hamstrings, and gives the shoulders a bit of load without turning the whole thing into boot camp, which is not what the beach asked for.
18. Sunset Cool-Down Stretch Flow
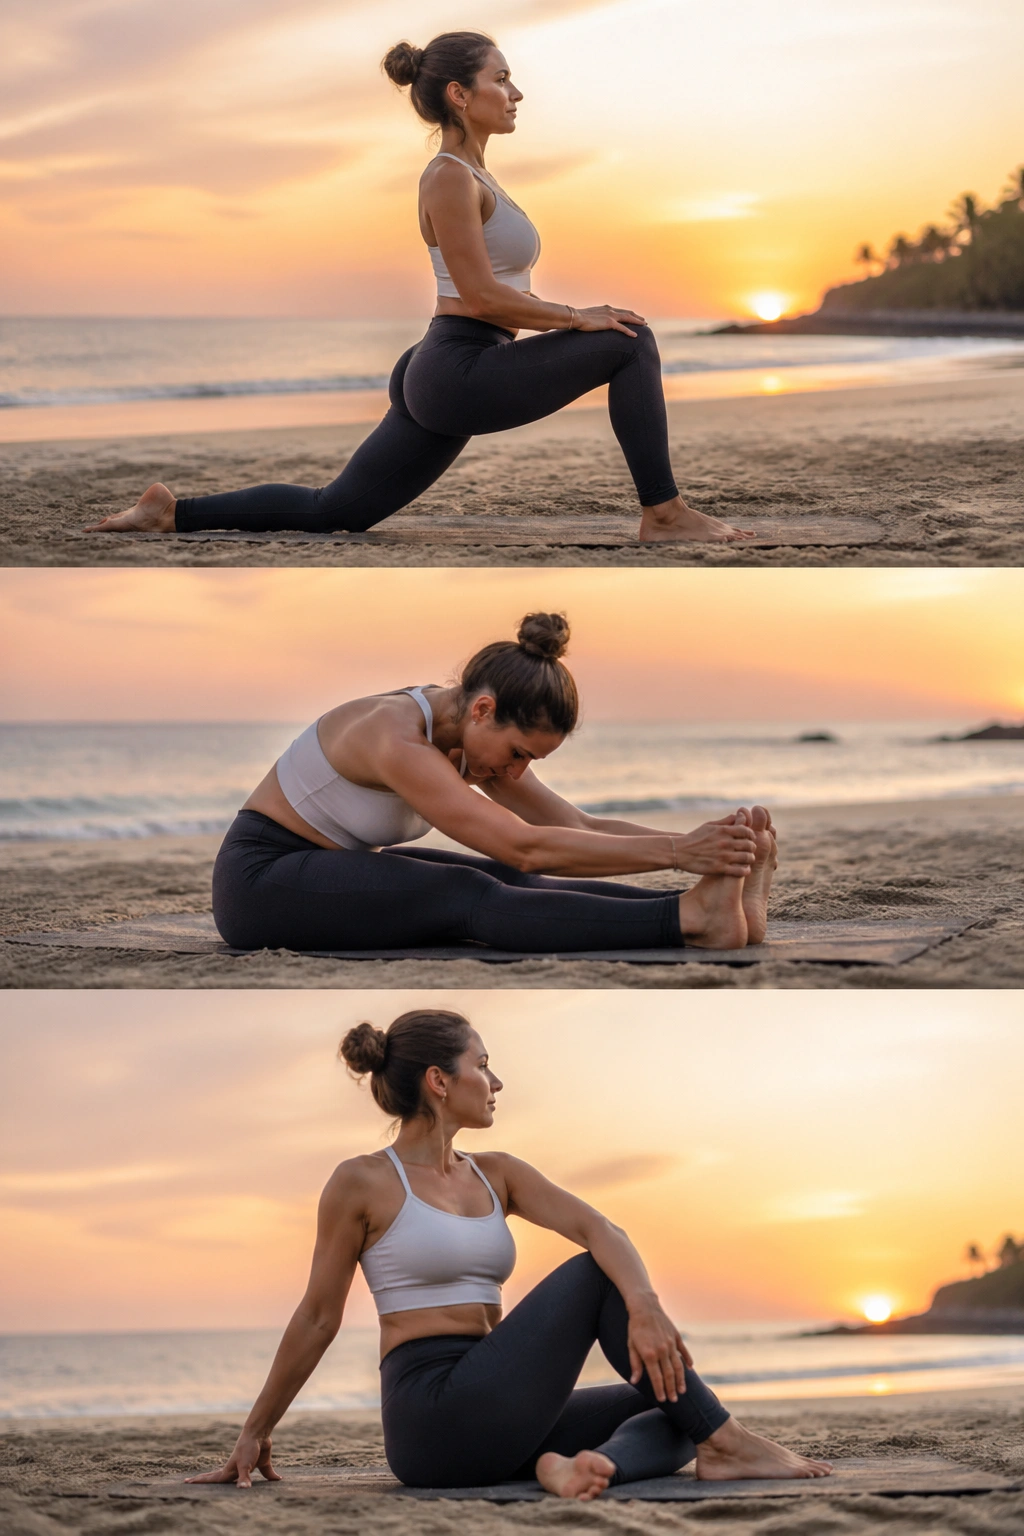
This is the piece that keeps the whole session from ending with tight hip flexors and a cranky lower back. After the stronger beach Pilates work, a cool-down flow lets the body settle, and honestly, it’s the part I look forward to most.
Move through a kneeling hip-flexor stretch, a seated hamstring fold, a gentle figure-four stretch, and a slow spinal twist on each side. Hold each position for 20 to 30 seconds and keep the breath soft. If the sand is uneven, use a towel under the knees or hips so you’re not fighting the ground while trying to relax.
The best cool-downs are calm, not fancy. You’re not chasing a big stretch or forcing range you do not have. You’re reminding the nervous system that the work is over and the body can come back down.
Finish with three slow breaths, sitting upright if you can, and let the shoulders drop. That last minute matters more than people think. It’s the difference between leaving the beach feeling trained and leaving it feeling scattered.
