



Knee pain has a way of turning a simple, functional movement like sitting down into a source of anxiety. It is incredibly frustrating to feel your body fighting you when you simply want to stay active or perform everyday tasks. Many people abandon the squat entirely because of that sharp, nagging pinch, but that is rarely the answer. In fact, total avoidance often leads to further weakness and joint stiffness.
The humble chair is the best tool you have for reclaiming your movement. By using a chair, you control your range of motion, providing a safety net that allows you to strengthen the surrounding muscles—the quads, glutes, and hamstrings—without grinding the joint through painful angles. This isn’t just about getting back to the gym; it is about reclaiming your independence and confidence in every step you take.
1. The Foundational Chair Sit-to-Stand
Most people rush this movement, using momentum to rock their upper body forward and “launch” themselves off the seat. That is a missed opportunity. To get the most out of this, you need to treat the chair as a feedback mechanism rather than a resting spot. Your goal is to barely touch the seat before reversing the direction.
The Mechanics of Proper Form
Start by standing just in front of your chair, feet hip-width apart. Keep your chest up and your gaze forward—looking down often causes your spine to round, shifting pressure away from your legs and onto your lower back. As you lower your hips, push them backward as if you are reaching for the seat with your glutes, not your knees.
- Keep your heels glued to the floor.
- Ensure your knees track over your toes, not inward.
- Control the descent; take a full three seconds to sit.
Pro tip: If you feel pain, place a cushion or a thick book on the chair. Shortening the range of motion by an inch or two can make a world of difference in joint comfort.
2. Box Squat with Elevated Seat Surface
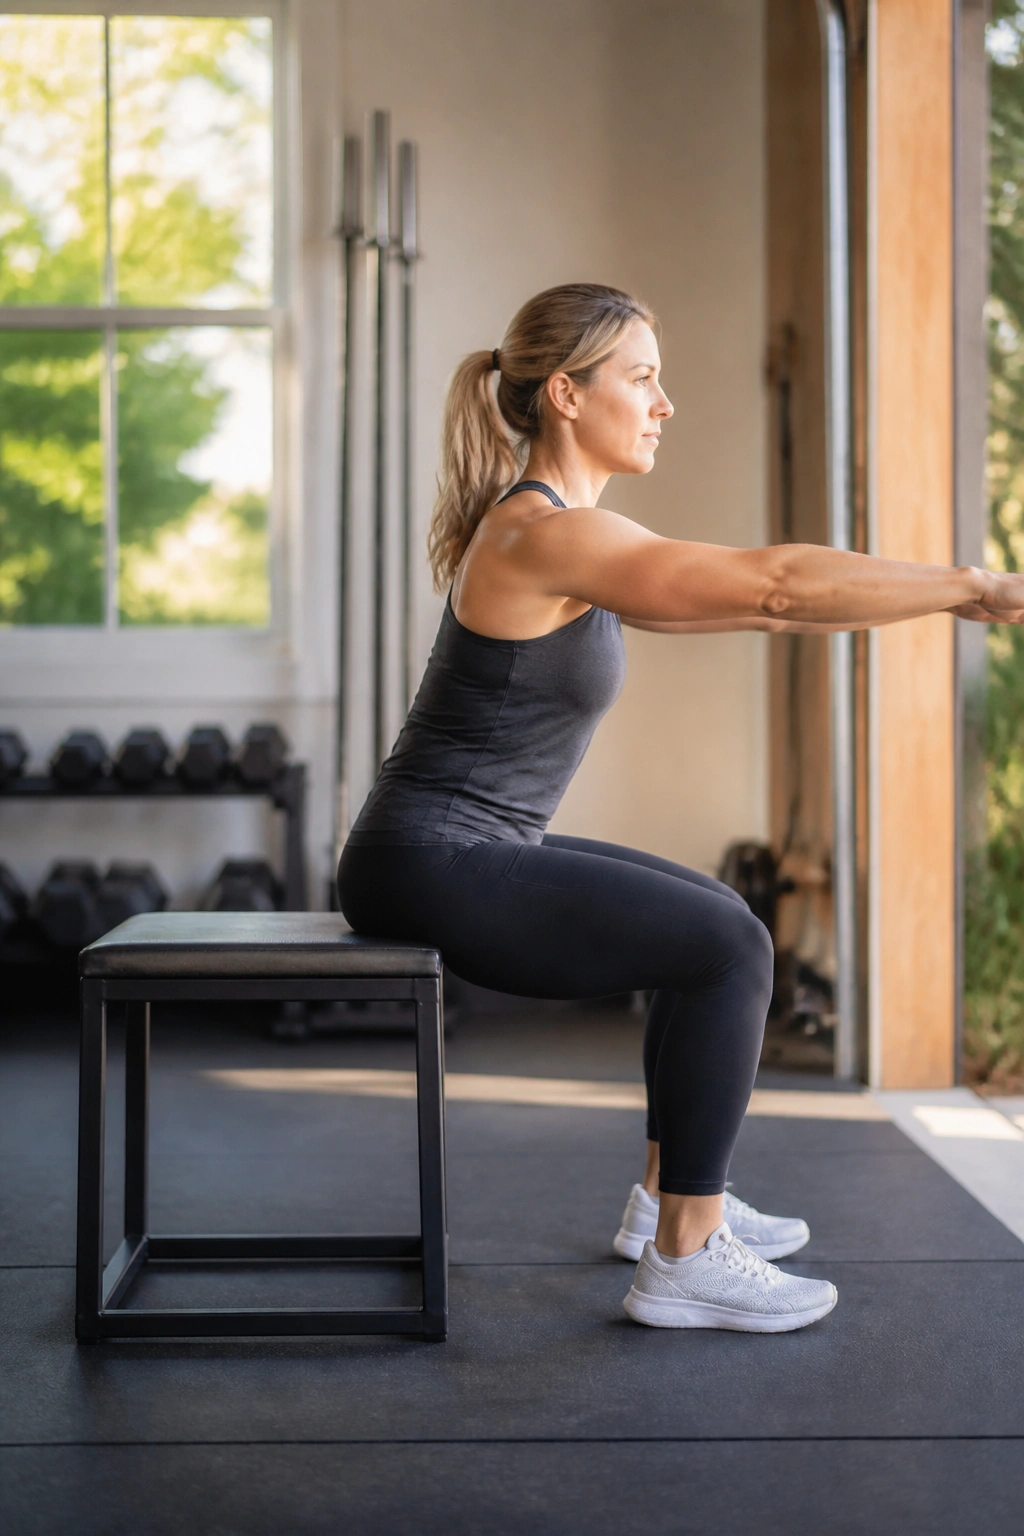
When a standard chair is too low, your knees reach an angle that might trigger discomfort. Using a higher surface, such as a sturdy bench, a sturdy ottoman, or a stack of firm cushions, changes the geometry of the lift. By sitting higher, you reduce the shear force on the knee joint significantly.
Why This Variation Works
This is essentially a “box squat.” By elevating the surface, you force your hips to travel horizontally rather than diving straight down. This shift in movement pattern is key. It moves the demand onto the posterior chain—the hamstrings and glutes—and away from the anterior portion of the knee.
Setting Up Your Station
Find a surface that allows your thighs to remain parallel to the floor or even slightly above it. Perform the squat exactly as you would with a regular chair, but focus intensely on the eccentric phase—the downward portion. The higher the surface, the less stress on the knee, so start higher if you are dealing with a flare-up. You can gradually decrease the height as your strength improves and your pain decreases.
3. Weighted Goblet Chair Squat for Core Stability
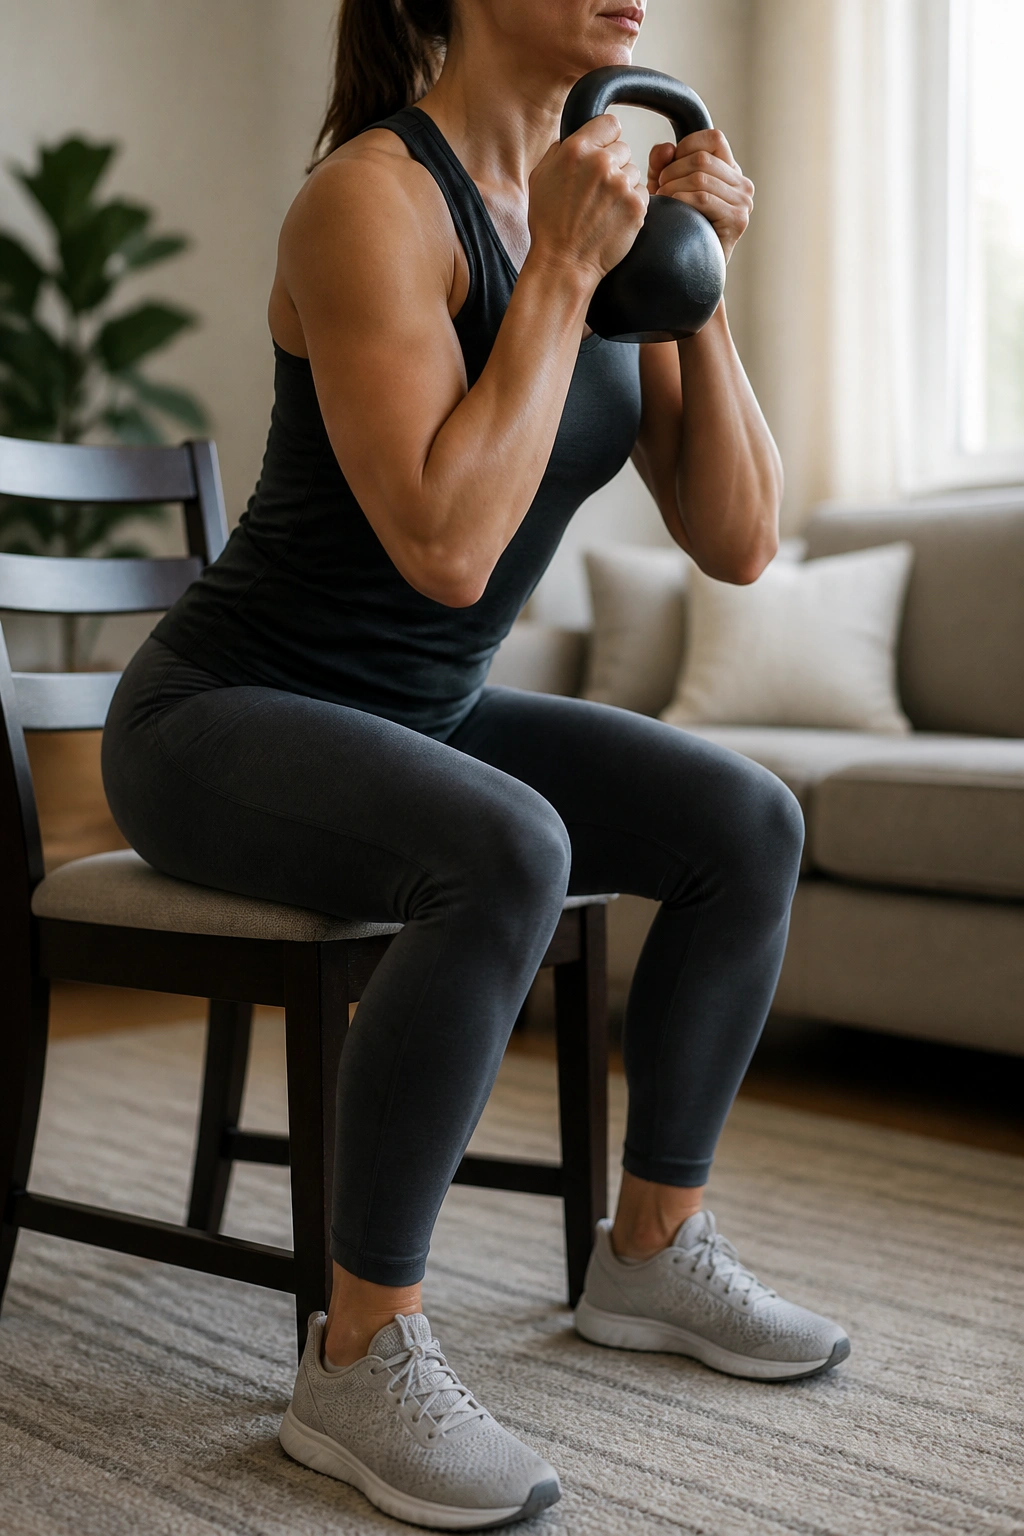
Adding a light weight to your squat can actually help your knees. It sounds counterintuitive, but holding a weight in front of your chest (a goblet hold) acts as a counterbalance. This shifts your center of gravity, allowing you to keep your torso more upright, which takes the pressure off your knees and puts it firmly onto your hips.
Choosing Your Resistance
You do not need a heavy dumbbell or kettlebell here. A gallon jug of water, a bag of rice, or even a heavy book will suffice. Hold it against your sternum with both hands.
- Feel the difference: As you lower, the weight prevents you from leaning forward too far.
- Engagement: Your core has to work harder to keep you stable, which stabilizes your entire structure.
If you find that holding the weight makes your back ache, drop the weight immediately. The goal of the goblet squat is stability and upright posture, not heavy lifting. Keep it light, keep it controlled, and prioritize your form above the weight on the scale.
4. Resistance Band Chair Squat for Glute Activation
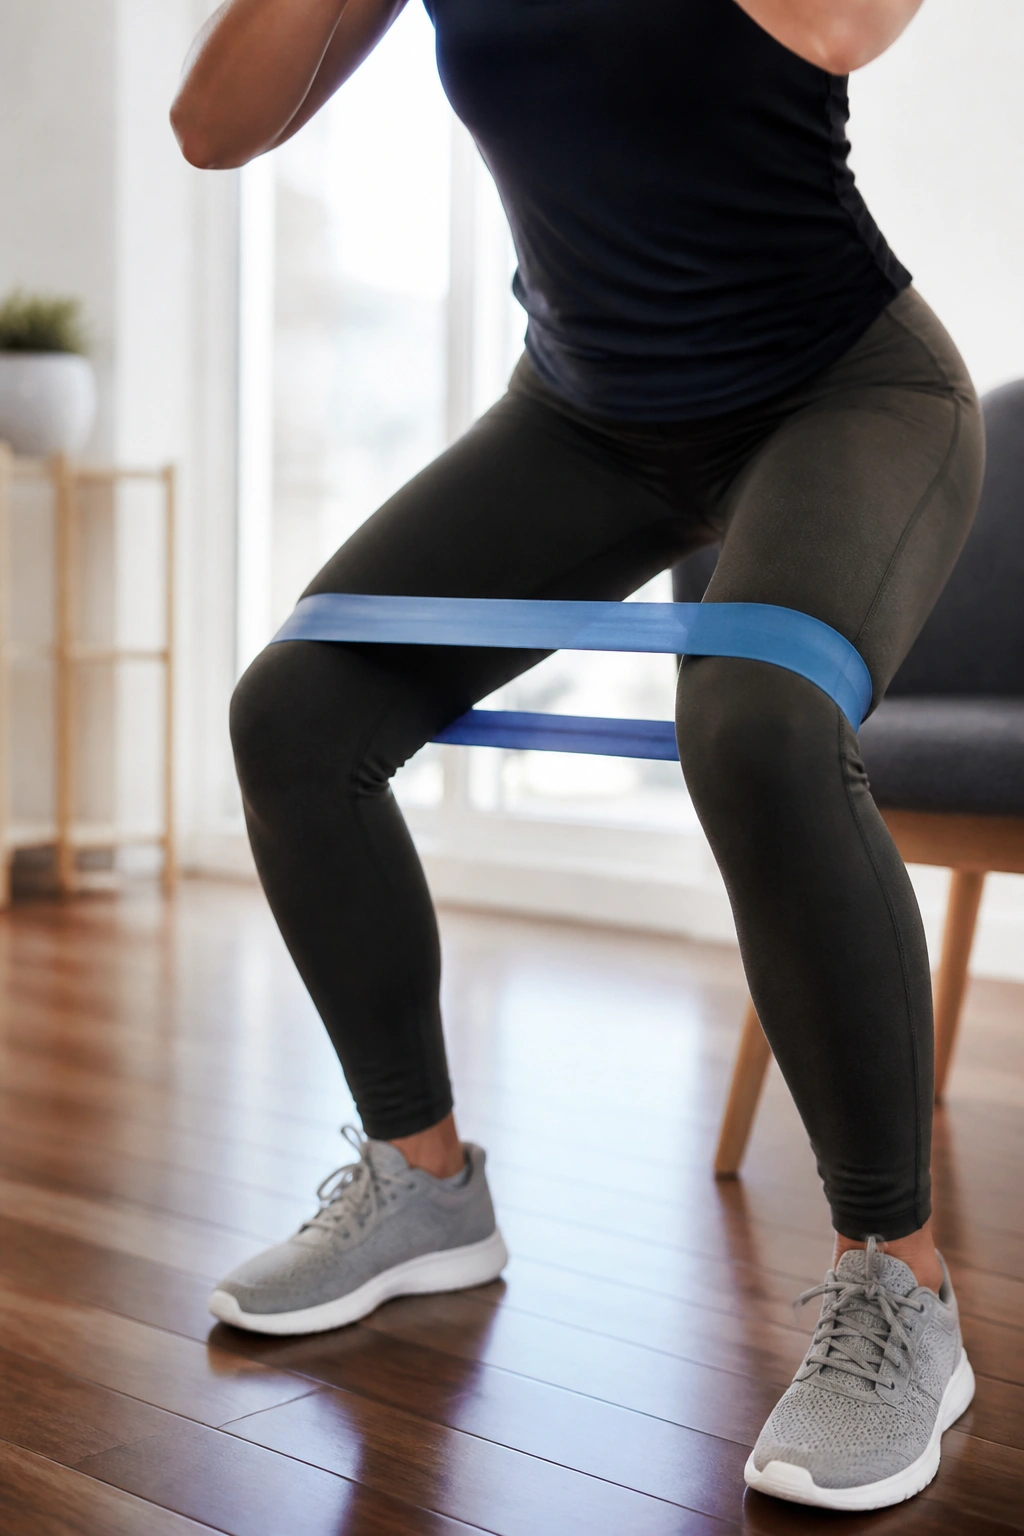
One of the most common causes of knee pain during squats is knee valgus—when the knees cave inward. If your glutes are not firing correctly, your knees pay the price. Adding a resistance band around your knees forces you to push outward, which naturally turns on the gluteus medius and keeps the knee in a stable, pain-free track.
How to Execute This Properly
Place a mini-band just above your knees. As you lower into the chair, fight the band. Imagine you are trying to push your knees apart throughout the entire duration of the movement.
The Feedback Loop
The band provides immediate sensory feedback. If your knees cave in, you lose the tension, and you know you need to correct your alignment. This is one of the most effective ways to train your brain to keep your knees safe without having to think about it too much. Try doing three sets of ten repetitions, focusing entirely on that outward pressure. It will change the feel of the movement entirely.
5. Slow Eccentric Chair Squat for Tendon Health
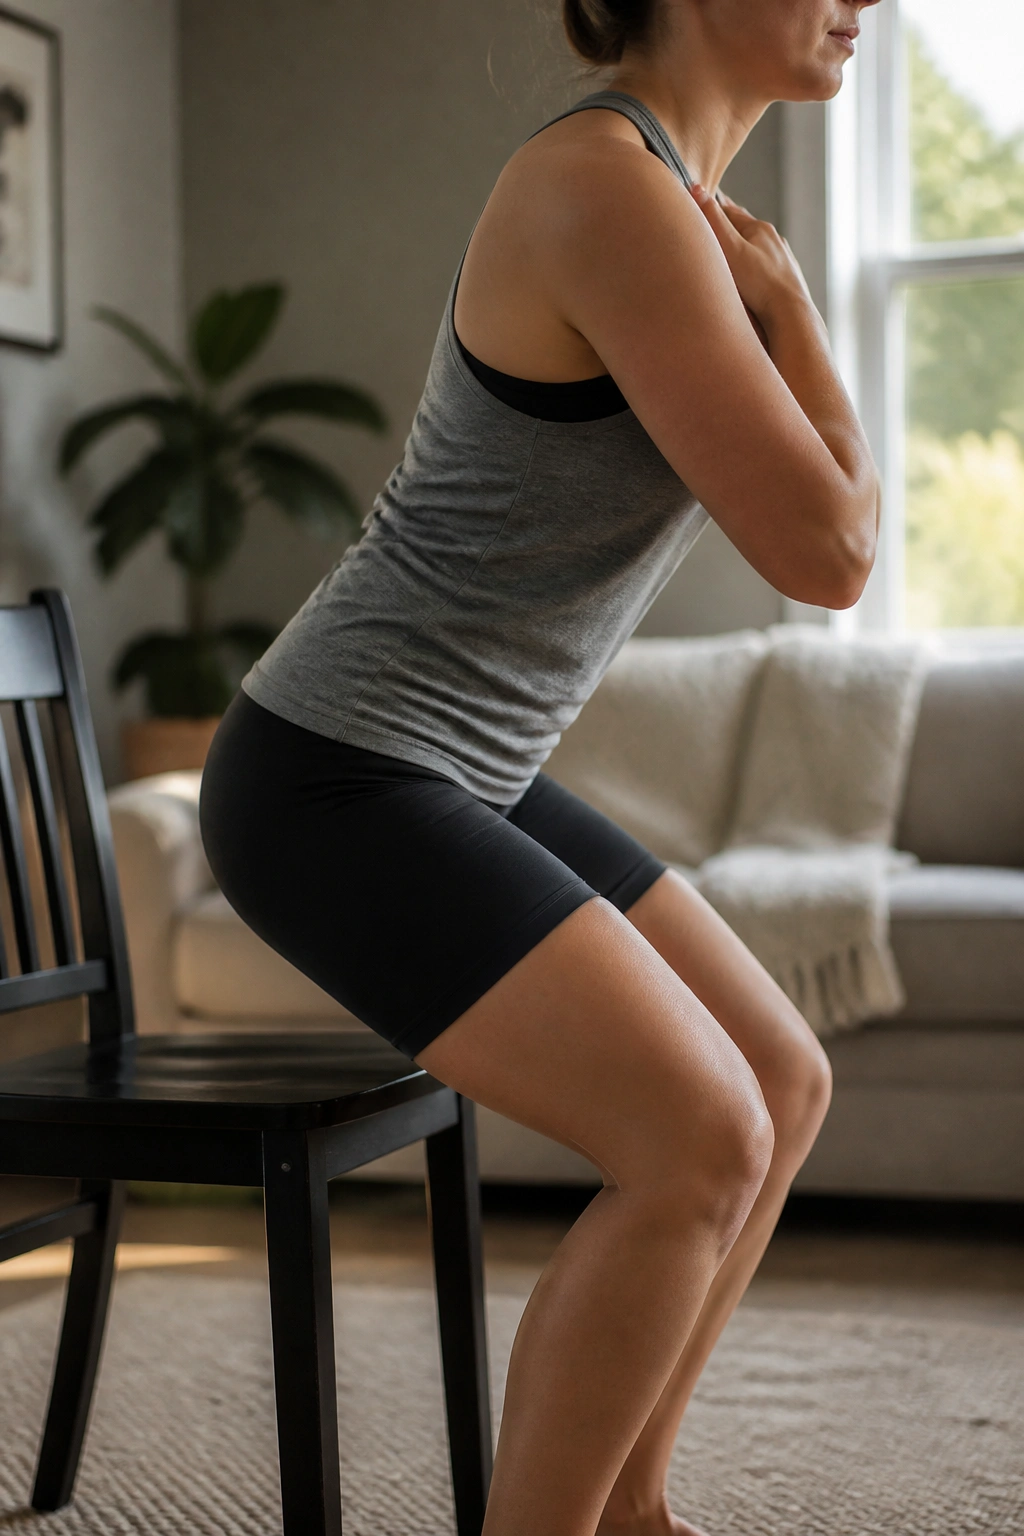
Tendonitis is often a chronic issue for people with knee pain. Fast, explosive movements can aggravate an inflamed patellar tendon. By slowing the descent down to a four or five-second count, you allow your muscles to manage the load more effectively and give your tendons time to adapt to the stress.
The Science of Control
The eccentric phase (the downward motion) is where your muscles are lengthening under tension. This is the exact phase that builds tendon strength. Do not rush this. If you can lower yourself to the chair in five seconds, you are putting your body in a position to build resilience.
A Typical Session Structure
- Down: 5 seconds (constant tension).
- Pause: 1 second (touch the seat).
- Up: 1 second (explosive but controlled).
Repeat this for six to eight repetitions. The burn will be significant, but it will be a muscular burn, not a joint pain. If you feel sharp pain in the front of the knee, shorten the depth or slow down the speed even further.
6. Single-Leg Assisted Chair Squat
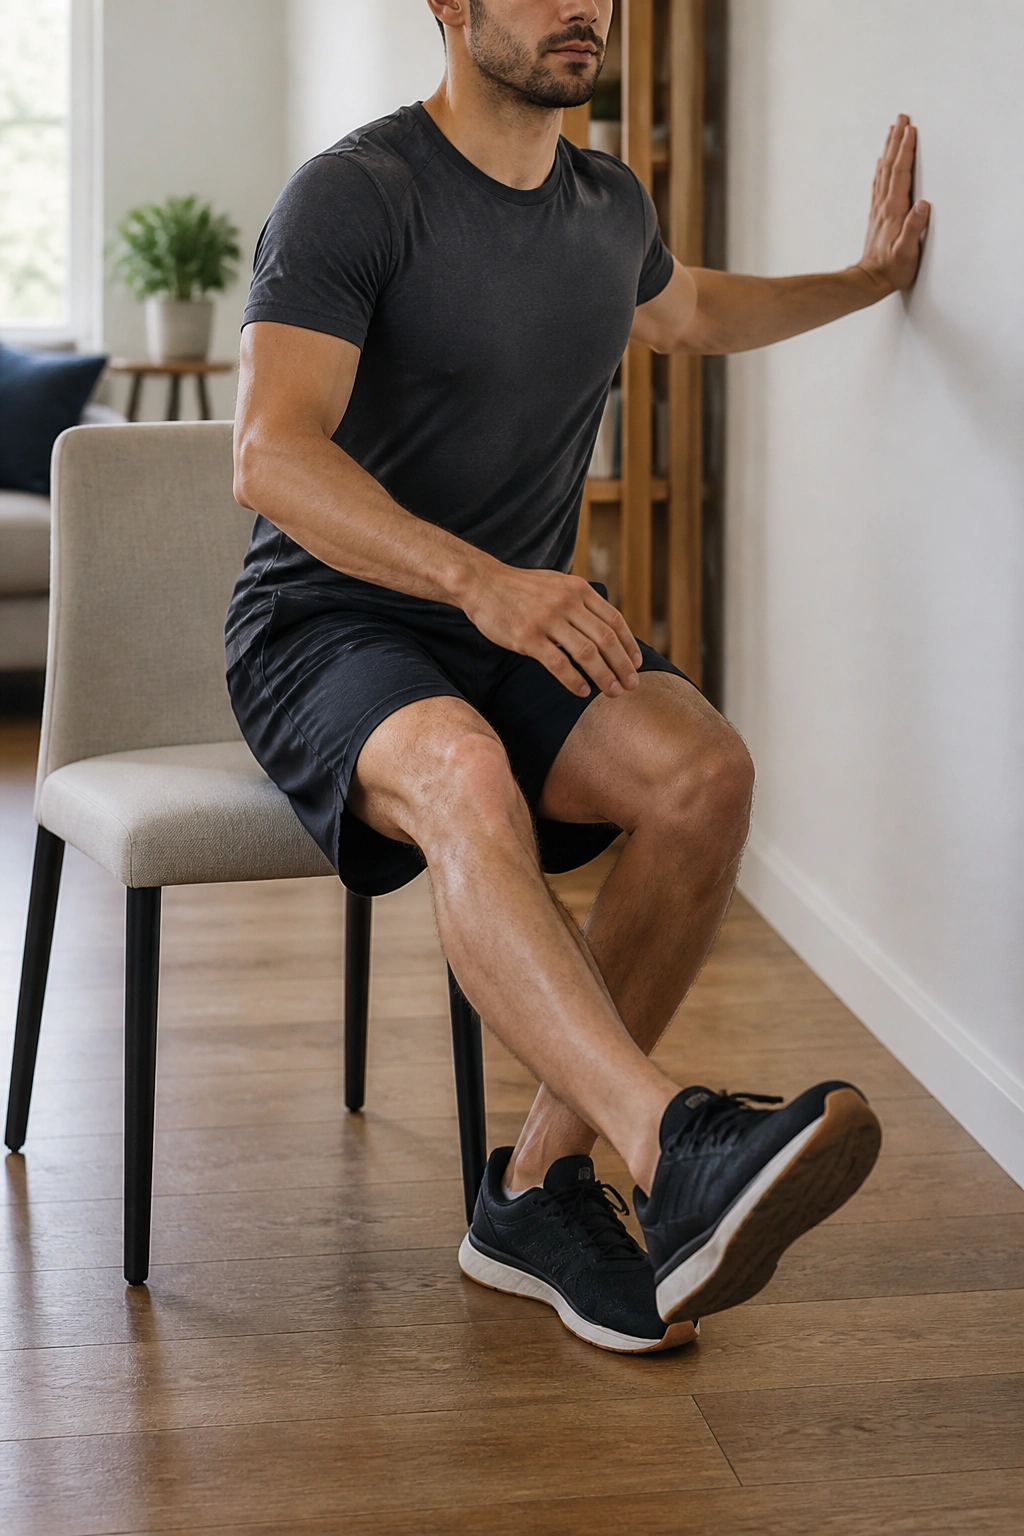
This is a progression for when you are ready to challenge your balance and isolate the legs. However, the “assisted” part is non-negotiable. Keep a hand on a sturdy table or wall for balance. This variation removes the reliance on your “good” leg to compensate for the “bad” one, forcing both to work independently.
Managing the Balance
Stand in front of the chair on one leg, with the other leg hovering in front of you. Lower yourself slowly toward the chair while holding onto a stable support with your opposite hand. You will likely feel a significant difference in stability between your left and right sides.
Why This Helps
Knee pain often stems from imbalances. If your left leg is stronger, your right knee works harder to keep up. By training on one leg, you identify those gaps. Do not worry if you can only manage a shallow squat at first. The benefit is in the control and the stability training, not the depth. Keep the movement small, slow, and honest.
7. Chair Squat with Heel Elevation for Ankle Mobility
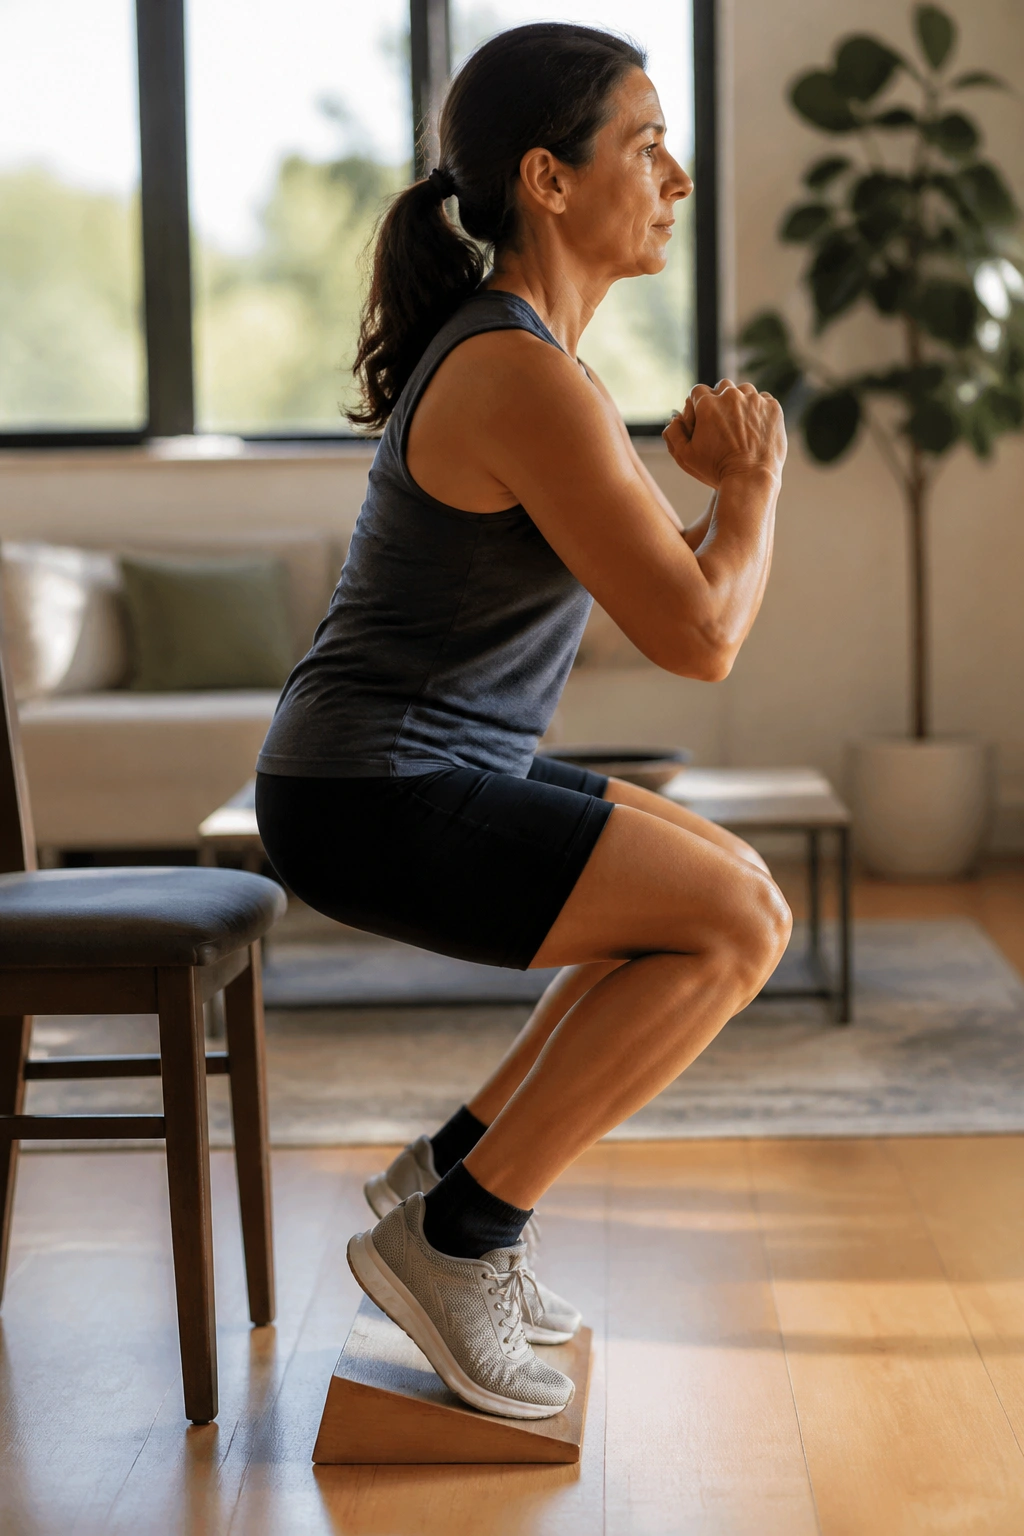
Sometimes, knee pain is actually an ankle problem in disguise. If your ankles are stiff, your knees have to collapse forward to make up for the lack of range of motion. Elevating your heels on a small wedge, a pair of weight plates, or even a folded towel can instantly free up your knees.
Understanding the Geometry
When your heels are raised, the squat becomes more knee-dominant but in a way that is much more forgiving on the joint. It forces the knees forward safely while allowing your torso to remain vertical. This setup creates a massive amount of relief for people who have limited dorsiflexion (the ability to pull the toes toward the shin).
Where to Place the Elevation
You only need about an inch of lift. Place it under your heels before you start. You will immediately notice that you can sink lower and sit back better without that “stuck” feeling in your ankles. This is a game-changer for those with stiff joints who have avoided squats for years.
8. Wall-Supported Chair Squat for Spinal Alignment
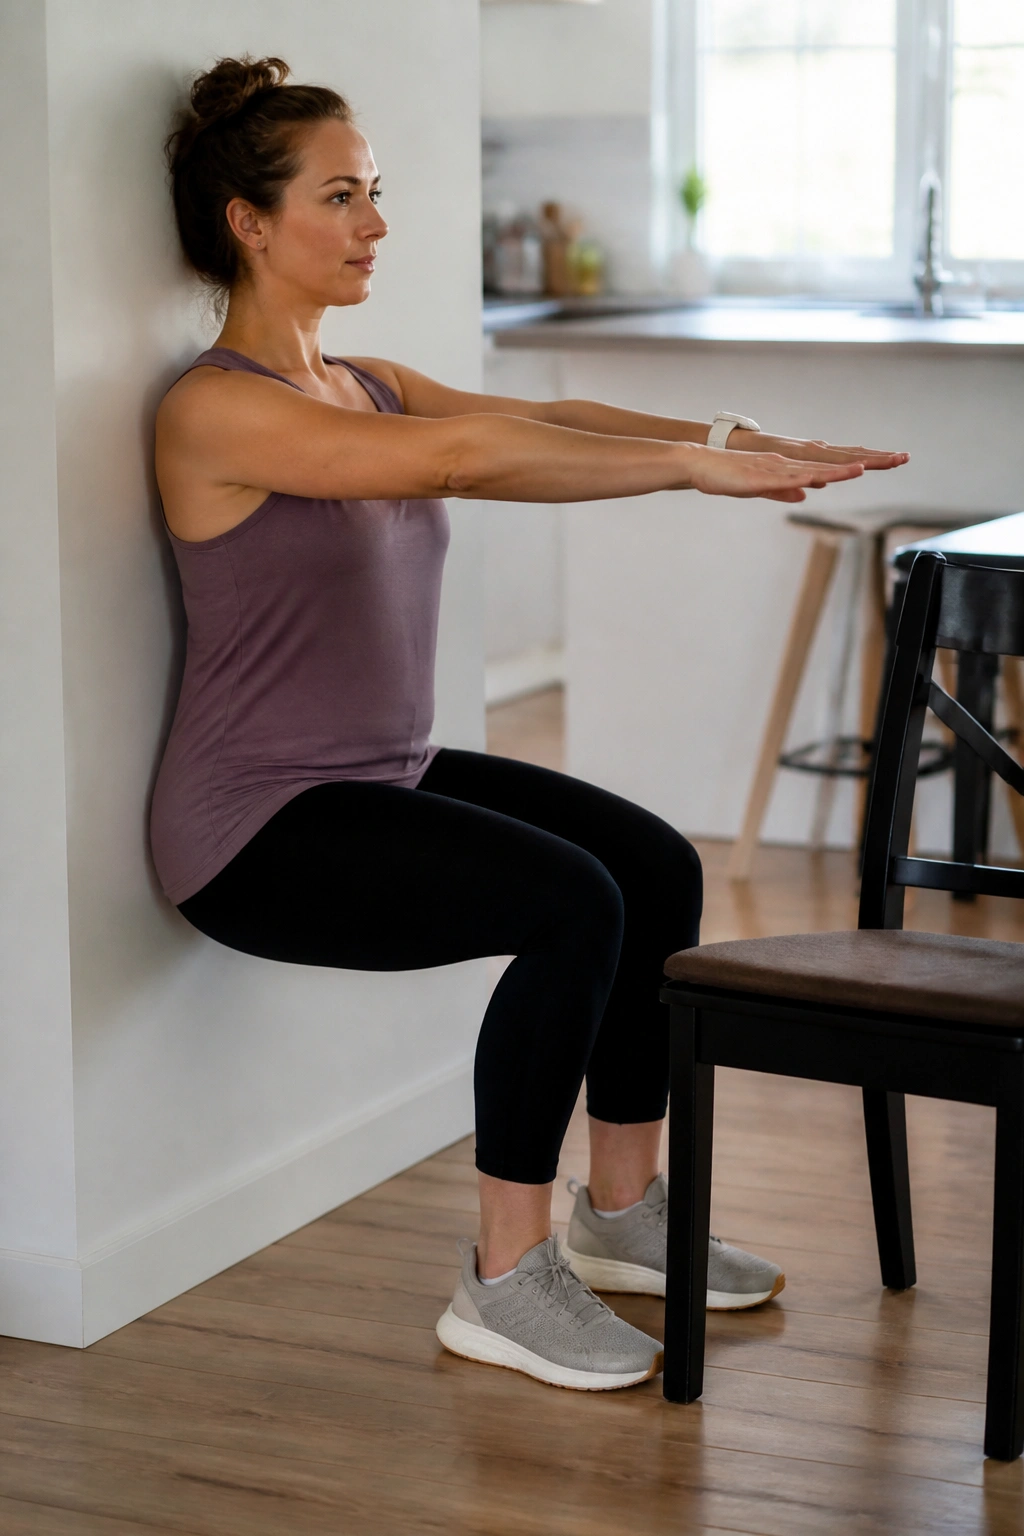
If you struggle with keeping your chest up or your back straight during a chair squat, the wall is your best friend. Position your chair a few inches away from a wall. You will perform the squat while ensuring your back maintains a connection with the wall, or simply use the wall for balance.
The “Wall-Slide” Effect
For a more supportive version, slide your back down the wall while you aim for the chair seat. The wall ensures you do not lean too far forward. It keeps your hips tucked, your chest proud, and your spine neutral.
Why This Matters
Often, pain occurs because we “hinge” instead of “squat.” We lean forward so much that we aren’t using our legs; we are using our lower back. The wall forces a more vertical path for your hips, which is generally much safer for the knees, especially for those with a history of joint sensitivity.
9. Split-Stance Chair Squat for Knee Tracking
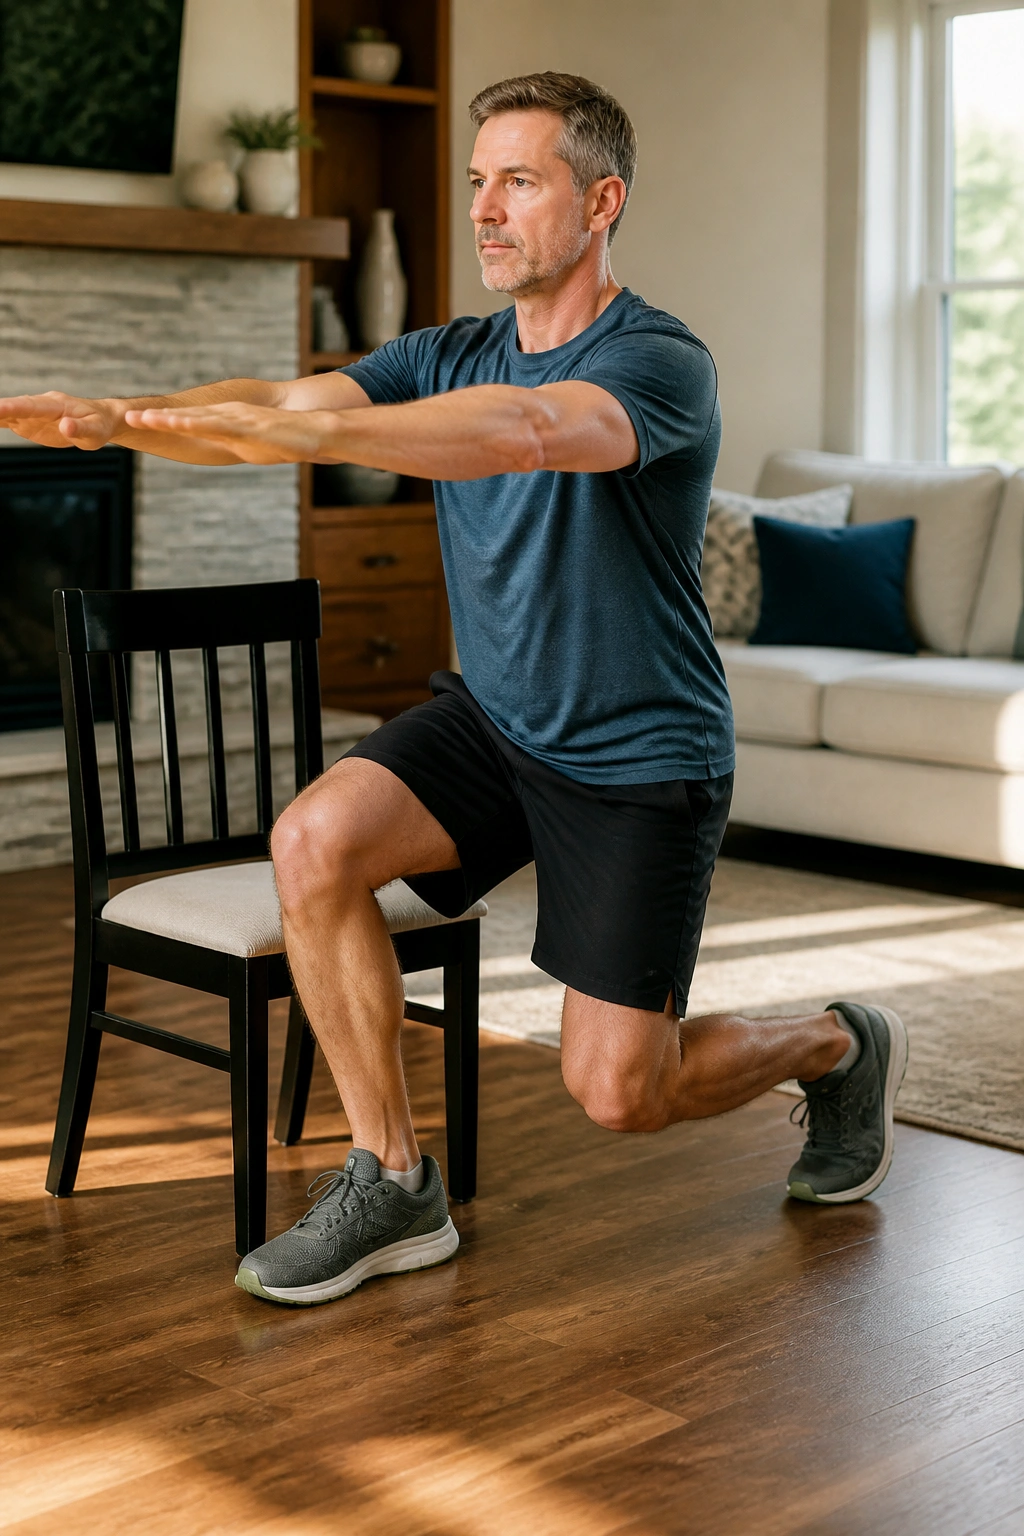
Most people squat with feet parallel, but that is not always the most comfortable position for everyone. The split-stance (or B-stance) involves stepping one foot slightly ahead of the other. This variation subtly alters the weight distribution and can significantly reduce the internal rotation of the knee.
How to Adjust Your Footing
Stand with your right foot fully planted and your left foot tucked back so that the toes of your left foot are aligned with the heel of your right foot. You are essentially doing a squat with one leg slightly biased.
- Switching sides: Perform your reps, then switch the feet so the left is in front.
- The benefit: This takes the “locked-in” feeling away from the knee joint, which can sometimes be the source of pain. It is a more natural, fluid movement that feels less rigid than the standard parallel stance.
10. Chair Squat with Controlled Pulse
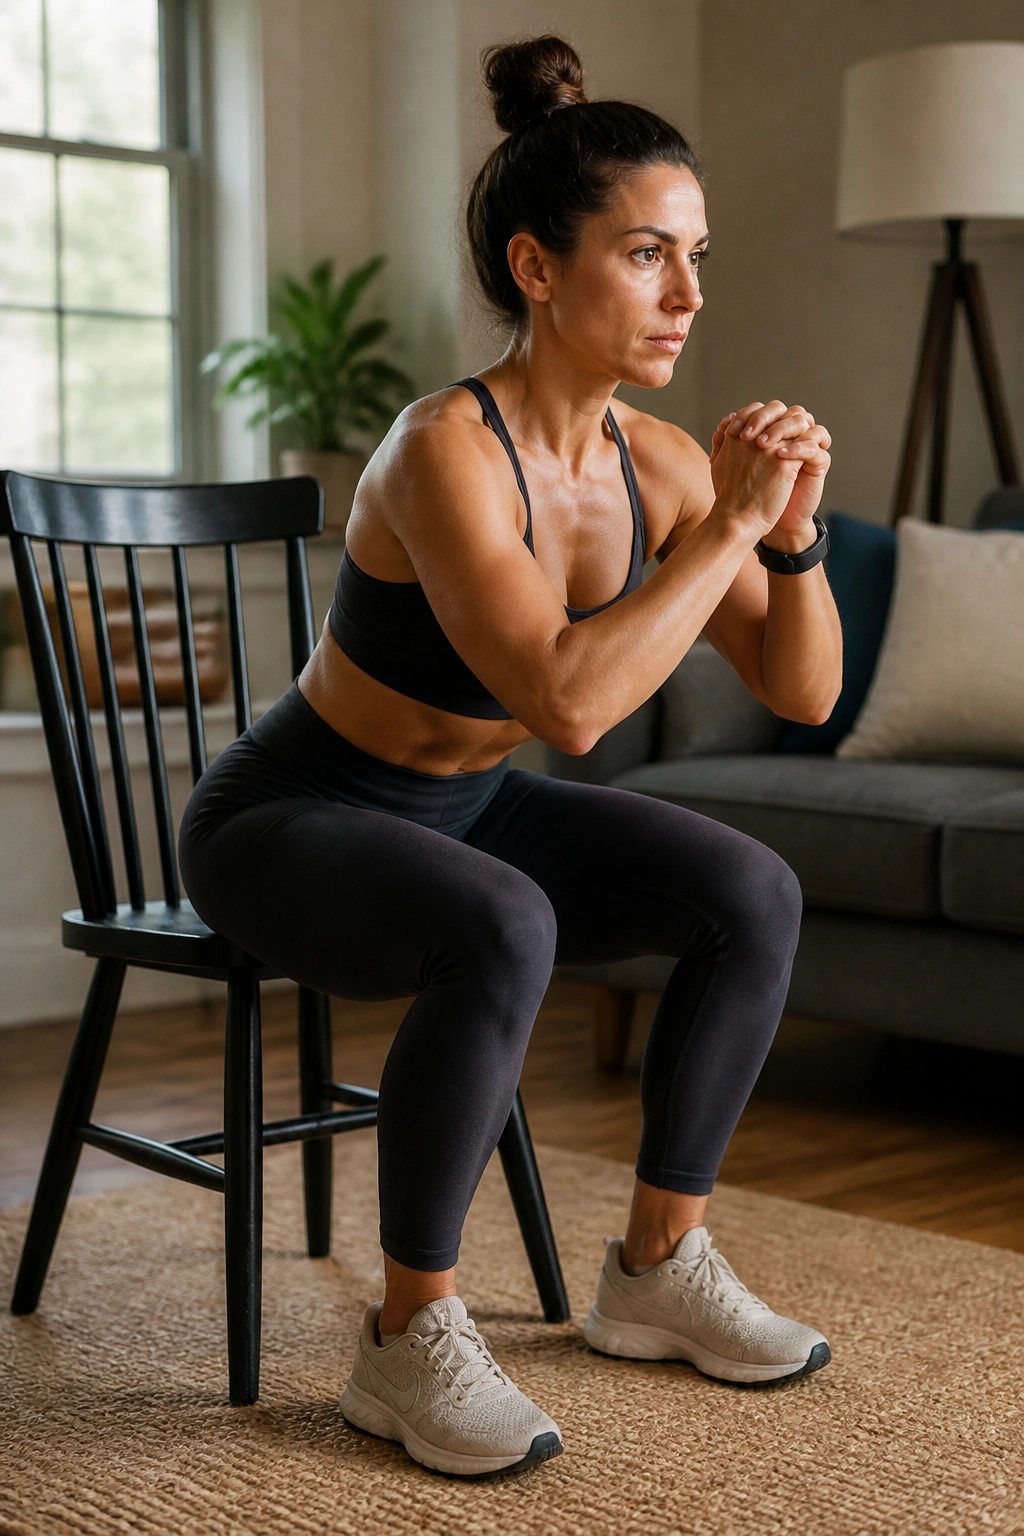
Isometrics and pulses at the bottom of the squat can help build endurance in the muscles surrounding the knee without requiring a full range of motion. If the deep squat hurts, stay at the top and add a small, controlled pulse.
Execution
Lower yourself halfway to the chair—not all the way down. Stop at the point of comfort. From there, pulse up and down just one or two inches for ten seconds.
Why It Works
You are keeping the muscles under constant tension without ever reaching the “danger zone” of a deep knee bend. This builds blood flow and strength in the quads and glutes, which acts as a protective brace for your knee. If your knees feel weak or “wobbly,” this pulse variation is an excellent way to stabilize them.
11. Wide-Stance Sumo Chair Squat
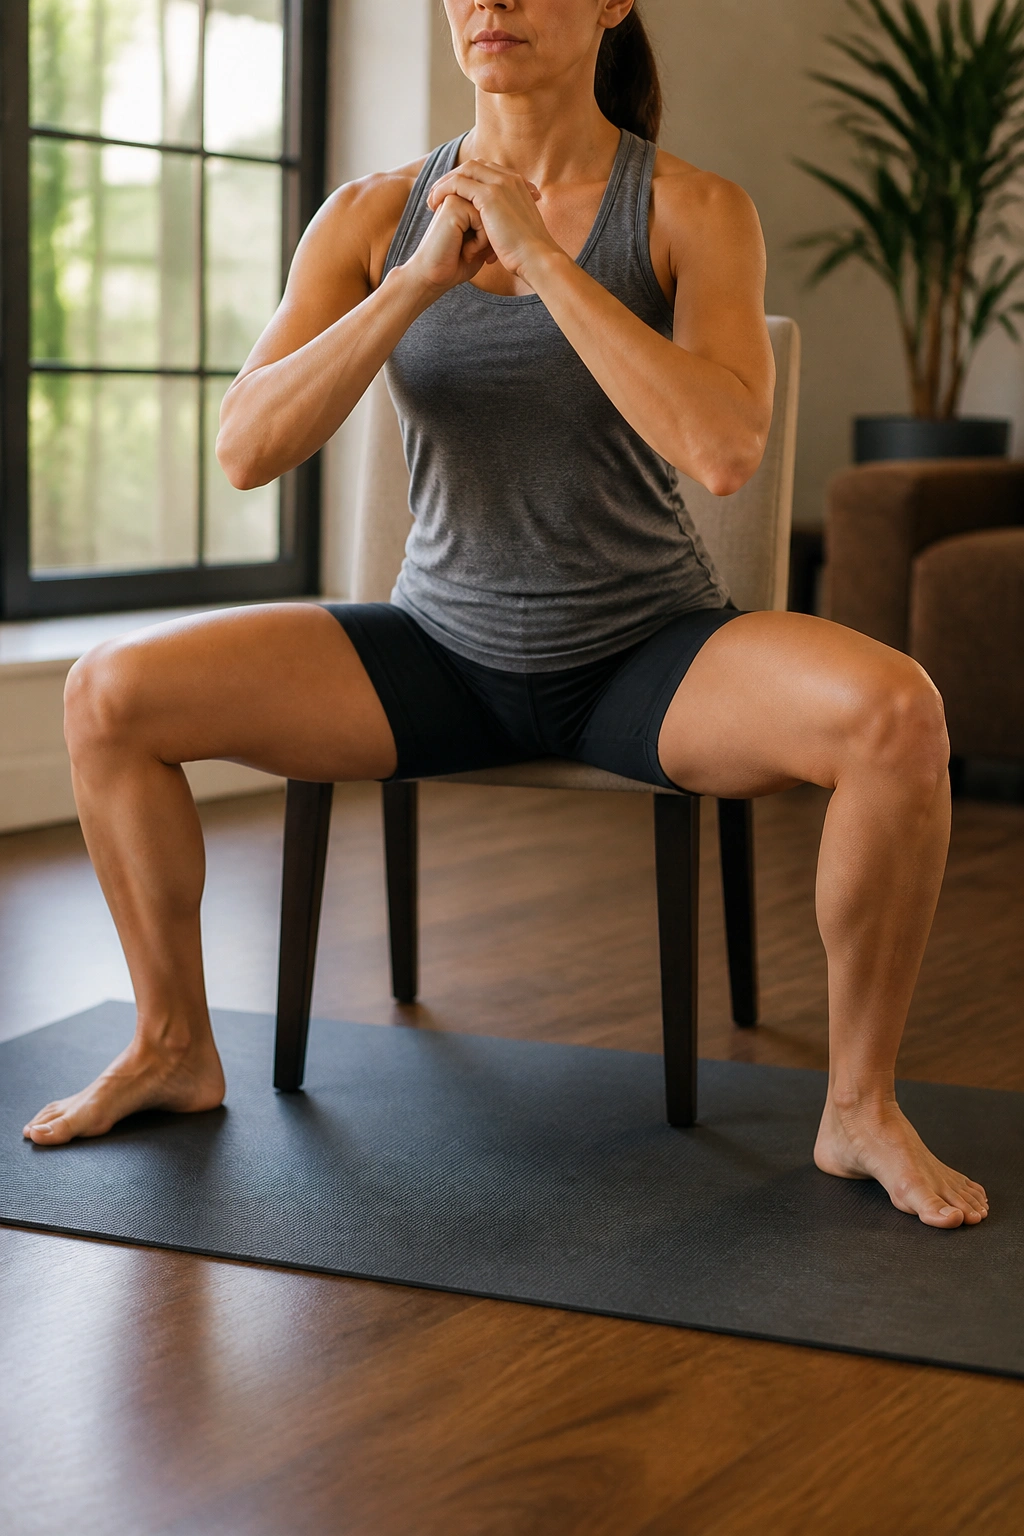
If your knees feel pinched during a standard narrow squat, widen your stance. Turning your feet outward (sumo style) allows your hips to open up, which often clears the path for the femur to move properly in the hip socket. This can take the pressure off the kneecap by aligning the hips better.
Finding Your Width
Move your feet wider than shoulder-width apart and point your toes outward at roughly 45 degrees. When you sit toward the chair, ensure your knees are tracking in line with your toes. If you feel like your knees are caving inward, your feet are likely too wide, or your toes are turned out too much. Adjust until you feel a comfortable, open sensation in your hips and zero pain in your knees.
12. Chair Squat with Bottom-Range Isometric Hold
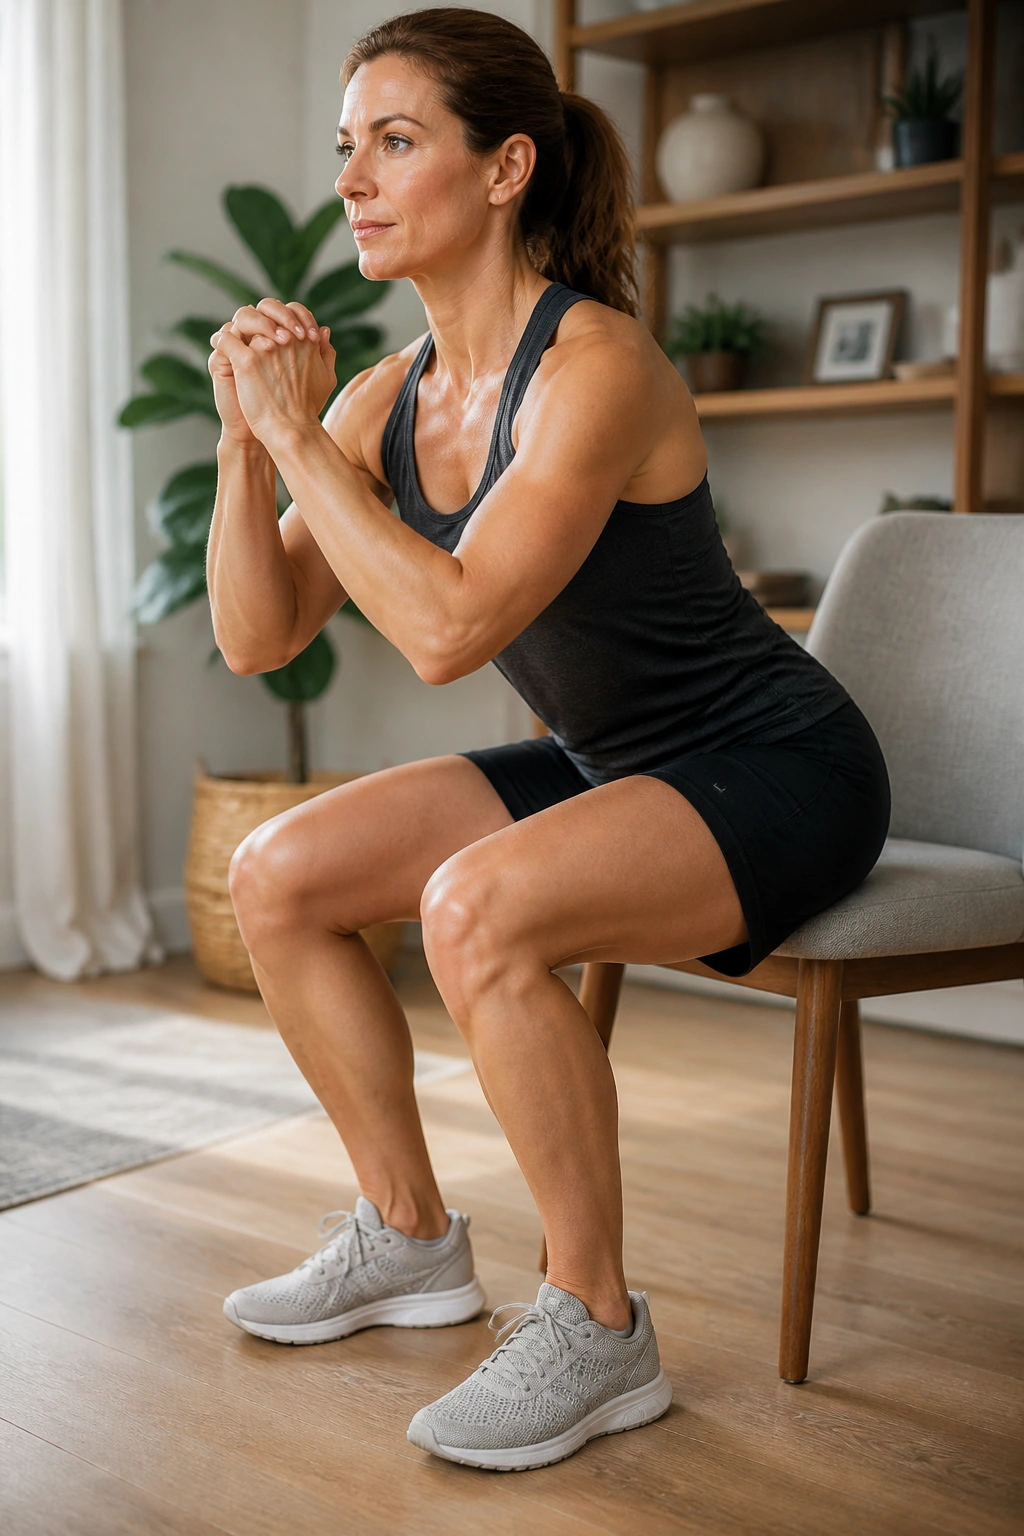
The bottom of the squat is where the knee is most vulnerable, but it is also where the muscle is at its most stretched length. By holding the position just above the chair for a few seconds, you build incredible strength.
How to Hold Safely
Lower yourself until you are just an inch above the chair seat. Stop. Keep your weight in your heels, not your toes. Hold this for five to ten seconds.
- The key: Do not relax. Keep your quads burning.
- The benefit: This teaches your muscles to stay engaged in that difficult position. It builds confidence in the joint’s stability. If you feel any sharp pain, rise up a few inches—the hold is effective even if you are not at the very bottom.
13. Chair Squat Incorporating Glute Bridge Squeeze
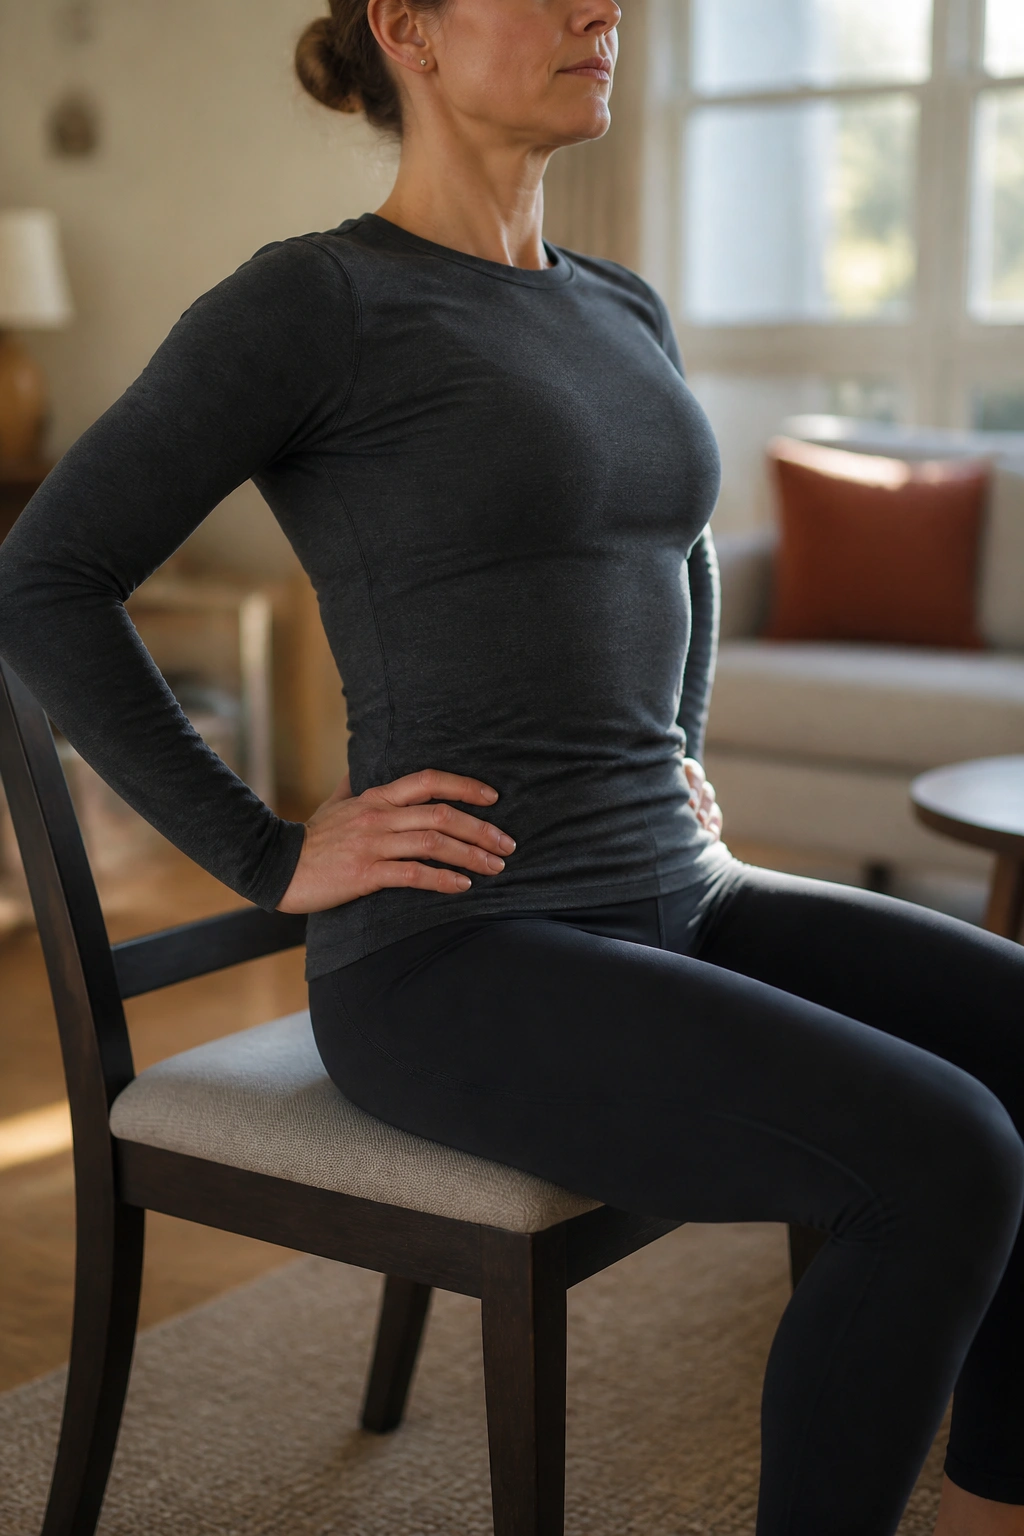
Combine a chair squat with a glute engagement exercise to ensure your muscles are doing the work, not your joints. This is a mental cue as much as a physical one. As you reach the bottom of the squat (or just before you stand up), squeeze your glutes as hard as possible.
Connecting the Muscle
Think of it this way: your glutes are the engine. When you sit down, focus on keeping that engine revving. Before you stand back up, initiate the movement with a hard squeeze of your glute muscles rather than a push from your toes. This “glute-first” approach saves your knees every single time. It turns the squat from a “leg push” into a “hip drive.”
14. Stability Ball Chair Squat Modification
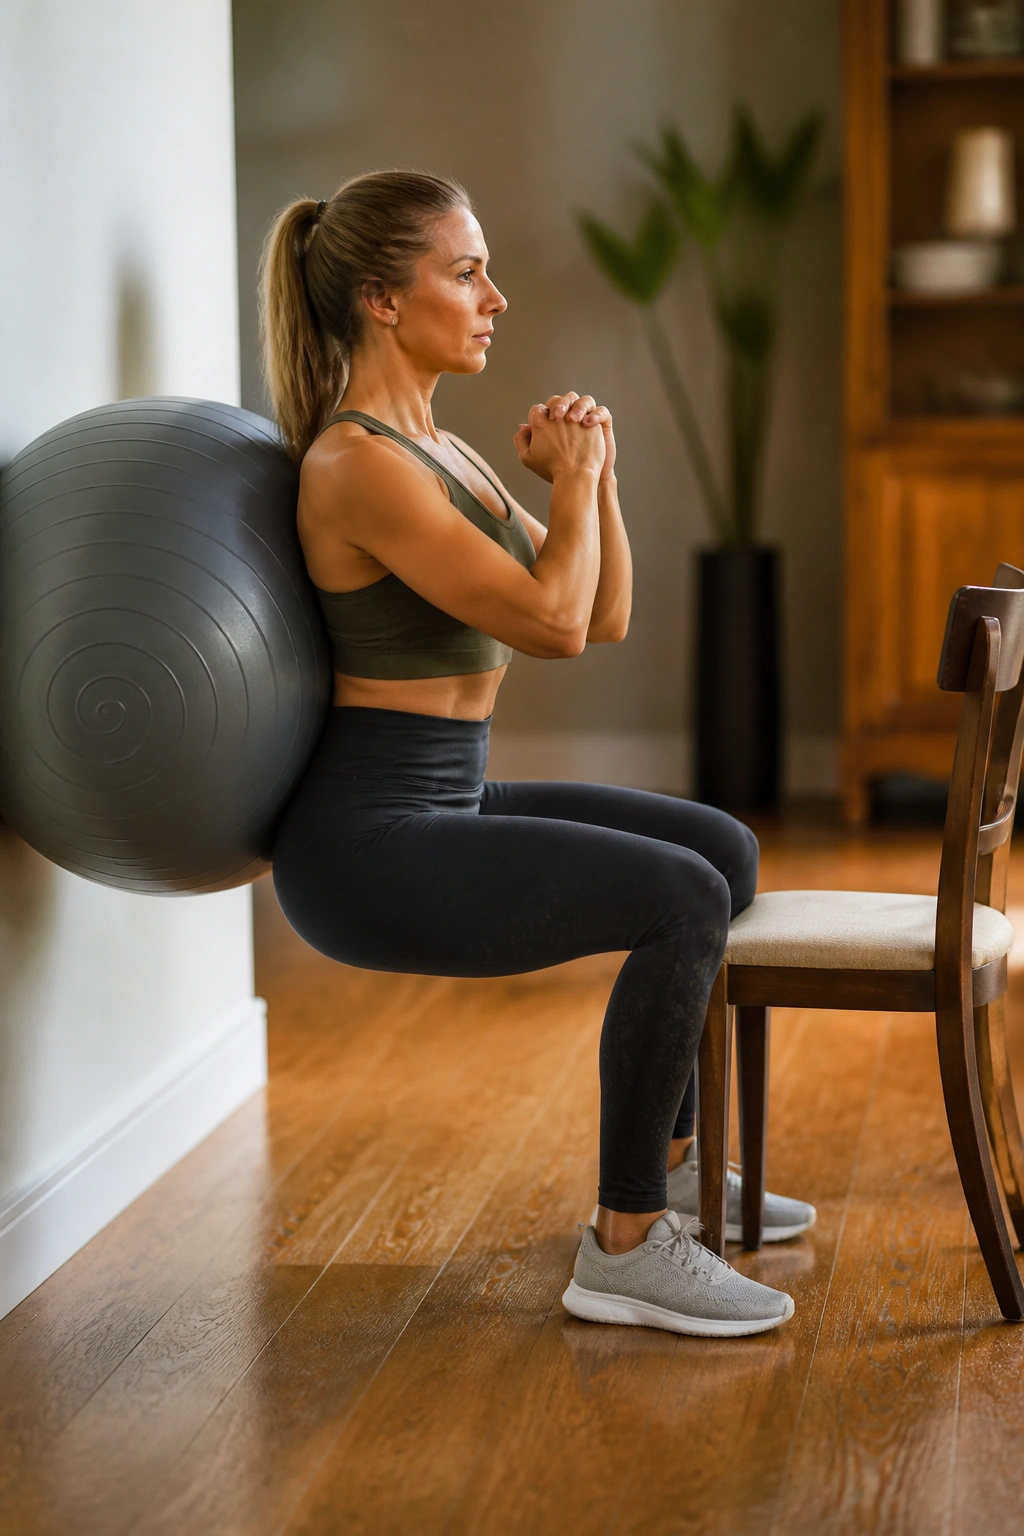
If you have a stability ball (exercise ball), you can use it to support your back against a wall while you squat toward a chair. This is the ultimate “safe” squat. The ball rolls with your back, providing support and guidance while you move.
The Advantage of the Ball
The ball keeps your spine vertical and prevents you from leaning forward. Because you feel supported, you are less likely to experience the fear-based tension that often causes knee pain. It creates a smooth, fluid descent that is very easy on the joints. If you are really struggling with pain, this is where you should start. It takes the guesswork out of form and lets you focus on the movement itself.
15. Chair Squat Paired with Calf Raise
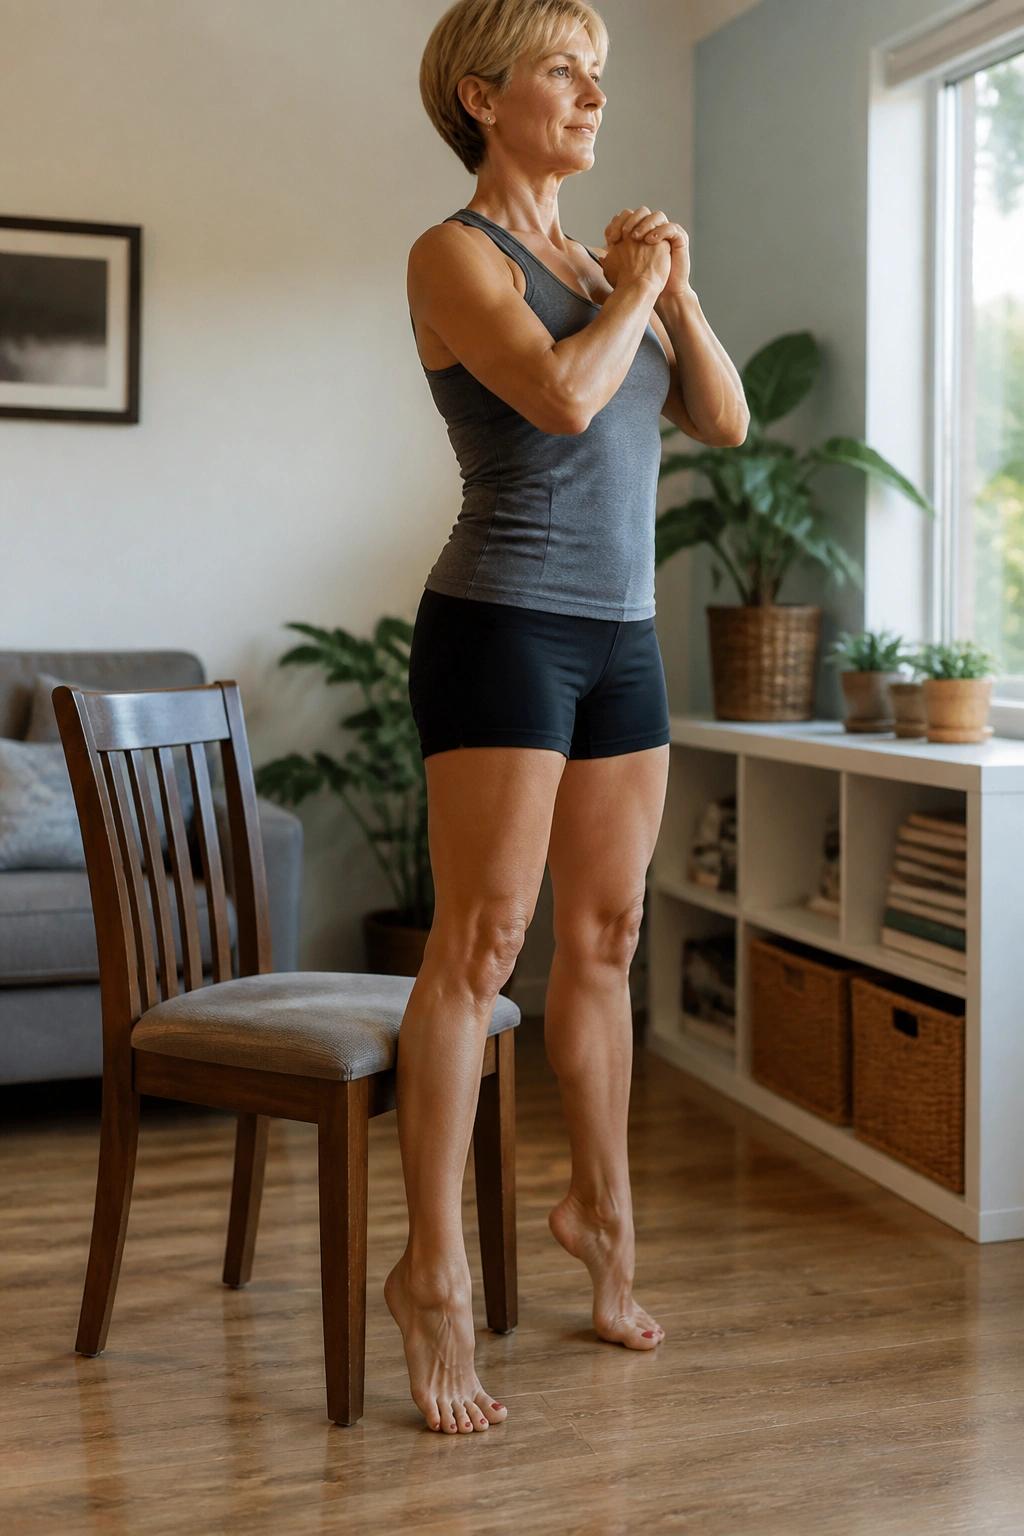
Knee stability is often linked to calf strength. If your calves are weak, your foot mechanics suffer, which propagates up to the knee. Pairing your chair squat with a calf raise at the top of the movement is a great way to build holistic lower-body strength.
The Routine
Stand up from your chair, and as you reach the top of the movement, rise onto your toes for a controlled calf raise. Lower your heels, then begin your next squat. This adds a layer of coordination and strengthens the stabilizers in your lower leg. It’s efficient, effective, and helps improve your balance significantly.
16. Lateral Step-Out Chair Squat
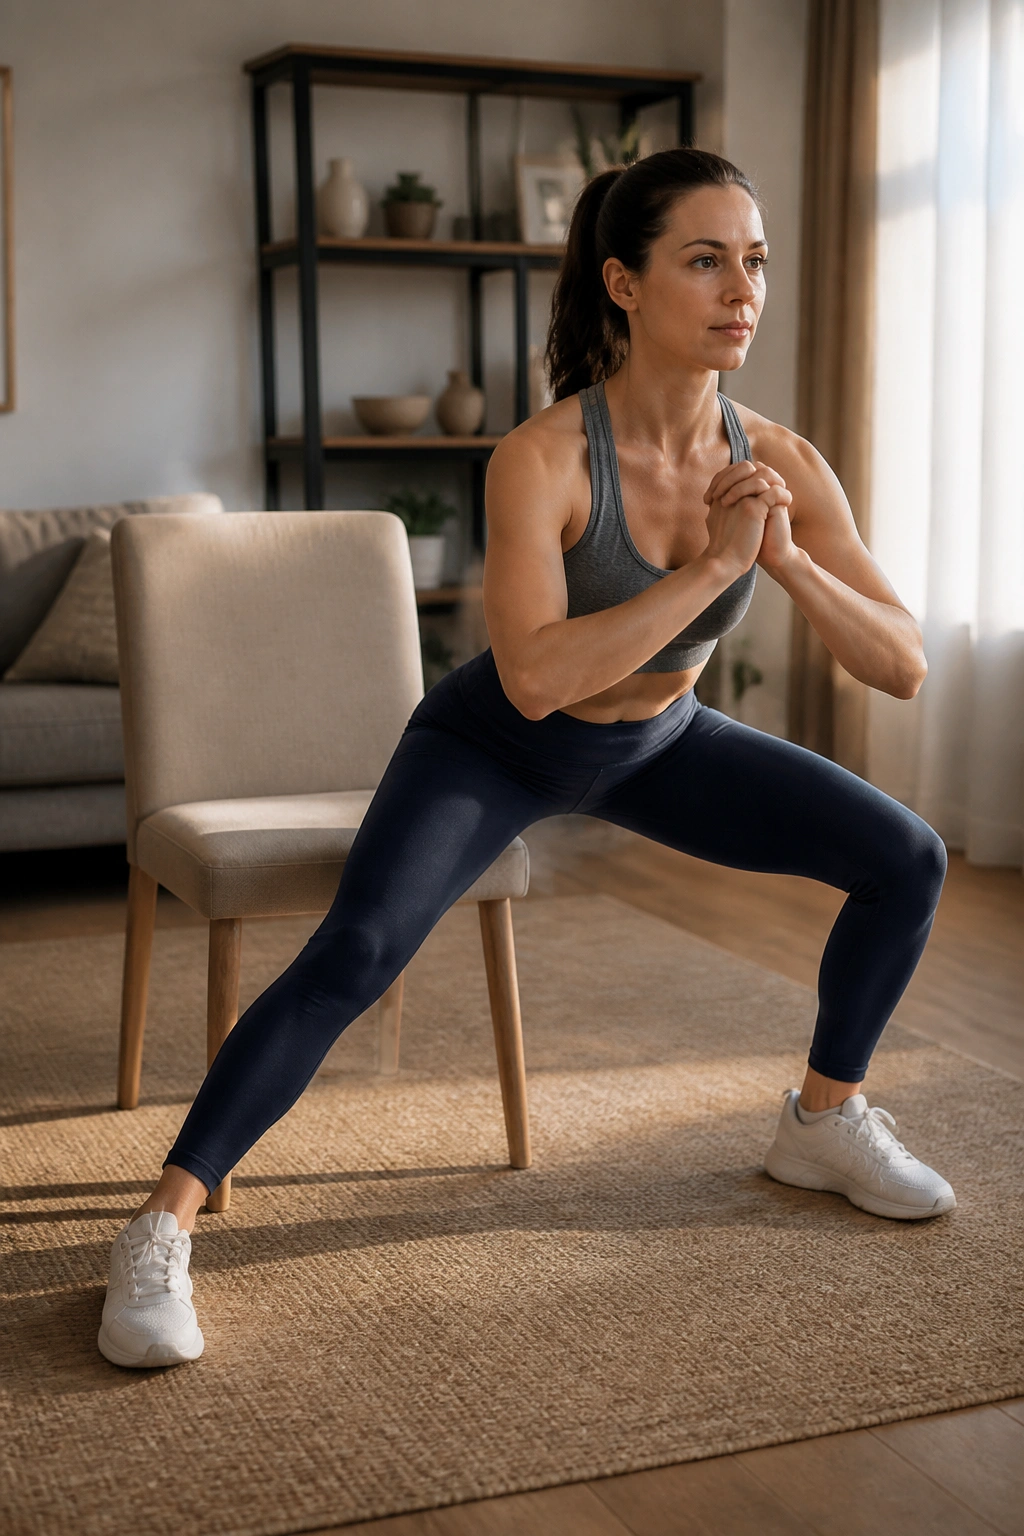
We spend almost all our time moving forward and backward. Adding lateral (side-to-side) movement helps train the hips in a different plane of motion, which is crucial for knee health.
How to Move
Stand in front of your chair. Instead of a normal squat, step your right foot out to the side into a wider stance, perform a shallow squat to the chair, stand up, and bring your feet back together. Then alternate to the left.
- Don’t overdo the depth: Since this is a wider, lateral movement, you don’t need to go as deep.
- Focus: Keep your weight centered. This movement strengthens the inner and outer thighs, which helps pull the kneecap into proper alignment.
17. Chair Squat with Overhead Arm Reach
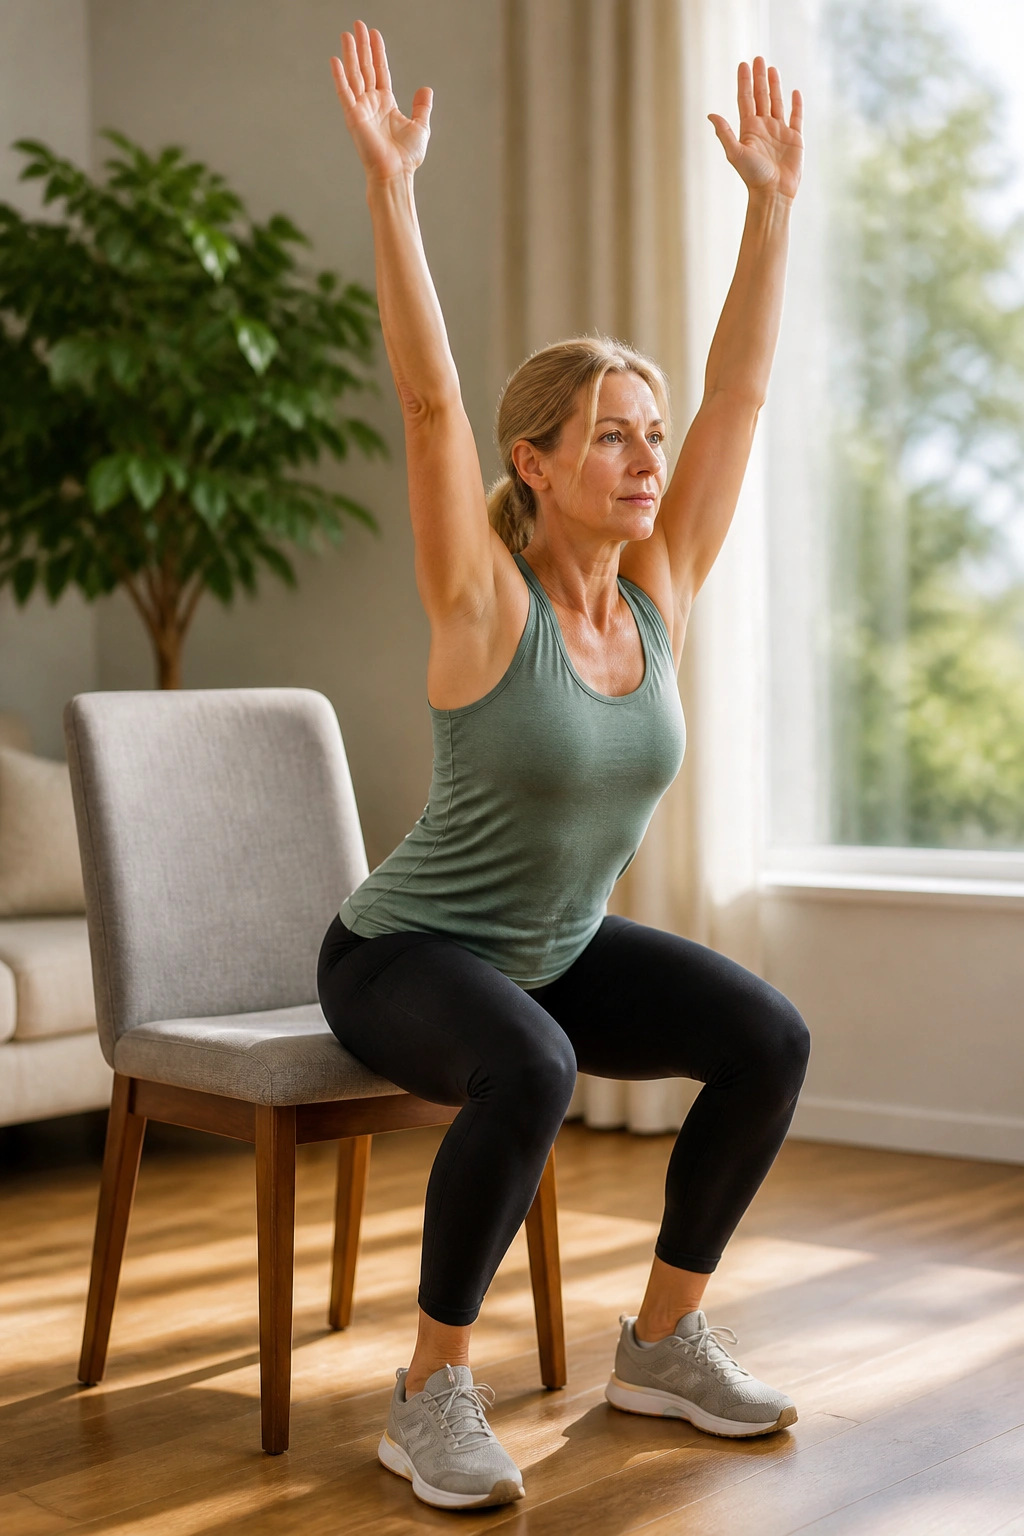
Many people lean forward because their chest drops. By reaching your arms overhead as you lower yourself, you force your thoracic spine (upper back) to extend. This makes it almost impossible to collapse forward, naturally keeping the weight back where it belongs.
The Reach Technique
Keep your arms straight up near your ears as you lower toward the chair. It feels a bit like a “zombie squat.” You will notice immediately that your chest stays much higher. This upright posture is the single best way to reduce knee strain for most people. If your shoulders are tight and you cannot reach straight up, reach out at a 45-degree angle. The effect is the same.
18. Chair Squat with Banded Hip Abduction
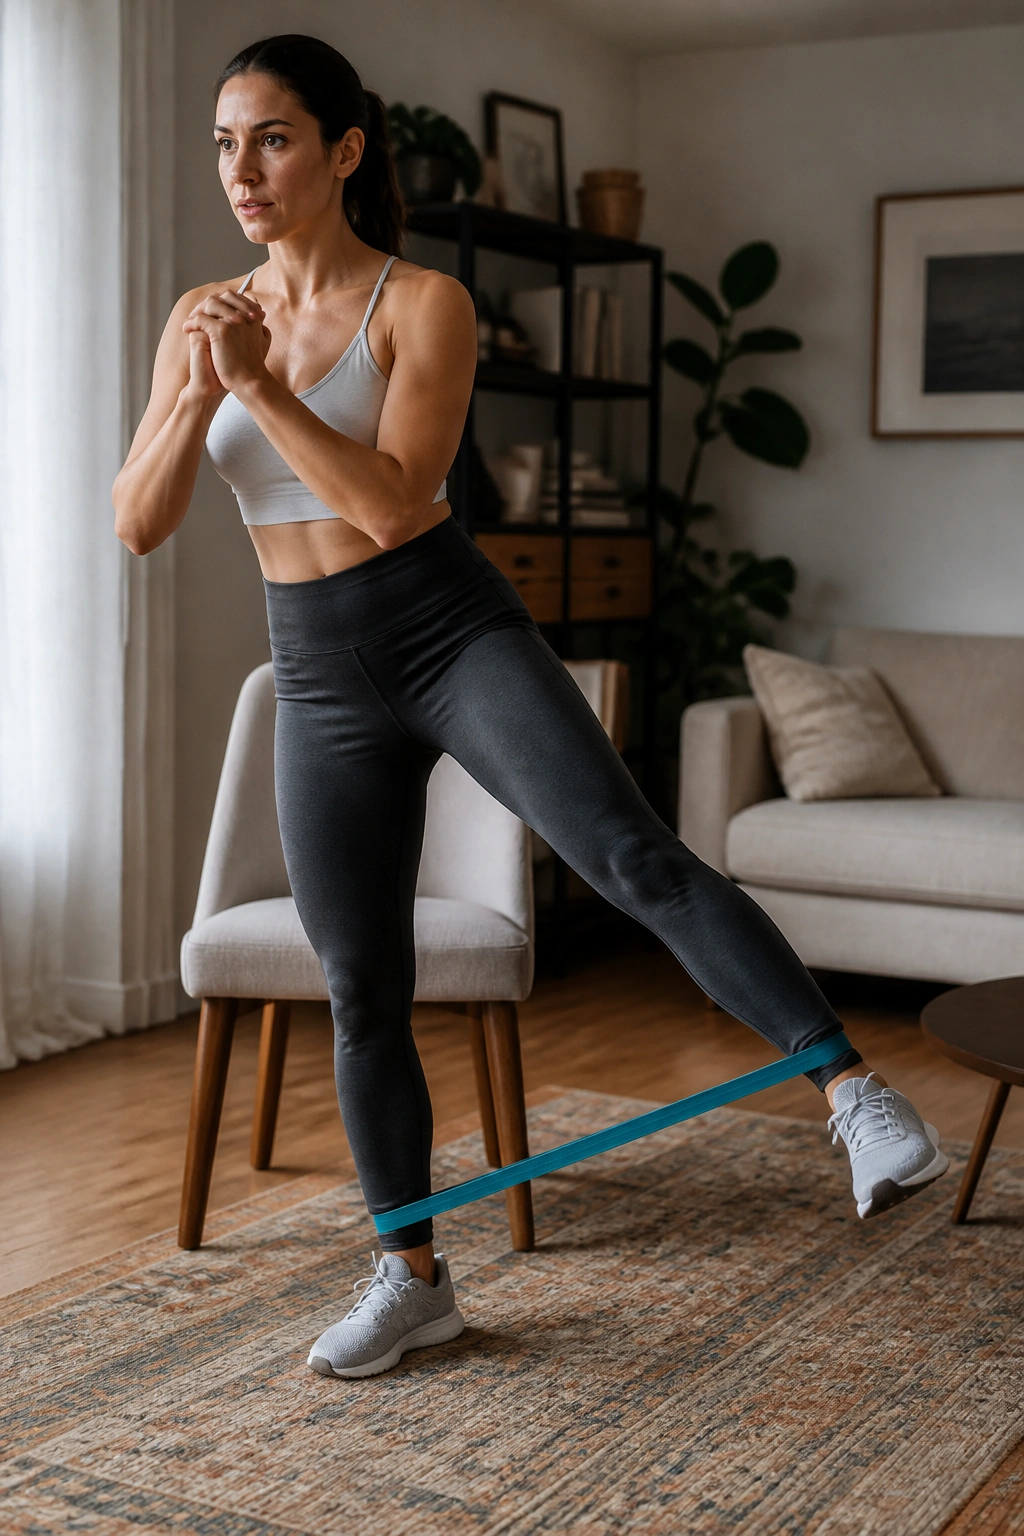
This is a two-in-one move that is brutal in the best way possible. Put a resistance band around your ankles. Perform your chair squat, and once you are standing, perform a small leg lift to the side (abduction).
Why This is Effective
You are working the squat (quads/glutes) and the hip stabilizers (glute medius) in one sequence. The hip abduction ensures your glutes are fully awake, which prevents the knees from collapsing on the next rep. It adds a bit of “tempo” and rhythm to your session, making it feel more like a structured workout and less like a chore.
The Bottom Line
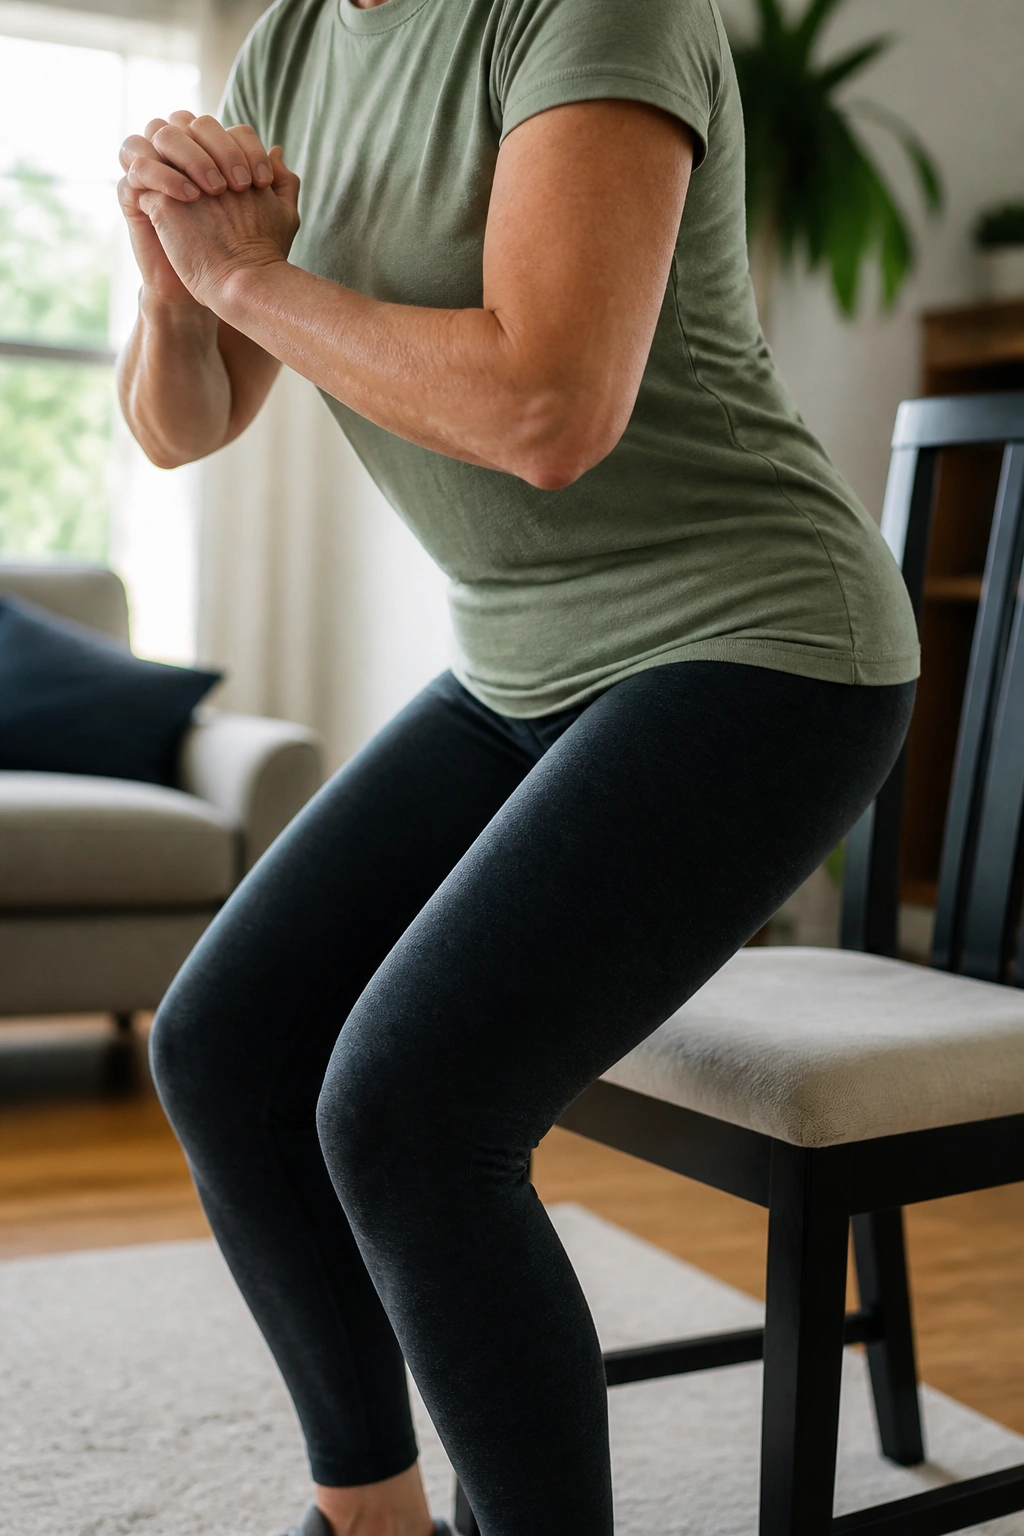
Knee pain does not mean you have to stop squatting. It means you have to start squatting smarter. By using the chair as your guide and selecting the variations that feel best for your current level of mobility and discomfort, you can build the strength needed to protect your joints for the long haul.
Start with the variations that provide the most support and the least pain. Do not rush to the harder versions. Consistency with a safer, lighter version will always yield better results than sporadic, painful attempts at “perfect” form. Your knees have a lot of work left to do, and with these variations, you can help them get there. Listen to your body, respect the pain, and focus on the control—that is the path to recovery.
