



The best beginner ab workouts for women are usually the quiet ones. Dead bugs, heel taps, side planks from the knees — the moves that look almost too easy until you hold them for 20 seconds and feel your midsection start to tremble.
That is not a flaw. It’s the point.
Early core training works best when it teaches your trunk to stay steady while your arms and legs move. That matters more than chasing a huge burn or doing a hundred rushed crunches that leave your neck sore and your lower back cranky. A good beginner routine should make your abs work, yes, but it should also teach breathing, bracing, and control.
I like this kind of training because it meets people where they are: stiff hip flexors, a sleepy deep core, and a habit of holding the breath the second something gets hard. If you’ve ever done sit-ups and felt the work everywhere except your stomach, you already know why a smarter starting point helps.
1. Dead Bug Marches
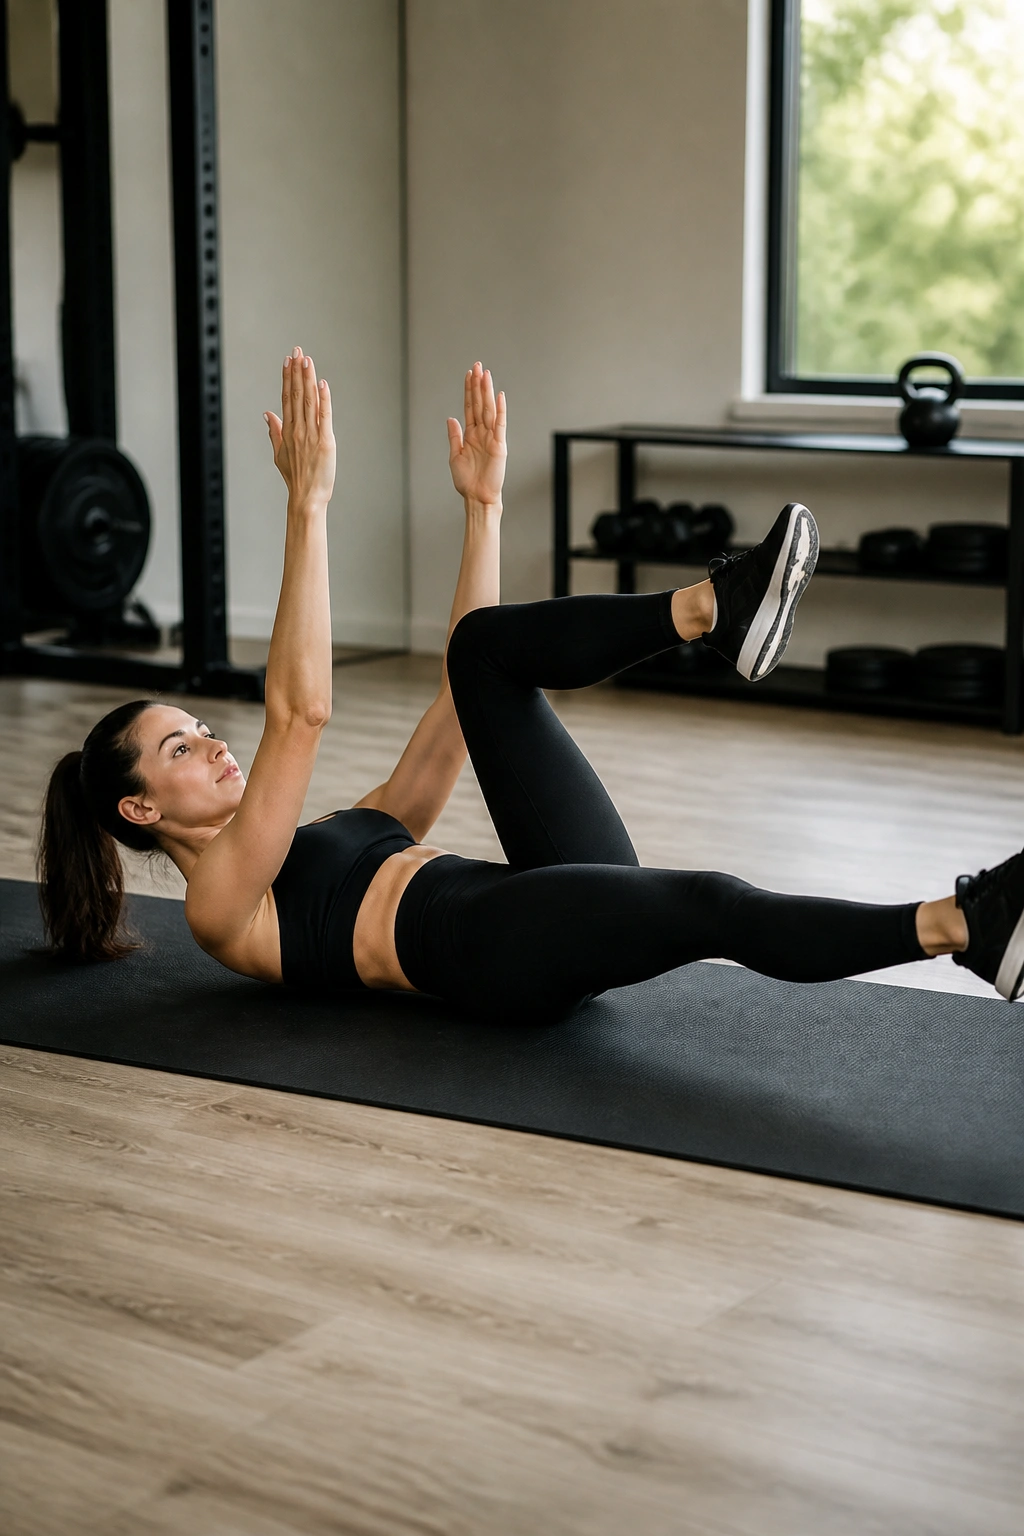
If I had to pick one first move, it would be this one. Dead bug marches teach your core to resist arching while your arms and legs move, which is exactly the skill most beginners need before they jump into harder floor work.
Lie on your back with your knees bent at 90 degrees, shins parallel to the floor. Press your lower back gently into the mat, then lower one foot toward the floor and bring it back up without letting your ribs pop up. The motion should look small and controlled. If your lower back lifts, the range is too big.
How to Make It Work
- Exhale as the leg lowers.
- Keep your hands pressed into the floor or reach them toward the ceiling.
- Move one side at a time for 6 to 8 reps per side.
- Stop the set the moment your lower back starts to arch.
Tip: if you only remember one cue, make it this one — ribs down, breath out, move slow.
A lot of people rush this exercise because it looks simple. Don’t. Slow dead bug marches are where the real work happens.
2. Bird Dog Holds
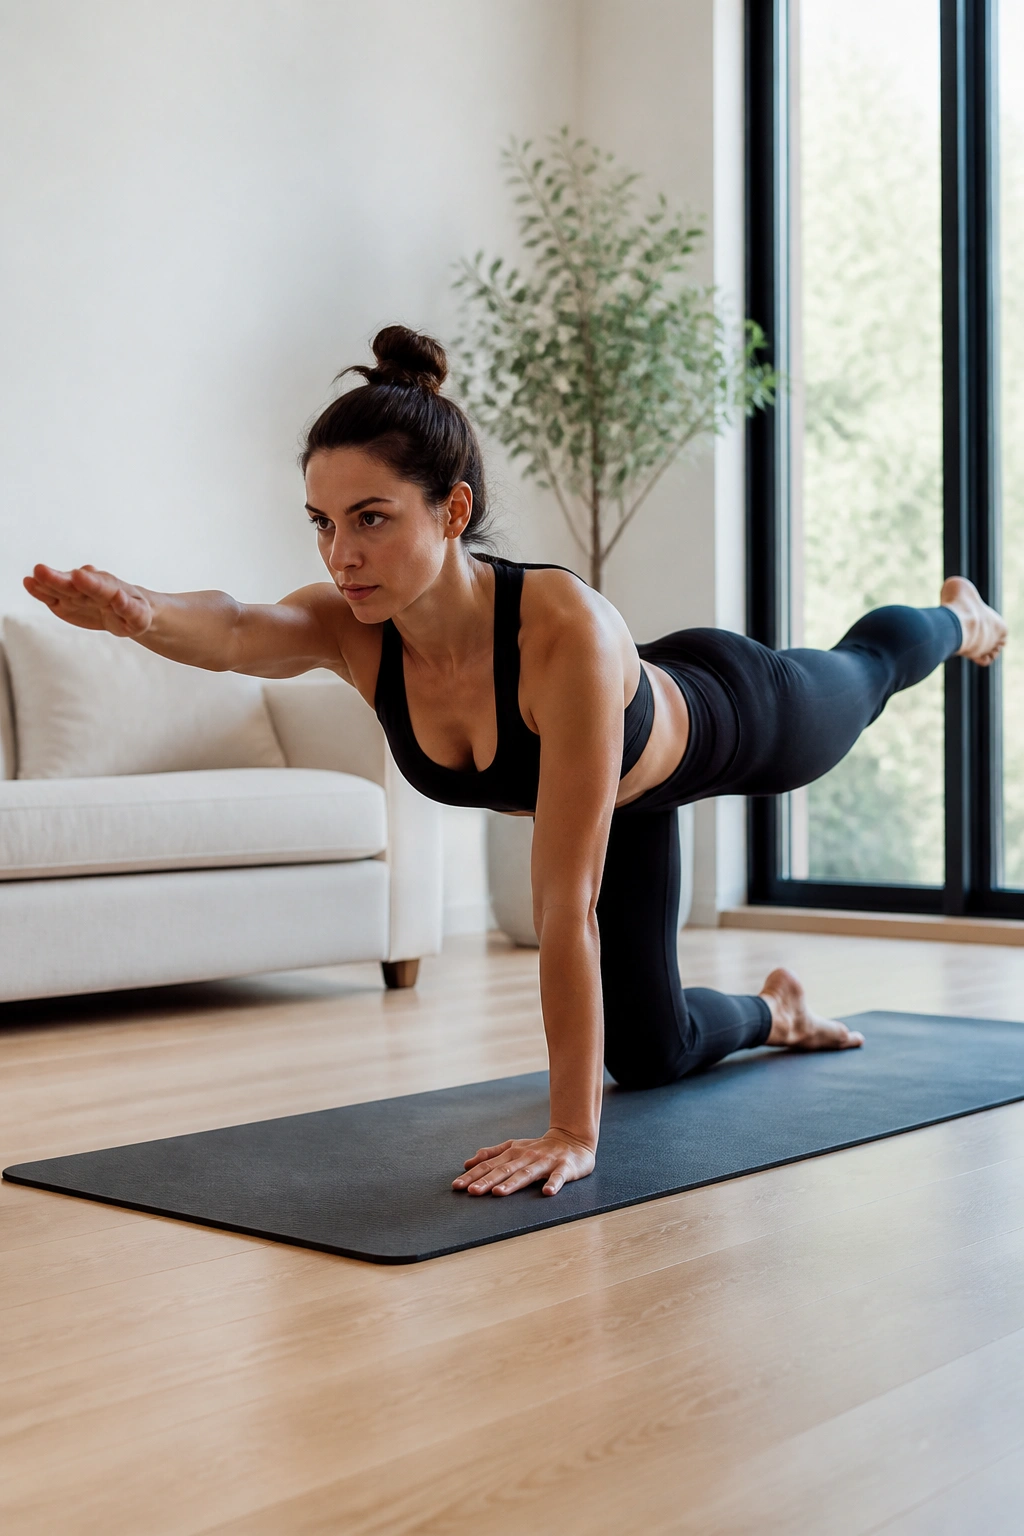
A bird dog looks gentle until you try to keep your hips from twisting. Then it starts to feel a lot more honest. That’s why it shows up in so many beginner core plans: it trains your abs, back, and glutes to stay lined up under light movement.
Start on hands and knees with your wrists under your shoulders and your knees under your hips. Reach one arm straight ahead and the opposite leg straight back, then hold for 3 to 5 seconds before switching sides. The goal is not height. The goal is a long, steady line from fingertips to heel.
A lot of people lift the leg too high and dump into the lower back. Keep the leg level with your torso or even a little lower if that helps you stay solid. Your body should feel like a table, not a wobbling chair.
Do 6 reps per side at first. If that feels easy, lengthen the hold before you add more reps. That small pause teaches control, and control is what makes the move worth doing.
3. Heel Taps
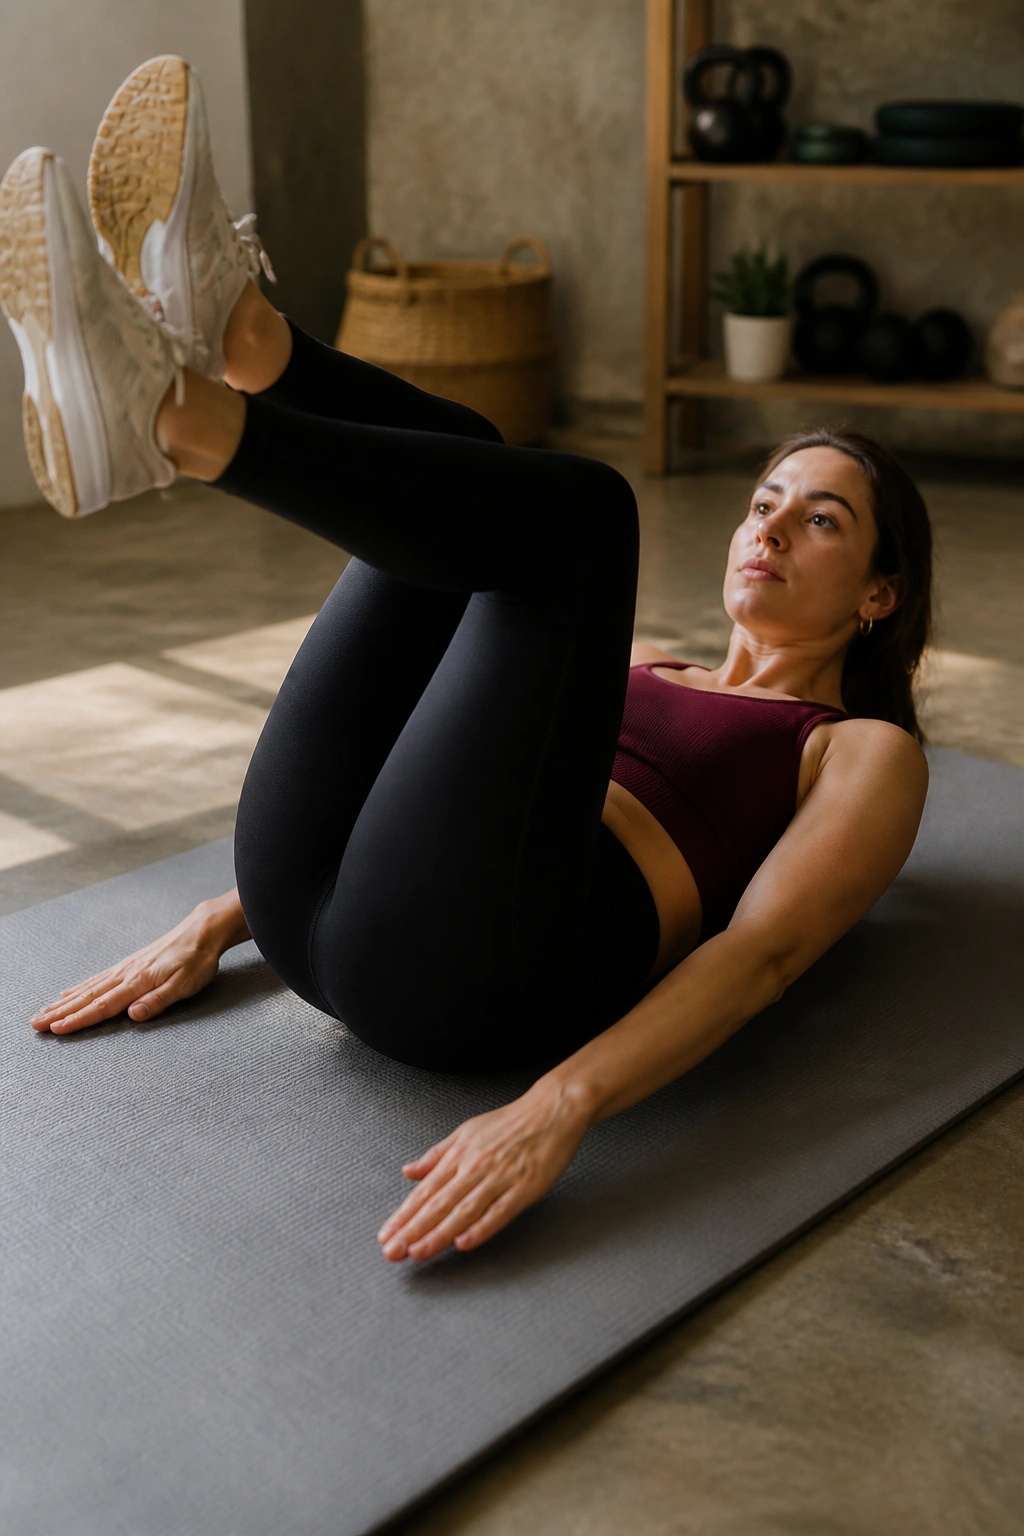
Why do heel taps show up in so many beginner core workouts? Because they teach the lower abs to work while your torso stays calm. No crunching. No flinging. Just a slow side-to-side reach that asks your core to keep you from rocking.
Lie on your back, knees bent, feet lifted into tabletop if that feels okay, and lower one heel toward the floor before bringing it back up. Then switch sides. You’ll probably feel this in the front of your stomach first, and if you do it slowly enough, it’s a good kind of tired rather than a sharp one.
How to Use It
Keep your hands by your sides or on your ribs so you can feel whether your midsection pops up. If your neck gets involved, lower your head back to the floor and shorten the range. The move should feel small and tidy.
I like heel taps for people who hate full crunches but still want something that feels like ab work. Start with 8 to 10 taps per side. If the lower back starts to arch, stop the set there. That’s your sign, not a failure.
4. Forearm Plank From the Knees
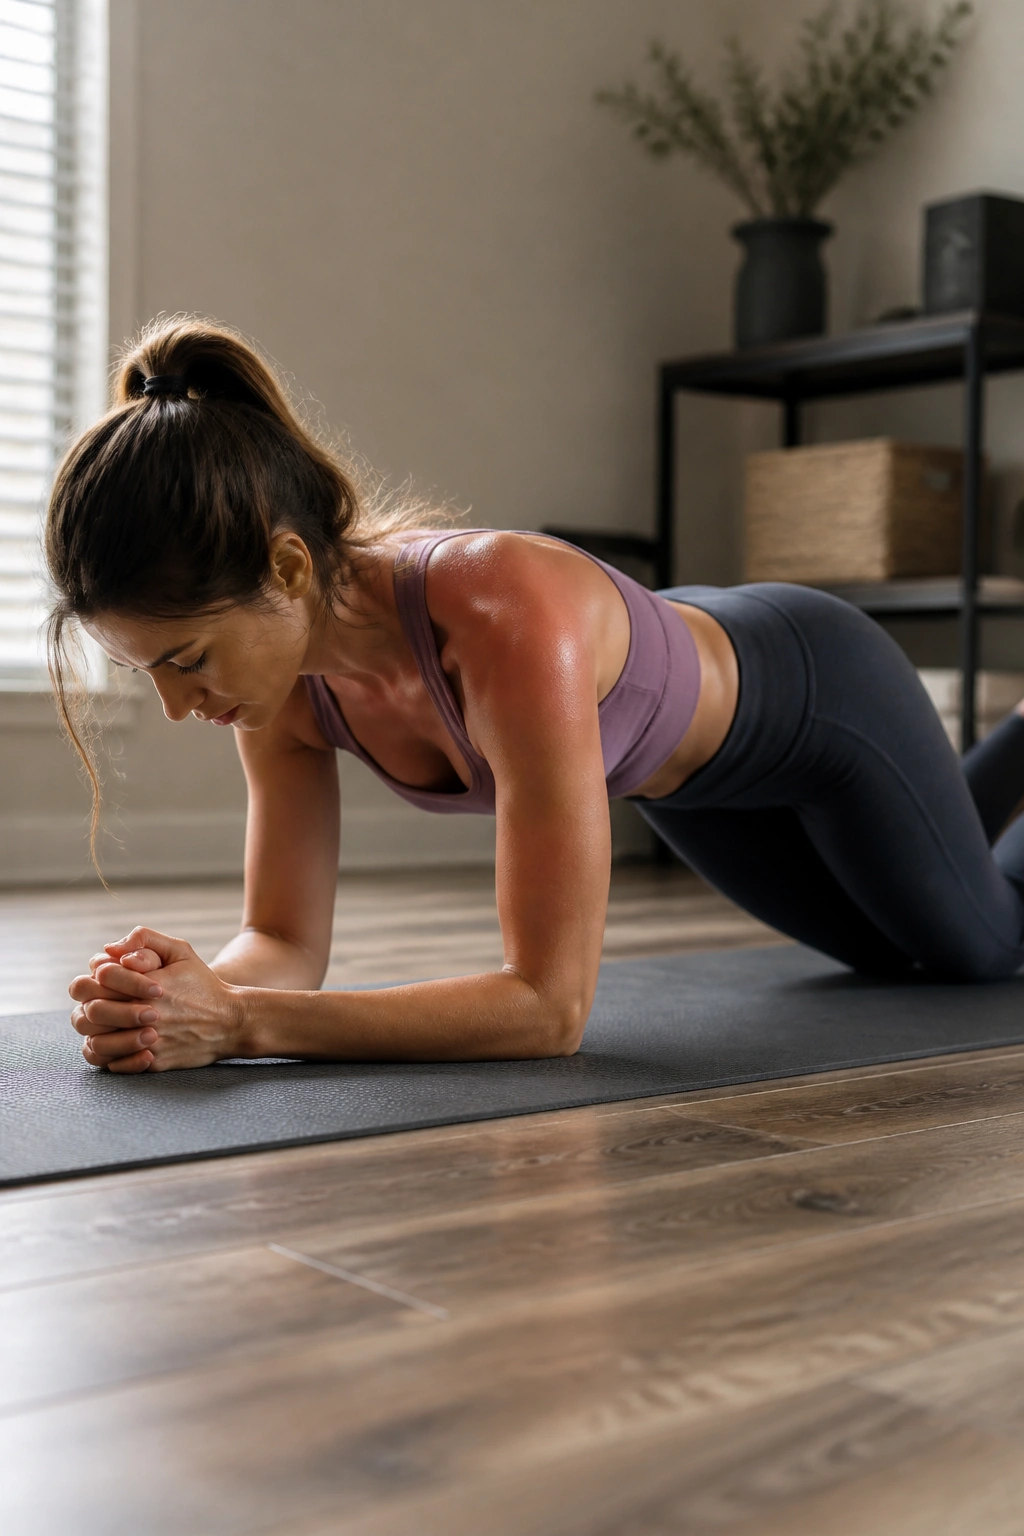
A full plank is not where most beginners should start. The kneeling version is better because it teaches the same bracing pattern without forcing you to fight for every second.
Set your forearms on the floor with your elbows under your shoulders, then rest your knees down and walk them back a little so your body forms one long line from shoulders to knees. Squeeze your glutes lightly. Press the floor away. Breathe. If your lower back sags, the hold is too long or your hips are too high.
Key Details to Watch
- Keep your elbows roughly under your shoulders.
- Tuck your pelvis just enough to avoid a low-back arch.
- Hold for 10 to 20 seconds at first.
- Rest fully between holds instead of grinding through sloppy reps.
Short, clean holds beat long, messy ones every time. That sounds boring, I know. It works.
5. Glute Bridge With Brace
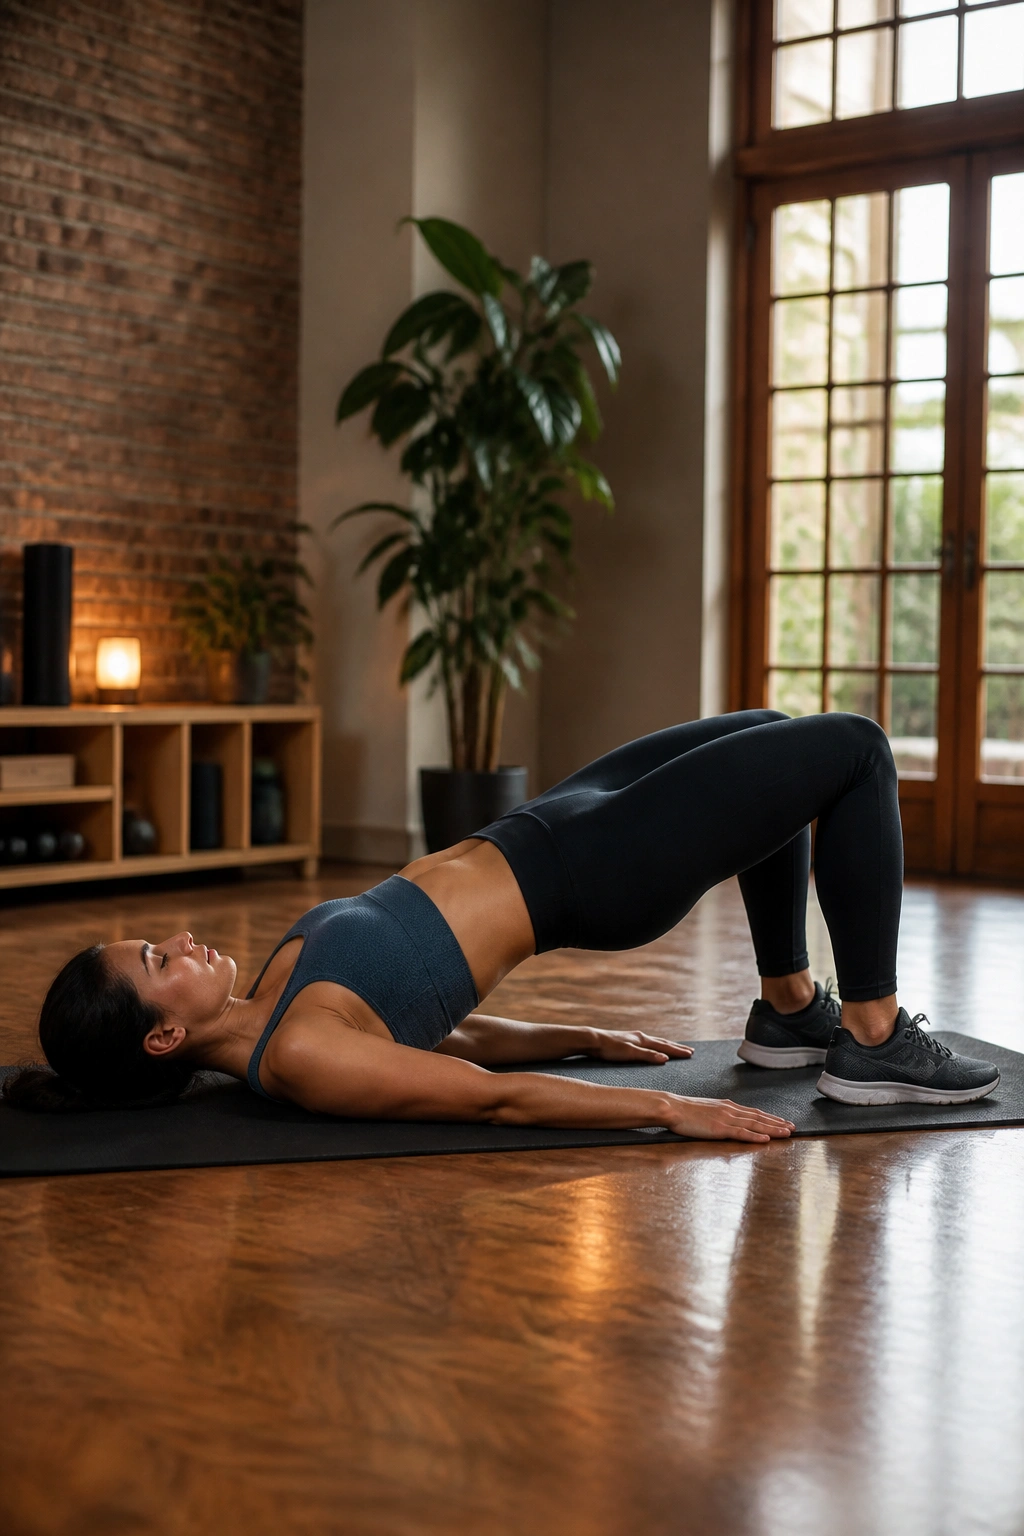
This one looks like a lower-body move at first glance, but it has a sneaky way of teaching your abs how to support your pelvis. A well-done glute bridge makes your core work without a single crunch, which is one reason I keep it in beginner plans.
Lie on your back with your knees bent and feet flat on the floor, about hip-width apart. Before you lift, gently flatten your lower back toward the floor and exhale. Then press through your heels and lift your hips until your body forms a straight line from shoulders to knees. Pause for a beat at the top, then lower with control.
The real trick is the brace. If you lift without it, your lower back does too much and your glutes do too little. That’s the opposite of what you want. Keep the ribs down, the neck relaxed, and the movement smooth.
Do 10 to 12 reps, holding the top for 2 seconds. If your hamstrings cramp, bring your feet a little closer to your hips and slow down.
6. Side Plank From the Knees
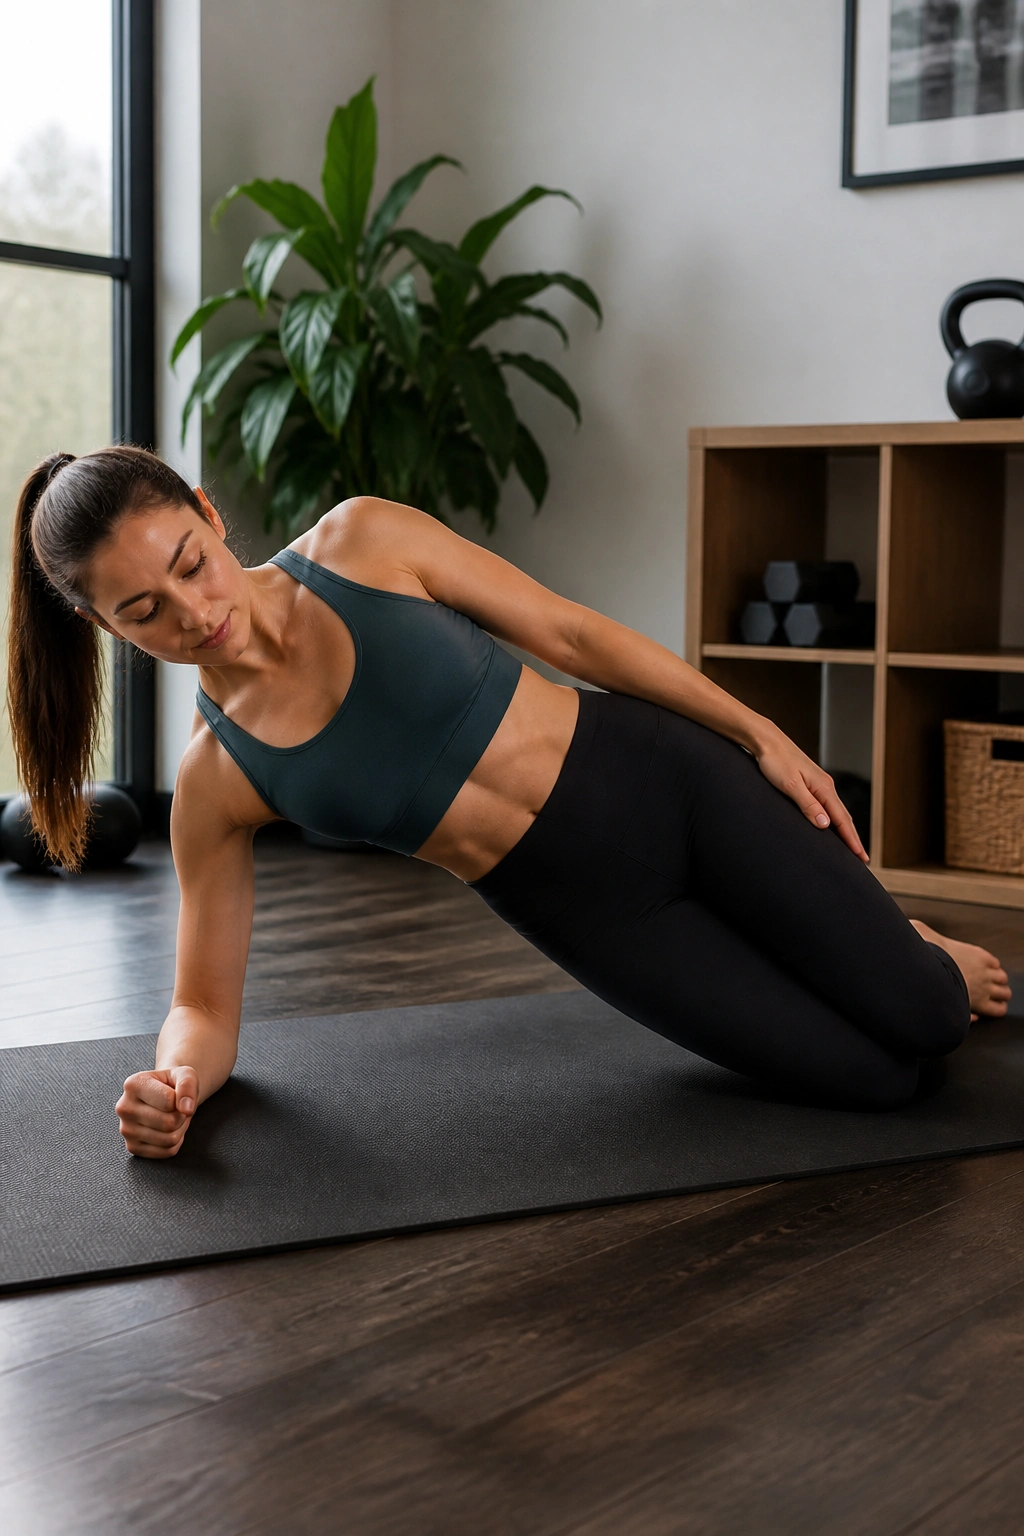
A side plank from the knees is one of my favorite starting points because it teaches side-to-side stability without asking you to wrestle a full-body lever. It’s the beginner version that still feels like real work.
Compared with a full side plank, this version gives your obliques and shoulder a much more manageable load. Your bottom knee stays on the floor, which shortens the lever and cuts down the wobble that often makes people quit too soon. That doesn’t make it easy. It makes it smart.
Stack one elbow under your shoulder, bend your knees, and lift your hips until your body makes a straight line from shoulder to knee. Hold for 10 to 15 seconds per side. If your top shoulder caves forward, reset and lift a little lower. No need to force a huge hip raise.
Small move. Big lesson.
If your waist feels steady and your shoulder feels awake, you’re in the right place. Two to three holds per side is enough when you’re starting out.
7. Toe Taps
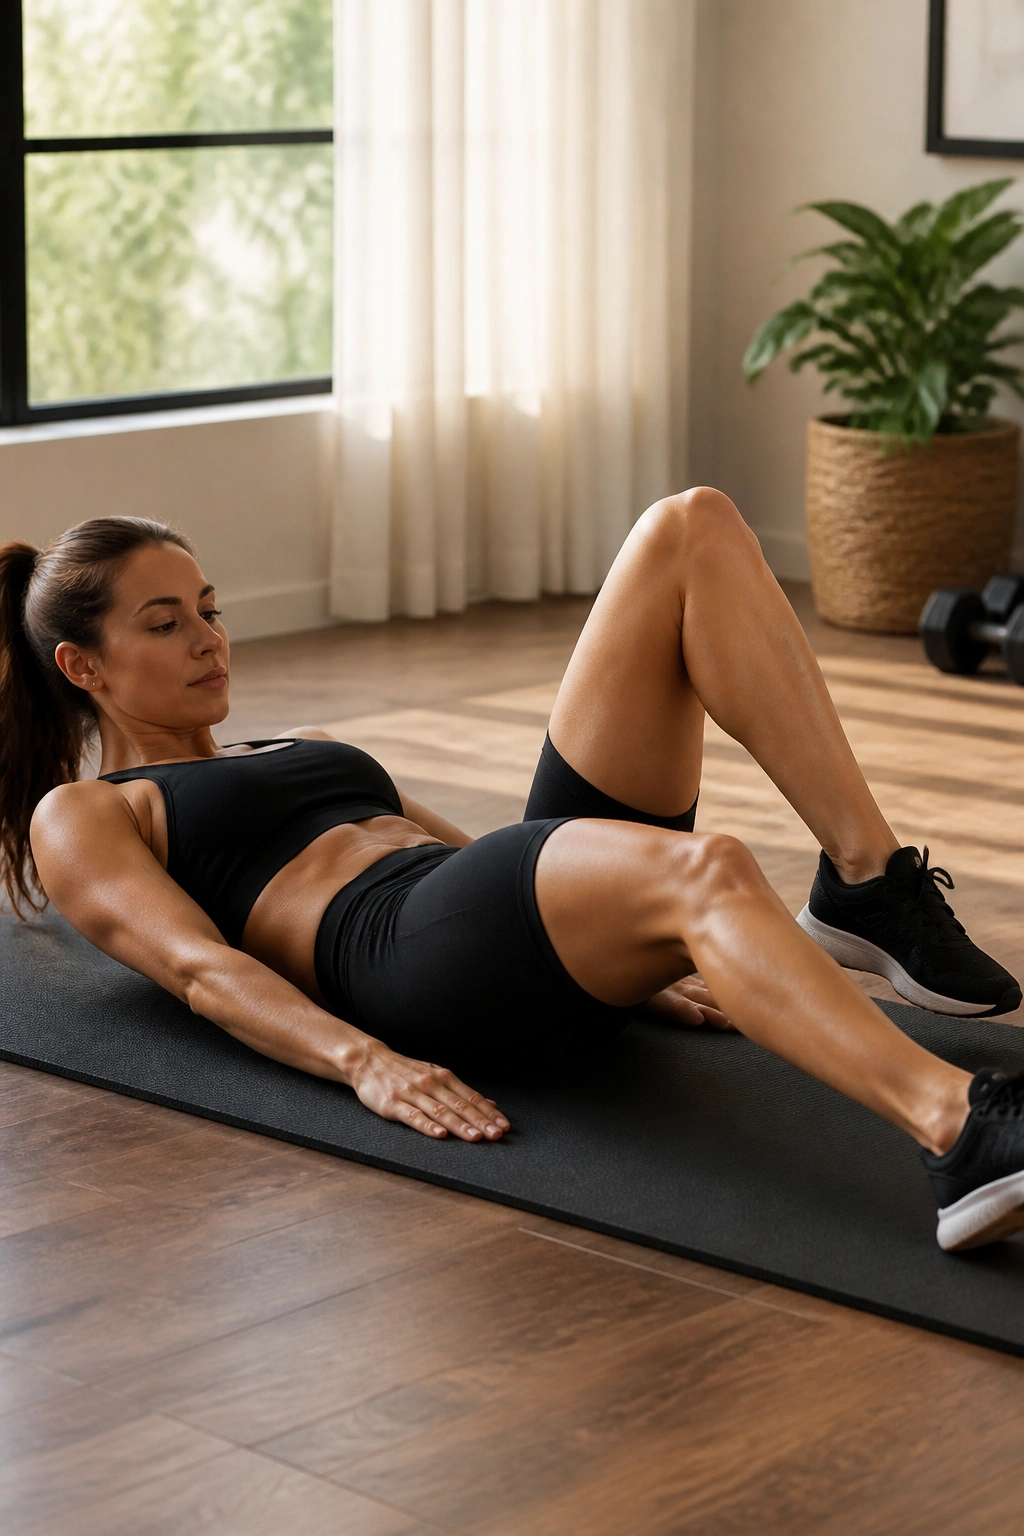
Toe taps are one of those exercises that look harmless until your abs start shaking at rep six. That shake is not a bad sign. It usually means your core is doing the job instead of your hip flexors taking over.
Lie on your back with your legs in tabletop, or keep one foot down if tabletop feels like too much. Lower one toe toward the floor, tap lightly, and bring it back up. Then switch sides. Keep your lower back heavy against the mat and your ribs soft. The motion should feel smooth, not snappy.
What to Watch For
- Don’t let your back arch when the foot lowers.
- Keep the tap small if your hips start to tilt.
- Exhale on the way down.
- Hold your head down if your neck starts to tighten.
If you want a simple target, try 8 taps per side and stop before your form falls apart. That last part matters more than the number.
8. Reverse Crunch
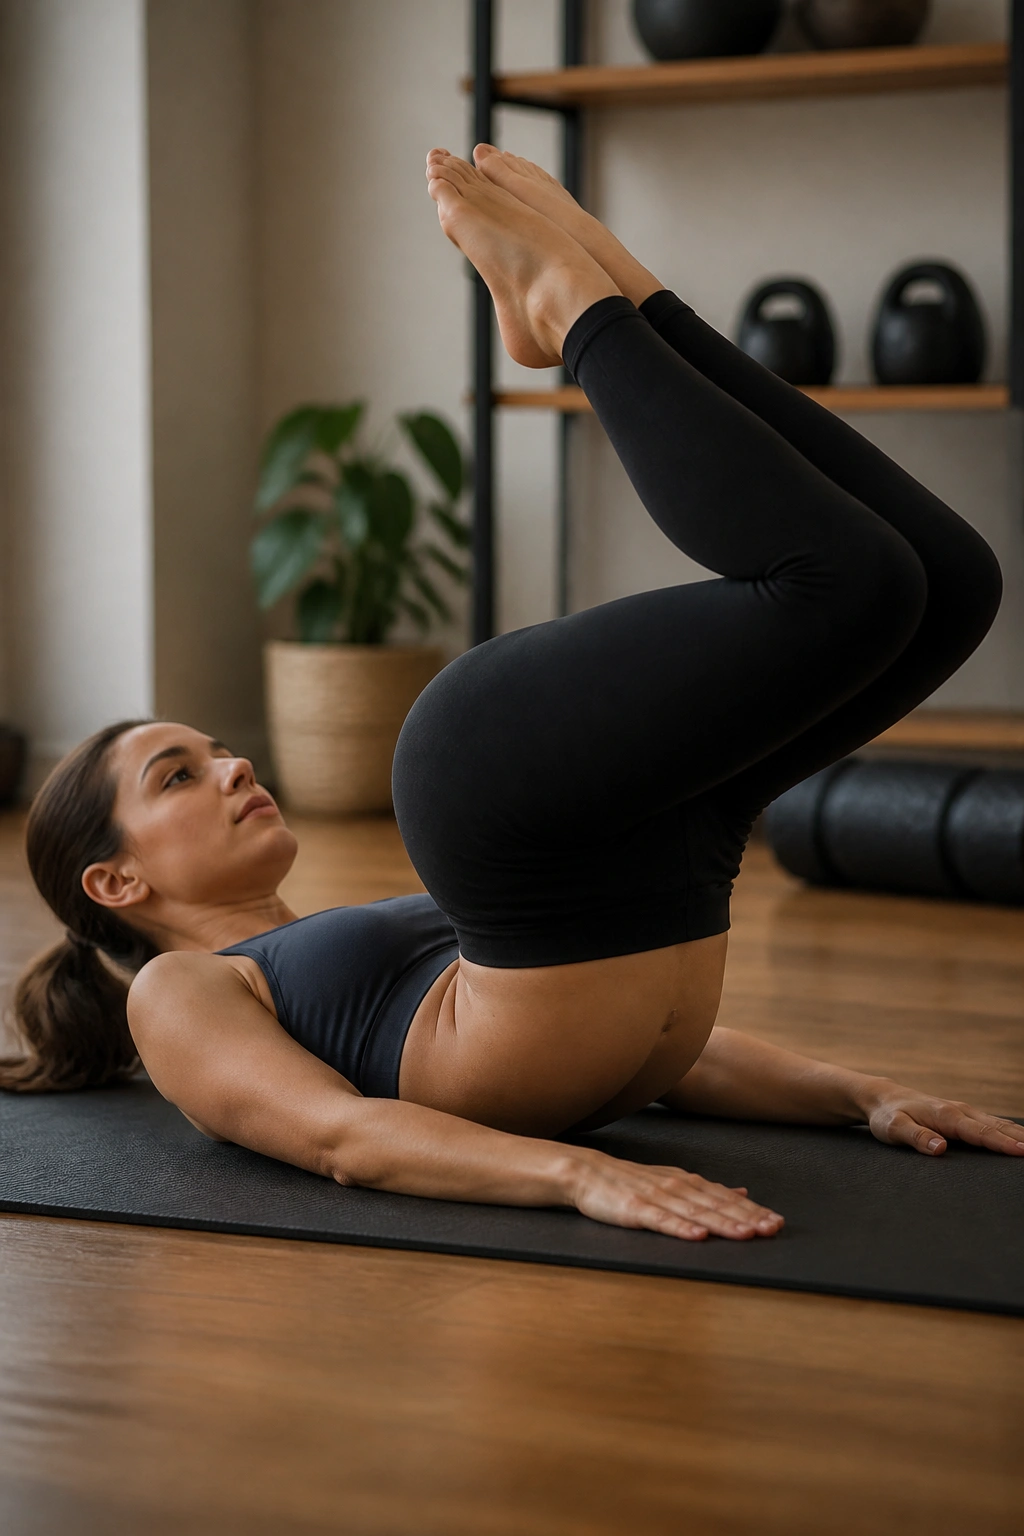
This is the move that often makes beginners say, “Oh, that’s where my abs are.” A reverse crunch targets the lower part of the abdominal wall by curling the pelvis upward, not by swinging the legs around like a pendulum.
Lie on your back with your knees bent and feet lifted. Bring your knees toward your chest, then use your lower abs to curl your tailbone a little off the floor. That tiny lift matters more than a big swing. If your feet fly up and your lower back yanks off the mat, you’ve gone too far.
Keep the motion slow and deliberate. Lower for 2 to 3 seconds, pause, then curl back up. Eight clean reps can feel like a lot if you’re actually doing them well.
I prefer reverse crunches over fast sit-up style work for people who are just starting out. They’re easier to control, and they teach the pelvis to move without turning the neck into the hero of the set. That’s a win.
9. Standing Cross-Body Crunch
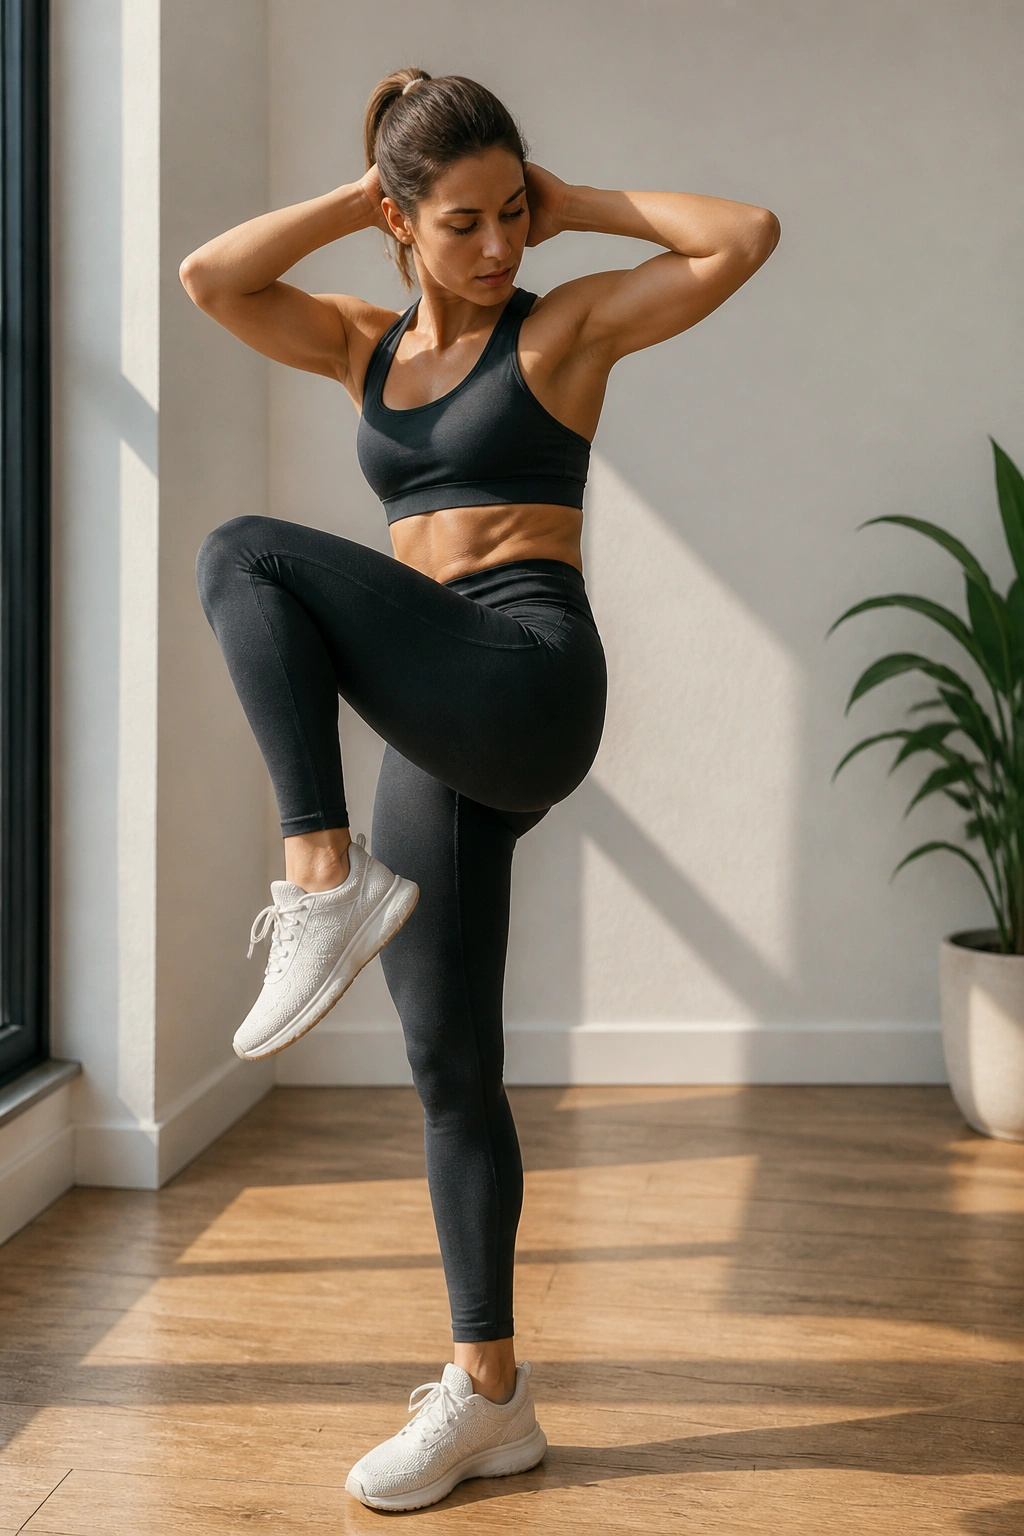
Do you hate floor workouts some days? Fair. A standing cross-body crunch gives you a low-impact option that still asks your core to twist and brace.
Stand tall, hands lightly behind your head or across your chest, then bring one knee up as the opposite elbow moves toward it. The key is the squeeze through the side of your torso, not a hard swing from the hips. Stay upright instead of collapsing forward. You should feel the waist line wake up, not your lower back pinch.
How to Make It Easier on the Back
Keep the movement slow and keep one foot grounded until the knee lifts. If balance feels shaky, hold a wall or chair with one hand. The exercise still counts. It just gets cleaner.
Try 10 to 12 reps per side. If you want a little more work, pause for one second at the top of each rep. That tiny pause makes the abdominal contraction much harder to fake.
10. Slow Mountain Climbers
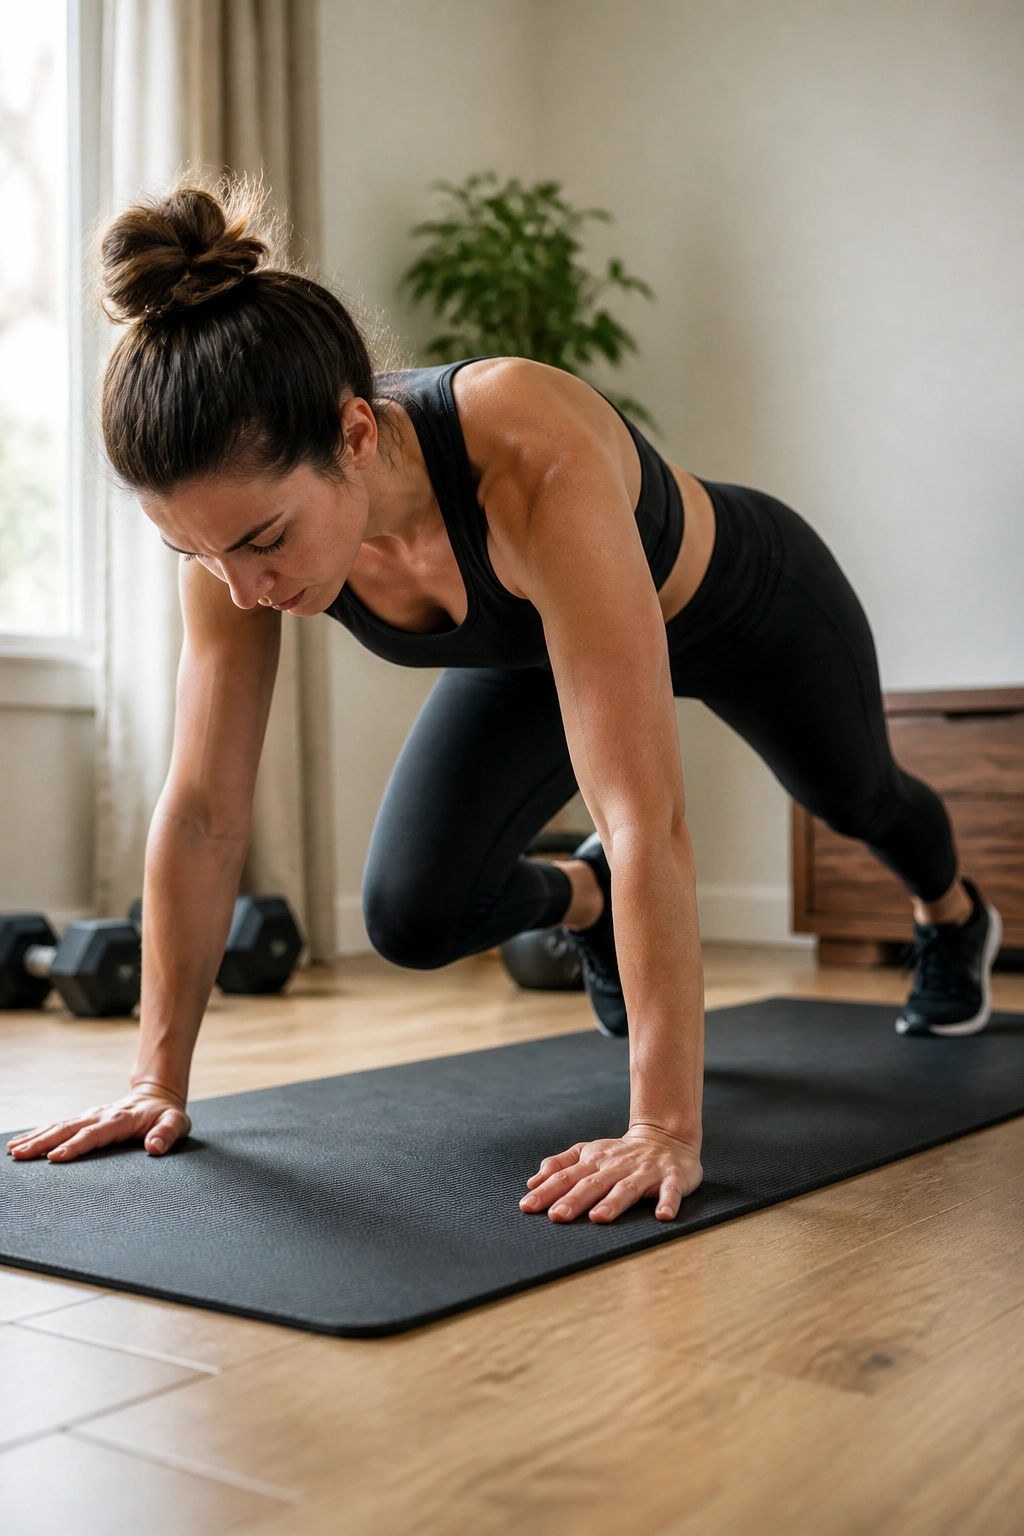
Fast mountain climbers turn into cardio before they turn into core work. Slow mountain climbers are a different animal. They force you to hold your torso still while one knee drives in at a time, and that’s where the ab training happens.
Start in a high plank with your hands under your shoulders. Bring one knee toward the opposite elbow, pause for a beat, then return it to the floor and switch sides. Keep your hips level. If they bounce side to side like a loose shopping cart, slow down even more.
- Hands stay planted under the shoulders.
- The knee comes forward under control.
- Each rep gets a brief pause.
- Stop after 6 to 8 reps per side if your back starts to sag.
The slower you go, the more honest the work gets. That’s the part most people skip.
11. Heel Slides
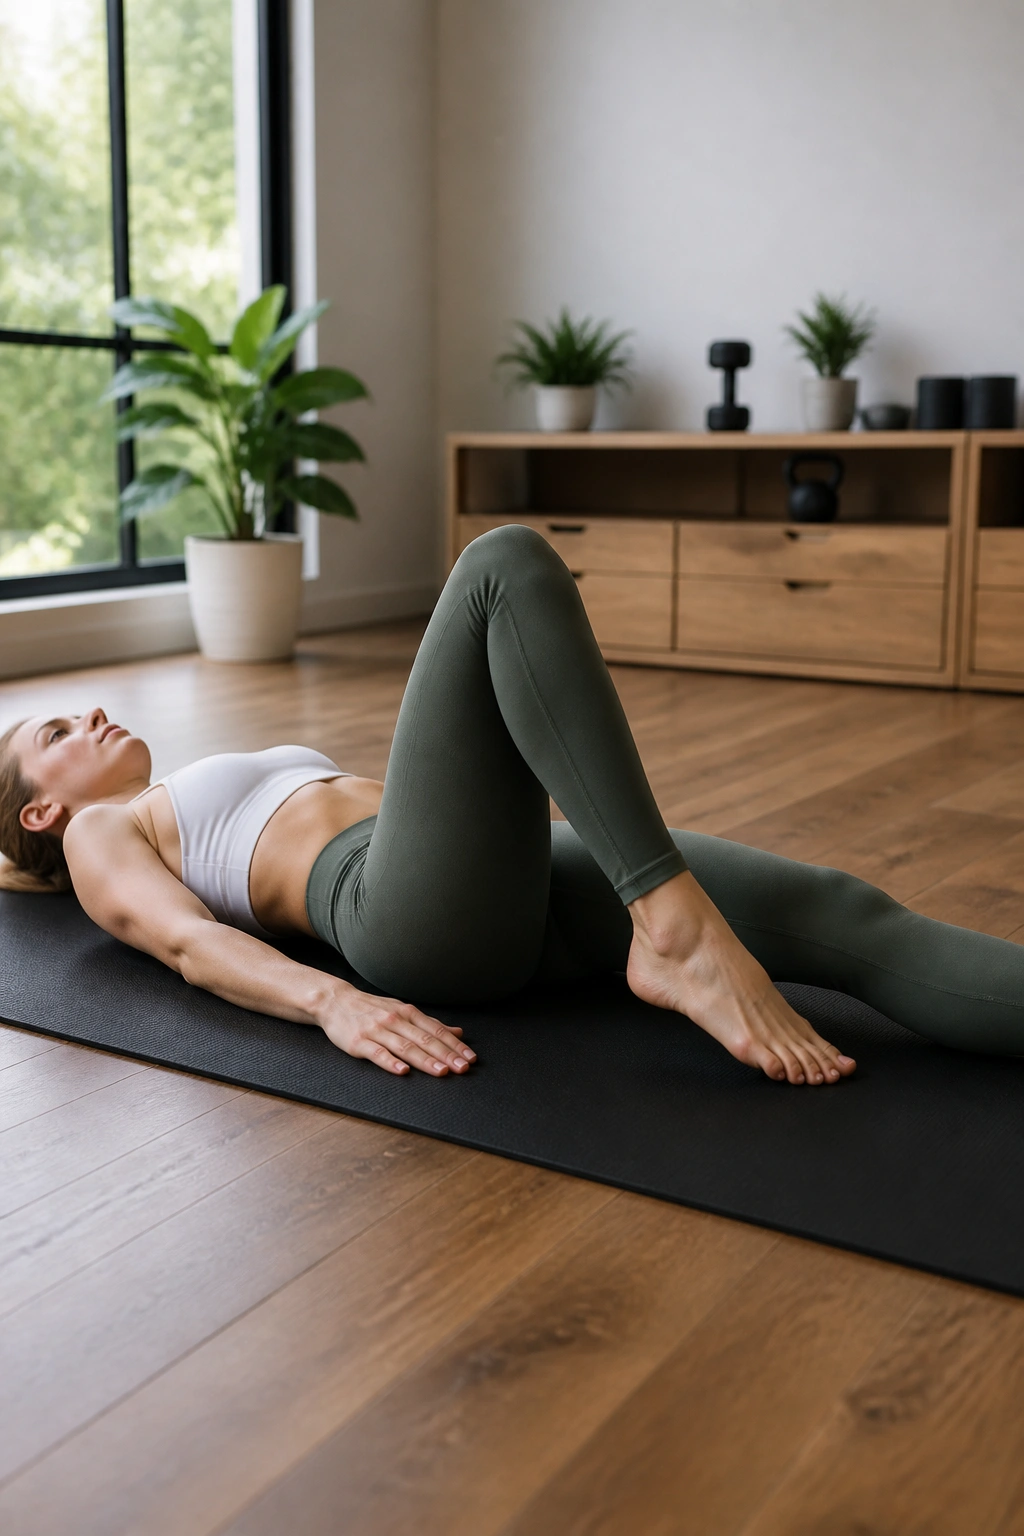
Heel slides are the kind of beginner drill that looks almost too simple to matter, which is probably why so many people overlook it. They shouldn’t. Heel slides are excellent for learning how to keep your ribs down while your leg moves away from your body.
Lie on your back with both knees bent. Slowly slide one heel away from you until the leg is almost straight, then pull it back in. Keep your lower back quiet. If you feel it arching, make the slide shorter. The point is not distance. The point is control.
This move is especially useful if crunches feel too aggressive or your lower back gets tired quickly. It asks the front of your core to stay on while the leg lengthens, which is exactly the kind of coordination beginners need.
Try 8 to 10 slides per side. Bare feet on a smooth floor or socks on wood both work. A mat can be a little too sticky for this one.
12. Bent-Knee Flutter Kicks
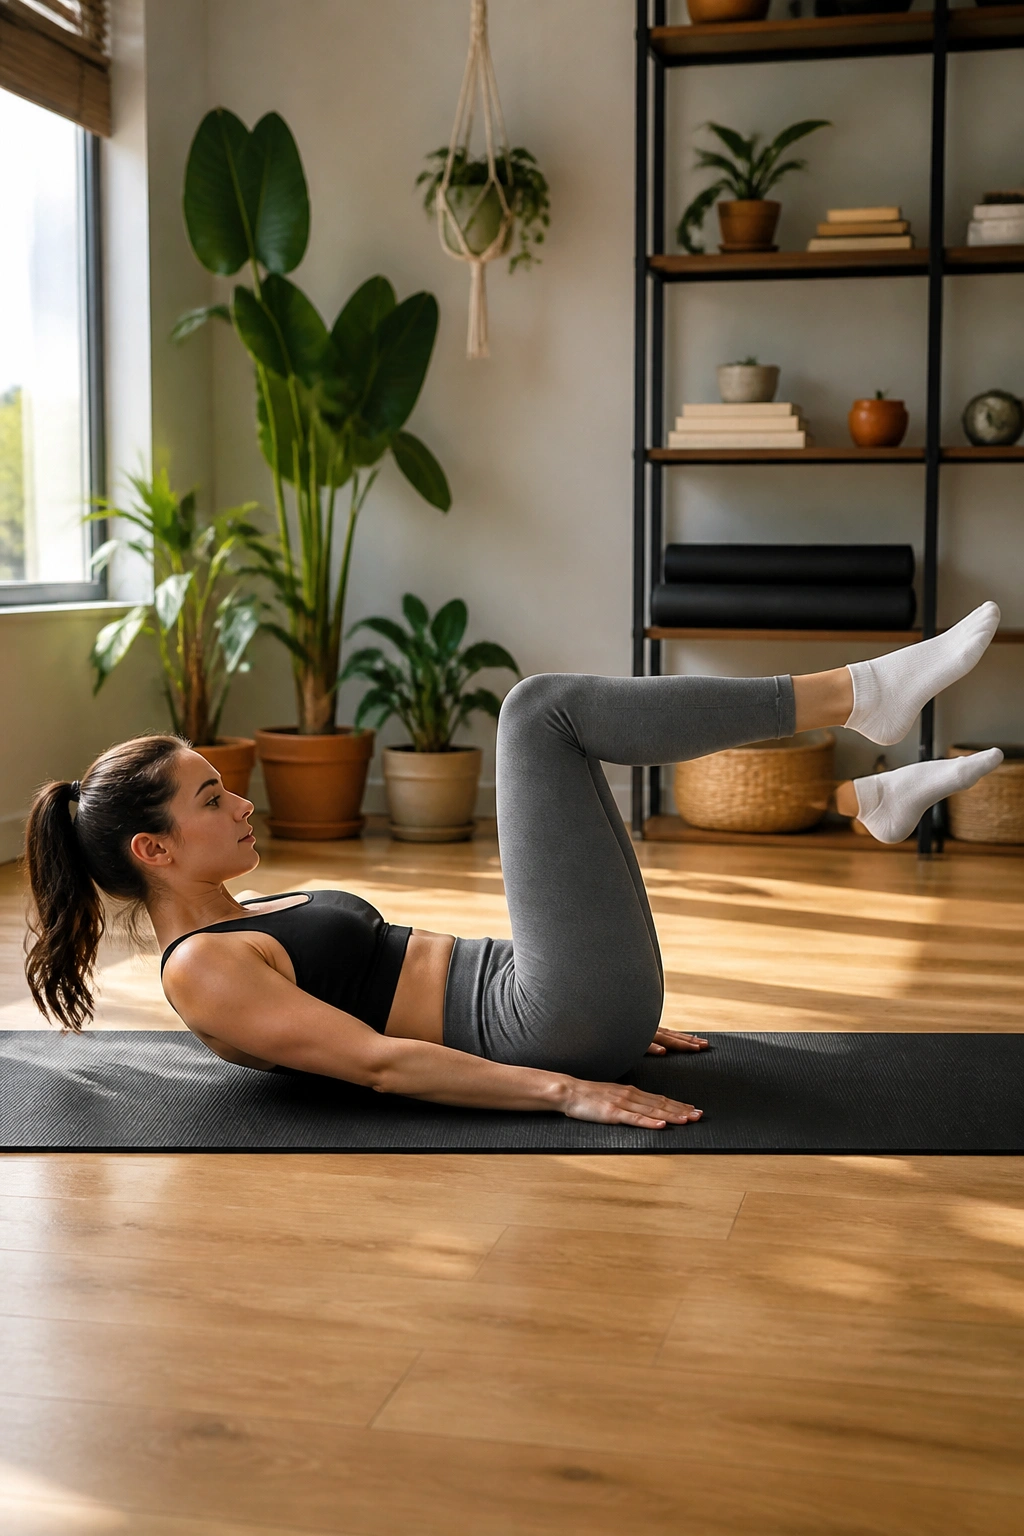
Straight-leg flutter kicks get all the attention, but for beginners they’re often too much too soon. Bent-knee flutter kicks shorten the lever, which makes the move friendlier on the lower back and easier to control.
Lie on your back, lift your feet off the floor, and bend your knees about 90 degrees. Then lower one foot a few inches, bring it back up, and alternate in a quick but controlled rhythm. The legs should move like small piston pumps, not giant kicks. Keep the lower back heavy and the breath steady.
I prefer this version for anyone who feels flutter kicks mostly in the hip flexors. That usually means the range is too long or the legs are too straight. Bending the knees takes the pressure down a notch without making the exercise useless.
Try 15 to 20 seconds per set. If your stomach starts doming upward, stop and reset. The move should feel demanding, not sloppy.
13. Glute Bridge March
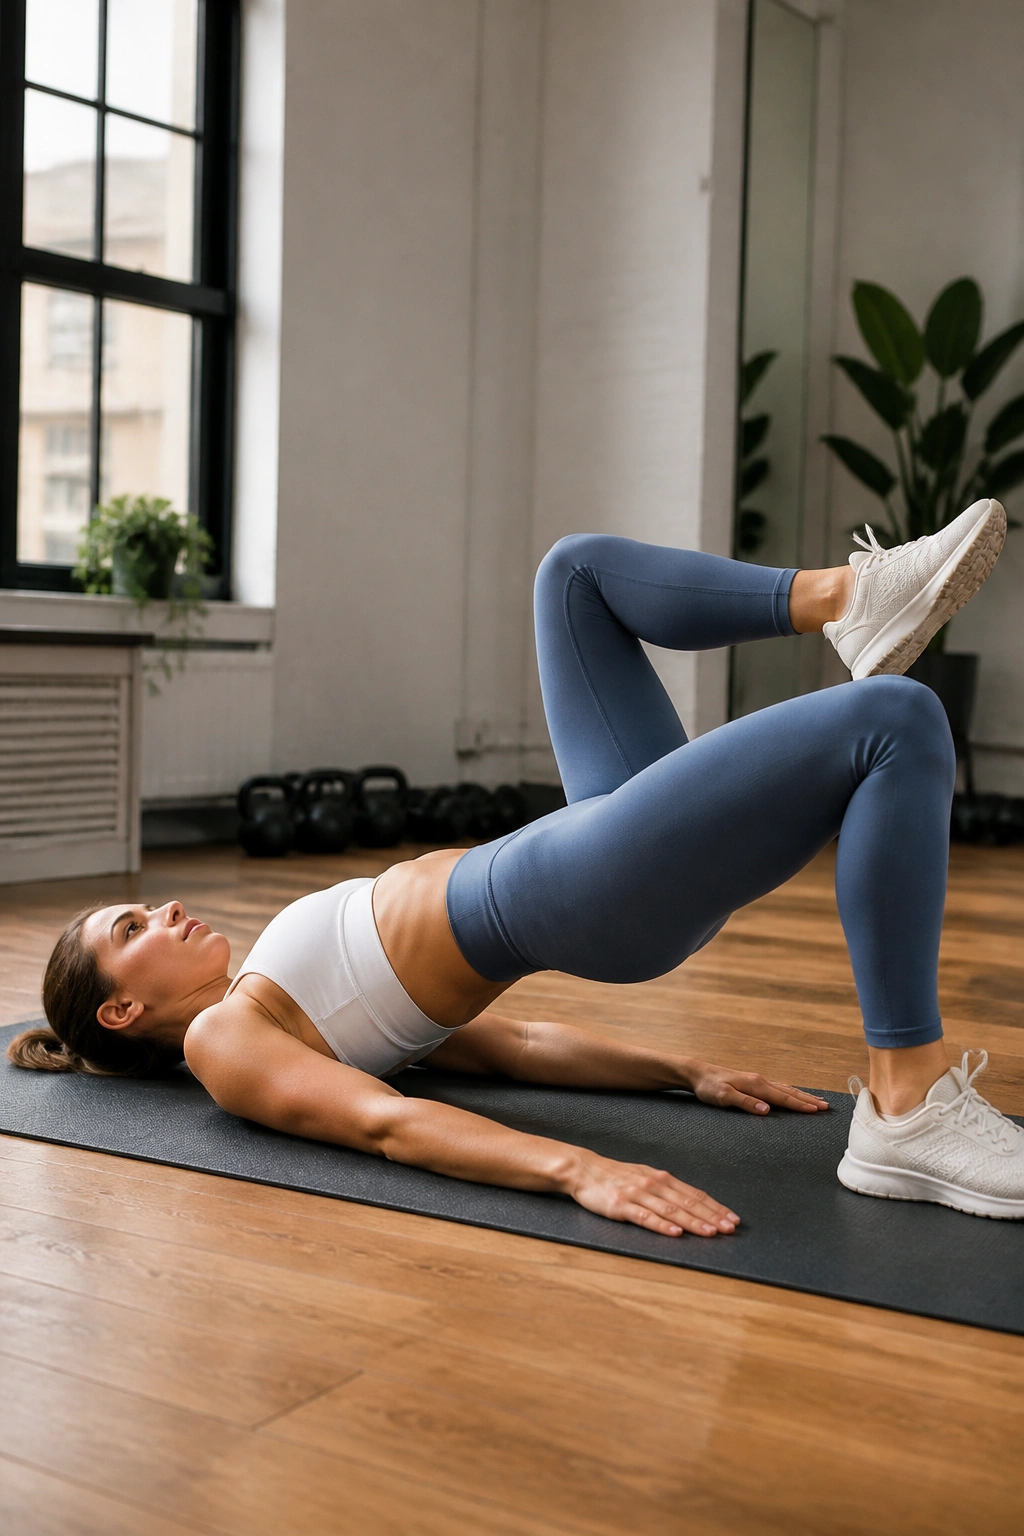
This is where core work starts to feel athletic. A glute bridge march asks your abs to keep your pelvis level while one knee lifts at a time, which means your trunk has to stay steady under motion.
Start in a glute bridge with your hips lifted. Keep that height, then lift one foot a few inches and set it back down. Switch sides without letting the hips rock. The fewer the wobbles, the better the rep.
Why It Matters
The bridge already wakes up your glutes. The march adds a balance challenge that makes your deep core step in. If one side dips when the other knee lifts, go slower and shorten the lift. There is no prize for a higher knee.
Do 6 to 8 marches per side. If you want a neat cue, think hips square, ribs down, feet light. That’s the whole game.
14. Hollow Tuck Hold
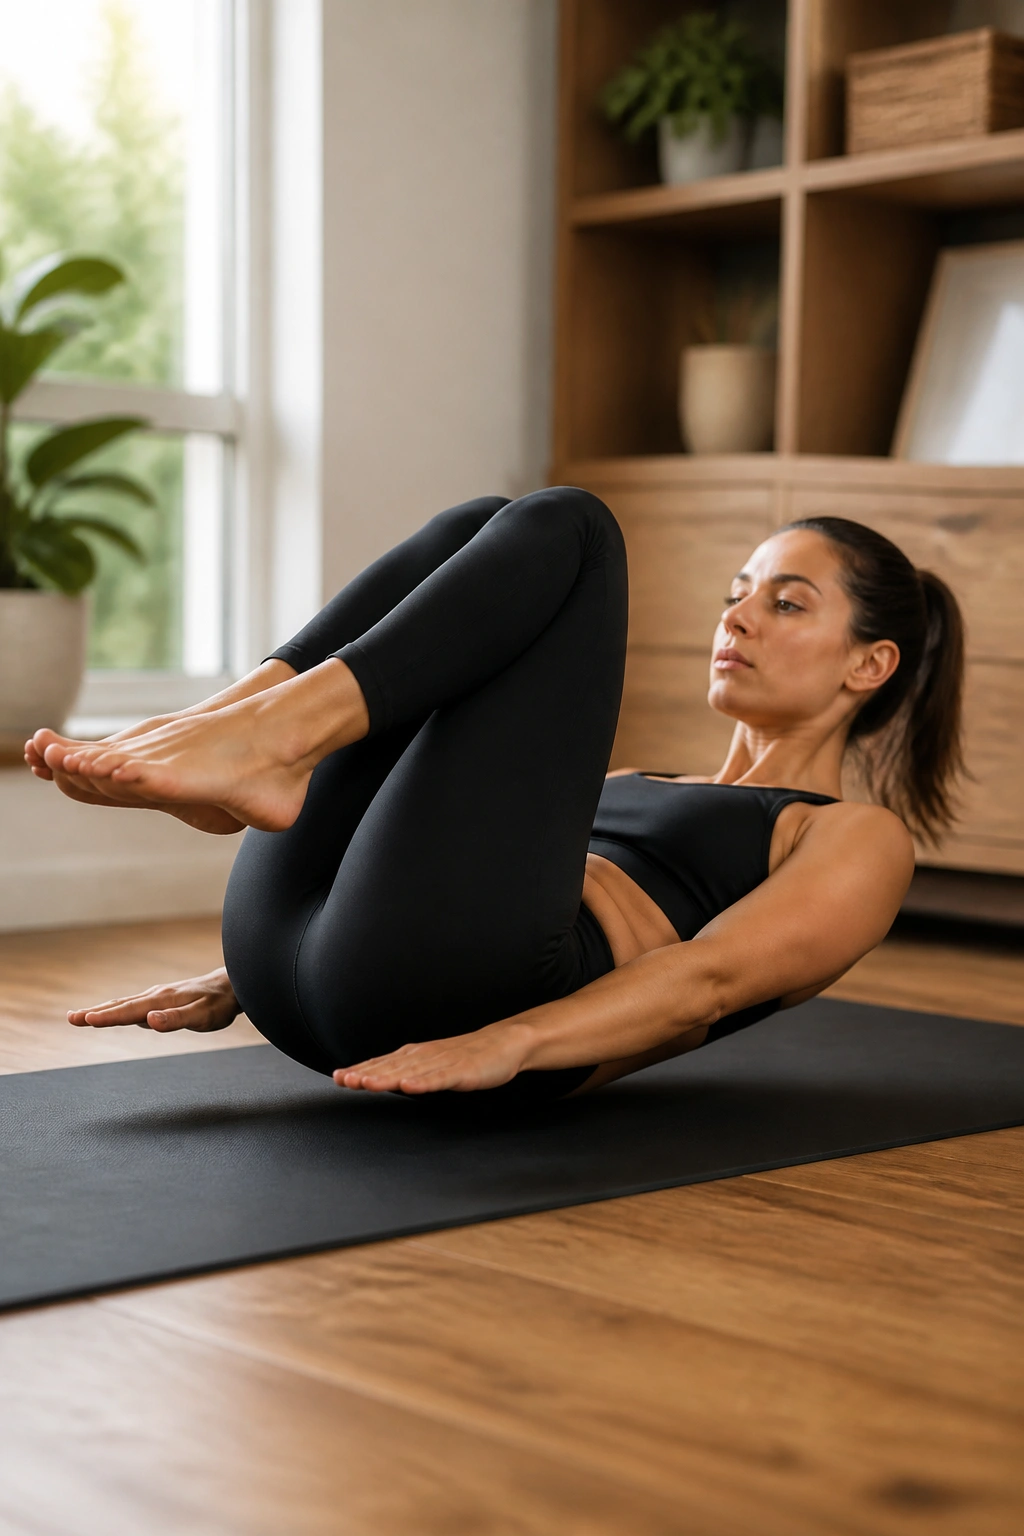
A full hollow hold can be a lot for someone starting out, and there’s no reason to force it. The tucked version keeps the shape of the exercise but reduces the strain so you can learn it safely.
Lie on your back, bring your knees toward your chest, and lift your shoulders just a little off the floor. Hold the shape while your lower back stays in contact with the mat. The stomach should feel braced, almost like you’re preparing for a poke in the middle. If your lower back arches, lower your shoulders or keep one foot on the floor.
This is one of those moves where less range often means more quality. Ten seconds done well beats thirty seconds with a back arch and a clenched jaw.
I like 3 holds of 10 to 15 seconds. Rest between holds and keep your breathing short and controlled. If the neck starts to shout, reset. No drama.
15. Pallof Press With a Band
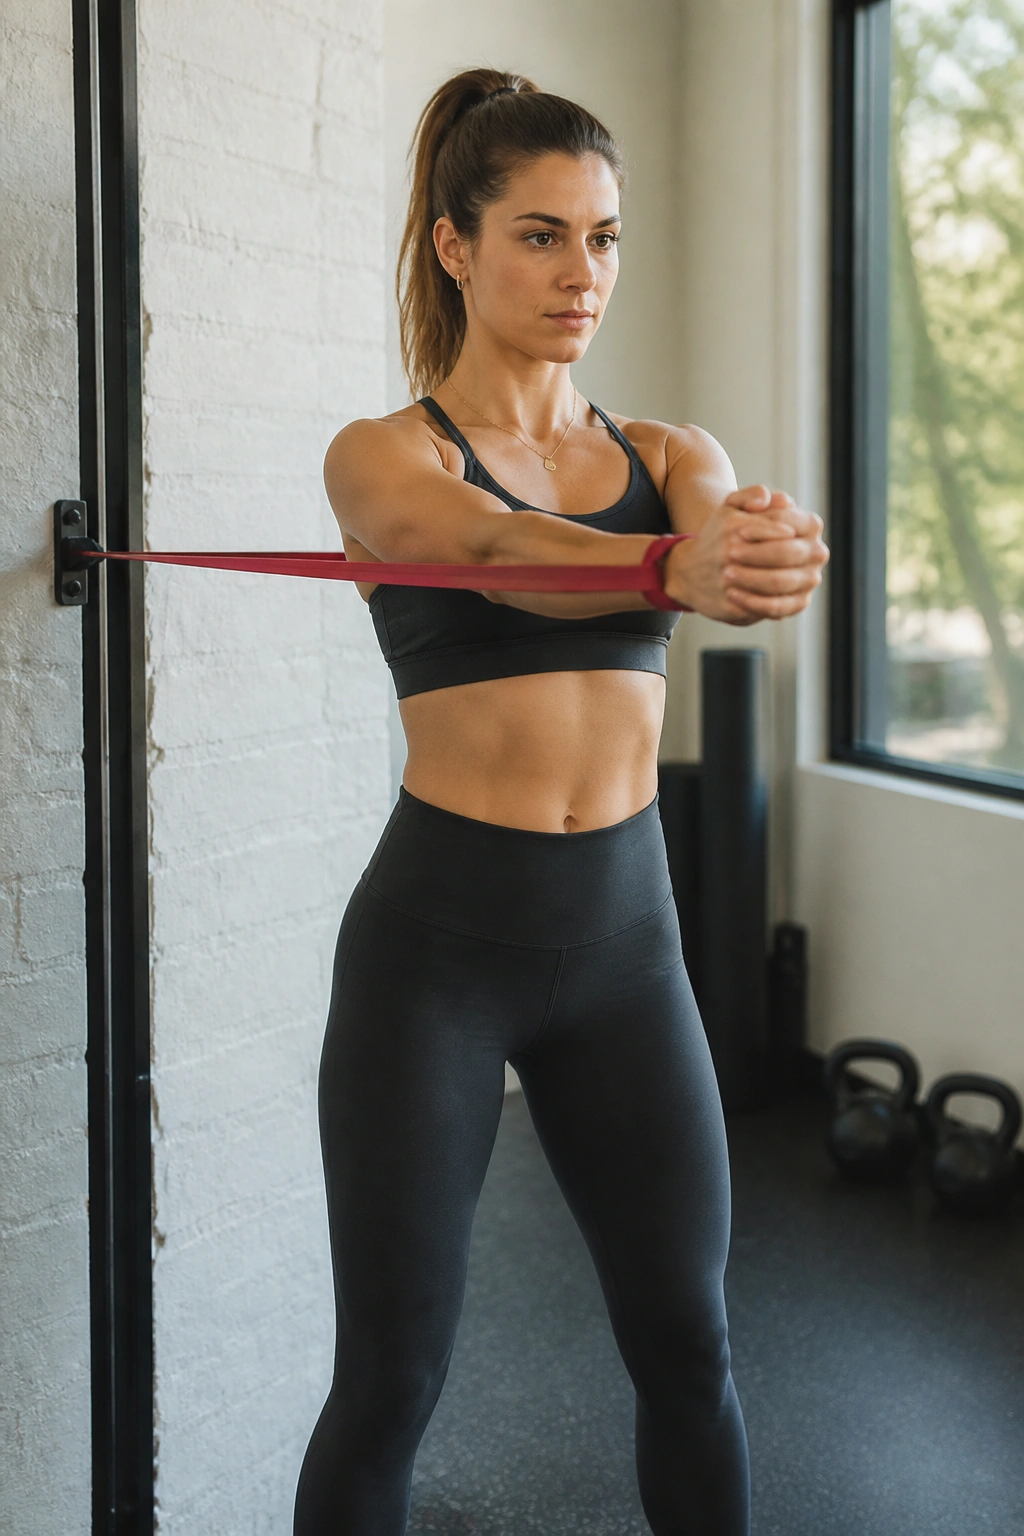
What makes the Pallof press so useful is simple: it teaches your core to resist twisting. That anti-rotation skill shows up in everything from carrying groceries to swinging a tennis racket, and it’s a nice change from endless flexion work.
Anchor a resistance band at chest height, stand sideways to the anchor, and hold the band at your sternum with both hands. Press it straight out, pause, and bring it back in without letting your torso turn toward the band. Your feet stay planted. Your hips stay quiet. The band tries to pull you off line, and your trunk has to say no.
Set It Up
- Stand far enough from the anchor to feel tension right away.
- Keep your knees soft, not locked.
- Press for 8 to 10 reps per side, or hold for 15 seconds.
- If the band jerks you around, move closer to the anchor point.
This move feels subtle, but it’s brutally useful. Beginners who hate floor work often end up liking it because the motion is so clear.
16. Slow Bicycle Crunch
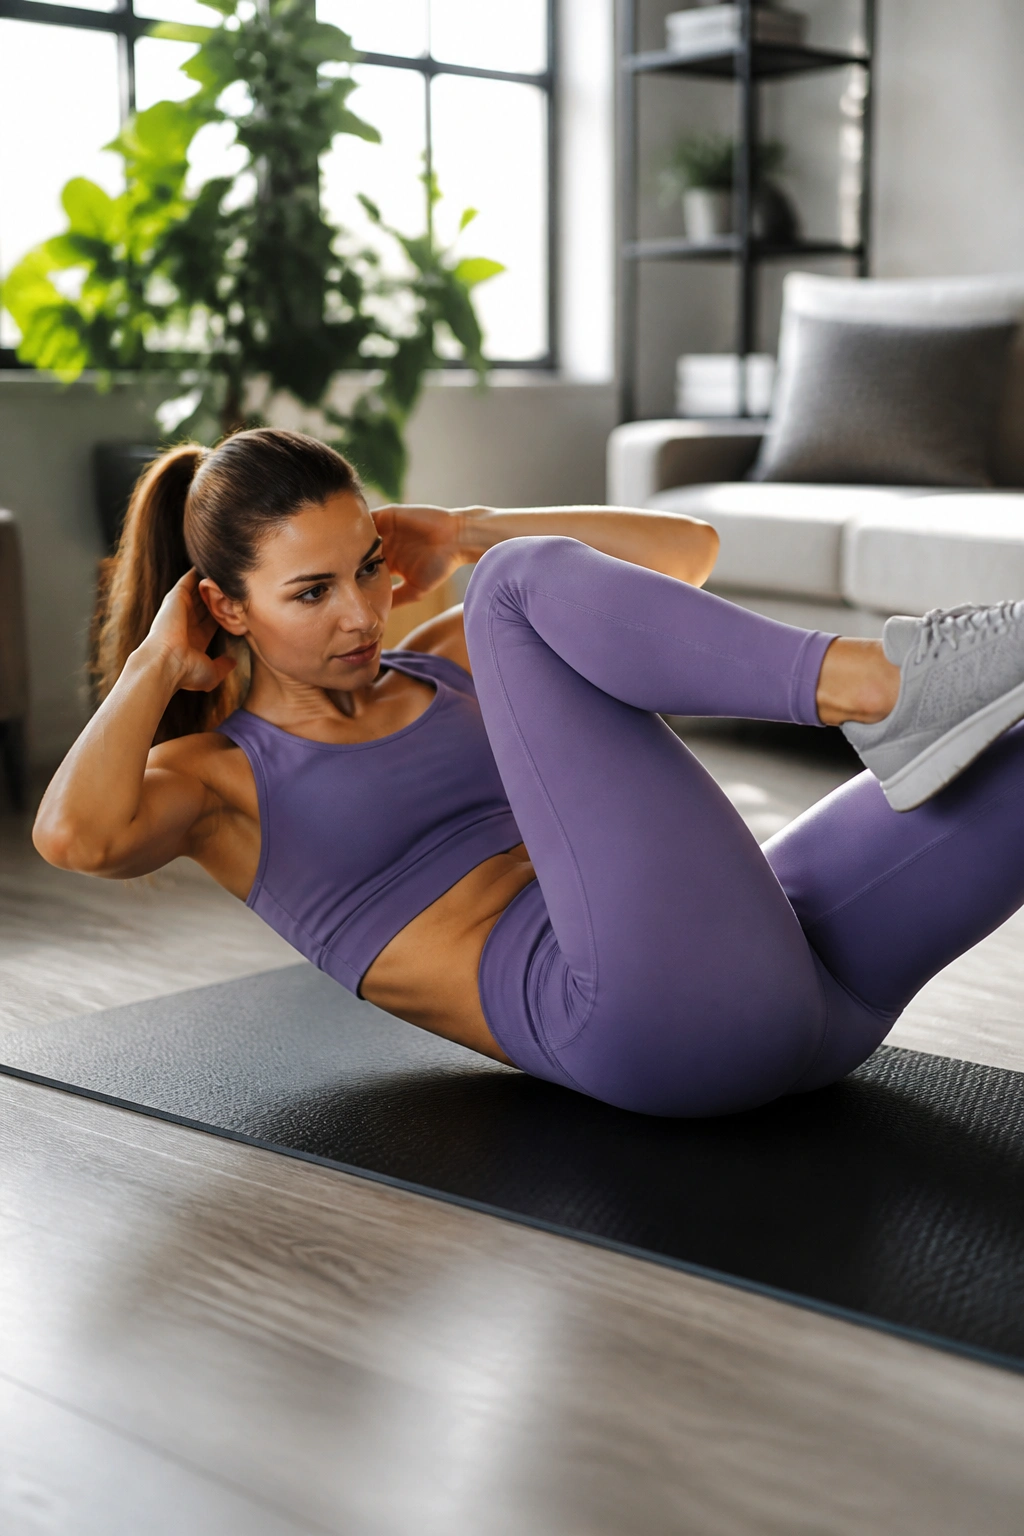
Fast bicycle crunches are messy. Slow ones are much better, and they usually hit the obliques without turning the whole thing into a neck fight.
Lie on your back, lift your shoulders slightly, and bring one knee in while the opposite elbow reaches across. Then switch sides, moving with control instead of speed. The point is to rotate your ribcage a little while keeping the neck relaxed and the lower back from popping up. If you’re yanking on your head, the pace is too fast.
This version works best when each rep has a brief pause at the top. That pause keeps the twist honest. It also makes the move feel harder than the sloppy version, which is one of those annoyingly helpful truths nobody likes hearing.
A good starting point is 6 to 8 reps per side. If you want cleaner form, keep your elbows wide and think about bringing the shoulder toward the opposite knee, not the elbow toward the thigh.
17. Wall Plank Shoulder Taps
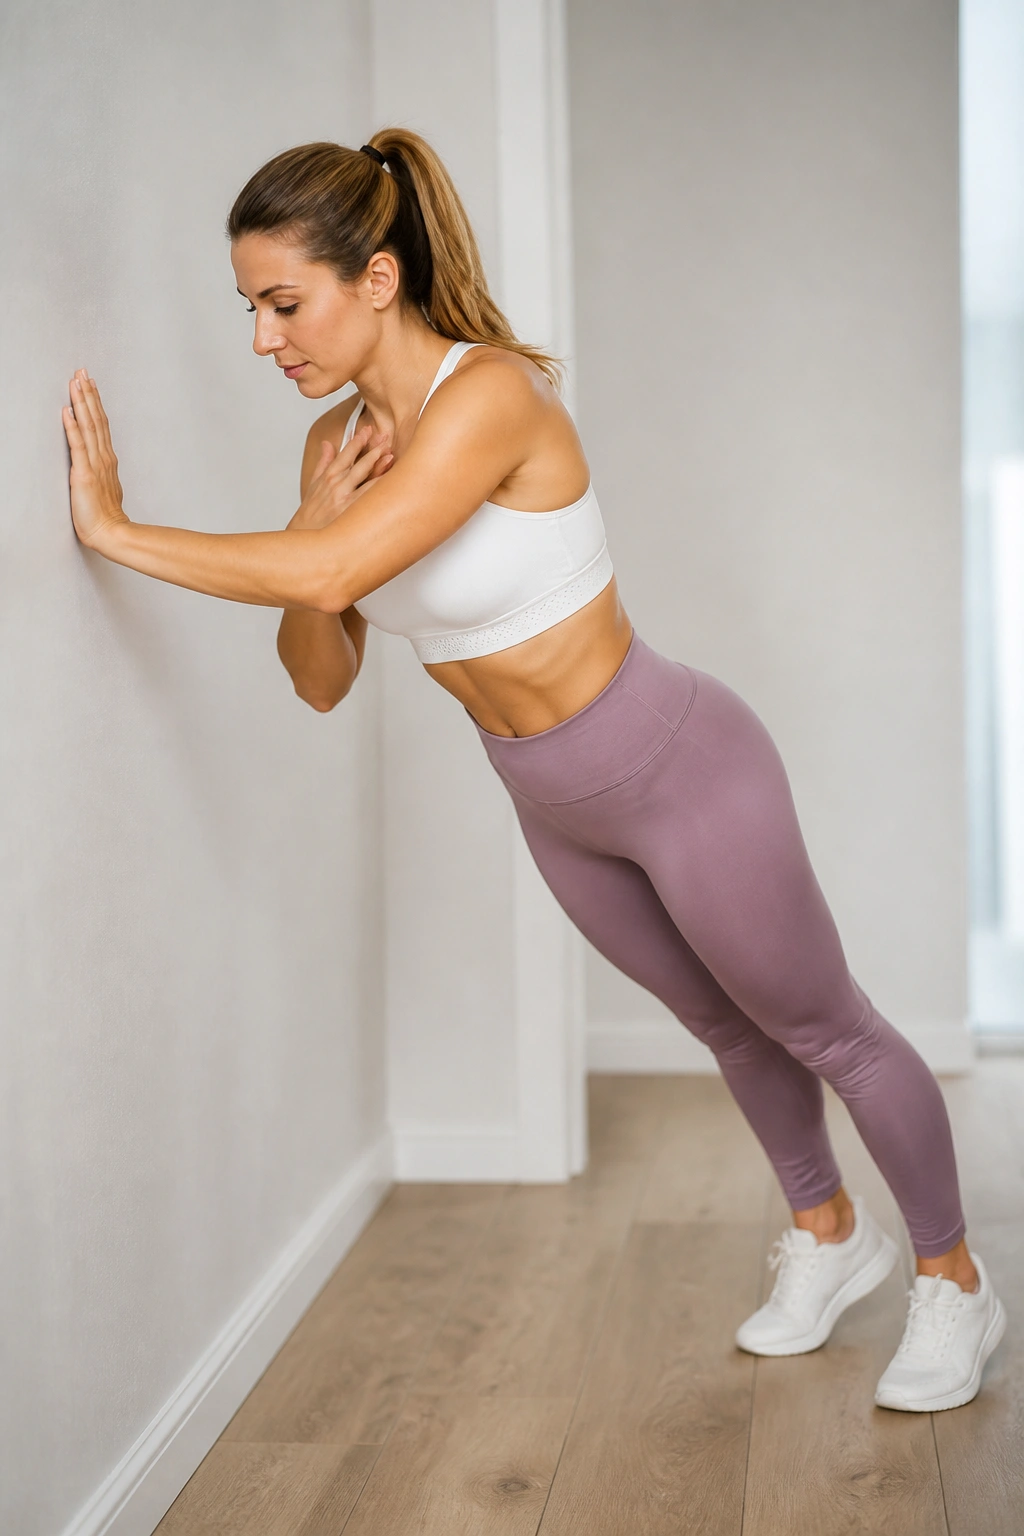
A wall plank is a sneaky little thing. It gives you the shape of a plank without dumping all of your body weight into the floor, which makes it a useful first step for beginners who want core work without wrist or low-back drama.
Stand facing a wall, place your hands on it, and walk your feet back until your body forms a straight line from head to heels. Brace your abs, then tap one shoulder with the opposite hand and switch sides. The movement should be small. The goal is not speed. The goal is keeping your hips from swaying side to side.
Yep, the wall counts.
That’s the part people laugh at until their core starts shaking after 20 taps. If a wall plank feels too easy, walk your feet farther back. If it feels too hard, move closer. That adjustment is the whole reason I like it for starters: you can fine-tune it in seconds.
Try 20 to 30 taps total. Keep your neck long and your ribs from flaring forward.
18. Ten-Minute Beginner Core Circuit
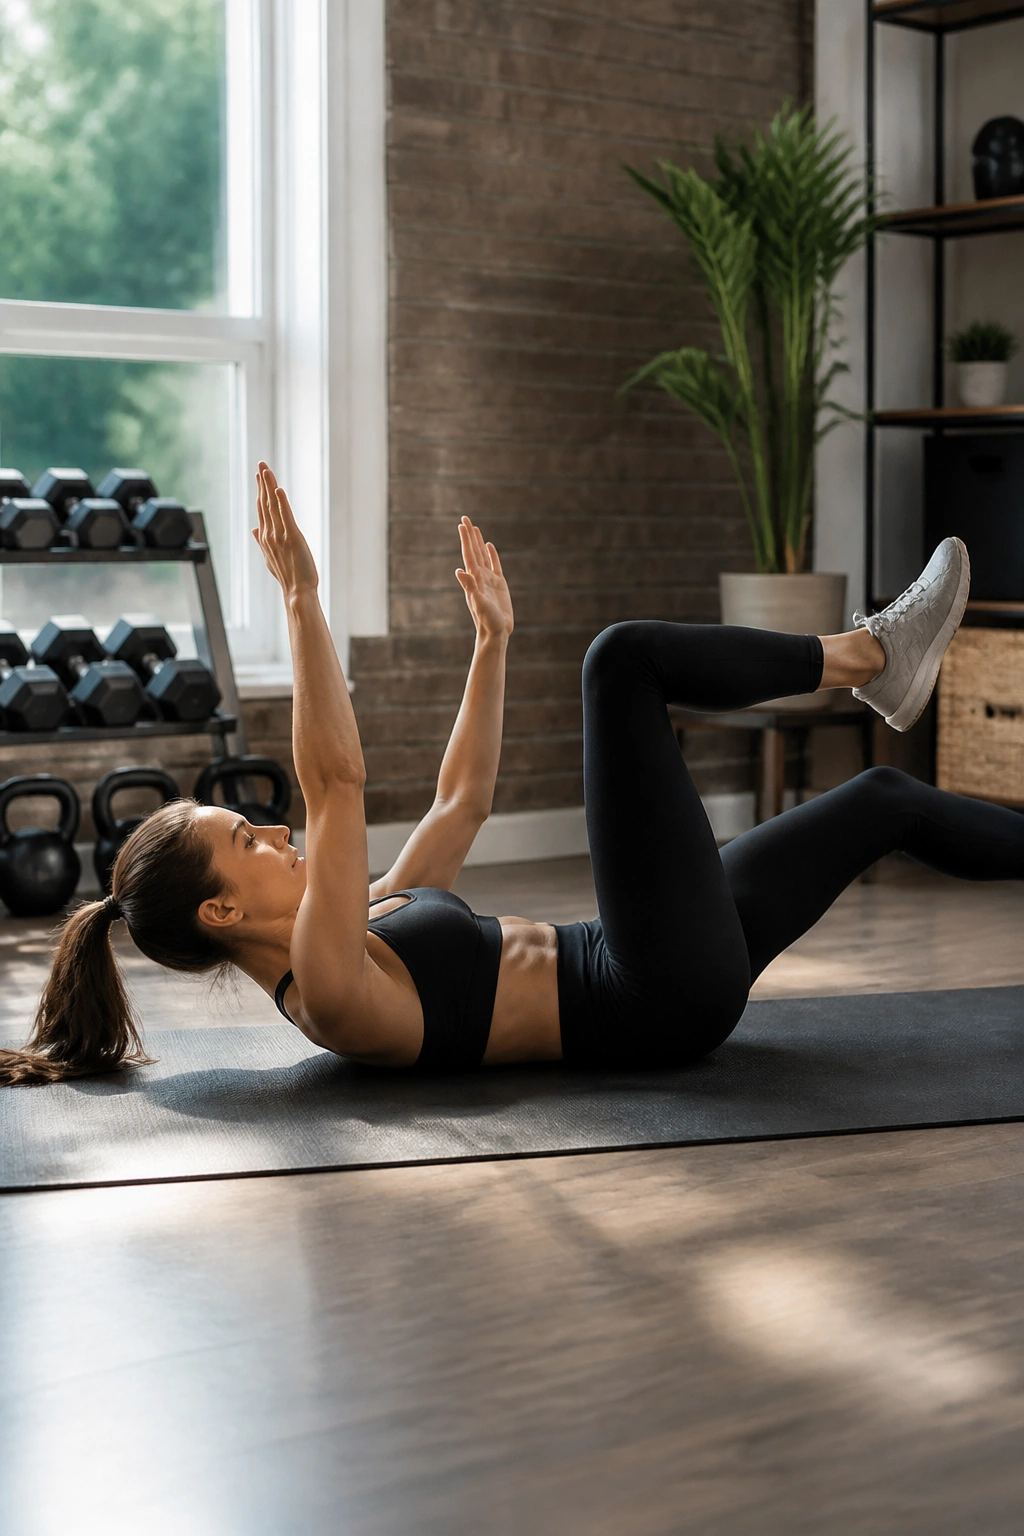
Putting the pieces together matters more than collecting exercises. A short circuit keeps things simple, and it gives you a way to train your abs without staring at the floor wondering what to do next.
Here’s a clean starter round:
- Dead bug marches — 6 reps per side
- Heel taps — 8 reps per side
- Kneeling forearm plank — 15 seconds
- Side plank from the knees — 10 seconds per side
- Glute bridge march — 6 reps per side
Rest for 30 to 45 seconds, then repeat the full round one more time. If you feel fresh, do 3 rounds. If your form gets shaky, stay at 2. That’s enough for a beginner session, and it’s better than doing a longer workout with poor reps.
The nice thing about this circuit is that it mixes floor stability, side-body work, and a little anti-rotation without beating you up. You should finish feeling worked, not wrecked. If your lower back complains, cut the holds in half and slow the leg lifts down. If you want to make it harder later, increase the hold times before you add more exercises.
