



A beginner core routine does not need a pile of crunches, a wobble board, or a machine that looks like it belongs in a dentist’s office. The smartest ab workouts for people new to core training teach you to brace, breathe, and keep your ribs, pelvis, and hips from drifting all over the place.
That matters more than most people think. Your abs are not a single muscle that wakes up when you do sit-ups. The work is shared by the rectus abdominis, the obliques, the deep transverse abdominis, and the muscles around your back and hips, which is why a move that looks small on paper can feel surprisingly demanding when you do it well.
A mat and a few feet of floor space are enough for most of what follows. Slow beats flashy. Five careful reps with good control will do more for your core than twenty rushed reps with your neck and lower back taking over.
If you want a simple starting point, pick four moves, do two rounds, and keep the rest between sets short. Dead bug, bird dog, a plank variation, and one standing or carrying move make a tidy little session. Clean form first. Burn second.
1. Dead Bug for Beginner Core Training
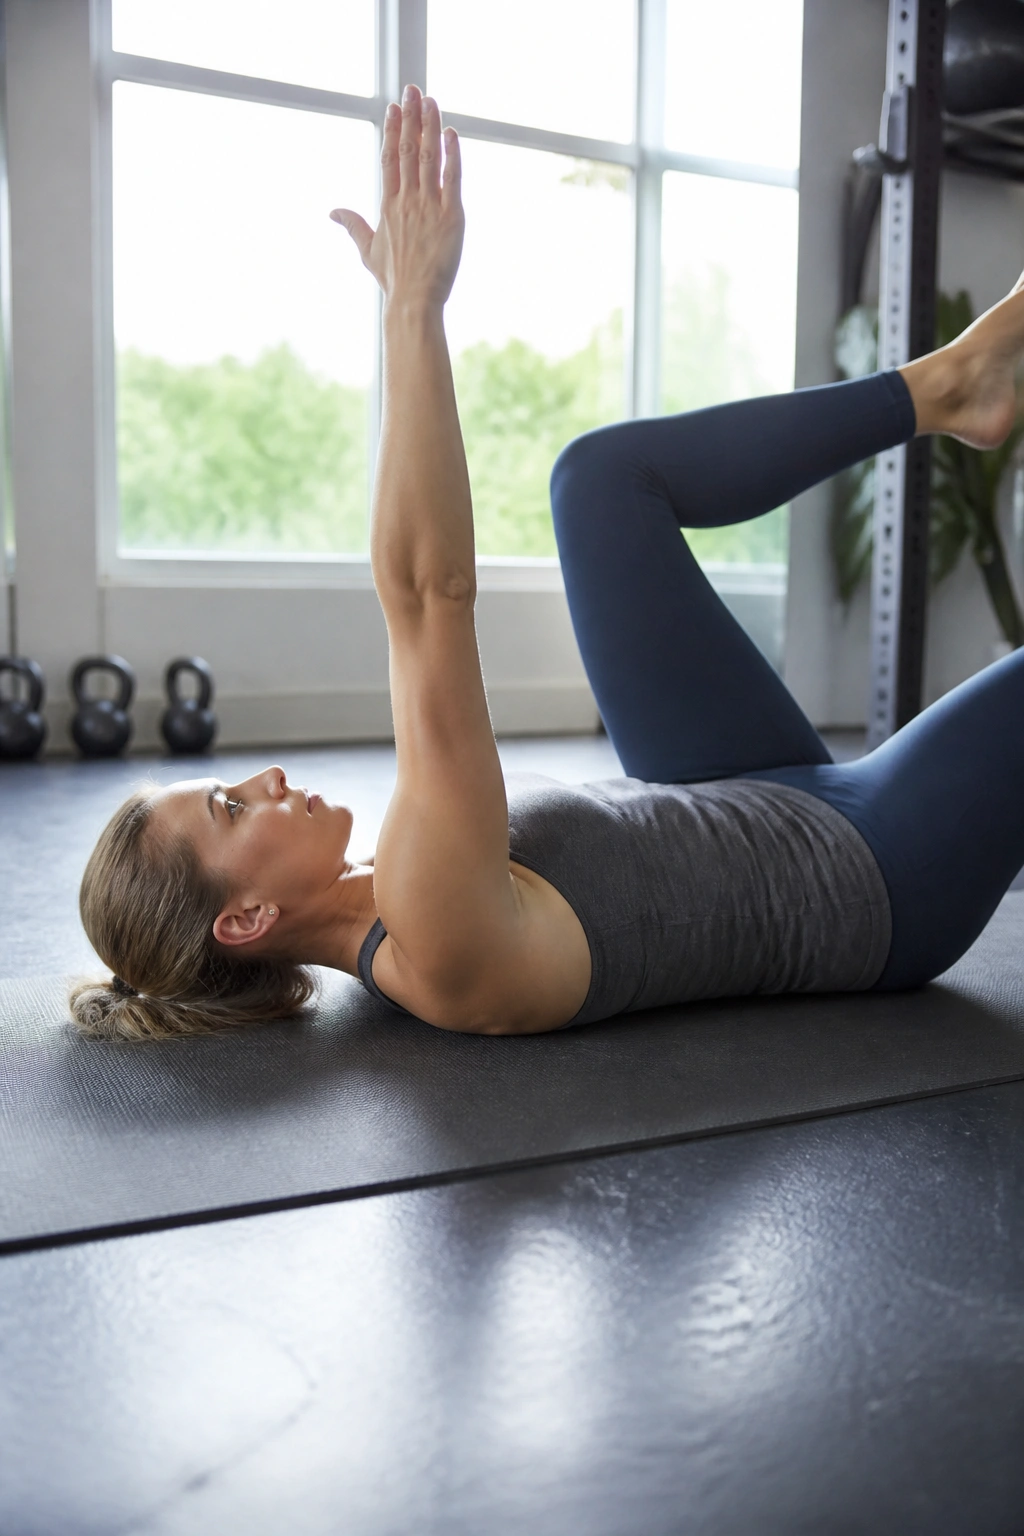
The dead bug looks almost too easy until you try to keep your lower back from popping off the floor. That is the whole point. You learn how to move your arms and legs while the middle of your body stays quiet, and that skill carries over to just about every other core exercise.
Why It Works
Lie on your back with your knees bent above your hips and your arms reaching toward the ceiling. Lower one opposite arm and leg slowly, then return to the start and switch sides. If your back arches, shorten the reach. Tiny range is fine.
Try 2 to 3 sets of 6 to 8 reps per side. The pace should be slow enough that you can feel your ribs stay down. If your hip flexors start doing all the work, reset and make the movement smaller.
- Press your lower back gently into the floor before each rep.
- Exhale as the arm and leg move away from you.
- Stop the motion before your back starts to arch.
- Bend the moving knee more if the lever feels too long.
Best cue: imagine balancing a glass of water on your belly. If it would spill, you’re moving too far.
2. Bird Dog for Core Stability
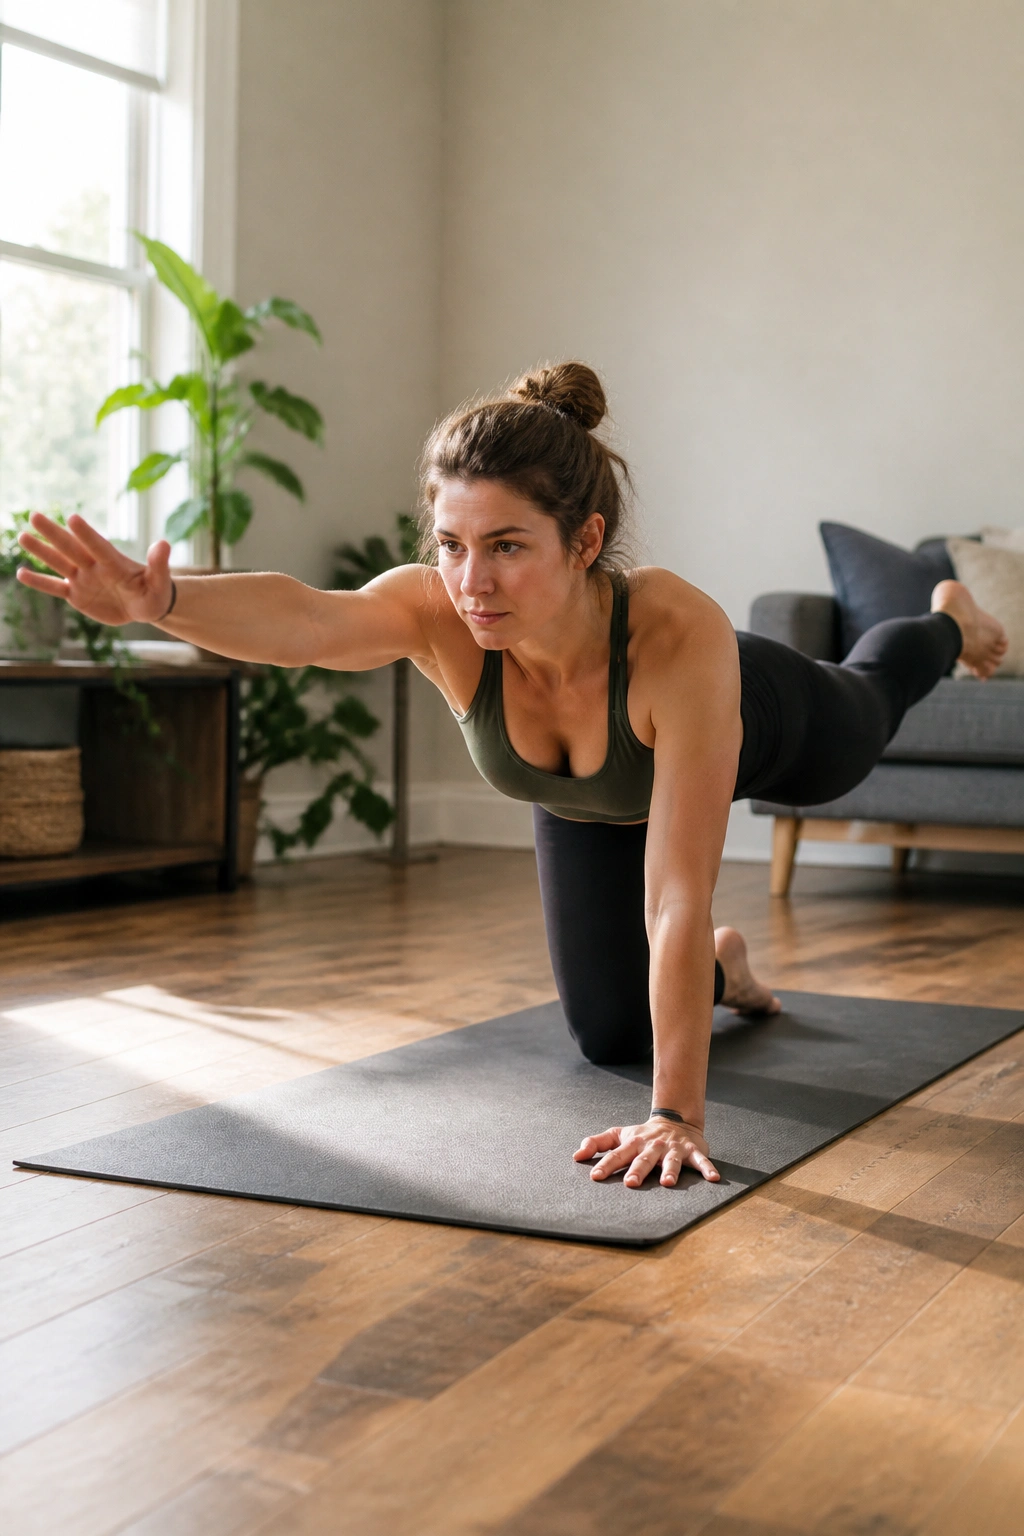
A bird dog teaches control, not sweat. That sounds simple, and it is, but simple is not the same as easy when you are trying to keep your spine still while one arm and one leg reach away from you.
Start on hands and knees with your hands under your shoulders and your knees under your hips. Reach one arm forward and the opposite leg back, pause for two or three seconds, then come back to center without wobbling. The hips should stay level. No twisting. No flinging.
I like this move for beginners because it shows you whether you can keep your trunk steady without grinding through your lower back. If your balance is shaky, that is useful information, not a failure. Shorten the reach, slow the pause, and keep going.
Use 2 sets of 6 to 10 reps per side. If you want to make it harder later, pause longer at full extension, not by swinging your limbs farther.
3. Forearm Plank for Steady Core Tension
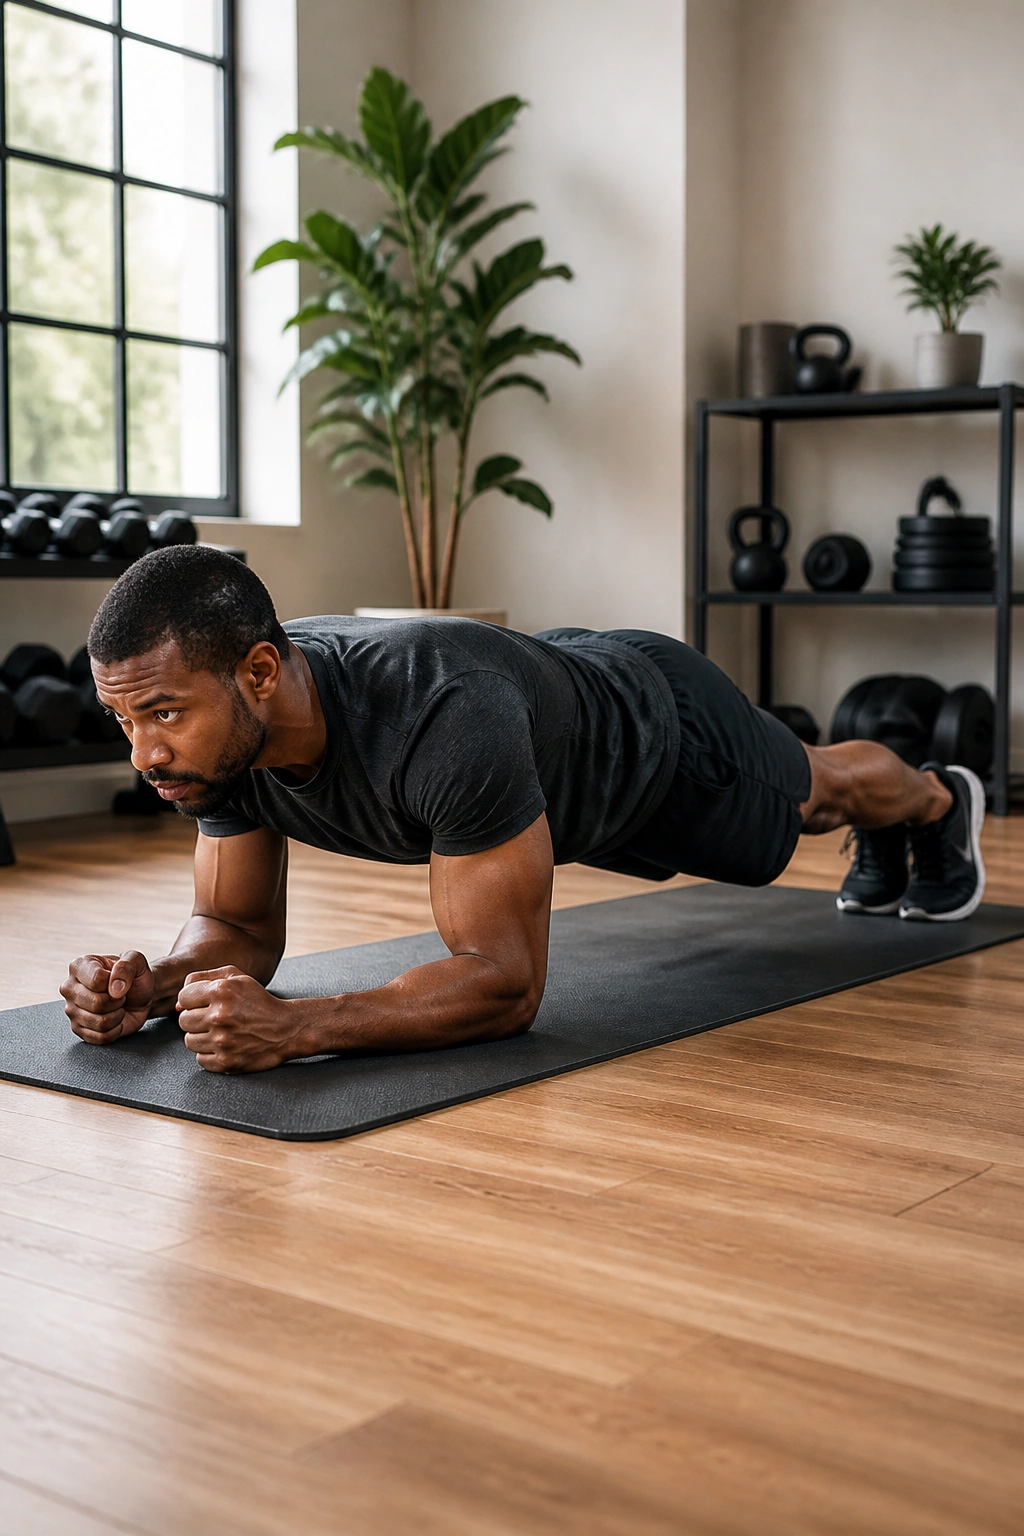
Can you hold a plank for 15 seconds without your hips sagging? That is a more useful question than asking how long you can suffer through a plank with bad form.
Your forearm plank should feel like a full-body brace, with the abs doing the main job and the glutes helping keep the pelvis from tipping forward. Set your elbows under your shoulders, stretch your legs back, and squeeze your thighs and butt. Your neck should stay long, with your gaze a few inches in front of your hands.
How to Make It Feel Manageable
Keep the first round short. Three holds of 10 to 20 seconds are plenty when you are new. Long, sloppy planks are a fast way to learn bad habits, and nobody needs that.
- Tuck your tail slightly so your low back does not dip.
- Press the floor away through your forearms.
- Breathe in small, steady breaths instead of holding your breath.
- Stop the set when your hips start to shake hard or sink.
A plank that lasts 12 clean seconds beats a 45-second grind with a sagging back. Every time.
4. Knee Plank for a Safer Starting Point
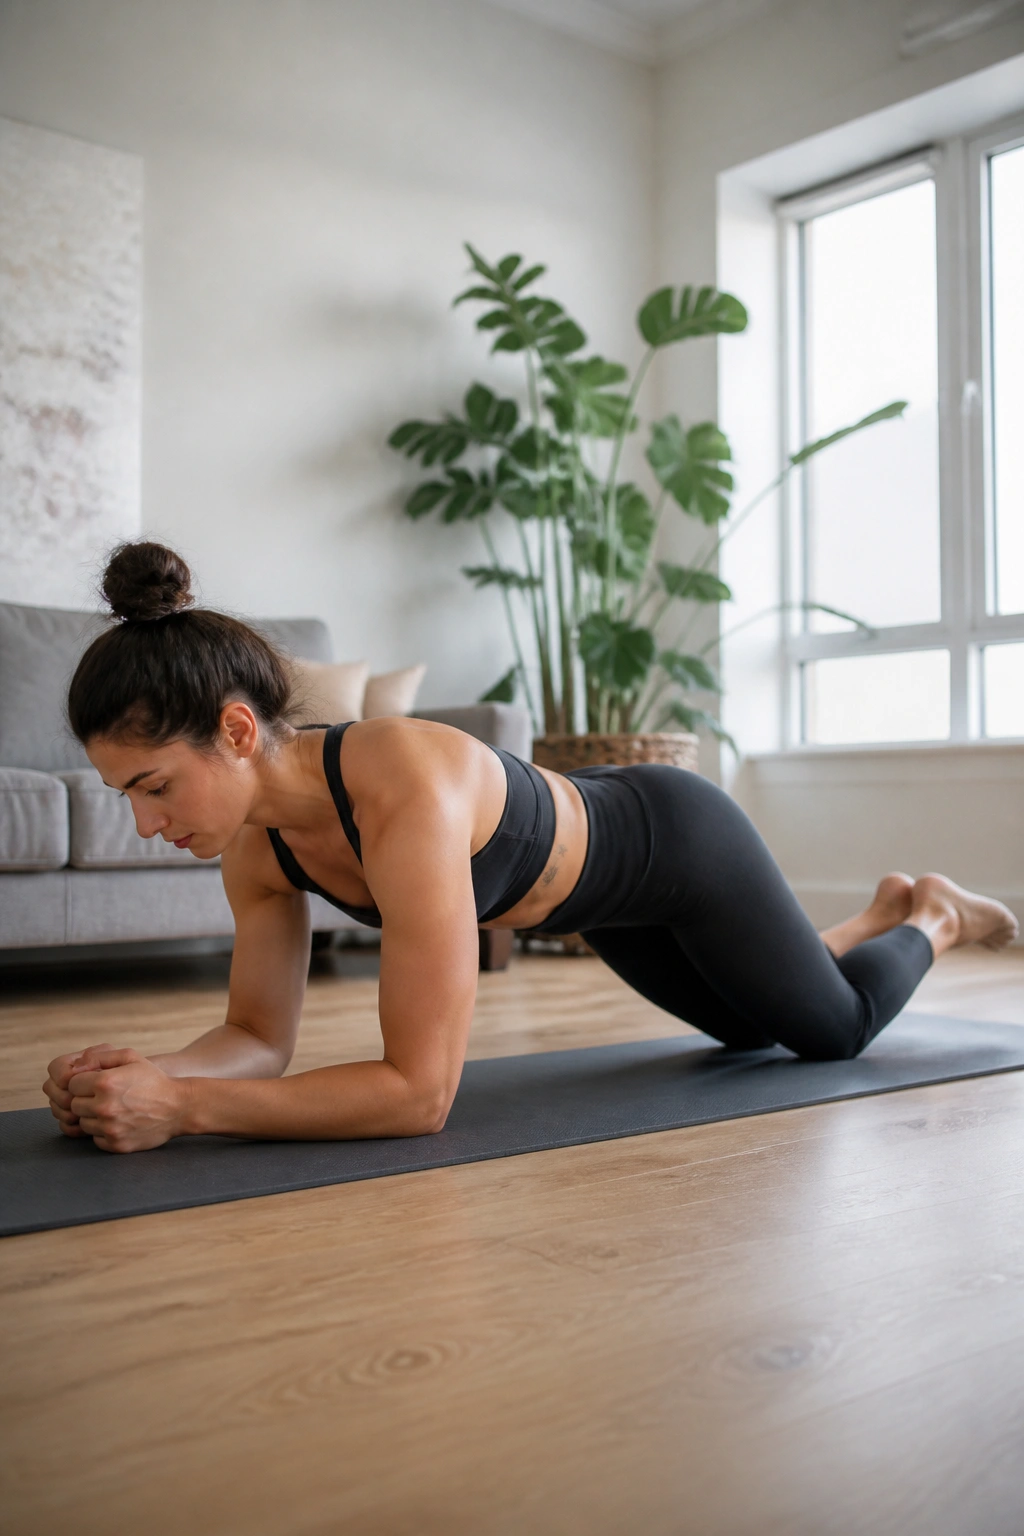
Picture a plank that does not fight your shoulders or make you panic halfway through. That is the knee plank. It gives you the shape and the bracing of a full plank, but with less load, which is exactly what many new exercisers need.
Set your forearms on the floor, then lower your knees so they rest behind your hips. Keep your body in a straight line from head to knees. The trick is not to sit back on your heels. Stay slightly forward, so your abs keep working and your shoulders stay engaged.
This version is useful when a full plank makes your lower back arch or your elbows shake too soon. Hold for 15 to 30 seconds, rest, and repeat. If that feels fine, lengthen the hold before you jump to the full version. There is no prize for rushing.
- Squeeze your glutes before you start.
- Keep your ribs from flaring.
- Think “long spine,” not “collapse and survive.”
- If your wrists are tender, forearm support helps a lot.
5. Side Plank From Knees for Obliques and Hip Control
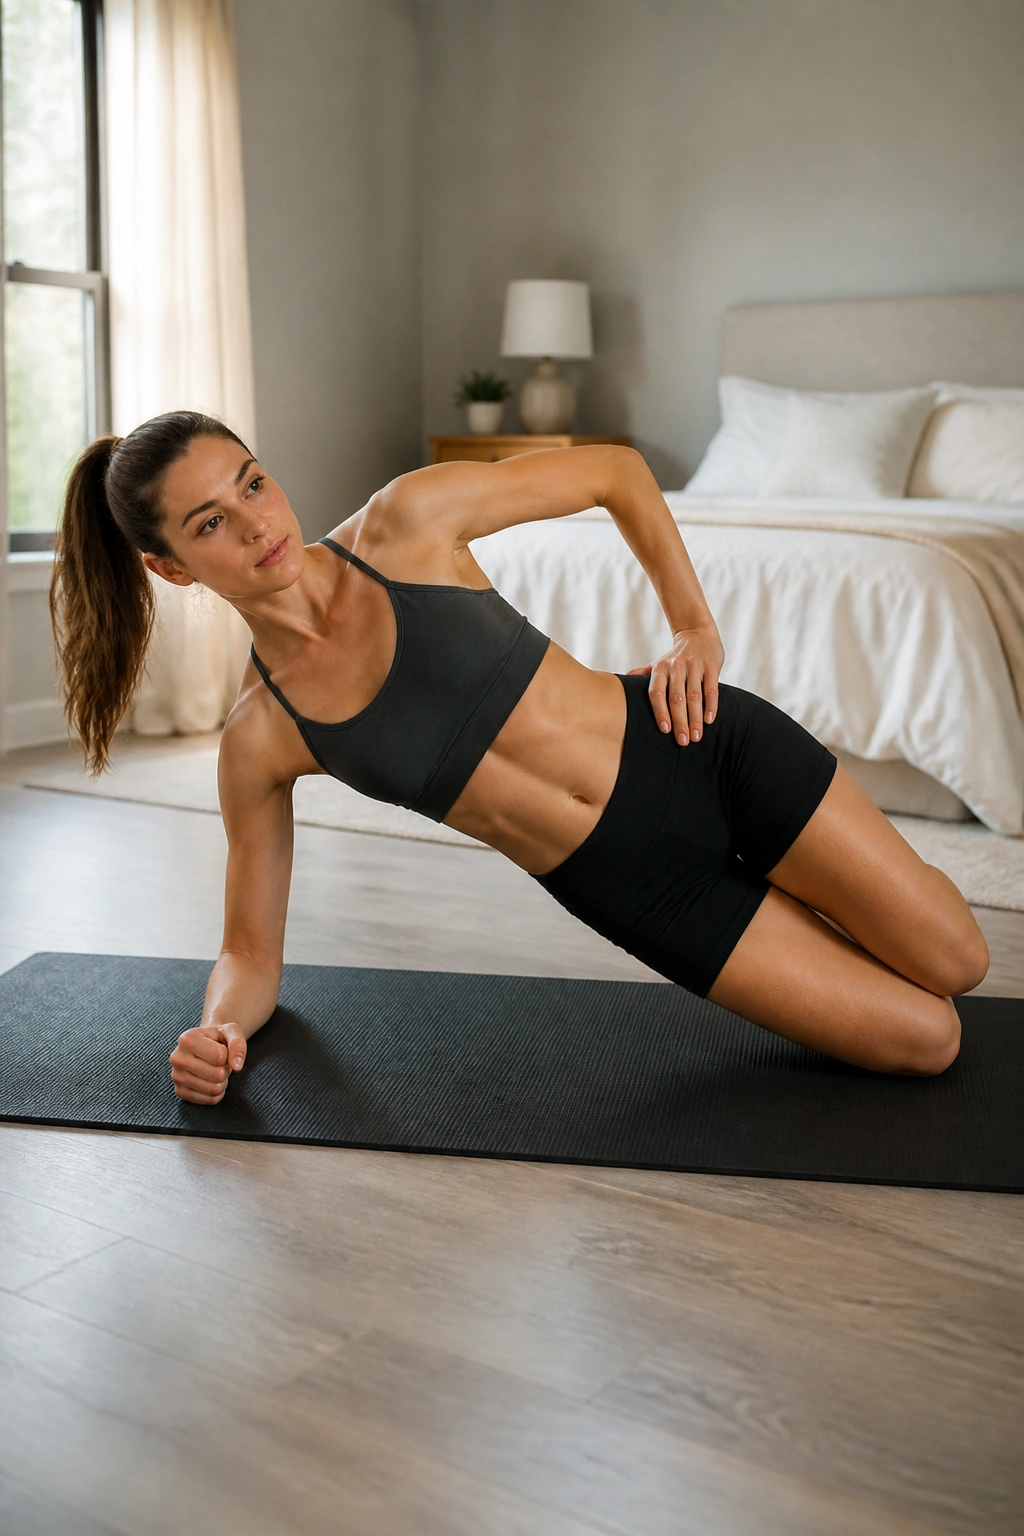
The side plank from the knees is one of those moves that looks polite until you do it. Then your side body starts talking back. That is a good thing, because beginner core training should teach your obliques to hold you up, not just bend you forward and back.
Lie on one side with your elbow under your shoulder and your knees bent. Lift your hips so your body forms a straight line from head to knees. The top shoulder should not roll forward. Keep it stacked over the elbow and stay tall through the waist.
I like this variation because it works the side abs without demanding full-body circus balance. If the top hip dumps backward, shorten the hold. If your neck tightens, reset and look slightly forward instead of straight up.
Hold each side for 10 to 20 seconds, then rest and switch. Do 2 to 3 rounds. Small holds, done well, build a lot more useful strength than wild side bends ever will.
6. Heel Taps for Easy Ab Workouts
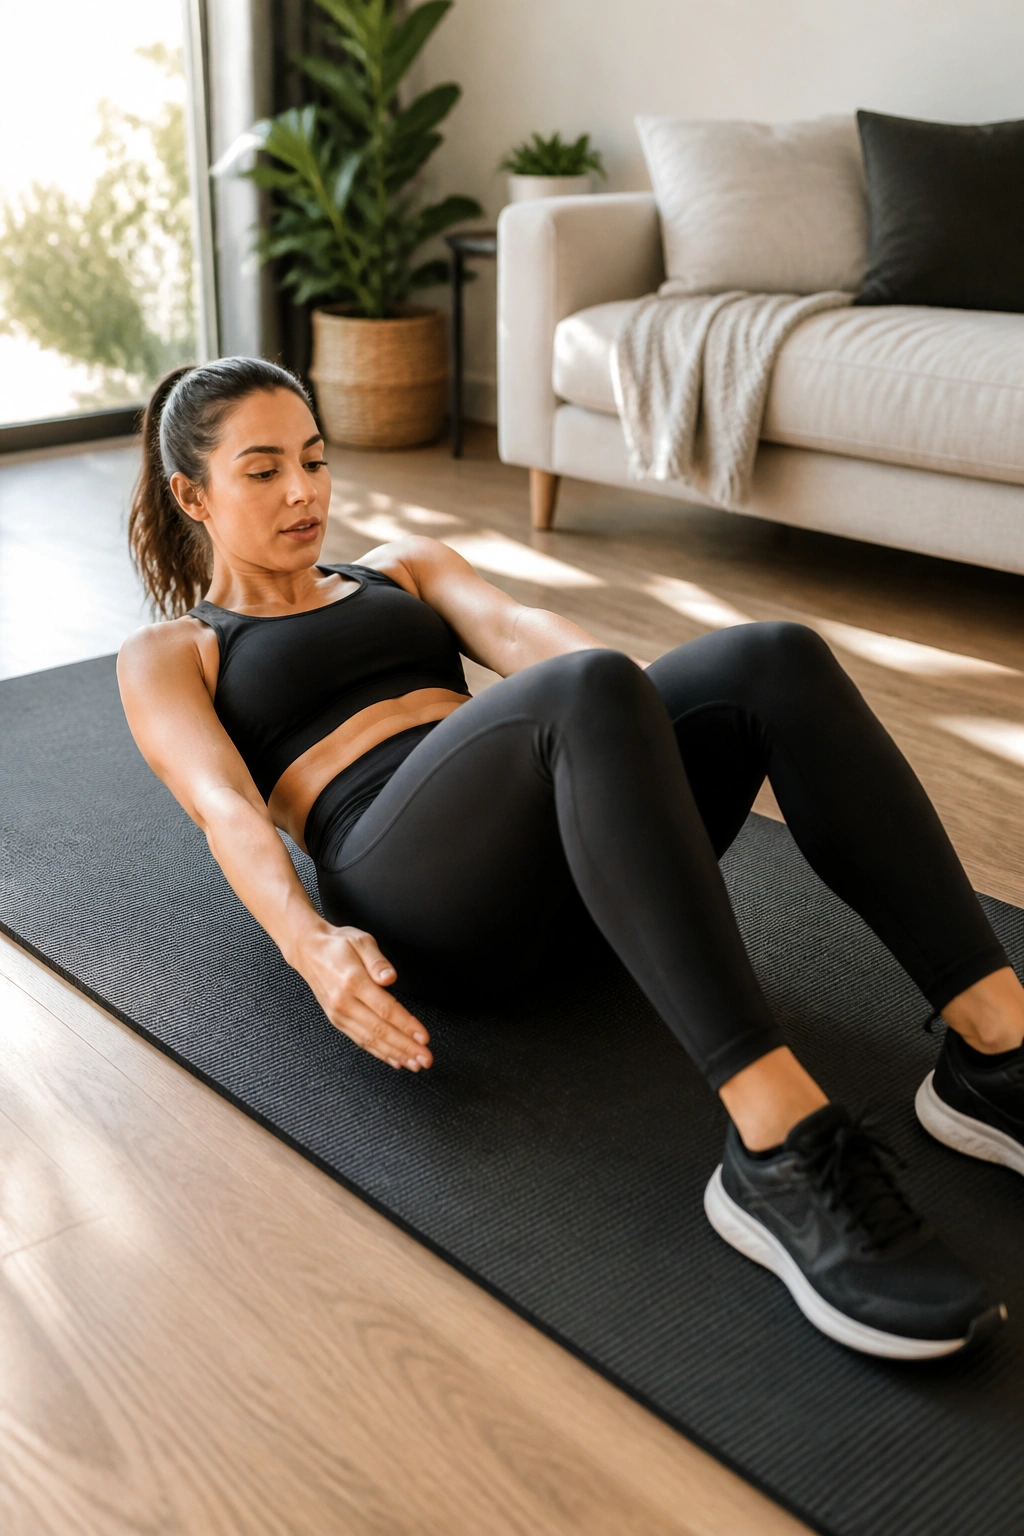
Unlike crunches, heel taps keep the movement low and controlled. That makes them useful for people who want to feel their abs work without yanking on the neck or rocking the whole torso.
Lie on your back with your knees bent, feet flat, and arms reaching along your sides. Lift your head and shoulders just enough to engage the upper abs, then tap one heel and the other side in a steady rhythm. The lower back should stay close to the floor. If it arches, shorten the reach or keep your shoulders down.
Who They Suit Best
Heel taps are a smart pick if full sit-ups feel clunky, if your neck gets tired fast, or if you want something you can slot between other floor moves without much setup. They are also easy to scale. Tap closer to your body for a lighter version. Reach farther only if you can keep the trunk steady.
Use 2 to 3 sets of 10 to 16 total taps. Slow the pace enough that each tap feels deliberate. Fast heel taps turn into hip flexor flailing in a hurry, and that is not the goal.
7. Crunch With a Long Exhale
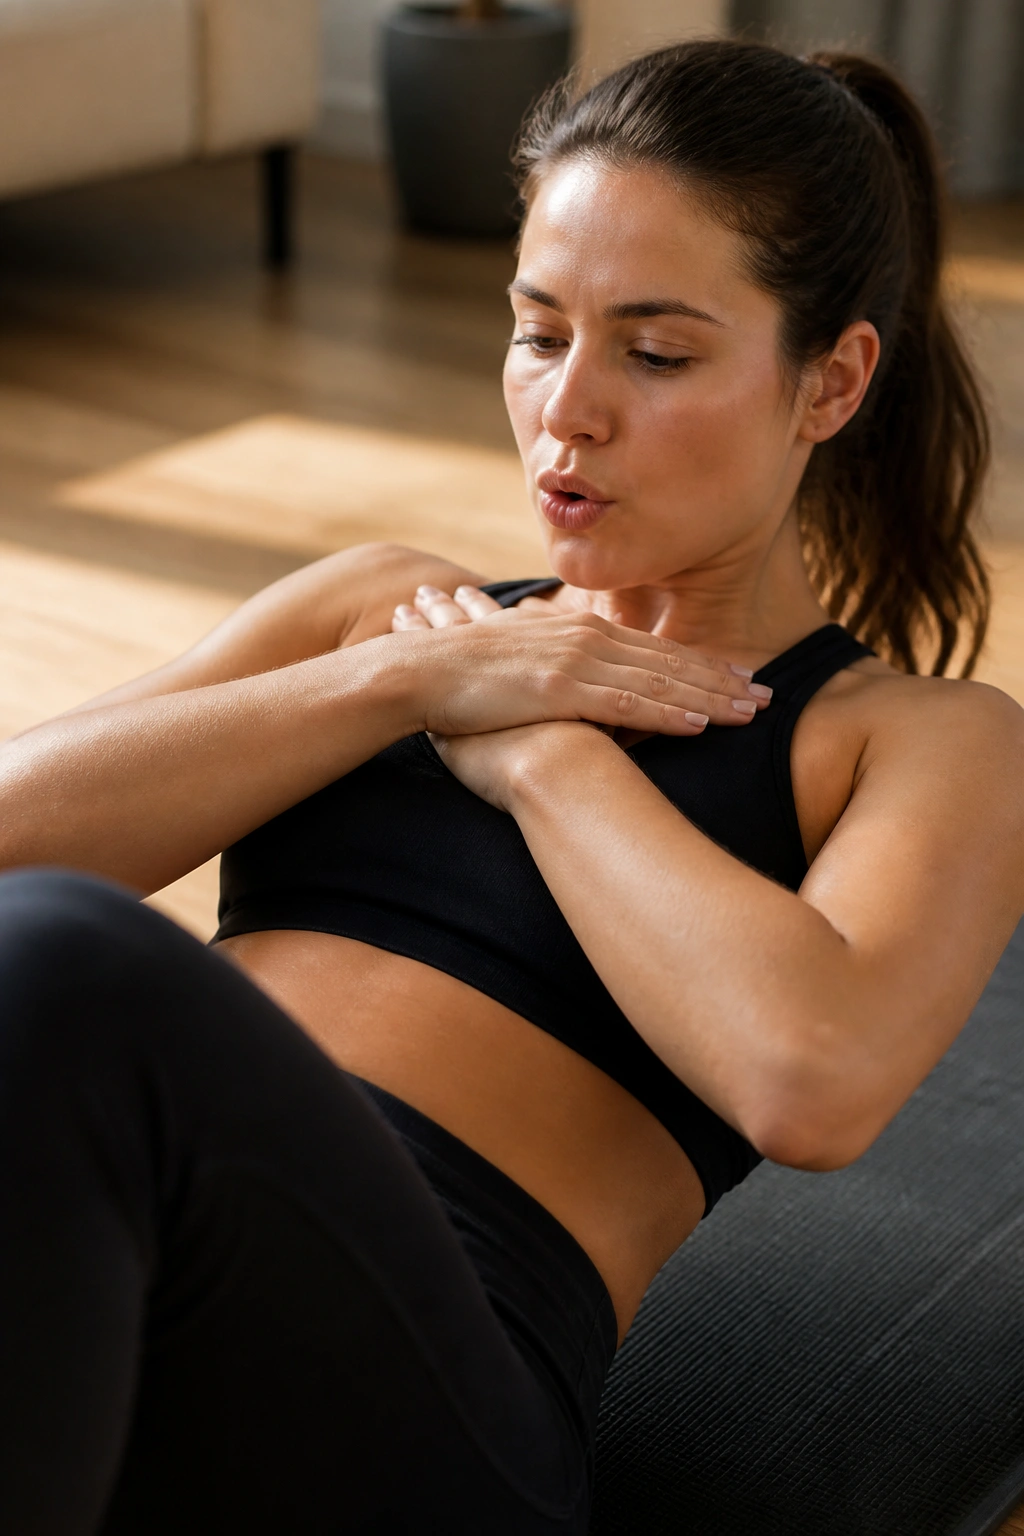
Crunches are not the villain. Rushed crunches are. Done with control, a basic crunch still has a place in beginner core training, especially when you keep the movement short and the breathing honest.
Lie on your back, bend your knees, and place your hands lightly across your chest or behind your head without pulling on your neck. Curl your head and shoulder blades off the floor just a little, then lower with control. The lift should come from your ribs closing toward your pelvis, not from a violent pull through the neck.
The long exhale matters more than people think. Blow out as you rise, and you will usually feel your abs engage sooner and your shoulders relax a bit. Eight to 12 clean reps is enough. More is not automatically better.
A lot of beginners make crunches ugly by going too high. You do not need to sit all the way up. A small curl done well is cleaner, kinder on the back, and far more honest than a half-sit-up with momentum.
8. Reverse Crunch for Lower-Ab Control
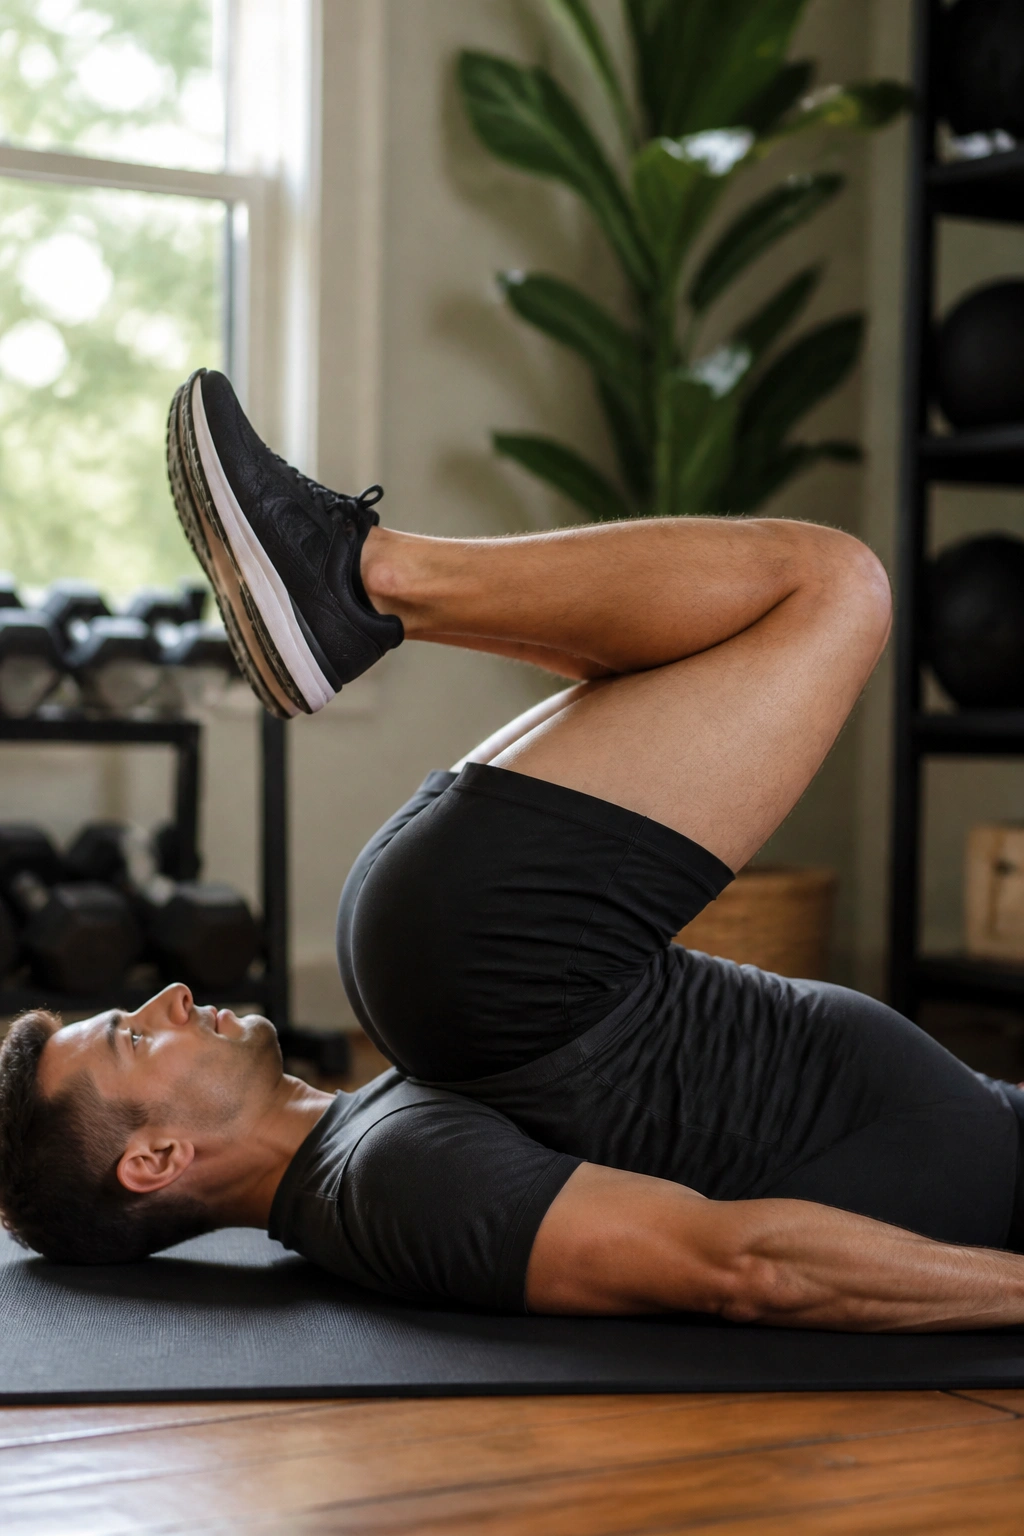
Why do reverse crunches feel better than leg lifts for so many beginners? Because the pelvis can tilt without forcing your hip flexors to drag your legs around in a big, heavy arc.
Lie on your back with your knees bent and shins roughly parallel to the floor. Press your lower back down, then curl your tailbone up an inch or two as your knees move slightly toward your chest. The motion is tiny. That is normal. If you swing your legs, the abs lose the job.
How to Get the Pelvis Curl Right
Think of bringing your belt buckle toward your face, not swinging your feet over your head. That cue is usually enough to keep the movement in the right place. Lower slowly and stop before your back arches.
Try 2 to 3 sets of 8 to 10 reps. If you feel this in your hip flexors more than your abs, bend your knees more and shorten the lift. A small curl with a clean finish beats a bigger one with sloppy mechanics.
This move pairs well with heel taps. One trains the front of the trunk in a small curl, the other teaches control while the legs move away from center.
9. Glute Bridge March for Hip and Core Control
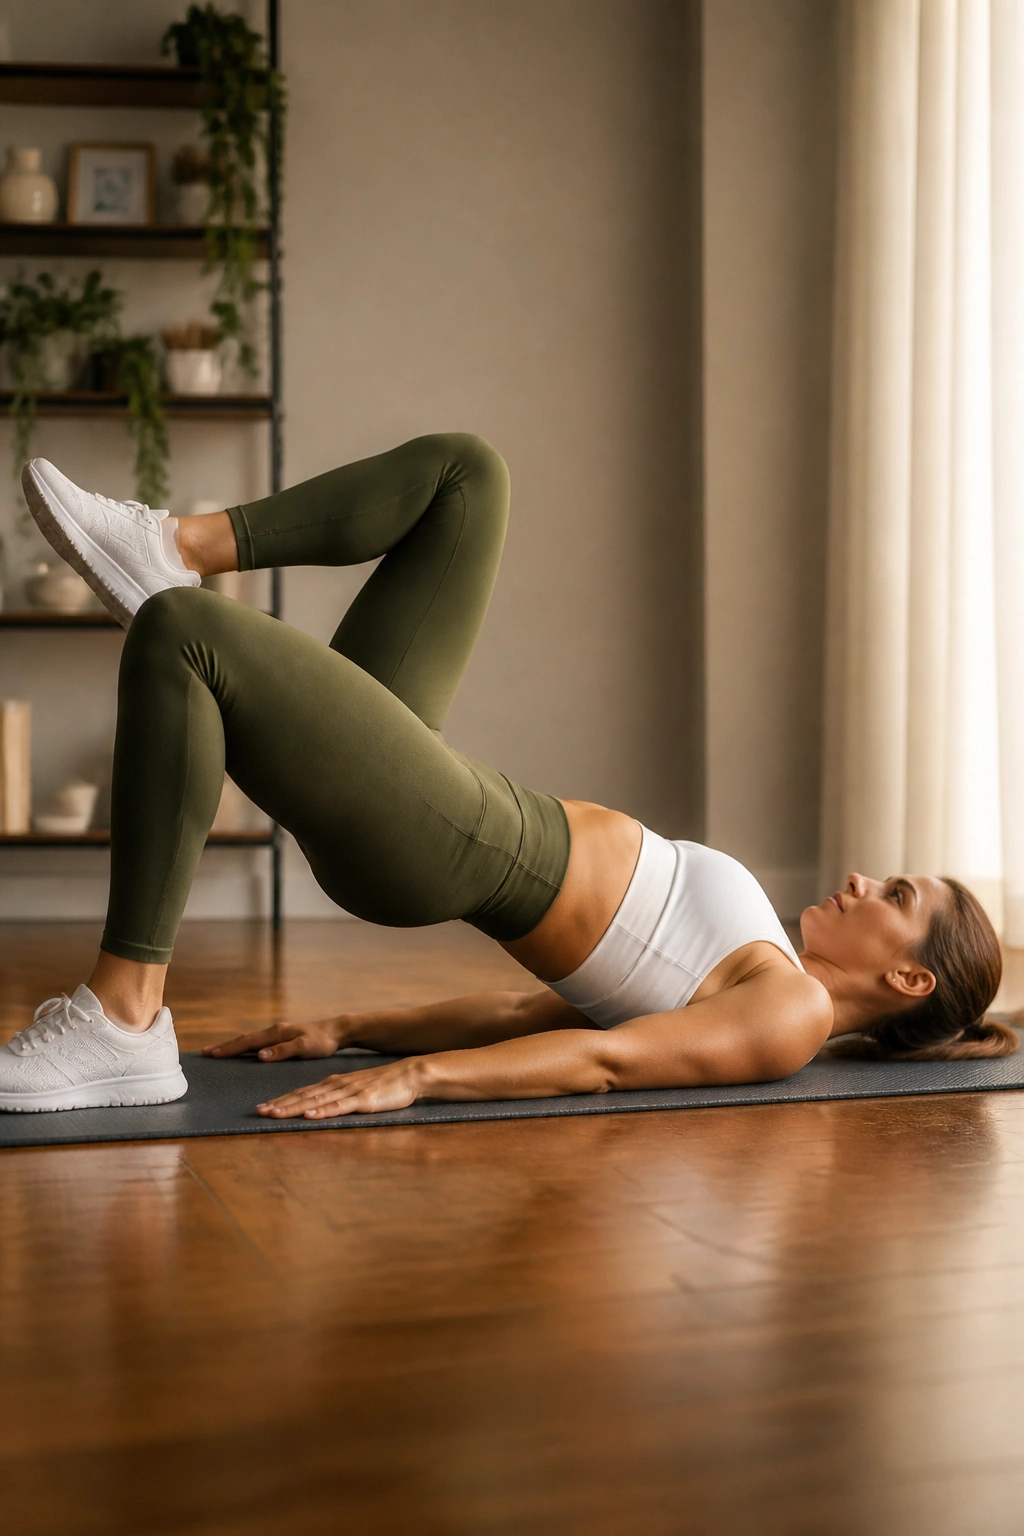
If your lower back steals work from your abs, the glute bridge march puts that habit on notice. You keep the hips lifted while one foot lifts off the floor, and the core has to stop your pelvis from rocking side to side.
Set up in a regular glute bridge with your feet flat and hips raised. From there, lift one knee toward your chest a few inches, set it back down, and switch sides. The pelvis should stay level. If it twists, lower the bridge a little or shorten the march.
- Keep your ribs down.
- Press through both heels.
- Move slowly enough to stop wobble.
- Stop if your hamstrings cramp hard; raise your feet a little closer to your hips.
Two to 3 sets of 8 marches per side is a smart start. It sounds modest. It is not. The anti-rotation demand sneaks up on you, especially if you try to rush the rhythm.
This one also teaches a useful lesson: strong abs are not always about bending forward. Sometimes they are about not moving when a limb tries to pull you around.
10. Slow Mountain Climbers for Controlled Core Work
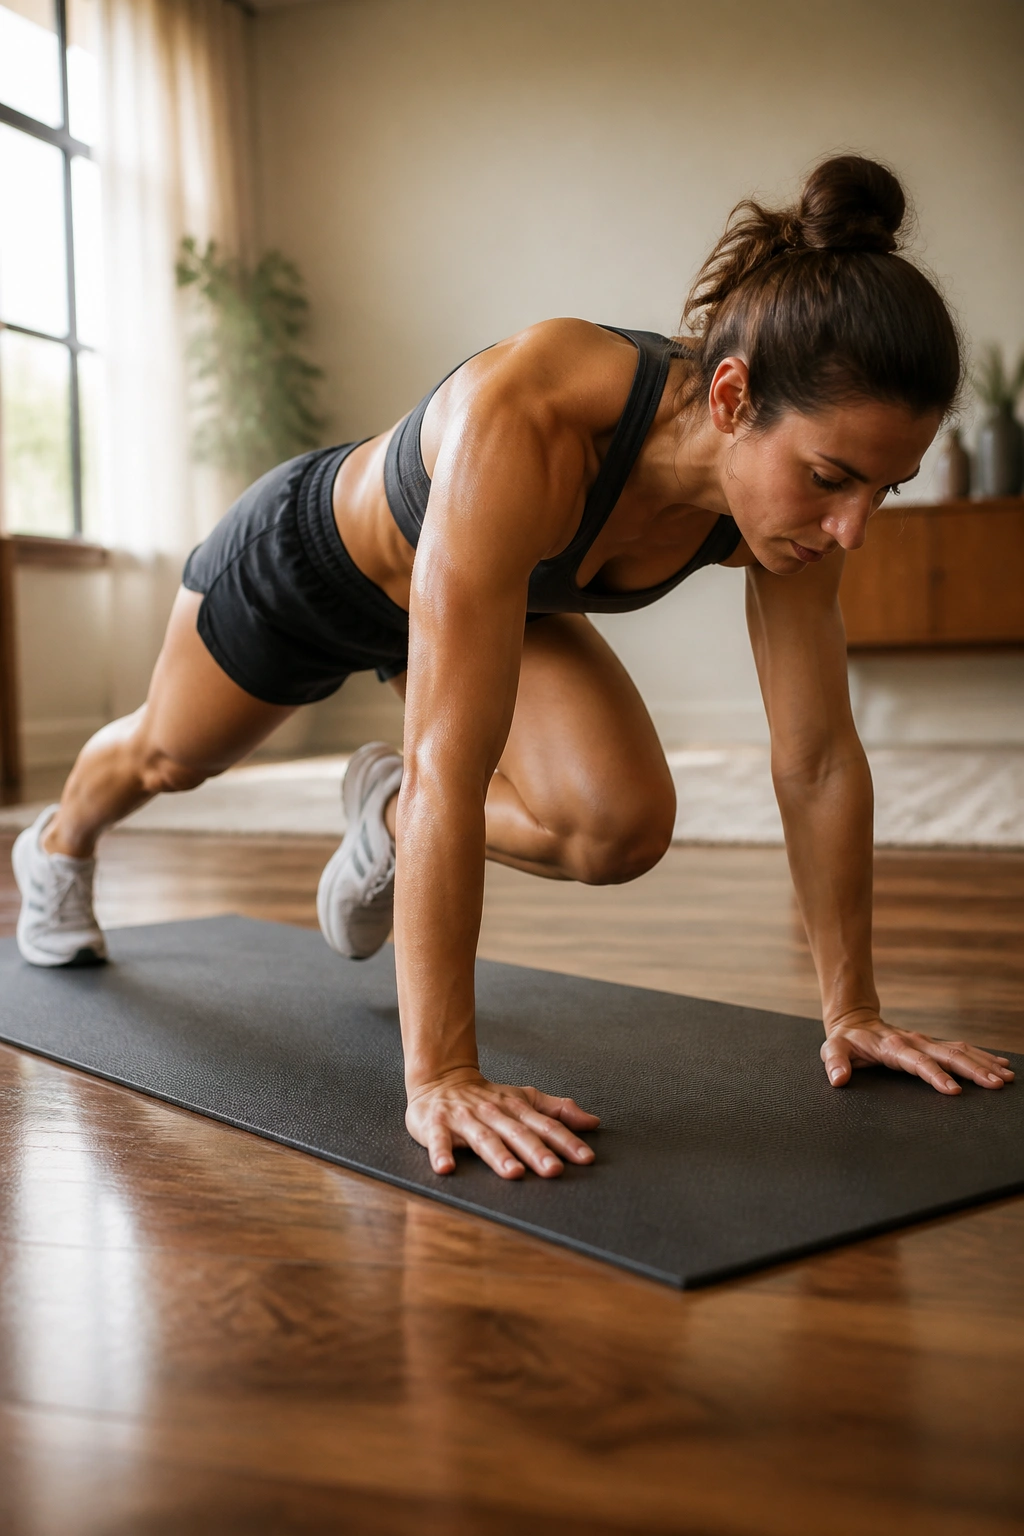
Mountain climbers usually get treated like a cardio drill, which is fine if you want sweat. Slow mountain climbers are a different animal. They ask the core to keep the pelvis stable while one knee drives in and the other leg stays long.
Start in a high plank with your hands under your shoulders. Bring one knee toward your chest, pause for a beat, and return it with control before switching sides. The body should stay quiet. If your hips bounce like a bad screen door, slow it down more.
I prefer the slow version for beginners because it teaches you how to own the plank position before speed shows up. That makes it more useful than the frantic version most people copy from social media. No medal for messy reps.
Do 2 to 3 rounds of 6 to 8 reps per side. If your wrists hate the floor, put your hands on a bench or sturdy chair and do the same pattern from an incline. Same drill. Less strain.
11. Standing Knee Raises for Home Core Work
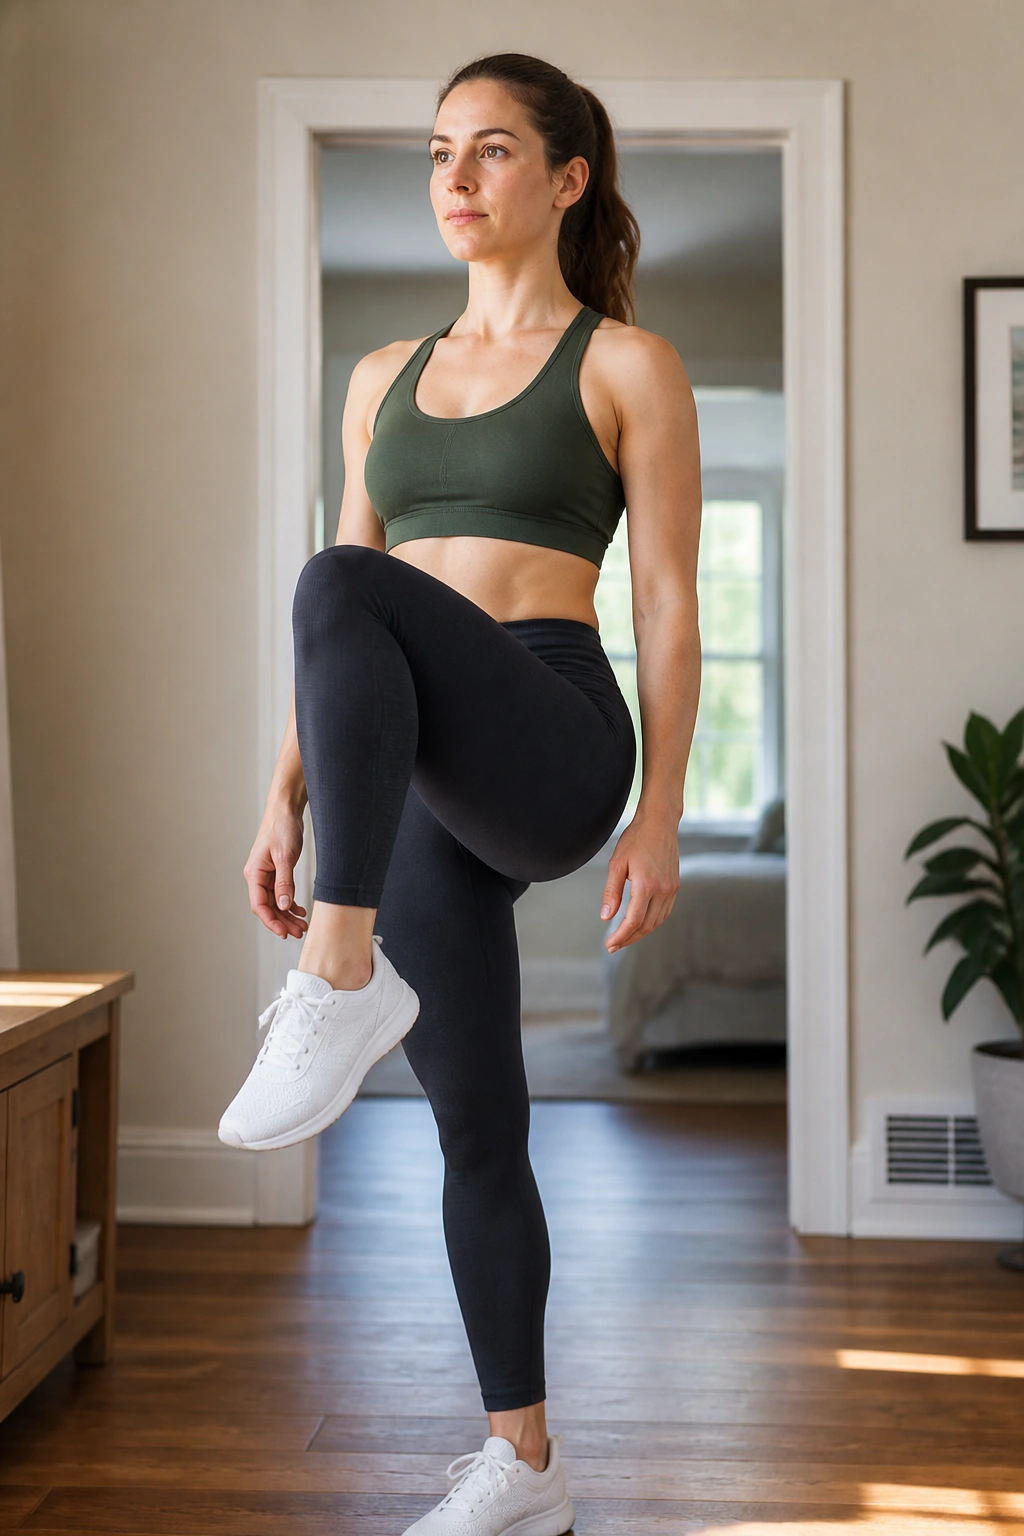
Not every core move has to happen on the floor. Standing knee raises are a nice choice when you want something simple, quiet, and easy to repeat beside a counter, chair, or wall.
Stand tall, pull one knee up toward your chest, pause, then lower it without leaning back. Keep your ribs stacked over your hips. The temptation is to swing the leg and call it done. Don’t. The slower version makes your abs work much harder to stop the torso from rocking.
This is a friendly option for beginners who feel awkward on the floor or want a move they can do between tasks. It also gives you a chance to practice posture while the hip flexors and lower abs share the load.
Try 2 to 3 sets of 8 to 12 reps per side. Add a slow two-count on the way down if you want more challenge. That tiny pause makes a bigger difference than people expect.
12. McGill Curl-Up for Back-Friendly Ab Training
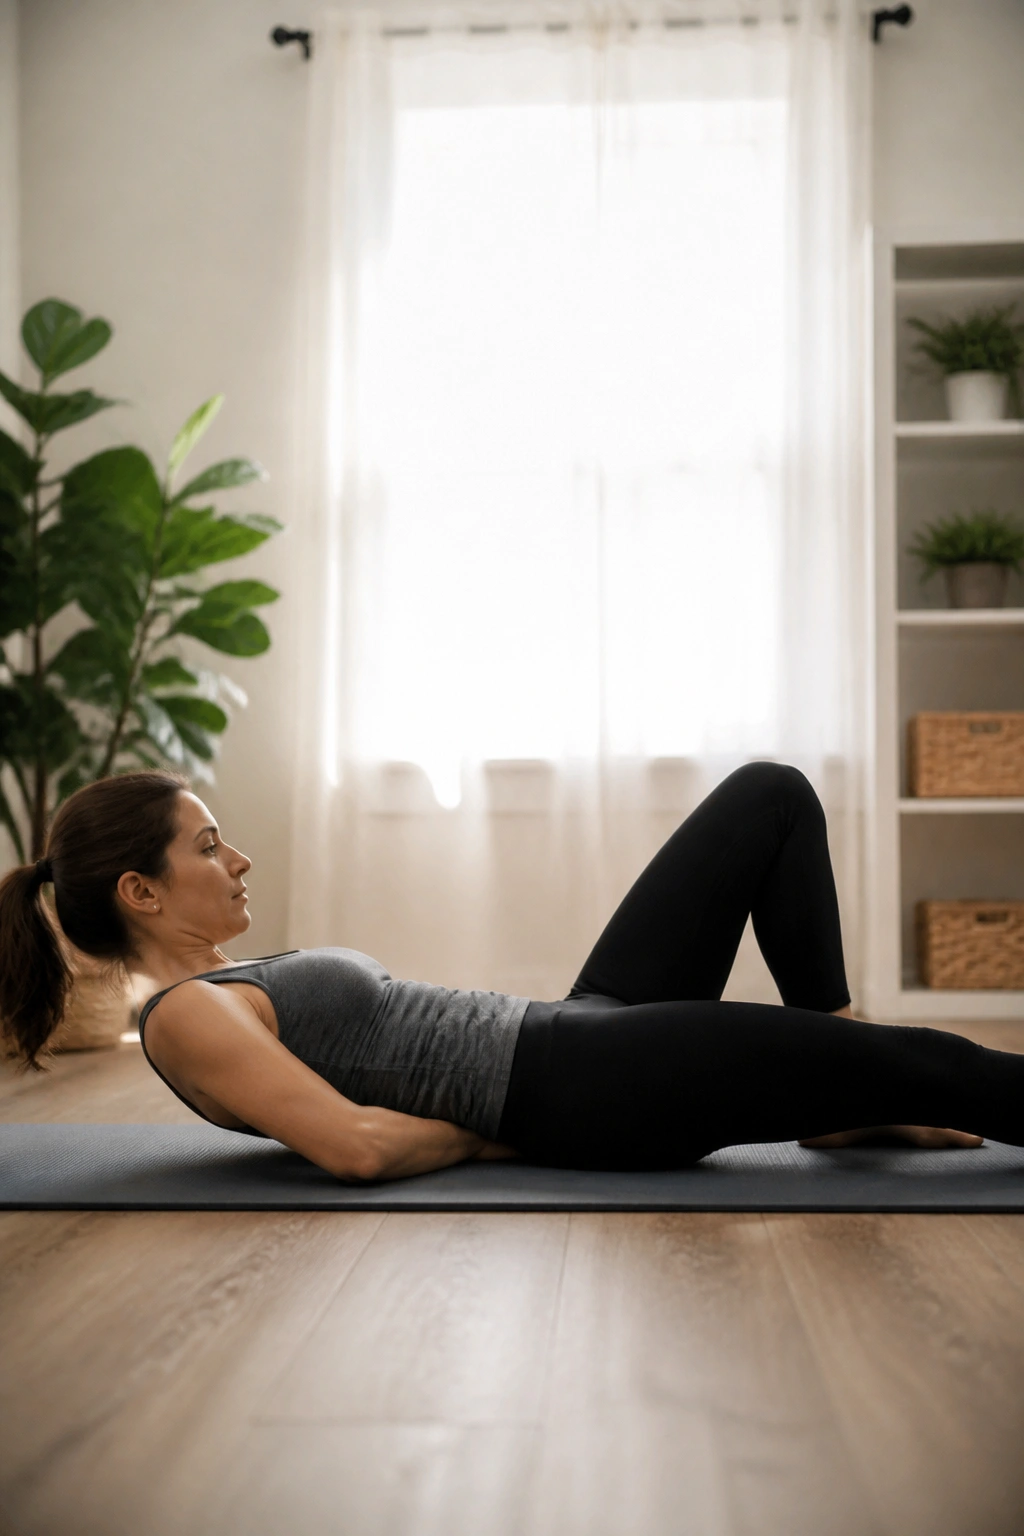
The McGill curl-up is the move I reach for when standard crunches bother someone’s neck or lower back. It is not flashy. That is the selling point.
Lie on your back with one knee bent and the other leg straight. Slide your hands under the curve of your lower back to keep a small natural arch. Lift your head and shoulders just a little while keeping the lower back shape steady, then lower with control. The body should feel braced, not folded in half.
What to Feel
You want a firm front-of-body brace and very little movement through the spine. If the lift turns into a big crunch, you are doing too much. Keep it tiny. The goal is tension, not height.
- Hold each rep for 5 to 10 seconds.
- Do 5 reps, rest, then switch sides.
- Keep your chin slightly tucked, not jammed toward your chest.
- Stop if your neck starts to crank.
This is one of the cleanest beginner ab workouts for people who need a calmer option. It teaches stiffness where stiffness matters, and it usually leaves the back happier than old-school sit-ups.
13. Tucked Hollow Hold for a Stronger Front Body
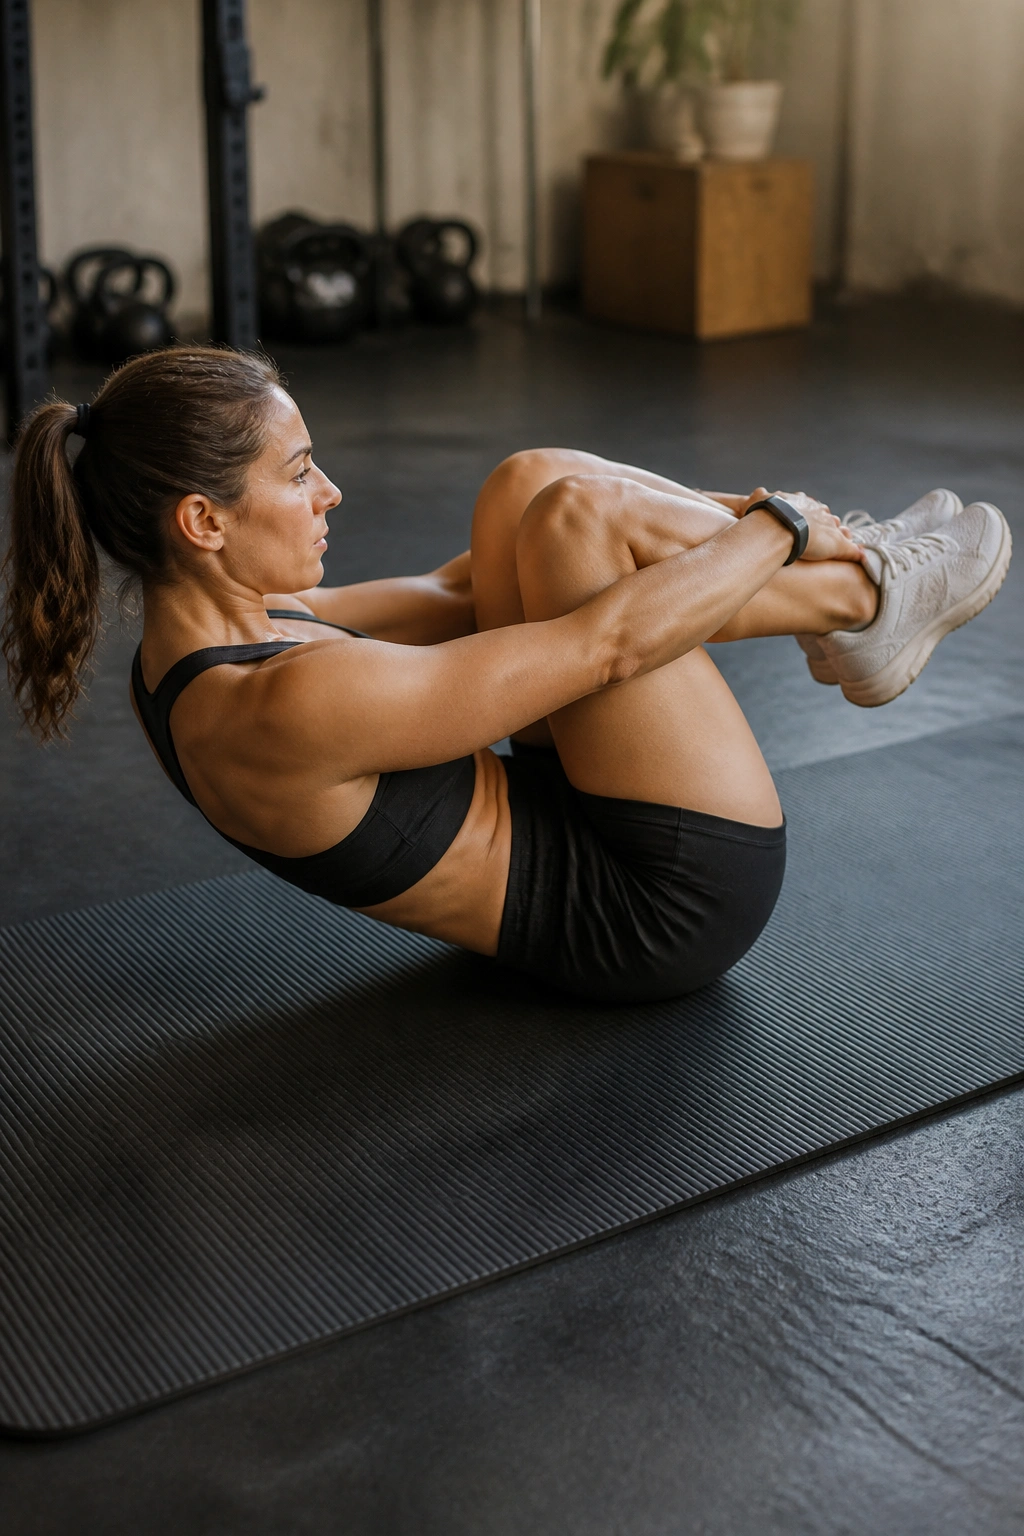
A tucked hollow hold is the clean bridge between dead bugs and the bigger hollow-body positions gymnasts use. It looks simple. It is not soft.
Lie on your back, bring your knees toward your chest, and lift your shoulders slightly off the floor while pressing your lower back into the mat. Keep your shins parallel to the floor or a little higher if needed. The smaller the tuck, the easier the hold.
The key is staying hollow without losing your lower-back contact. If your back pops up, the position is too long or too low. Shorten the shape and keep breathing. Tension matters more than time.
Hold for 10 to 20 seconds and repeat 3 times. If that feels shaky, keep one toe on the floor and lift the other leg. That tiny assist is enough to keep the exercise honest without turning it into a mess.
How to Scale It
Start with a deep tuck. Then, over time, open the knees farther from the chest or lower the shins a little. Small changes. That is how you keep progress steady.
14. Bear Hover Hold for Whole-Core Tension
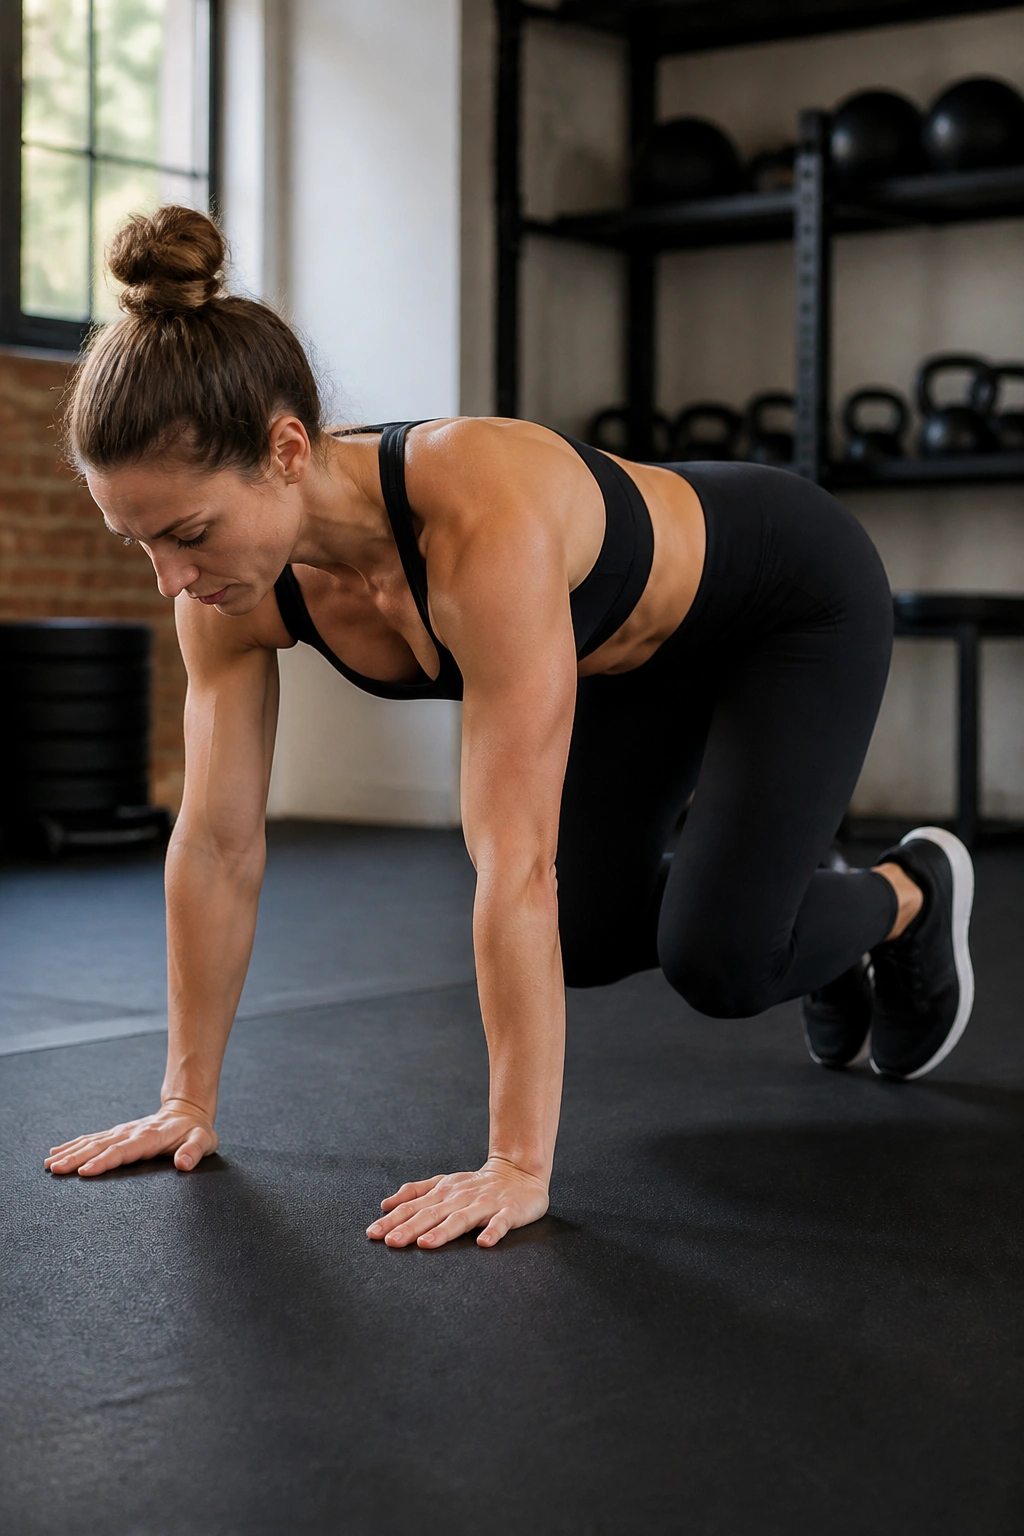
Unlike a plank, a bear hover makes you manage your shoulders, hips, and feet at once. That is why it wakes up beginners fast. It is also why the move needs a careful entry.
Start on hands and knees. Tuck your toes, press your hands into the floor, and lift your knees about one inch off the ground. Keep your back flat and your knees under your hips. Hold. Breathe. Do not rush to make it ugly.
This is best for people who already handle the dead bug and knee plank without drama. It is still beginner-friendly if you keep the hold short. Five to 15 seconds is a solid start. If your wrists feel cranky, place your hands on two yoga blocks or do the hover on fists.
- Keep the knees low.
- Push the floor away.
- Don’t let the shoulders creep toward the ears.
- Stop before the low back starts to sag.
A good bear hover feels compact and tense, almost like you are ready to move but choosing not to. That restraint is the whole exercise.
15. Suitcase Carry for Everyday Core Strength
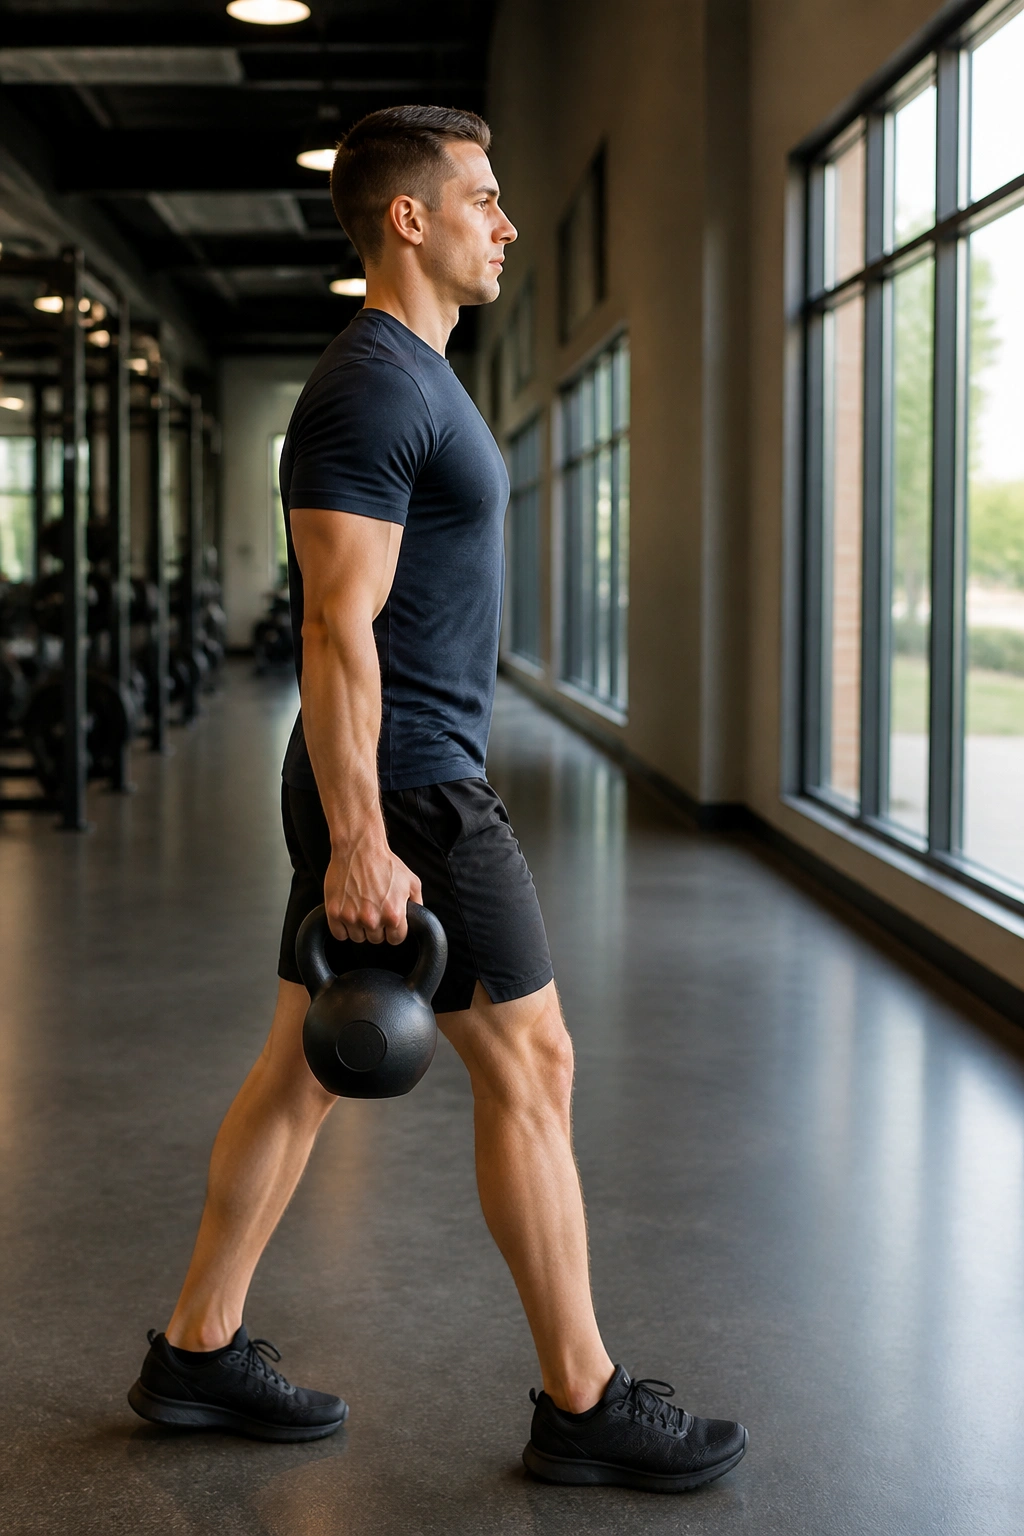
A suitcase carry is one of the least glamorous ab workouts on the list, and one of the most useful. Hold one weight at your side and walk without leaning. That is it. Simple shape, serious demand.
Grab a dumbbell, kettlebell, backpack, or even a heavy grocery bag in one hand. Stand tall, keep your shoulders level, and walk 20 to 40 steps before switching sides. The abs on the loaded side work hard to stop you from tipping, and the muscles across the trunk have to keep everything lined up.
This move feels different from floor work because the challenge shows up while you move through space. That is useful for daily life, where your body rarely stays still and symmetrical. Carrying a child, a shopping bag, a stack of books—same idea, different load.
- Use a weight that makes you work, not wobble.
- Walk slowly enough to stay upright.
- Keep your ribs stacked over your hips.
- Switch sides before your grip completely dies.
If you want one beginner-friendly core drill that carries over far outside the gym, this is a strong pick. Clean posture under load matters. A lot.
A good starter session does not need all 15 moves. Three or four is enough if you do them well, keep the reps controlled, and stop chasing the feeling of exhaustion as the main goal. The abs respond better to clean tension than to chaos.
Pick the moves that feel learnable, not the ones that look impressive. Then stay with them long enough to make them feel normal. That is where real core training starts to pay off.
