



Wall Pilates routines for weight loss work best when you want something you can repeat without wrecking your knees, wrists, or lower back. A plain wall gives you a lot more feedback than people expect: ribs stay stacked, pelvis stops tipping forward, and your legs have to do the work instead of your joints stealing the show.
That matters. Fat loss still comes down to energy balance, and no workout gets to cheat that math. But the sessions you repeat are the ones that matter, and a wall-based Pilates workout is easier to keep doing than a routine that leaves you flattened after ten minutes.
The other nice part is how quickly the burn shows up when the tempo slows down. A wall squat, a plank with hands on the wall, or a bridge with the heels pressed into a vertical surface can light up the thighs and core in a way that feels cleaner than flailing through fast reps. You can make a session short and sharp or long and steady. The wall does not care.
These routines are built to be mixed, matched, and repeated. Some are sneaky hard. Some look almost too easy until the last 10 seconds. That’s the good stuff.
1. Wall Roll-Downs and Reach-Backs
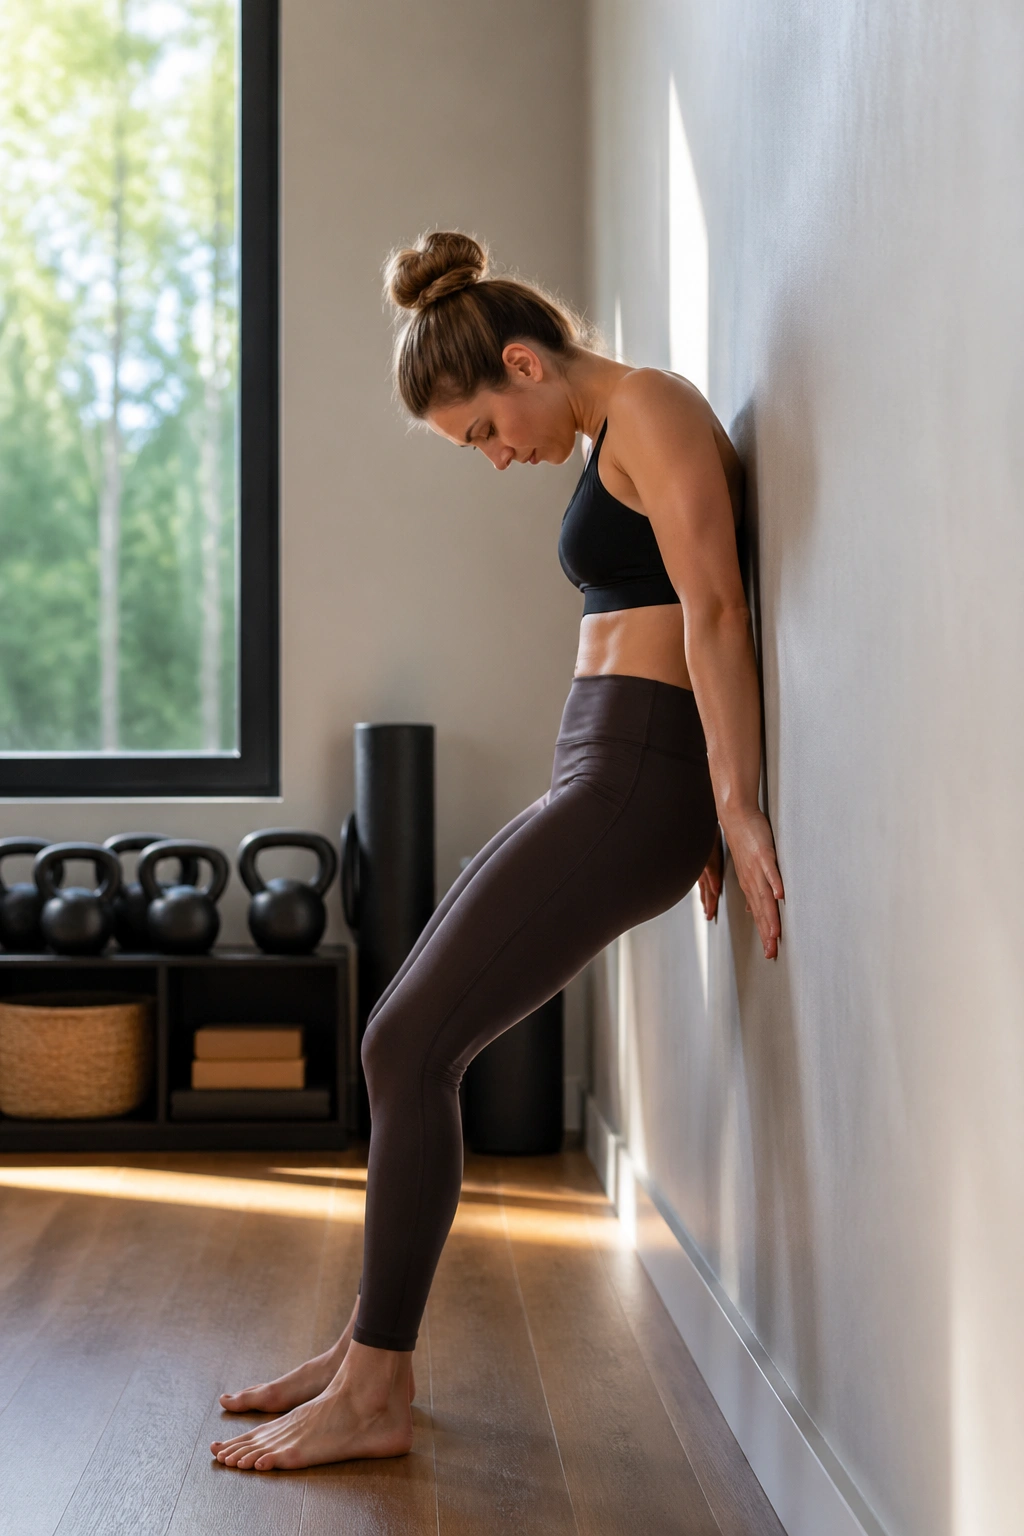
Standing wall roll-downs are the kind of move people skip because they look mild. They aren’t mild once you go slowly and keep your heels down. The spine has to articulate one section at a time, the abdominals have to brace, and the hamstrings stop you from collapsing into the floor.
Why the roll-down matters
The wall keeps your shoulders from dumping forward. Press your back lightly into it on the way down, then peel away as you fold. Six slow reps is enough to wake up the midsection without irritating a cranky lower back.
- Do 4 seconds down and 2 seconds up.
- Keep a soft bend in the knees the whole time.
- Exhale as your ribs soften toward your pelvis.
One small set can change the tone of the whole workout. Your body starts listening.
Tip: Keep your chin tucked a little, not jammed to your chest. That tiny adjustment keeps the neck calm and makes the movement feel smoother.
2. Wall Chair Squats with Calf Raises
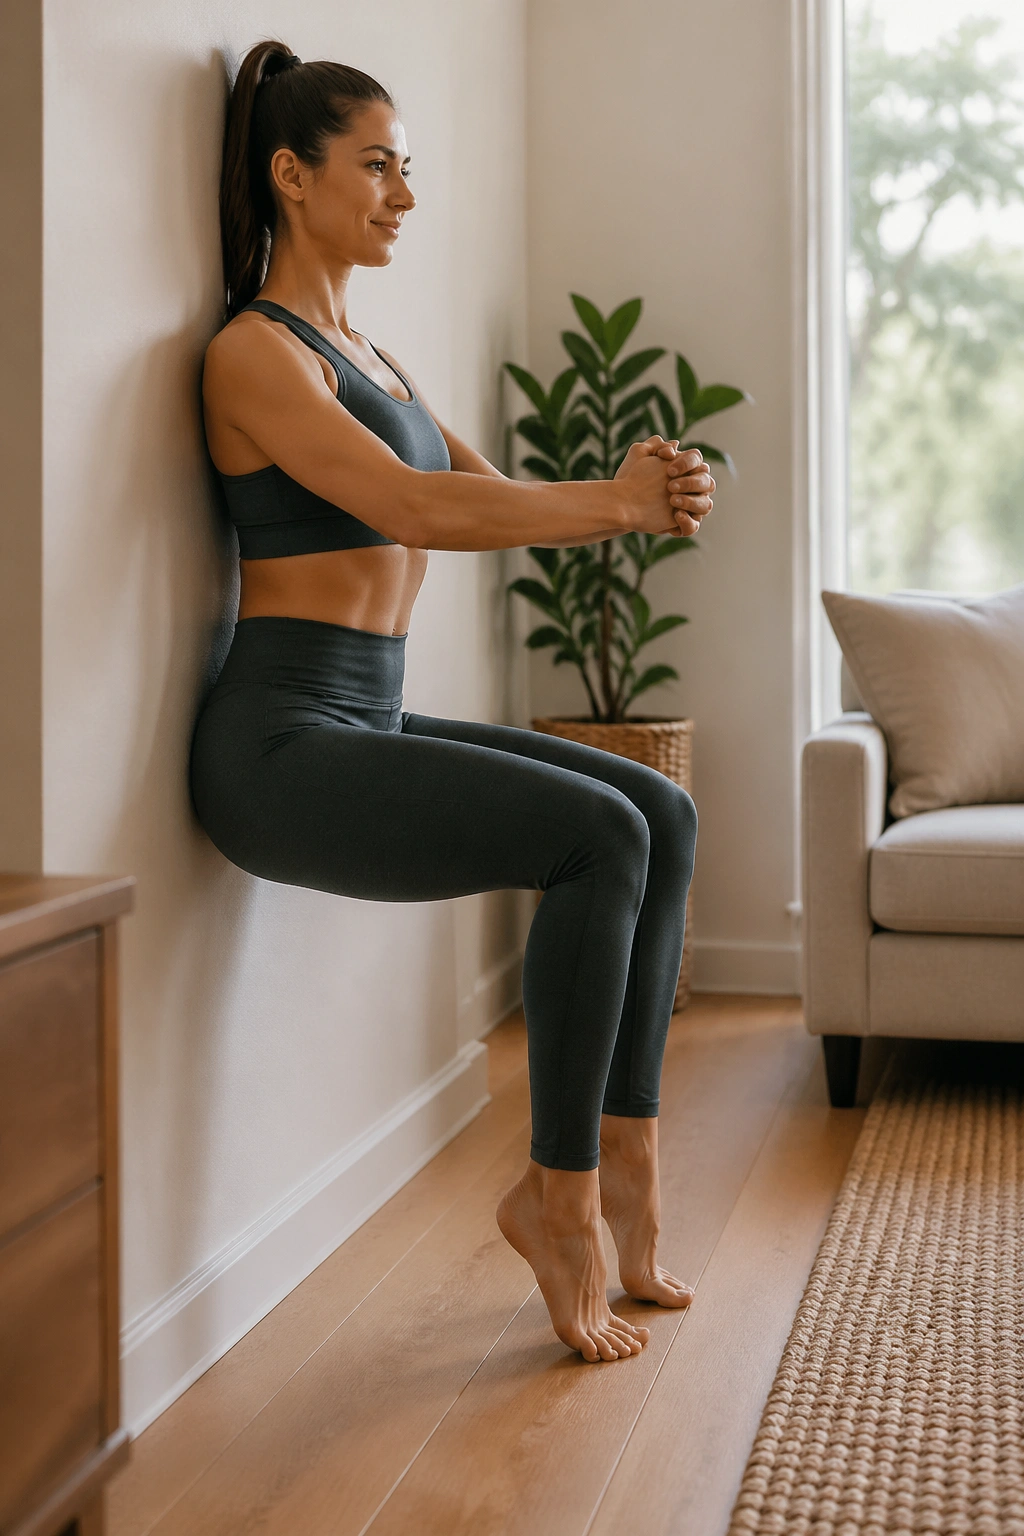
If you want a wall Pilates move that starts burning fast, this is the one. Wall chair squats with calf raises load the quads, glutes, and calves at the same time, which gives you more work in less time. That matters when you are trying to build a session that feels like exercise instead of a vague stretch.
Sit low enough that your thighs are close to parallel with the floor, then hold for 20 to 30 seconds. From there, add 10 slow calf raises without letting your hips bounce off the wall. The calves wake up, but the thighs keep carrying the real load.
A good set feels steady, not frantic. That’s the trick. You want the legs to tremble a little near the end, while your torso stays tall and your lower back stays quiet. Three rounds is plenty if you keep the hold honest.
They sting. That’s the point.
3. Wall Plank Knee Drives
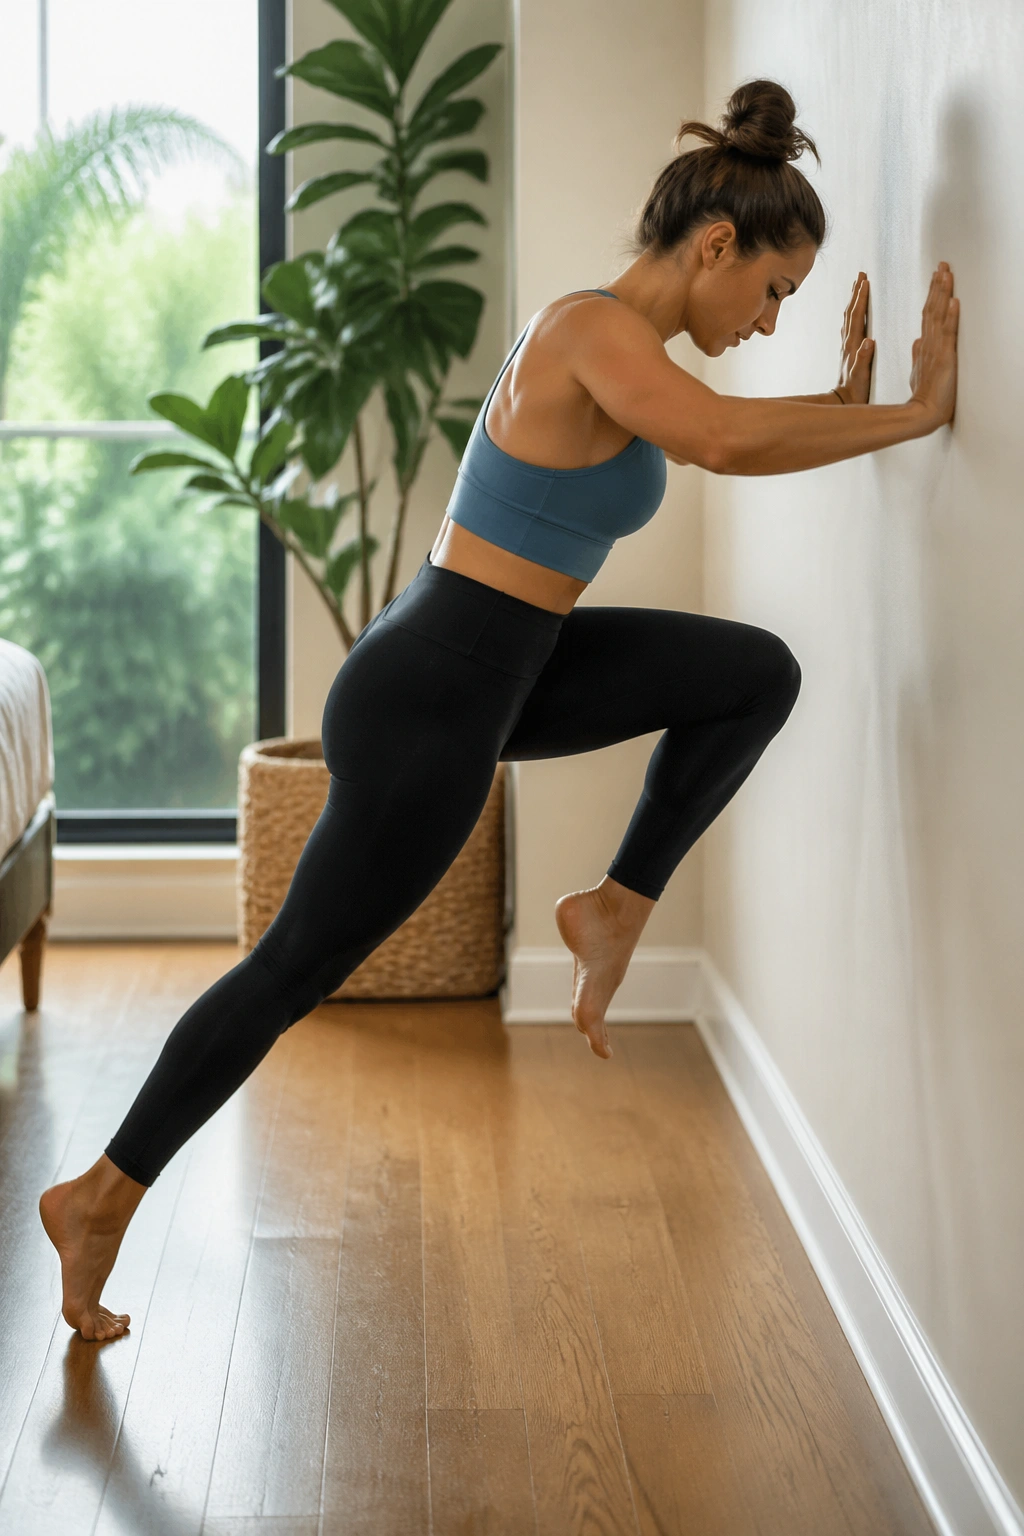
Can a wall plank still count as a plank? Yes, and it can be kinder to your wrists than the floor version. It also gives beginners a cleaner way to practice bracing without dumping into the shoulders or letting the low back sag.
How to do it
Put your hands on the wall at chest height, step your feet back, and create a long line from crown to heels. From there, drive one knee toward your chest, set it back, then switch sides for 8 to 12 controlled reps. The slower the shift, the more your deep core has to work.
A few things make this move useful. The wall stops you from cheating with speed, and the alternating knee drive gives the heart rate a little nudge. You’re not jumping. You’re forcing the trunk to stay organized while the legs move.
- Keep your shoulders away from your ears.
- Press the floor away through your heels.
- Do not let the ribs flare forward.
If your wrists get annoyed, move your hands a little higher on the wall. Small changes matter.
4. Wall Bridge and Heel Presses
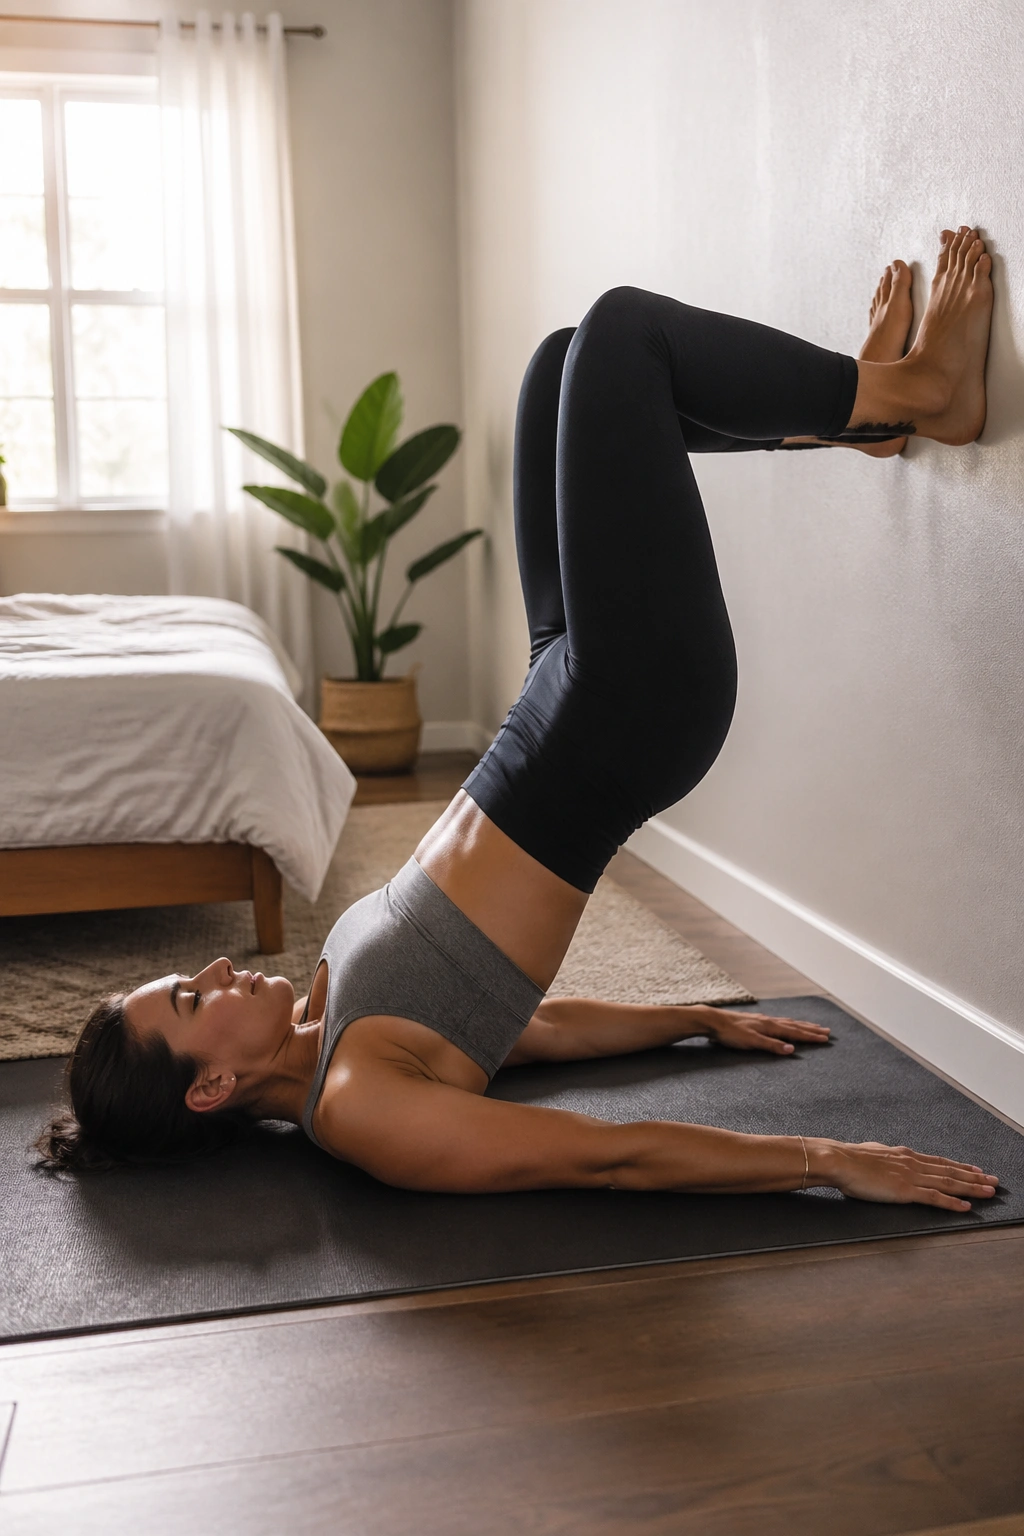
If your bridge work usually turns into a lower-back shrug, the wall cleans that up fast. Feet on the wall give you a target, and the heels can press in a way that switches the work toward the glutes and hamstrings instead of the spine.
Lie on your back, place your feet flat on the wall with knees bent, and lift your hips until your body makes a long slope from shoulders to knees. Hold for 3 seconds, then lower with control. That alone is good. Add a gentle heel press at the top and the backside starts to wake up properly.
- 8 to 10 bridges per set
- 3-second squeeze at the top
- Keep the neck long and the chin relaxed
There’s a cleaner feeling here than with rushing floor bridges. You can actually tell when the glutes are doing their job.
The wall keeps the range honest. That’s why I like it.
5. Wall Side-Lying Leg Lifts
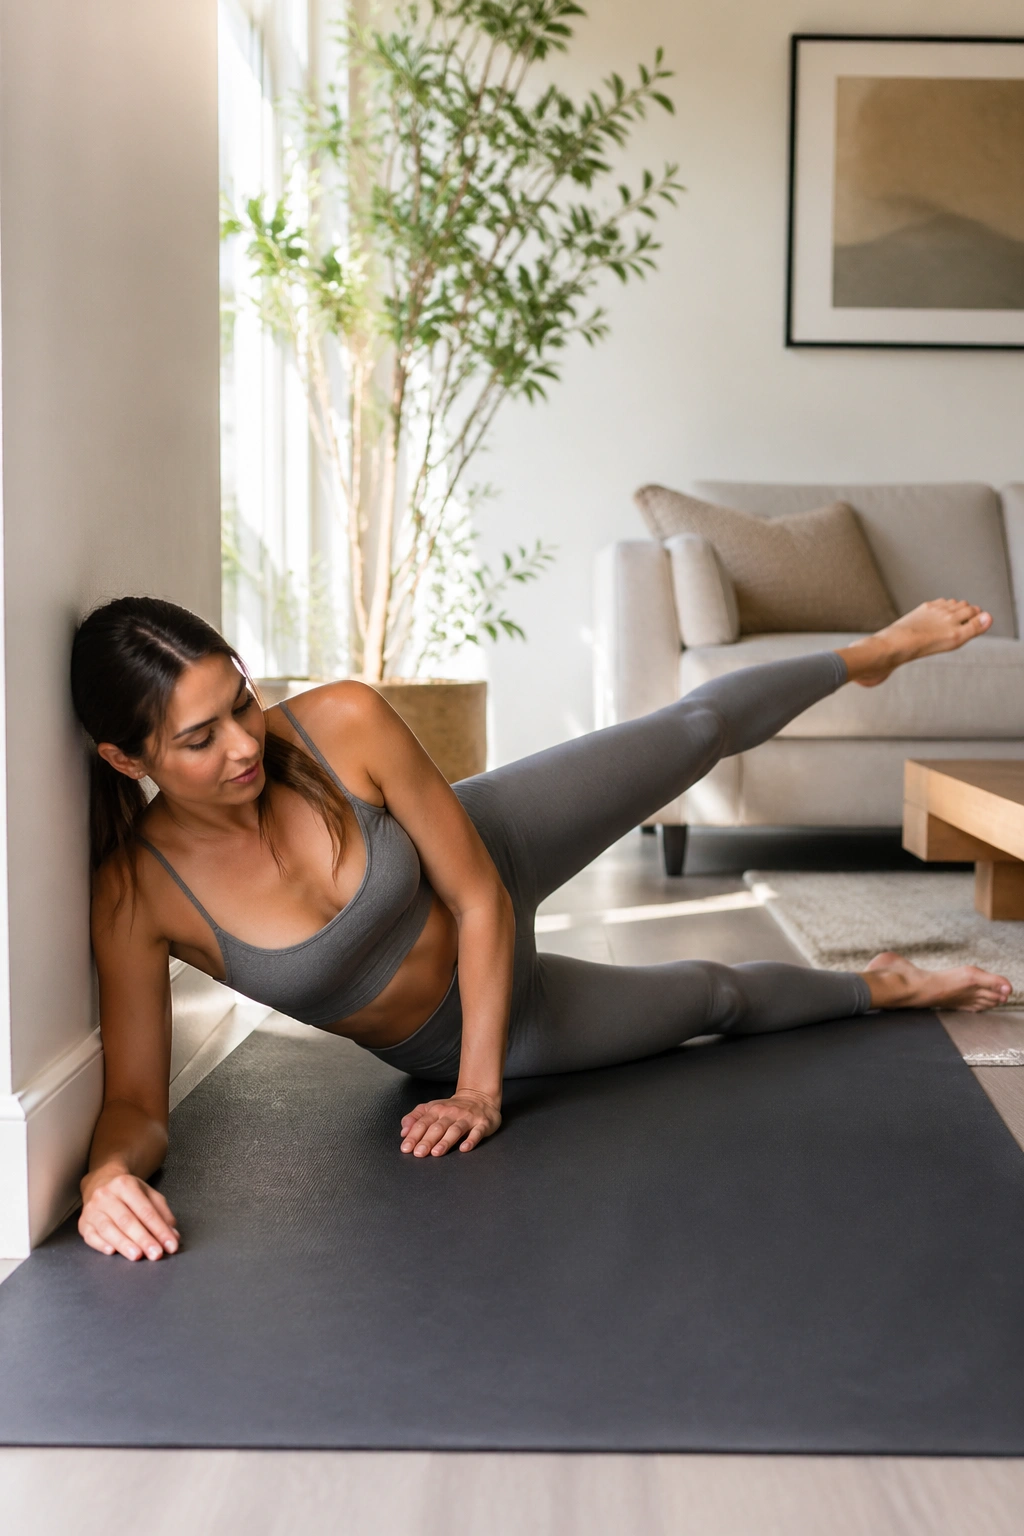
Lying on your side next to a wall sounds simple, and it is simple. The part that surprises people is how much the outer hip starts to talk when the leg lifts are small and strict. You do not need huge kicks. You need control.
Set your bottom shoulder and hip in a straight line, then use the wall lightly to keep your torso from rolling backward. Lift the top leg 8 to 12 inches, lower it without touching down hard, and keep the toes pointed forward or slightly down. Fifteen reps per side is enough to make the outer glute burn in a way that feels annoyingly honest.
The wall gives you something to stack against. That matters. Without it, a lot of people roll their hips open and let the hip flexors take over. With it, the lift stays narrow and the target stays where it should.
Take your time on the last five reps. That’s where the work gets interesting.
6. Wall Dead Bug Presses
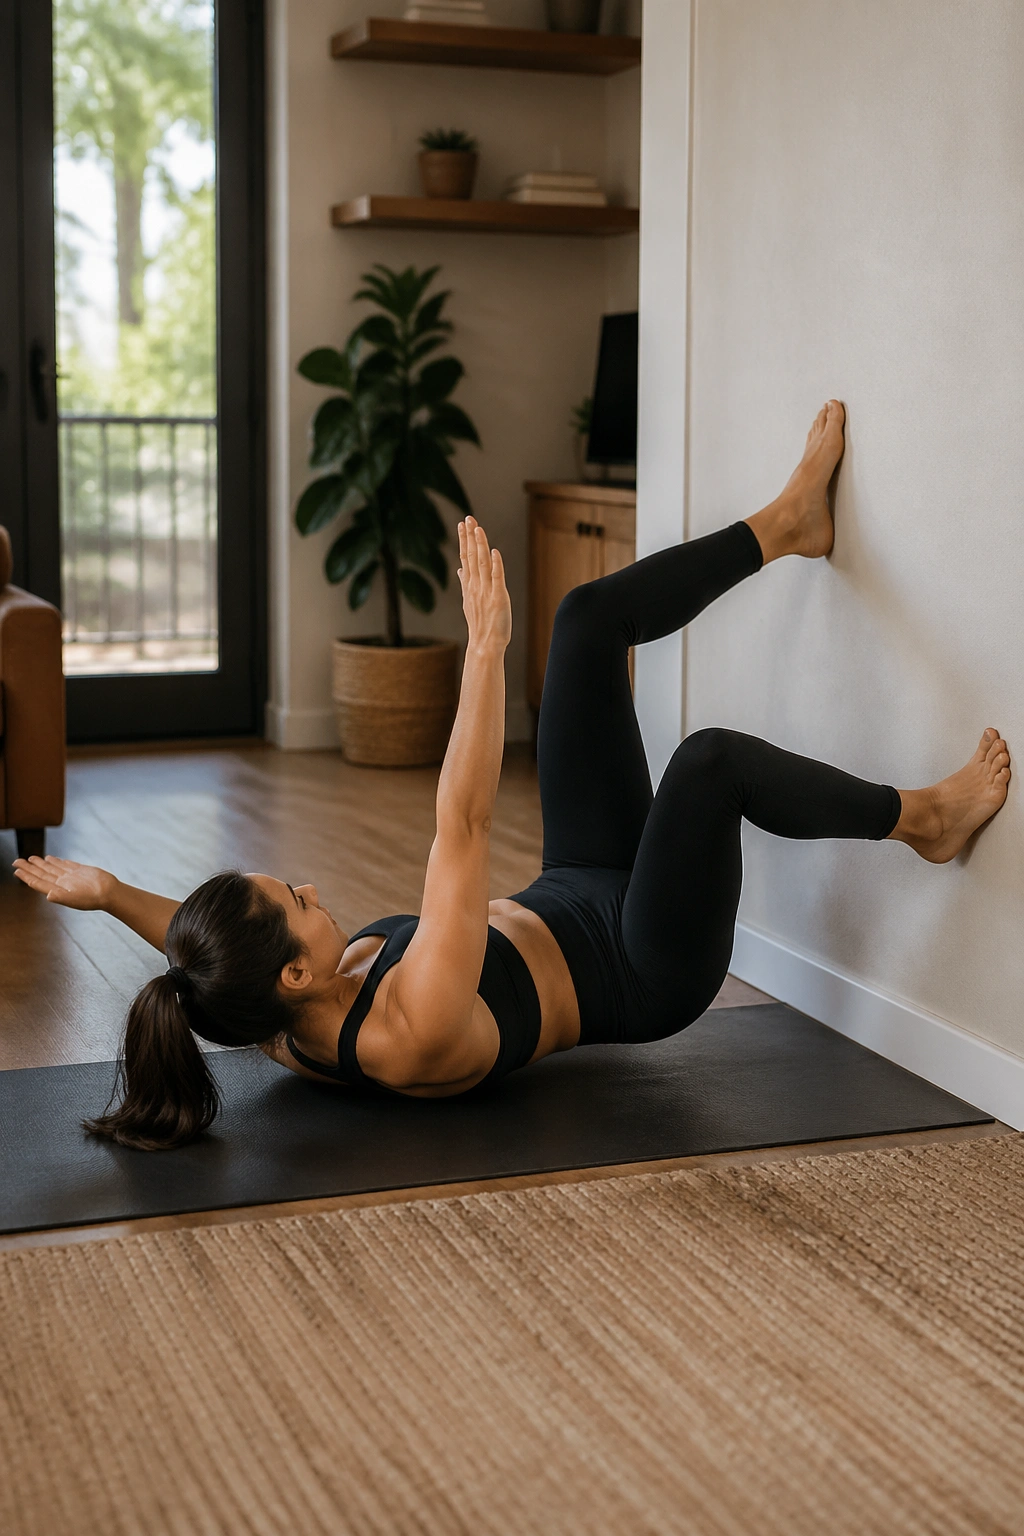
Unlike a floor dead bug, the wall version gives your feet something firm to push against. That makes it easier to stop arching your back, which is why this move works so well for people who lose their core the minute the legs start moving.
Lie on your back with your calves or feet pressing into the wall, knees bent at about 90 degrees. Reach one arm overhead, lower the opposite leg, then return and switch sides. Keep the low back heavy and quiet. Eight slow reps per side is enough when you move with control.
This one is especially useful if you want a back-friendly core exercise. The wall helps you feel the brace, and the pressure through the feet gives you a clearer line of tension from abs to hip flexors. No racing. No flinging the leg out and hoping for the best.
Best use? Put it near the start of a session, when the torso is fresh and you can still tell the difference between bracing and holding your breath.
7. Wall Hundred Hold at the Wall
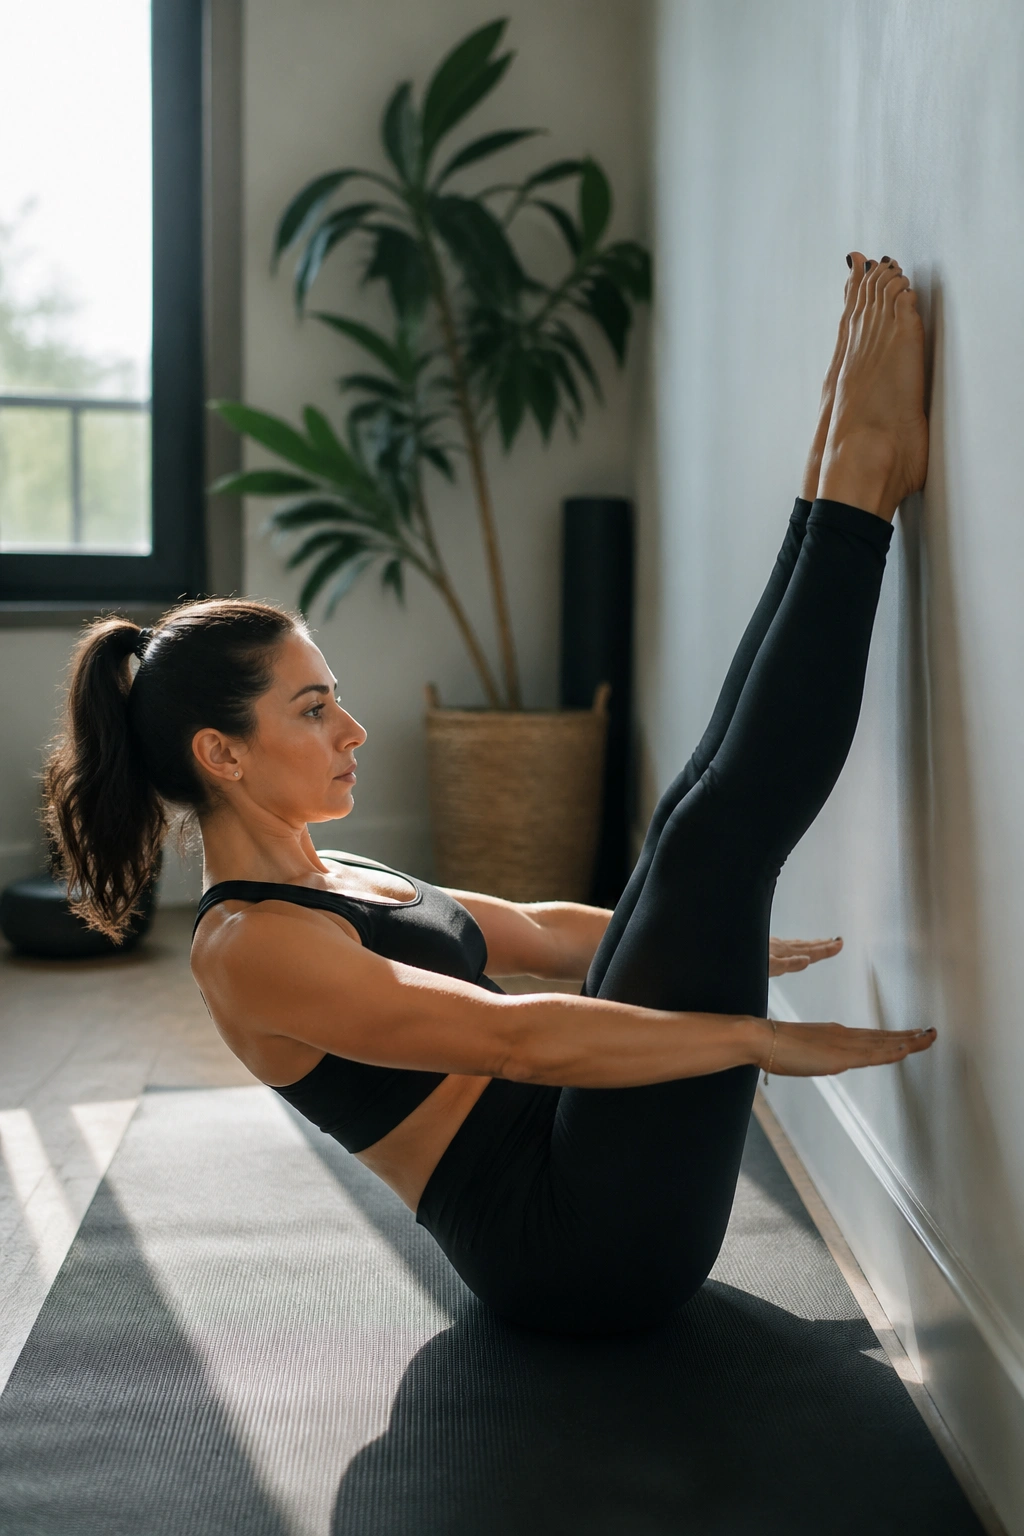
The Hundred gets less glamorous when your feet are on the wall—and that is exactly why it works. You lose the temptation to chatter through the motion, and the core has to handle the rhythm while the legs stay in a fixed position.
Why the rhythm matters
Set your feet on the wall, lift your upper back if that feels good, and press the backs of the arms into the floor as you pump them up and down. Aim for 30 to 50 arm pumps, rest, then repeat for a second round if your form stays crisp. The breathing pattern should stay even, not panicked.
This move hits endurance more than brute strength. That makes it useful in a wall Pilates routine for weight loss because it keeps the body under tension without pounding the joints. You can feel the abs, hip flexors, and shoulder stabilizers all trying to keep the shape.
- Keep the neck long.
- Press the ribs down, not out.
- Stop before your lower back arches.
Tip: If the neck gets cranky, keep your head down and focus on the arm pumps. You still get the core work.
8. Wall Split Squat Isometrics
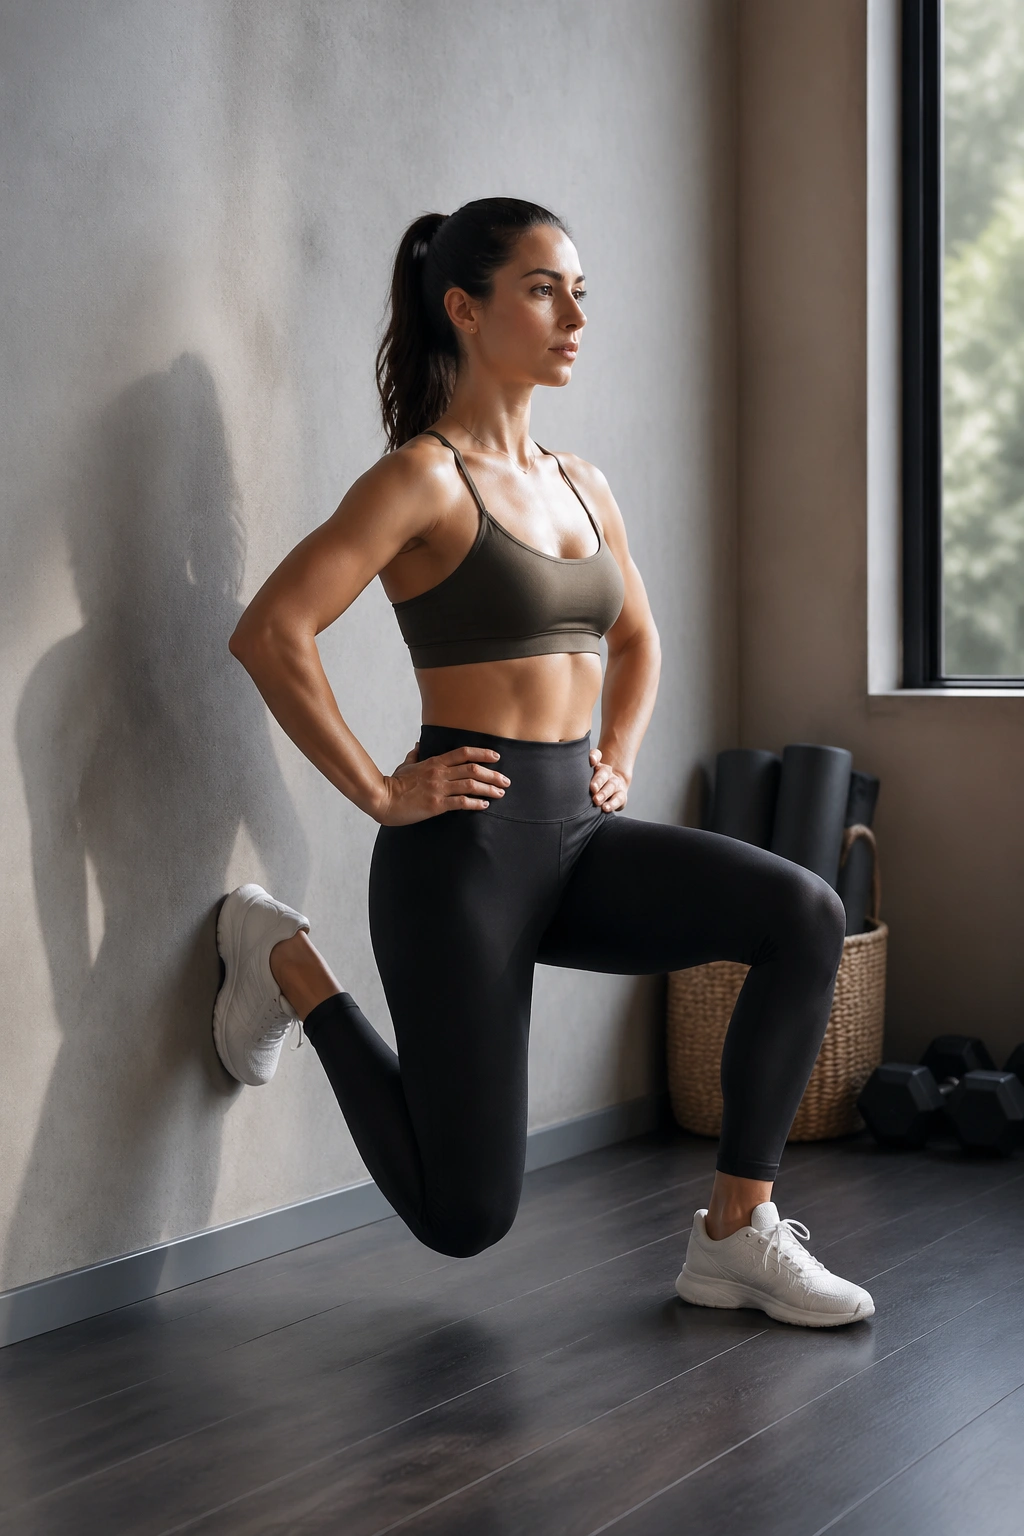
One leg. One wall. A very fast lesson in how much work your thighs can do. Wall split squat holds are sneaky because they don’t look like much from across the room. Then 20 seconds go by and your front leg starts negotiating.
Set one foot forward and the other back, then lower into a split squat with the back knee hovering above the floor. Use the wall for balance only, not for dumping your body weight. Hold for 20 to 30 seconds, add 8 tiny pulses, and switch sides.
The front thigh gets the first complaint. The glute of the back leg joins in soon after. That combination is useful because it’s hard to fake, and it keeps the heart rate ticking up without any impact.
No bouncing. Seriously.
If your knees feel sketchy, shorten the stance and keep the front shin more vertical. Small setup changes can turn a miserable hold into a useful one.
9. Wall Push-Up Ladder
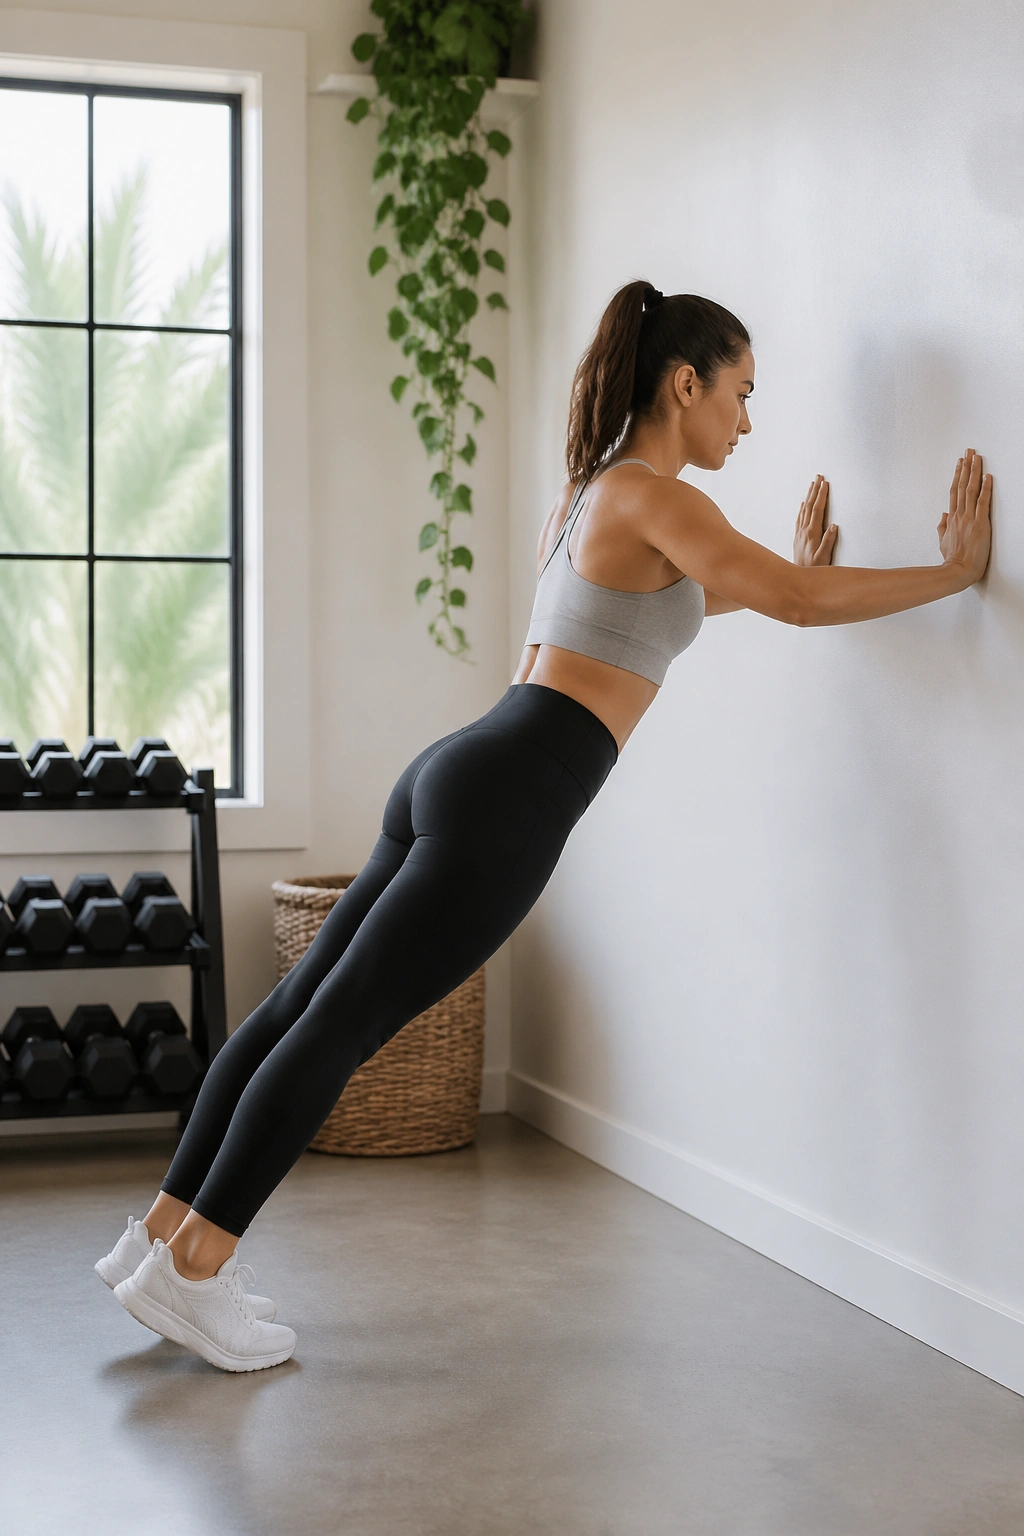
Why do wall push-ups belong in a weight-loss routine? Because they let you stack volume without trashing your form. More clean reps mean more total work, and more total work is the thing that usually gets ignored in home workouts.
How to keep it hard enough
Start with your hands on the wall at shoulder height and walk your feet back until your body forms a straight line. Do 12 reps, rest for 20 seconds, then do 10, then 8. If that feels too easy, move your feet farther from the wall and slow the lowering phase to 3 seconds.
This is one of those rare exercises that can be scaled almost endlessly. Taller stance, slower tempo, or a pause at the bottom—pick one and keep the others steady. The chest, triceps, and shoulders all have to stay engaged, and the wall helps you stay aligned when fatigue starts making things sloppy.
If you like simple benchmarks, aim to finish the last three reps of each set with a bit of strain but no shoulder shrug. That’s the sweet spot.
10. Wall Oblique Crunches
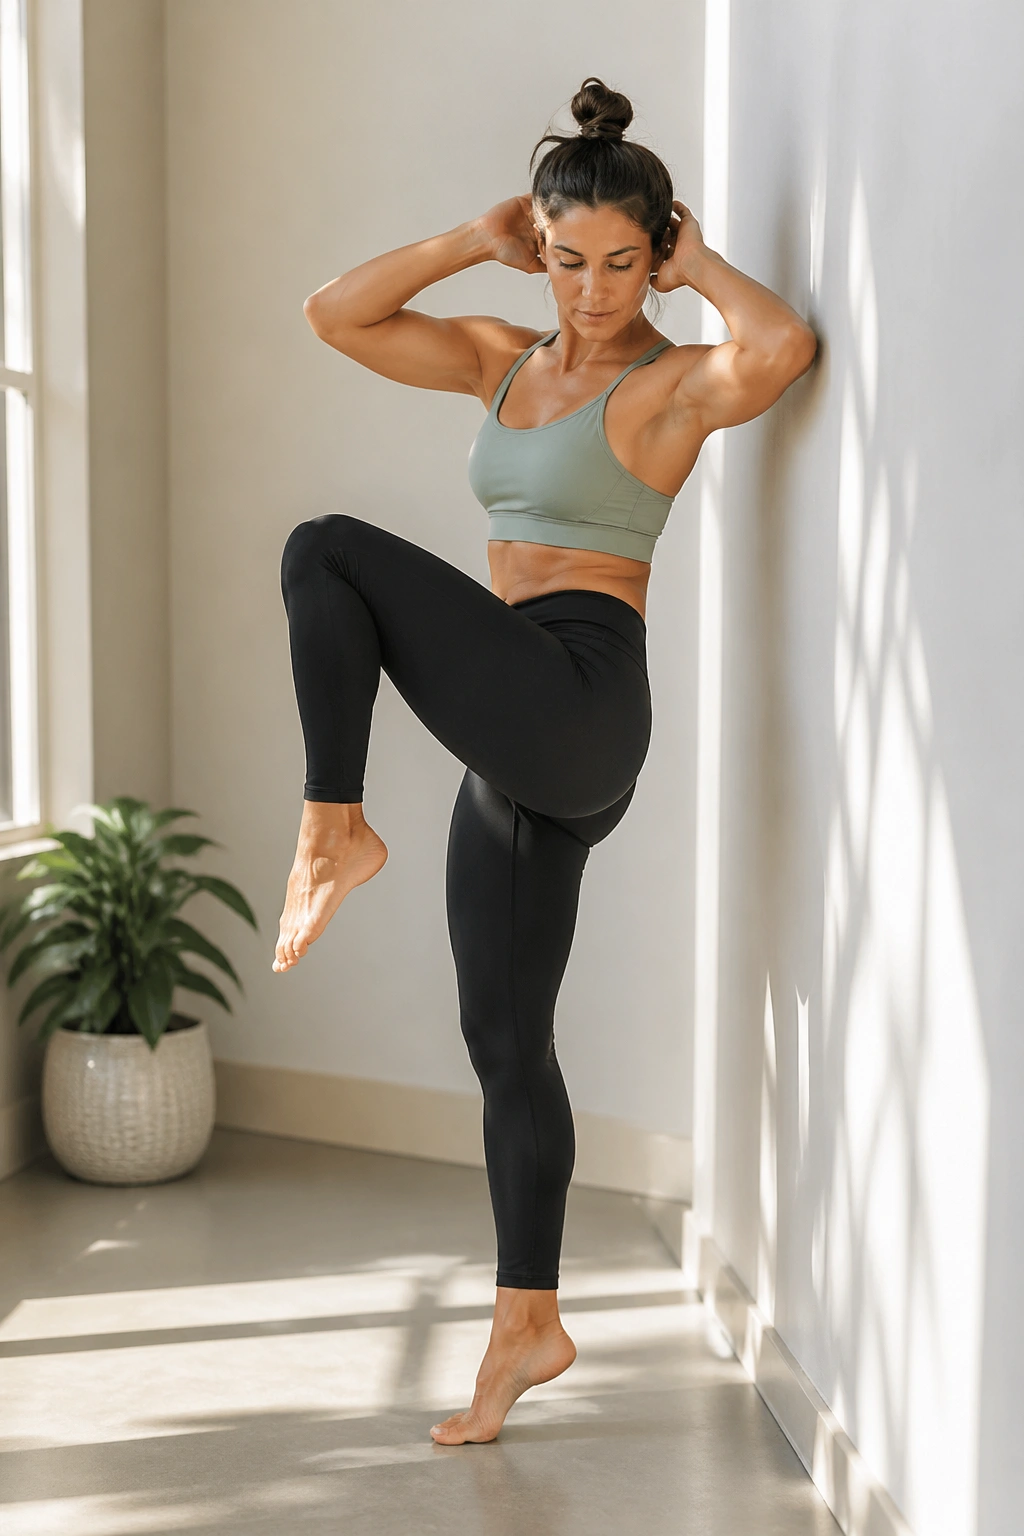
Stand sideways to the wall, and the side waist starts working the moment you drag the ribs down. That’s the beauty of this move. It gives you a clear target without asking for a huge range of motion, which is perfect when you want core work that feels precise instead of noisy.
Lift the outside knee while bringing the elbow toward it, then lower slowly and repeat for 12 to 15 reps per side. Keep the standing leg soft and the hips square. If you lean away from the wall, the whole thing turns into a sloppy side bend. If you stay tall, the obliques do the job.
- Move one rib toward one hip.
- Keep the shoulder away from the ear.
- Use a 1-second squeeze at the top.
You can feel the difference in the first set. One version feels like you’re just moving around. The other lights up the side body and forces you to stay honest.
That honesty is useful. It keeps the work where you want it.
11. Wall Frog Presses
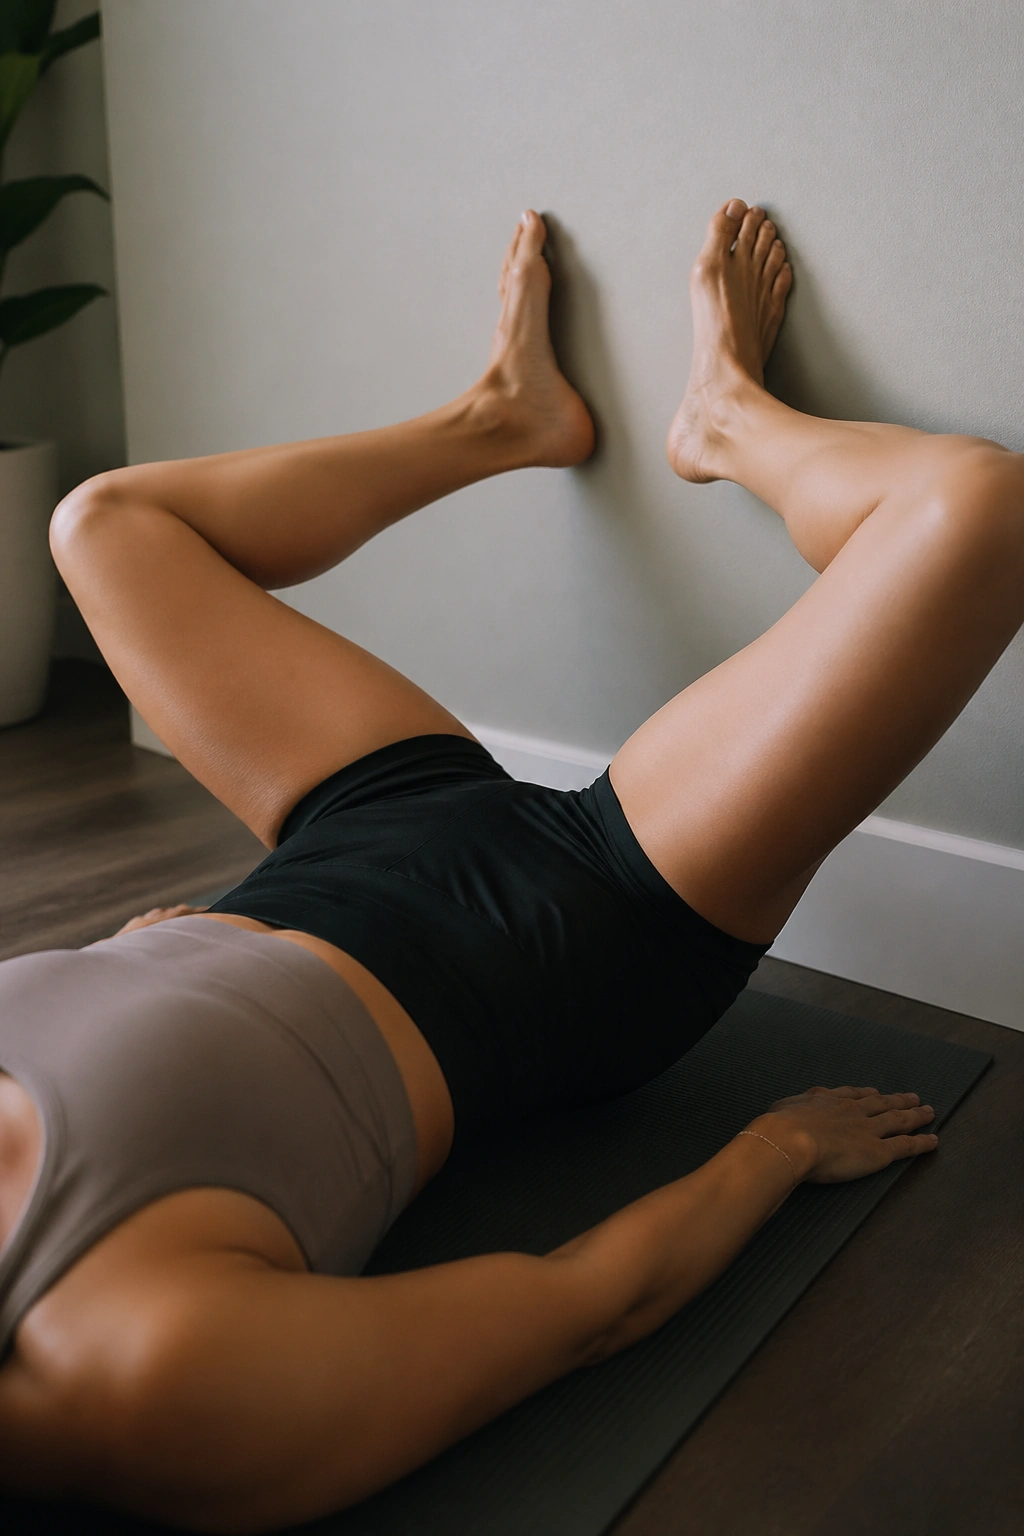
Wall frog presses are one of those moves that sound odd until you try them. Lie on your back with the soles of your feet touching the wall and your knees opening out to the sides, like a loose butterfly shape. From there, press the feet into the wall and lightly squeeze the inner thighs and glutes as the knees track out.
The first thing you notice is the pressure through the hips. The second is how little range you need to make it count. Fifteen slow presses, with a 2-second squeeze at the end of each one, is enough to wake up muscles most people ignore until they cramp.
I like this move because it pairs inner-thigh work with pelvic control. That makes it useful after bigger leg exercises, when the smaller stabilizers have started to drift off. The wall keeps the feet from wandering, and that steadiness gives the midsection a chance to stay organized.
It looks gentle. It isn’t.
12. Wall Hamstring Walkouts
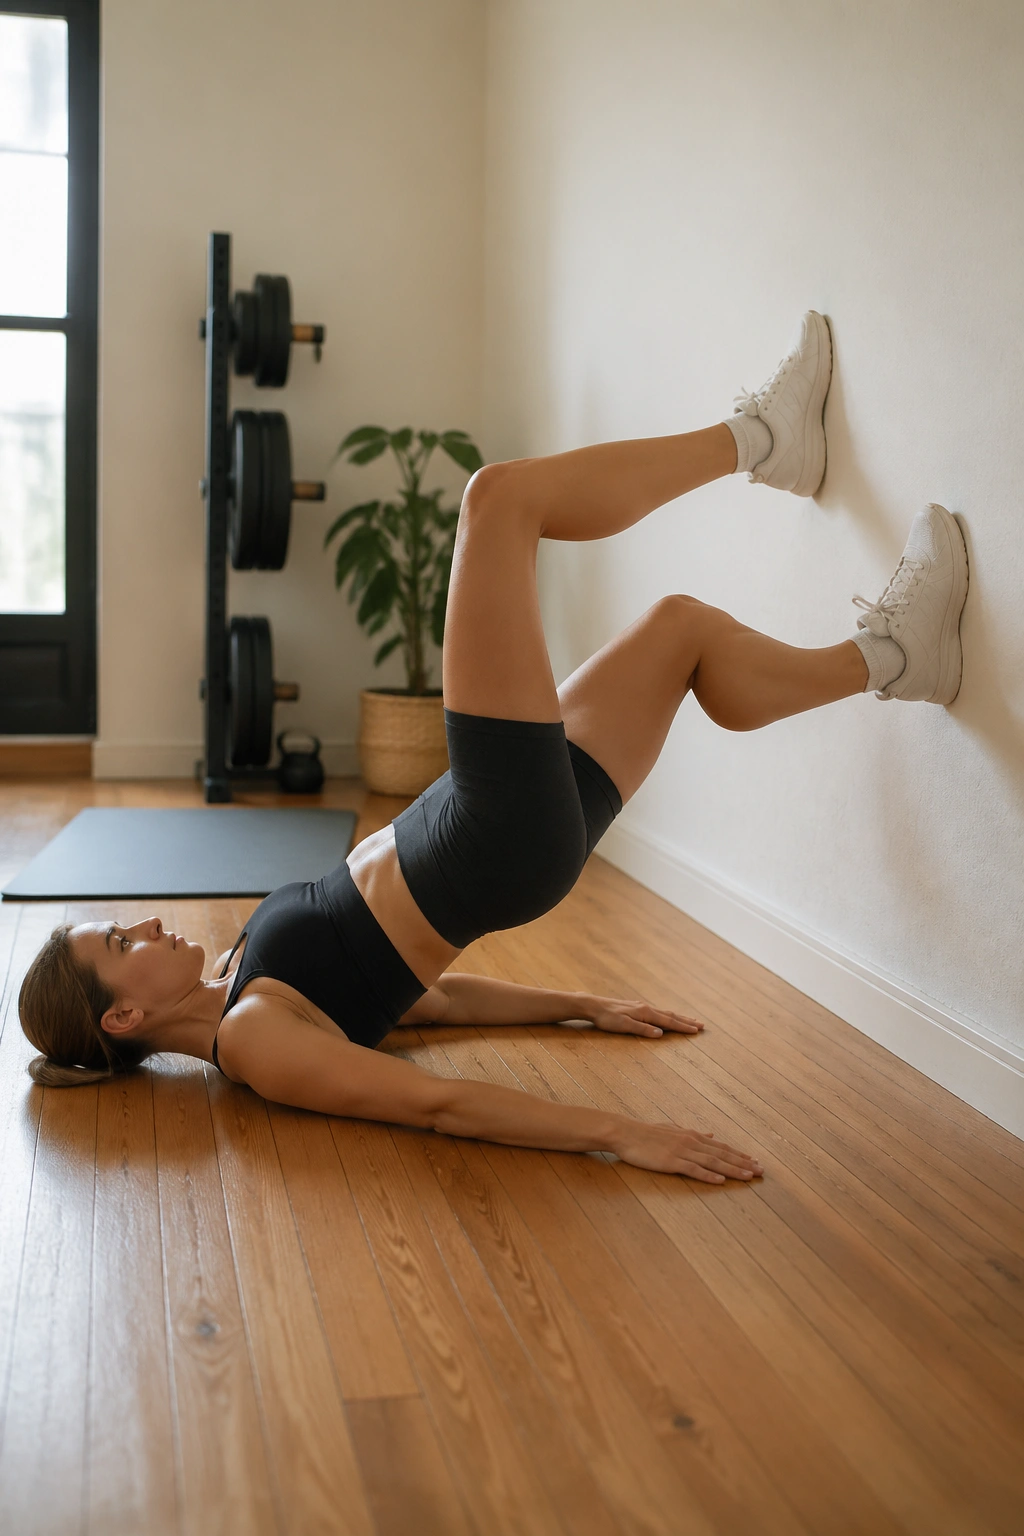
Unlike a standard bridge hold, walkouts keep changing the lever arm, so the work keeps climbing. That’s why wall hamstring walkouts feel tougher than a plain bridge even though the setup looks nearly the same.
Start in a bridge with your feet on the wall. Keep the hips lifted, then slowly walk one foot down the wall a few inches and bring it back, then switch sides. Six to eight walkouts per set is enough to light up the backs of the thighs and glutes without making your lower back complain.
This is a strong choice if you want posterior chain work that doesn’t need any equipment. It also builds the kind of control that helps with posture and walking endurance, which people tend to overlook when they talk only about abs and cardio.
Best for: anyone who likes a hamstring burn and doesn’t mind moving slowly. If the hips start dropping, reset. The wall is there to keep you honest, not to save sloppy reps.
13. Wall Mermaid Stretch Reset
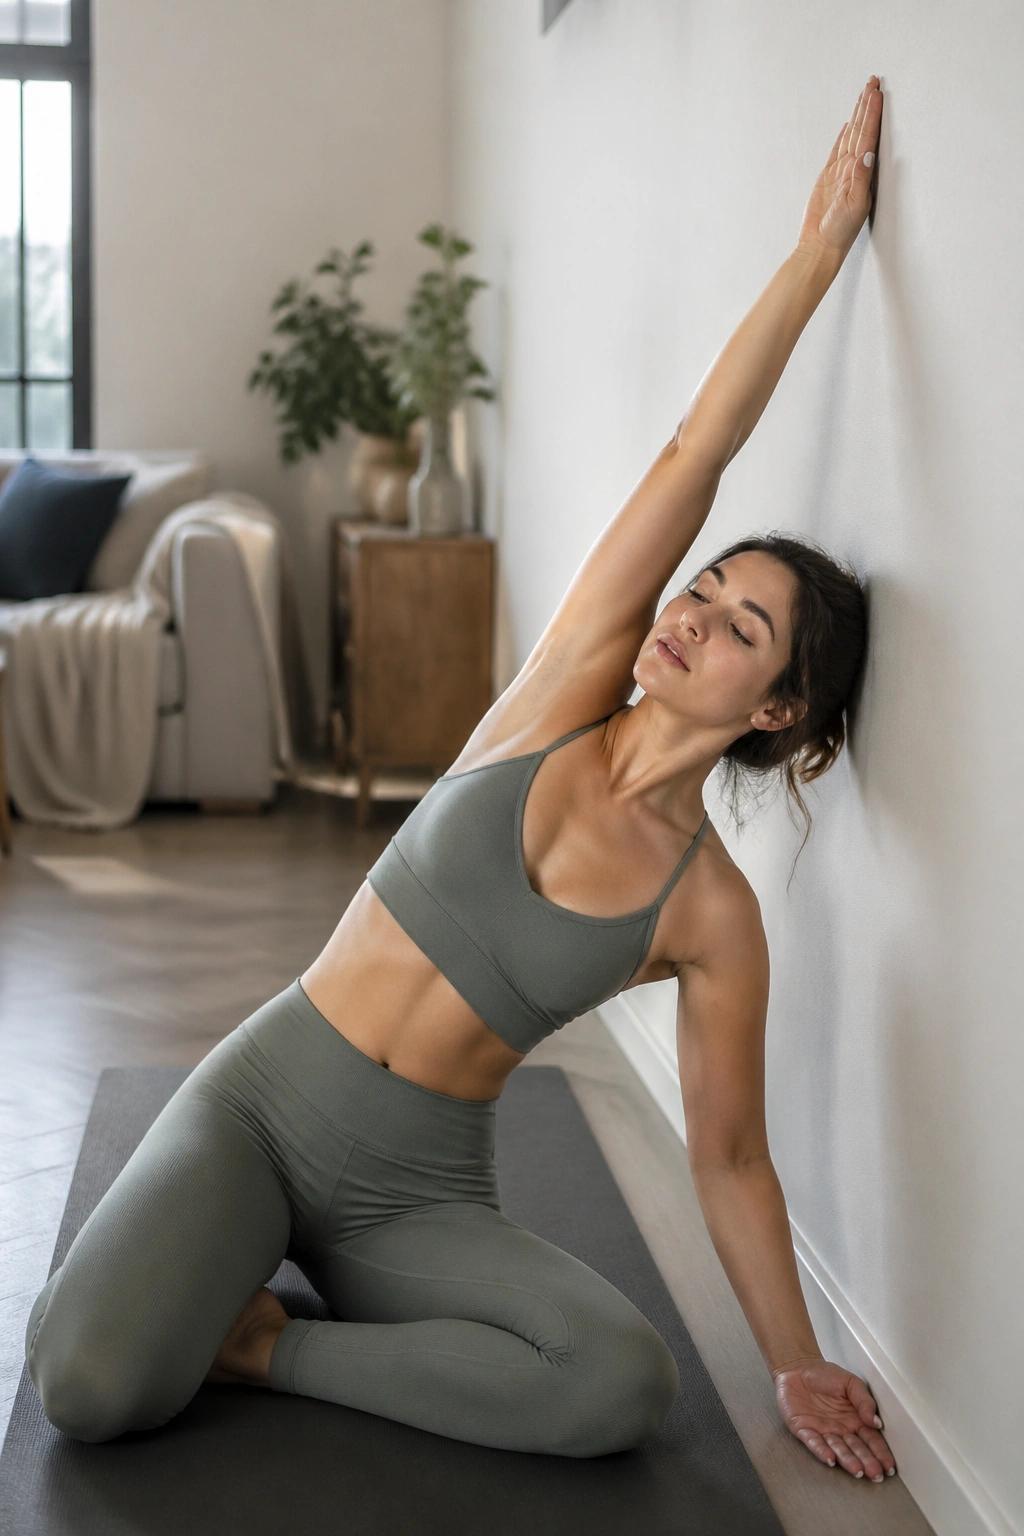
Fat-loss routines need recovery, and this one earns its spot. A mermaid stretch against the wall gives the ribs, side body, and hips a break after all the holds and pulses, which matters more than people admit. If you never slow down, the next workout tends to feel like a punishment.
Why a cooldown belongs in the plan
Sit or kneel beside the wall, slide one arm up and over, and breathe into the side you’re opening. Hold for 30 to 45 seconds on each side, then switch. The movement should feel long and spacious, not cranked. If you feel pinching in the shoulder, back off the range by an inch or two.
- Keep the lower ribs heavy.
- Breathe out longer than you breathe in.
- Let the neck stay soft.
This is not the flashy part of the session. It is the part that keeps you showing up again tomorrow. That alone makes it worth a few minutes.
14. Wall Marching Cardio Flow
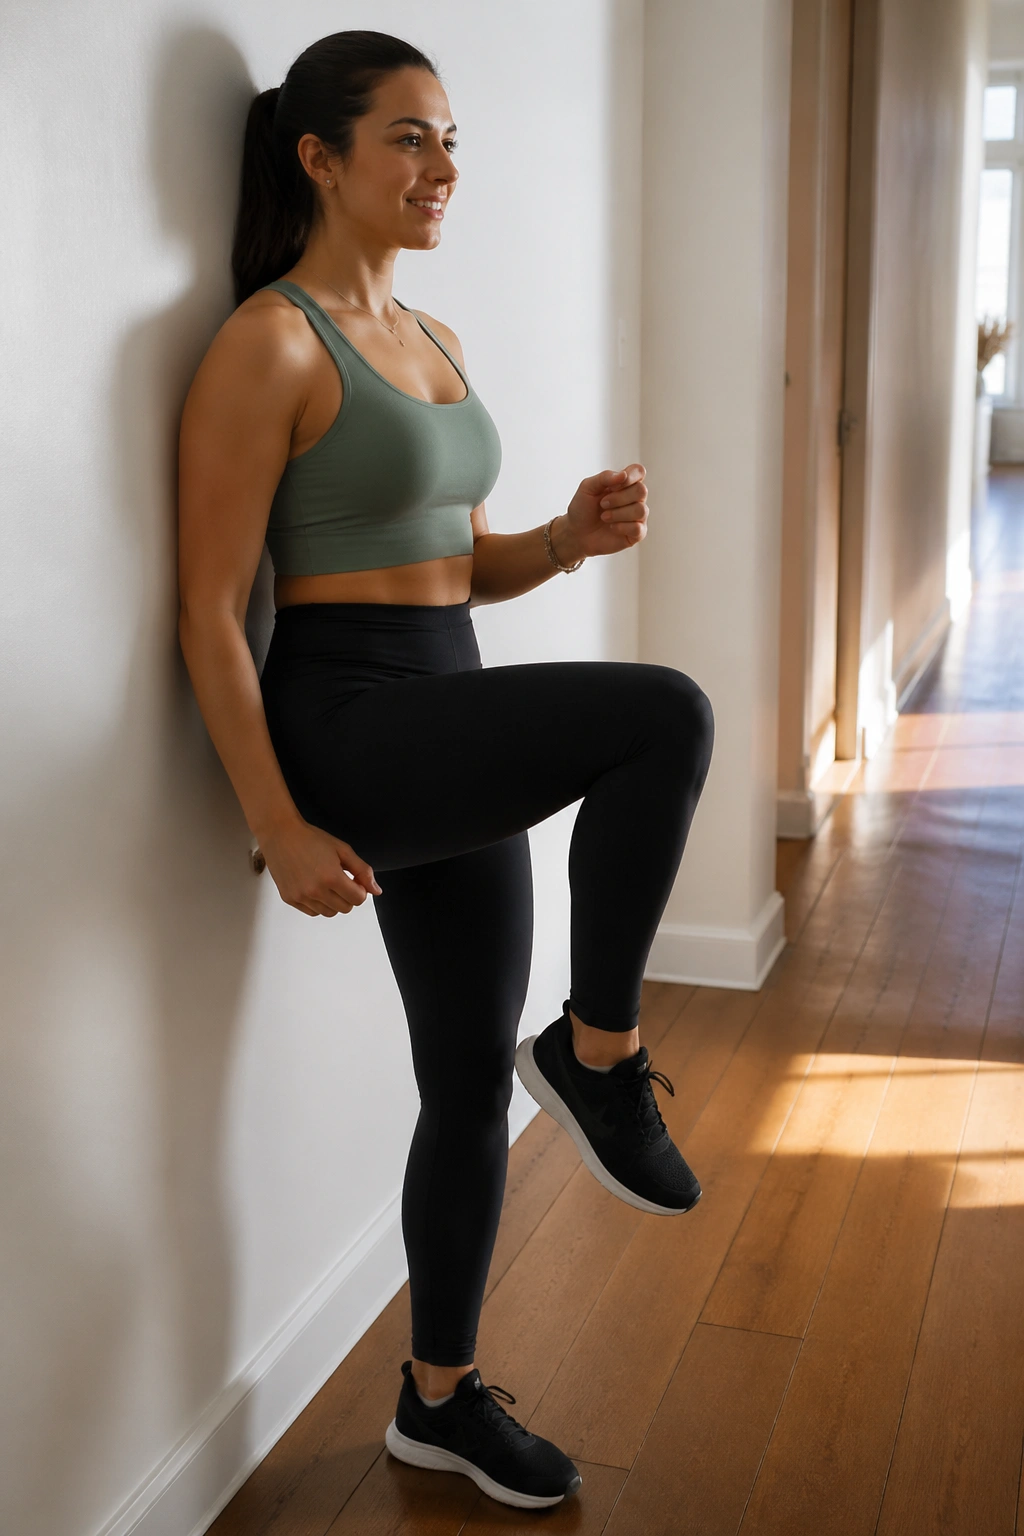
This is the move to reach for when you want your heart rate up without jumping around the room. Wall marching sounds tame. Then you spend 30 seconds driving knees up with brisk, controlled steps and your breathing changes fast.
Stand with your back lightly against the wall, feet about hip-width apart, and alternate high knees in place. Add active arm swings if you want more demand. Work for 30 seconds, rest for 15, and repeat for 4 to 6 rounds. The pace should feel sharp, but the landing should stay quiet.
The wall helps you keep the torso upright, which means the abs have to steady the trunk instead of letting the body wobble. That makes this move useful between slower strength drills, especially when you want a little metabolic push without turning the workout into a jumble.
If you live above somebody, keep the feet soft. Quiet feet, hard work.
15. Wall Lunge Hold with Arm Sweep
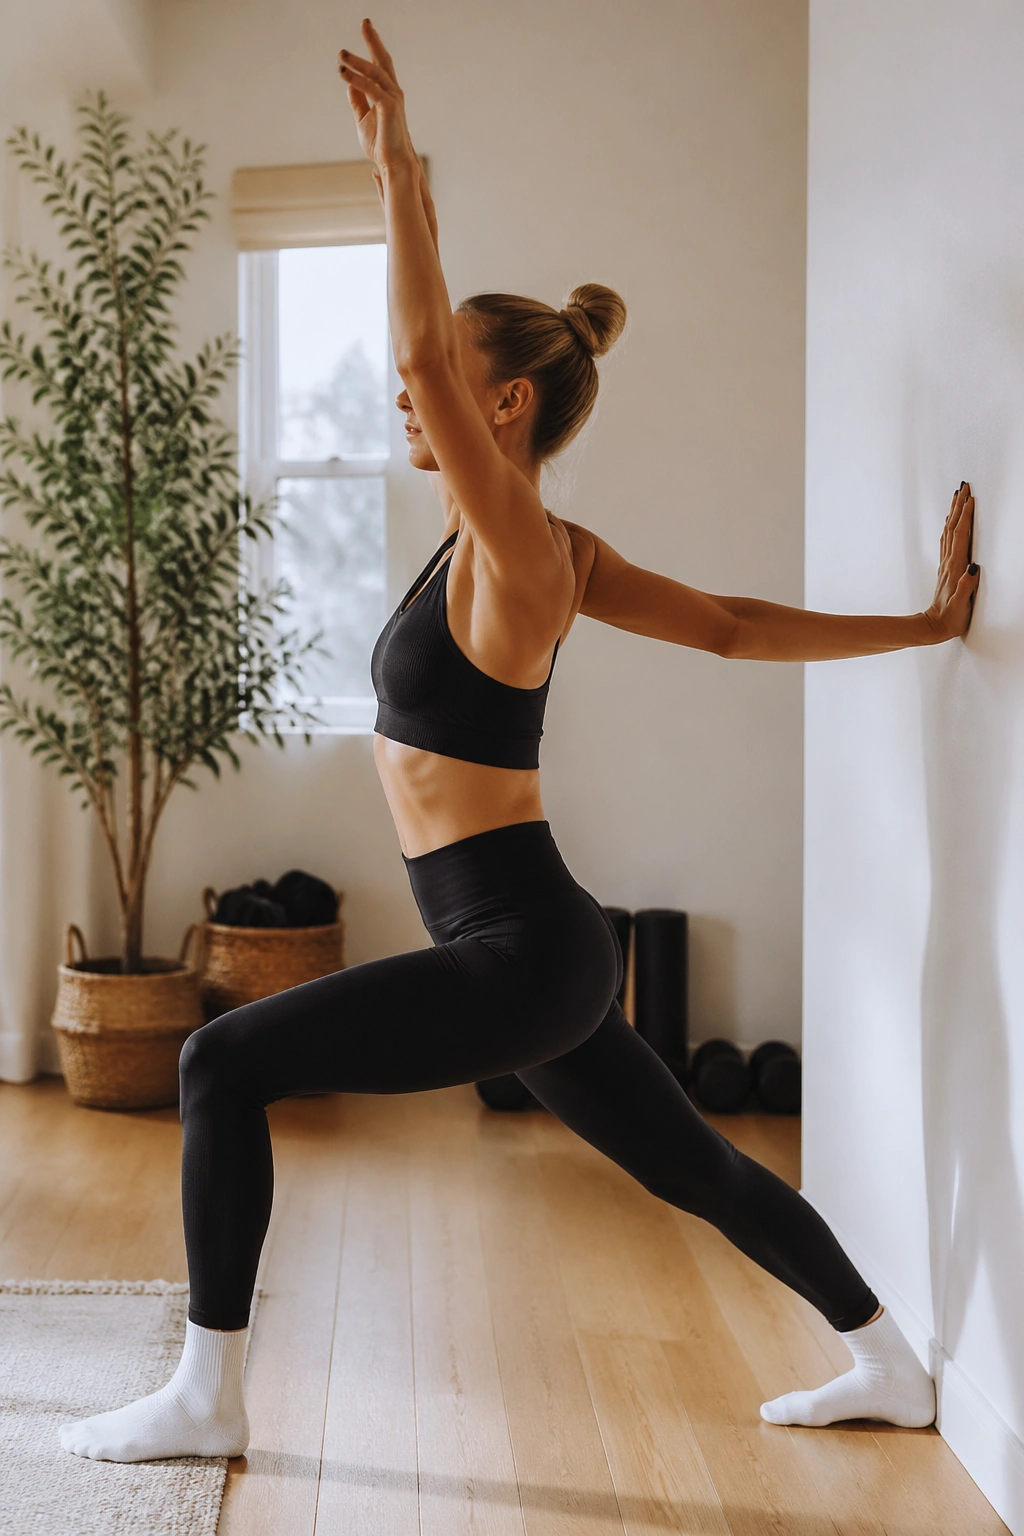
Why does a lunge get harder when the wall enters the picture? Because the wall stops you from cheating with balance, and that forces the front leg, glute, and trunk to do their part.
How to use it
Place one hand lightly on the wall, step one leg back, and drop into a lunge hold. From there, sweep the free arm forward and up for 5 slow reps, then switch sides. Hold each lunge for 20 to 30 seconds if you want more lower-body time under tension.
The arm sweep is not a gimmick. It makes the torso resist rotation while the legs stay loaded, which gives you a cleaner oblique and glute challenge. If your front knee caves inward, shorten the stance and try again.
This is the kind of move that rewards patience. The first rep feels easy. The last sweep feels much less polite.
16. Wall Toe Tap Core Set
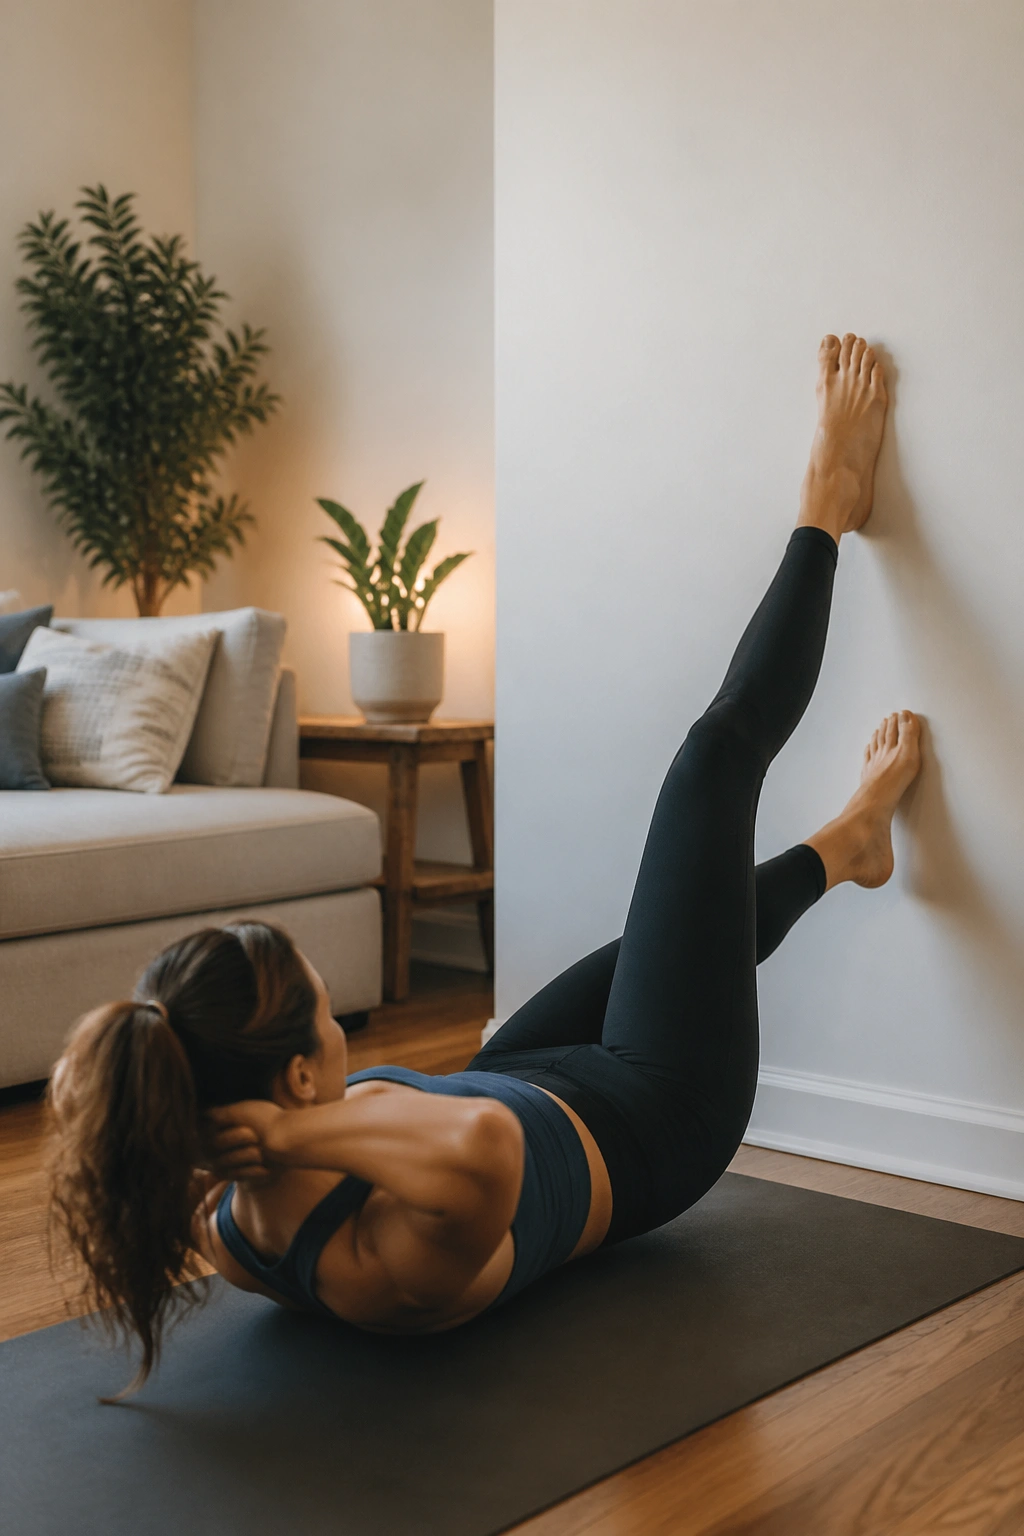
If floor leg lowers make your back arch, bring the wall into the conversation. A wall toe tap gives the abs a clear target and gives your pelvis a reference point, which makes it much easier to stay controlled.
Lie on your back with your legs bent and feet on the wall. Lift one foot away, tap the toe lightly down toward the floor, then bring it back to the wall and switch sides. Keep the low back settled and the ribs quiet. Eight to 10 taps per side is enough for a solid set.
- Move slowly enough to keep the spine steady.
- Do not let the lifted leg drag the pelvis with it.
- Stop the set when you lose the back connection.
That last part matters. If the lower back starts to arch, the work has already drifted. Reset and try again.
This is core training you can feel in the middle of the torso, not in the neck or hip flexors.
17. Wall Glute Pulse Burn
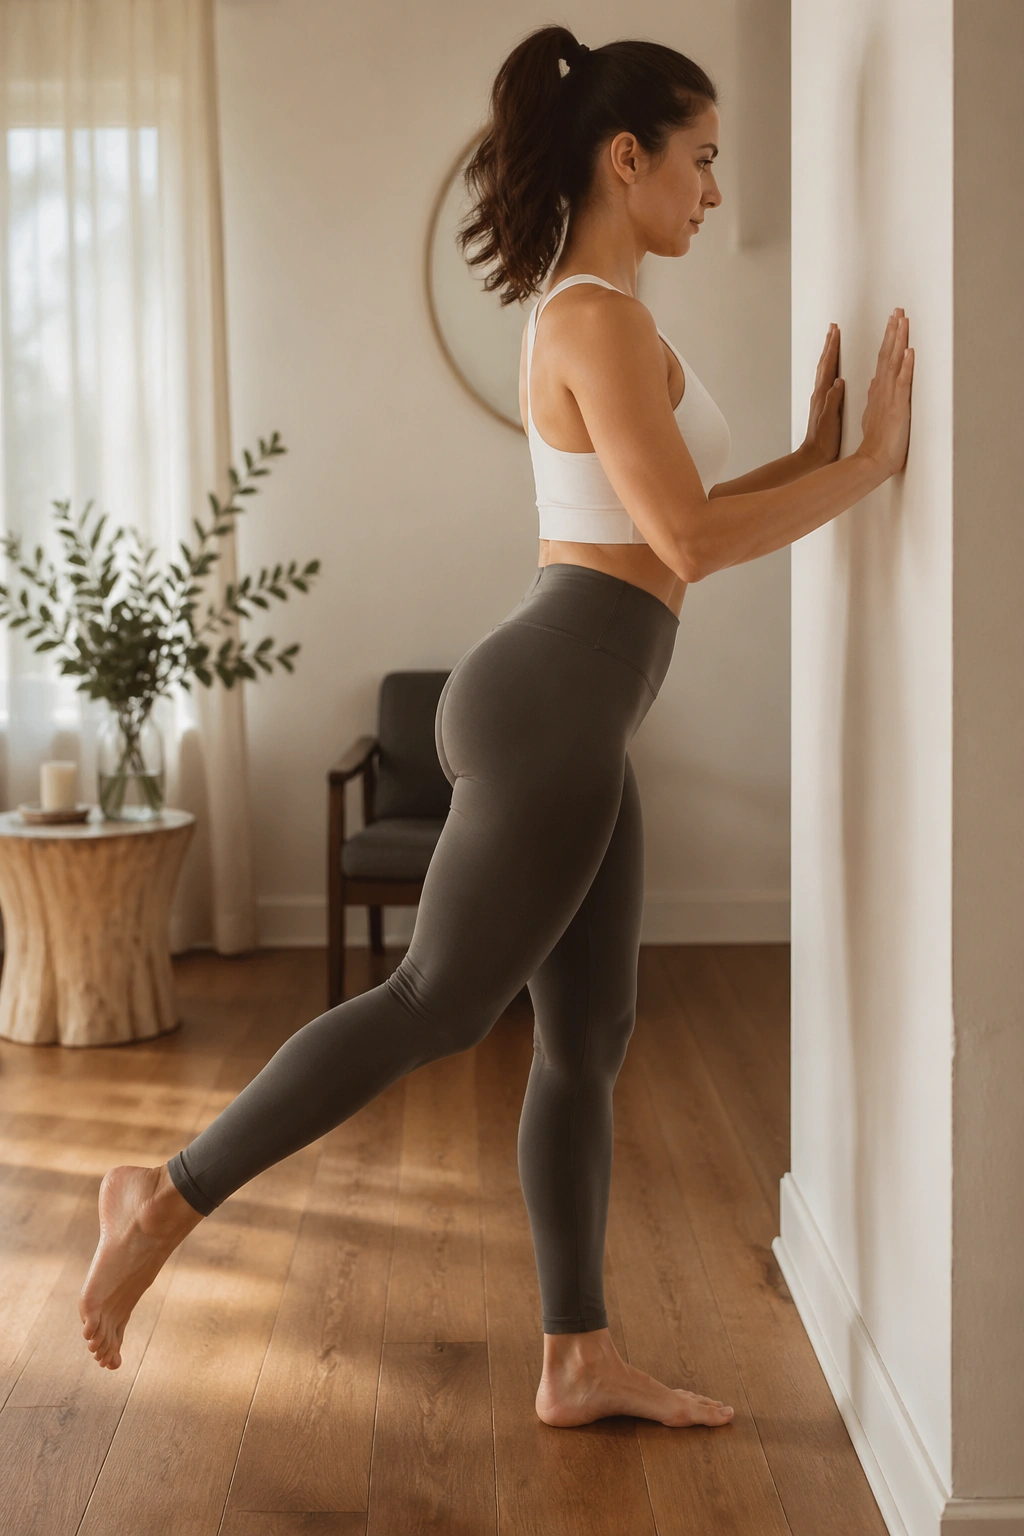
Wall glute pulses are a little ugly in the best way. Stand facing the wall, place your forearms on it, hinge forward slightly at the hips, and extend one leg straight back. From there, pulse the lifted heel up 15 to 20 times with a tiny, controlled motion that comes from the glute, not the low back.
The point is not height. The point is tension. A two-inch pulse, done cleanly, will do more for the back of the hip than a wild swing that looks bigger in the mirror. Keep the standing leg soft, the standing heel rooted, and the pelvis square.
Three rounds per side is plenty if you keep the movement tight. You should feel the outer glute and upper hamstring start to heat up by the end of the second set. If your lower back starts doing the work, shorten the range and slow down.
Small pulses. Serious burn.
18. Wall Bicycle Presses
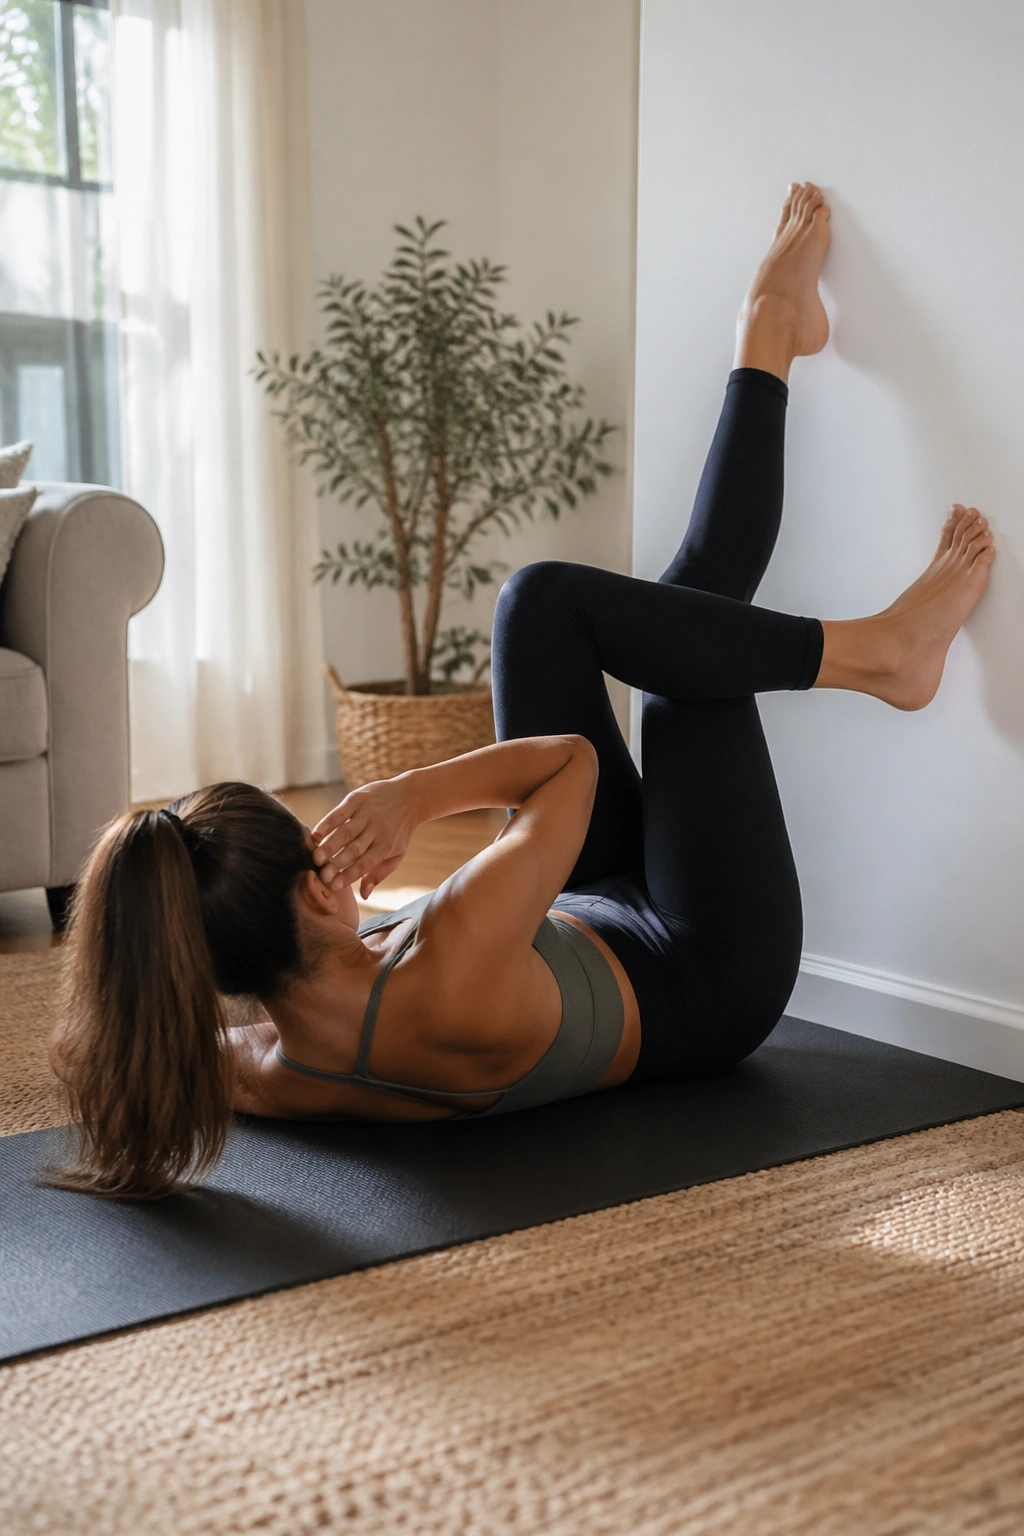
Unlike a floor bicycle crunch, the wall version keeps the neck out of it. That alone makes it worth trying if regular bicycle work leaves your jaw tight and your shoulders creeping toward your ears.
Lie on your back with your calves pressed into the wall. Reach opposite elbow toward opposite knee while one leg extends out, then switch sides in a slow, controlled rhythm. Eight cycles per side is enough if you keep the movement deliberate and the breath steady. Exhale on each twist so the ribs can narrow instead of flaring.
This version is best for people who want core endurance without a lot of spinal flexion speed. The wall gives you a cleaner setup, and that means less flopping around when fatigue starts to show up. If the movement feels too easy, move your feet slightly higher on the wall or slow each rep to 4 seconds.
The goal is control, not crunch noise.
19. Wall Angels and Rib Cage Control
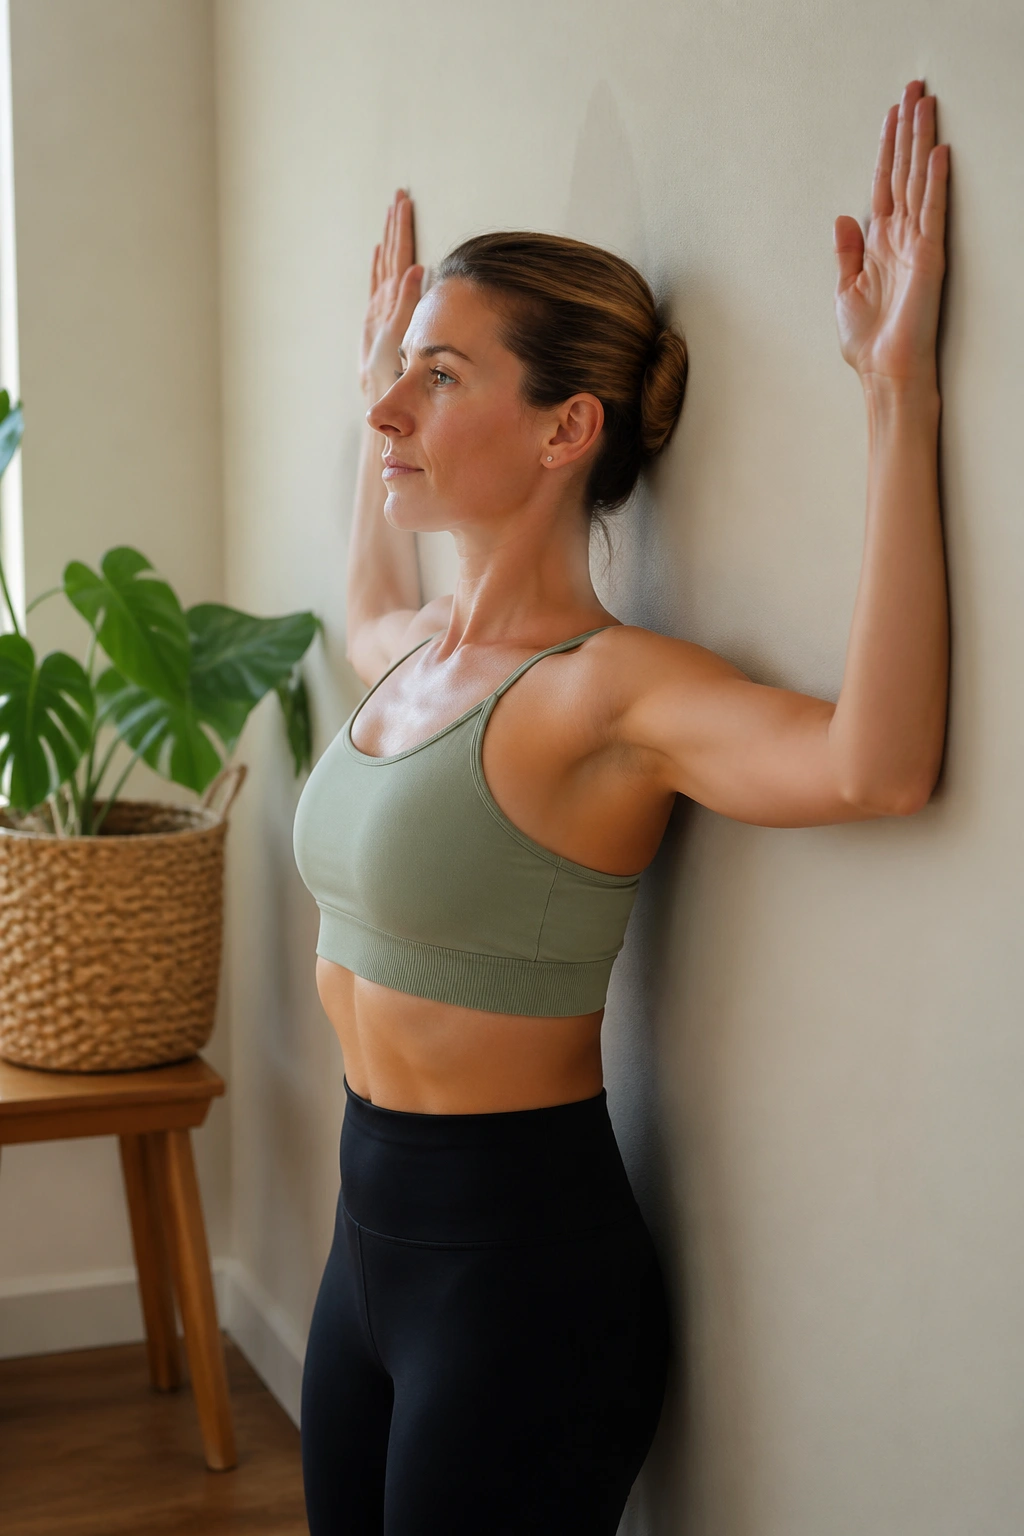
Standing wall angels look tame, and I say that with affection. They’re one of the best ways to teach the upper back to stay honest while the ribs stop flaring forward like a popped tent.
How the wall keeps you honest
Press your back, head, and hips lightly into the wall, then slide the arms up and down in a snow-angel shape. Eight to 10 slow reps is enough. If your wrists or elbows won’t touch the wall, do not force them. Keep the ribs down and work within your range.
- Move with the back of the rib cage flat.
- Keep the chin level, not jutting forward.
- Pause for one breath at the top.
This matters for wall Pilates because rib control changes everything else. Better stacking means cleaner squats, cleaner planks, and less lower-back compensation when the core gets tired.
It’s not the flashiest drill in the pile. It might be the most useful.
20. Wall Full-Body Finisher Circuit
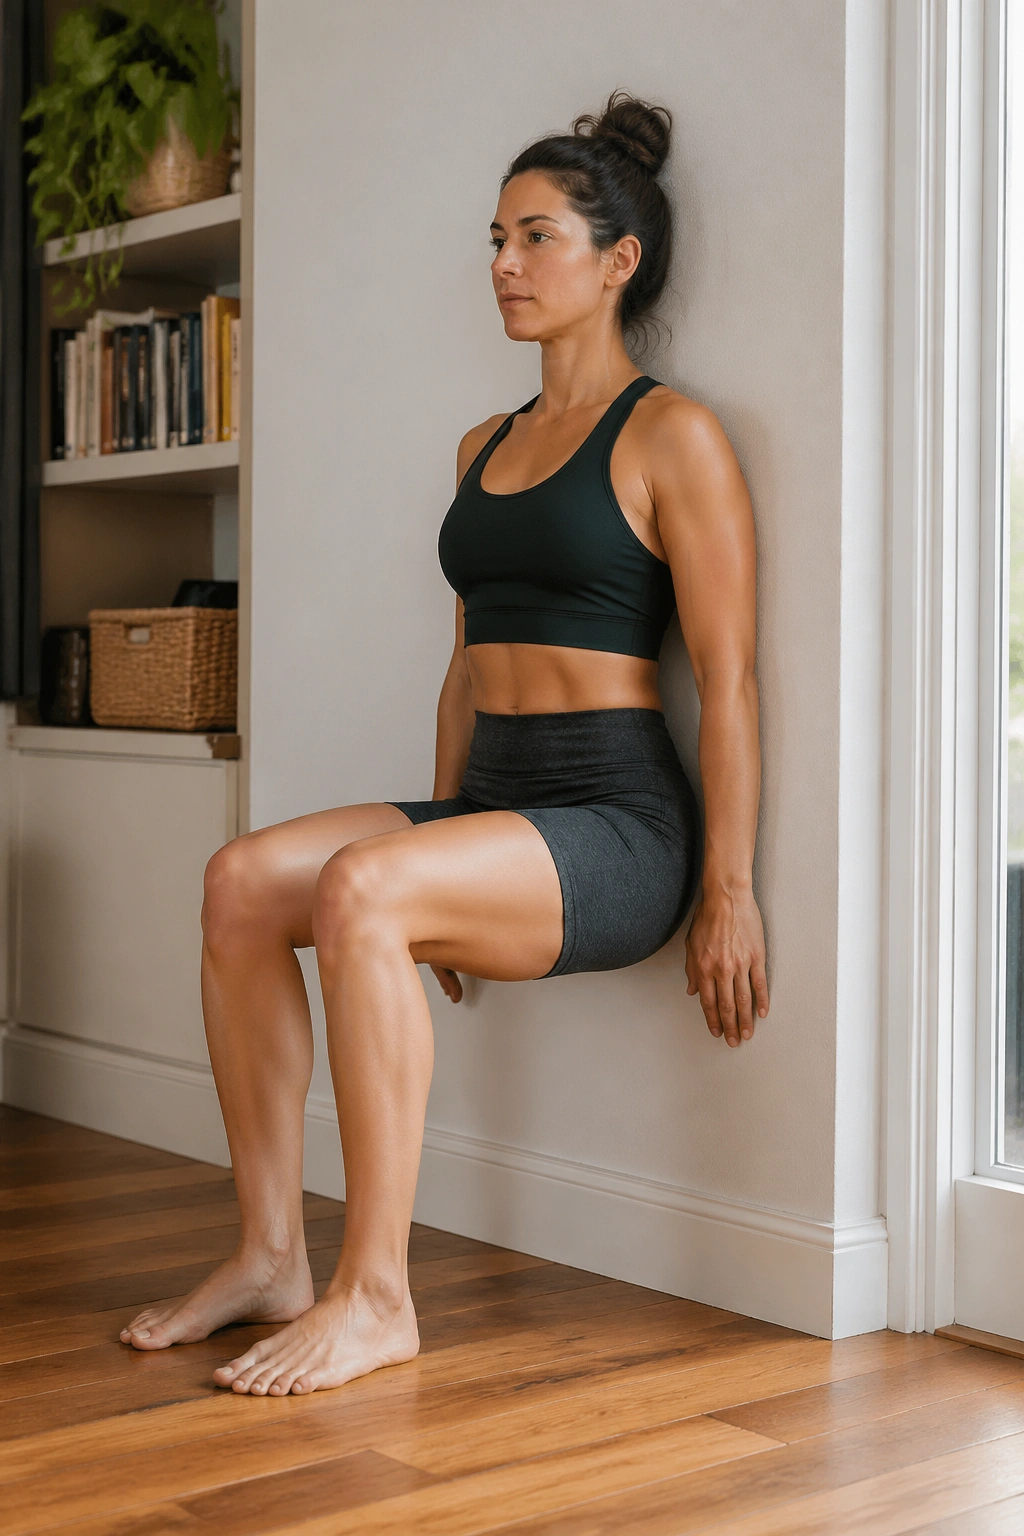
This is the routine I would save for the days when you want one block that covers legs, core, shoulders, and heart rate. A full-body wall Pilates finisher works because it layers effort without needing speed. You can keep moving, keep breathing, and keep the session short enough that you’ll actually do it again later in the week.
Run this circuit for 2 to 3 rounds:
- 30 seconds wall chair squat hold
- 30 seconds wall marching
- 10 wall push-ups
- 10 wall bridge reps
- 15 seconds rest between moves
- 45 seconds rest between rounds
The whole thing takes about 6 to 10 minutes depending on your pace. That makes it a useful cap on a longer session or a stand-alone workout on a busy day. If you want more challenge, slow every lowering phase to 3 seconds and keep the rest periods honest. If you need less, cut the push-ups to 6 reps and keep the squat hold higher.
Wall Pilates for weight loss works best when the routine is repeatable. That’s the part people skip. Not the sweat. Not the fancy variations. Repeatability.
And if you can string three or four of these sessions into a week, paired with walking and sensible eating, the body starts changing in a way that feels earned rather than noisy. That’s the version worth keeping.
