



A sore back can make a short drive feel like punishment. The best foam roller Pilates moves for back pain do not involve grinding your lower spine into a hard cylinder and hoping the ache disappears. In my experience, that brute-force approach misses the point. A roller works better when it acts like a teacher: it shows you when your ribs flare, when your pelvis tips, and when your hips and shoulders leave the low back to do all the work.
That matters because a lot of everyday back pain is mechanical rather than dramatic. You sit too long, brace too hard, twist from the waist instead of the ribs, grip the hip flexors, stop breathing into the back of the rib cage, and then wonder why getting up from the couch feels older than it should. The low back ends up paying for stiffness and weakness somewhere else.
Pilates has always been good at spotting that kind of problem. Done well, it builds breath control, spinal awareness, deep trunk strength, and smoother hip motion. Add a foam roller, and you get instant feedback. If you wobble, arch, shove with your neck, or rush the move, the roller tells on you right away.
One more thing before we start moving: a touchy back is not the same thing as a dangerous back. Sharp pain after a fall, fever, numbness, leg weakness, saddle numbness, bowel or bladder changes, or pain that shoots hard below the knee needs medical attention, not a home workout. For the tight, stiff, achy kind of back pain that comes with desk time, stress, and stale movement habits, these drills can be gold.
Why Foam Roller Pilates Moves for Back Pain Work Better Than Aggressive Rolling
A lot of people hear foam roller and think of punishment. They lie on the roller, dig into the sorest spot, grit their teeth, and keep going because it feels “productive.” I do not love that plan for a cranky low back.
The lumbar spine has a natural curve, and it does not have the rib support your upper back has. When you roll straight over the lower back, you often get compression without much useful change. What tends to help more is using the roller to improve position, breathing, and control. That is much closer to how Pilates helps backs calm down.
Clinical guidelines for non-specific low back pain have long leaned toward staying active and building movement tolerance rather than resting for days and waiting for a miracle. Pilates-based exercise has shown up in reviews as a helpful option for pain and function, especially when the work focuses on trunk endurance, coordination, and graded motion. That tracks with what many good physical therapists teach in the clinic.
So think of the roller in three jobs:
- Feedback: it tells you when your spine, ribs, or pelvis drift out of place
- Support: it props you up so stiff areas can move with less strain
- Challenge: it adds a small balance demand, which wakes up the deep stabilizers that protect the back during daily life
That middle role gets overlooked. A lot.
When a move is chosen well, you finish feeling taller, warmer, and less guarded—not beat up. That is the standard I use with every exercise below.
Before You Start These Foam Roller Pilates Moves for Back Pain
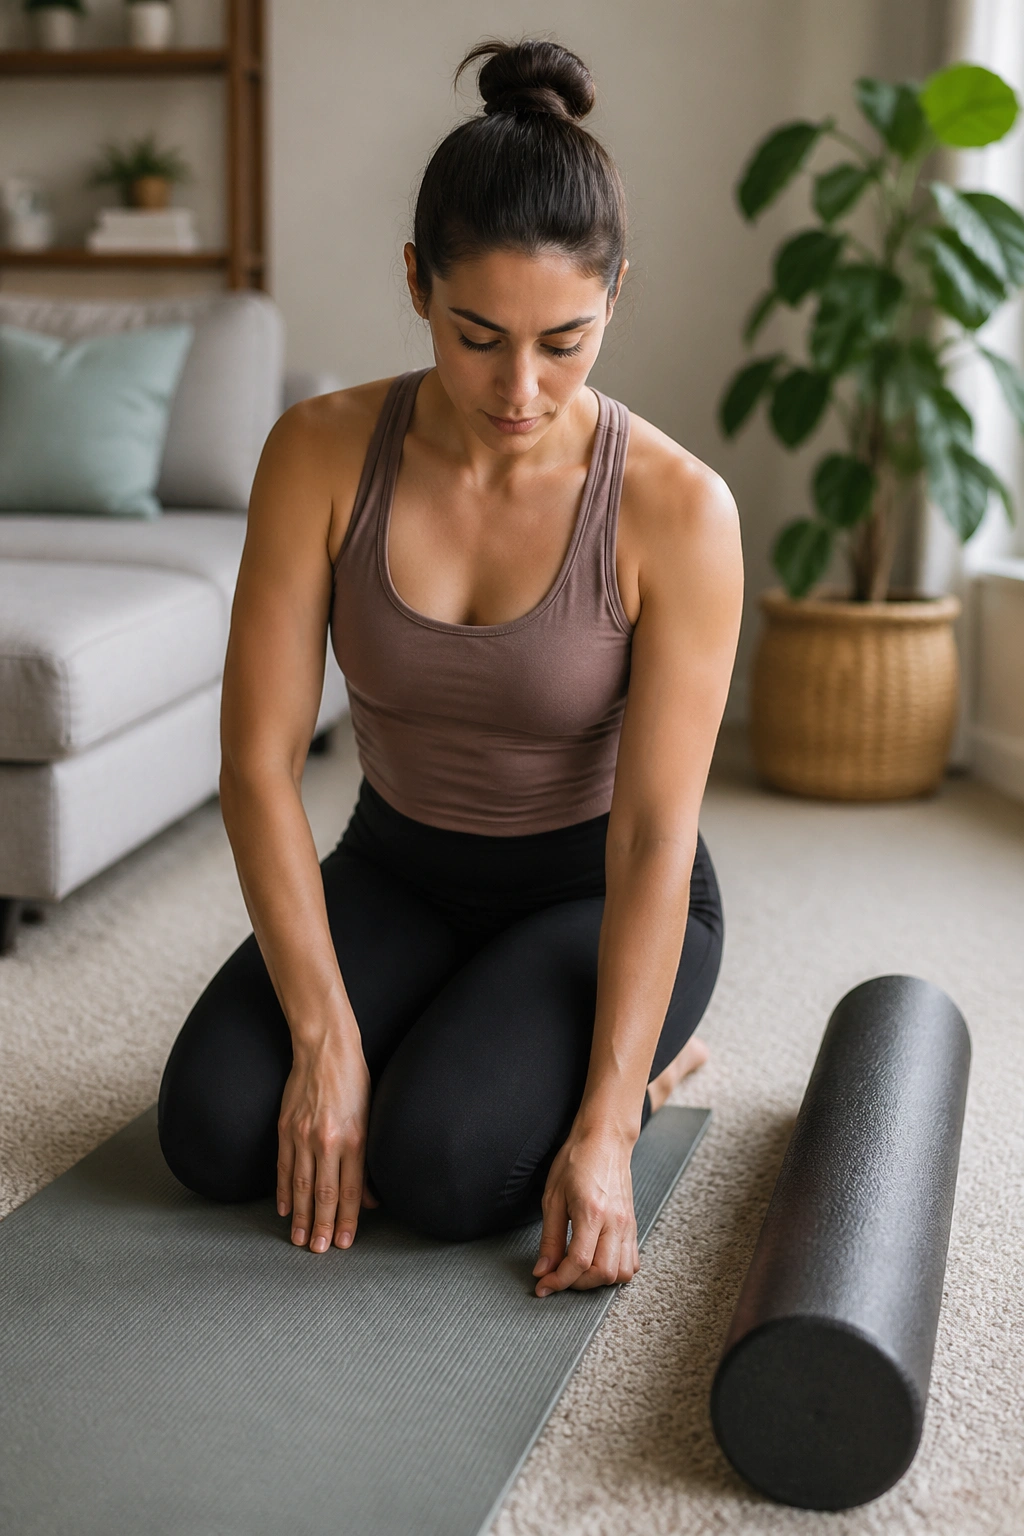
Skip the knobby roller.
If your back is sore, a 36-inch medium-density foam roller is the sweet spot for most of these moves. A soft roller works if you are tender or new to exercise. A hard roller has its place, though I would save that for legs and upper back work once your symptoms have settled.
A few setup rules make a big difference:
- Work on a yoga mat or carpeted floor so the roller does not slide away
- Stay in a range where discomfort is mild—think 0 to 3 out of 10 and easing after the set
- Move with your breath; in Pilates, the exhale usually helps you brace without clenching
- Start with 4 to 6 moves, not all 15 in one shot
- Do 5 to 8 slow reps unless a move is held for breaths instead of repetitions
Your lower back is not meant to be ironed flat.
If a move makes pain spread farther, creates tingling, or leaves you more guarded ten minutes later, stop and swap it out. Extension-sensitive backs often prefer smaller backbends. Flexion-sensitive backs may not like deep rounded positions. You do not need to prove anything to a foam roller.
I like to tell people to pay attention to the after-feel. The right dose leaves your back feeling lighter when you stand up, and your breath should feel easier. If you finish a session and feel jammed, shaky, or oddly irritated around one hot spot, the move was too big, too fast, or wrong for your back that day.
1. Diaphragmatic Breathing on a Lengthwise Roller
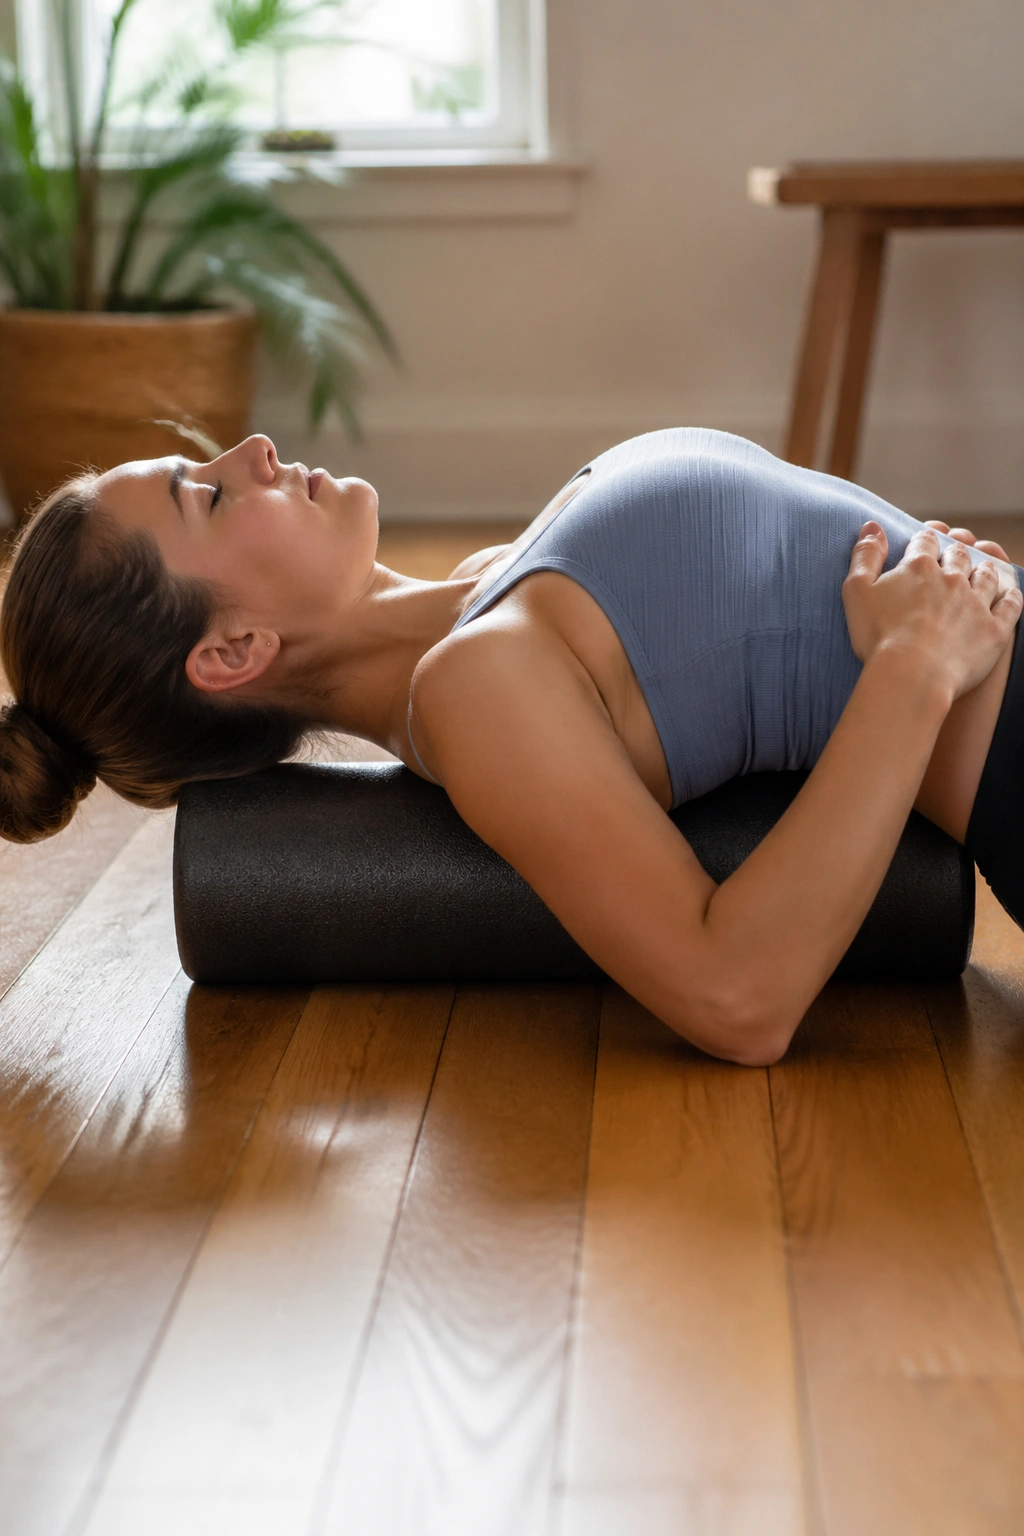
Can breathing help back pain? On its own, no. But it can change how much extra work your back is doing every minute, and that is not small.
Lie lengthwise on the roller so your head, mid-back, and sacrum are supported. Bend your knees, place your feet hip-width apart, and let your arms rest by your sides or on your ribs. If you feel wobbly, widen your feet another inch or two.
What to do
Take 5 to 8 slow breaths. Inhale through your nose and try to expand the back and sides of your rib cage into the roller. Exhale through pursed lips for about 5 seconds, letting the ribs soften down without smashing your back flat.
The goal is not a dramatic inhale. It is a wider one.
Many sore backs live under a rib cage that stays popped up all day. When the ribs lift and flare, the lower back often tightens to hold you there. This position gives you instant feedback. If your chest jumps first and your low back arches bigger on every inhale, you will feel it.
Quick cues
- Keep your jaw loose and throat soft
- Let the back of your ribs feel heavy on the roller
- Keep a small natural curve in the low back rather than forcing it down
- If your neck feels strained, use a folded towel under the head end of the roller
This is the move I come back to when someone says, “I don’t know how to relax my back without collapsing.” It teaches support without stiffness, which is harder than it sounds.
2. Pelvic Clock on the Roller
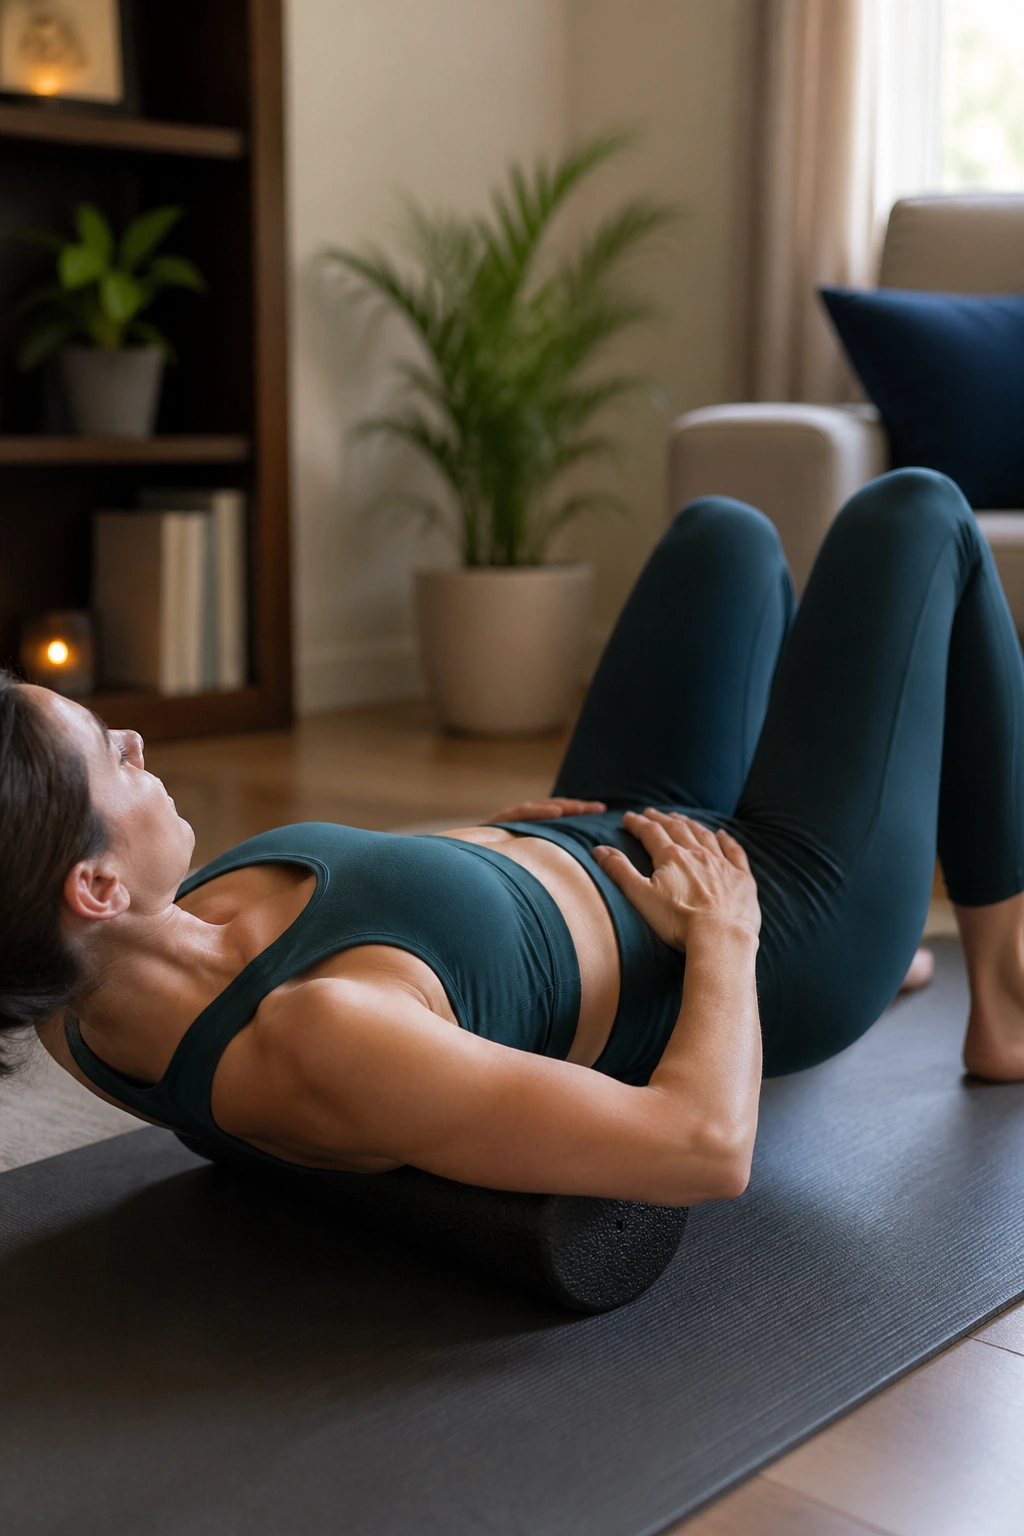
Tiny pelvic movements are underrated. A lot of back pain comes from not being able to move the pelvis in small, clean directions, so the spine jumps into one big pattern instead.
Stay lying lengthwise on the roller with your knees bent and feet grounded. Picture your pelvis as a clock face: 12 o’clock is your navel, 6 o’clock is your pubic bone, and 3 and 9 are the two front hip bones.
How to do the clock
Gently tip toward 12 and 6 first. At 12, your low back gets a touch flatter. At 6, the curve increases a bit. Then explore 3 to 9, letting one side of the pelvis get heavier and then the other. After that, draw a slow circle around the full clock.
Keep the movement small—about the size of what you would do if you were trying to shift a coin under your waistband. Do 3 circles each direction.
Watch for this
- Shoulders gripping into the roller
- Knees wobbling side to side
- A neck that starts helping
- Big movements that come from the ribs instead of the pelvis
The best part of pelvic clock is not the move itself. It is what happens later, when you stand up and notice you can tilt into a chair, hinge to brush your teeth, or settle your pelvis under your ribs without that old stiff, all-or-nothing feeling.
3. Supported Imprint and Release
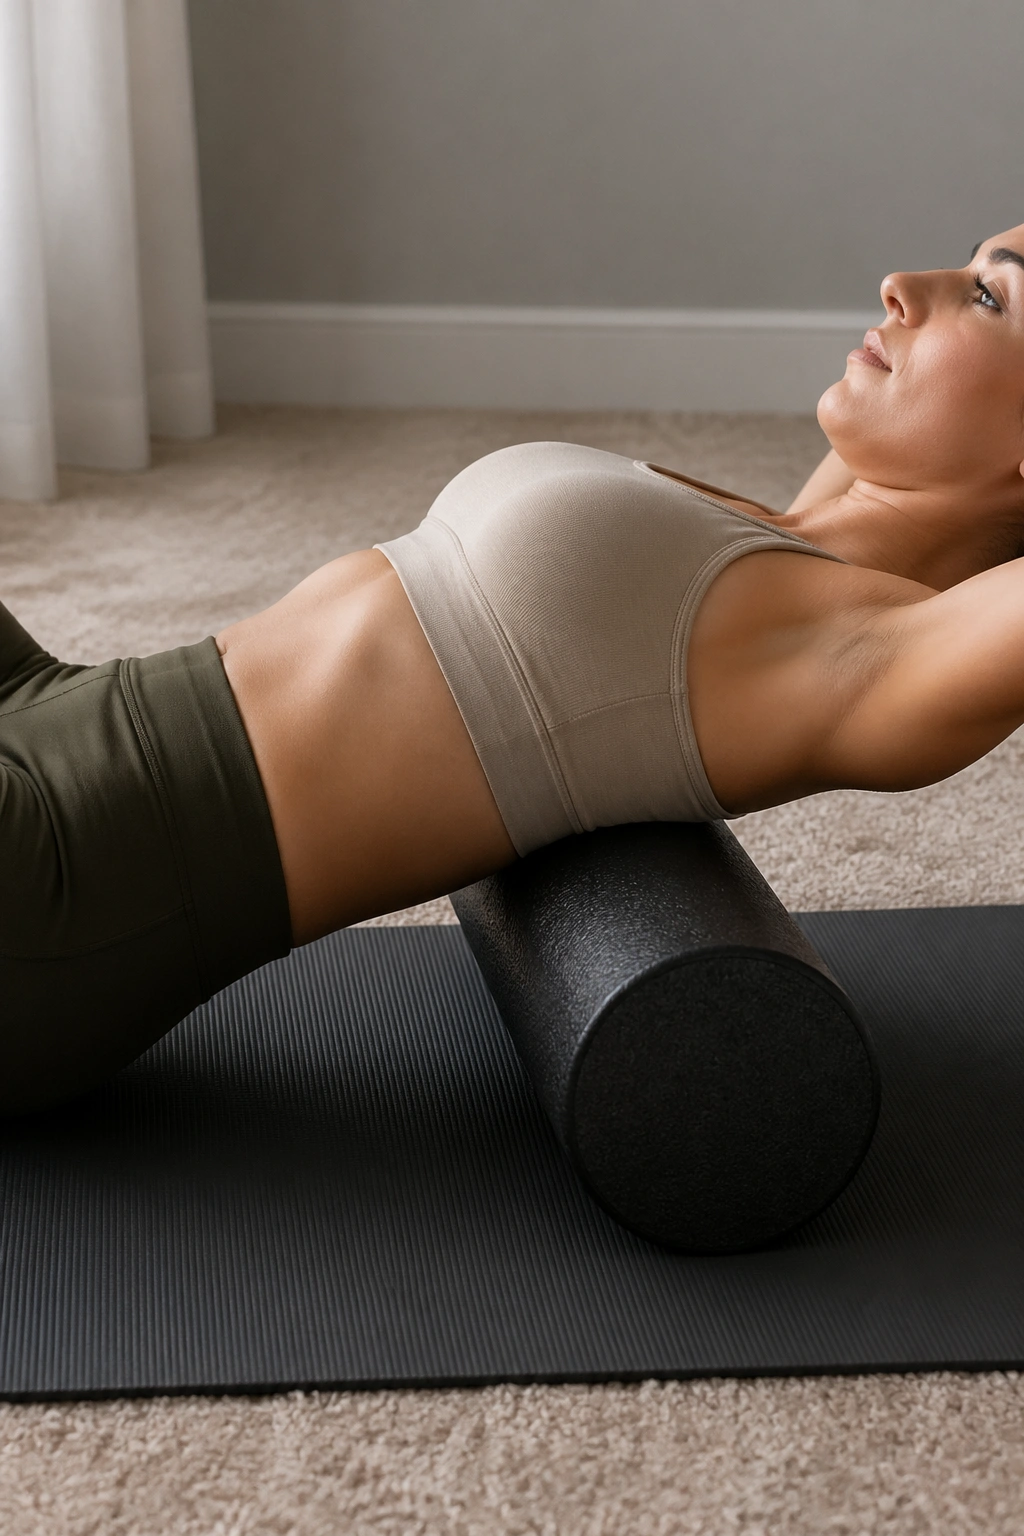
People hear “flatten your back” and slam their spine into the floor. Do not do that here. This drill is about control, not force.
Set yourself up lengthwise on the roller again. Start from neutral, where the back has a small natural curve and the front of the ribs are not lifted. On your exhale, lightly draw the lower belly in and let the low back gently move toward the roller. On the inhale, release back to neutral.
That is one rep. Do 6 to 8.
This move teaches you how to create abdominal support without squeezing your glutes, shoving with your feet, or clamping the rib cage. Those cheating patterns are part of why some people “brace their core” and still end up with a sore back after standing, lifting, or doing planks.
Keep the effort around 30 to 40 percent. If your hamstrings cramp or your neck tenses, you are pushing too hard. Think of it as a soft zipper from pubic bone toward ribs, then let it melt away.
Small move. Big payoff.
4. Marching Balance with Neutral Spine
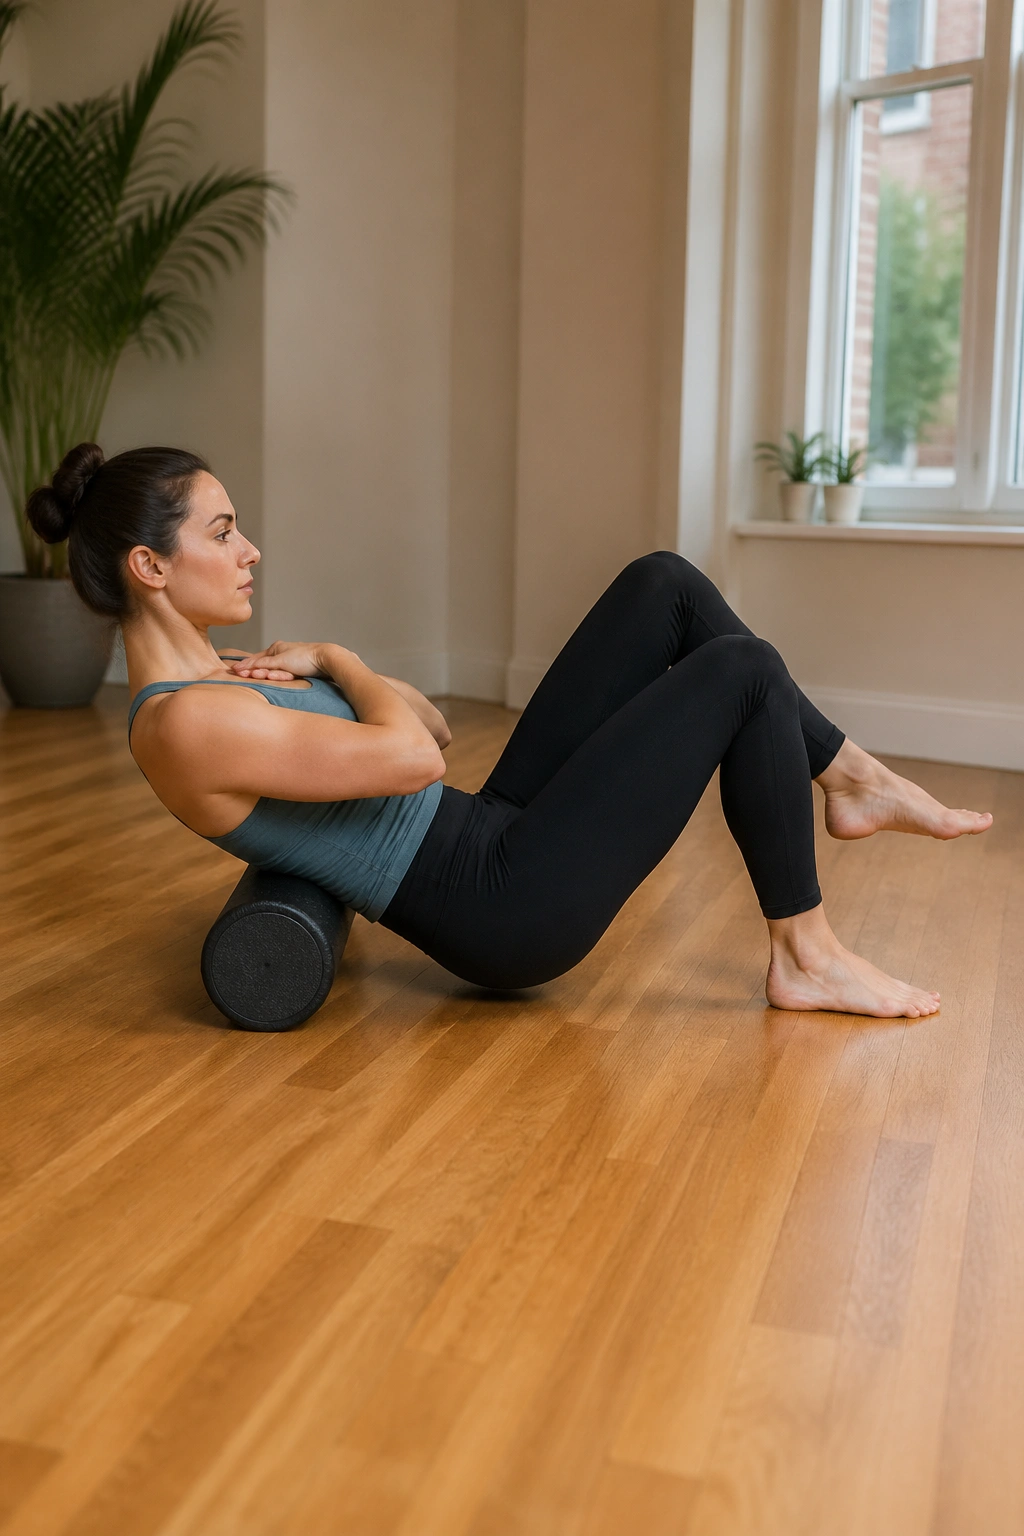
The roller will wobble. That is the lesson.
Stay lengthwise on the roller with knees bent and feet planted. Find your neutral spine first. Then, on an exhale, float one foot 1 to 2 inches off the floor without letting the roller tip or your pelvis twist. Lower it with control, then switch sides. Aim for 5 marches per side.
Why marching helps
Back pain often shows up when the pelvis cannot stay organized while the legs move. Walking, climbing stairs, getting into a car, stepping over a dog toy on the floor—those are all single-leg tasks in disguise. Marching on the roller exposes weak links fast.
If you lift a foot and your whole torso rocks, you have learned something useful. Usually the fix is not to grip harder. It is to exhale longer, make the lift smaller, and press the standing foot down evenly through the heel and ball of the foot.
A good rep feels quiet. Your chest stays soft, the chin stays level, and the low back does not dig or arch. If you can manage that with slow marching, your back usually likes you better when you return to everyday movement.
No heroics here. Clean beats hard.
5. Heel Slides Along the Floor
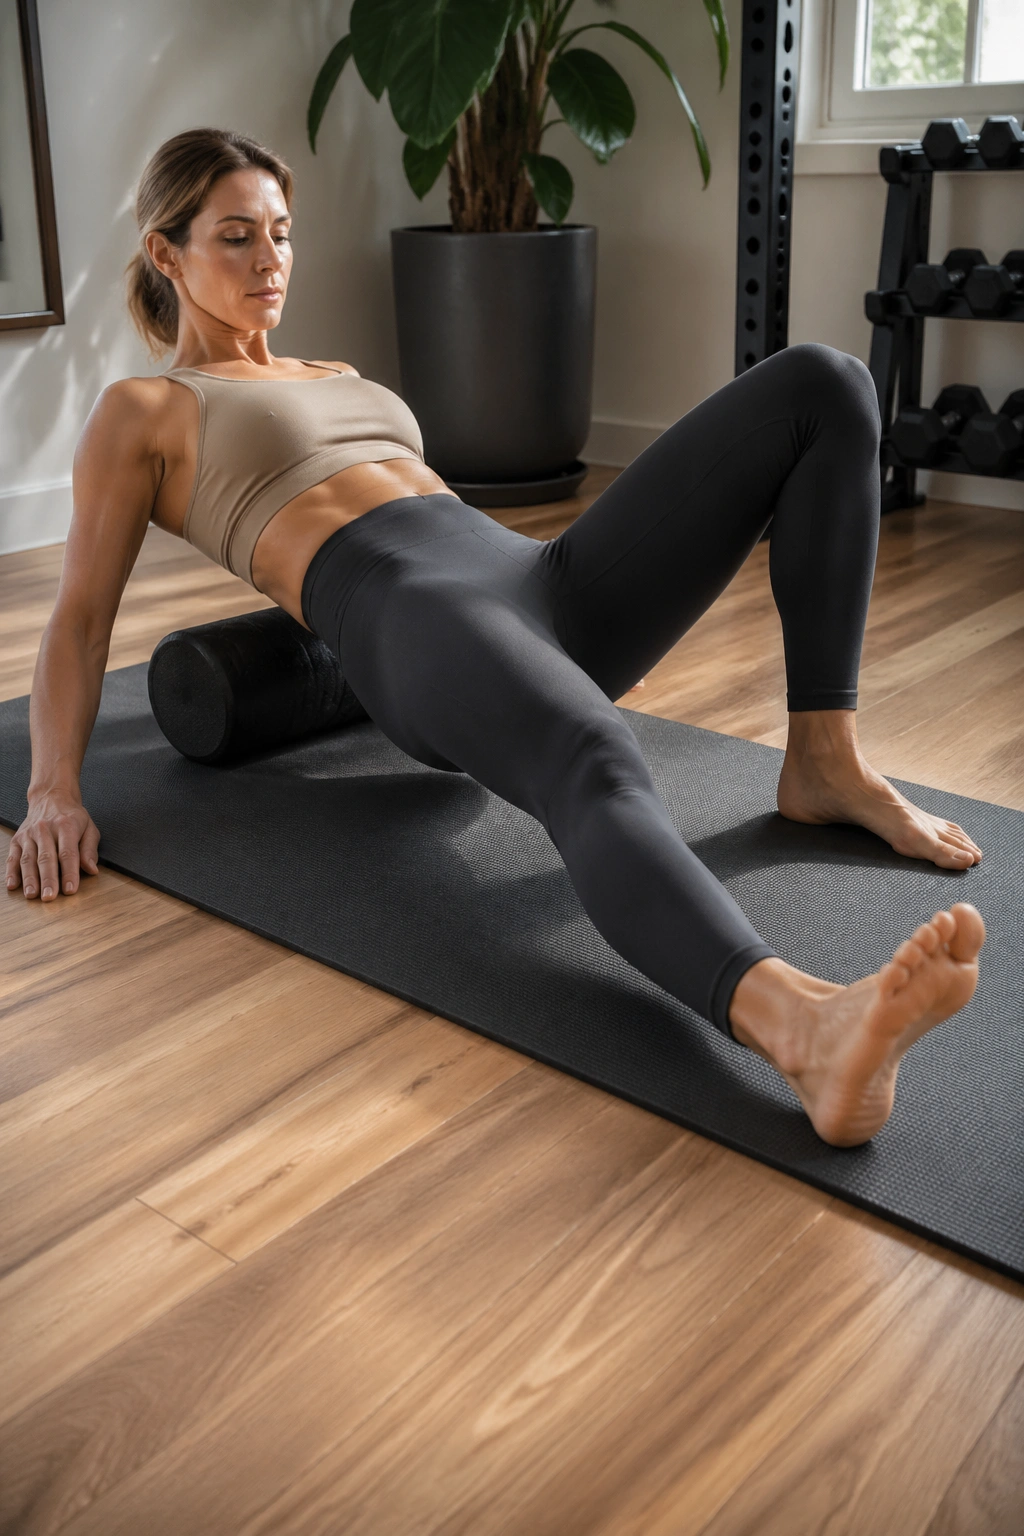
Want a move that looks easy and exposes every cheat? This is the one.
From the same lengthwise setup, keep one foot planted and slide the other heel slowly away until the leg is almost straight. Exhale as the heel glides out, pause for a beat, then inhale to pull it back in. Do 5 to 8 reps per side.
A few details matter
- Keep the roller still under your spine
- Let the moving leg stay light rather than dragging from the hip flexor
- Do not let the ribs pop up as the leg lengthens
- Stop the slide before your back loses its shape
What makes heel slides useful is the long lever. The farther the leg gets from you, the more your trunk has to organize without turning rigid. That matters for people whose back hurts during walking, rolling in bed, or putting on pants while standing on one leg—a task that sounds harmless until your pelvis is all over the place.
If the slide feels shaky, shorten it by half. You can also keep a sock on the moving foot so it glides easier on a mat. That small trick can turn a frustrating move into one that clicks.
6. Arm Arcs Overhead on the Roller
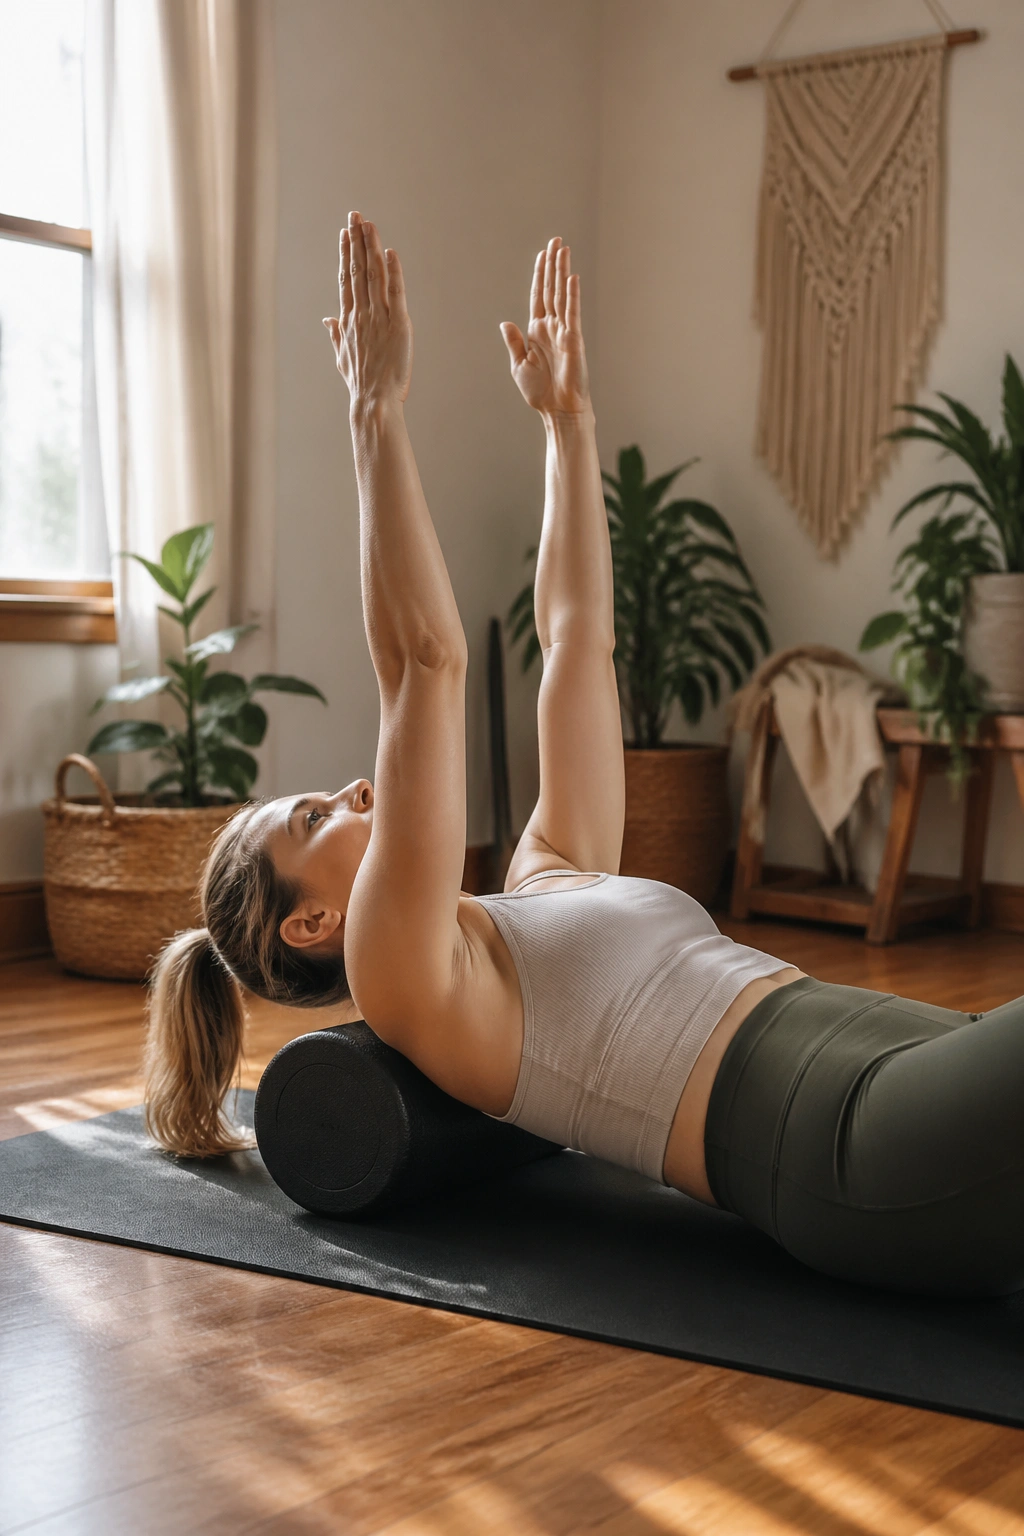
When your arms go overhead and your ribs jump up like a trap door, your back notices. A lot of “back pain from reaching” is tied to shoulder motion that borrows from the spine.
Lie lengthwise on the roller with arms reaching to the ceiling, palms facing each other. Keep a soft bend in the elbows. On an inhale, slowly arc both arms overhead as far as you can without flaring the ribs or lifting the low back. Exhale to bring the arms back over the chest. Try 6 slow reps.
What to feel
You want the shoulder blades to slide around the rib cage while the front ribs stay quiet. The stretch should land through the chest, lats, and front of the shoulders—not as a pinch in the low back.
People often force the last two inches. Skip that. The useful range is the range you can control.
If both arms together feel like too much, alternate one arm at a time. That cuts the leverage in half and gives you a clean way to build up. Once the movement is smooth, you can hold a 1-pound hand weight in each hand, though bodyweight alone is plenty for most sore backs.
This drill is sneaky. It looks like shoulder work, yet it often reduces that ache between the shoulder blades and lower ribs that shows up after keyboard time and long drives.
7. Snow Angels for the Rib Cage and Upper Back
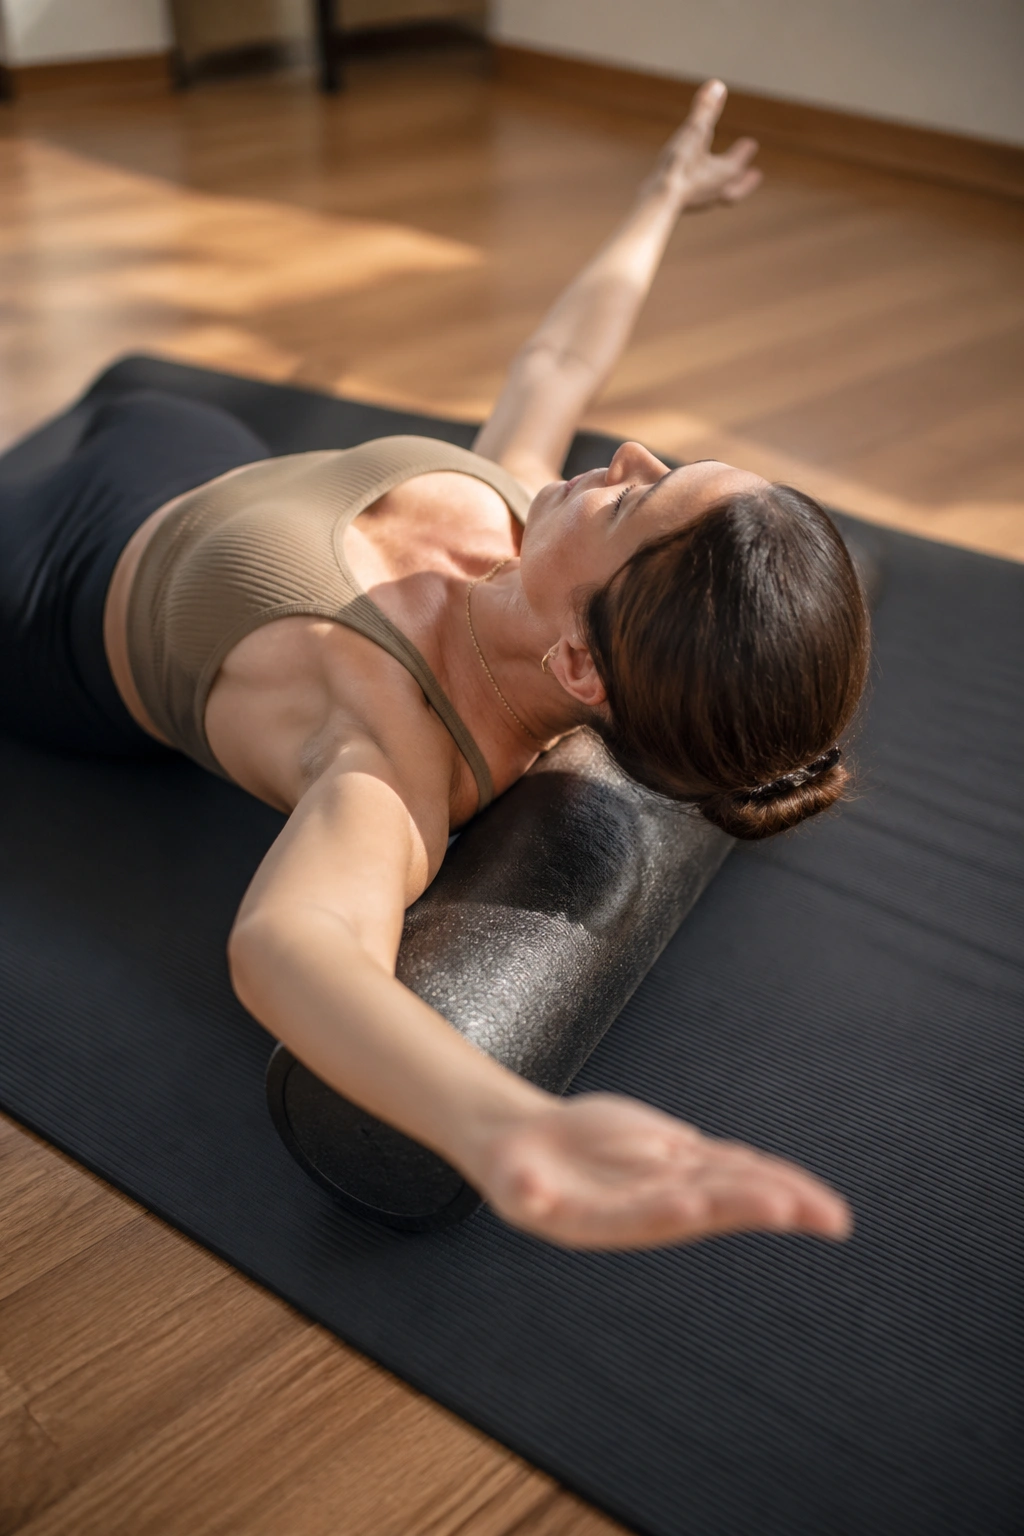
Back pain is not always a low-back problem. Sometimes the real issue is a stiff chest and an upper back that has forgotten how to extend and rotate.
Set up lengthwise on the roller again. Start with your arms by your sides, palms facing up if that is comfortable. Sweep the arms out to a T shape and then overhead, then return the same way, like making a slow-motion snow angel. Aim for 5 to 6 reps.
Move like you are tracing wet paint and do not want to smear it.
If your hands cannot reach the floor, that is fine. The floor is not the goal. The goal is smooth shoulder blade motion with calm ribs. Keep the lower ribs soft so the upper back and shoulders do the work they are meant to do.
I like this move for people who say their back feels “stuck” under the bra line or between the shoulder blades. It opens the front body, gives the thoracic spine room to move, and often improves posture without any old-fashioned “shoulders back, chest up” barking—which, honestly, makes some backs tighter.
Take your time with it. The good stuff happens in the slow part.
8. Thoracic Extension Over the Roller
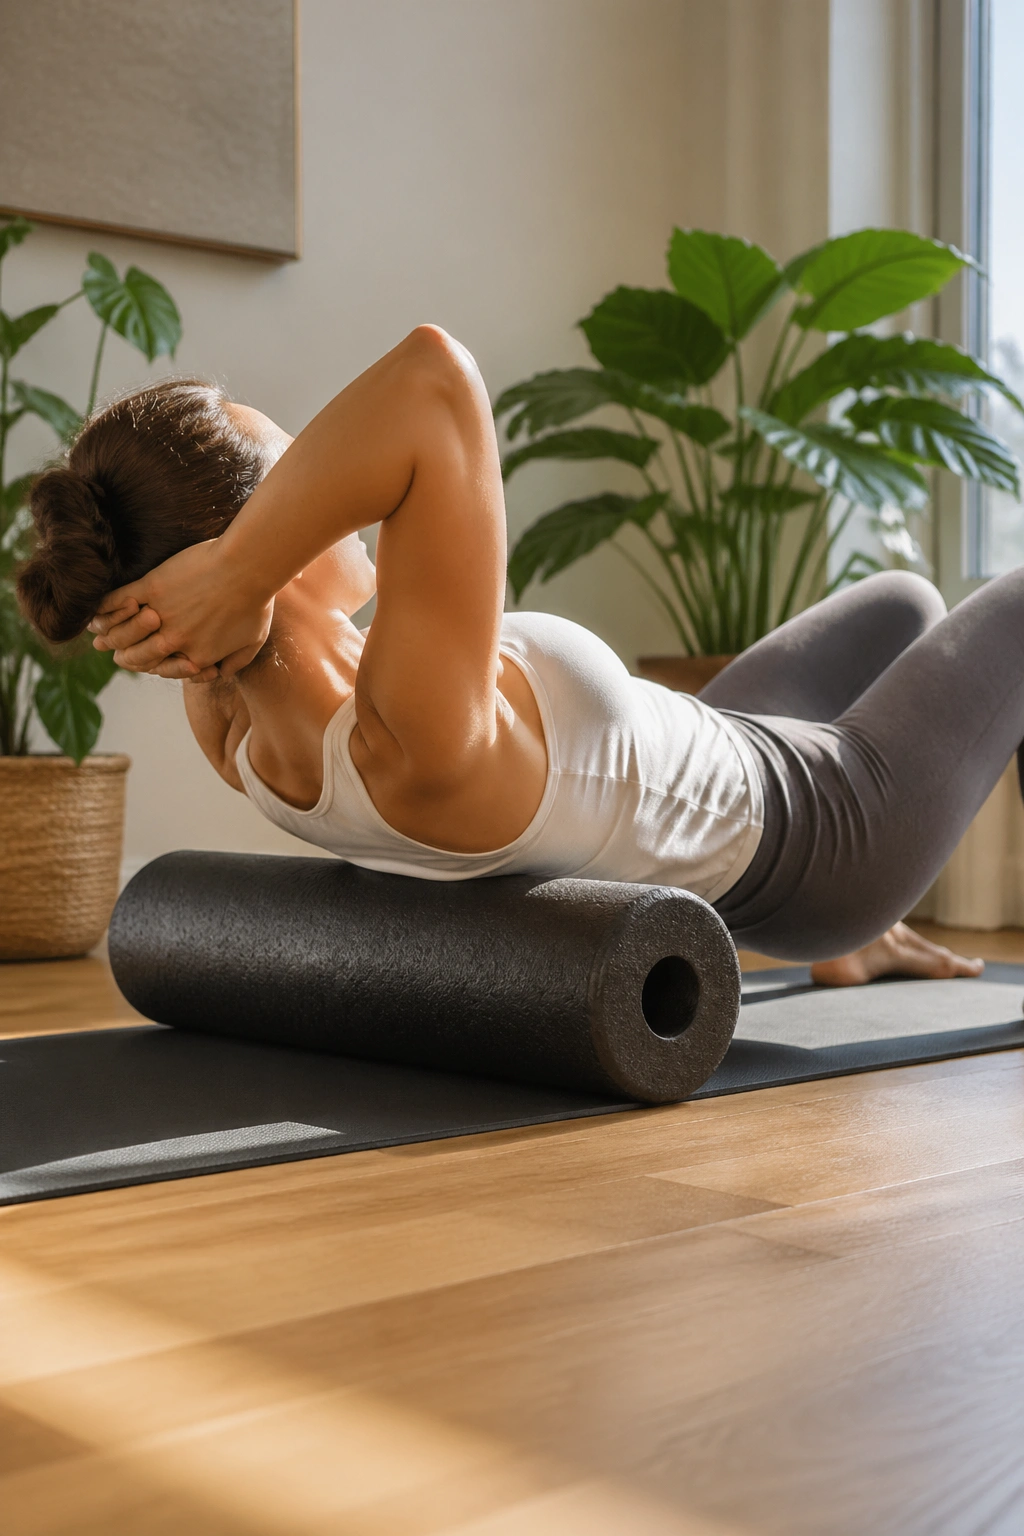
Two inches makes the difference here. Place the roller across your mat under the upper back, not the low back, and you get a targeted mobilization that can free up a lot of motion your lumbar spine has been trying to fake.
Sit on the floor, place the roller behind you, and lie back so it sits around the bottom of the shoulder blades. Support your head with your hands, elbows angled slightly forward. Lift the hips if needed to fine-tune the roller position.
The movement
Take a breath in. As you exhale, gently lean your upper back over the roller. Think “sternum lifts” rather than “head drops.” Inhale to return. Do 3 to 5 reps, then shift the roller up or down by an inch and repeat at 2 to 3 spots.
Safety cues I would not skip
- Keep the roller on the mid-back, not the lumbar spine
- Move through a small arc if backbends bother you
- Support the head so the neck does not hang
- If you have osteoporosis or a known spinal fracture history, get clearance before doing loaded extension work
This move is a favorite for desk-bound upper backs, though it only works when it stays controlled. If you fling yourself over the roller, you get a dramatic stretch and not much useful change. If you move segment by segment, the upper back starts sharing the job again, and the lower back often settles down because it no longer has to be the “mobile” part all day.
9. Side-Lying Open Book with Your Hand on the Roller
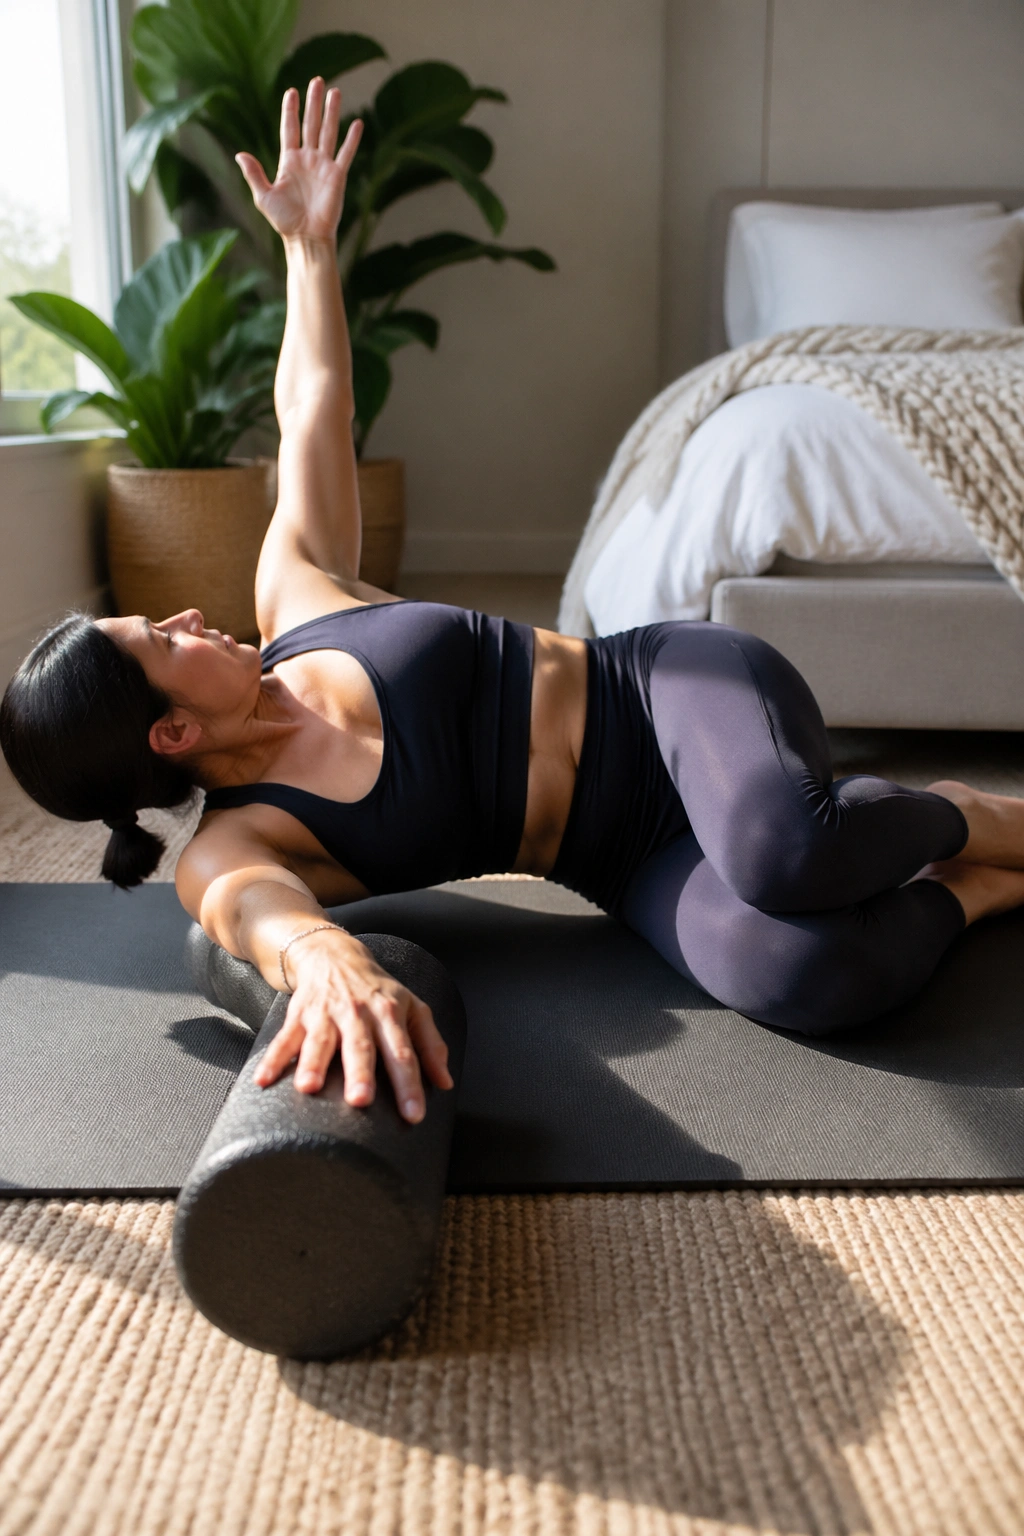
After a long block at a laptop, spinal rotation is usually one of the first things to go. You can still turn your head and swing your arms, so it does not look like a problem, but the ribs stop helping. Then the low back gets asked to twist more than it likes.
Lie on one side with hips and knees bent to about 90 degrees. Stack the knees and place a pillow between them if needed. Rest both arms straight in front of you at chest height, with the top hand on the foam roller.
How to use the roller
As you inhale, roll the top hand backward in a wide arc, letting the chest open toward the ceiling. The roller reduces friction, which helps you open through the shoulder and ribs without yanking. Exhale to return the hand to the start. Do 5 to 6 reps, then switch sides.
Keep the knees stacked so the twist lands in the upper back rather than the low back. If the top knee lifts, the pelvis is escaping the move.
This one feels smooth when you get it right. The shoulder opens, the ribs turn, the breath deepens into the side body, and the low back stays out of the drama. I like it before walking, after sitting, and any time the mid-back feels glued together.
10. Bridge with Feet on the Roller
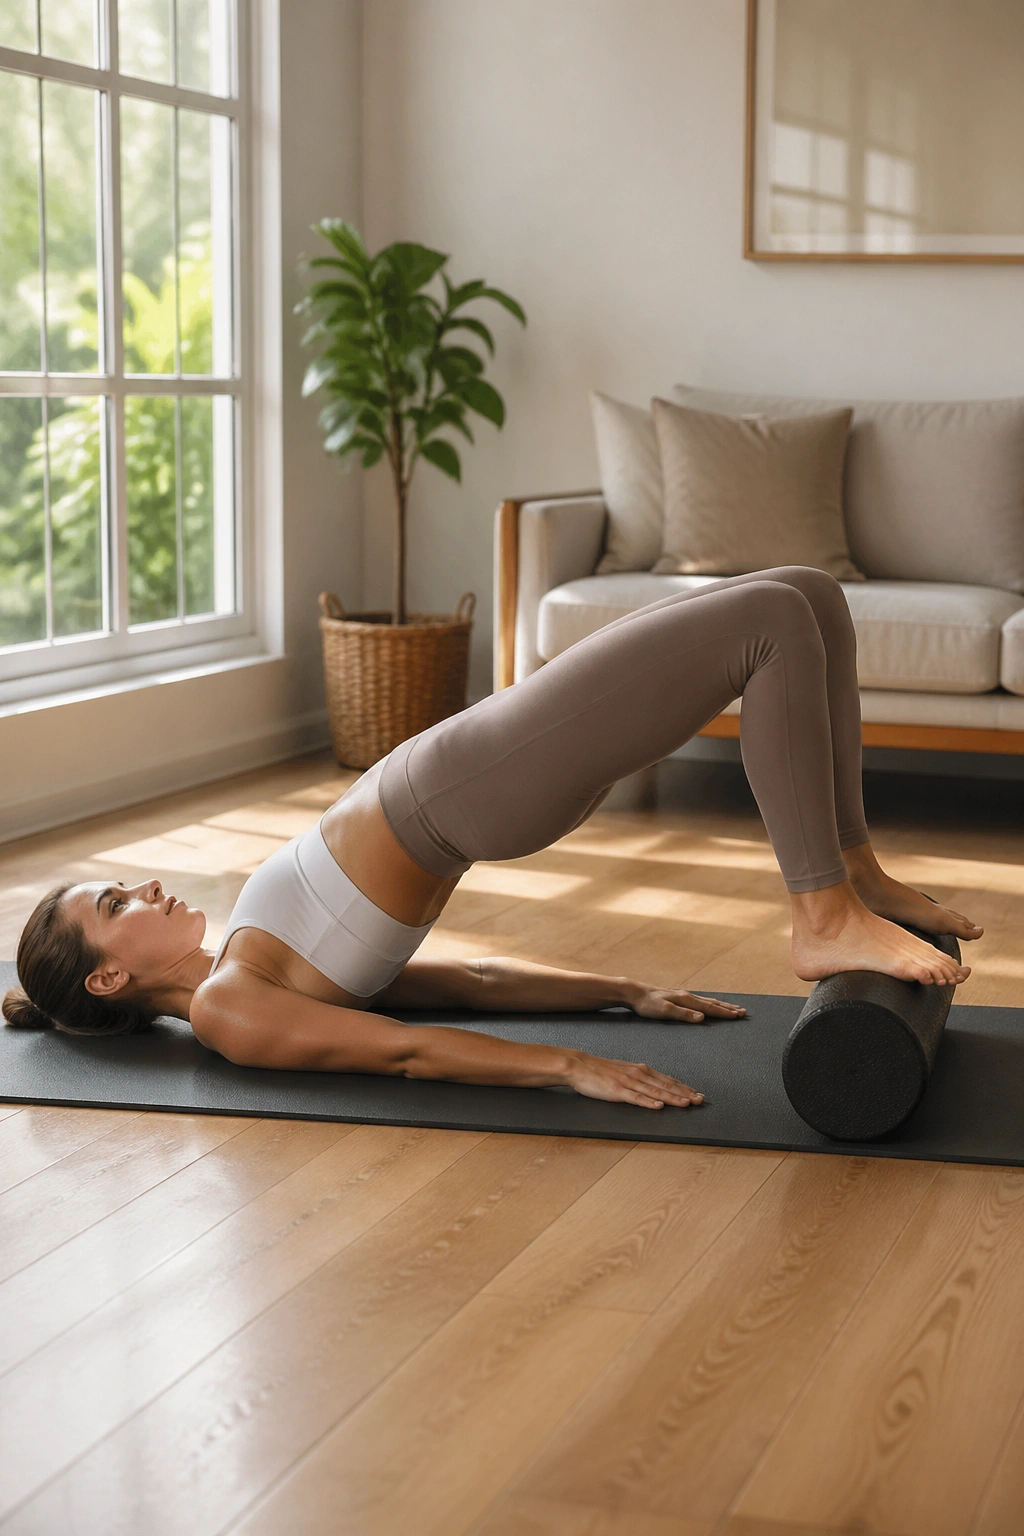
Unlike a floor bridge, this version will not let you bluff your way through with momentum. The roller under your feet demands hamstring and glute control, which many sore backs need.
Lie on your back with knees bent and both heels on top of the roller. Feet stay hip-width apart, toes relaxed. Arms rest by your sides. Exhale, press through the heels, and peel the pelvis off the floor into a bridge. Inhale at the top. Exhale to lower one vertebra at a time. Do 6 to 8 reps.
Why this version hits differently
The unstable surface makes the back line of the body work together: calves, hamstrings, glutes, and the deep trunk. If the roller shoots away, you pushed too hard or lost your heel pressure. If the front ribs pop up at the top, the movement came from the back instead of the hips.
A strong rep feels like the front of the hips opens while the back of the legs wake up.
Quick corrections
- Keep the roller still
- Think heels heavy, toes light
- Lift only as high as you can without arching
- Lower slowly; that is where a lot of the benefit lives
For people with low back ache from sitting, this can be one of the fastest ways to remind the glutes they are on the payroll.
11. Hamstring Curl Bridge
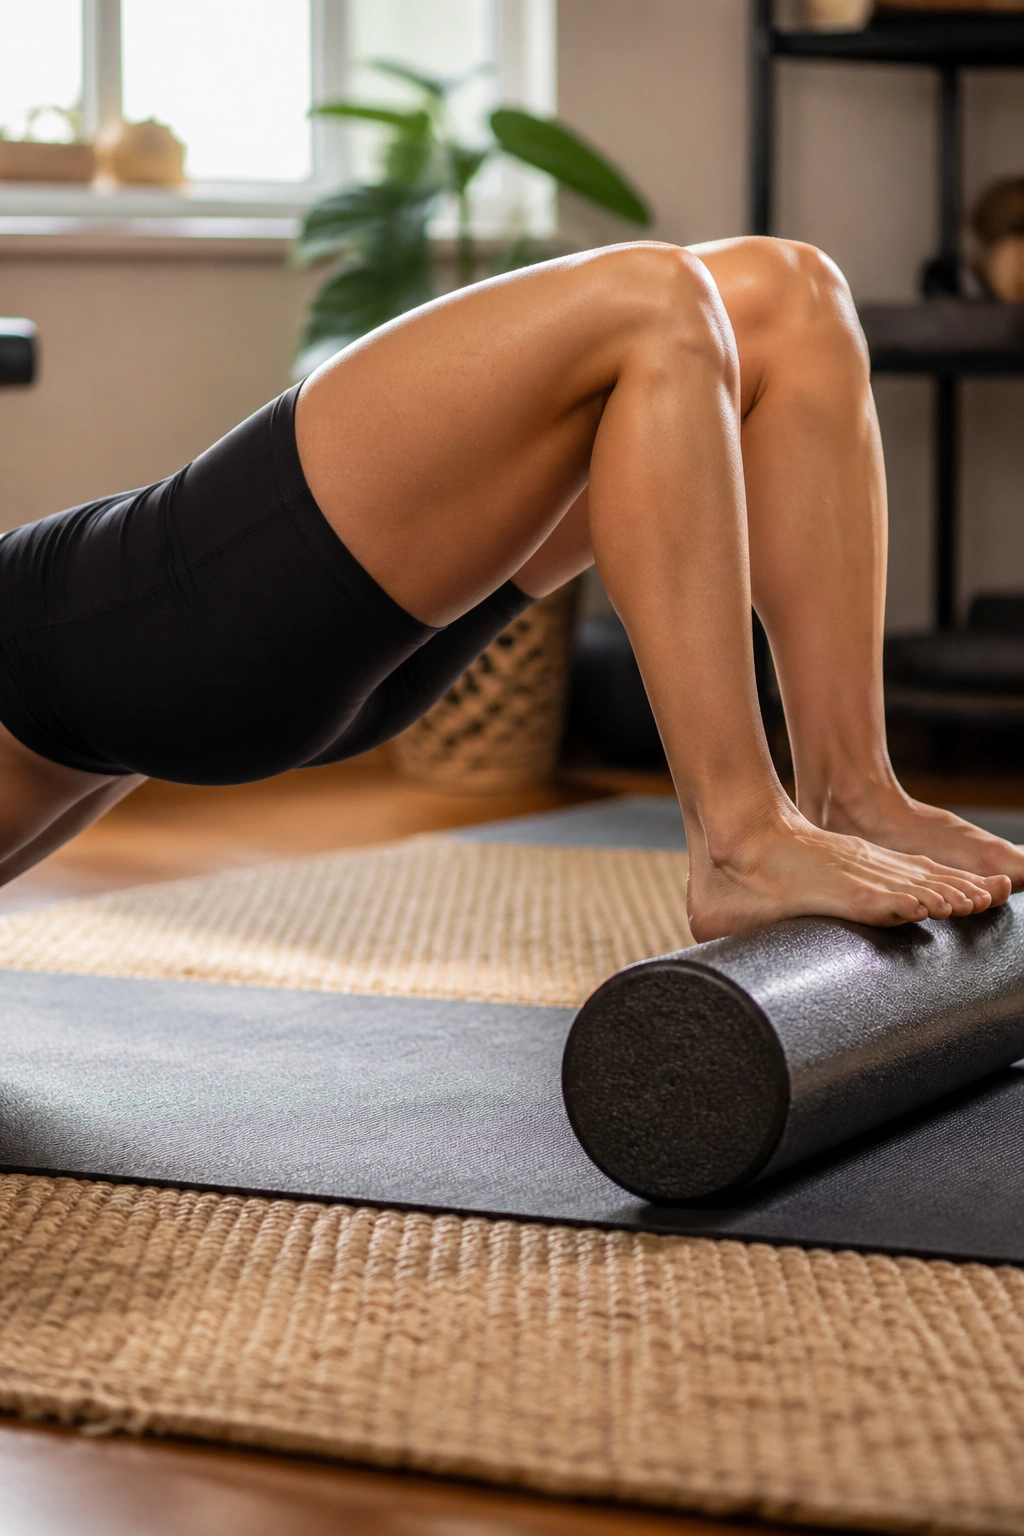
Your hamstrings may cramp on rep two. That is feedback, not failure.
Start in the same bridge position with heels on the roller and hips lifted. Hold the bridge and slowly pull the roller toward you by bending the knees. Roll it back out with control. Even a 2- to 4-inch pull counts. Try 4 to 6 reps.
Why it helps a sore back
When the hamstrings and glutes can control hip extension, the lower back does less gripping during walking, standing, and lifting. This move ties the whole posterior chain together, which is exactly what many backs are missing.
The first version should be small. Keep the hips level and the ribs quiet. If your pelvis drops as the roller comes in, shorten the range. If you cramp, pause, lower down, stretch the legs for a few breaths, and start again with a smaller pull.
A smart scale-down
Do the curl in two parts:
- Lift into a bridge
- Lower the hips halfway
- Pull the roller in an inch or two
- Push it back out
- Lower to the floor
That variation is easier and still useful. No shame in it. This is one of the tougher moves on the list, and it earns that reputation.
12. Child’s Pose Roll-Out with Forearms on the Roller
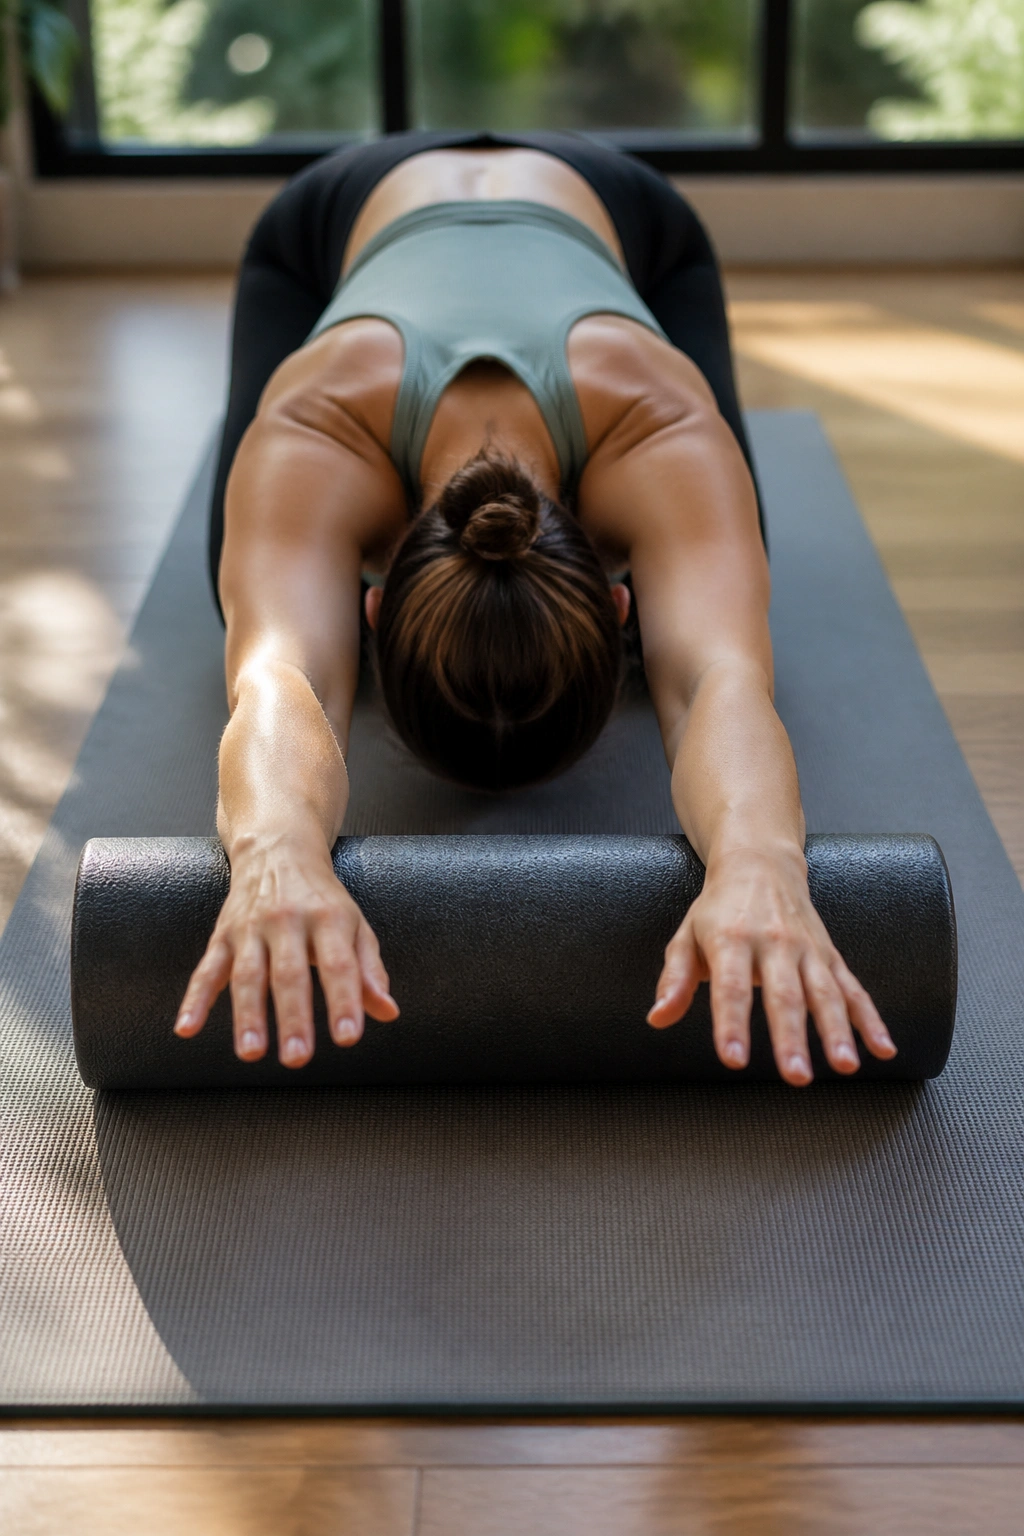
This one feels like your back is finally allowed to widen.
Kneel on a mat, place your forearms on the foam roller, and sit your hips toward your heels. Roll the forearms forward a few inches as you let your chest soften toward the floor. Stay for 3 to 5 breaths, then come up and repeat 2 to 3 times.
You are not trying to collapse. Think long spine, heavy hips, soft front ribs. The breath should spread into the lower back and side ribs. If your shoulders are stiff, angle the elbows a little wider. If your knees complain, put a folded blanket under them or place a pillow between calves and hamstrings.
This is a good reset between harder drills. It gives the lats, mid-back, and side body a stretch while letting the nervous system downshift a notch. For people who feel compressed after standing or walking, that decompressed, broad-backed feeling can be a relief.
If deep flexion bothers your back, reduce the sit-back and keep the shape more diagonal.
13. Dead Bug Press Into the Roller
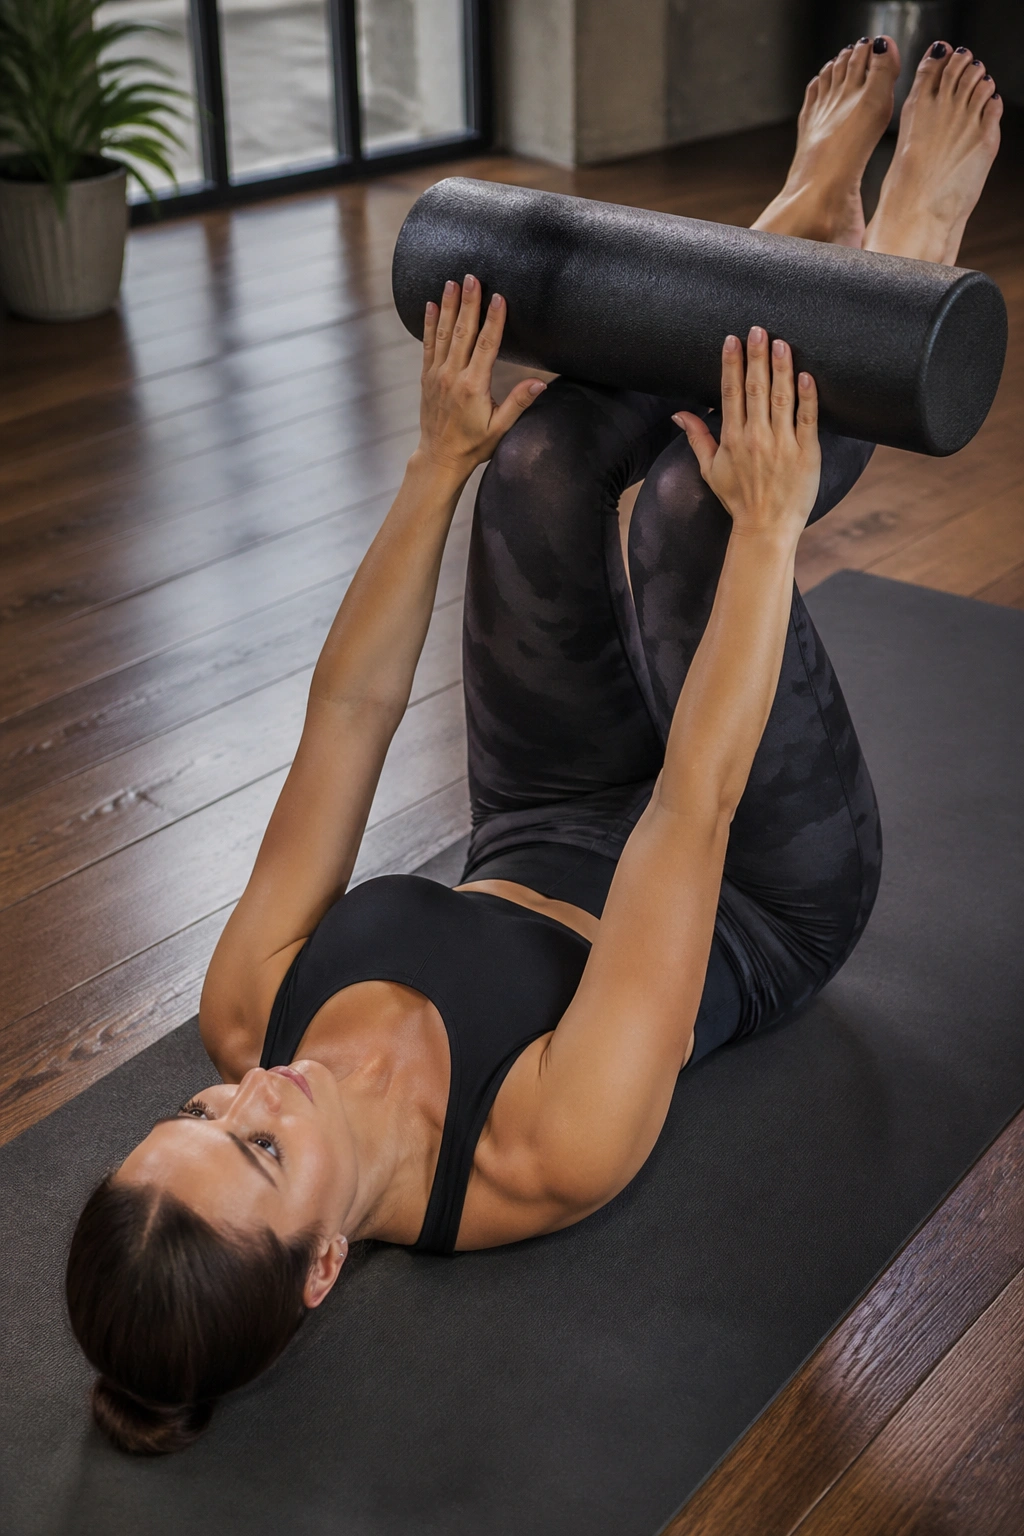
Need core work without curling your neck off the floor? Pressing into the roller is one of my favorite shortcuts.
Lie on your back with hips and knees at 90 degrees. Place the foam roller across the fronts of your thighs. Press both palms firmly into the roller while the thighs press back into it. That co-contraction lights up the deep trunk fast.
How to move
Keep the press steady. On an exhale, tap one foot toward the floor without letting the back arch or the roller shift. Inhale to return. Alternate sides for 5 to 8 taps each.
What makes this different
The roller gives you something to connect to, and that tends to clean up the move. People who feel lost during abdominal work often find the press makes the whole pattern click. You get front-body support without neck strain, and the pelvis learns to stay organized while the legs move.
A few things to watch:
- Do not mash your back flat; keep a small natural curve or a light imprint
- Tap only as low as you can control
- Keep the chin neutral rather than poking forward
- Exhale on the lowering phase; it helps keep the ribs from lifting
This is a strong choice when back pain shows up during leg lowering, getting out of bed, or transitions where the trunk needs to stay steady while the legs do their own job.
14. Kneeling Roll-Out
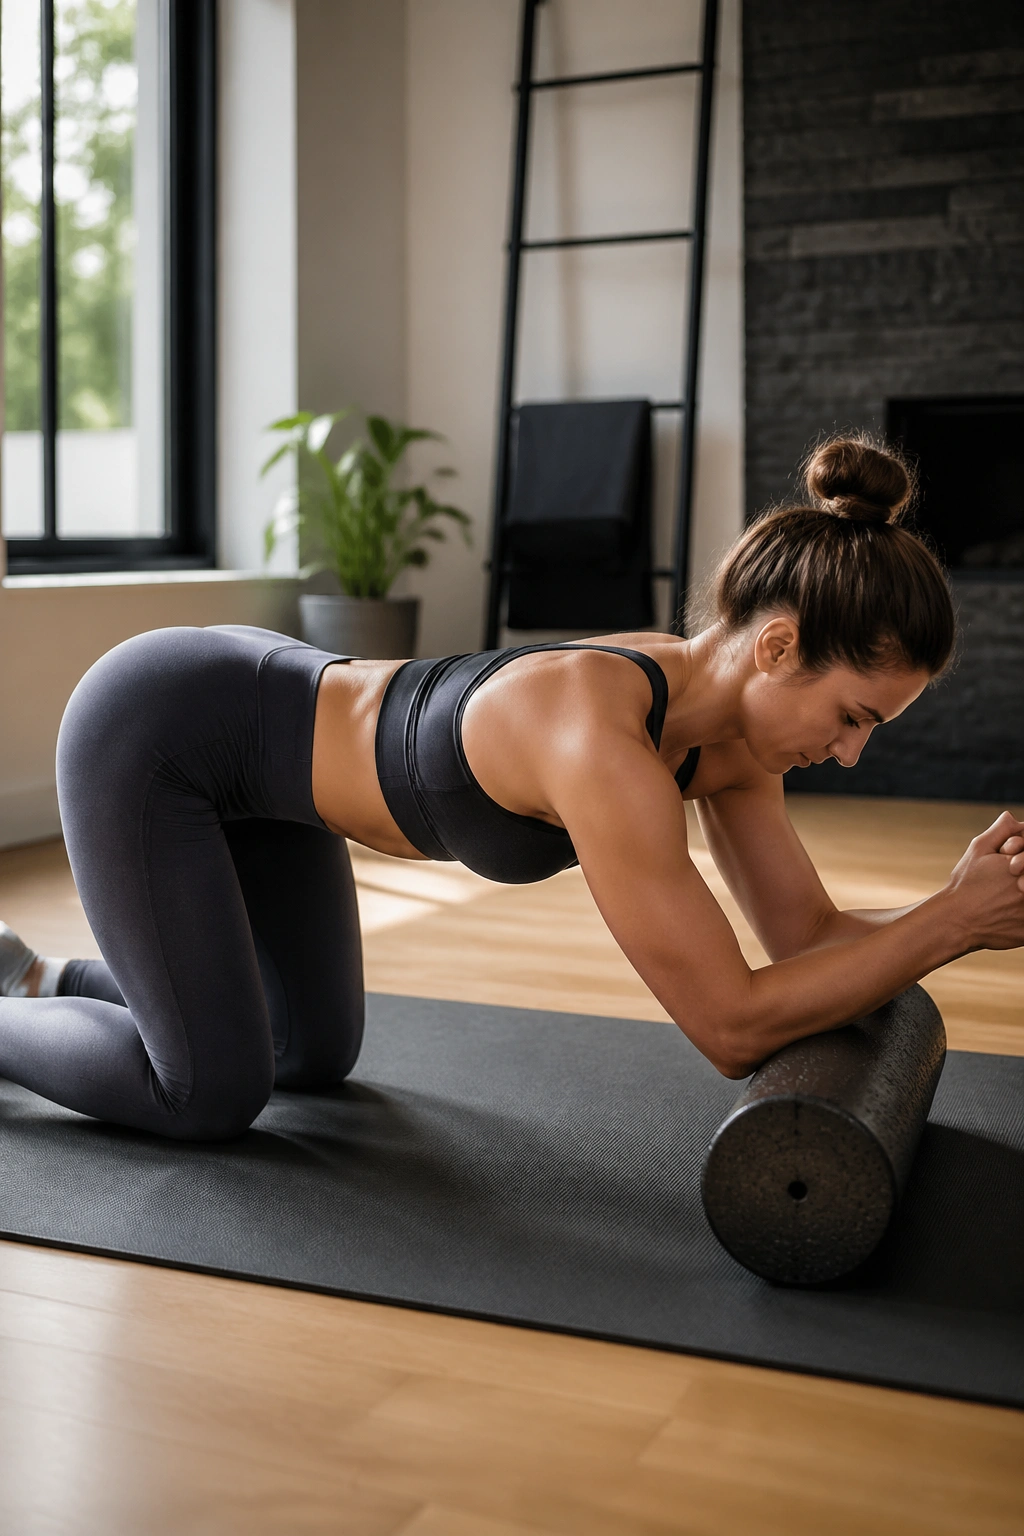
If you only keep one tougher move from this list, make it the kneeling roll-out. It teaches your trunk to resist extension—the exact thing many sore lower backs struggle with when reaching, lifting overhead, or trying to plank.
Kneel on a mat with the foam roller in front of you. Place both forearms on top of it, elbows under shoulders. Start tall, with glutes lightly engaged and ribs stacked over the pelvis. On an inhale, roll the forearms forward a few inches while keeping the torso in one long line. Exhale to pull back in using your abdominals and lats. Do 5 to 8 reps.
Range first, ego later
Most people go too far too soon. The moment your low back sags, the rep is over. Start with a tiny roll—sometimes 4 to 6 inches is enough. A clean small rep beats a sloppy big one every time.
This is not a stretch. It is anti-arch strength work.
If your shoulders are irritated, keep the range short and think of pressing the forearms down into the roller as it moves. That turns on the serratus and lats, which helps hold the rib cage in place. Extension-sensitive backs may need to skip this on flared-up days, though many people can tolerate a short range once they learn to keep the ribs down.
The move looks modest. It is not. Done right, it teaches the kind of trunk control that shows up later when you reach into the back seat, carry groceries, or grab a pan from a high shelf without your lower back jumping in.
15. Mermaid Side Stretch with Roller Support
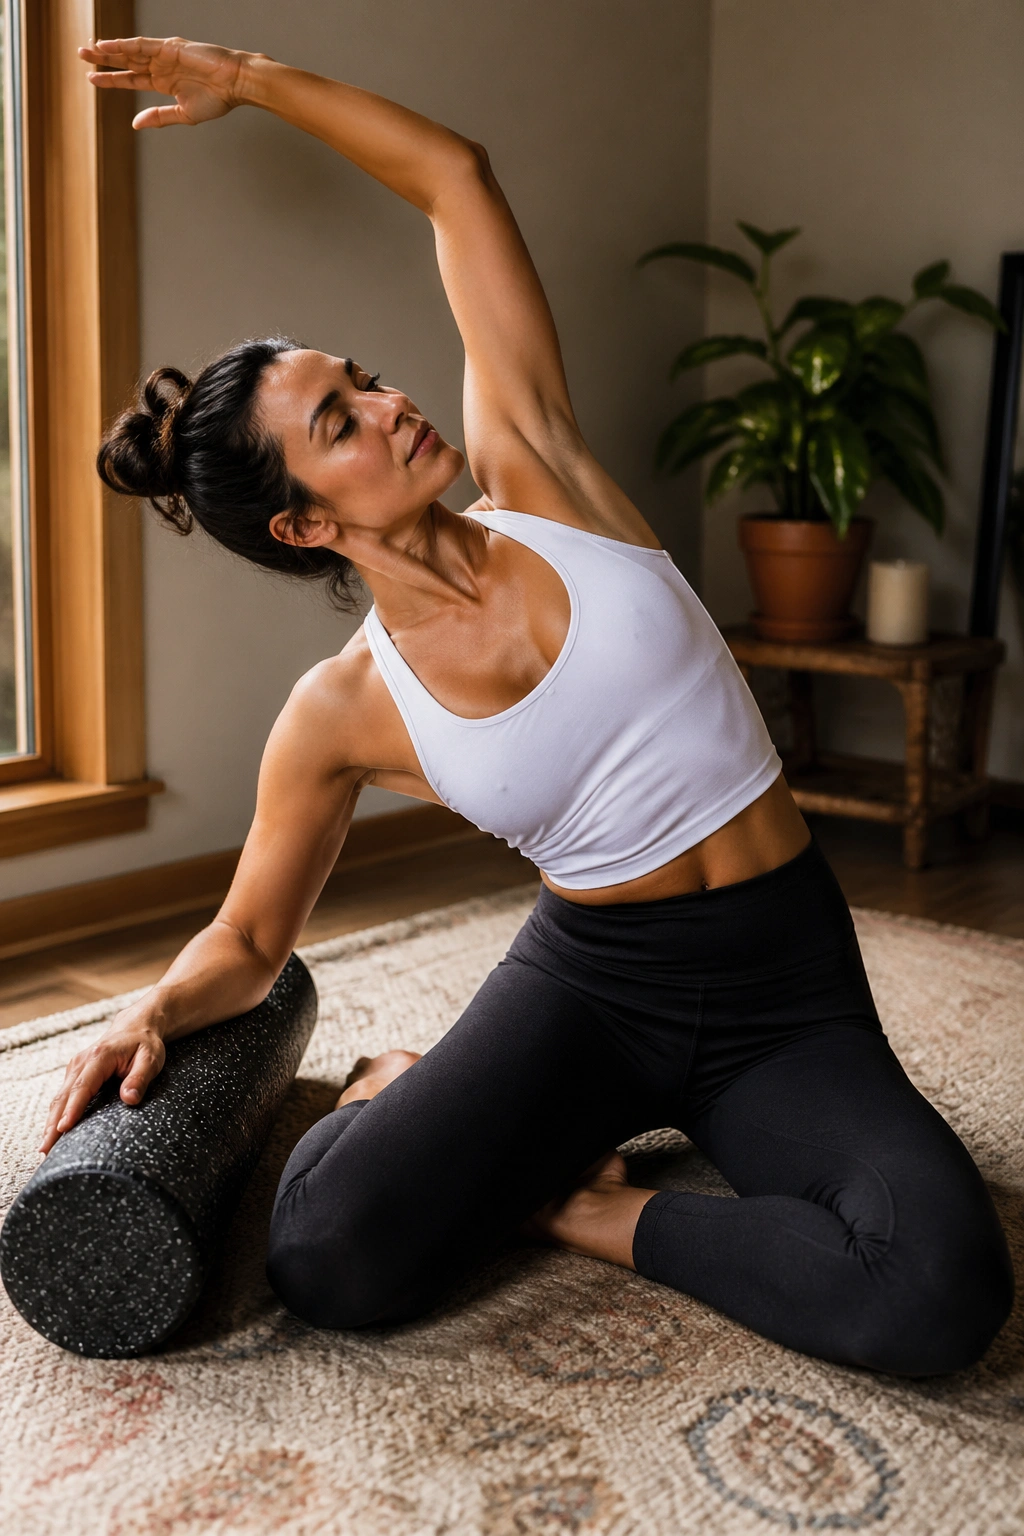
I keep coming back to Mermaid because side bending is the missing piece in a lot of back routines. People work flexion, extension, even rotation, and then forget the side body entirely. The quadratus lumborum, lats, obliques, and intercostals remember.
Sit with both knees folded to one side in a comfortable mermaid position, or sit cross-legged if your hips prefer that. Place the foam roller beside you and rest the near forearm or hand on it.
Roll the forearm away as you reach the opposite arm overhead, creating a long arc from the outer hip to the fingertips. Stay for 2 to 3 breaths, come back up, and repeat 3 to 4 times before switching sides.
Keep both sitting bones as grounded as you can. The stretch should travel along the side waist and ribs rather than pinching into the low back. If kneeling or side-sitting bothers your hips, do the same shape seated on a cushion or chair.
This move often finishes a session beautifully—I know, that word gets thrown around, but it fits here—because it gives the rib cage space to expand again. If your back pain comes with the feeling that one side is always shorter, tighter, or more compressed, Mermaid is often the piece that brings things back into balance without needing a hard stretch.
Final Thoughts
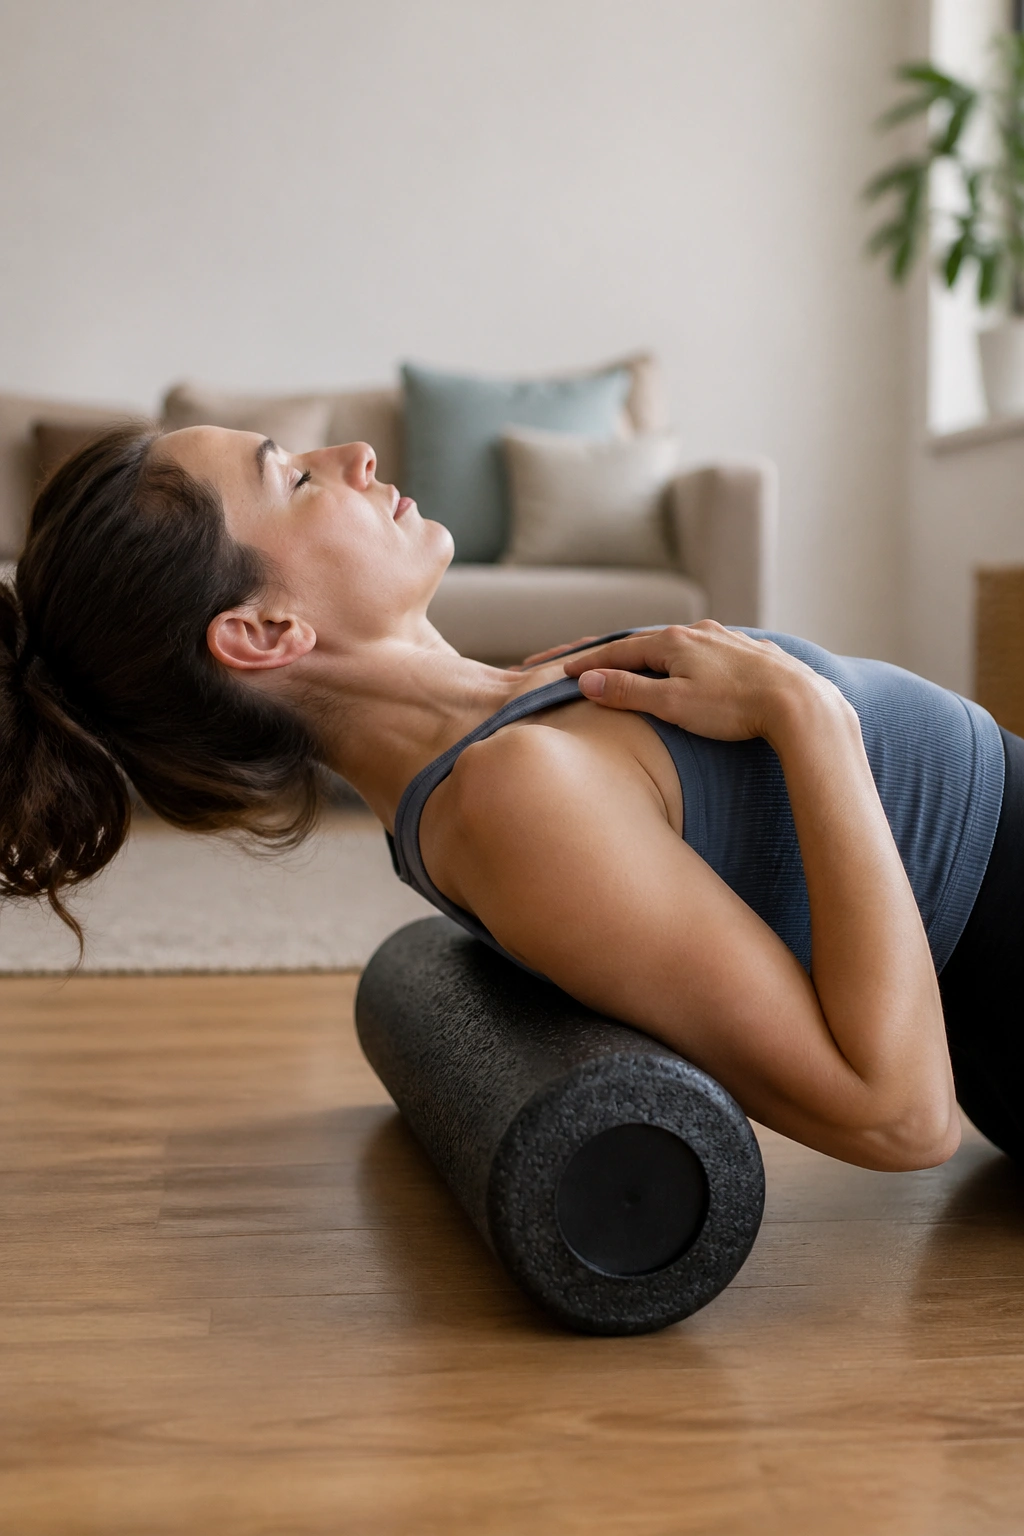
If your back is sore, control beats intensity. The roller is most useful when it helps you breathe better, move your pelvis and ribs with more precision, and get the hips and shoulders doing their share again.
You do not need all 15 moves every time. A smart short session might be breathing, pelvic clock, marching, thoracic extension, bridge, and Mermaid. Another day, when your back feels more stiff than weak, you might lean on open book, Child’s Pose roll-out, and arm arcs instead.
Keep the dose modest at first. Ten focused minutes done three or four times a week tends to beat one marathon session that leaves you irritated.
And if one move keeps helping, stay with it. Bodies like repetition when the pattern is good.
