



A shaky plank tells you more about your trunk than twenty crunches ever will. In yoga, core strength lives in the boring-looking moments: the half second before the foot lands, the pause at the top of a knee drive, the way your ribs stay quiet when the hips want to swing open. A good yoga flow for core strength should leave your abdomen warm, your shoulders awake, and your breath steady. That’s a better test than a sweaty finish.
The best part is that yoga asks the core to do several jobs at once. It has to brace, rotate a little, resist rotation, and keep the pelvis from tipping like a bucket of water. That matters if you sit a lot, run, lift weights, or simply want a back that doesn’t complain every time you twist for something on the floor. The deep trunk muscles work hardest when the movement is controlled, not rushed.
Some sequences focus on the obvious stuff — plank, boat, side plank. Others sneak up on you through balance, lunges, and slow transitions. The list below moves from straightforward to spicy, and a few entries are the sort of thing that looks mild until your midsection starts shaking halfway through the second breath. That’s when you know it’s working. Maybe annoyingly so.
1. Sun Salutation A With Long Plank Holds
Sun Salutation A is the one people rush through, which is exactly why it’s so useful here. The moment you slow the plank down and stay for 3 to 5 full breaths, the whole sequence stops being a warm-up and starts feeling like real trunk work.
Why It Hits the Middle
The trick is the hold. A fast vinyasa lets the shoulders do most of the talking, but a slower round forces the abdomen to keep the ribs from flaring and the low back from sagging. You are not chasing exhaustion. You are teaching the body to stay tidy while the arms and legs keep moving.
Try this version:
- Forward fold
- Half lift
- Step back to high plank
- Hold for 3 breaths
- Lower knees, chest, and chin or move through chaturanga if that’s solid for you
- Upward dog or cobra
- Downward dog for 3 breaths
- Repeat for 3 to 6 rounds
Keep the heels pressing back and the belly lifting up. That little lift matters more than trying to “squeeze” the abs in a dramatic way. The goal is quiet strength, not a grimace.
A lot of people treat Sun Salutation as a way to get to the “real” practice. I’d argue the sequence is the practice, especially when the plank gets honest.
2. Low Lunge Knee-Drive Flow
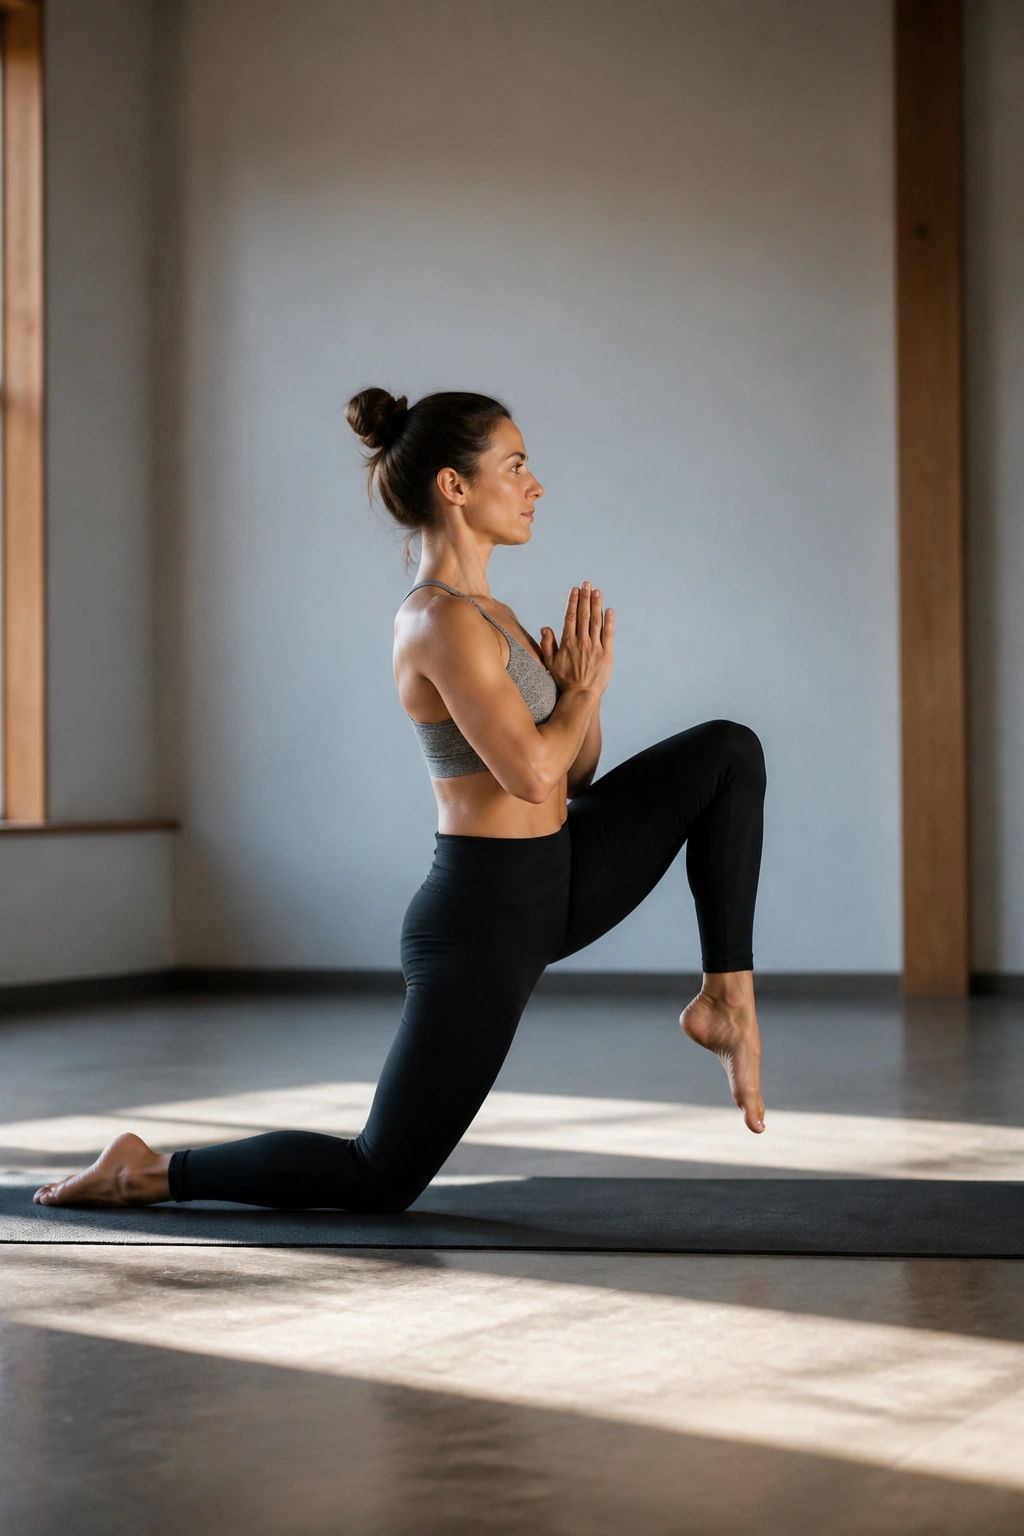
A slow knee drive can light up the lower abs faster than a hundred sloppy sit-ups. It’s small, controlled, and sneaky, which is why I like it.
Start in a low lunge with your back knee lifted if your balance is decent, or keep the knee down if you want more stability. On an exhale, drive the back knee forward toward the chest, then step it back into lunge without letting the torso pitch forward. That anti-swing moment is the whole point.
The key is the pause at the top. If the knee flies up and the spine follows it, you’re mostly doing a hip flexor drill. If the rib cage stays stacked over the pelvis, the deep front line has to work. Keep the hands at prayer or on blocks if the floor makes you round too much.
Use 6 to 8 knee drives per side, then hold the final lunge for 2 breaths before switching. Shorter range is fine. Cleaner range is better. Small wobble, no big drama.
3. Down Dog Plank Waves
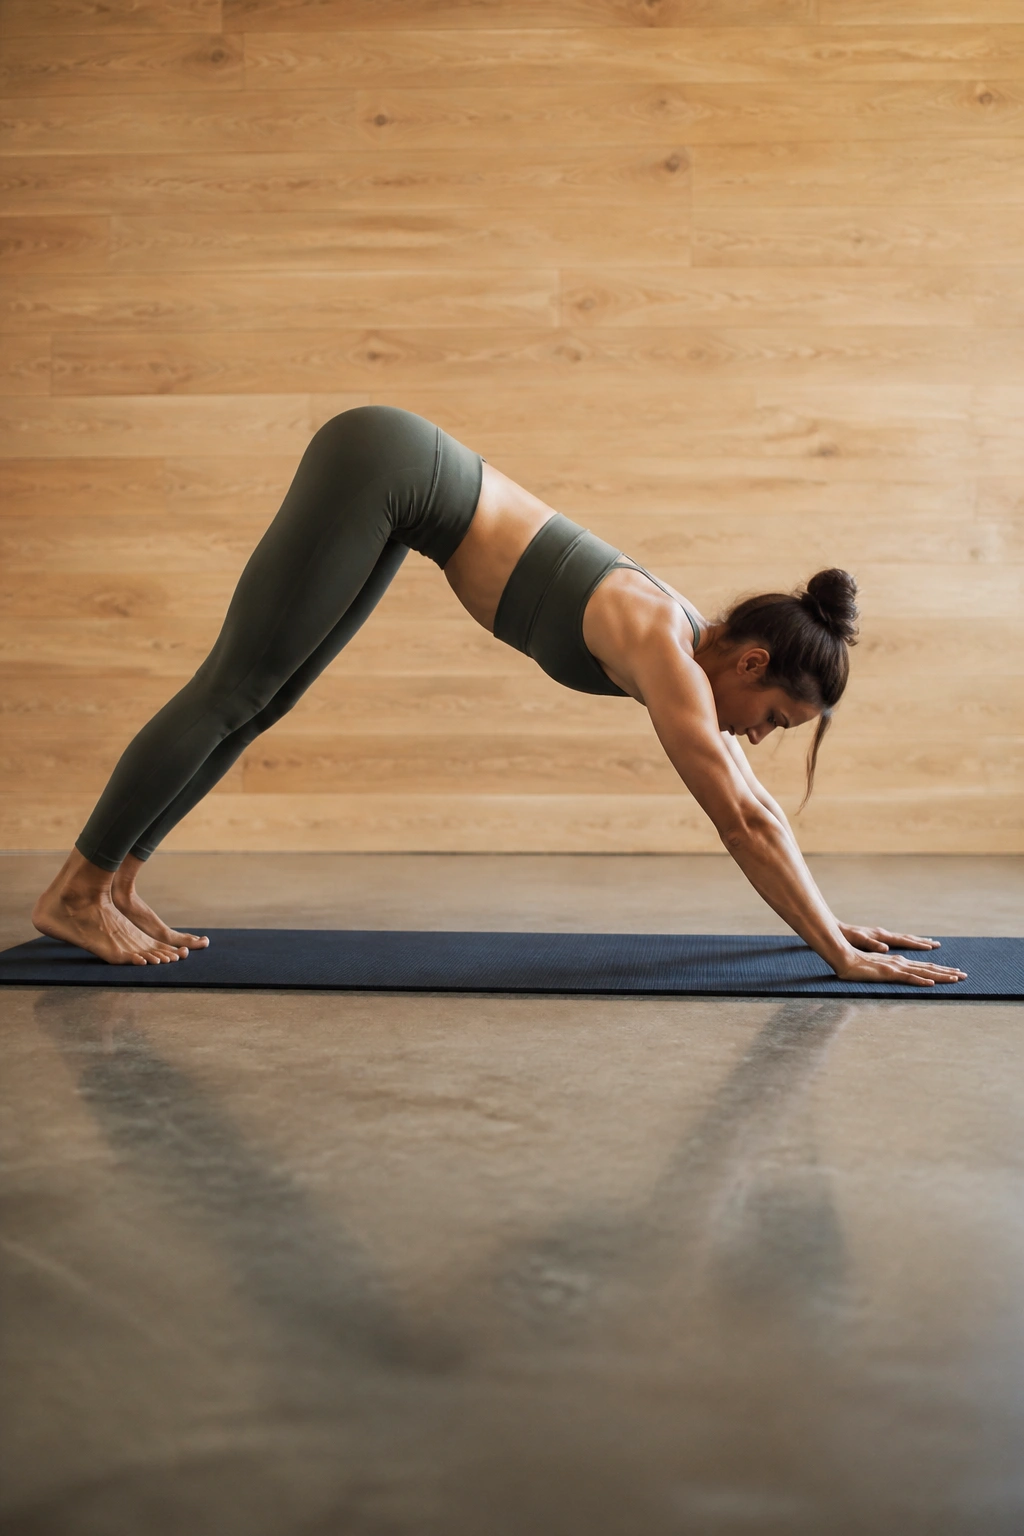
Why does the wave version feel harder than a normal plank? Because your torso has to control the shift in both directions. The body is not just holding still anymore; it’s managing momentum.
Move from downward dog to plank on a slow inhale, then press back to downward dog on a long exhale. The move should feel like a drawn-out push-up through the shoulders and a controlled slide through the ribs and pelvis. If your lower back dumps into the floor when you come forward, shorten the range and bend your knees a little in downward dog.
How to Use It
Try 5 to 8 waves for one round, rest for a breath, then do another round. Two rounds is plenty if you’re keeping the tempo slow. If the wrists get cranky, put your hands on blocks or come to forearms for part of the set.
Do not rush the forward glide. That’s where the core has to stop the chest from dropping and the hips from following too far behind. The movement should look smooth from the outside and feel work-heavy from the inside.
4. Chair Pose and Airplane Arms
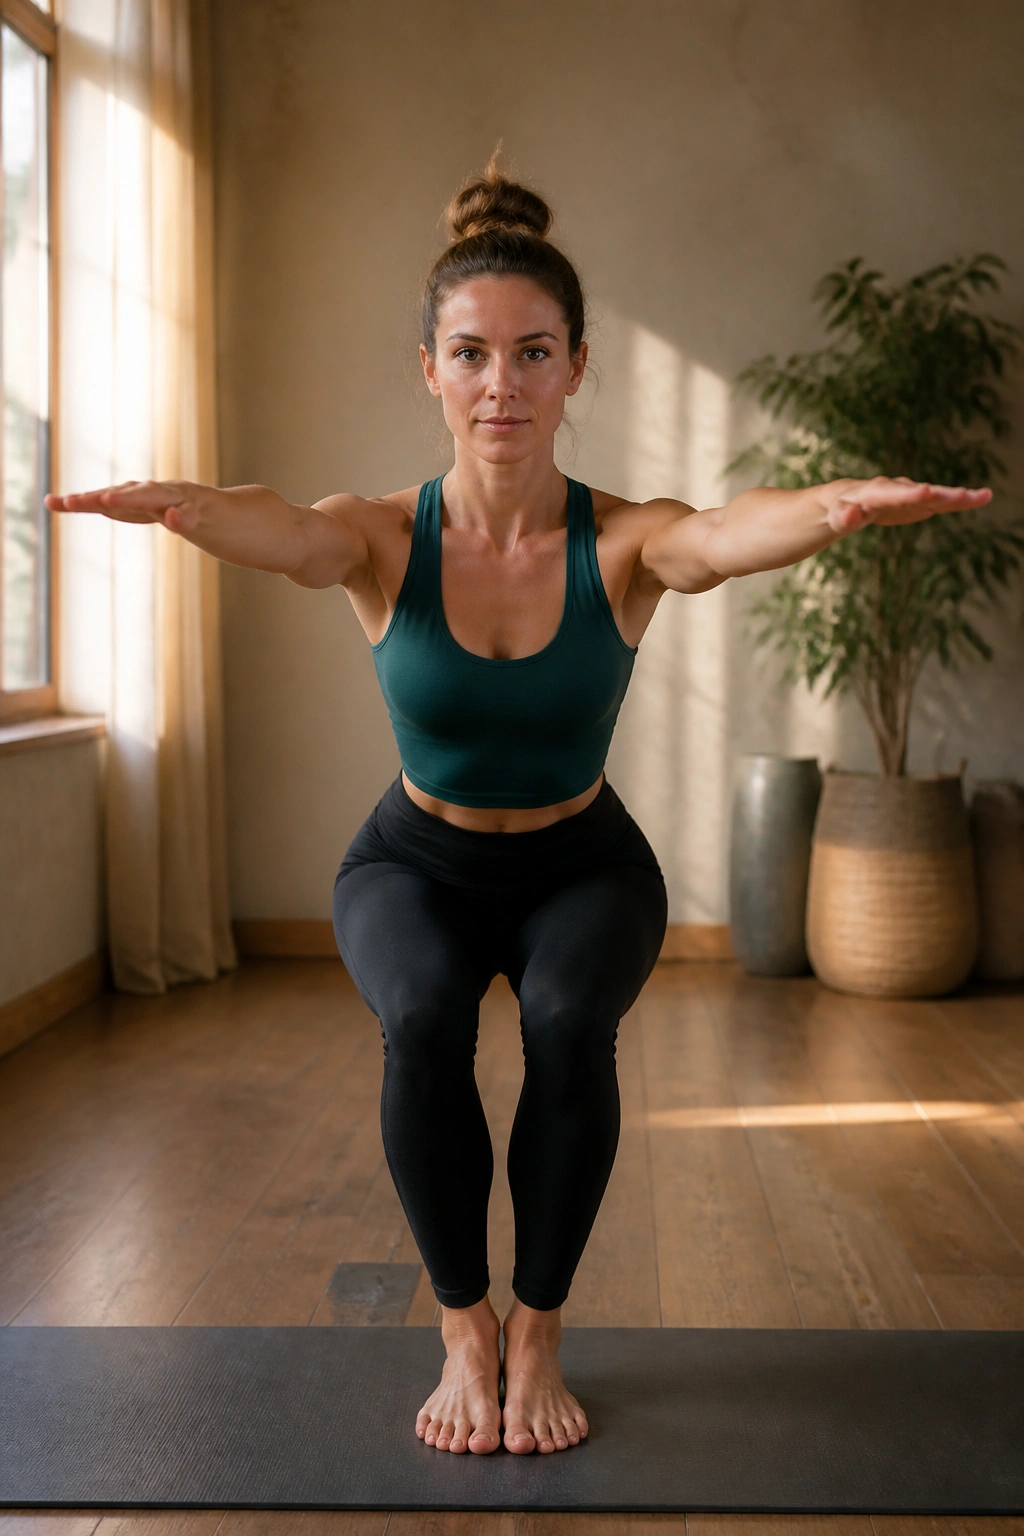
Sink into chair and the shake shows up fast. Hold the thighs, lift the arms, and suddenly the center of the body has to decide whether it is in charge or not.
Chair pose becomes a core drill when you stop treating it like a squat and start treating it like a stillness test. Keep the feet about hip-width apart, sit the hips back a few inches, and draw the lower ribs in without collapsing the chest. Then reach the arms straight ahead, or sweep them into airplane arms with the palms facing down. That long lever makes the trunk work much harder.
What to Watch For
- Weight in the heels, but not so far back that the toes lift
- Knees tracking over the second and third toes
- Tailbone reaching down without over-tucking
- Chest broad, not puffed forward
- Breath steady for 4 to 6 breaths
A lot of people arch their low back here because the arms are working and the quads are already noisy. Don’t let the ribs pop. That’s the trap.
Hold it for 2 or 3 rounds and you’ll get the point. Chair pose is boring right up until it isn’t.
5. Crescent Lunge Twist Ladder
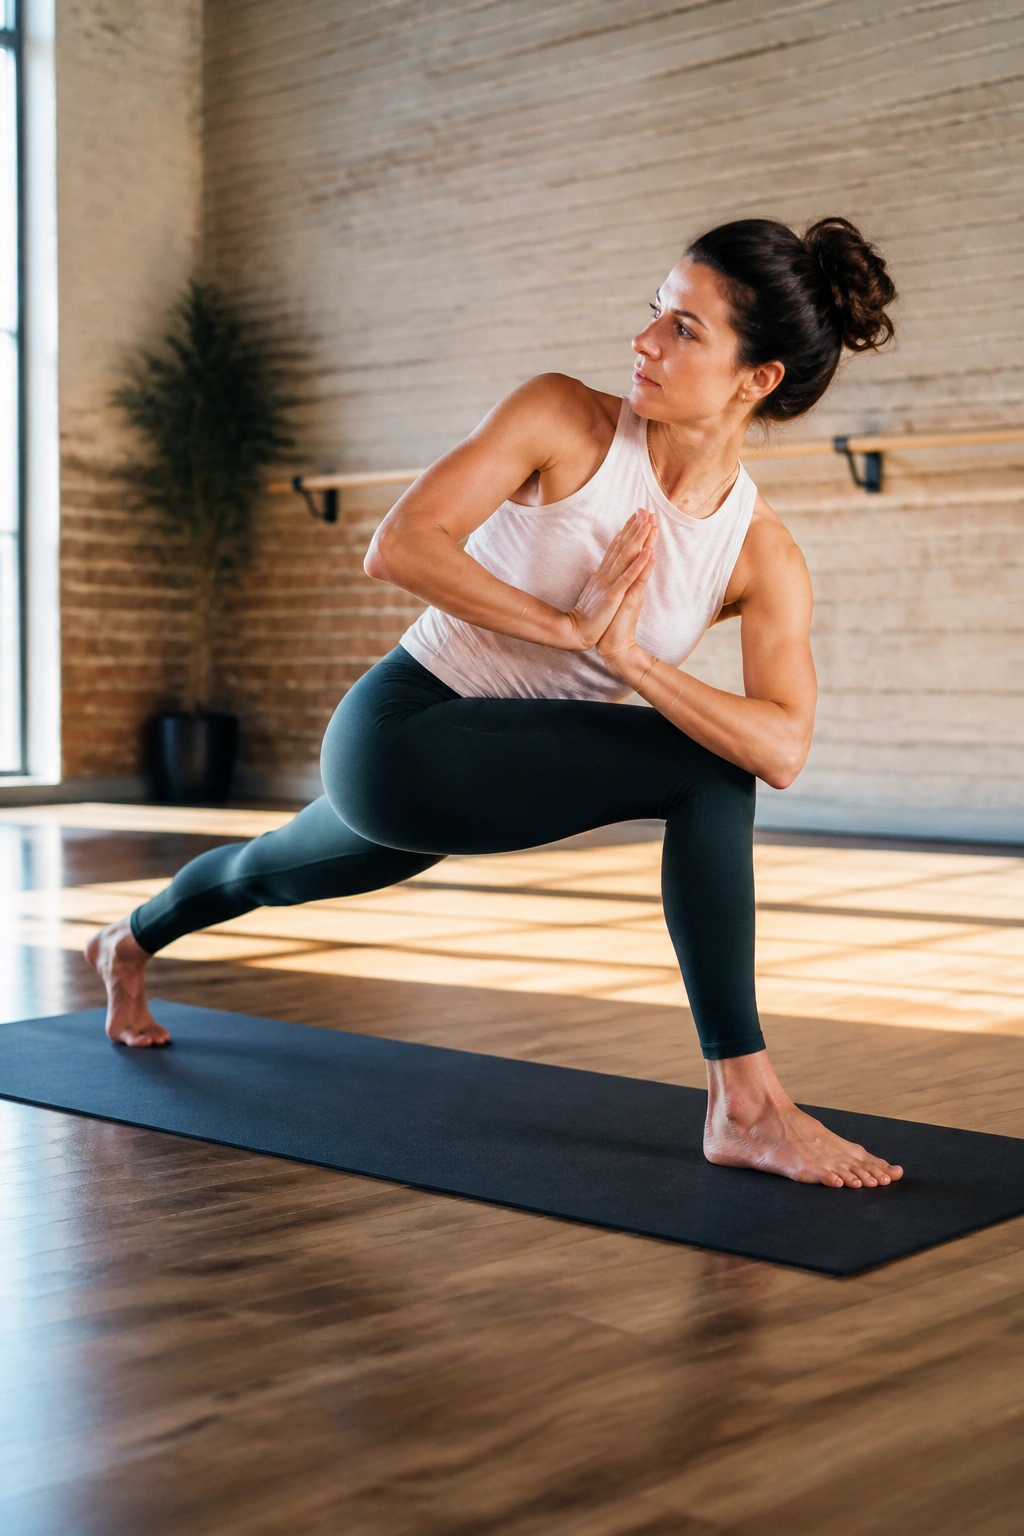
Twisting in crescent lunge looks mild until you hold it still. Then the standing leg starts to tremble, the back hip tries to open, and the waist has to do actual work instead of performing for the mirror.
I like this one as a ladder because it lets you climb up in difficulty without jumping into the deep end. Start in crescent lunge with the back heel lifted. Bring the hands to prayer at the chest and twist toward the front leg for 2 breaths. Then lift the prayer hands a few inches away from the sternum and hold for 2 more breaths. If that feels steady, reach the top arm up and open the chest slightly while keeping the pelvis mostly square.
The twist should come from the ribs and upper back, not from yanking the shoulders around. If the low back feels pinched, shorten the stance. That’s usually the fix people ignore because the deeper lunge looks better in class. Better-looking is not always better-working.
Three rounds per side is enough. Any more, and the movement starts losing its clean edges.
6. Warrior III Balance Sequence
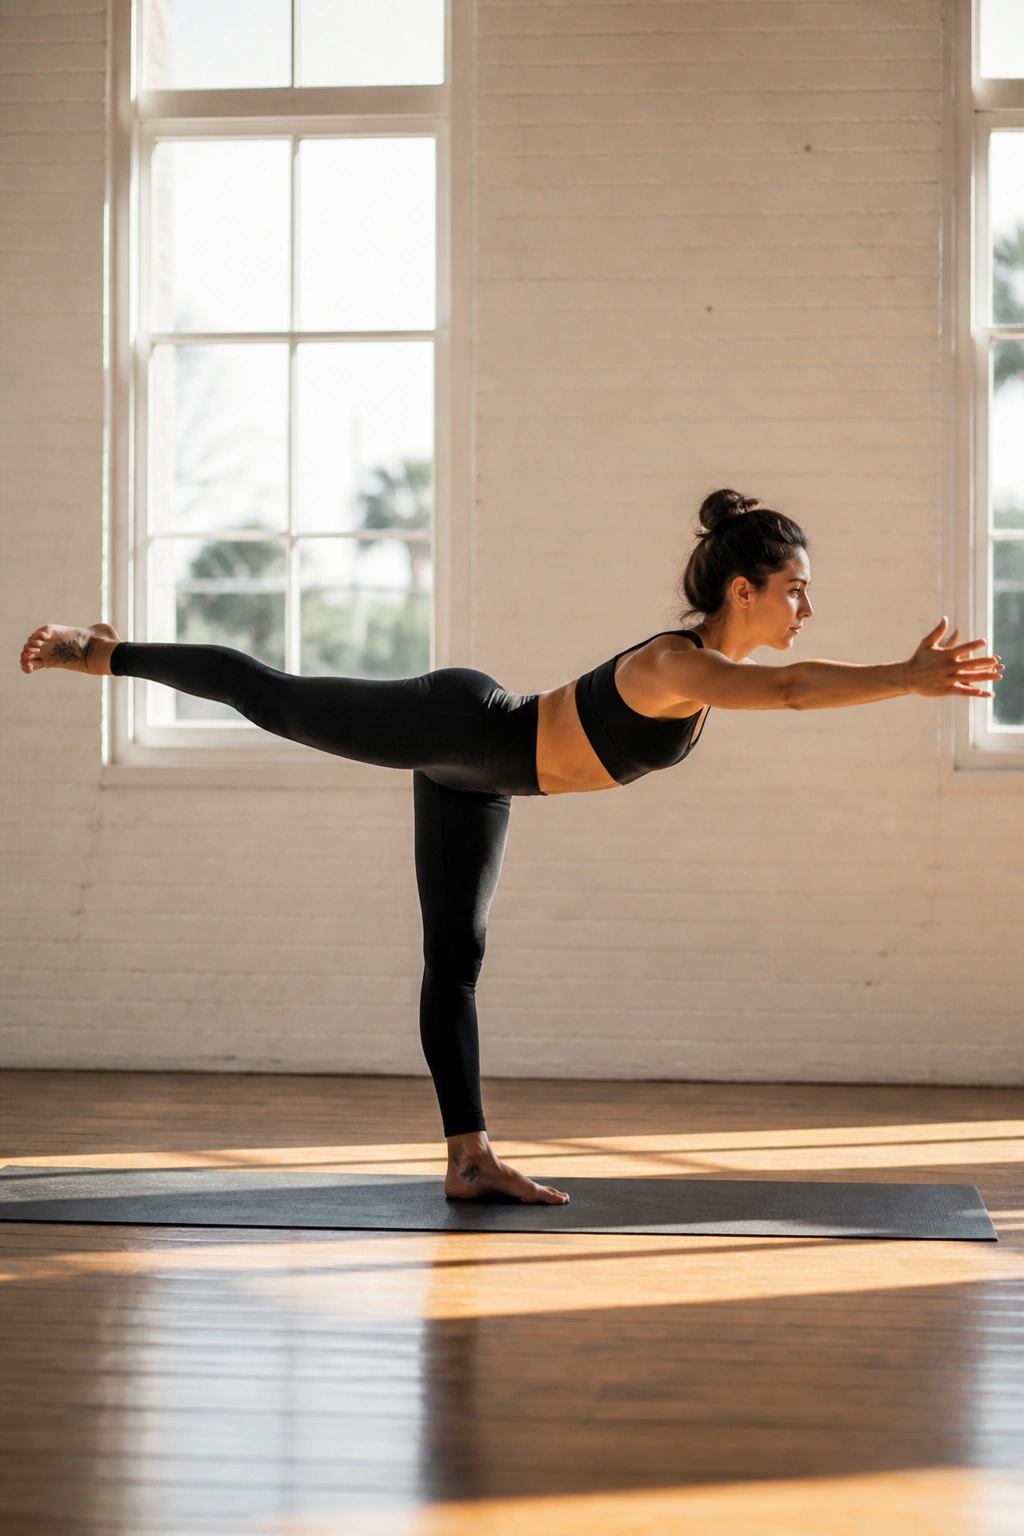
Unlike a fast balance drill, Warrior III asks you to own the hinge. That is why it cooks the center so quickly. One leg floats, the torso tips forward, and the whole shape falls apart if the trunk stops paying attention for even a second.
Begin standing tall, shift weight into one foot, then hinge forward with a long spine as the other leg reaches back. Keep the lifted toes active and the hips mostly level. You can leave the hands at heart, reach them forward, or place the fingertips on blocks if the floor helps. The goal is not height. The goal is stillness.
A useful benchmark: hold for 3 to 5 breaths on each side, then come back to standing before the standing leg gets sloppy. If the hamstrings are tight, bend the knee a little. If the ankle wobbles, use a wall or the back of a chair. There’s no prize for wobbling harder.
Best Way to Practice
Do 2 to 4 rounds per side and keep your gaze on one fixed spot. The body settles faster when the eyes stop wandering. That tiny bit of focus changes everything.
7. Side Plank Reach-Through Flow
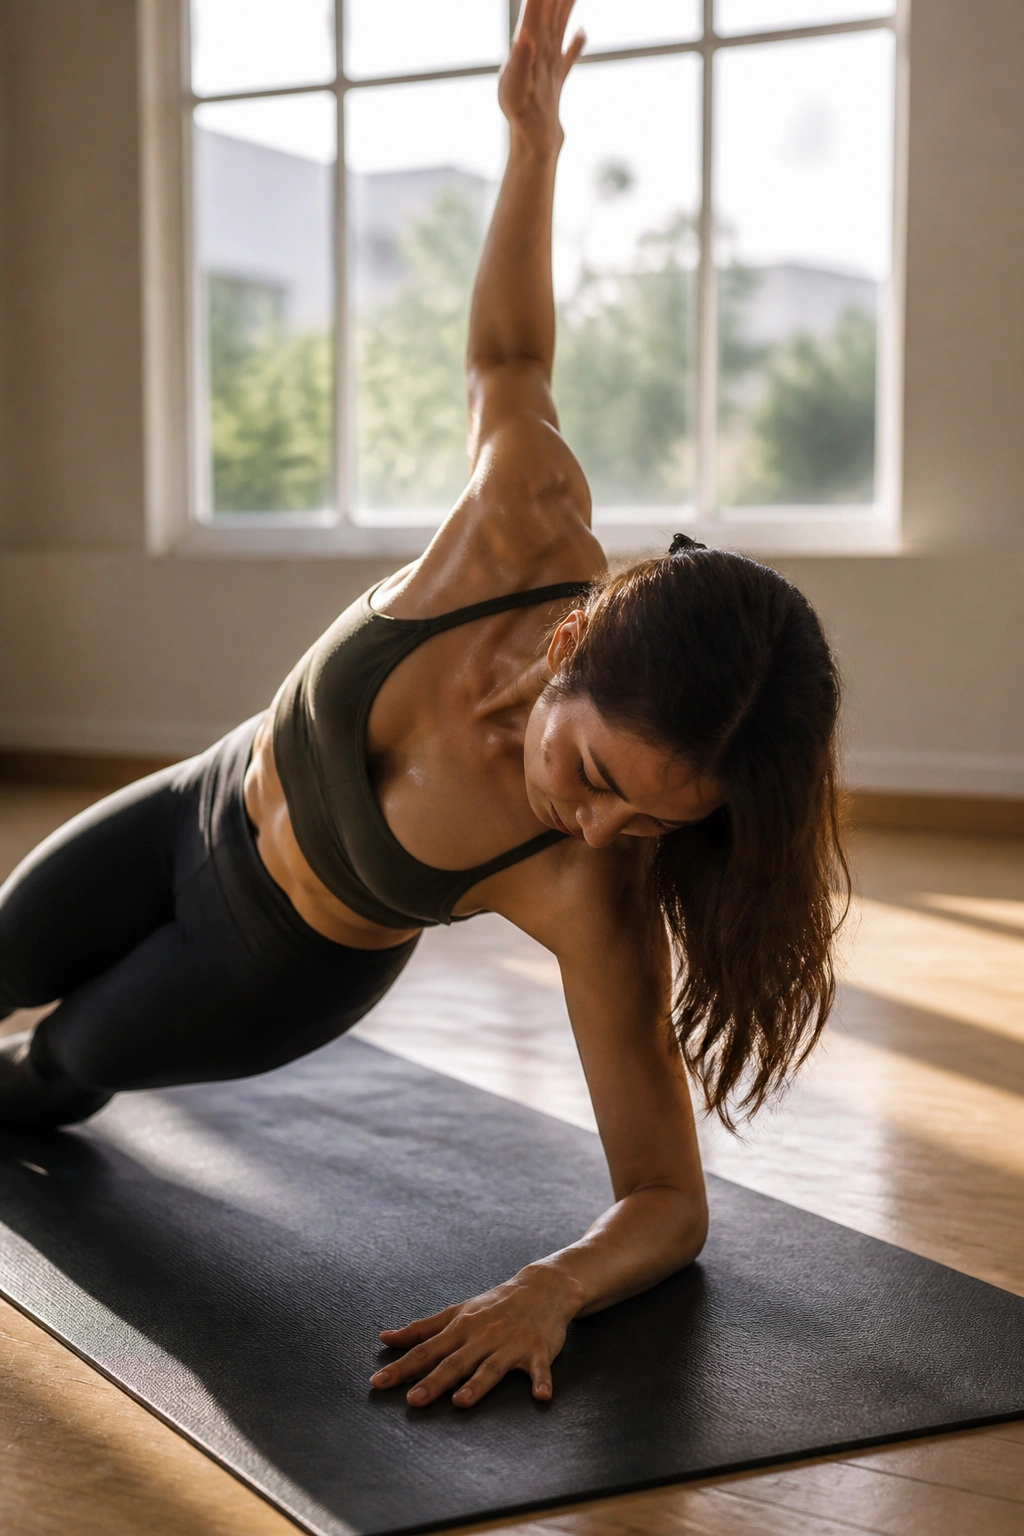
Side plank is where the obliques stop pretending. The side body has to hold you up, and then it has to control the rotation when you thread the arm underneath and open it again.
Start in high plank, shift onto one hand, and stack the feet or stagger them for more balance. Lift the top arm, then reach it under the torso in a slow thread-through before opening it back up toward the ceiling. That reach-through is the hard part. It asks the trunk to resist collapse while the shoulder and ribs move in opposite directions.
What Makes It Different
- Stronger obliques than a plain side hold
- More shoulder stability because the standing arm has to keep pressing
- Better control through rotation and anti-rotation
- Easy to scale by dropping the bottom knee
If full side plank feels like too much, keep the bottom knee down and still do the reach-through. The core doesn’t care if the shape looks dramatic. It cares whether you can control the movement without dumping into the shoulder.
Three to five passes per side is plenty. On a good day, add a small top-leg lift. On a tired day, keep it simple and clean.
8. Boat Pose to Half Boat Pulses
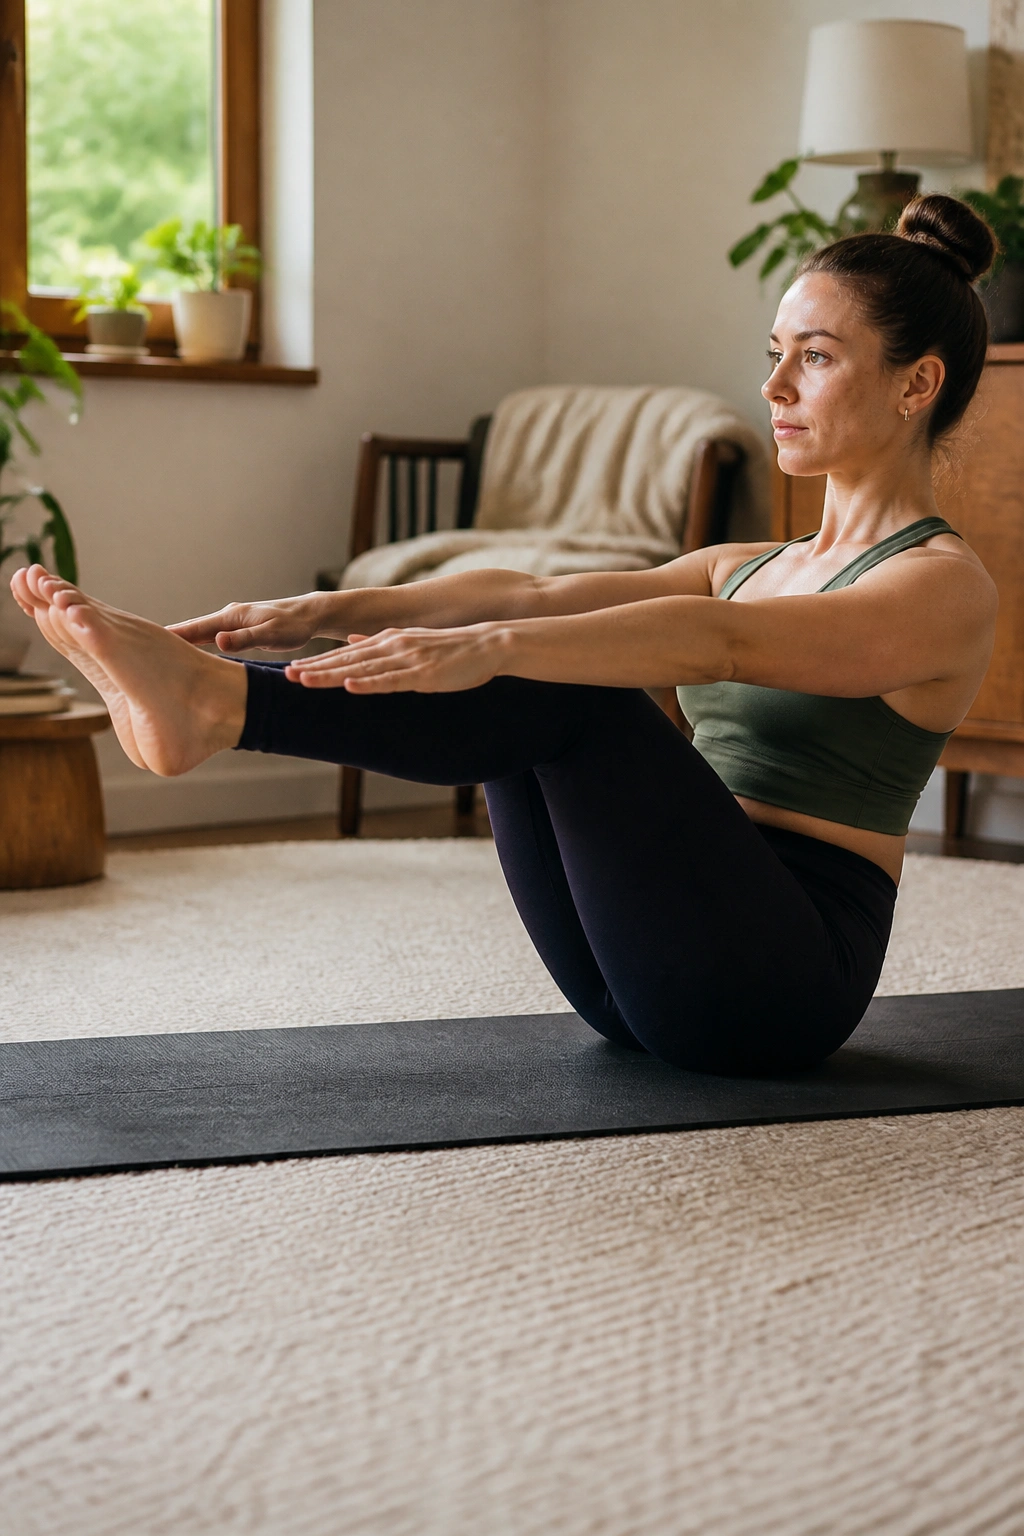
Why does boat pose feel harder after twenty seconds? Because the body starts negotiating with gravity, and gravity usually wins unless the front line is awake.
Sit tall, tip back until the feet lift, and bring the shins parallel to the floor or keep the knees bent if you need a softer version. Once you’re steady, pulse between a full boat and a half boat position, moving only a few inches each time. Short pulses beat big flails every time. The abs get more out of a controlled shift than a wild kick.
How to Scale It
- Knees bent with shins angled up: easiest version
- Hands behind the thighs: useful if the low back rounds too much
- Arms reaching forward: harder
- Straight legs: only if you can keep the chest open
Try 5 pulses, then hold for 3 breaths. Repeat for 3 rounds. If the neck starts grumping, keep the gaze forward rather than dropping the chin. And if the sitting bones feel like they’re digging into the floor, sit on a folded blanket. That tiny lift makes the shape more usable.
9. Forearm Plank to Dolphin Rollbacks
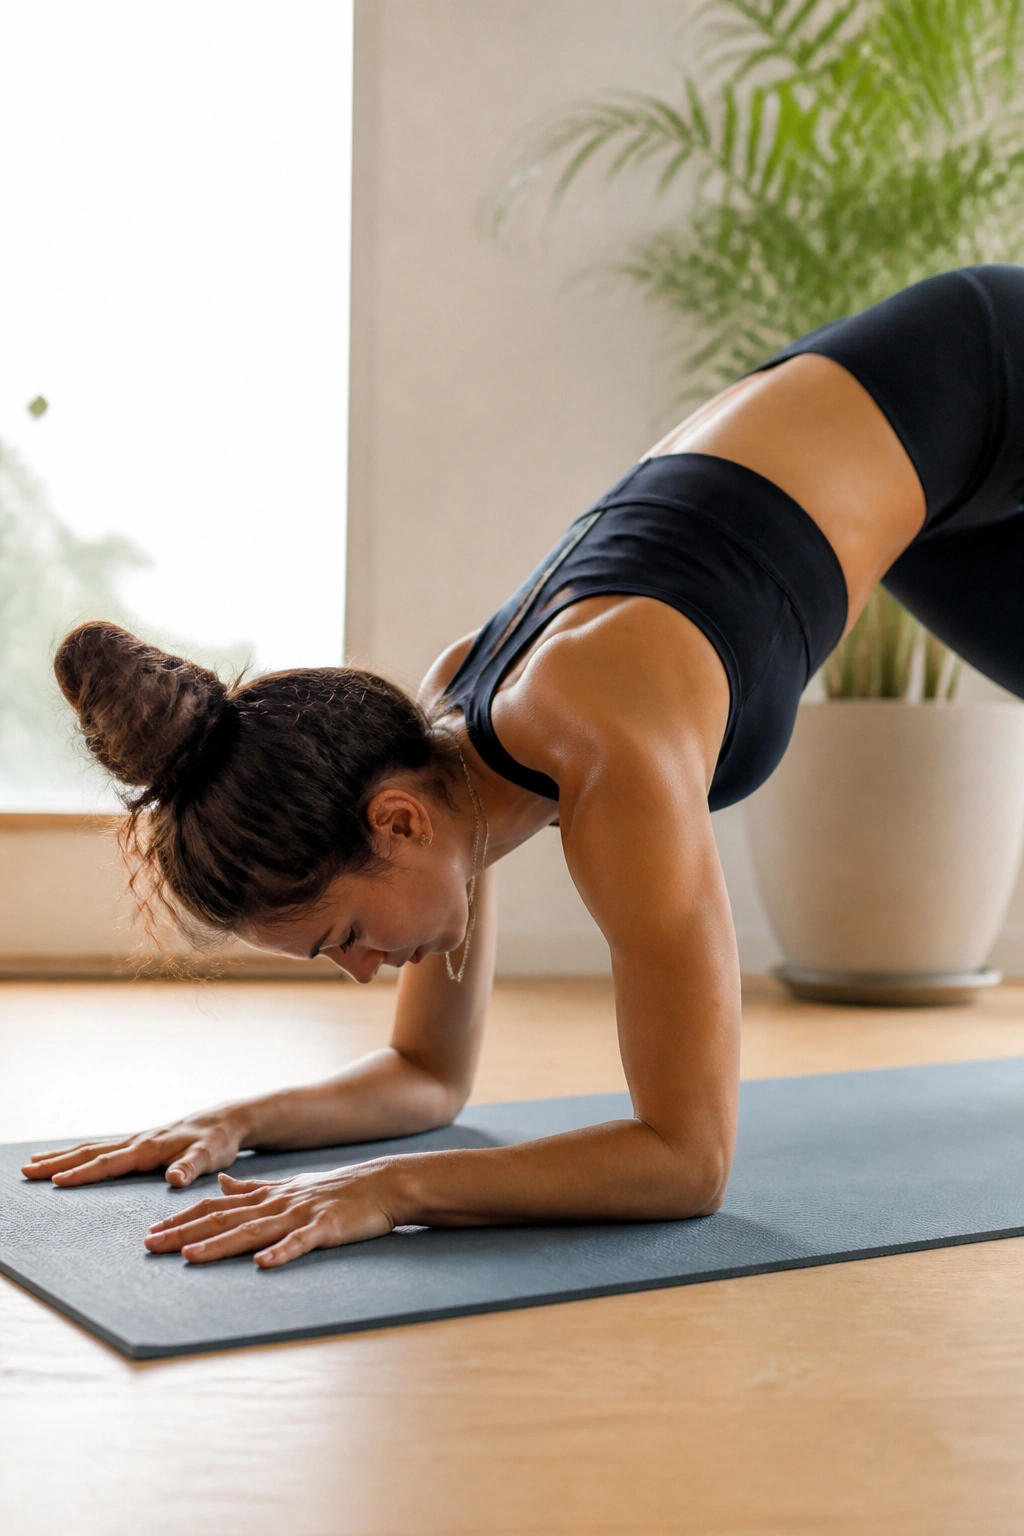
If your wrists hate long planks, this one is kinder. If your shoulders are lazy, it is not. Dolphin rollbacks spread the load differently, and that shift wakes up the upper abs and serratus in a way a lot of people miss.
Start on your forearms with the elbows under the shoulders and the forearms parallel. Lift into dolphin, then roll the body forward until the shoulders move over the elbows, and roll back again. The spine stays long, but the movement should feel like a controlled glide rather than a collapse-and-save.
When to Use It
This is a good choice if you want core work without so much wrist pressure. It also teaches the ribs to stay in place while the shoulders travel, which matters in chaturanga and arm balances. But if the neck clamps up, back off. Don’t bully your way through shoulder irritation.
Use 6 slow rollbacks, rest for one breath, then repeat once more. Keep the heels pressing back and the belly from hanging toward the floor. The motion should stop before the low back takes over.
10. Bird Dog to Knee Hover Flow
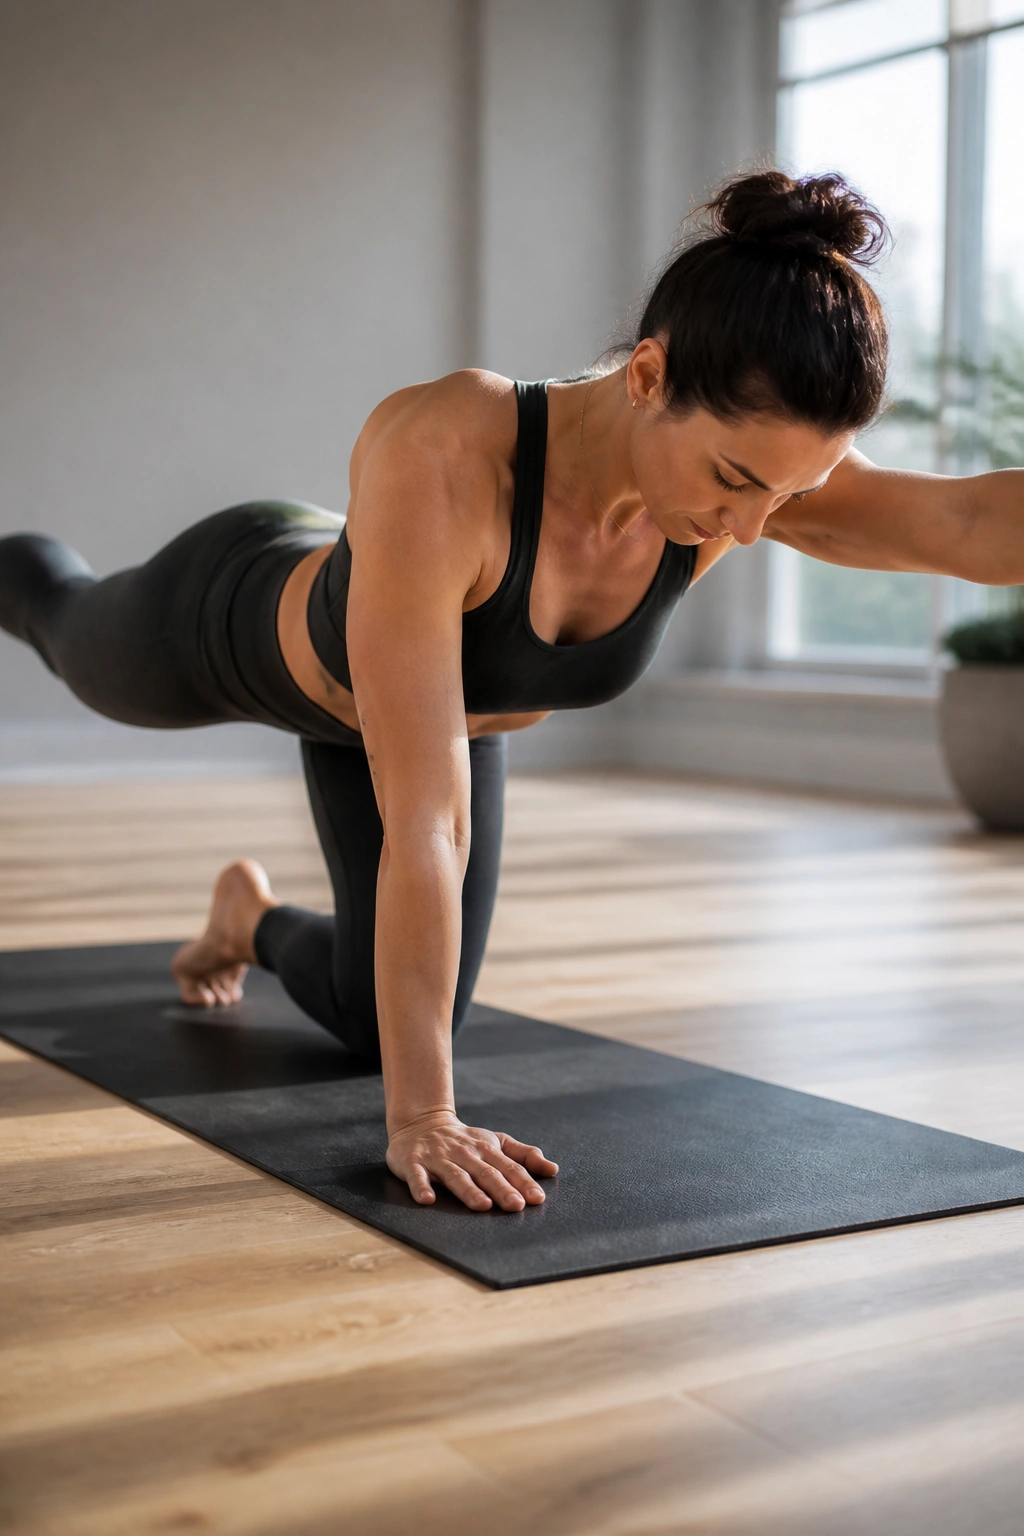
Hands and knees look easy until you hover one knee an inch off the mat. Then the whole center starts to tell the truth.
Bird dog becomes a real core flow when you layer in a knee hover and a slow reach. Start in tabletop, extend the opposite arm and leg, then pull the elbow and knee inward under the torso without rounding the upper back. Hover the knee for a second, send it back out, and place it down with control. The pause matters more than the lift.
What to Feel
- Pelvis staying level
- Lower belly gently drawing in
- Standing shoulder pressing away from the floor
- Neck long, eyes down
- Breath staying quiet and even
Try 6 reps per side. If the balance is messy, leave the hand and knee on the floor longer and shorten the reach. I’d take a smaller range with better control over a bigger shape that dumps weight into the low back.
That little hover is sneaky. It looks almost too small to count, which is exactly why it works.
11. Half Moon to Standing Split Transitions
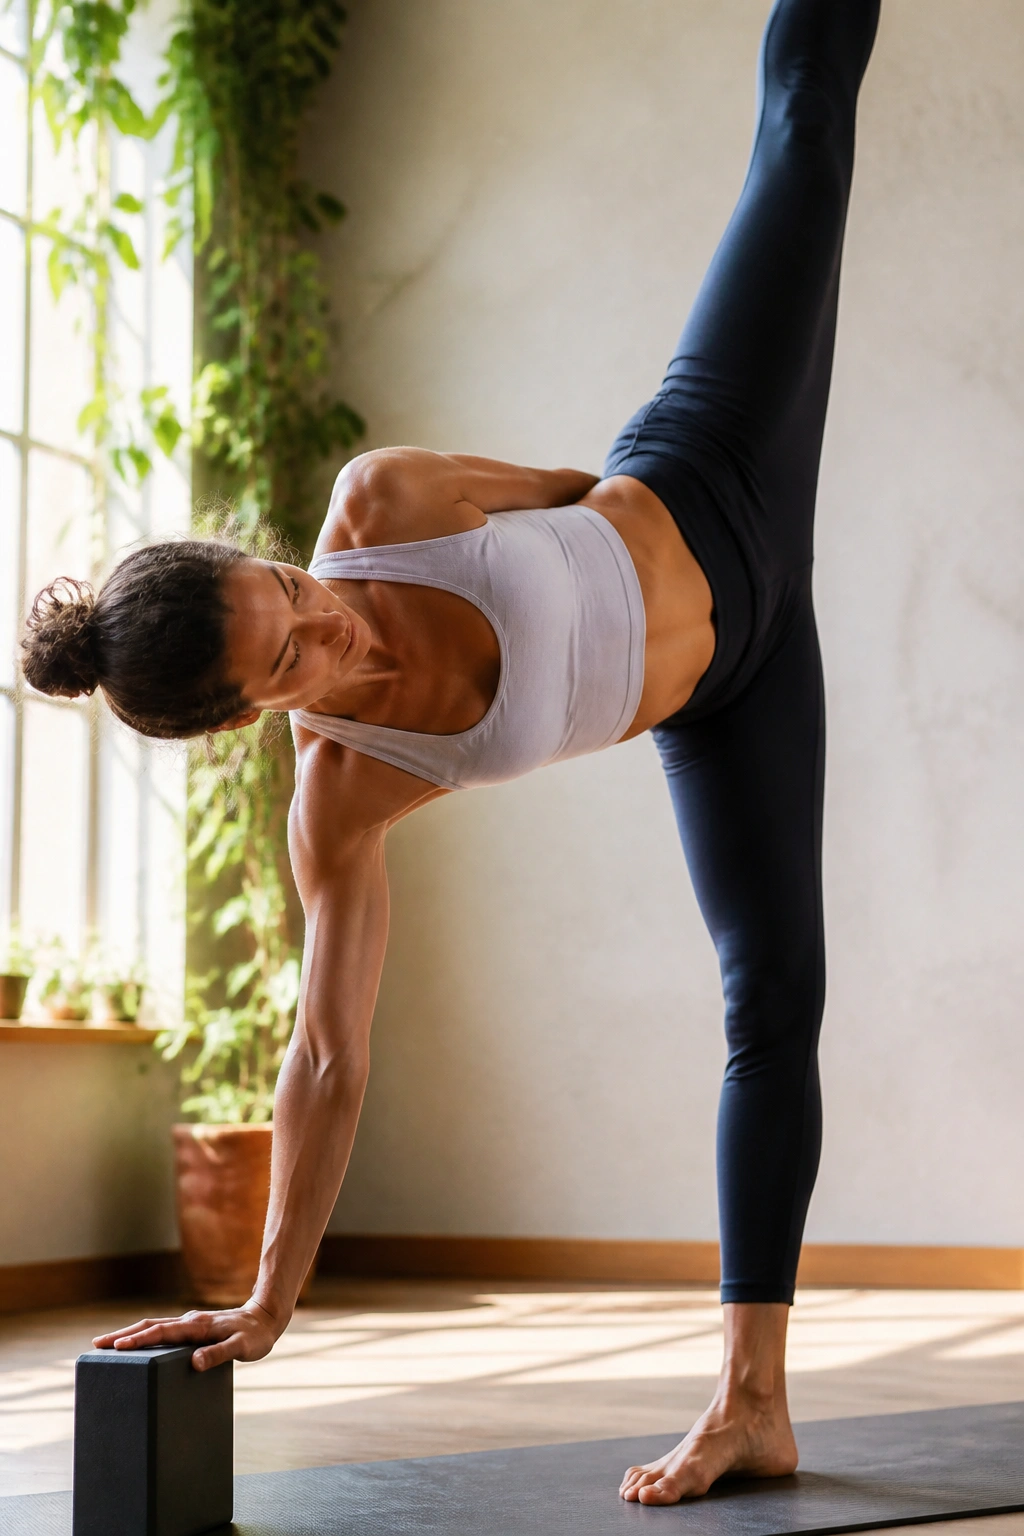
Half Moon is already a decent balance challenge. Add a standing split transition and the standing side has to hold the whole thing together while the lifted leg keeps reaching without throwing the spine off line.
Set up in Half Moon with the bottom hand on a block if the floor feels far away. Once stable, start to tilt the torso toward the floor while lifting the back leg a little higher into standing split. Then return to Half Moon before the torso tilts too far. The point is not how high the lifted leg goes. The point is whether the trunk can control the shift.
A neat trick: keep the bottom hip from rolling open by thinking of both front hip points facing the floor. That cue is plain, but it works. If balance gets noisy, keep the top hand on the hip instead of reaching up. Fancy arm shapes are optional.
Do 3 to 5 transitions per side. Go slow enough that the lower ribs stay quiet. If they flare, the move got too big.
12. Crow Prep and Micro-Hops
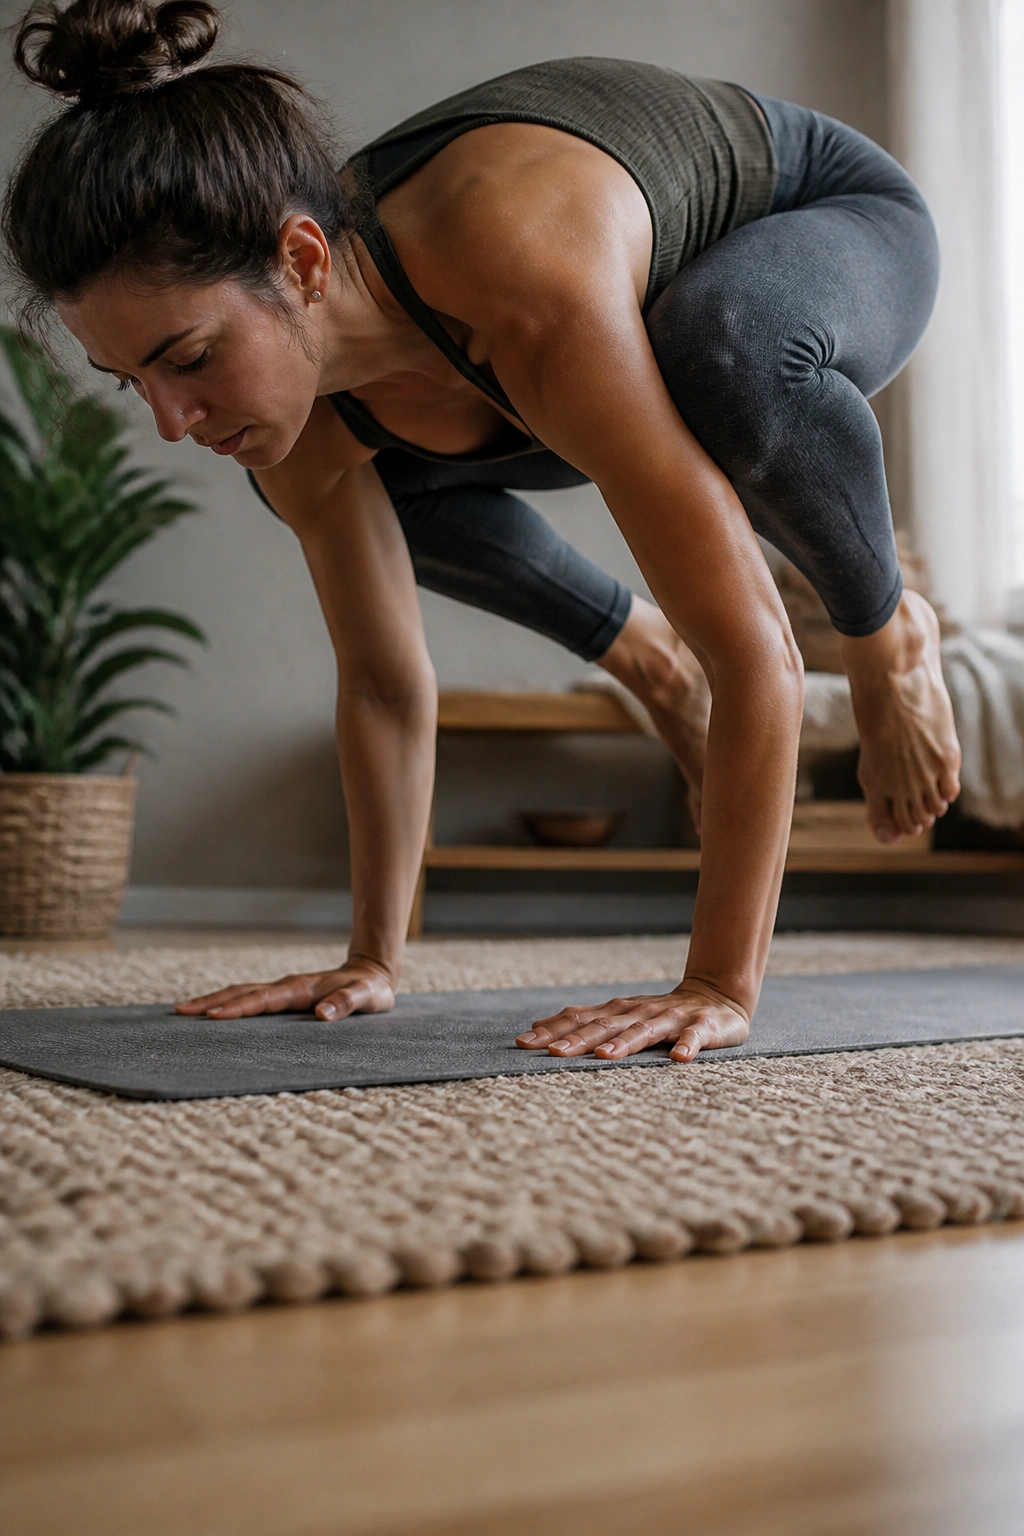
Crow prep is not just arm strength. It never has been. The real work comes from drawing the knees in, rounding the upper back, and holding the body compact while the feet barely unweight.
Place the hands shoulder-width apart, fingers spread wide, and shift the knees onto the upper arms. Lean forward until the toes grow light, then try a micro-hop — just a one-inch lift off the mat. That tiny hop is enough. You are teaching the center to hold a compressed shape.
What Helps Most
- A folded blanket under the face if fear makes you tip back too fast
- Blocks under the feet for easier entry
- Gaze a few inches ahead of the hands, not straight down
- Elbows bending slightly outward only if the shoulders stay strong
- A soft landing, not a crash
Crow prep is a place where people try to do too much too soon. Bad idea. Keep the hops tiny, keep the breath steady, and leave while the form is still clean. Two or three good attempts beat ten ugly ones.
13. Bridge Marches and Marching Glute Lifts
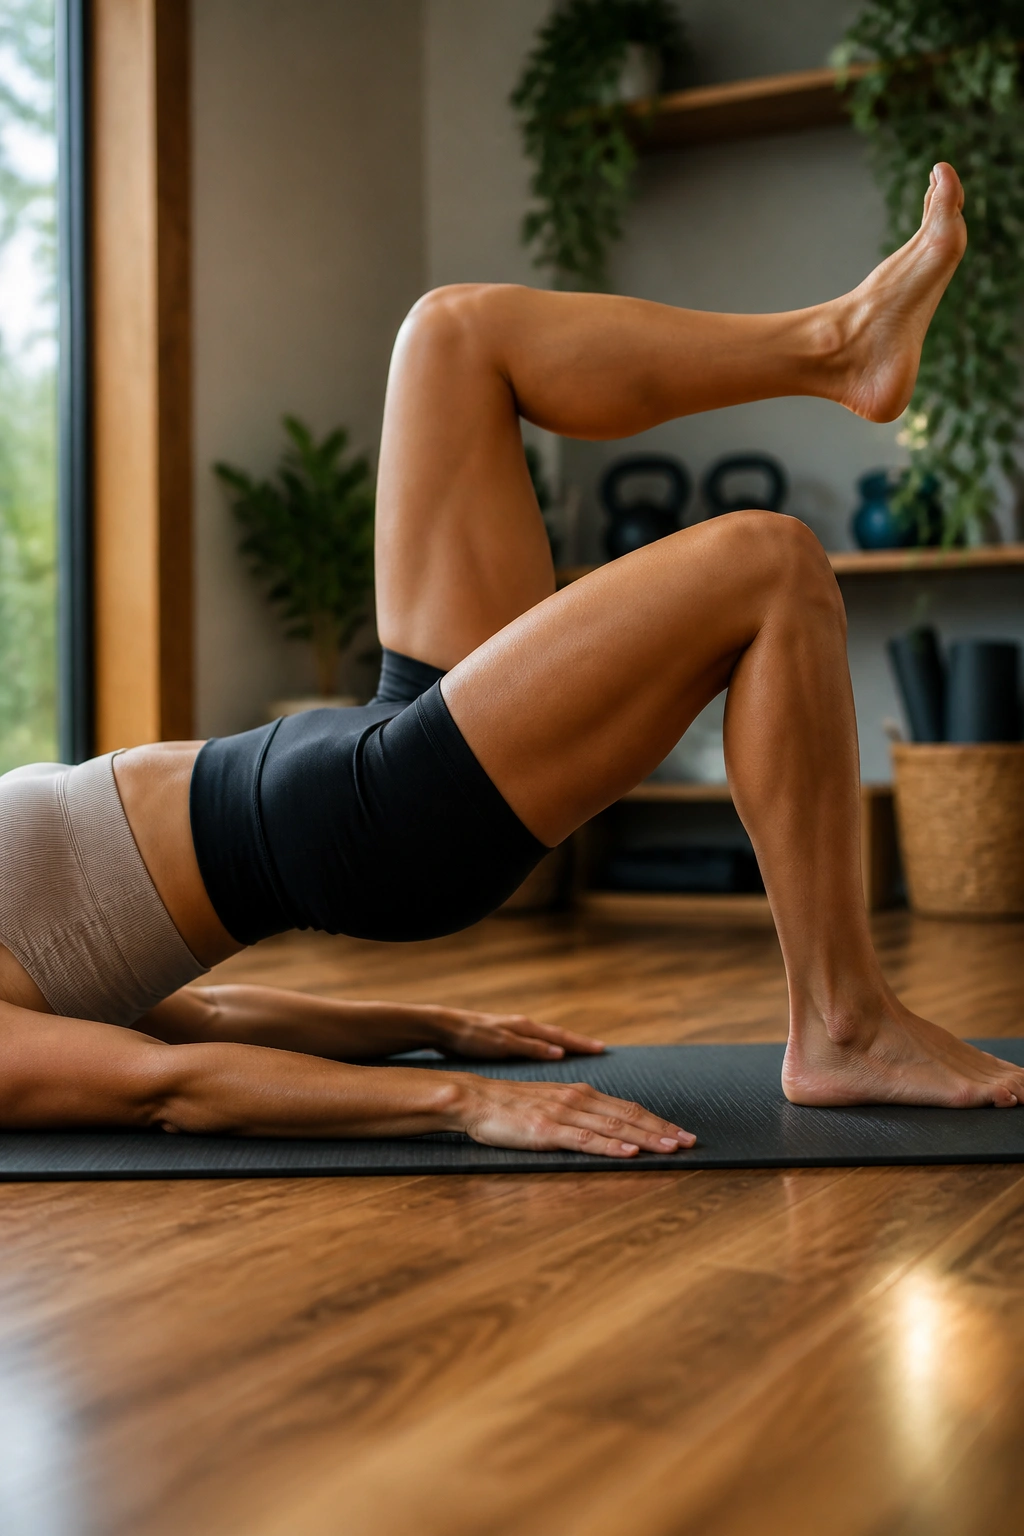
This is the one I like for people who hate crunches. Bridge marches train the back side of the body to help the front side stay honest, which sounds indirect until you feel how much more stable the pelvis gets.
Lie on your back, feet flat, and lift into bridge. Hold the hips at one level, then march one foot up an inch or two without letting the pelvis tip. Set it down and switch sides. The work is in the quiet pelvis. If the hips shift side to side, the core has already lost some of the job.
A few clean cues make a big difference:
- Feet hip-width apart
- Ribs heavy, not splayed
- Chin slightly tucked so the neck relaxes
- Glutes active but not cramping
- Three to five marches per side before resetting
Use 2 to 4 rounds. If the hamstrings grab too hard, bring the feet a little closer to the seat. If the low back arches, lower the bridge and try again. This is not glamorous, and that’s exactly why it works.
14. Revolved Chair to Standing Knee Lift
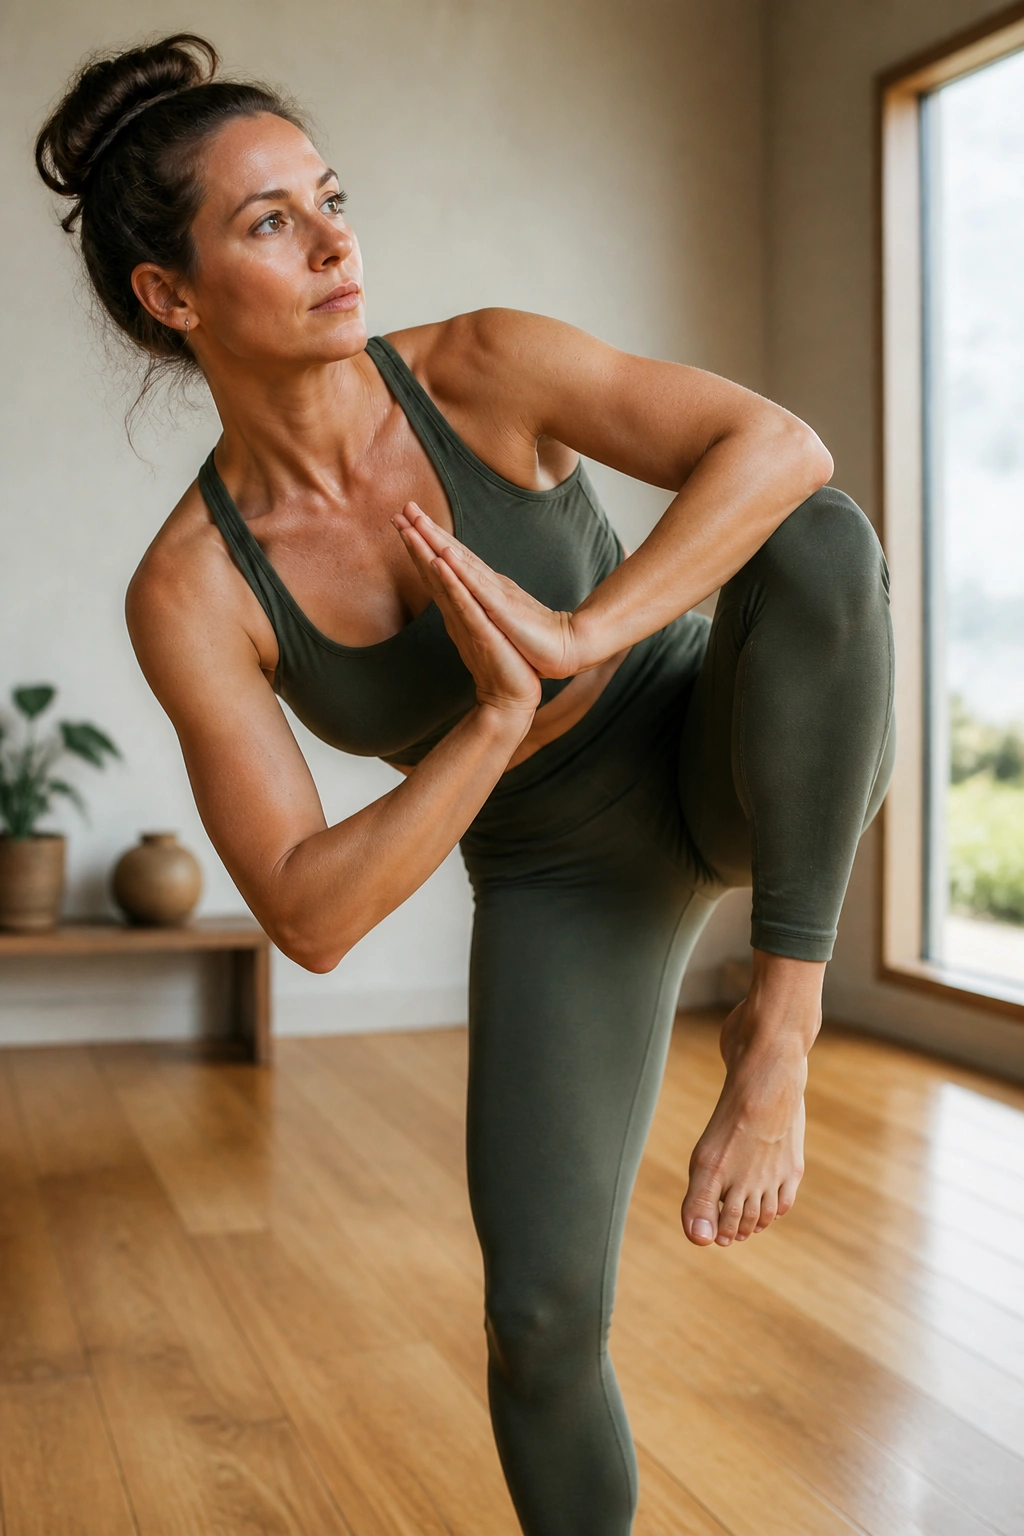
If your standing leg wobbles in revolved chair, that’s your midsection telling the truth. Twist plus balance is a sharp test, and the moment the knee lifts, the body has to stop cheating.
Begin in chair pose, bring the hands to prayer, and rotate toward one side so the opposite elbow finds the outer knee or just presses close to it. From there, shift weight into the standing foot and lift the back knee toward the chest. Return to chair and repeat. The lift should happen without a rib flare or a big lean backward.
What To Watch For
- Standing foot stays rooted through the big toe mound
- Spine lengthens before the twist deepens
- Knee lift comes up on control, not momentum
- Shoulders stay away from the ears
- Face stays calm — yes, that matters
Do 4 to 6 reps per side. If the balance piece takes over, keep the lifted toe on the floor and practice only the twist. You can always make it harder later. I’d rather see a small, steady arc than a dramatic wobble that depends on luck.
15. Slow Chaturanga Vinyasa With Hover Holds
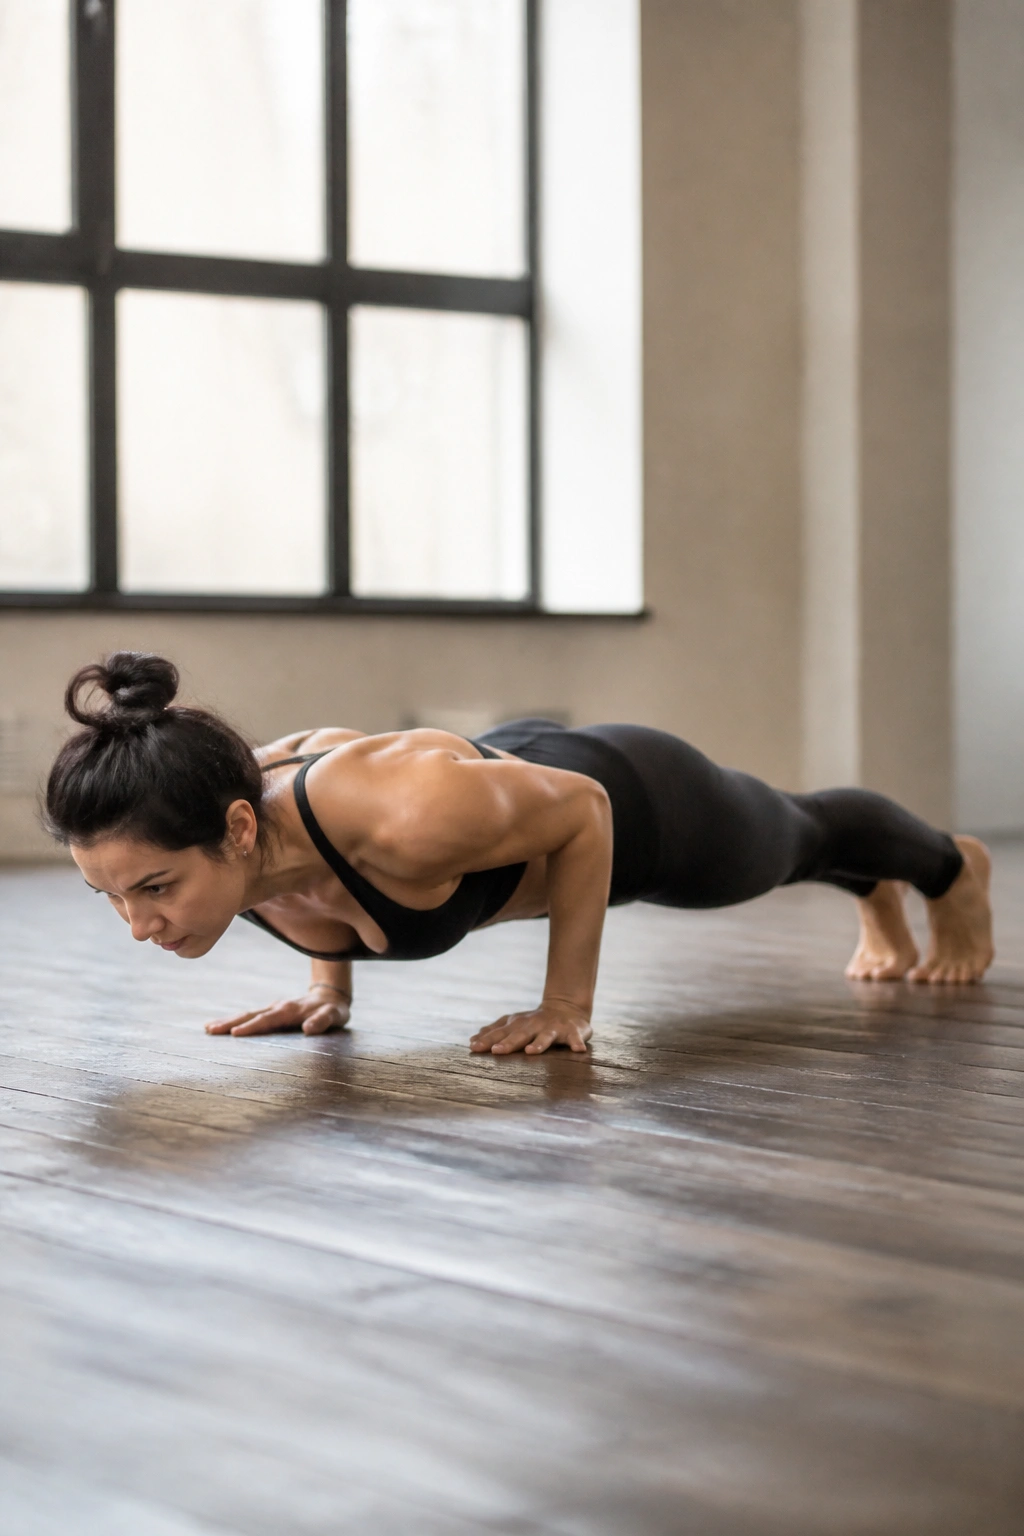
Slow chaturanga is where a lot of people discover they were borrowing from the lower back the whole time. The hover hold fixes that fast.
From plank, bend the elbows to about 30 to 45 degrees, lower halfway, and pause for 1 to 2 seconds before either lowering all the way to the floor or pressing into upward dog or cobra. That tiny pause forces the front body to stay tight and the shoulders to keep the elbows from drifting wide. If the chest crashes first, the core is already out of position.
A few things matter here:
- Wrists under shoulders in plank
- Elbows hugging in, not winging out
- Neck long, eyes slightly ahead of the mat
- Belly lifting so the low back doesn’t sag
- Smooth exhale through the lower phase
Three to five slow rounds are enough to expose sloppy mechanics. If the shoulders feel pinchy, skip the hover and work from knees. If the whole body shakes, good. That’s usually a sign the pace is honest.
Final Thoughts
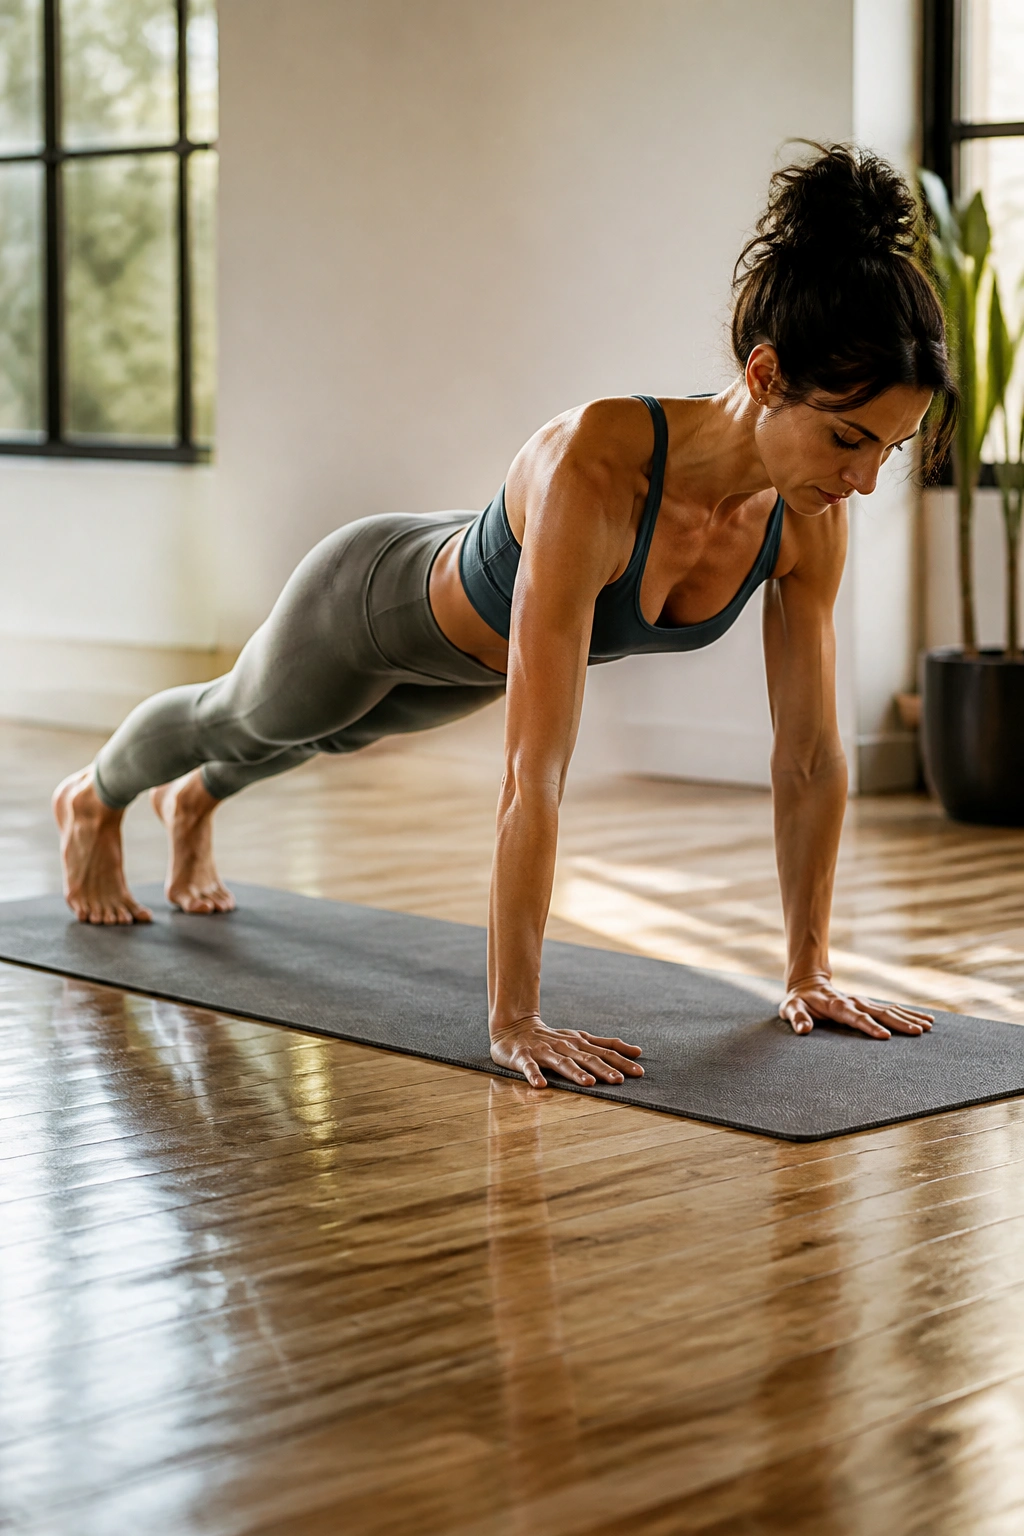
Core strength in yoga looks quieter than people expect. No one gets points for the loudest pose. The real win is when the ribs stay stacked, the pelvis stops wandering, and the breath keeps moving while the body does harder things.
Pick three flows and repeat them for a few practices before chasing the next shiny sequence. One floor-based drill, one standing balance, one slow plank variation is a solid mix. That’s enough to build real control without turning the session into a circus.
And if a flow makes your lower back take over, shorten the stance, bend the knees, or cut the range in half. The best version is the one you can keep clean for the last rep, not the first one.
