



A flat-looking backside is often less about genetics than about how your hips actually move. If your glutes never get asked to extend, stabilize, or hold your pelvis steady on one leg, they tend to coast while your hamstrings and lower back pick up the slack. That’s where yoga poses for a rounder, stronger booty can earn their keep.
They work best when you stop treating yoga like gentle stretching with pretty shapes and start treating it like smart strength work. The glute max gives you shape and power. The glute medius and glute minimus help keep your pelvis level and your knees from collapsing inward. When those muscles wake up, your stance changes. Your walk changes. Even your standing posture looks different.
Yoga won’t replace heavy loading if pure size is your only goal. I’d be blunt about that. But it can build cleaner glute activation, better hip control, stronger single-leg balance, and the kind of end-range strength most people skip. That combination matters more than people think, and it shows up fast in the way your hips feel during squats, lunges, and even everyday stairs.
The trick is choosing poses that actually make the backside work instead of just hanging out on stretched ligaments. Slow holds, deliberate breath, and a little patience do more than frantic pulsing ever will. Start with the first pose and pay attention to where the effort lands.
1. Chair Pose for a Rounder, Stronger Booty
Chair Pose looks tame from the outside. It isn’t.
The moment you sit back with any real control, your glutes have to help keep you from tipping over. If you do it well, you’ll feel the work in the backs of your hips, not only in the fronts of your thighs. That matters. A lot of people fold forward and dump all the tension into the quads, then wonder why their backside never feels involved.
Why It Works
Chair Pose asks for hip flexion plus isometric glute work, which is a nice combo when you want a firmer, more lifted feel. The pelvis stays tucked enough to keep the low back from taking over, and the heels stay heavy so the glutes can help drive you upward when you rise.
Quick Setup Cues
- Stand with feet about hip-width apart.
- Sit back like you’re tapping a chair behind you.
- Keep weight in your heels and the base of the big toe.
- Reach your arms up without flaring the ribs.
- Hold for 3 to 5 slow breaths.
Best tip: if you mostly feel your thighs, shift your hips back an inch more and soften your knees less aggressively forward. Tiny adjustment. Big difference.
2. Goddess Pose and Deep Sumo Holds
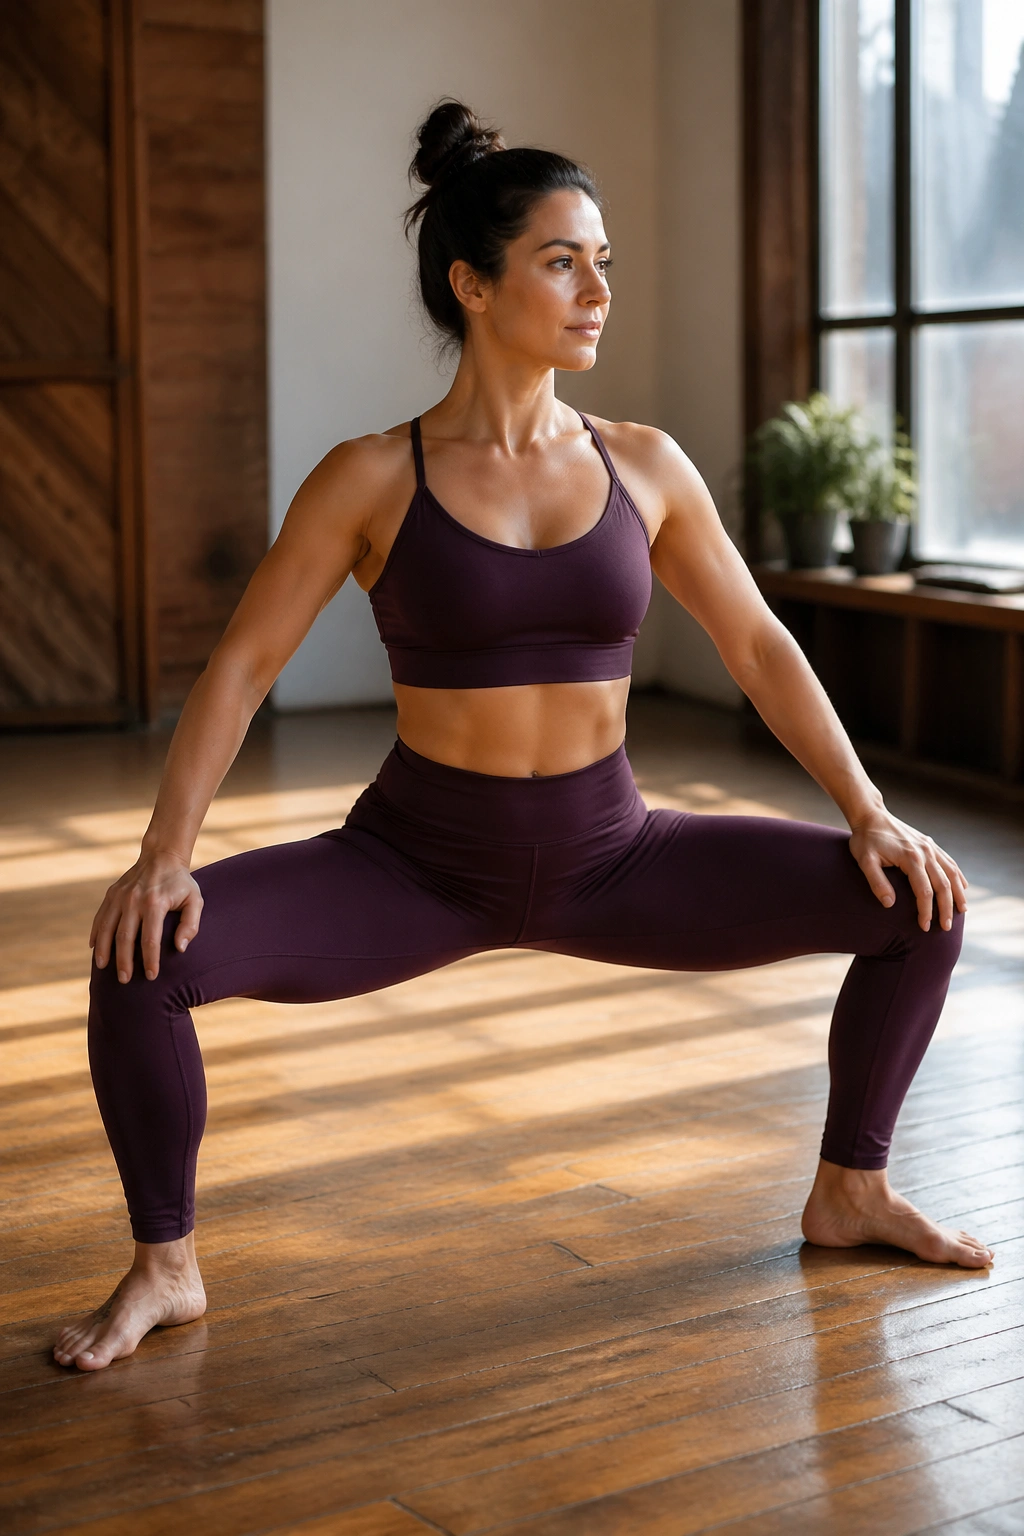
If you want outer-glute work without getting on the floor, Goddess Pose is brutally effective.
The wide stance changes everything. Your glute medius, glute maximus, and inner thighs all have to contribute to keep the knees tracking over the toes. That makes this pose a smart pick for people who want stronger hips, not just a nice stretch. It also has a very honest way of exposing weak points. One side usually drops faster. You’ll notice.
Hold the posture low enough that you feel the muscles working, but not so low that your lower back arches to fake the effort. The best version feels like a controlled burn across the hips and thighs, with the pelvis staying stacked rather than spilling forward. There’s no need to chase a giant range.
A lot of people rush this one. Bad idea. Stay still for 20 to 40 seconds, breathe into the sides of the ribs, and keep the knees tracking over the second and third toes. The pose gets better when you stop wobbling around and start building real tolerance in the legs. It’s not glamorous. It works.
3. Warrior III for Single-Leg Glute Strength
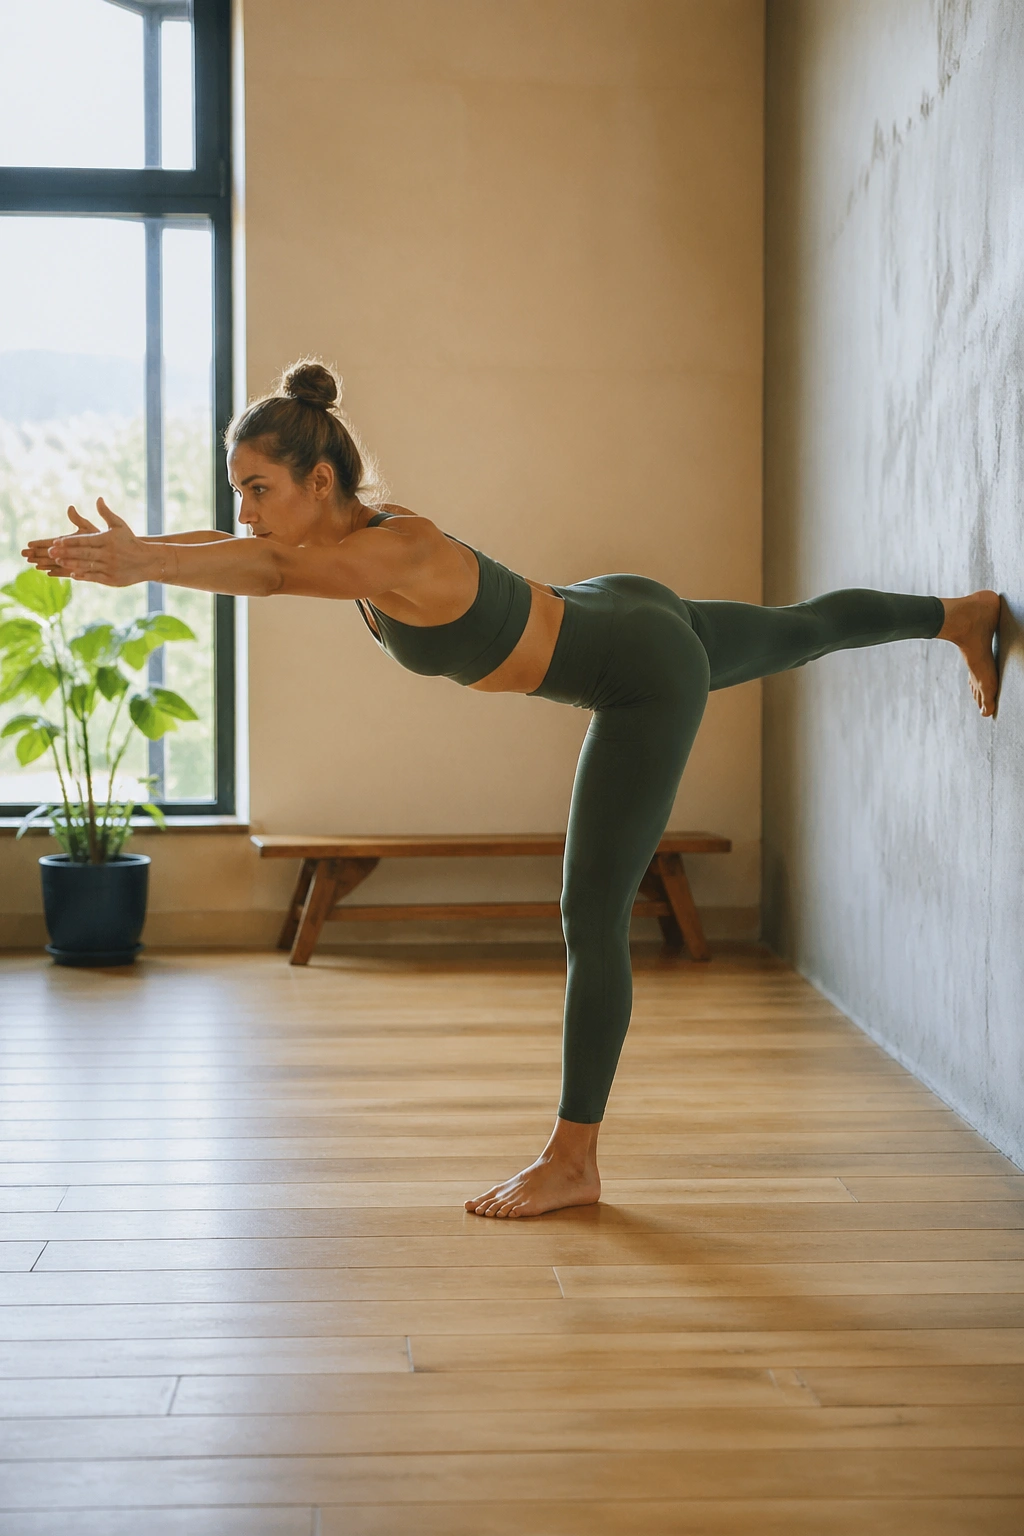
Why does Warrior III show up in so many glute routines? Because one leg has to do the hard job.
When you tip forward into Warrior III, the standing glute on the support side works to keep the pelvis from hiking or dropping. That’s the same kind of control you need when you walk up stairs, land from a step, or stabilize during lunges. It’s not a balance trick. It’s a glute test.
The back leg matters too. If you lift it with intent, the entire line from hamstring to glute has to stay active, and that’s where the pose gets interesting. Most people either fling the leg too high or let the pelvis open to the side. Neither version helps much. Keep the hips square and the lifted heel reaching long, not high.
How to Use It
- Start near a wall if balance is shaky.
- Keep the standing knee soft, not locked.
- Hinge from the hip crease instead of rounding the spine.
- Hold 3 breaths per side, then switch.
- Use a light fingertip touch on the wall if needed.
One clean rep beats three messy ones.
4. Crescent Lunge for Longer, Stronger Glutes
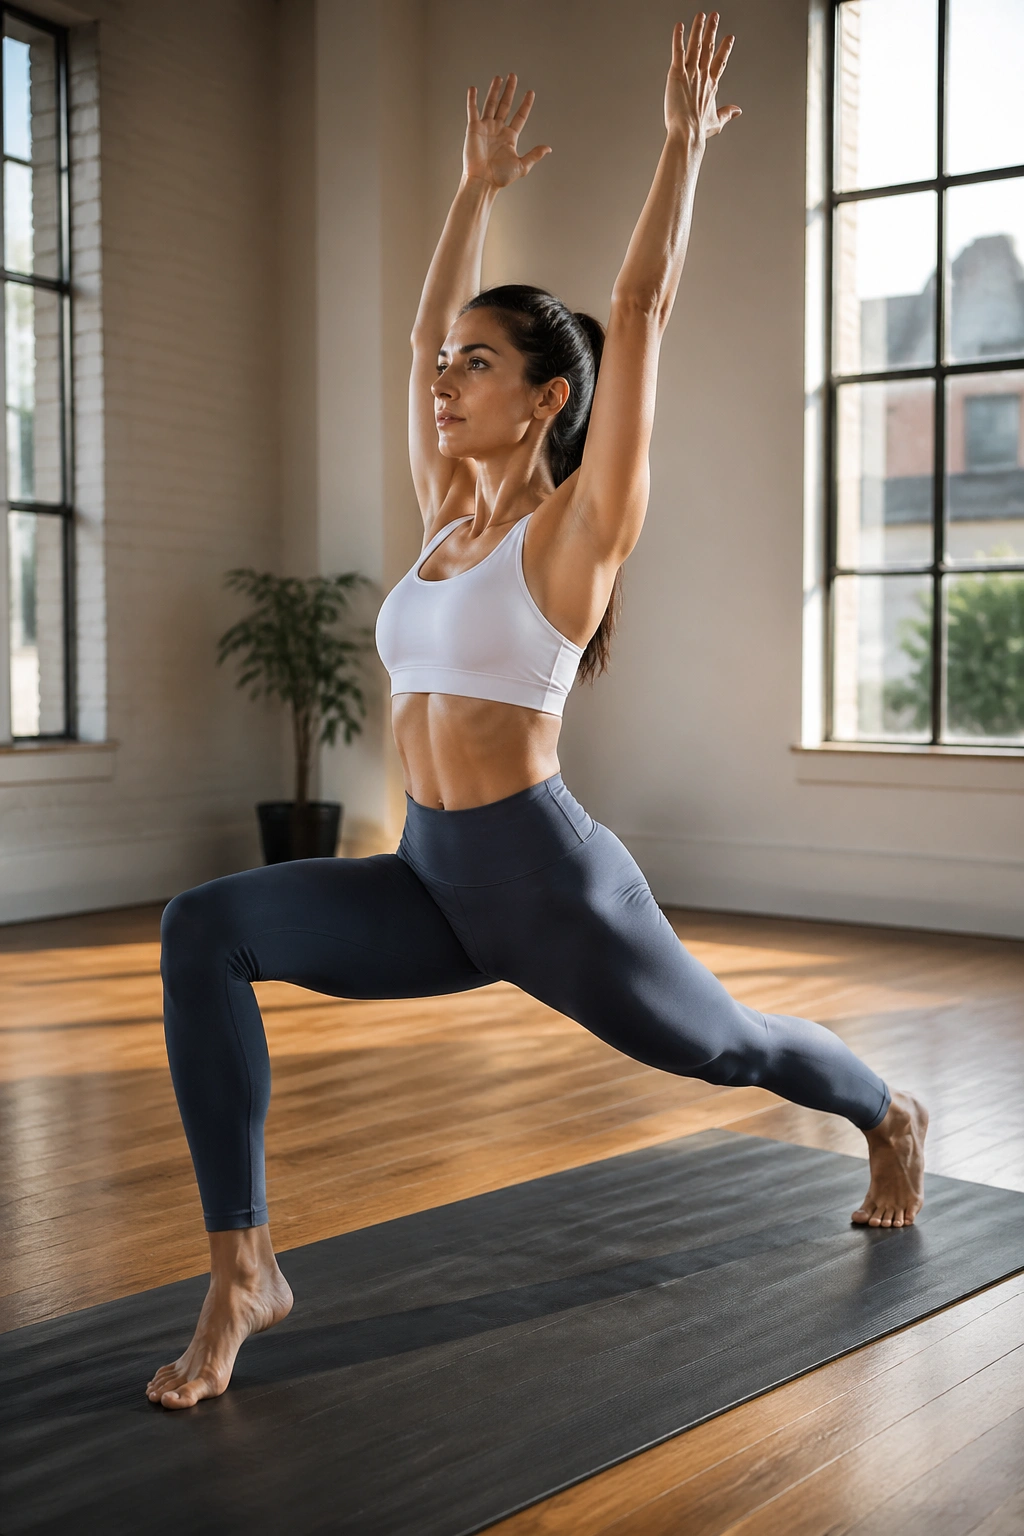
Picture the back leg in Crescent Lunge: long, awake, and working harder than it first appears.
That trailing leg is doing more than just standing there. The glute on that side helps extend the hip, while the front side gets the benefit of stability and control through the pelvis. If you keep the torso upright and avoid dumping into the low back, Crescent Lunge becomes a sneaky strength builder that also opens the front of the hip on the back leg. Tight hip flexors can make glute work feel dull. This pose helps with that.
The best version is not a rushed bounce. Sink down a little, feel the back heel press away, and keep the front knee stacked over the ankle. If you want a stronger glute focus, squeeze the back leg lightly as you rise and lower with control. Slow tempo matters more than big depth.
- Keep the back heel lifted and the toes angled forward.
- Draw the ribs down so the low back stays quiet.
- Hold 5 to 8 breaths on each side.
- If balance is rough, lower the back knee for a few rounds.
A lot of people need this pose more than they think.
5. Bridge Pose for a Rounder Booty Lift
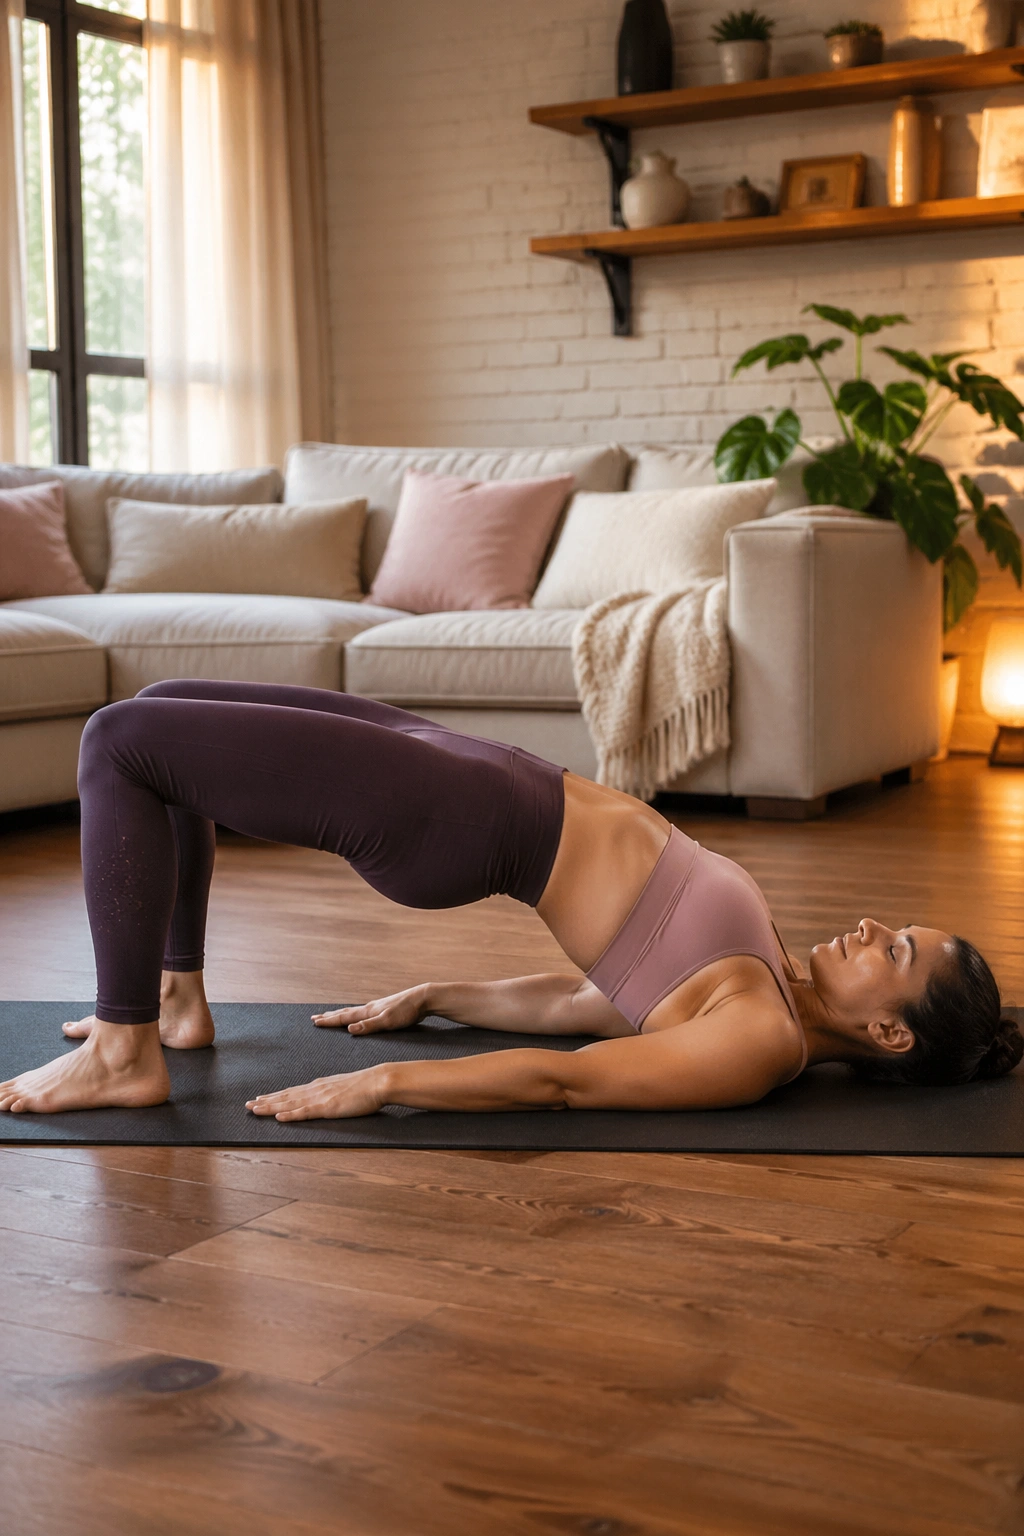
The floor gives you honest feedback in Bridge Pose. You press down, and your hips either rise because the glutes did the work or they cheat because the lower back took over.
That’s why I like this one so much. It’s simple, yes, but it is not lazy. When your feet are planted about hip-width apart and your heels are close enough that your fingertips can just brush them, the glutes can push the pelvis upward without overextending the spine. You should feel the backs of the hips wake up fast.
The cue I use most often is this: ribs stay heavy, hips lift from the glutes, not from the low back. If your chest pops up and the lower ribs flare, you’ve lost the target. Keep the chin slightly tucked, breathe out as you lift, and pause at the top for a one-count squeeze. That tiny pause matters more than an extra inch of height.
A bridge can be held for 5 breaths or repeated for 10 slow reps. Both work. Just don’t rush the descent. The slow lowering is part of the training, and it’s where a lot of people cheat themselves.
6. Single-Leg Bridge for One-Side Stability
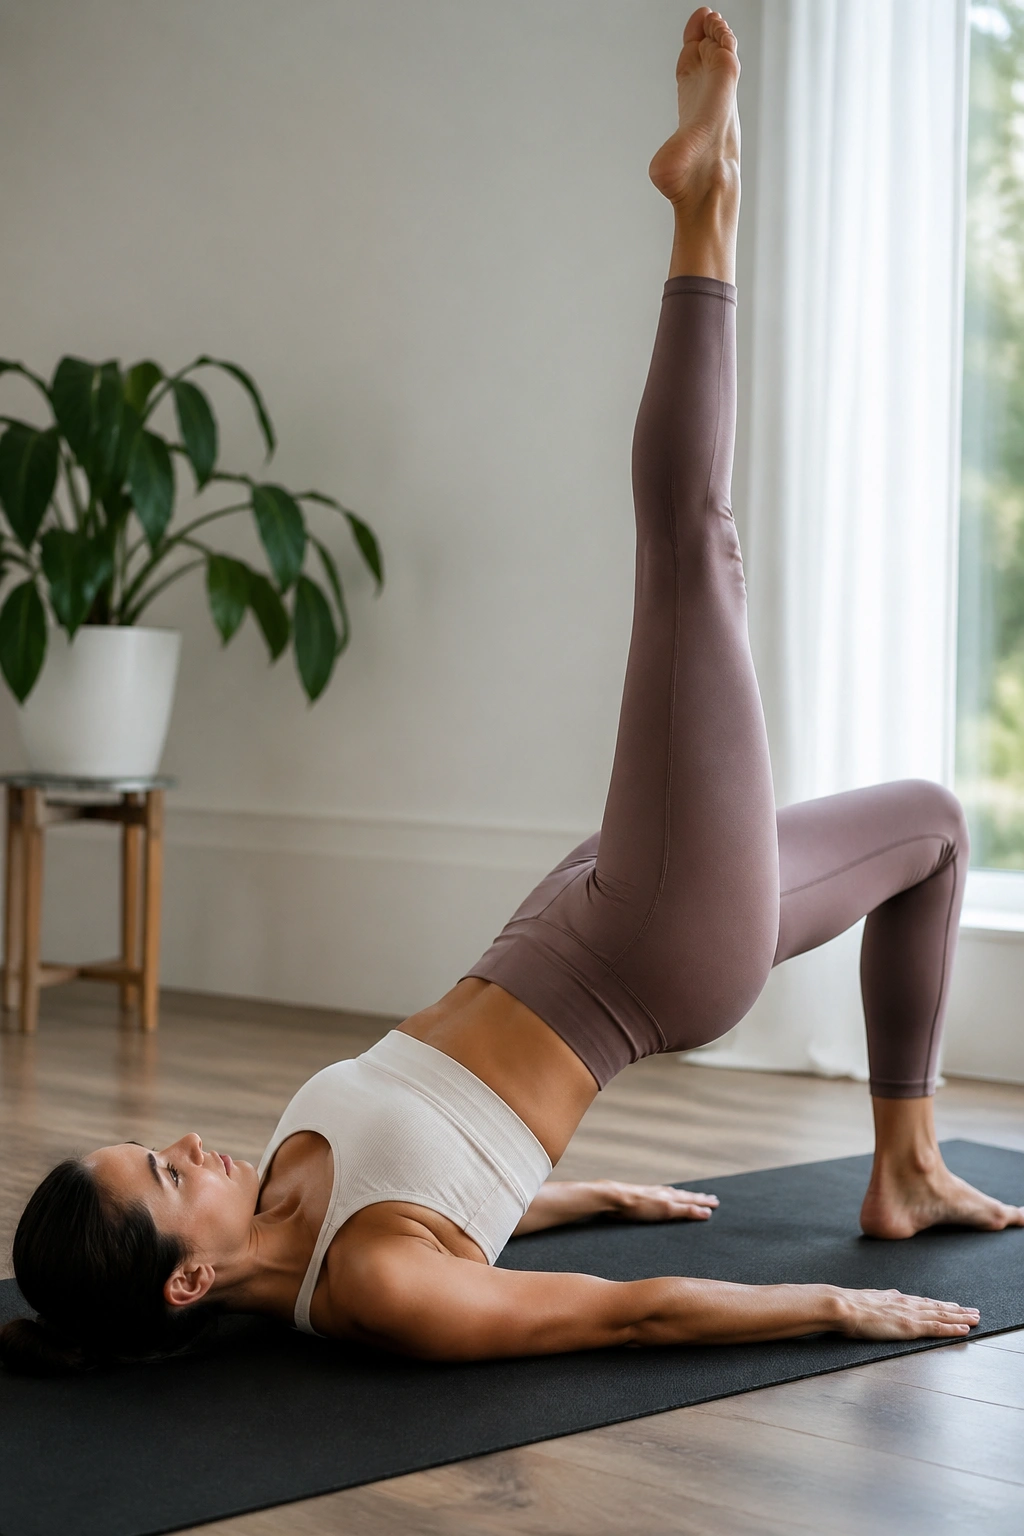
Unlike the two-leg bridge, Single-Leg Bridge tells you exactly which side likes to slack off.
The support-side glute has to carry more load, and that makes this one especially useful if you notice one hip feels weaker or less stable than the other. It also exposes rotation. If your pelvis twists off to one side the second you lift a foot, that’s useful information. Annoying, sure. Useful too.
This pose is best for people who already know the standard bridge and want a harder version without needing equipment. Keep the lifted knee bent at about 90 degrees, press through the grounded heel, and keep the hips as level as you can. Don’t chase height. Chase symmetry.
Best Use Case
- Begin with 5 reps per side.
- Hold the top for 2 to 3 breaths.
- Keep both hip points facing the ceiling.
- Use a pillow under the head if the neck feels strained.
If you want a better-looking backside, side-to-side balance matters more than people admit. This pose shows you that.
7. Locust Pose for the Backside Chain
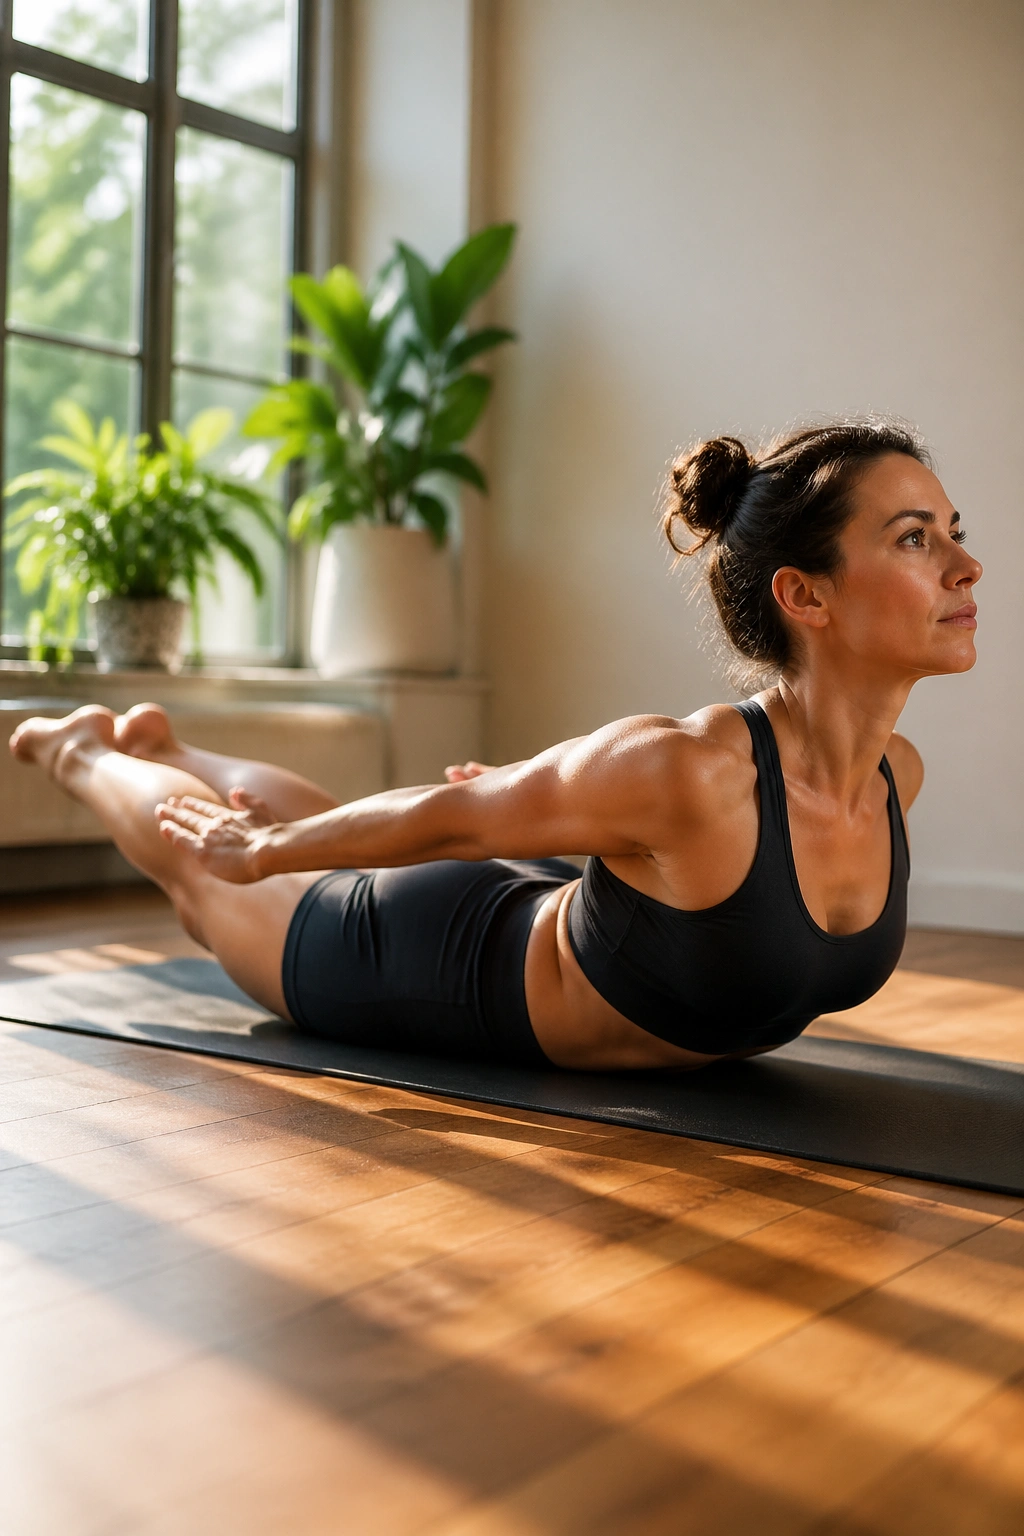
Locust Pose is one of those shapes that looks small and feels bigger than expected.
You’re lying face down, lifting the chest, arms, and legs just enough to turn the back body on. The glutes have to fire to raise the legs off the floor, and because your pelvis stays grounded, there’s nowhere to hide. No fancy momentum. No cheating with the arms. Just steady work through the backside chain.
I like Locust because it hits more than one thing at once. The glutes help. The hamstrings help. The spinal muscles help too, which matters because a strong back line often shows up as better posture through the hips. That alone can make the backside look more lifted when you stand. Small thing. Big visual effect.
What to Watch For
- Lift the legs only a few inches.
- Keep the neck long and the gaze down.
- Turn the inner thighs slightly in so the low back doesn’t pinch.
- Hold for 3 breaths, rest, then repeat 2 to 3 rounds.
If the lower back takes over, lift less. That is not failure. That is good coaching.
8. Bow Pose for a Strong Glute and Back Extension
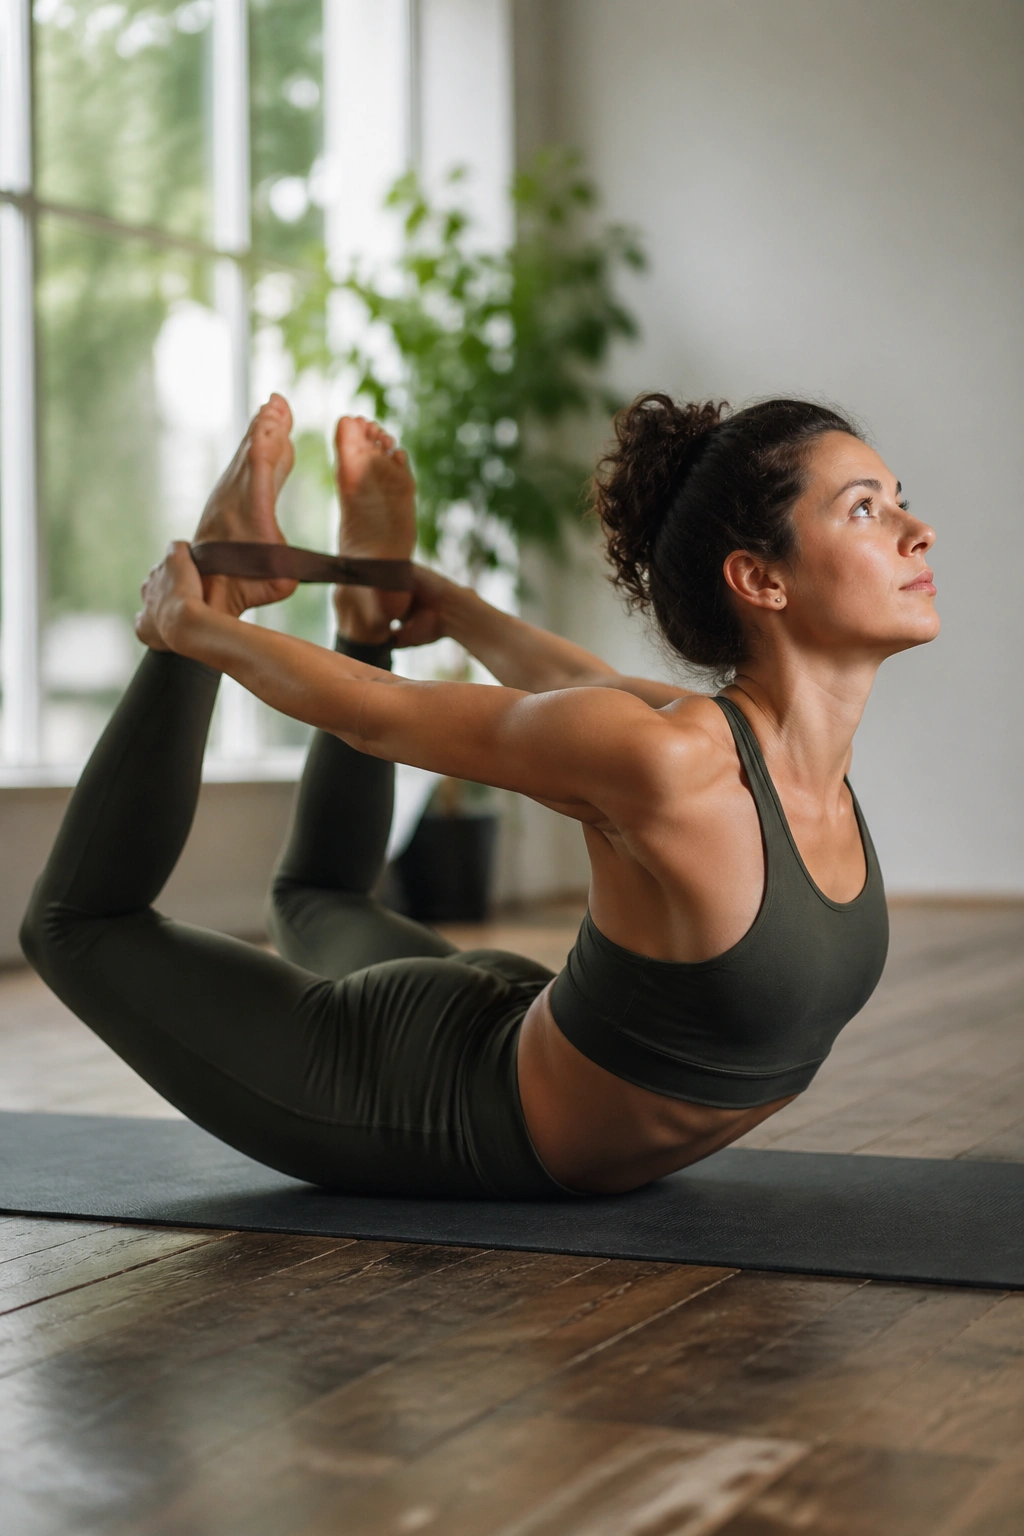
Bow Pose is not a gentle stretch.
It asks a lot from the front of the body, but the glutes also have to work hard to keep the legs lifted and the pelvis from dumping forward. That combination makes it a strong choice for people who already have a decent base of back and hip mobility. If you have cranky knees or a sensitive low back, keep it modest or skip it. No prize for forcing this one.
The shape opens the quads, wakes up the glutes, and asks the upper back to participate too. When done well, it feels like a full posterior-chain engagement rather than a contortion act. That’s the difference between useful and showy.
A strap around the ankles can make Bow Pose more manageable. You can also lift one leg at a time if the full version feels like too much. A short hold of 2 to 4 breaths is enough. Longer is not always better here. Sometimes it just turns into a lower-back fight.
Bow Pose rewards patience and punishes ego. Fair trade.
9. Side Plank with Top Leg Lift for Glute Medius Fire
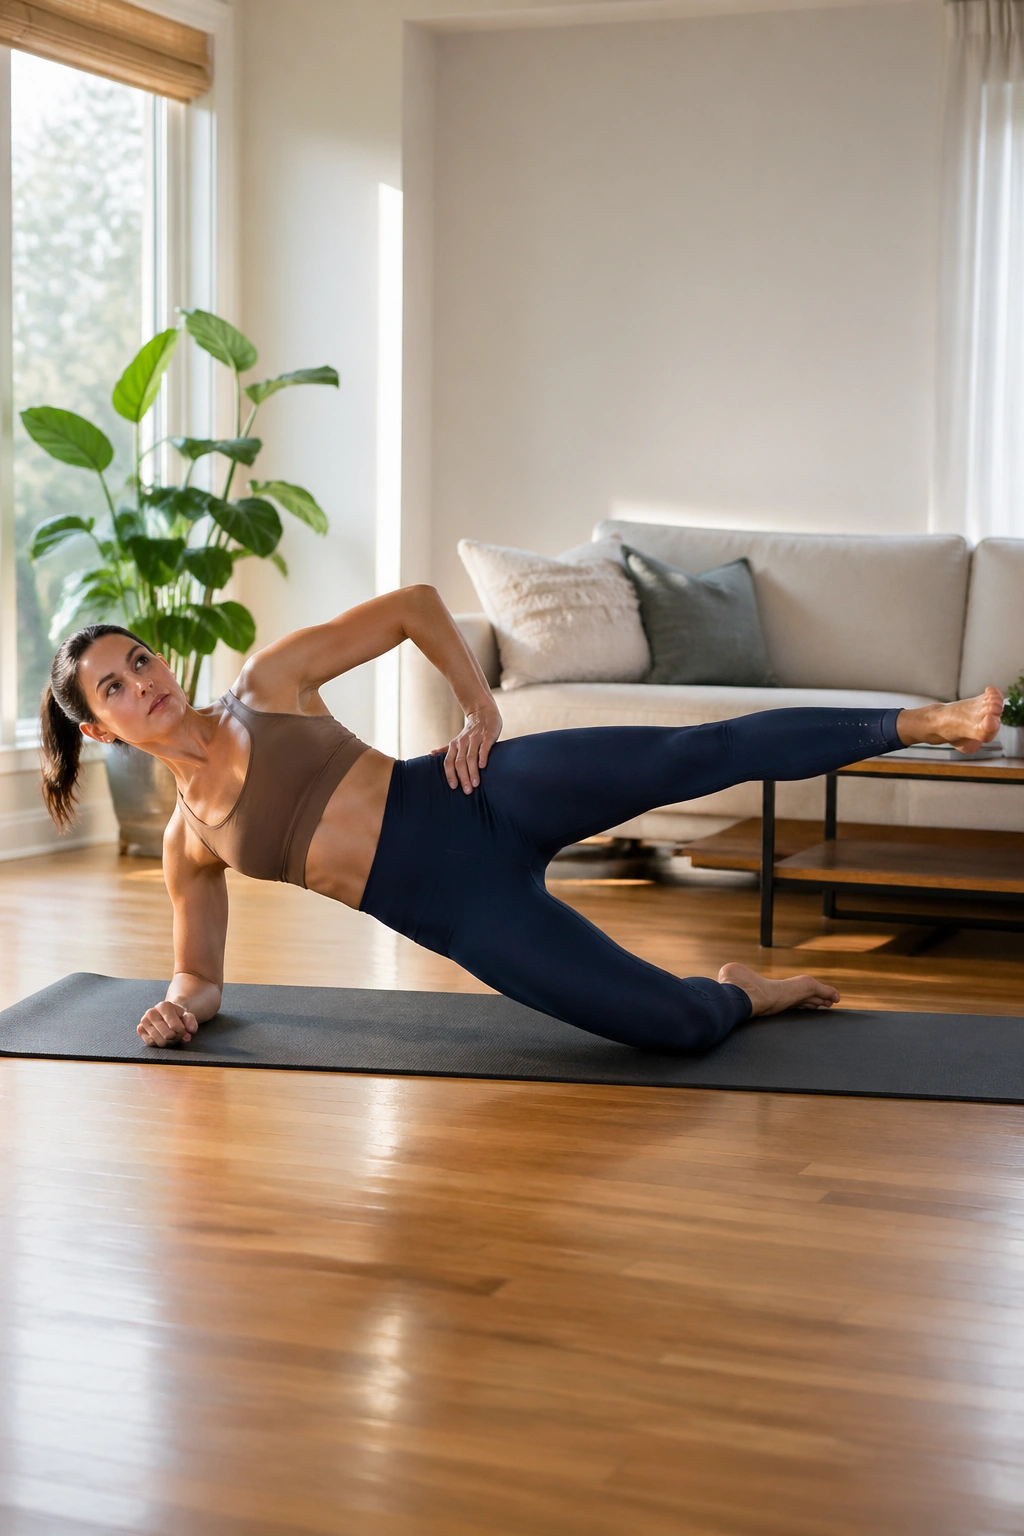
Why do side planks matter for booty work? Because the outer hip is doing a lot of the quiet, boring work that keeps everything looking and feeling strong.
The top leg lift changes the game. Now the glute medius has to lift and hold the leg while the side body keeps the pelvis from sagging. That’s a huge deal for hip stability and a very good way to clean up weak links that show up in squats, lunges, and even ordinary walking. If one hip drops, the pose will tell on you fast.
Start with the bottom knee down if full side plank feels shaky. A wall is fair game too. Press the lower hand into the floor, stack the shoulders, and lift the top leg only as high as you can without rolling the chest open. A small range done well beats a wild swing that barely touches the right muscles.
How to Get the Most From It
- Hold the pose for 2 to 4 breaths each side.
- Keep the lifted toes pointed forward, not turned up.
- Stop if the shoulder collapses.
- Use the lower knee as a support when balance goes sideways.
Outer glute work is rarely dramatic. It is, however, deeply useful.
10. Three-Legged Down Dog for Glute Lift
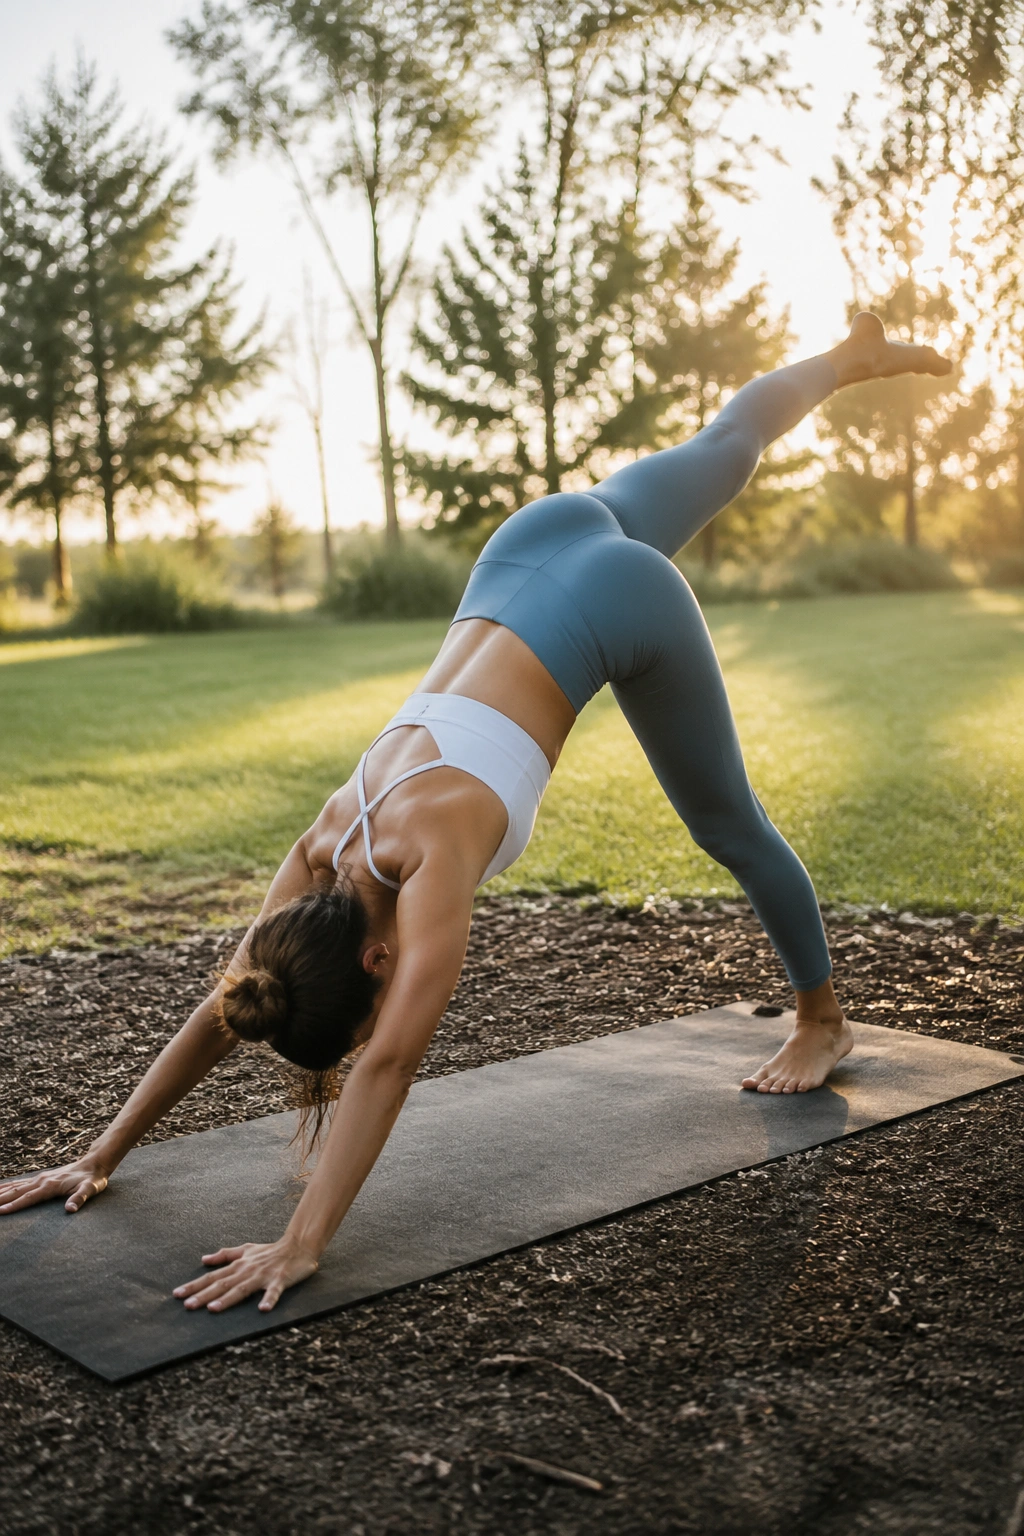
Three-Legged Down Dog can turn into a sloppy kick if you’re not paying attention.
The lifted leg should feel like it’s reaching from the hip, not just flinging up from the lower back. Keep the ribs knitted in, press evenly through both hands, and let the standing leg do the stabilizing while the lifted glute stays active. If the pelvis opens a little, that’s fine. If it rolls all the way over, you’ve lost the point.
I love this posture for people who want an easy way to add glute work to a flow. It shows up fast, doesn’t need equipment, and gives you a nice blend of stretch and strength through the standing leg. The hamstring on the lifted side also gets involved, which makes the whole thing feel more connected.
- Lift only to the height you can control.
- Keep both hips working toward level.
- Hold 3 breaths or do 5 slow pulses.
- Lower the foot with control, not a drop.
The kicker is simple: a cleaner three-legged dog often looks smaller than a wild one. It works harder, though.
11. Standing Figure Four for Outer-Hip Control
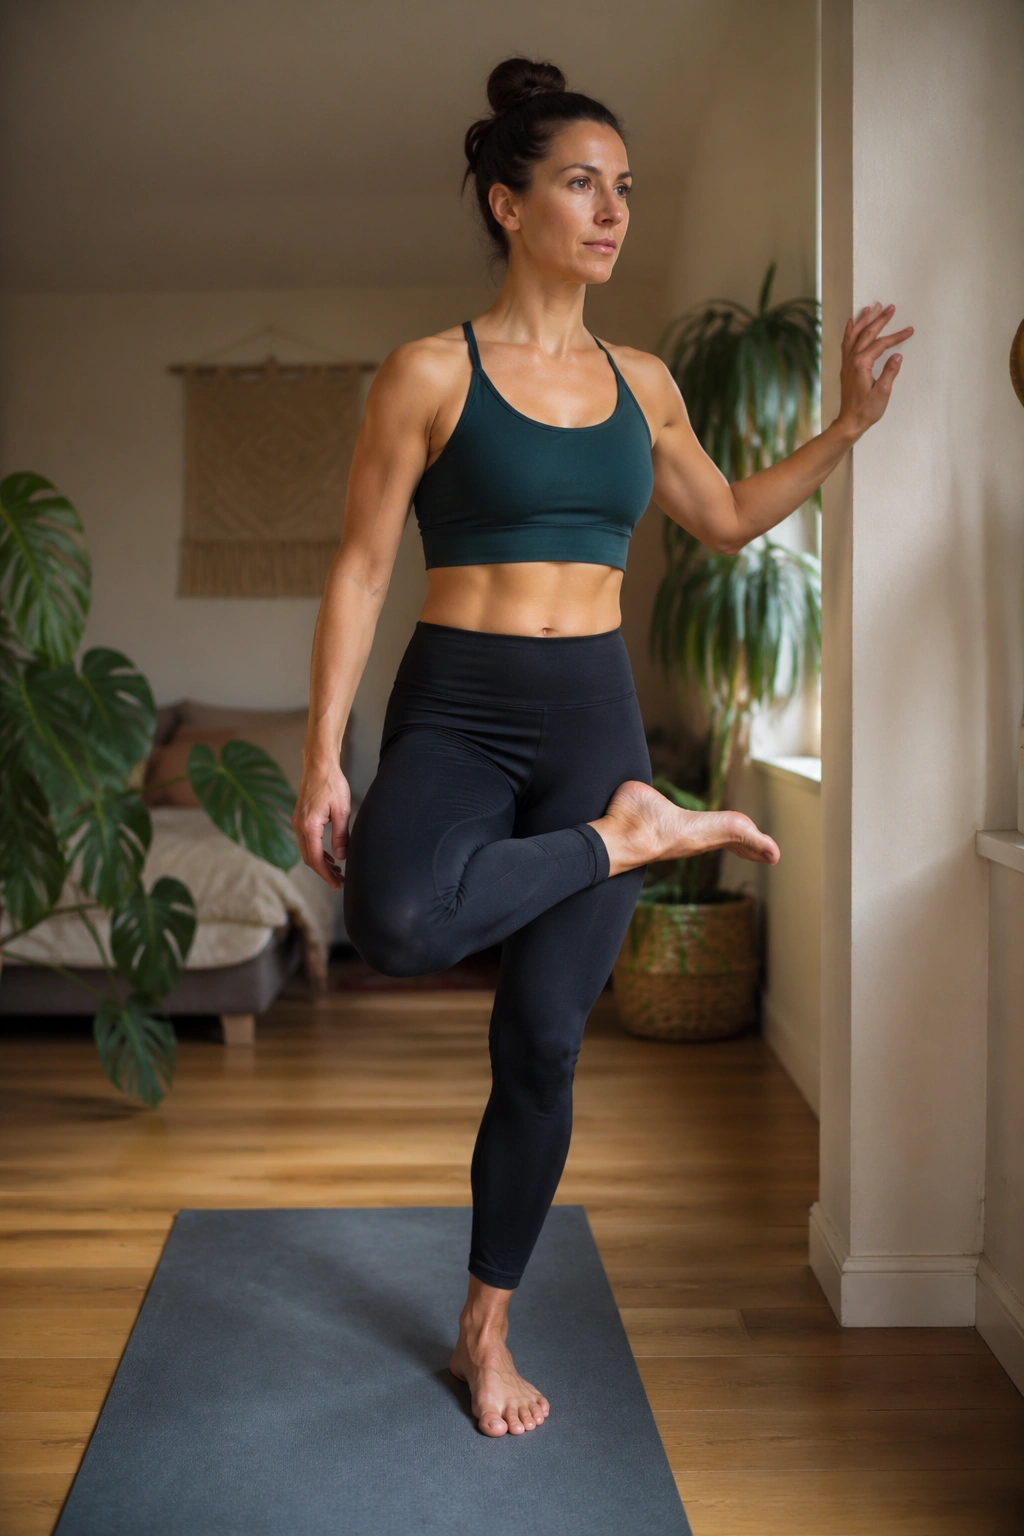
Standing Figure Four has the calm of a stretch and the sneaky difficulty of a balance drill.
Cross one ankle over the opposite thigh, sit back a little, and suddenly the standing glute has a job. It has to keep the whole pelvis from dumping or twisting while the crossed leg opens the outer hip. That makes this a smart choice after your stronger poses, when the hips are warm and you want both release and control.
The stretch lands deep in the outside of the lifted-side glute and around the piriformis area, which is exactly where a lot of people feel tight after long sitting. You’ll know you’ve gone far enough when the outer hip feels broad and the breath stays smooth. If the low back clamps, come up a little.
A wall or chair works well here. Use your fingertips if needed. Balance is not the point. The point is to let the standing glute hold you steady while the raised hip opens without forcing.
12. Half Pigeon Pose for the Deep Glute Stretch
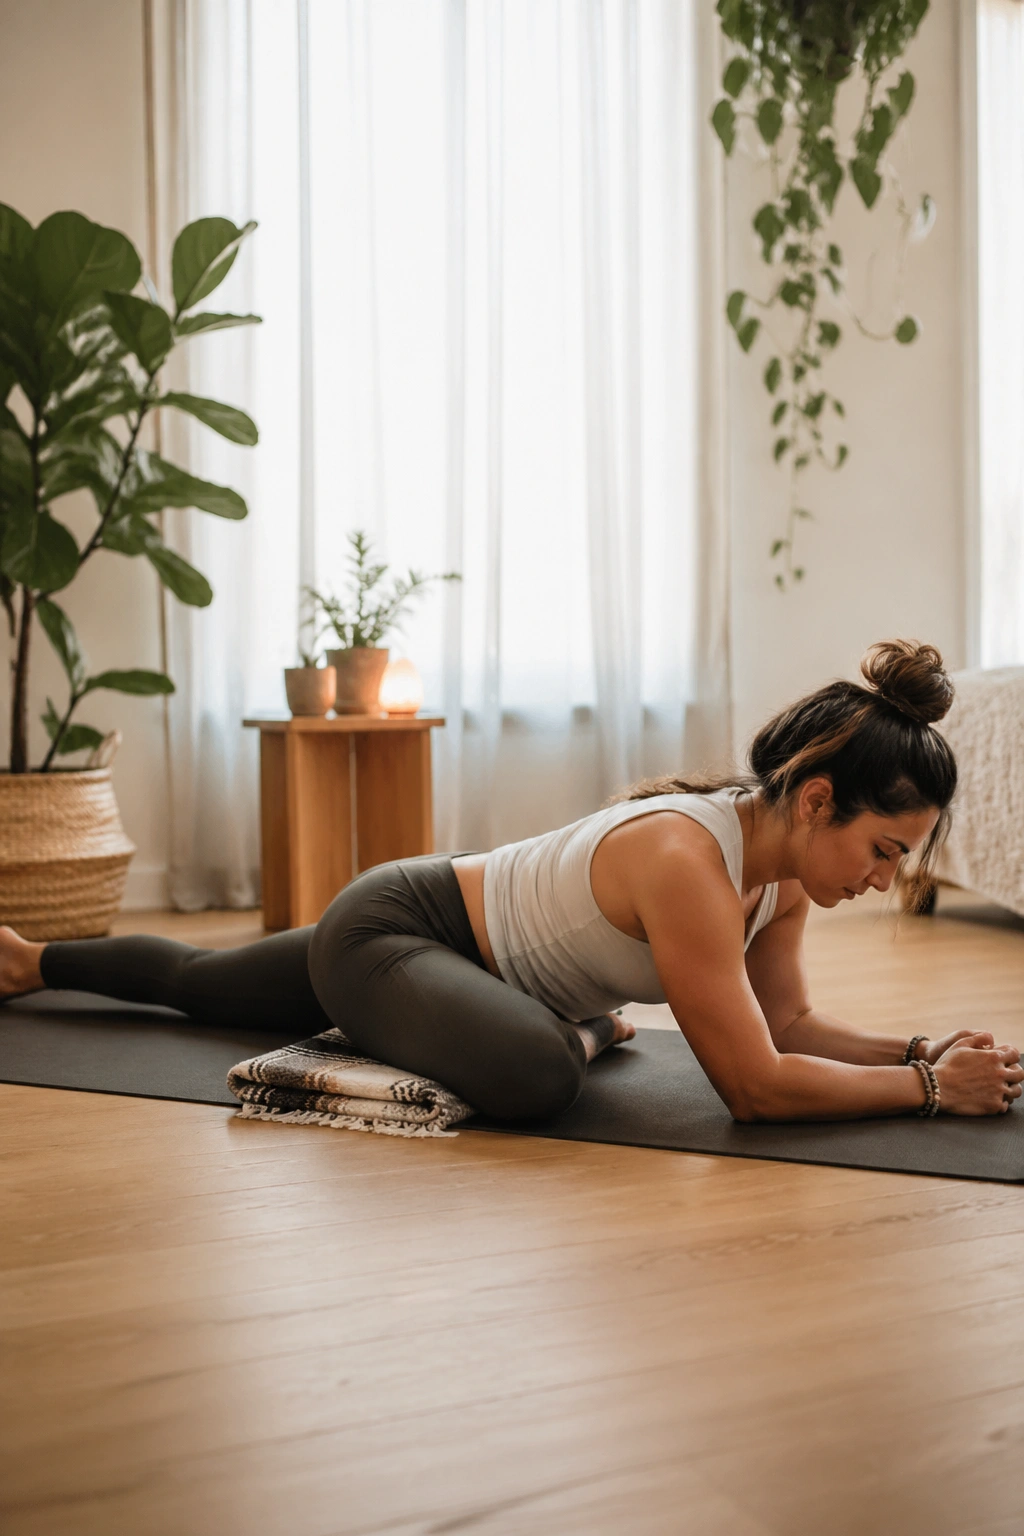
Half Pigeon is the one people either love or hate.
It opens the outer glutes and the deep rotators more intensely than most standing shapes, and that can be a gift after a hard strengthening session. It can also feel dramatic if your hips are tight or your knee doesn’t love rotation, so the setup matters. Slide a blanket under the front hip if one side is floating high. That small adjustment changes the whole pose.
The nice thing about Half Pigeon is that it gives the backside room to soften after all the work. That matters. Tight glutes do not always build well; sometimes they just get cranky and overprotective. A stretch like this helps restore range so the strengthening poses can land better later.
What Makes It Different
Unlike Standing Figure Four, Pigeon lets you stay down and breathe into the tissue for a longer hold. It reaches deeper, but that also means you should be a little picky about sensation. You want a stretch in the outer hip or glute, not a sharp jab in the knee.
How to Use It
- Hold for 5 to 8 slow breaths.
- Keep the front foot flexed to protect the knee.
- Use props without apology.
- Back out immediately if the knee complains.
13. Cow Face Pose for the Side-Hip Knots
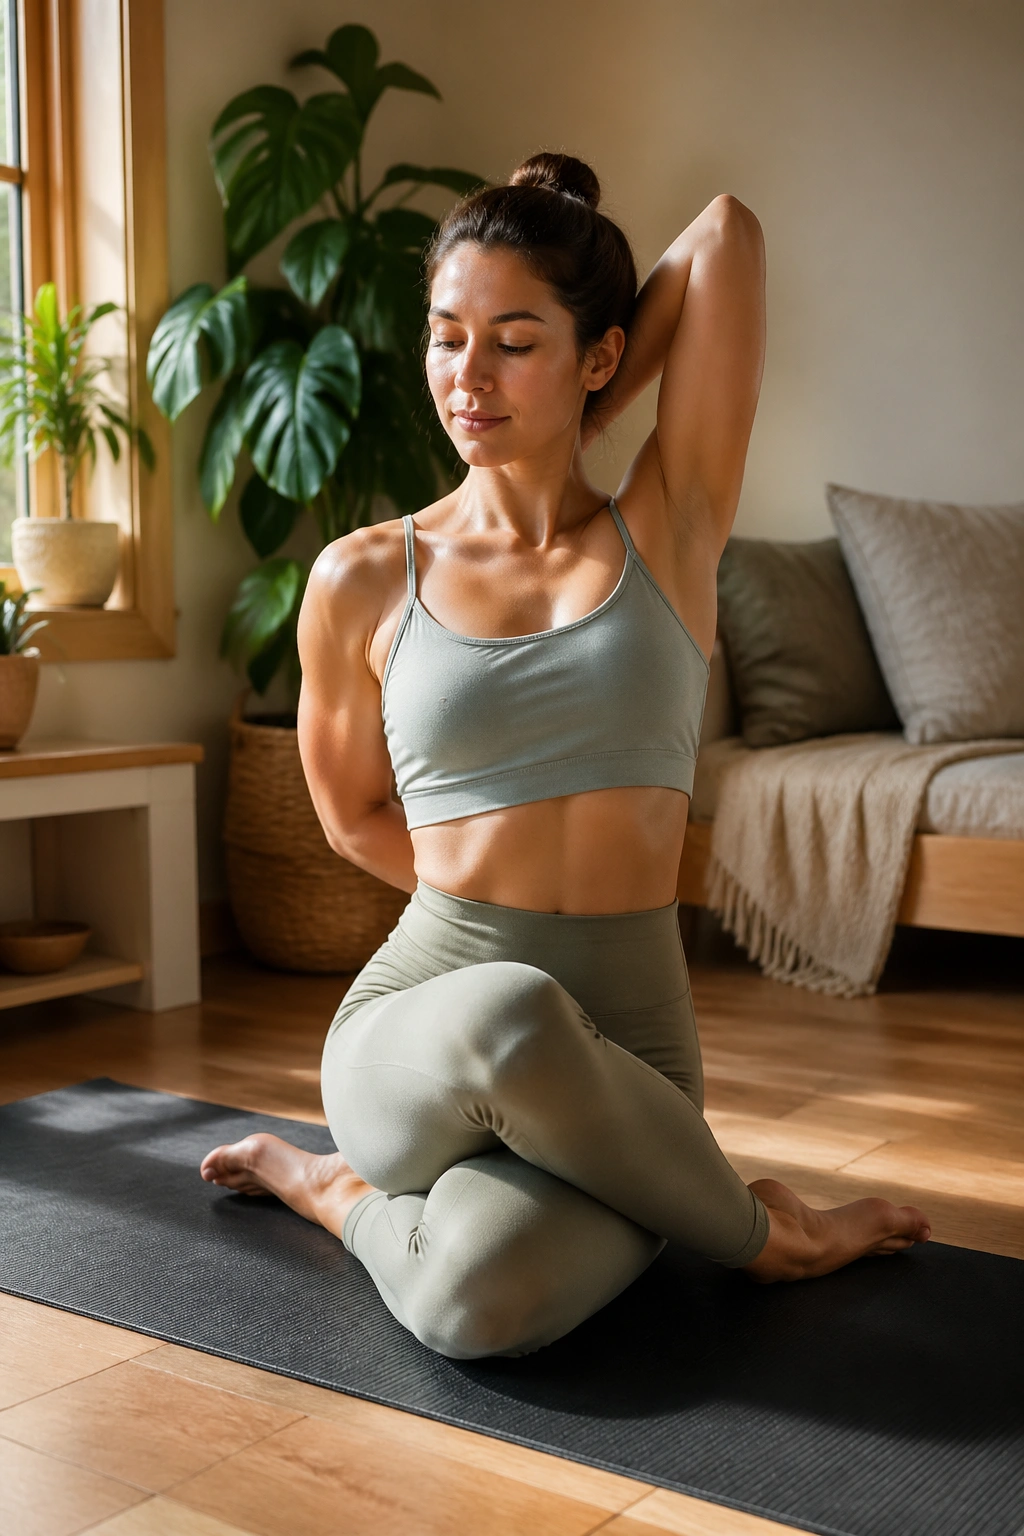
Cow Face Pose can feel awkward the first time you set it up. That’s normal.
The crossed legs position creates a deep stretch across the outer hip, and if you add a forward fold, the back-side hip and glute tissues start to release too. This is especially helpful when your hips feel bound up from sitting, driving, or even too much standing in one posture. The release can make your stronger poses feel cleaner afterward. Less grip. More space.
How to Sit Taller
- Stack the knees as neatly as your body allows.
- Sit on a folded blanket if one hip is lifted off the floor.
- Keep the chest broad before folding forward.
- Breathe into the outer hip for 4 to 6 breaths.
A little twist in the setup is fine. Don’t force symmetry that isn’t there yet. The shape should feel like a firm stretch, not a wrestling match with your joints.
What to Watch For
If the knees complain, back off the depth and keep the torso upright. If the ankles feel cranky, unfold and try again later. Cow Face works best when you’re patient. Rush it, and it turns into a mess.
14. Frog Pose for Hip Opening and Deeper Squat Mechanics
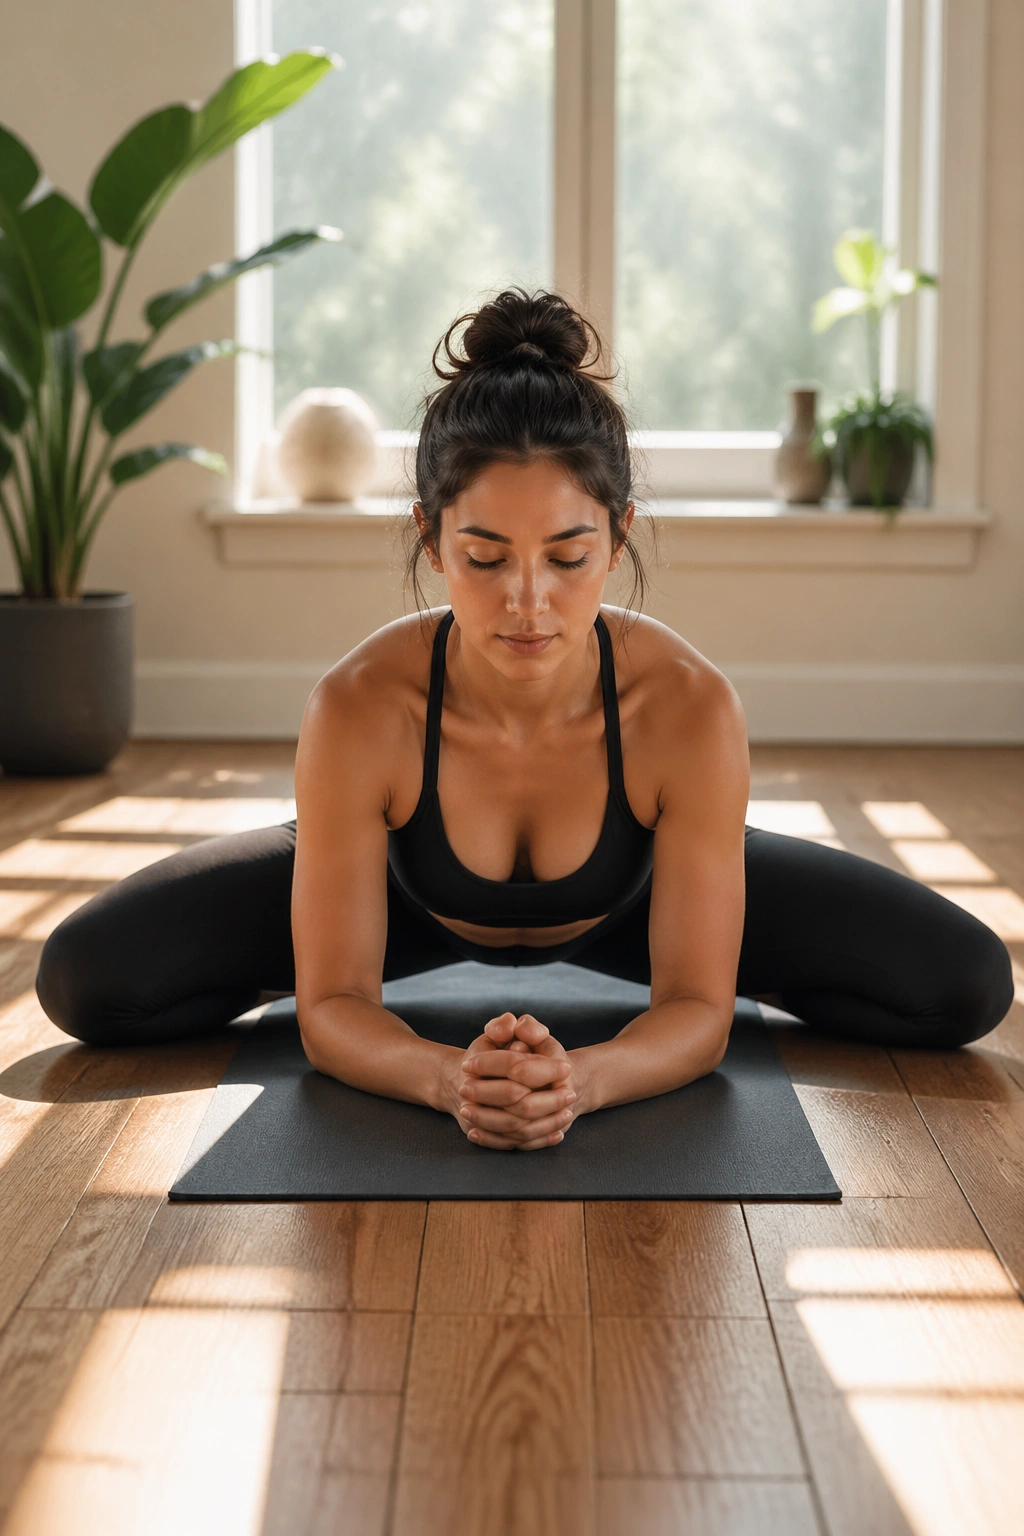
Frog Pose looks simple, then your hips start telling the truth.
The wide-knee position opens the inner thighs and adductors, which can change how your hips sit in squats, lunges, and even in standing glute work. When the inner line is less restricted, the glutes often have an easier time doing their job through a fuller range. That’s the part people miss. Stretching the inside of the legs can help the backside work better.
The key is to back off before the knees get cranky. You want a spread through the groin and inner thighs, not a sharp tug at the joint. Keep the feet in line with the knees, brace the forearms on the floor or a block, and breathe slowly. Small rocks forward can deepen the opening, but only a little. No dramatic lunges into the floor.
This pose is especially useful after the stronger standing work because it helps balance out all the extension and contraction. A body that can open and contract with control tends to move better. It also feels better, which is a nice bonus.
15. Wheel Pose for the Full Posterior Chain
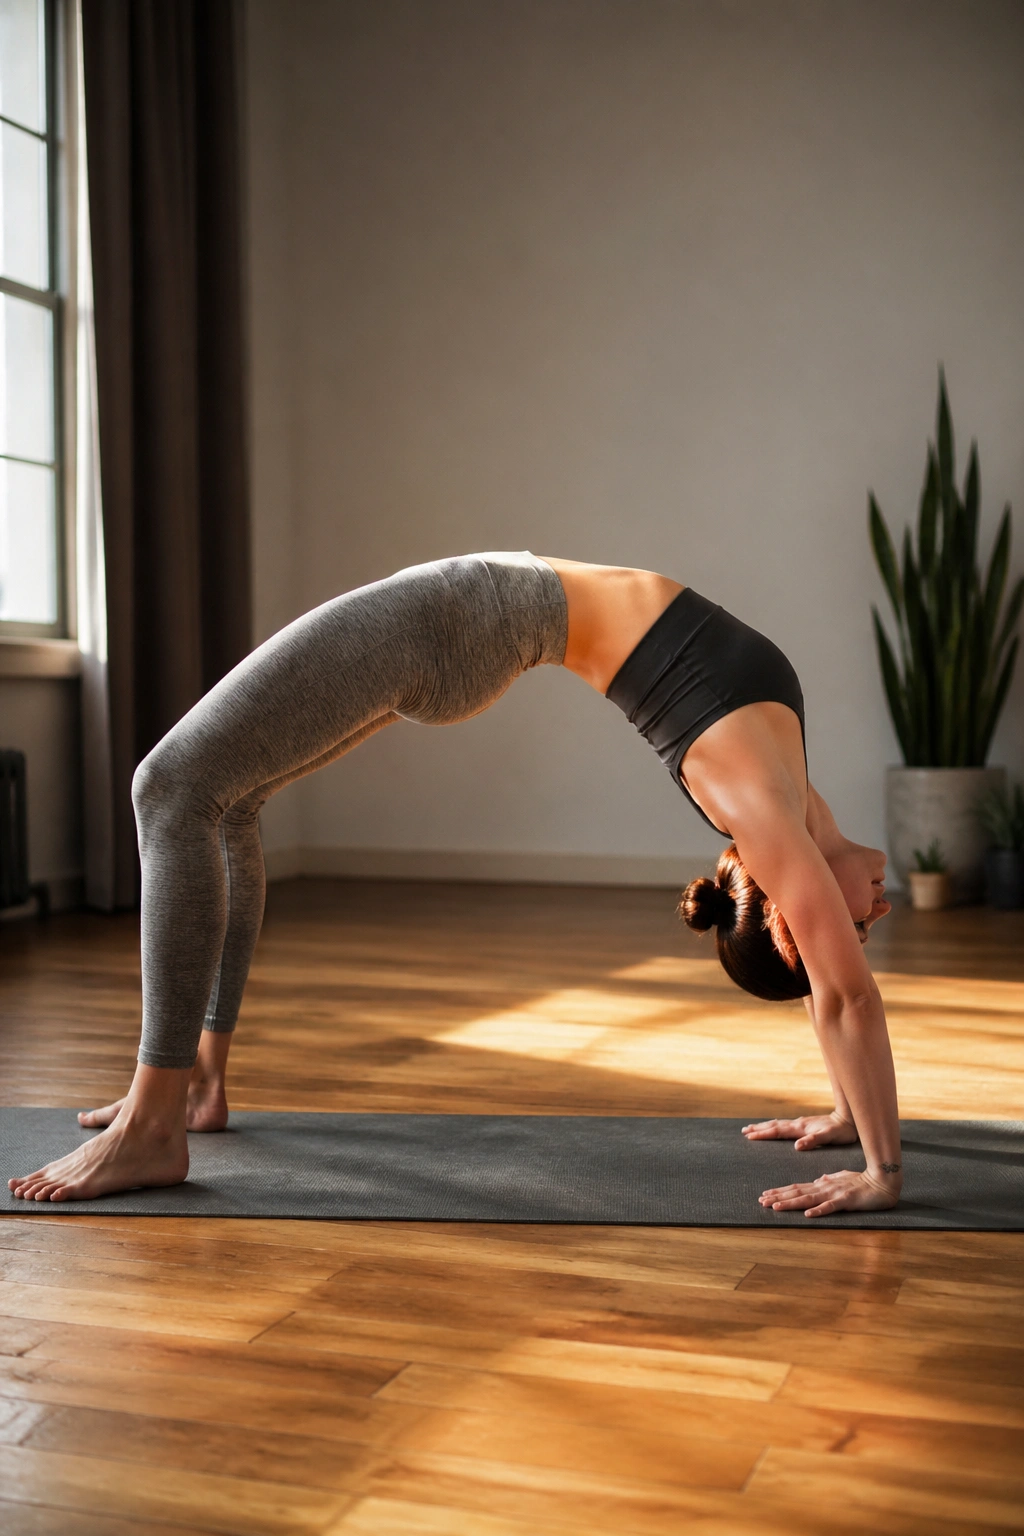
Why finish with Wheel Pose? Because it asks the whole backside to show up.
The glutes, hamstrings, and spinal muscles all join in to lift the pelvis and keep the shape from collapsing. It is a strong pose, and it rewards people who already have some shoulder and spine mobility. If that’s not you, no shame. Use Bridge Pose instead and keep building from there. Wheel is a finish line for some people, not a starting point.
When it goes well, Wheel feels expansive through the front of the body and powerful through the hips. The glutes have to stay active to keep the lumbar spine from doing all the work, which is where many people get sloppy. Press the feet down, keep the knees tracking forward, and think about lifting the hips with the backs of the legs rather than pushing everything into the low back.
How to Get the Most From It
- Warm up with bridges first.
- Hold for 2 to 4 breaths.
- Keep the elbows from splaying too wide.
- Exit slowly, one vertebra at a time.
Wheel is not subtle. That’s the point.
The Bottom Line
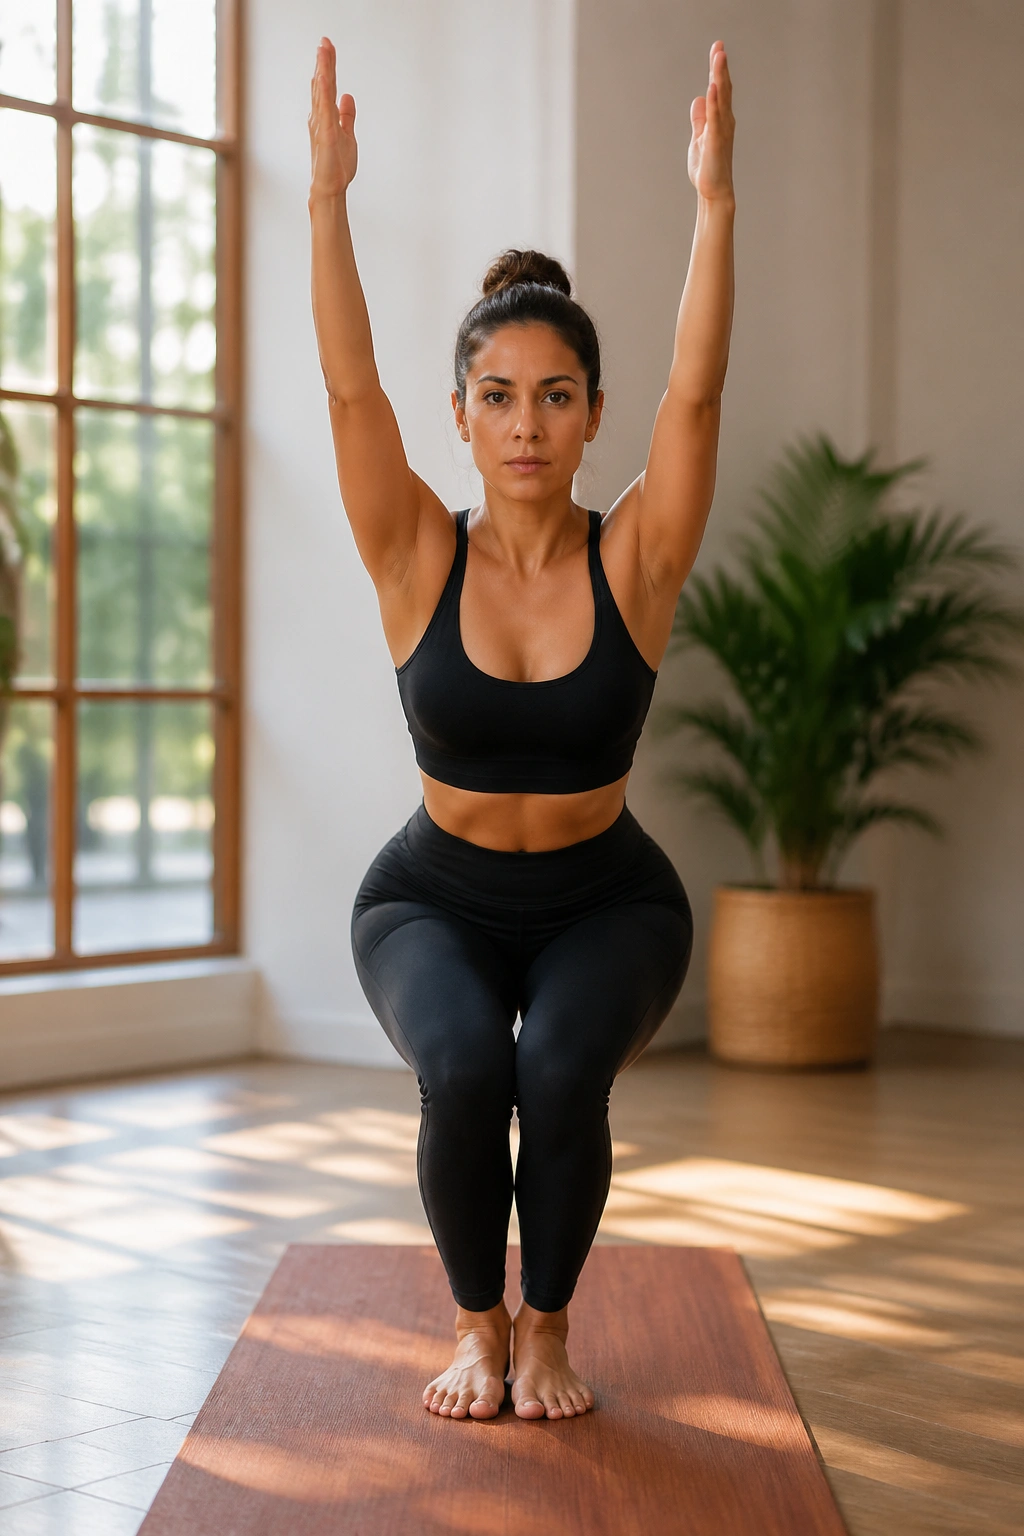
The glutes respond best to a mix of strength, balance, and mobility. That’s why these poses work better together than they do as isolated party tricks. Chair, Warrior III, Bridge, and Wheel ask the muscles to produce force. Pigeon, Cow Face, and Frog give them room to move well after the work is done.
If your goal is a rounder, stronger booty, consistency matters more than intensity games. Three to four short sessions a week is plenty for most people. Pick a few strength-heavy poses, pair them with one or two openers, and hold each one long enough to feel the right muscles wake up. Hurry less. Breathe more.
And keep an eye on the boring details. Foot placement, pelvic position, and how slowly you lower out of a pose make a bigger difference than people like to admit. That’s where the shape changes start.
