



Bad knees and yoga can get along—if you stop chasing the full shape.
That’s the part people miss. The knee is rarely the place where the whole problem starts, but it’s often the place that complains first. Tight hips, stiff ankles, weak glutes, and a pose that asks for more bend than your joint wants all show up as the same grumpy message: not this way.
The fix is usually unglamorous. Shorten the stance. Add a blanket. Keep a little bend instead of forcing a deep one. And yes, sometimes the smartest choice is skipping a pose that looks harmless on the mat but feels awful in your own body. That is not failing. That is paying attention.
These 15 yoga poses for bad knees are chosen for one reason: they can be modified without turning your practice into a special project. Some are standing, some are seated, some are lying down, and a few are the kind of quiet, boring-looking shapes that save a cranky joint more often than the flashy ones do. Start small. Your knees will tell you which version deserves to stay.
1. Mountain Pose With a Soft Knee Bend
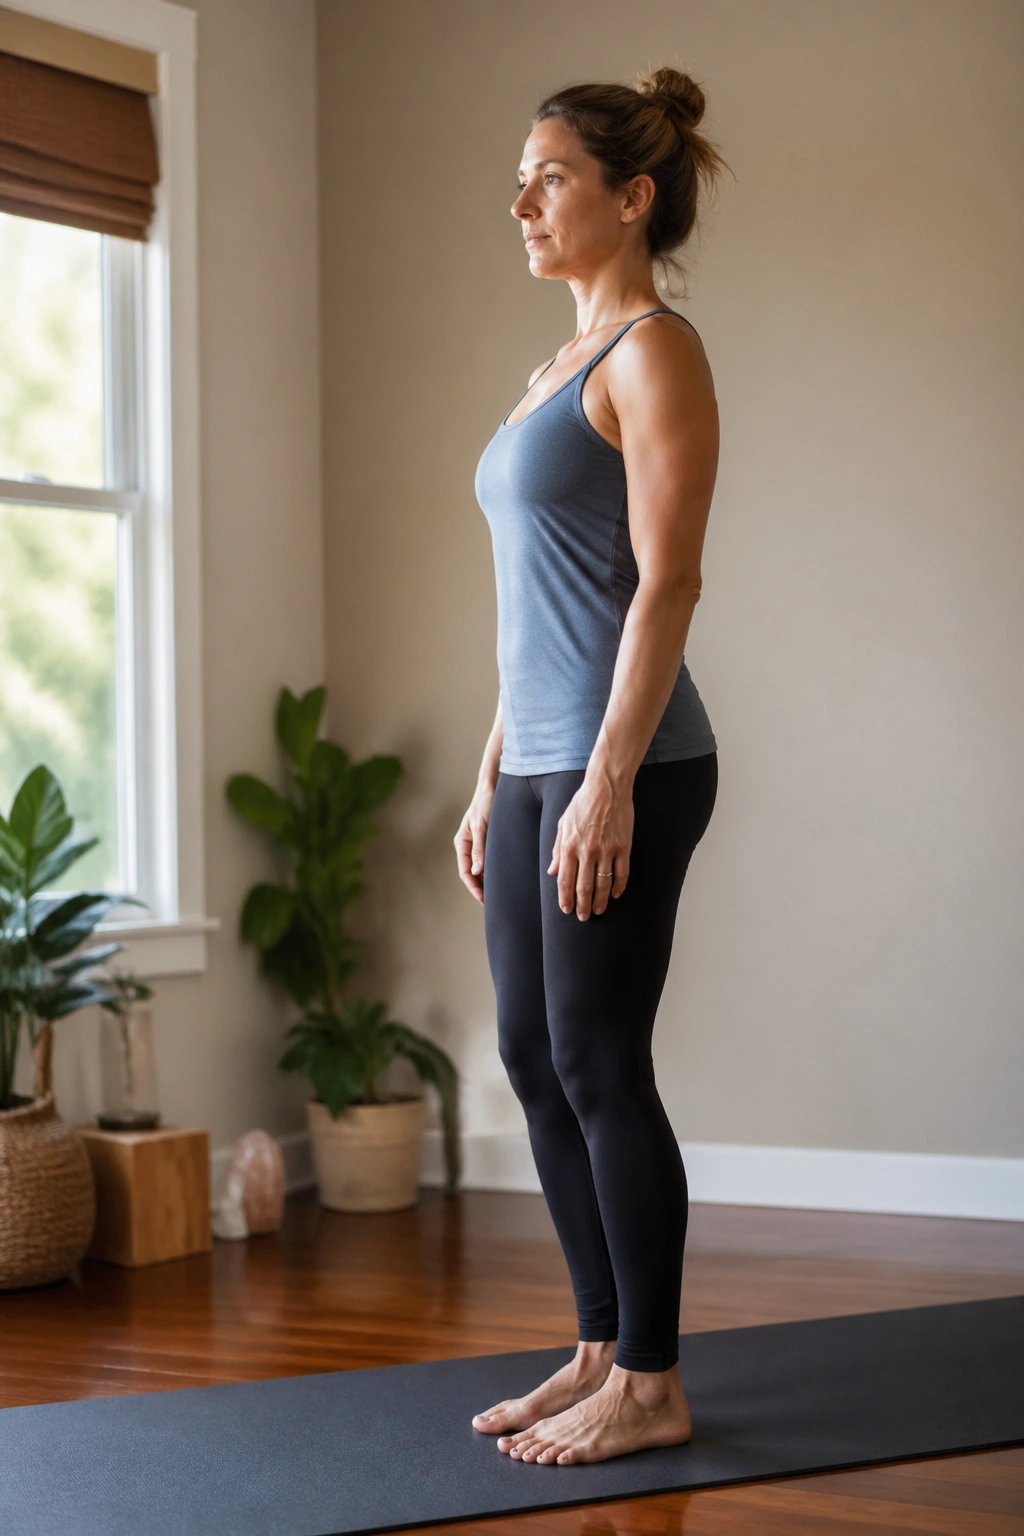
Standing still can be surprisingly useful when your knees are irritated, because Mountain Pose gives you a place to rebuild the basics without stacking a lot of load into one joint. I like this pose for people who think yoga has to start with a deep bend or a dramatic shape. It doesn’t.
A soft bend is the whole point here. Locking the knees back tends to jam the joint, while a tiny release lets the muscles around the leg do their part. Feel both feet press down evenly, with the heel, base of the big toe, and base of the little toe all touching the floor. That tripod matters more than people think.
What to Feel For
- Weight spread across both feet, not dumped into the inner arches.
- Kneecaps facing forward without being shoved back.
- Thighs gently active, as if you’re standing tall in a line and not slouching into the joints.
- A long spine and relaxed jaw. Simple. Useful.
If your knees feel wobbly, stand near a wall and let one fingertips rest there. That tiny bit of support can make the whole shape feel calmer. Mountain Pose is not a pose you “win.” It’s a place you return to when everything else gets messy.
2. Chair Pose for Bad Knees at the Wall
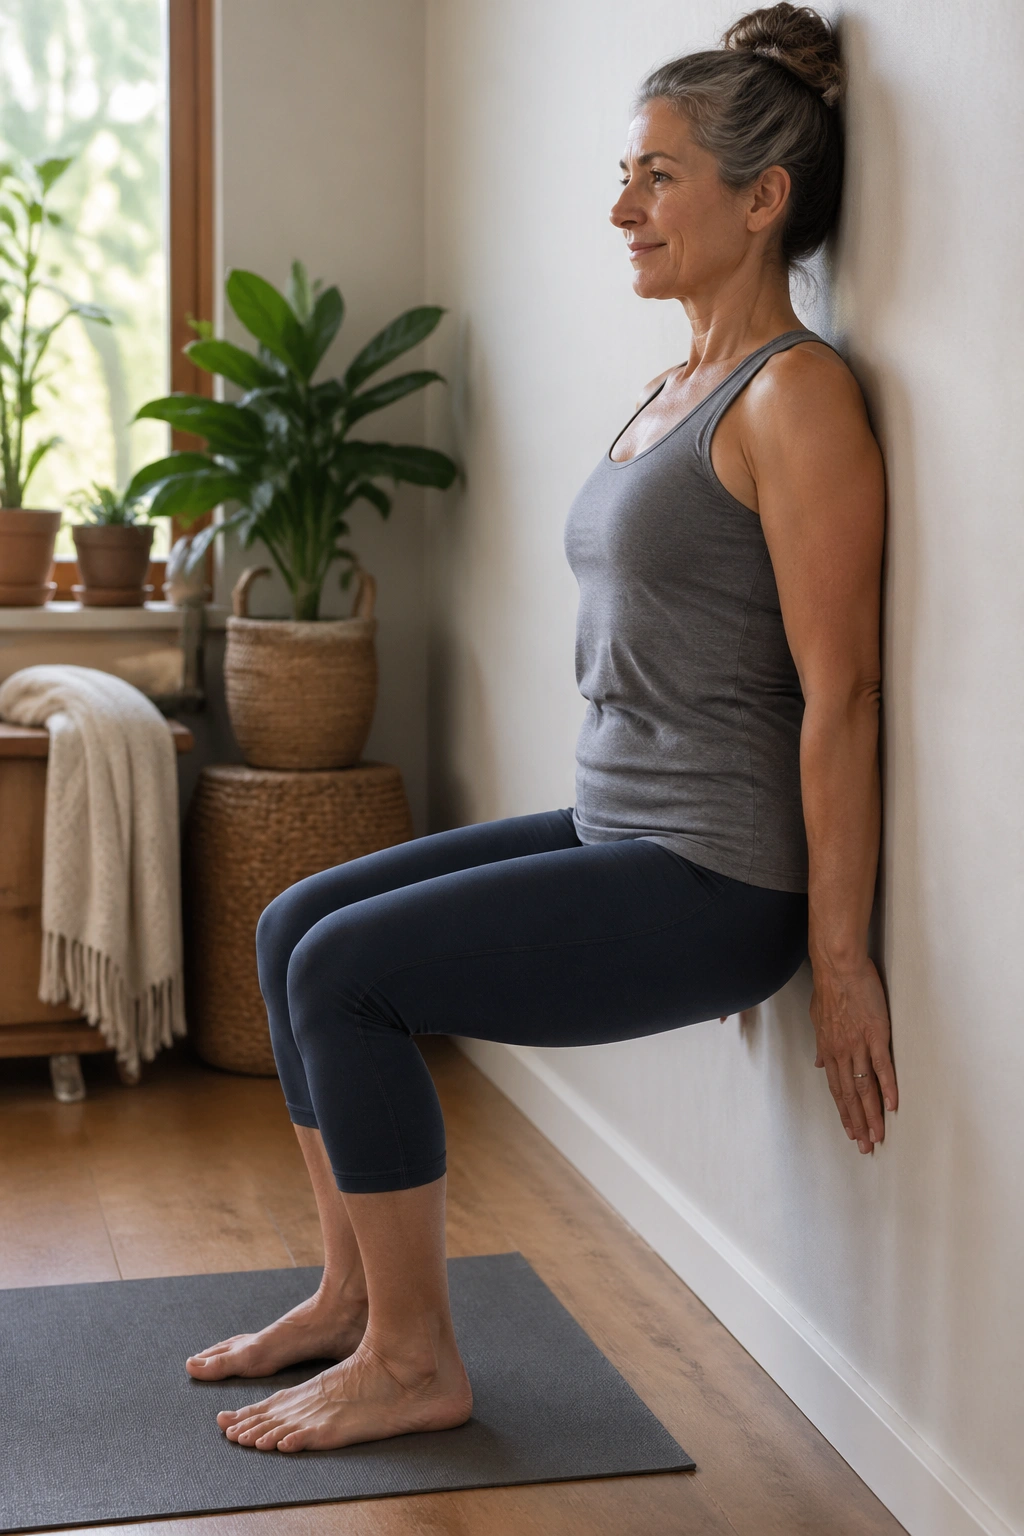
Why bother with Chair Pose when knees are sensitive? Because a shallow version can build the leg strength that helps those knees feel less cranky in daily life. The trick is to stop treating it like a test of how low you can go.
How to Make It Knee-Friendly
Stand with your back close to a wall, feet about hip-width apart. Slide your hips back until they lightly tap the wall, then bend your knees only a little. You are aiming for support, not depth. If the front of the knees start to feel pinchy, stand up a few inches and try again.
A chair nearby works too. Tap your hips toward the seat without fully sitting down. That gives you the same pattern—hips back, chest lifted, weight in the heels—without asking the knees for a deep angle they may not like.
One detail matters a lot: keep the knees tracking in the same direction as the second toes. If they cave inward, the whole thing gets sloppy fast. No need to hold your breath. Breathe out on the bend, breathe in as you lengthen up.
The best version of Chair Pose for sore knees is the one that feels like a controlled sit-back, not a squat competition.
3. Warrior I With a Short Stance
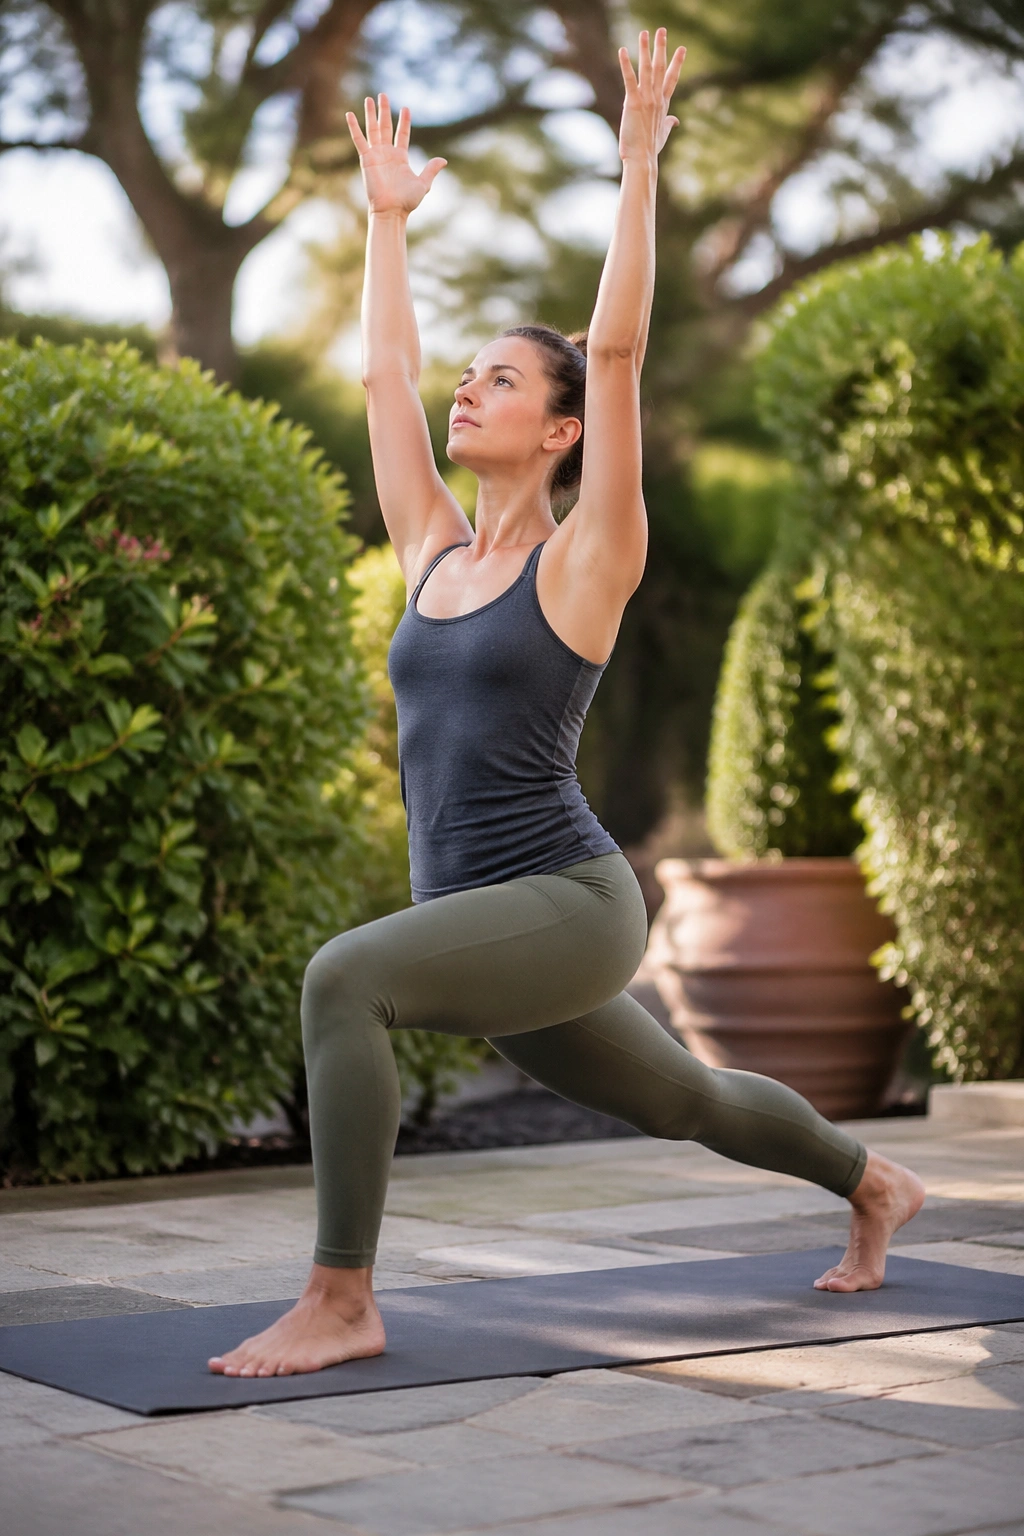
A lot of people overstride in Warrior I and then wonder why the front knee grumbles. The stance is usually the problem, not the pose itself. Shortening it by even a few inches can change the whole experience.
Keep the front foot forward, back heel grounded at an angle if that feels okay, and avoid dropping so deeply that the front thigh feels trapped. The front knee can bend, but it does not need to sink toward the mat. In fact, a more modest bend often gives you a cleaner line from hip to ankle, which the joint usually likes better.
The torso can stay lifted instead of diving over the front leg. I prefer hands on the hips or even on blocks when someone is protecting a knee. That keeps the chest open and reduces the urge to cram more bend into the front leg just to make the pose look “correct.”
If your back foot or ankle feels cranky too, lift the heel and turn this into a split-stance lunge shape. Same upper body. Less drama below. Warrior I should feel sturdy, not like you’ve stepped too far onto a ski slope.
4. Warrior II With a Higher Front Knee
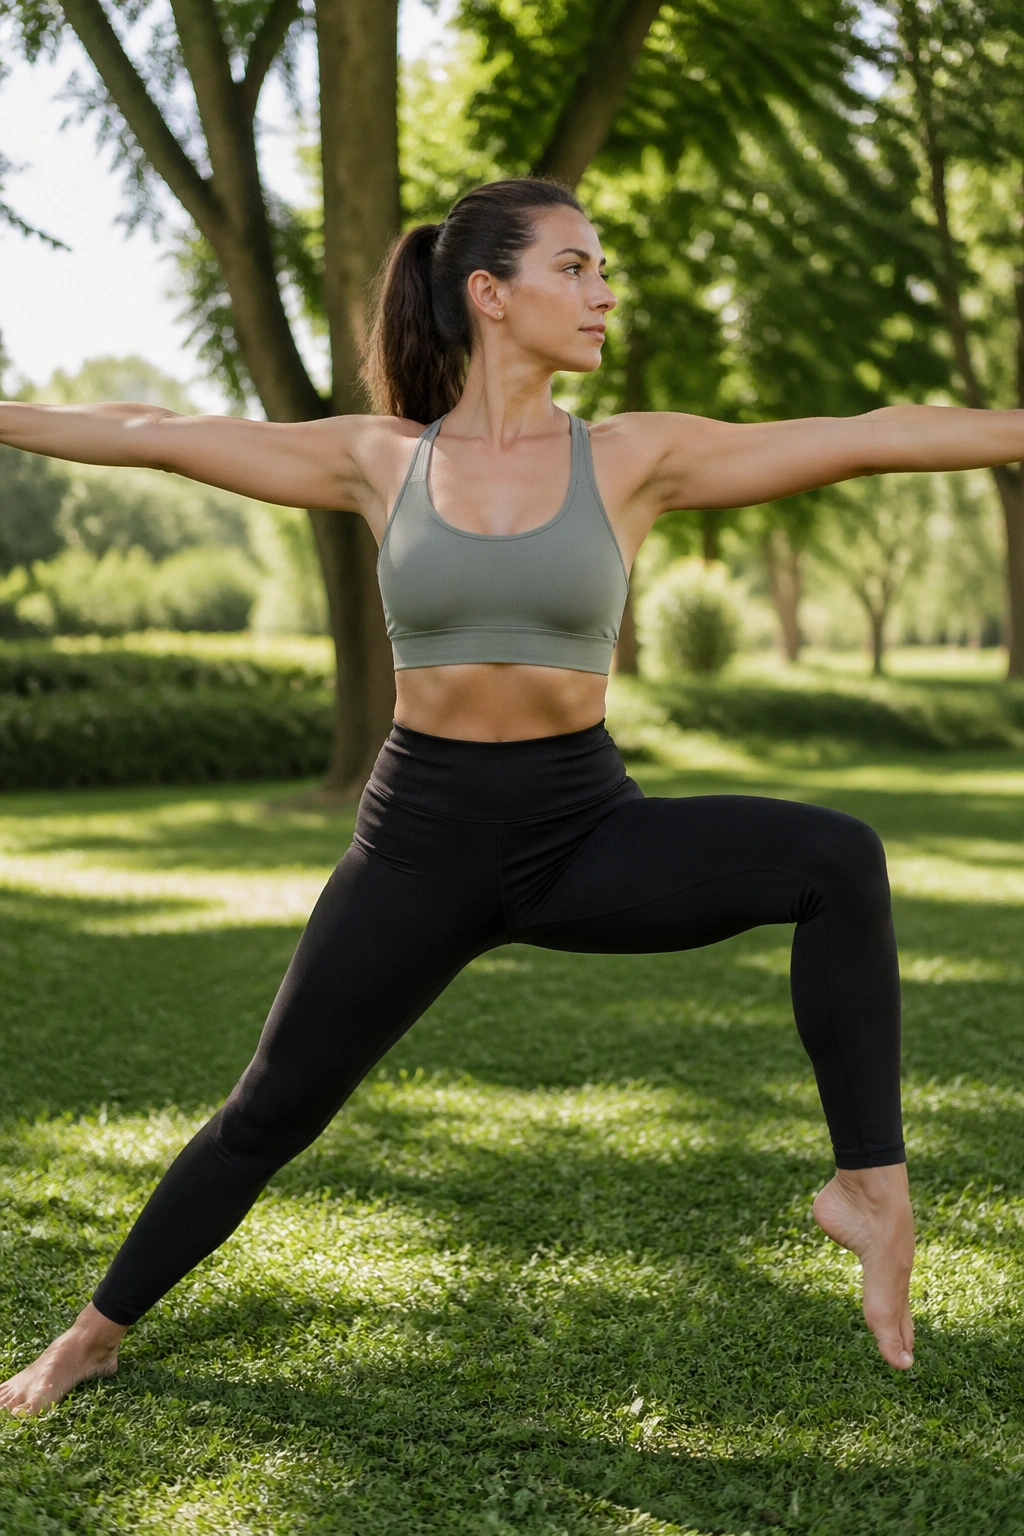
Warrior II is one of those poses that looks simple until you realize how much lower-body work it asks for. The good news is that it can be softened a lot without losing its shape.
Unlike a deep lunge, Warrior II lets you keep the torso upright and the hips more open. That gives the knees a friendlier line, especially if you keep the front knee only lightly bent and stop before the thigh starts to burn in that sharp, compressed way. The back leg stays long, but it should not be locked hard. A strong leg is not the same thing as a rigid one.
I like Warrior II for people who want to practice standing strength without folding the knee too much. It teaches the legs to share work instead of shoving everything into one front joint. That matters more than it sounds. A knee often gets irritated when the hip and foot have checked out.
If the front knee feels happier with a slightly shorter stance, take it. If the back heel wants to swivel out a little so the pelvis can settle, let it. This is one of the better standing shapes for bad knees because it rewards patience more than depth.
5. Reverse Warrior With a Side-Rib Reach
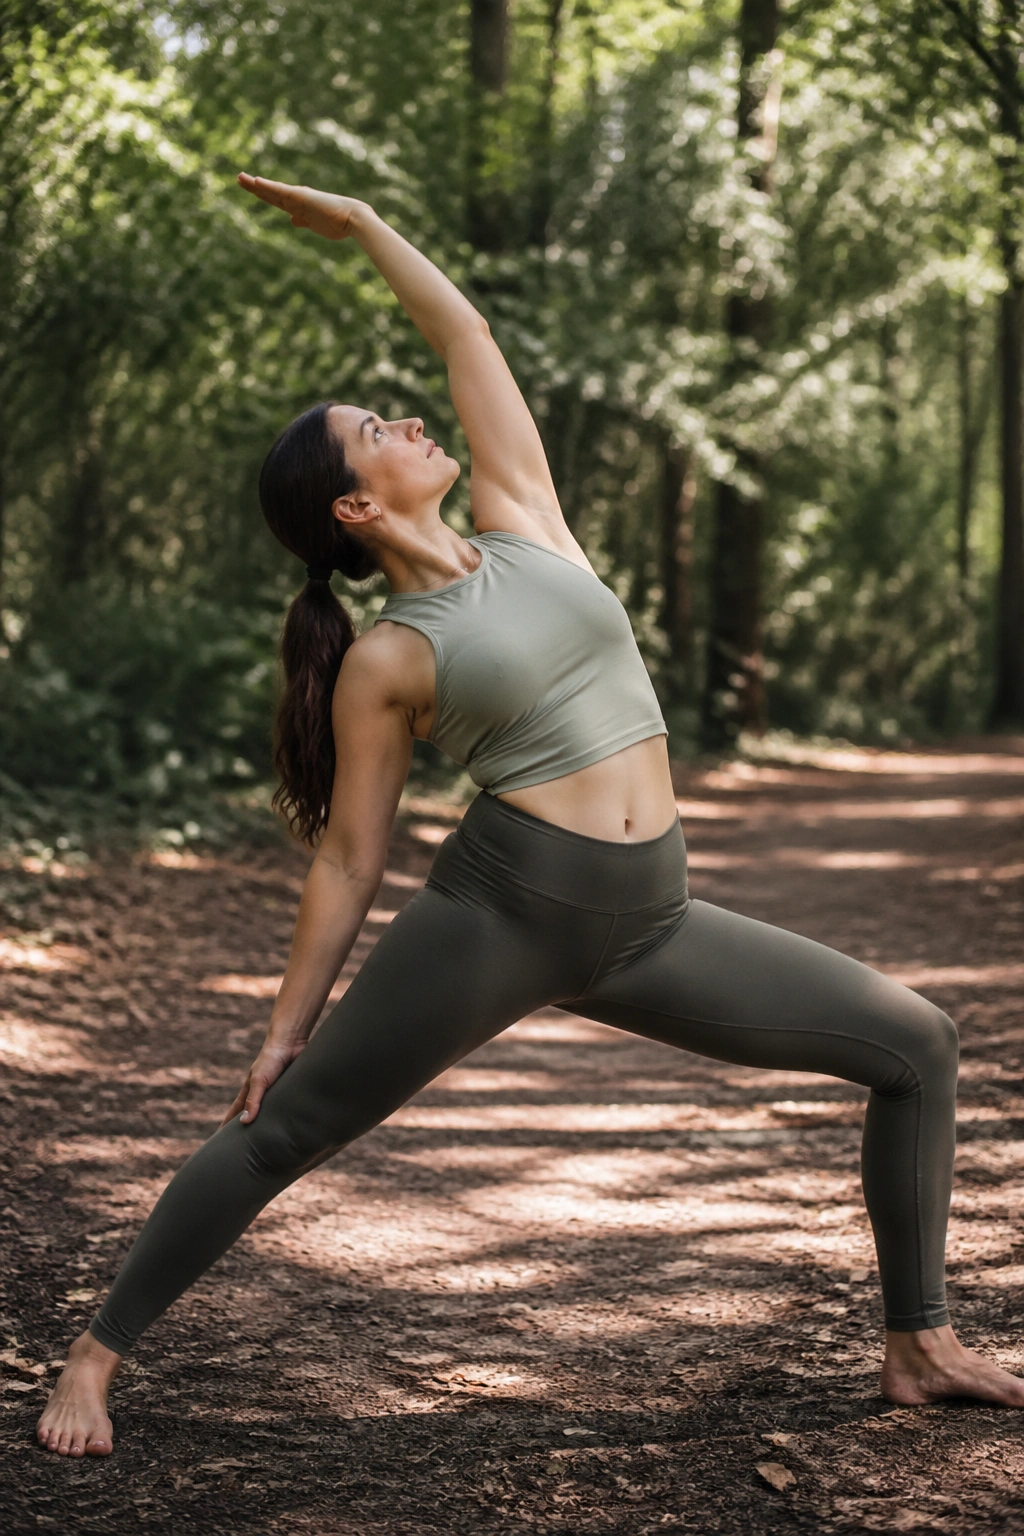
Reverse Warrior is not supposed to be a backbend stunt. It’s a side stretch with one bent leg doing the heavy lifting, and that distinction matters if your knees are touchy.
What to Shorten
Start from a gentle Warrior II. Keep the front knee exactly where it is while you let the back hand slide down the rear leg. The upper body reaches up and back, but the front knee should not drift inward or collapse toward the big toe. If anything, think of lifting the rib cage away from the front thigh.
A shorter stance usually makes this pose easier on the front knee. So does bending the front leg less than you think you should. The side body still opens, and the knee gets a break from extra compression.
- Front knee stays soft, not jammed.
- Back leg remains long without snapping straight.
- Front foot presses down through the whole sole.
- Neck stays easy; no need to throw the head back.
If the front knee complains, reduce the bend before you reduce the reach. That swap keeps the shape alive without turning it into a strain.
6. Crescent Lunge With the Back Knee Down
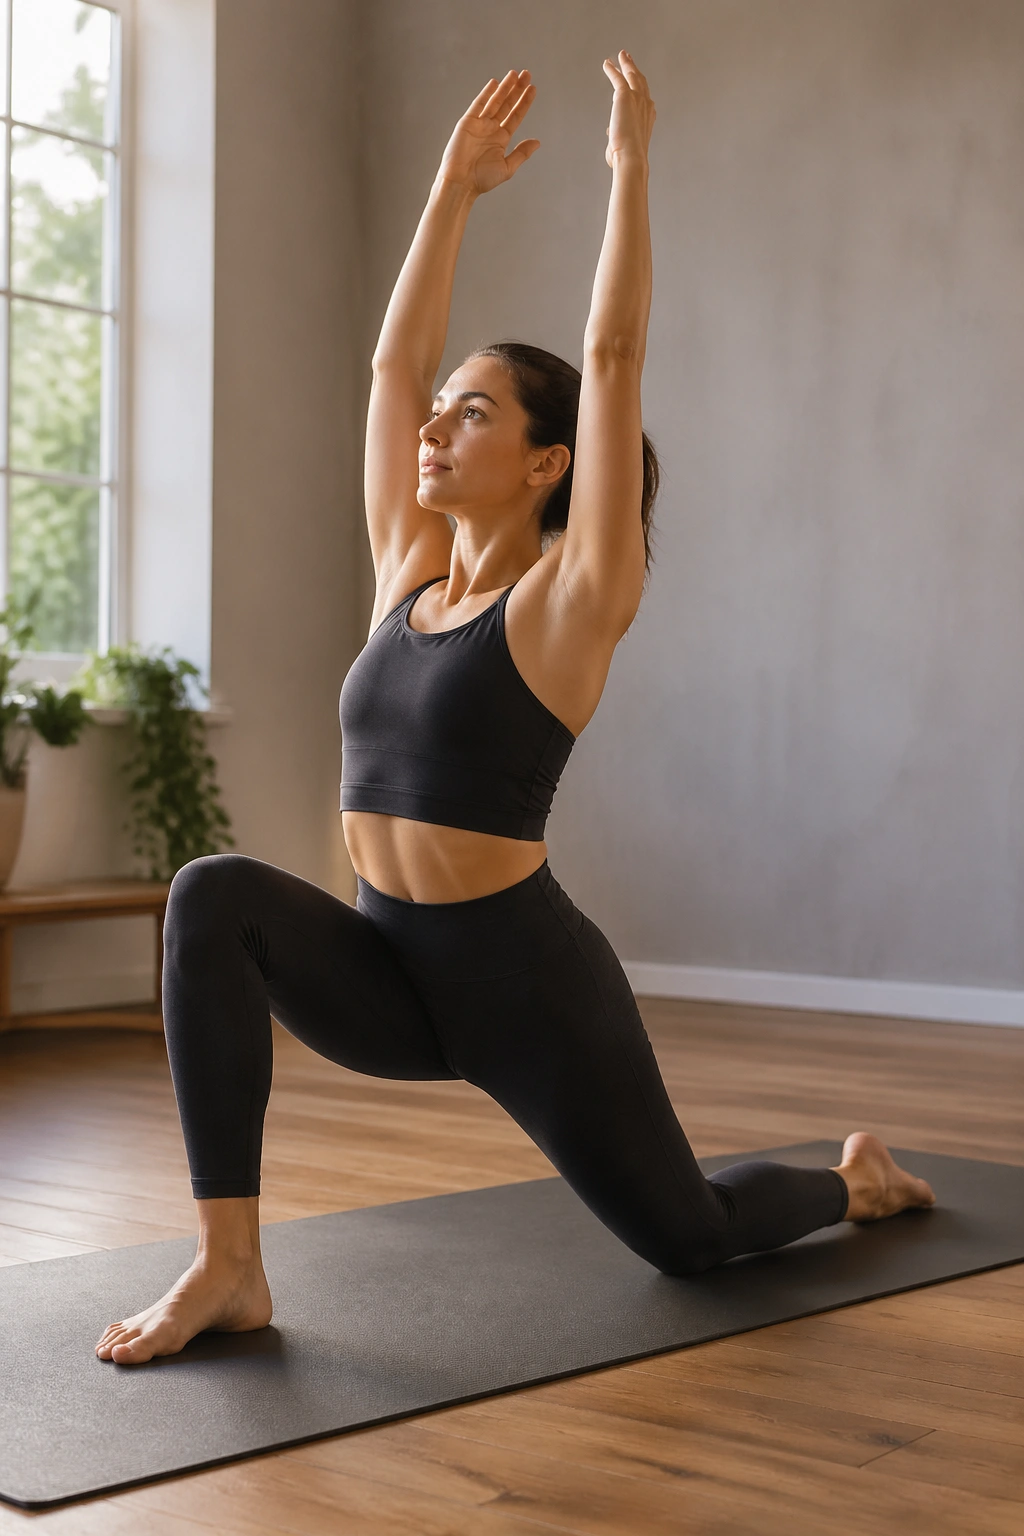
Crescent Lunge can be lovely, but if you rush into a deep stance, the front knee may start filing complaints before you even settle in. A low, supported version is far kinder.
I usually think of this pose as a long step, not a big one. The feet are far enough apart that you can stack the front knee over the ankle without rocking the body forward. If the back knee needs help, lower it to a folded blanket or mat and keep the pelvis lifted. That changes the feel right away.
One thing people often miss: the front shin does not need to go far past vertical. If your knee is sore, a smaller bend is often enough to create the stretch in the hip flexor and the work in the standing leg. That is where the benefit is anyway. Not in the deepest angle.
Hands can stay on blocks or on the front thigh. I like blocks because they take pressure off the shoulders and keep the chest from pitching forward. You should feel long through the spine, warm in the front hip, and stable through the standing foot. If the front knee feels pinched, walk the back foot a little farther back and try again.
7. Low Lunge for Bad Knees on a Folded Blanket
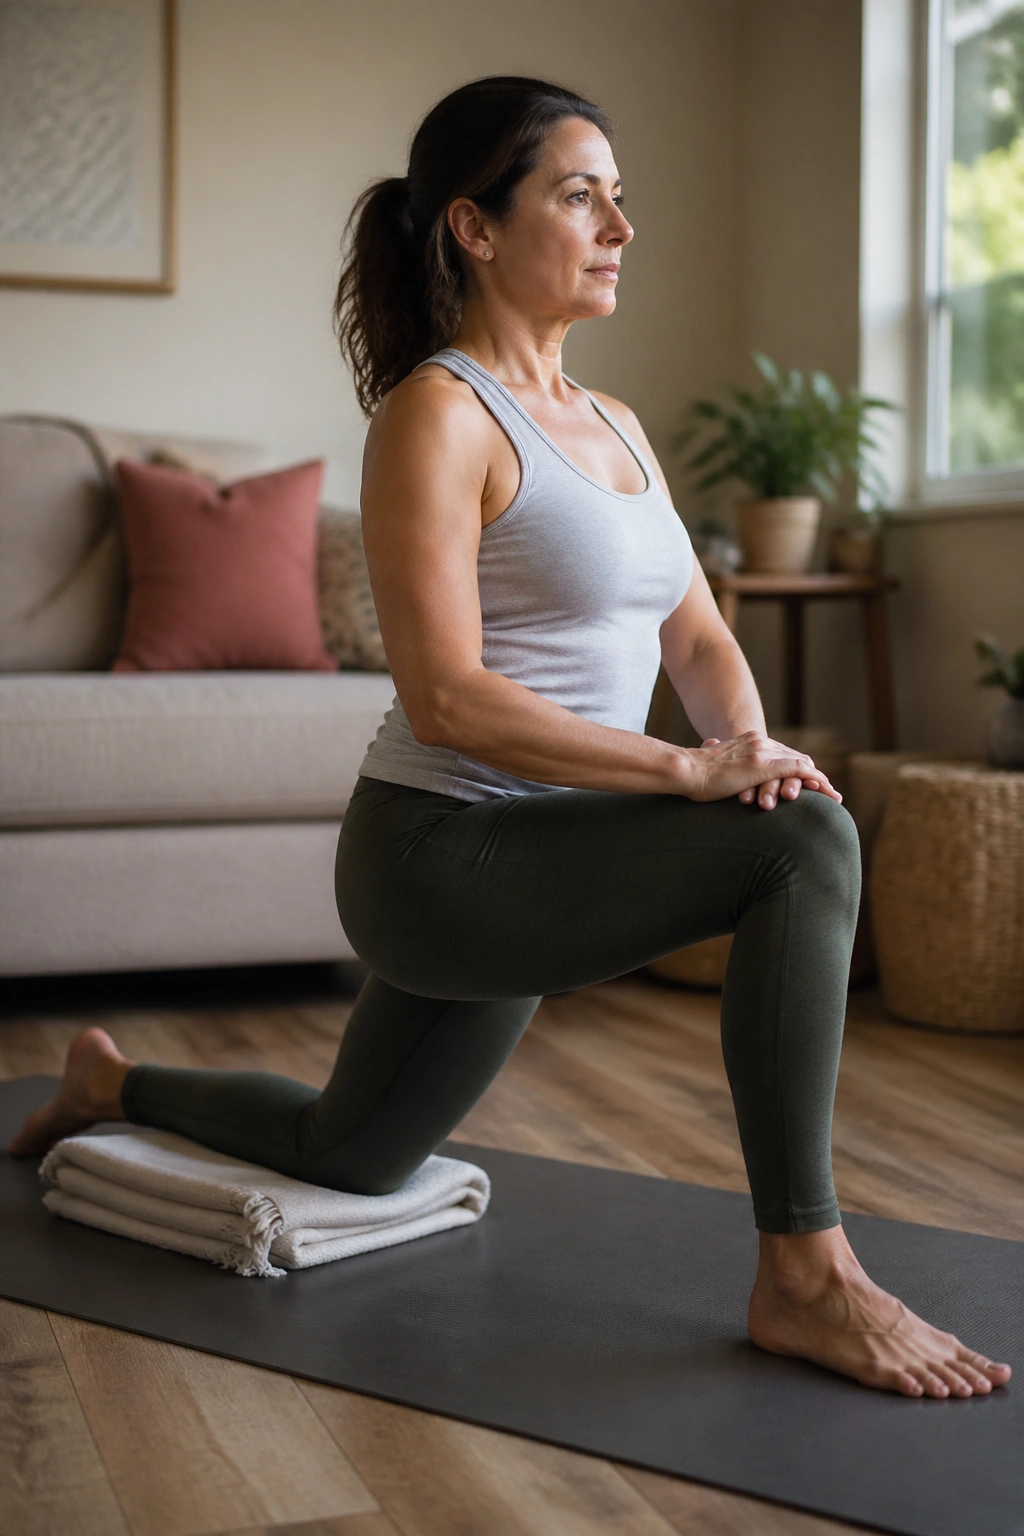
Can you kneel if your knees are angry? Sometimes, yes. But only if you set it up like you actually care about the joint.
Low Lunge is the sort of pose that can feel soothing or miserable depending on the padding. A folded blanket under the back knee changes the pressure point from a sharp jab to a dull, manageable contact. You can also tuck the blanket under the shin if the floor is hard. Small thing. Huge difference.
The Setup That Matters
Keep the front foot forward far enough that the knee can hover over the ankle without being forced into a deep angle. Then bring your torso upright. The temptation is to sink forward because it looks more “yoga-like.” Resist that. Tall is better here.
If the back knee still hates the floor, put a block under the back thigh and leave the knee lighter. Or skip the kneeling version and keep the back knee lifted entirely. You do not need to earn points by enduring pain.
The front hip should feel open and the front thigh engaged, but the knee itself should not be taking a pounding. I’ve seen more than one person blame the pose when the real issue was the bare floor and a too-short stance. Fix those two things first. Then decide if the shape is worth keeping.
8. Bridge Pose With Feet Set Close
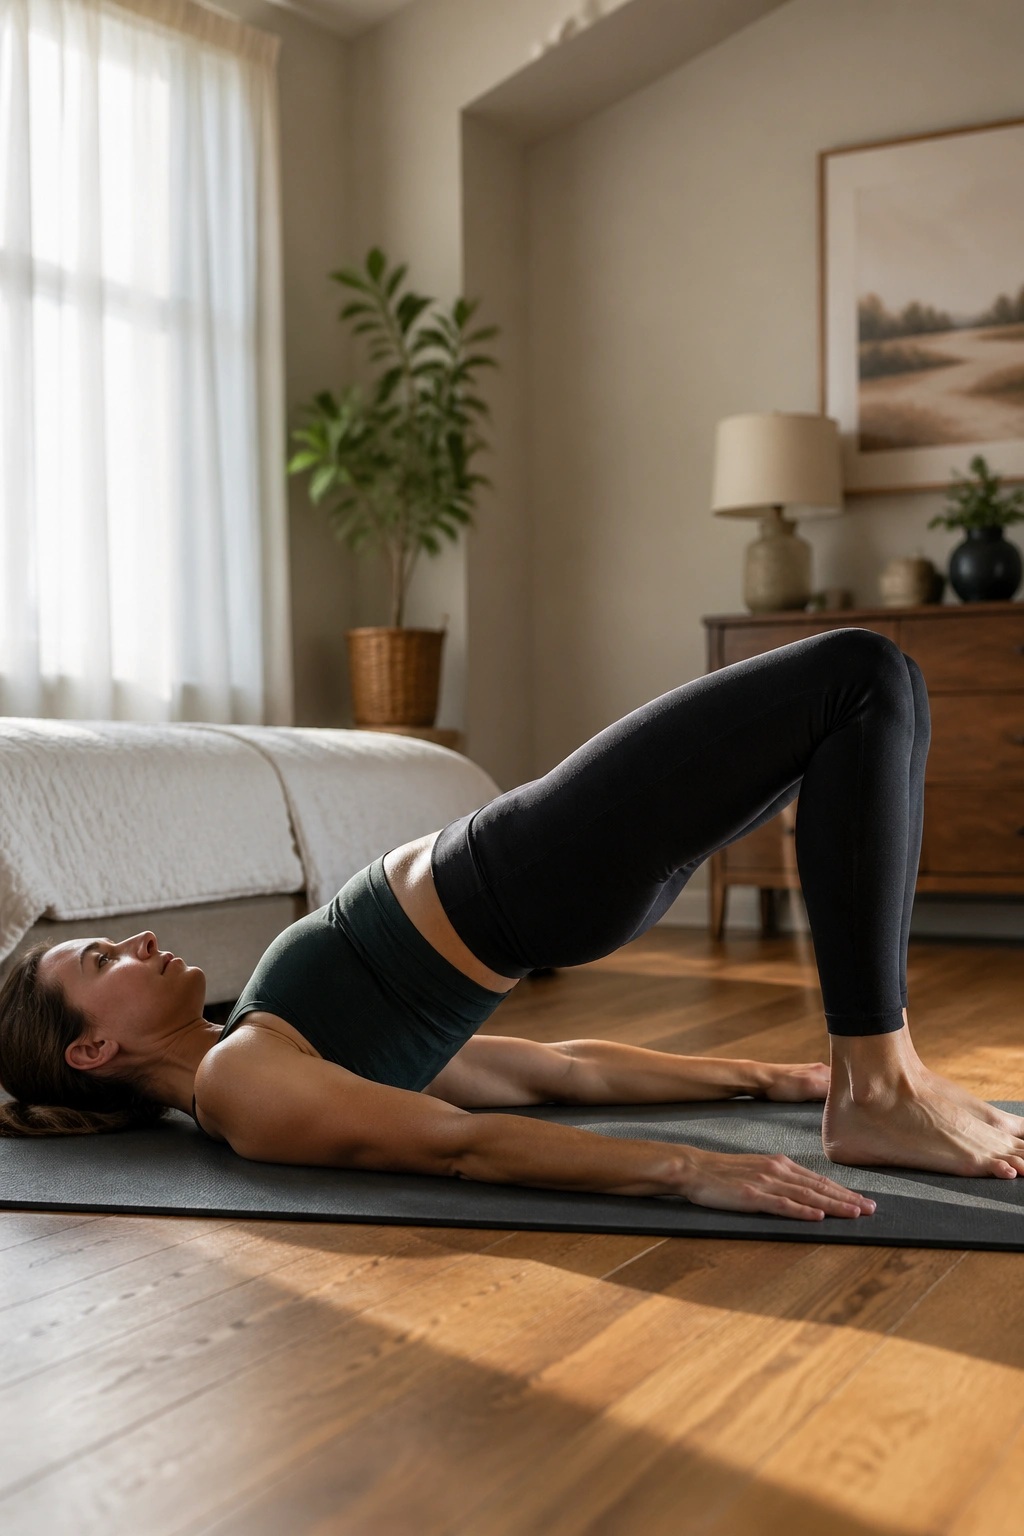
Bridge Pose is one of my favorites for cranky knees because it strengthens the back side of the body without asking for much knee flexion. It looks quiet. It works hard.
Feet should be close enough that the fingertips can almost graze the heels. Too far away, and the knees start to drift and twist; too close, and the low back may do the job that the glutes should handle. You want the shins near vertical when you lift. That’s the sweet spot.
Press the feet down, lift the hips only as high as you can without clenching the lower back, and keep the knees pointing forward. If they want to splay apart, squeeze a block or a folded blanket between the thighs. That tiny squeeze can wake up the inner legs and keep the knees from wandering outward.
Supported Bridge is even easier on the body. Place a yoga block under the sacrum and let the pelvis rest there. No heroic effort required. The pose becomes more of a quiet chest opener and less of a strength drill, which is useful when the knees need a break but you still want to move.
9. Cat-Cow on Hands and Knees With Padding
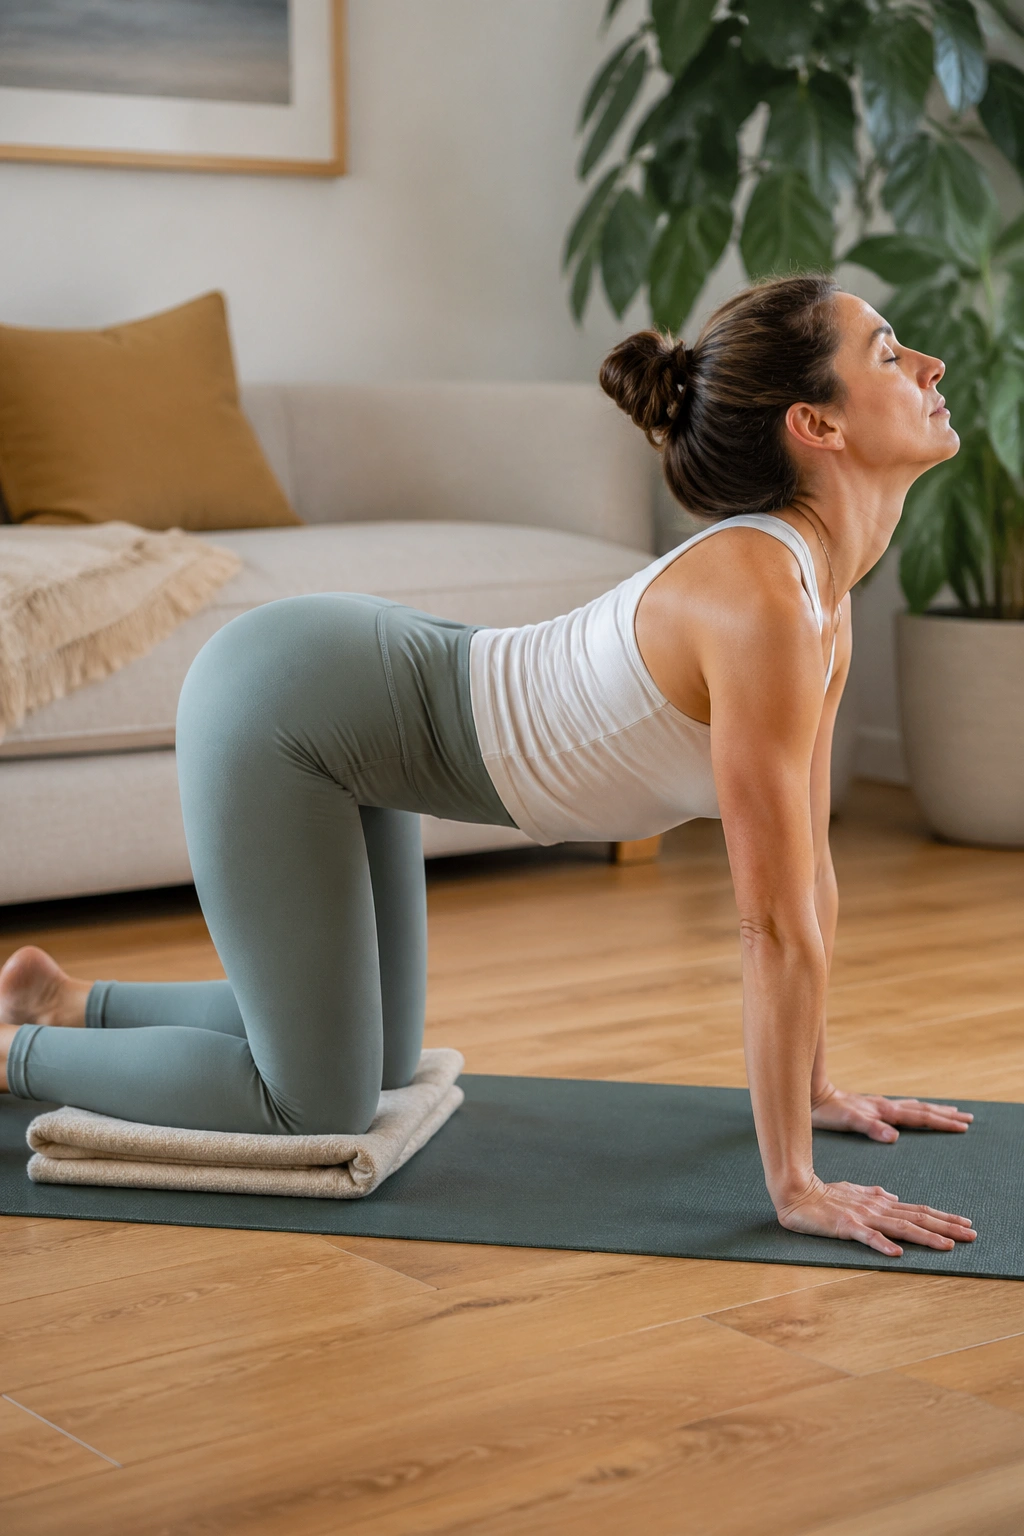
Cat-Cow should feel like a spinal wave, not a knee workout. If the kneeling part is the problem, you have two fixes: more padding or a standing version.
On the mat, fold a blanket or two under the knees so the joint doesn’t press straight into a hard surface. Keep the hands under the shoulders and move slowly enough that the pelvis, ribs, and head all follow the same rhythm. The motion is tiny at first. That is fine. Tiny is honest.
If Kneeling Is a No-Go
Stand with your hands on your thighs or on a wall. Inhale and tip the chest forward a little; exhale and round the back, pressing the hands lightly into the thighs. The spine still gets the motion, and the knees stay out of the way.
- Use extra padding under the knees if the mat feels unforgiving.
- Keep the movement smooth, not sharp.
- Let the shoulders stay wide so the neck does not clamp down.
- Stop well before any pinching starts in the front of the knees.
The best version of Cat-Cow is the one you can repeat five or six times without bracing. If the pose makes you grimace, it’s too much. The shape should loosen your back, not collect tension in your knees.
10. Sphinx Pose for a Knee-Friendly Backbend
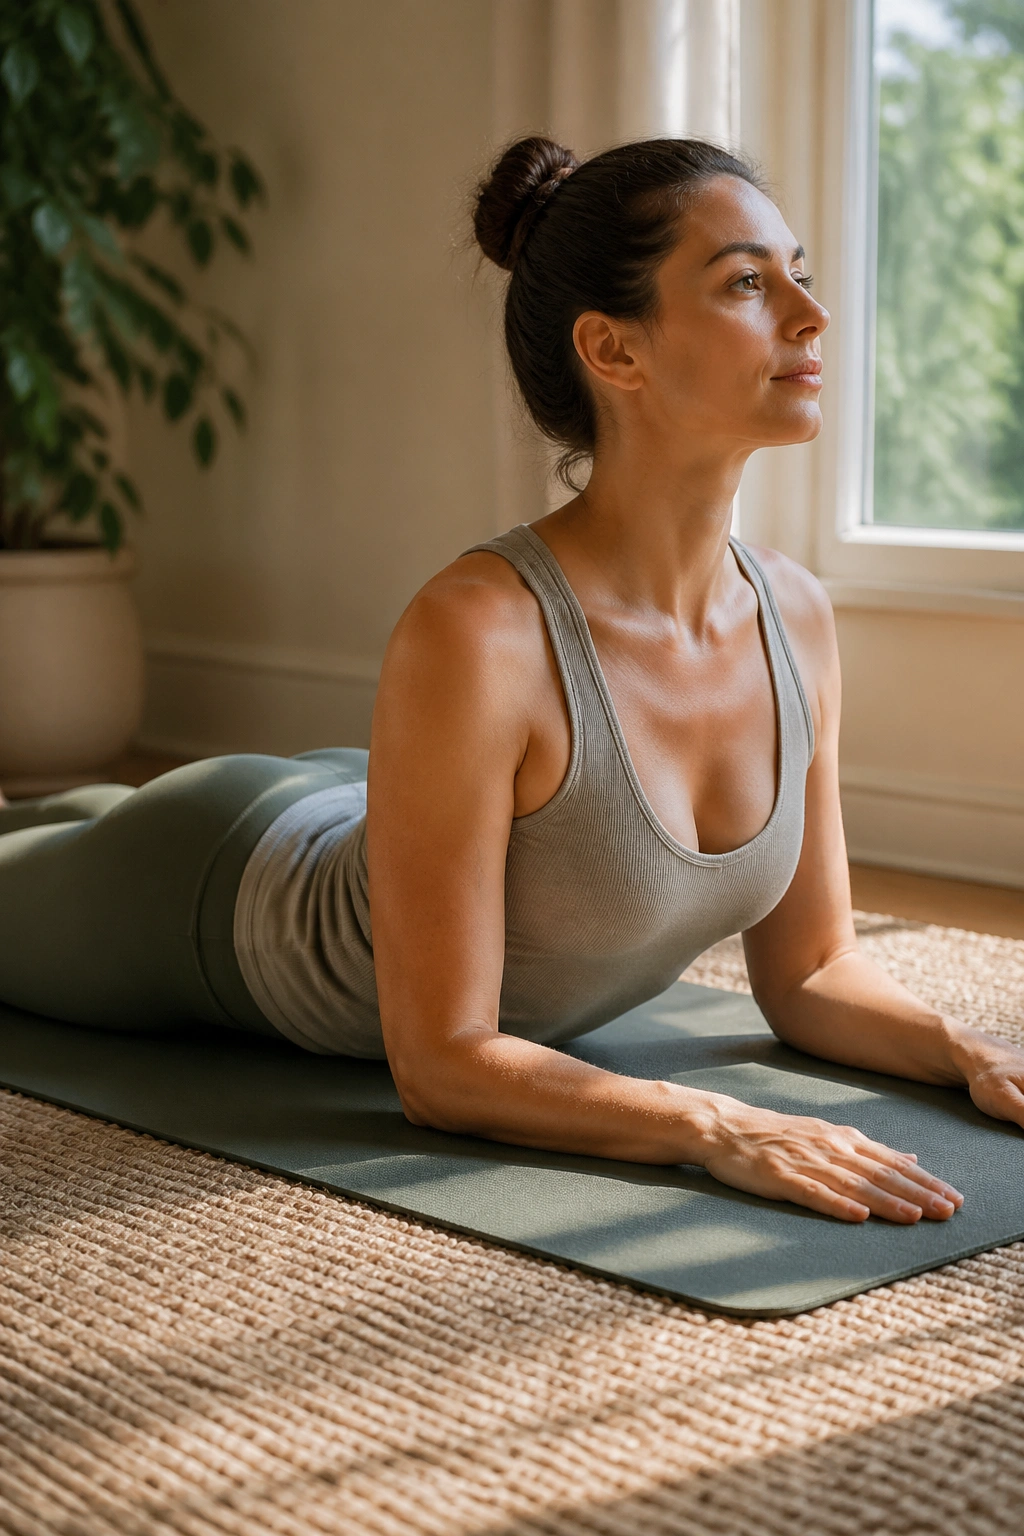
Sphinx Pose is one of those unflashy shapes that earns its keep. You lie on your stomach, prop up on the forearms, and let the front of the body open without asking the knees to bend much at all.
If your knees hate deep flexion, this can be a relief. The legs stay long behind you, and the pressure moves out of the joint and into the floor. That alone can make the pose worth keeping in a practice. The elbows land under the shoulders, the chest broadens, and the low back gets a mild lift.
How Far to Go
Not far. That’s the honest answer. Too much backbend can dump into the low back and turn the pose sloppy. Keep the pubic bone heavy, the thighs soft, and the neck long. You’re aiming for a gentle opening across the belly and front ribs, not a dramatic arch.
If the lower back feels tight, slide the elbows a little forward and lower the chest. If the shoulders bunch up, think about drawing the upper arms away from the ears. The pose should feel steady and even, with no weird pinch in the spine or knees.
It’s a nice counterpose after long sitting, and it pairs well with restorative work. No knee pressure. No rush. Just enough lift to remind the front body how to breathe.
11. Reclined Figure Four With a Flexed Foot
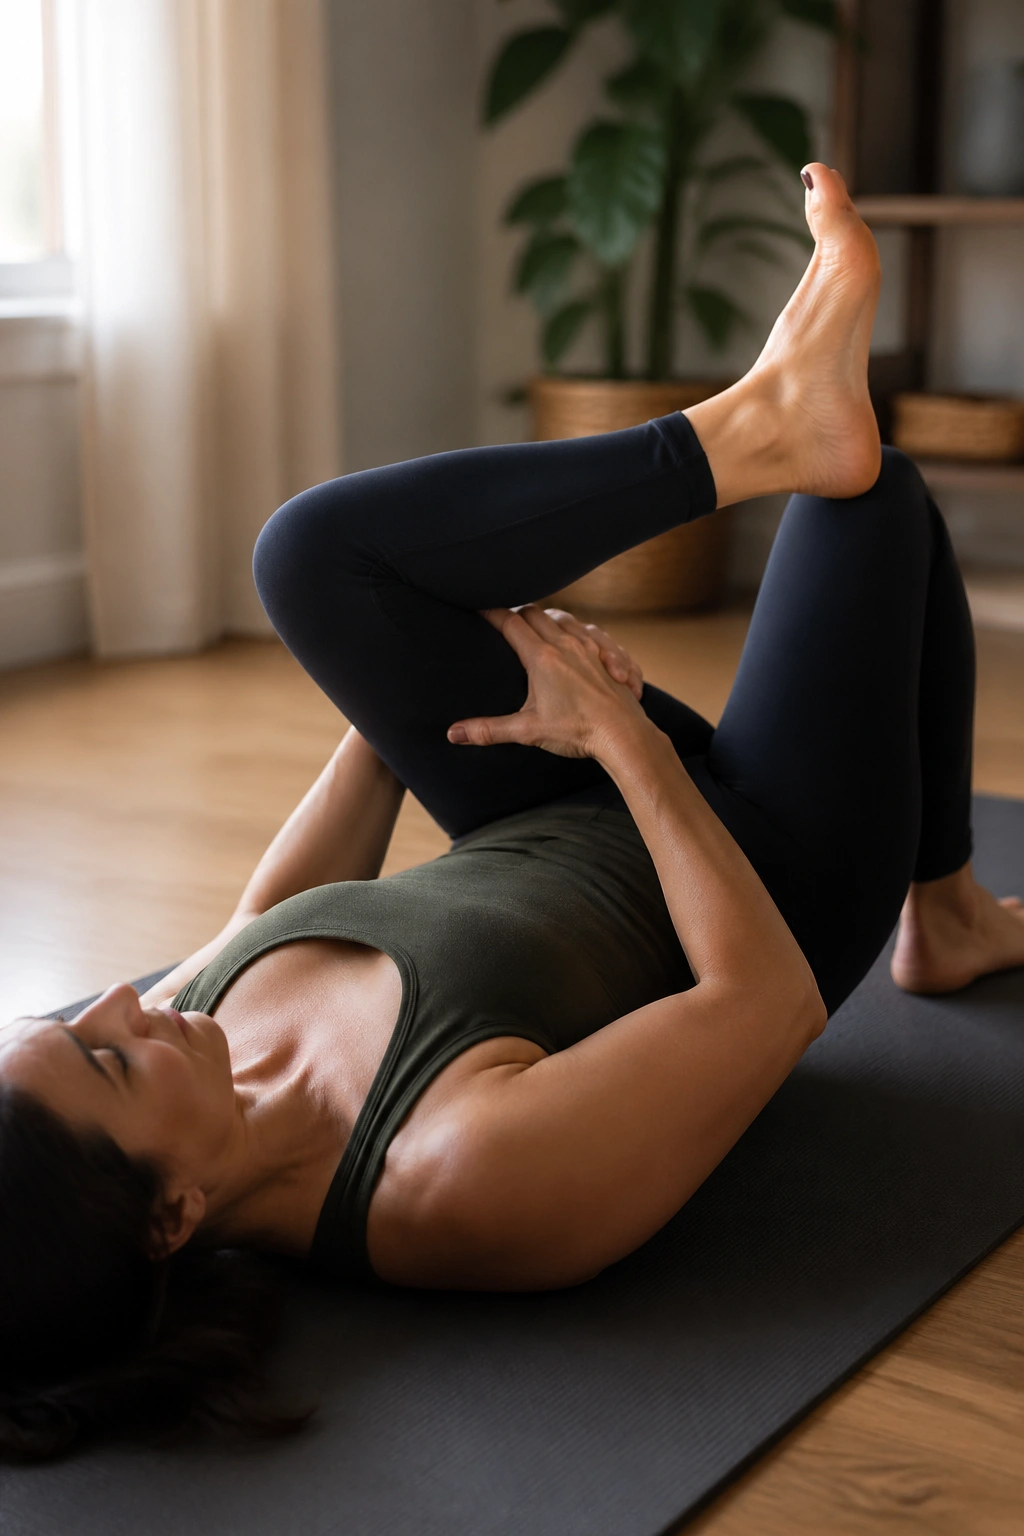
This is one of the cleanest hip stretches for people with sensitive knees, and the reason is simple: you are not pulling on the lower leg. You’re using the thigh.
Lie on your back, cross one ankle over the opposite thigh, and keep the foot flexed rather than floppy. That flex protects the knee more than people expect. Then thread the hands behind the standing leg and draw the thigh toward you until the outer hip opens.
What you do not want is to yank on the shin. That can tug the knee into a position it does not love. Keep the crossed foot active, and if the stretch feels too intense, move the standing foot farther away or keep the lower leg on the floor instead of lifting it.
A useful trick: press the crossed knee gently away with the hand for a breath, then back off. That tiny back-and-forth makes the stretch more controlled and less grabby. You should feel it in the outer hip and glute, maybe a little in the deep butt muscles, but not in the kneecap.
If the knee opens on its own, fine. If it doesn’t, leave it alone. This is one of those shapes where less force usually gives you more useful release.
12. Supine Hamstring Stretch With a Strap
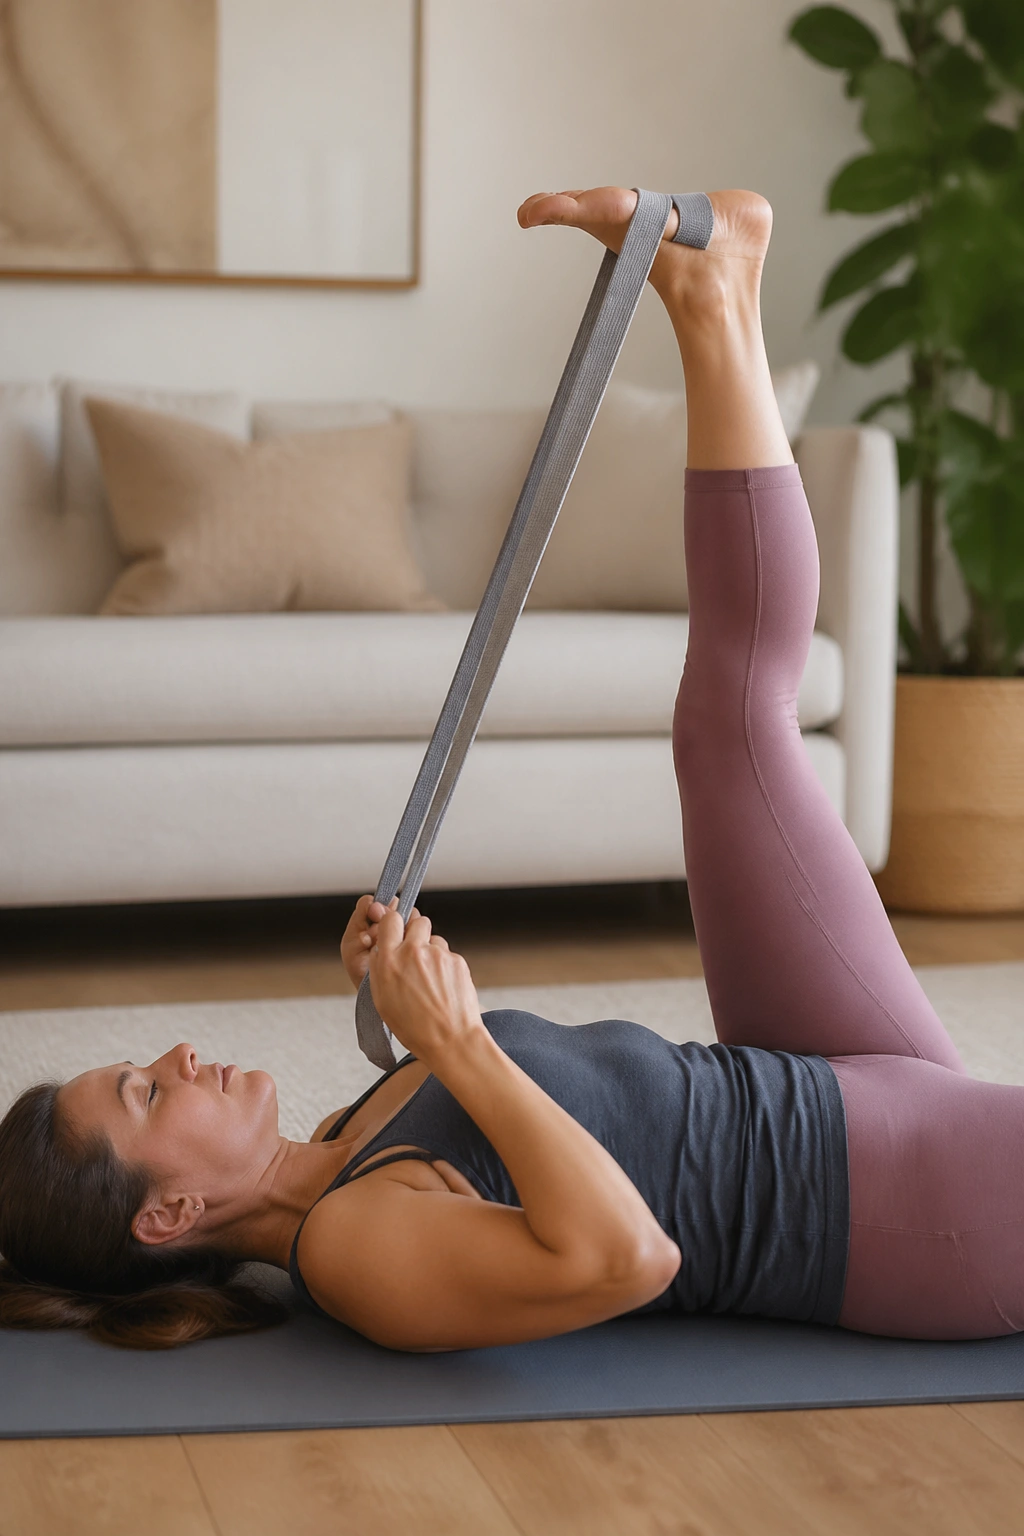
Supine hamstring work can be a dream for bad knees, as long as you stop chasing a straight leg at any cost. The strap is there to help you find a clean line, not a perfect one.
Lie on your back and loop a strap around the ball of one foot. Keep the other leg bent with the foot on the floor if your low back feels sensitive. As you lift the strapped leg, keep the knee slightly soft. A few degrees of bend can make the whole thing calmer, especially if the back of the knee tends to tighten.
The stretch should show up behind the thigh, not in the joint itself. If it moves into the knee, lower the leg a little and shorten the range. That’s usually the fix. People often think they need to “stretch through” the discomfort. Bad idea. Hamstrings respond better when you give them a controlled edge, not a hard shove.
You can hold the strap with both hands and keep the shoulders relaxed. Breathe into the back of the thigh. Then pause. Sometimes the leg releases more after 20 or 30 seconds, and that’s the kind of change you actually want. Not force. Just a little more length.
13. Bound Angle Pose for Bad Knees With Bolsters
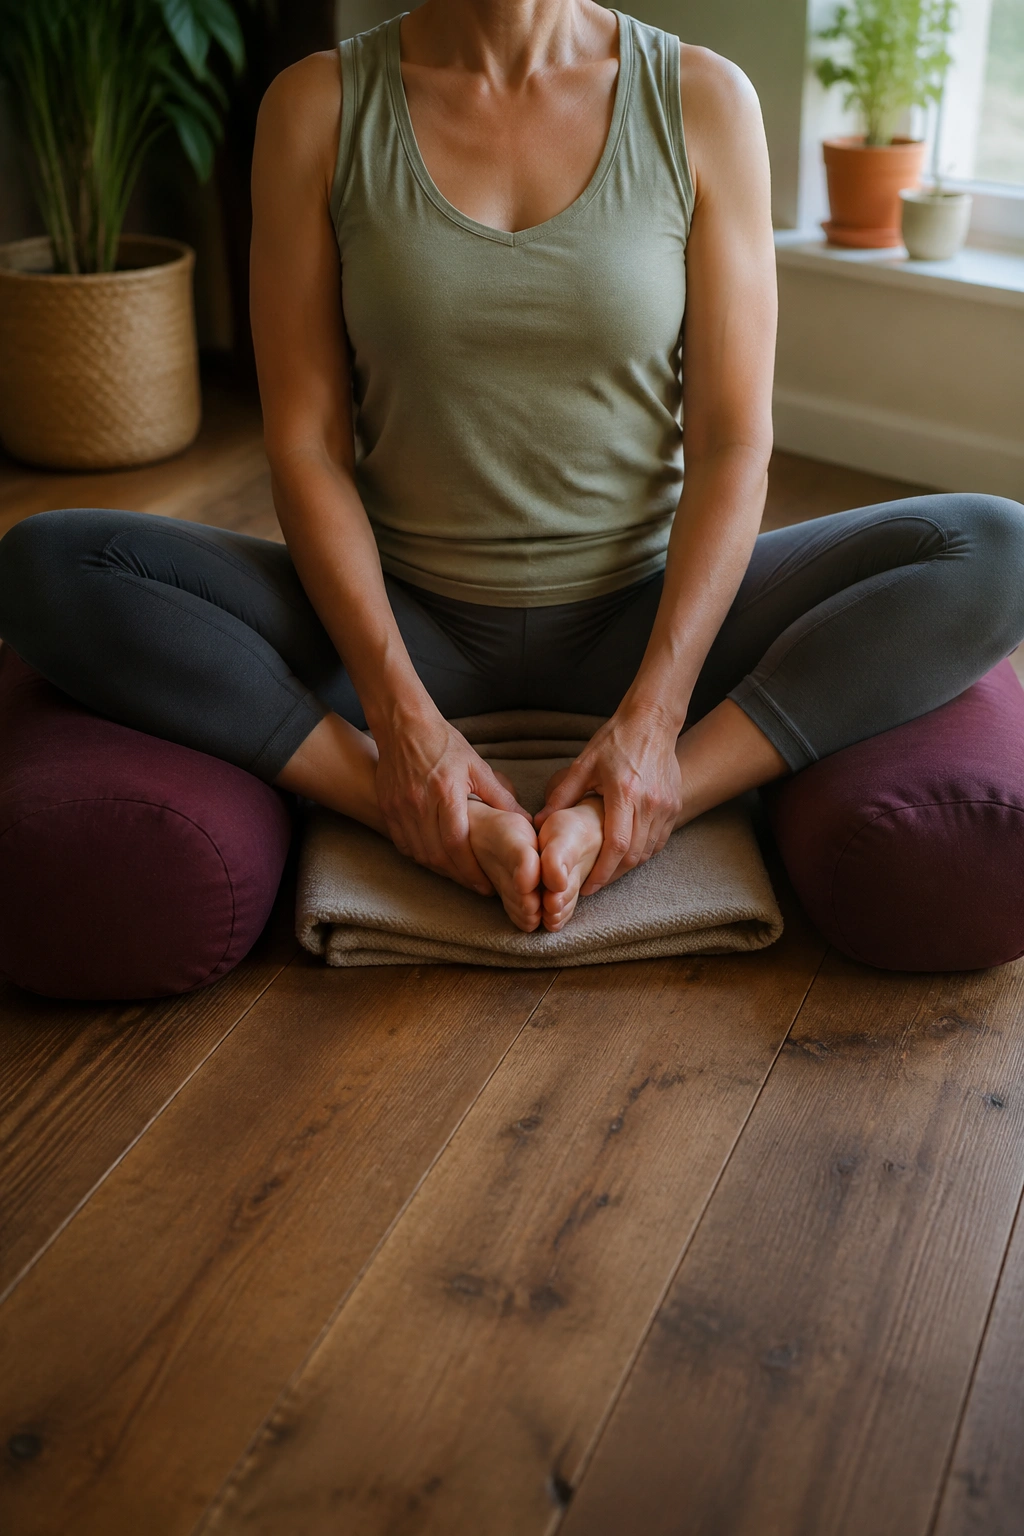
Bound Angle Pose gets a bad reputation when people try to push the knees toward the floor. That’s the part to ignore. The floor is not the goal.
Sit on a folded blanket so your pelvis tips slightly forward. Bring the soles of the feet together, then place blocks or bolsters under the thighs so the knees can rest where they want to rest. If the hips feel tight, move the feet farther away from the pelvis. That often takes strain off the knees immediately.
What Support Does Here
Support changes the pose from a forced groin stretch into a quiet opening for the inner thighs. The knees do not need to hover in midair, and they definitely do not need to be pressed down by hand. That old cue is more trouble than it’s worth for many bodies.
- Sit higher if the low back rounds.
- Move the feet farther away if the knees feel pinched.
- Use two blocks under the outer thighs if the hips are stubborn.
- Keep the feet active, not floppy.
This is a shape that rewards patience. The body settles over a minute or two, and the breath tends to slow down once the knees stop fighting gravity. If you’ve got bad knees and restless hips, this one can feel like a genuine reset.
14. Seated Wide-Leg Fold With Bent Knees
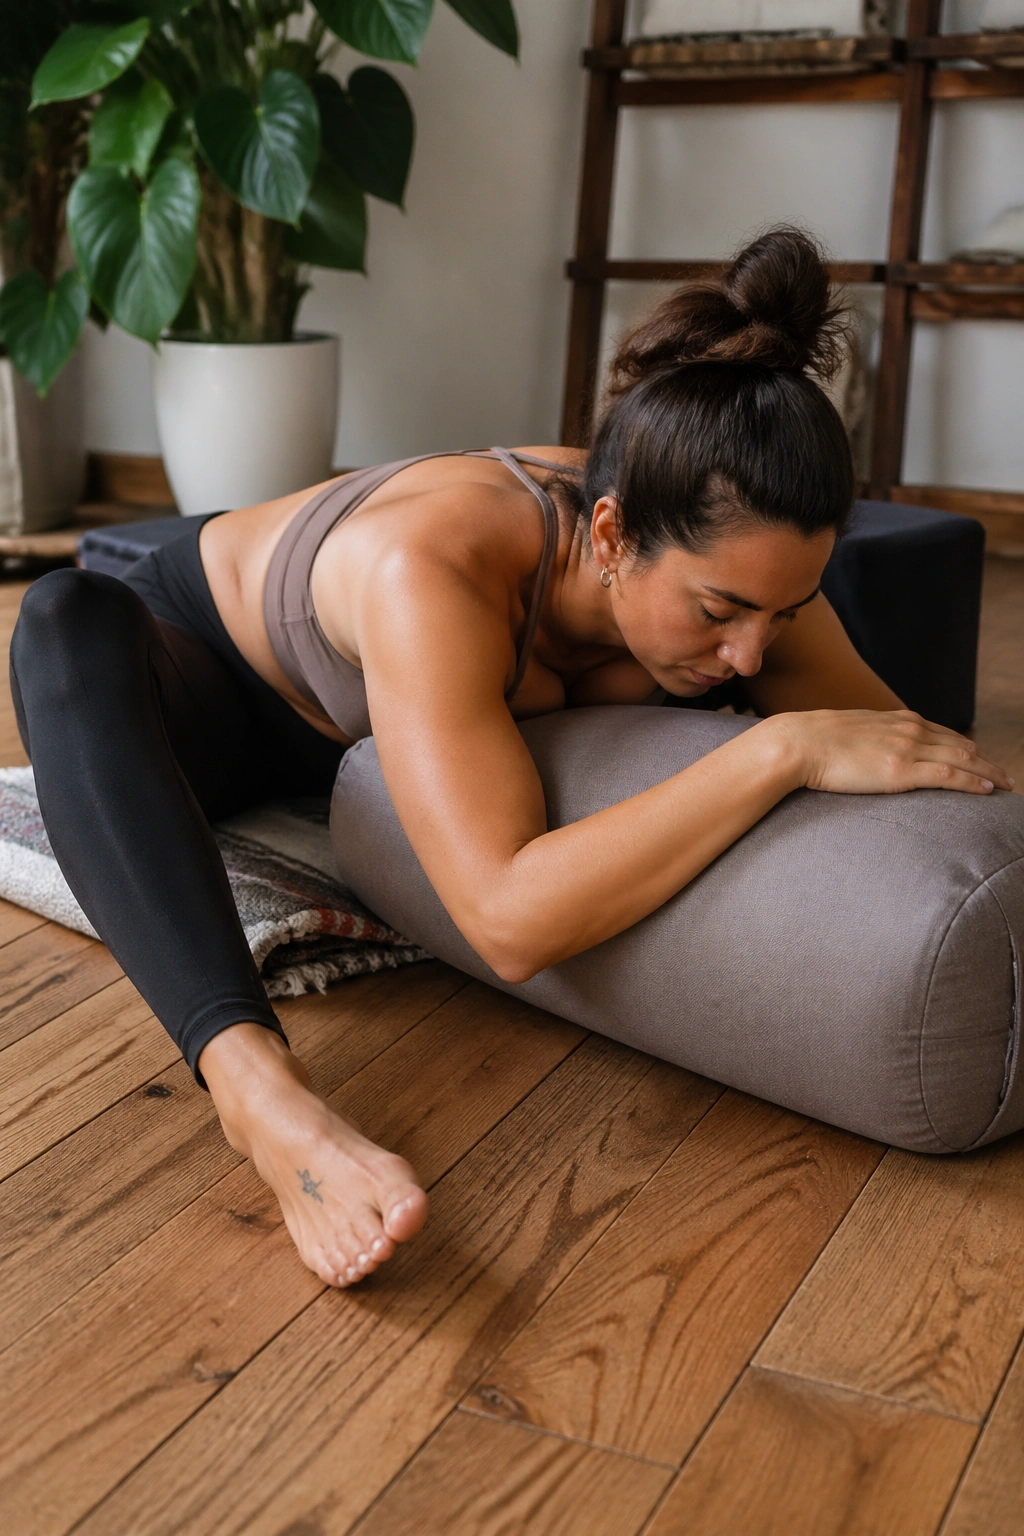
Straight legs are not sacred. If your knees or hamstrings hate them, bend the knees and move on.
This wide-leg fold works best when you sit on a folded blanket and spread the legs to a distance that feels manageable. A lot of people go too wide right away, which yanks on the inner thighs and pulls the pelvis backward. That’s when the low back starts doing odd things and the knees feel like bystanders in a car crash.
How to Use the Bend
Let the knees stay soft enough that the thigh muscles can relax. Then hinge forward from the hips, not the waist. If the chest barely moves, that’s fine. The point is to find a long spine and a tolerable stretch, not to collapse toward the floor.
A bolster or stacked pillows in front of you can make this much kinder. Rest your chest there, breathe, and keep the knees from locking. If the inner knees feel strained, bring the feet a little closer together. If the stretch is too easy, widen the legs by an inch or two rather than six.
This pose is less about touching the ground and more about letting the back of the legs open without a fight. That makes it useful for people whose knees dislike tension from the back chain. Quietly useful. No fireworks.
15. Legs-Up-the-Wall for a Quiet Finish
Some practices need effort. This one needs a wall and a few minutes.
Legs-Up-the-Wall is a restorative shape that can be a gift for tired knees, especially after standing work. Slide close enough that the back of the legs can rest up the wall without strain. If the hamstrings tug, scoot a few inches farther away or place a folded blanket under the lower back and sacrum. You can also keep a soft bend in the knees instead of insisting on straight legs.
The beauty of this pose is that the knees are not bearing weight, twisting, or folding into a deep angle. They’re just being held. That can feel oddly luxurious after a day of walking, standing, or sitting in one position too long.
If your knees like a little more support, place a pillow under the calves or let the feet separate into a relaxed V. Hands can rest on the belly, the ribs, or out to the sides. Breathe slowly. Stay for five to ten minutes if it feels good. And if you want one habit that makes knee-friendly yoga easier over time, make it this: end more practices with a shape that asks less of the joints than the rest of the day did.
