



A stiff upper back doesn’t always show up as pain. Sometimes it looks like shoulders living near your ears, a breath that never quite drops below the collarbones, or a neck that feels tired after a normal day at a desk. Yoga poses for a strong open upper back work better when they do two jobs at once: they create room through the thoracic spine and teach the muscles around the shoulder blades how to hold that room without bracing.
A lot of people chase big backbends when what their upper back actually needs is better motion where the ribs, spine, and shoulder blades meet. That’s the part most people ignore. The upper back likes extension, rotation, and control; the low back likes to stay out of the drama.
So the useful question is not “How far can I bend?” It’s “Can I move my rib cage, shoulders, and upper spine in a way that feels clean, strong, and repeatable?” The poses below answer that in different ways. Some are gentle and sneaky. Some make the muscles work. All of them can help build that open, lifted feeling without turning your lower back into the star of the show.
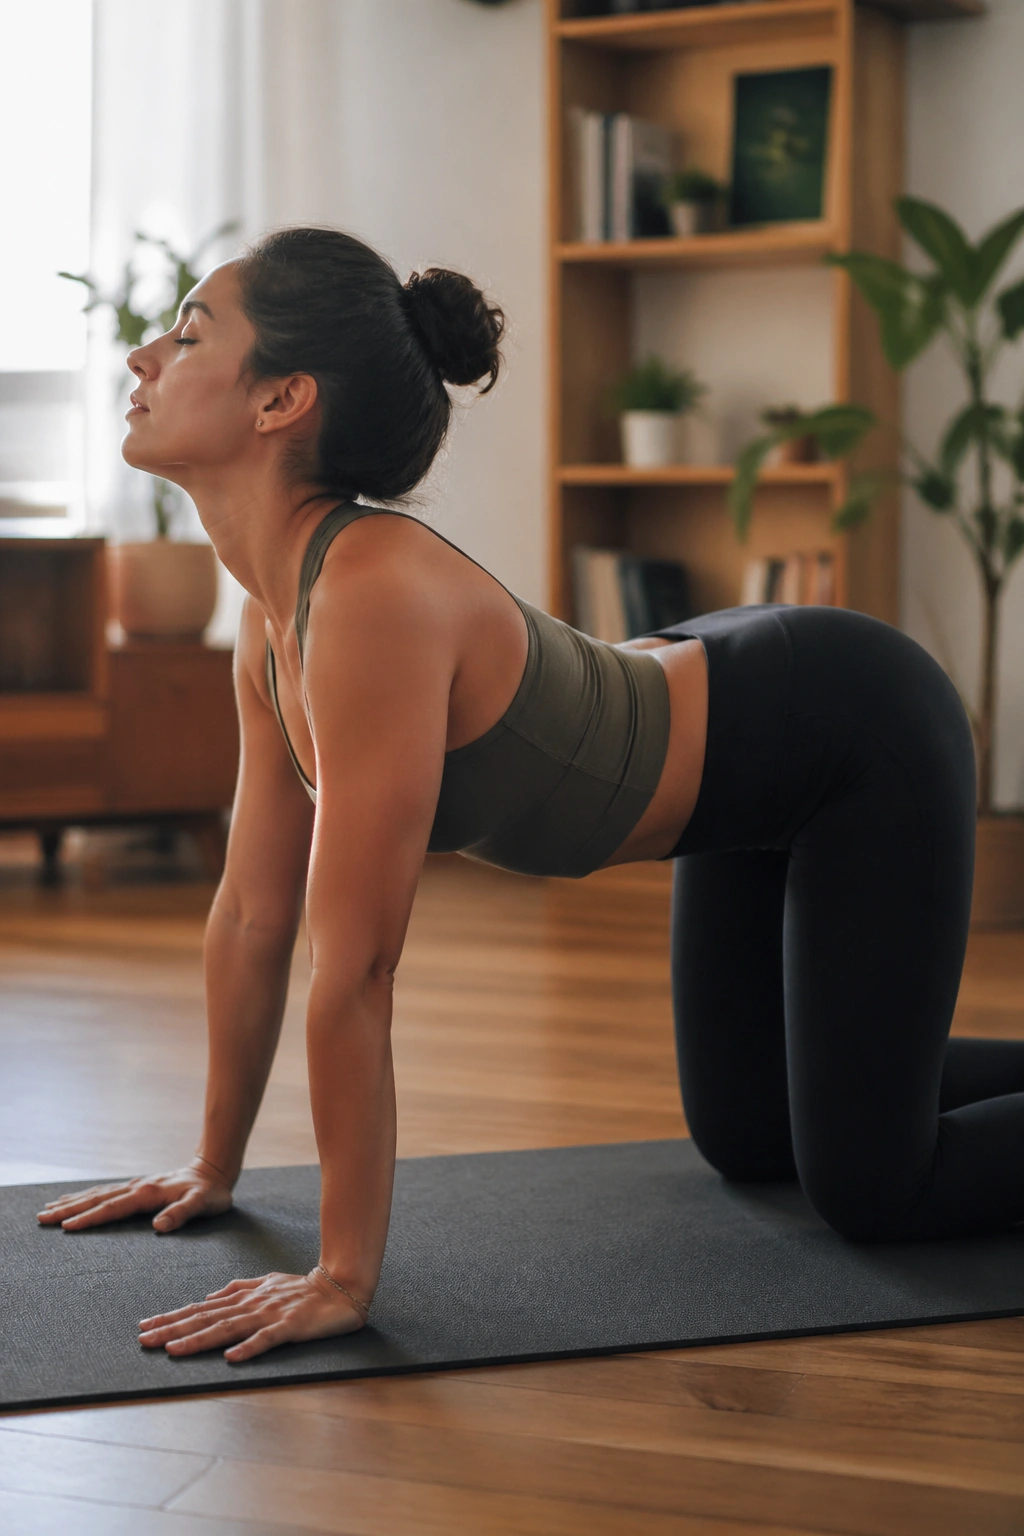
1. Cat-Cow to Wake Up the Thoracic Spine
Cat-Cow looks easy because it is easy. That’s also why it gets skipped, which is a mistake. If your upper back feels glued in place, this simple movement is one of the best ways to remind it that it can bend and round without panic.
Start on hands and knees with wrists under shoulders and knees under hips. On the inhale, let the chest glide forward, broaden the collarbones, and tip the tailbone up. On the exhale, round the spine, push the floor away, and spread the shoulder blades apart as if you were making space between them. The goal is not a yoga-performance arch. The goal is smooth spinal segmentation.
What to Feel
- The movement should travel from tailbone to neck, not just from the low back.
- Your shoulder blades should slide rather than jam.
- The ribs should move with the breath.
- The neck stays long. No cranking the head up.
Speed ruins it. Four to six slow rounds usually do more than twenty rushed ones.
What to Avoid
Do not dump all the motion into the lumbar spine. That’s the easy cheat, and it leaves the upper back asleep. If the neck is doing most of the work, soften the chin and look down between the thumbs instead of throwing the head back.
A useful cue: try to make the middle of your back feel alive. That’s the piece people usually miss, and it changes everything that comes after.
2. Thread the Needle to Unstick the Shoulder Blade
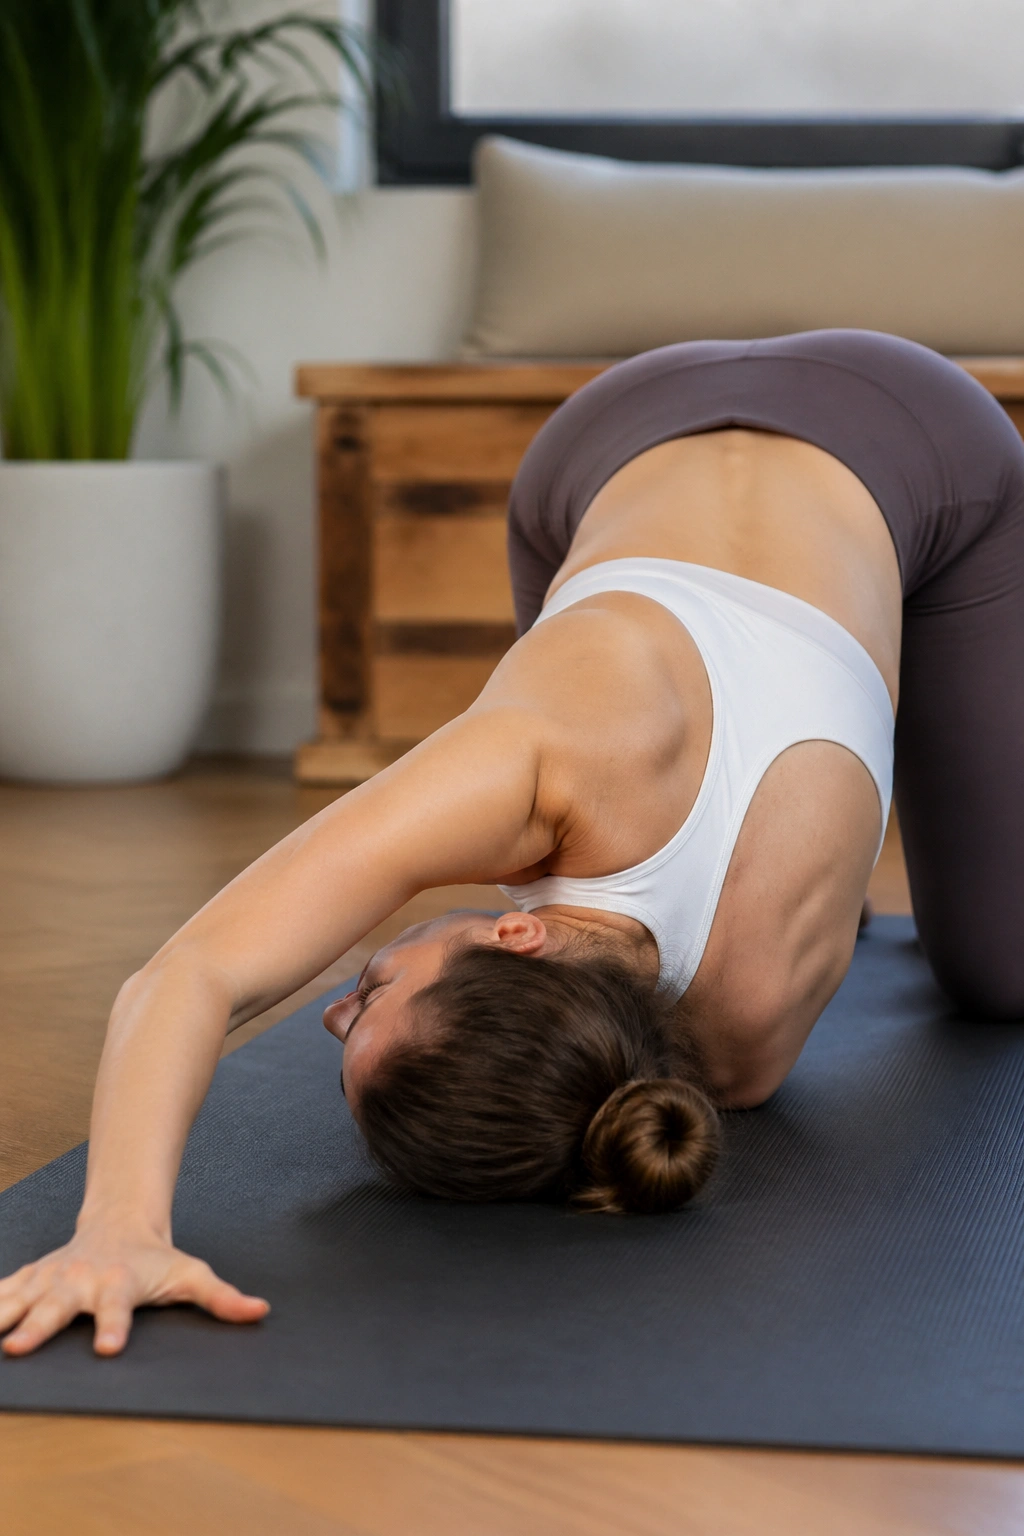
Why does one arm-under twist feel so relieving? Because it gives the back of the shoulder and the ribs a clean rotation without asking the whole spine to collapse. Thread the Needle is small, but it reaches into the places that get tight from typing, driving, carrying bags, and sleeping with one shoulder jammed forward.
From hands and knees, slide your right arm under the left arm and let the right shoulder and temple lower toward the mat. Keep the hips stacked over the knees if you can. Breathe into the back ribs. Then pause. That pause matters more than the shape itself.
Easier Version
If the shoulder feels pinchy, don’t force the twist deeper.
- Rest the shoulder on a block or folded blanket.
- Keep the free arm pressed into the floor for support.
- Stay high, with the chest a little lifted.
- Breathe for 3 to 5 slow rounds before changing sides.
The upper back usually opens when you stop trying to win the pose. A long exhale lets the ribs soften and the shoulder blade settle, and that’s where the useful stretch lives.
What to Watch For
Pinching in the front of the shoulder is a stop sign. So is a neck that feels twisted into a knot. Back off, shorten the range, and make the twist smaller. Smaller is often better. Really.
3. Puppy Pose for an Open Upper Back Without Cranking the Low Back
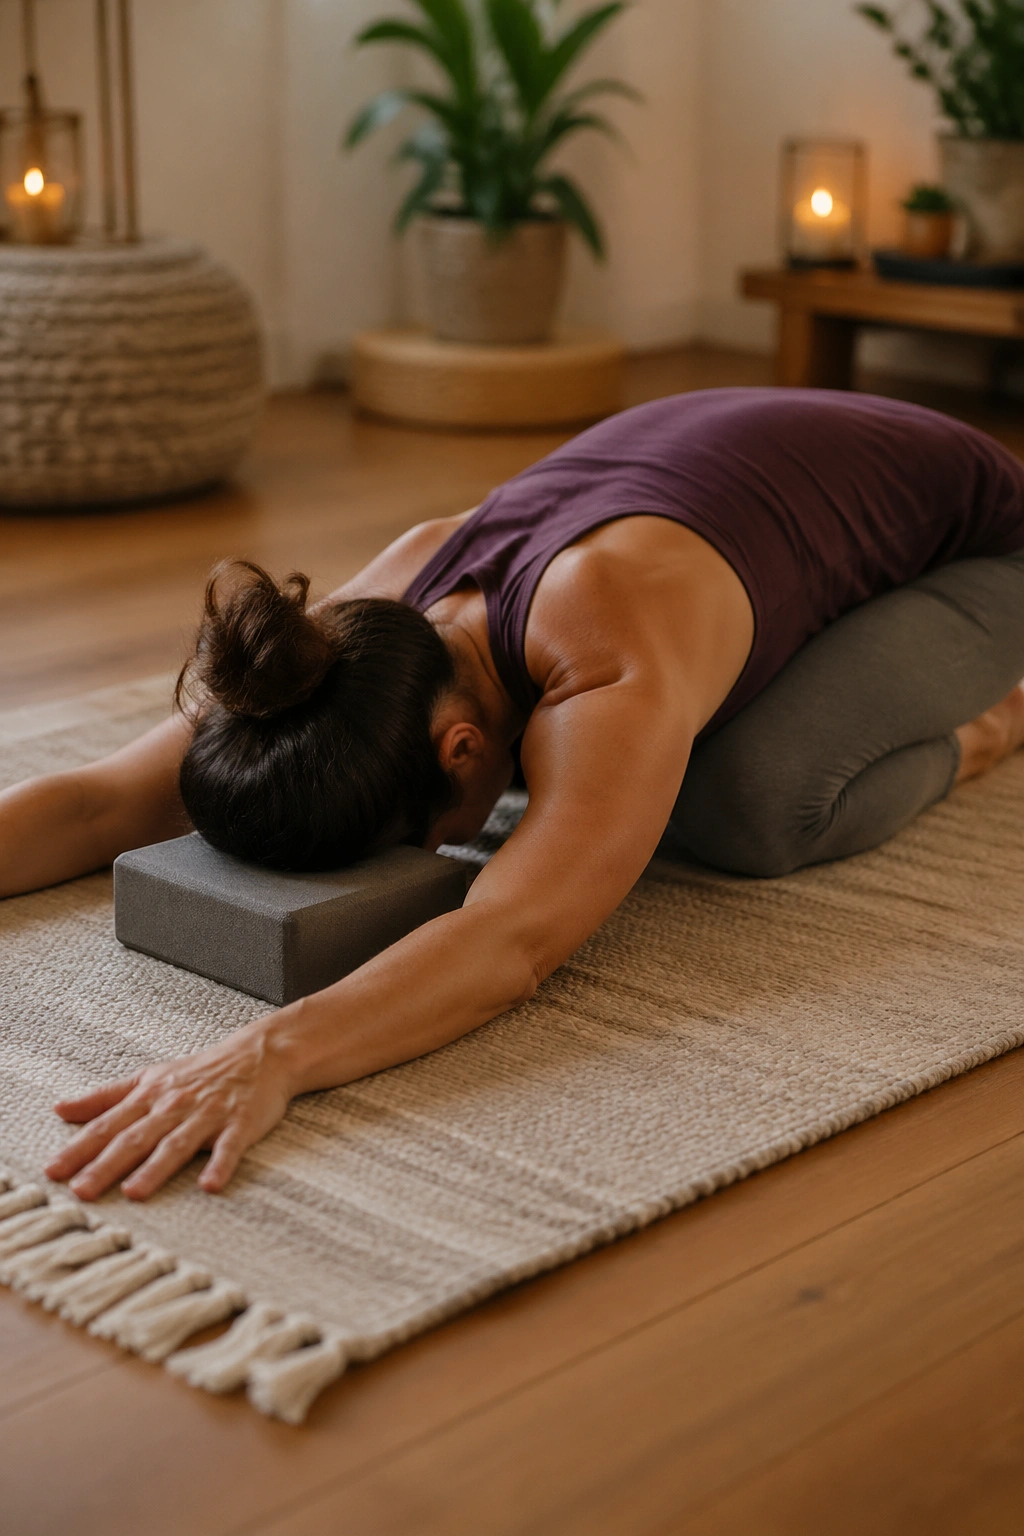
Puppy Pose is the shape I reach for when the upper back needs extension but the lower back needs to stay quiet. It sits somewhere between Child’s Pose and Downward Dog, which makes it sneaky in a good way. The chest drops toward the floor while the hips stay over the knees, so the thoracic spine does the reaching instead of the lumbar spine taking over.
Set your hands forward, keep your hips above your knees, and let the chest melt down. If the floor feels too far away, use a block or a rolled blanket under the forehead. That small support changes the whole pose. It helps the neck relax and keeps the chest open without asking for a dramatic bend.
What It Should Feel Like
- A stretch across the armpits and side ribs.
- Gentle length along the front of the chest.
- A little pressure in the upper back, not the low back.
- A quieter breath, because the ribs have more room.
If the low back feels compressed, come out a bit. Don’t chase depth.
A lot of people make this pose too intense by flaring the ribs and dumping the belly. That turns it into a hinge instead of a stretch. Keep the front ribs gently knitted in and let the sternum reach forward and down instead of just dropping.
Puppy Pose is also a good wake-up before stronger back extension work. It prepares the body without shouting at it.
4. Sphinx Pose for Gentle Upper-Back Extension
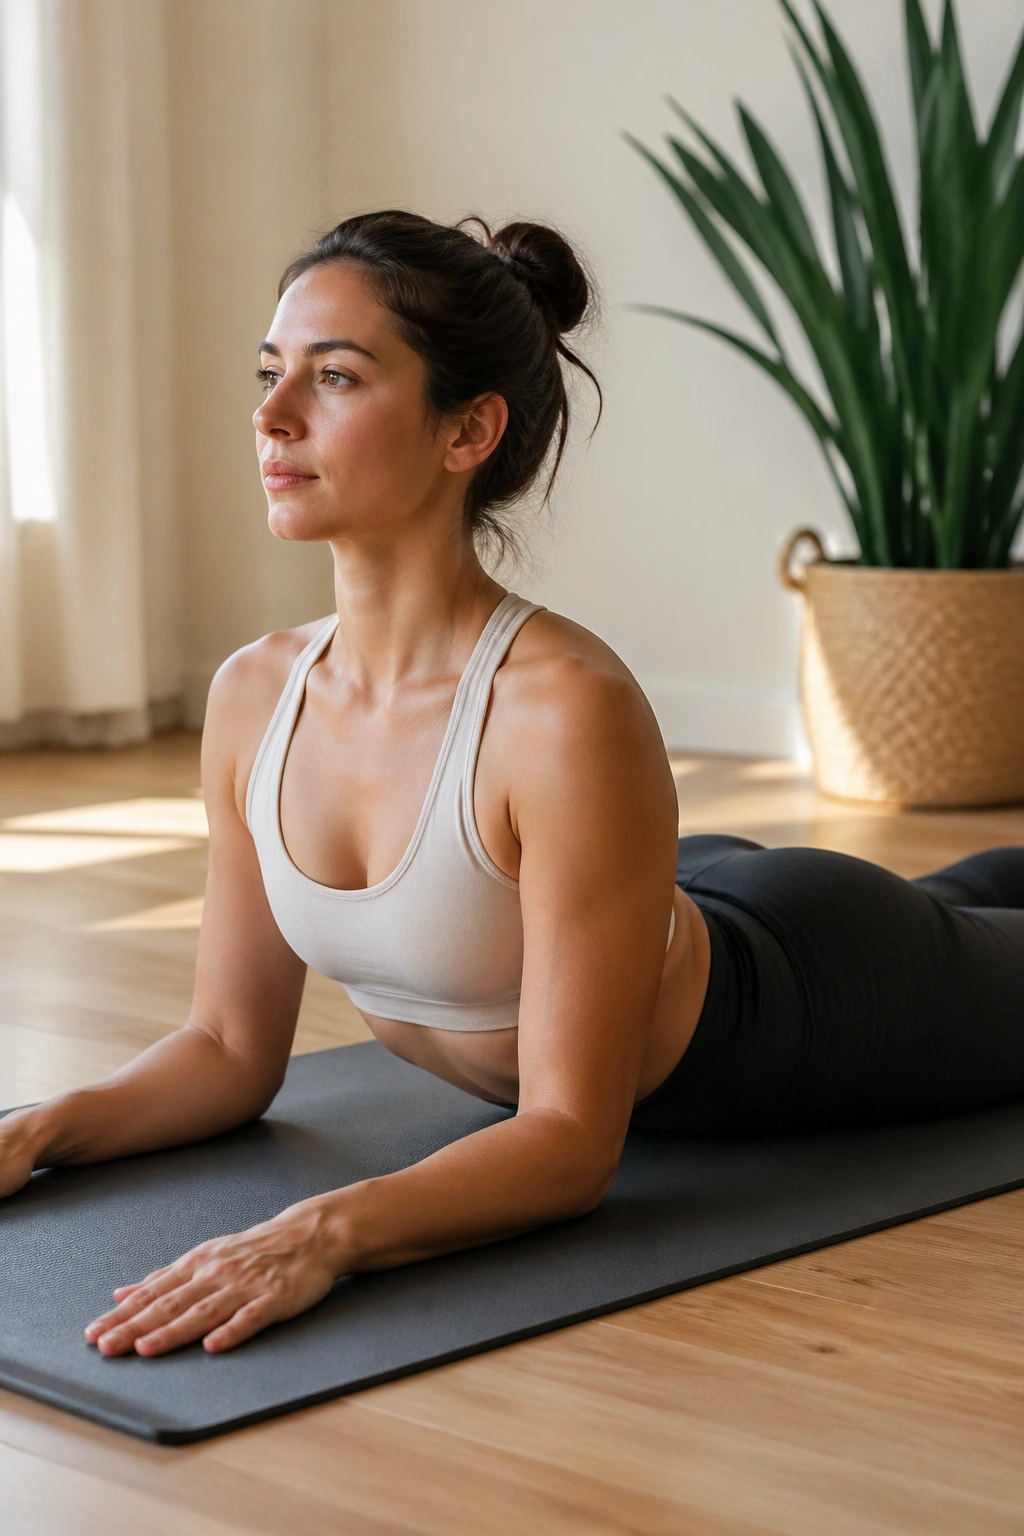
Sphinx is the quiet workhorse of upper-back opening. It’s low, steady, and honest. No drama. You lie on your stomach, place the forearms on the mat with elbows under or slightly in front of the shoulders, and press the forearms down to lift the sternum forward and up a little.
The lift should come from the chest and upper spine, not from yanking the ribs off the floor. Keep the pubic bone heavy. Let the shoulders soften away from the ears. That alone can change the shape of the upper back in a way most people feel immediately.
Sphinx works because it gives you extension without asking for a huge range. That matters. Big backbends can feel impressive and still do almost nothing useful if the low back takes the load. Sphinx keeps the curve small enough that the thoracic spine has to participate.
One breath at a time, the front of the body opens and the muscles between the shoulder blades have to wake up and support the shape. That’s the part people usually like best. It feels organized, not forced.
Hold it for 5 to 8 breaths. If the shoulders creep toward the ears, reset. If the neck feels compressed, lower the chest a little. The pose should feel like a long conversation with the floor, not a fight.
5. Cobra Pose for Active Chest Lift
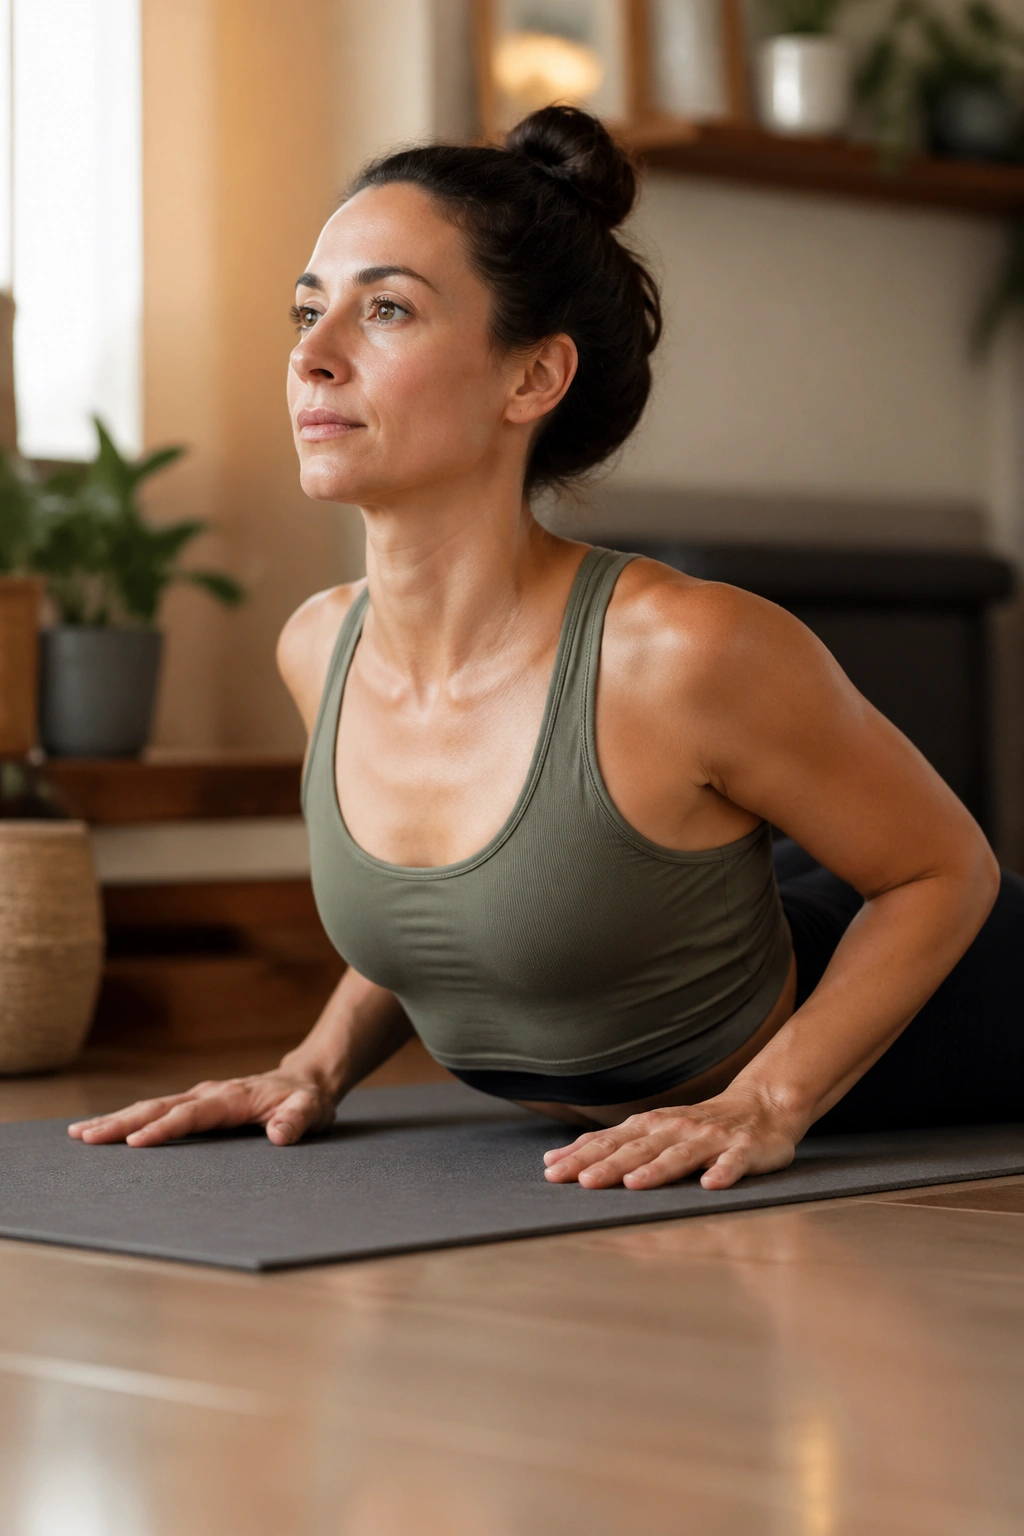
Cobra is the more active cousin of Sphinx. Unlike Sphinx, it asks you to generate the lift yourself instead of resting into forearm support. That makes it one of the best poses for building upper-back strength along with mobility.
Lie face down with the tops of the feet on the mat. Place the hands lightly under the shoulders and press the pubic bone down before lifting the chest a few inches. The lift should be modest. You are not trying to look like a king cobra. You’re trying to lengthen the front of the spine while the shoulder blades glide back and down.
Baby Cobra vs Higher Cobra
Baby Cobra is usually the smarter choice.
- Keep the elbows bent.
- Lift only until the hands feel light.
- Stop before the low back complains.
- Breathe into the upper chest, not the throat.
Higher Cobra is fine for some bodies, but it can become a lower-back pose fast. That’s why I prefer the lower version for most people who want an open upper back with some real control behind it.
The useful cue here is sternum forward, not chin up. If the chin leads, the neck gets cranky and the upper back checks out. If the chest leads, the thoracic spine does the work it was built to do.
Come down on an exhale. Rest between rounds. Two or three clean lifts are better than one tired one.
6. Locust Pose for Upper-Back Strength
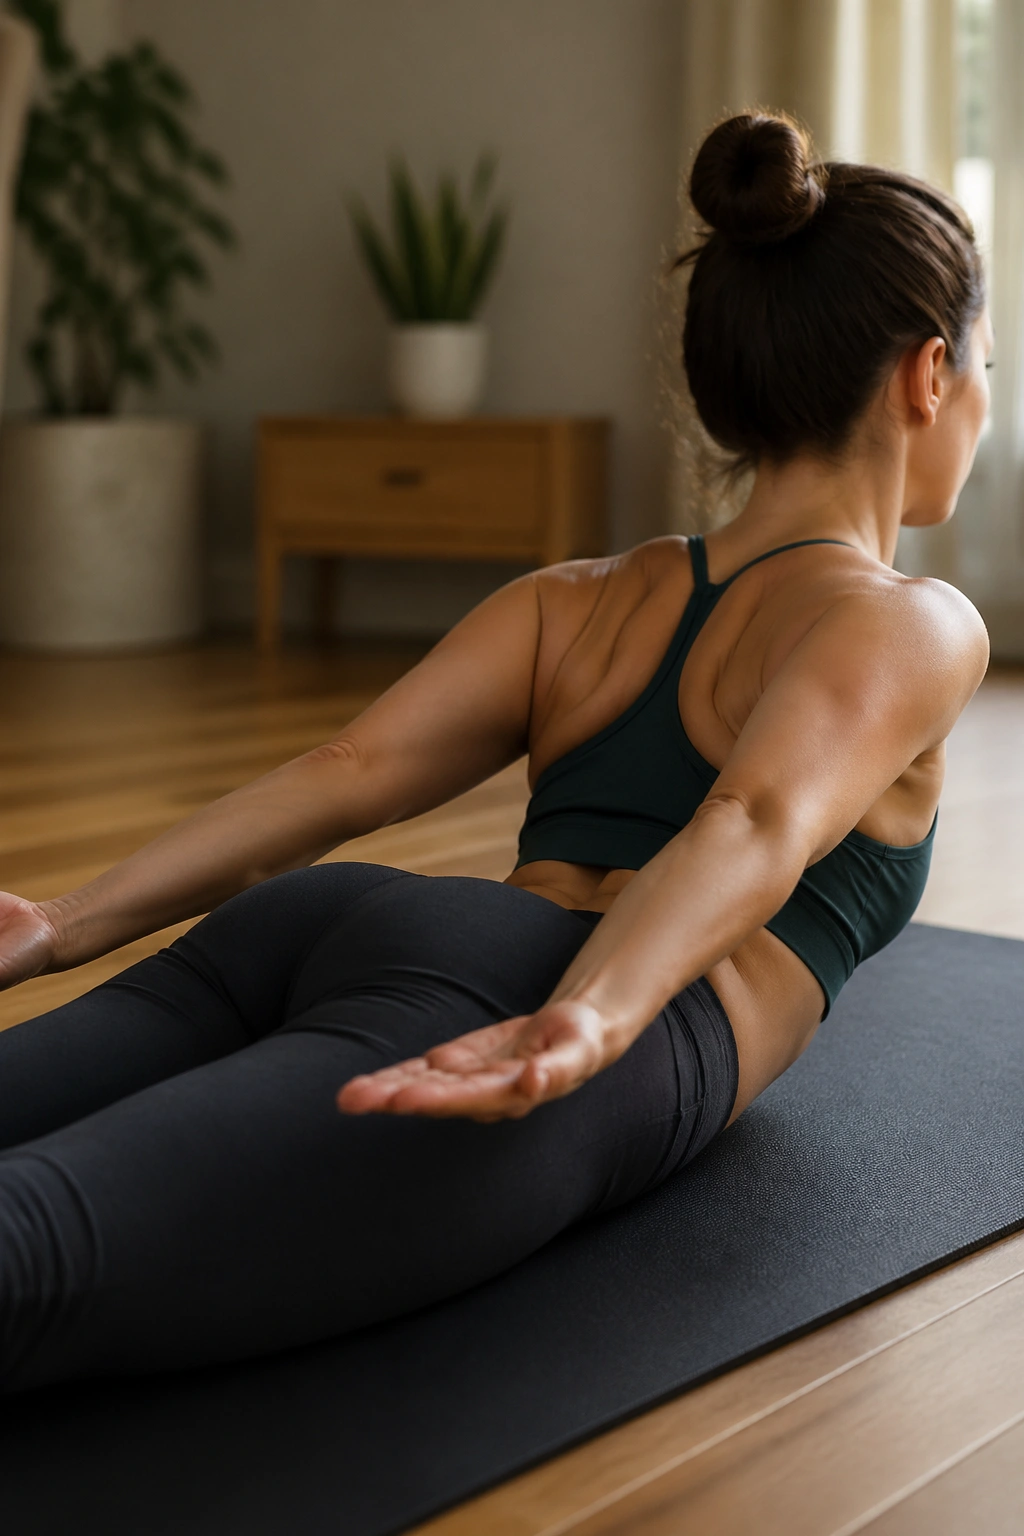
If you want an upper back that can hold itself up, Locust matters. It’s one of the best poses for the muscles that keep the shoulders from slumping forward all day: spinal extensors, mid and lower traps, rhomboids, and the glutes that help stabilize the chain behind you.
Lie on your belly with the arms by your sides, fingertips reaching toward the heels. On an inhale, lift the chest a little, maybe the legs a little, and lengthen from the crown of the head through the toes. Keep the neck long. If you can only lift an inch and still breathe, that’s enough.
Arm Options
- Arms by the sides: easiest and cleanest.
- Cactus arms: more work between the shoulder blades.
- Reaching forward: more length, more load, more challenge.
The point is not height. The point is effort without strain. A tiny lift held with control usually trains the upper back better than a big, sloppy one.
One thing I love about Locust is how quickly it exposes compensation. If the low back does all the work, you feel it. If the shoulders shrug, you feel that too. That feedback is useful. It tells you where your habits are.
Hold for 3 to 5 breaths, lower with control, and rest your forehead on your hands for a beat before repeating. Small, clean repetitions are the win here.
7. Dolphin Pose for Shoulder and Upper-Back Load
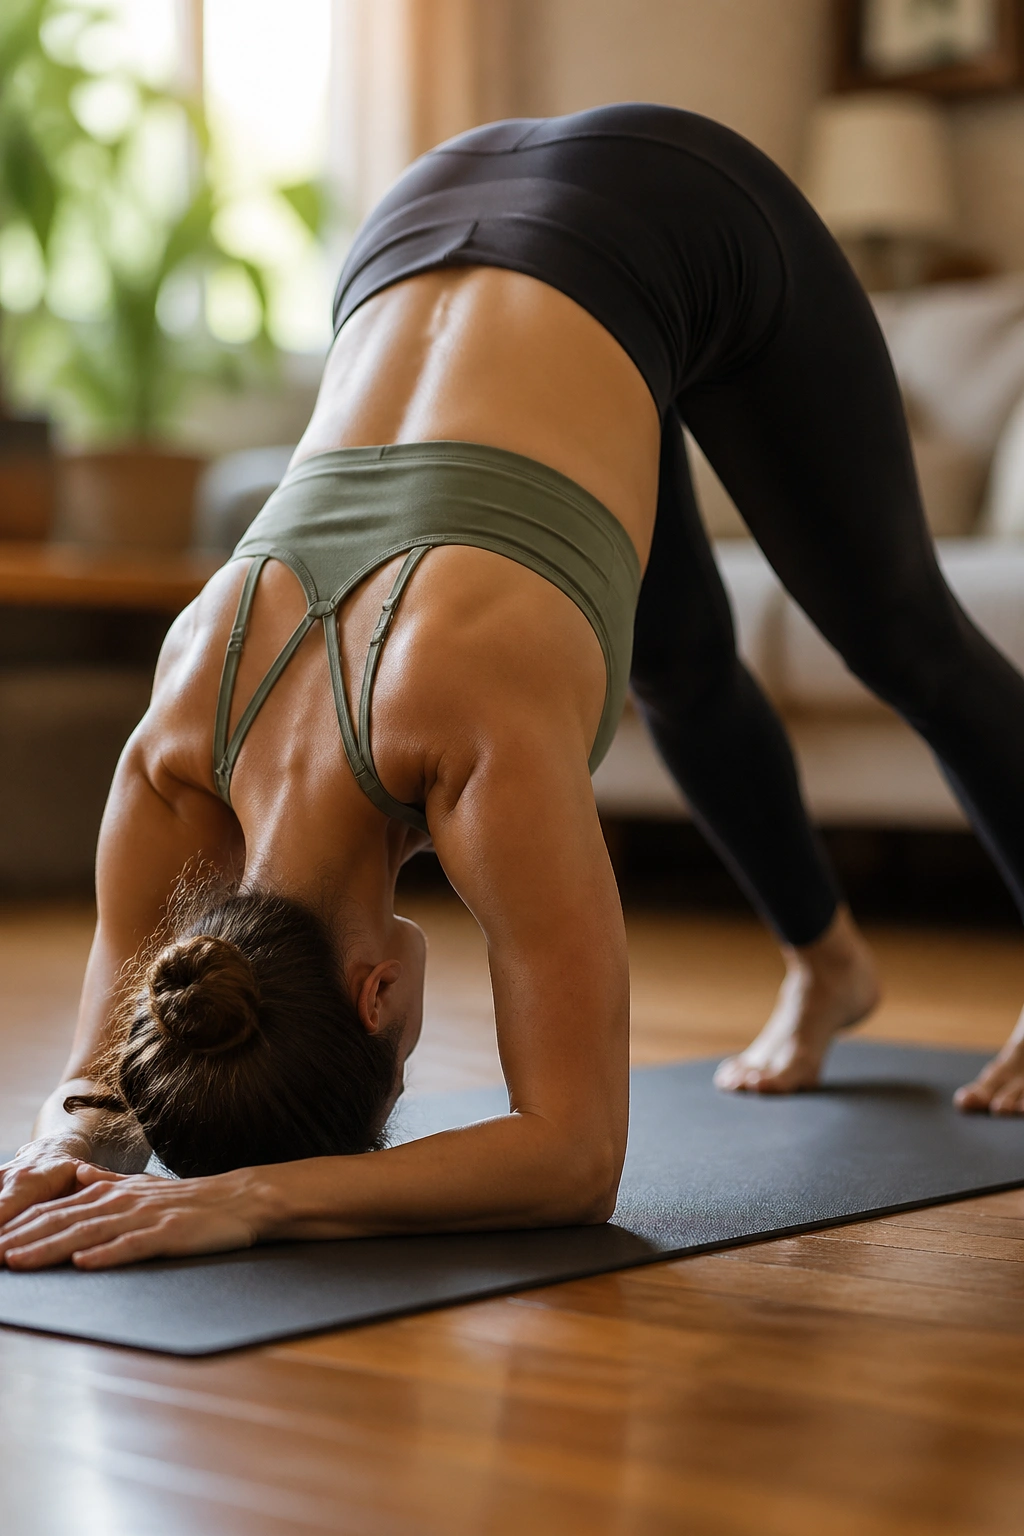
The first few breaths in Dolphin usually tell the truth. It’s one of those poses that looks calm from the outside and feels like honest work from the inside. Forearms on the floor, hips lifted, heels reaching back. The shoulders and upper back have to organize themselves fast.
Dolphin is excellent for the upper back because it teaches the shoulder girdle to hold weight without collapsing into the neck. Press the forearms down, lift the shoulders away from the ears, and let the upper back broaden. Walk the feet in only as far as you can keep the breath smooth. If the breath gets ragged, you’ve gone too far.
What Good Dolphin Feels Like
- Pressure through the forearms, especially the inner edges.
- Shoulder blades wrapping slightly around the ribs.
- A long line from elbows to hips.
- Hamstrings working, but not stealing the whole show.
Watch the neck. People often drop the head and jam the cervical spine. That makes the pose feel harder in a bad way. Keep the head between the arms, gaze back toward the feet, and keep the back of the neck spacious.
Dolphin is also a bridge to stronger arm balances and inversions, but even on its own it builds the kind of upper-back support that makes everything else feel steadier. Five breaths is plenty for most people. Ten if you’re having a good day. Fewer if your shoulders are already grumpy.
8. Forearm Plank for Scapular Strength
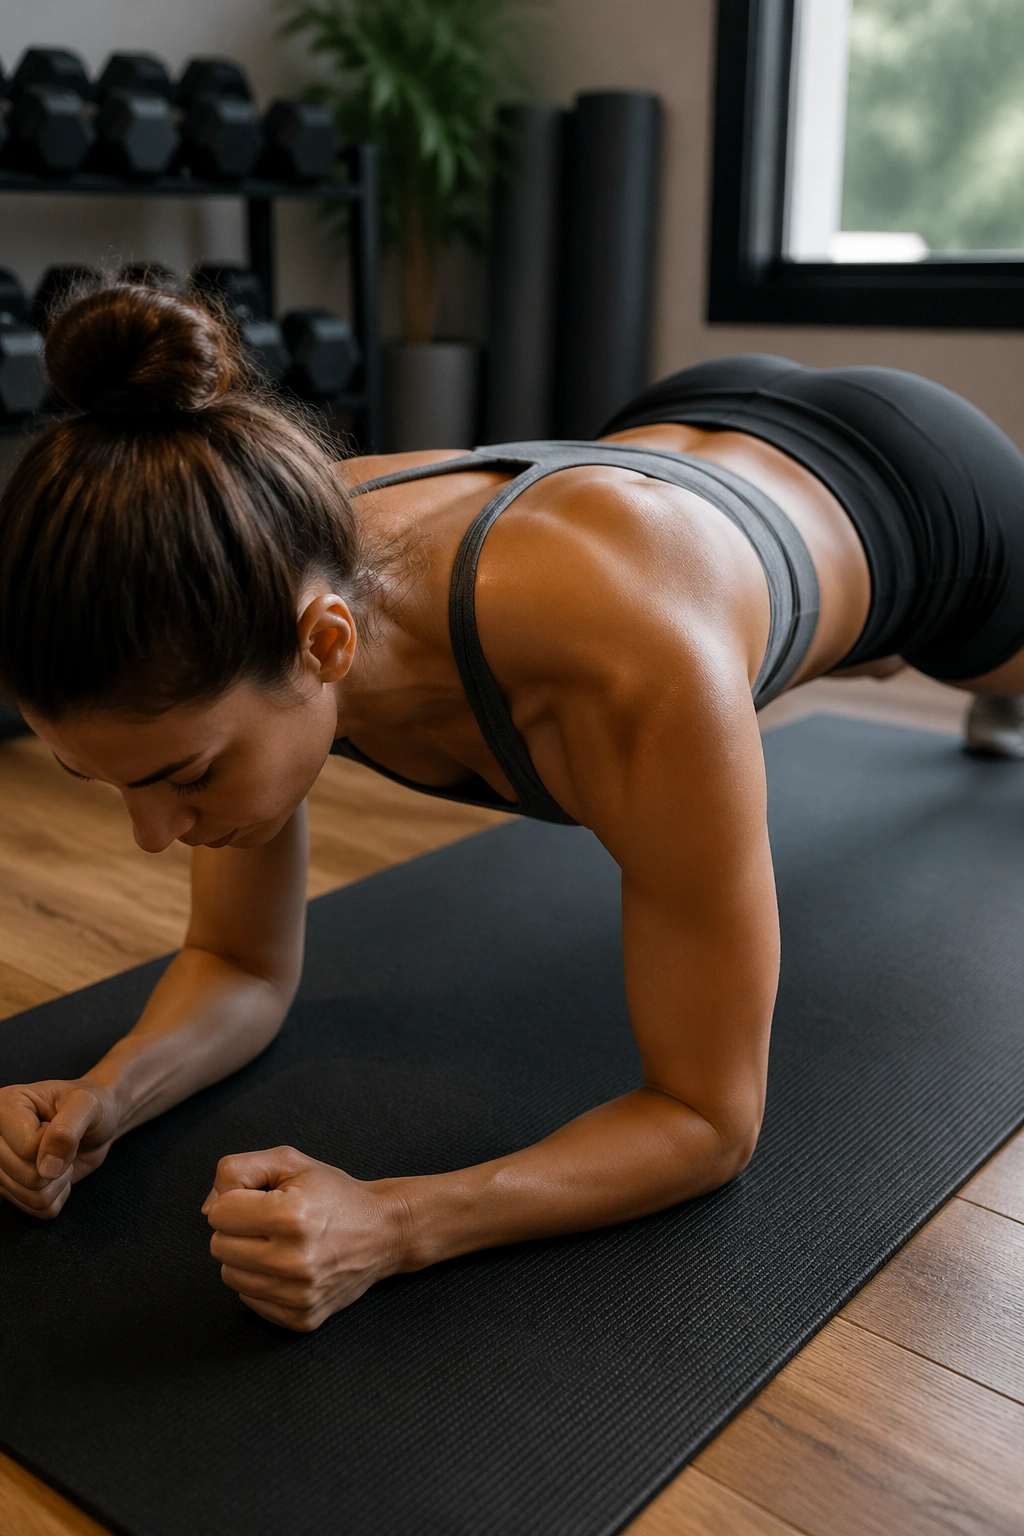
Plank is not just an ab exercise. If you do it well, it trains the upper back to stay wide and active while the front body resists sagging. That’s a big deal for posture. It’s also why a sloppy plank feels terrible in the shoulders.
Set up on the forearms with the elbows under the shoulders. Step the feet back, press the floor away, and keep the shoulder blades broad. The upper back should feel engaged, almost as if the space between the shoulder blades is gently puffing upward. Not hard. Just awake.
Hold for 15 to 30 seconds at first. Shorter is fine. Honestly, shorter is often better. If the lower back starts to dip or the shoulders creep toward the ears, stop the set, reset, and try again.
A clean plank teaches the serratus anterior to work with the traps, which is one of the quiet keys to a stable, open upper back. People rarely think about that muscle until it’s weak. Then the shoulder blades wing, the chest collapses, and every overhead shape feels shaky.
One sentence, because it matters: do not hang between the shoulder blades. Push the floor away and keep the shape alive.
9. Eagle Arms in Mountain Pose for the Back of the Shoulders
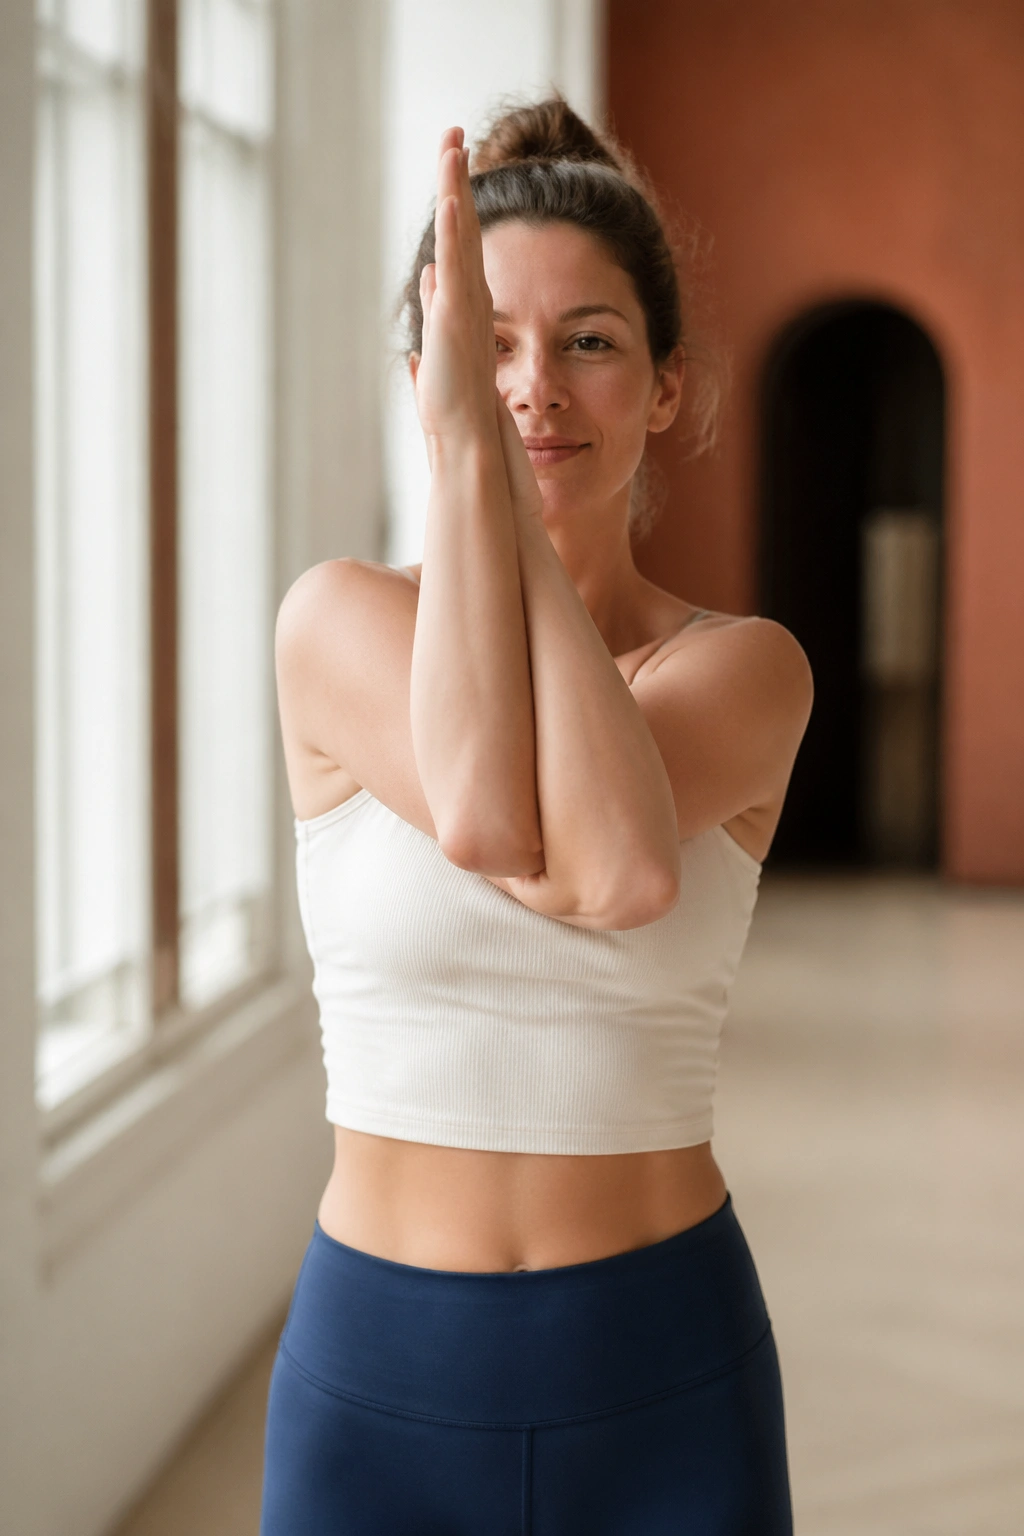
Want a pose you can do in a hallway, at a desk, or while waiting for water to boil? Eagle Arms in Mountain Pose is the one. It gives the back of the shoulders and the space between the shoulder blades a tidy, useful stretch without needing a mat.
Stand tall, cross one arm under the other, and either wrap the forearms or let the backs of the hands meet. Lift the elbows slightly and soften the chest. Then breathe. The upper back usually opens once the shoulder blades stop trying to clamp together.
Simple Cues
- Keep the ribs stacked over the pelvis.
- Let the elbows rise without shrugging the shoulders.
- Draw the chin slightly back, not down.
- Breathe into the back of the rib cage.
You can also do this seated, which makes it easier to hold for longer. Thirty seconds is enough to feel the change. A minute is better if the arms are really tight.
The beauty of Eagle Arms is that it reaches the part most people miss: the posterior shoulder, the rhomboids, and the upper traps when they’re tired from holding the head forward all day. It’s not flashy. It works.
If the full wrap feels crowded, hold the shoulders instead of the hands. Same idea. Less drama.
10. Cow Face Arms for Deep Shoulder Rotation
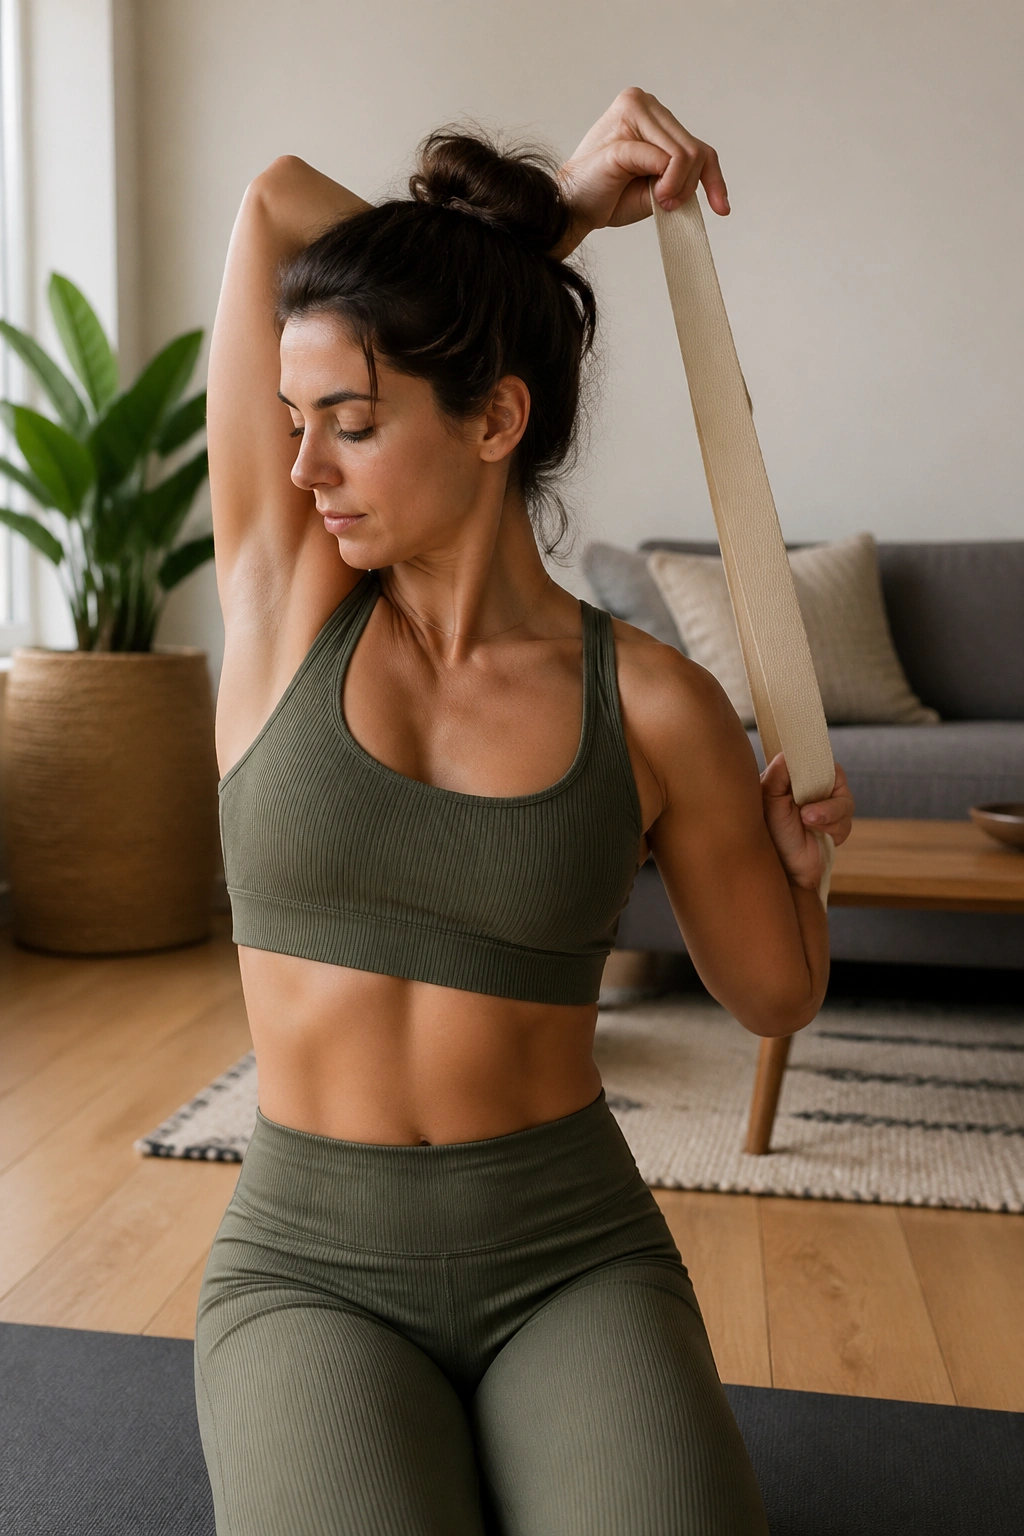
Unlike Eagle Arms, Cow Face Arms ask the shoulder joint to rotate more deeply. That’s why the pose can feel awkward at first. Awkward does not mean wrong. It usually means the tissues around the shoulder need time to remember they move more than one way.
Lift one elbow overhead and let the hand drop behind the neck. Reach the other arm behind the back from below. If the hands meet, fine. If they don’t, use a strap. A strap is not a cheat. It’s a bridge. The goal is to breathe into the outer shoulder, the triceps, and the back of the upper arm without forcing the joints together.
If the Hands Don’t Meet
- Hold a strap between the hands.
- Keep the lower ribs from flaring.
- Sit or stand tall instead of leaning sideways.
- Switch sides slowly; this pose often feels uneven.
That last part is normal. One shoulder is usually tighter than the other. Sometimes the difference is huge. You notice it fast in Cow Face Arms.
The pose helps the upper back because it opens the line from the back of the shoulder into the shoulder blade and lets the ribs move more freely. It’s one of those shapes that feels strange for five breaths and then suddenly feels obvious. That’s a good sign.
11. Chair Pose with Eagle Arms for Standing Strength
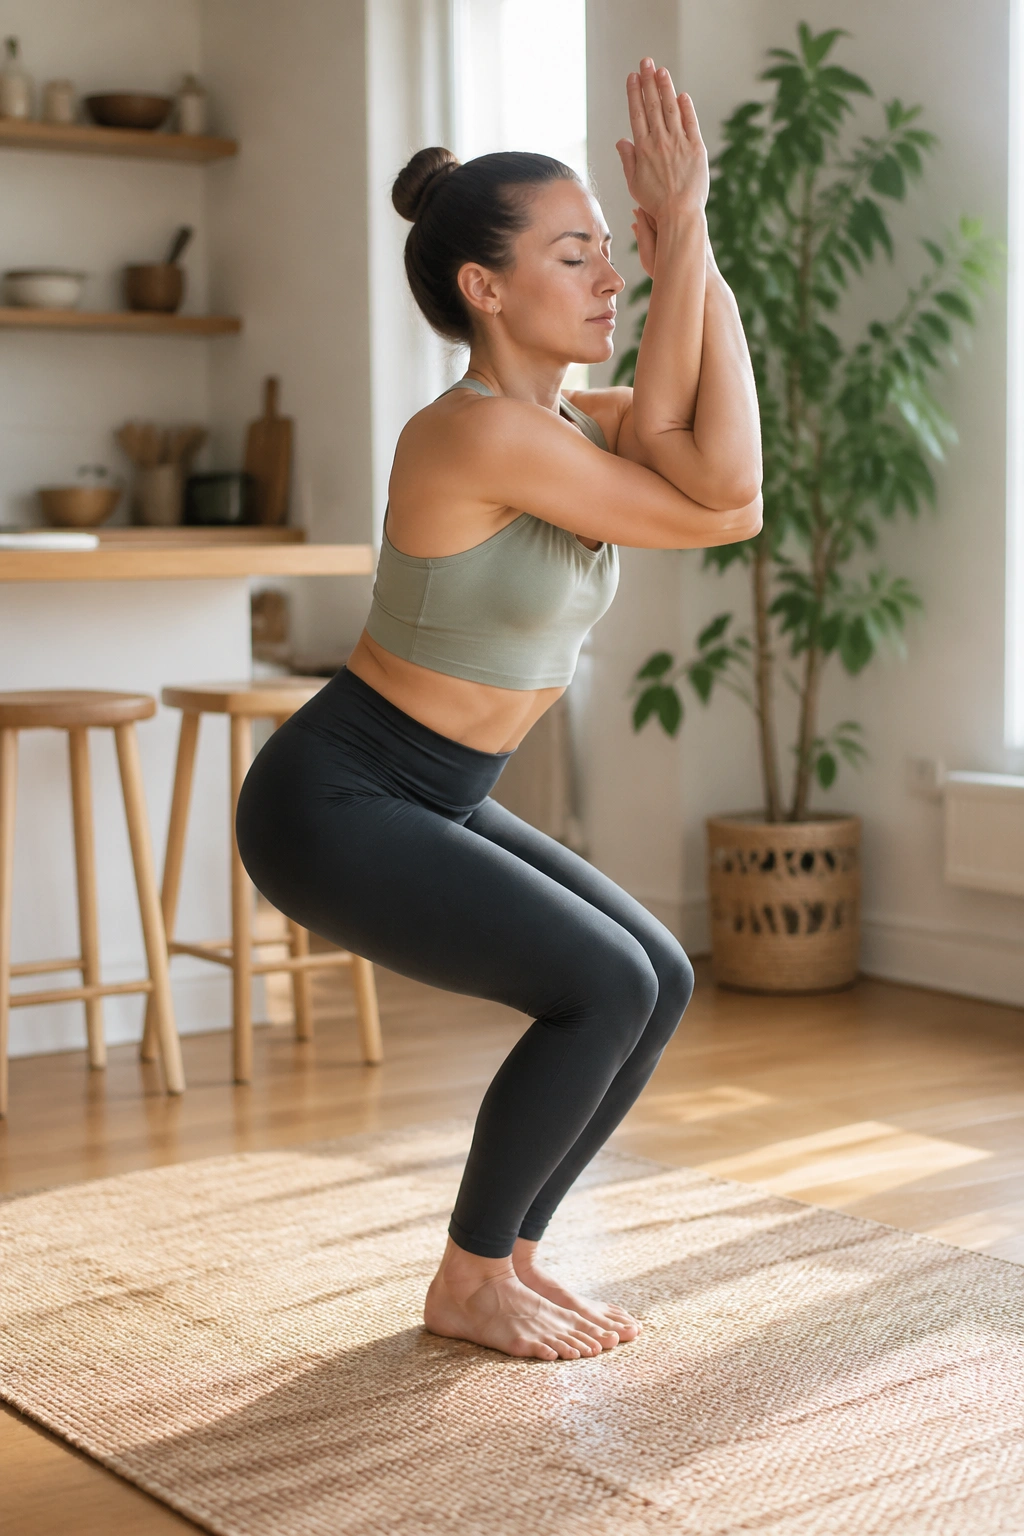
This is where posture work turns into work. Chair Pose with Eagle Arms adds leg strength and balance to the upper-back opening, which matters because a strong open upper back is not just about stretching. It also needs support from the rest of the body.
Sit the hips back as if you’re lowering into a chair, then wrap the arms into Eagle. Keep the weight in the heels and the chest lifted enough to keep the spine long. The elbows can rise a little, but don’t let the shoulders crawl toward the ears.
The legs will probably burn before the upper back gives up. That’s normal. The pose asks the whole system to stay organized, and that’s what makes it useful. You’re training the body to keep the chest open while the lower body works.
A short hold of 20 to 40 seconds is plenty. Repeat it two or three times if you want more heat. If the knees collapse inward, stand up and reset. If the neck gets tense, lower the elbows and soften the jaw.
Chair with Eagle Arms is a strong reminder that upper-back work doesn’t have to stay on the floor. It can live in standing shapes too, which makes the gains easier to carry into daily life.
12. Bound Side Angle Pose for Rib-Cage Rotation
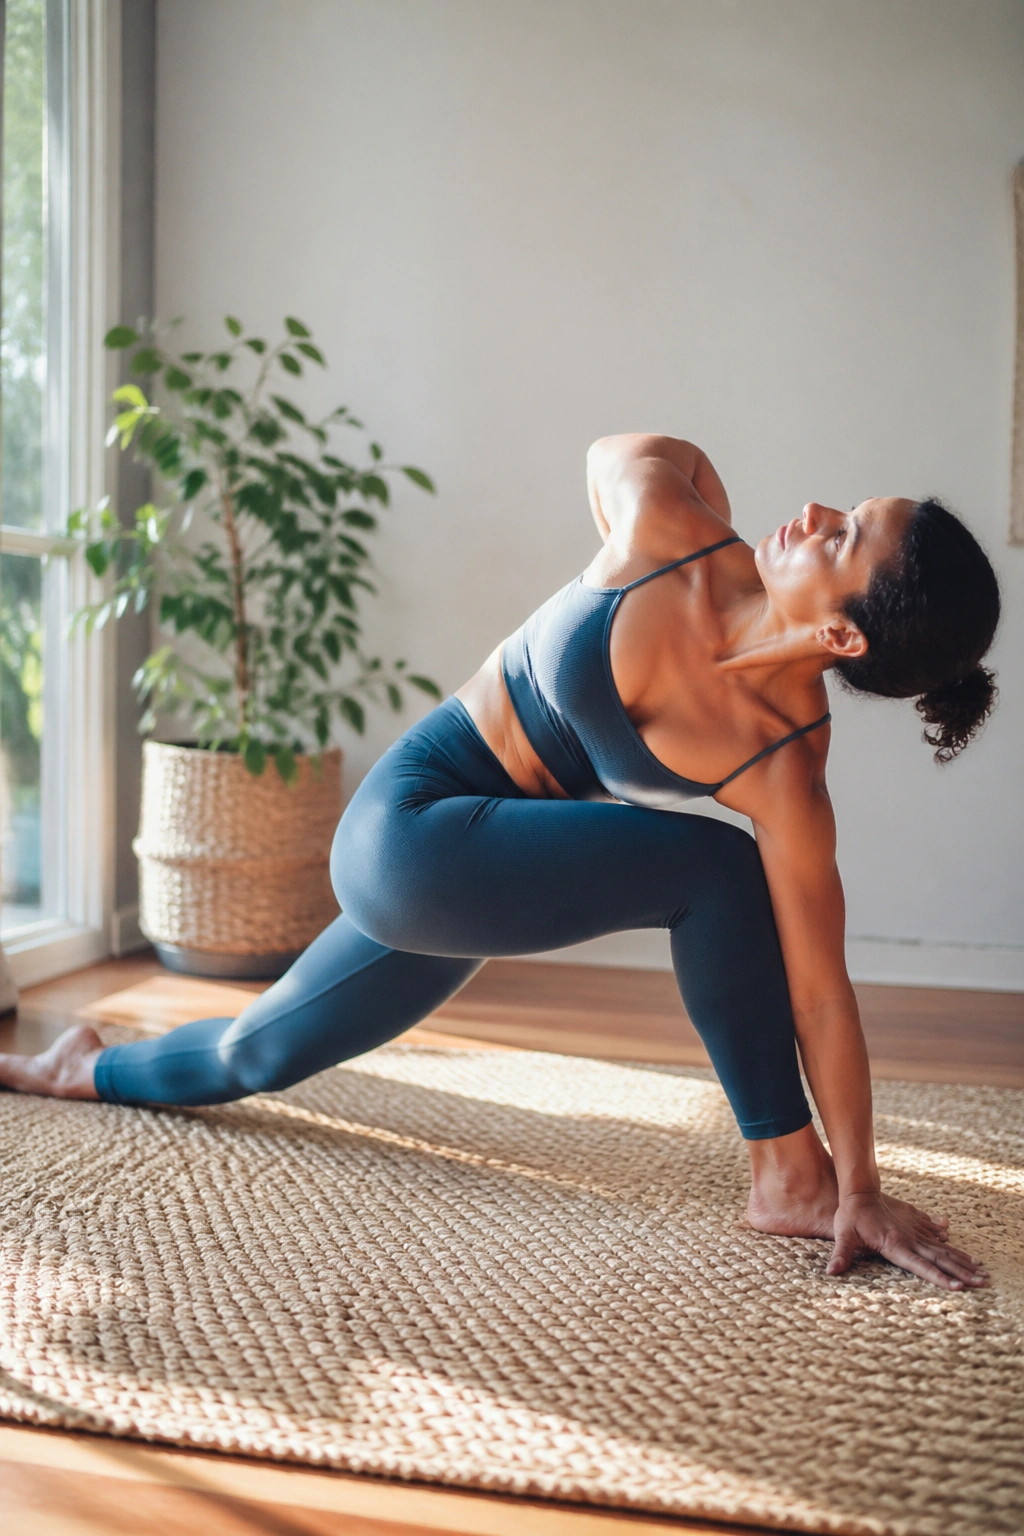
Reach, twist, and bind if it’s there. Bound Side Angle Pose does a bit of everything, which is why it’s so useful for the upper back. The front body opens, the ribs rotate, and the shoulder line gets a chance to move in a way that feels more athletic than passive.
Set up in a lunge, turn the torso, and place the lower forearm on the thigh or bring the hand to the floor or a block. The top arm can reach over the ear or wrap behind the back if the bind is available. Keep the chest broad, but don’t force it open by dumping into the lower back.
If the Bind Is Too Much
- Stay with the top arm reaching forward or overhead.
- Use a block under the lower hand.
- Keep the back heel down only if it helps your balance.
- Look down if the neck feels crowded.
The useful work here happens in the ribs. That’s the detail people skip. When the rib cage rotates well, the upper back looks and feels freer. When only the arm moves, the twist never really lands.
This pose is also a good place to notice whether your chest is collapsing toward the floor. If it is, shorten the stance and make the shape smaller. A tidy shape teaches more than a dramatic one.
13. Half Lord of the Fishes Pose for Thoracic Twisting
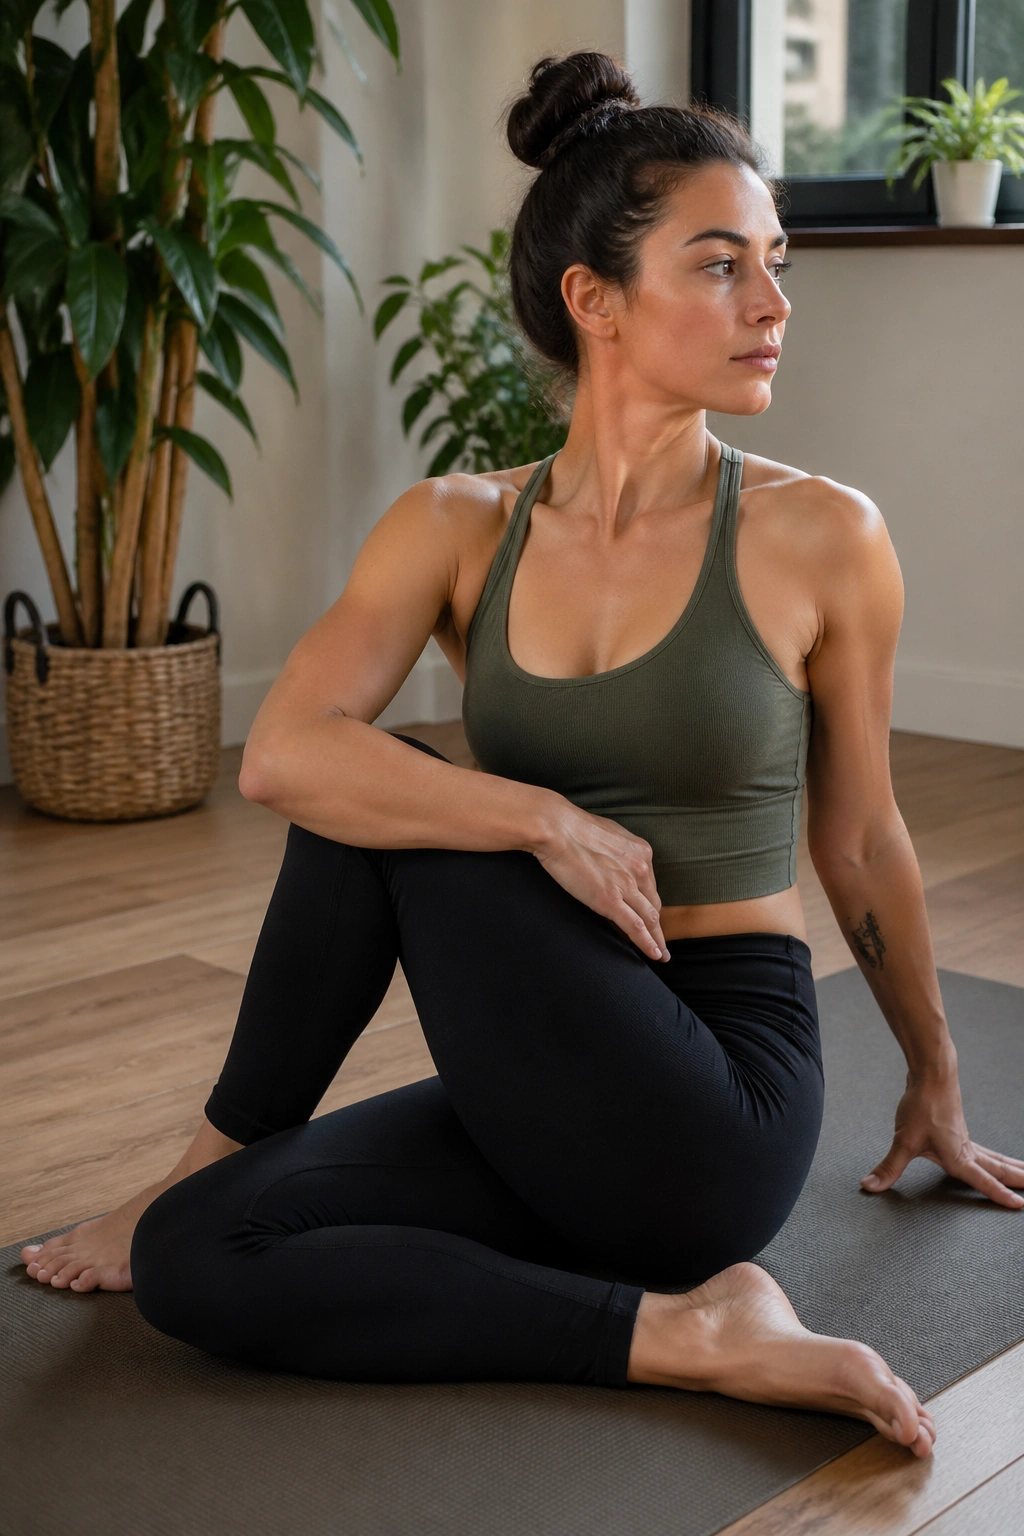
A good twist is quieter than people expect. Half Lord of the Fishes gives the thoracic spine rotation without asking the low back to do all the work, which is exactly why it belongs in an upper-back sequence.
Sit on a blanket if your hips are tight. Stack one leg over the other, sit tall, and twist from the ribs before the neck follows. The hand behind you is there for support, not leverage. If you crank on the knee or yank the head around, you’ve missed the point.
How to Keep the Twist Honest
- Grow tall on the inhale.
- Rotate on the exhale.
- Keep both sit bones heavy.
- Let the gaze be the last thing to move.
The back of the rib cage should feel like it has space to breathe. That’s the main event. If the twist feels compressed in the low back, come out a little and sit on a thicker prop. The upper back usually rotates better when the pelvis is stable and slightly lifted.
This is a shape I like after more open poses like Sphinx or Puppy, because the front body is already awake. Then the twist has someplace to go. Without that prep, many people force the motion and wonder why it feels stuck.
14. Bridge Pose for Lift Through the Upper Back
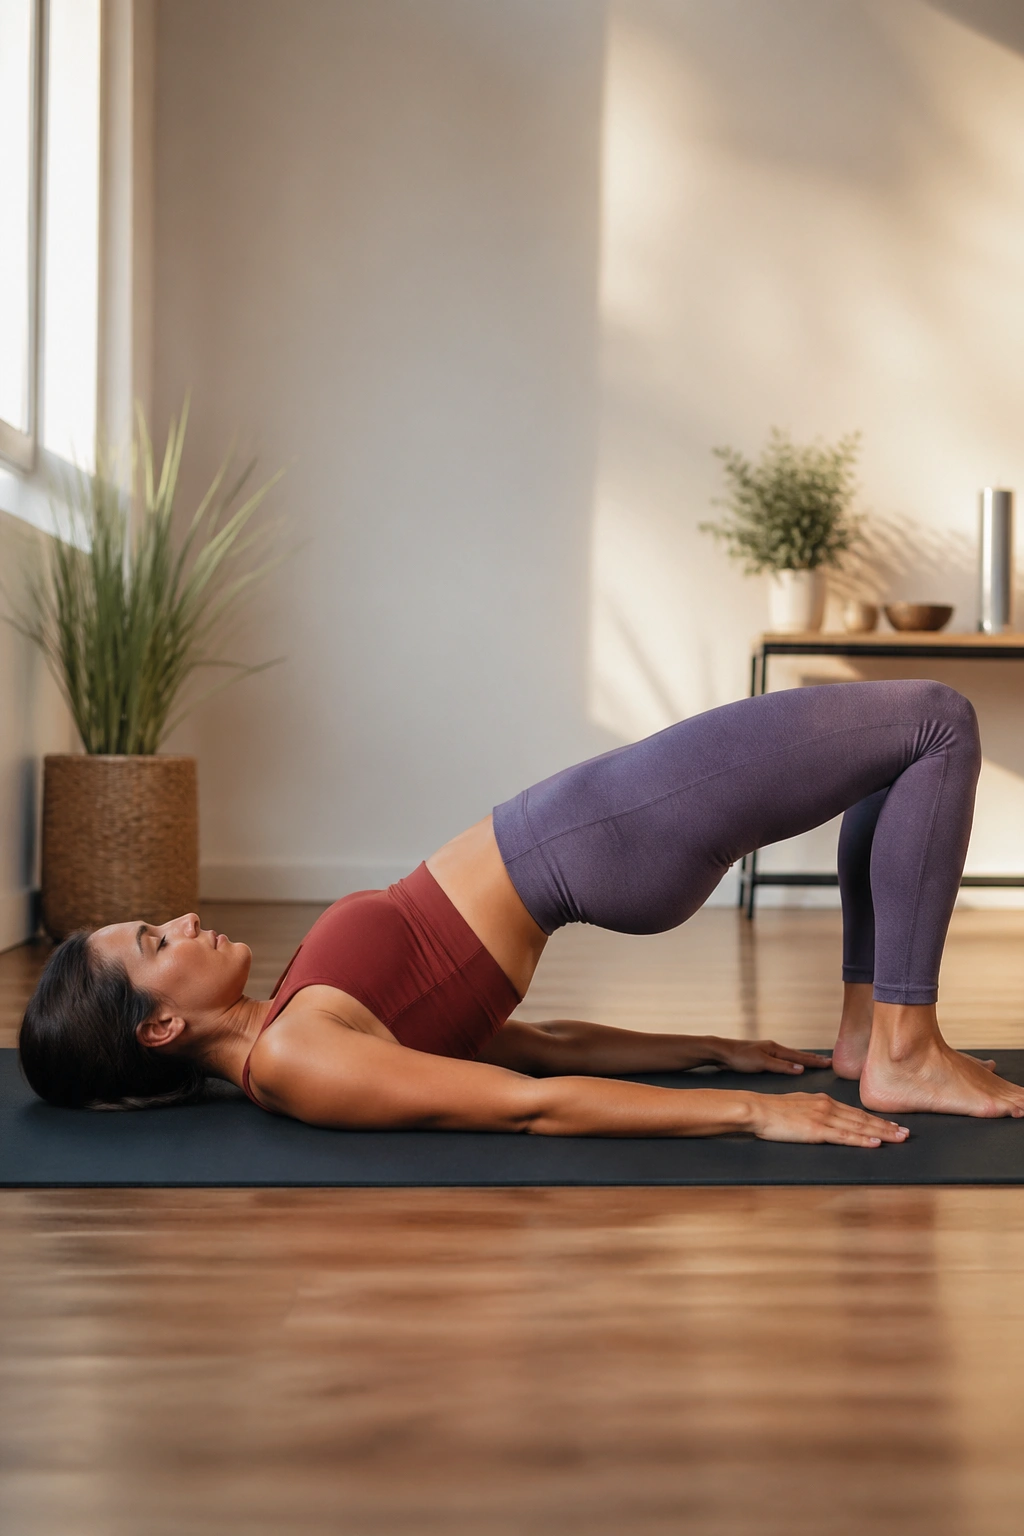
Bridge is easy to underestimate. People look at it and assume the hips are doing all the work. They’re not. A good Bridge asks the upper back to support the lift so the chest can open without the neck turning into a hinge.
Lie on your back with the feet hip-width apart and close enough that the fingertips can graze the heels. Press the feet down, lift the hips, and roll the shoulders slightly underneath you. The sternum should move toward the chin a little, but the chin stays relaxed. If the neck feels squeezed, back out.
Bridge is one of the cleanest ways to train extension with support. The glutes help, the hamstrings help, and the upper back holds the lift steady enough that the front of the chest can open. That combination matters. It’s the difference between a loose backbend and a stable one.
You can stay for 5 breaths, lower, and repeat for 2 or 3 rounds. If you interlace the hands under the body, do it only if the shoulders feel spacious. Don’t force the clasp. That tends to pull the shoulder heads forward and makes the upper back work harder in a bad way.
A good Bridge feels firm, warm, and oddly calming. It has structure.
15. Supported Fish Pose to Finish Open and Breathing Easier
A rolled blanket under the upper back changes the whole shape of the breath. Supported Fish Pose is the quiet finish that lets all the opening work settle into the body instead of floating off into nowhere. It opens the front of the chest, encourages the thoracic spine to extend, and gives the shoulder blades somewhere to rest.
Place a folded blanket or yoga block under the upper back, just below the shoulder blades, then let the head rest back if it feels comfortable. Arms can relax out to the sides or rest on the belly. Keep the knees bent if the low back likes that better. If the neck feels too sharp, lower the prop and make the arch smaller.
How to Settle Into It
- Stay for 1 to 3 minutes.
- Let the exhale get longer than the inhale.
- Keep the jaw soft.
- Breathe into the side ribs and collarbones.
This is not about a huge backbend. It’s about letting the upper body remember what open feels like when it isn’t working so hard. Some people feel a sweet stretch across the chest. Others feel their breath widen in the back ribs. Both are good signs.
If you want a simple upper-back sequence, repeat Cat-Cow, Thread the Needle, Locust, and Supported Fish. That four-pose loop gives you motion, rotation, strength, and rest. The upper back usually likes that mix more than it likes extremes. And honestly, most bodies do too.
