



Tight traps can make a simple shoulder stretch feel like a fight. One moment you’re trying to relax, the next your neck is creeping up toward your ears and your breath gets shallow. That’s the annoying part about upper trapezius tension: it doesn’t always show up as pain. Sometimes it feels like stiffness, a dull pull at the base of the skull, or that familiar sense that your shoulders have forgotten how to drop.
The fix usually isn’t to yank harder. It’s to give the shoulders a few different kinds of movement — some gentle flexion, some side-bending, some chest opening, some time under gravity, and a little patience. Good shoulder yoga poses don’t just stretch the obvious spot. They change the way your shoulder blades glide, how your ribs stack, and how your neck stops doing extra work it never asked for in the first place.
If your traps flare up after desk work, long drives, lifting, stress, or a day spent looking down at a phone, you’re in familiar company. The upper trapezius is a hard worker, but it also likes to take over when the rest of the shoulder girdle gets lazy. That’s why the best shoulder stretches for tight traps are rarely dramatic. They’re usually small, clean, and oddly satisfying.
A quick caution before you start: if you have sharp pain, tingling, numbness, or pain that shoots down the arm, skip the casual stretching and get it checked out. For ordinary tightness, though, these poses can make a real difference. Start with a few of them, move slowly, and let the exhale do some of the work.
1. Cat-Cow with Scapular Glide
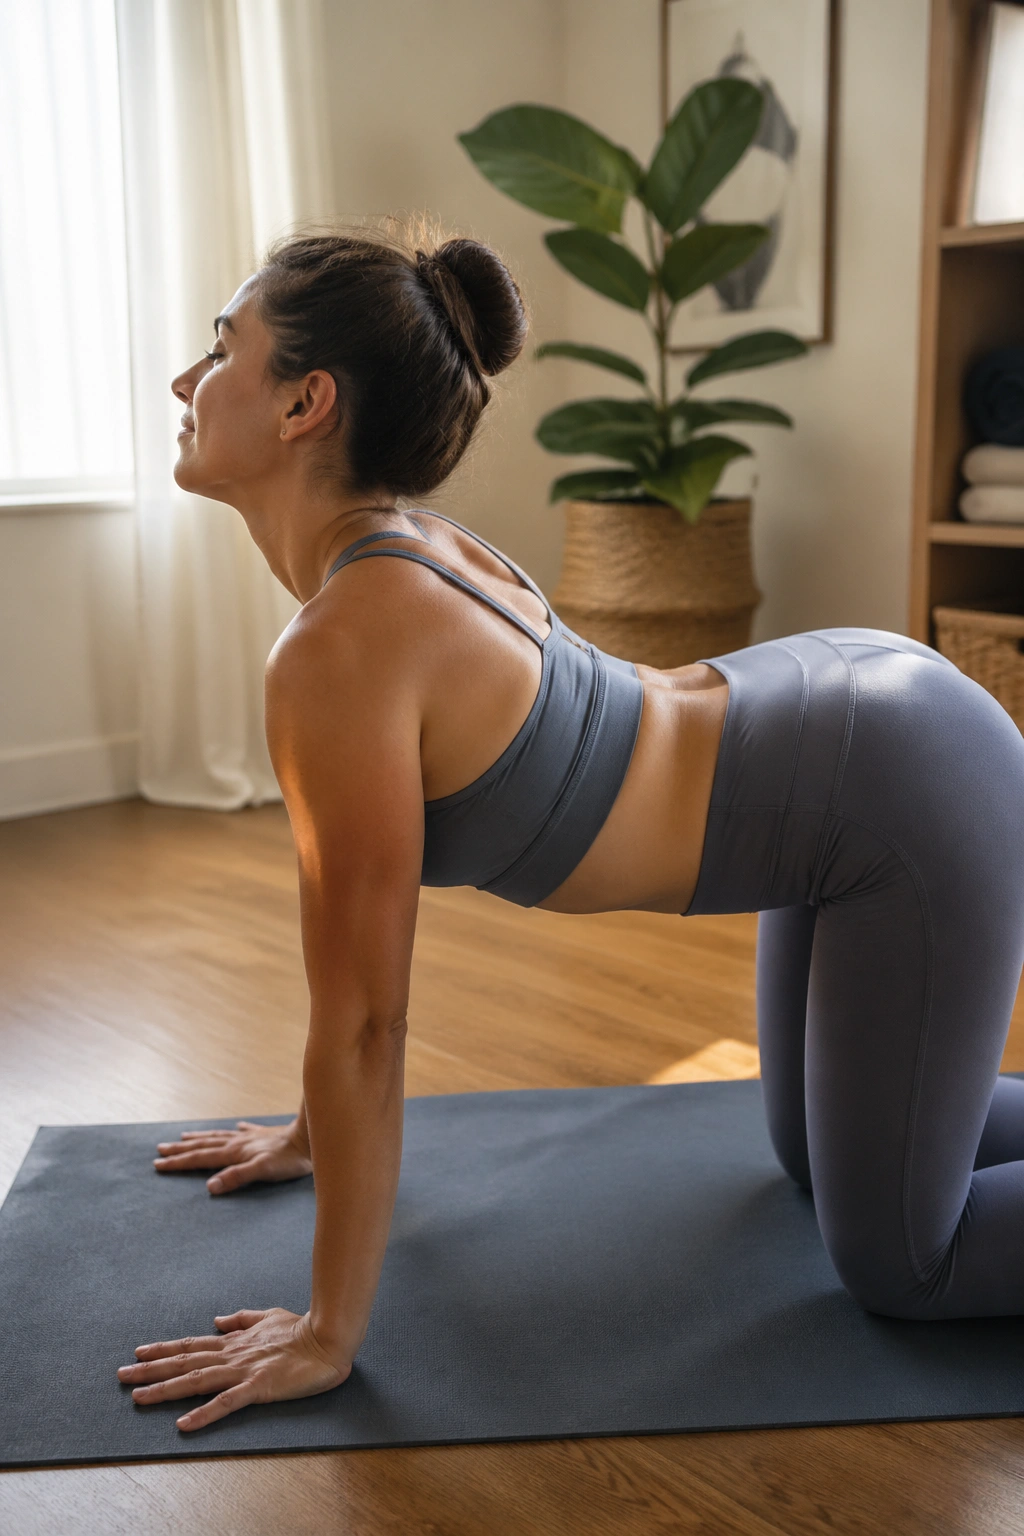
Cat-Cow is one of those poses people rush through, which is a shame. Done well, it’s a small reset for the whole upper back, especially when you add a clear shoulder-blade glide instead of just waving the spine around.
Why It Works
On the “cat” shape, you press the floor away and let the shoulder blades spread. On the “cow” shape, you let the chest come forward and the collarbones widen. That back-and-forth helps your traps stop bracing so hard, because the shoulders get to move instead of hold one fixed position.
Keep your hands under your shoulders and your knees under your hips. Move slowly enough that you can feel the difference between shrugging and actively pushing the mat away. That tiny detail matters.
- Do 6 to 8 slow rounds.
- Keep the elbows soft, not locked.
- On cat, exhale fully and let the upper back round.
- On cow, lift the chest a little, not the chin.
Tiny cue, big payoff: keep your neck long. If your head is leading the movement, your traps will jump right back in.
2. Thread the Needle
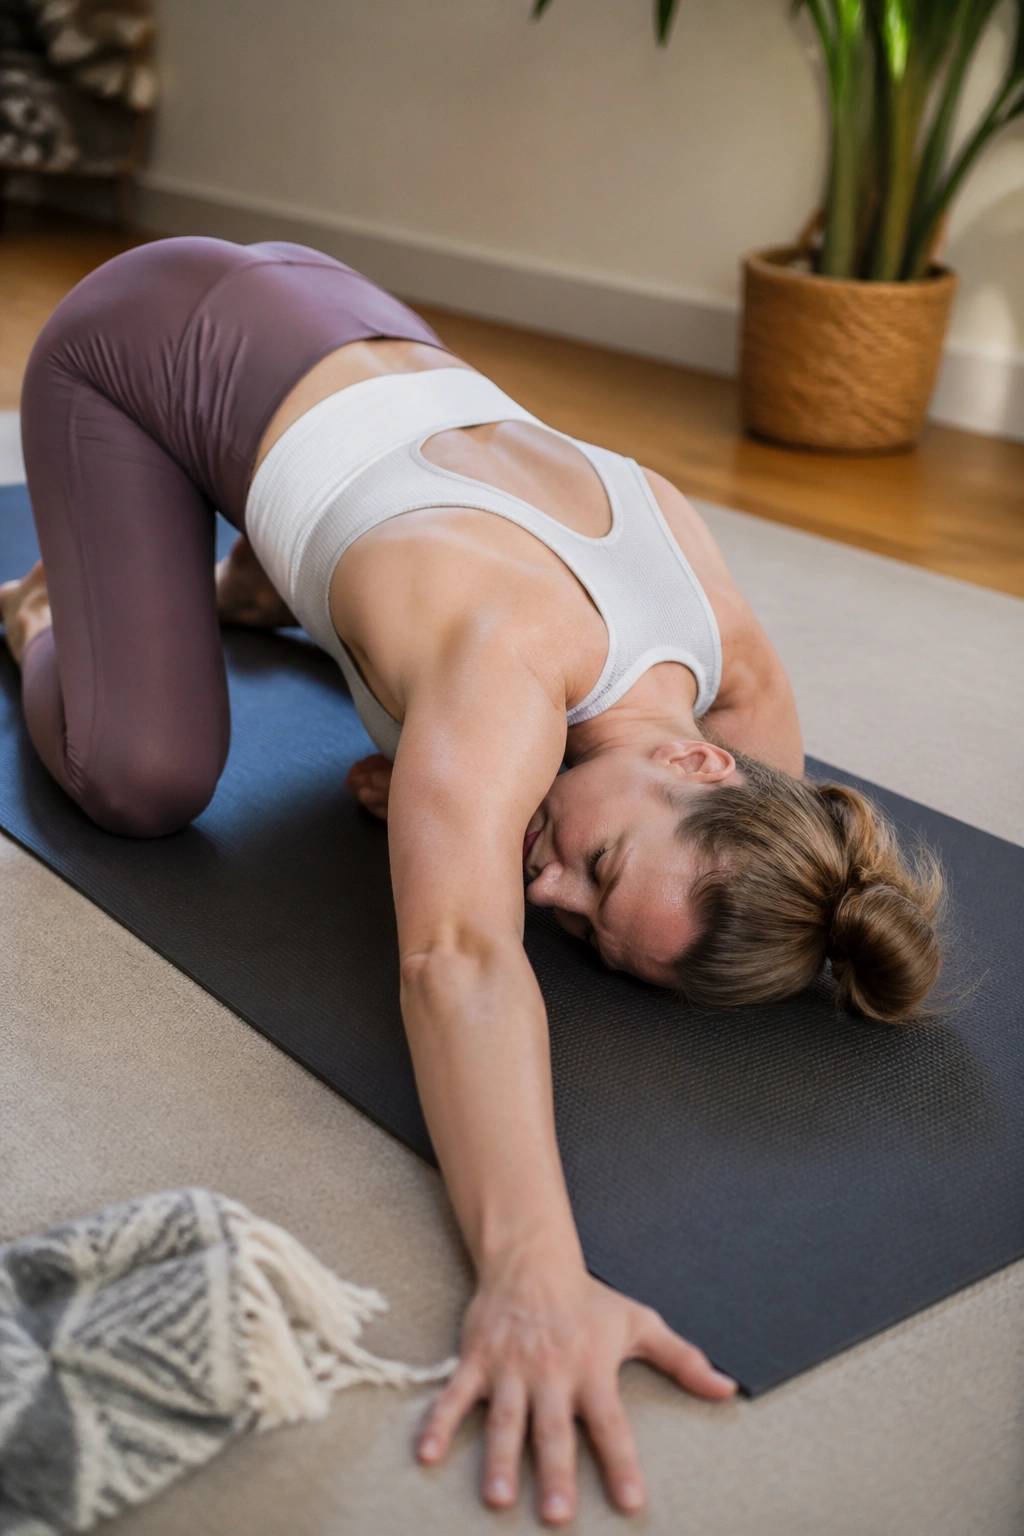
If your upper traps are angry, this is often the first pose that makes them unclench. It’s direct, plain, and a little humbling in the best way.
Start on all fours. Slide your right arm under your left arm, palm up, and let your right shoulder and temple come toward the floor. The stretch usually lands across the back of the shoulder blade, the rear delt, and the side of the neck if you’ve been carrying tension there for a while.
The trick is not to force depth. People get greedy here and shove too far. Bad idea. Keep the hips stacked over the knees, and if the shoulder doesn’t reach the floor, place a folded blanket or block under it so you can stay there long enough to breathe.
How to use it
Take 4 to 6 slow breaths on each side. Press lightly through the supporting hand, then back off and let gravity do the rest. You want a stretch that feels spreading and warm, not sharp or pinchy.
If one side feels wildly tighter than the other, don’t “fix” it with extra force. Just notice it. Tight traps love to hide asymmetry.
3. Puppy Pose
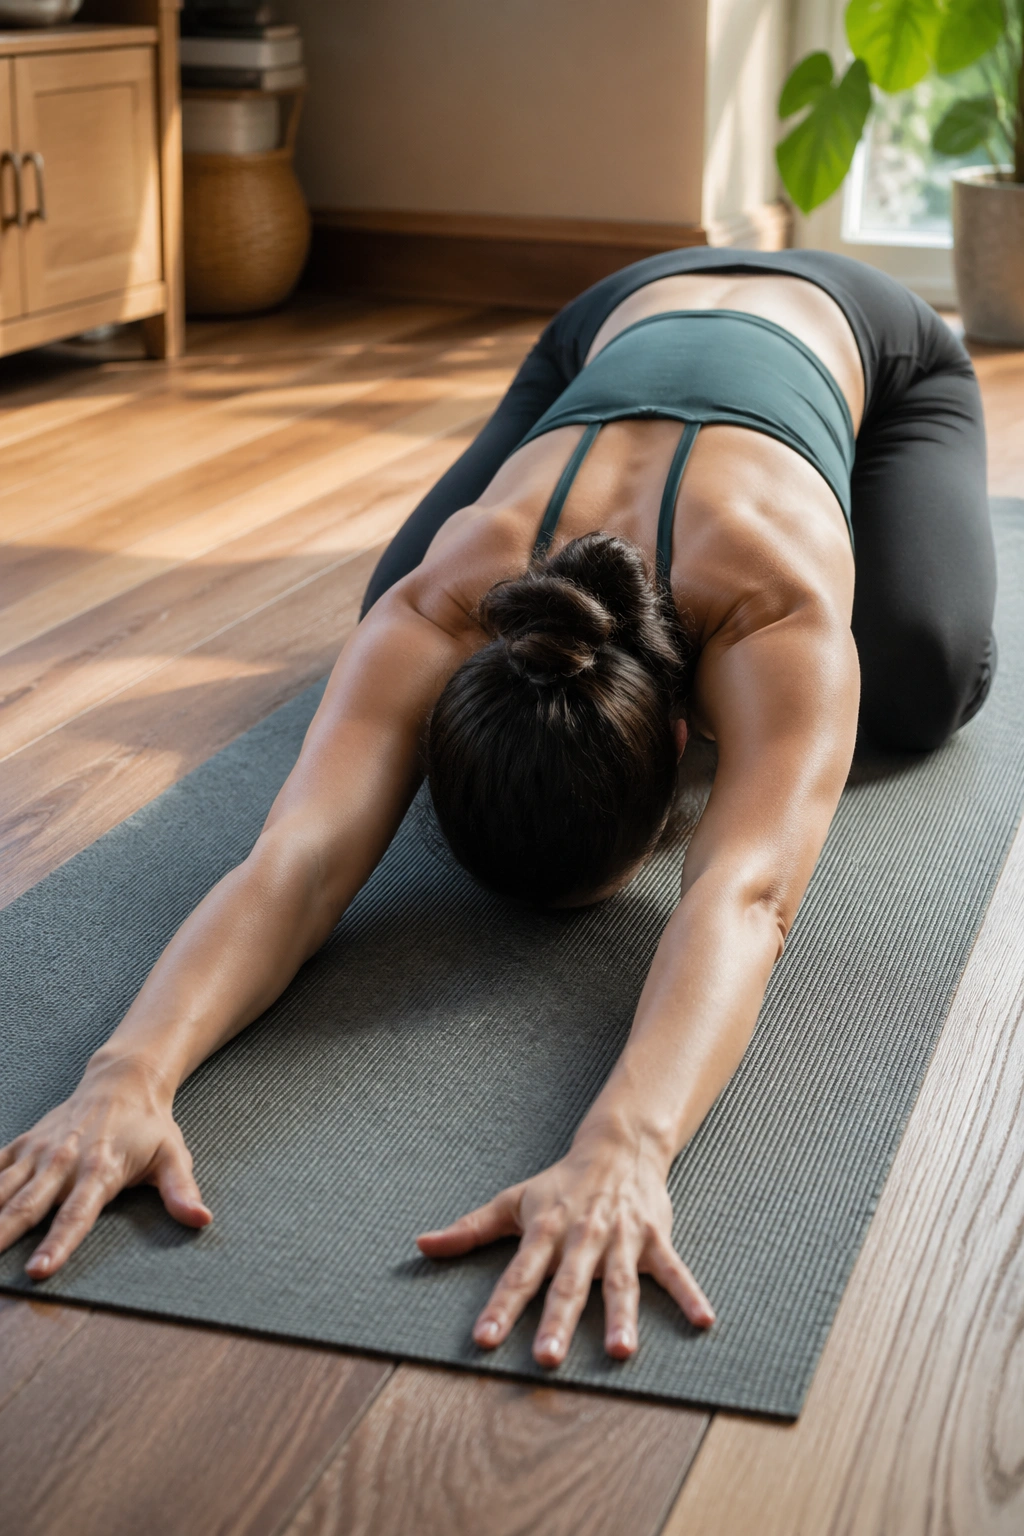
Why does Puppy Pose hit tight shoulders so hard? Because it asks for overhead reach without the full load of a standing stretch, and that changes everything.
From hands and knees, walk the hands forward and sink the chest toward the mat while keeping the hips above the knees. It looks simple. It isn’t, not if your shoulders are locked down from hours of hunching. The arms are reaching, the chest is opening, and the upper traps often realize they can let go only after a few breaths.
What to watch for
If the lower back takes over, walk the hands back a little. If the neck feels cranked, rest the forehead or chin on a block. And if you feel the ribs flaring hard, soften that. You want length, not collapse.
- Hold for 5 to 8 breaths.
- Keep the elbows straight but not rigid.
- Slide the shoulders away from the ears.
- Let the ribs stay heavy.
I like this pose as a middle-ground stretch. It’s deeper than Child’s Pose, but less aggressive than forcing a bind or hanging weight into a cold shoulder. Useful. Quietly useful.
4. Extended Child’s Pose with Side Reach
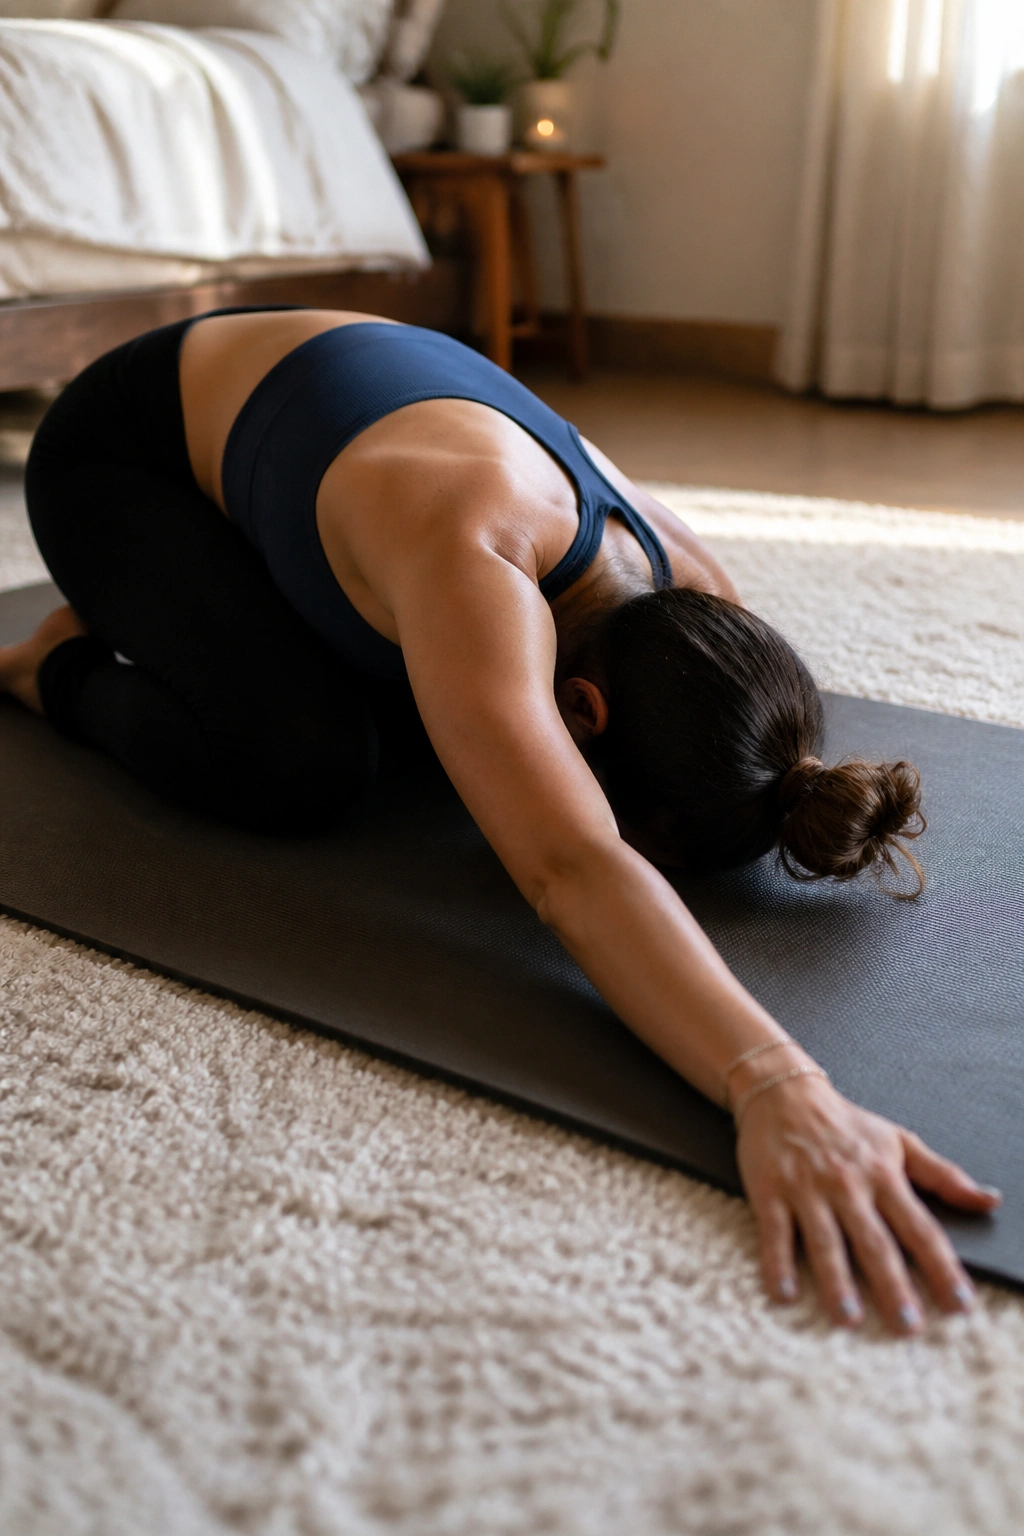
When one shoulder feels higher than the other after a long day, this is the pose I reach for first. It’s not flashy, and that’s part of why it works.
Set up in Child’s Pose, then walk both hands over to the right until you feel the whole left side body open from the hip up through the outer ribs and shoulder. That side line matters more than people think. Tight traps often show up with a stiff rib cage, and once the ribs can move, the shoulders stop acting like a clamp.
Breathe into the back of the ribs. Seriously. Most people breathe into the front and wonder why the upper back stays stuck.
- Keep the hips heavy on the heels.
- Move both hands a few inches farther if the stretch feels dull.
- Stay for 3 to 5 breaths on each side.
- Keep the forehead supported if the neck feels cranky.
The opening here is sneaky. It doesn’t feel huge at first. Then you stand up and realize your neck sits a little lower on your body.
5. Eagle Arms
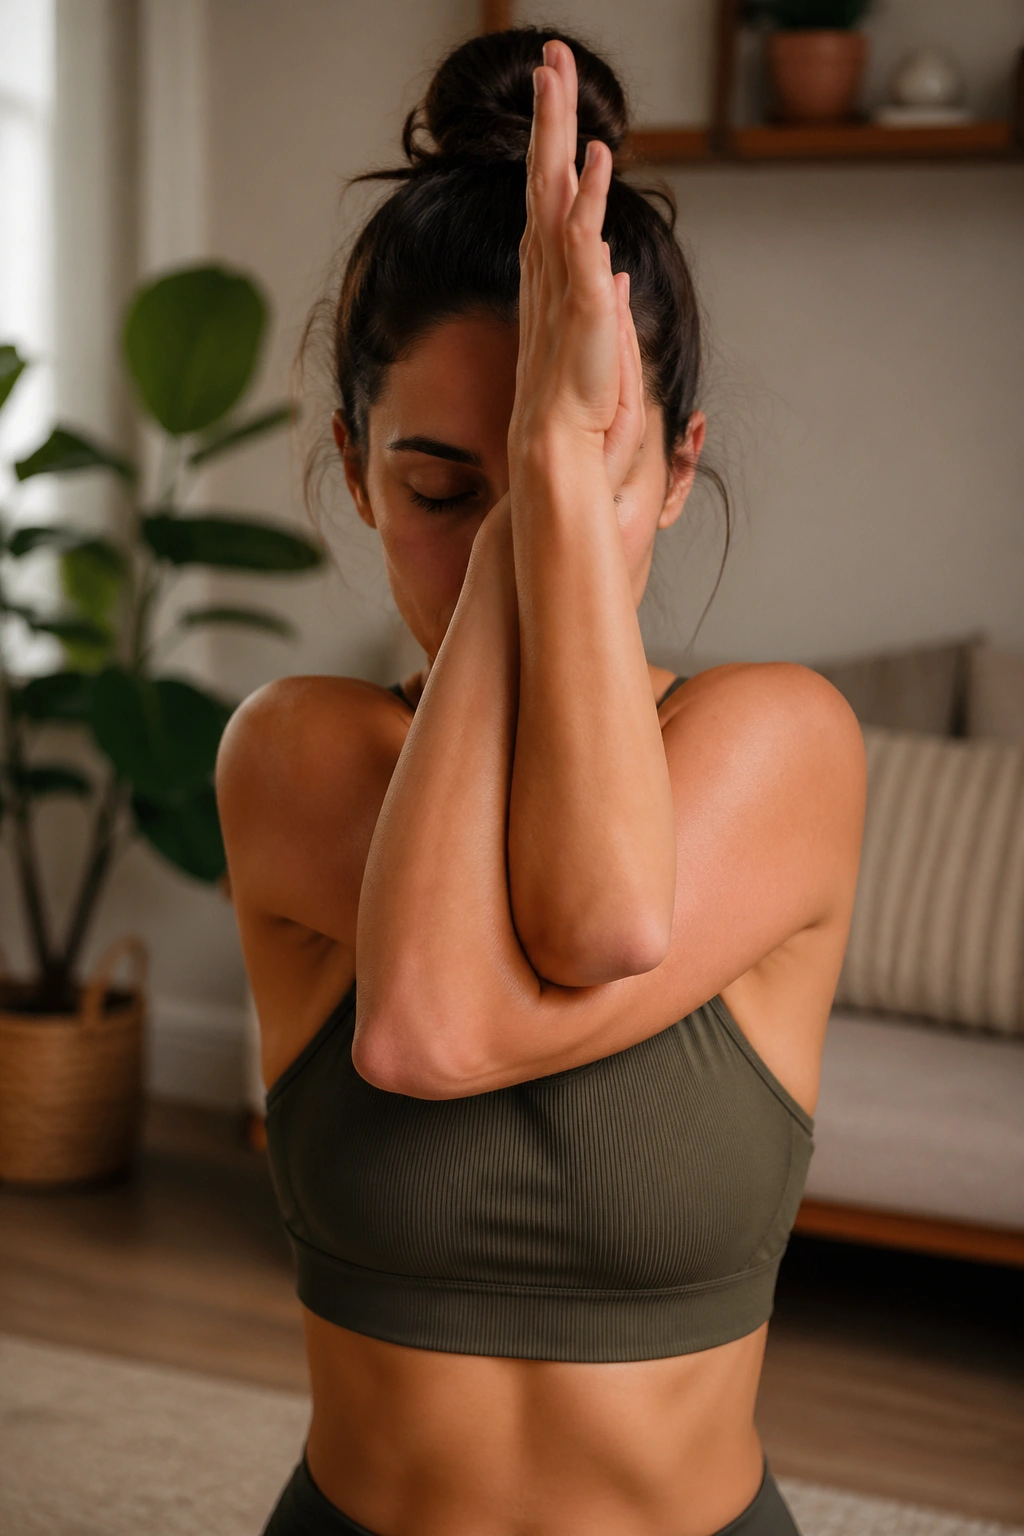
Eagle Arms are awkward the first few times. That’s normal. They’re also one of the best ways to get the muscles between the shoulder blades to stop gripping so hard.
Cross one elbow under the other, then either press the backs of the hands together or hold opposite shoulders if the full wrap isn’t there yet. Lift the elbows a little and let the shoulder blades spread wide across the back. That spreading action is the whole point. The upper traps don’t like it much at first, which is exactly why it helps.
What makes this pose worth keeping
Unlike a big overhead stretch, Eagle Arms work from the center out. You feel the backs of the shoulders, the upper back, and the space between the shoulder blades wake up in a way that’s hard to fake. If you spend your day typing, gripping, driving, or carrying bags on one side, this pose can be oddly satisfying.
Hold for 4 to 6 breaths. Then switch sides.
A small adjustment helps a lot: keep the elbows a little lower if the neck starts to tighten. High elbows can feel impressive, but they are not always the goal. Relaxation beats bravado here.
6. Dolphin Pose
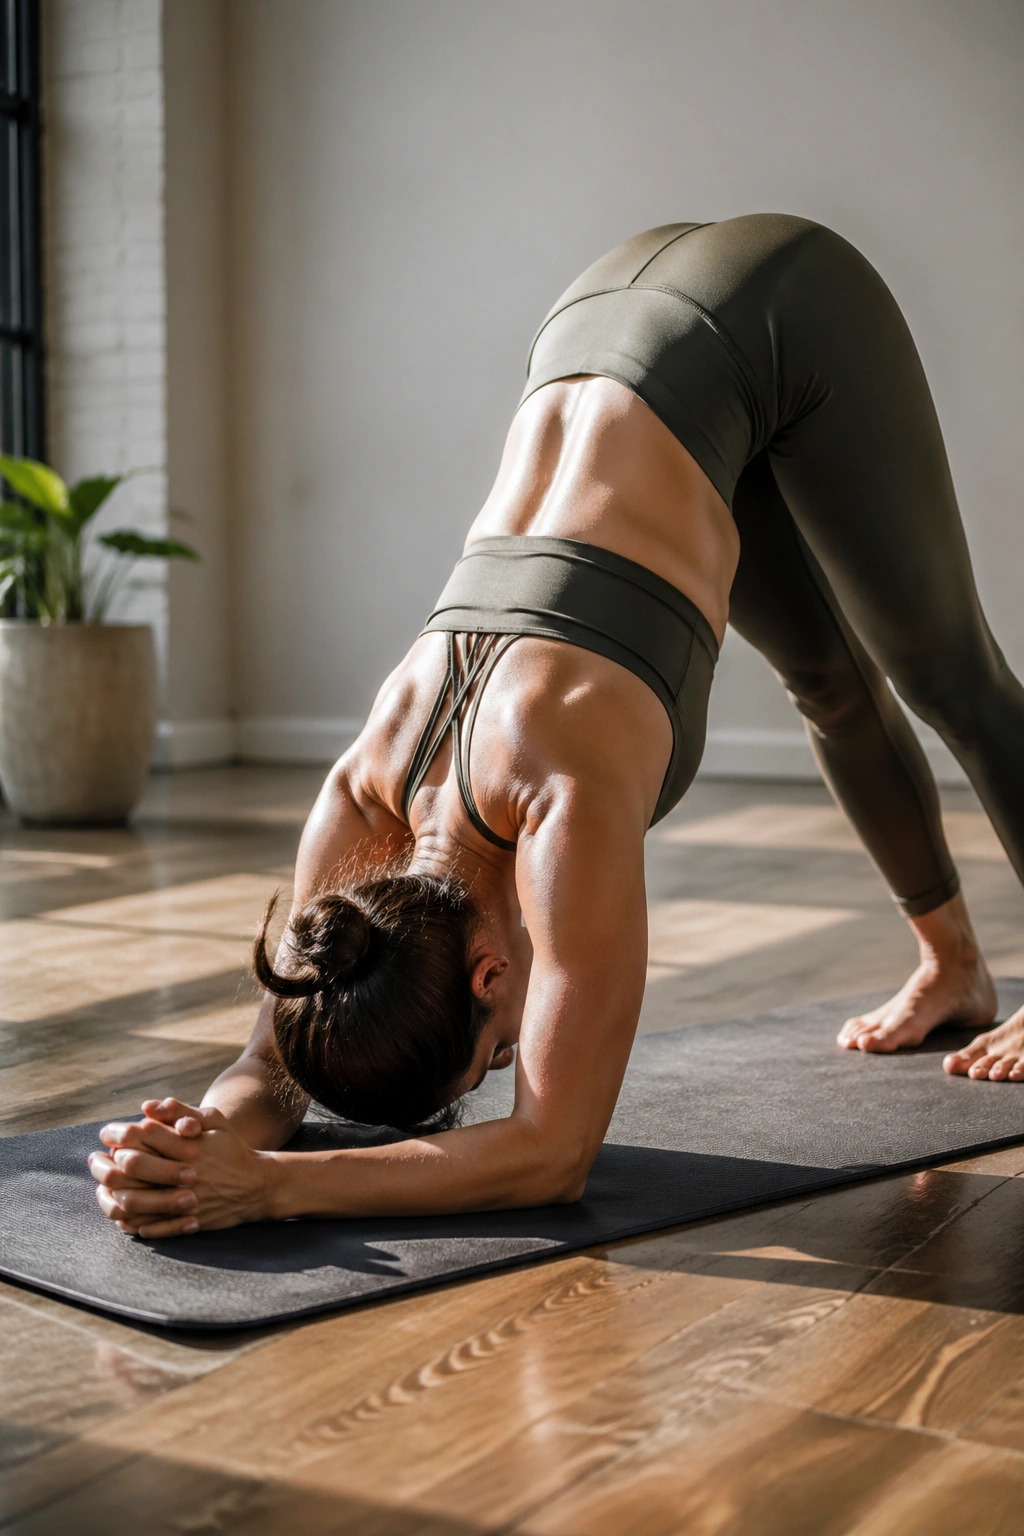
Dolphin is the stronger cousin of Downward Dog. It asks more from the shoulders and less from the wrists, which makes it a smart choice if your upper body needs work but your hands are tired or sensitive.
Forearms go down, elbows stay shoulder-width apart, and the hips lift. The shoulders get to bear weight in a new way, and that can help the traps stop doing all the stabilizing. It’s not a passive stretch. It’s a load-bearing one, and that’s the point.
What makes it different
Unlike Downward Dog, Dolphin keeps the wrists out of the picture and puts the shoulder girdle under a cleaner line of work. You’ll feel the upper back engage, the chest soften a little, and the outer shoulders stretch once you stop collapsing through the ribs.
Try this:
- Hold for 3 to 5 breaths.
- Keep the head between the upper arms.
- Walk the feet in a little if the stretch feels too blunt.
- Bend the knees if the spine is rounding too much.
If you’ve never done Dolphin, don’t chase depth. A short, honest version is far better than a shaky one. And if your traps start to pinch instead of lengthen, come out, rest, and try again later.
7. Sphinx Pose
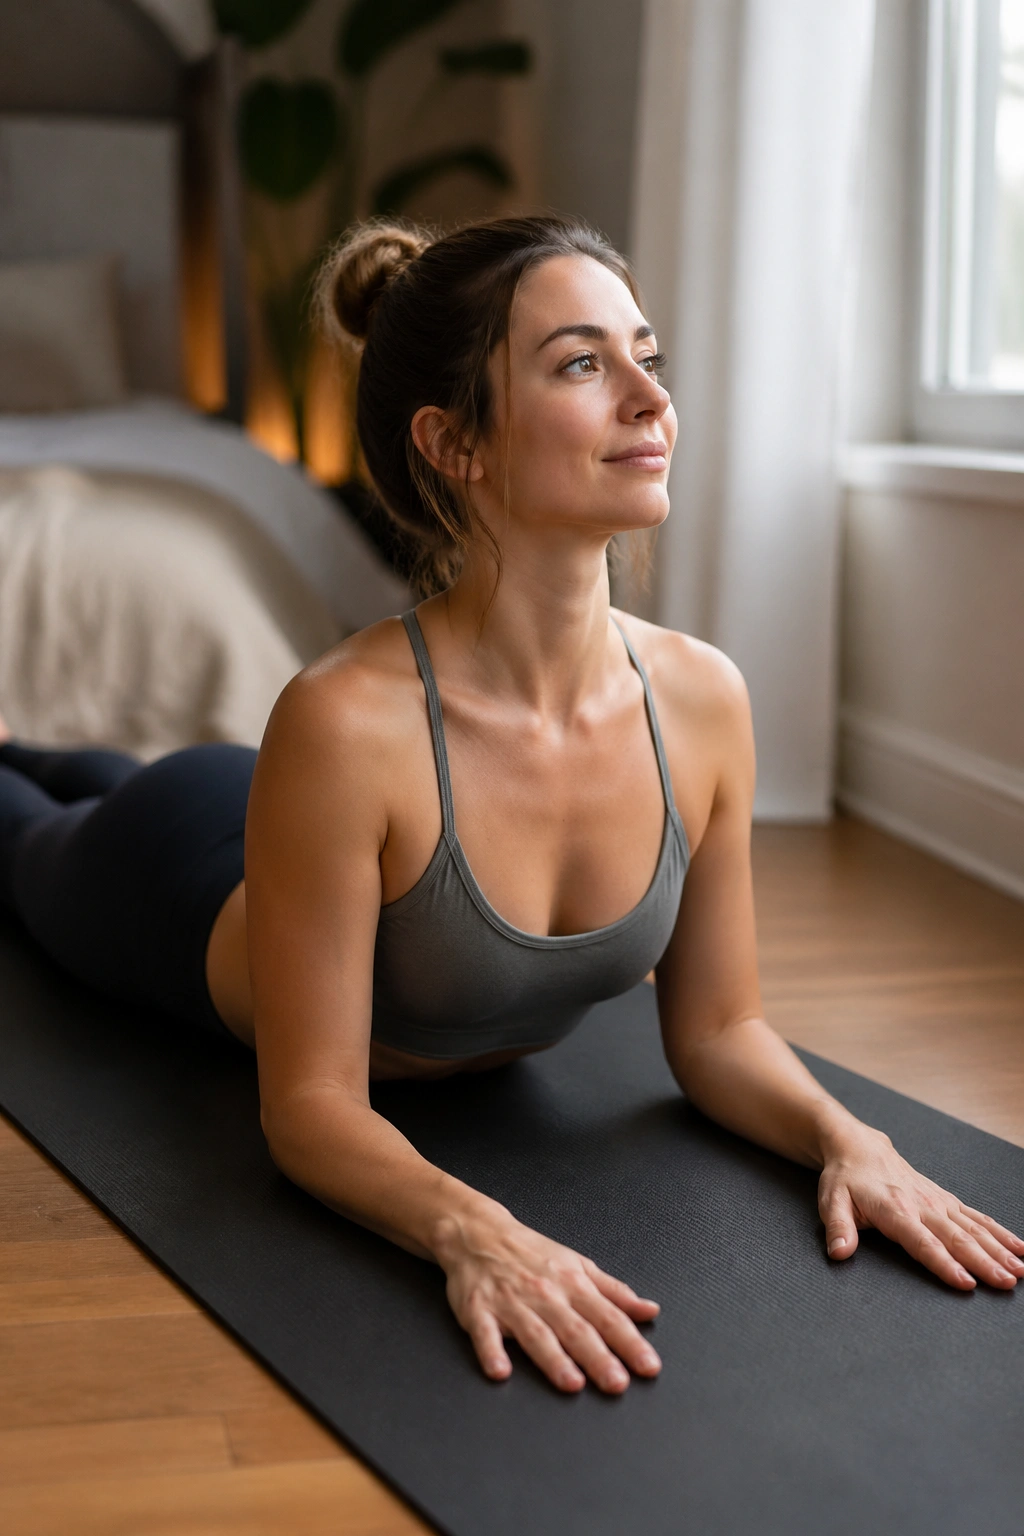
Sphinx is small, but it matters. It gives the front of the body a chance to open so the shoulders don’t have to live in a folded, defensive shape all day.
Lie on your belly and place your forearms on the floor with the elbows under the shoulders. Lift through the chest just enough to feel the collarbones widen. The neck stays long. The ribs stay quiet. That last part is easy to miss, and it changes the whole pose.
A lot of tight-trap tension comes from the body living in forward flexion for too long — chin down, shoulders rounded, chest closed. Sphinx gently reverses that pattern without asking for a huge backbend. That makes it useful for people who want shoulder release without extra drama in the low back.
Hold for 5 to 8 breaths. If the front of the shoulders feels pinchy, slide the elbows slightly forward or lower the chest a touch.
No need to force this one. If it feels calm and open, that’s enough.
8. Cow Face Arms
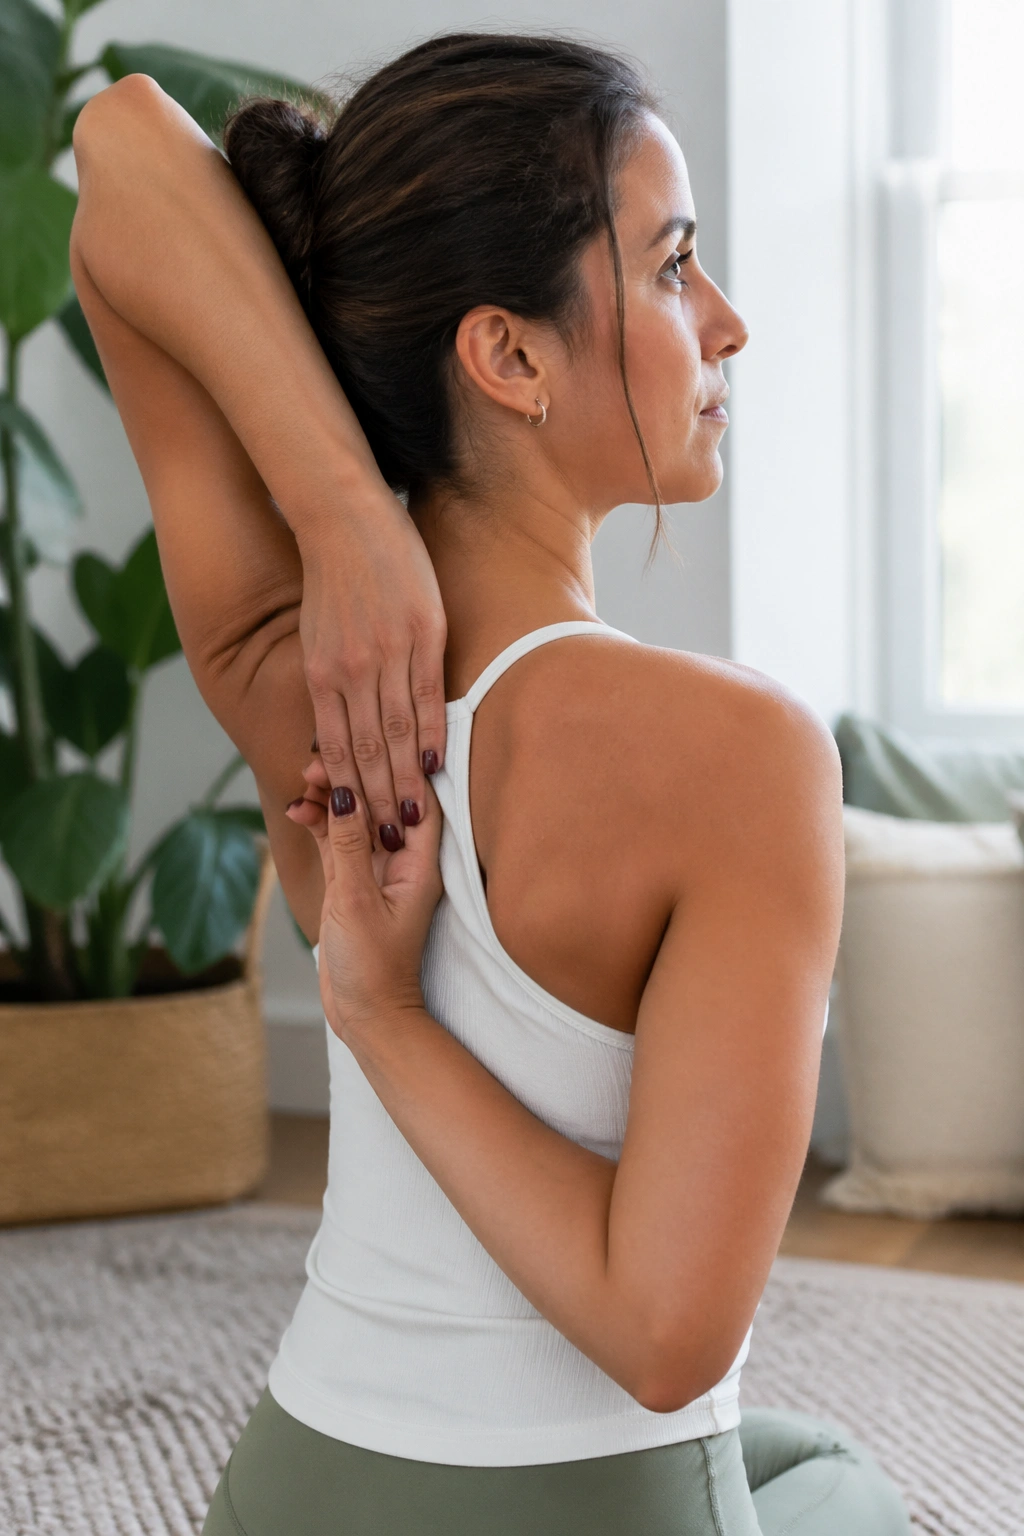
Cow Face Arms can be intense, which is exactly why they deserve a place on this list. They ask for internal and external rotation in the shoulders, and that kind of work often exposes the places where the traps have been trying to compensate.
Raise one elbow overhead and drop the other arm down the back, then work toward clasping the hands behind you. If the hands don’t meet, use a strap, towel, or belt. That’s not a cheat. It’s the practical version.
What to watch for
- Keep the ribs from flaring forward.
- Let the top elbow point upward, not forward.
- Stop if the front of the shoulder feels sharp.
- Use a strap before you yank the arms together.
The nice part is that this pose teaches the shoulders to rotate without the neck taking over. You may feel a deep stretch through the triceps, the side of the shoulder, and the upper back all at once. If one side is messier than the other, that’s common. Work with the side you have, not the one you wish you had.
A full bind is optional. Honest alignment is not.
9. Downward-Facing Dog
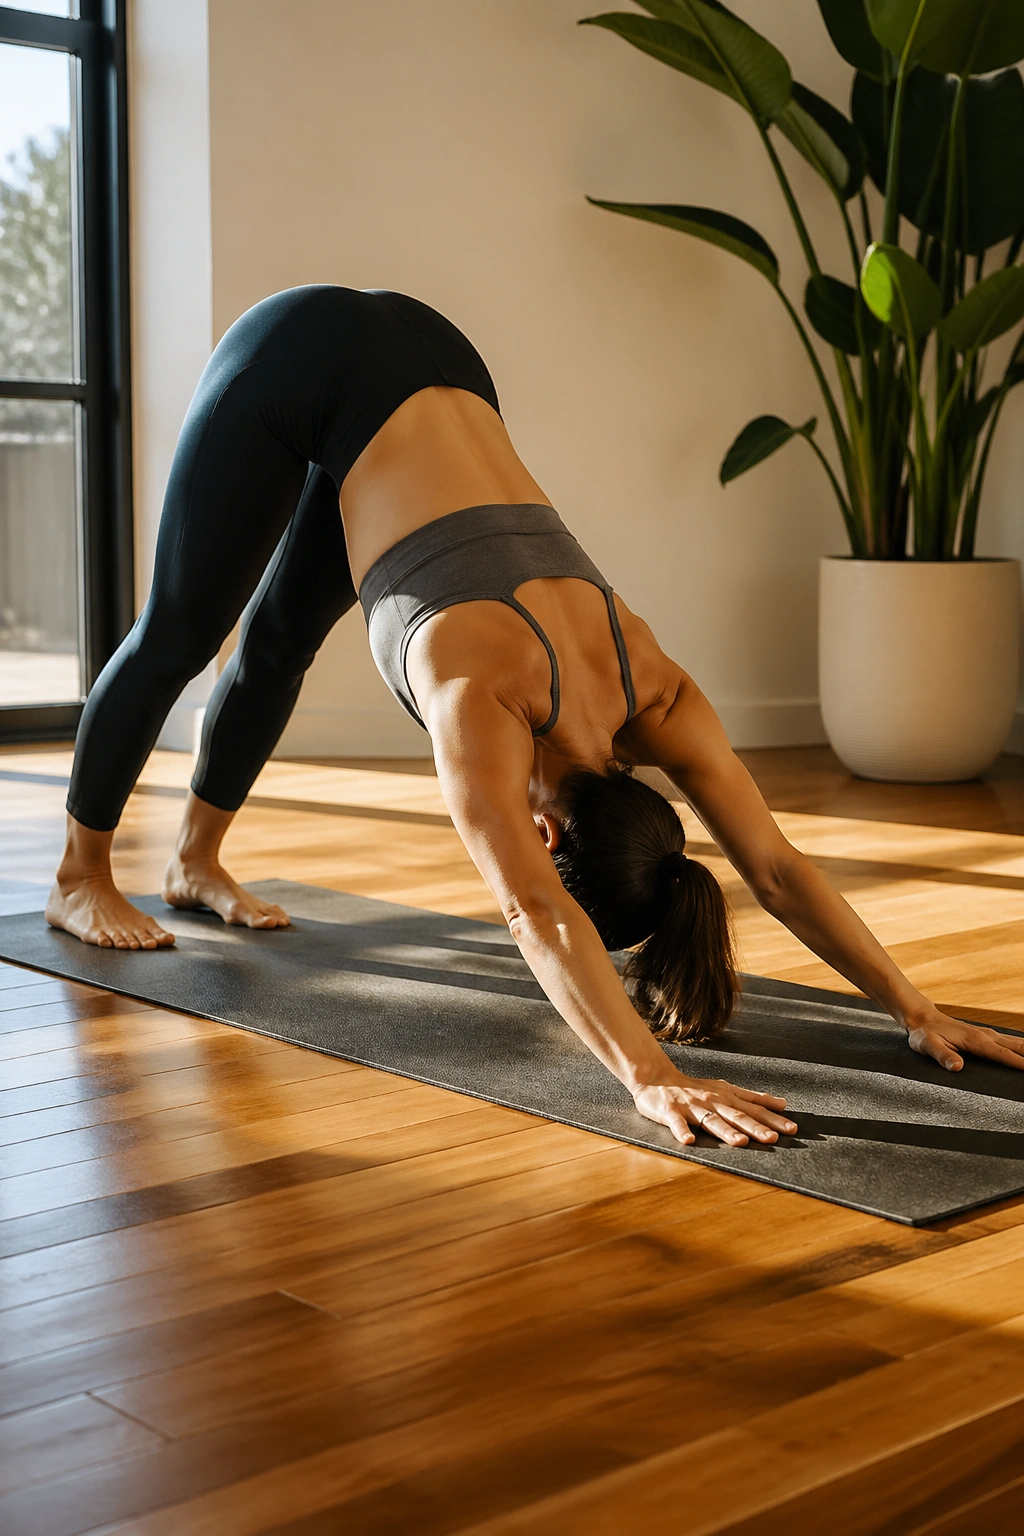
Downward Dog can either help your traps or feed them, depending on how you do it. That’s why this pose gets misunderstood so often.
The version that helps starts with a slight bend in the knees, a broad press through the hands, and shoulders that move away from the ears instead of jammed upward. Think long spine first, heels later. People get obsessed with heels on the floor and miss the shoulder work entirely.
You want the upper arms to rotate enough that the inner elbows face forward a bit. That keeps the shoulder sockets happier and gives the traps less to hold onto. If the pose feels like a shrug factory, shorten the stance and bend the knees more.
A cleaner setup
- Press the mat away strongly.
- Keep the neck relaxed.
- Let the rib cage pull back toward the thighs.
- Breathe for 3 to 5 slow breaths.
This is one of those poses that looks simple from a distance and feels very specific up close. Done well, it opens the shoulders, lengthens the sides of the body, and gives the neck a break. Done badly, it just makes you tired.
10. Reverse Tabletop
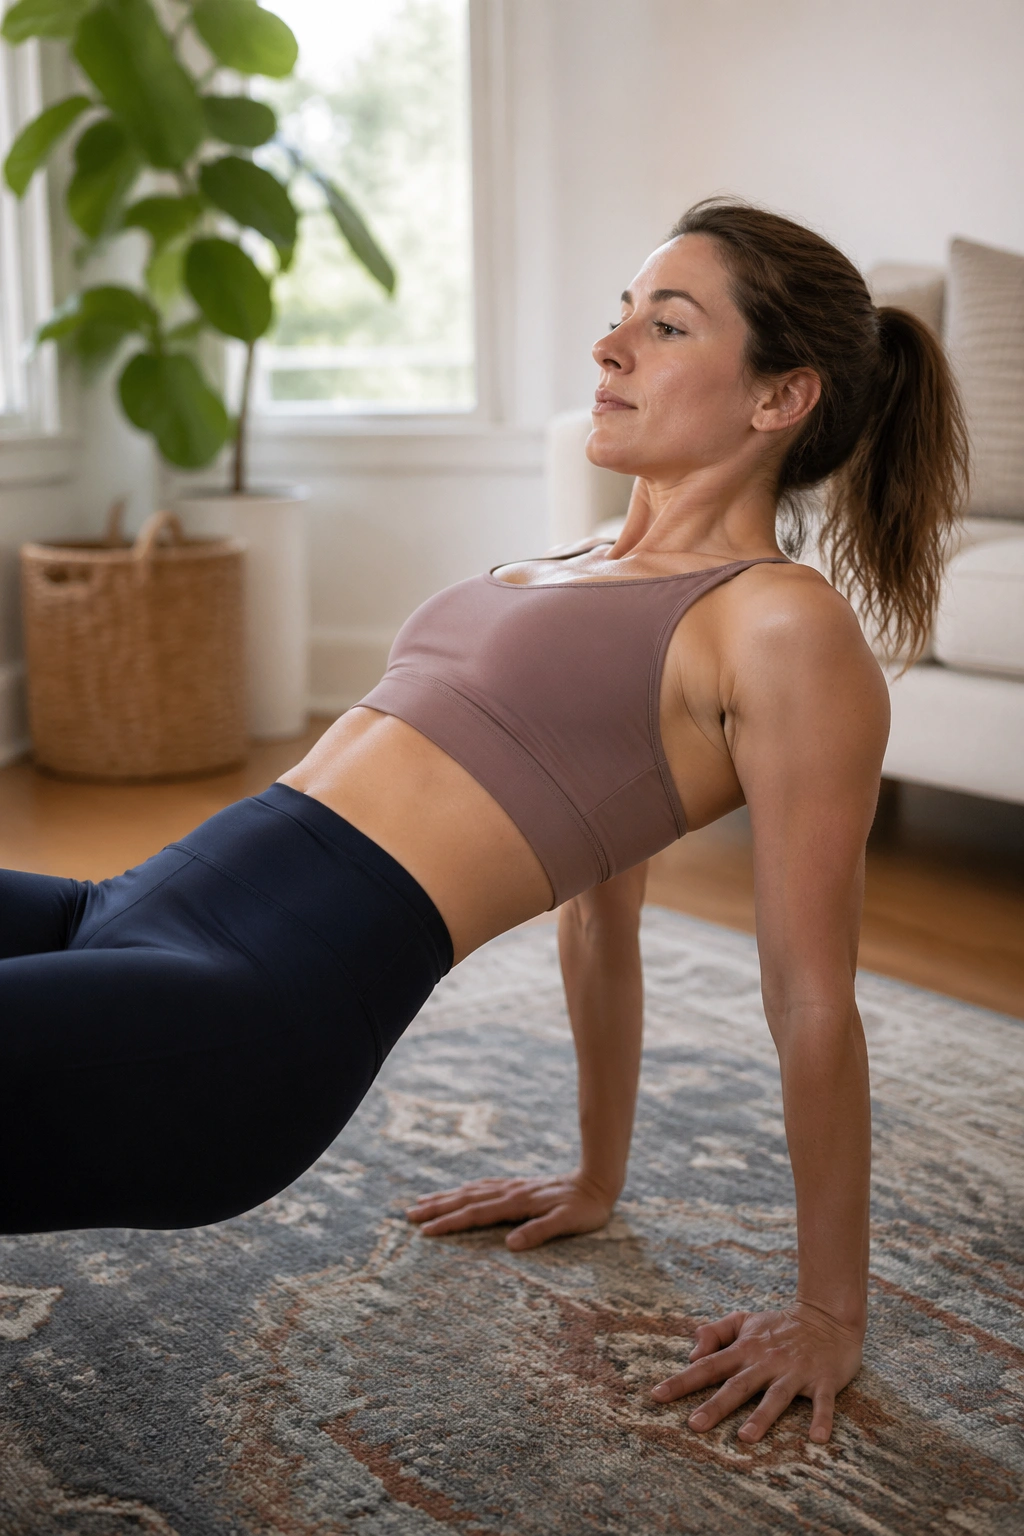
On days your shoulders feel collapsed forward, Reverse Tabletop can feel like opening a window. Fresh air, finally.
Sit with your feet flat and hands behind your hips, fingers pointing toward the feet or slightly out to the sides if the wrists prefer that. Lift the hips and chest, then let the shoulder blades slide down the back. The front body opens, the chest gets a clean line of space, and the upper traps can stop gripping the head forward.
This pose is worth doing slowly. If you fling the hips up and dump into the neck, the benefit disappears fast. Keep the chin slightly tucked and the neck long. If that’s hard, lower the hips and work in a smaller range.
You can hold for 3 to 5 breaths, lower, then repeat once or twice. That’s enough.
If your wrists are fussy, place your hands on low blocks behind you. Tiny setup changes matter more than people admit. Especially here.
11. Gate Pose
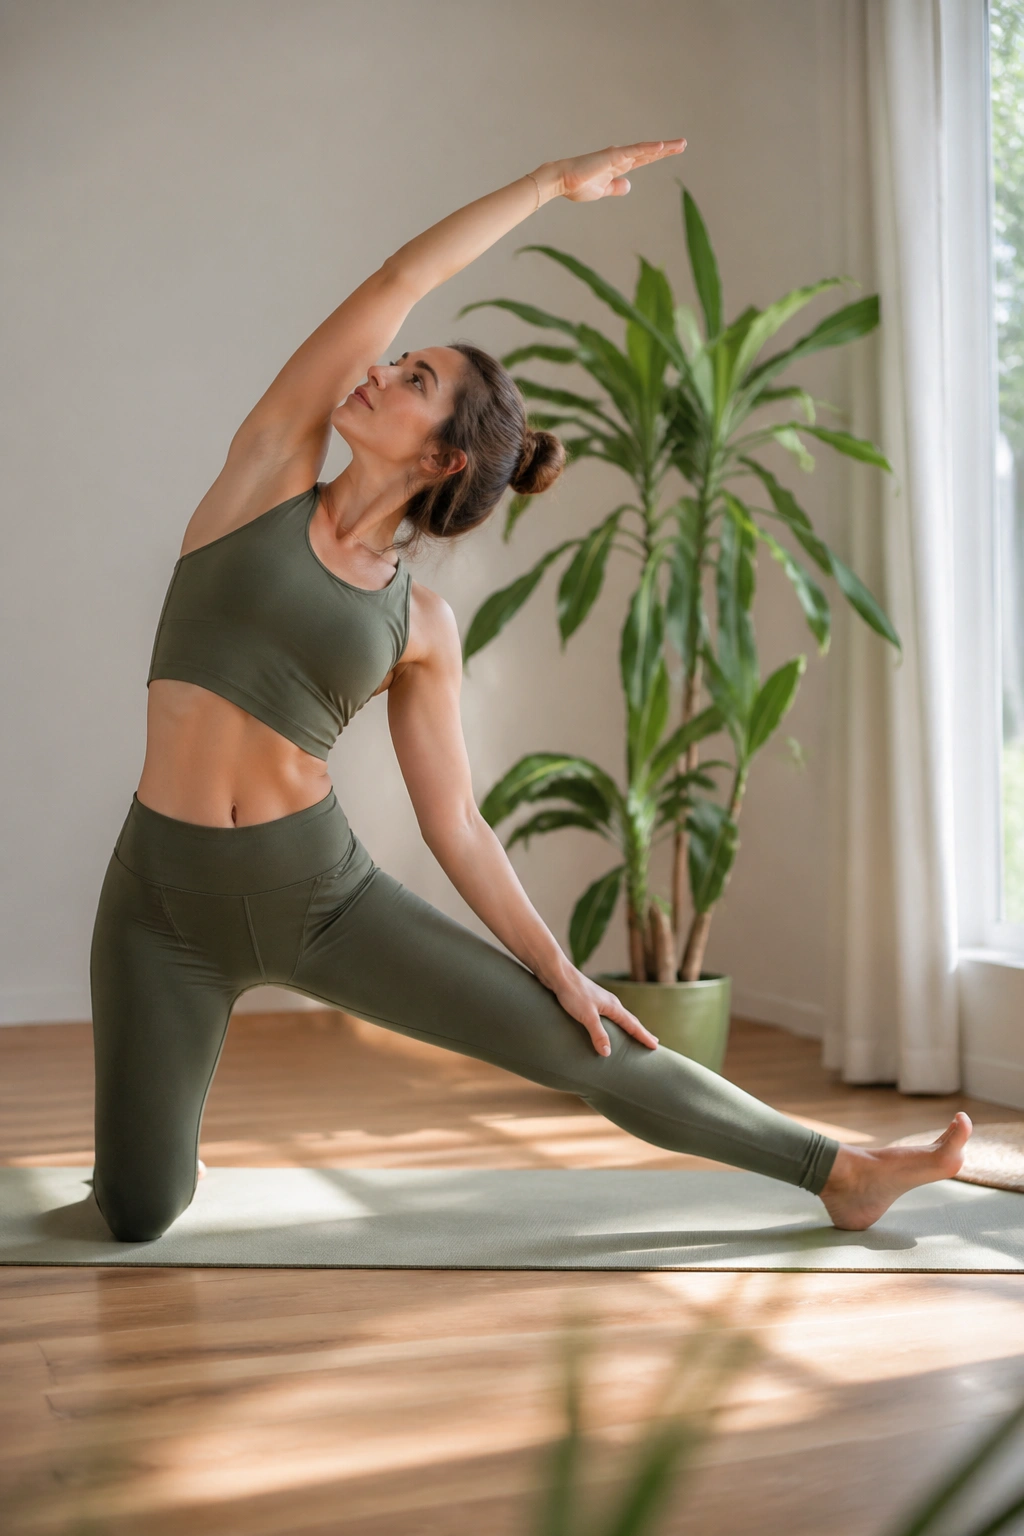
Gate Pose looks mild until you settle into it. Then the side body starts to speak up, and the whole shoulder line changes.
Kneel on one knee with the other leg extended to the side. Reach the same-side arm overhead and arc it gently toward the straight leg. The stretch runs through the ribs, the outer waist, and often the top shoulder in a way that feels cleaner than a brute-force neck stretch.
The key is to keep the bottom shoulder from collapsing toward the ear. Long line. That’s the point. If you let yourself fold too quickly, you lose the opening and the traps clamp down again.
You can keep the bottom hand on the thigh for support or let it trace the shin. No need to reach for the floor if that steals your breathing.
Hold for 4 to 6 breaths on each side.
This one is sneaky because it doesn’t scream “shoulder pose” at first glance. But if your traps are tight because your ribs and side body are locked, Gate Pose can feel like somebody turned the room lights on.
12. Standing Rag Doll with Interlaced Fingers
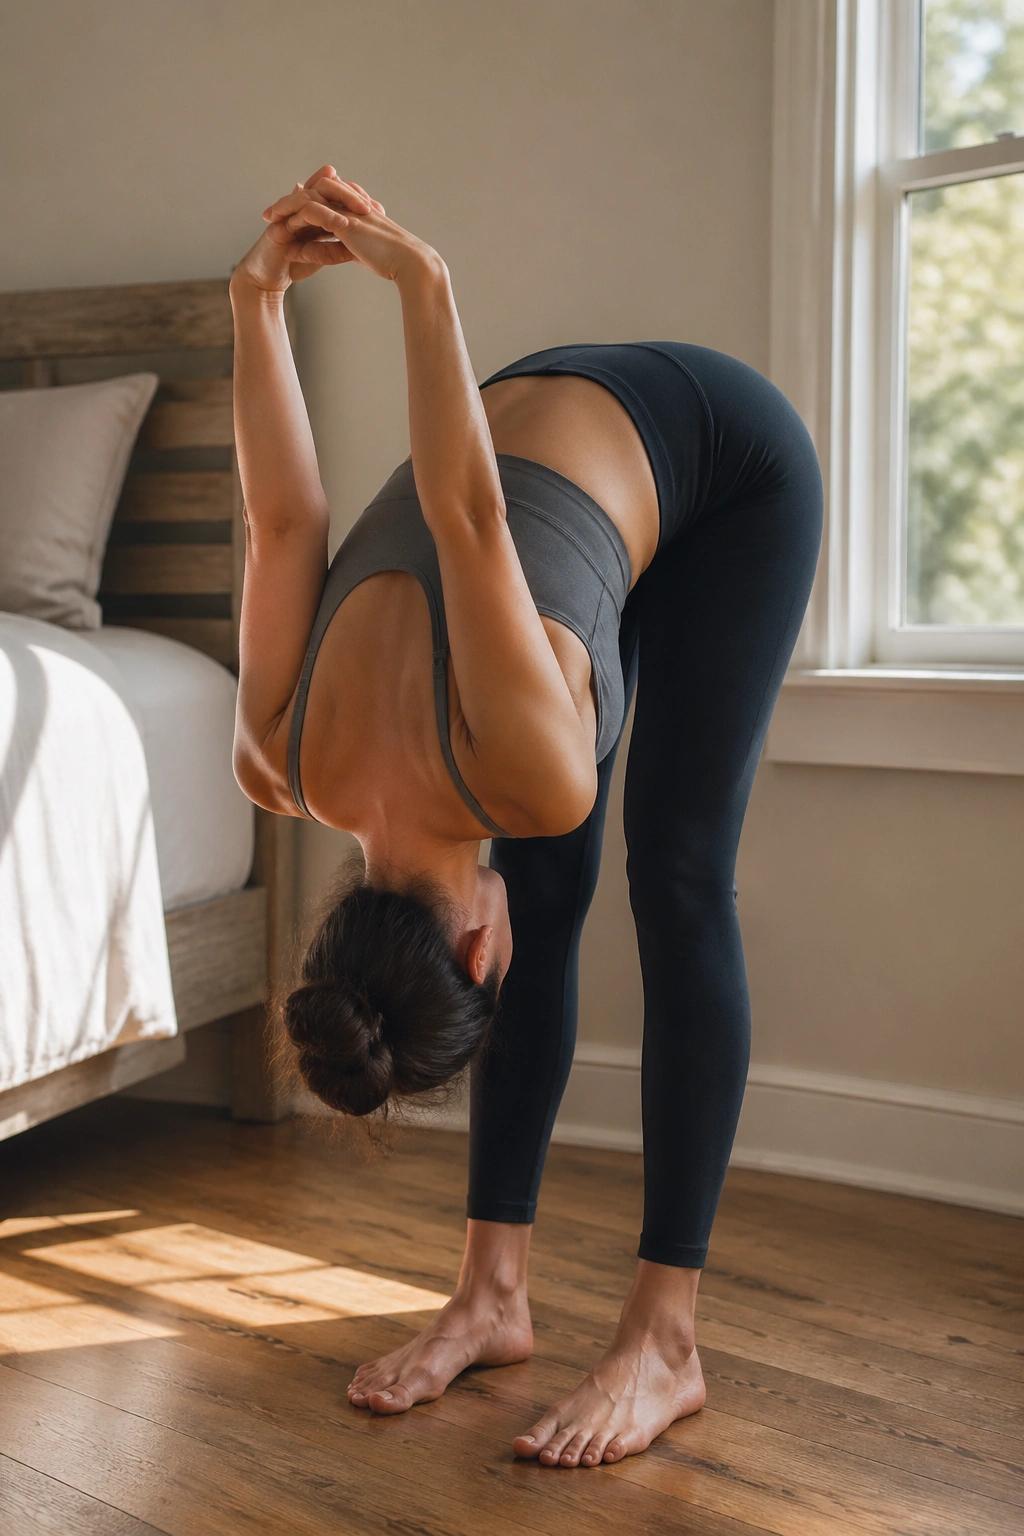
Unlike a strict hamstring stretch, Rag Doll gives your neck permission to hang out and stop performing. That alone can make it worth doing.
Stand with feet about hip-width apart, fold from the hips, and let the head and arms drape. If it feels good, interlace the fingers behind the back and let the arms drop toward the floor or slightly toward the ceiling if the shoulders allow it. Bend the knees as much as needed. A little knee bend is not a failure. It’s smart.
Why it helps tight traps
When the head hangs and the weight shifts forward, the muscles along the top of the shoulders get a chance to soften without being asked to hold posture. Add a slow breath out, and the release often deepens on its own.
- Keep the jaw loose.
- Let the neck be heavy.
- Sway a little side to side if it feels good.
- Stay for 5 to 8 breaths.
This is one of the few shoulder releases that can feel almost too easy. Don’t mistake that for not working. Sometimes easy is exactly what your upper body needed.
13. Wall Angels
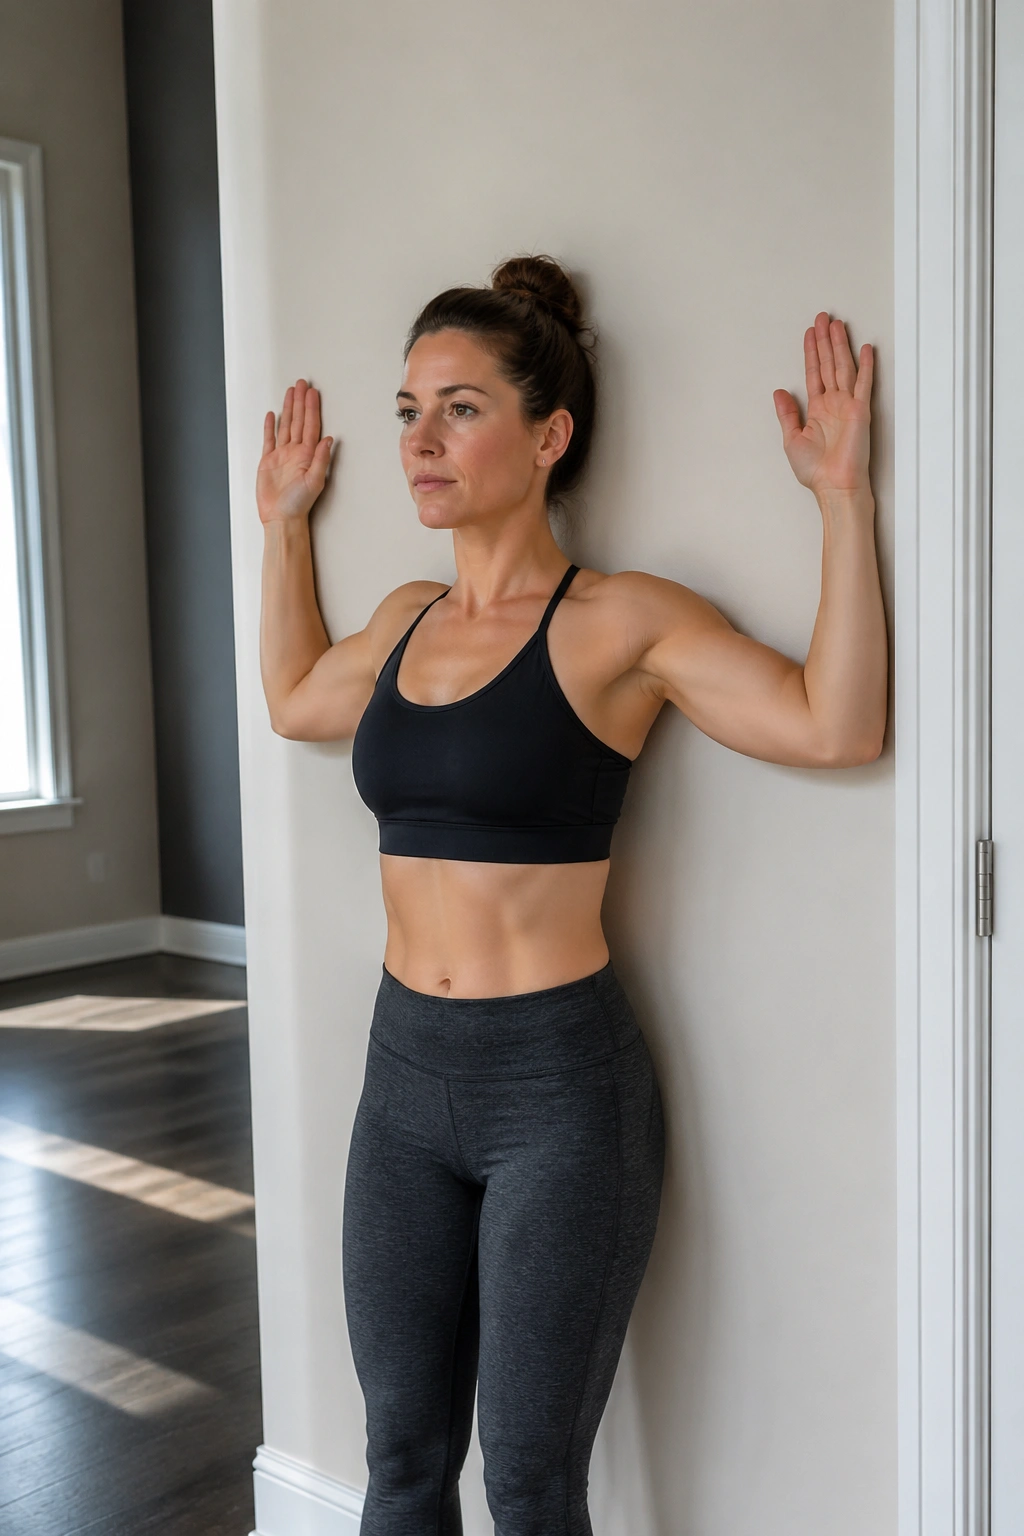
Wall Angels are plain, maybe even a little boring, and that is why I like them. The wall tells the truth. It catches the little cheats.
Stand with your back near a wall, feet a few inches out, and press the back of the head, upper back, and pelvis as comfortably as you can against it. Bring the arms up into a goalpost shape, then slide them up and down in a slow, controlled motion. If your ribs flare or your shoulders shoot forward, the wall will show you right away.
Why the wall matters
The support helps you feel how often tight traps are tied to rib flare and forward shoulder position. You’re not just moving the arms. You’re teaching the upper body to stack in a cleaner line.
- Do 6 to 8 slow reps.
- Keep the motion smaller than you think.
- Stop before the shoulders shrug.
- Exhale as the arms lower.
If your hands can’t touch the wall the whole time, that’s fine. Use the range you can control. Clean reps beat dramatic ones every time. This is one of the best shoulder mobility drills for trap tension because it builds awareness instead of just chasing a stretch.
14. Supported Fish Pose
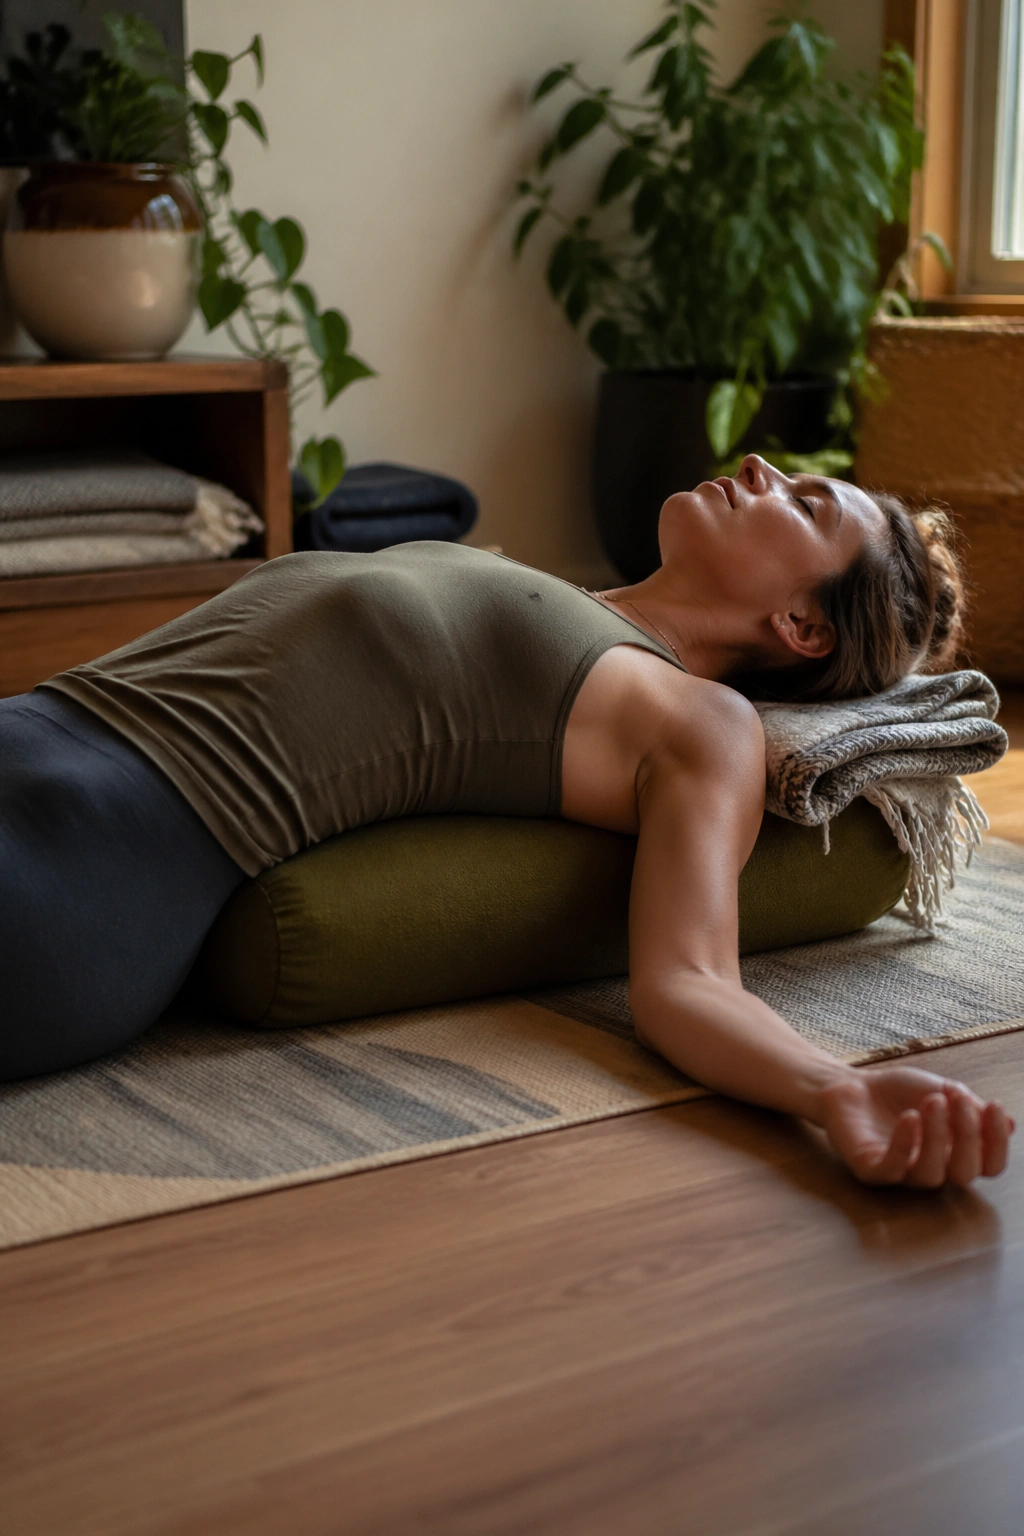
Supported Fish Pose gives the front of the body a place to open without effort. That matters because traps often tighten when the chest stays closed for too long.
Place a bolster or a tightly rolled blanket lengthwise under the upper back, then lie back so the head is supported by a second blanket if needed. Let the chest open, the collarbones spread, and the shoulders drape toward the floor. Arms can rest in cactus shape or simply at your sides.
The magic here is not dramatic depth. It’s ease. You’re taking the work away from the upper traps, not asking them to stretch harder. If your neck feels compressed, raise the support under the head. If the low back arches too much, bend the knees or slide the support a little lower.
Stay for 1 to 3 minutes if it feels good.
This pose works well after stronger shoulder work because it lets the body absorb the session without more effort. Passive doesn’t mean lazy. Sometimes passive is the smartest move in the room.
15. Legs-Up-the-Wall with Cactus Arms
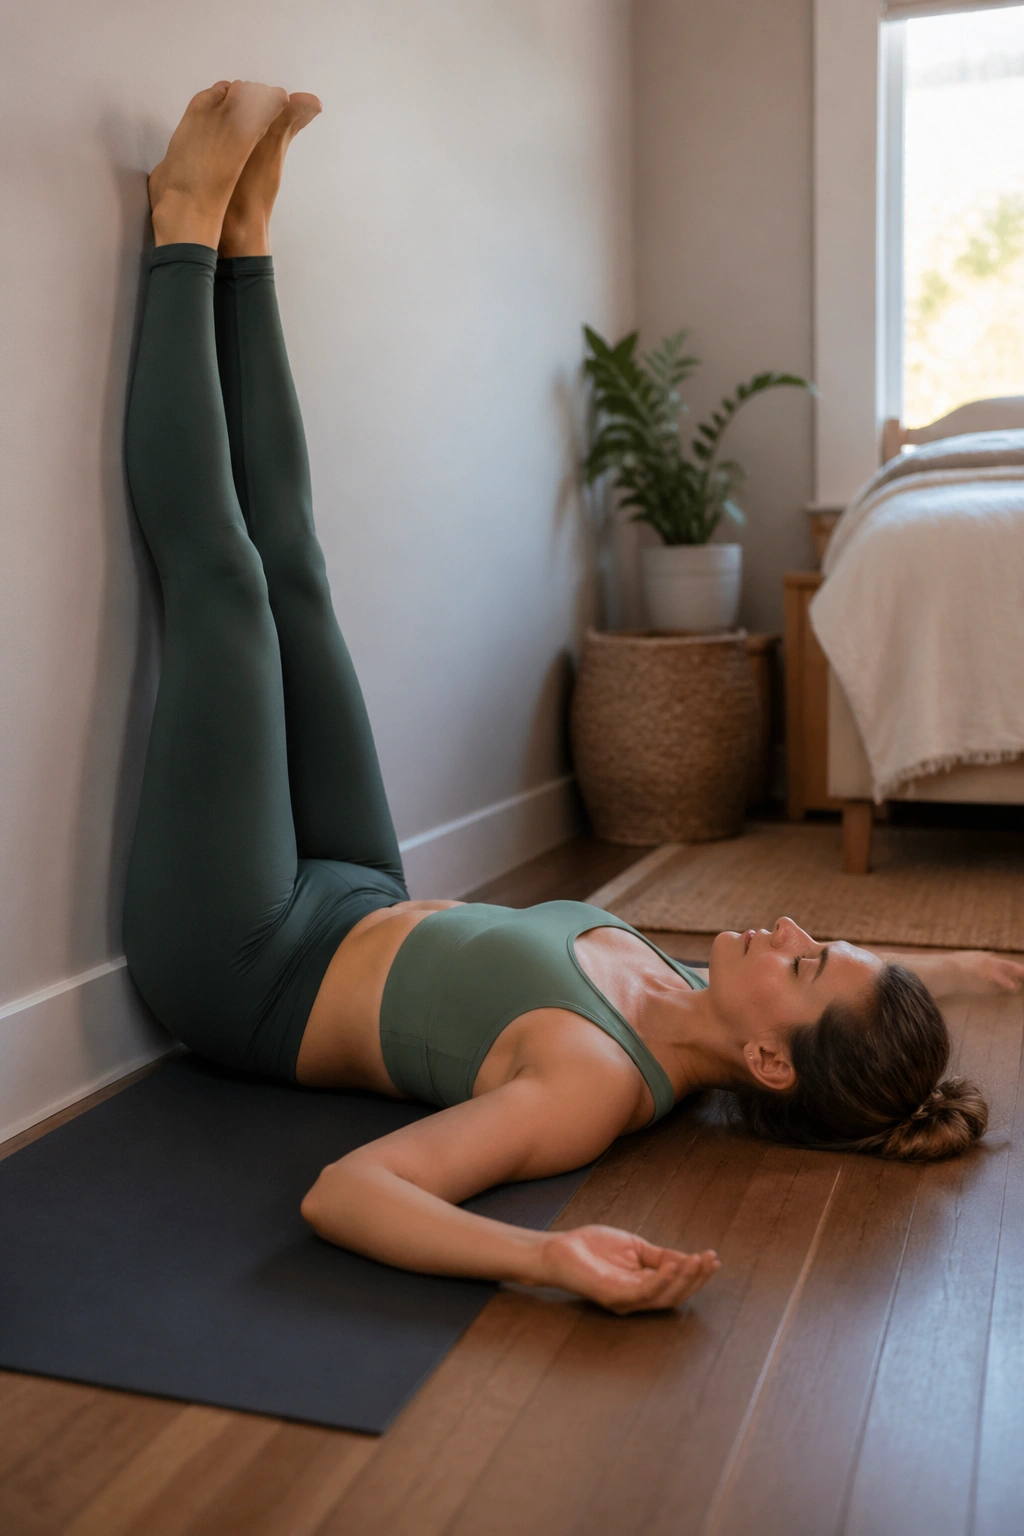
This is the one I’d pick when your traps feel wired, not just tight. The body gets upside-down enough to settle down, and the shoulders get to drop into the floor without trying to hold a shape.
Sit beside a wall, swing the legs up, and lie back with the hips close enough to the wall that the legs can rest without strain. Then open the arms into cactus shape, elbows bent and palms up. The chest softens. The shoulders melt a little. Breathing gets quieter.
Best way to finish
Keep the exhale longer than the inhale. That sounds small, but it changes the whole tone of the pose. A slow exhale tells the upper body that it does not need to guard so hard.
- Stay for 2 to 5 minutes.
- Use a folded blanket under the hips if that feels better.
- Let the jaw stay loose.
- If the shoulders want extra support, place a thin blanket under the upper arms.
This is not the pose for stretching harder. It’s the pose for ending well. That difference matters.
Final Thoughts
Tight traps usually do better with variety than with force. A little movement, a little load, a little side-bending, and a little rest can calm the whole shoulder line far more effectively than one giant stretch held with gritted teeth.
If I had to keep it simple, I’d pair one active pose, one stretch, and one restorative hold. Cat-Cow or Wall Angels, Thread the Needle or Puppy Pose, then Supported Fish or Legs-Up-the-Wall. Clean. Repeatable. Good enough to matter.
And that’s the part people miss. The shoulders don’t usually need a dramatic rescue. They need a few honest minutes, most days, with enough room to let go.
