



The best workouts to build muscle at home do not need a garage gym.
A pair of dumbbells helps, sure, but a backpack packed with books, a sturdy chair, and a patch of floor can do a lot more than people expect. The trick is treating each set like it matters — close to failure, full range, enough load, and enough rest to actually turn effort into muscle.
Home training fails when it turns into fast reps and random burn. Thirty half-squats with no tension won’t do much for your legs, and endless push-up flurries won’t build much chest if every set ends while you still have gas left. The good stuff comes from hard sets that make you slow down near the end, where form stays clean but the muscle has to work for it.
The 15 workouts below lean on bodyweight, backpacks, bands, and a few cheap tools that live well at home. You can run them as standalone moves or combine them into a weekly plan without needing a commercial gym to do the heavy lifting.
1. Push-Up Sets for Chest, Shoulders, and Triceps
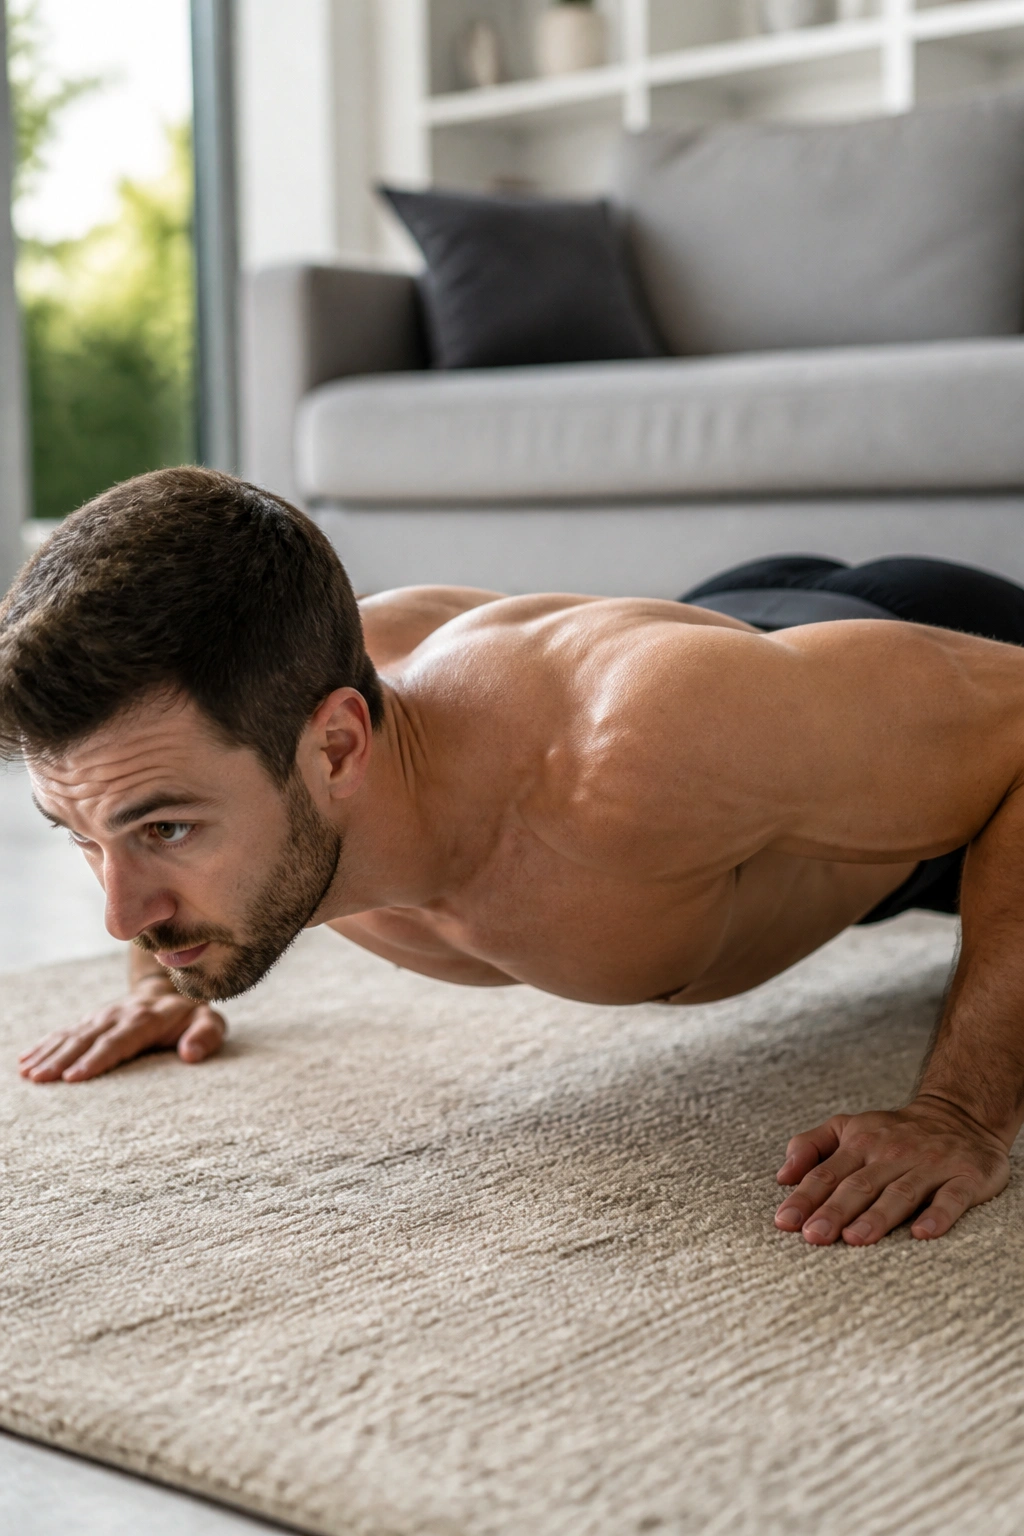
A hard push-up set still embarrasses a lot of fancy equipment. That sounds rude, but it’s true. If your chest, shoulders, and triceps are getting pushed close to failure with good form, push-ups remain one of the cleanest ways to build upper-body muscle at home.
Why It Works
The push-up loads your body through a long range of motion, which is a big deal for growth. Hands just outside shoulder width, elbows around a 30-to-45-degree angle, and a chest that reaches close to the floor — that’s the shape you want.
I like this one because it scales well. A standard push-up works for a while, then you can slow the lowering phase to 3 seconds, pause for 1 second at the bottom, elevate your feet on a chair, or toss a backpack on your upper back.
- Aim for 3 to 5 sets of 8 to 20 reps.
- Rest 60 to 90 seconds between sets.
- Stop when you have one or two clean reps left.
- If 20 reps feels easy, make it harder before chasing 30.
Do not turn it into a neck-and-hip shrug. Keep your ribs down and your body in one line. The last rep should look the same as the first, only slower.
2. Bulgarian Split Squats
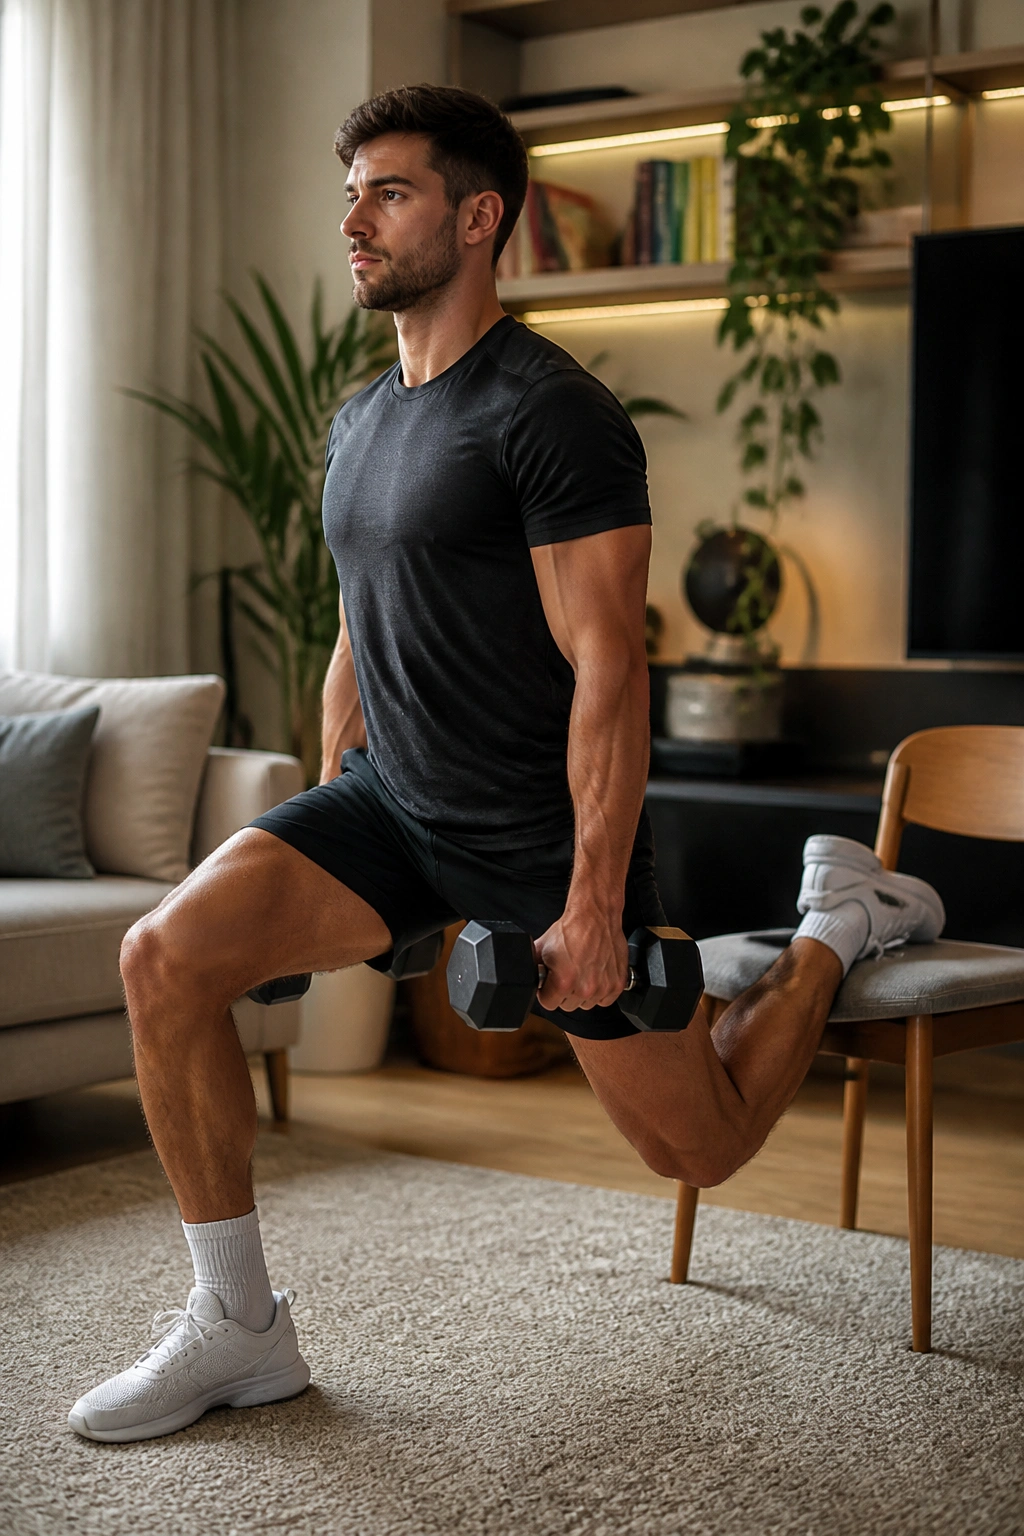
Why does one leg feel so brutally honest? Bulgarian split squats have that effect. They expose weak glutes, lazy quads, and wobbly balance in one neat package, which is exactly why they earn a place in any serious home muscle routine.
What Makes Them So Effective
One leg works at a time, so you get a lot of stimulus without needing heavy load. Set your rear foot on a chair or couch, keep your front foot far enough away that your knee can travel without cramming forward, and lower until your back knee nearly brushes the floor.
The front leg should do the real work. If you feel this mostly in the rear leg, your stance is probably too short. If you feel only your knee, take a longer step and lean your torso a little forward so the hip can help.
How to Use Them
- Use 3 to 4 sets of 8 to 12 reps per leg.
- Hold a backpack at your chest or dumbbells at your sides.
- Pause for 1 second at the bottom to stop bouncing.
- Keep the front heel down and drive through the whole foot.
They’re rude. That’s the point. A pair of these with a loaded backpack can do more for your legs than a dozen sloppy bodyweight squats.
3. Hip Thrusts on the Couch
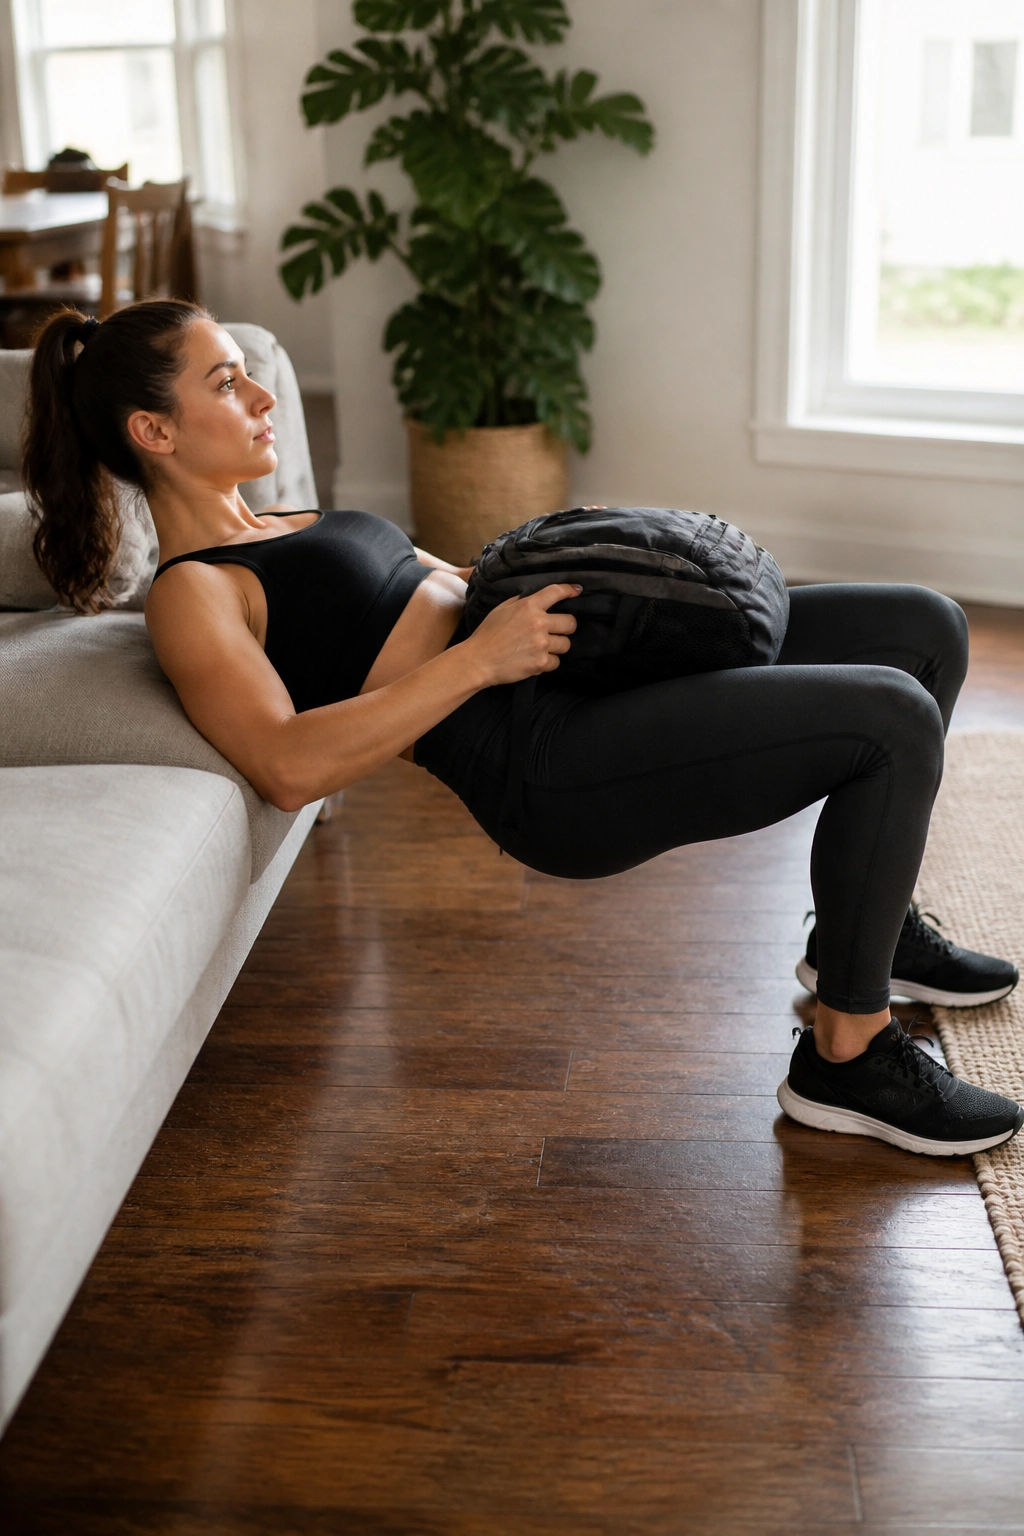
A couch edge and a backpack can build glutes if you stop treating the last three reps like an afterthought. Hip thrusts are one of those home workouts that look too simple right up until your glutes start fighting back.
The setup is easy: upper back against a sturdy couch or bench, feet flat, knees bent, load across the hips. At the top, your shins should be close to vertical, your chin tucked, and your ribs not flared up like you’re trying to show off a low back arch.
That top squeeze matters. Hard. Hold it for a full second and think about driving your hips up, not flinging your spine backward. If the move turns into a lower-back bend, the glutes lose the fight and the whole point goes missing.
- Try 4 sets of 10 to 15 reps.
- Use a backpack, dumbbell, or loaded duffel bag on the hips.
- Rest 45 to 75 seconds.
- Add a band above the knees if you want more glute med work.
Watch the last rep. If your knees collapse inward, the set is over.
4. One-Arm Backpack Rows
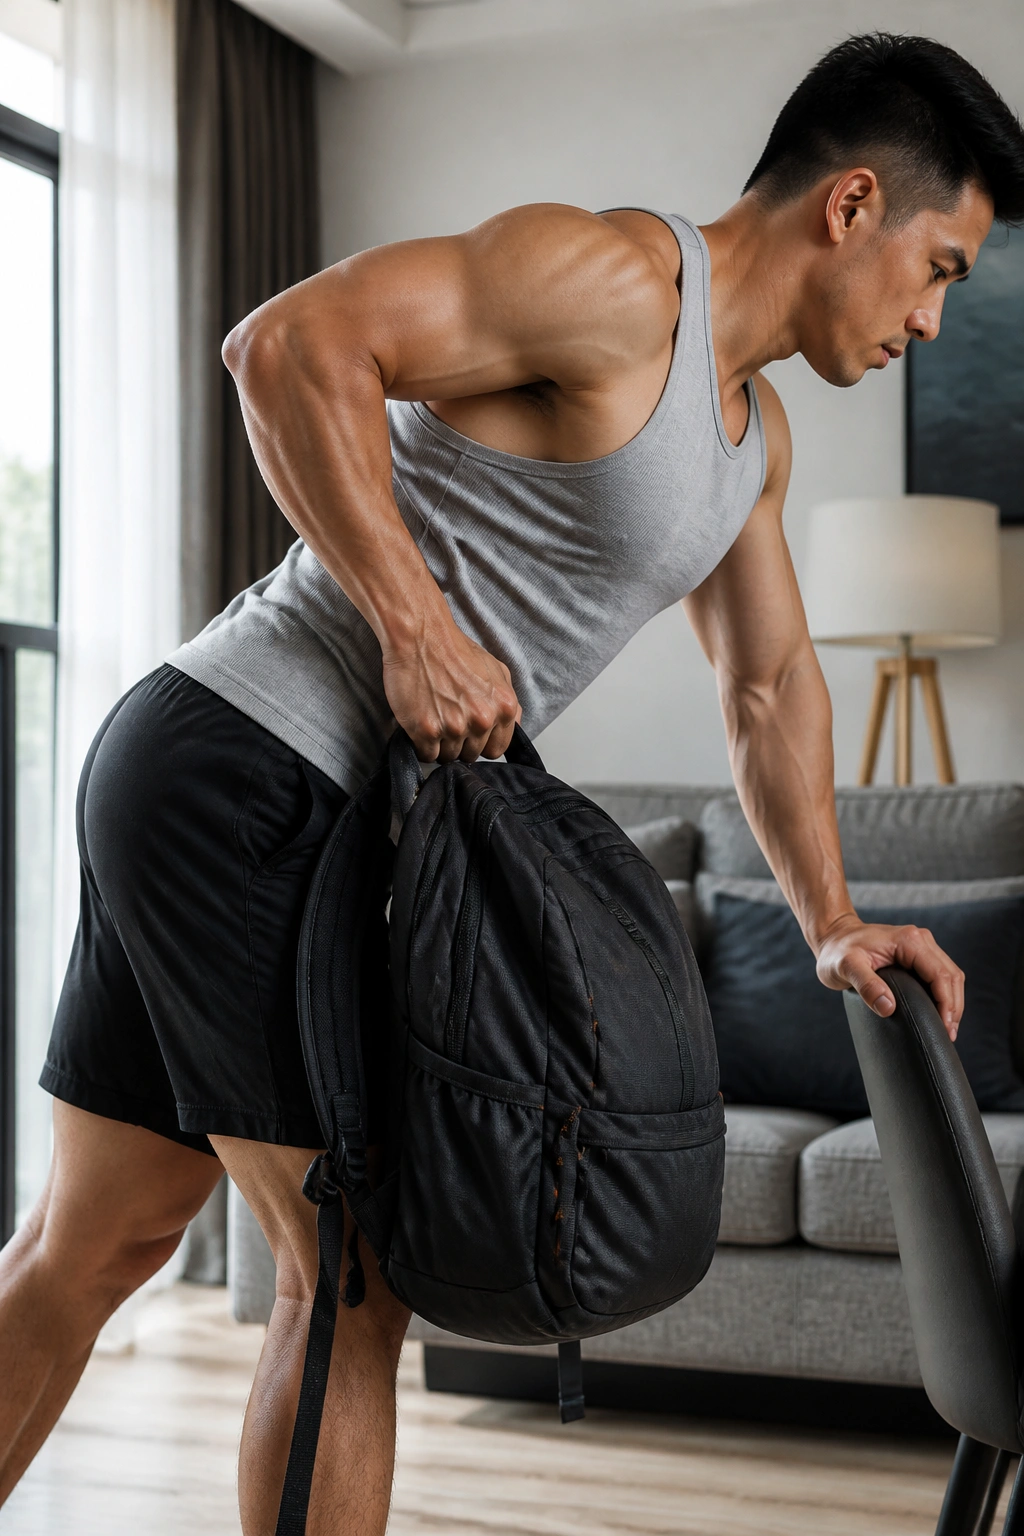
Back training at home is not doomed to be weak. That’s a lazy myth, usually told by people who never loaded a backpack properly. One-arm rows are awkward at first, then they become one of the most useful things you can do for your upper back.
Brace one hand on a chair or couch, hinge at the hips, and pull the backpack toward your hip, not straight up toward your chest. That elbow path matters. Pulling toward the hip tends to hit the lat better, while pulling high drifts into the upper trap.
The backpack is a little clunky, which is actually part of the charm. Books shift. Towels help. A tighter pack feels better than a loose one because the weight stops bouncing around at the top of each rep.
What to Watch For
- Keep your torso still.
- Let the shoulder blade reach forward at the bottom.
- Squeeze the back hard at the top for 1 second.
- Use 3 to 5 sets of 8 to 15 reps per side.
A row should feel like your back is doing the work, not your biceps stealing the show. If your body is twisting every rep, the load is too heavy or the brace is too weak.
5. Pike Push-Ups
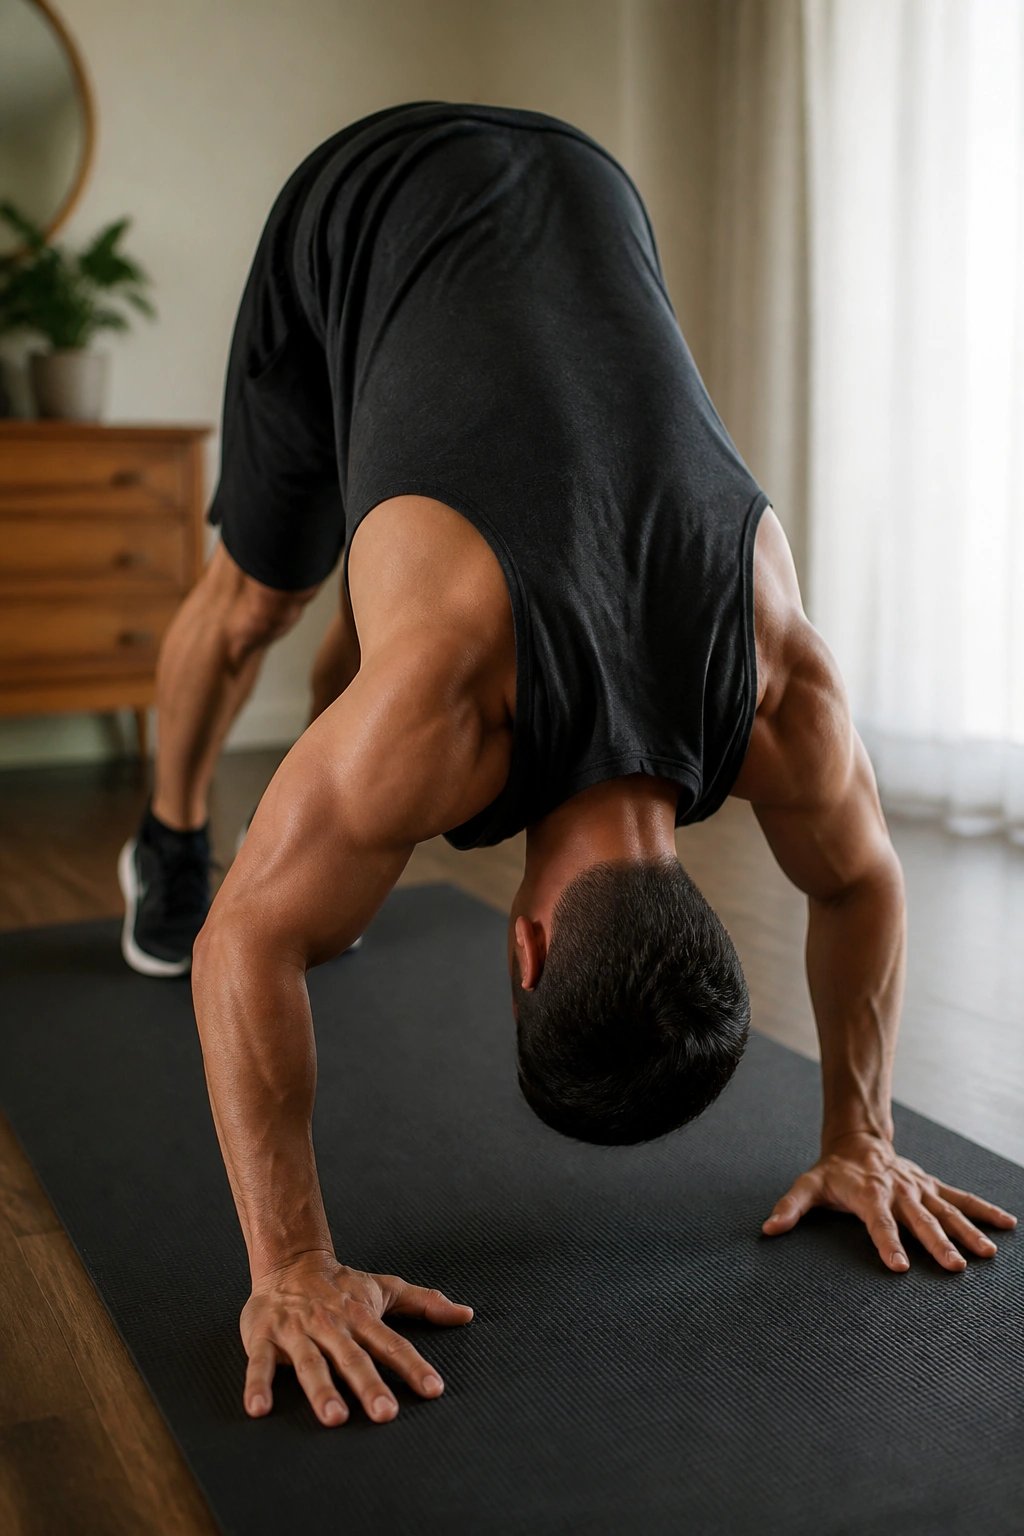
Your shoulders know this one before your head does. Pike push-ups hit the delts hard because they shift your body into a more vertical pressing angle, and that changes everything.
Start in a pike position with hips high, hands shoulder width, and heels off the floor if needed. Lower your head toward the floor between your hands, then press back up until your elbows are straight. The goal is not to fold into a weird yoga pose. It’s to keep the movement controlled while the shoulders do the heavy lifting.
The higher the hips, the more shoulder-dominant the rep becomes. Feet elevated on a chair makes it tougher. Slowing the lowering phase makes it meaner. A small towel under the head can even give you a consistent depth target.
How to Make It Count
- Use 3 to 5 sets of 6 to 12 reps.
- Keep your elbows angled slightly out, not jammed tight.
- Stop if your lower back collapses.
- Progress by raising your feet before piling on more reps.
Short version: if you want bigger shoulders at home, this one earns its spot fast.
6. Goblet Squats with a Backpack or Dumbbell
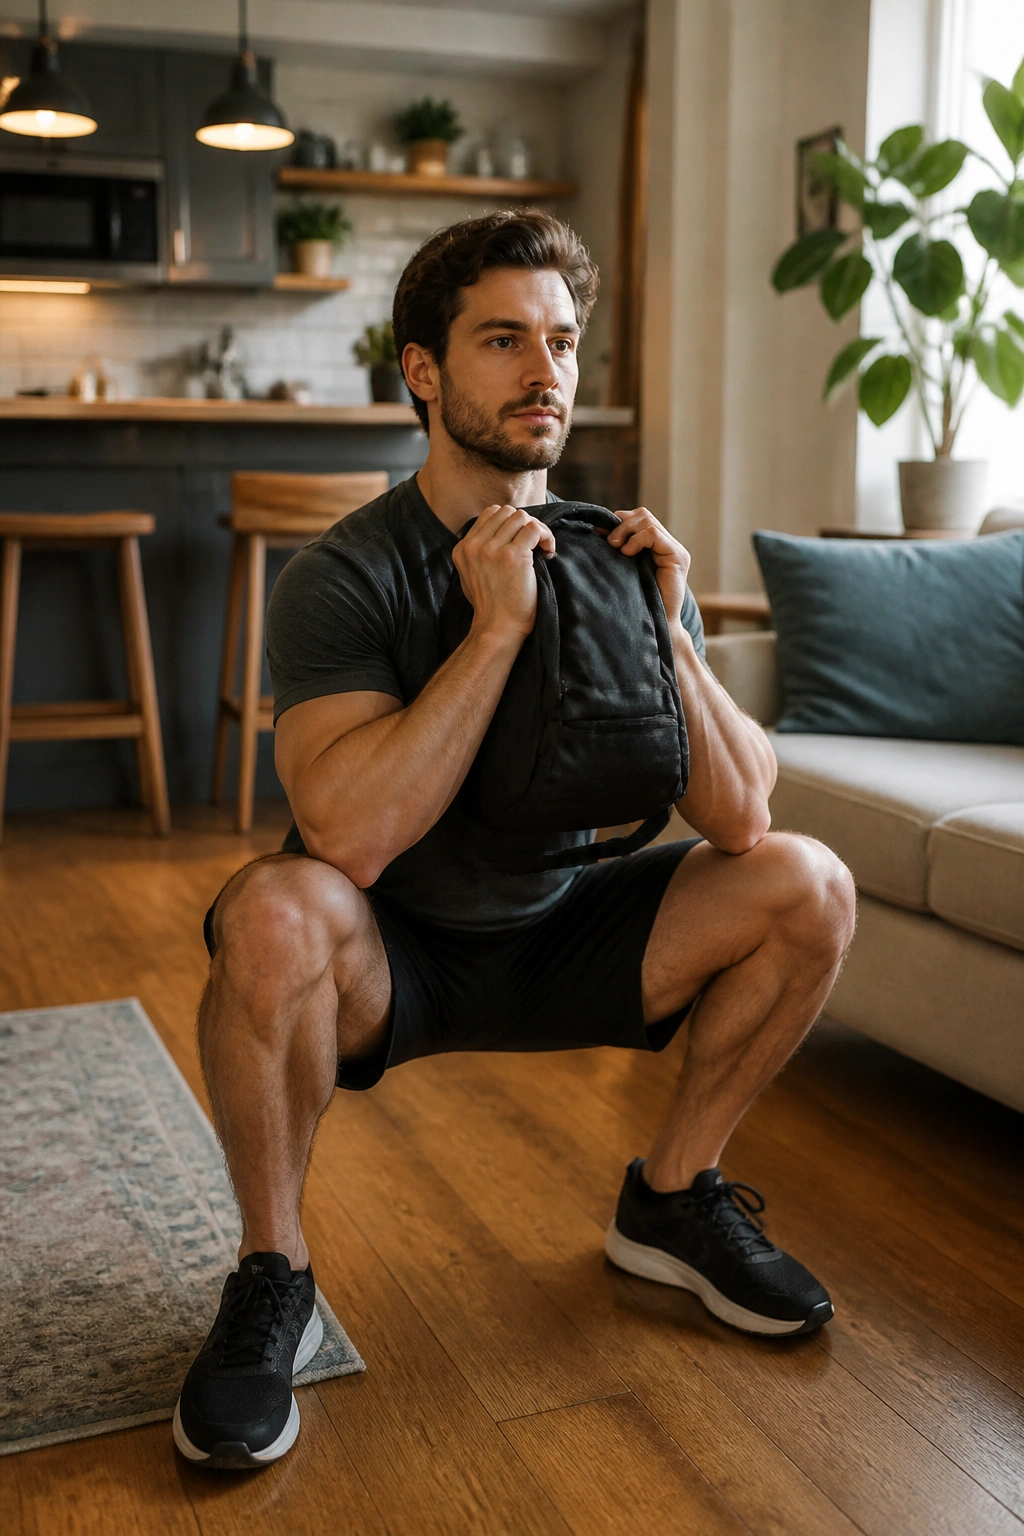
Twenty controlled goblet squats with a loaded backpack can make your quads go quiet. That’s the kind of quiet you want. Goblet squats are simple, but they’re simple in the useful way, not the boring way.
Hold the weight close to your chest, keep your elbows pointed down, and sit between your heels. Your whole foot should stay planted. If the heels pop up, the load is probably too heavy for your current depth, or your stance needs a small adjustment.
I’m partial to goblet squats because they clean up sloppy squat mechanics fast. The front-loaded position encourages a more upright torso, which keeps the move honest and gives your core some work at the same time.
- Try 3 to 5 sets of 8 to 15 reps.
- Pause for 1 second at the bottom on the final two reps.
- Use a dumbbell, kettlebell, or backpack held at chest height.
- Add a slow 3-second lowering phase when bodyweight stops feeling hard enough.
Do not rush the bottom. The deepest part of the rep is where most people cheat.
7. Romanian Deadlifts
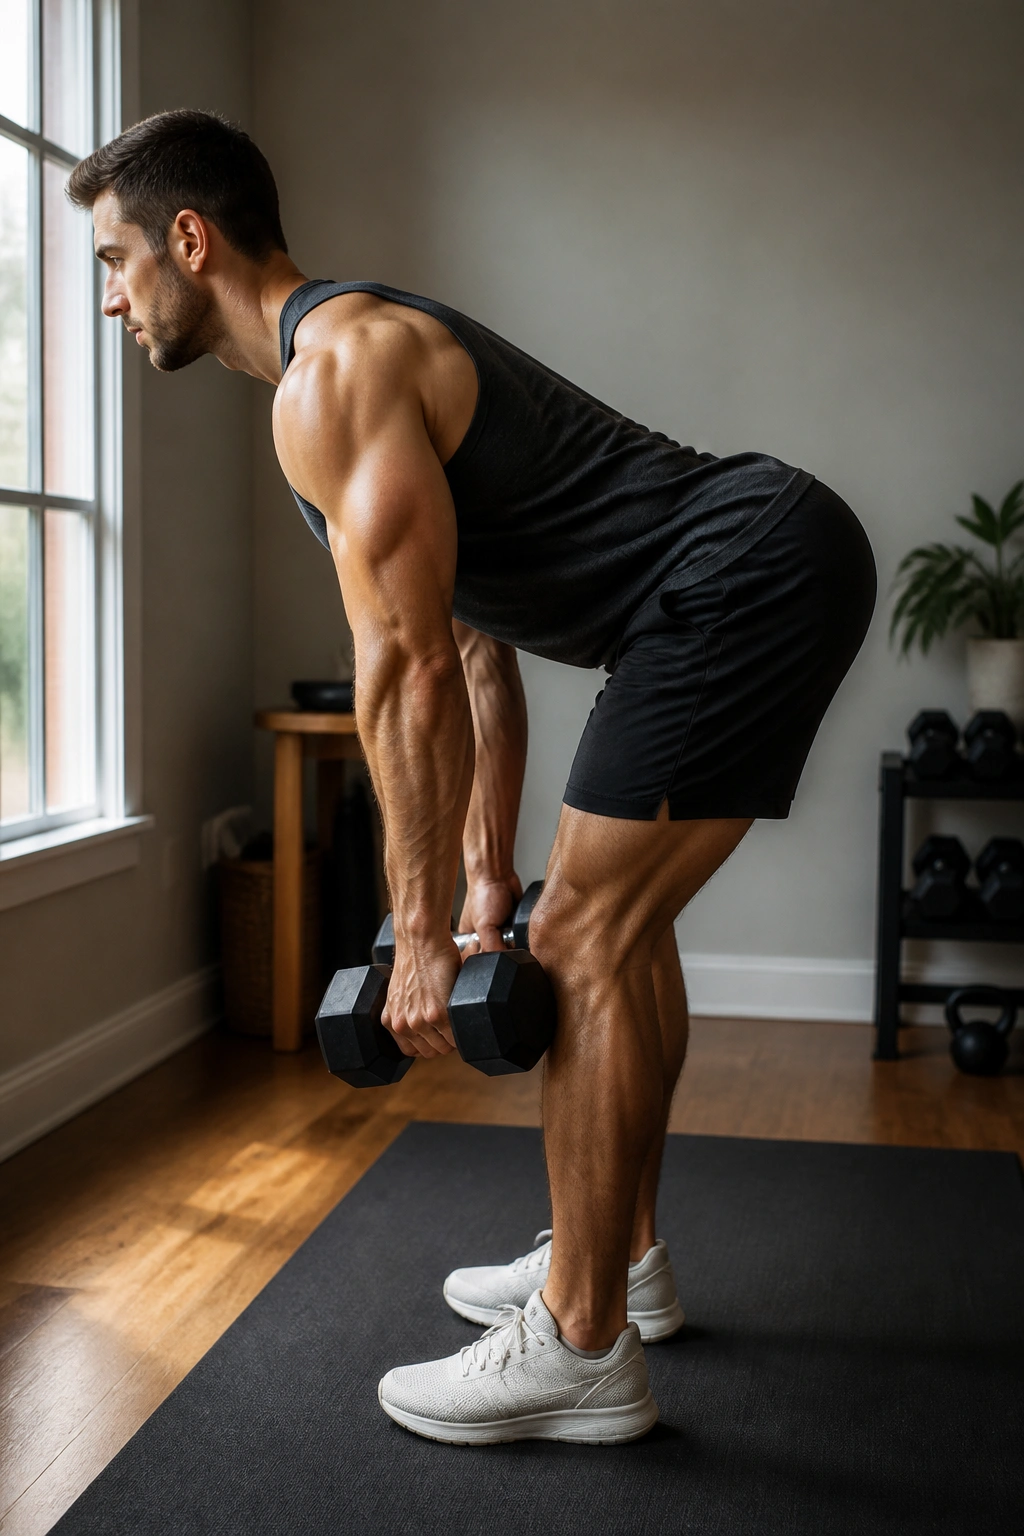
What if your hamstrings barely do anything in your home routine? Then a Romanian deadlift should move near the top of your list. It’s a hinge, not a squat, and that difference matters more than people think.
Stand with a pair of dumbbells, a backpack held with both hands, or two loaded bags. Soften the knees a little, push the hips back, and let the weight slide down the front of the legs while the spine stays long. The lowering stops when the hamstrings feel stretched and the back position is still solid.
The whole move should look restrained. No dropping. No reaching for the floor. You’re loading the back of the body, not proving how low you can go.
H3: What the Rep Should Feel Like
By the middle of the set, the hamstrings should feel tense and the glutes should be doing real work on the way up. If your lower back feels like the main event, stop and reset your hinge.
- Use 3 to 4 sets of 8 to 12 reps.
- Keep the weight close to the legs.
- Pause for 1 second at the bottom if you need to clean up form.
- Try single-leg RDLs when bilateral reps get too easy.
That one earns respect quickly. It’s not flashy. It works.
8. Resistance Band Lat Pulldowns
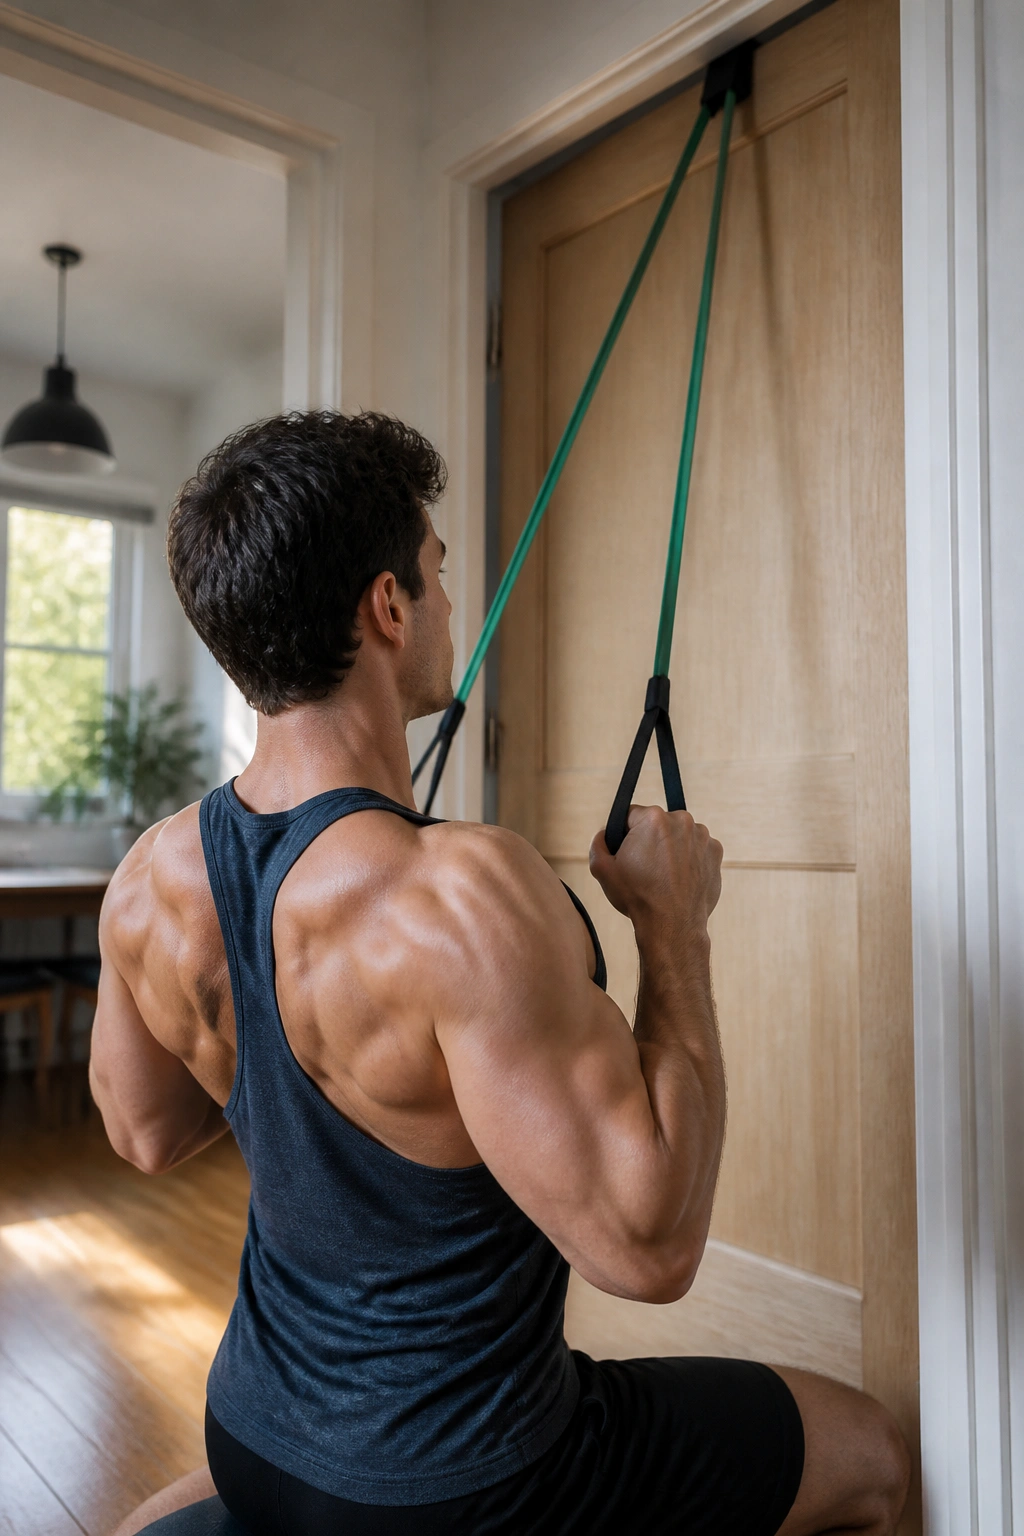
A band looped over a door can give your back more work than most people expect. The lat pulldown is one of the best home options for building upper-back width when pull-up bars are unavailable or when your pulling volume needs a little more structure.
Anchor the band high and secure it to a proper door anchor or another sturdy attachment point. Then kneel or stand tall, brace your ribs, and pull your elbows down toward your sides. The motion should finish with your shoulder blades pulled down, not shrugged up near your ears.
The band gives you a nice little surprise at the bottom, where tension spikes. That’s the part people usually like best — or hate best, depending on how honest their upper back is feeling.
How to Keep It Safe and Useful
- Use 3 to 4 sets of 10 to 20 reps.
- Pick a band thick enough that the last 3 reps slow down.
- Keep your neck relaxed.
- If the band snaps or shifts, stop and fix the setup before continuing.
A pulldown like this won’t replace a heavy pull-up forever, but it can build real lat size when you keep the reps hard and the tension consistent.
9. Glute Bridge March
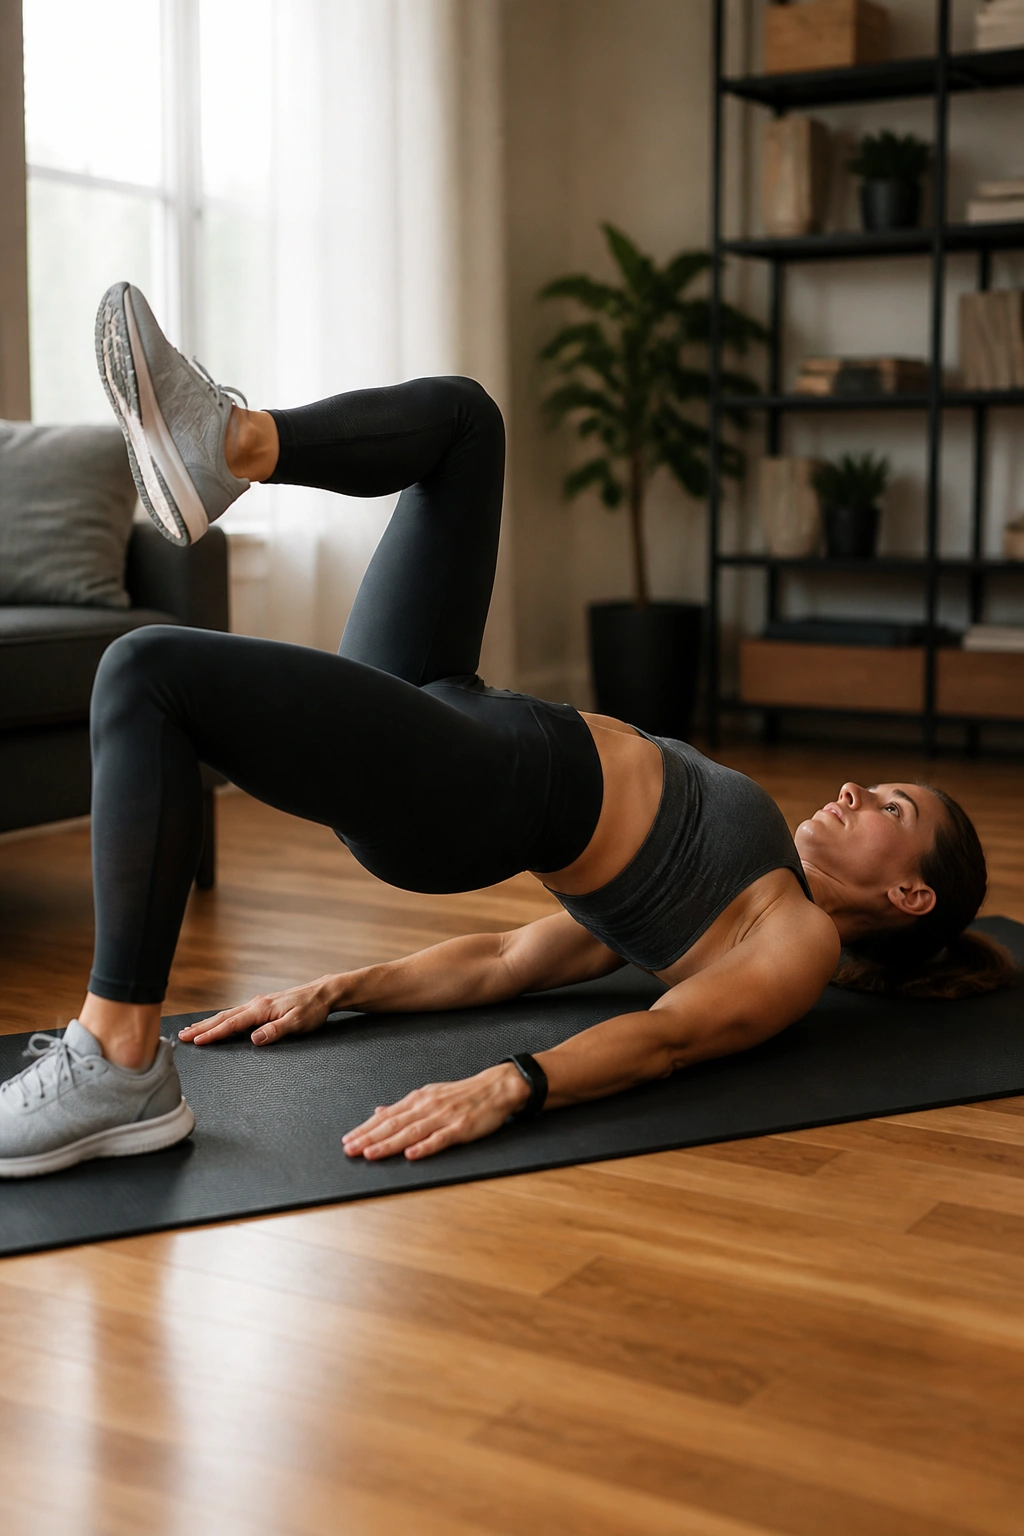
The glute bridge march looks easy until your hips start wobbling. Then it gets interesting. This is one of those sneaky home workouts that builds glutes, teaches pelvic control, and gives your core a useful job.
Set up in a regular glute bridge: feet flat, hips high, ribs down. From there, lift one foot a few inches off the floor without dropping the hips, set it down, and switch sides. The whole point is to keep the bridge shape steady while one leg does a little more of the work.
If your pelvis tips or your lower back starts doing the lifting, slow it down. The march is not a race. It’s a test of control.
- Start with 3 sets of 10 to 16 total marches.
- Add a mini-band above the knees for extra glute tension.
- Hold the top bridge for 2 seconds before each march.
- Keep pressure through the heel of the planted leg.
I like this one as an accessory after hip thrusts or split squats. It fills in the gaps without beating you up.
10. Reverse Lunges
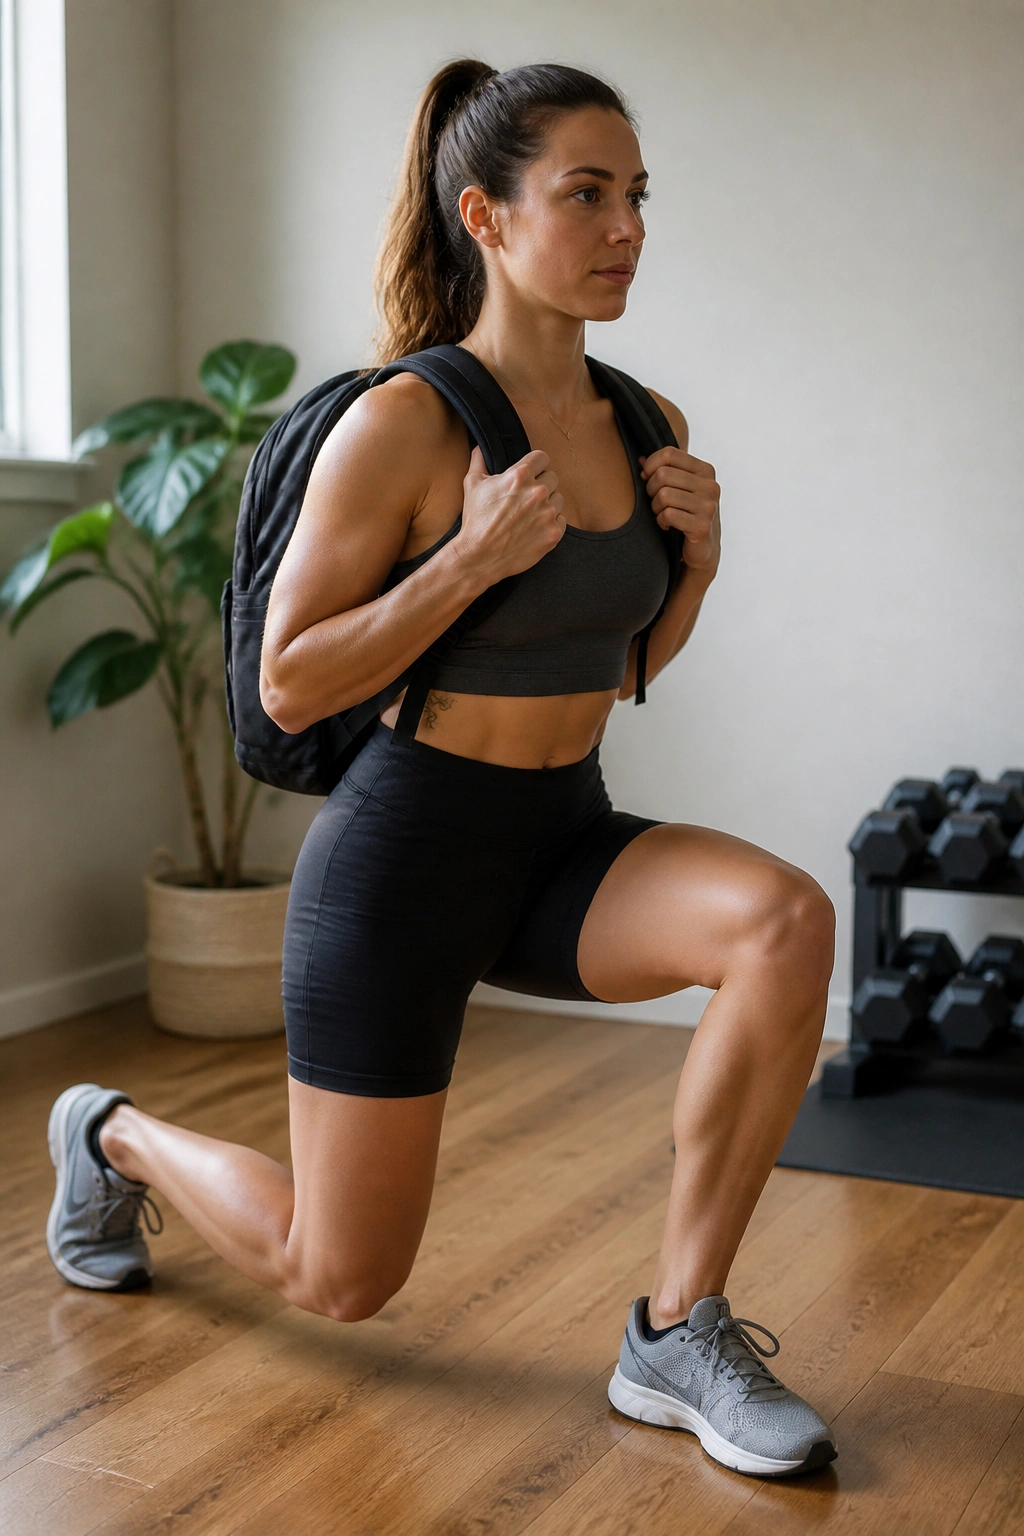
If forward lunges beat up your knees, reverse lunges are the calmer cousin. They still challenge the quads and glutes, but the backward step usually feels friendlier and easier to control.
Step back one leg at a time, lower until both knees bend, and keep most of your weight over the front leg as you drive back to standing. A slightly forward torso lean helps the glute do more of the work. A very upright torso shifts more load to the quads. Both are useful, depending on what you want.
A loaded backpack on your back works well here, and dumbbells at the sides work too. What matters most is a smooth descent and a strong push through the front foot.
Quick Form Checks
- Take a long enough step that the front knee does not jam forward.
- Keep the front heel down.
- Touch the back knee lightly, then rise.
- Use 3 to 4 sets of 8 to 12 reps per side.
Reverse lunges are one of those moves that reward patience. Rush them and they turn sloppy. Slow down, and they start building legs in a way your joints usually appreciate.
11. Floor Press
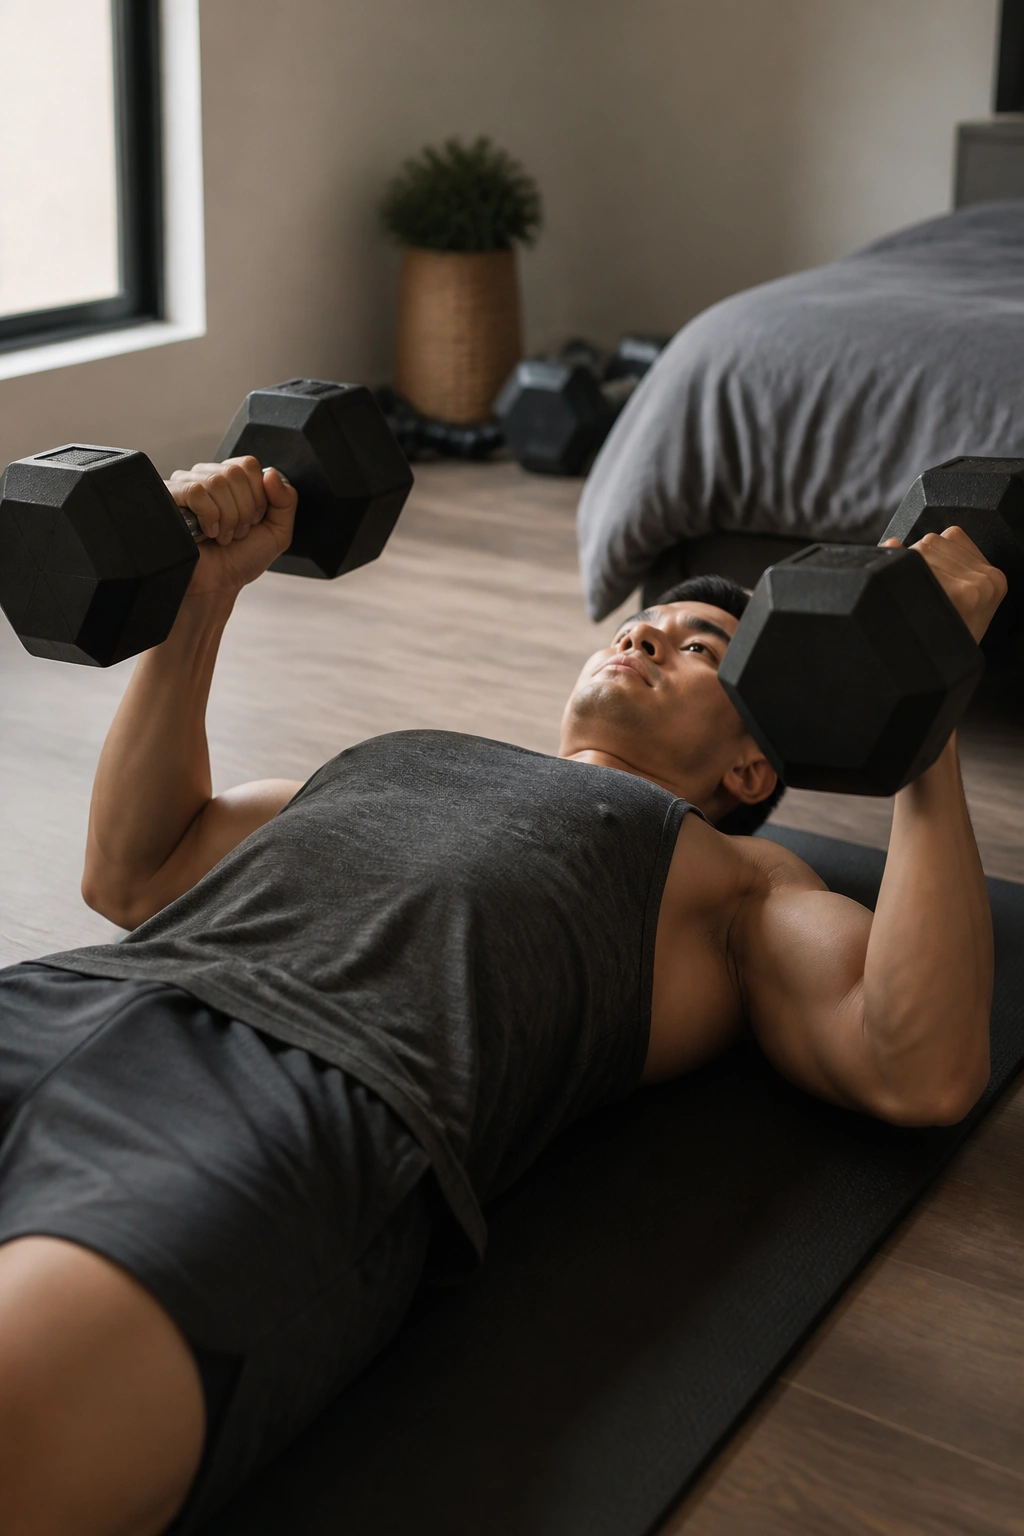
Push-ups are not the only chest move worth doing at home. Floor presses give you a chance to load the chest, triceps, and front delts in a way that feels more like a classic strength lift, with a built-in limit on how low the shoulders can travel.
Lie on the floor with dumbbells, water jugs, or other safe handheld loads. Press from the elbows resting lightly on the floor, then drive the weight up until the arms are straight. The floor cuts off the bottom half of the rep, which often feels easier on the shoulders and lets you push a bit harder near the top.
That shorter range can sound like a drawback. Sometimes it is. But for a lot of home lifters, the floor press is the difference between avoiding pressing work and doing enough pressing work to grow.
H3: Why the Floor Matters
The floor keeps you honest about the bottom position and stops the shoulder from drifting too deep. If you’ve ever felt cranky shoulders during deep pressing, this version is worth keeping around.
- Use 3 to 5 sets of 6 to 12 reps.
- Keep wrists stacked over elbows.
- Lower under control for 2 to 3 seconds.
- Pause briefly on the floor before each press.
If push-ups are your bodyweight press, floor presses are the loaded version that keeps showing up and doing the job.
12. Lateral Raises
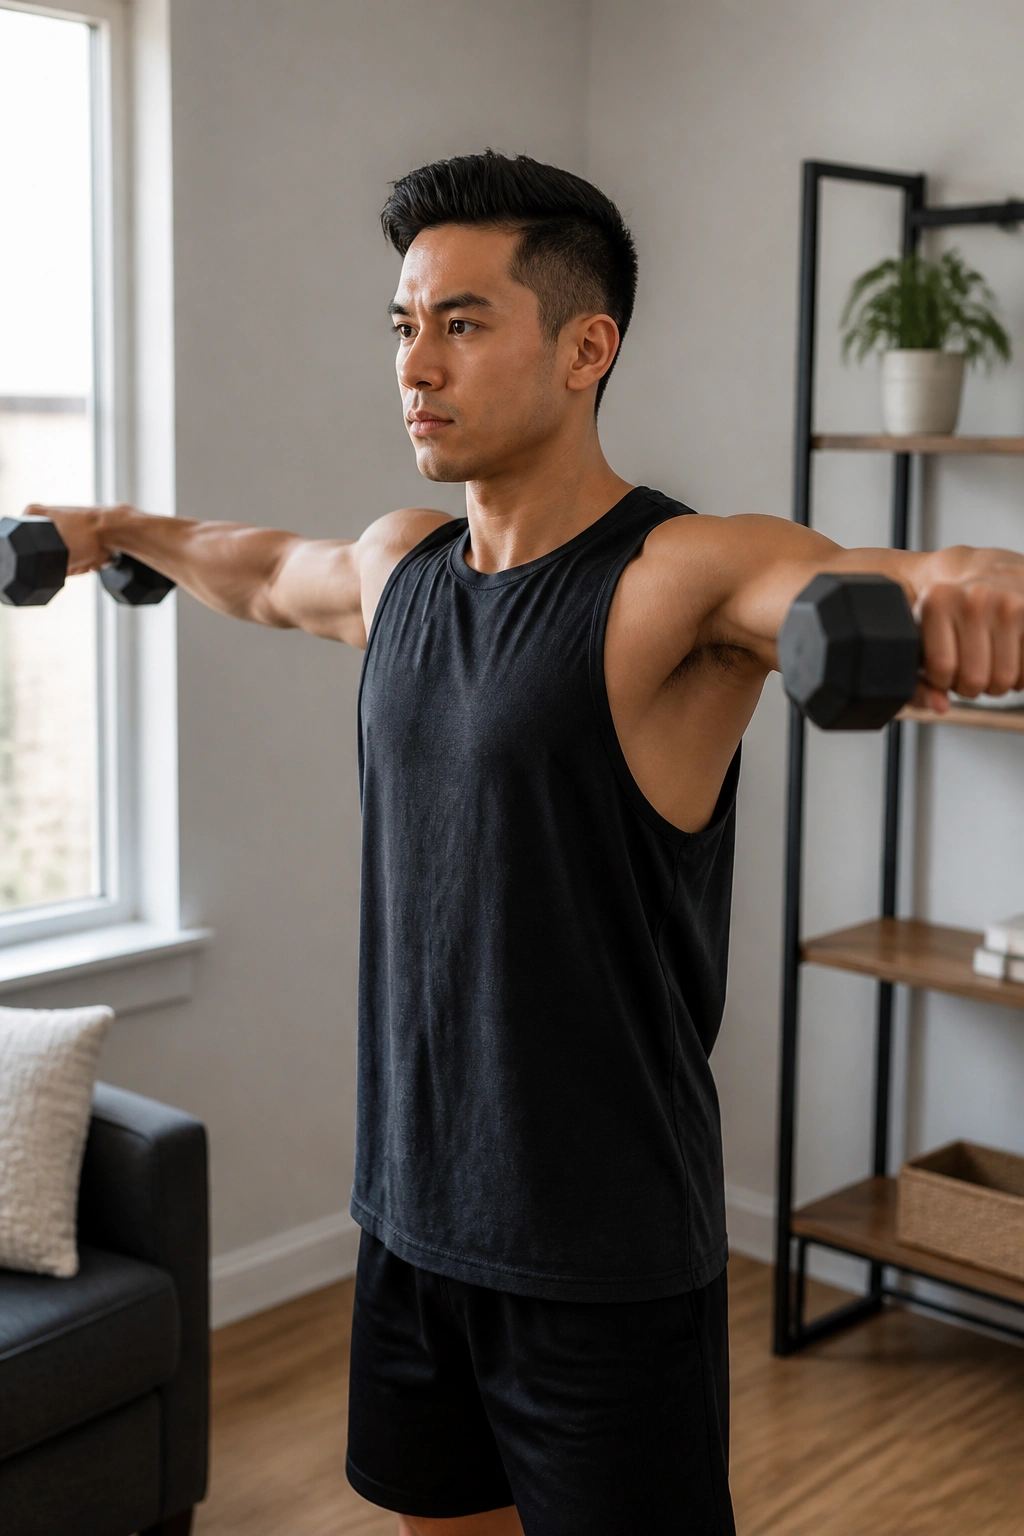
Tiny movement. Big shoulder burn. Lateral raises are the classic reminder that muscle growth does not always need a huge range or heavy weight — it needs tension where the muscle actually works.
Stand tall with dumbbells, water bottles, or bands. Raise the arms out to the sides until they’re about level with the shoulders, then lower under control. The elbows should stay slightly bent, and the hands should not swing above the elbows like you’re pouring water from a jug.
The side delts tend to like moderate reps, clean form, and a bit of patience. Chasing huge weight usually turns the set into a trap-shrug hybrid, and that’s not what you want.
- Try 3 to 4 sets of 12 to 20 reps.
- Keep the motion smooth and upright.
- Stop at shoulder height.
- Rest 45 to 60 seconds and keep the tension honest.
If your neck is taking over, the weight is too heavy. No drama. Just drop down and do the set properly.
13. Single-Leg Calf Raises
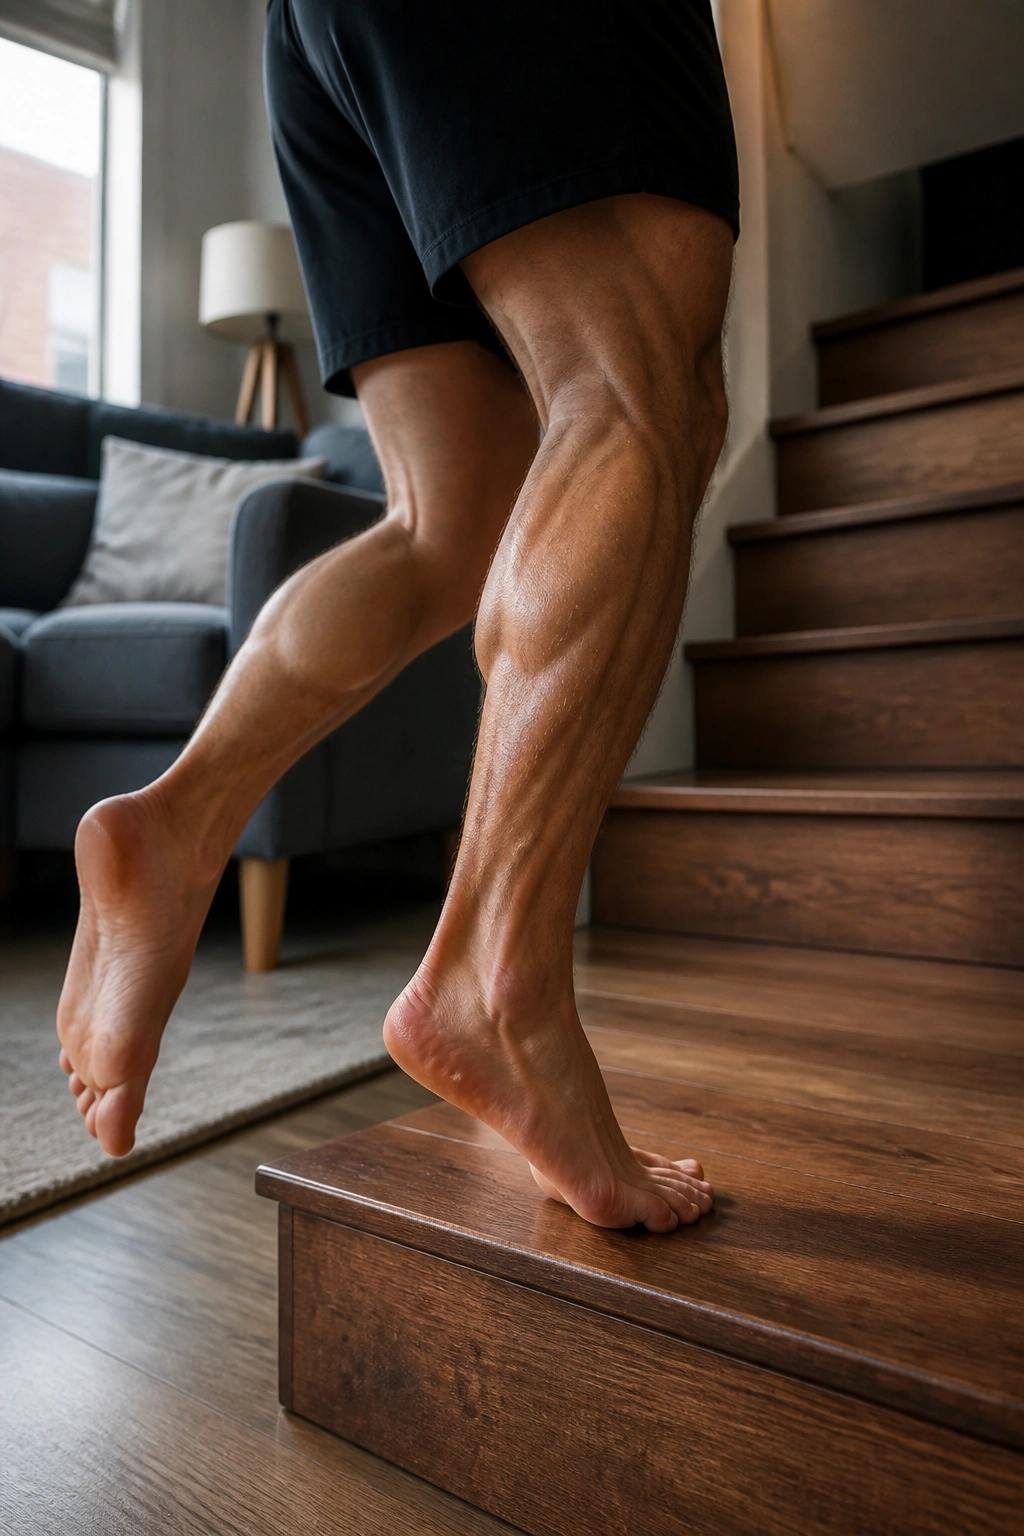
Calves need stubborn work, not guesswork. Single-leg calf raises are simple, but they’re also one of the few home exercises that let you attack the calves with enough detail to matter.
Stand on the edge of a step or a thick book stack so the heel can drop below the level of the toes. Lower slowly, pause for a second in the stretched position, then rise as high as you can and hold the top. The top squeeze matters more than most people think, and the bottom stretch matters too.
There are two useful versions here. A straight-knee calf raise hits the gastrocnemius more. A bent-knee version shifts more toward the soleus. If you want fuller lower legs, do both. Boring? Maybe. Effective? Yes.
A Better Way to Load Them
- Use 4 to 5 sets of 10 to 20 reps per leg.
- Hold a dumbbell or wear a backpack for extra resistance.
- Pause 1 second at the top and 1 second at the bottom.
- Keep the ankle moving through the full range.
Calves are rarely polite about growth. They usually ask for more reps, more range, and more consistency than people expect.
14. Band Pull-Aparts and Face Pulls
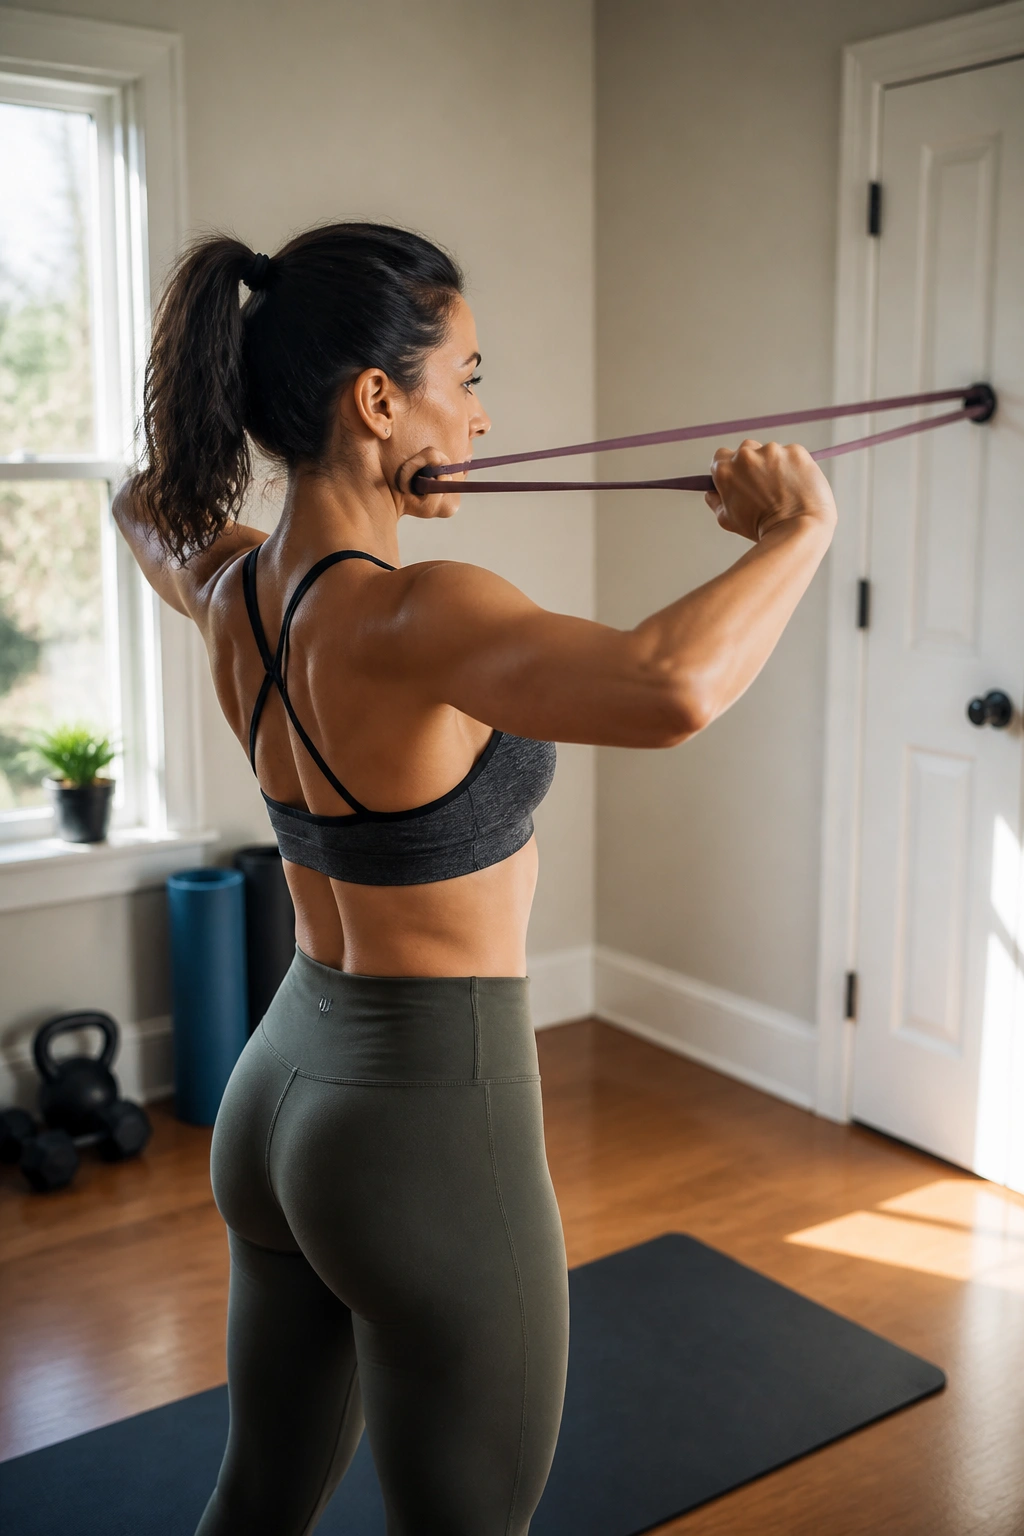
A light band can fix the thing push-ups miss. Rear delts, upper back, and the small muscles around the shoulders do a lot of quiet work, and if you only press, they tend to get neglected fast.
Band pull-aparts are the simpler move: arms straight, band at chest height, pull apart until the band touches your chest or gets close, then return with control. Face pulls are a little richer. Anchor the band at eye level, pull toward your face, and finish with elbows high and hands apart.
I like pairing these after pressing or on recovery days because they give the shoulders some balance without frying you. They also make your posture feel a little less slumped if you sit a lot, which is hardly a bad side effect.
Use Them Like This
- Pull-aparts: 3 sets of 15 to 25 reps.
- Face pulls: 3 sets of 12 to 20 reps.
- Keep the shoulders down and out of the ears.
- Don’t jerk the band — tension should stay smooth.
These are not glamorous. They are useful. There’s a difference.
15. Backpack Complex and Loaded Carry Finisher
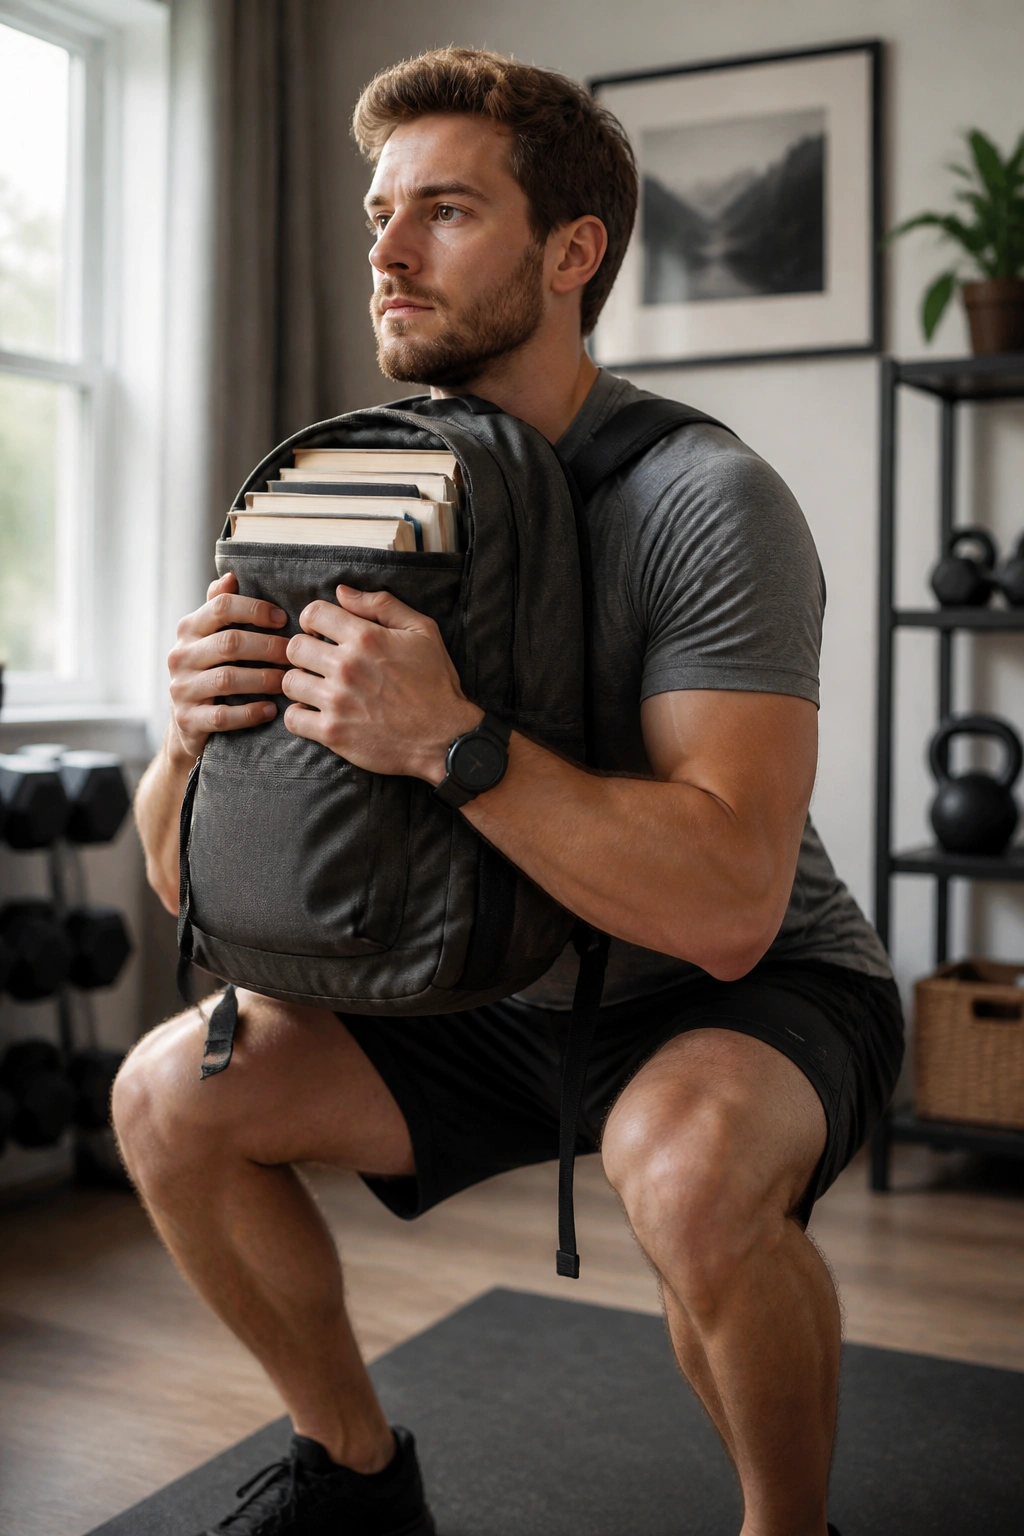
A backpack complex can make a small room feel smaller in the best way. You load one bag, keep moving, and turn a few square feet into a full-body muscle session that hits legs, back, grip, and core all at once.
Use a backpack stuffed with books, water bottles, or bags of rice. Do 5 goblet squats, 5 bent-over rows, 5 reverse lunges per side, and 20 to 40 steps of a suitcase carry or march. Rest about 90 seconds, then repeat for 3 to 5 rounds. The load should be heavy enough that the last round feels slower without destroying form.
The carry part matters. A suitcase carry — one hand only — punishes the core and grip in a way that looks simple from the outside. It is not simple. It is just honest.
A Smart Way to Put the Whole List Together
If you want a practical weekly setup, rotate a push, a pull, a leg move, and one finisher:
- Day 1: Push-ups, one-arm rows, Bulgarian split squats, calf raises.
- Day 2: Floor press, Romanian deadlifts, hip thrusts, lateral raises.
- Day 3: Pike push-ups, band pulldowns, reverse lunges, backpack carry work.
That gives you pressing, pulling, squatting, hinging, and loaded walking without turning the week into a random pile of exercises. Keep the sets hard, add reps or weight over time, and don’t be shy about making a backpack heavier when your current load stops biting.
A small home setup only works when each set gets treated like training. A backpack on the floor is clutter. Put it on your back, and it becomes the thing that changes the room.
Final Thoughts
Muscle growth at home comes down to a few plain rules: load the body enough, move through a full range, and stop pretending easy sets count as hard work. The exercises above cover the biggest bases, and they do it without needing much more than a chair, a band, and something heavy you can carry.
The smart move is not doing all 15 in one giant blur. Pick a few, get stronger at them, and keep the reps honest. That’s where the change shows up — in better tension, cleaner form, and a workout that feels like it actually asked something from you.
