



That soft, stubborn belly after birth is not one thing. It can be stretched skin, a deep core that went offline, a rib cage that forgot how to stack over the pelvis, and—sometimes—a gap down the midline called diastasis recti. If you’ve been staring at your stomach and wondering why crunches feel wrong, you’re not imagining it. The body changes shape, pressure, and support in one messy sweep.
The smartest mummy tummy workouts do not start with punishment. They start with pressure control. That means breathing, gentle core bracing, hip support, and exercises that teach your trunk how to hold itself again without bulging, leaking, or making your back do all the work.
And yes, that matters after a vaginal birth and after a C-section. If you feel heaviness in the pelvis, see a ridge pop up along the belly midline, or get sharp pain around the scar, that is your cue to back off and get checked by a clinician or pelvic floor physio. No hero points for pushing through bad signs. None.
The moves below start small and build. That’s the point. The best postpartum core work looks a little boring at first, and then—if you do it well—it starts to feel like your body is waking back up.
1. 360-Degree Breathing for Mummy Tummy Recovery
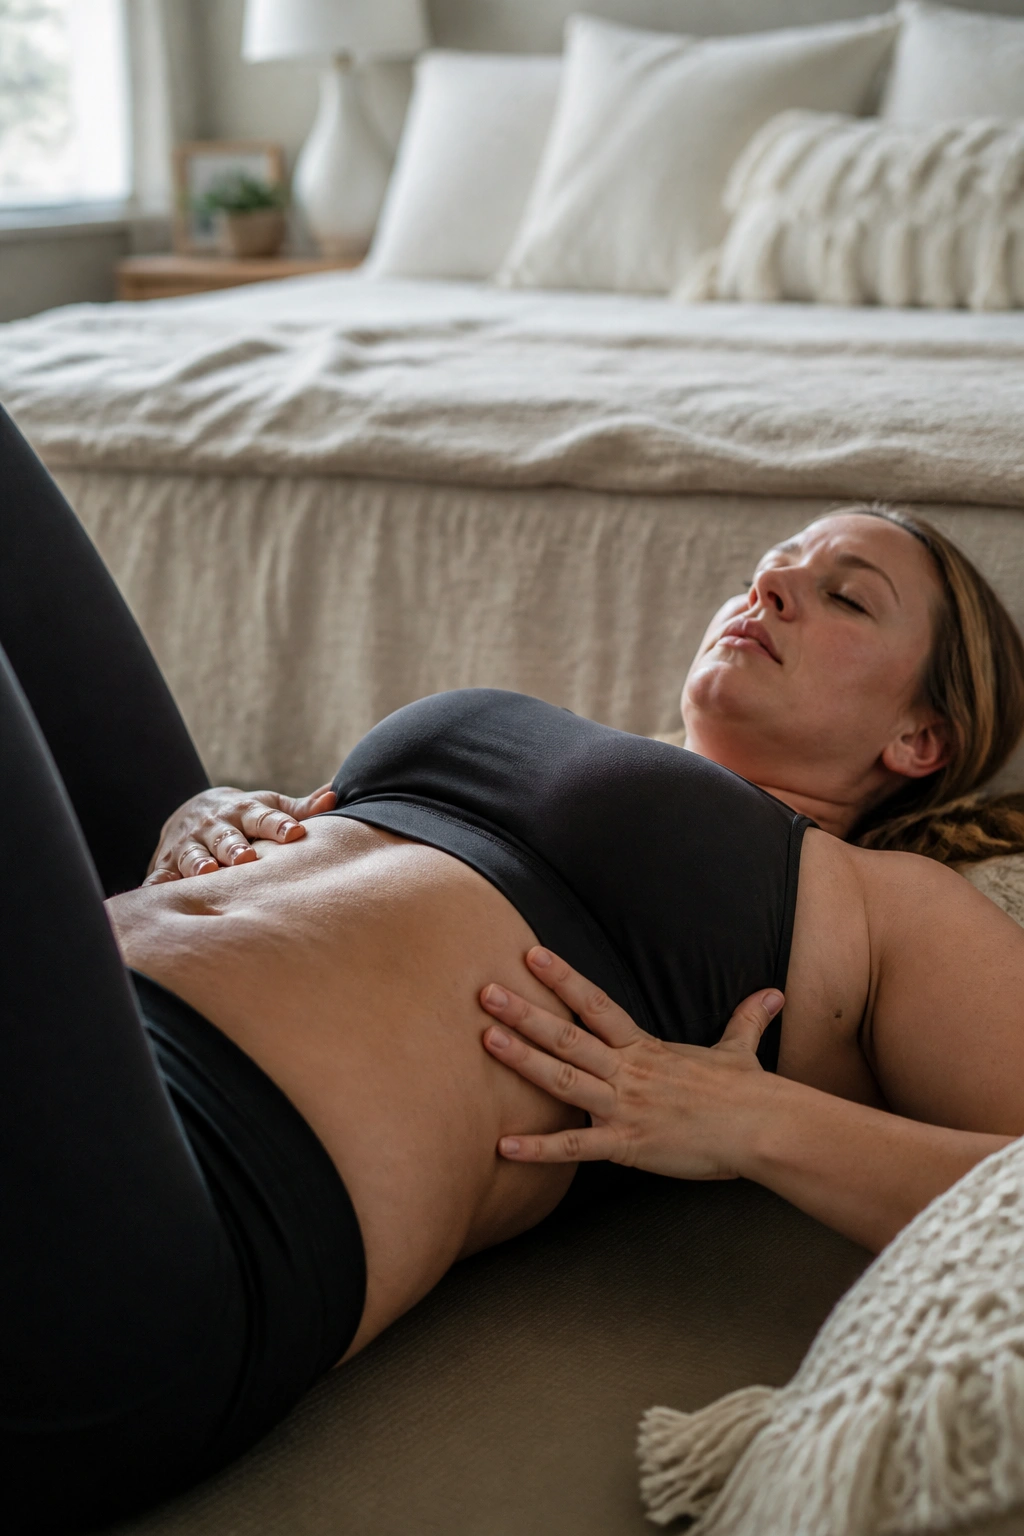
Breathing is the first workout because it teaches pressure before it asks for strength. That sounds almost too simple, but simple is exactly what a tired postpartum core needs. When you inhale into the lower ribs, sides, and back, your diaphragm and pelvic floor start working like partners again instead of strangers.
Why It Belongs First
Lie on your back with your knees bent, or roll onto your side if that feels better. Put one hand on your lower ribs and one on your belly, then breathe in through your nose for about 4 seconds. You want the ribs to widen sideways and into the back, not just the belly to puff out. On the exhale, let your ribs soften down and feel the lower tummy gently draw inward.
That gentle lift on the exhale is the money part. No sucking in hard. No bracing like you’re about to take a punch. Just a quiet, controlled lift that helps reconnect the deep core with the pelvic floor.
- Do 5 slow breaths.
- Rest for 20 to 30 seconds.
- Repeat for 3 rounds.
- Use it before every other exercise in this list.
Pro tip: if your abdomen domes upward when you breathe in, you’re probably pushing too much pressure forward. Ease off and make the inhale smaller.
2. Pelvic Tilts on the Floor
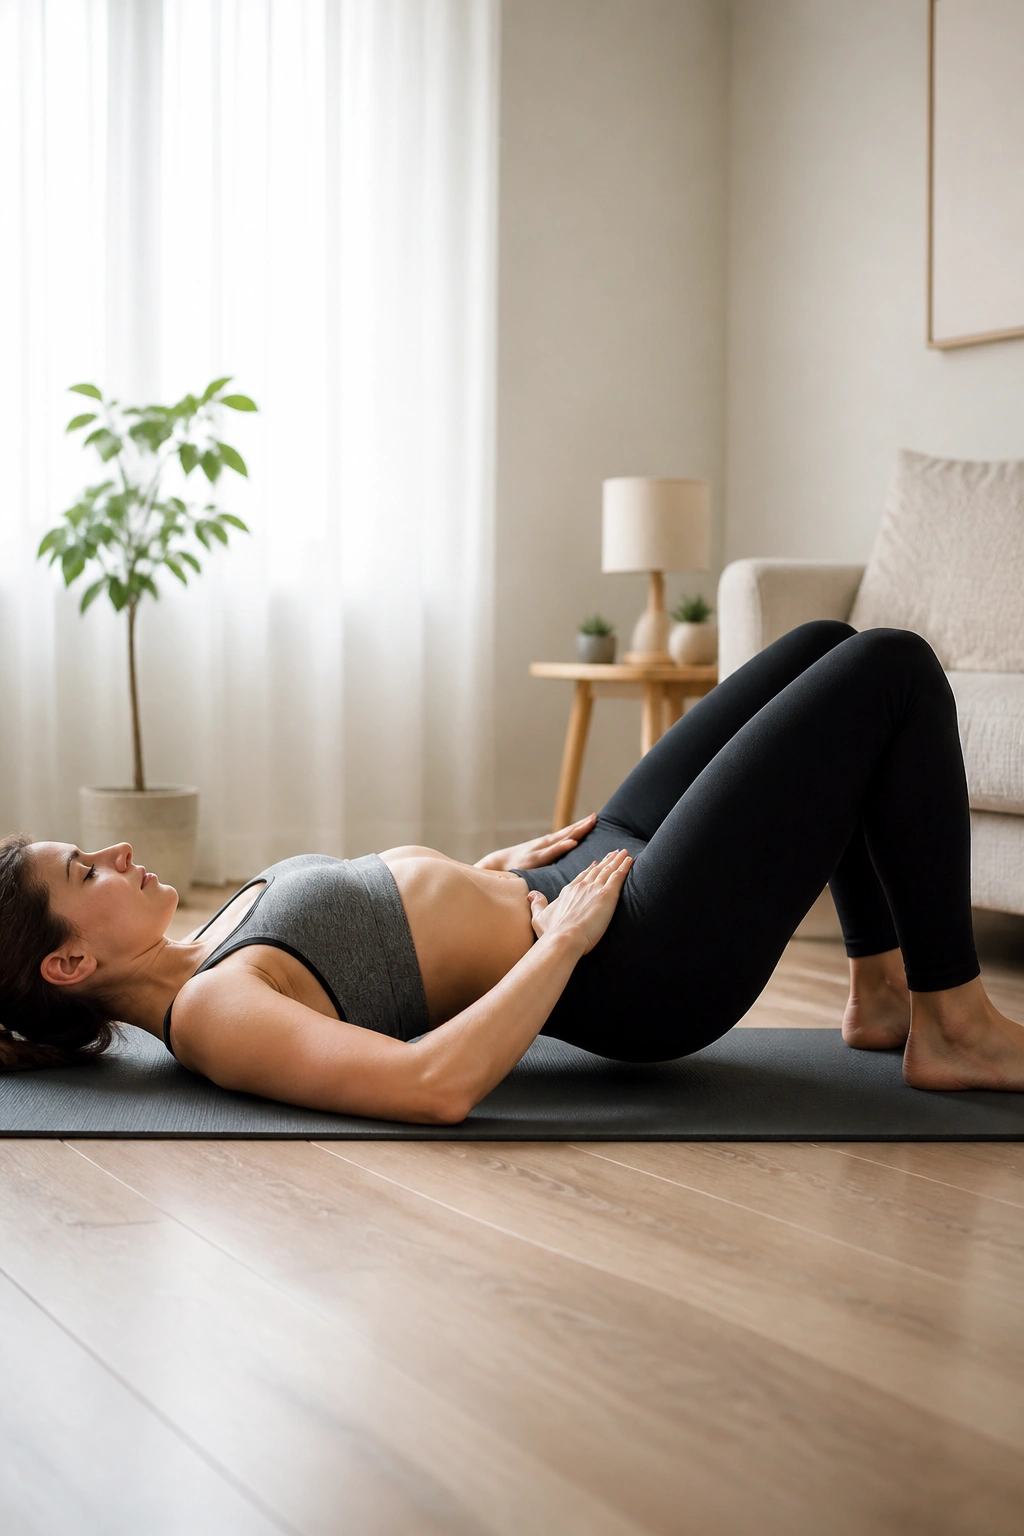
Pelvic tilts look tiny. That is the point. After pregnancy, a lot of people lose the feel of where their pelvis sits, and the low back starts gripping to make up for it. Pelvic tilts help you find that middle ground again without loading the belly.
Lie on your back with your knees bent and feet flat. Exhale and gently tip your pelvis so the low back settles toward the floor. Then inhale and return to neutral. Don’t smash your spine flat. Don’t arch hard either. The motion should feel like a small rocking of a bowl of water, not a dramatic crunch.
I like this move for the days when the midsection feels awkward and disconnected. It gives you feedback fast. If your ribs flare or your upper abs kick in too much, the tilt gets sloppy right away, which is useful information. Your body tells on itself here.
Do 8 to 10 slow reps for 2 sets. If you can’t keep the movement smooth, make it smaller. If it hurts the scar, the tailbone, or the pelvic floor, stop. Clean reps beat bigger ones.
3. Heel Slides
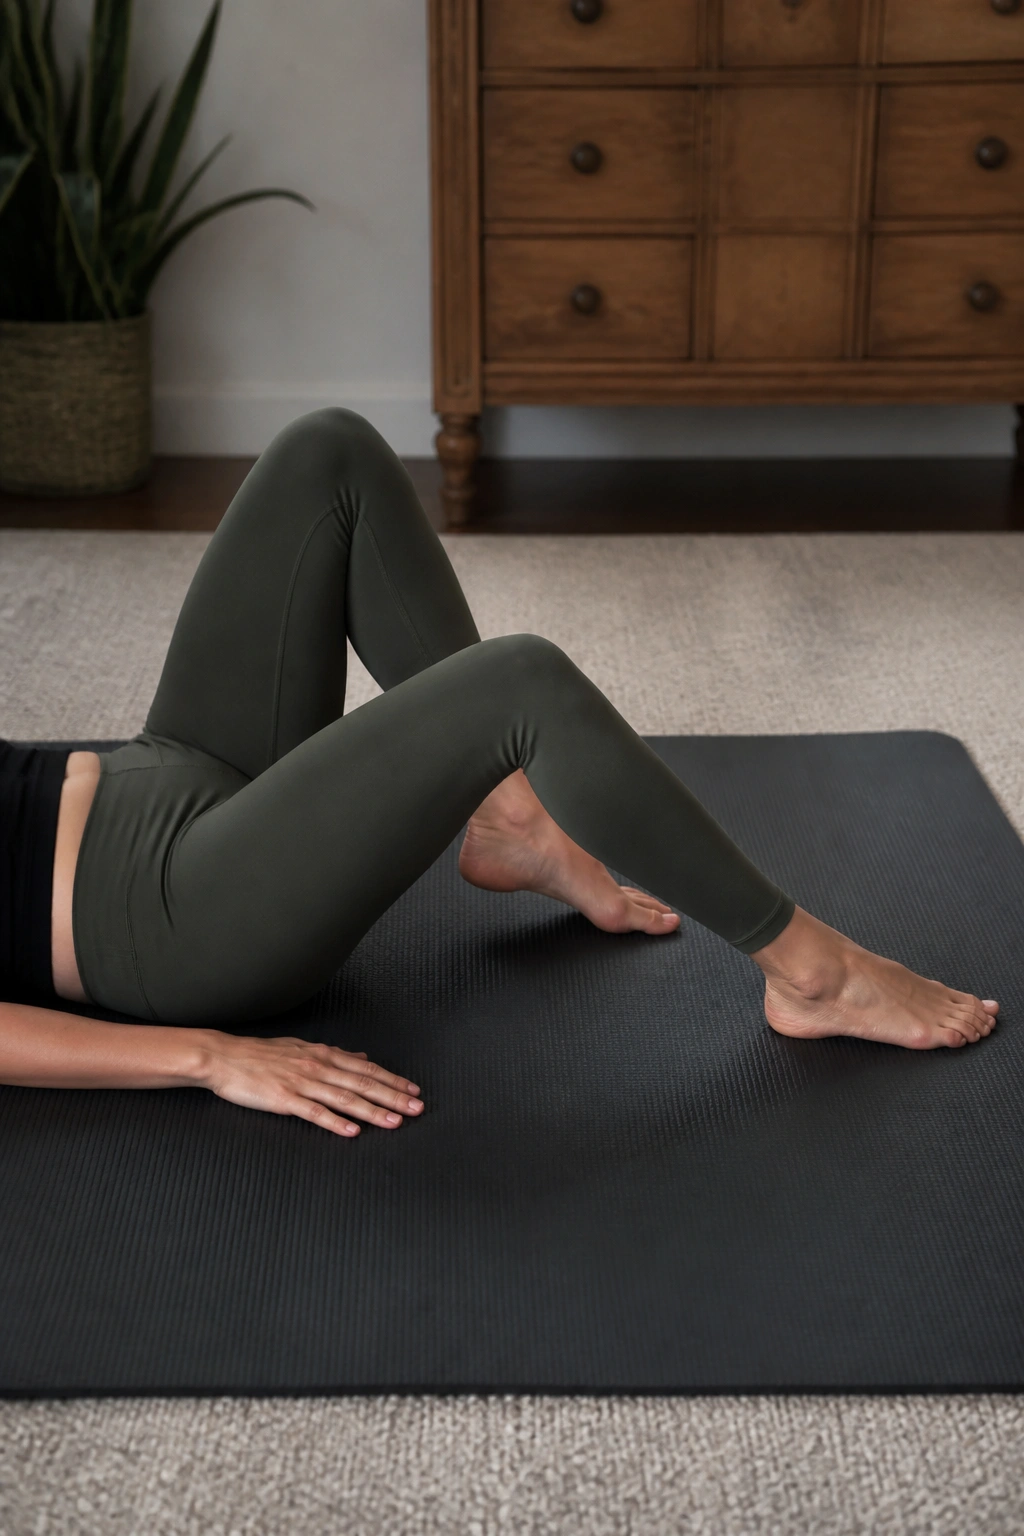
Why does a heel slide matter? Because it asks one leg to move while the rest of you stays quiet. That sounds easy until you try it after birth and feel your ribs pop, your back arch, or your belly dome. Then you realize the move is doing exactly what it should.
Start on your back with both knees bent. Exhale, brace lightly, and slide one heel away from you until the leg is almost straight. Keep the heel in contact with the floor the whole time. Inhale as you slide it back. The pelvis should stay steady. No rocking. No chasing the movement with your lower back.
How to Use It
- 6 to 8 slides per side
- 2 sets
- Slide slowly for about 3 seconds out and 3 seconds back
- Stop before the ribs flare
A tiny range done well is better than a long slide that makes your abdomen coning jump out. If you want more challenge later, slide the leg farther only after the current version feels boring. Boring is progress here.
4. Bent-Knee Marches
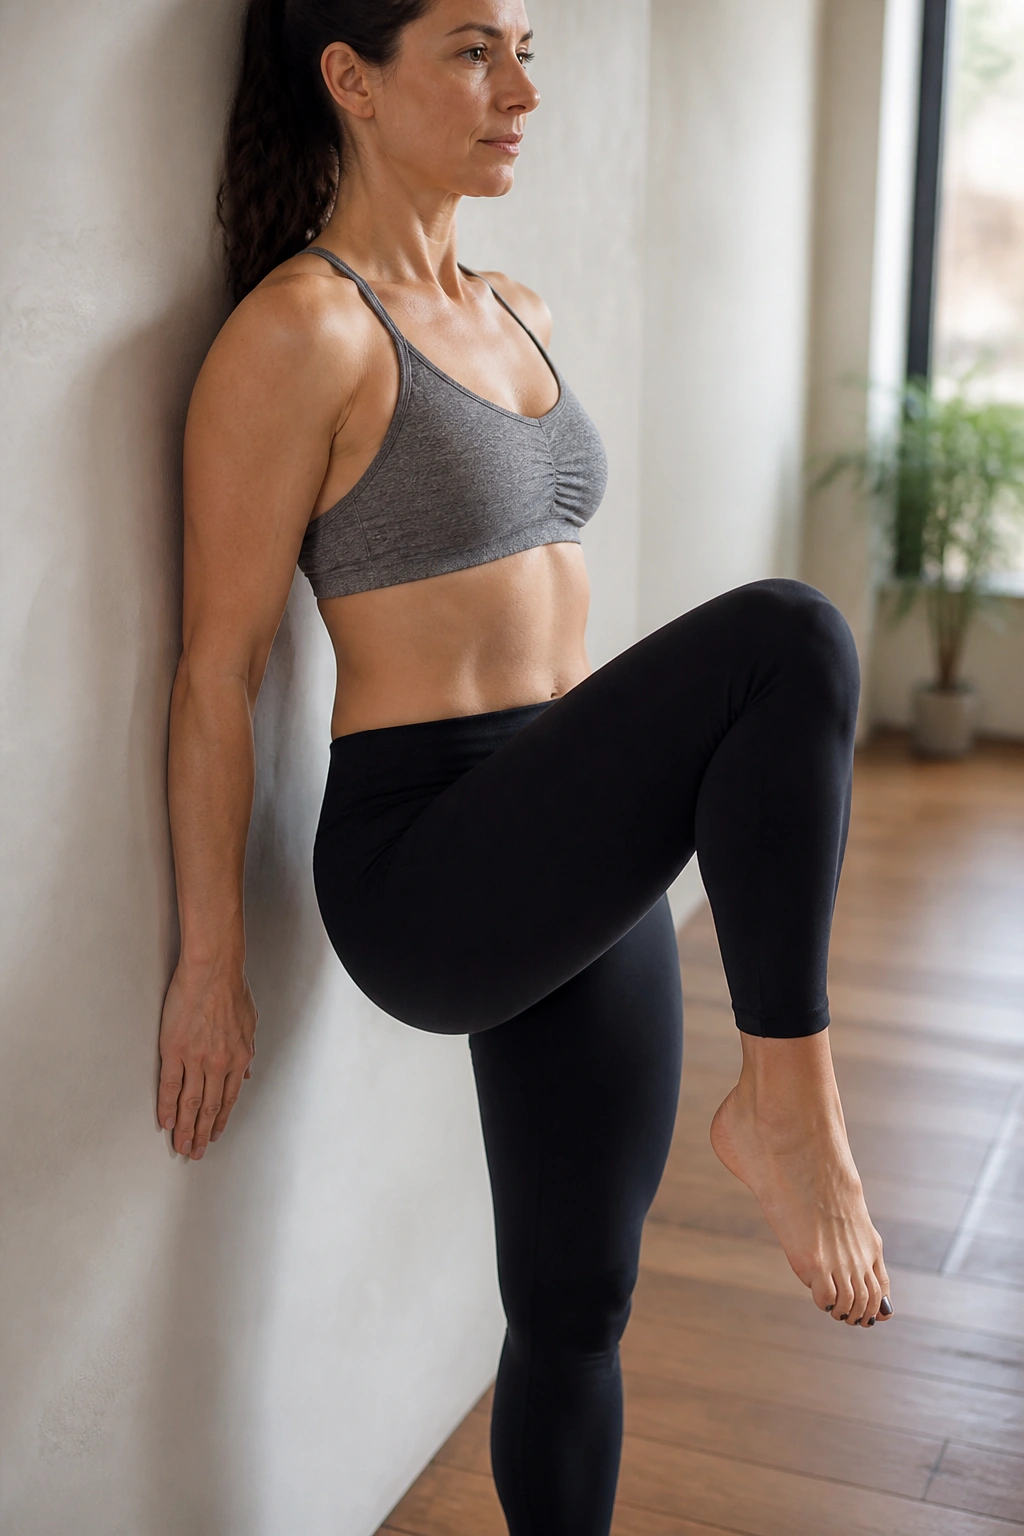
Picture yourself in the kitchen, baby on one hip, feeding bottle in the other hand, and your stomach feeling like it’s bracing all day. Bent-knee marches teach your core to stay organised while one leg moves. That’s a real-life skill, not just a floor drill.
Lie on your back or stand with your back near a wall if the floor is not your friend yet. Exhale, lightly engage your low abs, and lift one knee a few inches. Lower it with control, then switch sides. The goal is not height. The goal is no wobble.
The tricky part is resisting the urge to lean back or puff the belly forward as the knee lifts. That happens fast. Too fast. So slow the march down until you can feel the ribs stay stacked over the pelvis.
- 8 to 10 marches per side
- 1 to 2 sets
- Keep the lift low
- Pause for one beat at the top
If the hip flexors start doing all the work, shorten the range and breathe out a little longer on the lift.
5. Dead Bug Heel Taps
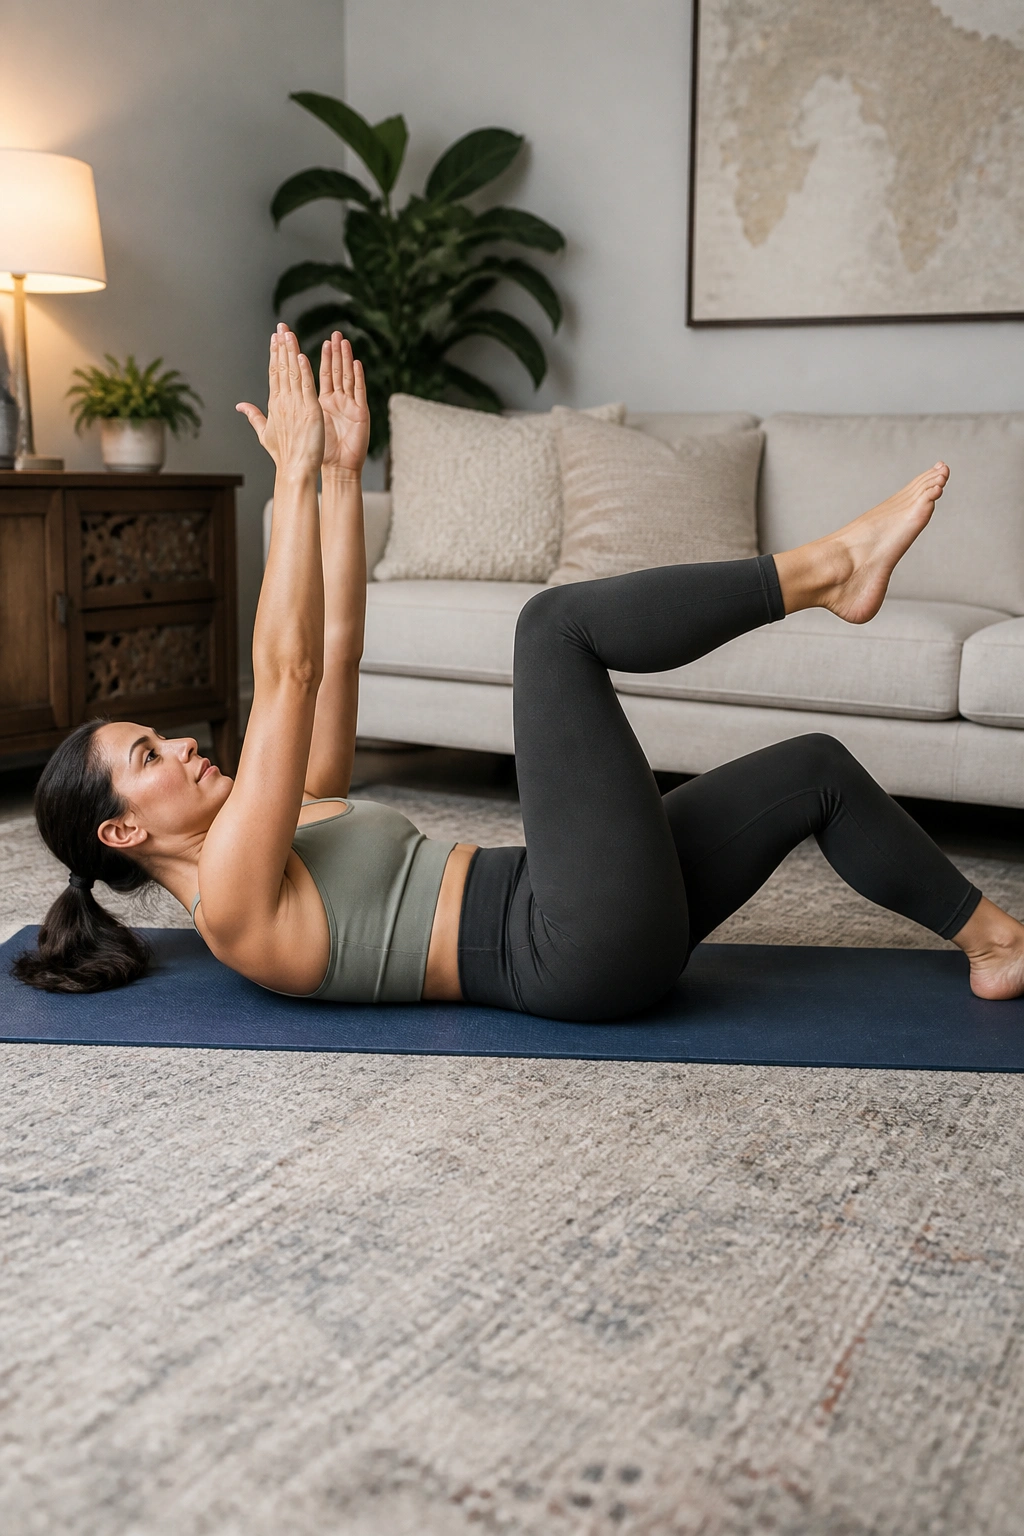
Dead bug heel taps are one of my favorite mummy tummy workouts because they feel honest. They show you whether your deep core can hold shape when the legs move, and they do it without the neck strain that comes with crunches. That matters more than people think, especially when sleep-deprived shoulders are already living near the ears.
Lie on your back with your hips and knees at 90 degrees, arms pointing up. Exhale, flatten the rib flare, and tap one heel to the floor before bringing it back. Then switch sides. Keep the low back neutral; it should not jam into the mat, and it should not arch like a bridge either.
You will probably feel the lower abs switch on hard. Good. You may also notice your belly trying to dome if the movement is too big. That is your signal to bring the knees closer to the body or tap the heel higher instead of lower.
Slow is better. Always.
Try 6 taps per side for 2 or 3 rounds. If your neck gets tight, support your head with a thin towel and keep the eyes looking straight up, not toward the thighs.
6. Glute Bridges
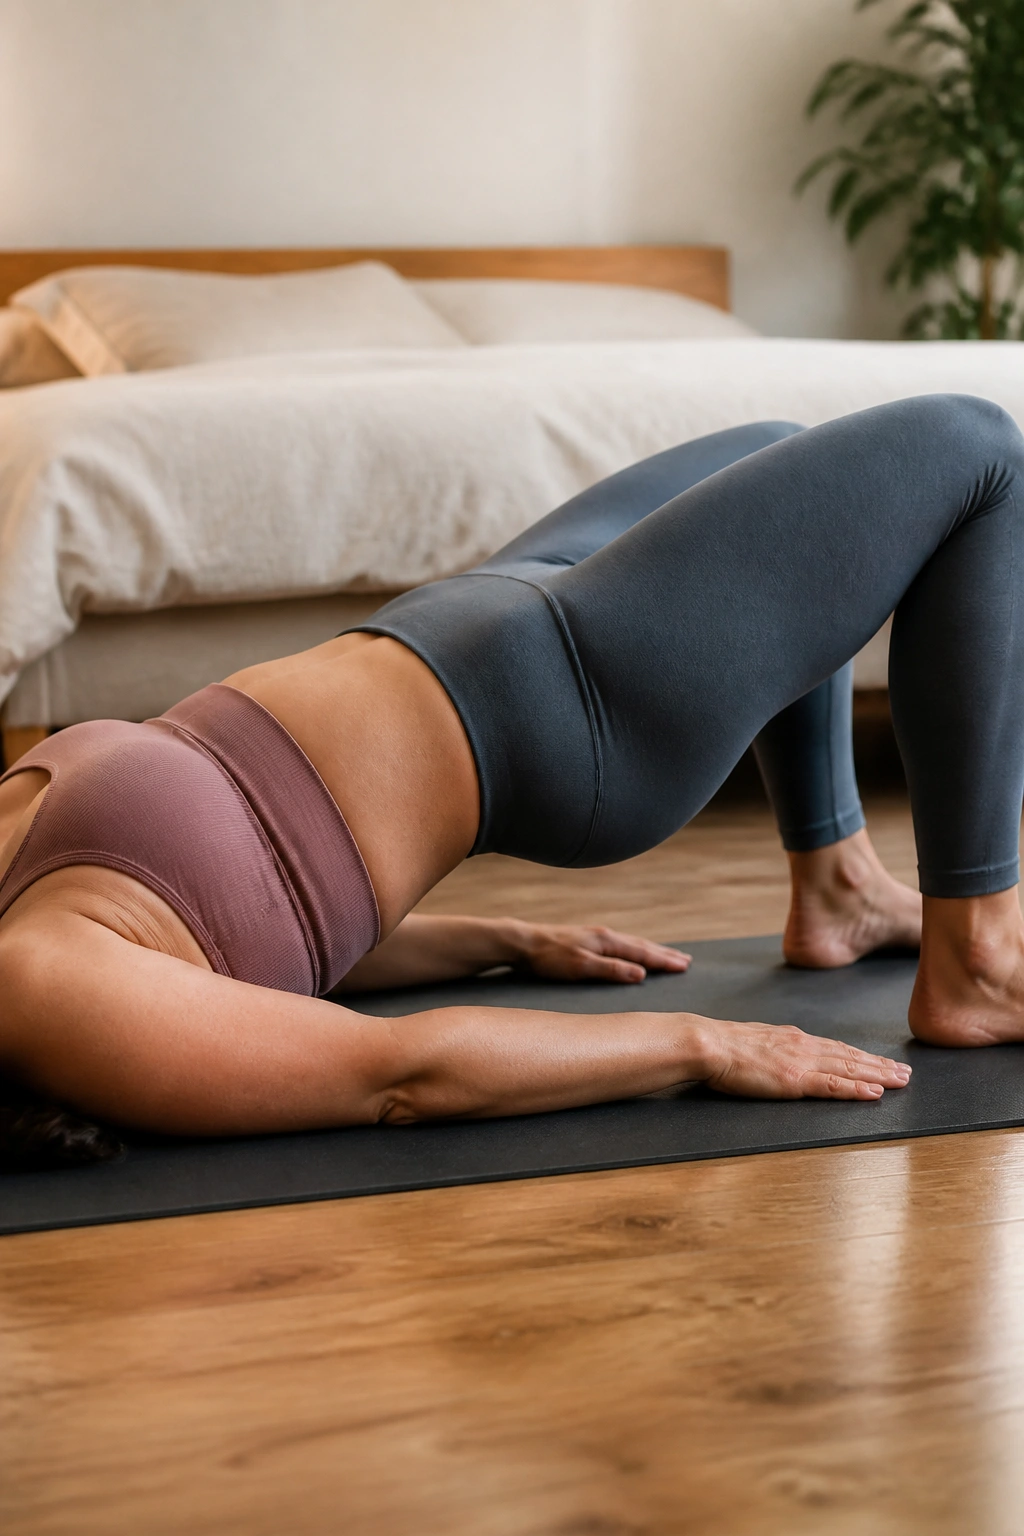
Unlike crunches, glute bridges do not ask the front of the body to do everything. They train the backside, which is a relief if your lower back has been carrying the load for months. Strong glutes help the pelvis sit better, and when the pelvis sits better, the abdomen usually stops feeling like it has to grip for dear life.
Lie on your back with knees bent and feet about hip-width apart. Exhale, gently tuck the pelvis, and press through the heels to lift the hips until the body forms a straight line from shoulders to knees. Hold for 1 to 2 seconds, then lower with control. Keep the ribs from flaring up at the top. That is the part people miss.
I tend to recommend bridges for anyone who sits a lot, feeds a baby with a rounded back, or feels low-back ache after standing too long. They are also useful if walking feels like you are not getting enough help from the hips.
Do 8 to 12 reps for 2 sets. If the hamstrings cramp, walk the feet a little closer to the body. If the belly domes, lower less high and breathe out longer on the lift.
What to Watch For
The bridge should feel like a lift, not a backbend. If your weight rolls into the toes or the ribs jut forward, reset and start again.
7. Quadruped Rock Backs
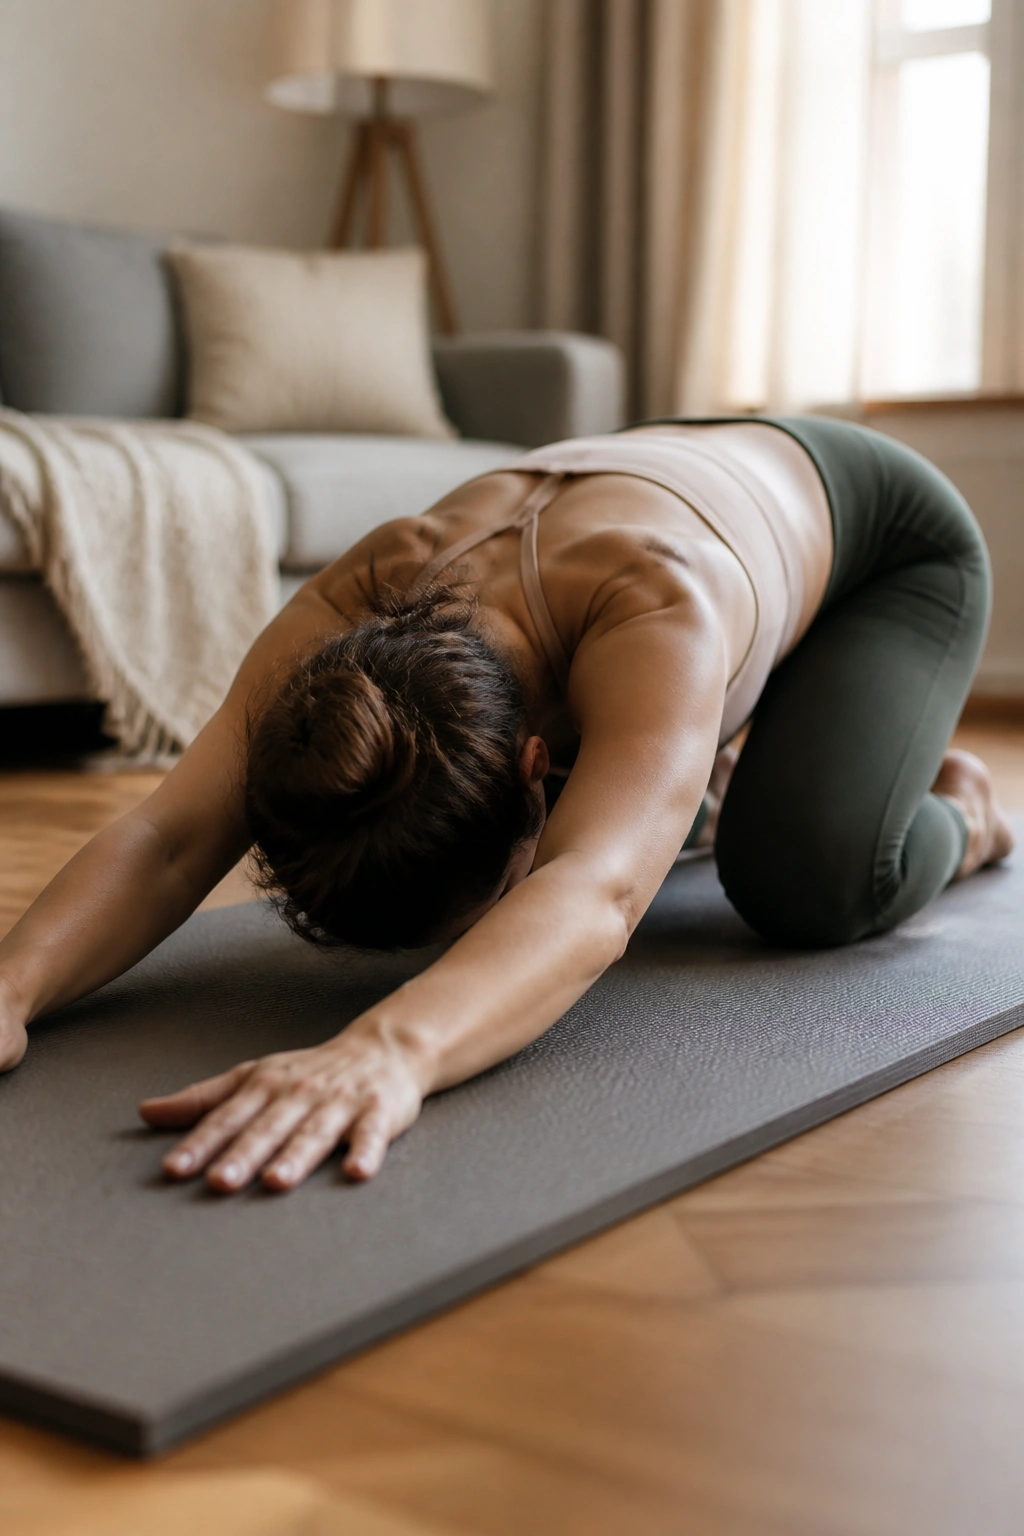
On hands and knees, rocking back is unglamorous and useful. It lets the belly and spine move without a big pressure spike, which is a gift if lying on your back feels weird or if you need a softer start after a long day of holding a baby.
Set your hands under your shoulders and knees under your hips. Keep your spine long, inhale, then exhale as you rock your hips back toward your heels. Stop before your belly hangs heavily or your low back rounds hard. Come forward again and repeat.
What You Should Feel
You should feel a mild stretch through the hips, some length through the low back, and a sense that your ribs can stay quiet. The movement is small. If it becomes a deep squat with your arms firing and your neck craning, you’ve gone past the useful range.
- 8 slow rocks
- 2 rounds
- Keep elbows soft
- Stop if wrist pain shows up
This is a nice reset move between harder exercises. It also works well as a quick check-in before lifting a toddler off the floor.
8. Bird Dog Reaches
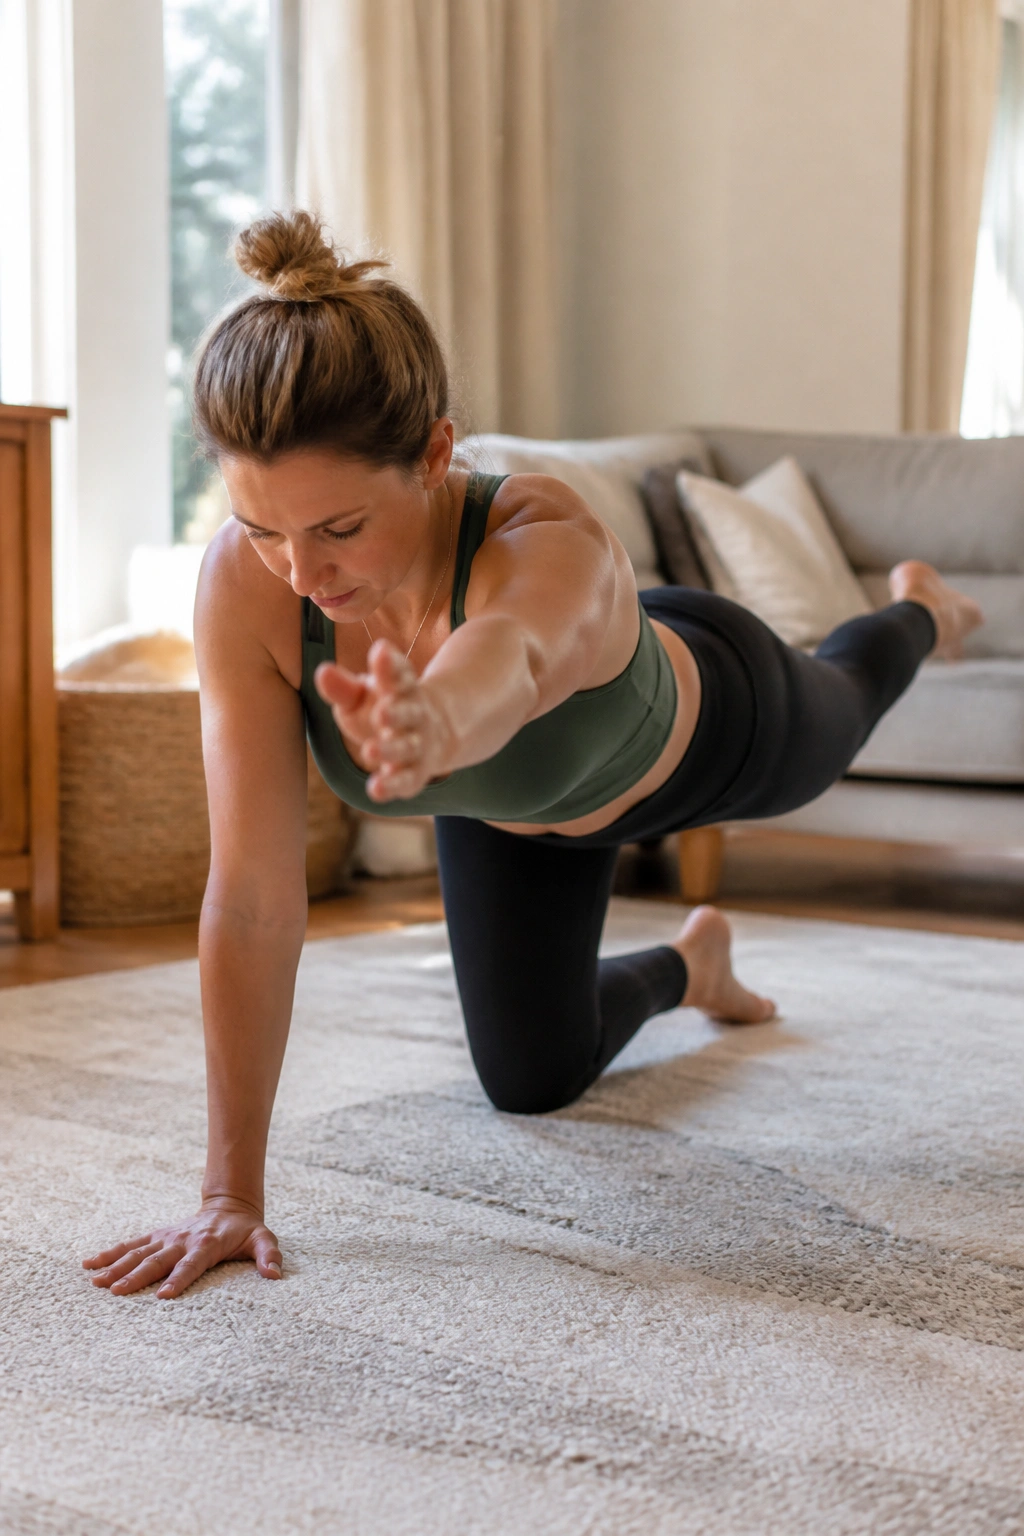
If a move can expose wobbly core control, it’s the bird dog. Cross-body reaches tell you whether your trunk can resist twisting while an arm and leg leave the floor. That sounds academic until you carry a diaper bag, twist for a car seat, and wonder why your middle feels loose.
Start on hands and knees. Reach one leg long behind you and the opposite arm forward, but do it slowly—about 3 seconds out, 3 seconds back. Keep the hips level and the ribs from swinging open. If that feels shaky, begin with just the leg reach or just the arm reach. You do not get extra points for doing the full version too early.
It’s a sneaky little strength drill. The load is small, yet the control demand is high, which is why it shows gaps so quickly. I like that about it. It’s honest.
Do 6 reaches per side for 2 sets. If your low back pinches, shorten the reach and think long through the crown of the head instead of high through the foot.
9. Wall Push-Aways
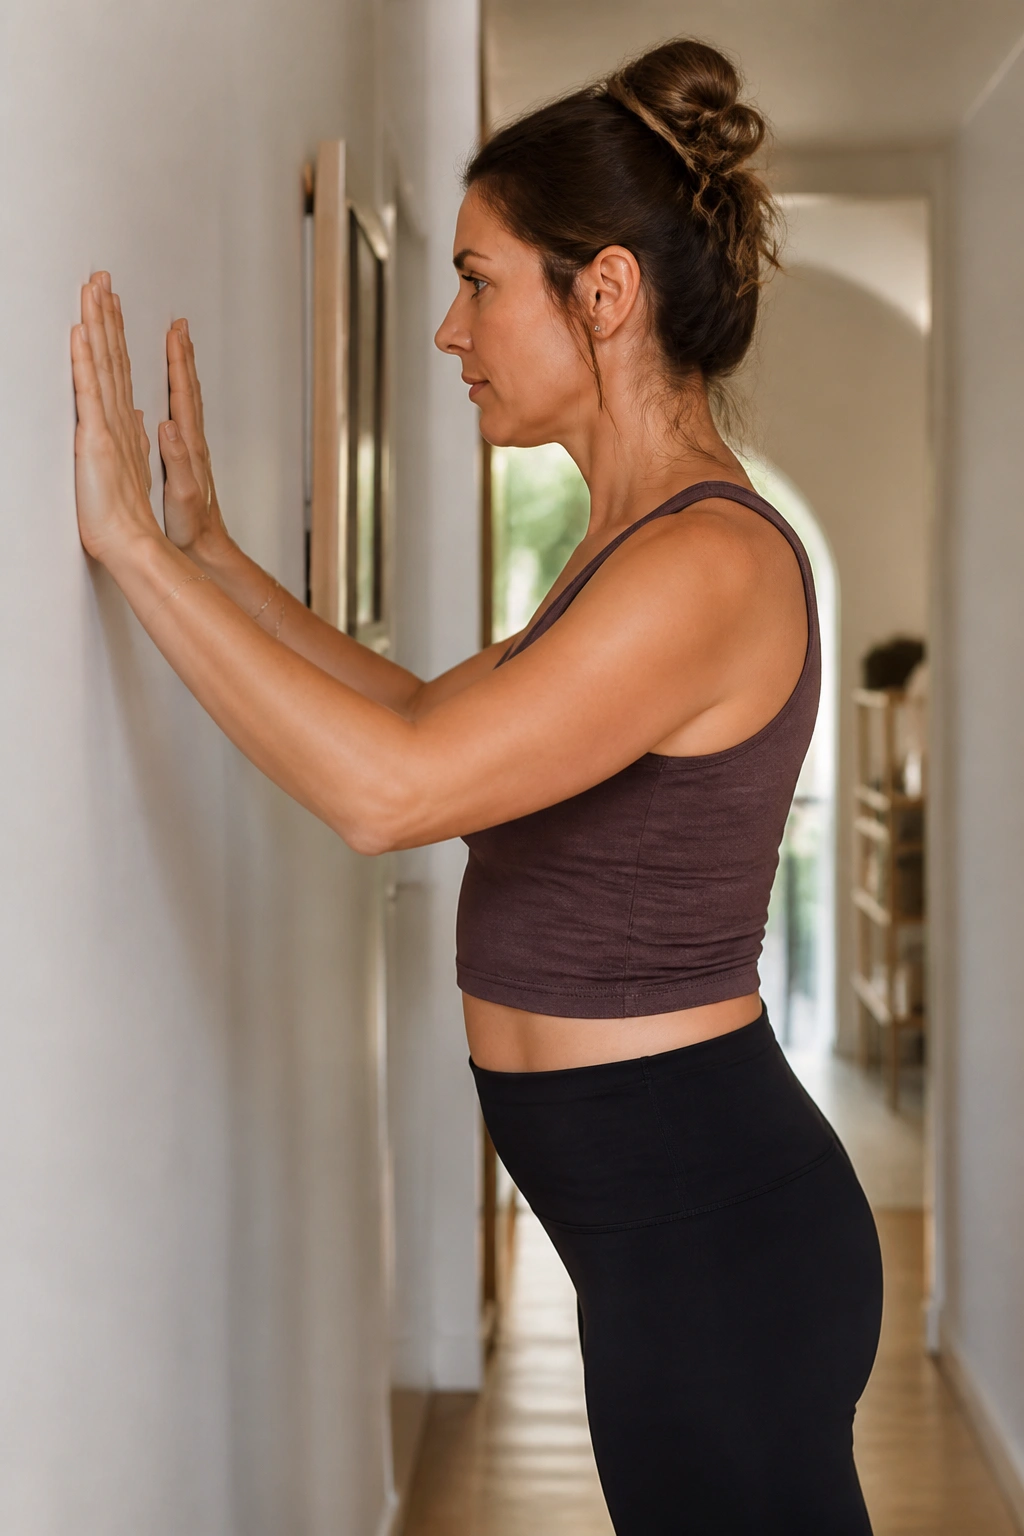
Why press into a wall for core work? Because the wall gives you feedback you can actually feel. A lot of postpartum exercise is about learning position again, and standing wall work helps you find ribs-over-pelvis alignment without having to balance on the floor.
Stand facing a wall with your forearms on it, elbows around shoulder height. Step one foot back a little, exhale, and gently push your forearms into the wall as though you are trying to move it away. The shoulder blades should wrap a touch around the ribs, and the low belly should draw in without hard gripping.
This one is especially useful if you spend the day upright. Kitchen counter. Bathroom mirror. Hallway. Wherever. It turns a random standing moment into a 20-second core reset.
How to Fit It Into the Day
Use 5 pushes, holding each for about 5 seconds. Keep the pressure moderate, not maximal. If your neck tightens, lower the elbows a little and soften the push. The goal is control, not strain.
10. Modified Side Plank From Knees
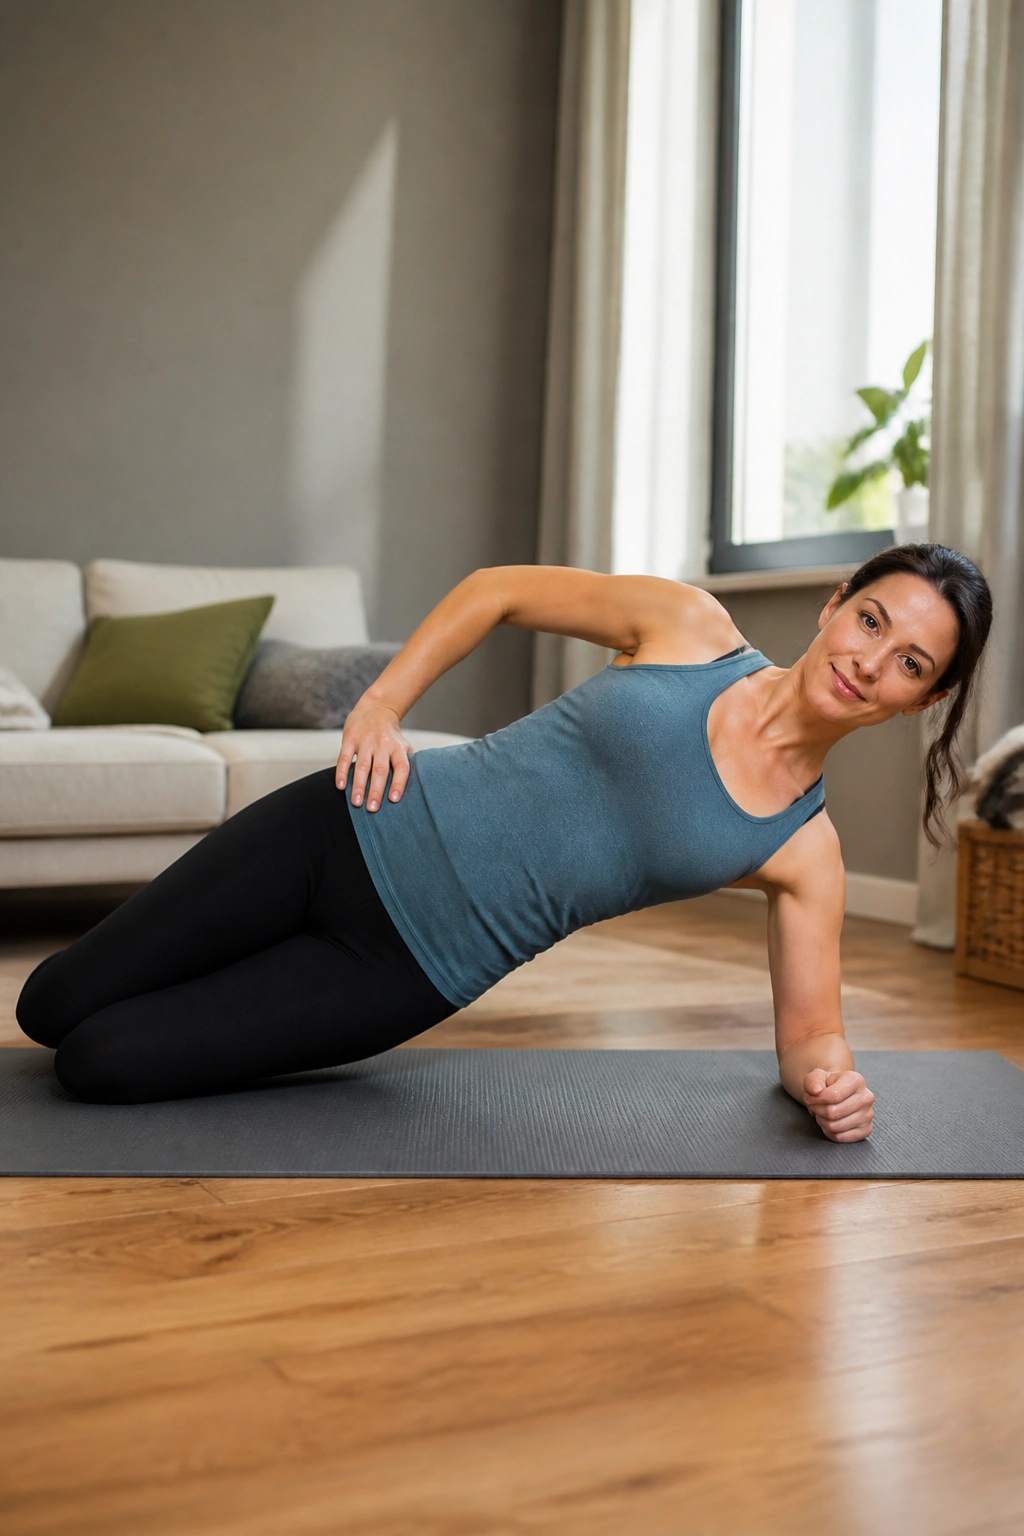
A full side plank can feel rude too soon after birth. The knees-down version is much kinder, and it still wakes up the side body in a way that matters for mummy tummy recovery. Your obliques help stabilize the trunk, but they also need to learn how to work without making the belly bulge.
Set up on one forearm with your knees bent and stacked, hips facing forward. Lift the hips a few inches off the floor and hold. Think long through the top of the head and steady through the ribs. If you feel the shoulder collapsing or the waist cramping, lower down and reset.
This move is good for people who notice one-sided weakness, hip drop, or a stubborn pull through the waist when they stand on one leg. It is not flashy. It is effective.
- Hold for 10 to 20 seconds
- Repeat 2 to 3 times per side
- Keep the top shoulder away from the ear
- Stop if the belly domes or the shoulder pinches
Short holds done cleanly beat a long shaky effort every time.
11. Sit-to-Stand With Core Brace
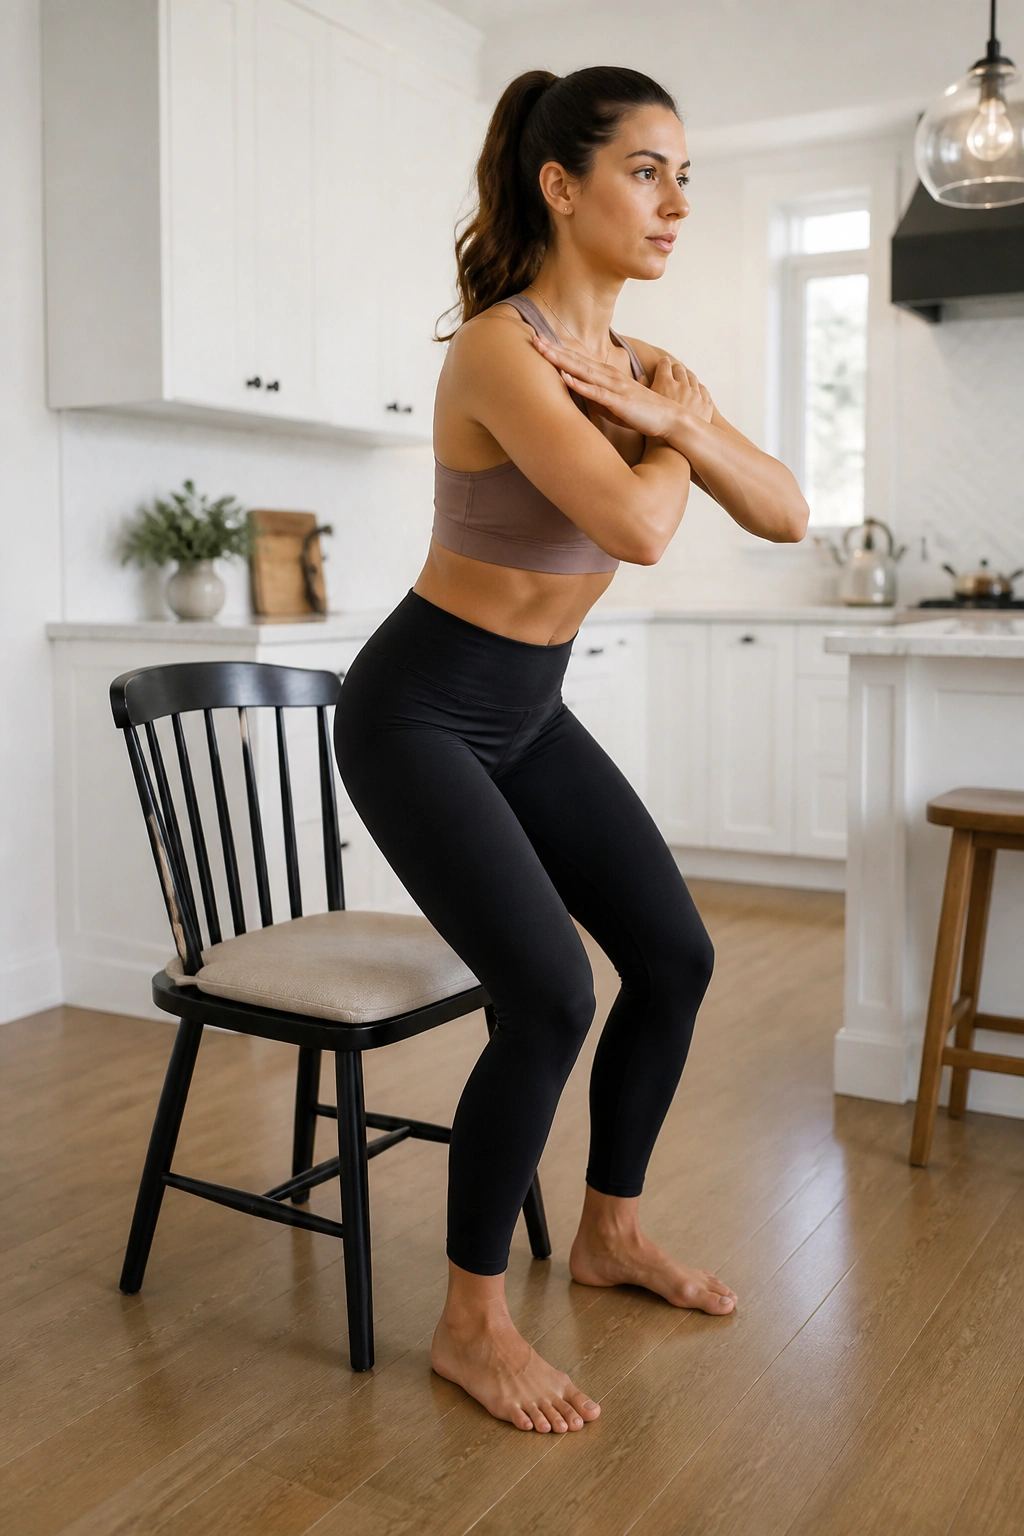
The sit-to-stand might be the most ordinary workout in this whole list, and that is exactly why I rate it. Postpartum life is full of getting up from low couches, changing mats, beds, and nursery chairs. If your core can’t organise itself during that basic pattern, the strain shows up everywhere else.
Sit on a firm chair with your feet planted about hip-width apart. Exhale, lightly brace the belly, and stand up without throwing your chest forward. Sit back down with control. That’s it. No momentum. No plopping. No low-back shove to get the job done.
A lot of people feel their knees, hips, and abs all working together here, which is a good sign. If the belly flares or you need to rock forward to get up, raise the chair height a little or use your hands on the seat edges for support. Make the pattern clean before you make it harder.
Clean reps beat fast reps.
Do 8 to 10 sit-to-stands for 2 rounds. Once that feels steady, you can add a baby-held version later, but not before you can rise smoothly on your own.
12. Standing Marches With Overhead Reach
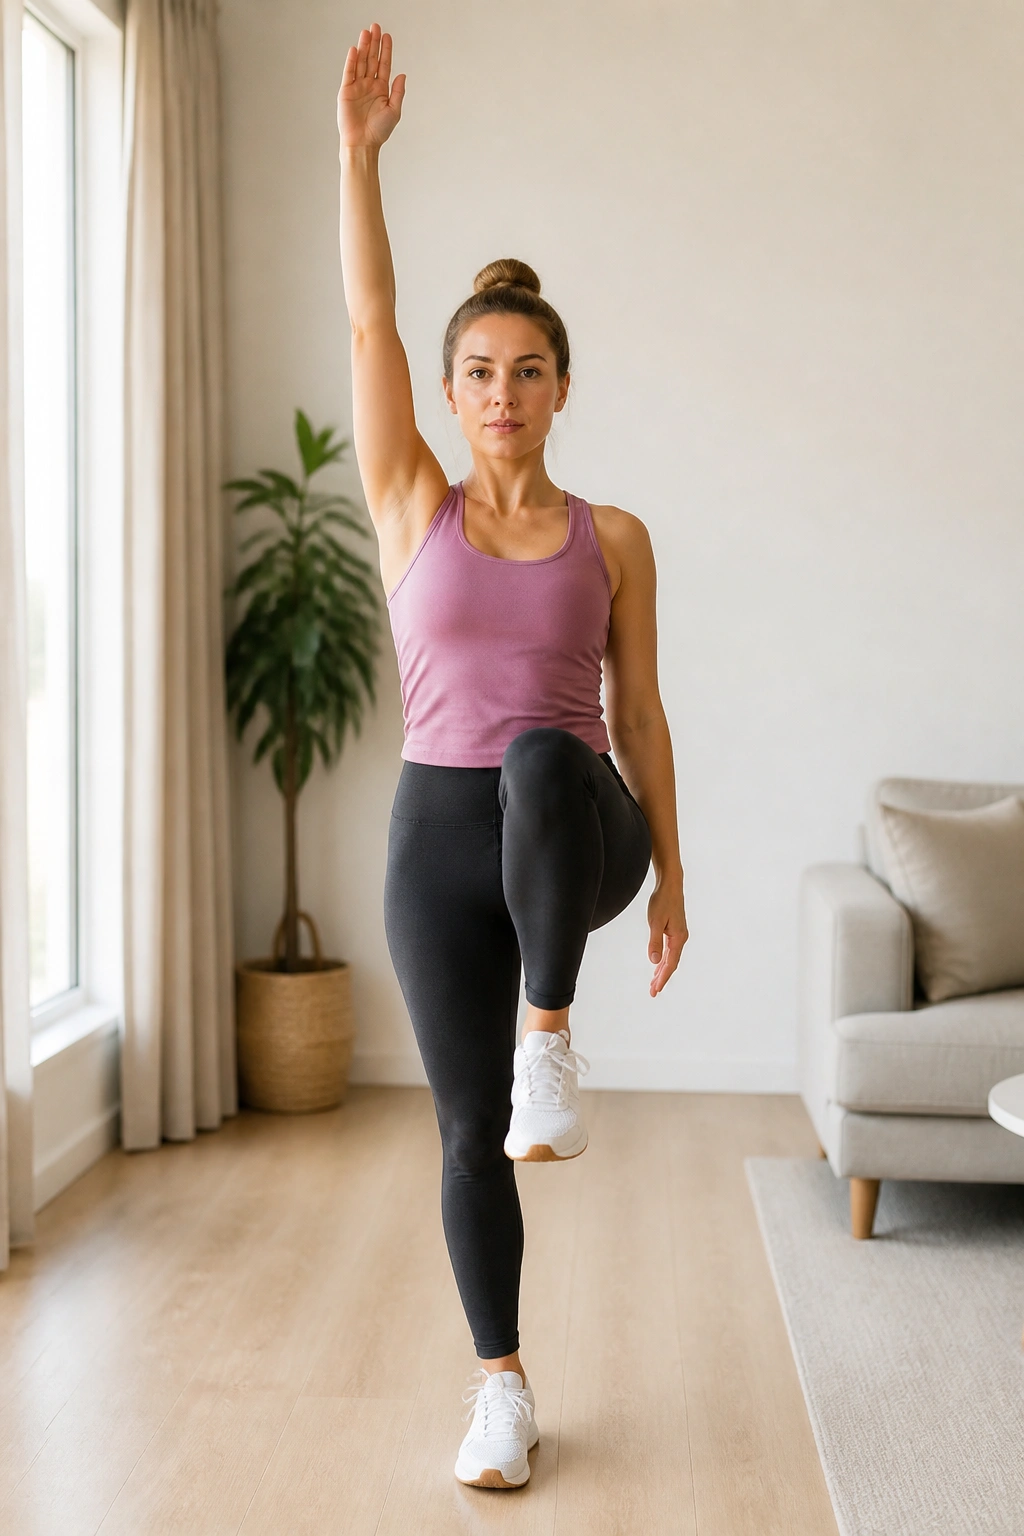
Unlike floor drills, standing marches train the core while you actually move and reach. That matters because real life after birth is not done lying on a mat. You’re carrying laundry, lifting a car seat, reaching a shelf, and trying not to twist like a rusty hinge.
Stand tall with your feet under your hips. Lift one knee while the opposite arm reaches overhead, then switch sides. Keep the ribs from popping forward as the arm lifts. If the reach makes you arch your back, lower the arm or keep it at shoulder height instead. The move should feel coordinated, not dramatic.
I like this one after the gentler floor work has settled in. It adds balance and a little anti-extension challenge without asking for jumping or impact. It also gives you a quick read on whether your core can hold shape during standing movement.
Try 6 to 8 marches on each side for 2 rounds. Use a mirror the first time if you can. A sideways body check tells you a lot.
13. Suitcase Carries
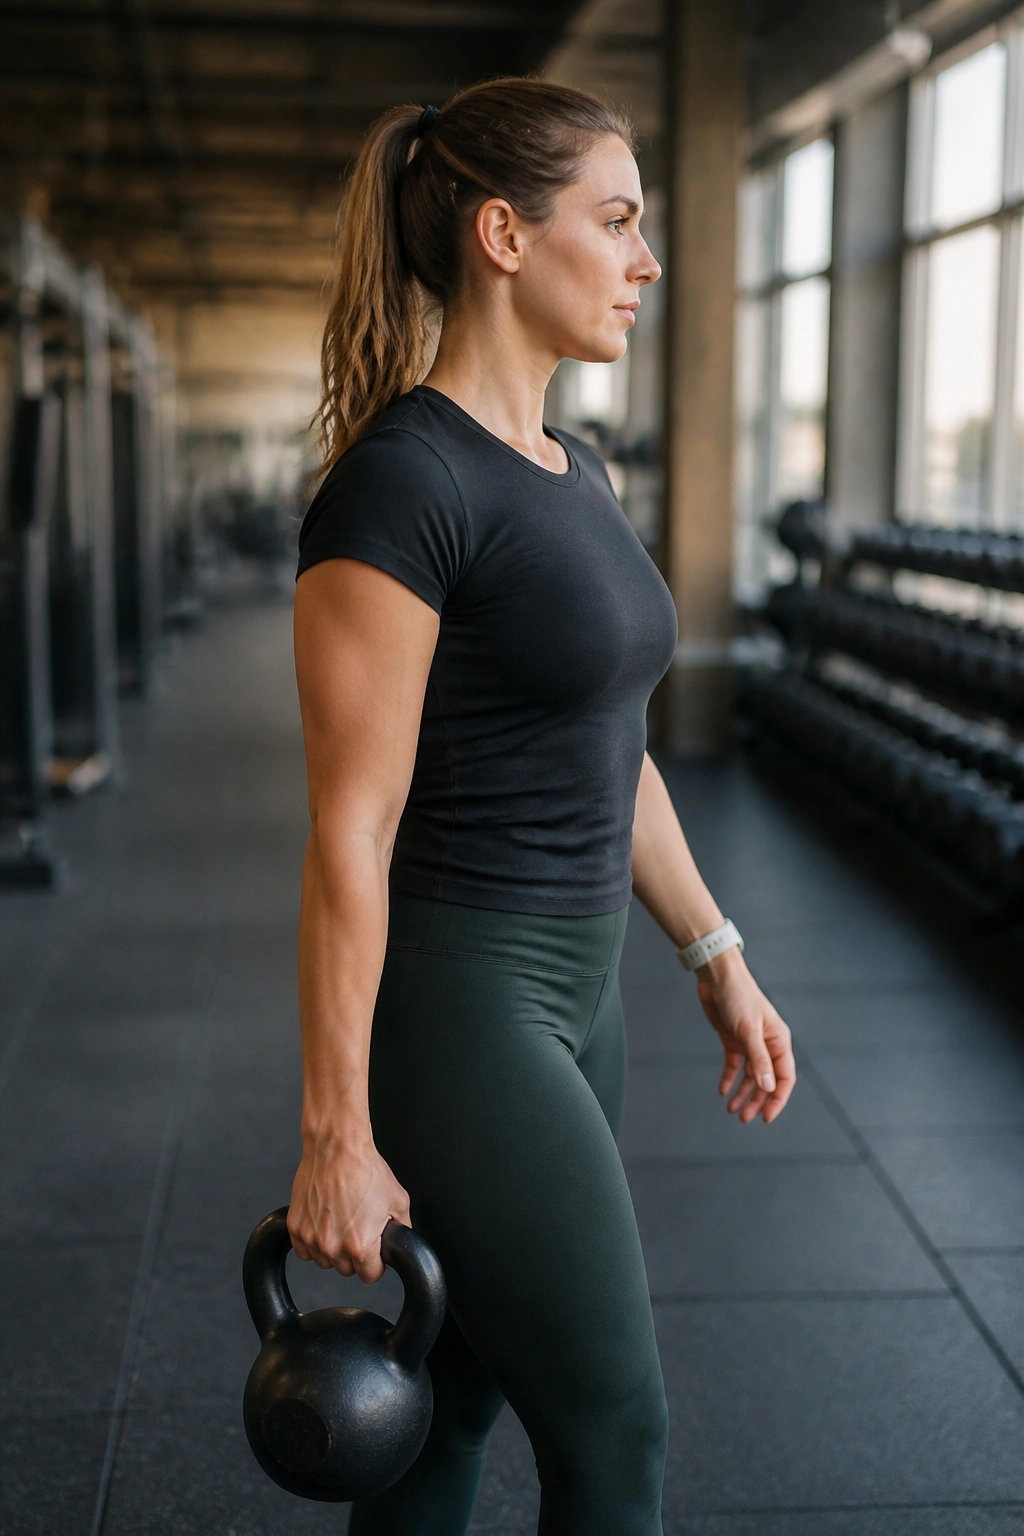
One dumbbell, one heavy bag, one side of the body working overtime. Suitcase carries look almost too easy until you notice how quickly your torso wants to lean. That resistance to leaning is the exercise. It teaches the midsection to stay tall while one side carries load, which is a daily-life skill if you have a toddler on one hip and a nappy bag in the other hand.
Hold a weight, shopping bag, or kettlebell on one side and walk slowly for 20 to 40 feet. Keep the shoulders level, ribs stacked over the pelvis, and the free hand relaxed. Then switch sides. If you feel yourself tipping, the load is too heavy. Drop the weight before the form gets sloppy.
Why It Works
The trunk has to fight sideways bend and rotation at the same time. That makes the deep core work in a way floor exercises can’t always match. It is especially useful once walking, lifting, and carrying start to feel like part of your workout anyway.
- 3 to 5 carries per side
- 20 to 40 feet each
- Moderate weight to start
- Slow, steady steps
14. Side-Lying Clamshells With Exhale
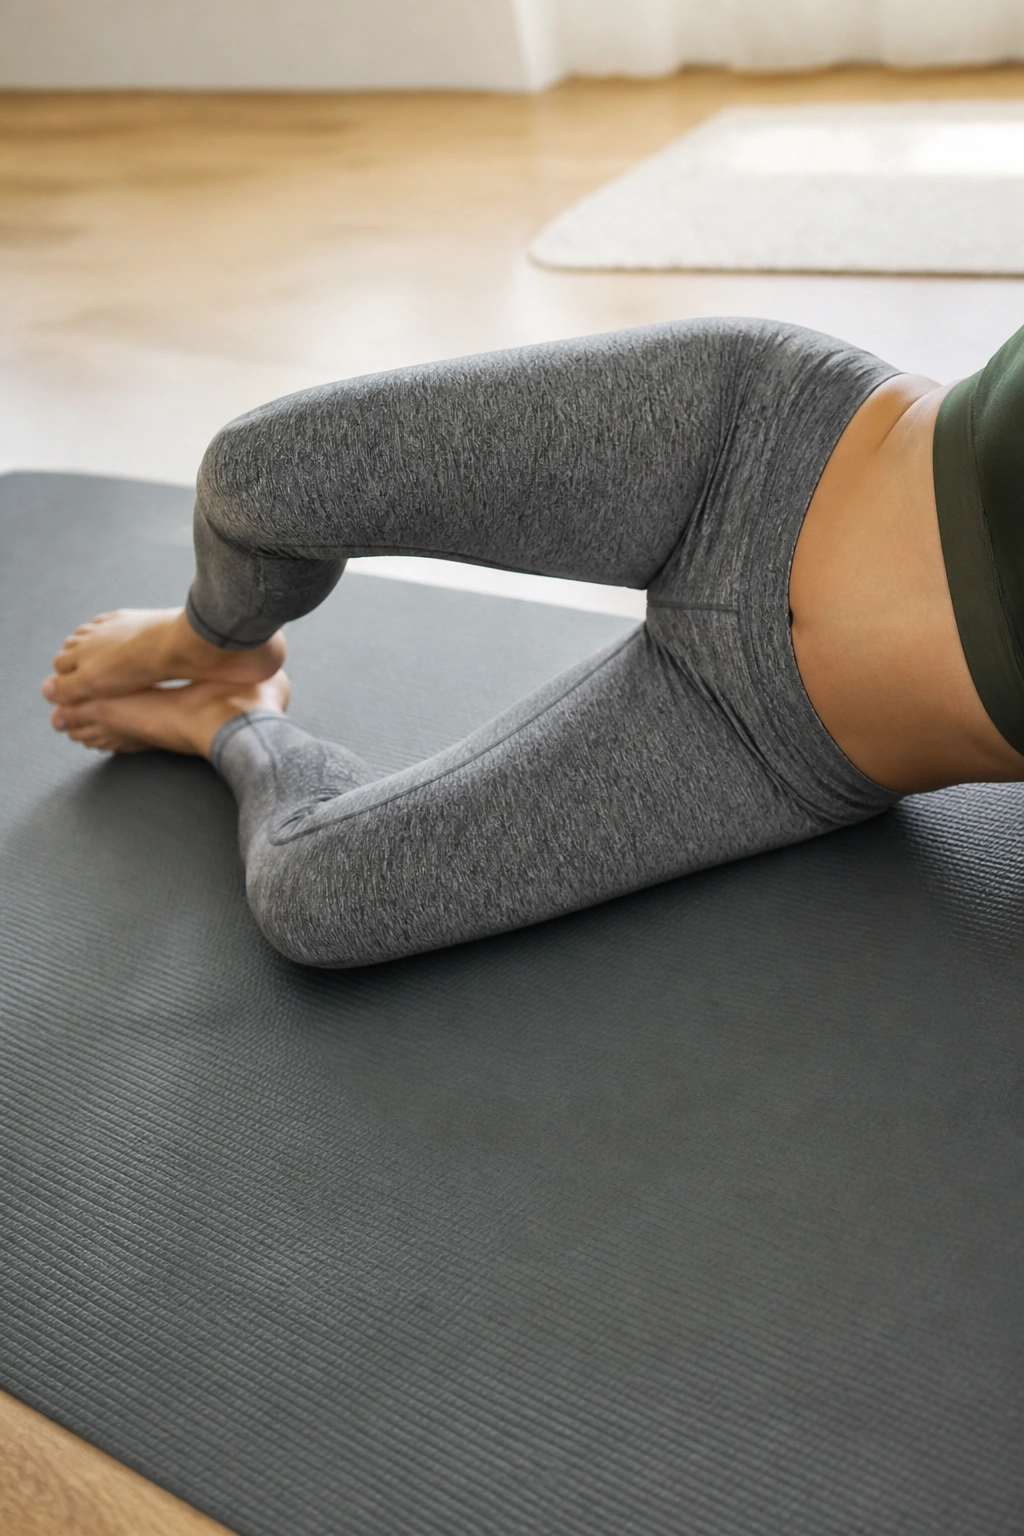
A hip exercise can help mummy tummy work better because the pelvis and core are team players. If the hips are weak or sleepy, the belly often steps in and over-braces to keep you stable. Clamshells wake up the side glutes, which helps the pelvis stay quieter when you stand, walk, or turn.
Lie on your side with knees bent and feet together. Keep your hips stacked, exhale, and open the top knee like a clamshell without rolling the pelvis backward. The movement is small. If you fling the knee open high, the low back starts helping and the whole point gets lost.
You can add a mini band above the knees once the basic version feels easy, but don’t rush it. A clean bodyweight rep with a smooth exhale is more useful than a messy band rep with the back arched.
Do 10 to 15 reps per side for 2 sets. If the hip flexors cramp or the waist tightens, reduce the range and slow the exhale.
15. McGill Modified Curl-Up
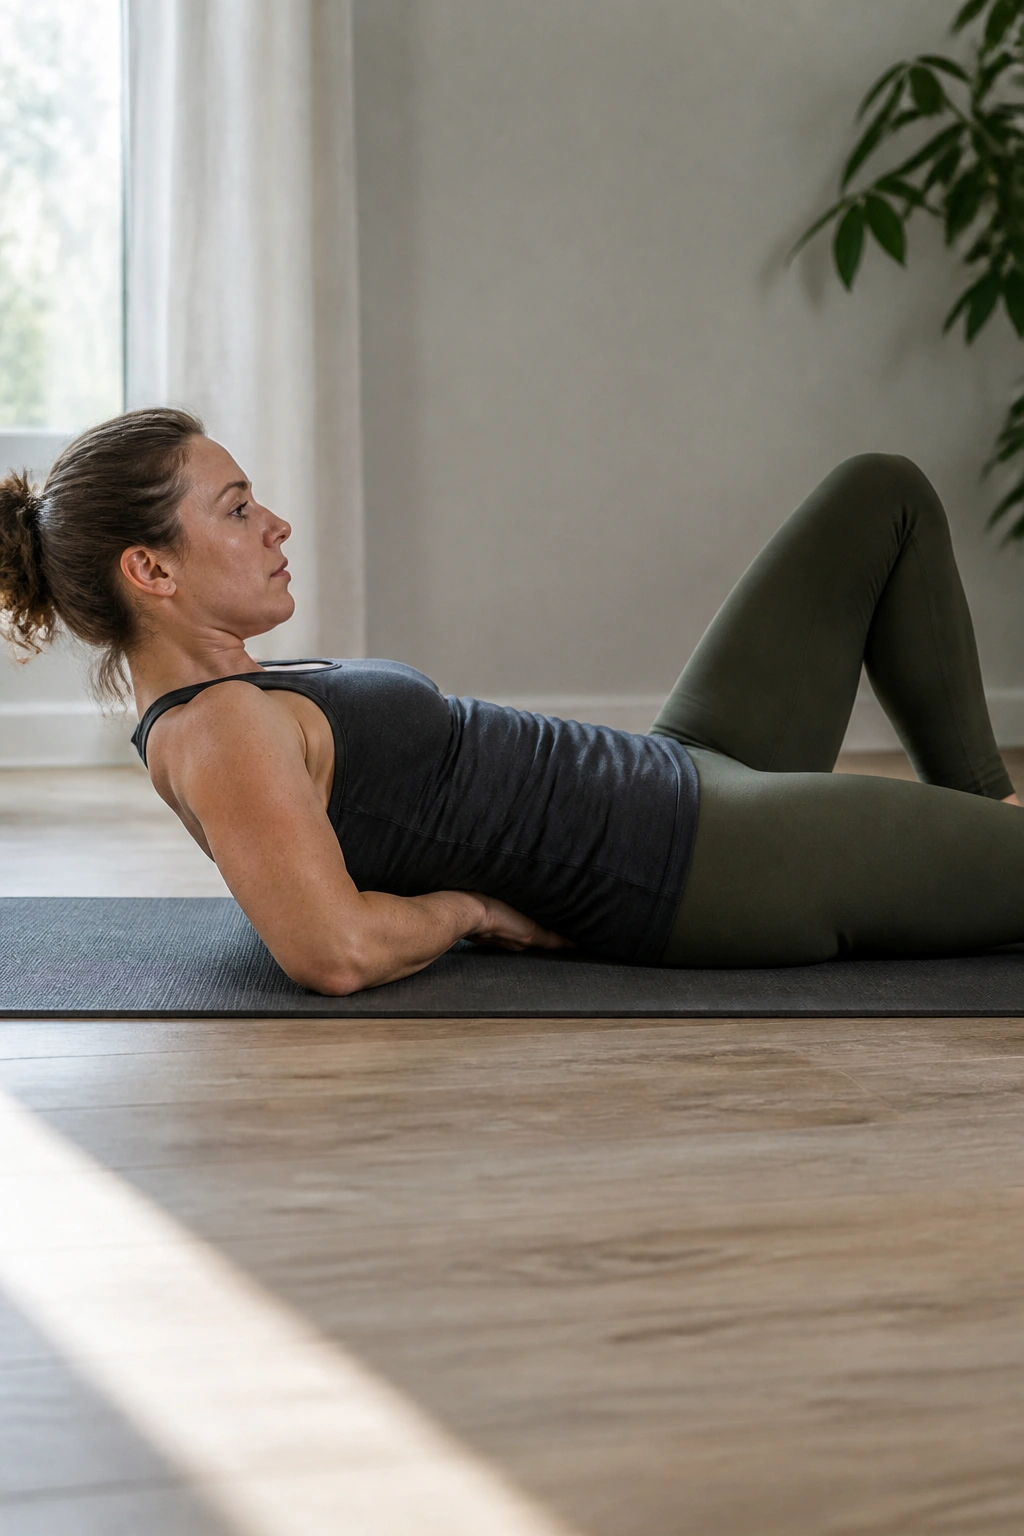
Is a curl-up off-limits after birth? Not always. The full sit-up is a different animal, and I would leave that one alone if you have doming, pelvic floor symptoms, or scar discomfort. The McGill modified curl-up is gentler, more controlled, and built around holding the trunk steady rather than folding it in half.
Lie on your back with one knee bent and the other leg straight. Slide your hands under the low back so you keep a small natural curve there. Lift your head and shoulders just a few inches, hold for a beat or two, then lower. You are not trying to crunch hard. You are trying to keep the spine stable while the upper abs switch on.
How to Use It Safely
- 5 to 6 reps per side
- Hold each lift for 3 to 5 seconds
- Keep the neck long
- Stop if the midline domes or the scar feels tugged
This move works best once the basic breathing and floor drills feel calm. It is a bridge between rehab and strength.
16. Wall Squats With Ball Squeeze
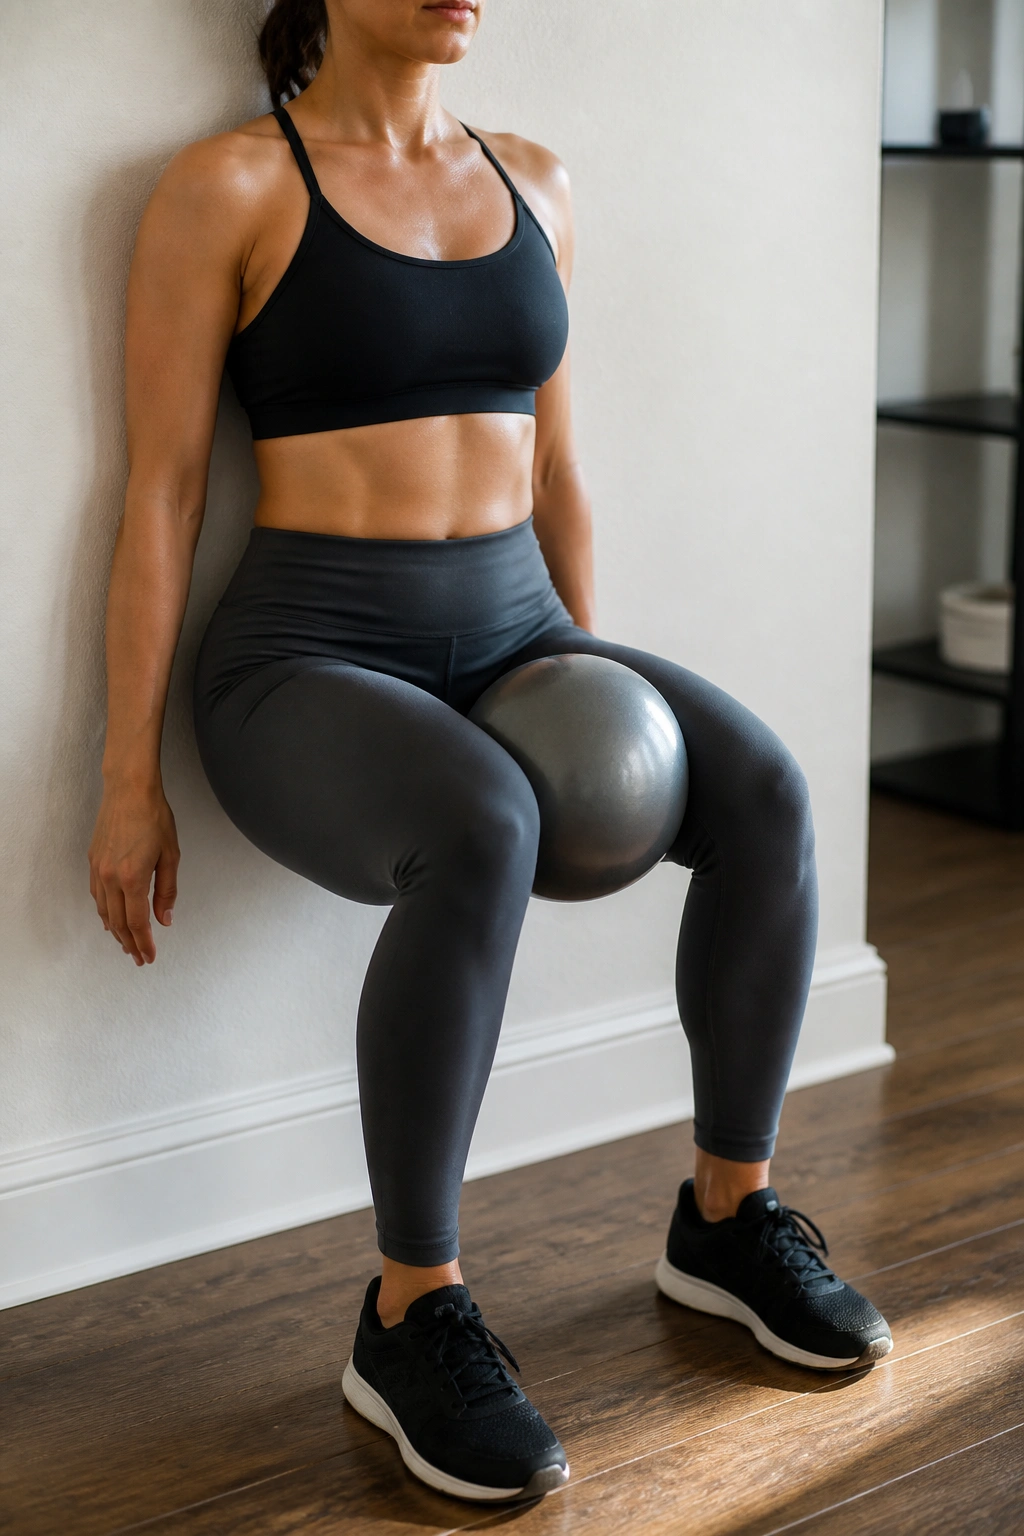
A wall squat can feel like a break for the brain and work for the body at the same time. You get support from the wall, but the legs, glutes, and inner thighs still have to do the job. That combination is useful when standing all day leaves your core feeling loose and your hips feeling tired.
Stand with your back against a wall and feet a step or two forward. Slide down only as far as you can keep the ribs down and the pelvis steady. If you want a little more inner-thigh work, squeeze a pillow or small ball between the knees as you hold the squat. Then press through the feet to stand back up.
The ball squeeze is not there for drama. It helps the inner thighs connect with the pelvic floor and the deep core, which can feel surprisingly stabilising after birth. Keep the hold short and clean rather than sinking low and losing shape.
- 6 to 8 reps
- Or hold for 15 to 20 seconds
- Keep the knees over the ankles
- Don’t let the lower back arch off the wall
17. Pallof Press With a Band
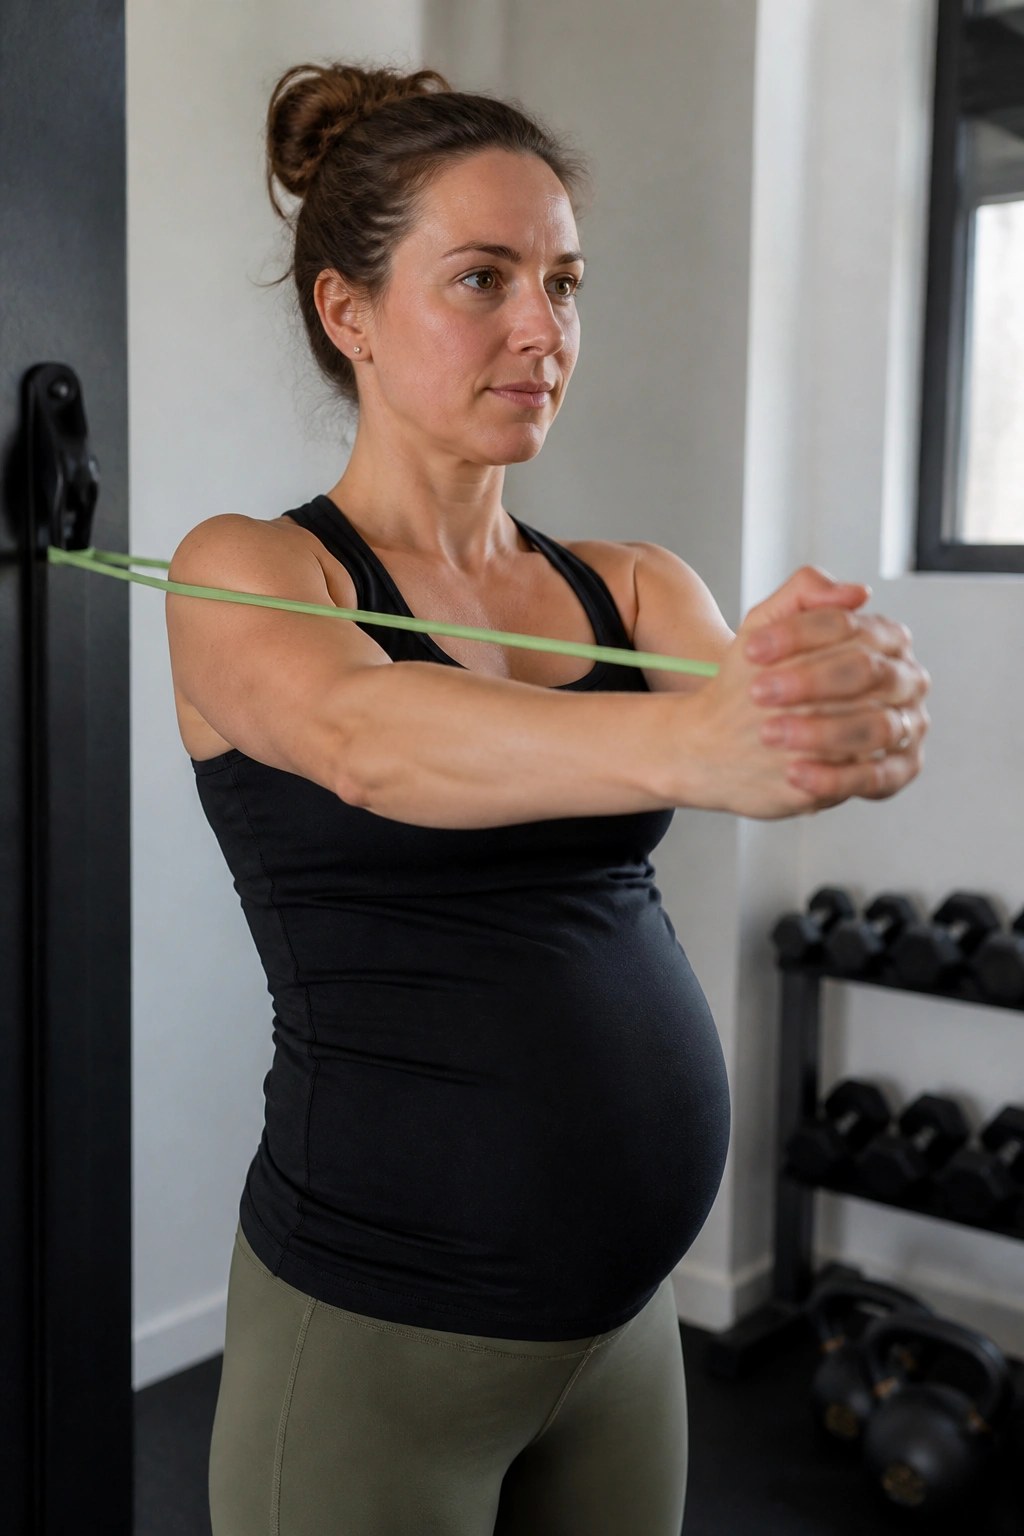
The Pallof press is one of those exercises that looks boring from across the room and earns its keep the second you feel it. It trains the body to resist twisting, which is a big deal when you’re lifting a car seat, opening a pram, or turning while holding a baby.
Anchor a resistance band at chest height. Stand sideways to the anchor, hold the band at your sternum, and press it straight out in front of you. Your job is to stop the torso from rotating toward the band. Bring it back in, then press again. The movement is small. The challenge is in the stillness.
This one is excellent once you’re ready for a standing anti-rotation drill that doesn’t need much floor time. Half-kneeling Pallof presses work too if standing feels too easy, but standing is the place I’d start for most postpartum bodies that can already manage the earlier drills.
Do 8 presses per side, or hold each press for 5 to 10 seconds. If your ribs flare, lighten the band. If your hips sway, widen your stance.
18. The 10-Minute Mummy Tummy Circuit
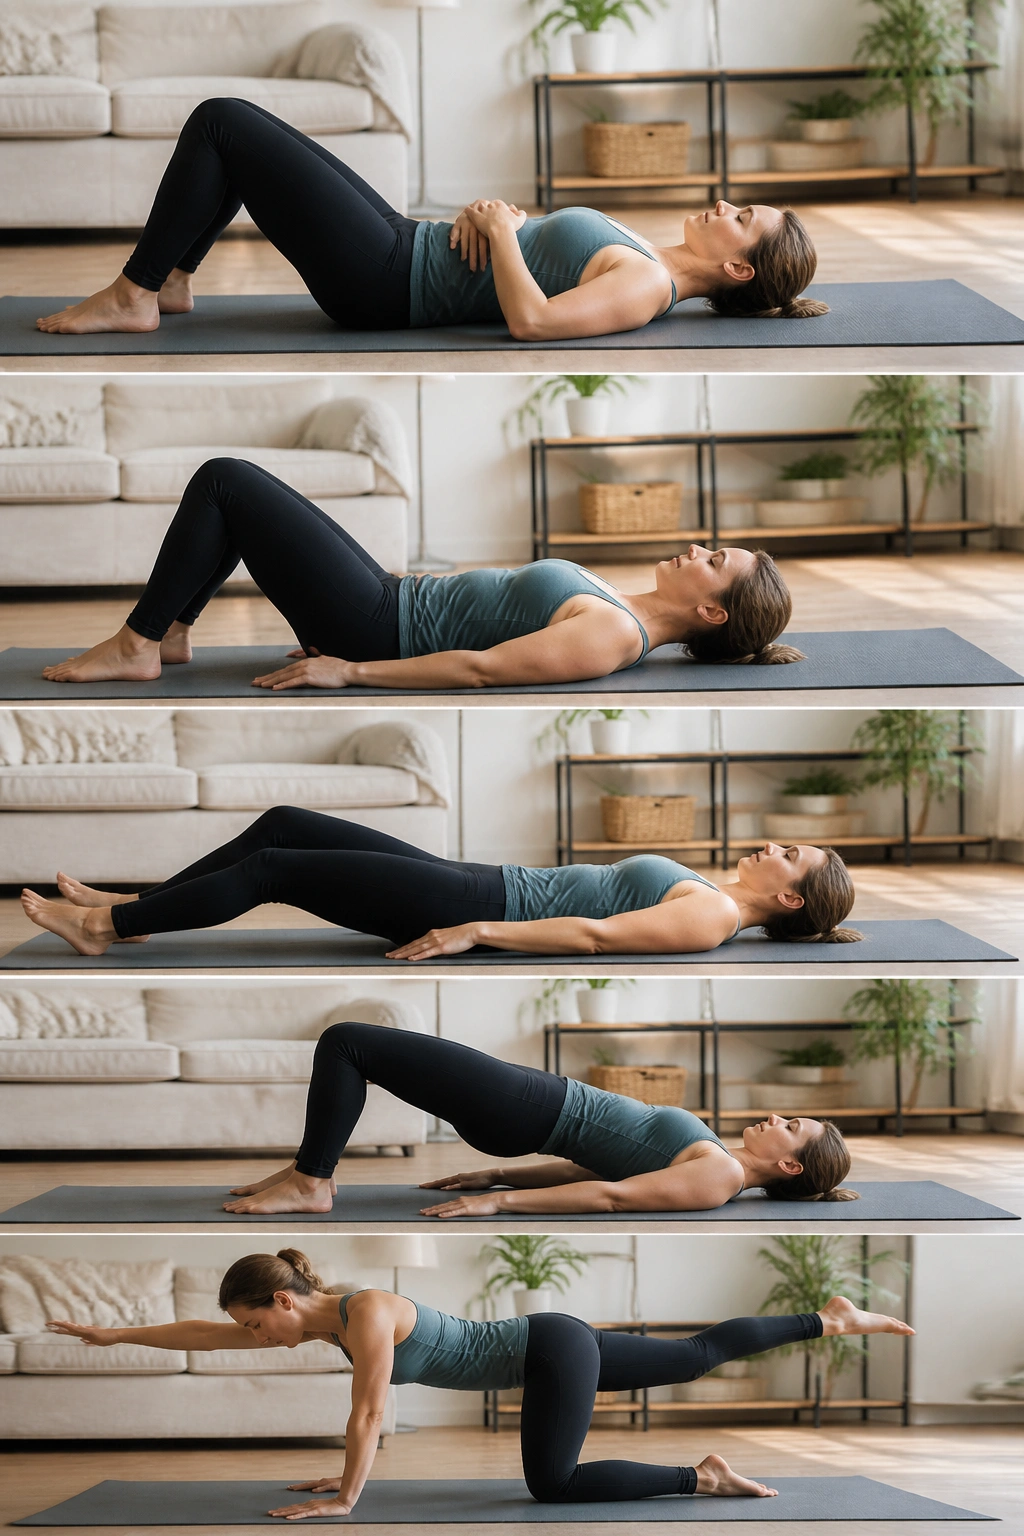
If you want one routine you can repeat without overthinking it, build this one from the easier moves and keep it tidy. The point is not to smoke your abs. The point is to teach your body to stack, breathe, and move without pressure leaking into the wrong places. That’s the whole game.
Here’s a simple 10-minute circuit that covers the basics without getting cute:
- 5 360-degree breaths
- 8 pelvic tilts
- 6 heel slides per side
- 8 glute bridges
- 6 bird dog reaches per side
- 20-foot suitcase carry per side
Move through the list once, rest for 30 to 45 seconds, then repeat if you still feel good. If you only have one round in you, that’s fine. If your midline domes, your pelvic floor feels heavy, or you can’t keep the ribs stacked, stay with the breathing and floor work for a while longer.
The cleanest way to progress is plain and unglamorous: first get the motion smooth, then get a little stronger, then add standing work, then add load. That order saves you from the common trap of jumping straight to hard ab exercises because they look impressive on paper.
And that’s really the whole point with mummy tummy workouts. Start with control, not chaos. Build the pressure system back before you ask it to do heavy lifting. If your body feels quieter, steadier, and less pushy through the middle after a session, you’re on the right track.
