



Diastasis recti repair workouts are not about hammering your abs until they behave. They work better when you teach the midline to manage pressure, breathe, and hold shape under load.
That matters more than most people think. A gap between the rectus muscles can show up after pregnancy, and it can still be there long after the baby phase is over. Some bodies close the space a bit; others don’t close much at all, yet function better once the deeper core, ribs, pelvis, and breath start working together again.
A lot of people jump straight to crunches, planks, or long gym sessions because those look like “core work.” Bad idea. If you see doming, coning, a weird ridge down the middle of the belly, or that heavy tugging feeling around the navel, the problem is usually pressure control, not just weak abs.
The best diastasis recti repair workouts start low and move up in a very specific order: breathing, gentle floor drills, then controlled standing strength, then loaded movement. That order matters. Skip it, and the belly tells on you fast.
1. 360 Breathing for Diastasis Recti Repair Workouts
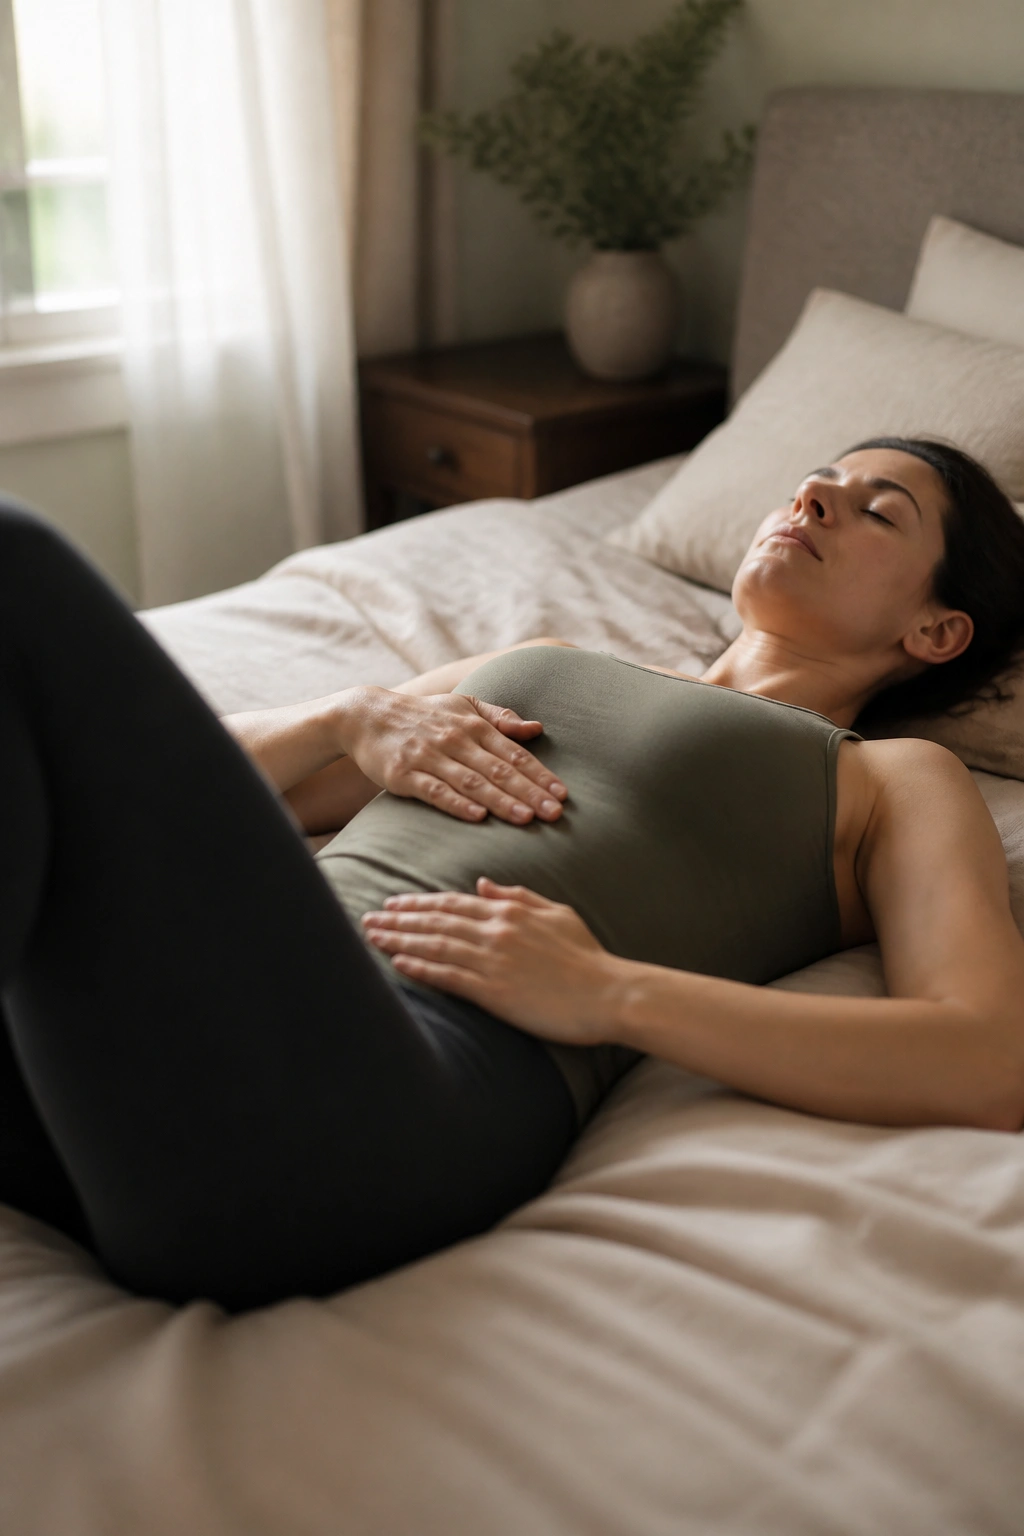
Breathing is the first workout. Before you chase planks or fancy band work, you want the ribcage and belly to stop fighting each other. A good 360 breath teaches your body to expand into the sides and back of the ribs on the inhale, then narrow the ribs and gently draw the lower belly in on the exhale.
Lie on your back with knees bent, or sit tall if lying flat feels weird. Put one hand on the low ribs and one on the lower belly. Inhale through the nose for about 4 seconds, then exhale through pursed lips for 5 to 6 seconds, like you’re fogging a mirror slowly. The lower belly should soften on the inhale and feel a little flatter on the exhale. Do not suck the stomach in hard. That is a brace, not a breath.
Five breaths count as one set. Start with 2 sets, once or twice a day. If your shoulders lift, your chest is doing too much of the work. If your belly pushes out hard on the exhale, the pressure is going the wrong way. Keep it easy, almost boring. That is the point.
2. Pelvic Tilts That Wake Up the Deep Core
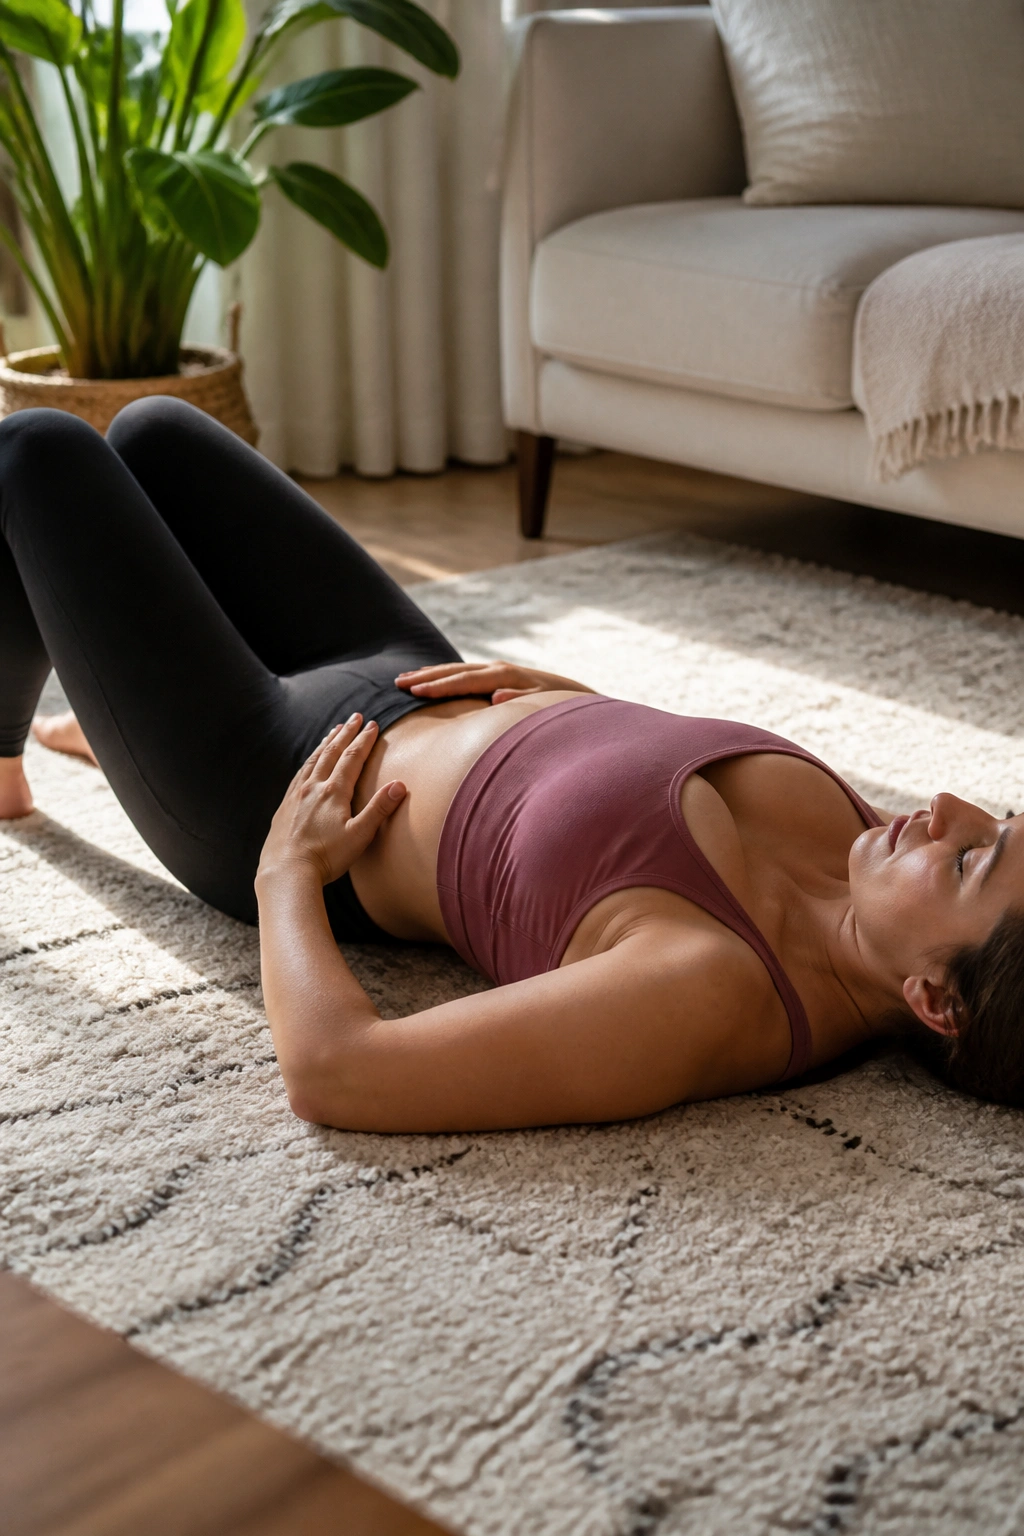
Why start with something so small? Because tiny movements teach control better than big dramatic ones. Pelvic tilts show the lower abs how to help without turning the move into a crunch.
How to do it
Lie on your back with knees bent and feet flat. Exhale first, then gently flatten the low back toward the floor by tipping the pelvis up a few degrees. Inhale and let the low back return to neutral. That’s one rep. Aim for 8 to 12 slow reps, and keep the range small enough that your ribs stay quiet.
The movement should look almost subtle from across the room. If your chest pops up or your ribs flare, you’re doing too much. A little back-and-forth motion is enough to wake things up. People often try to “push” the low back down. Don’t. That turns into strain fast.
What you should feel
- A light effort low in the belly
- The pelvis rocking, not the whole torso rolling
- No neck tension
- No doming down the center
If you had a C-section or your lower abdomen feels tender, make the tilt smaller and slower. The goal is control, not force.
3. Heel Slides That Keep the Belly Quiet
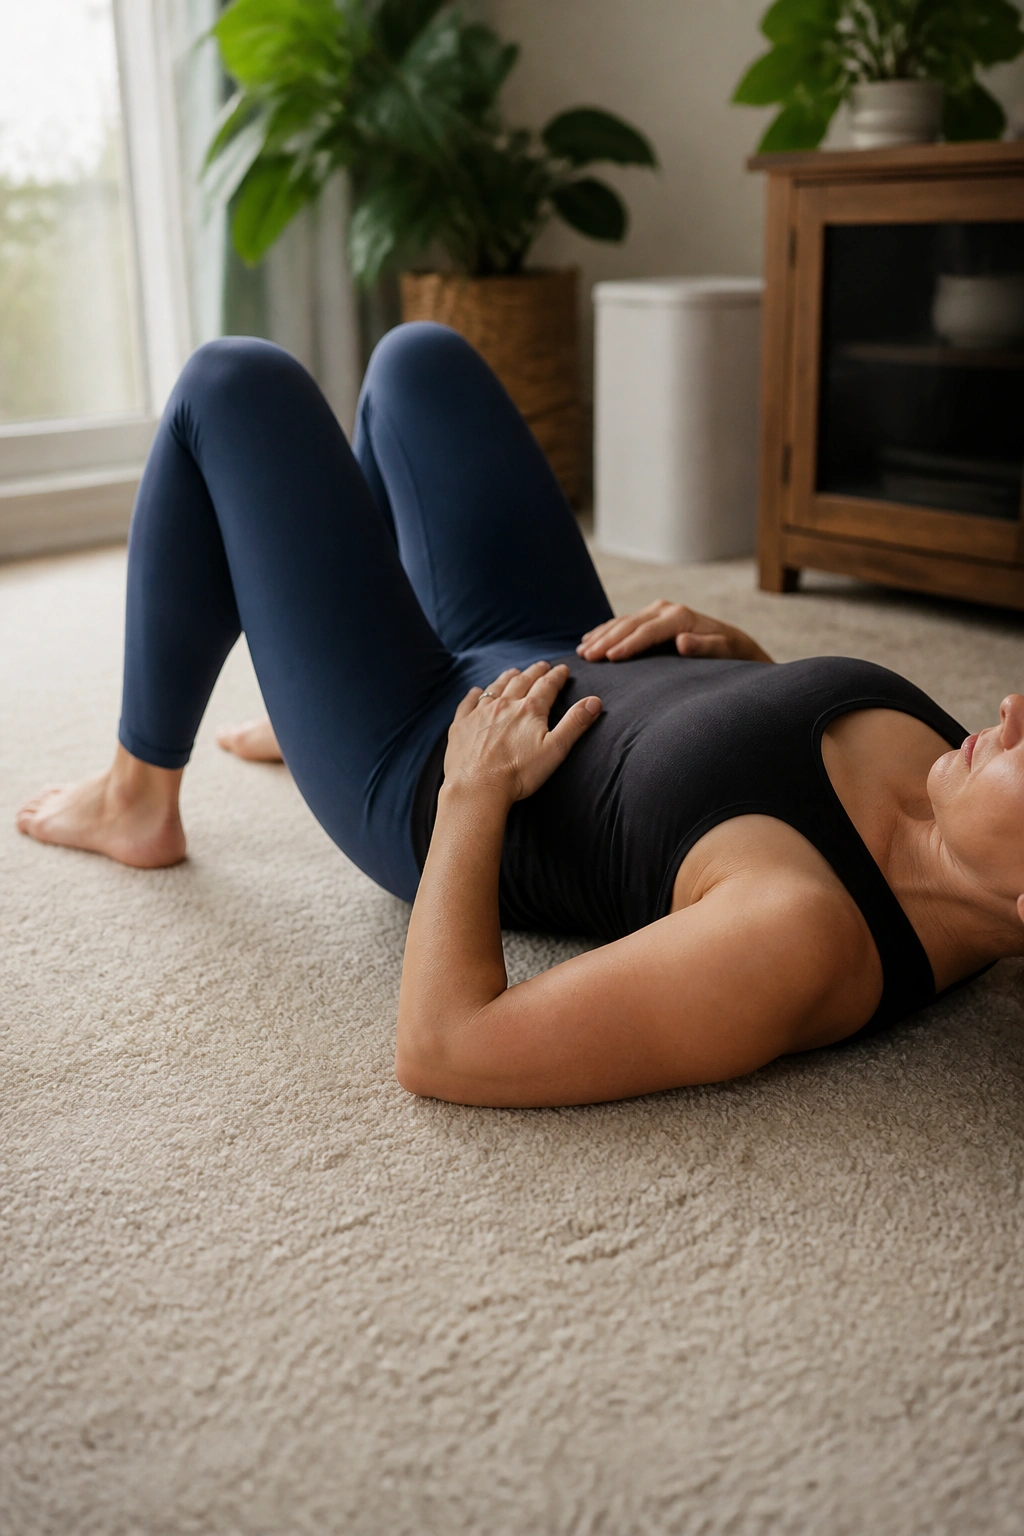
Picture one heel sliding away on a smooth floor while the rest of you stays calm. That’s the job here. Heel slides are sneaky-hard because they challenge the core the moment one leg lengthens.
Start on your back with knees bent. Exhale gently, brace with only about 20 percent effort, then slide one heel away until the leg is almost straight or until the belly starts to poke upward. Inhale as you bring it back. Six slides per side is a good place to begin, though some people need only 4 on each side at first.
A towel under the heel can make this smoother on carpet. A yoga mat works too. If the movement creates doming, shorten the slide by half. That’s not failing. It means your current range is honest.
The main mistake is rushing. Another one is pressing the low back hard into the floor like you’re trying to glue it there. Keep the movement smooth and light. When heel slides feel clean, getting dressed, walking, and lifting a baby usually feel less like a wrestling match.
4. Supine Marches for Steady Pressure Control
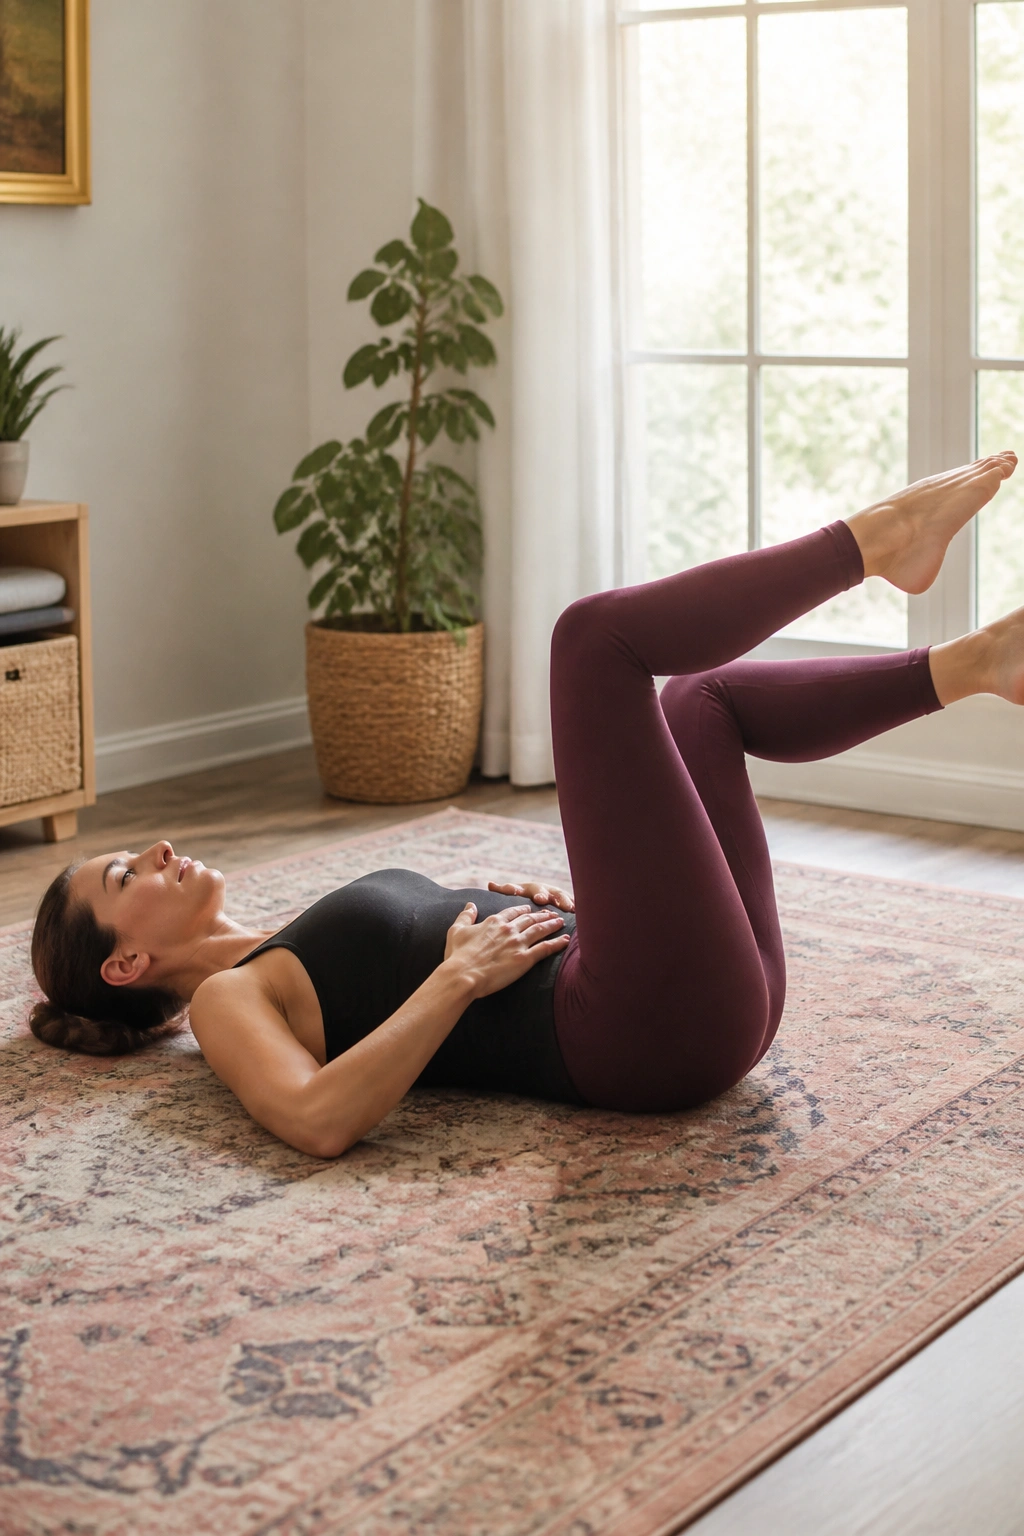
Supine marches look simple. They’re not. The second one foot leaves the floor, the belly has to stop the torso from wobbling.
Lie on your back with knees bent, feet flat, and ribs stacked over the pelvis. Exhale, then lift one foot just to tabletop height or a few inches off the floor, without letting the low back arch. Lower it with control and switch sides. Start with 6 to 8 marches per side, then build to 10 if the shape stays clean.
A hand on the lower belly can help you check whether the wall is pushing out. Another trick: keep the exhale going as the leg lifts. If you hold your breath, the pressure usually shoots straight forward, and the midline shows it.
Shorter range beats higher lift. Every time. If tabletop feels too much, start with toe taps instead of full marches. If you feel the pelvis rocking side to side, slow down and make each lift smaller.
This is one of those moves people skip because it looks too basic. Then they get annoyed when standing exercises feel sloppy. There’s a reason therapists come back to marching so often.
5. Bent-Knee Fallout for Side-to-Side Control
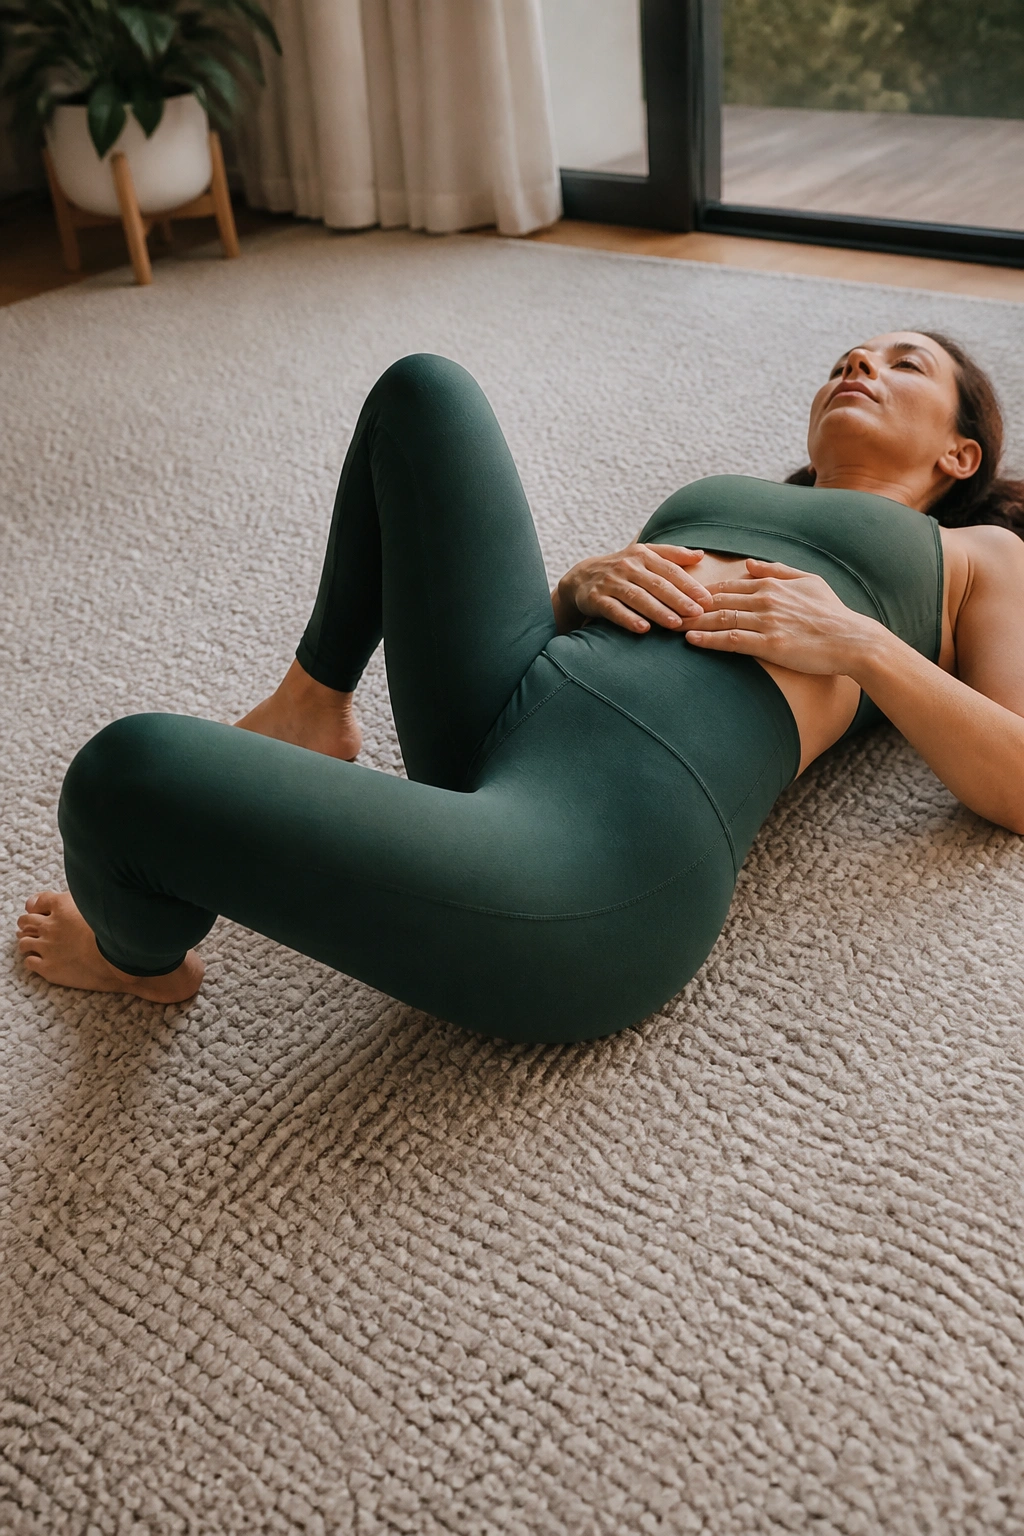
Unlike marching, which asks the belly to hold steady as a leg lifts, bent-knee fallout asks the torso to stay quiet while one leg opens out to the side. That makes it a nice test of asymmetry, especially if one hip feels tighter than the other.
Lie on your back with knees bent and feet on the floor. Exhale, then let one knee fall out just 2 to 4 inches. Stop before the pelvis rolls or the ribs flare. Bring it back in on the inhale. Six to 8 reps on each side is enough for most people at first.
A lot of people force the knee wide because the motion looks easy. It isn’t. The range should be tiny, almost stingy. You’re training control, not hip flexibility. If the outside of the hip or the low back takes over, the movement is too big.
This one is especially useful if you notice one side domes faster than the other or if one glute feels lazy. Keep the foot grounded and the breath slow. The body tends to reveal its favorite cheat patterns here.
6. Bird Dog Reaches on Hands and Knees
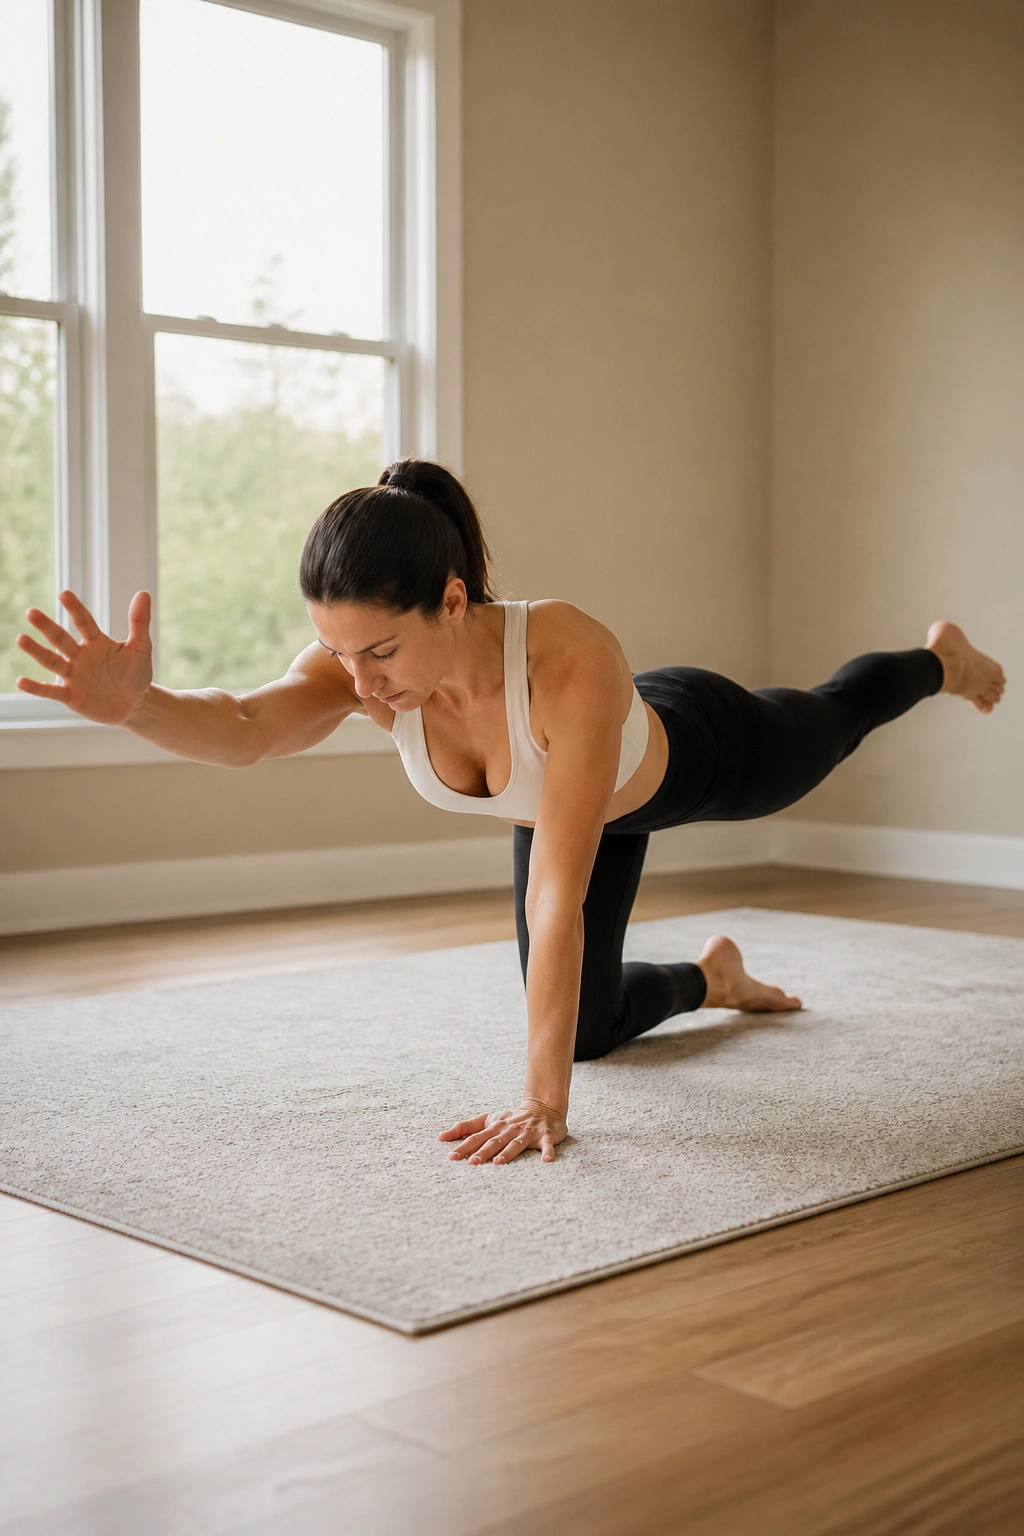
On hands and knees, the floor tells on you fast. Bird dog reaches make the core work without the crunch, and they’re one of the cleanest ways to teach cross-body stability.
What you should feel
- The ribs stay level, not twisted
- The low back stays long, not arched
- The belly holds shape instead of doming
- The lifted arm and leg reach away, not up
Start in quadruped with hands under shoulders and knees under hips. Exhale, then reach the right arm forward and the left leg back. Pause for 2 to 3 seconds. Return with control. Repeat on the other side. Five to 8 reps per side is enough. If the full reach makes the trunk shake or the belly bulge, keep one toe on the floor and only reach the arm, or slide the leg back instead of lifting it.
A stable bird dog feels long, not tense. People often crank the neck, lift the leg too high, or dump into the low back. None of that helps. Imagine a cup of water sitting on the pelvis. If it would spill, you went too far.
Tip: the best bird dog is the one you can repeat slowly without losing shape on rep 4.
7. Glute Bridges That Don’t Push the Belly Out
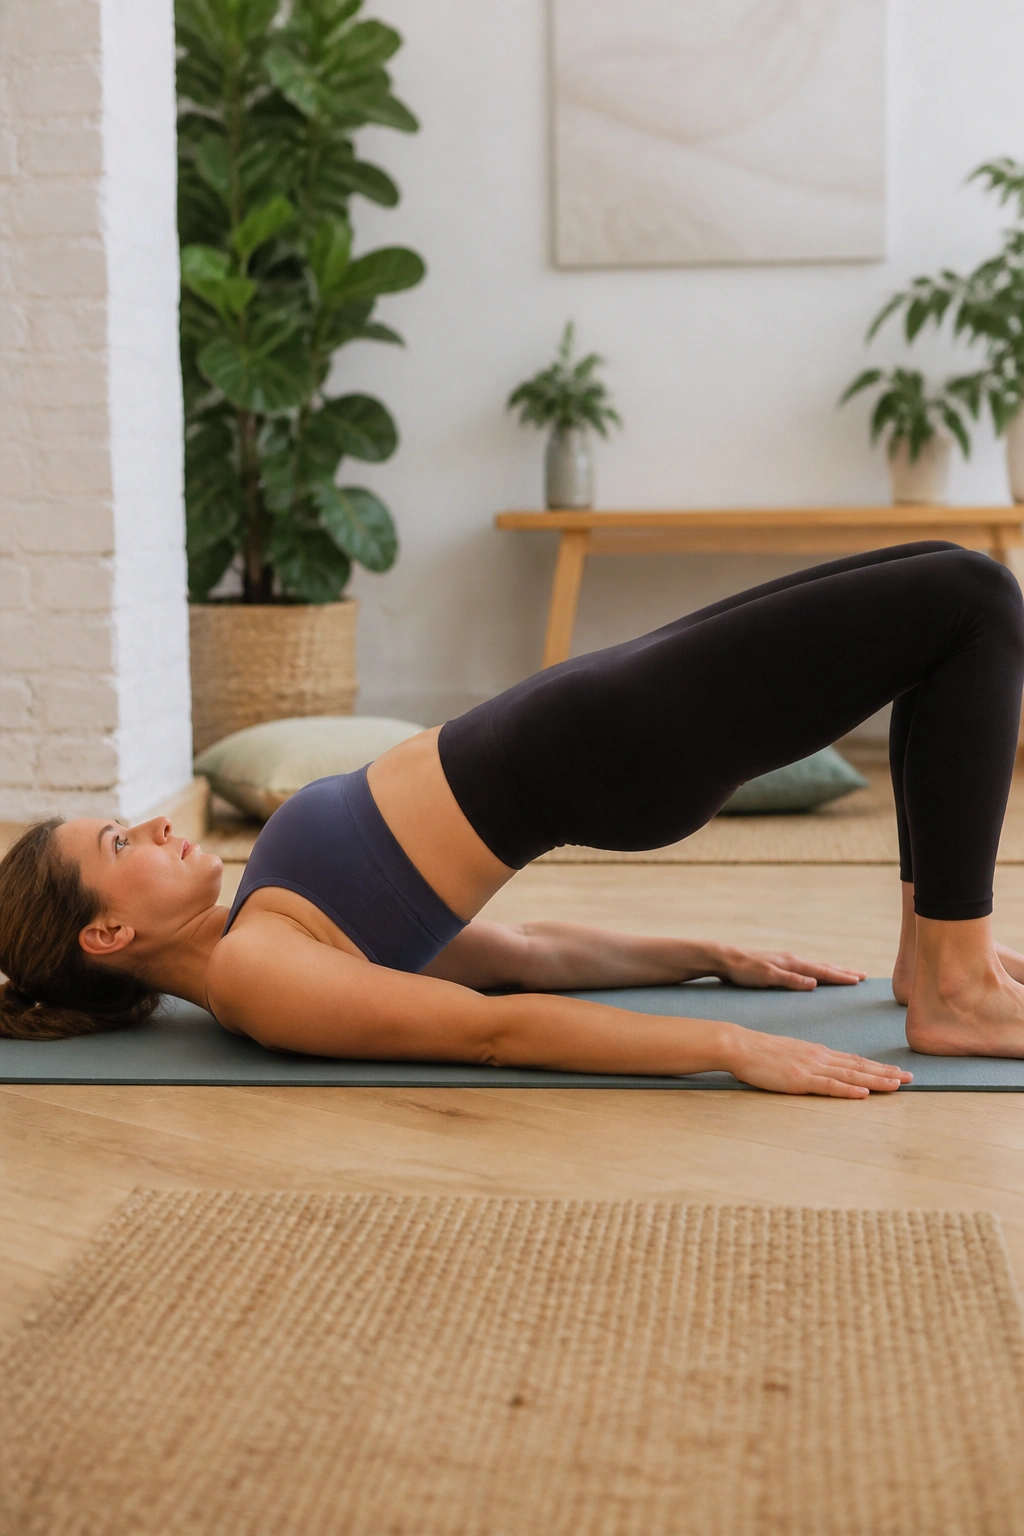
The backside matters. A lot. If the glutes are asleep, the lower back and front of the belly often take over, and that’s a lousy trade for postpartum core work.
Lie on your back with knees bent and feet hip-width apart. Exhale, then press through the heels and lift the hips until the body makes a straight line from shoulders to knees. Pause for 1 to 2 seconds, then lower with control. Start with 8 to 12 reps, and keep the top position modest.
The common mistake is going too high. People chase a big lift, the ribs pop up, and the belly domes. That is not a stronger bridge. It’s a back bend in disguise. Keep the ribs down and stop the lift when the glutes are working hard but the low back still feels calm.
If a standard bridge feels shaky, try a mini bridge: lift only 2 or 3 inches. You should feel the hamstrings and glutes, not neck tension or a hard bulge down the center. Bridges are boring when done well. They’re also one of the first moves that makes standing, climbing stairs, and getting out of bed feel less awkward.
8. Wall Presses for Upright Core Support
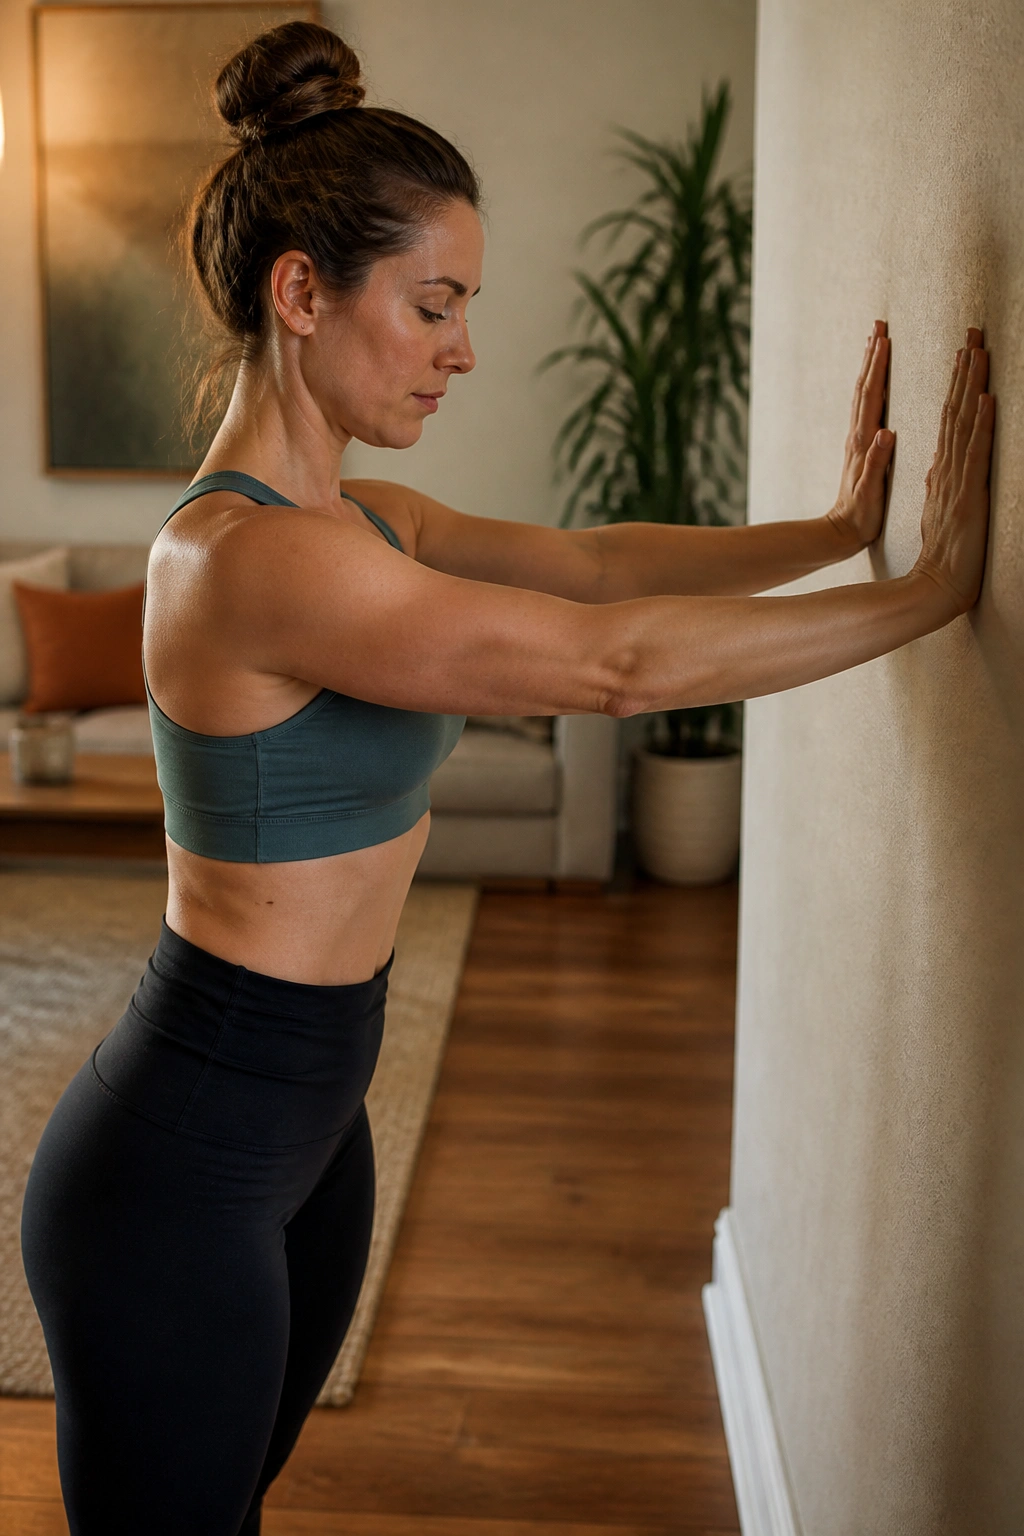
Not every good core move happens on the floor. Wall presses are underrated because they teach the belly to work in a standing position, which is much closer to real life than lying on a mat.
Stand facing a wall with feet about a foot away. Place forearms on the wall at chest height. Exhale, gently press the forearms into the wall, and feel the lower ribs soften while the deep belly draws in just enough to stay organized. Hold for 3 to 5 seconds, then relax. Six slow presses is a solid start.
This is a useful option during pregnancy too, when floor work feels annoying or lying flat feels wrong. The wall gives you feedback. If you arch the low back or shove the ribs forward, you’ll feel it right away. Keep the neck long and the shoulders away from the ears.
Some people think standing exercises are “too easy” for core rehab. Then they try holding a diaper bag while talking to a toddler and discover their midsection hasn’t caught up. Wall presses bridge that gap without making the abdomen angry.
9. Side-Lying Clamshells for Pelvic Stability
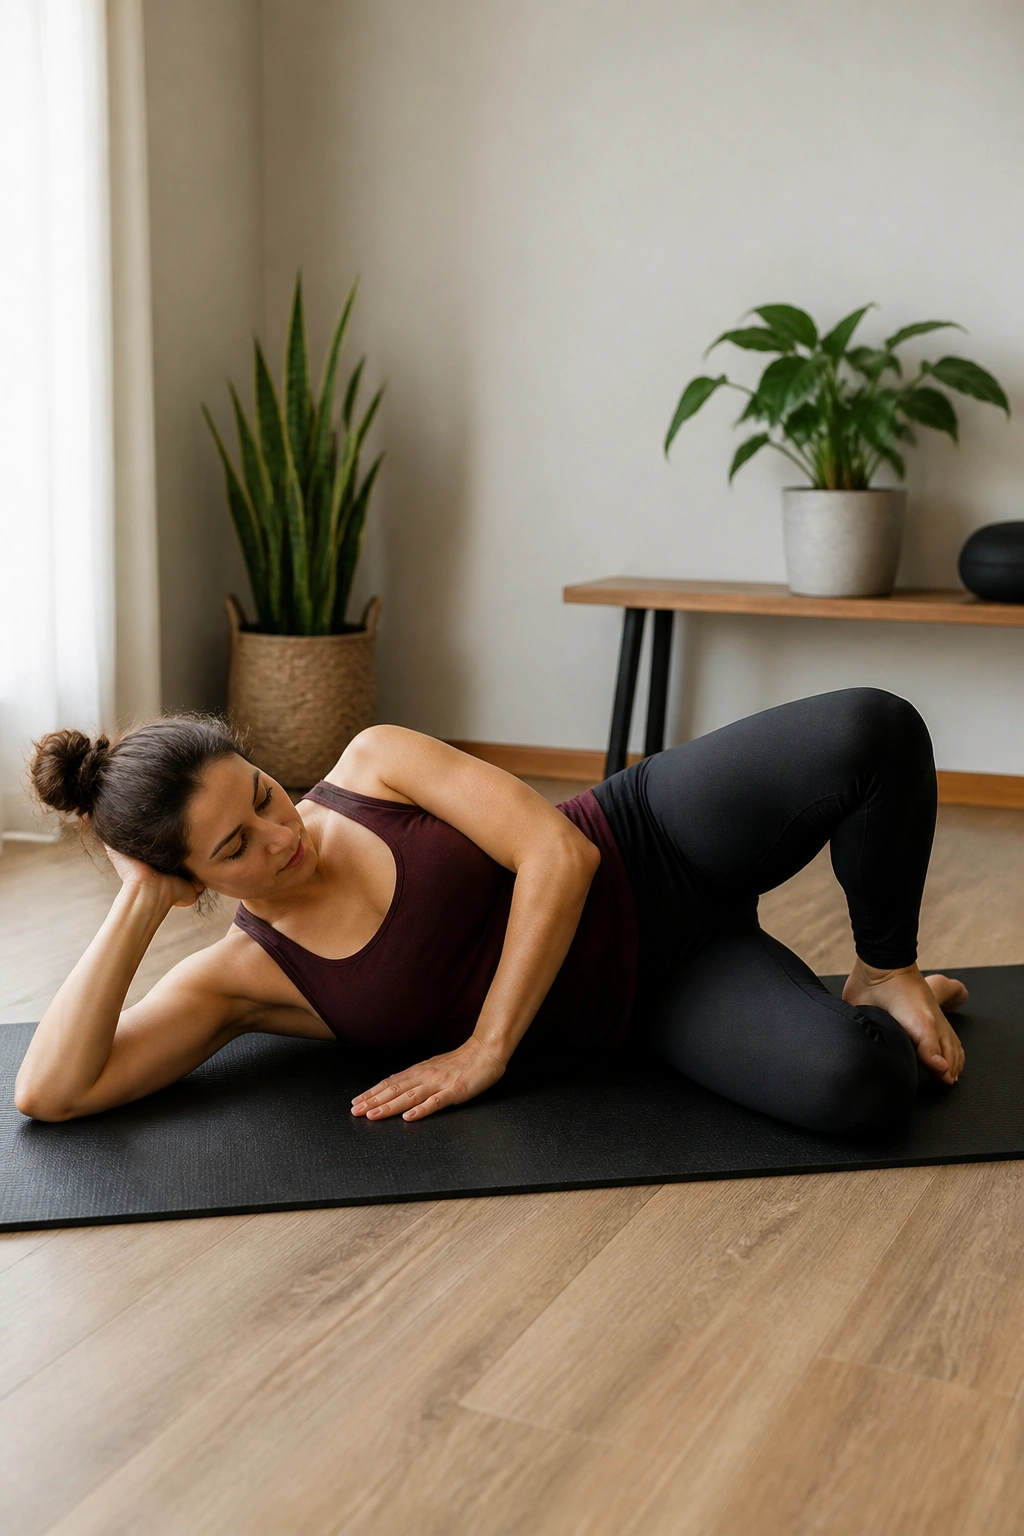
Clamshells are not an obvious diastasis exercise, and I like that. Repair work is not only about the abs. The pelvis needs help too, because weak side hips can make the trunk work harder than it should.
Lie on your side with knees bent and feet together. Keep the hips stacked. Exhale, then lift the top knee a few inches without rolling the pelvis backward. Lower slowly. 10 to 15 reps per side works well, and a light mini-band around the knees can make the last few reps more honest.
The move should come from the side of the hip, not the front. If you feel it in the front of the hip or the low back, the range is too big or the pelvis is tipping. A towel between the knees can help you keep the setup tidy, especially if your hips feel stiff.
Clamshells are easy to dismiss because they look like leg work. They are leg work. And that’s the point. A steadier pelvis gives the belly less nonsense to deal with when you walk, carry, and turn.
10. Dead Bug Heel Taps for Diastasis Recti Repair Workouts
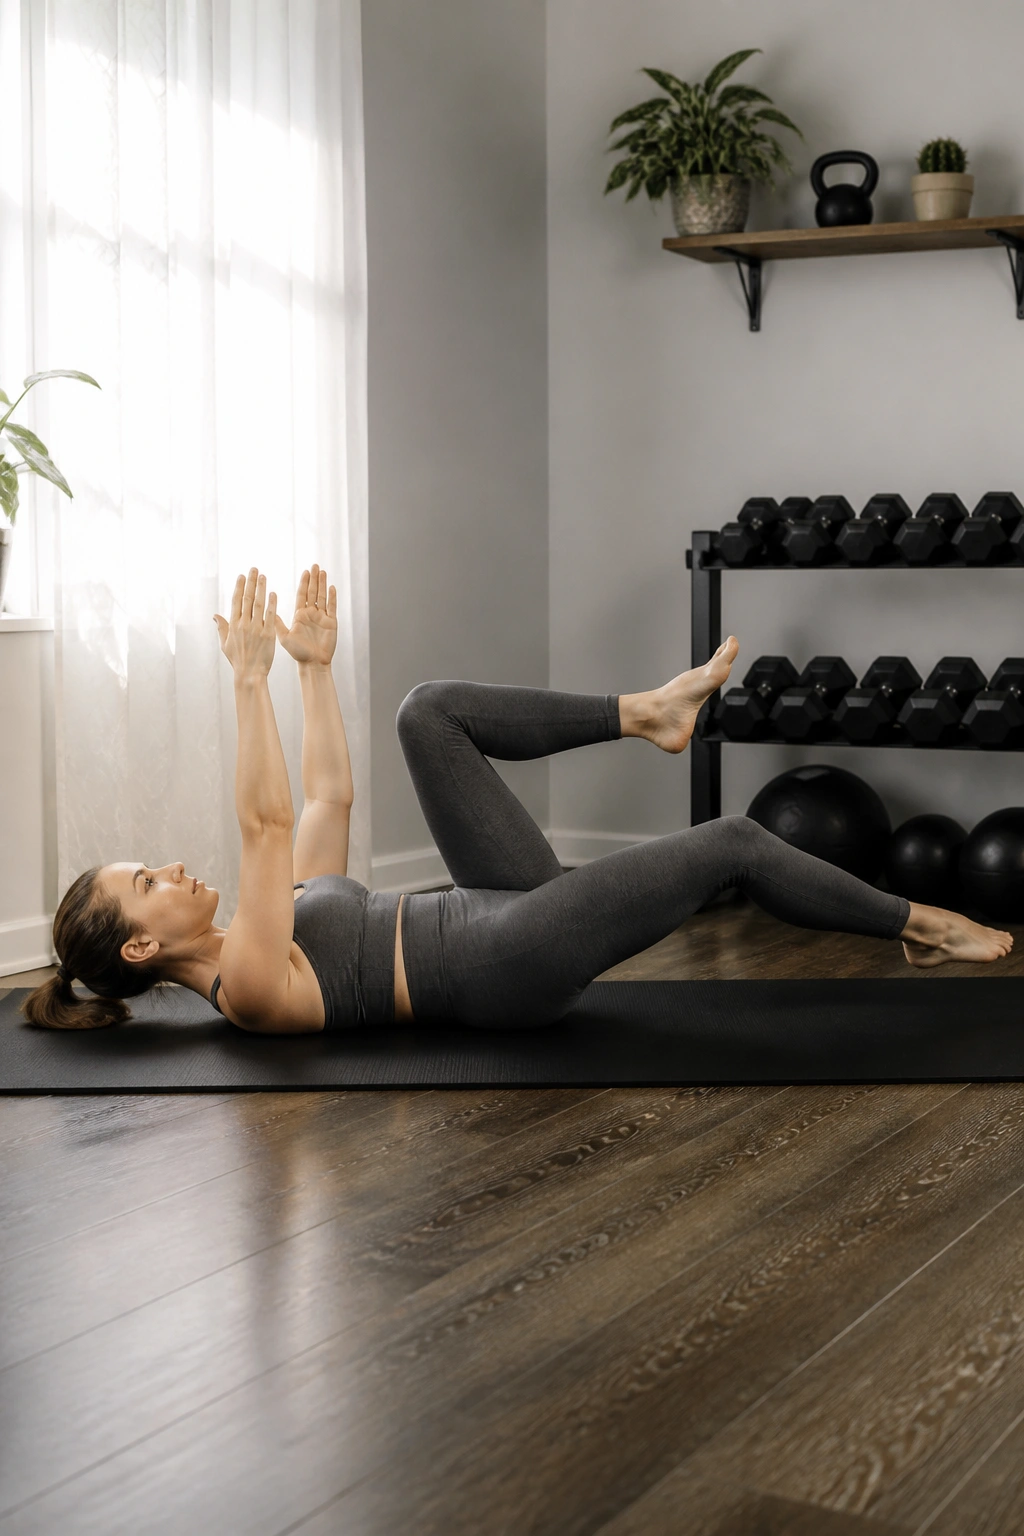
Can you make dead bugs safe for a healing belly? Yes, if you shrink them and respect the pressure. Dead bug heel taps are one of the best mid-level progressions because they ask the core to hold shape while the legs move.
How to scale it
Start with both knees bent over the hips. Exhale and lower one heel to tap the floor, then return. If that stays clean, progress to a lower hover. If that still feels easy, move to alternating arms and legs. Keep the range small before you make it bigger.
The trunk should stay quiet. No rib flare. No hard belly ridge. No breath-holding. If the low back arches, reset and shorten the leg reach. Some people do better with hands pressing lightly into the thighs for feedback at first.
Three things make this exercise work: slow tempo, full exhale, and honest range. Rush it and the belly often pops. Use a 2-second lower, 1-second tap, 2-second return pattern. That rhythm gives you time to keep control instead of flying through it.
This is one of the first moves that starts to feel like “real core work” again. That feeling is earned, not forced.
11. Side Plank on Knees for Oblique Strength
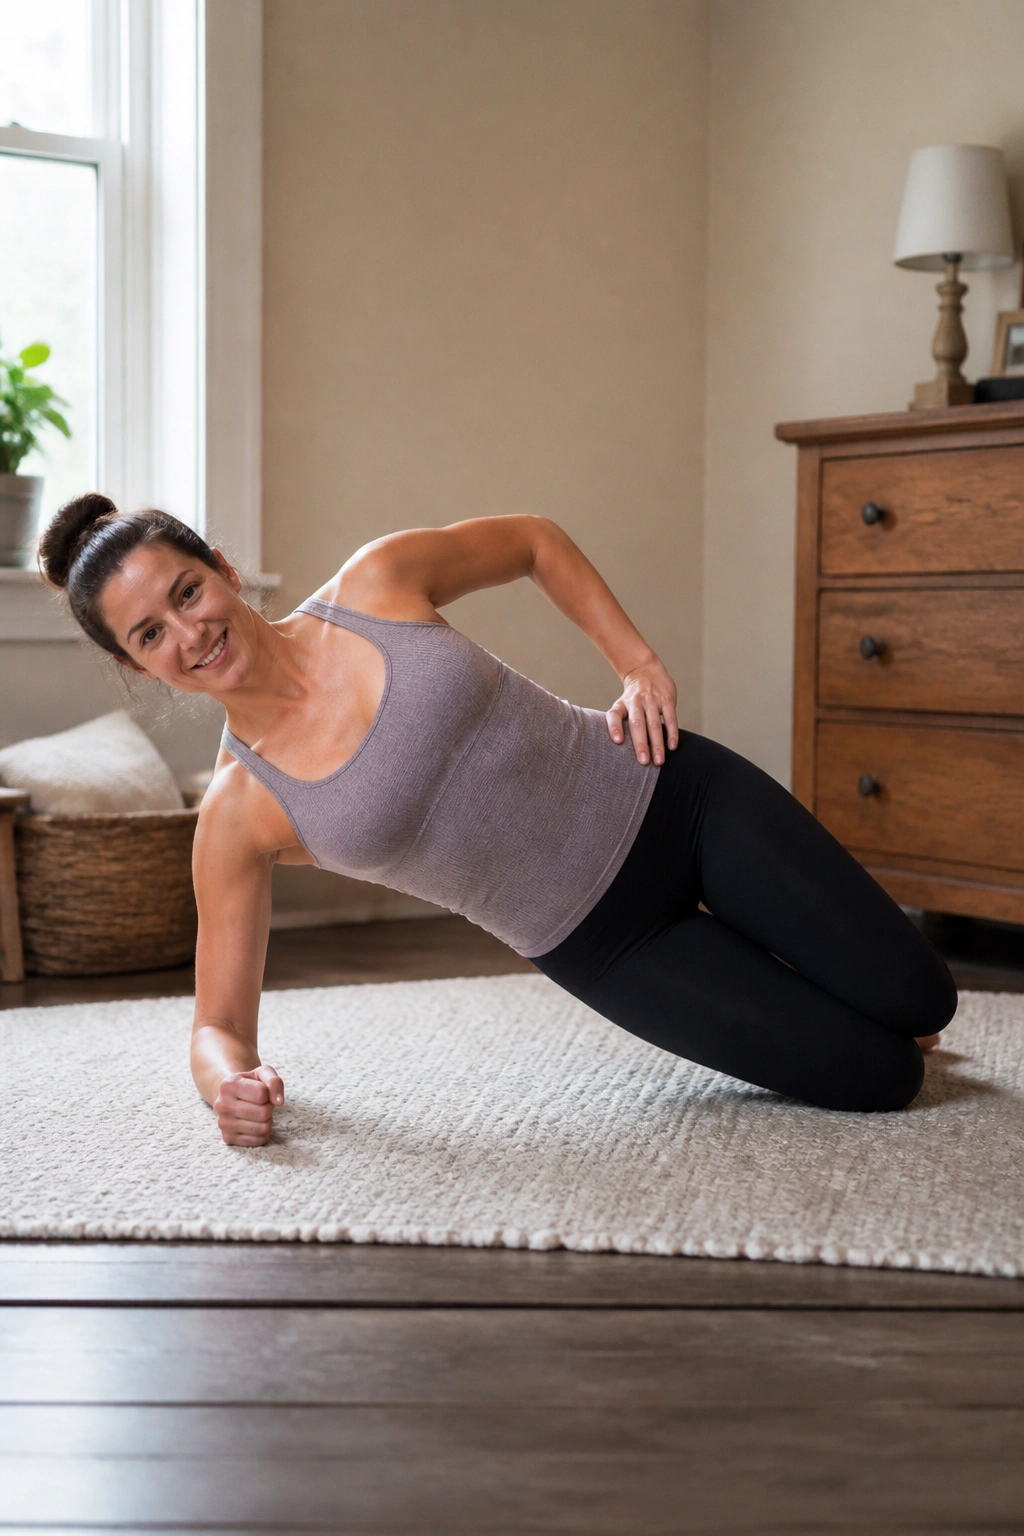
A front plank is not the first place I’d send most postpartum bodies. A side plank on the knees is kinder, and often more useful early on, because it loads the side wall without dumping everything straight through the midline.
Set your elbow under your shoulder and bend the knees. Lift the hips so the body makes a straight line from head to knees. Hold for 10 to 20 seconds, then rest. Two or 3 rounds on each side is plenty. If the shoulder complains, put the elbow on a bench or do the plank against a wall.
The side plank should feel like a steady line, not a side crunch. If the hip drops or the waist caves in, reduce the hold time. If the belly domes, back off to a wall version and work there until the shape stays smooth.
This move earns its place because the obliques do a lot of quiet work in keeping the midline organized. It also helps balance out the front-of-body bias that shows up in so many daily tasks, from feeding a baby to hunching over a sink.
12. Sit-to-Stand Squats with Breath Control
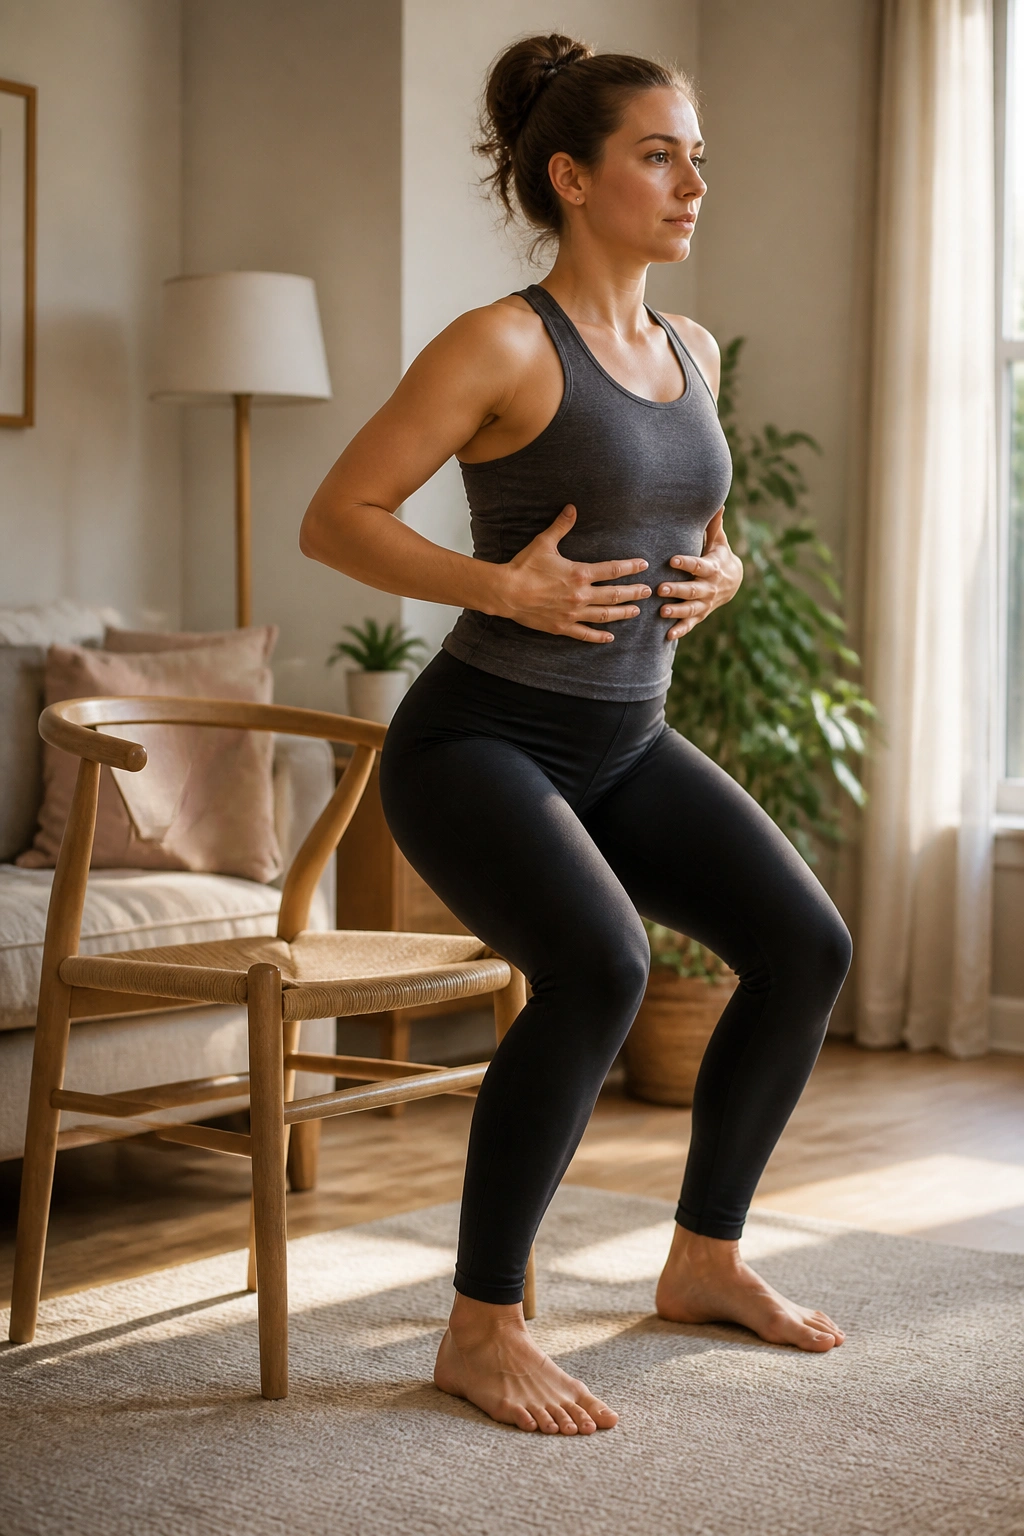
Standing up from a chair is core training in disguise. I like this one because it translates directly to life: couch transfers, toilet stands, getting out of the car, and all the half-rushed motions that usually expose weak spots.
Breath cue
Sit on a sturdy chair with feet about hip-width apart. Lean slightly forward, exhale, and stand up without flinging the ribs or belly forward. Inhale as you lower back down with control. Start with 8 to 12 reps for 2 sets.
Quick setup notes
- Keep the feet planted
- Use a chair height that lets you stand without collapsing
- Pause for a second at the top
- Stop if the belly domes on the way up
The easiest mistake is using momentum. People throw the chest forward, push with the hands, and avoid the leg and core work entirely. That gives the muscles nothing useful to do. Slow the descent and the rise, and the whole move changes.
If a chair squat feels too ambitious, start with a higher surface or hold onto a countertop. The point is to train the trunk to stay stacked while the legs do real work. That stack matters every time you lift, carry, or chase something small and fast.
13. Pallof Presses with a Resistance Band
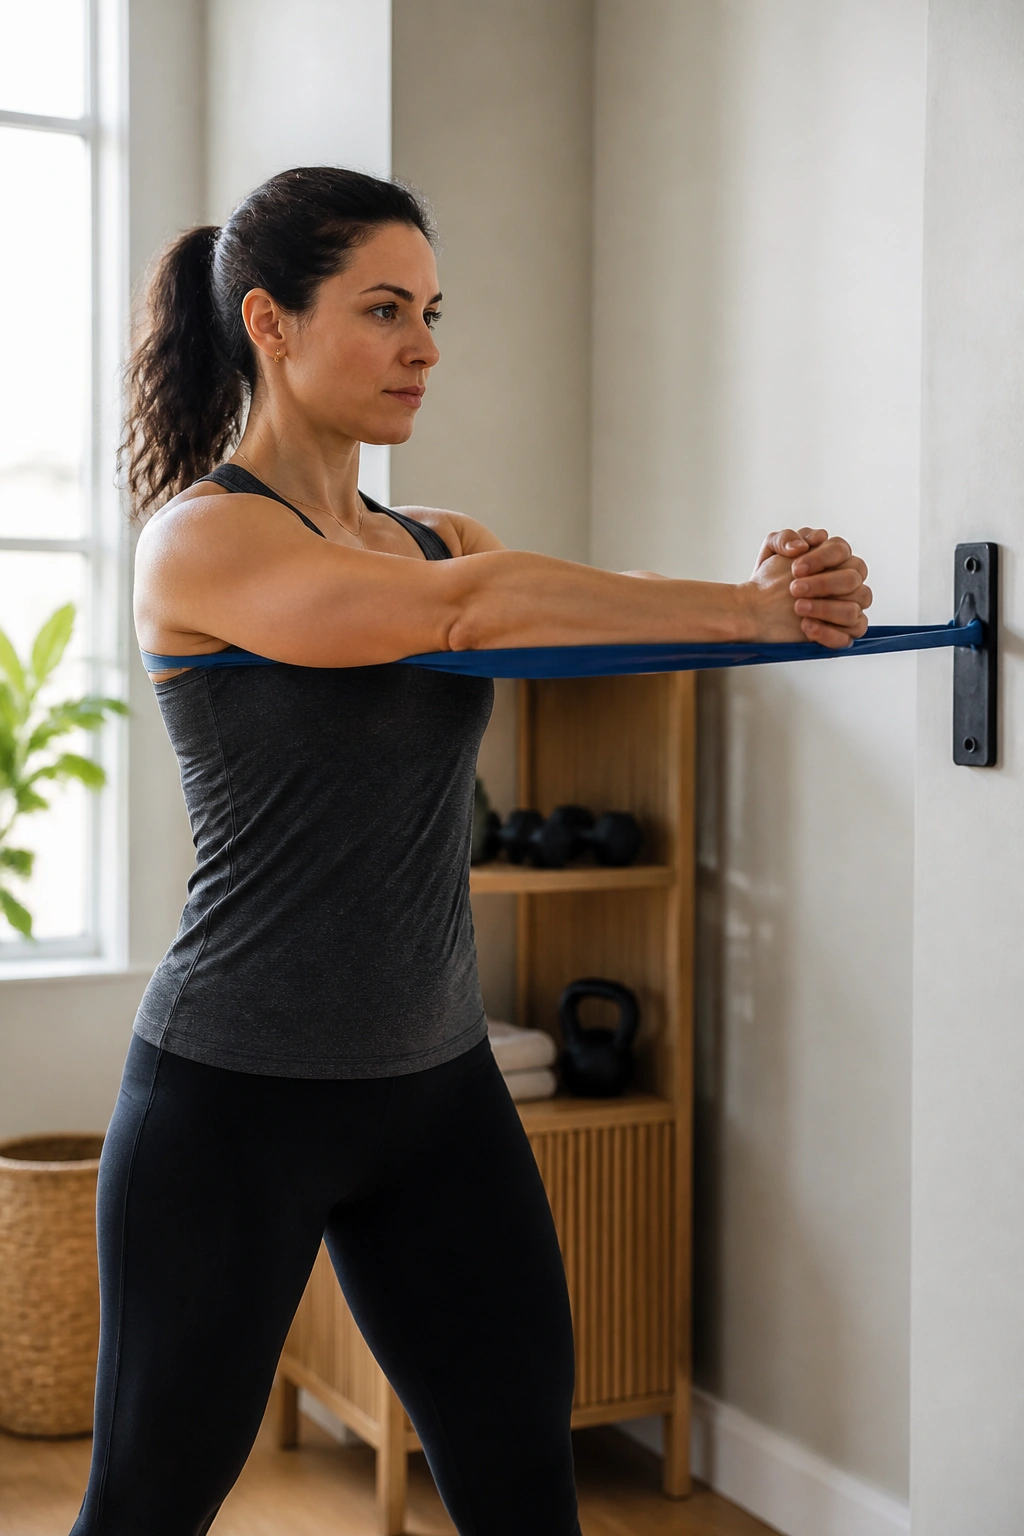
Rotation control matters more than most people realize. Pallof presses train the body to resist twisting, which is exactly what the core has to do when you carry a car seat in one hand and a diaper bag in the other.
Anchor a band at chest height. Stand sideways to the anchor, hold the band at the chest, step out until there’s light tension, then press the hands straight forward 6 to 10 inches. Hold for 2 seconds, bring it back, and repeat. Eight reps per side is a nice starting point.
Why it helps
The band tries to pull you sideways. Your job is to stay square. That means the deep core, obliques, and glutes all have to do their jobs without turning the torso into a wobble machine. If you lean or twist, the resistance is too much.
Keep the ribs stacked over the pelvis, knees soft, and shoulders relaxed. People often grip too hard or arch the low back. Neither helps. A light band that you can control for 8 smooth reps is better than a heavy band that makes you fight for your life.
This move is one of my favorites for bridging rehab into real strength. It feels practical because it is.
14. Suitcase Carries That Train the Midline
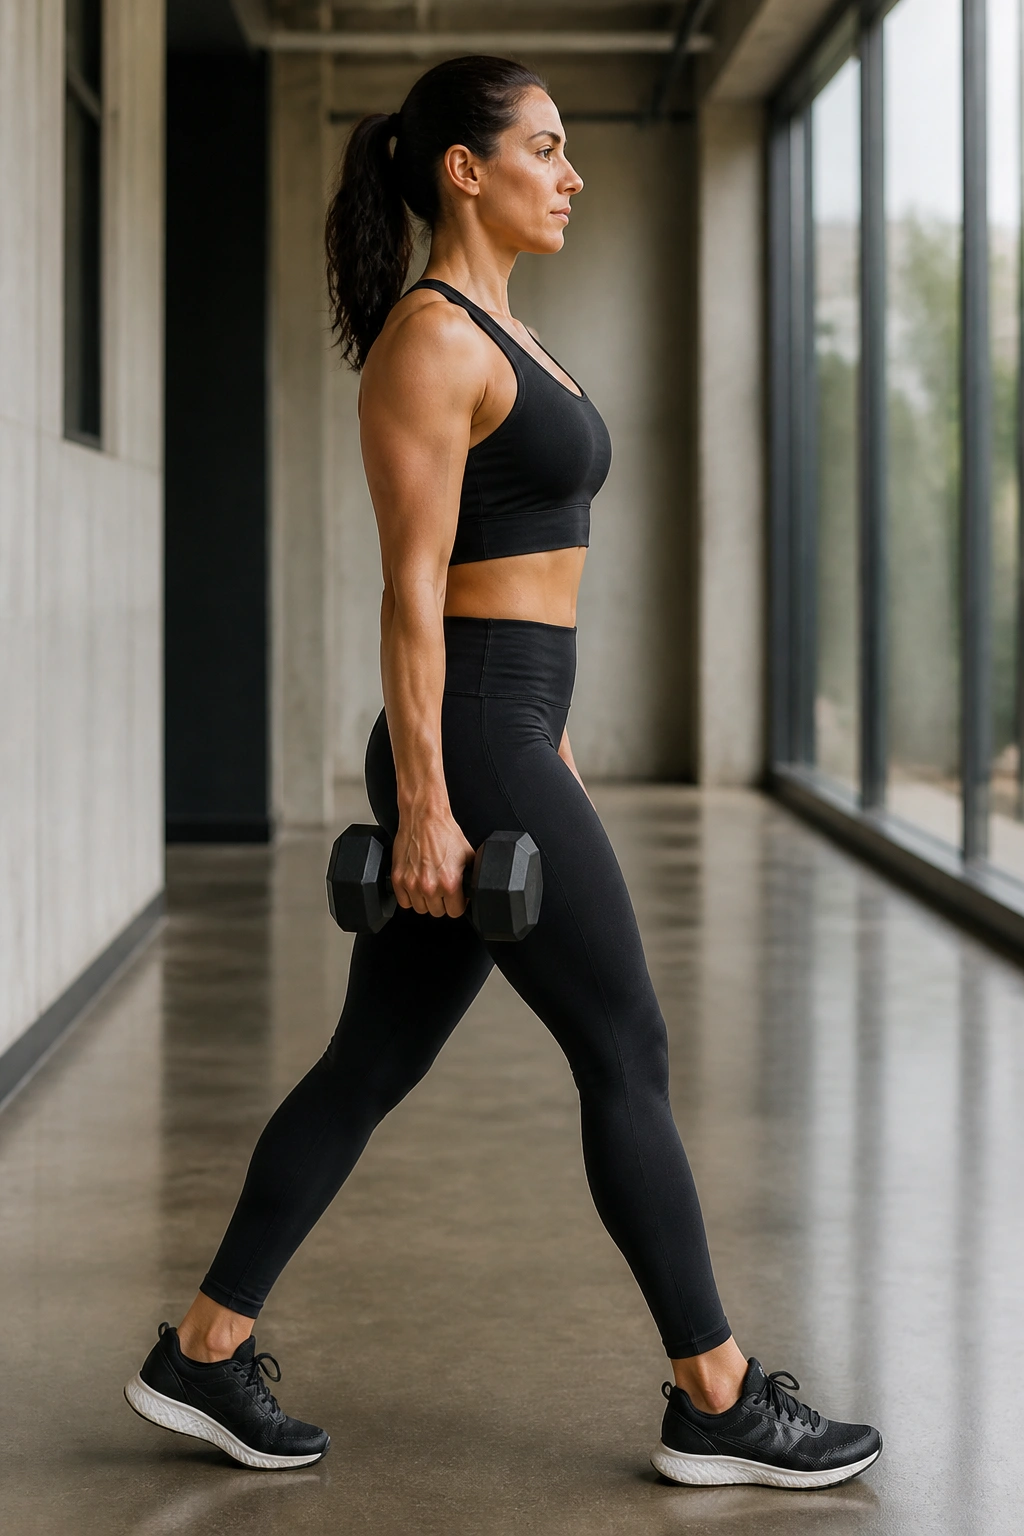
One dumbbell. One side. That’s all it takes to make the body pay attention. Suitcase carries teach the trunk to stay upright while one side is loaded, and they’re brilliant for the kind of asymmetrical carrying parents do all day.
Hold a dumbbell or kettlebell at one side, stand tall, and walk 20 to 40 yards. Switch hands and repeat. Three to 4 rounds per side is enough. The goal is not speed. It’s staying level while the weight wants to pull you over.
- Walk with short, controlled steps
- Keep the ribs stacked, not flared
- Don’t let one hip hike up
- Use a lighter weight if you lean at all
That last one matters. If you can’t stay tall, the bell is too heavy. Period. The carry should feel challenging but clean. You may notice the obliques on the unloaded side working harder than expected. Good. That’s the point.
Suitcase carries are a bridge between rehab and ordinary life. Grocery bag? Same idea. Child on one hip? Same idea, only messier.
15. Half-Kneeling Band Rows for Trunk Control
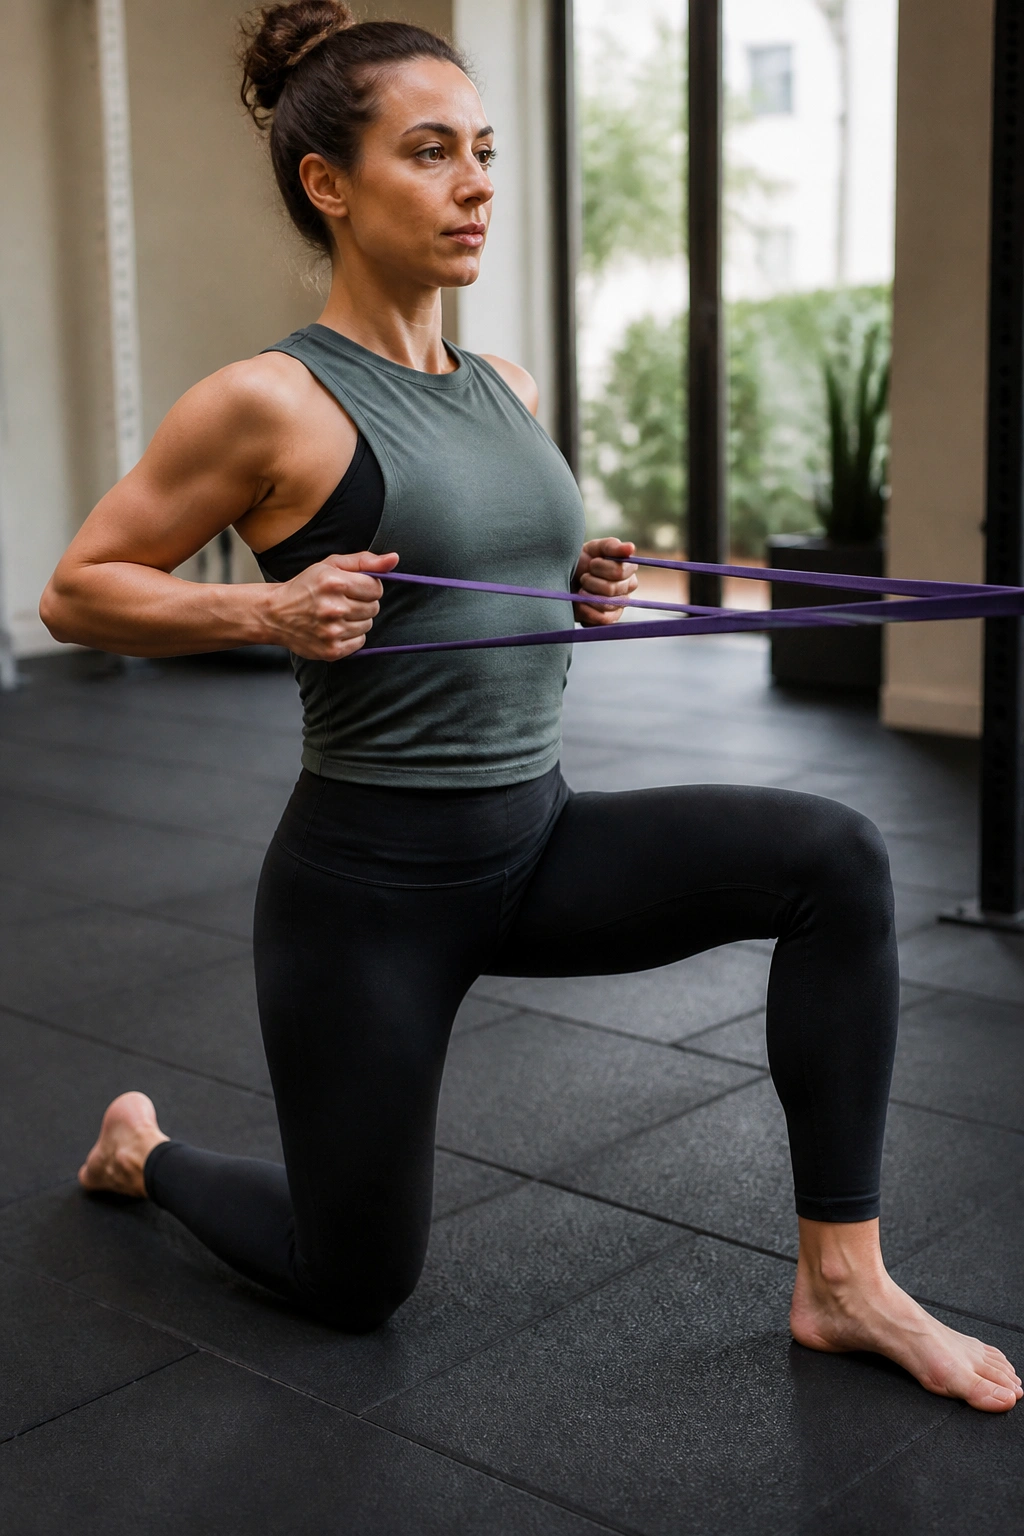
Half-kneeling rows are one of those exercises that look like upper-back work and quietly turn into a core lesson. One knee down, one foot planted, and the trunk has to stay honest.
Set up a band at chest height. Kneel with the right knee down and the left foot forward, then row the band toward the ribs while keeping the ribs from jutting forward. Pause for a second, then return slowly. Do 8 to 12 reps, switch sides, and keep the motion smooth.
Half-kneeling makes cheating harder. If you arch the low back, you’ll feel it right away. If the pelvis shifts forward, the row gets sloppy. That feedback is useful. It shows you whether the trunk can stay stacked while the arms work.
A folded towel under the kneeling knee helps if the floor is unforgiving. If the position feels unstable, widen the stance a little and shorten the row. You want the shoulder blades to move, but the belly should stay organized.
This is a nice move for people who’ve done the floor drills and are ready for something that looks a bit more like normal training.
16. Elevated Plank Holds Without the Doming
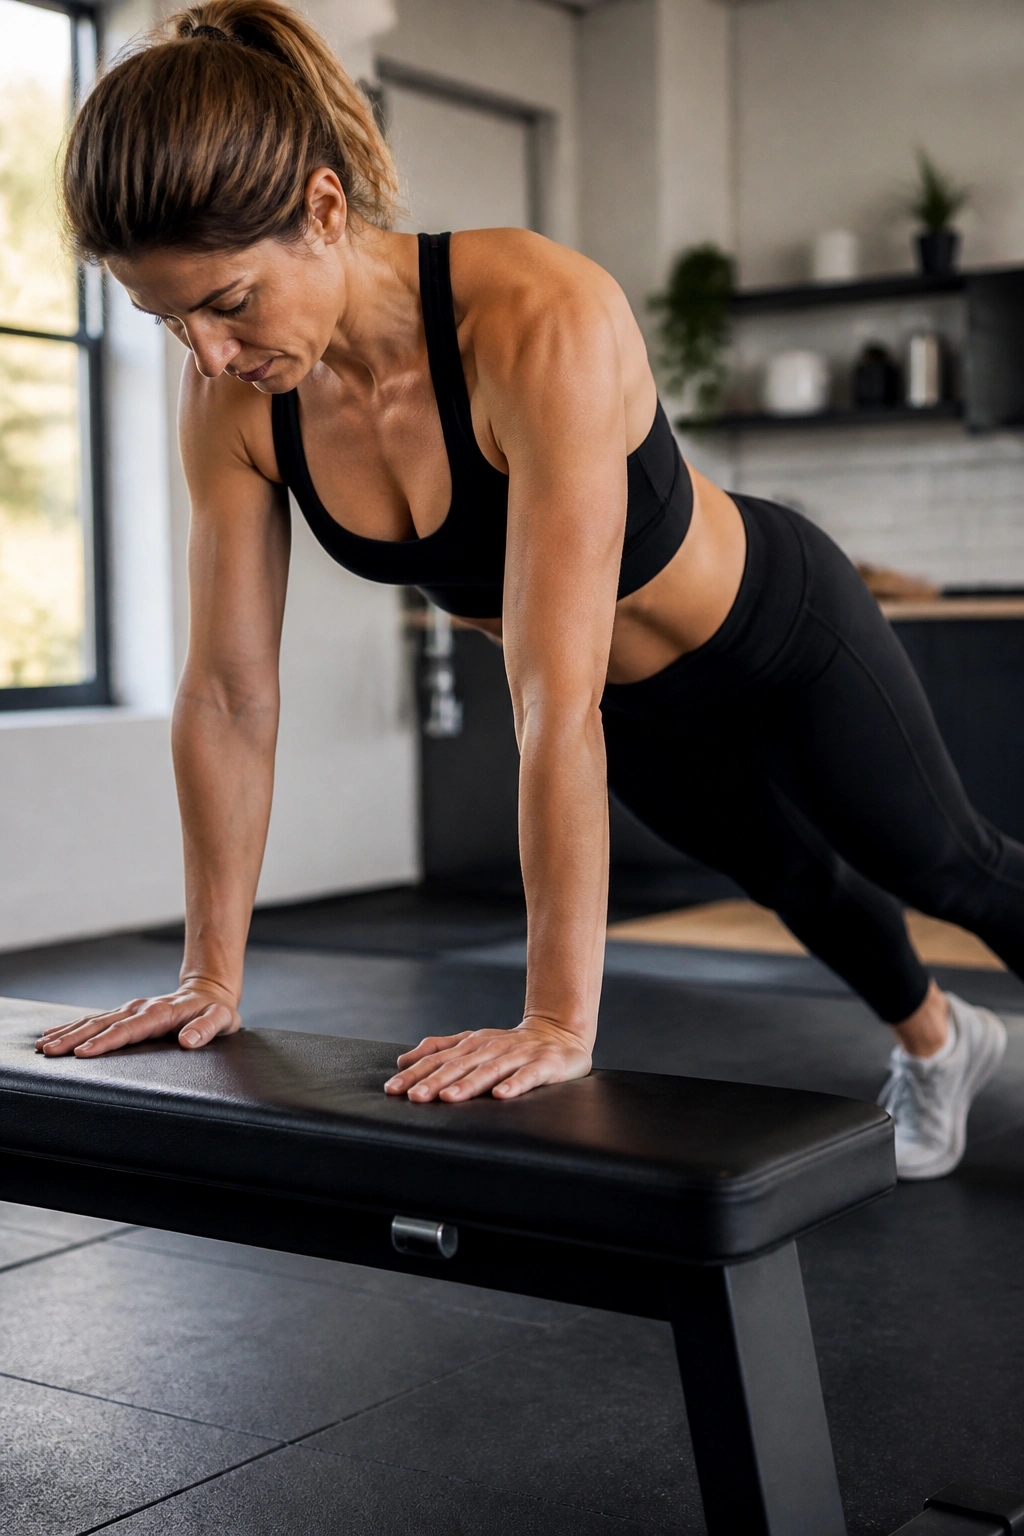
Unlike a floor plank, the elevated version gives you room to keep pressure under control. That’s why I prefer it first. Hands on a bench, countertop, or sturdy table let you build plank strength without asking the belly to take a giant step too soon.
Place the hands under the shoulders, walk the feet back, and hold a straight line from head to heels. Start with 10 to 20 seconds, then rest. Three to 5 holds is enough. If the belly domes, the angle is too low. Raise the hands and try again.
The real mistake is treating plank holds like a toughness contest. They’re a pressure-management drill. You should be able to breathe while you hold. If you freeze and bear down, the midline will usually show it. Keep the neck long, the glutes lightly on, and the ribs from spilling forward.
Progress is simple here: lower the incline over time. Countertop to bench, bench to couch arm, couch arm to floor. Not all at once. A clean 15-second hold on a high surface beats a sloppy 30-second hold on the floor.
17. Modified Curl-Up Progressions for a Stronger Linea Alba
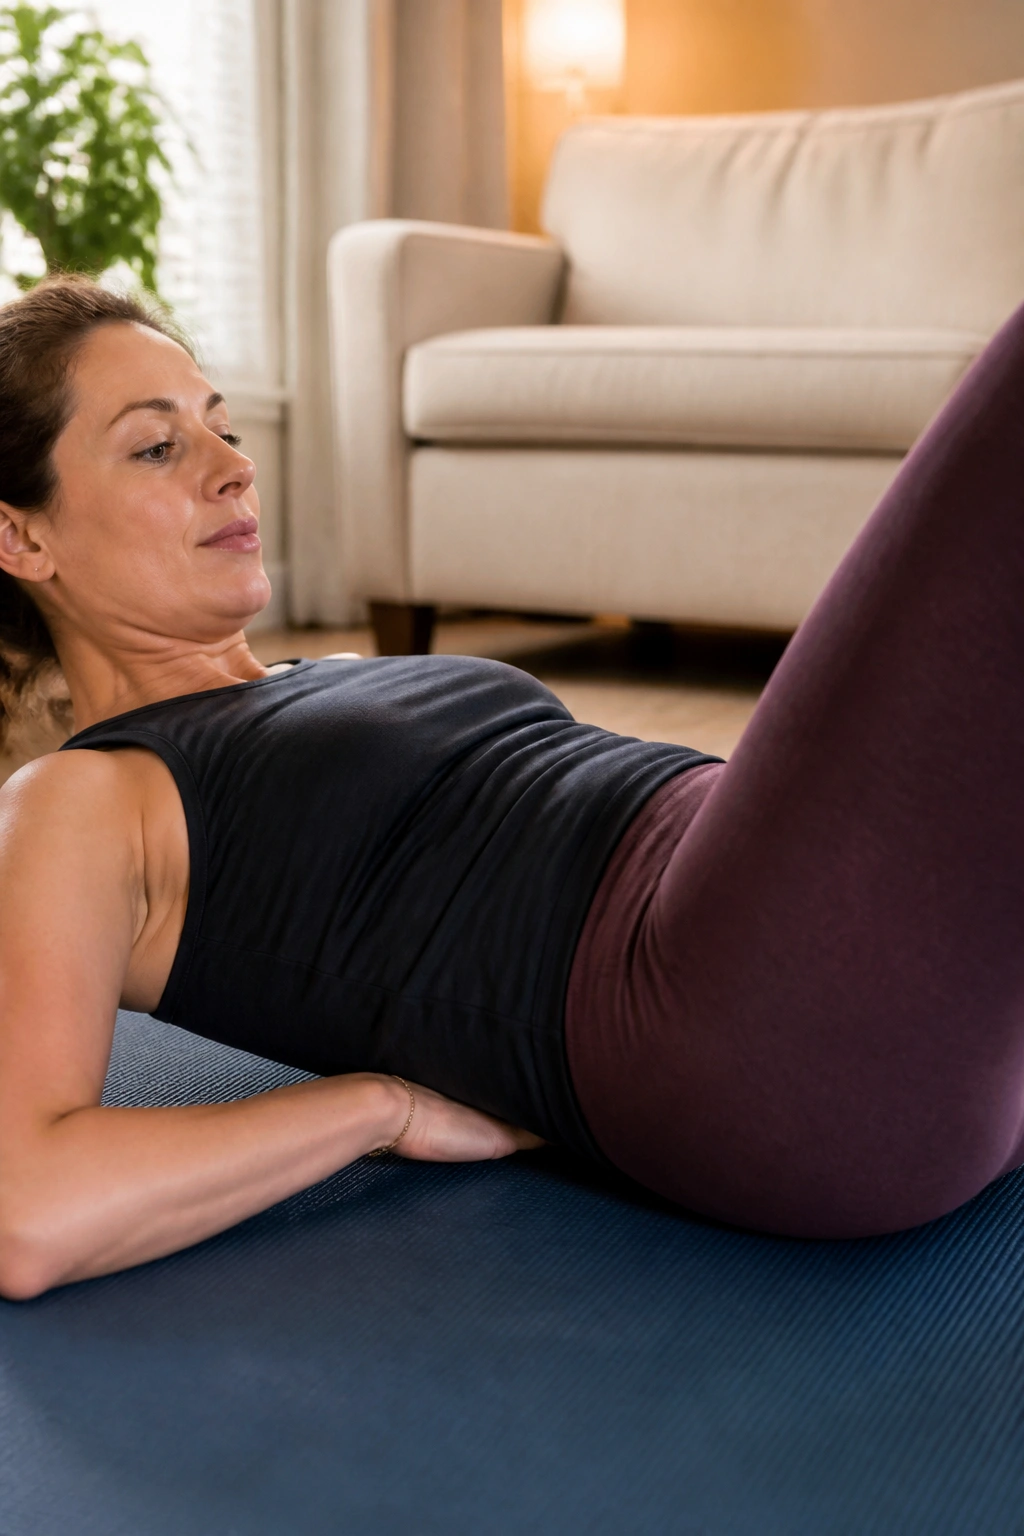
Can crunches come back? Sometimes, yes. But not the sloppy, necky, rib-flaring kind. A modified curl-up, used carefully, can help the front line tolerate flexion again without making the belly bulge.
The small range is the point
Lie on your back with one knee bent and the other leg long. One hand can slide under the low back for a tiny bit of support. Exhale, lift the head and shoulders just a few inches, hold for 2 to 3 seconds, then lower slowly. Five to 8 reps is plenty.
The movement is tiny. That’s not a flaw. It’s the strategy. You are not trying to sit all the way up. You’re teaching the linea alba and deep core to handle a controlled curl without overpressurizing the front wall. If the neck takes over, use less range. If doming shows up, stop and back up to heel slides or dead bugs.
A lot of people rush this exercise because it looks like a familiar ab move. Treat it like rehab, not like a workout challenge. The first clean reps usually feel almost too easy. Then you realize the midline stayed flat and the breathing stayed calm. That’s the win.
18. Split Squats and Reach for Diastasis Recti Repair Workouts
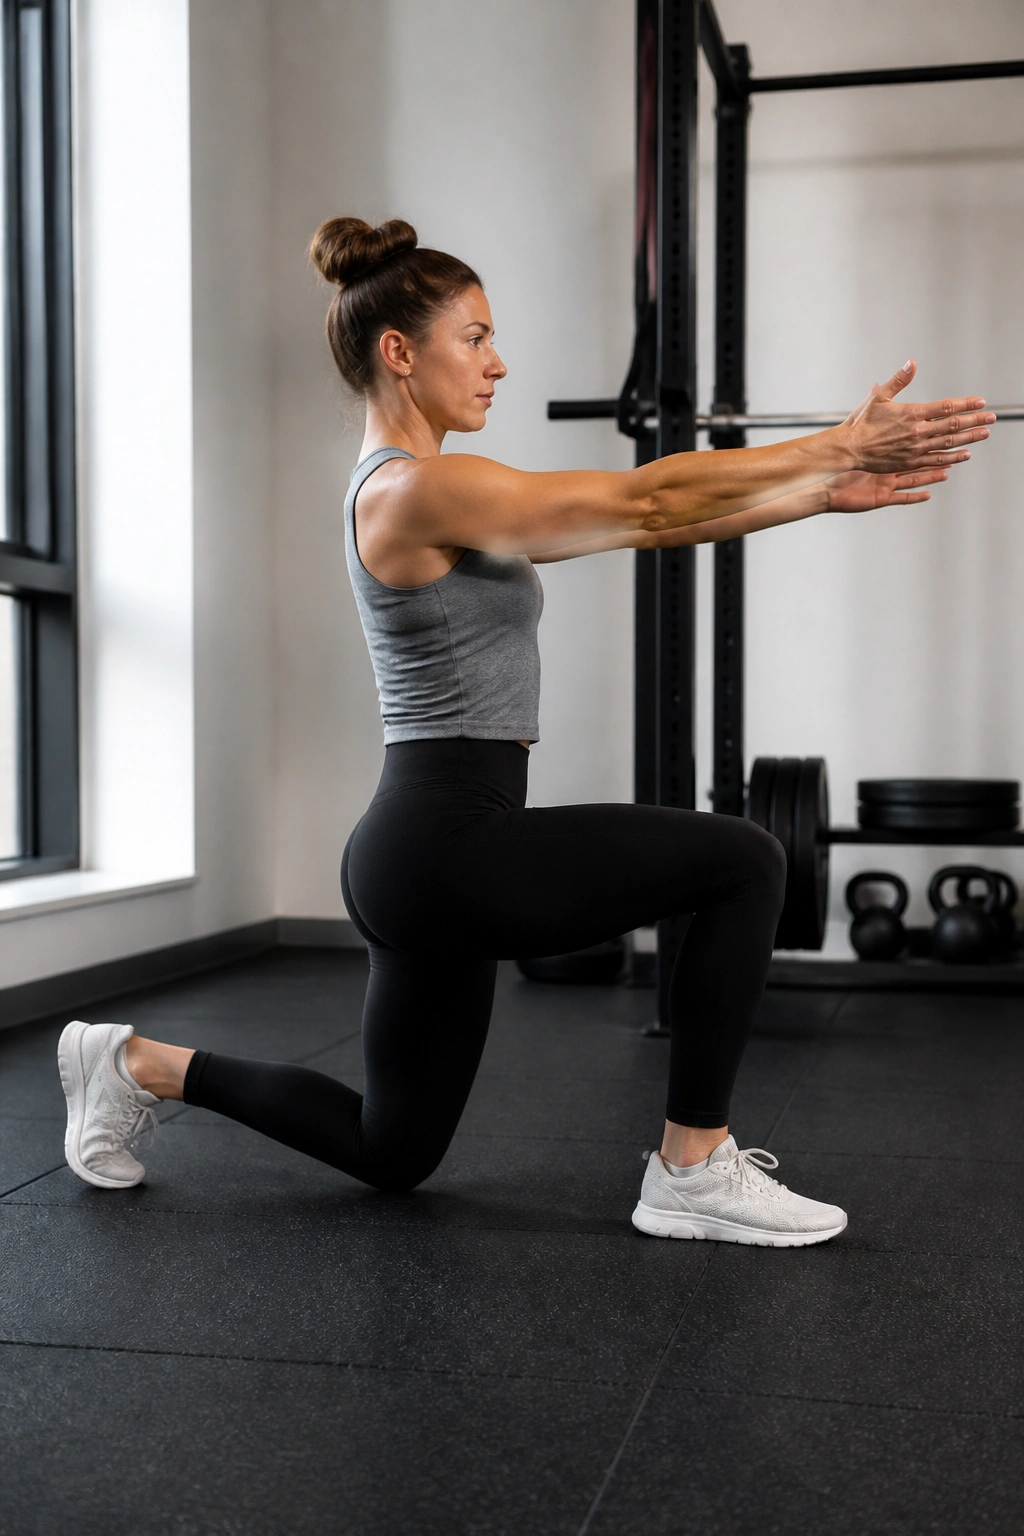
Real-life core strength shows up on one leg. Split squats teach the belly to stay organized while the hips, glutes, and legs do a job that looks simple and usually isn’t.
Step one foot back into a short split stance. Lower a few inches, reach the arms forward if that helps balance, then exhale as you stand. Start with 6 to 8 reps per side using bodyweight only. If that feels smooth, hold light dumbbells by your sides. If it feels shaky, hold onto a wall or countertop with one hand.
Keep the front knee tracking over the middle toes, and don’t sink so low that the belly pushes forward. The range can be tiny and still count. That is a useful lesson, especially for anyone who tries to “push through” with big flashy reps and ends up with doming or low-back strain instead.
This is a strong place to finish because it blends breath, balance, and load in one move. If split squats feel clean, a lot of daily tasks start to get easier: stairs, carrying a child, stepping out of the tub, standing up with groceries in both hands. That’s the kind of progress that matters.
