



The humble squat is often misunderstood as a simple movement that requires no instruction. You drop your hips, bend your knees, and stand back up. It sounds straightforward enough, but the moment you try to maintain perfect form—keeping your heels glued to the floor, chest upright, and knees tracking perfectly—you realize there is a massive gap between “doing a squat” and “performing a quality rep.”
If you lack the mobility in your ankles, the stability in your core, or the strength in your glutes, a standard squat can quickly devolve into a messy, awkward movement that strains your lower back. That is exactly why I advocate for variations. Beginners often rush to “standardize” their squats before their bodies are ready for the load or the geometry. By using variations, you are not just making the exercise easier; you are systematically teaching your nervous system the correct patterns, strengthening the stabilizer muscles that usually get ignored, and gradually building the confidence required for more advanced training.
This is not about finding the “perfect” squat; it is about finding the version of the squat that works for your current biomechanics. Some people have longer femurs and struggle to stay upright; others have limited ankle dorsiflexion that forces them onto their toes. These fifteen variations exist to bypass those specific roadblocks, allowing you to get the stimulus you need without fighting your own anatomy. Let’s look at how to break the squat down into its component parts so you can build them back up into a movement that feels natural, fluid, and powerful.
1. The Standard Air Squat
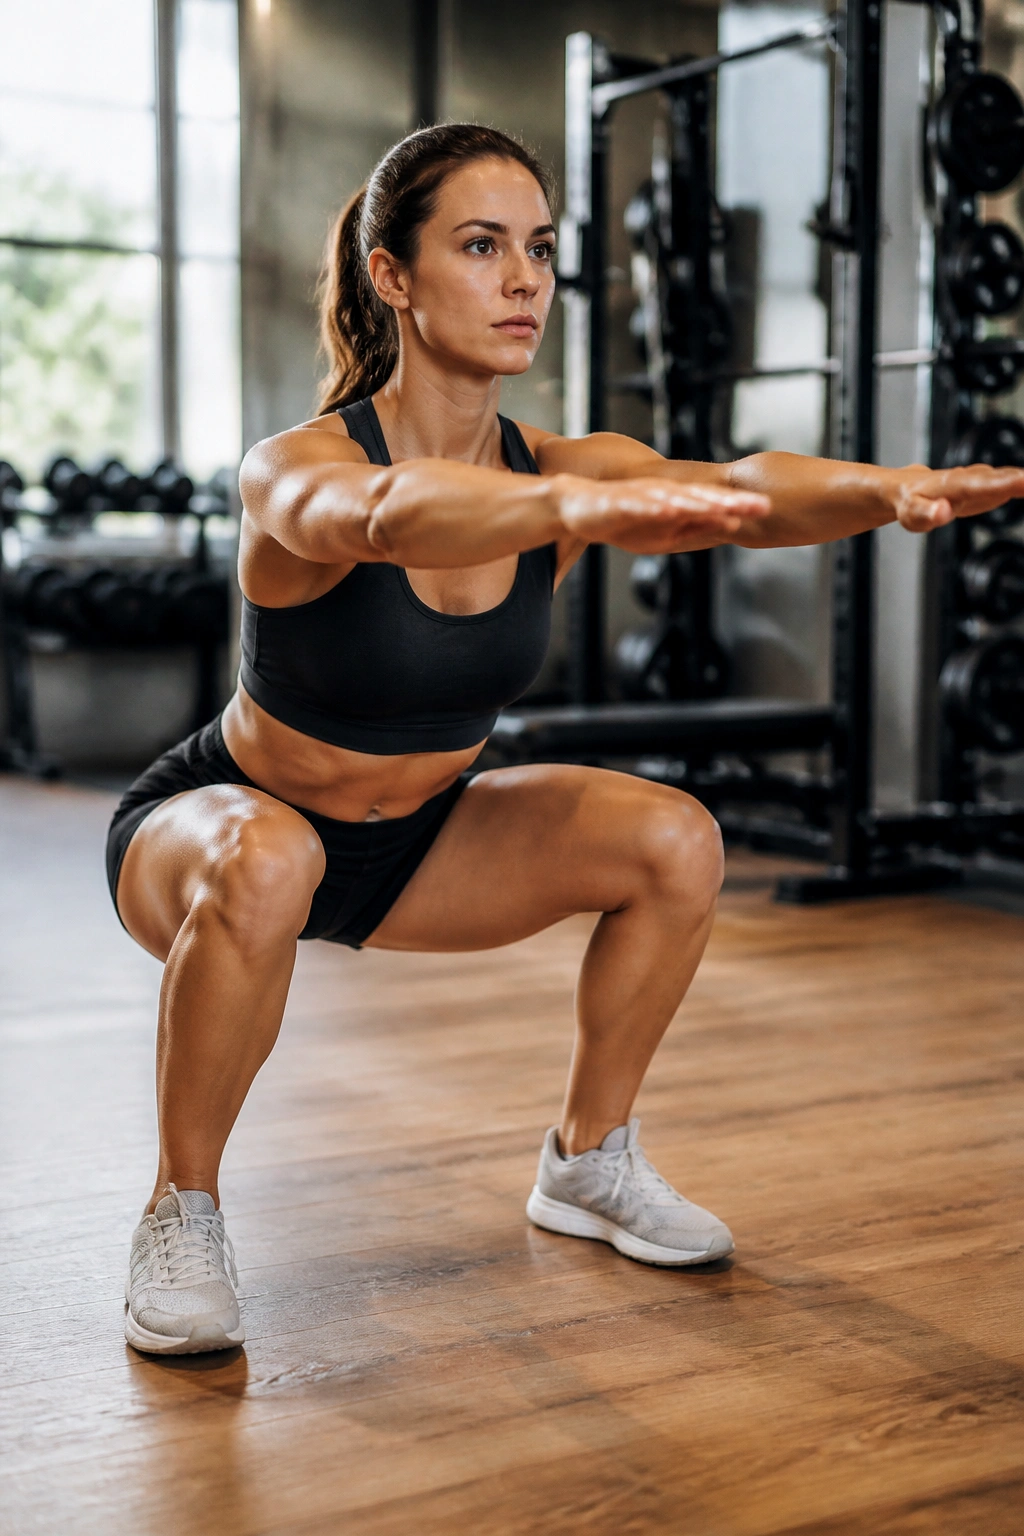
We have to start here, even if it feels obvious. The air squat is the gold standard for foundational movement, but most people perform it with a “good enough” mentality that limits progress. You aren’t just bending your knees. You are engaging in a triple-flexion movement involving your hips, knees, and ankles, all synchronized to move your center of mass straight down between your heels.
The Mechanics of a Proper Rep
If you want to master the air squat, stop thinking about “going down.” Instead, think about “sitting back.” Start with your feet slightly wider than shoulder-width, toes turned out just a few degrees. As you begin the descent, initiate the movement by pushing your hips back as if you are reaching for a stool behind you. Keep your chest up throughout the entire motion—if your shoulders collapse forward, your lower back will take the load, which is exactly what we want to avoid.
Common Pitfalls to Watch For
- Heel lifting: If your heels pop off the ground, your center of mass is too far forward; reset and focus on driving through the middle of your foot.
- Knee caving: Your knees should track in line with your toes, not collapse inward toward each other.
- Rounding the back: Maintain a neutral spine by bracing your core as if you are about to take a punch.
Pro tip: Imagine you are trying to spread the floor apart with your feet. This simple mental cue naturally engages your glutes and helps keep your knees tracking outward, preventing the dreaded knee-cave.
2. The Box Squat
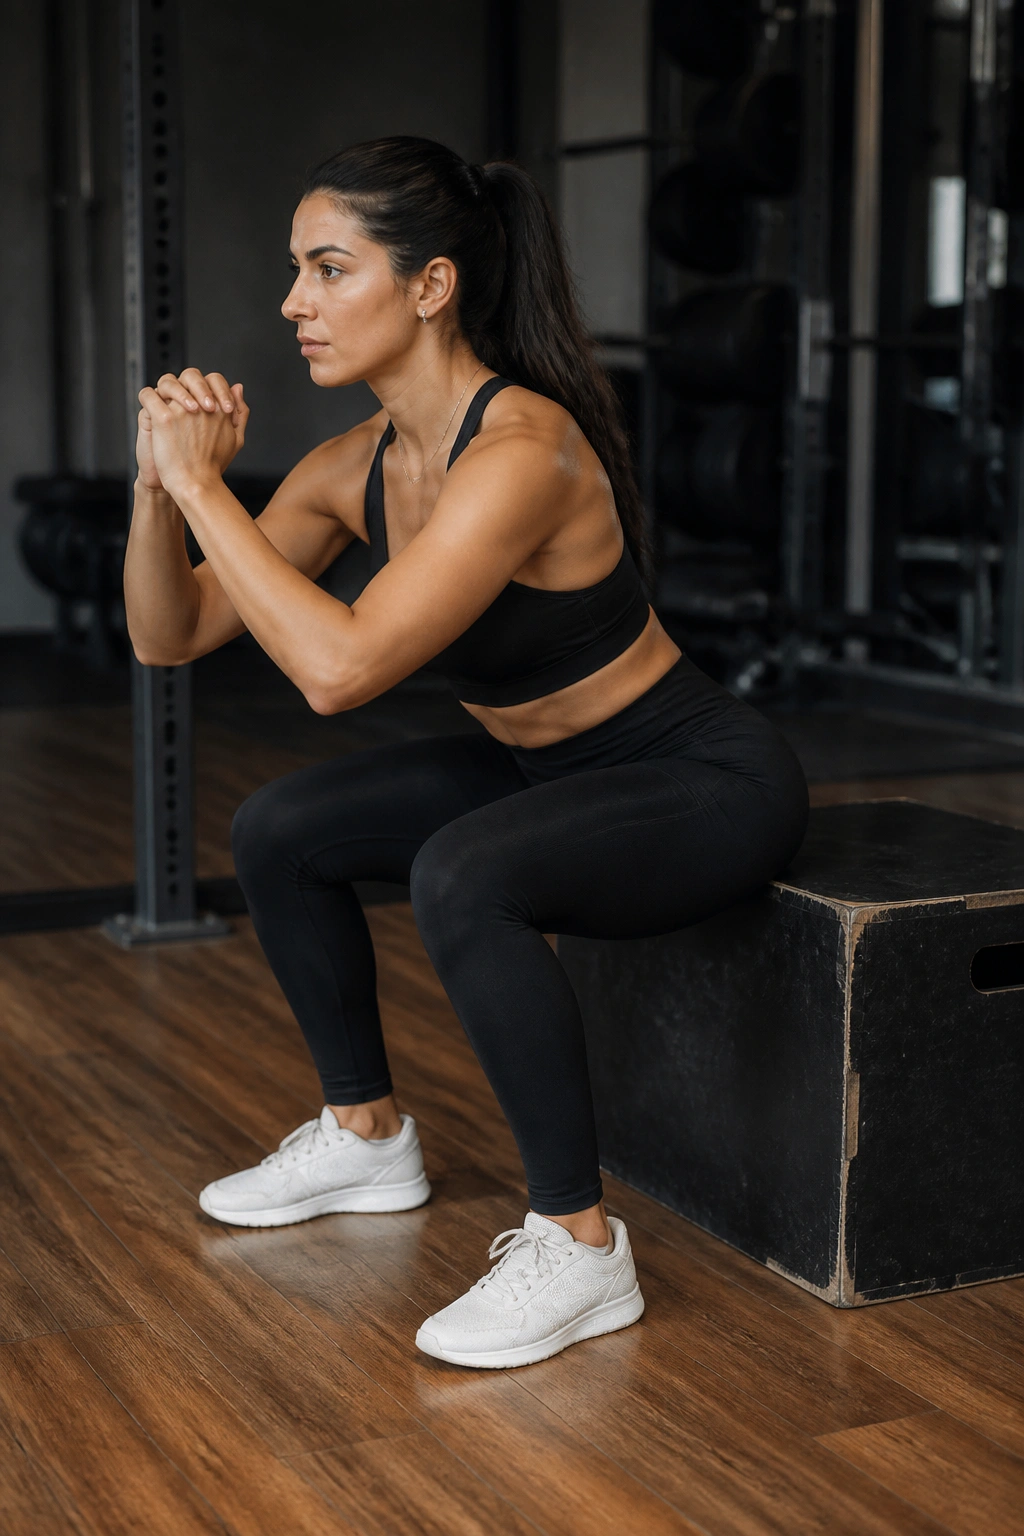
This is the ultimate confidence builder for anyone terrified of losing their balance or failing to hit proper depth. By placing a sturdy box or chair behind you, you remove the fear of “falling” into a squat. The box provides a tactile target, ensuring you hit the exact same depth on every single repetition. It turns a chaotic, uncertain movement into a repeatable, controlled exercise.
Why You Should Use This Variation
Most beginners lack the proprioception to know where their hips are in space. When you squat to a box, you get immediate feedback. If you don’t feel the box, you know you haven’t gone deep enough. If you slam onto the box, you know you are descending too quickly without control. It teaches you to control the eccentric (lowering) phase of the movement, which is where most of your strength and muscle gains actually happen.
Setting Up Your Station
Find a box, bench, or chair that puts your thighs roughly parallel to the floor when you sit down. If the surface is too low, you will struggle to get back up without sacrificing form; if it is too high, you aren’t getting the full benefit of the range of motion. Aim for a height where your knees form a ninety-degree angle at the bottom of the squat. Remember, the goal is to tap the box, not relax your entire body weight onto it. Keep tension in your legs the entire time.
3. The Chair-Assisted Squat
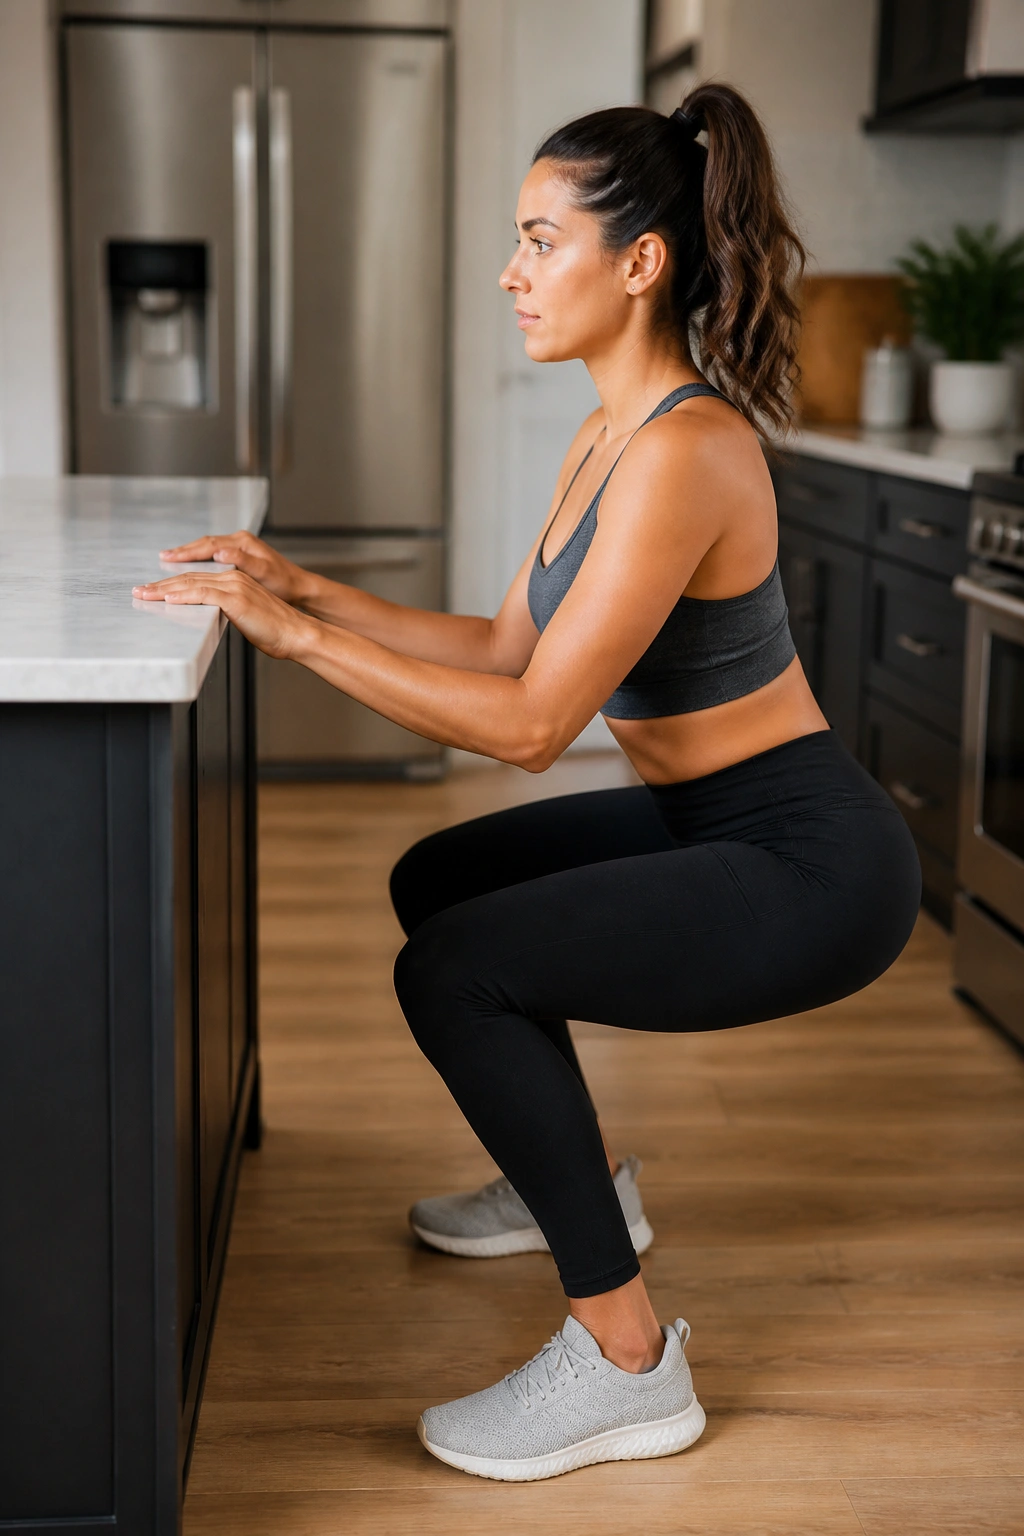
Sometimes your legs are ready to work, but your stability is not. If you find yourself wobbling or feeling dizzy when you try to squat, you need a way to support your balance without taking the work away from your muscles. The chair-assisted squat uses a sturdy, stationary object in front of you—a countertop or the back of a high-backed chair—to provide a safety net.
How to Use the Assist
Stand facing the chair or counter and lightly rest your fingertips on the surface. You aren’t pulling yourself up, and you aren’t leaning on it for support. Think of your hands as “training wheels” that keep you upright. Because you have this point of stability in front of you, you can focus entirely on the vertical path of your torso and the depth of your hips without worrying about tipping over backward.
Progressing Away From the Assist
The goal with this variation is to eventually let go. Start by using both hands with a firm grip. Over time, switch to using just your fingertips. Eventually, try hovering your hands an inch or two above the surface. If you feel yourself losing balance, you can lightly touch down to correct yourself. This transition period is crucial for building the neurological pathways required for unassisted movement. It bridges the gap between total dependency and independent squats.
4. The Sumo Squat
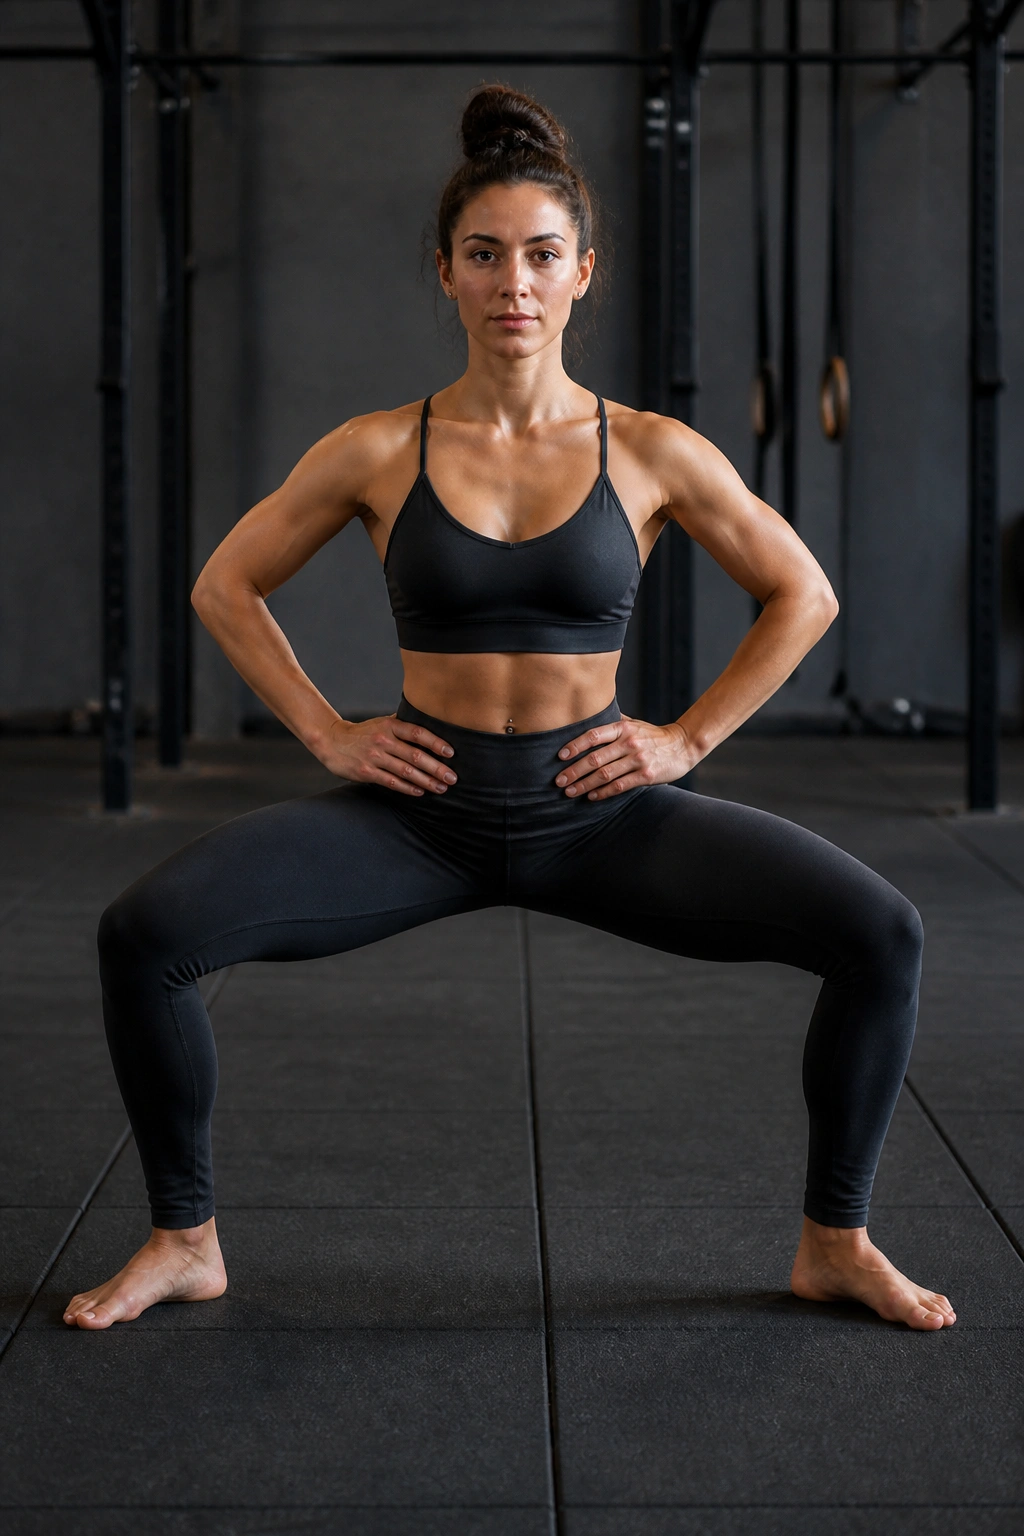
If you struggle with narrow-stance squats, your hips might be saying “no” to that alignment. The sumo squat changes the leverage by widening your stance significantly—well beyond shoulder width—and turning your toes outward. This adjustment shifts the emphasis away from the quads and places more demand on your adductors (the inner thigh muscles) and your glutes.
Anatomy and Leverage
Why does this feel different? Because of the change in hip geometry. With your feet wide and toes pointed out, you don’t need as much ankle mobility to achieve depth because your knees aren’t traveling as far forward. This makes the sumo squat an excellent choice for individuals who find standard squats physically impossible due to stiffness in the ankles or hips.
The Feel of the Movement
When you descend, you should feel a distinct stretch in your inner thighs. This is normal. You want to maintain that wide base throughout the ascent as well, pushing your knees outward as you stand. Do not let your knees buckle in. If you find your feet are sliding on the floor, adjust your stance slightly narrower until you feel stable. This is a powerful, grounding movement that builds strength in the inner leg, which is often a neglected area in beginner programming.
5. The Wall Sit
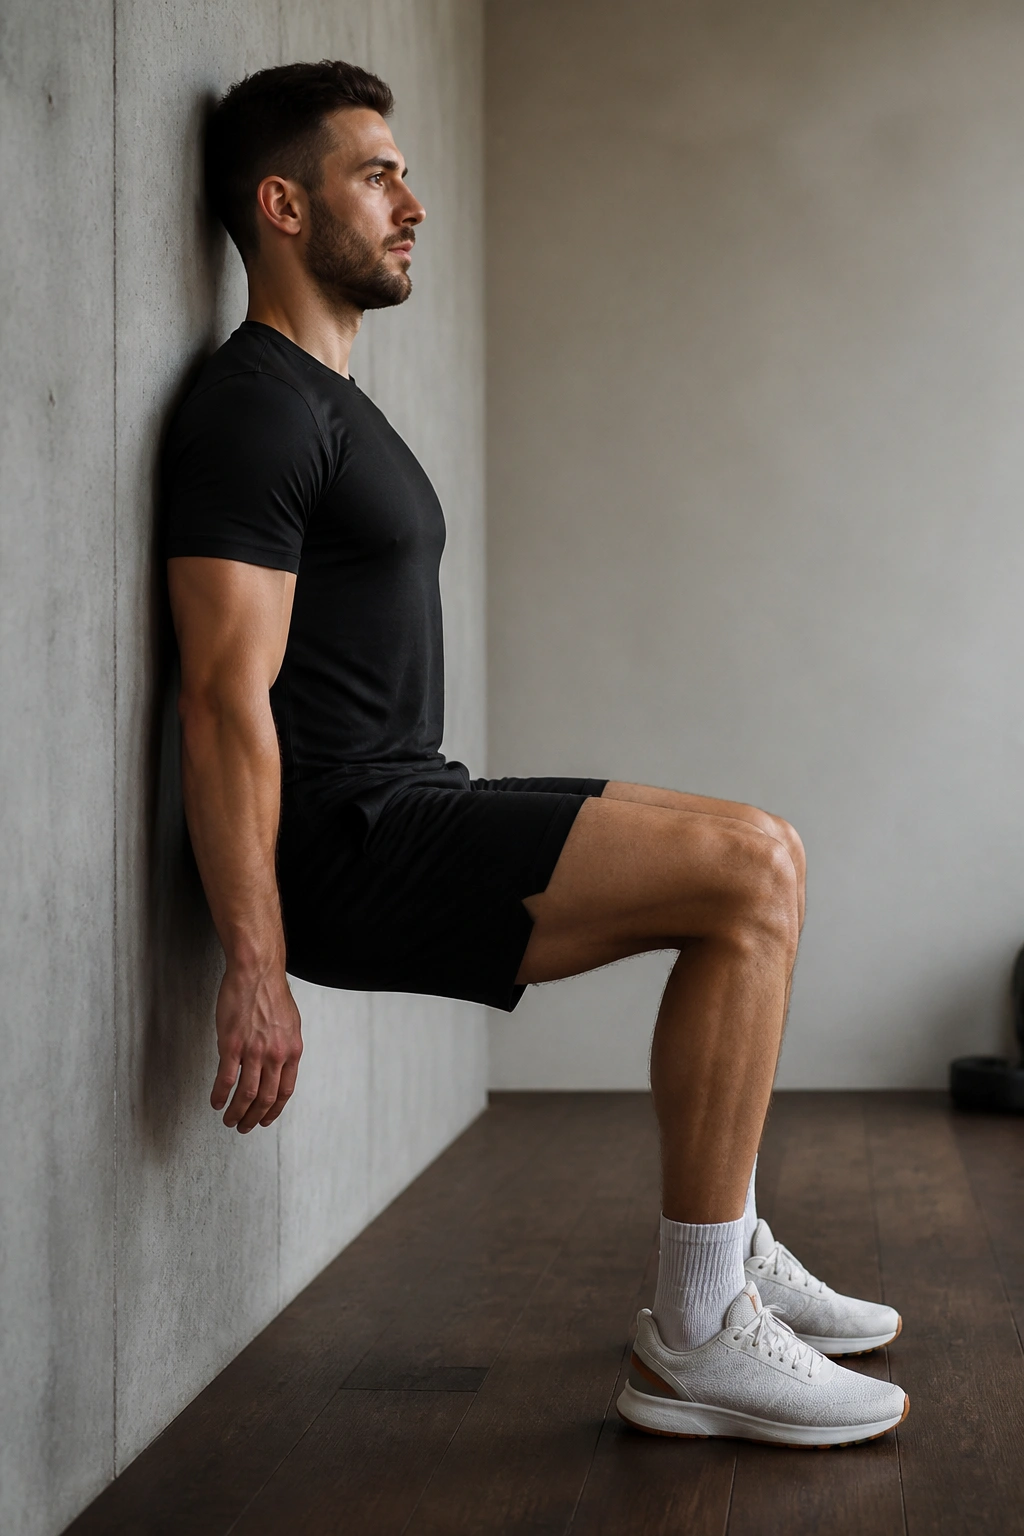
We are moving away from dynamic movement for a moment to focus on pure, unadulterated endurance. The wall sit is an isometric exercise—meaning your muscles are working while your joints remain stationary. It forces your quadriceps to stay under tension for a prolonged period, which is a fantastic way to develop the mental grit required for more complex exercises.
Why Isometrics Matter
You might think that standing still against a wall is easy, but hold a wall sit for sixty seconds, and your legs will be shaking uncontrollably. This is the “time under tension” principle at work. By holding the squat position, you are forcing your muscle fibers to recruit and sustain force, which builds stability around the knee joint. It is excellent for protecting the knees and strengthening the quads without the impact or coordination demands of a moving squat.
Technical Precision
The biggest mistake people make here is “cheating” by leaning forward or putting their hands on their thighs. Keep your back completely flat against the wall, head resting back, and hands at your sides or crossed over your chest. Your thighs should be parallel to the floor, just like the bottom of a perfect squat. If you find your legs sliding, make sure you are wearing shoes with good grip or find a surface that won’t cause your feet to slip.
6. The Pause Squat
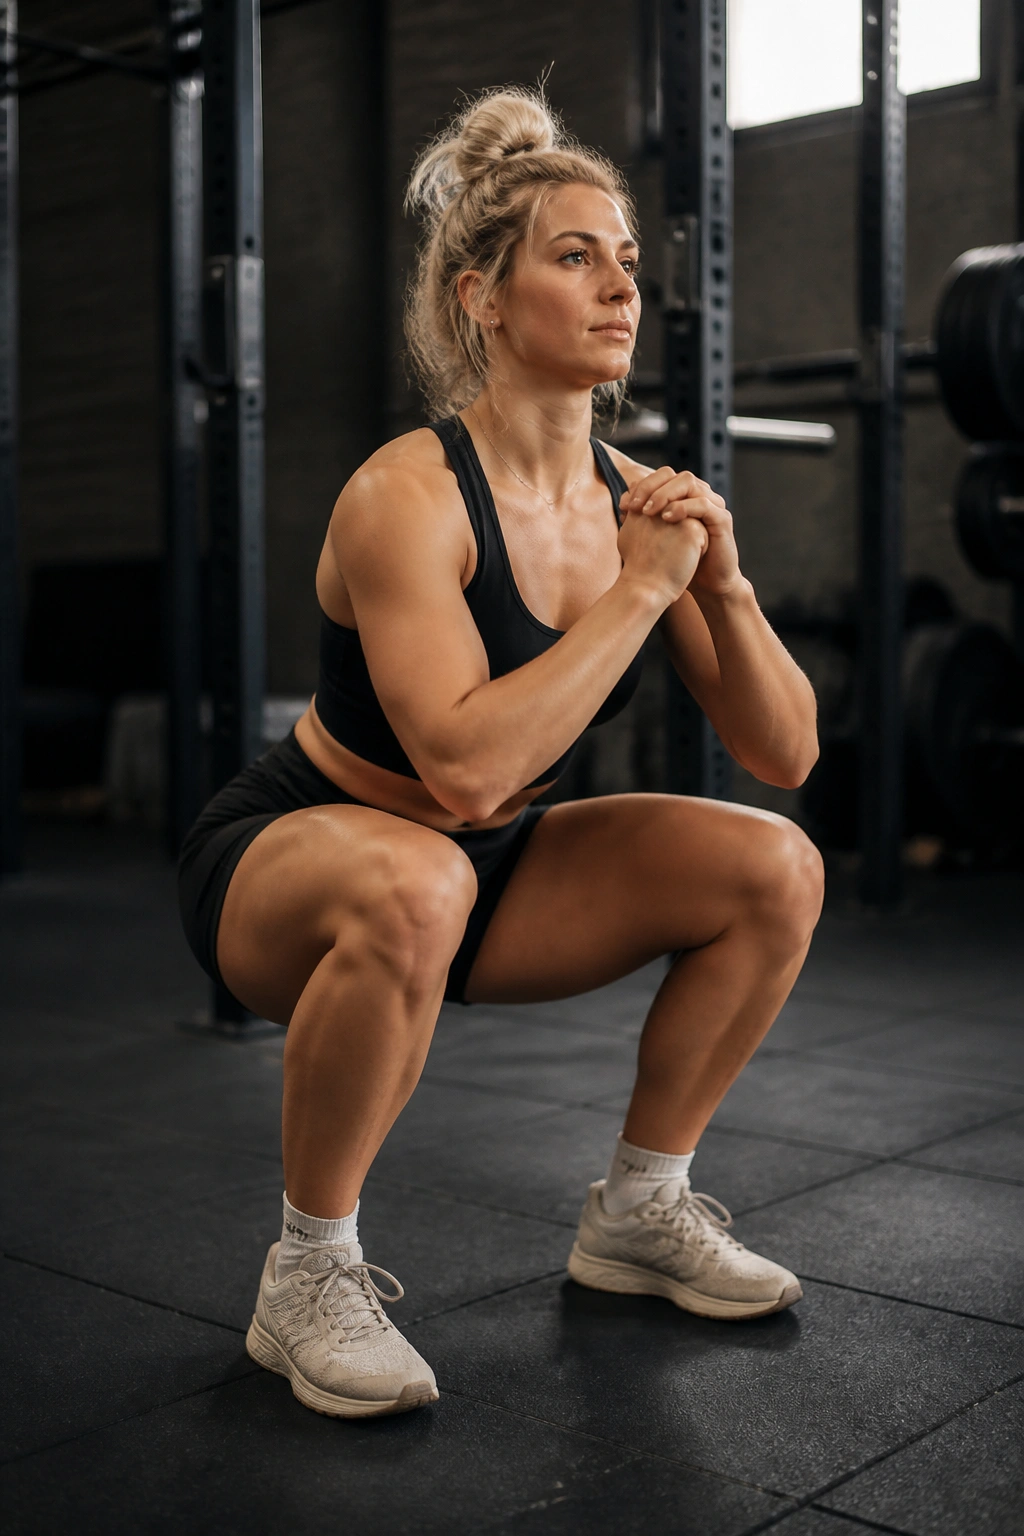
If you want to turn a basic air squat into a masterclass of control, you add a pause. This variation involves stopping at the very bottom of your squat and holding that position for two to three seconds before standing back up. This removes the “bounce” that many people subconsciously use to get out of the bottom of the squat, forcing your muscles to generate force from a dead stop.
The Science of the “Dead Stop”
When you drop into a squat, your tendons store elastic energy, acting like springs that help launch you back up. By pausing, you dissipate that stored energy. This forces your muscles to do all the heavy lifting. It is arguably the best variation for identifying weaknesses in your movement pattern. If you feel like you are going to fall over during the pause, it usually means your core is not braced enough or your center of gravity is slightly off.
When to Integrate Pauses
You do not need to do this on every rep of every set. Incorporate it as a technical drill at the start of your training session. Perform five reps, pausing for three full seconds at the bottom of each one, focusing on maintaining total tension. Once you stand up, you can finish the rest of your set with regular speed. It trains your brain to feel comfortable at the bottom of the movement, which is exactly where most people panic and lose form.
7. The Narrow Stance Squat
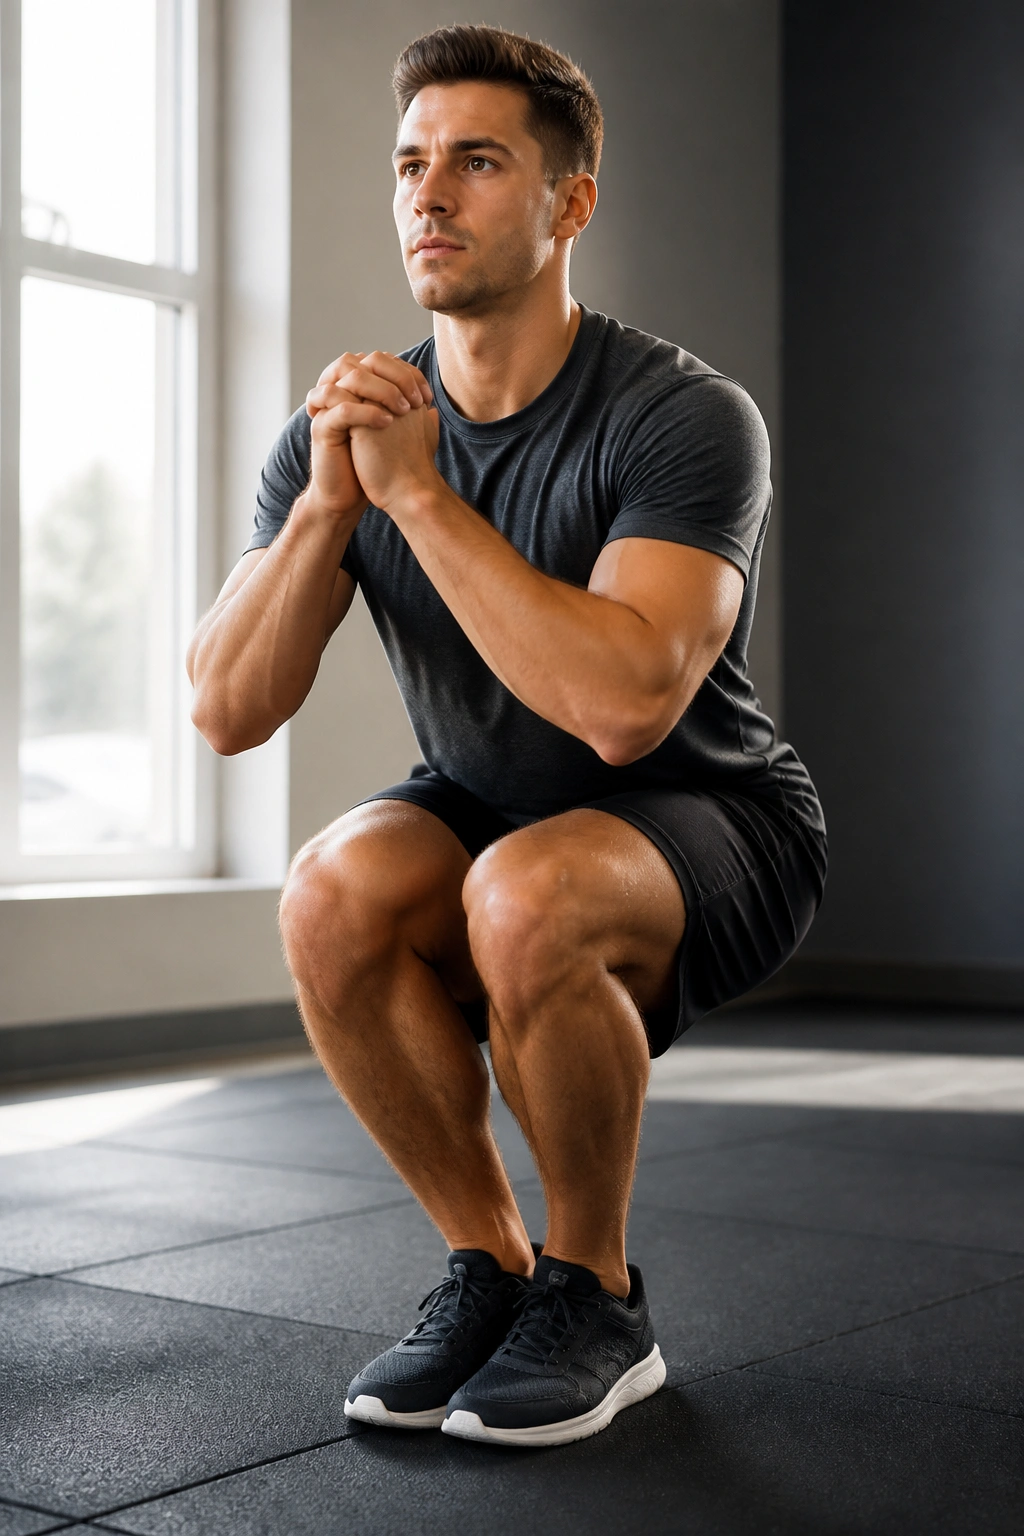
Most advice suggests a shoulder-width stance, but narrowing your feet until they are just a few inches apart creates an entirely different challenge. The narrow stance squat places the majority of the load squarely on the quadriceps. Because your hips have less “room” to maneuver, you have to stay significantly more upright, which forces your quads to work through a much larger range of motion.
Why This Is Harder Than It Looks
Balance is the primary challenge here. When your feet are close together, your base of support is tiny. You will likely feel like you want to tip backward as you descend. To counteract this, you have to keep your chest incredibly upright. Think of your torso as a pillar that needs to stay perpendicular to the floor. If you lean too far forward, you lose the balance immediately.
Who Is This For?
This variation is best for those who have mastered the standard squat and want to specifically target quad growth or improve their vertical posture. It is also an excellent diagnostic tool. If you cannot perform a narrow-stance squat without falling over or your heels lifting, it tells you that your ankle mobility is likely the bottleneck. Use this as a test: if you struggle, spend more time on ankle stretches before moving to heavier or more complex squat variations.
8. The Tempo Squat
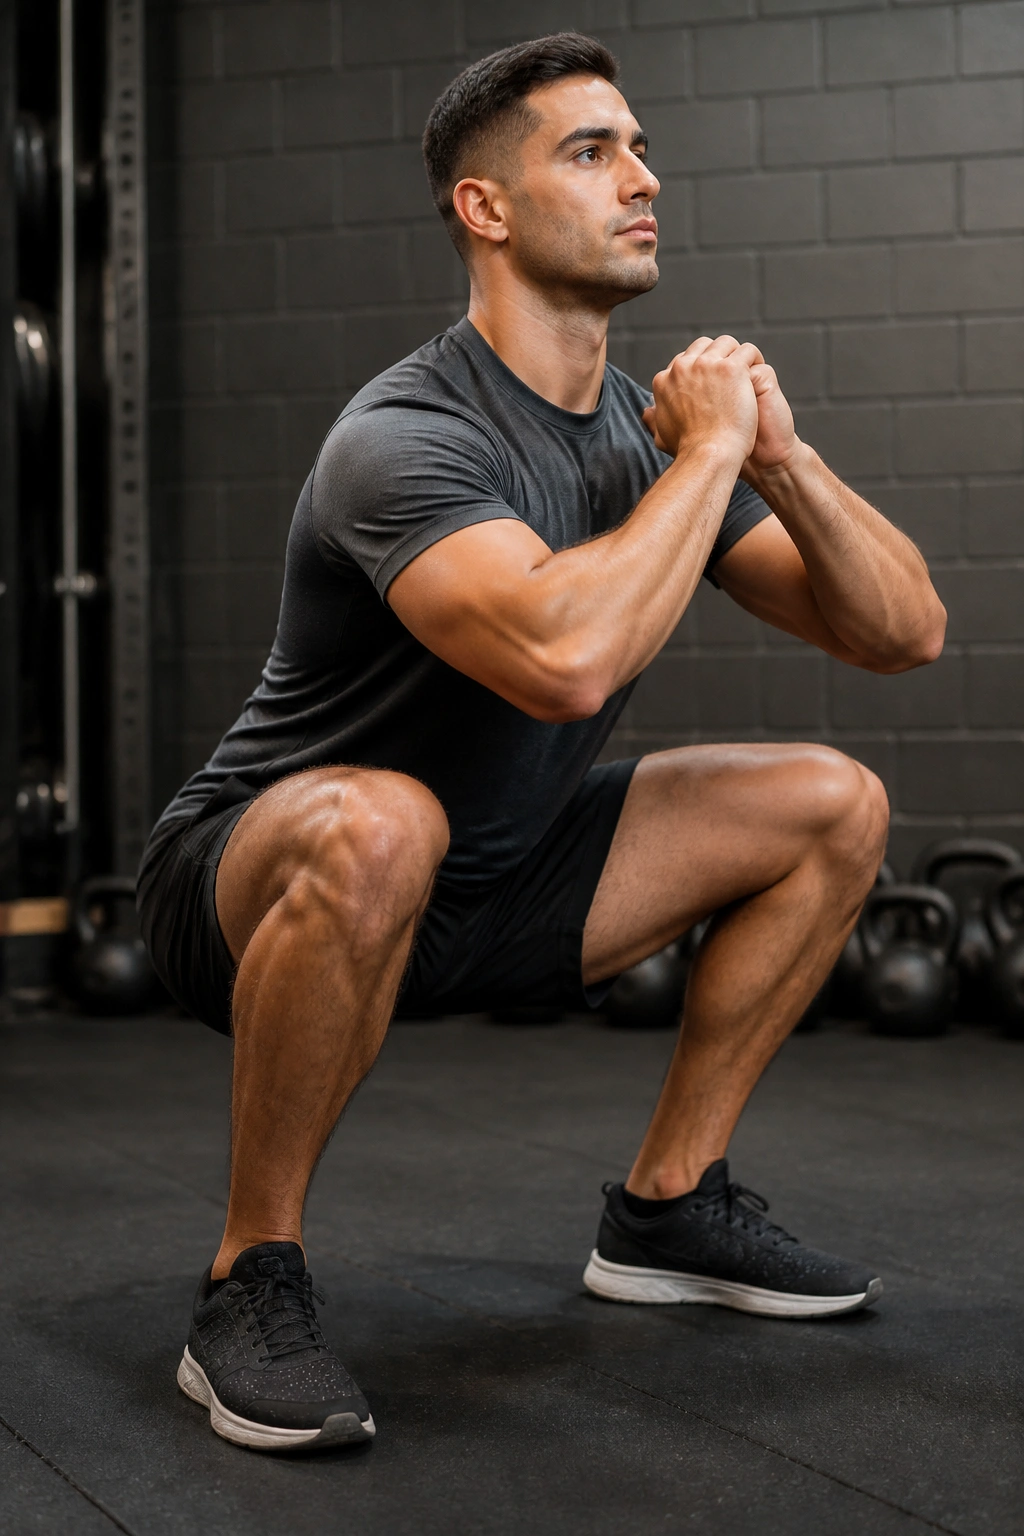
If the pause squat is about stability, the tempo squat is about rhythm and control. This variation dictates the speed of every phase of the movement. A common prescription is a three-second descent, a one-second hold, and a one-second explosive ascent. This eliminates momentum entirely. You aren’t “falling” into the squat anymore; you are lowering your body with deliberate precision.
Why Momentum Is the Enemy
Momentum is a liar. It makes a weight feel lighter and a movement feel easier, but it robs you of the strength-building benefits of the exercise. When you control the descent, you are overloading your muscles in the lengthening (eccentric) phase. This is vital for tendon health and muscle hypertrophy. If you are doing squats to get stronger, you need to own the entire range of motion, not just the part where you stand up.
How to Count Your Tempo
Don’t rush the count. Use a slow internal count: “one-thousand-one, one-thousand-two, one-thousand-three” for the way down. Then, explode up. You will notice that you get tired much faster with tempo squats, even without any added weight. That is the sign of an effective workout. You are essentially turning a bodyweight movement into a high-intensity session by removing your ability to cheat with speed.
9. The Static Split Squat
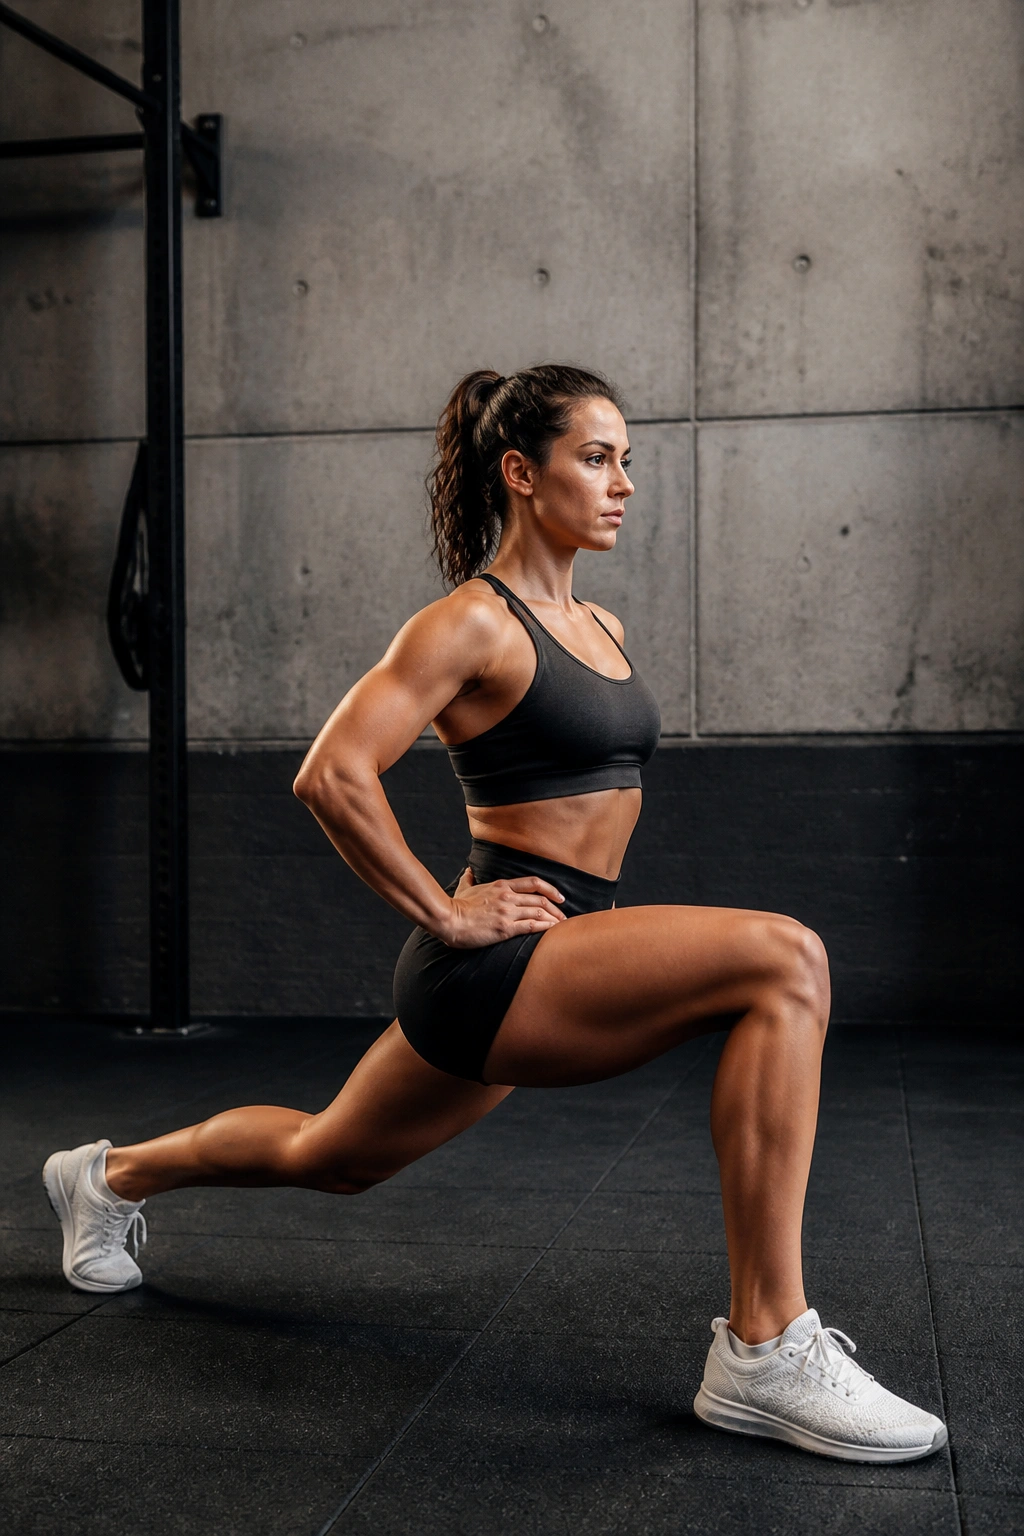
The split squat is often confused with a lunge, but there is a key difference. In a lunge, you are moving dynamically. In a static split squat, your feet remain fixed in the same position for the entire set. By placing one foot in front of the other and dropping your back knee toward the ground, you isolate the front leg, dramatically increasing the intensity of the work.
The Single-Leg Advantage
We spend most of our lives moving on one leg at a time—walking, running, climbing stairs. Yet, most people train squats with two legs. The split squat fixes this imbalance. It forces the lead leg to bear the weight while the trailing leg provides balance. This reveals any left-to-right strength discrepancies you might have. Most of us have one leg that is slightly stronger or more stable than the other; the split squat will show you exactly which one that is.
Ensuring Proper Form
Set your feet about two to three feet apart. Keep your torso upright—avoid the temptation to lean forward over the front knee. As you lower, think about dropping the back knee straight down toward the floor, rather than pushing the front knee forward. Your weight should be distributed mostly through the mid-foot and heel of the front foot. If your front heel lifts, take a slightly wider stance.
10. The Cossack Squat
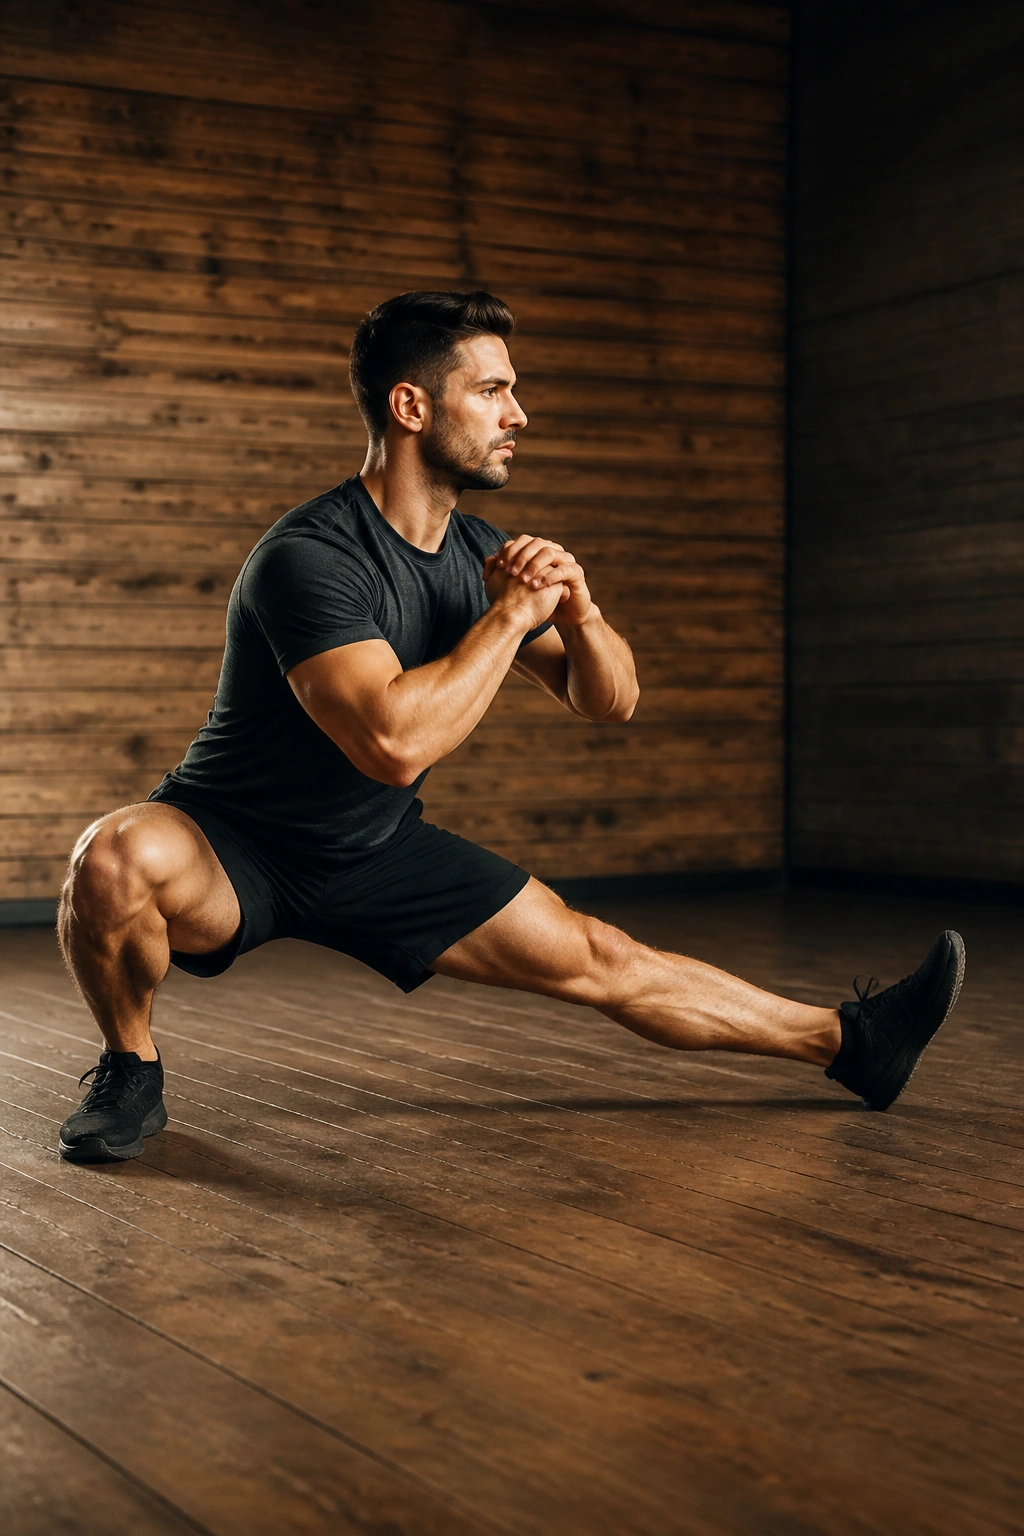
If you want to build lower-body strength and mobility simultaneously, the Cossack squat is your best friend. This is essentially a side-to-side squat. You start with a very wide stance, then shift your weight over to one leg, bending that knee while keeping the other leg completely straight. It requires significant hip, knee, and ankle mobility, but it is one of the most effective ways to open up tight hips.
The Mobility Requirement
This is not a beginner movement in the traditional sense, but it is excellent for beginners who are willing to go slow. It trains your hips to move through a lateral plane, which is often completely neglected in standard weight training. Most gym exercises are linear (forward and backward). The Cossack squat teaches your muscles to handle tension from different angles, which is critical for injury prevention in everyday life.
How to Scale It
If you cannot get low in a Cossack squat, do not force it. Start by keeping your stance slightly narrower and focusing on shifting your weight side-to-side without dropping into a full squat. You can also use a sturdy object in front of you to hold onto for balance as you lower yourself. As your mobility improves, you will be able to sink deeper into the bent leg, feeling a deep stretch in the inner thigh of the straight leg.
11. The Squat to Calf Raise
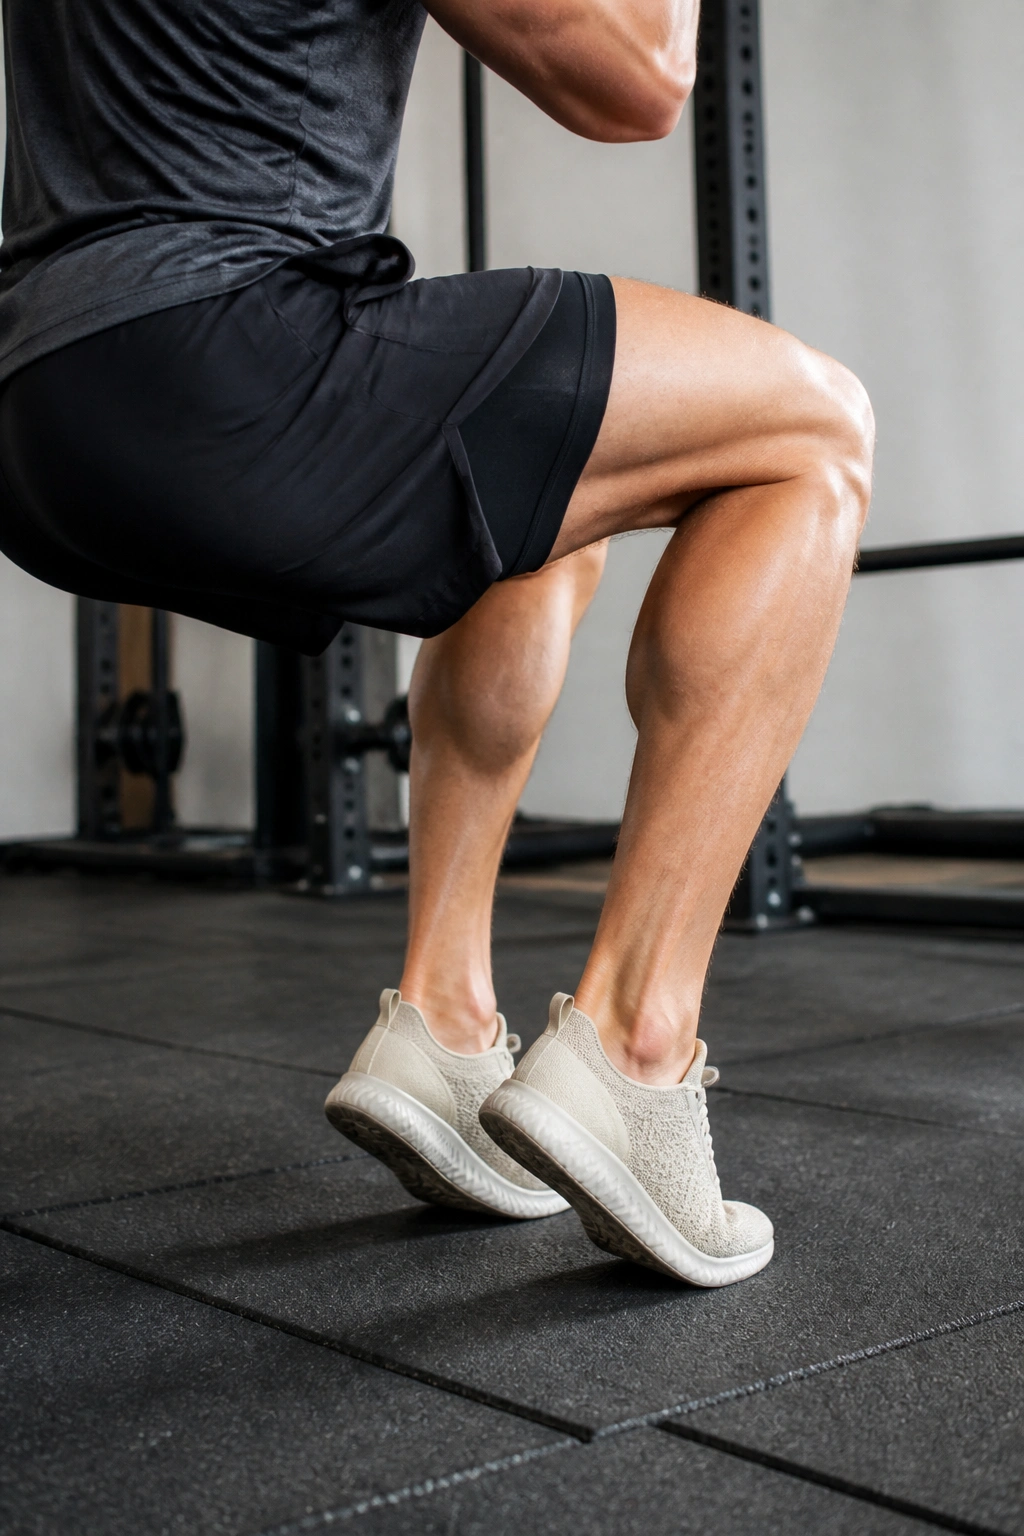
This variation adds a finishing touch to the standard air squat. Once you reach the top of your squat and your legs are straight, you immediately transition into a controlled calf raise, lifting your heels off the floor. This adds an element of ankle stability and forces you to engage your balance at the peak of the movement.
Building the Ankle Chain
Strong ankles are the foundation of a strong squat. By adding the calf raise, you are strengthening the muscles around the ankle joint (the gastrocnemius and soleus) while they are in a stabilized position. This is particularly useful for people who struggle with balance during the transition phase of the squat. It forces you to stabilize your core before you shift your weight onto your toes.
Coordination and Control
The key here is the transition. Do not treat these as two separate exercises. Think of it as one fluid motion: squat down, stand up, and immediately transition into the calf raise. Maintain tension in your core throughout the lift. If you find yourself wobbling, perform the calf raise closer to a wall so you can touch it for stability. This is not about how high you can lift your heels; it is about the control you maintain throughout the lift.
12. The Prisoner Squat
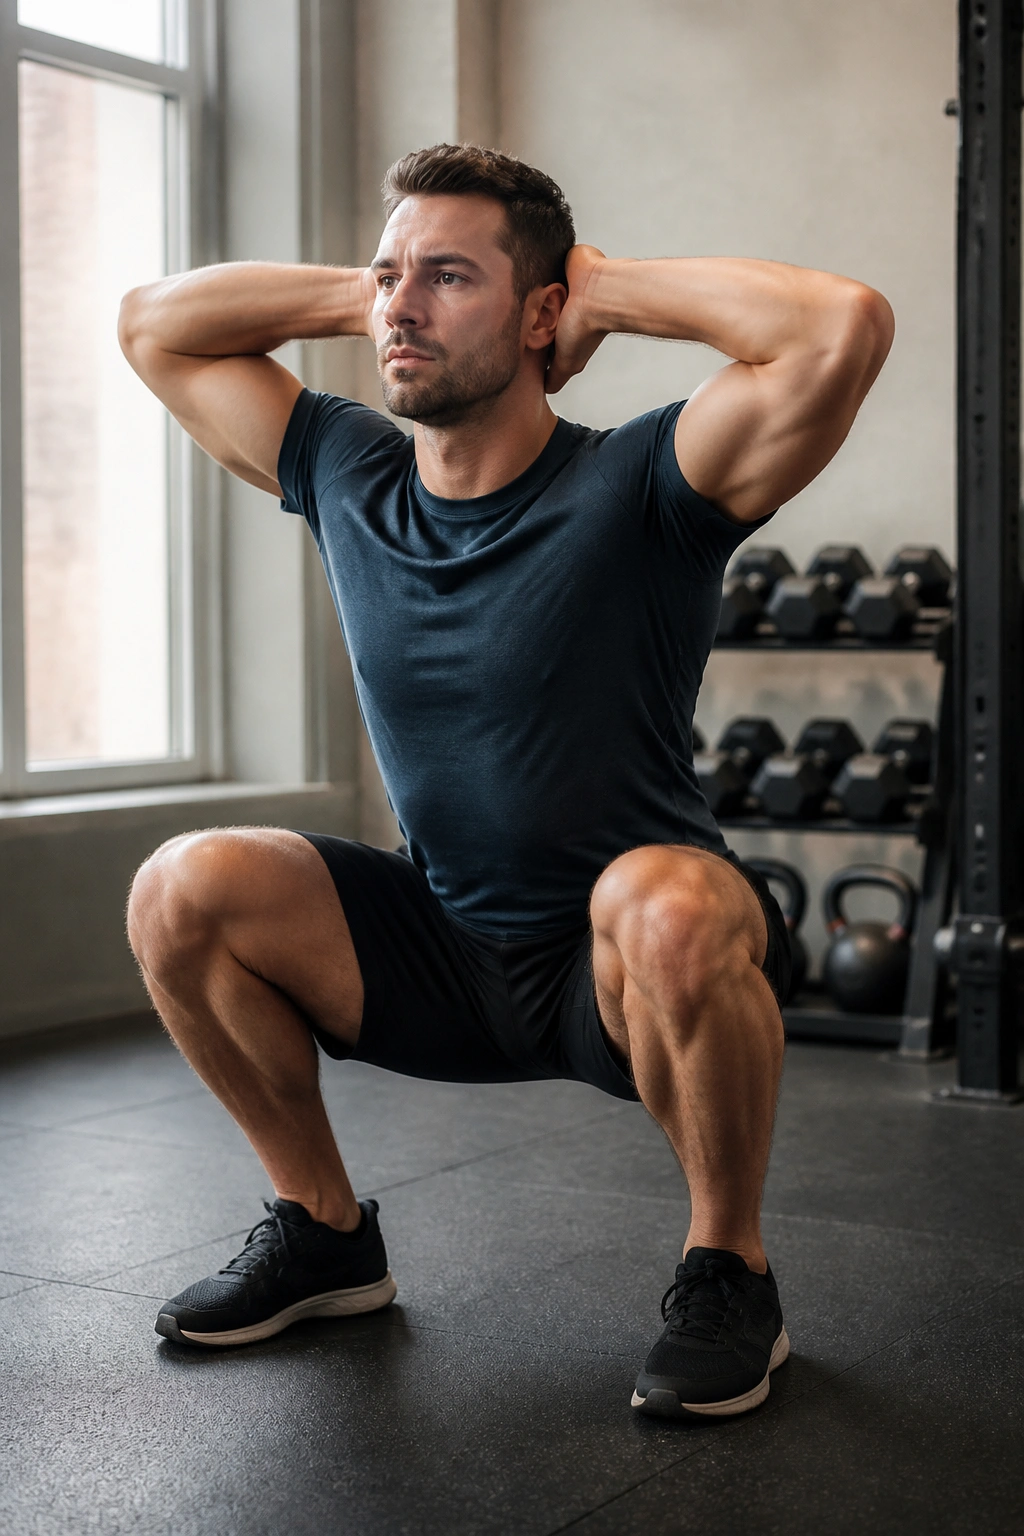
The “prisoner” variation gets its name from the position of your hands: placed behind your head, fingers interlocked. This serves a very specific purpose. By taking your hands out of the equation, you cannot use them to counterbalance your body weight. You also have to fight to keep your chest open and your elbows pulled back, which prevents you from hunching over as you squat.
Why This Forces Better Posture
When we are tired, our shoulders tend to collapse inward. The prisoner squat makes this impossible. If you drop your chest, you will feel the strain in your neck and upper back. This provides instant, uncomfortable feedback. If you are struggling to keep your chest up during a standard squat, try this variation. It forces your thoracic spine (the upper back) into a better position, which in turn helps your lower back stay neutral.
The Difficulty Factor
Be warned: this variation is significantly harder than the standard air squat. By losing the counterbalance of your arms, the movement becomes more “front-loaded.” You will likely find you cannot squat as deep as you normally would without your heels lifting or your chest falling. Embrace this. It is training your postural muscles to stay engaged under load, which is a skill that carries over to every other exercise you will ever perform.
13. The Counterbalanced (Desk) Squat
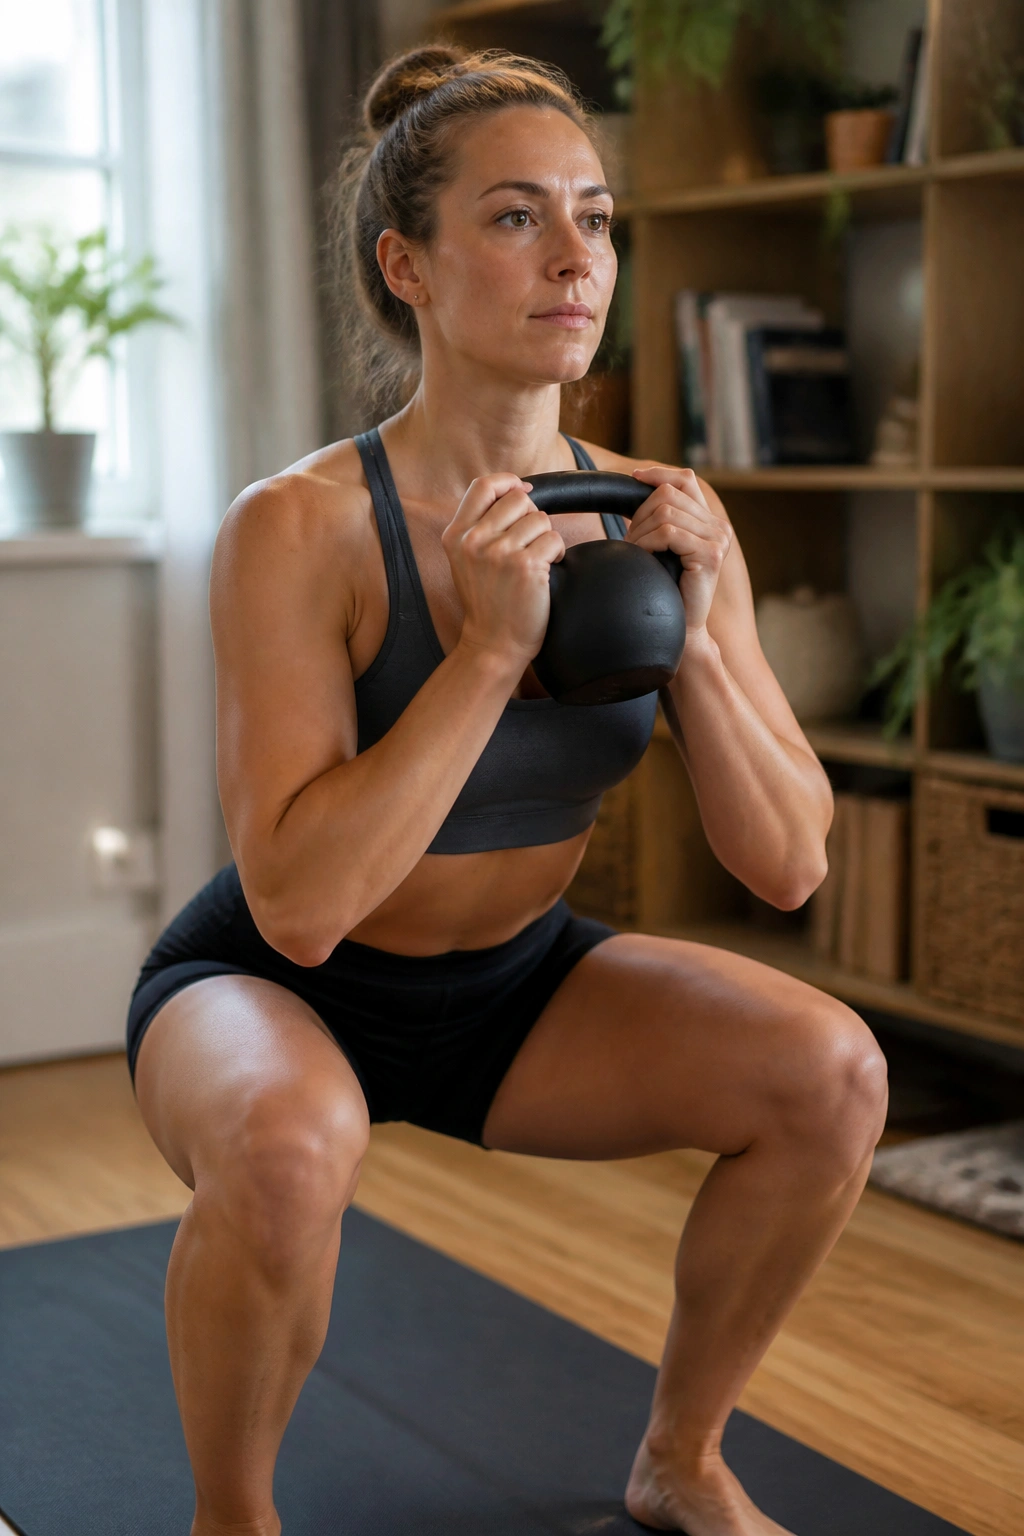
If you struggle to stay upright, you need a counterbalance. This is the opposite of the prisoner squat. By holding a small weight, a heavy book, or even a water bottle in front of you at chest height, you create a counterbalance that pulls your center of gravity forward just enough to allow you to sit back and down with ease.
How Leverage Works
It sounds counterintuitive—add weight to make it easier? Yes. When you hold an object in front of you, it acts as a lever. It allows you to sit your hips further back without tipping over. This is a classic trick for people with longer legs or limited ankle mobility. It gives you the “permission” your body needs to get into a deeper, more effective squat position without the usual struggle against your own anatomy.
Using Household Items
You don’t need a gym weight for this. Grab something that weighs about five to ten pounds. A large book, a bag of rice, or a gallon jug of water works perfectly. Keep it tucked close to your chest—don’t let it hang down. Hold it firmly at sternum height. You will immediately feel the difference; the squat will suddenly feel much more natural, and you will likely find that you can hit a greater depth than you could without the object.
14. The Heel-Elevated Squat
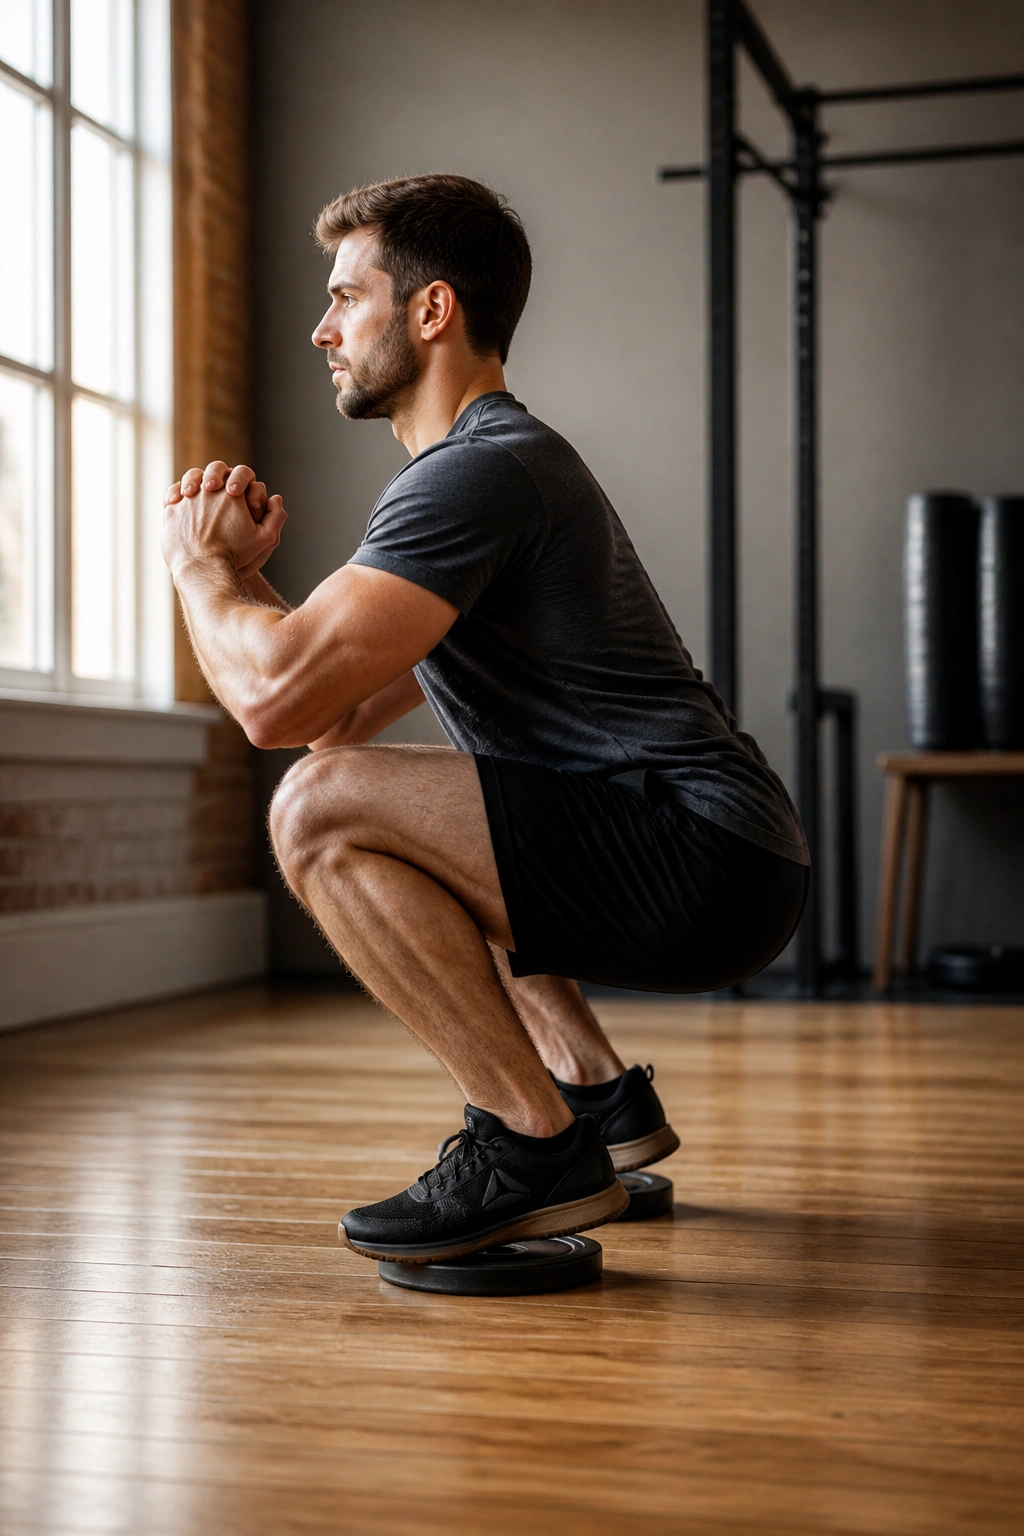
If you have tried everything and you still feel like you are going to fall backward, your issue is almost certainly ankle dorsiflexion. Your ankles are just not designed to bend far enough to allow your shins to travel forward comfortably. The simple solution? Elevate your heels. Place a couple of small weight plates or a stable, slanted foam wedge under your heels.
The Mechanical Advantage
By lifting your heels, you are effectively “giving yourself” the ankle mobility you are currently lacking. Your knees can travel further forward without your heel leaving the ground. This keeps your torso perfectly upright and allows you to descend into a deep, quad-dominant squat without any of the struggle associated with tight calves.
Moving Forward
Use this as a bridge, not a permanent crutch. While the heel-elevated squat is a great way to build strength, you should also spend time working on ankle mobility exercises—like calf stretches and ankle circles—outside of your squat training. The goal is to eventually move back to a flat-foot squat as your mobility improves. For now, enjoy the deeper range of motion and the extra muscle activation that the heel elevation provides.
15. The Isometric Squat Hold
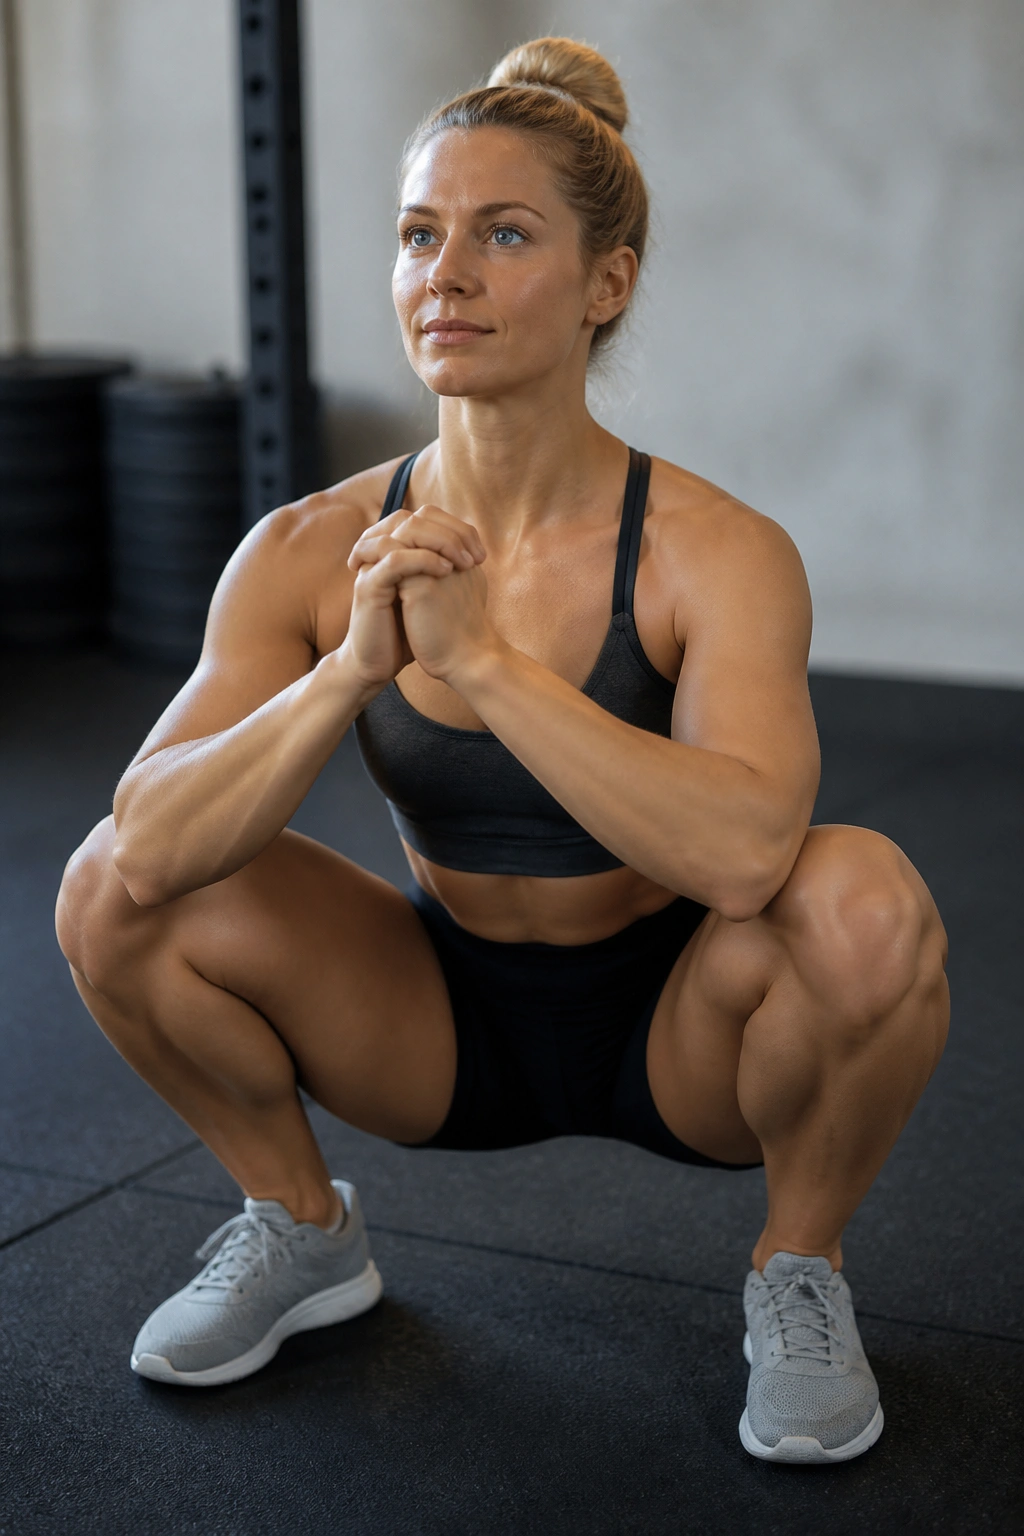
We end with a classic test of character: the bottom-position squat hold. Instead of moving, you drop into your lowest comfortable squat position and stay there. You are not leaning against a wall; you are holding yourself up using only your own muscle tension. This is the ultimate way to build active flexibility in your hips and knees.
Why This Is Different From a Wall Sit
In a wall sit, the wall does half the work. In an isometric squat hold, you are responsible for maintaining every aspect of your posture. You have to keep your chest up, your core braced, and your knees pushed out, all while fighting gravity. It is an intense, full-body activation. It teaches you how to relax into the bottom of the squat while maintaining enough tension to stay upright.
Finding Your “Floor”
Don’t aim for maximum depth immediately. Aim for the depth you can hold for at least fifteen seconds without your form breaking. If you start shaking after five seconds, that’s fine—just stand up, rest, and try again. This variation is about teaching your nervous system that the bottom of the squat is a safe, stable place to be. Over time, you will find that your “floor” naturally gets lower and your endurance increases.
Final Thoughts
The squat is a journey, not a destination. You do not need to master all fifteen of these variations at once, and you certainly don’t need to do them all in a single workout. Start by identifying where your bottleneck is. If you cannot hit depth, try the box squat or the heel-elevated variation. If you wobble, use the chair-assisted method. If you feel like your posture is sloppy, try the prisoner squat.
Do not be afraid to regress. If a variation feels too easy, add a pause. If it feels too hard, grab a counterbalance. The most successful lifters are not the ones who try to force their bodies into the hardest version of an exercise; they are the ones who consistently choose the version that allows them to perform with perfect, repeatable form. Keep your movements controlled, listen to how your joints feel, and remember that even the smallest adjustment can make the difference between a movement that hurts and a movement that builds. Your body will reward you for the patience you put into the process.
