



Shoulder mobility workouts for stiff joints work best when you start smaller than feels necessary. A shoulder that feels jammed in the front, pinchy overhead, or plain stubborn after a long day usually does not want a heroic stretch. It wants motion that feels safe enough to let the muscles stop bracing.
That distinction matters. The shoulder is not one joint doing one job; it’s a ball-and-socket joint, a moving shoulder blade, and a rib cage that has to keep up. If the chest is tight, the lats are clenched, or the upper back barely rotates, the arm starts running into a wall long before it should.
I’ve never liked the advice to “push through” shoulder stiffness. Bad move. That’s how people turn a cranky joint into a more dramatic problem, and the shoulder is already fussy enough without being bullied.
The 15 workouts below start with the gentlest reset drills and move toward the kinds of movements that build usable overhead range, cleaner rotation, and better control. Some are tiny. Some feel almost boring. A few make you realize how much the rib cage has been cheating for the arm all along.
1. Pendulum Swings for Stiff Shoulder Joints
A shoulder that’s irritated or locked up often does better with gravity than with force. Pendulum swings are the first thing I reach for because they let the arm move without asking the joint to hold the whole load. No grinding. No yanking. Just a loose hang and a little motion.
Why It Helps
The point here is not to stretch hard. It’s to give the joint a bit of motion while the muscles relax their death grip. When you hinge at the hips and let the arm hang, the humerus gets a light tug that can feel strangely relieving.
Keep the circles tiny at first. Think the size of a small plate, not a dinner platter. If the shoulder feels better after 20 to 30 seconds, keep going. If it feels more irritated, cut the range down and slow it further.
How to Do It
- Hinge forward with your free hand on a table or chair.
- Let the working arm hang loose.
- Make 10 small circles clockwise.
- Reverse for 10 circles.
- Finish with 10 gentle forward-and-back swings.
One good cue: the hand should feel heavy, not active. If the forearm starts helping, the shoulder will tense right back up.
2. Wall Slides to Rebuild Overhead Reach

Wall slides look simple, and that is exactly why they work so well. They expose the spots where the ribs flare, the shoulders shrug, and the upper back refuses to move. If you can slide your forearms up a wall without pinching, you’re teaching the shoulder to open in a cleaner line.
The trick is to keep the lower ribs from popping forward. That matters more than people think. A lot of “tight shoulders” are really a back-and-ribs problem dressed up like a shoulder problem, and wall slides make that obvious fast.
Stand with your forearms against a wall, elbows bent, and feet a few inches away from the baseboard. Exhale as you slide upward 4 to 8 inches, then pause. If the shoulders climb toward your ears, stop there and reset. No prize for height. There’s only useful range, and then there’s cheating.
Do 2 sets of 6 slow reps. If the top position feels shaky, do fewer reps and make each one cleaner. That pays off better than grinding out a sloppy set.
3. Table Slides for an Arm That Won’t Go Up Easily

Why do table slides help when overhead reach feels stiff? Because they take some of the arm weight out of the equation. That alone can calm down a cranky shoulder. The motion still happens, but the joint does not have to fight gravity as hard.
Sit or stand in front of a table with a towel under your hand. Slide the hand forward until the arm is long and the chest starts to open, then pause for one slow breath. If the shoulder feels jammed, shorten the slide by a few inches and keep the movement smooth.
How to Use It
- Start with the elbow bent and the shoulder relaxed.
- Slide forward until you feel a mild stretch, not a pinch.
- Hold for 2 to 3 breaths.
- Pull back slowly and reset the shoulder blade.
Do 8 to 10 reps on each side.
The nice part is that this drill works well on days when the shoulder is grumpy. It’s not flashy. It doesn’t need to be. The shoulder just gets to practice moving in a low-stress way, which is often the missing piece.
4. Scapular CARs for Shoulder Blade Control

Spend a day at a desk and watch what happens to the shoulder blades. They drift forward, tip, and stiffen in place. Scapular CARs — controlled articular rotations — put that motion back on the menu.
This is less about the arm and more about the shoulder blade sliding around the rib cage. That matters because the scapula sets the stage for nearly every overhead move. If it’s stuck, the arm has to compensate.
Stand tall and keep the elbow straight. Move the shoulder blade up, back, down, and forward in the biggest slow circle you can manage without shrugging or twisting your trunk. The movement should feel deliberate, almost slow enough to annoy you. Good. That means you’re not rushing past the part that matters.
- 3 circles forward
- 3 circles backward
- Keep the neck long
- Keep the ribs quiet
A tiny circle done well beats a giant circle that comes from the lower back. Every time.
5. Doorway Pec Stretch for the Front of Tight Shoulders

The front of the shoulder and chest can get short and dense without much warning. Long hours at a keyboard do it. So do a lot of pressing workouts. So does stress, which makes people sit like they’re bracing for a camera flash.
Doorway pec stretches are useful because they open the front line without asking the shoulder to work hard. Set the forearm on the doorframe with the elbow around shoulder height or a little lower, then step through until you feel a stretch across the chest and front shoulder. That stretch should feel broad, not sharp.
Do not crank the arm back until your rib cage arches like a bridge. That’s fake range. It looks bigger than it is, and it teaches the body to borrow motion from the low back. Keep the sternum quiet and breathe into the upper chest and side ribs for 20 to 30 seconds.
I like this one after pushups, presses, or a long workday. It pairs well with a slower drill like wall slides, because the chest opens a bit and the shoulder blade has room to sit flatter afterward.
6. Thread the Needle for the Back of the Shoulder
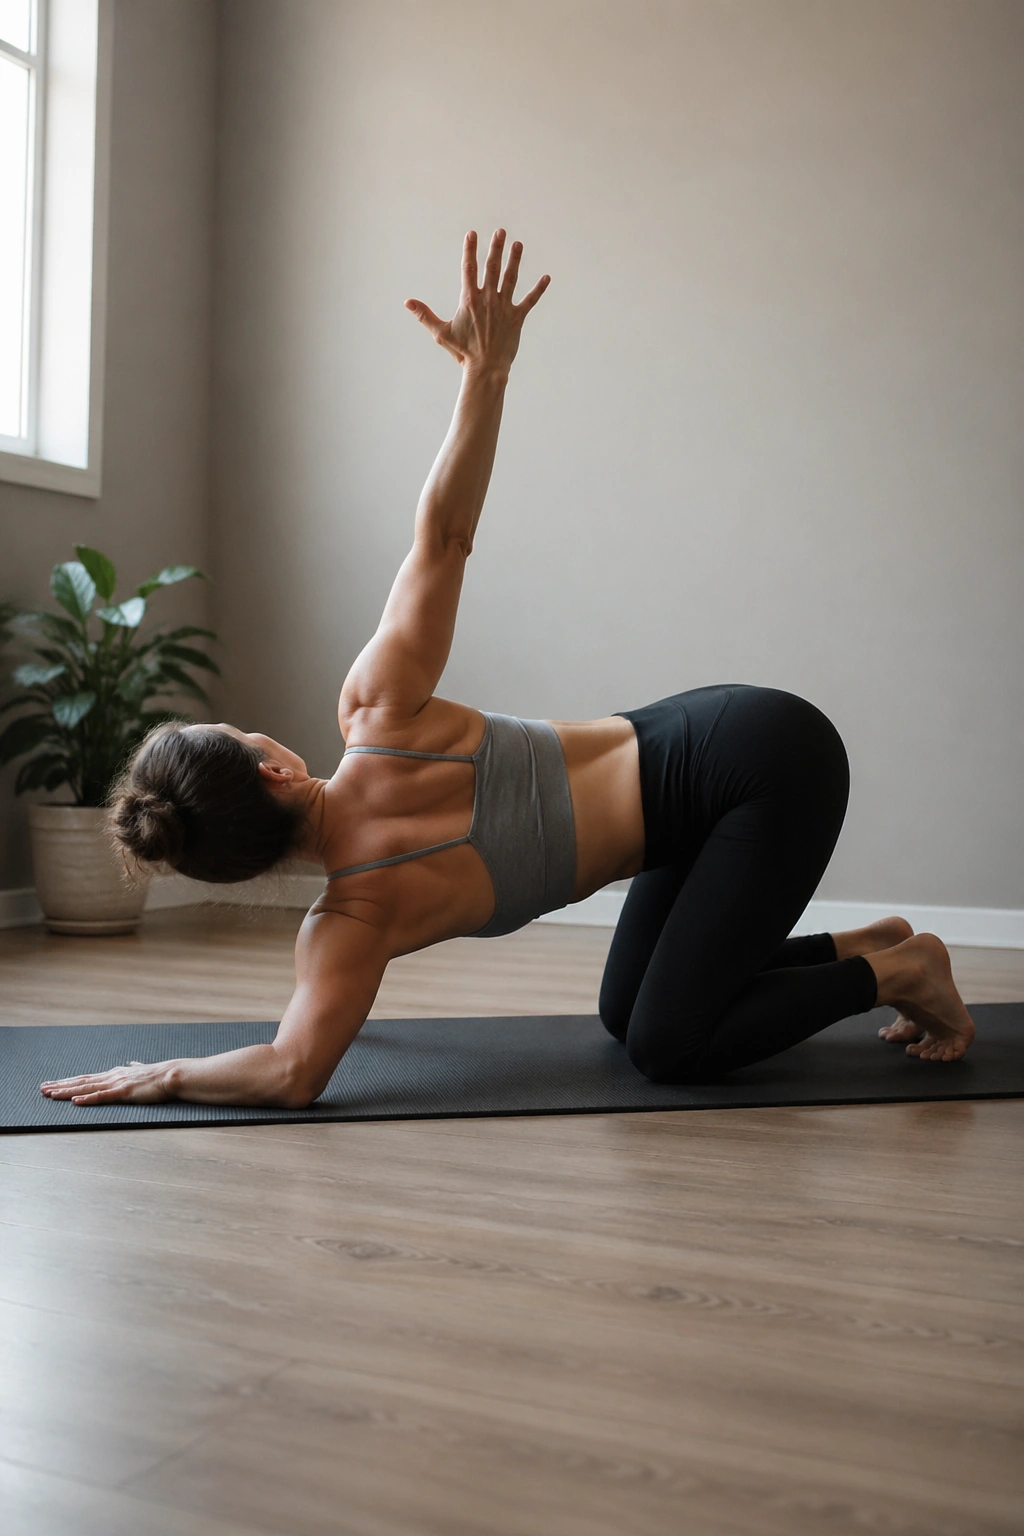
If doorway stretches open the front, thread the needle does almost the opposite. It reaches into the back of the shoulder and the upper back, which is where a lot of hidden stiffness lives.
Unlike a chest stretch, this one asks the torso to rotate. That makes it useful when the shoulder itself feels blocked but the real problem is a stiff upper back that won’t turn. Get on all fours, slide one arm under the other, and let the shoulder and side of the head lower toward the floor. Then slowly unwind and open the arm toward the ceiling.
That spiral matters. It’s not just a stretch; it’s a motion pattern. The shoulder gets to move while the spine rotates, and the two are supposed to cooperate anyway.
Aim for 5 slow reps on each side, with one full breath in the open position. If the floor is too low, rest the head on a block or stacked towels. The goal is a smooth turn, not a forced pretzel shape.
7. Dowel Pass-Throughs for a Smoother Overhead Path

A dowel pass-through is one of those drills that looks old-school because it works. A broomstick, PVC pipe, or even a long towel can give the shoulders a clean overhead path without loading the joint too hard.
What Makes It Different
Most shoulder stretches isolate one angle. Pass-throughs teach the whole arc: front of the shoulder, overhead position, and the way the arms move behind the body. That full sweep is useful if reaching overhead feels jerky or uneven.
Hold the stick with a wide grip. Start in front of the thighs, lift it overhead, then continue until it reaches the low back. If the elbows bend, widen the hands. If the ribs flare, slow down and shorten the range.
How to Keep It Clean
- Use a grip wide enough to avoid pinching.
- Move at a pace you could copy with your eyes closed.
- Keep the stick slightly in front of the face on the way up.
- Stop if the shoulder catches hard.
Do 6 to 8 passes. Light tension is fine. Sharp pain is not. A wider grip is not failure; it’s the smarter way to make the movement available.
8. Side-Lying Open Books for Thoracic Rotation

A stiff shoulder often hides a stiff upper back. Side-lying open books handle that part neatly. They rotate the rib cage, which gives the shoulder blade a better surface to move on. That sounds small. It isn’t.
Lie on your side with knees bent and arms stacked in front of you. Sweep the top arm open like you’re turning the page of a heavy book, then let the chest and upper back follow the arm. The lower body stays planted. That is the whole point.
Breathing changes this drill more than people expect. A slow exhale lets the ribs settle; the next inhale often finds a little more rotation without force. You don’t need a deep twist. You need a repeatable one.
Do 5 reps per side, pausing for a breath each time the top arm opens. If the lower knee lifts or the low back twists, back off. The rotation should come from the rib cage, not from flinging the hips around.
9. Towel Reach Behind the Back for Internal Rotation

Can your hand reach the middle of your back without the shoulder hiking up toward your ear? If not, a towel reach can help. This drill is useful for the awkward motions people forget until they try to zip a dress, tuck in a shirt, or reach a bra strap.
Hold one end of a towel over one shoulder and the other end behind the low back. Gently pull the top hand upward and let the bottom hand slide a little higher as the shoulder opens. The idea is not to wrench the arm into place. It’s to give the shoulder a target and some assistance.
Keep the elbow relaxed. Keep the neck relaxed too. If the shoulder feels jammed near the front, release pressure and try a shorter range. Sometimes two inches is enough to get the joint moving again.
- Start with 10 to 15 seconds
- Breathe slowly through the nose
- Switch sides after 2 rounds
- Use a softer towel if the grip feels awkward
This one is sneaky. It looks modest, then you realize how much it helps the daily stuff that never shows up in gym selfies.
10. Bench Lat Stretch for the Side Body
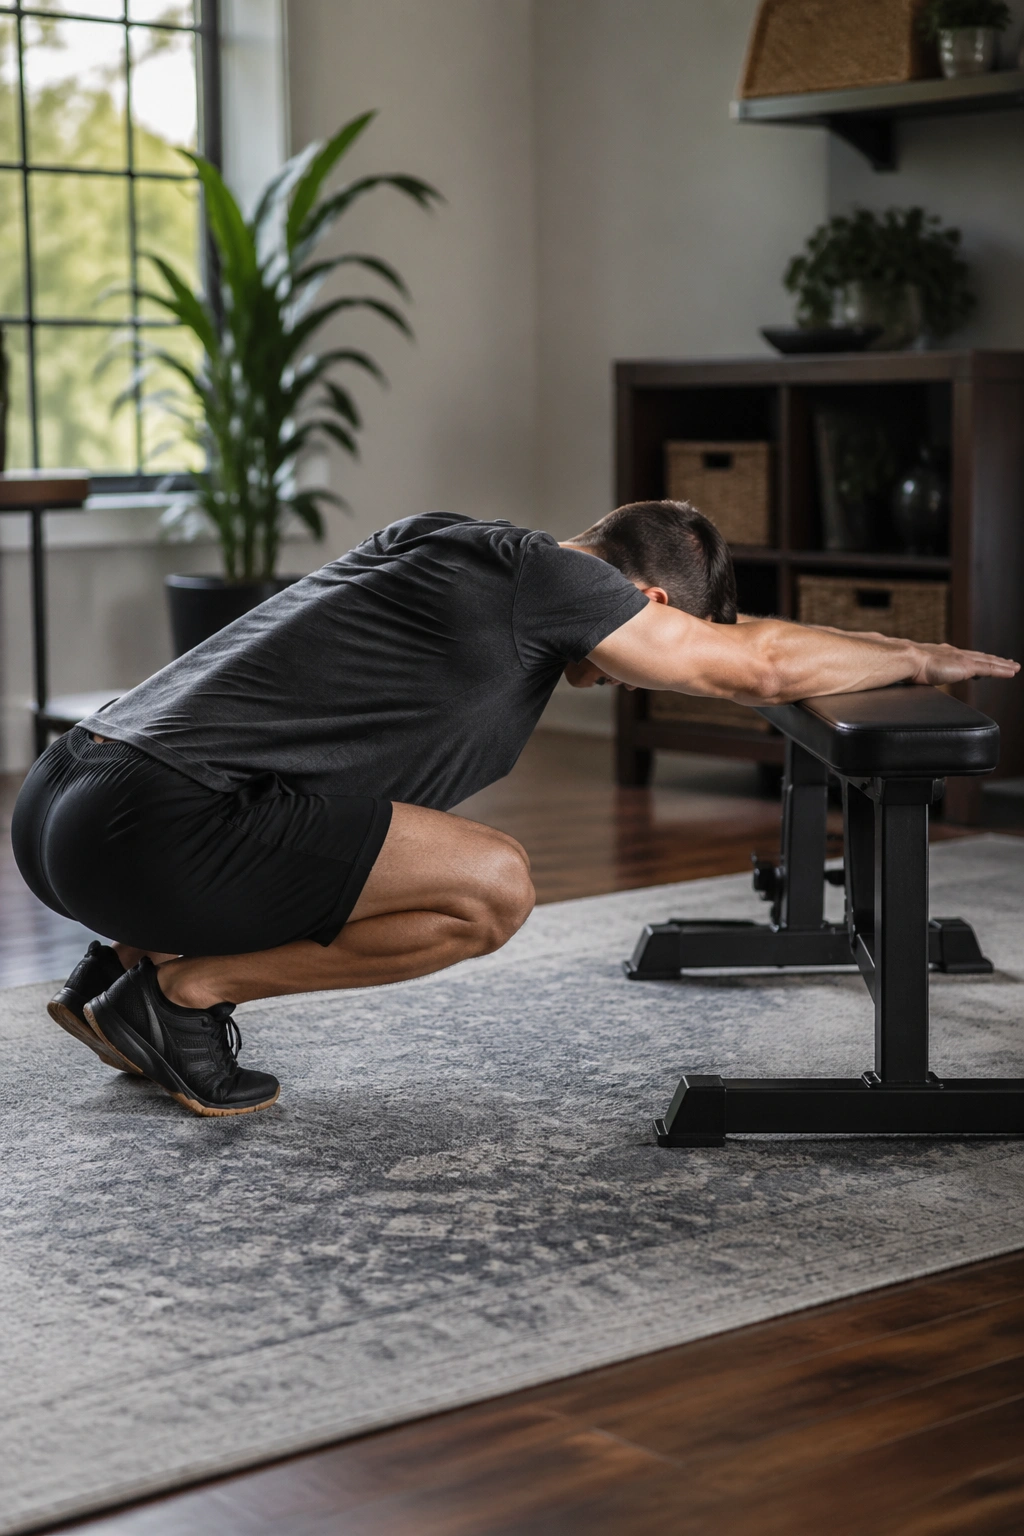
When overhead reach stalls around shoulder height, the lats often have a hand in it. They run from the side of the back into the upper arm, so a tight lat can pull against arm lift in a way that feels like a hard stop.
Set both hands on a bench, desk, or sturdy chair, then walk the hips back until the torso lowers and the side body stretches. If one shoulder is tighter, shift the hips slightly toward the opposite side and see what changes. Often the first stretch is just a general pull. The second one finds the stubborn spot.
This is one of the few stretches I like for people who sit a lot and press a lot. It opens the side body, but it also asks the shoulder blade to tilt upward a bit, which is part of healthy overhead motion. Keep the chest long and the chin tucked softly. No hanging off the lower back.
Hold for 20 to 40 seconds. A slow exhale usually deepens it more than pushing harder does. The side of the rib cage should feel long, not jammed.
11. Band-Assisted Overhead Flexion
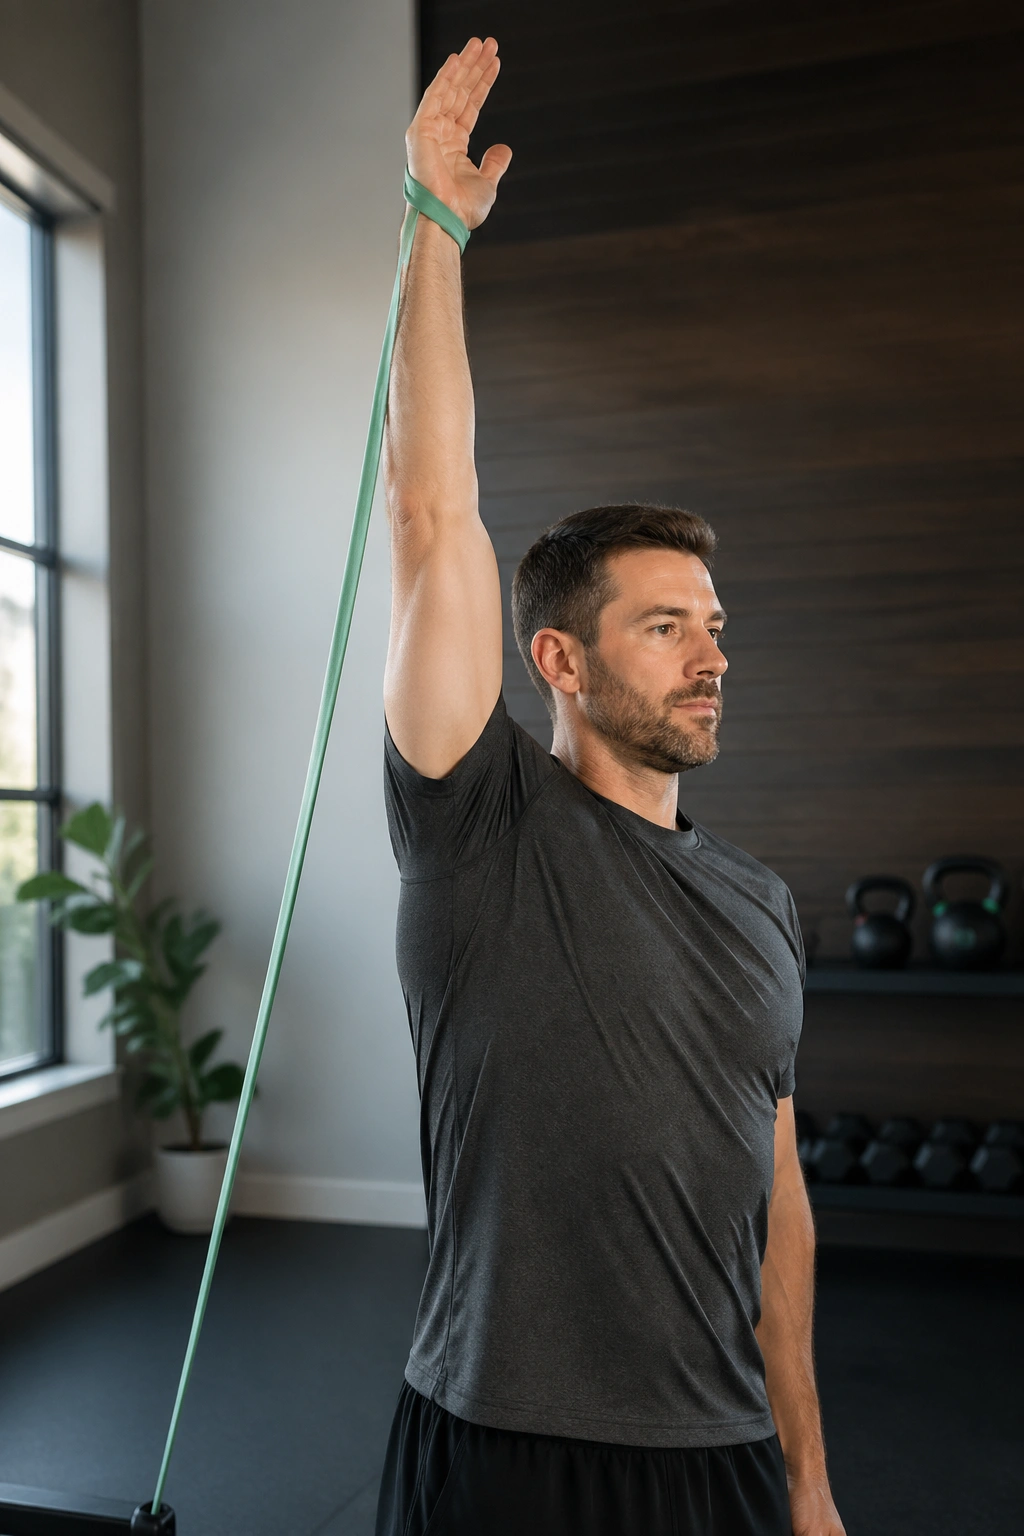
A band-assisted overhead flexion drill gives the shoulder support while it practices the end range. That’s different from a passive stretch. The band helps the arm travel overhead with a little less effort, and that can make the movement feel smoother.
Anchor a light band low, loop it around the wrist or palm, and step back until there’s a small pull downward. From there, raise the arm overhead slowly and let the band assist the last part of the motion. If the shoulder pinches, reduce the angle or ditch the band tension. The goal is cooperation, not a tug-of-war.
This is the kind of drill that works well after a warm-up, not before the joint wakes up. Use it once the shoulder has already had some motion from wall slides or pendulums. Then the assist feels helpful instead of awkward.
Do 5 slow reps per arm. Pause for a second at the top and notice whether the shoulder sits by the ear or feels long and smooth. That difference tells you more than a mirror sometimes does.
12. Wall Angels for Cleaner Shoulder Tracking

Can you keep your ribs from flaring while your arms glide up the wall? That’s the real test here, not whether you can force your hands into a perfect position.
Wall angels challenge shoulder mobility and control at the same time. Stand with your back against a wall, feet a few inches forward, and try to keep the head, upper back, and pelvis near the wall while your arms move from a bent position into a higher one. If the wrists don’t touch the wall, fine. If the elbows drift forward a little, also fine. The spine just should not turn into a trampoline.
This drill exposes bad habits fast. People want to arch the back and shrug the shoulders because that feels like more range. It isn’t. It’s borrowed range, and the shoulder usually pays for it later. Move slowly enough that you can feel when the ribs start to cheat.
Do 6 reps with a small pause at the top. If the motion gets sloppy, reduce the range. A cleaner half-range wall angel helps more than a dramatic but messy one.
13. Quadruped Rock-Backs With Reach

A shoulder that spends most of its day slumped forward often likes this one. Quadruped rock-backs with reach put weight through the hands, wake up the shoulder blade, and give the joint a chance to move while the body stays grounded.
Start on hands and knees. Reach one arm forward, or slightly out to the side if that feels better, then rock the hips back toward the heels while the chest lowers. Come forward and repeat. The shoulder gets a little load, a little glide, and a little space to move in all at once.
What to Watch For
- Keep the neck long
- Use a soft elbow
- Stop before the shoulder collapses inward
- If the wrists ache, use fists or hold dumbbells as handles
Do 5 to 8 rocks per side. The range should feel controlled, not loose. I like this drill because it’s honest; if the shoulder doesn’t like the position, it tells you immediately. And if it does like it, you can feel the front of the joint settle down after a few slow passes.
14. Prone Y-T-W Lifts for Joint Control

This is the one people skip, then wonder why the shoulder still feels wobbly at the top of a press. Prone Y-T-W lifts train the smaller muscles that keep the shoulder blade from flopping around when the arm moves.
Lie face down on the floor or on an incline bench. Lift the arms into a Y shape, then a T, then a W, keeping the movement small and crisp. The hands do not need to fly high. A one-inch lift done cleanly is better than an overdone lift that turns into a neck exercise.
How to Keep It Honest
- Use no weight at first
- Move one shape at a time
- Keep the shoulders away from the ears
- Pause for 1 second at the top
Do 2 rounds of 3 Ys, 3 Ts, and 3 Ws. If the upper traps take over, rest a bit and start again with smaller lifts. This isn’t about burning out the back. It’s about teaching the shoulder blade to sit and move with more control.
15. Slow Cross-Body Sweeps and Breath Reset

Not every mobility drill has to look dramatic. Some of the best shoulder work is plain, slow, and almost annoyingly simple.
Stand or sit tall and sweep one arm across the chest with the opposite hand lightly guiding just above the elbow. Hold that cross-body position for a breath, then release and sweep the same arm forward and slightly overhead in a smooth arc. The motion should feel like wiping fog from a mirror, not forcing a joint into place.
This is a strong finishing drill because it blends a stretch with a movement pattern. The back of the shoulder gets length. The front gets a little glide. The breathing keeps the whole thing from turning stiff and mechanical. If the shoulder is angry, keep the sweep small and focus on the exhale.
Do 3 to 5 sweeps per side, then let the arms hang loose for two slow breaths. That’s often enough to make the shoulder feel less guarded for the rest of the day. If you’re putting these drills into a daily routine, this is a good one to end with. It leaves the joint quiet, not rattled.
