



A sore back does not need crunches.
Modified core exercises for injuries work when they ask the trunk to stabilize, breathe, and resist motion without poking a cranky joint. That means less strain, less range, and more control. The right move often looks boring from the outside. Good. Boring is useful here.
Most people make the same mistake: they try to “train the core” with hard flexion, long planks, or twisting reps before the body is ready. If the ribs flare, the neck grabs, or the low back pinches, the drill is doing too much. A smarter approach uses small, clean patterns that rebuild tolerance one set at a time.
Sharp pain, numbness, pain that travels down a leg or arm, or a fresh post-op situation needs a clinician first. That’s not me being cautious for the sake of it. That’s just common sense.
The best rehab-friendly core work usually starts with breathing, then simple floor drills, then carries and anti-rotation holds. Some of these will feel almost too light at first. They aren’t. The point is to teach your body to hold shape under mild stress, because that’s what most daily life asks for anyway — getting out of bed, reaching into a car, lifting a grocery bag, or standing up without wincing.
1. 90/90 Breathing with Feet on Wall
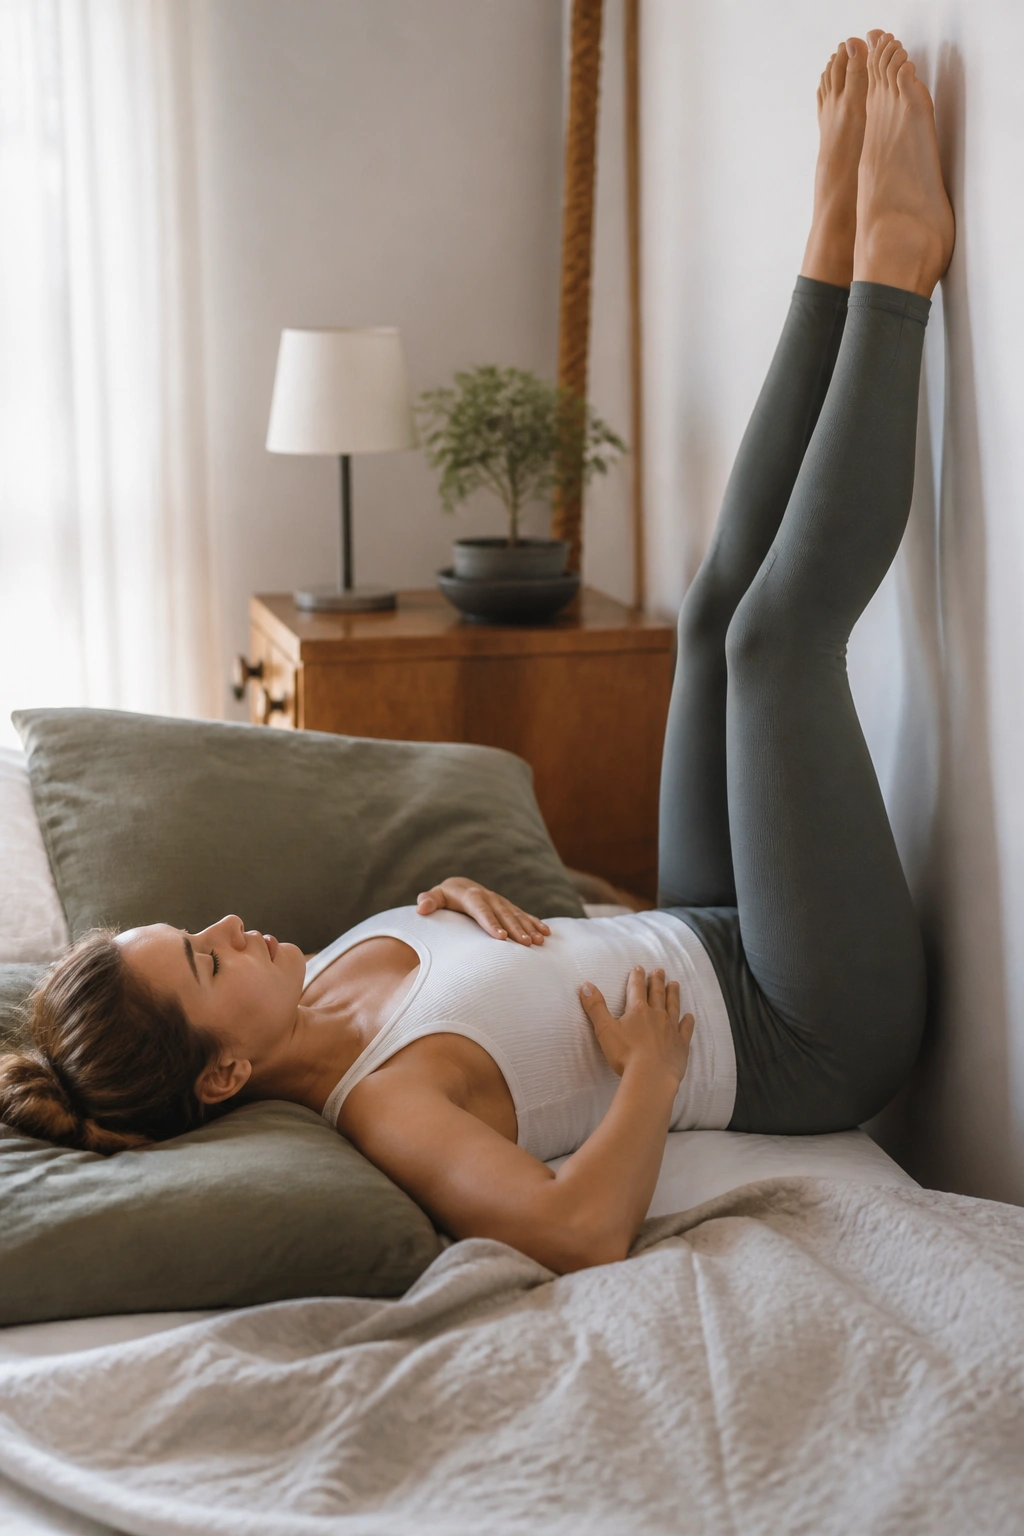
A strong core starts with a breath you can control.
Lie on your back with your feet on a wall or a sturdy chair, knees and hips bent to about 90 degrees. Put one hand on your chest and the other on your lower ribs. Inhale through your nose for 3 to 4 seconds, then exhale for 5 to 6 seconds until your ribs soften and your low back feels heavy against the floor. That exhale is not a collapse; it’s a reset.
Why It Calms the Trunk
This drill gives a tired back a break from gripping. It helps you feel where your ribs sit over your pelvis, which matters a lot if you’ve been living in a constant brace. People with low back irritation often breathe high into the chest and hold tension in the neck. This flips that pattern.
- Do 4 to 5 slow breaths per set.
- Use 2 to 3 sets before harder core work.
- Keep your jaw loose and your shoulders heavy.
- If your low back arches, put your feet a little higher on the wall.
Tip: If you can’t get your exhale to last 5 full seconds, shorten it. Don’t force it.
2. Dead Bug Heel Taps
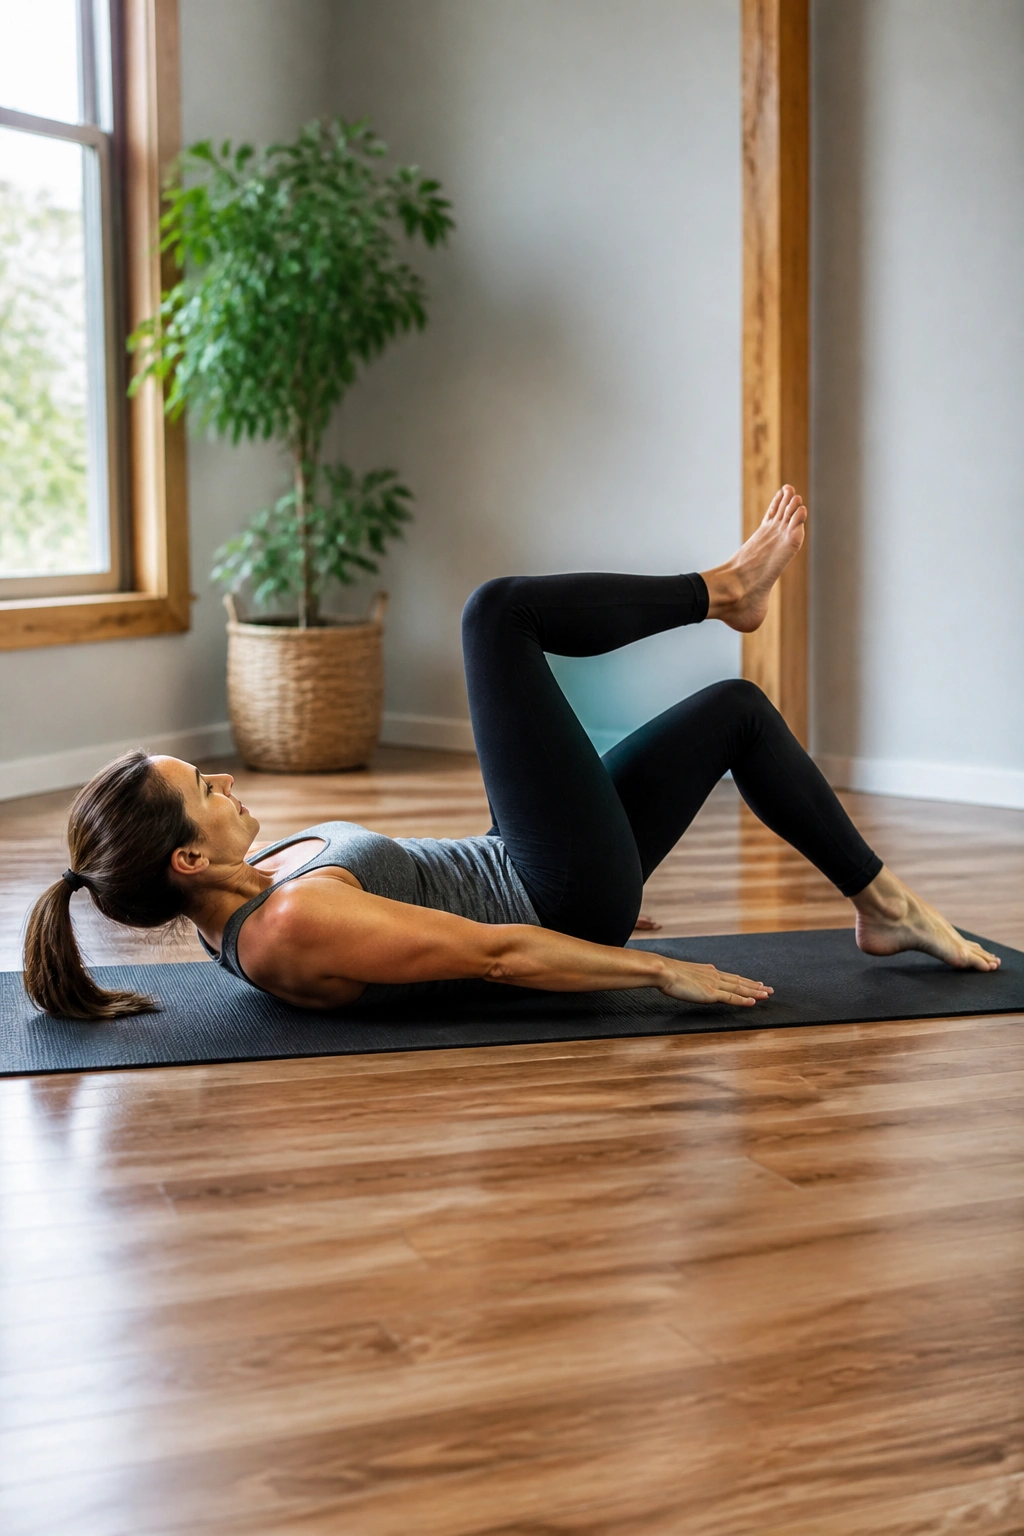
Can a core move be hard without looking hard? Yes. This is the one.
Start on your back with your hips and knees bent to tabletop, or keep one foot down if that’s too much. Brace lightly, then lower one heel toward the floor and bring it back up while your low back stays quiet. The goal is not a giant range. The goal is no arch, no rib flare, no hip shift.
How to Make It Easier
If your back complains, shrink the motion first. Tap the heel only 1 inch away from the floor. If that still feels messy, keep the opposite toe grounded and slide the working heel out only halfway. The exercise should feel like control, not a wrestling match with your spine.
How to Get the Most From It
- 6 to 10 taps per side
- Slow out, slow back
- Exhale as the heel lowers
- Stop the set the moment your back starts to lift
One clean rep beats five sloppy ones. Every time.
3. Bird Dog Reach
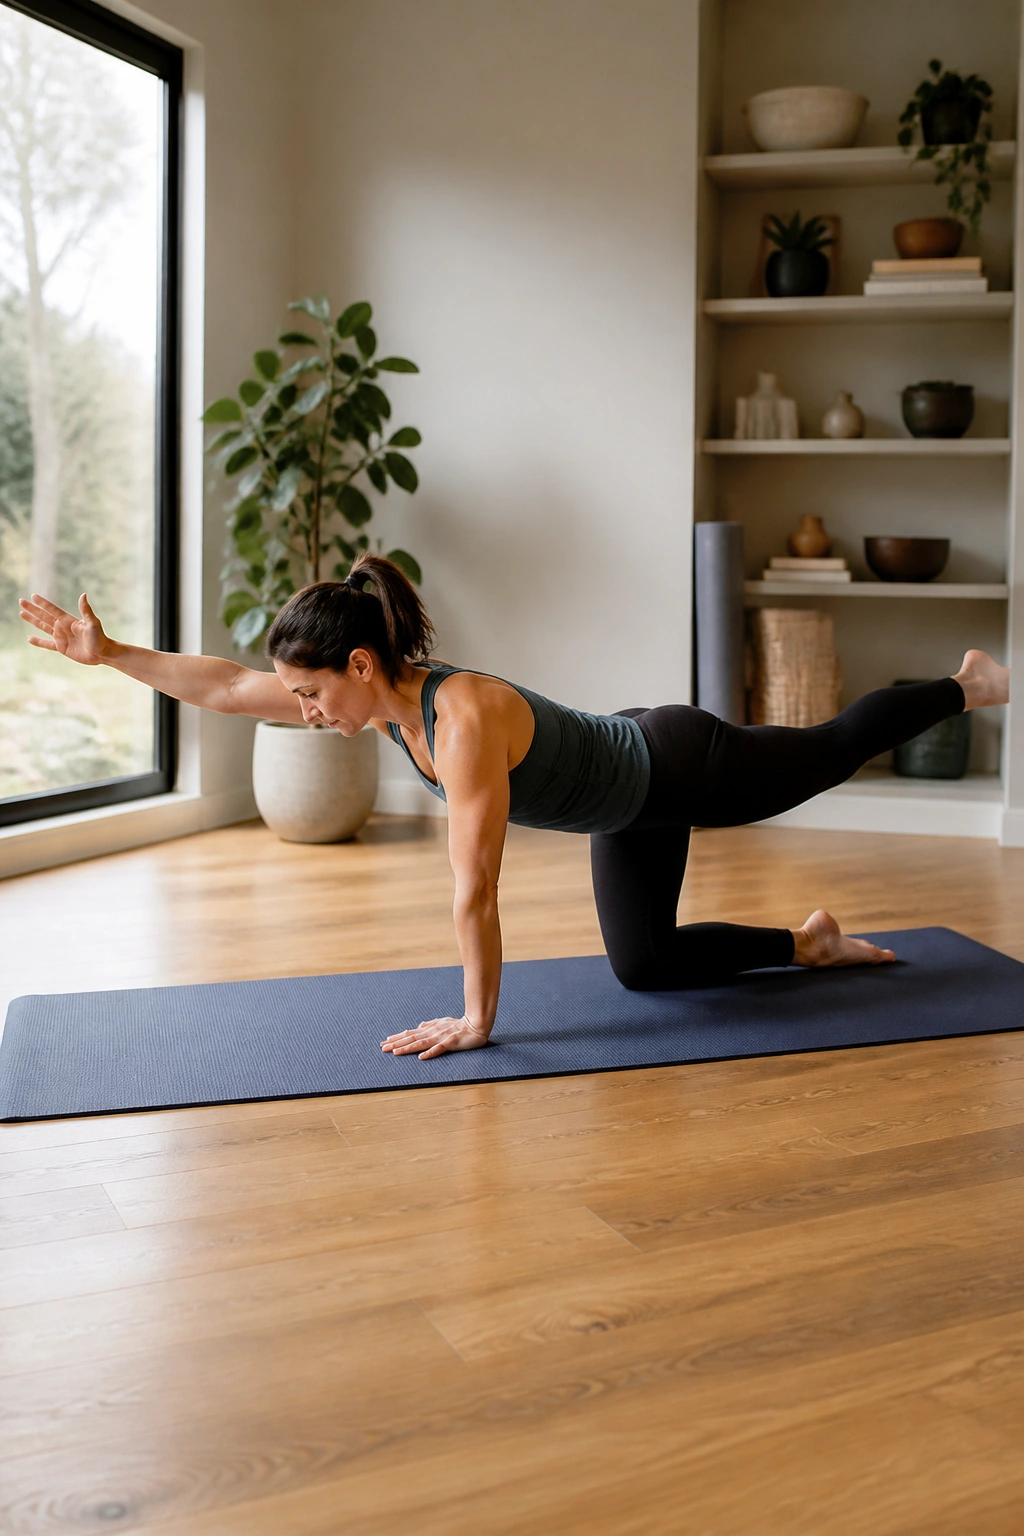
On a bad day, this is often the move that still behaves.
Get on hands and knees with your wrists under your shoulders and knees under your hips. Reach one arm forward and the opposite leg back, but don’t chase height. Reach long. That difference matters. A foot lifted six inches higher usually means the back is doing the job the glute should have done.
What Makes It Useful
Bird dog trains cross-body control. Your trunk has to stay steady while the limbs move, which is exactly what you want after a flare-up, a stiff back, or a round of aggressive training that left everything cranky. If you’ve got shoulder sensitivity, keep the hand on the floor and just slide the leg back.
- Hold each rep for 3 to 5 seconds.
- Do 5 to 8 reps per side.
- Keep your hips level, not rotated.
- Use a folded towel under the knees if the floor feels harsh.
A Simple Rule
If the torso sways, the reach is too big. Shorten it and keep going.
4. Side Plank from Knees
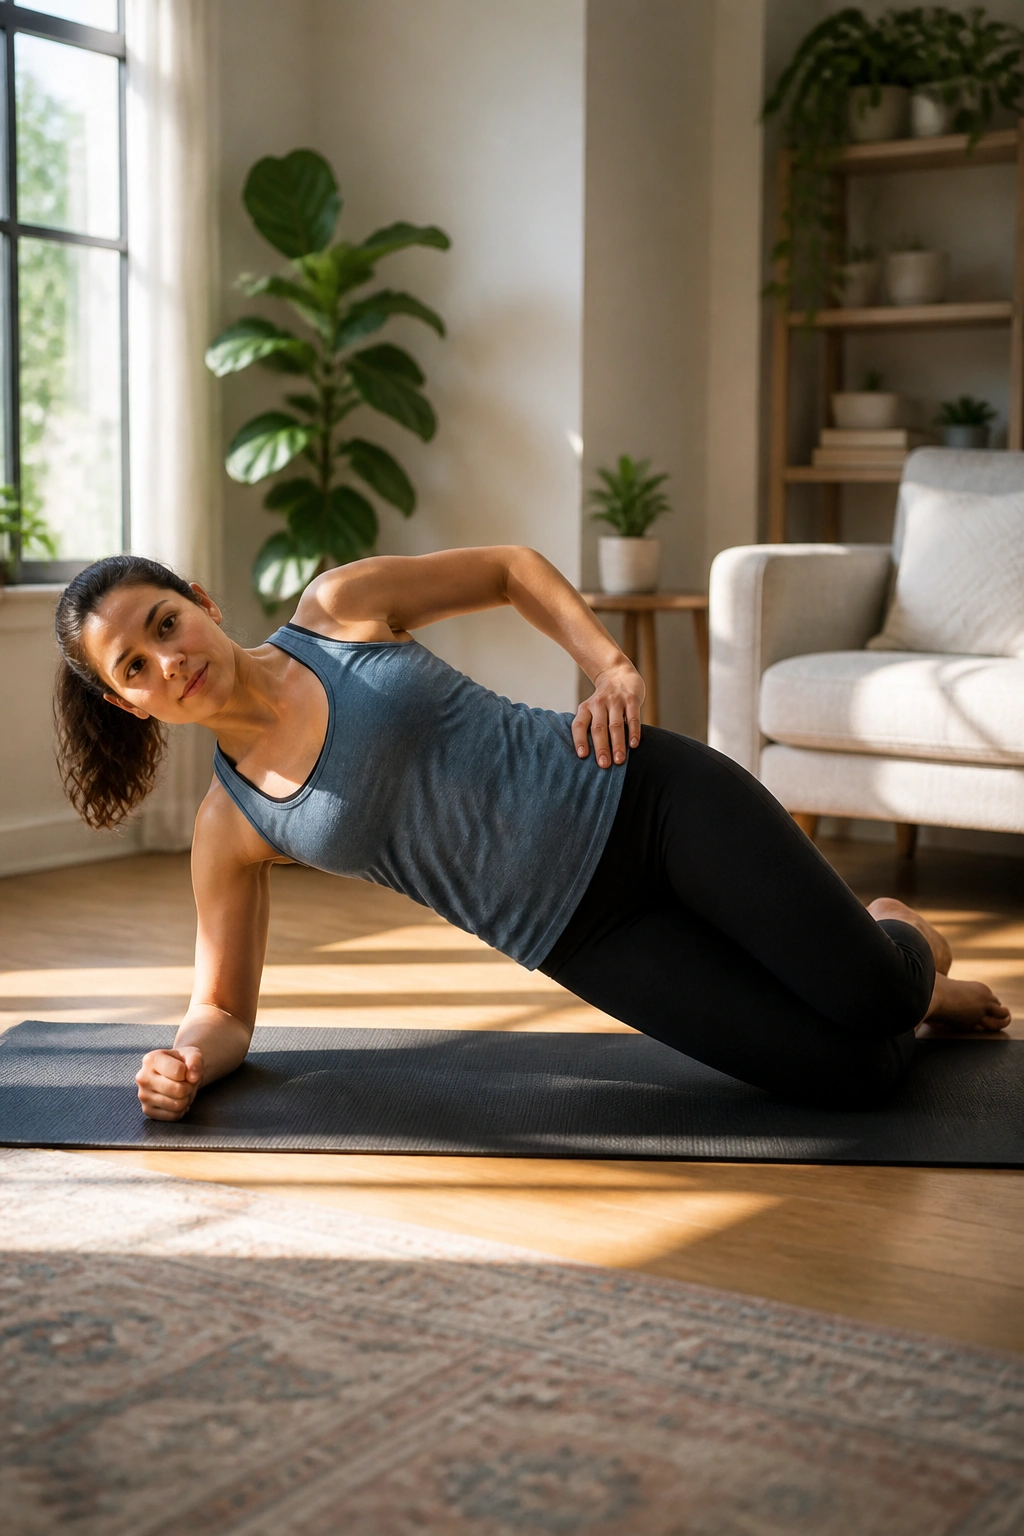
A side plank from the knees looks modest. It isn’t.
The side body — especially the obliques and the muscles around the waist and hip — does a lot of quiet work in daily life. It keeps you from collapsing sideways when you carry a child, stand on one leg, or reach across the car seat. A kneeling side plank gives you that training without the full drama of a straight-leg hold.
Lie on your side with your elbow under your shoulder, knees bent, then lift your hips so your body makes a clean line from shoulder to knee. Keep your chest from rolling forward. Keep your hips stacked. Short holds work better than long, ugly ones.
Short and clean beats long and saggy.
Try 10 to 20 seconds per side for 2 to 4 rounds. If your shoulder hates floor pressure, do the same shape with your forearm against a wall instead of the floor. Same idea. Less load.
5. Pallof Press: A Modified Anti-Rotation Core Drill
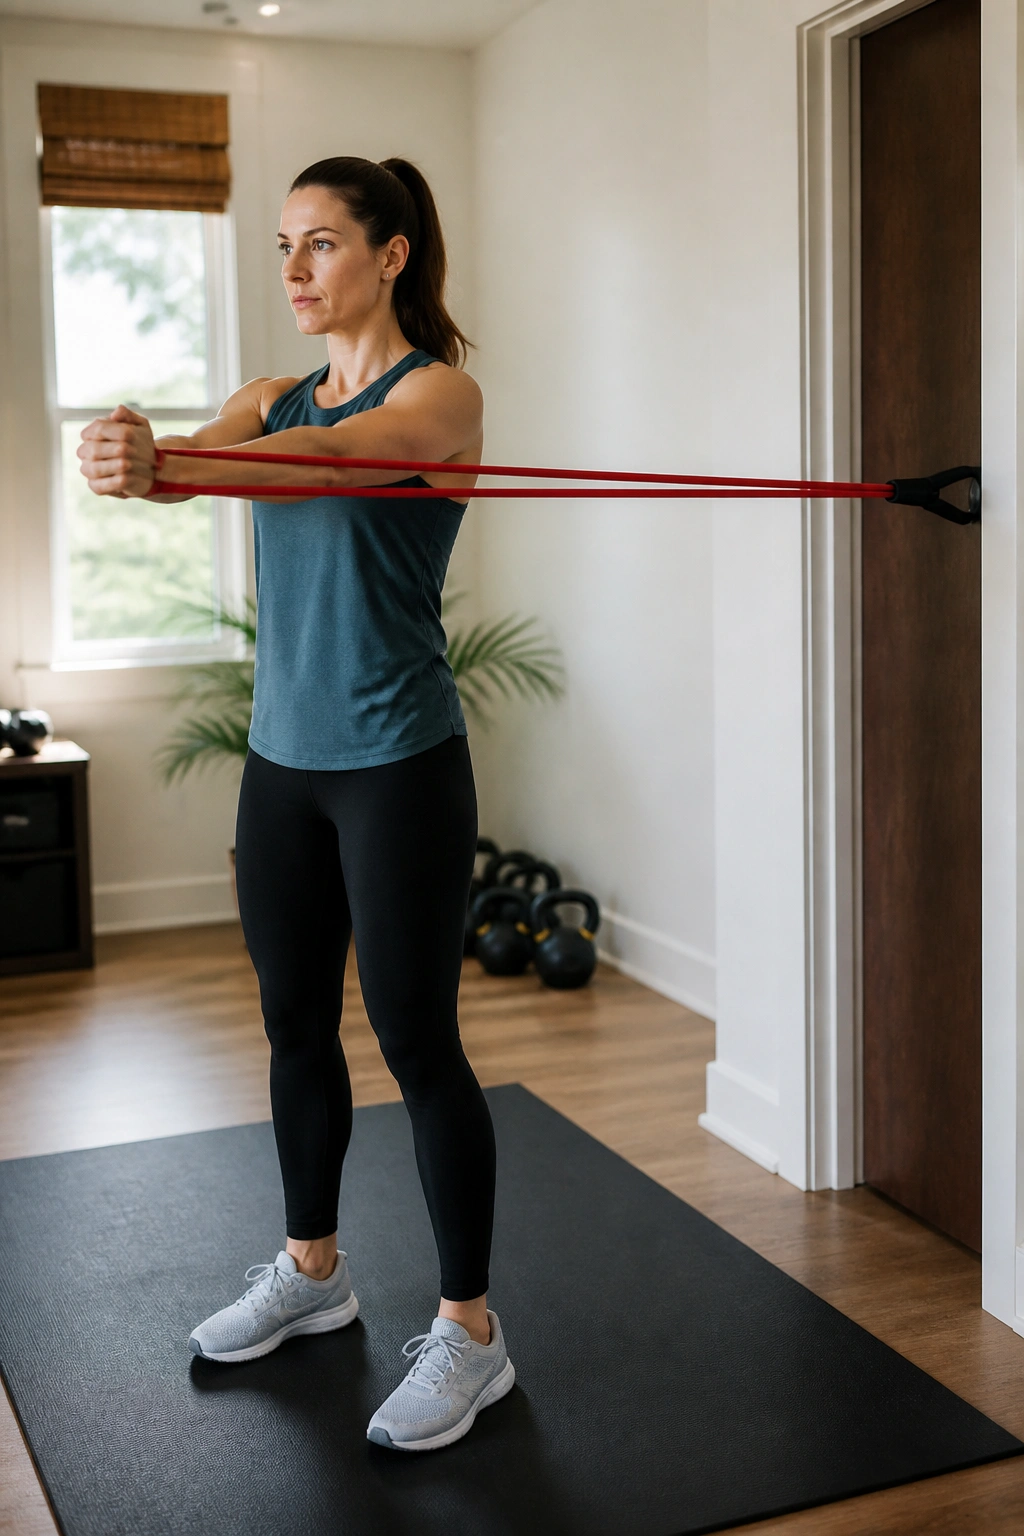
A band press doesn’t look dramatic, and that’s the point.
Stand sideways to a resistance band anchored at chest height. Hold the handle at your sternum, step out until the band has real tension, then press your hands straight out and bring them back in without letting your torso twist toward the anchor. The trunk should resist the pull, not chase it. That makes the Pallof press one of the best injury-friendly core exercises for people who hate twisting or side bending.
Compared with crunches, this drill trains the core to hold position instead of folding the spine over and over. That makes it a smart choice for backs that get irritated by flexion, and for anyone coming back from a long break who needs a calmer, cleaner start.
How to Use It
- 8 to 12 presses per side, or 15 to 20-second holds
- Stand tall with soft knees
- Keep your ribs stacked over your pelvis
- Use a lighter band than you think at first
If standing bothers your hips or back, try the same press in half-kneeling. That strips away some lower-body noise and makes the trunk do the work.
6. Glute Bridge March
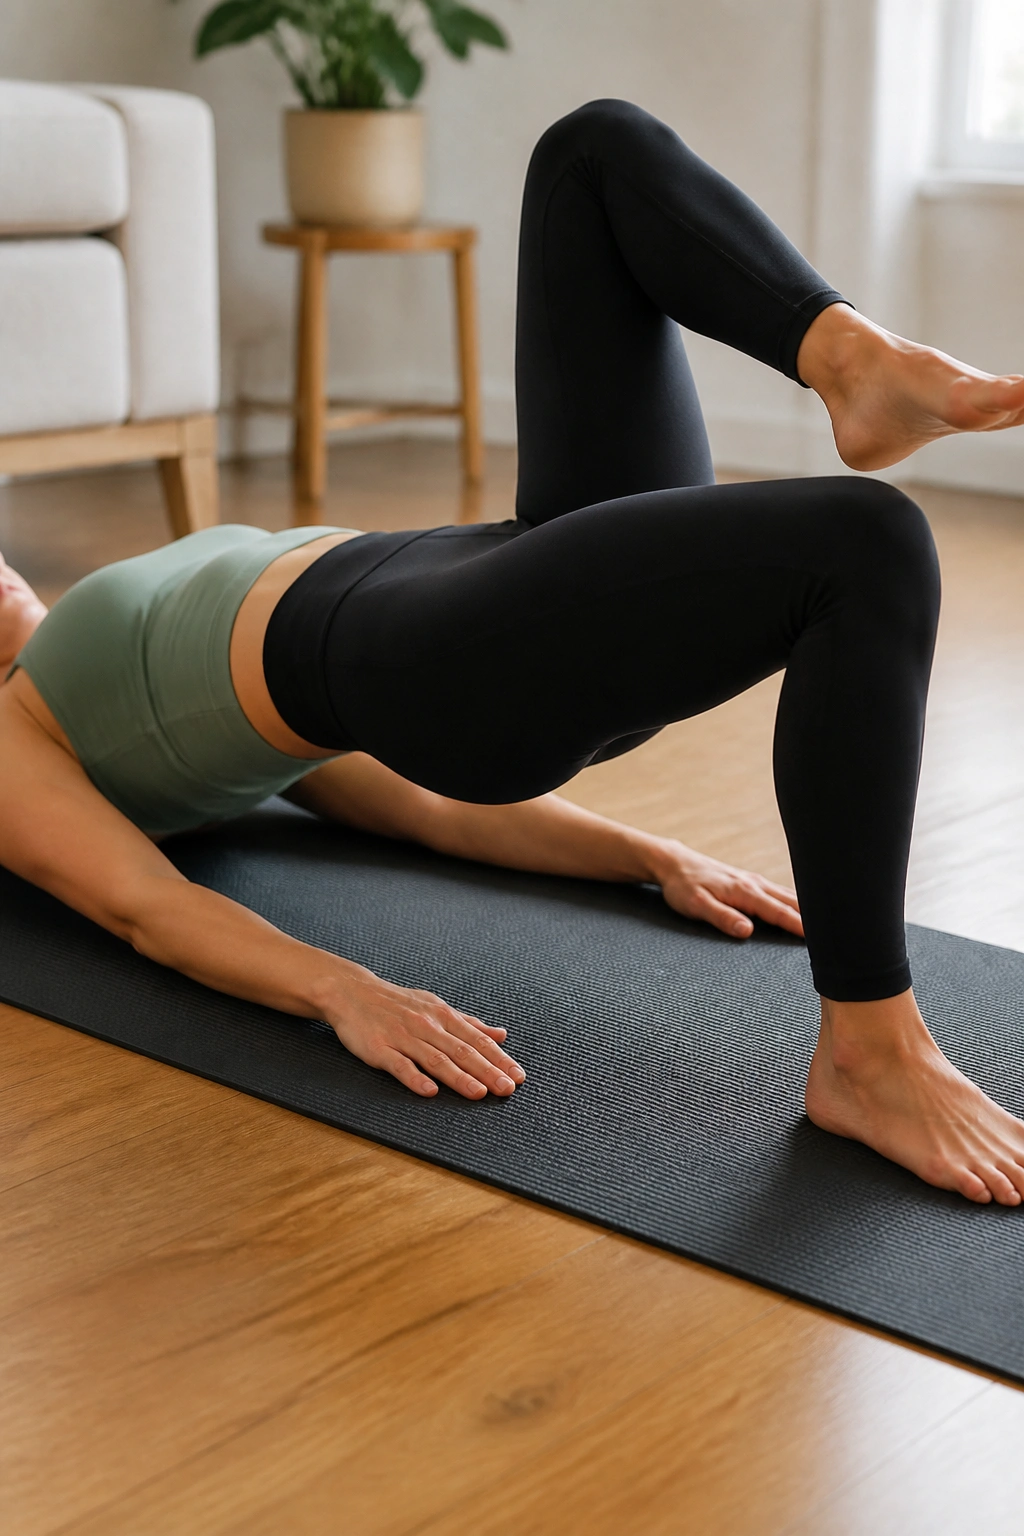
If floor abs make your back grumpy, train the hips harder.
Lie on your back with your knees bent and feet flat. Lift into a glute bridge, then slowly raise one foot an inch or two without letting your pelvis drop or sway. Set it down, switch sides, and keep breathing. The challenge is not height. It’s keeping the pelvis quiet while one leg moves.
This is a sneaky little drill for back-friendly core work because the glutes and abs have to share the job. People who live in their lower back often discover that their hips are doing too little and their spine is doing too much. The bridge march starts to fix that.
Do 6 to 8 marches per side. If your hamstrings cramp, lower the hips a little and slow down. If the low back arches, shorten the lift and think about exhaling as the foot leaves the floor.
Tiny lift. Steady pelvis. That’s the whole game.
7. Incline Forearm Plank
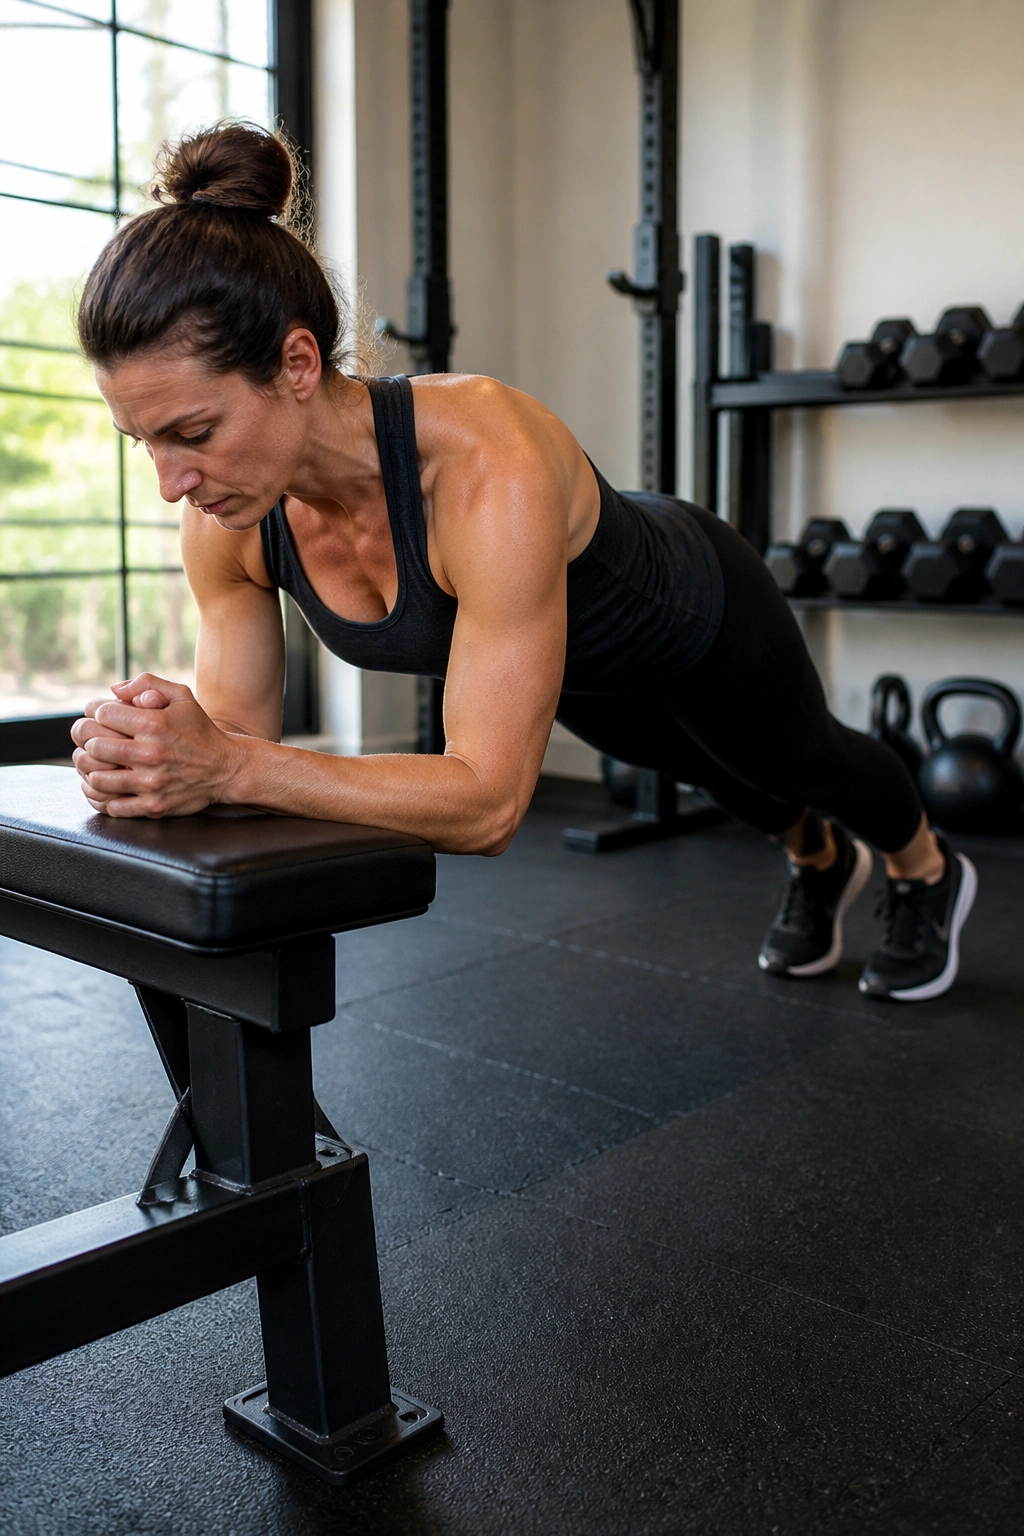
Why start on the floor when a bench will do the job with less flare-up?
Put your forearms on a bench, sturdy couch, or countertop. Step your feet back until your body makes a long line, then hold without sagging through the low back or hiking the hips too high. This is the same plank pattern many people know, but the incline cuts the load enough that injured shoulders, wrists, and backs can usually tolerate it better.
Set It Up on a Bench
- Elbows under shoulders
- Glutes lightly on
- Ribs down, not flared
- Neck long, eyes on the floor
A 10- to 30-second hold is enough to start. If you can breathe only in short gasps, the plank is too hard. Raise your hands higher or shorten the hold. You want control first, burning second.
A floor plank is not morally superior. It’s just harder. Sometimes that harder version is the wrong tool for the day.
8. Suitcase Carry
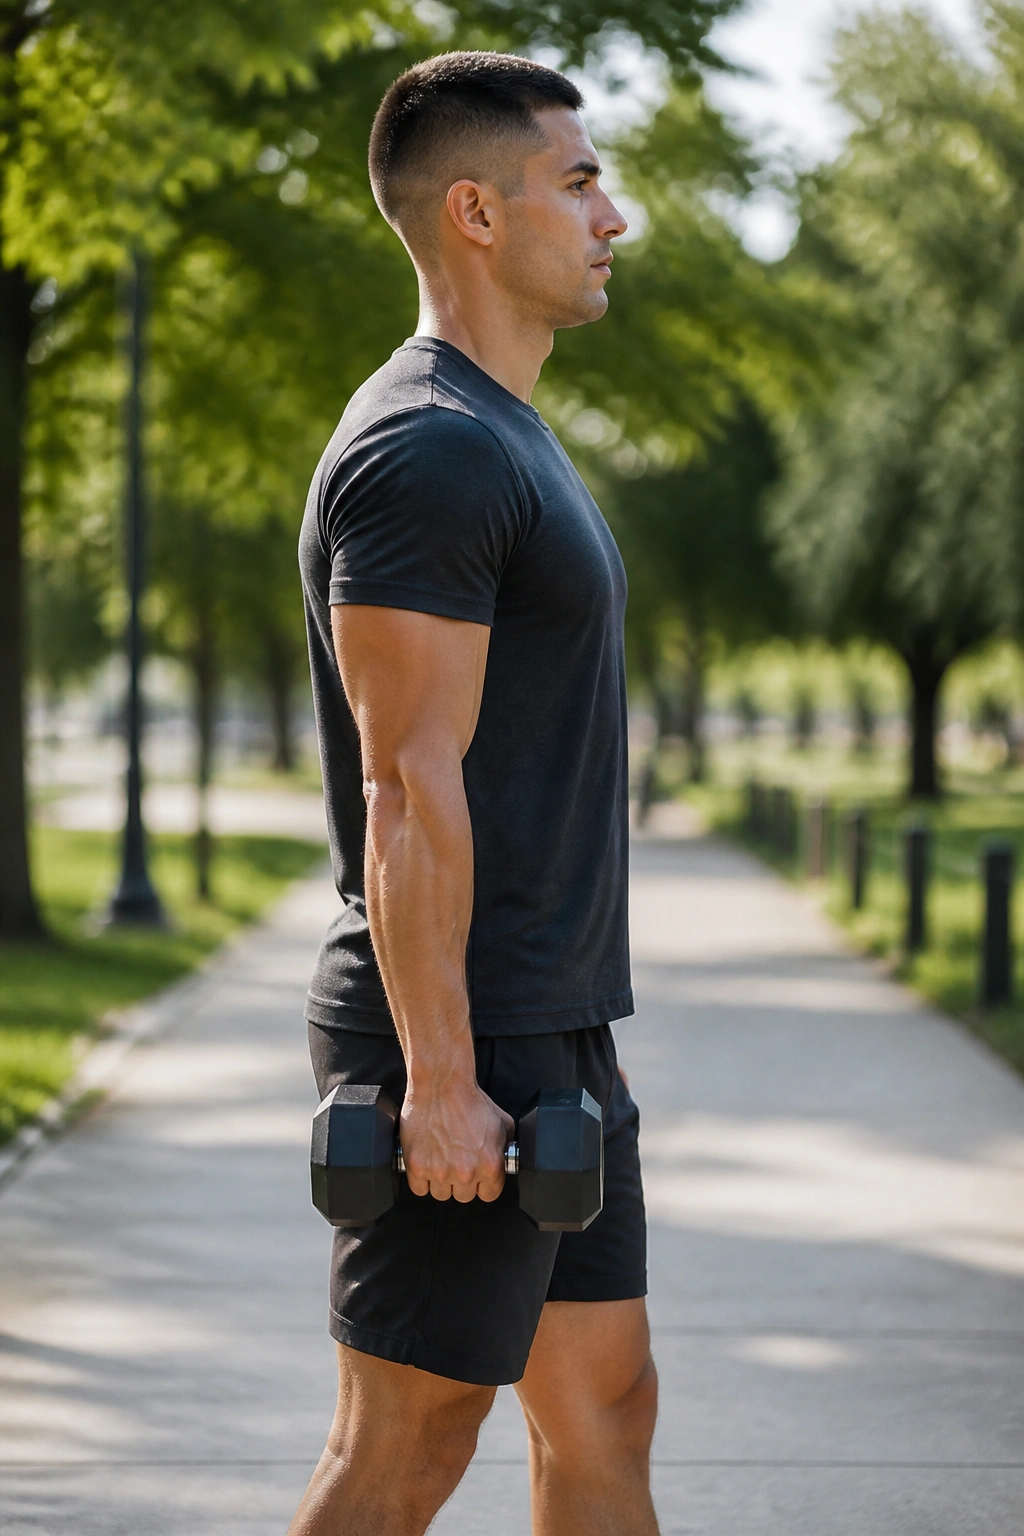
Imagine carrying one heavy grocery bag for 30 yards without leaning. That’s the suitcase carry.
Hold one dumbbell, kettlebell, or sandbag at your side and walk tall for 20 to 40 meters. Your job is to stay upright, not to fight the weight with a side bend. The trunk has to resist tipping, which is exactly why this works so well for oblique strength and hip stability.
What to Watch For
- Don’t lean away from the weight.
- Keep the shoulder packed down, not shrugged.
- Walk at a normal pace.
- Switch hands every set.
This is one of my favorite drills for people who are past the “gentle floor work only” stage but still can’t tolerate much spinal motion. It feels functional because it is functional. You carry things in real life. You turn, stop, and walk on uneven ground. The suitcase carry trains all of that without a lot of noise.
Start with 2 to 4 carries per side. Short and steady wins.
9. Heel Slides with Brace
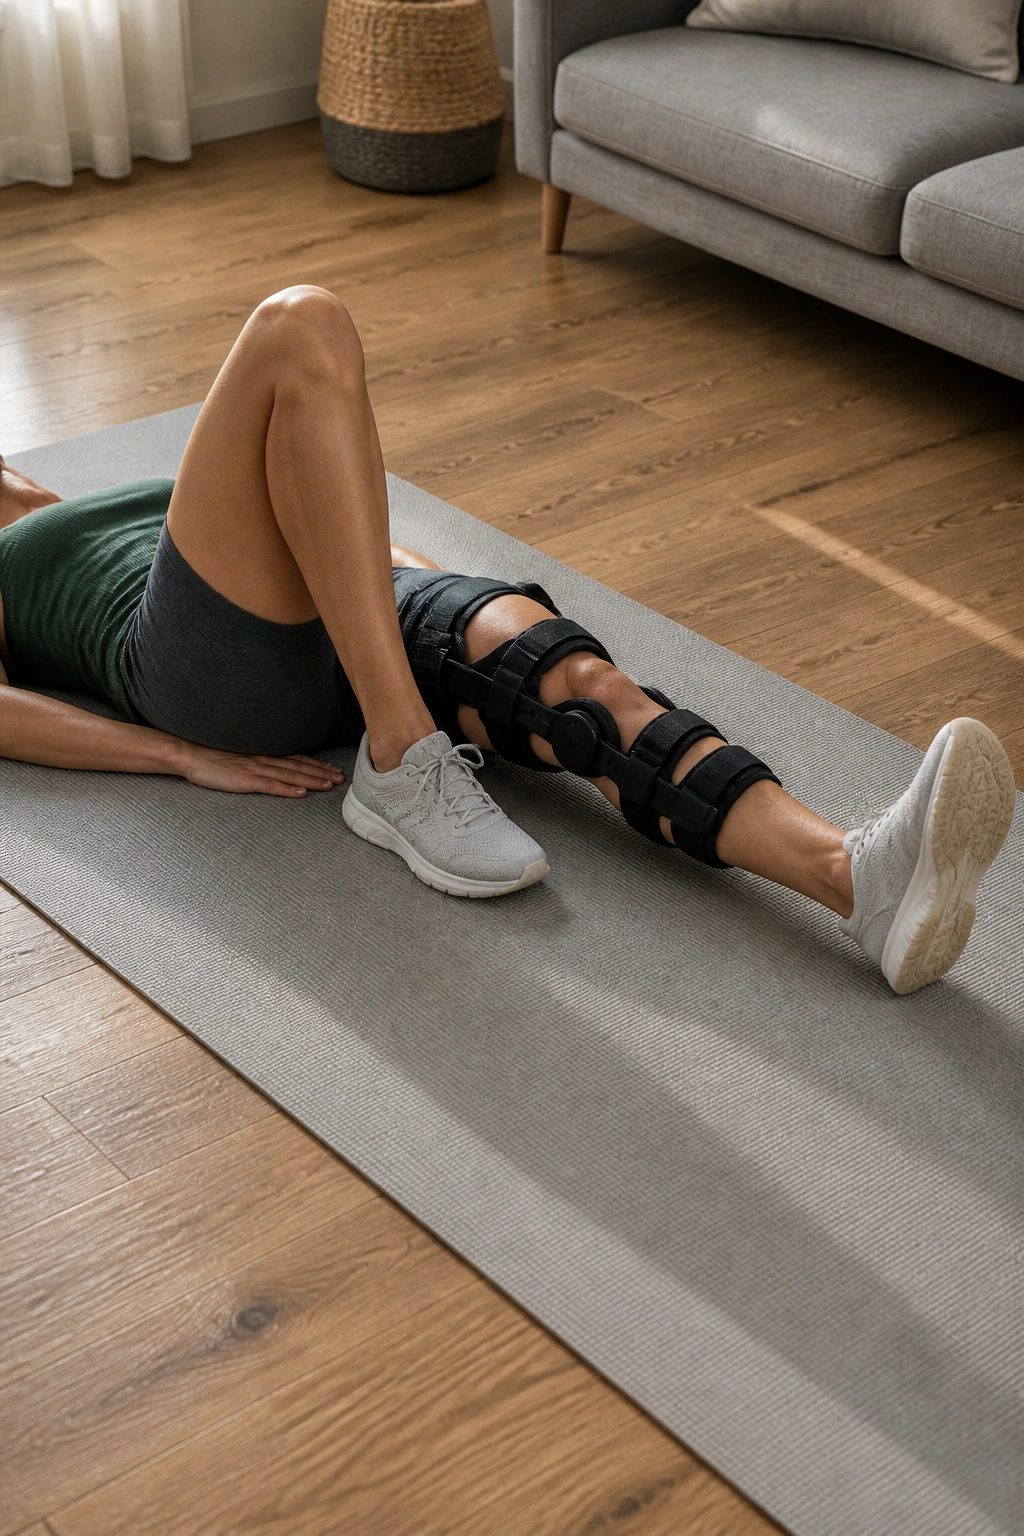
Can something this small matter? Absolutely.
Lie on your back with one knee bent and one leg straight. Lightly brace your midsection, then slide the straight heel away until the leg is nearly long, and pull it back again without letting your ribs pop or your low back arch. That slow slide is a lovely way to teach abdominal control when full dead bugs feel like too much.
How to Use It After a Flare-Up
If your back or pelvis is touchy, this is often the first floor drill that still behaves. Keep the slide tiny at first — maybe 4 to 6 inches — and build only when you can keep the pelvis quiet. People after pregnancy sometimes like this one because it feels organized, not aggressive.
- 6 to 8 slides per side
- Exhale during the slide out
- Keep the foot in light contact with the floor
- Stop if the back lifts or the hip flexors grab
The cleanest reps feel almost sleepy. That’s a good sign.
10. Quadruped Rock-Backs with Brace
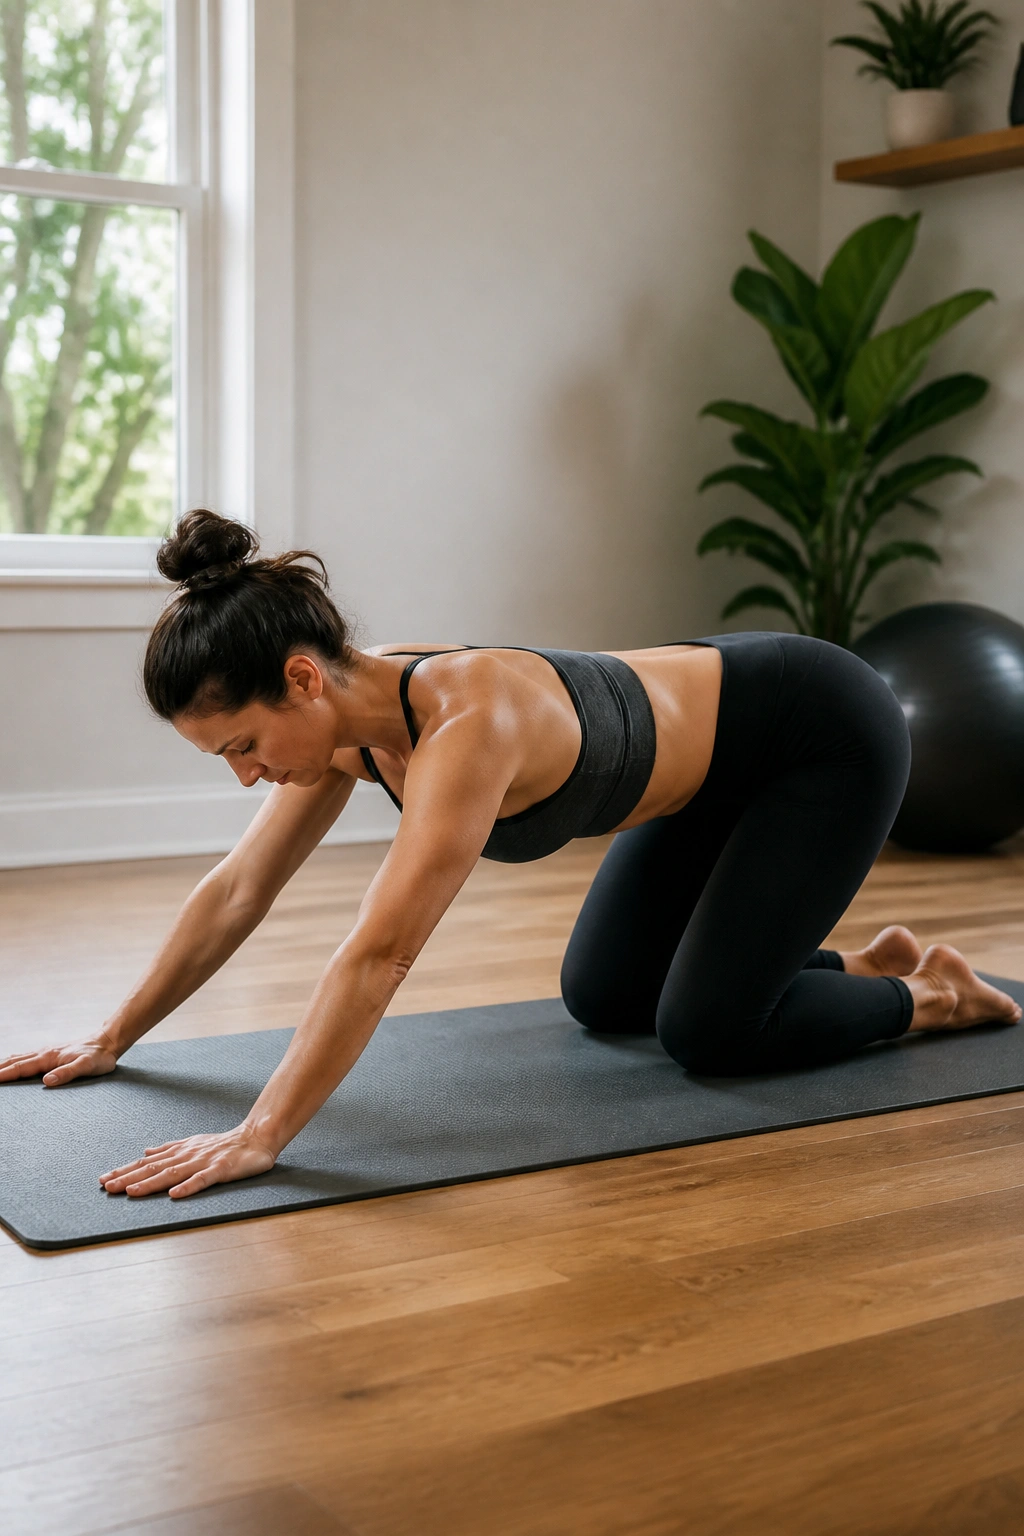
Get on all fours, inhale once, then exhale and gently shift your hips back toward your heels before returning to the starting position.
That’s it. No race. No big collapse. The point of this drill is to move the hips while the trunk stays calm, which can feel like a relief if standing or lying work has been irritating your back. It also gives the knees and hips a chance to move through range without loading the spine in a big way.
If your wrists ache, drop to your forearms. If your knees dislike pressure, fold a thick towel or use a pad. The setup matters. People skip this part and then wonder why the drill feels awful. It isn’t the rock-back that’s wrong. It’s the floor under your joints.
Do 8 to 10 controlled reps. Keep the movement smooth, not deep. You’re looking for a quiet spine and easy breathing. Once the shape stays clean, you can add a brief pause at the back of the movement.
11. McGill Curl-Up: A Modified Crunch for Sensitive Backs
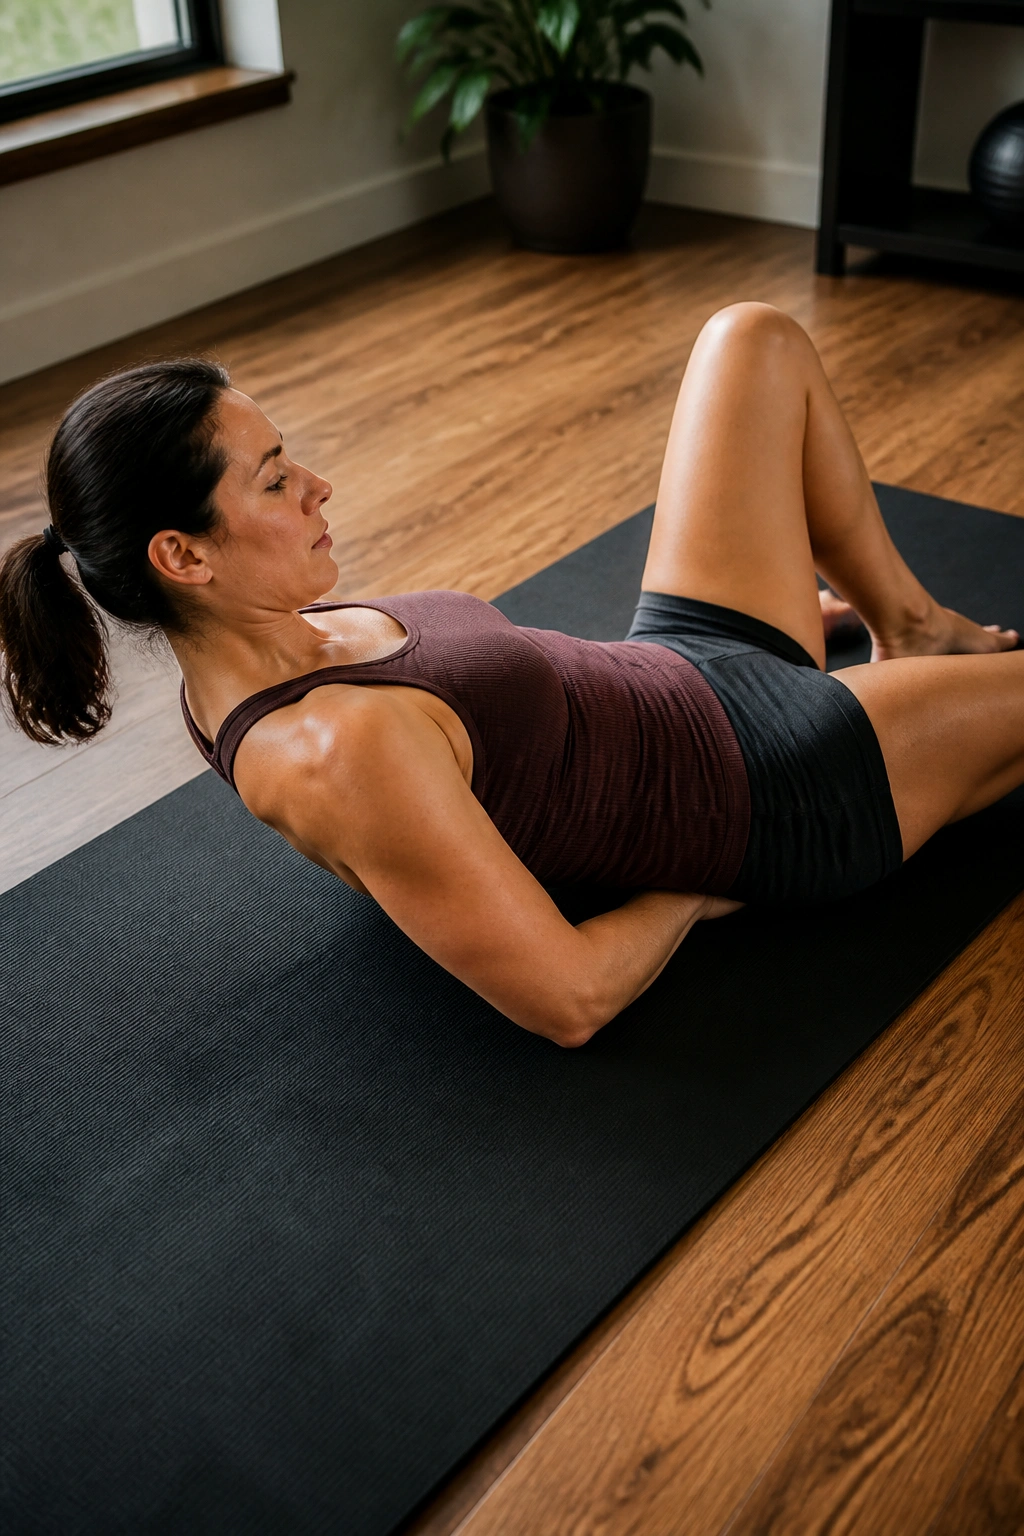
A regular crunch asks the spine to bend again and again. The McGill curl-up does not.
Lie on your back with one knee bent and the other leg straight. Slip your hands under the natural curve of your low back, then lift your head and shoulders just a few inches without flattening the spine into the floor. Hold for 5 to 8 seconds, lower, rest, and repeat. This small lift is the whole point. It gives the abs work without turning the movement into a full sit-up.
The difference matters for people whose backs hate repeated flexion. A lot. Full crunches can feel fine for one person and miserable for another. The modified version keeps the load cleaner and the range smaller.
Use 5 to 8 reps per side to start. Don’t pull on the neck. Don’t chase height. If your hip flexors take over, the lift is too big. If the low back flattens hard, ease off. This is one of those rare exercises where less really is more.
12. Tall-Kneeling Band Press: A Modified Core Press Without Floor Work
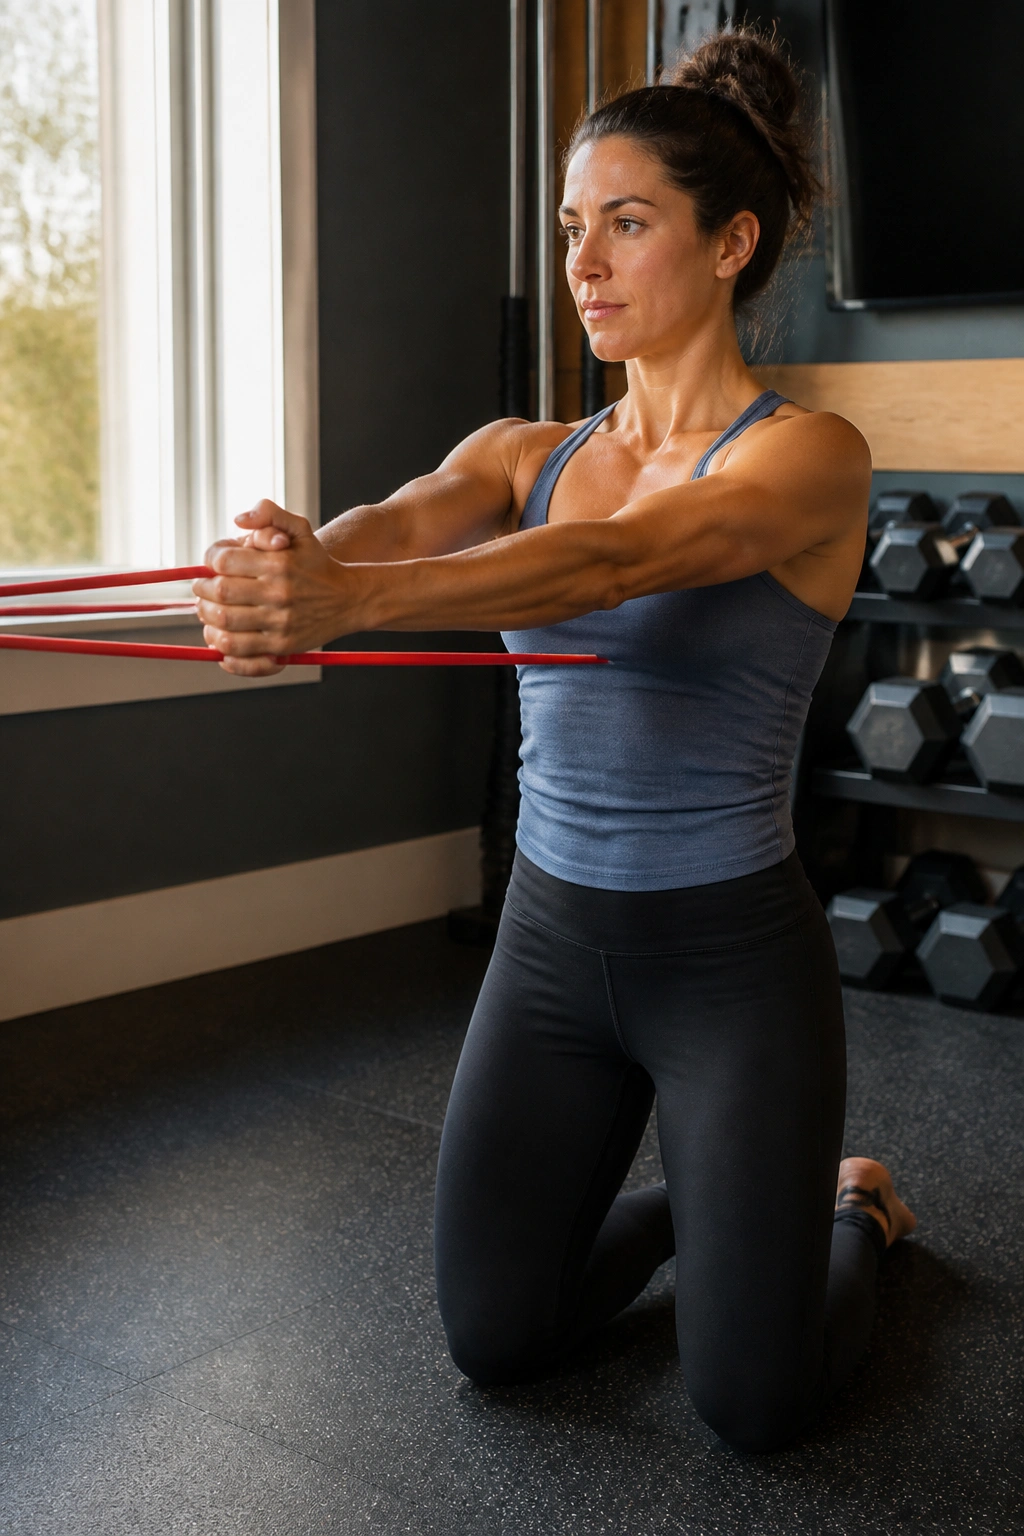
This looks like an upper-body drill, but the trunk is doing plenty.
Come into a tall-kneeling position with both knees down, hips extended, and a resistance band anchored in front of you at chest height. Press the band straight out and bring it back slowly while keeping your ribs from flaring and your glutes gently engaged. Because you’re kneeling, the pelvis has less room to cheat. The core has to keep everything stacked.
Why It Helps
Tall kneeling strips away a lot of the lower-body sway that hides weak trunk control. It’s a clean way to train people who can’t tolerate floor work, or who get irritated by standing drills that invite too much back extension. If kneeling on the floor bothers your knees, put a thick pad under them or switch to half-kneeling.
- 8 to 10 presses per side
- Hold the press out for 2 seconds
- Keep the chin level, not jutting forward
- Exhale as the arms press away
One nice thing about this drill: it teaches the body that a brace doesn’t have to mean a breath hold. That alone is worth the setup.
13. Seated Knee Lift with Exhale
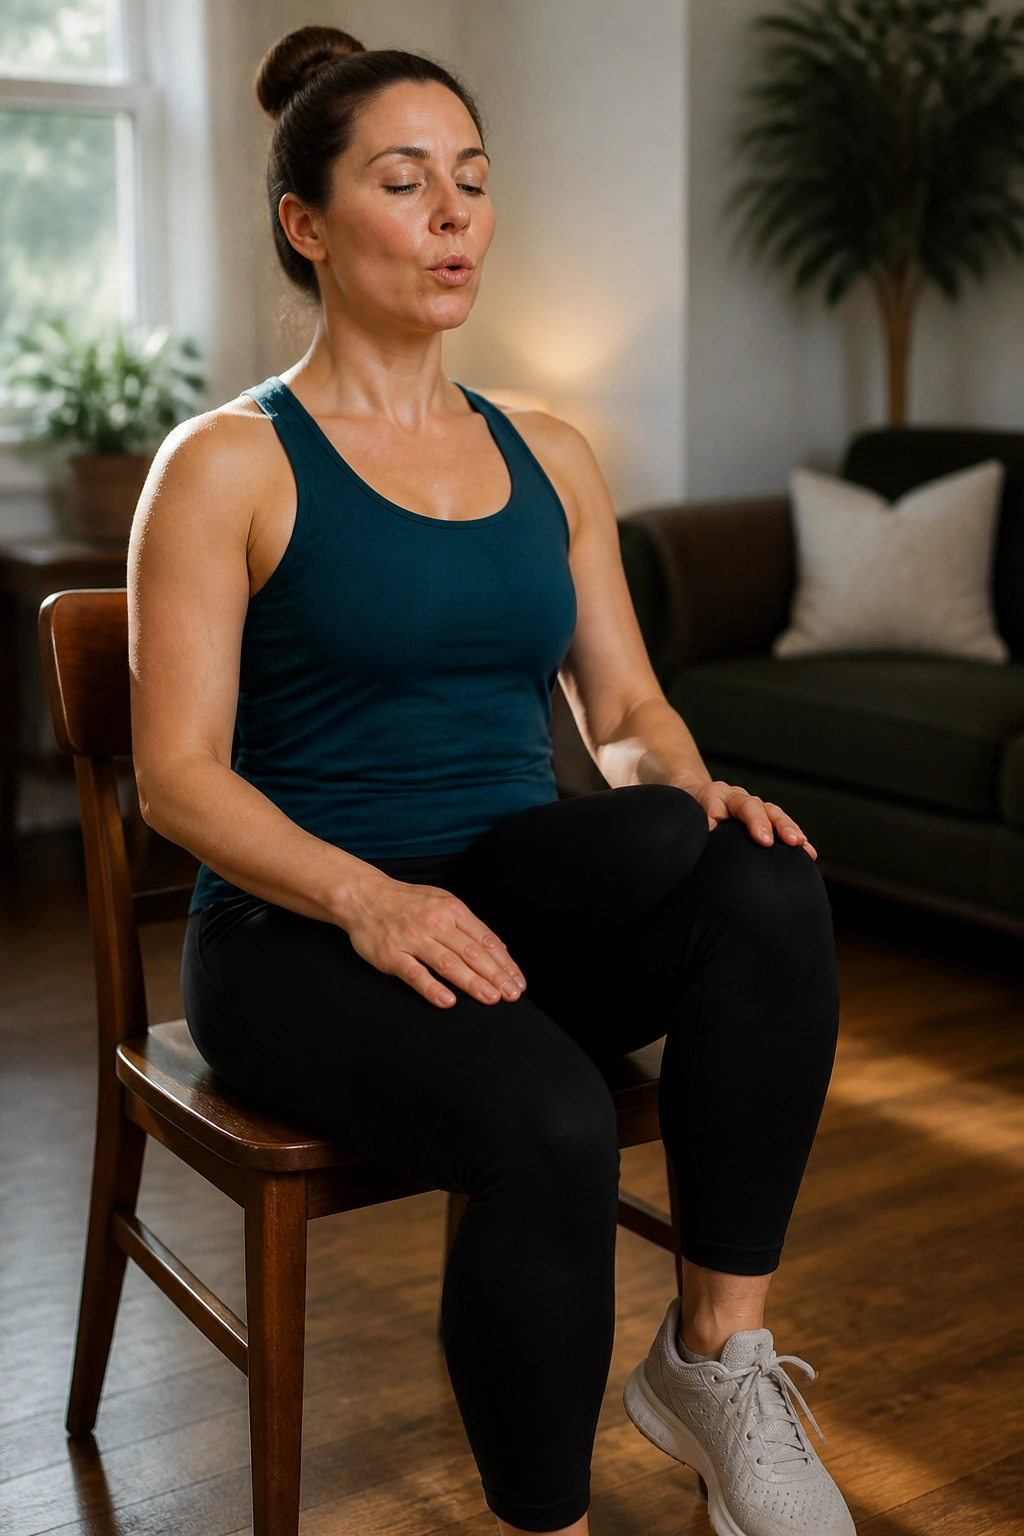
A chair can be a surprisingly good rehab tool.
Sit tall on a sturdy chair with both feet on the floor. Exhale, then lift one knee an inch or two without leaning back or hiking your shoulders. Set it down slowly and switch sides. The motion is tiny, but the demand on the lower abs and hip flexors is real because you have to keep the torso from wobbling.
Quick Details That Matter
- Keep both sit bones heavy on the seat
- Use a folded towel under you if the chair is too low
- Lift only as high as you can without rocking back
- Aim for 8 to 10 reps per side
This one is useful for people who can’t get on the floor, people who spend long hours at a desk, and anyone whose back prefers upright positions over lying down. It also makes a solid travel-day drill. No mat. No excuses. No drama.
If the movement feels too easy, slow the lowering phase to 3 full seconds. That changes the game fast.
14. Wall Press March
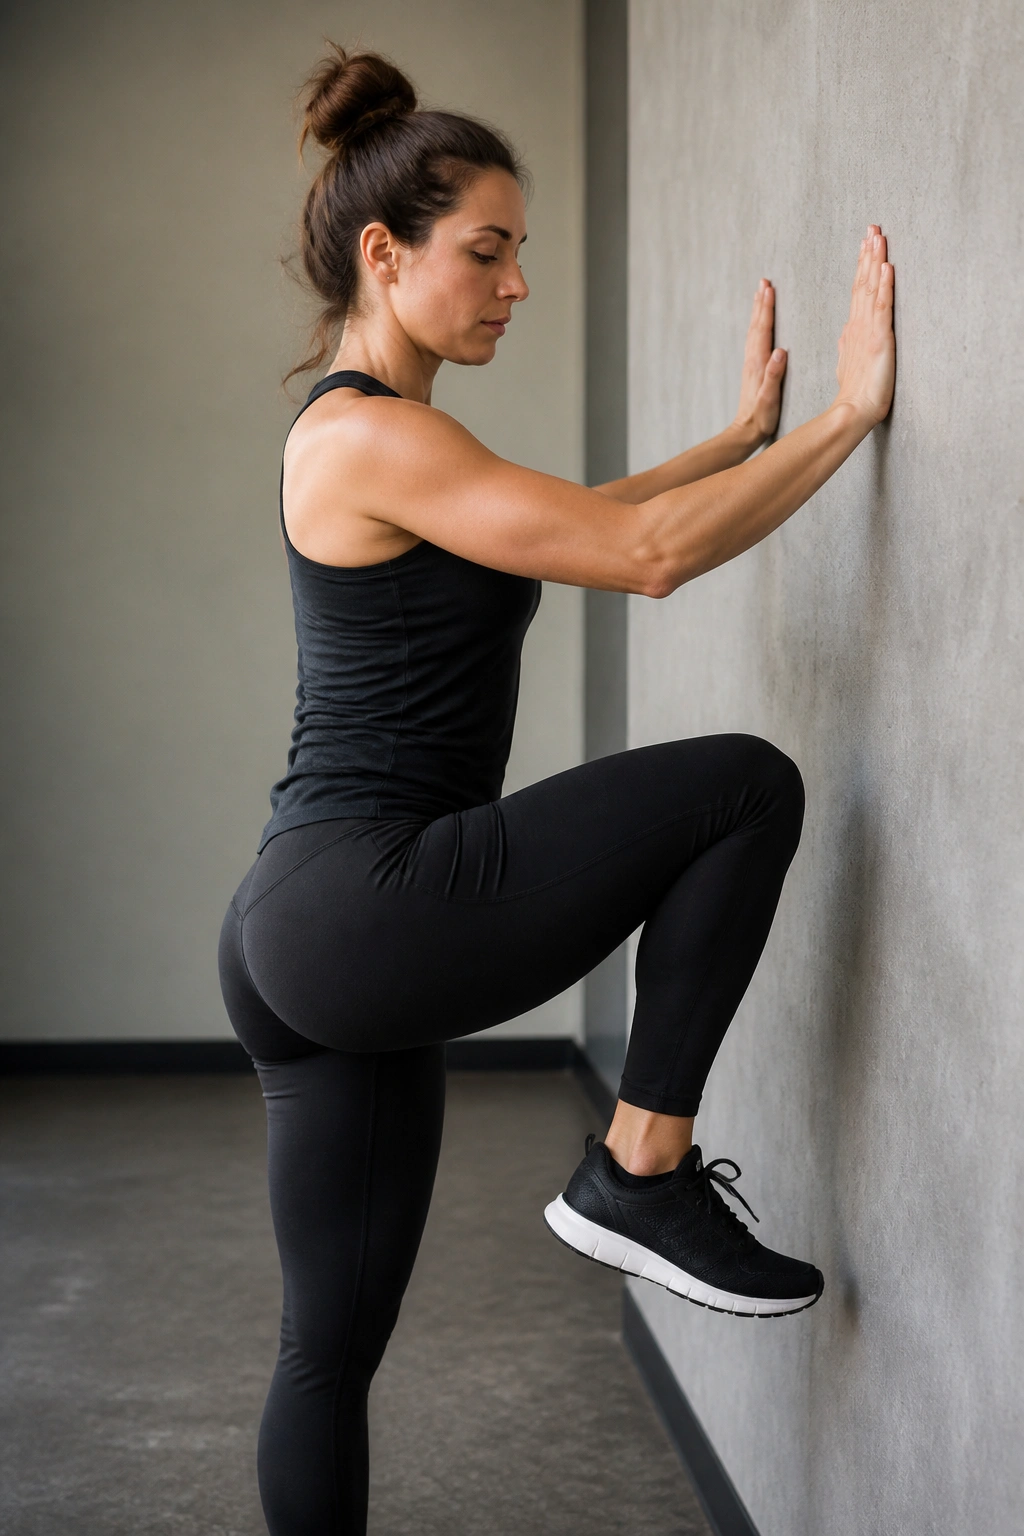
What happens when you borrow a wall for stability? The trunk gets honest.
Stand facing a wall and place your forearms against it at shoulder height. Lean in just enough to feel pressure, then lift one knee while keeping the ribs from flaring and the pelvis from tilting. Lower it, switch sides, and keep the pressure into the wall steady the whole time. It’s a standing cousin of the dead bug, and it works nicely when floor positions feel wrong.
How to Set It Up
- Forearms, not hands, on the wall
- Feet hip-width apart
- Press the wall with about 30 to 40 percent effort
- Lift the knee only as high as you can without swaying
This is a sneaky good option for shoulder rehab too, because the forearms bear load without asking the wrist to extend back. That small detail matters more than people think. If one side of your body tends to collapse when the other leg moves, the wall gives instant feedback.
Keep the march slow. If the torso twists, the lift is too high.
15. Farmer Carry

Not every core exercise looks like core work.
Pick up two weights — dumbbells, kettlebells, or even heavy shopping bags — and walk for 20 to 40 meters with your chest tall, ribs stacked, and shoulders level. This is the bilateral version of a carry, so it asks the whole trunk to stay stiff while the legs move. Grip, posture, breathing, and pelvic control all have to cooperate. That makes it useful for injury rehab and also for the plain old reality of lifting things without wobbling.
Compared with planks, carries train the trunk in motion. Compared with crunches, they demand almost no spinal flexion. And compared with fancy machine work, they’re brutally honest. If the weight is too heavy, you’ll shrug or lean. If it’s too light, you won’t get much.
Start with 3 to 4 trips of 20 to 30 meters. Rest for about 45 to 60 seconds between carries. Keep the walk smooth, not fast. If your grip gives out before your core does, that’s fine — use a slightly lighter load and keep the shape clean. There’s a reason physical therapists and strength coaches keep coming back to loaded carries. They expose weak links fast, and they do it without a lot of nonsense.
You do not need to do all 15 exercises in one session. Pick 3 or 4 that match your current tolerance, keep the reps tidy, and let the work feel a little ordinary. That’s usually the sign you’ve chosen the right drill.
