



Thirty stretches for a looser more mobile body sounds like a lot until you realize most of them take less time than scrolling your phone between tasks. And that’s the point: mobility usually doesn’t come from one heroic session on a yoga mat. It comes from a steady mix of small, honest movements that keep your neck, spine, hips, ankles, and shoulders from feeling welded in place.
I’ve always liked stretching routines that feel practical, not precious. You do not need incense, a perfect floor, or the flexibility of a circus performer. You need a body that can bend, twist, reach, squat, and breathe without complaining every time you stand up. That means choosing stretches that give you shape and options, not just a dramatic sensation for thirty seconds.
The best mobility work has a few things in common. It uses slow breathing, it stays out of sharp pain, and it moves more than one joint at a time. A 20- to 30-second hold works well for many static stretches when you’re already warm, while moving stretches can help you loosen up before walking, lifting, running, or sitting for hours.
Start at the top, where tension likes to hide and act innocent.
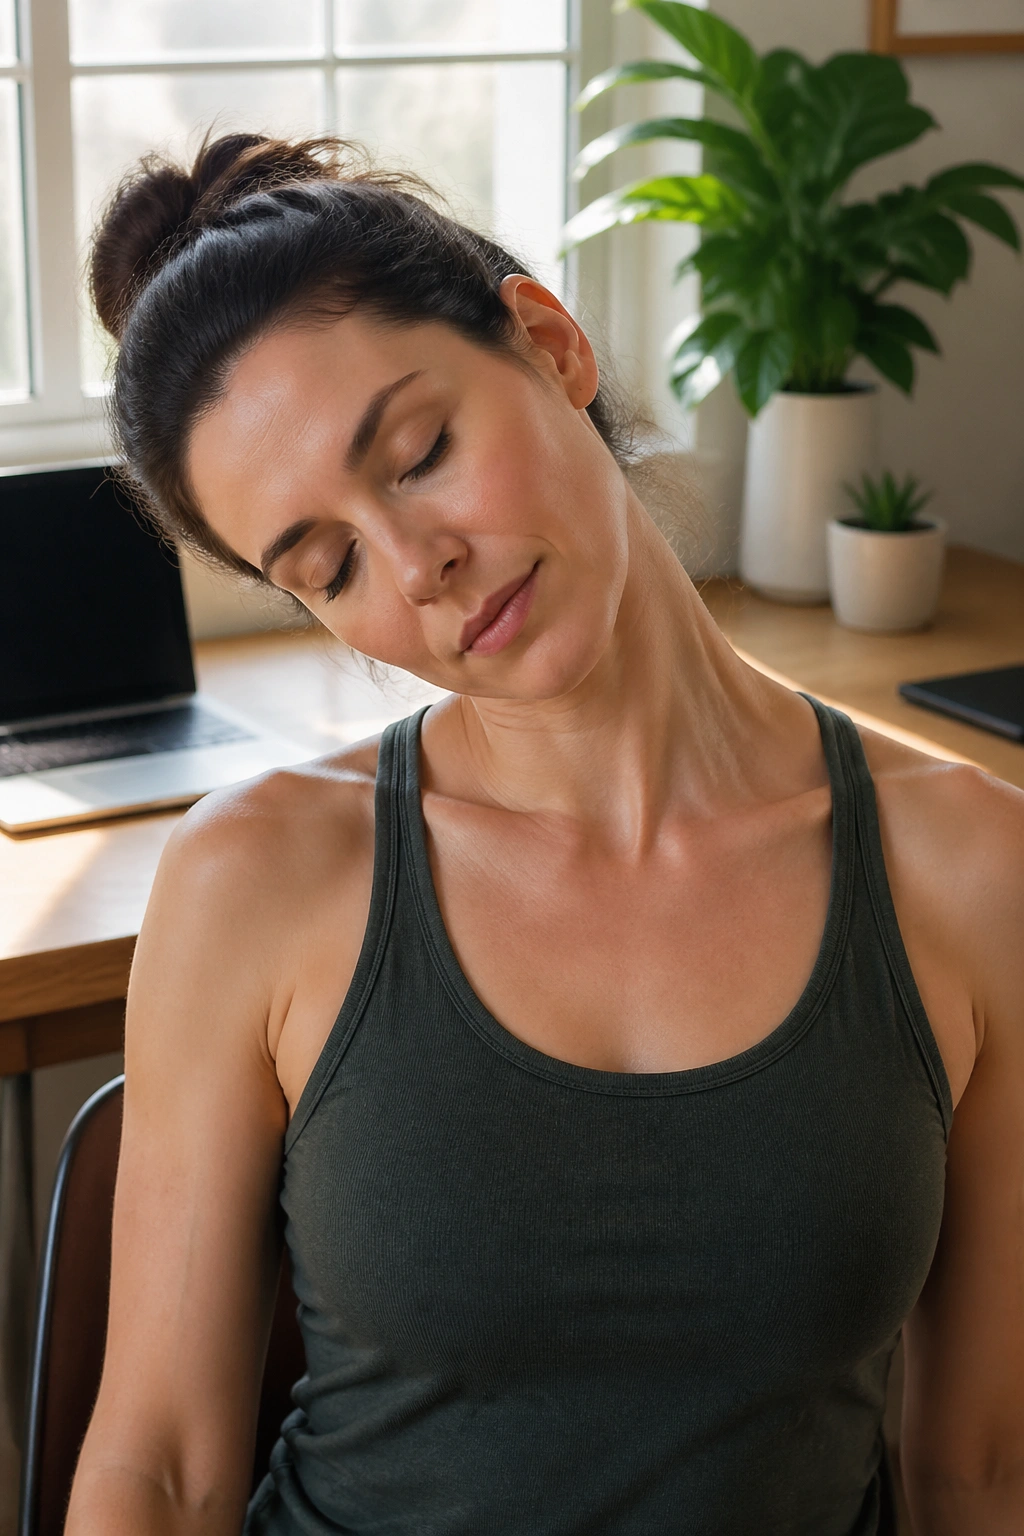
1. Neck Side Bend to Unclench the Upper Traps
A lot of “neck tightness” is really your upper traps and the side of your neck doing too much of the day’s work. This side bend stretch is simple, which is probably why people skip it. I wouldn’t. It’s one of the quickest ways to make your head feel less perched on a stack of bricks.
How to Do It
Sit tall, let both shoulders drop, and tilt one ear toward the same-side shoulder. Keep your chin neutral instead of letting it jab forward. If you want a little more stretch, gently hold the chair seat with the hand on the side you’re stretching away from.
What to Feel
You want a long, clean pull along the side of the neck and into the top of the shoulder. No pinching. No dragging. If it bites at the joints, come back out a few degrees and breathe slowly for 20 to 30 seconds.
A small adjustment changes everything here. Turning your nose a touch toward the ceiling often shifts the line of tension into the levator scapulae, which is the sneaky little muscle that loves to tighten after long hours at a desk.
2. Chin Tucks That Undo the Forward-Head Habit
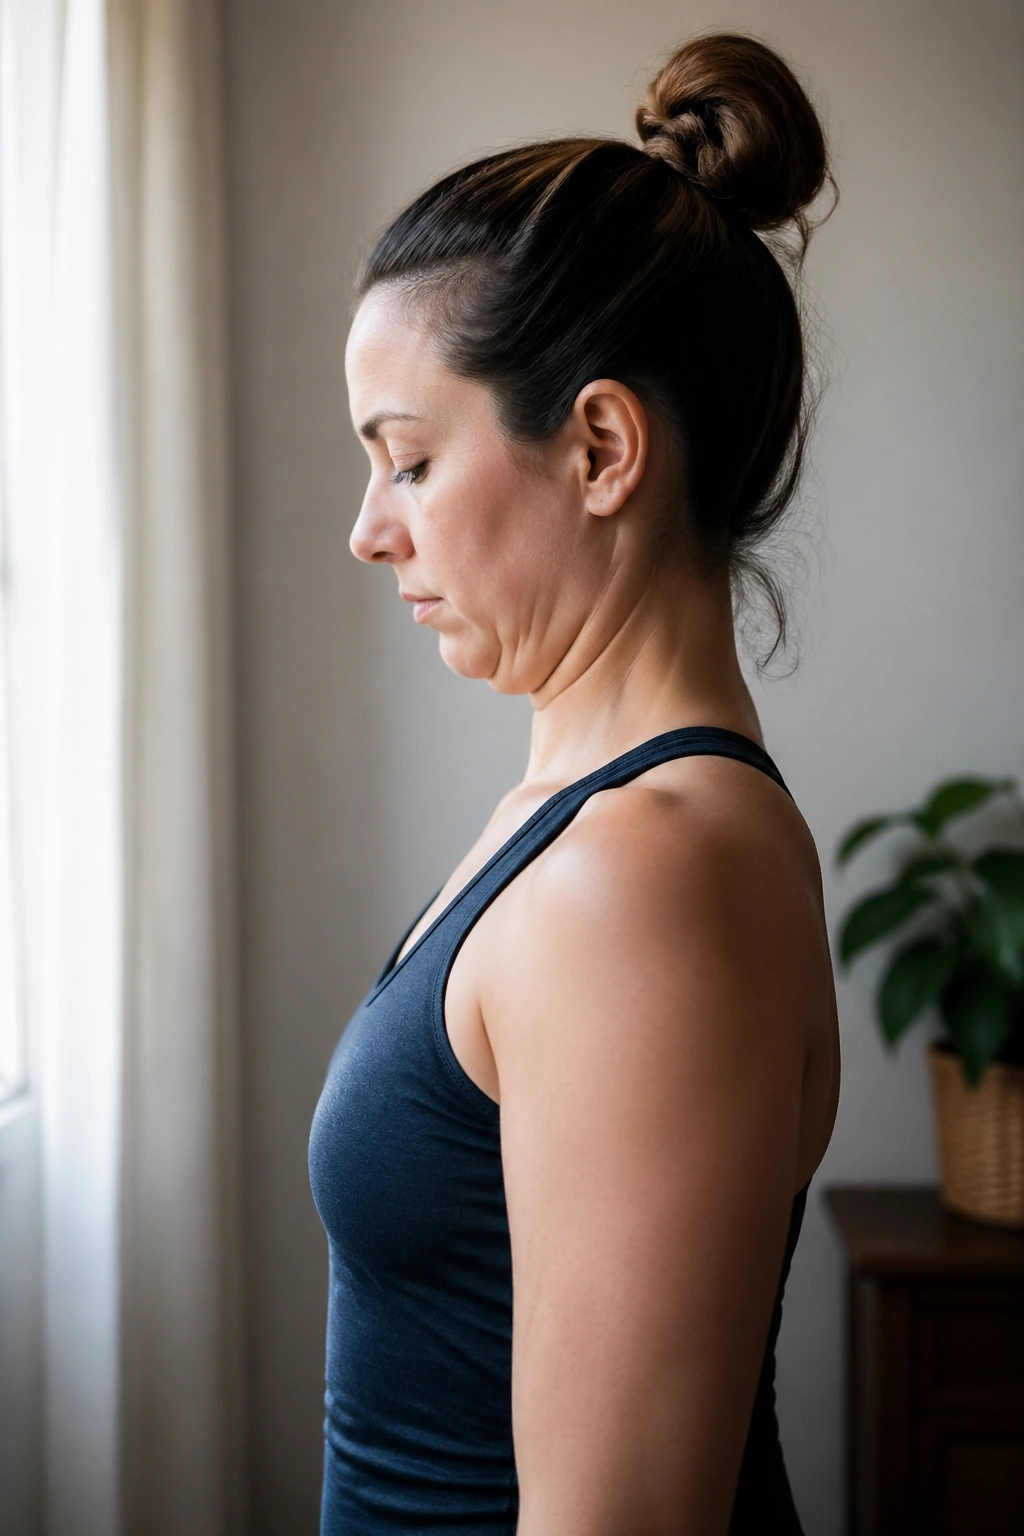
Boring stretches are often the ones that work best. Chin tucks look almost too simple to matter, yet they’re one of the cleanest ways to give your neck a break if your head spends the day drifting in front of your shoulders. That forward-head pattern can make everything feel tighter than it really is.
Sit or stand against a wall and gently draw your chin straight back, like you’re making a double chin without tipping your head down. Hold for 2 to 3 seconds, then release. Do 8 to 10 slow reps. If you keep your ribs down and your back of neck long, this stops being a neck-crunch and starts becoming a tidy reset.
A useful version is the lying one. Flat on your back, knees bent, you can practice the same action with less cheating. It feels small. It is small. That’s the point.
3. Thread the Needle for the Upper Back
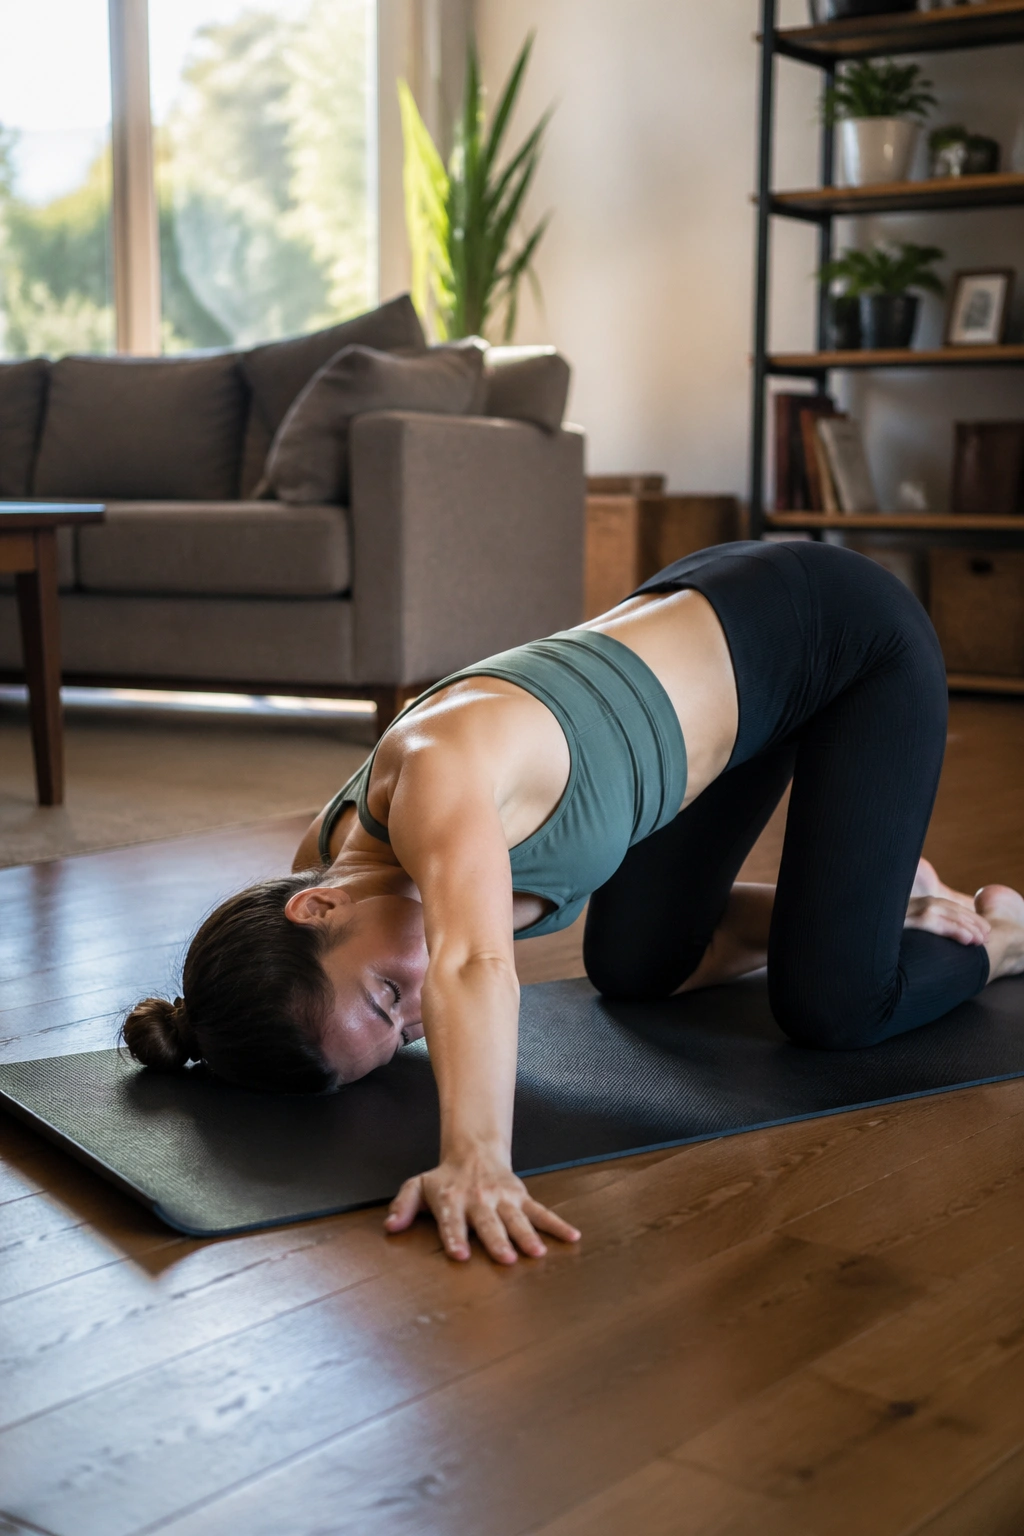
Why does a shoulder stretch sometimes make your mid-back feel better? Because the body cheats in layers. When the thoracic spine is stiff, the shoulders often try to do the rotation job for it, and that usually ends with cranky traps and a dull ache between the shoulder blades.
Get onto hands and knees, slide one arm underneath the other, and rest that shoulder and the side of your head toward the floor. Keep the hips stacked over the knees if you can. Breathe into the ribs for 5 slow breaths, then switch sides.
How to Use It
- Reach the top arm long first, then thread it through.
- Let the chest soften toward the floor.
- Keep the supporting hand active so you don’t dump all your weight into the shoulder.
- Stop if the stretch feels sharp in the front of the shoulder.
This one works well after pushing, pulling, or sitting hunched over a laptop. It opens the upper back without demanding that you twist like a washcloth.
4. Doorway Chest Stretch for Rounded Shoulders
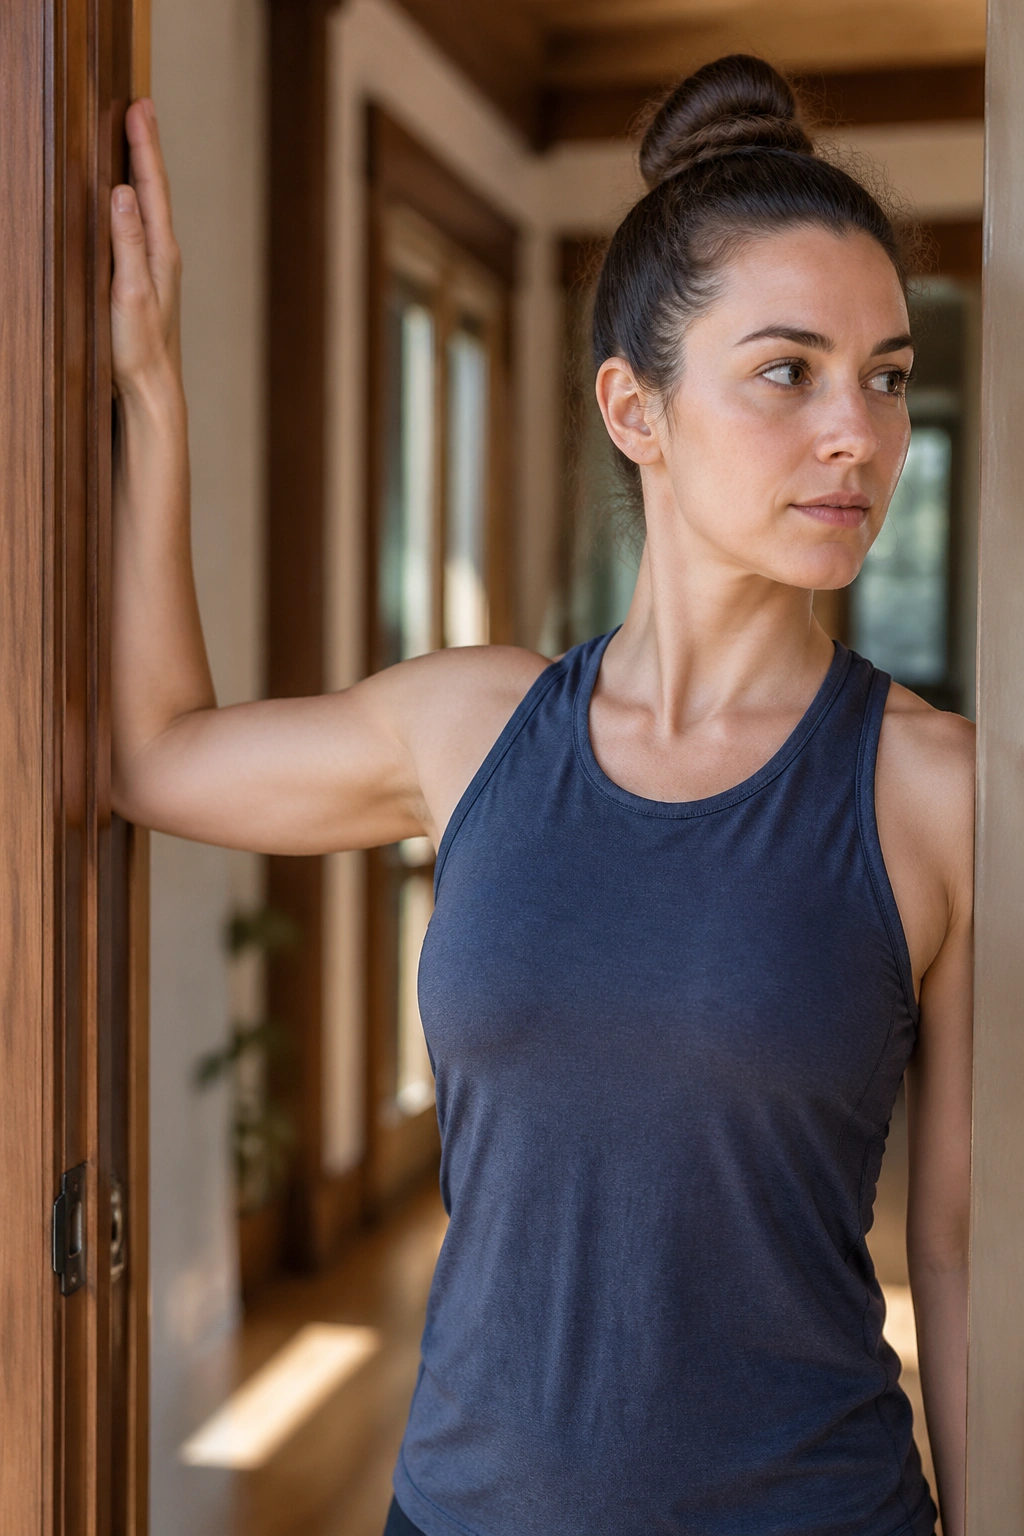
If you sit a lot, press weights, or carry bags on the same side, your chest can get so used to being short that standing tall starts to feel strange. The doorway chest stretch fixes the front side of that story. It opens the pectorals and gives your shoulders room to sit back where they belong.
Place one forearm on a doorway frame with the elbow bent around 90 degrees, then step the same-side foot forward until you feel a stretch across the chest and front of the shoulder. A slightly lower arm angle is often kinder than a high one. Hold 20 to 40 seconds, then switch.
A tiny angle change matters here. If the shoulder feels jammed, lower the arm and step through less aggressively. You want the stretch to live in the muscle, not in the joint.
My favorite cue: keep the ribs quiet. If your chest is flaring hard, the stretch gets messy fast.
5. Overhead Triceps Stretch That Also Reaches the Lat Line
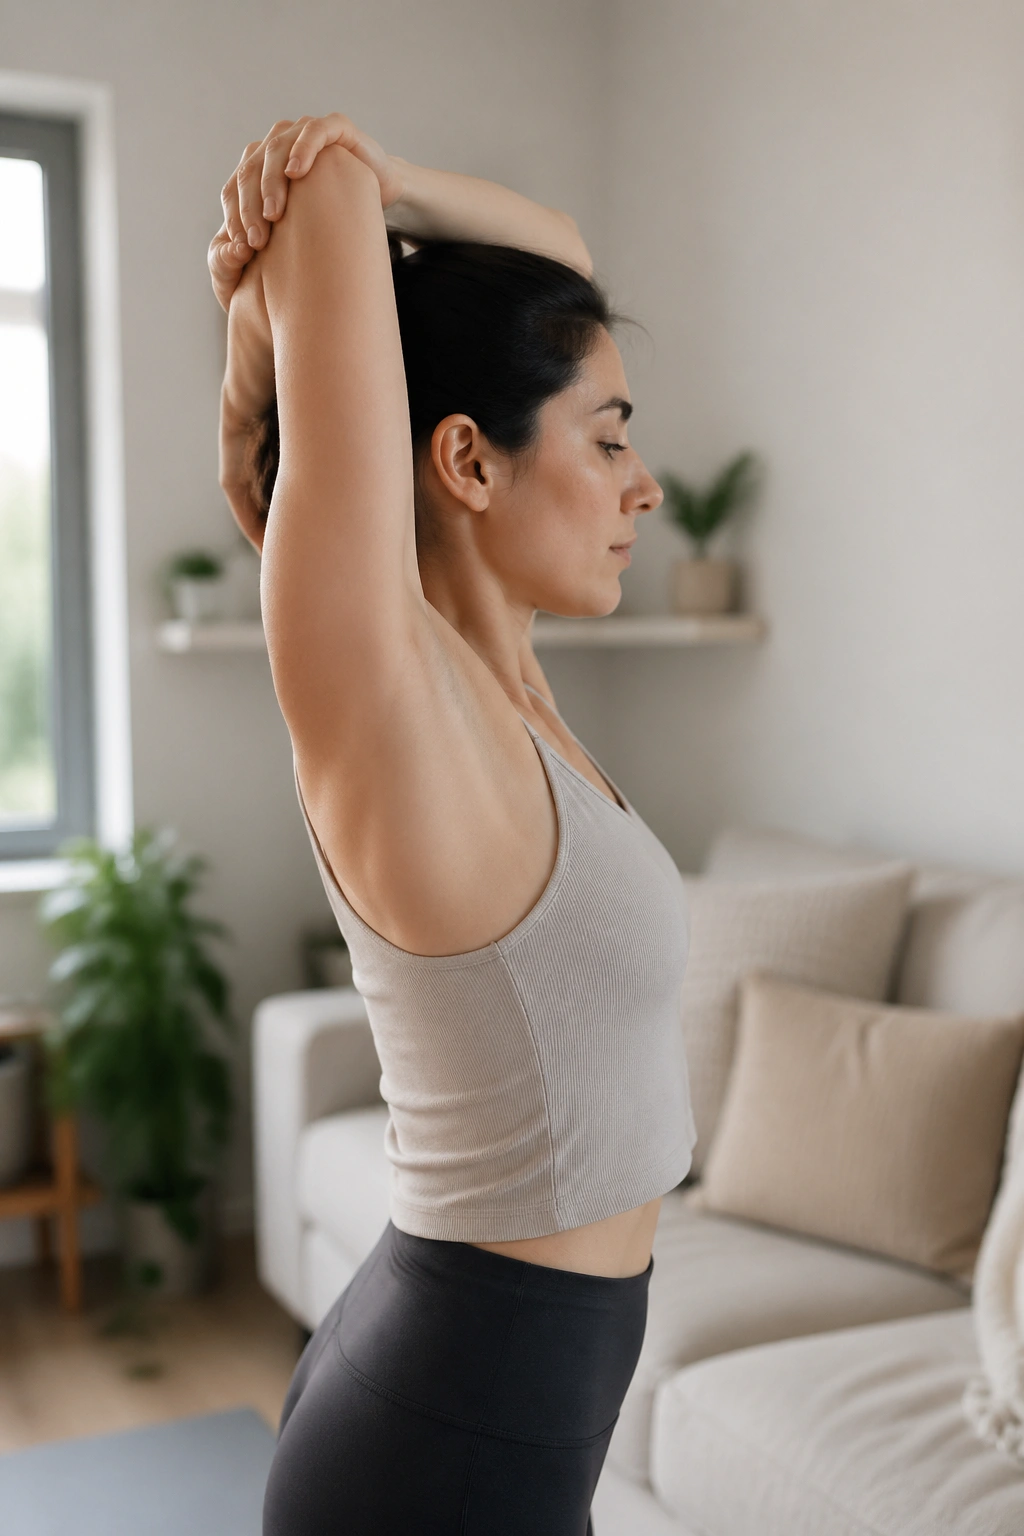
People think of this one as an arm stretch, but it often reaches farther than that. If your ribs stay stacked and you don’t arch your low back, the overhead triceps stretch can tug through the side body and into the lat, which is useful after lifting, swimming, climbing, or just doing too much overhead reaching.
Raise one arm overhead, bend the elbow, and let the hand slide down the middle of your back. Use the other hand to apply a light, steady pressure near the elbow. Hold for 20 to 30 seconds, then swap sides.
No force. Seriously. If you crank on the elbow like you’re trying to start a lawnmower, the shoulder usually resents you. A softer grip and a taller ribcage give you a much cleaner line of stretch.
You can do this seated, standing, or even half-kneeling. The position matters less than the shape: ribs down, elbow pointed upward, breath steady.
6. Side Body Reach Along the Ribs and Lats
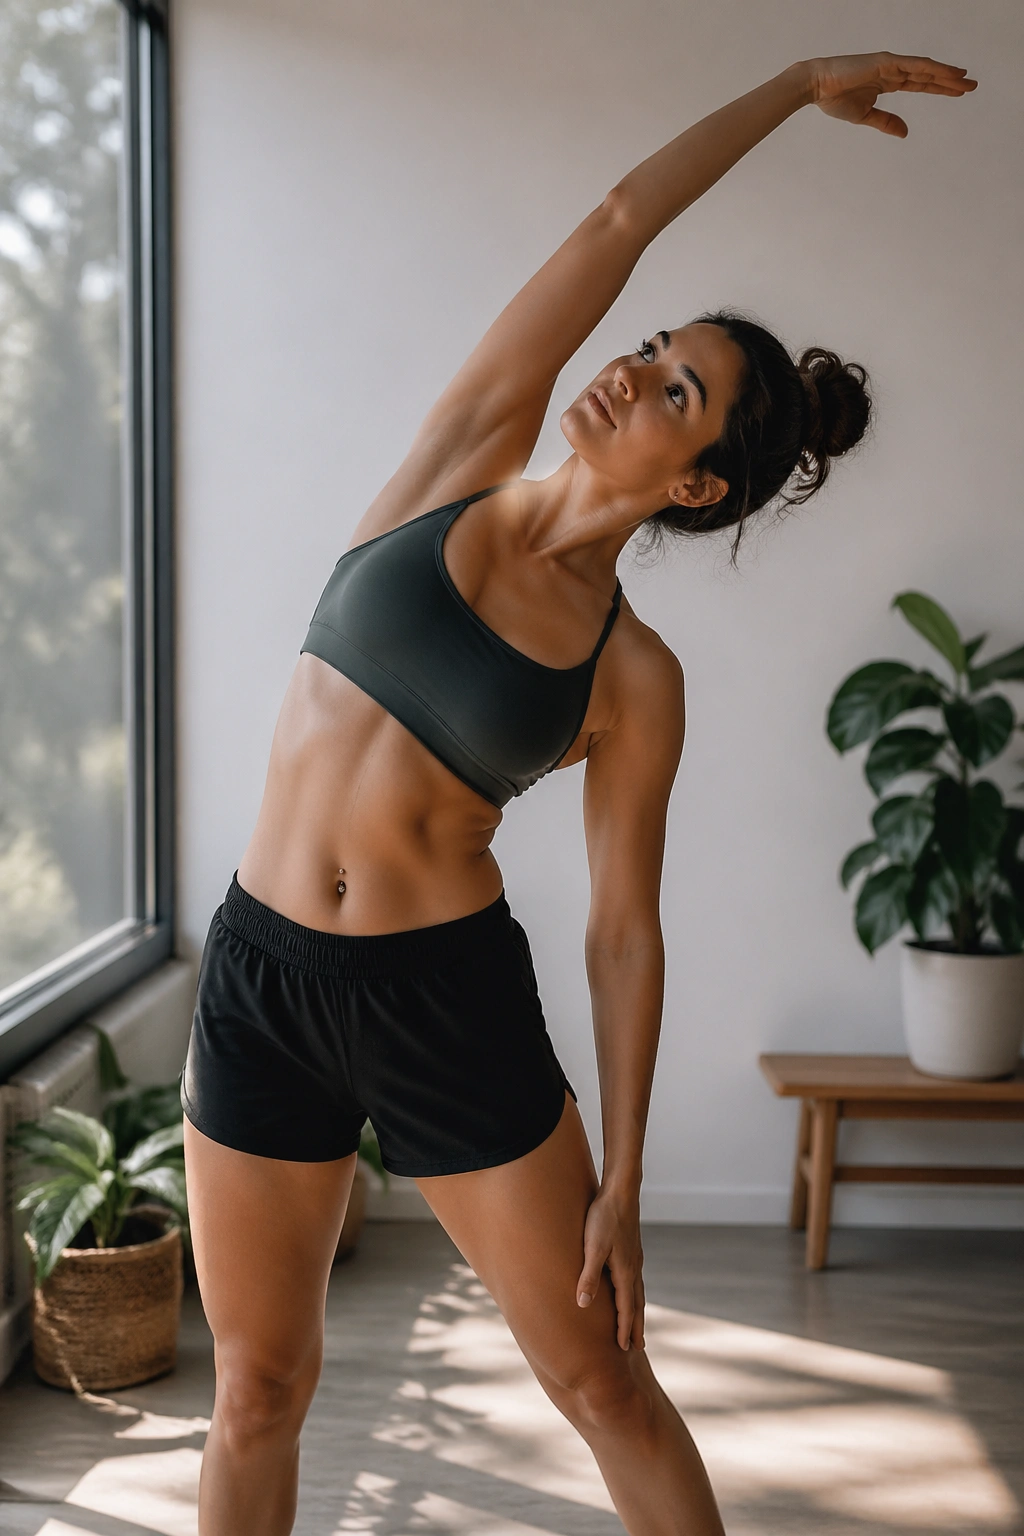
This one feels bigger than it looks. A side body reach stretches from the outside of the hip all the way to the fingers if you do it with enough length and not a lot of drama. It’s one of my favorite stretches for people who feel compressed through the torso.
Stand with your feet about hip-width apart. Reach one arm up, then lean away from that side while the opposite hip stays heavy. Don’t collapse forward. Keep the chest open and let the breath expand the side ribs. Hold for 3 to 5 breaths, then switch.
Unlike a simple side bend, this one asks the body to stay long. That makes it useful after overhead work or long periods of sitting, where the trunk starts to feel like it forgot how to make space. A slow exhale often deepens it more than another inch of leaning.
If you want extra reach, slide the lower hand down the outside of the thigh. Small. Clean. That is enough.
7. Cat-Cow for a Spine That Likes to Move
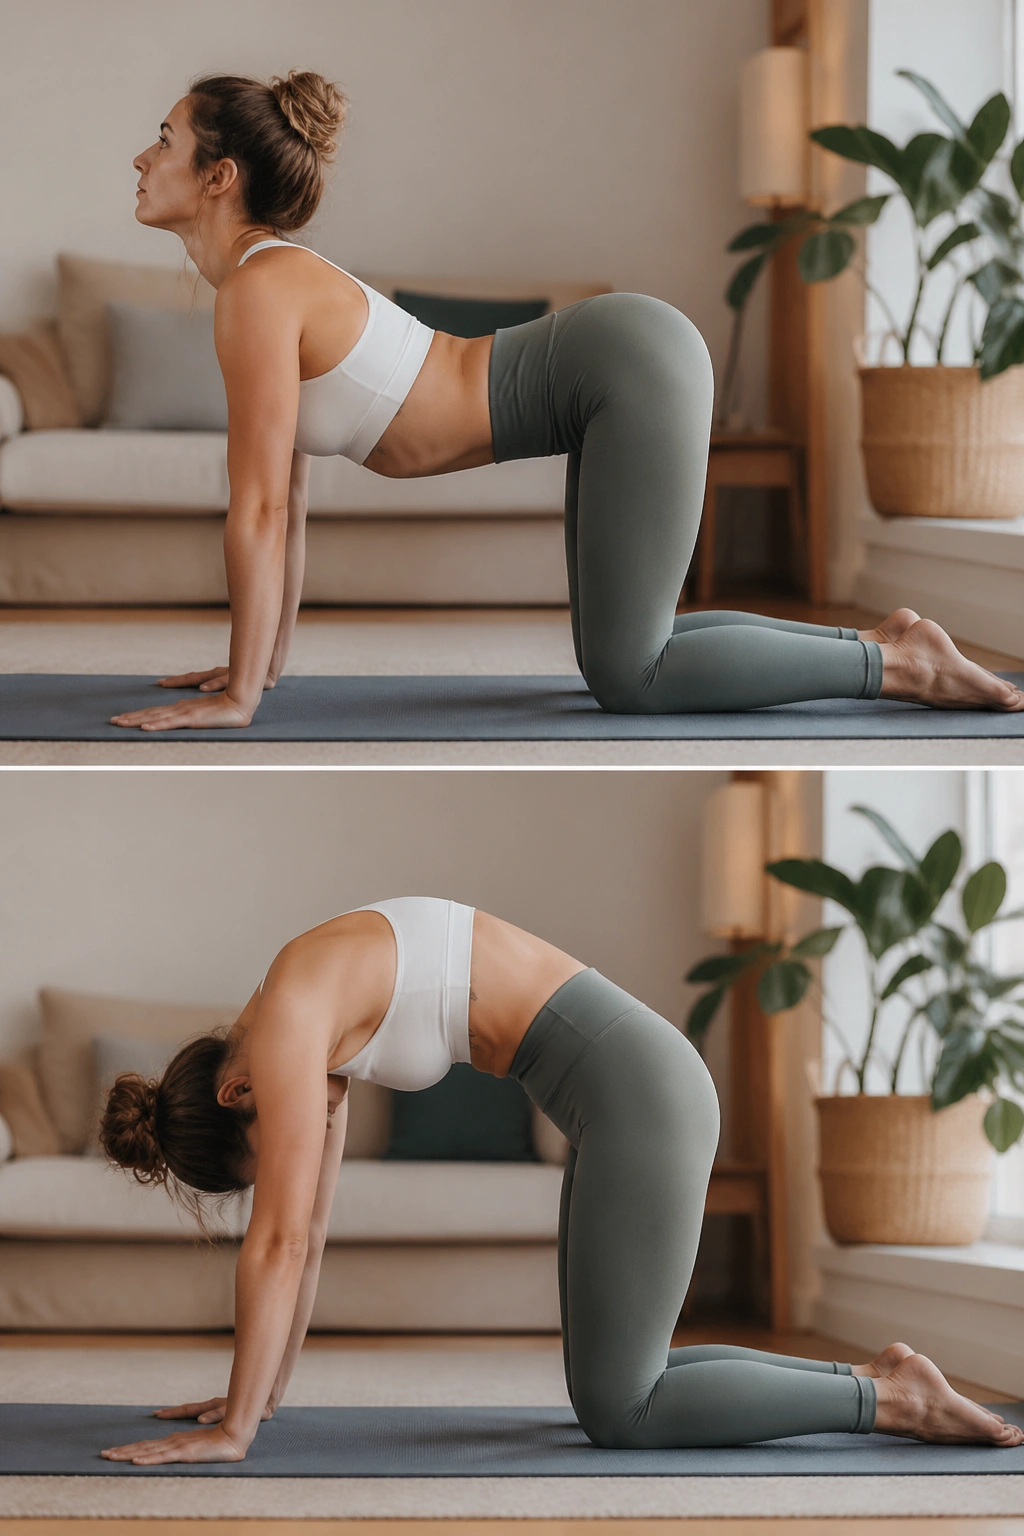
The spine usually prefers movement before stillness. Cat-cow is the cleanest proof I know. It warms the back without shoving anything, and it gives your ribs, pelvis, and shoulders a chance to remember that they are allowed to cooperate.
On hands and knees, round your back as you exhale, then arch gently as you inhale. Keep the motion slow enough that each segment has time to show up. Eight rounds is plenty. If you rush it, the low back does all the work and the rest of the spine stays out for coffee.
What to Watch For
- Press evenly through both hands.
- Move the pelvis first, not only the chest.
- Let the neck follow the spine instead of throwing the head around.
- Keep the breath smooth and unforced.
Cat-cow is one of those stretches that looks mild until you notice your back stops feeling like one stiff block. Use it before a run, after a long drive, or as the first thing you do when you hit the mat.
8. Puppy Pose for the Shoulders and Upper Back
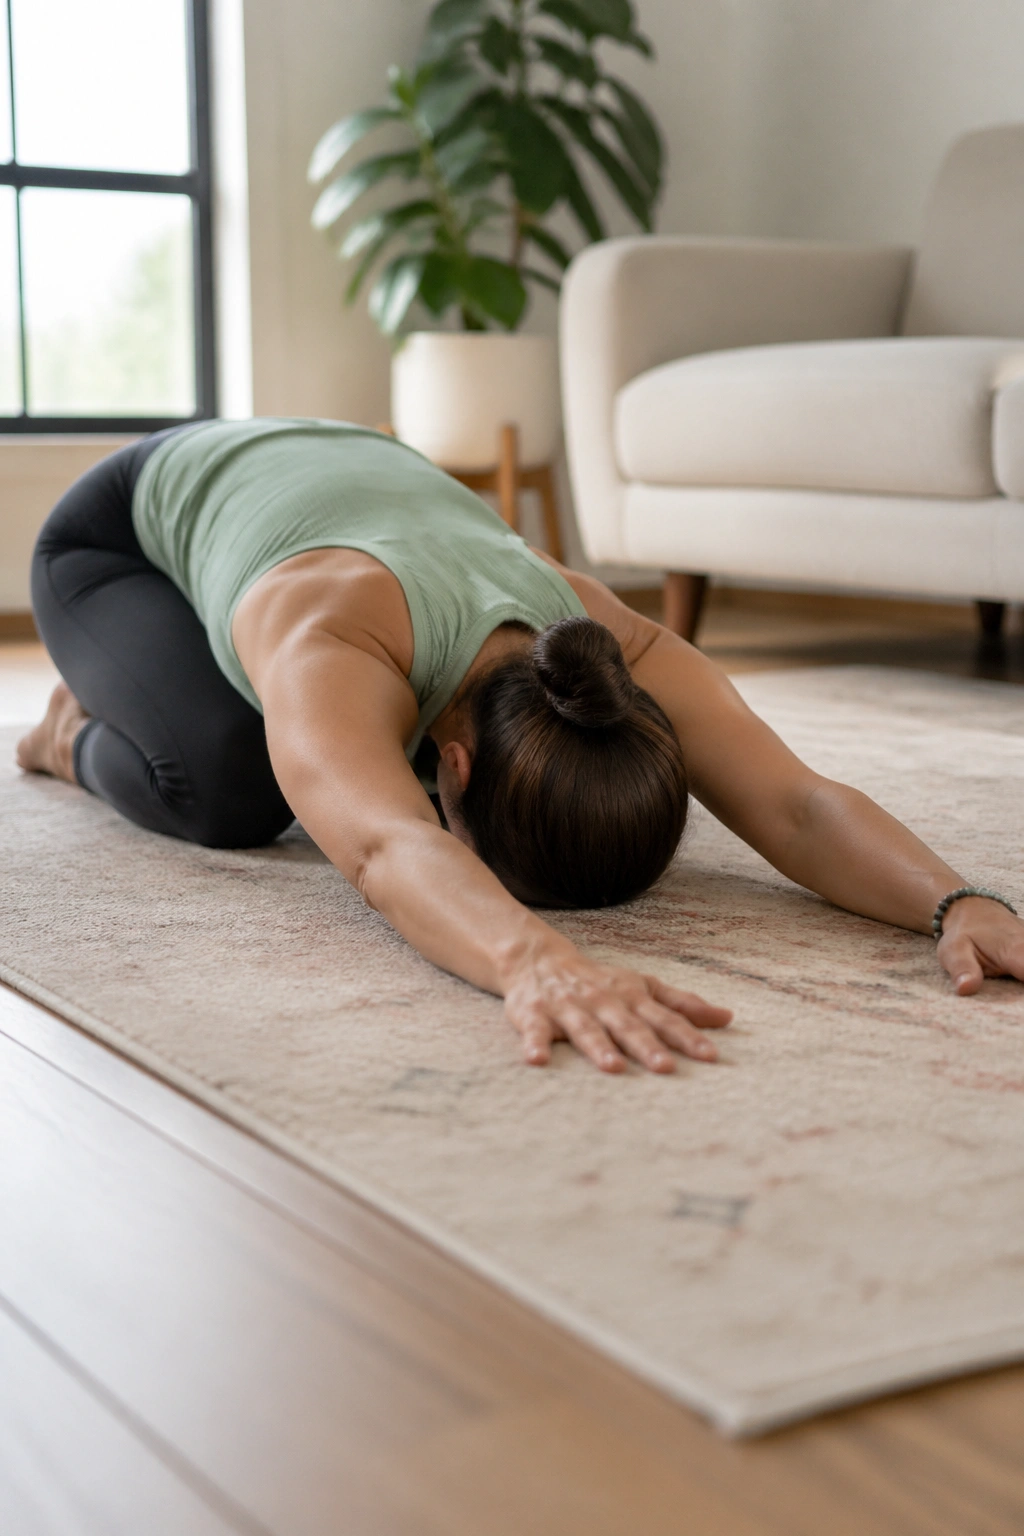
Puppy pose is like child’s pose with the hips lifted and the chest given a better shot at the floor. That change matters. It shifts more work into the shoulders, upper back, and armpit area, which is exactly where a lot of people feel stuck after pressing, typing, or hunching over a steering wheel.
Start on hands and knees, then walk your hands forward while keeping your hips stacked over your knees. Lower your chest toward the floor and rest your forehead or chin down if that feels okay. Hold for 5 slow breaths. If your low back tugs, bring the hands back a few inches and shorten the reach.
A block or folded blanket under the forehead can make this feel calmer. I like that version better for longer holds anyway. It keeps the neck from doing extra work.
Do not dump into the shoulders. The goal is length, not collapse.
9. Sphinx Pose to Open the Front of the Body
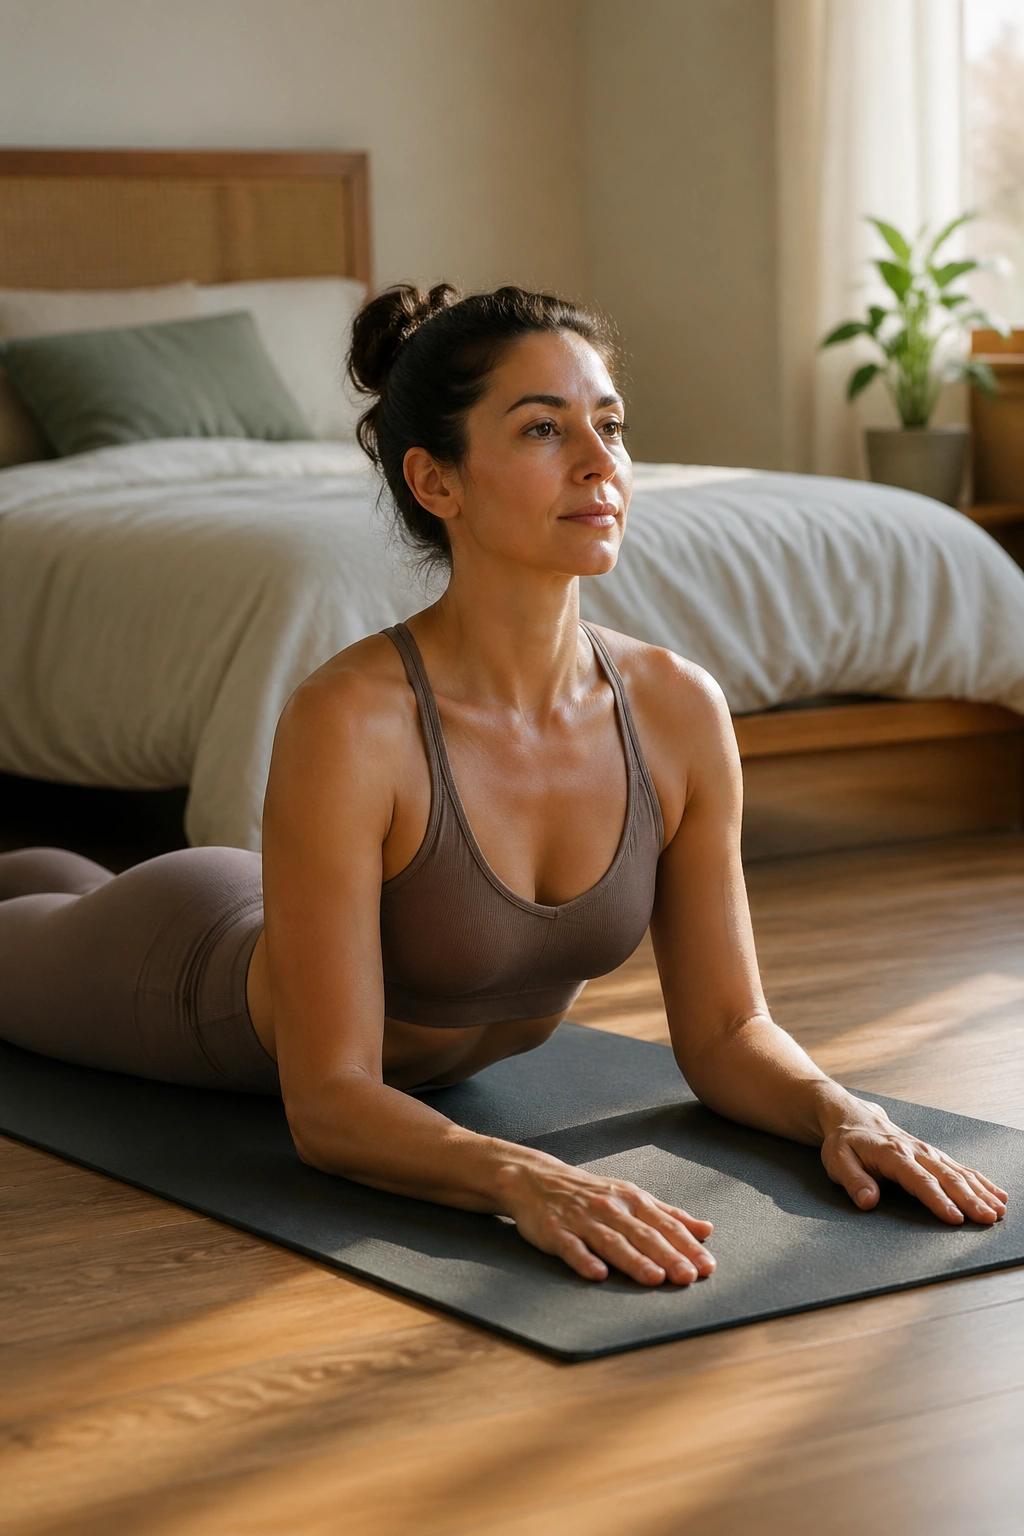
Need a backbend that doesn’t turn into a full-body performance? Sphinx pose is the quieter version. It gently extends the spine, opens the front of the torso, and gives the abdominal wall a chance to lengthen after too much sitting.
Lie on your stomach and prop yourself onto your forearms with elbows under the shoulders. Press the forearms down lightly and imagine the tailbone reaching away as the chest floats forward. Hold for 20 to 30 seconds, breathing into the belly and lower ribs.
Why It Works
Sphinx stretches the front line without asking for a deep backbend. That makes it useful when you feel compressed but don’t want to jam the low back. It often feels especially good after a long day at a desk or before a gentle mobility session.
If the low back feels cranky, slide the elbows a little farther forward and keep the chest lower. The stretch should feel like an opening, not a hinge being forced.
10. Open Book Stretch for Thoracic Rotation
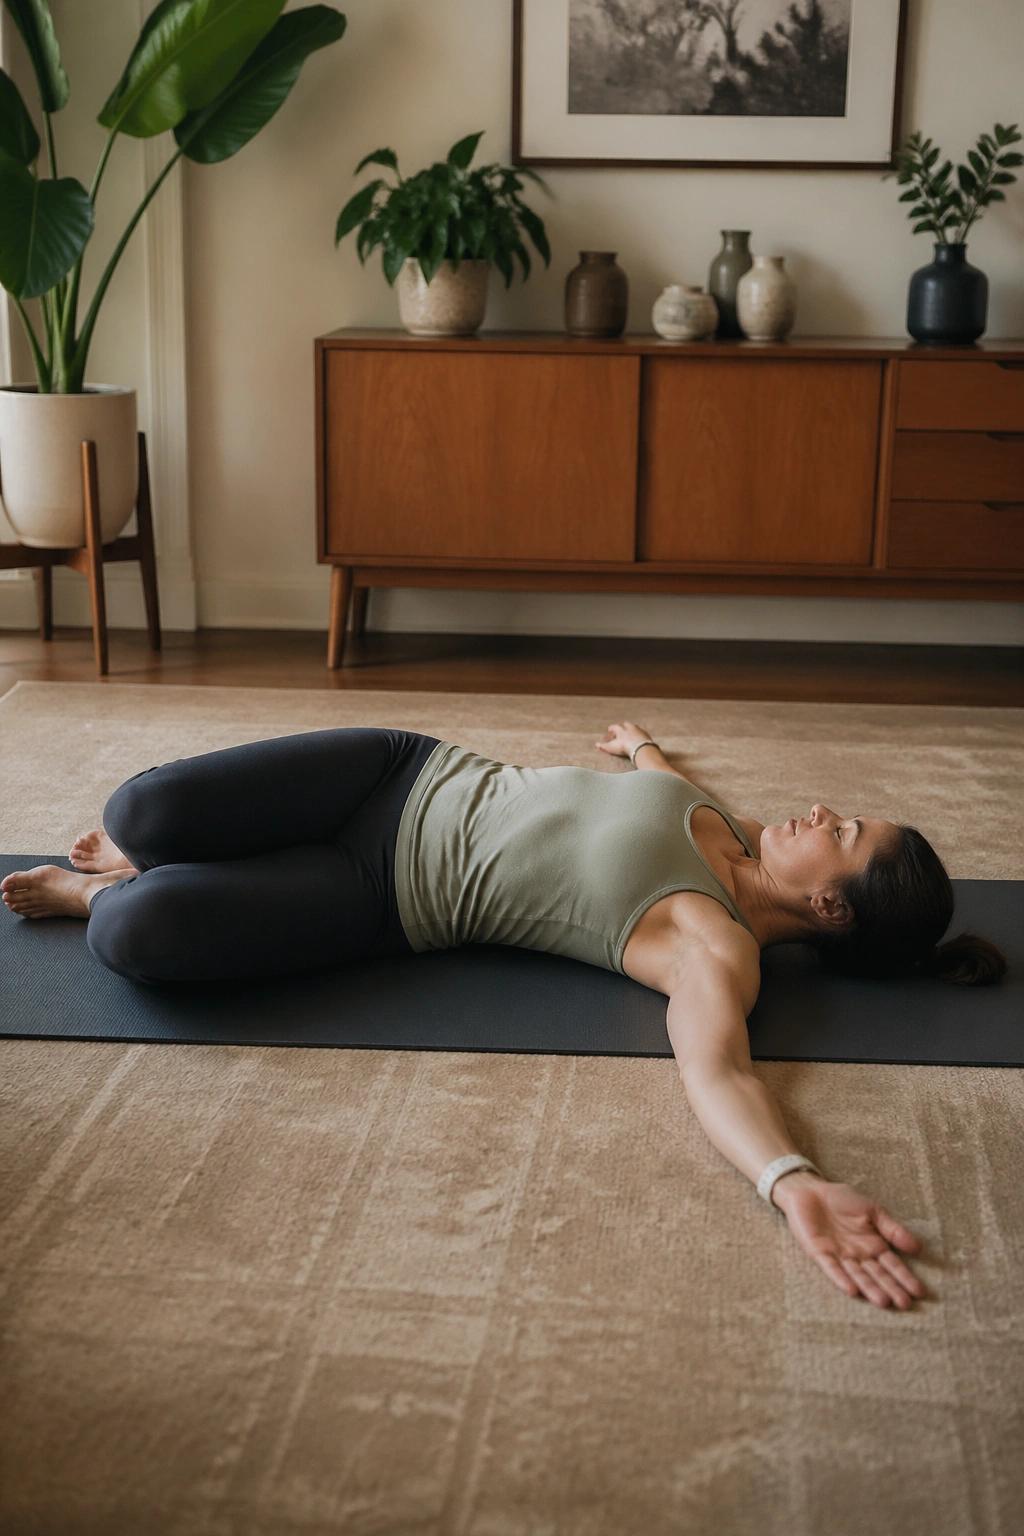
I keep coming back to this one because it’s one of the few stretches that makes the mid-back feel clean and specific. Open book rotation is a side-lying drill that lets the rib cage turn without the hips getting bossy.
Lie on your side with knees bent and stacked. Reach the top arm straight out in front of you, then sweep it open toward the floor behind you as your eyes follow the hand. Keep the knees together so the pelvis stays mostly still. Five slow reps per side is enough to wake up the thoracic spine.
A few people try to yank this stretch open too fast. That backfires. The chest should peel open in a smooth arc, and the breath should stay calm enough that you could speak if you had to.
If your shoulder feels tight, place a pillow between the knees and keep the top arm bent a little. Rotation should feel smooth, not forced.
11. Seated Spinal Twist Without the Yanking
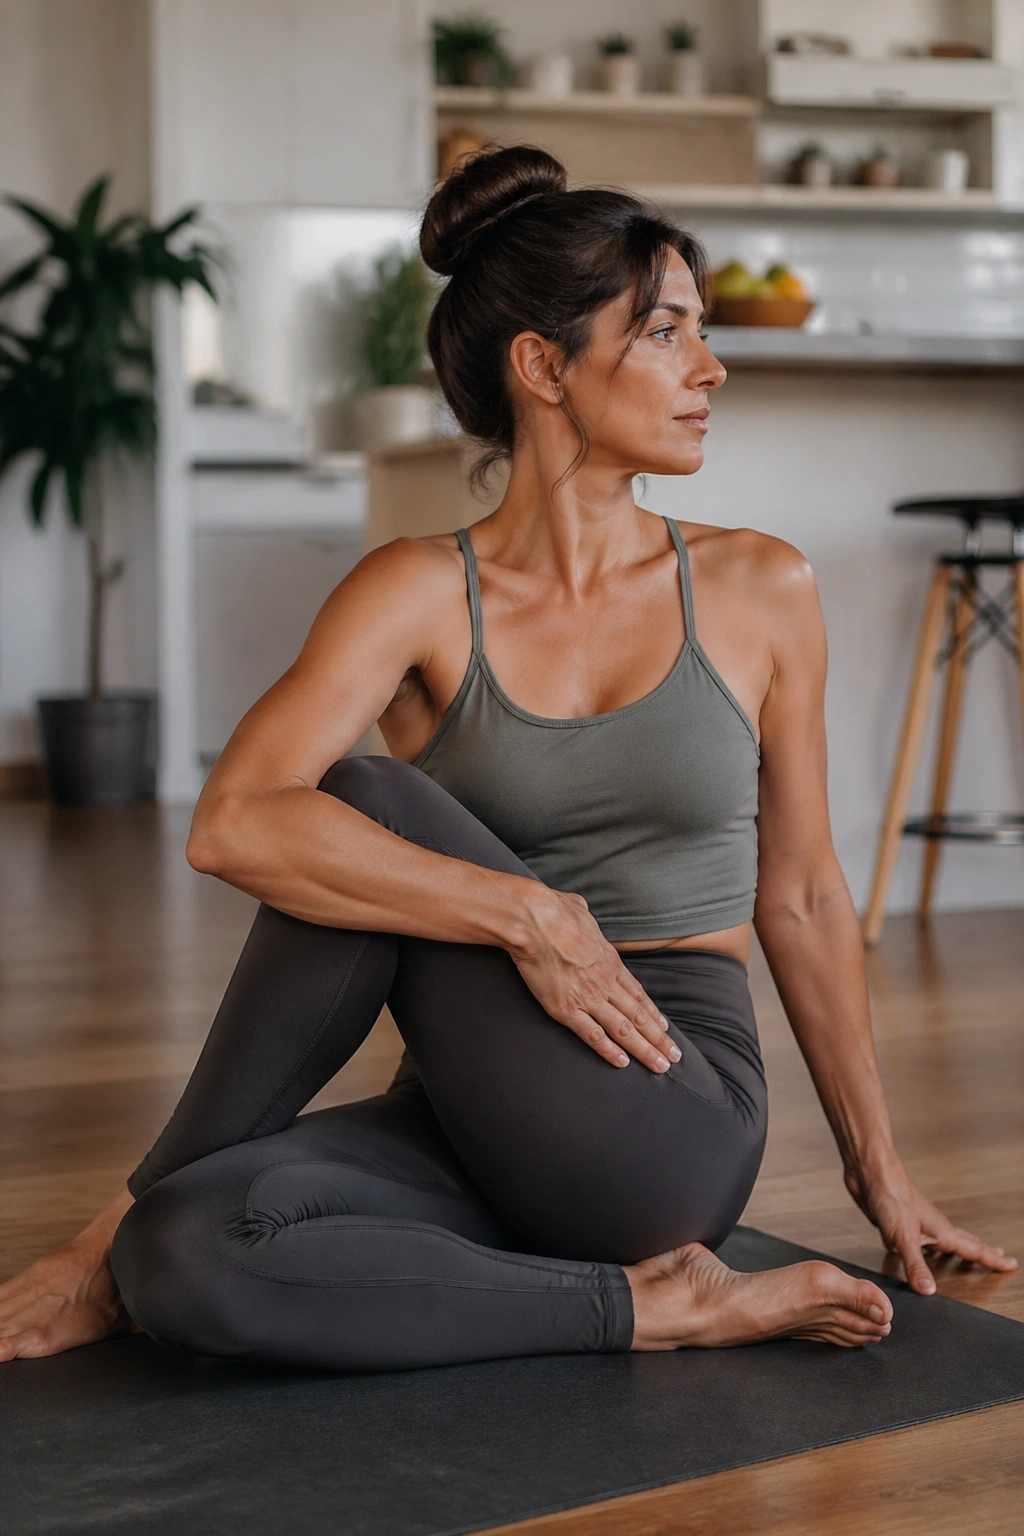
A seated twist can be wonderful or aggravating, and the difference usually comes down to how much people try to win the stretch. Don’t win it. Sit tall, lengthen first, then twist second.
Cross one foot over the other leg or place it beside the opposite knee, then use one hand behind you for support and the other hand to guide the turn. Keep the twist coming from the rib cage, not from the arm pulling like a crank. Hold for 20 to 30 seconds and breathe into the side of the waist.
The best twists feel roomy. You should be able to inhale into the back ribs even while turning.
If your low back is touchy, keep the twist small and focus on lifting the crown of the head upward. That tiny bit of length usually gives you more benefit than trying to rotate farther.
12. Downward Dog Pedal for Calves, Hamstrings, and Ankles
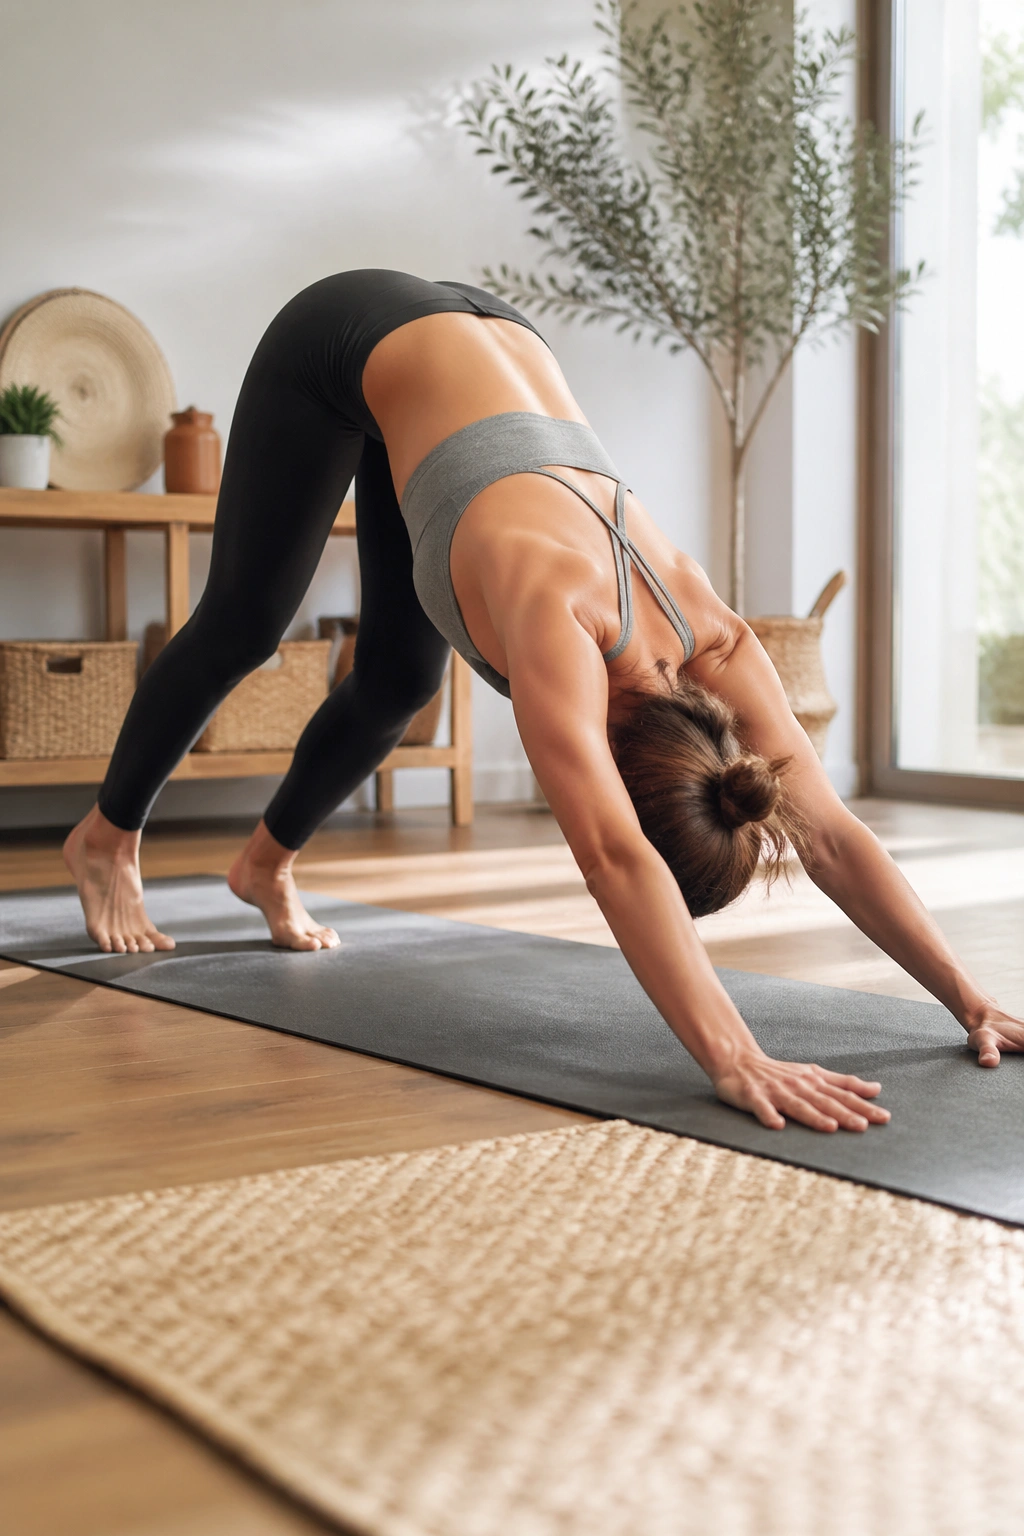
Not every stretch needs to be still. Downward dog pedal is a moving stretch, and that’s a good thing. It opens the calves and hamstrings while also waking up the ankles and shoulders, which makes it a neat bridge between resting and moving.
From downward dog, bend one knee and press the opposite heel toward the floor, then switch sides in a slow, smooth rhythm. Do 8 to 10 alternating pedals. If the wrists get annoyed, put your hands on a bench or the edge of a couch instead of the floor.
This is the version I prefer before walking, hiking, or lifting. It helps the legs wake up without going limp. The calf of the straight leg usually takes the main stretch, while the bent leg gives the hamstring a break.
Keep the breath even and the heels honest. They do not need to hit the floor.
13. Half-Kneeling Hip Flexor Stretch That Actually Hits the Hip
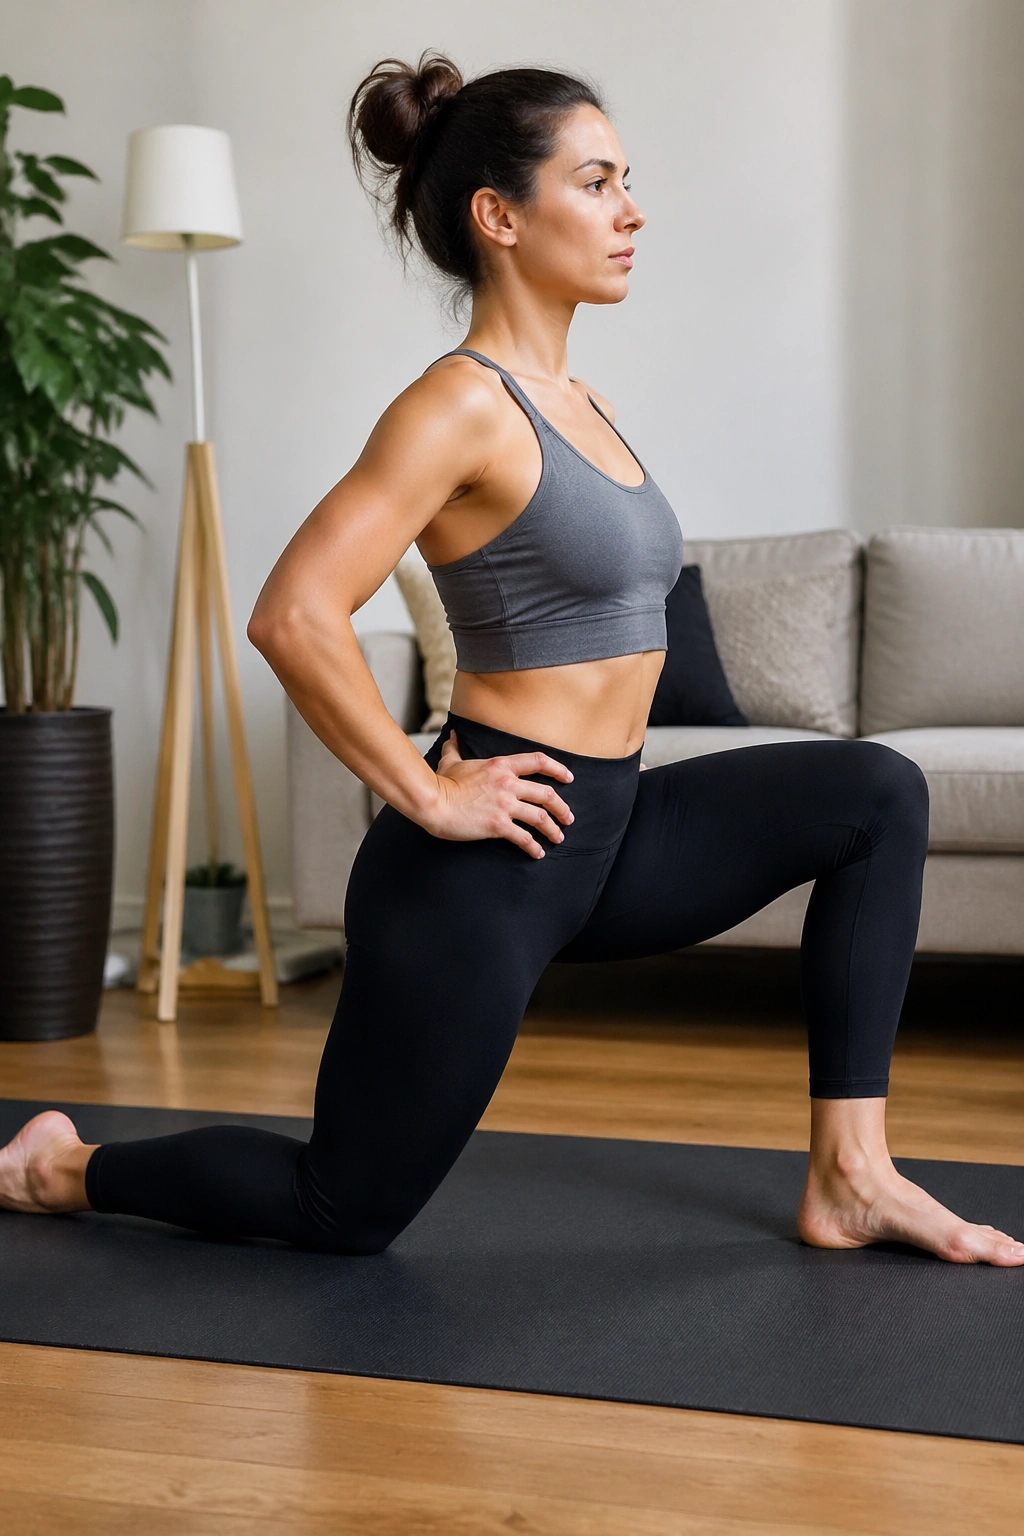
A lot of people think they’re stretching the hip flexors and end up cranking their lower backs instead. Half-kneeling fixes that. It puts the stretch where it belongs if you set the pelvis first.
Kneel with one foot forward and the back knee down on a pad or folded towel. Tuck the pelvis slightly, squeeze the back glute, and shift forward only 2 or 3 inches. You should feel the front of the hip on the kneeling side open up. Hold for 20 to 30 seconds.
How to Set It Up
- Keep the torso upright.
- Squeeze the back-side glute.
- Don’t arch the low back.
- Step forward in tiny increments.
If you want more, reach the same-side arm overhead and lean a hair toward the front leg. That adds a line through the psoas and front thigh without making the stretch messy. It’s a small move, but it lands well.
14. Couch Stretch for Quads That Feel Short
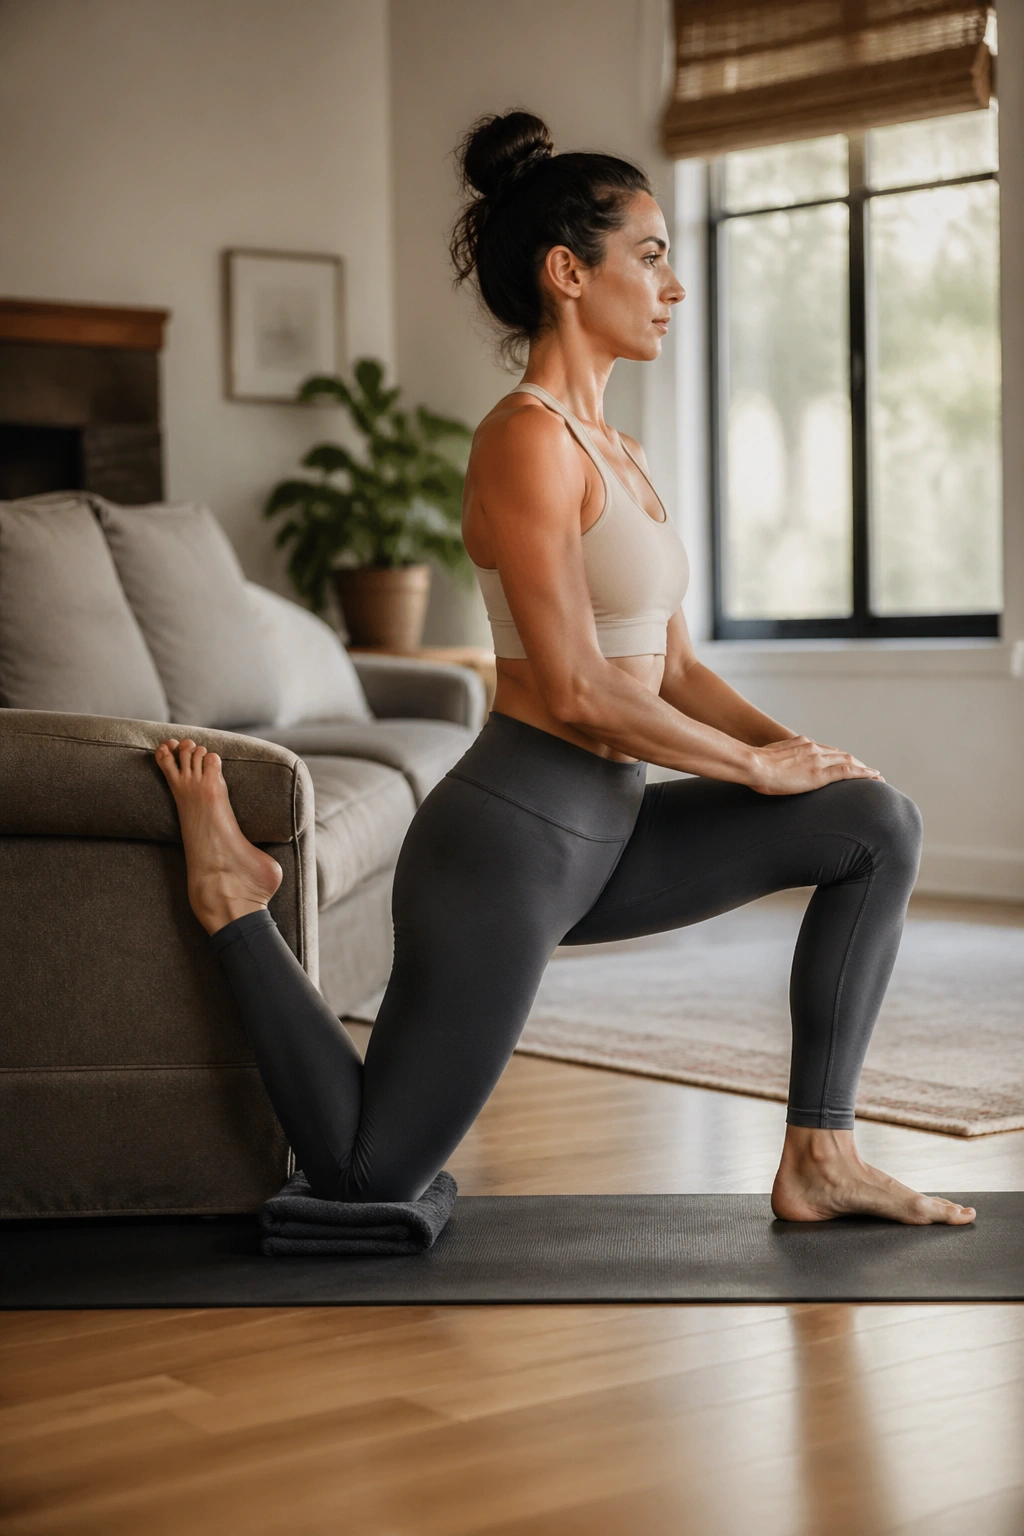
This one is not subtle. If your quads and hip flexors have been shortened by sitting, cycling, sprinting, or hard training, couch stretch gets their attention fast. It can feel intense, which is exactly why it works so well when done with control.
Set one shin upright against a wall or the side of a couch, with the other foot forward in a half-kneeling position. Keep the torso tall and squeeze the back-side glute to avoid dumping into the lower back. Start with 15 to 20 seconds if you’re new to it.
Use padding under the back knee. Really. A folded mat, towel, or pillow makes a big difference, and there’s no prize for suffering on a hard floor.
The stretch usually shows up in the front thigh, near the top of the quad, and sometimes across the front of the hip. If it feels like a knee jam, back out and adjust the shin angle.
15. Figure-Four Glute Stretch for a Grumpy Low Back
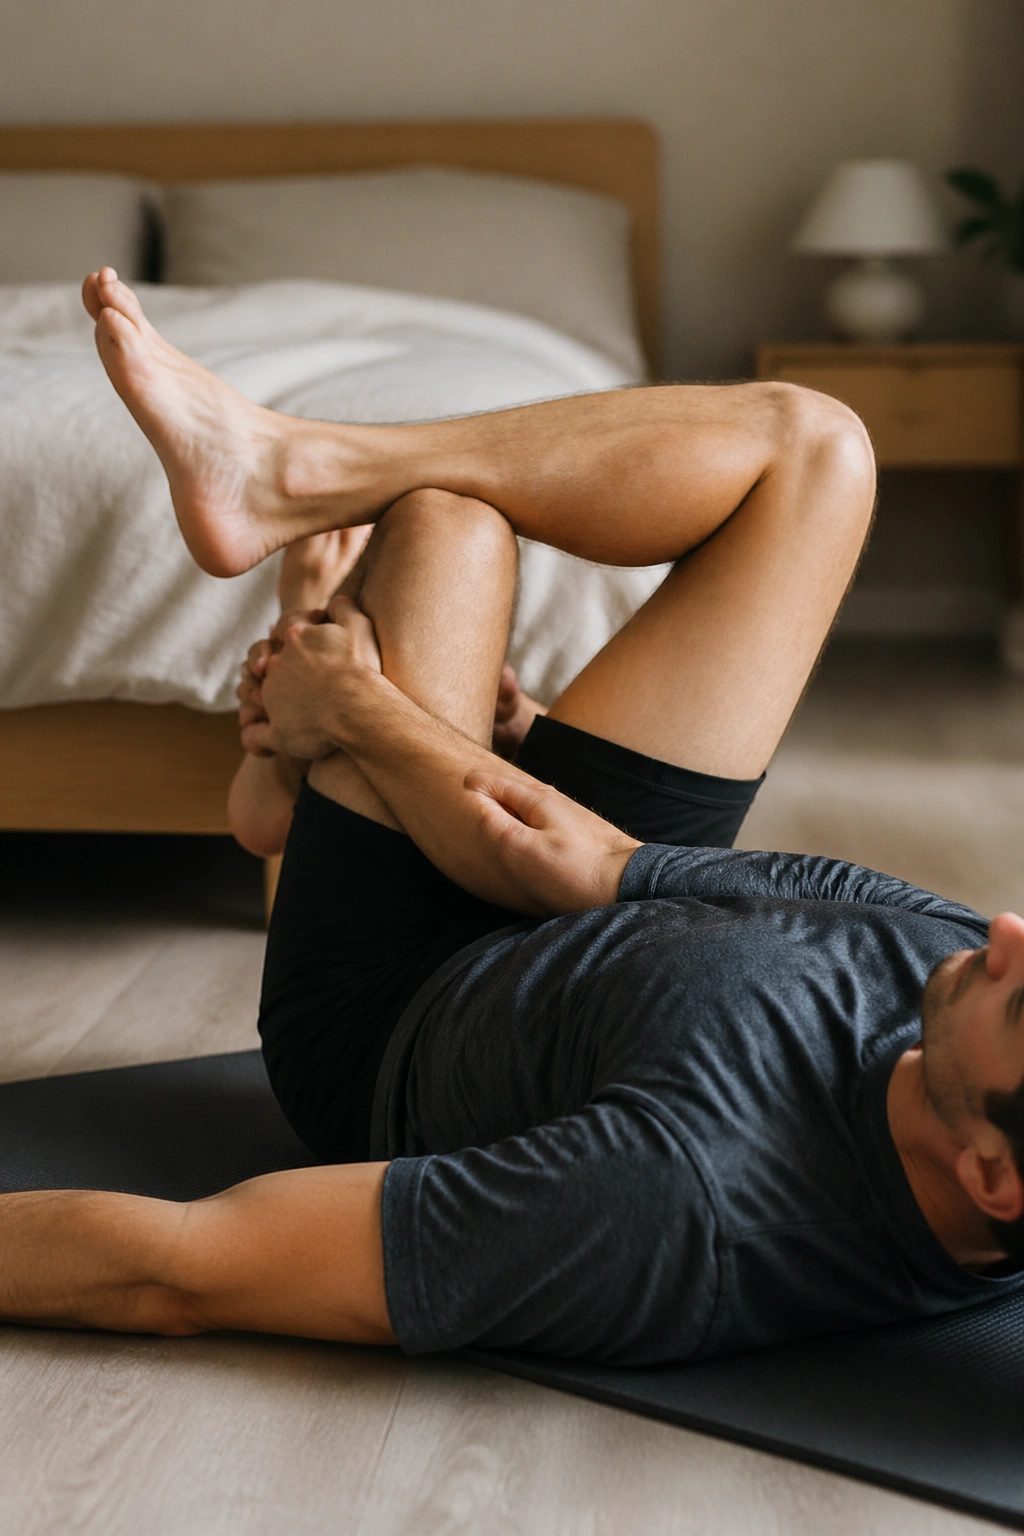
Why does a glute stretch sometimes help the low back? Because the deep rotators around the hip often hold on when the pelvis gets stiff. Figure-four is a clean way to reach that area without asking the spine to do all the talking.
Lie on your back, cross one ankle over the opposite knee, and pull the supporting thigh toward your chest. Keep the head down and the breath slow. Hold for 5 breaths, then switch sides.
If your knee doesn’t love the position, place the foot on a wall instead of pulling hard. That usually makes the stretch friendlier and keeps the pressure off the joint. A seated version works too, but the lying one tends to stay calmer.
I like this after long car rides. It makes the hips feel less welded together.
16. 90/90 Hip Stretch for Rotation You Can Actually Use
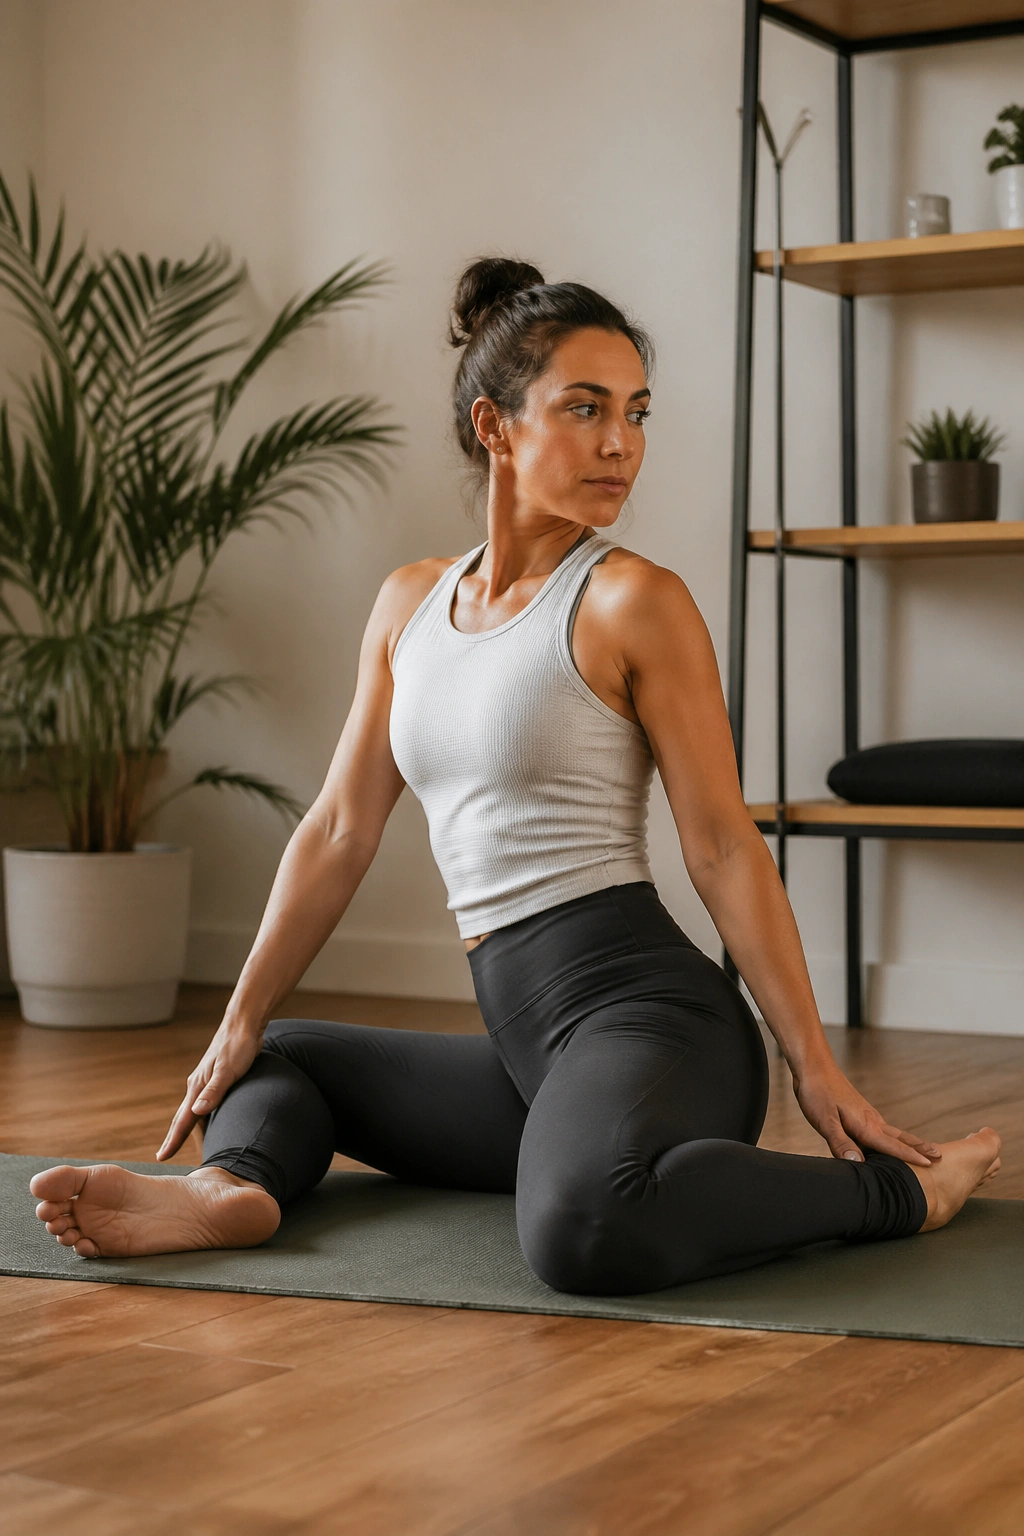
Hips that only open in one direction are annoying. They make squats clunky, sitting awkward, and getting up from the floor feel like a side quest. The 90/90 stretch teaches the hips to rotate instead of only prying them open in the same old way.
Sit with one front leg bent at 90 degrees and the back leg bent at 90 degrees behind you. Keep the torso tall first, then lean gently over the front shin. After a few breaths, rotate your torso toward the back leg and repeat. That switch matters more than people think.
What Makes It Different
- It works internal and external rotation.
- It asks both hips to participate.
- It feels less like a pry and more like a reset.
- It’s useful before squats, lunges, and floor work.
If you can’t sit upright yet, use your hands behind you for support. No shame there. The stretch gets better with practice, and the body usually prefers that patient approach anyway.
17. Frog Stretch for Inner Thigh Mobility
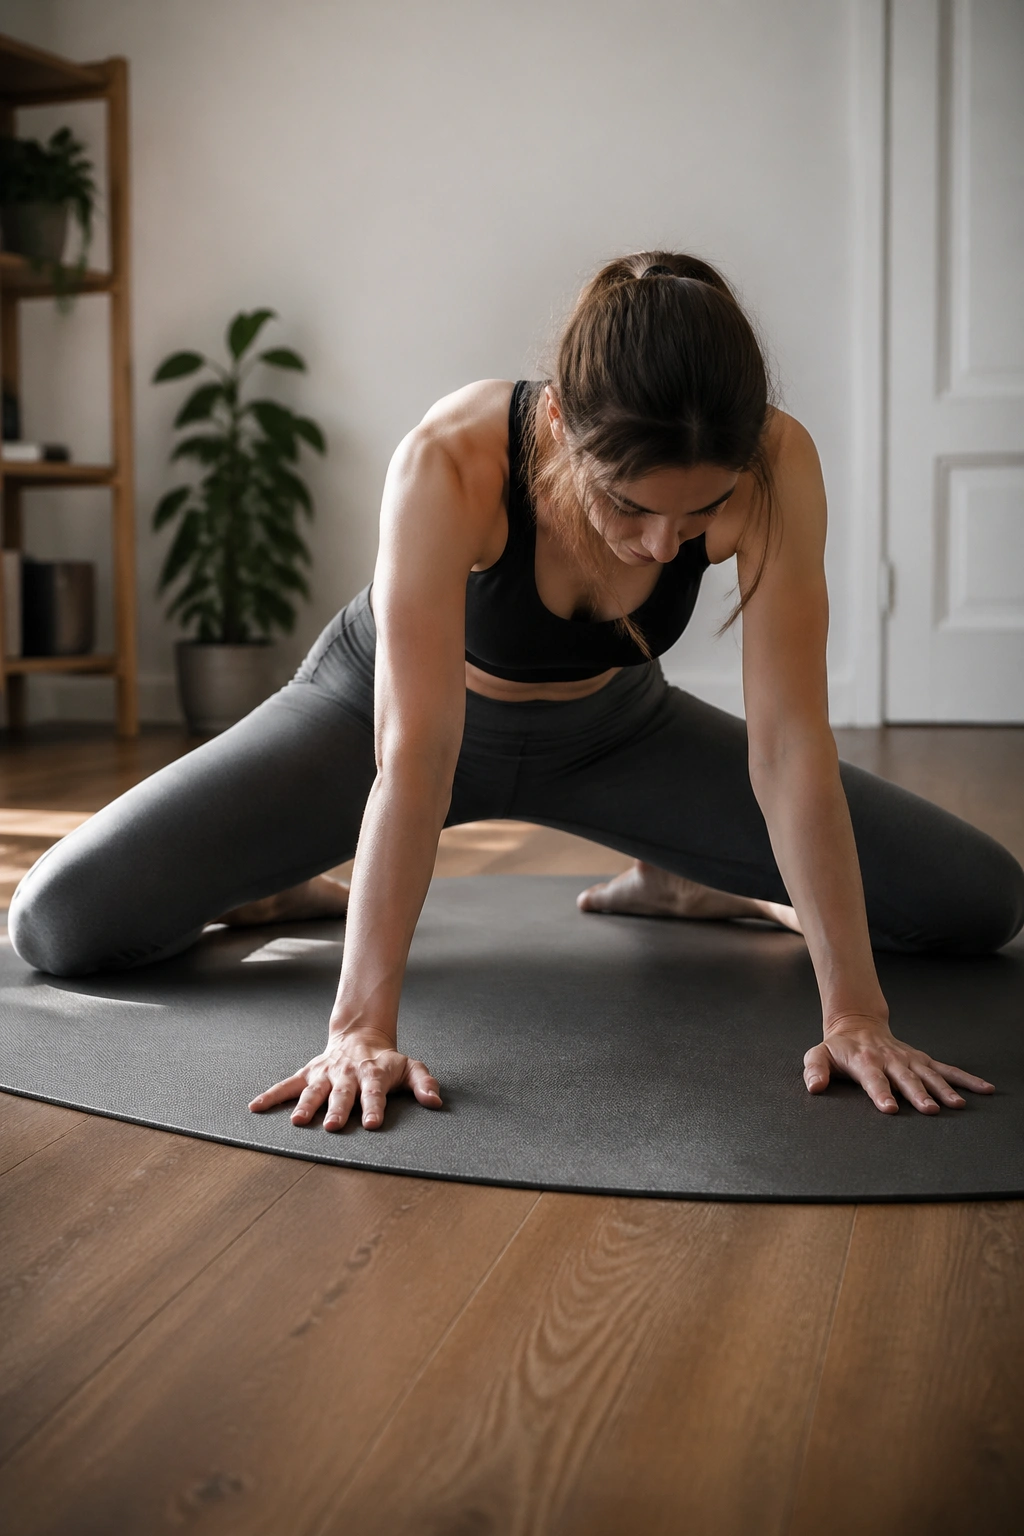
The frog stretch is a little odd at first, and that’s part of its charm. It gets into the adductors — the inner thighs — which can feel like stiff cables after sitting a lot or doing side-to-side sports.
Come to hands and knees, then widen the knees while turning the feet out so the inner edges of the shins rest on the floor. Keep the hips behind the knees at first, then rock back a few inches if that feels okay. Stay for 20 to 30 seconds or 5 slow breaths.
Use a mat or towel under the knees. The floor can get mean fast in this position.
This stretch works best when you don’t force the range. A gentle spread in the inner thighs is enough. If the groin feels pinched, narrow the knees a bit and back out. That small adjustment usually turns a miserable stretch into a useful one.
18. Lizard Pose for Hips, Groin, and Front Leg Reach
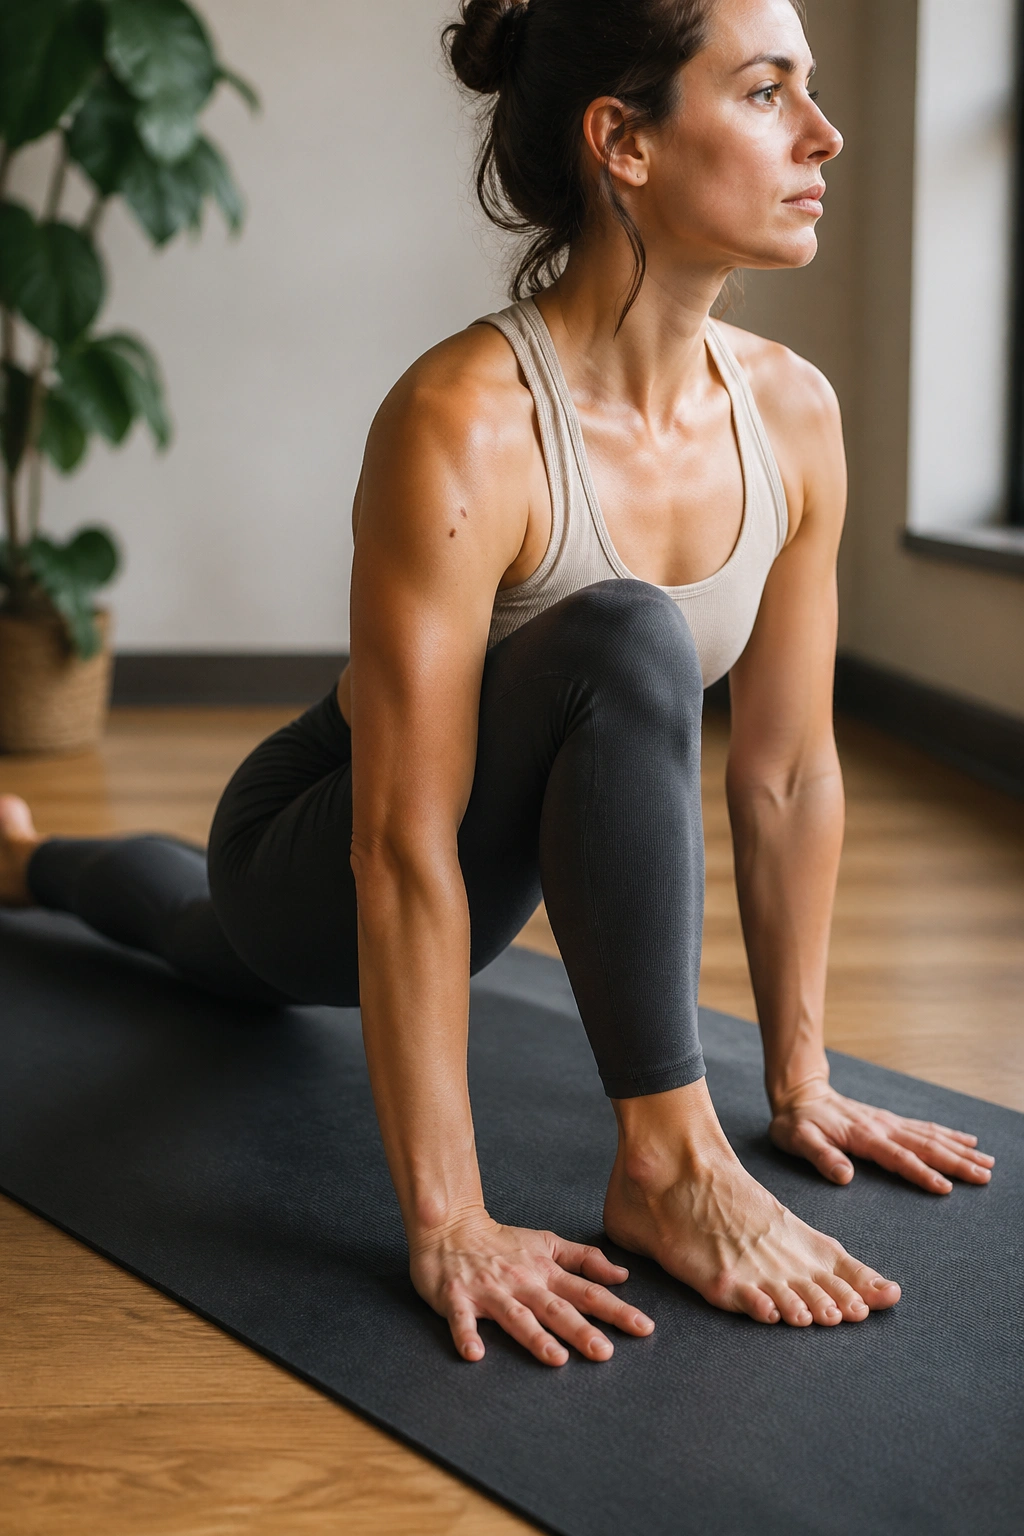
Unlike frog, lizard pose loads one side at a time and gives you a longer line through the front of the hip. It’s a stronger stretch, but also a more complete one if you want the hip flexor and inner thigh to open together.
Start in a low lunge, then bring both hands inside the front foot. Keep the back leg long and lower the forearms only if the body is ready for it. Hold for 3 to 5 breaths, then switch sides.
A useful trick is to keep the front knee tracking over the middle toes instead of collapsing inward. That keeps the stretch useful and spares the knee from weird torque.
Lizard is a nice one for runners, walkers, and anyone whose hips feel narrow after lots of forward motion. It can also be scaled way down. Hands on blocks count.
19. Hamstring Strap Stretch Without the Low-Back Tug
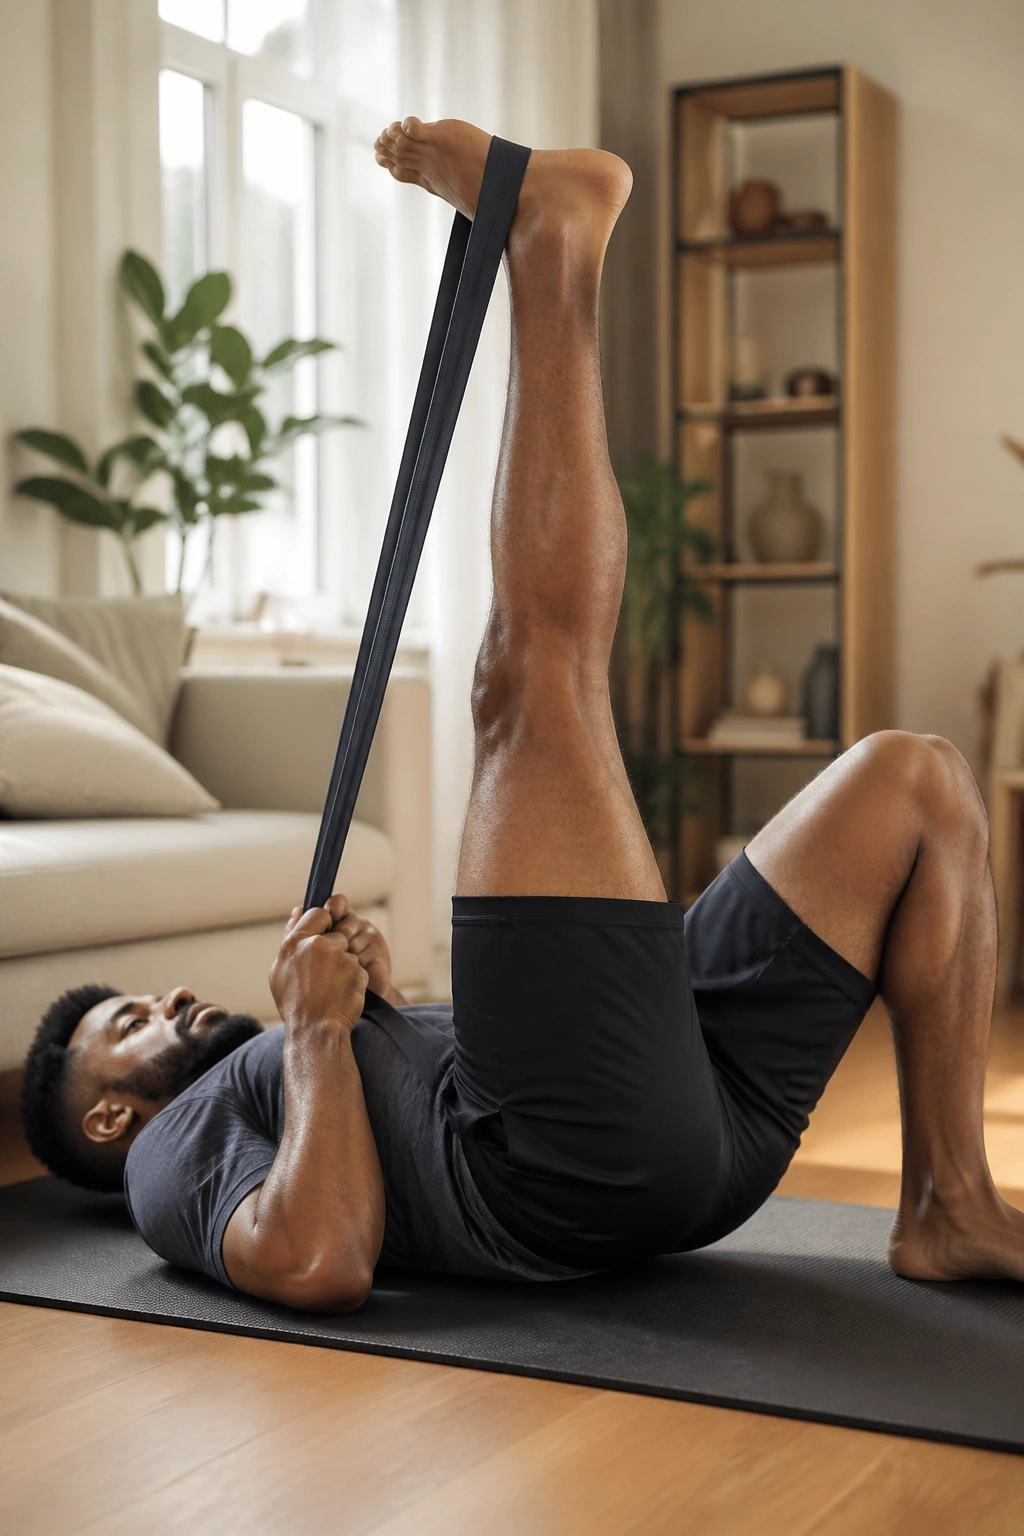
A strap or towel makes hamstring stretching much cleaner because you don’t need to fold your whole body into a pretzel to reach the leg. That matters if the low back tends to round or complain.
Lie on your back and loop a strap around the ball of one foot. Keep the opposite leg long or bent with the foot on the floor. Raise the strapped leg until you feel a stretch in the back of the thigh, then keep the knee slightly soft if needed. Hold for 20 to 30 seconds.
Best Cues
- Flex the foot gently.
- Keep both hips heavy.
- Don’t yank the strap.
- Stop before the pelvis tucks hard.
The goal is a stretch that lives in the hamstring, not a tug-of-war with your spine. If the leg shakes a little, that’s fine. If the lower back starts to lift, you’ve gone too far.
20. Standing Hamstring Hinge for a Longer Back Line
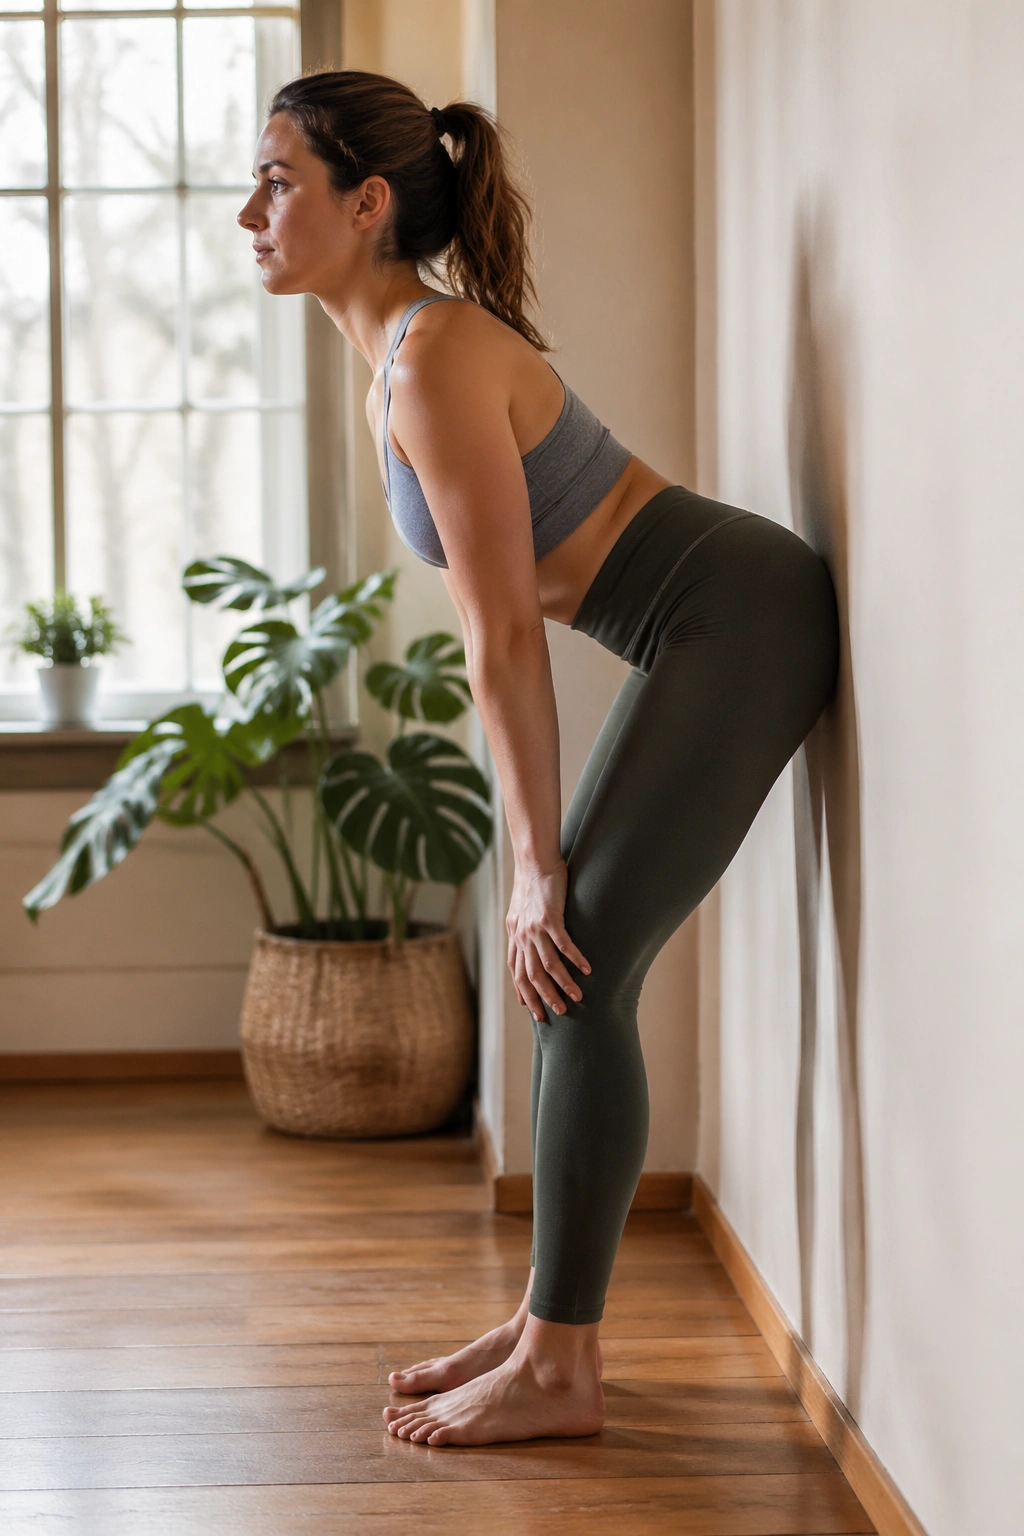
This is the hamstring stretch I trust most when I want the back to stay long. Standing hinges teach the body that the hips can fold without the spine rounding into a C-shape.
Stand with soft knees and place your hands on your thighs. Push the hips back as if you’re closing a car door with your butt, then keep the chest broad and the neck relaxed. You should feel the length increase along the back of the legs, not a sharp tug behind the knees.
A wall behind you helps a lot. It gives you a target for the hips and stops the movement from turning into a sloppy toe-touch.
If you can only hinge a few inches before the hamstrings fire, that’s fine. Stay there. The body learns from repeated clean reps much faster than from one dramatic fold.
21. Standing Quad Stretch with the Knees Kept Close
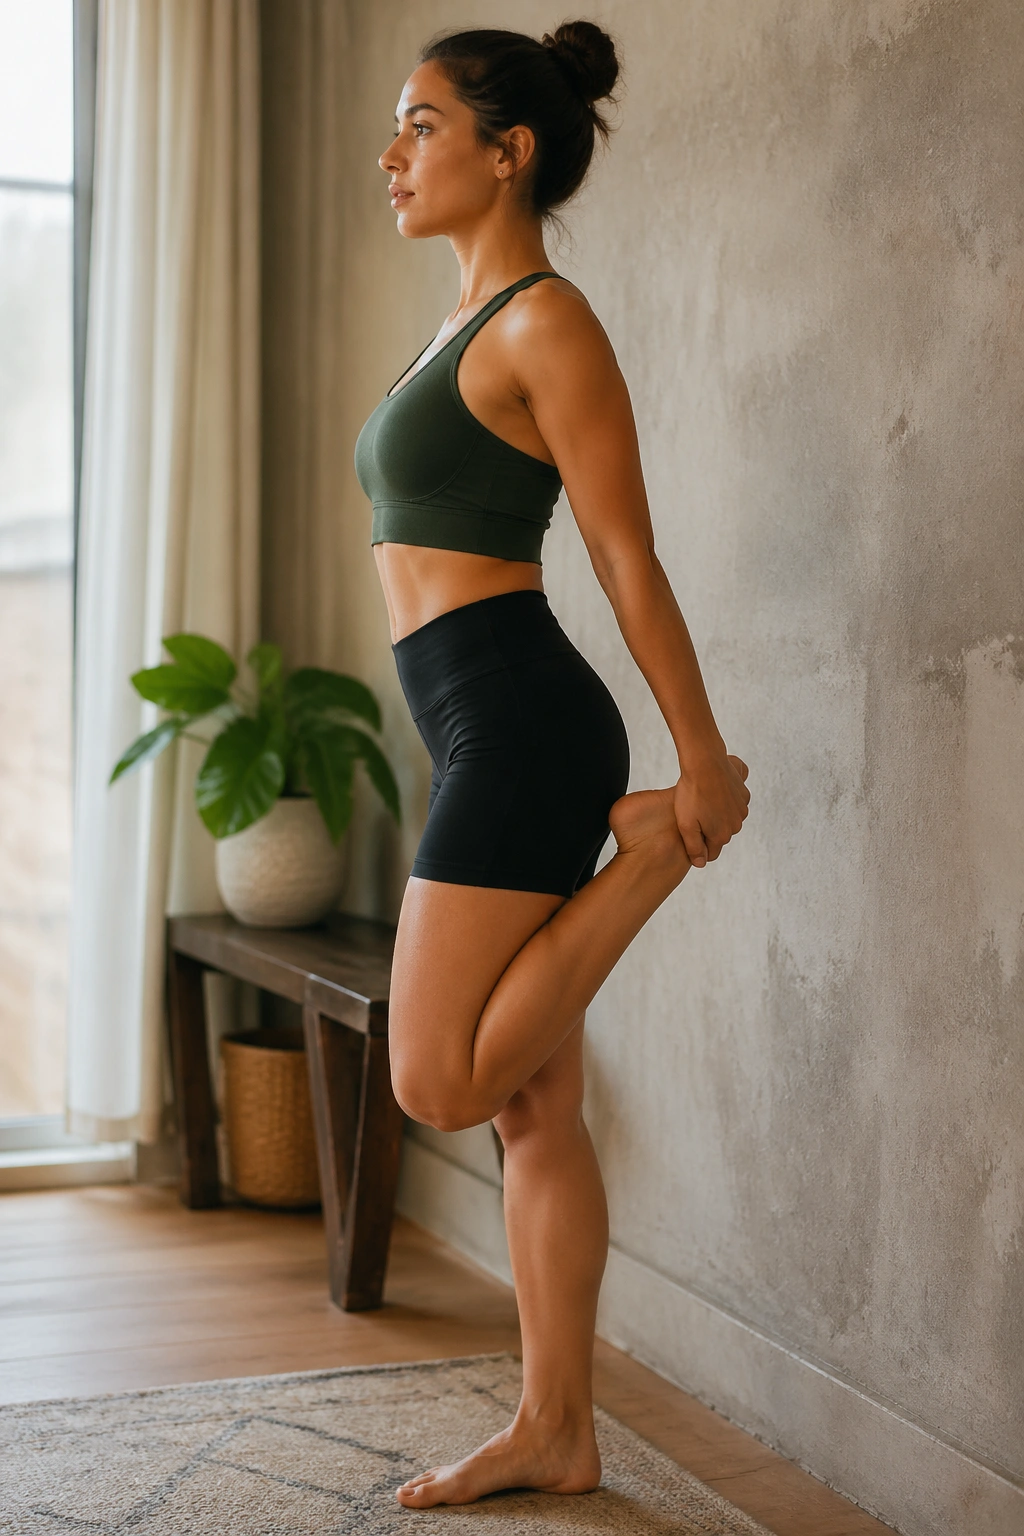
Why keep the knees together? Because it stops the stretch from turning into an arching contest. When the standing quad stretch is set up well, it opens the front thigh and the hip without letting the low back steal the scene.
Stand near a wall for balance, bend one knee, and catch the ankle behind you. Bring the knees closer together, squeeze the standing-side glute, and keep the pelvis tucked just a touch. Hold for 20 seconds, then switch.
If your knee is sensitive, don’t force the heel all the way to the glute. A smaller bend with a tall torso often gives a better result than trying to win points for range. You can also do this lying on your side if balance is a pain.
The front thigh usually feels warmer after this stretch, and walking afterward tends to feel smoother.
22. Adductor Rockback for Stiff Inner Thighs
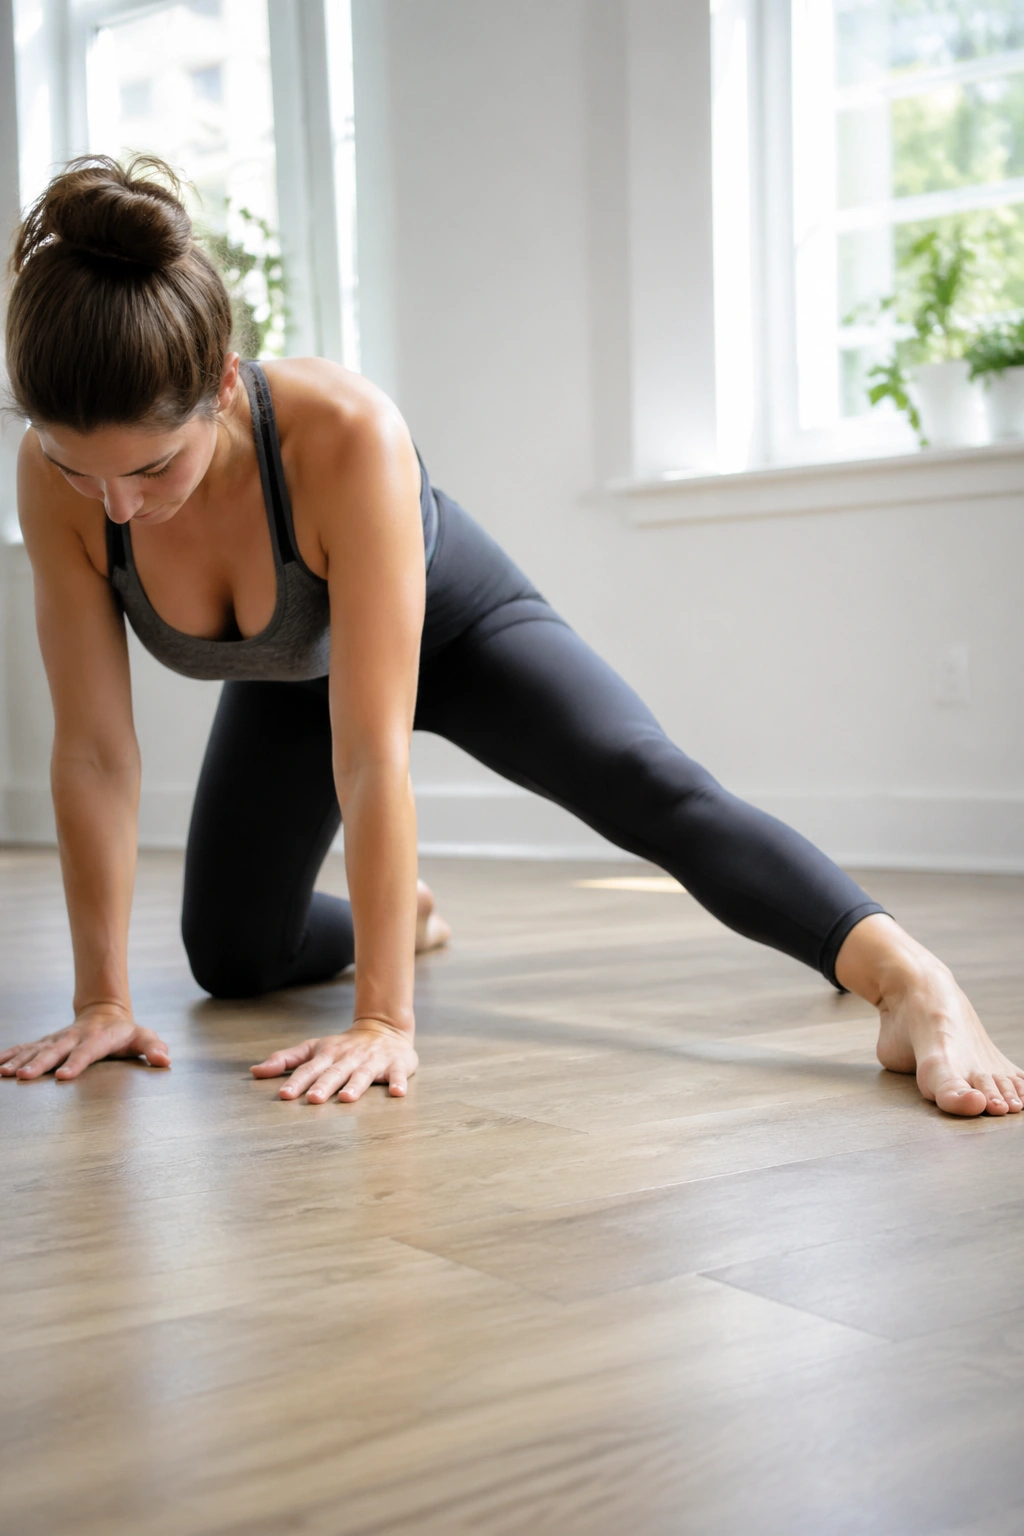
If your inner thighs feel like they’ve forgotten their job, this one helps. Adductor rockbacks are a moving stretch, which means they loosen the groin without asking you to hold a hard end range right away.
Start on all fours and extend one leg out to the side with the foot flat or the heel down. Keep the back straight and rock your hips backward, then forward again. Do 8 to 10 slow reps on each side. The stretch should show up in the inner thigh of the extended leg.
This is especially nice before lunges, side steps, or any workout that asks the hips to change direction. It’s also a lot kinder than forcing a deep adductor hold too early.
Keep the movement smooth. If the knee or groin feels pinchy, shorten the range and make the rock smaller.
23. Ankle Wall Dorsiflexion Stretch for Better Squats and Steps
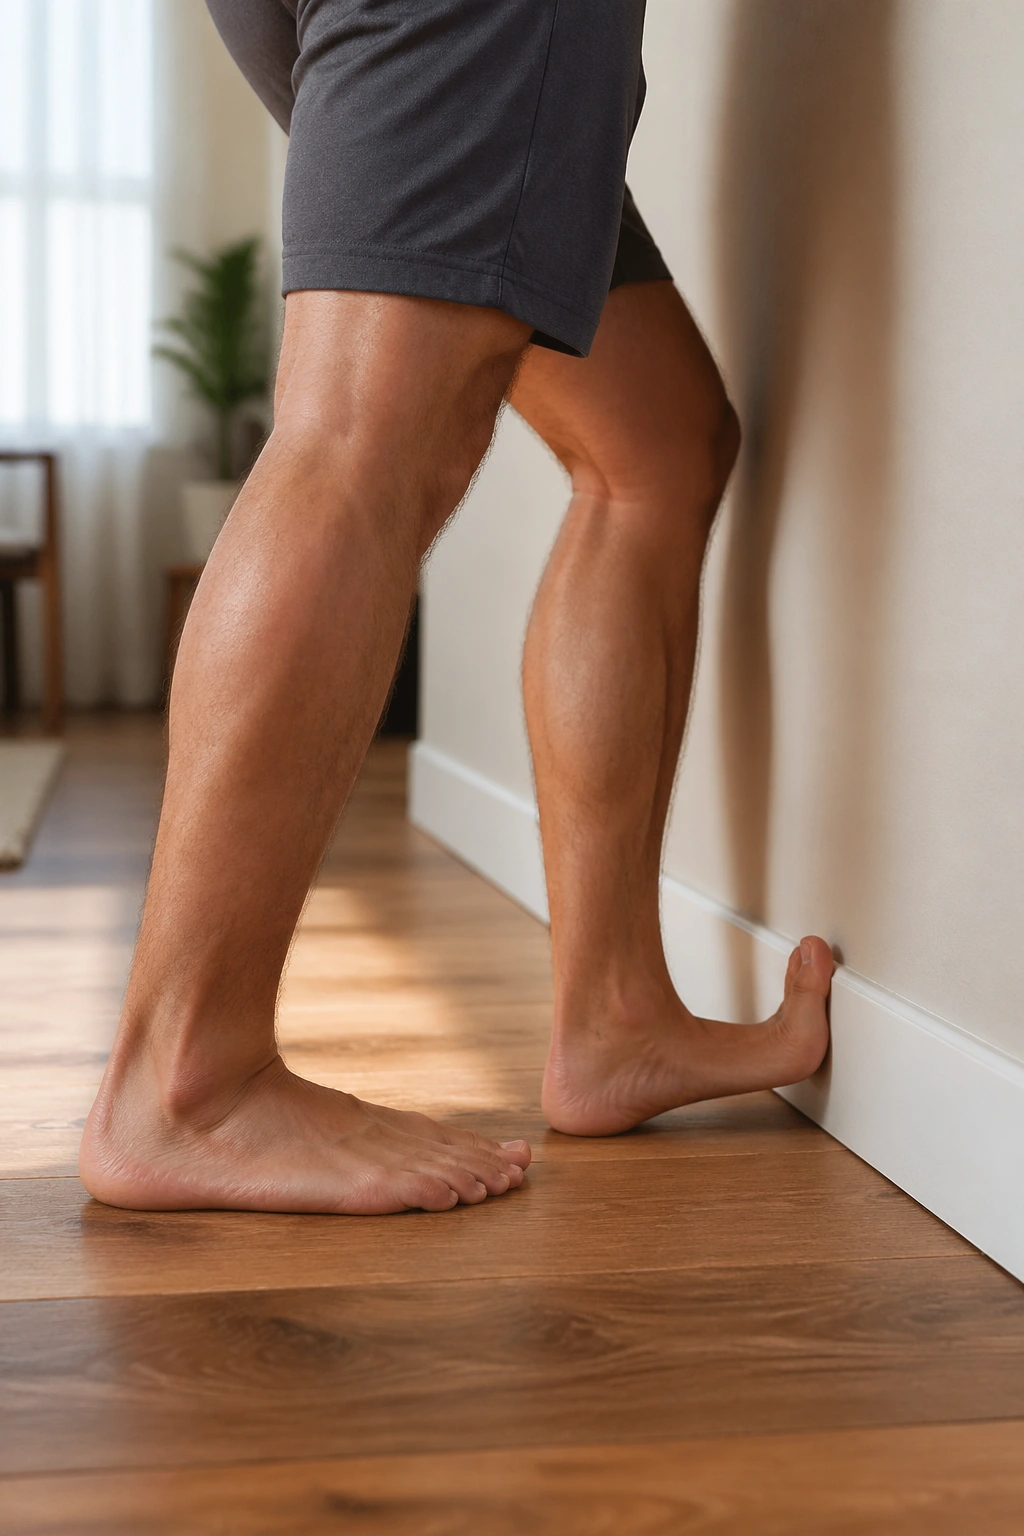
A stiff ankle can mess with squats, stairs, and even your walking stride. This wall drill is tiny but useful, and it shows you pretty fast whether the ankle is the real problem or just one of them.
Stand facing a wall with one foot a few inches away from it. Keeping the heel down, drive the knee toward the wall and then back off. Repeat 10 slow reps, then inch the foot farther away and try again. The goal is smooth knee travel without the heel popping up.
This is more of a mobility drill than a long stretch, and I like it that way. It teaches the ankle to move through range instead of just sitting in a passive hold.
If you want a clear sign you’re doing it right, watch the shin. It should travel forward without the arch collapsing or the heel lifting.
24. Calf Wall Stretch with Two Different Angles
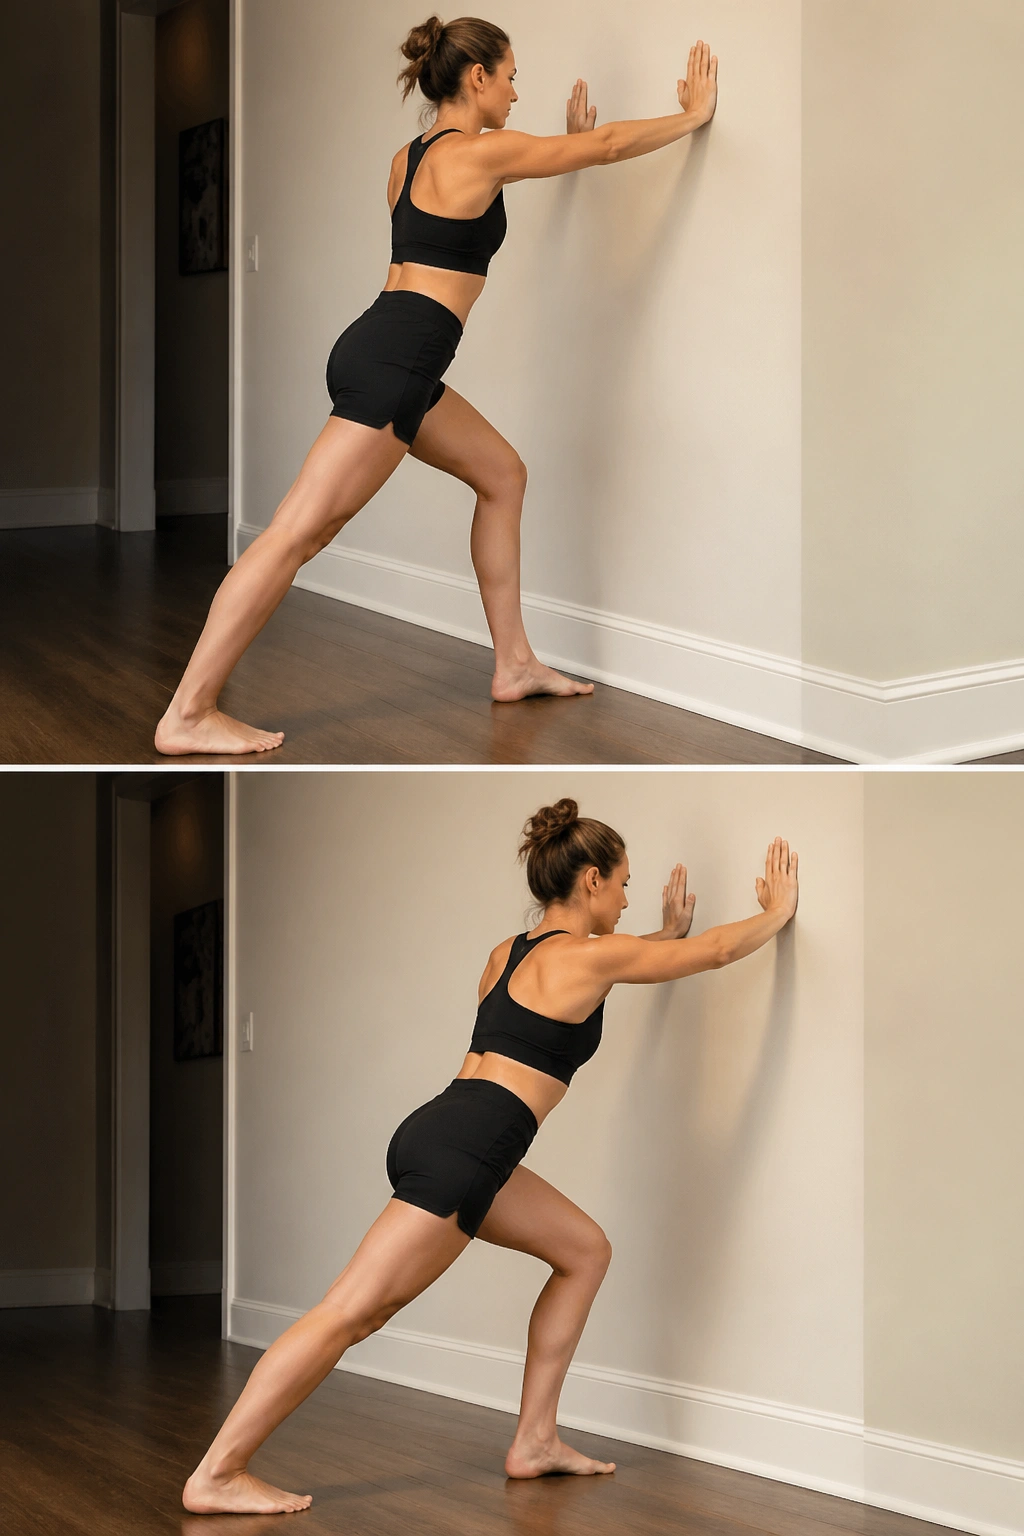
Calves are sneaky. People stretch them and still wonder why the ankles feel tight, because the two main calf muscles respond to slightly different knee positions. That’s why this one is worth doing with both a straight knee and a bent one.
Place both hands on a wall, step one foot back, and press the back heel down. With the back knee straight, you’ll feel more of the upper calf. Then bend the back knee a little and keep the heel anchored; that version shifts more toward the deeper calf near the Achilles. Hold each version for about 20 seconds.
That tiny knee change matters more than most people expect. The stretch should stay even and steady, not sharp or bouncy.
I like this after runs, long walks, or days spent in shoes that don’t give the ankle much room. It’s plain work, but plain work pays off.
25. Toe Squat for Foot and Toe Mobility
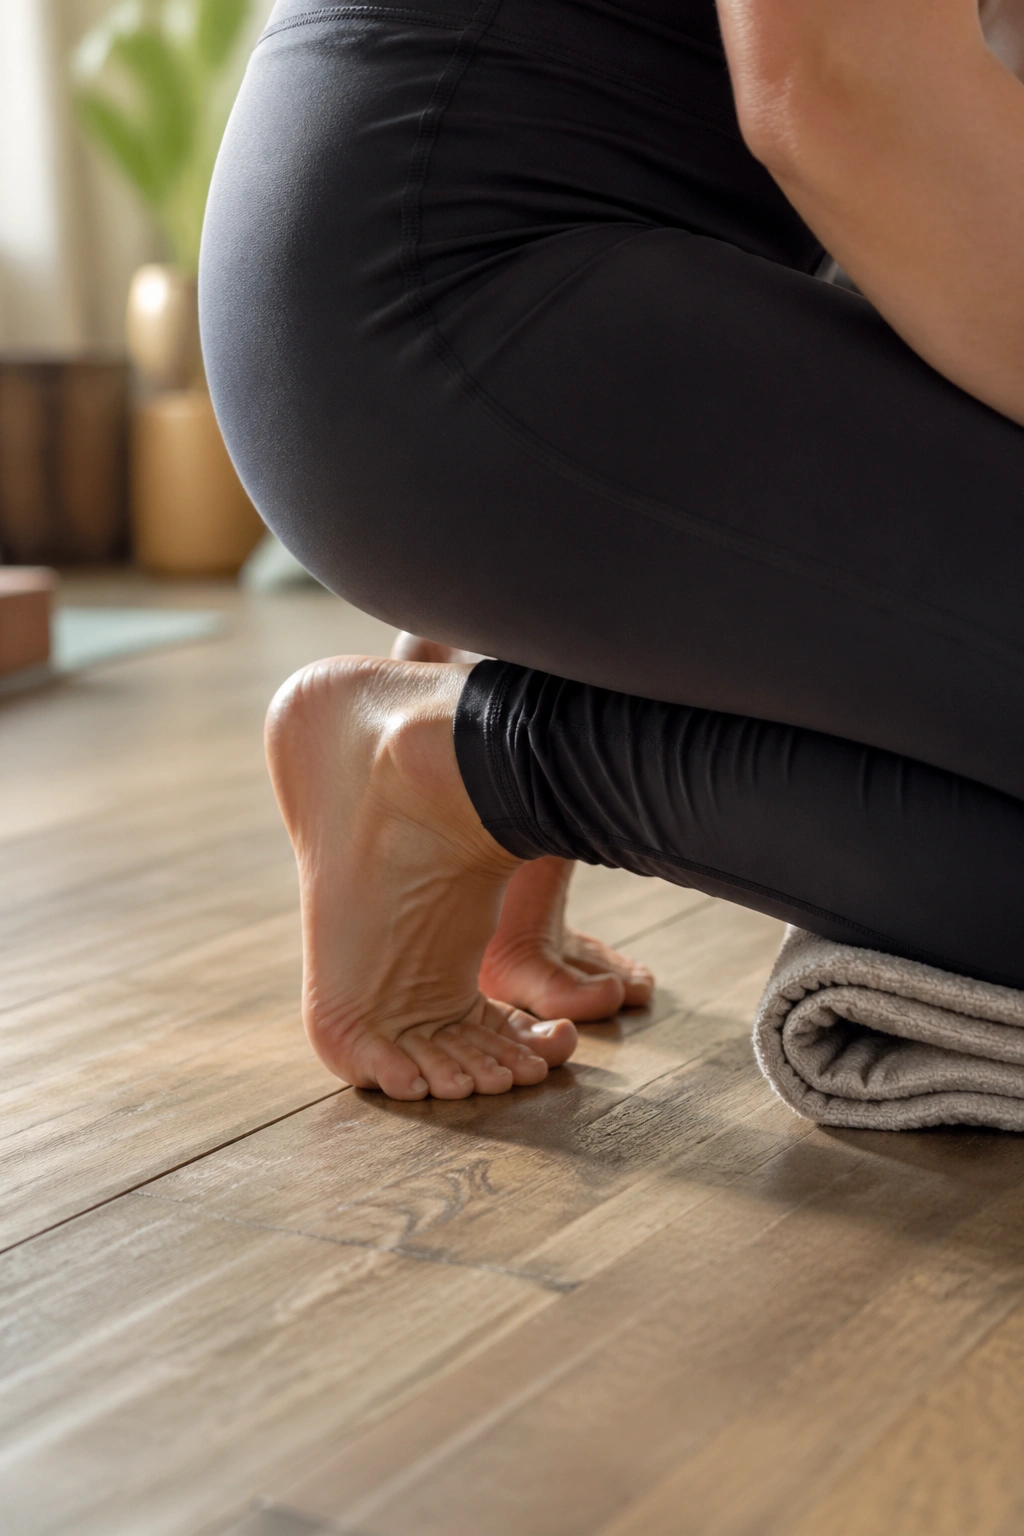
This one looks harmless until your toes say otherwise. Toe squat is a direct way to wake up the foot, especially if you spend most of the day in stiff shoes or on hard floors.
Kneel on the floor, tuck the toes under, and sit your hips back a few inches toward the heels. Start with 10 to 15 seconds. If that feels manageable, hold longer or shift a little more weight back. A folded towel under the knees makes the whole thing less dramatic.
What to Notice
- The stretch should be in the toes and the front of the foot.
- Keep the ankles calm and the breath steady.
- If one toe joint protests, back out and try a smaller sit-back.
- Sharp pain means stop.
Foot mobility gets ignored a lot, which is a shame because a stiff foot usually sends the strain somewhere else. This is a small stretch with a weirdly useful payoff.
26. Wrist Flexor Stretch for Desk Hands and Heavy Grips
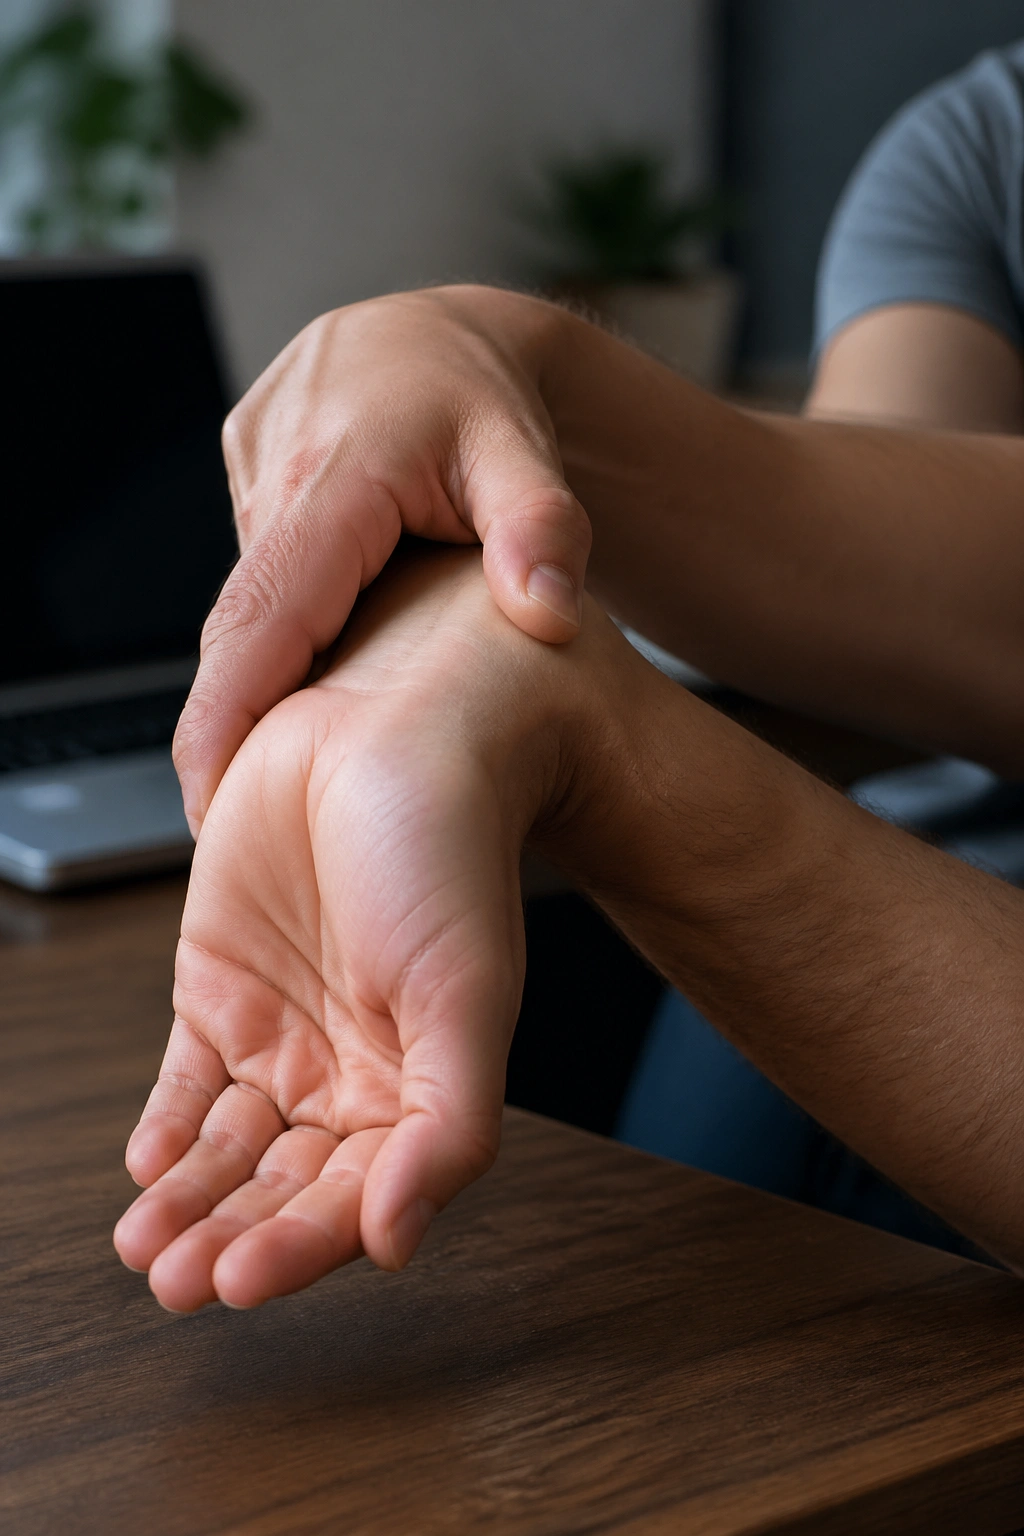
Your wrists need stretching too. If you type, lift, carry, or spend time on the floor in yoga, the front of the forearm can get tight and cranky fast. The wrist flexor stretch gives that area a break.
Extend one arm in front with the palm facing up. Use the other hand to gently pull the fingers down and back until you feel a stretch along the underside of the forearm and into the wrist. Hold for 15 to 20 seconds, then switch sides.
You can also do this with the palm on a wall or the floor if that feels smoother. The goal is a clean stretch, not a big bend that makes the wrist feel jammed.
If the elbow locks out hard, soften it. That often makes the stretch better and keeps the nerves from getting irritated. Small, steady pressure works better than a yank every time.
27. Wrist Extensor Stretch for the Top of the Forearm
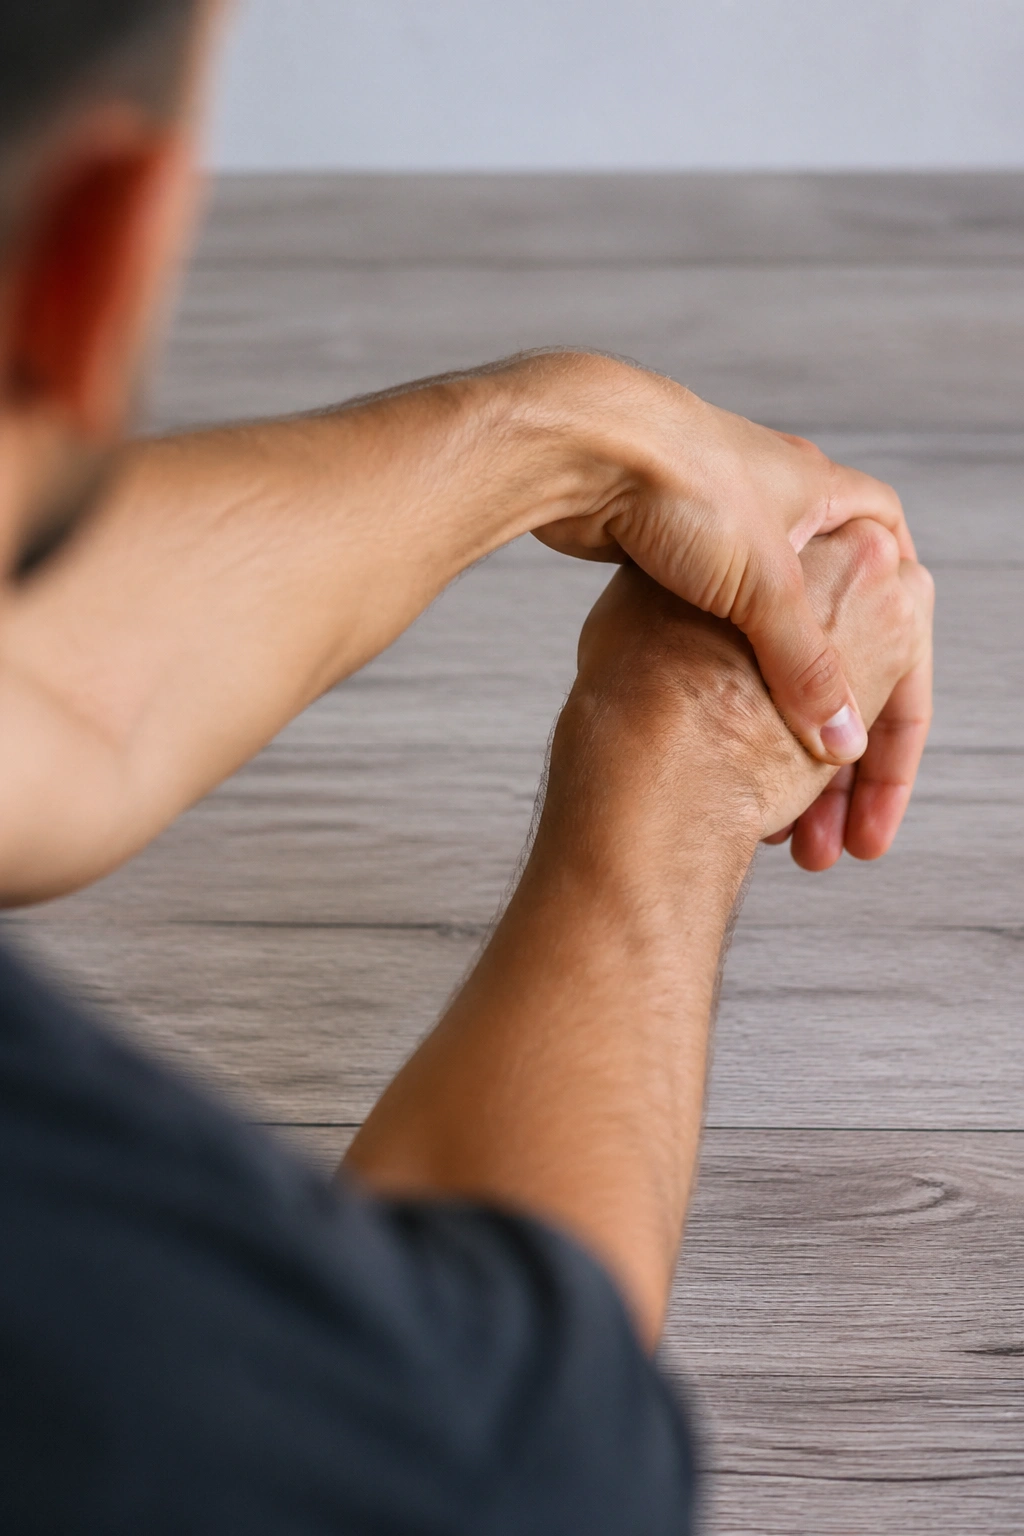
The top of the forearm gets neglected until it starts barking after mouse use, gripping, or lots of plank work. The wrist extensor stretch balances out the flexor stretch and helps the whole hand feel less tight.
Extend one arm with the palm facing down, then use the other hand to gently bend the fingers and wrist toward the floor. You should feel this on the back of the forearm. Hold for 15 to 20 seconds, then change sides.
If you lift a lot, this one is worth doing after your session rather than before it. The forearm usually settles better when it’s not already fighting a barbell or dumbbell.
A soft elbow helps here too. So does a slow breath. If the stretch turns into numbness or tingling, stop and ease off.
28. Tabletop Wrist Rocks for a Moving Reset
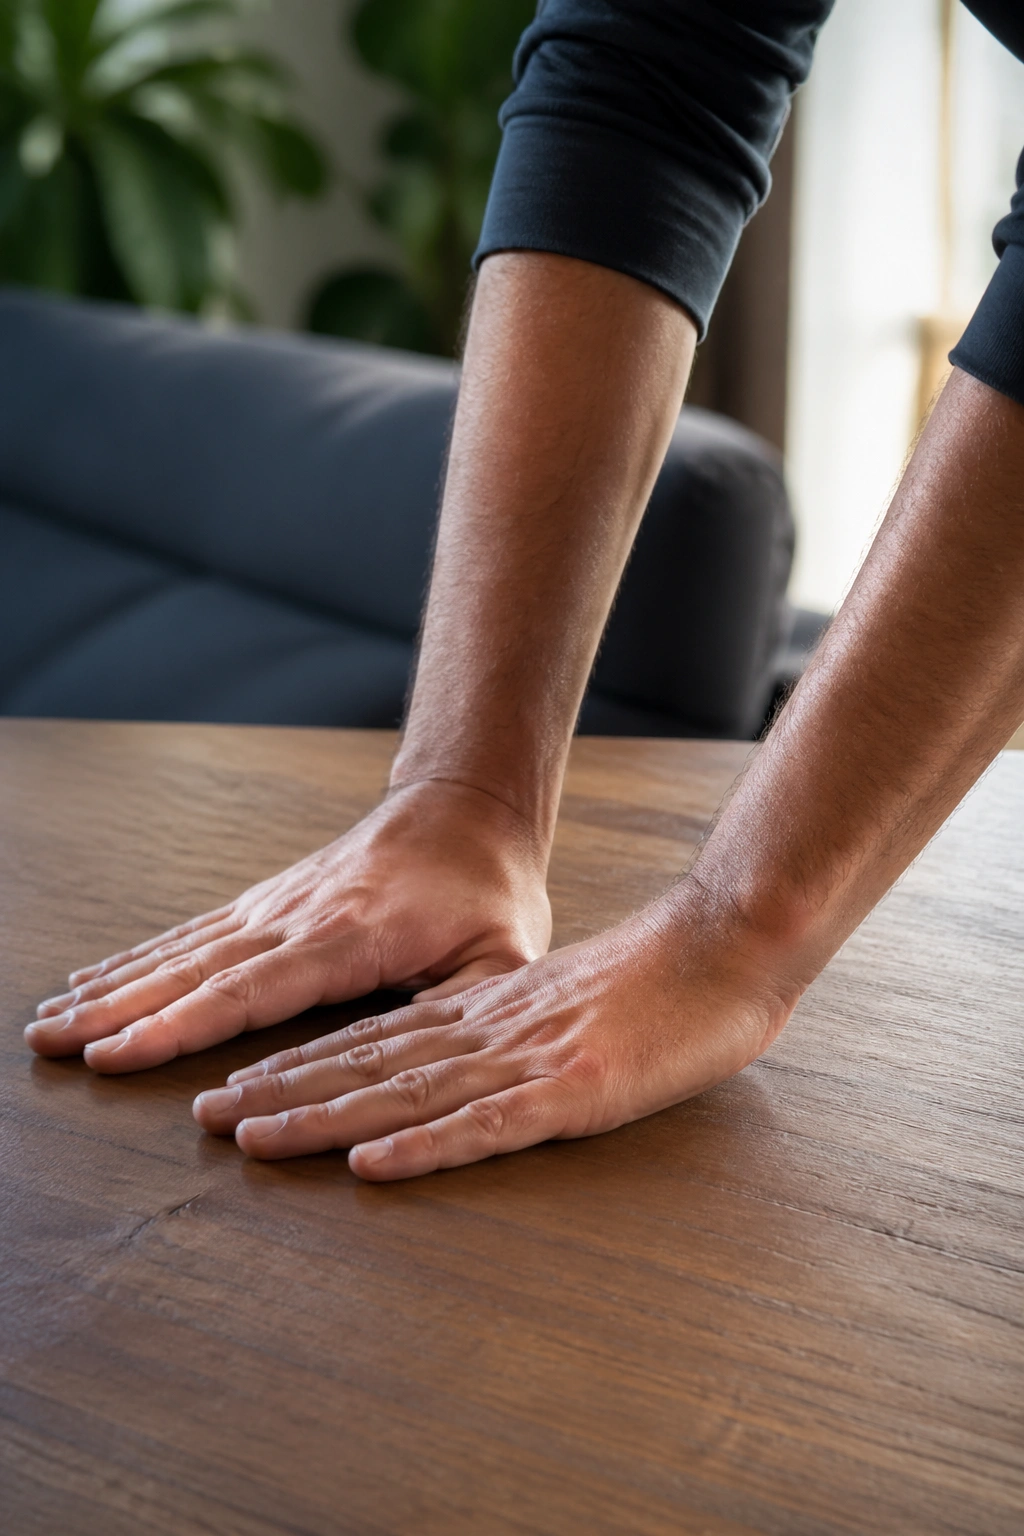
Static wrist stretches are useful, but sometimes the wrists want motion more than a long hold. Tabletop wrist rocks give you that. They’re plain, efficient, and surprisingly good before floor-based yoga or upper-body work.
Start on hands and knees with the fingers spread wide. Rock your body forward and back in a small range, then side to side if that feels okay. Do 5 to 8 slow passes in each direction. Keep the pressure even through the whole hand instead of dumping into the heel of the palm.
This is the one I’d choose before plank work, handstands, or any session where the hands are going to carry weight. It wakes up the wrists without asking them to bear a big stretch right away.
If the wrists are sensitive, make the motion tiny. You’re teaching load tolerance, not proving anything.
29. Bound Angle Forward Fold to Open the Inner Hips
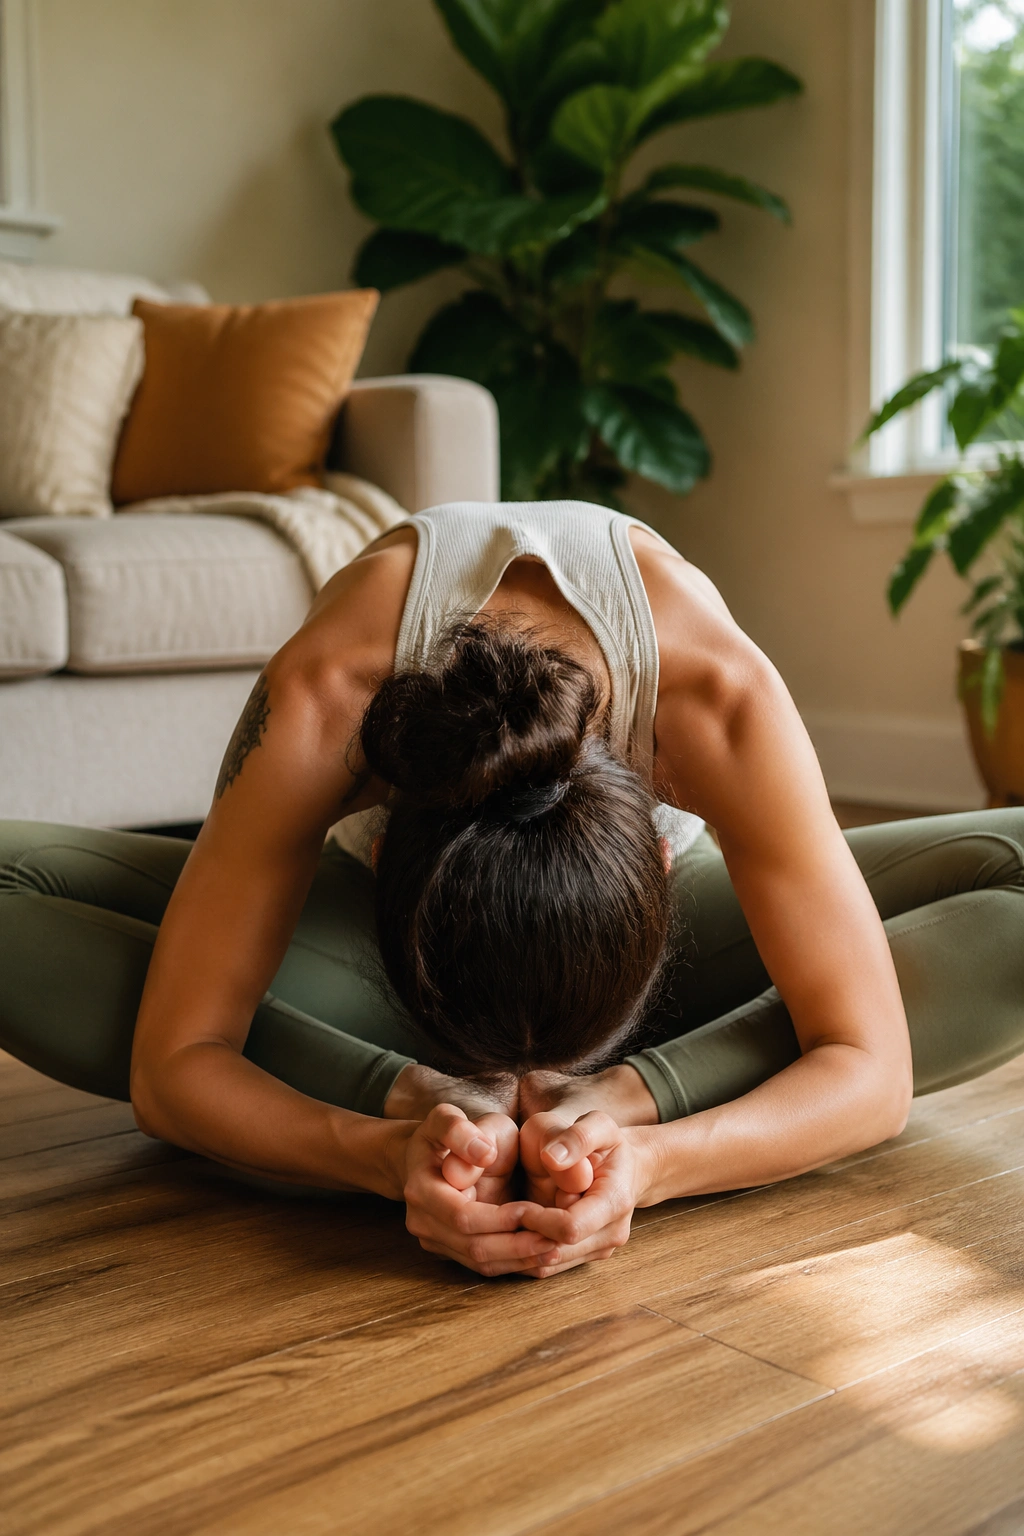
Soles of the feet together, knees out, spine long first. That’s the whole setup, and it’s enough. Bound angle forward fold opens the inner hips and groin without the aggressive feel of some wider positions.
Sit on the floor or on a folded blanket if your pelvis tips backward. Bring the feet together, let the knees fall outward, and hinge forward only as far as the hips allow. Hold for 20 to 30 seconds or stay for several easy breaths.
If the knees hover high, that is normal. Do not shove them down. A cushion under each thigh can help the body settle without forcing the joints into a place they do not want to be.
This stretch has a calm, almost settling feel that makes it good at the end of a session. I also like it on days when the hips feel busy from walking or long periods of standing.
30. Legs-Up-the-Wall for Hips, Hamstrings, and a Slower Exhale
This is the stretch I reach for when the body feels worked over and the nervous system needs to back off a notch. It’s gentle, but don’t mistake gentle for useless. Legs-up-the-wall gives the hamstrings a passively open position, lets the hips rest, and usually makes the breath slow down on its own.
Lie on your back and scoot your hips close to a wall, then place both legs up the wall with the knees either straight or slightly bent. Let your arms rest out to the sides. Stay here for 2 to 10 minutes. If the hamstrings tug too much, move your hips a little farther from the wall. If you want more ease, bend the knees and slide the feet lower.
This is a good place to finish because it doesn’t ask you to perform. It asks you to settle.
A body gets looser from repetition, not from one heroic stretch session. Pick a few of these, keep them honest, and repeat them often enough that your joints stop acting surprised every time you move.
