



Pilates workouts for long lean sculpted lines work best when they feel precise, not frantic. That’s the part people miss. You do not need to thrash around on a mat for forty minutes to look more lifted through the waist, smoother through the hips, and a little longer through the torso — you need controlled reps, clean breath, and enough challenge to make the small muscles pay attention.
The whole look comes from a handful of things done well: stacked ribs, a pelvis that isn’t tilting all over the place, shoulders that know where to sit, and muscles that stay under tension instead of collapsing at the easiest point. Muscles do not literally grow longer in a single session. But the way Pilates trains posture, balance, and control can make you look taller and more connected from head to toe. That’s the magic people keep trying to buy from flashier workouts.
And yes, the burn matters. So does the stretch. So does that sneaky little shake in your inner thighs when you hold a leg at forty-five degrees for ten slow counts and pretend you’re fine. You’re not trying to smash yourself into the floor. You’re trying to make every rep tidy enough that the right muscles have no choice but to work.
These 22 Pilates workouts are built for exactly that feeling — long, lean, sculpted lines without the sloppy momentum that ruins the effect. Start with the first one, because it earns its place fast.
1. The Hundred With Toe-Tap Finish
The Hundred works because it teaches your front body to stay calm while your breath does the heavy lifting. That sounds small. It isn’t.
Set up in tabletop or with the legs long and low if your lower back stays quiet there. Curl the head and shoulders just enough to see the thighs, pump the arms from the ribs, and keep the chin slightly tucked so the neck doesn’t take over. Five breaths in, five breaths out, ten times is the classic count, but you can start with five cycles if your neck needs a friend.
Why It Works
The Hundred is one of those Pilates staples that looks almost too simple until your core starts quivering halfway through. The point is not speed. The point is control under pressure.
- Keep the ribs heavy enough that they don’t pop open.
- Pump the arms from the shoulders, not the wrists.
- Make the exhale long and deliberate.
- Lower the legs only as far as you can hold the pelvis still.
Finish with 8 to 10 slow toe taps per side. That little add-on turns the warm-up into a real ab sequence and makes the lower belly work without yanking the spine around.
Tip: If your neck gets crunchy, keep one hand behind the head for the first half and drop the head down before form gets sloppy.
2. Roll-Up and Reach-Back Flow
Nothing says “Pilates” like a slow roll-up that refuses to be rushed. The move is old-school, but it still earns its keep because it asks for spinal articulation, hamstring flexibility, and abdominal control at the same time.
Lie flat, arms overhead, legs long, and peel up one vertebra at a time until you’re sitting tall. Then reach forward over the legs, pause, and roll back down with the same kind of care. Six slow reps is plenty if you keep the tempo honest. If your hips grab or your feet lift, bend the knees a little and clean up the shape before you chase depth.
The reach-back matters more than people think. It teaches the rib cage to stay soft while the abs hold the shape. That’s a big part of the long-looking line people want from Pilates workouts, and it’s usually the part rushed through in class. Don’t do that. The lowering phase is where the work lives.
One sentence of advice: roll down slower than you think you need to.
3. Slow Single-Leg Stretch Switches
Slow switches beat fast switches every time. Fast can look busy. Slow makes the waist work.
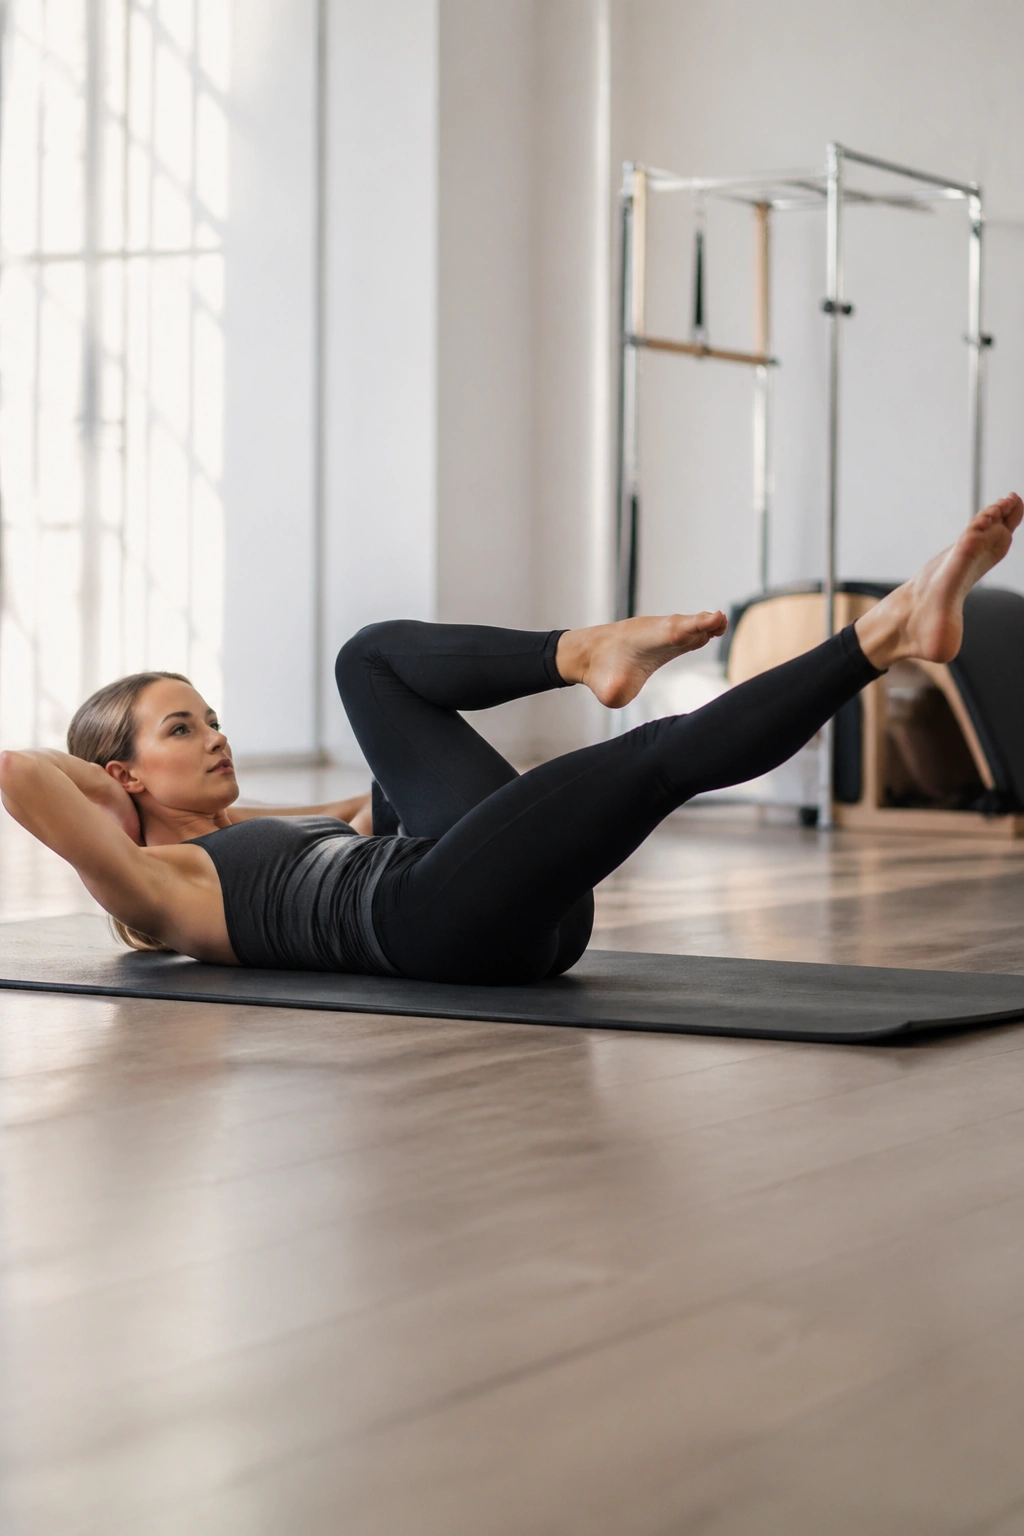
Lie on your back, curl up, and bring one knee in while the other leg reaches long at about forty-five degrees. Instead of kicking through the air, switch with control and pause for a beat when the legs change. That pause is the whole point. It strips out momentum and leaves the deep abdominals to do their job.
How to Use It
Do 8 to 12 switches per side and keep the shoulders broad instead of creeping toward the ears. The lower the reaching leg goes, the harder the exercise gets, but only lower it if the lumbar spine stays quiet. If your back arches, raise the leg. No drama.
This one also helps the front of the hips learn restraint. People with tight hip flexors usually fling the leg because they can feel the effort there. Better to keep the movement small and exact. Your legs do not need to bicycle. They need to extend with clean lines and come back without the pelvis wobbling.
4. Side-Lying Leg Series for the Outer Hips
Lie on your side and the whole workout changes. The waist wakes up, the glutes start to burn, and the hips stop cheating.
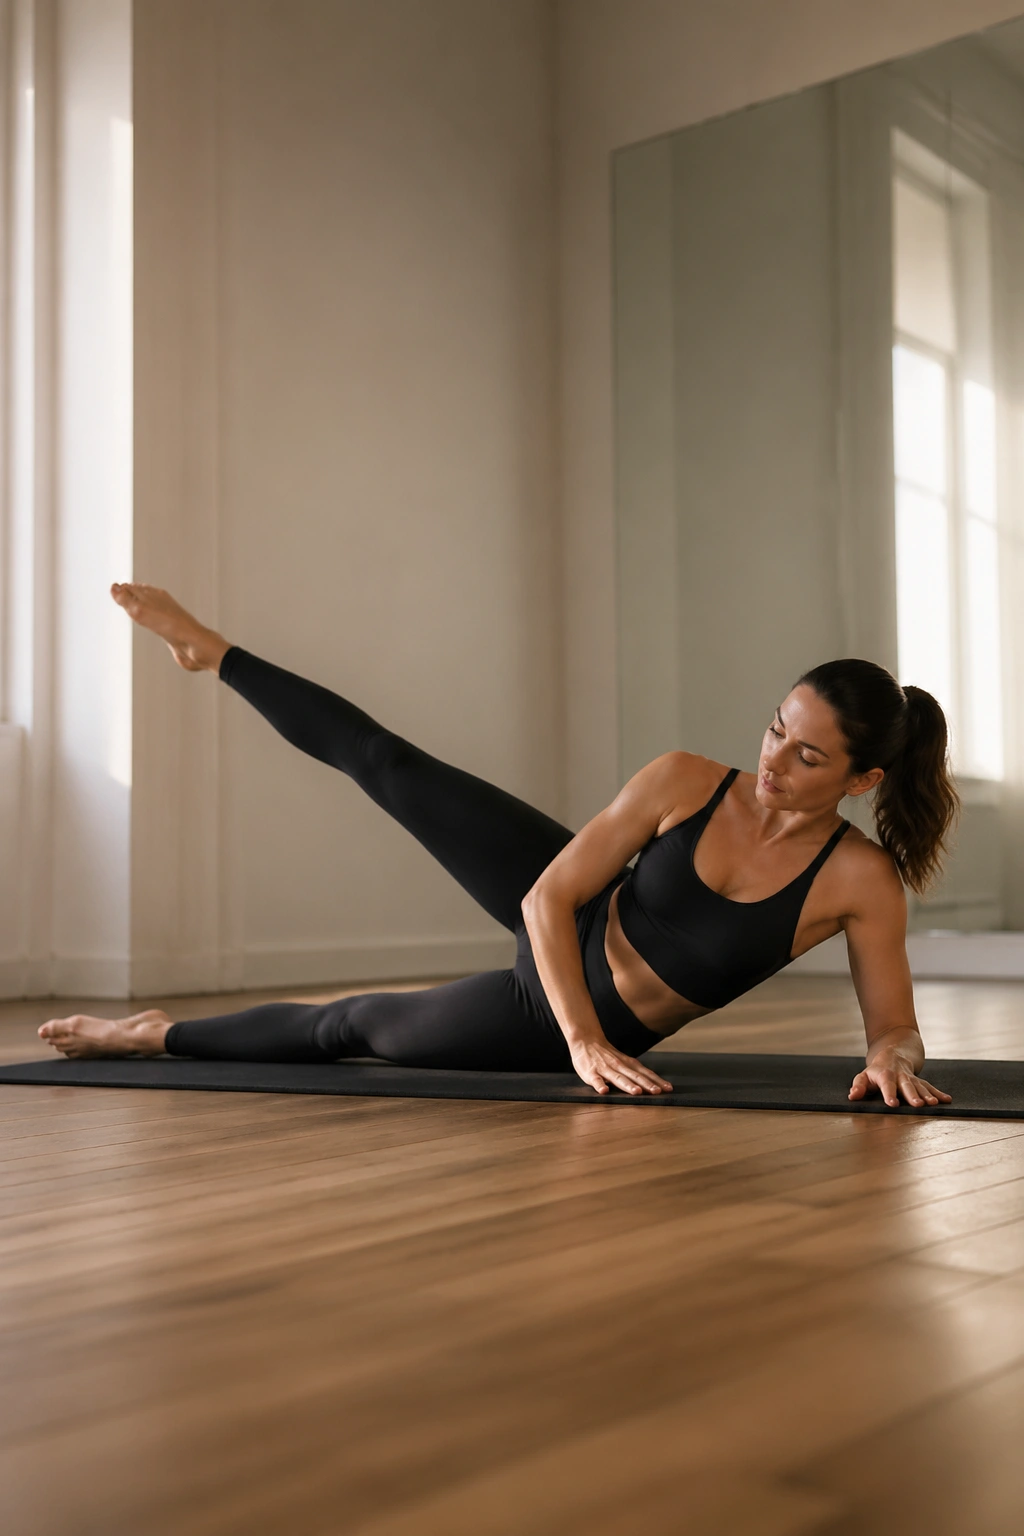
Stack your shoulders and hips, then slide the bottom arm long or prop the head in your hand. Lift the top leg slightly, turn it out just enough to keep the knee honest, and work through front kicks, back kicks, circles, and small lifts. The outer hip should feel awake, not jammed. If the front of the hip pinches, the leg is too high.
- 10 front kicks
- 10 back kicks
- 10 small circles each way
- 8 tiny lifts at the top
That’s enough to light up the side body without turning it into a circus. Keep the waist lifted away from the mat the whole time. If you collapse into the floor, the line disappears.
A small detail that matters: keep the toes slightly long, not clawed. It sounds fussy. It isn’t. The line from hip to toe looks cleaner when the foot stays active but relaxed.
5. Glute Bridge March With Pelvic Control
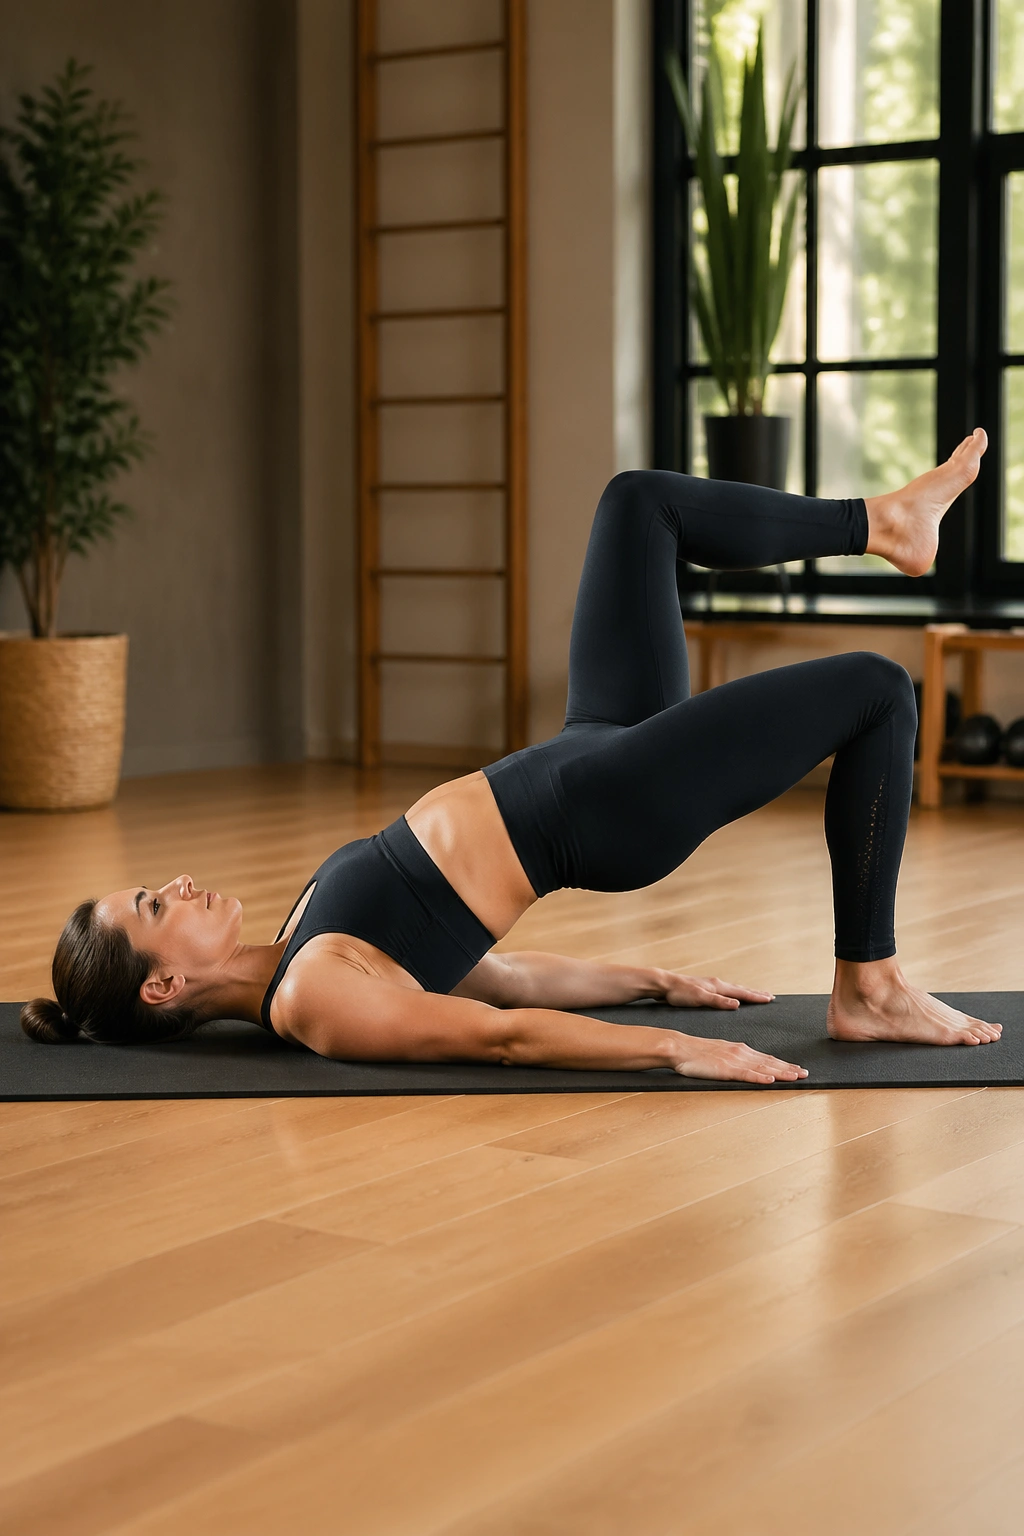
A good bridge is about more than squeezing the glutes. It’s about keeping the pelvis from wandering when one foot leaves the floor.
Set the feet hip-width apart, press into the heels, and peel the spine up until the body makes one long diagonal from shoulders to knees. Hold there for a breath, then lift one foot a few inches without letting the hips tip. Put it down. Switch sides. Eight marches per side is enough when the hold is clean.
The bridge march hits the back line in a way that looks almost boring from the outside. Inside the body, it’s a different story. The hamstrings, glutes, and deep abs all have to agree on the same shape. If they don’t, the hips wobble and the lower back takes over. That’s not the look.
Do not lift so high that the ribs flare. The bridge should feel like the spine is long and buoyant, not cranked into a hard arch. One flat sentence here: height is less important than control.
6. Swan and Dart Backline Flow
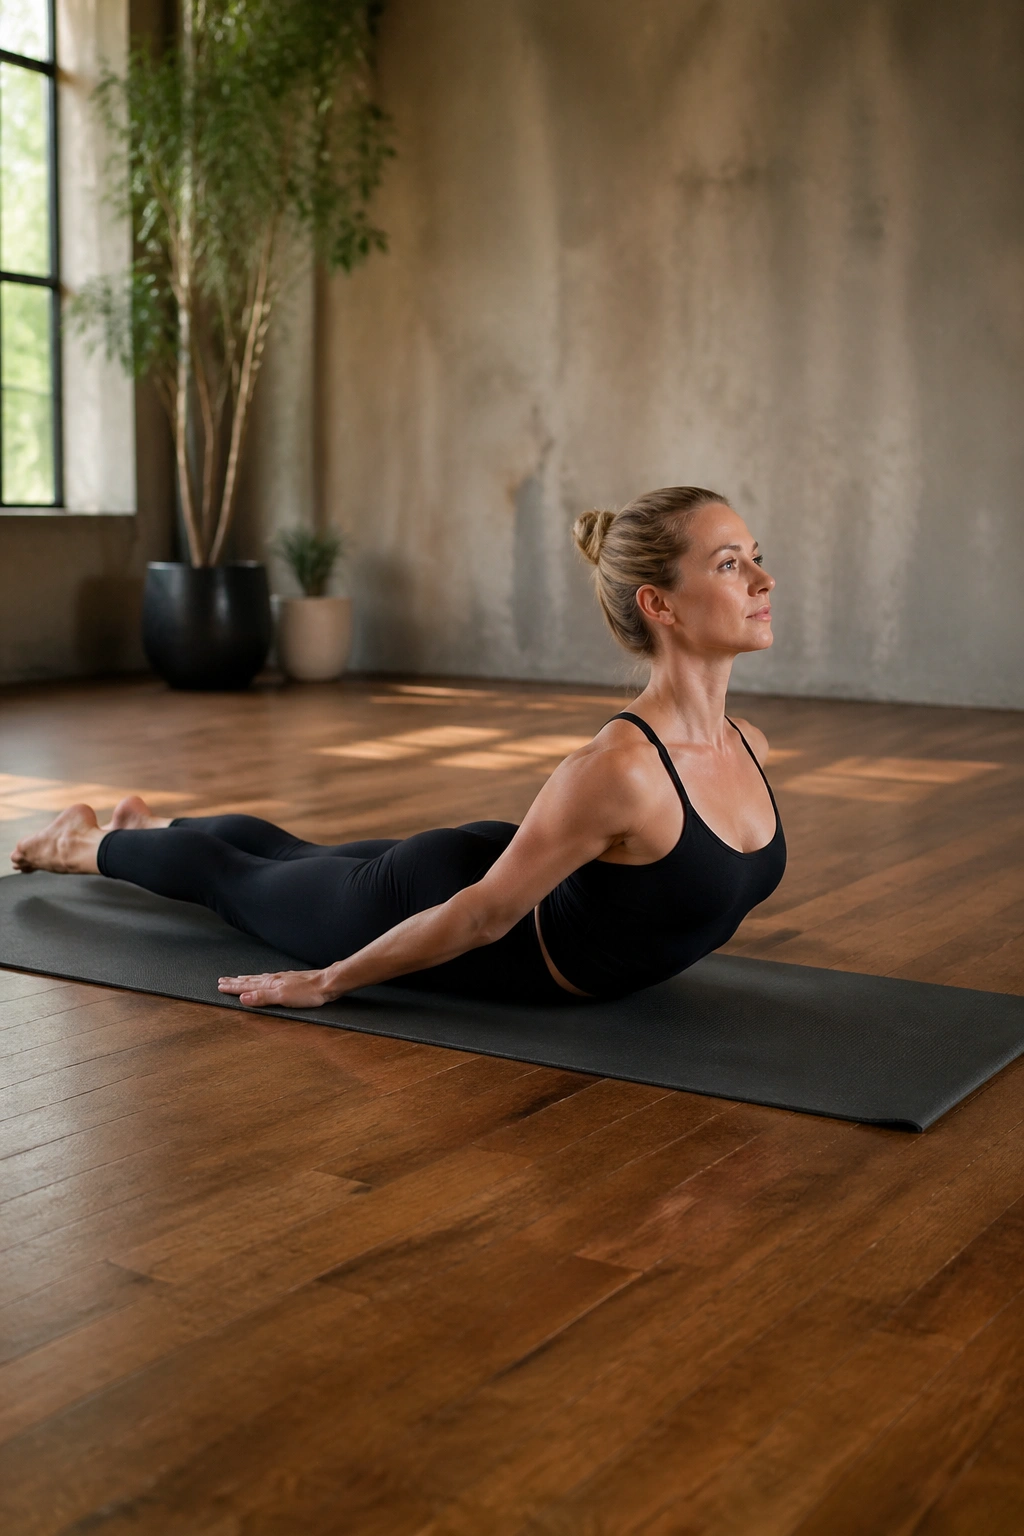
People chase “lean” in the front body and forget the back. That’s a mistake.
The Swan and Dart family of moves lengthens the chest, opens the shoulders, and reminds the spine that extension is part of a balanced Pilates practice. Lie face down, legs long, forehead hovering, and start with a tiny upper-back lift. Not a giant cobra. A clean, small lift that comes from the upper spine and stays out of the low back.
Reach the arms long or keep them by the sides. Lift for 3 to 5 slow counts, lower with control, and repeat 6 to 8 times. Then add a dart shape: arms back, chest slightly lifted, legs hovering if your back is happy there. The goal is a long line through the crown of the head and the toes, not a strained lower-back bend.
The first time you do this well, you’ll feel the work in places most people ignore — between the shoulder blades, around the back of the ribs, and deep in the glutes. That’s useful. Those are the spots that help the body look tall when you stand up again.
7. Forearm Plank Knee Hovers
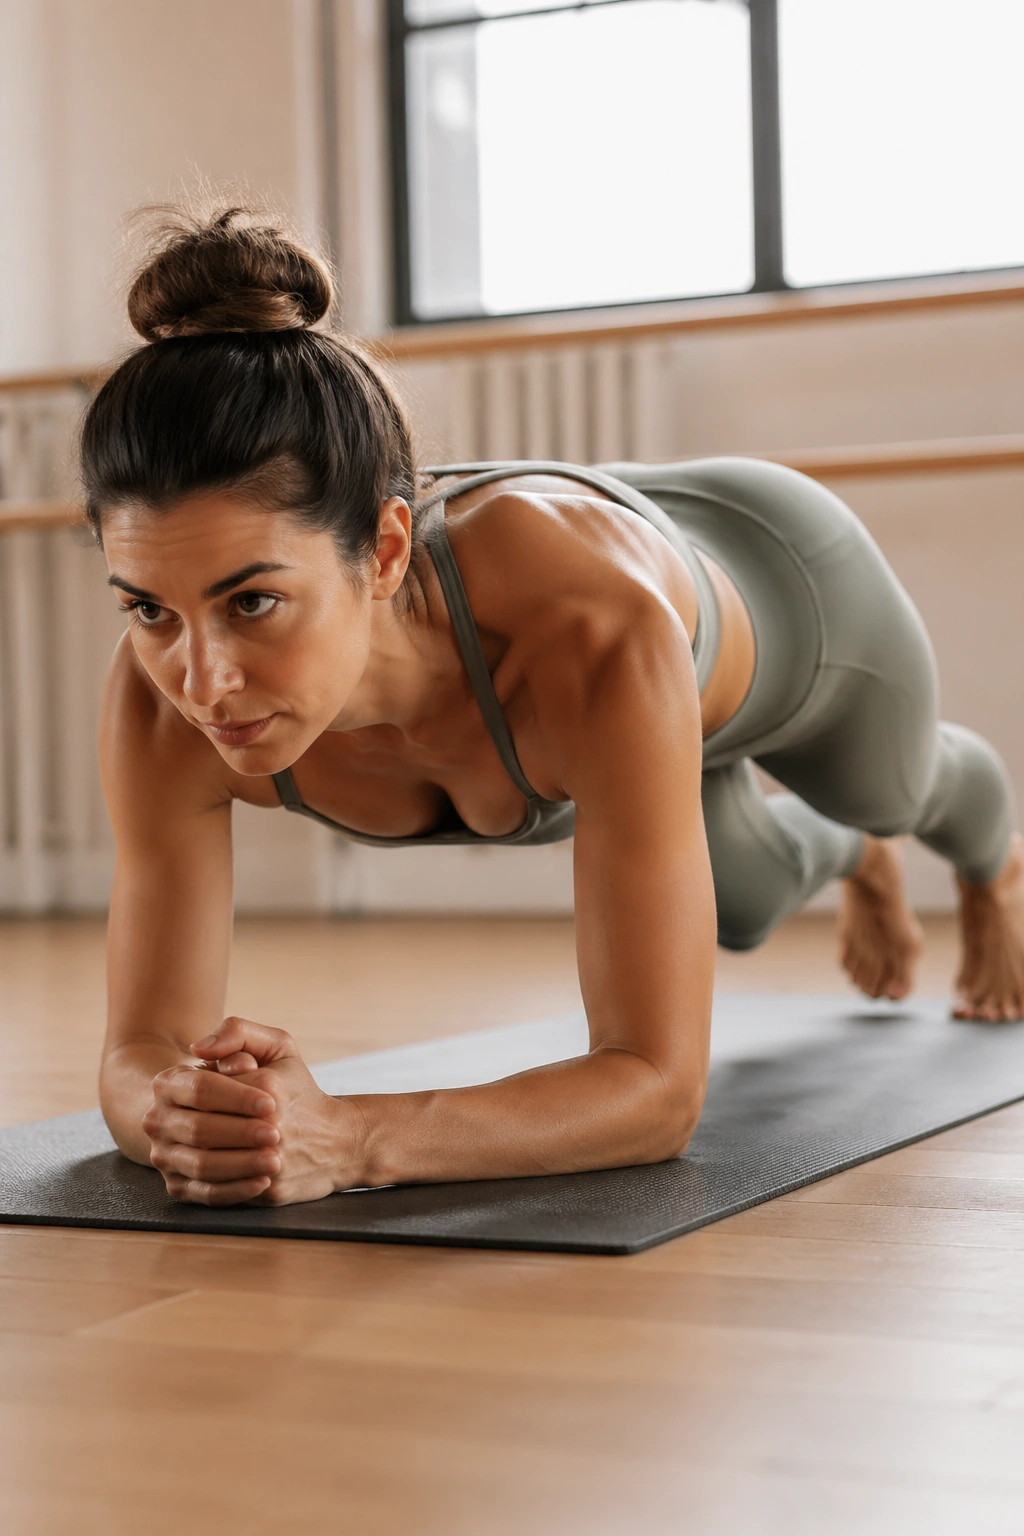
Want a plank that feels more Pilates than gym grind? Take it lower and make it quieter.
Set up on the forearms with the shoulders directly over the elbows, legs long, and heels pushing back. Instead of holding and suffering, float one knee an inch or two off the floor and set it down, then switch sides. The tiny hover forces the waist to stabilize without letting the hips sag. Twenty to thirty seconds of clean hovers can do more than a minute of sloppy holding.
What To Watch For
Keep the ribs knitted in and the tailbone long. If your neck starts jutting forward, reset. If the low back starts pinching, shorten the hold or drop to the knees.
How To Keep the Waist From Dumping
Think about dragging the floor away with the forearms. Think about the inner thighs touching even when they aren’t. That cue helps more than squeezing the glutes like mad. You want a straight, long line, not a clenched one.
This is one of those workouts where form makes or breaks the effect. A beautiful plank is not loud. It’s steady.
8. Teaser Prep on the Mat
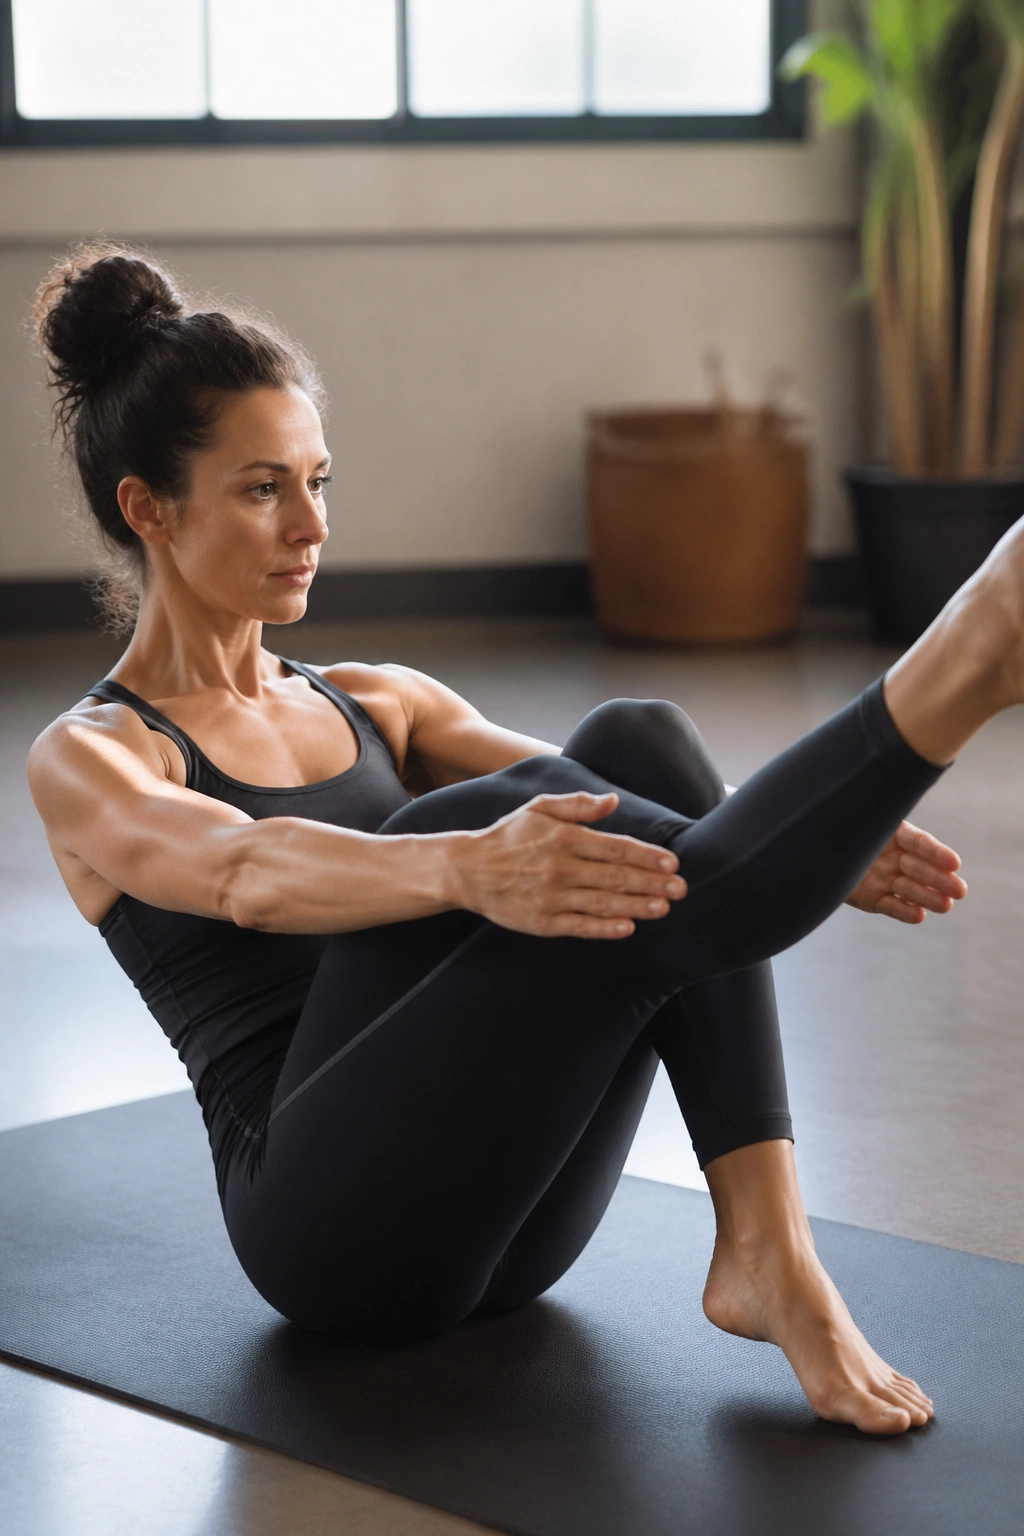
The teaser gets all the attention, but teaser prep is often the smarter place to live. It builds the shape without the wobble.
Start curled up with knees bent, then extend one leg at a time, keeping the torso lifted as the legs lengthen. If the full teaser is clean, great. If not, stay in the prep and work the angle where the abs still hold and the back doesn’t grumble. Five reps each side is enough for a focused set.
The real job here is learning to balance on the sit bones without collapsing behind them. That changes posture in a way people can see. Shoulders stop slouching. The waist looks tidier. The front of the hip flexors stop yanking everything out of line.
Slow the lowering down. That’s where the control lives. One quick note: if the neck feels thick or tight, keep the gaze on the knees and the lift small. Fancy is not the goal. Clean is.
9. Reformer Footwork Ladder
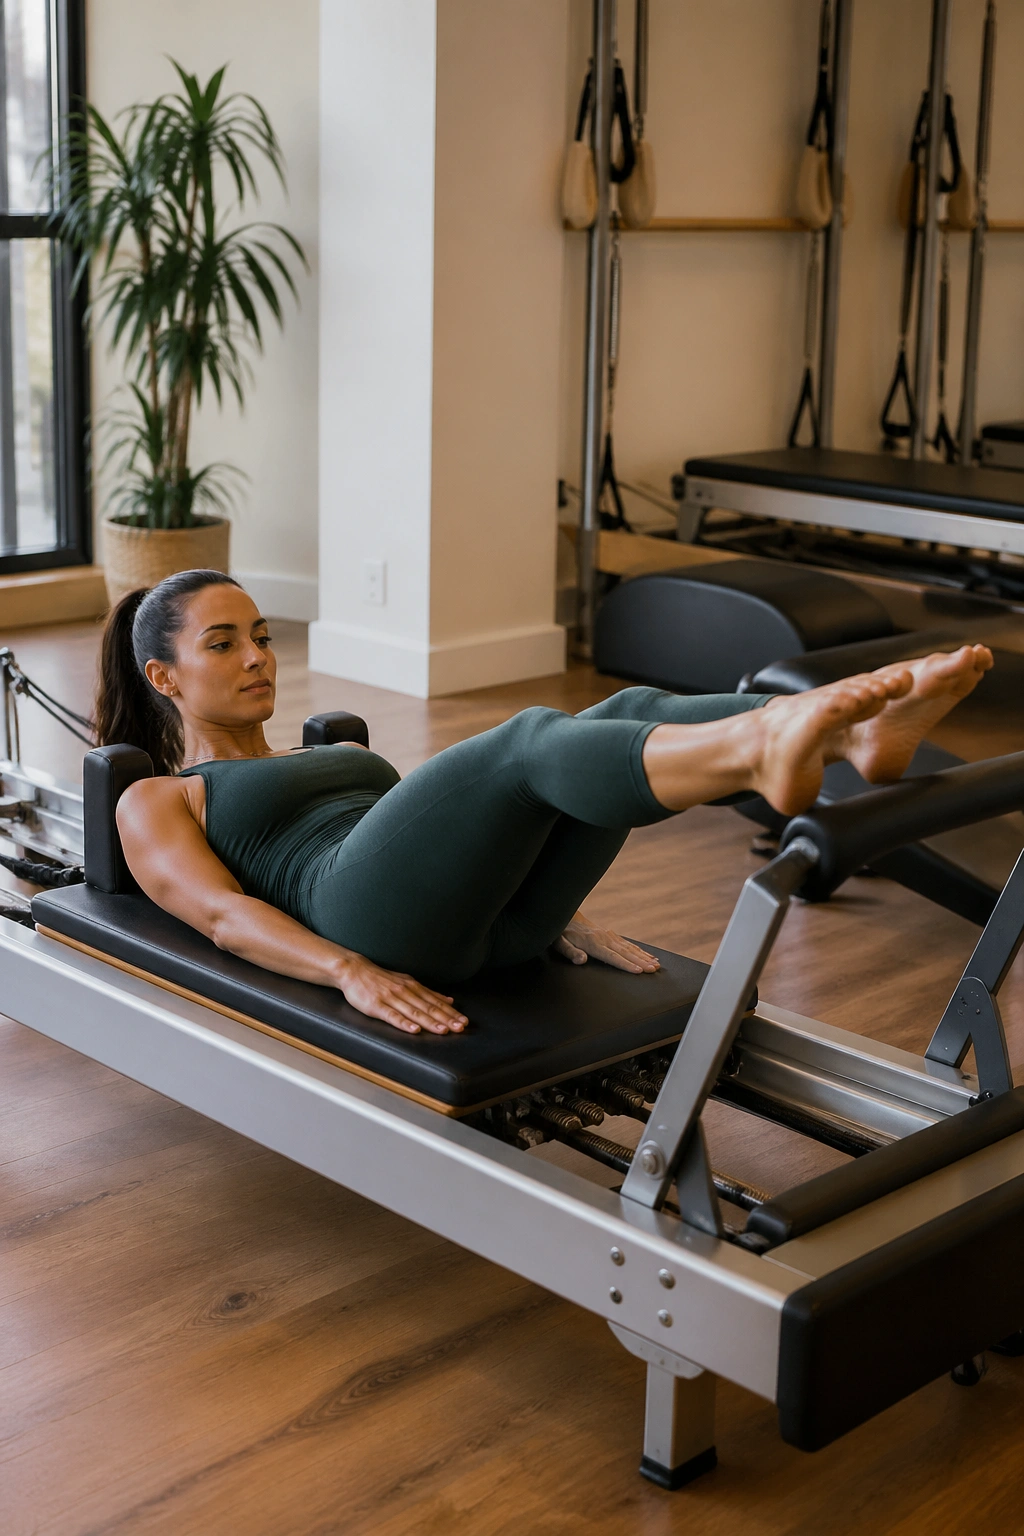
If you have access to a reformer, footwork is one of the fastest ways to feel the line from hip to ankle sharpen up. It also teaches the legs to press without dumping into the lower back.
Use three foot positions: heels, arches, and toes on the bar. Press the carriage out and return with control for 10 reps in each position. Keep the springs moderate — heavy enough to feel resistance, light enough to keep the motion smooth. The machine should glide, not slam.
This is where the reformer beats mat work for some people. The moving carriage gives feedback every single second, which makes alignment easier to catch. On the mat, your body has to self-correct more. On the reformer, the machine tells on you.
Who benefits most? Beginners who need tactile feedback, and experienced movers who want cleaner leg lines without doing endless reps. A small detail: keep the knees tracking over the second toe on every press. If the knees drift in, the line gets messy fast.
10. Standing Side Bend With Light Resistance
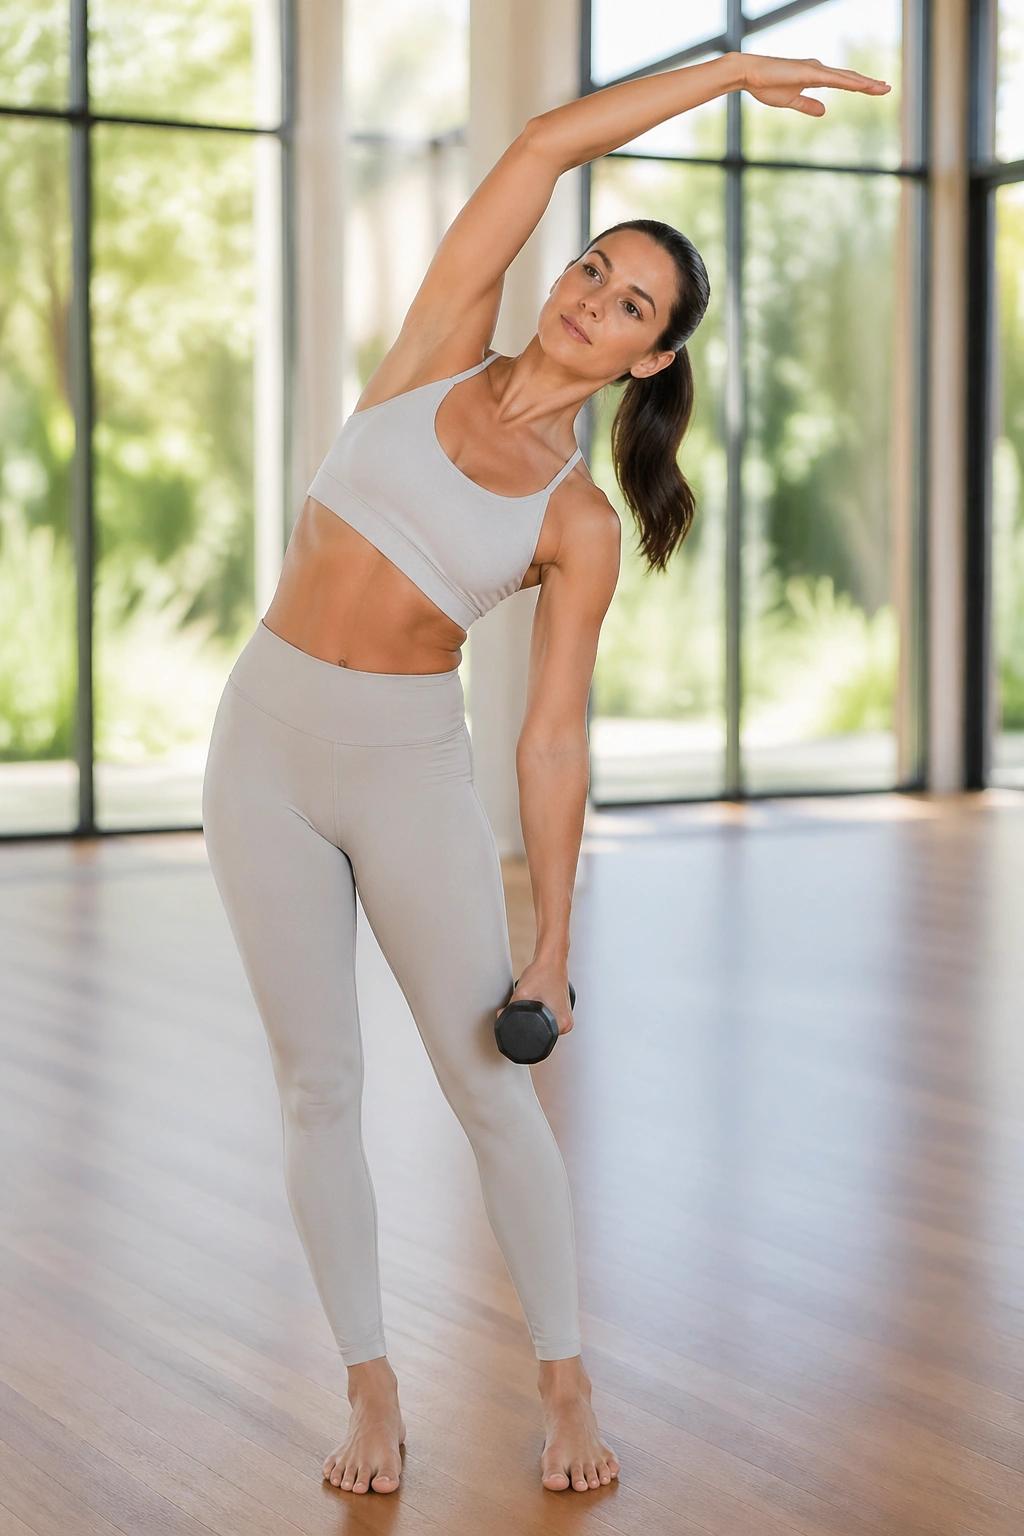
Stand up. Yes, really. Pilates is not only a floor game.
Hold a light dumbbell, a small ball, or nothing at all, and slide one hand down the thigh while the opposite arm reaches overhead. The bend should come from the side body, not a hard crunch at the waist. Come back to center and repeat 6 to 8 times per side. Keep the pelvis facing forward and the chest open.
This move does two things at once. It trains the obliques to lengthen while they work, and it reminds the body that the waistline is supposed to move with grace, not collapse. The standing position also brings the feet into the picture, which matters more than people admit. If the arches roll in, the whole thing gets wobbly.
A tiny but useful cue: keep both sides of the neck long. If the top shoulder creeps toward the ear, lower the arm a little and try again. No heroics.
11. Mermaid to Rotation Combo
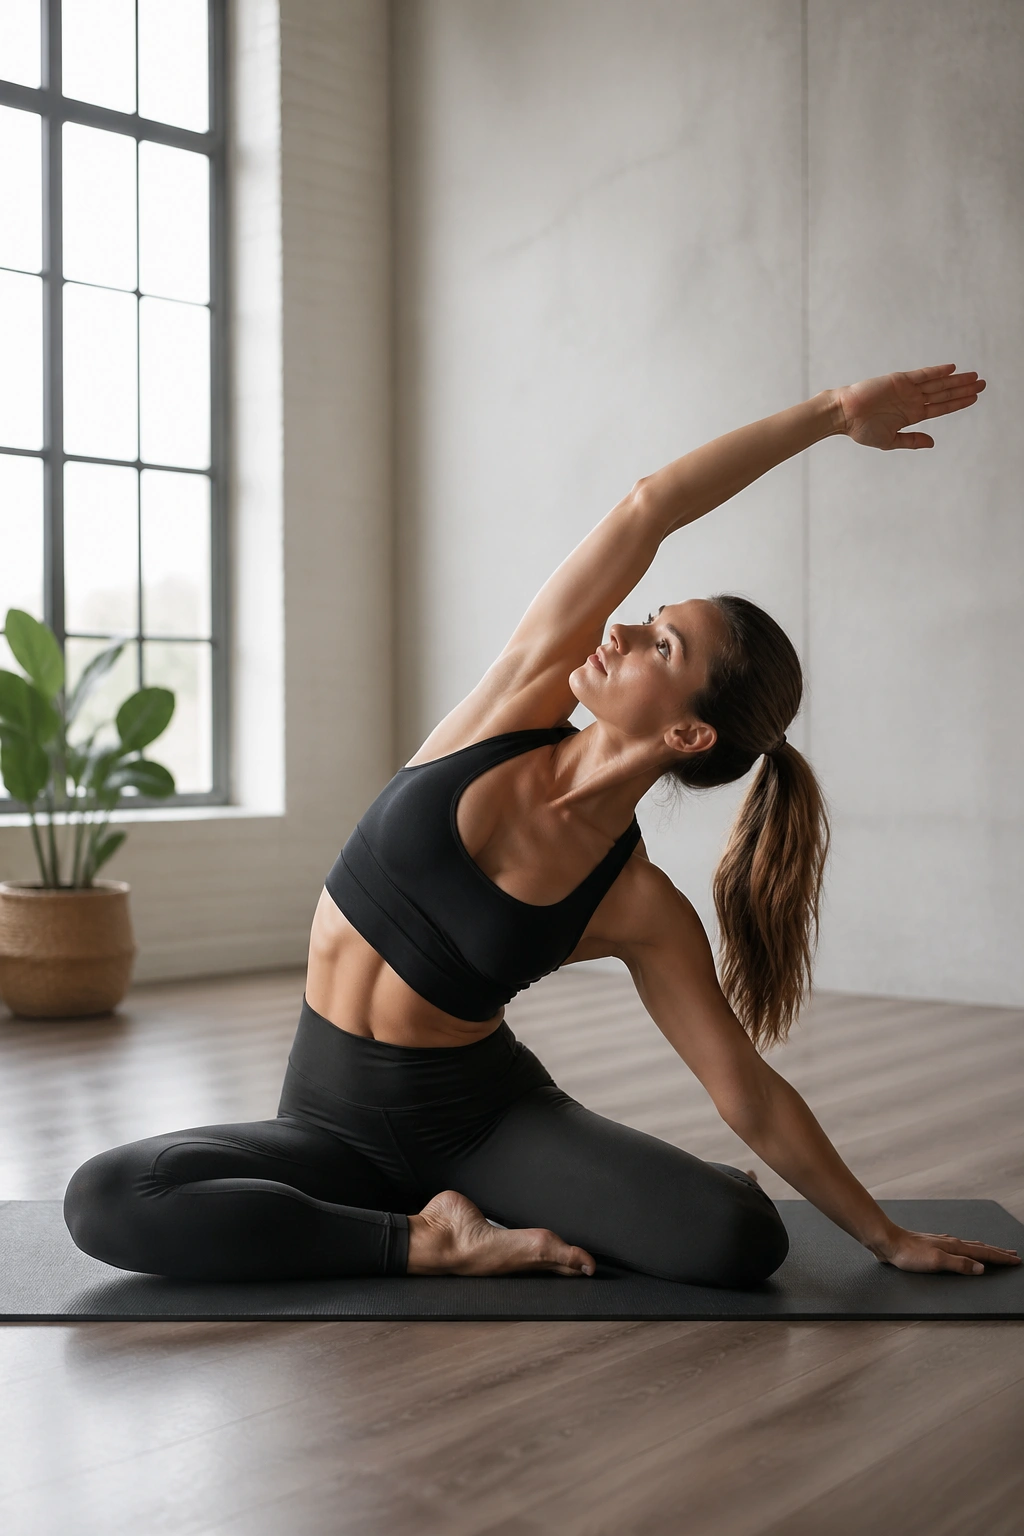
The Mermaid is one of those exercises that looks calm and feels sneaky. Add rotation and you get a side-body workout that also wakes up the ribs.
Sit with the legs folded to one side, one hand on the floor, the opposite arm reaching overhead. Side bend away from the folded legs, then rotate the chest toward the floor and return through center. Do 3 slow mermaids per side, then finish with 5 controlled rotation pulses if your spine feels good there.
The appeal here is obvious once you try it. The side body gets length, then it gets strength while that length is still there. That combination is what gives Pilates its drawn-out look across the waist and rib cage. It also feels good after a long day at a desk, which is a nice bonus even if you didn’t ask for one.
A quick practical note: sit tall on a folded mat or cushion if your hip bones dig into the floor. A comfortable setup makes the movement cleaner. Pain makes people shorten the range and lie to themselves about it.
12. Pilates Push-Up to Child’s Pose Reset
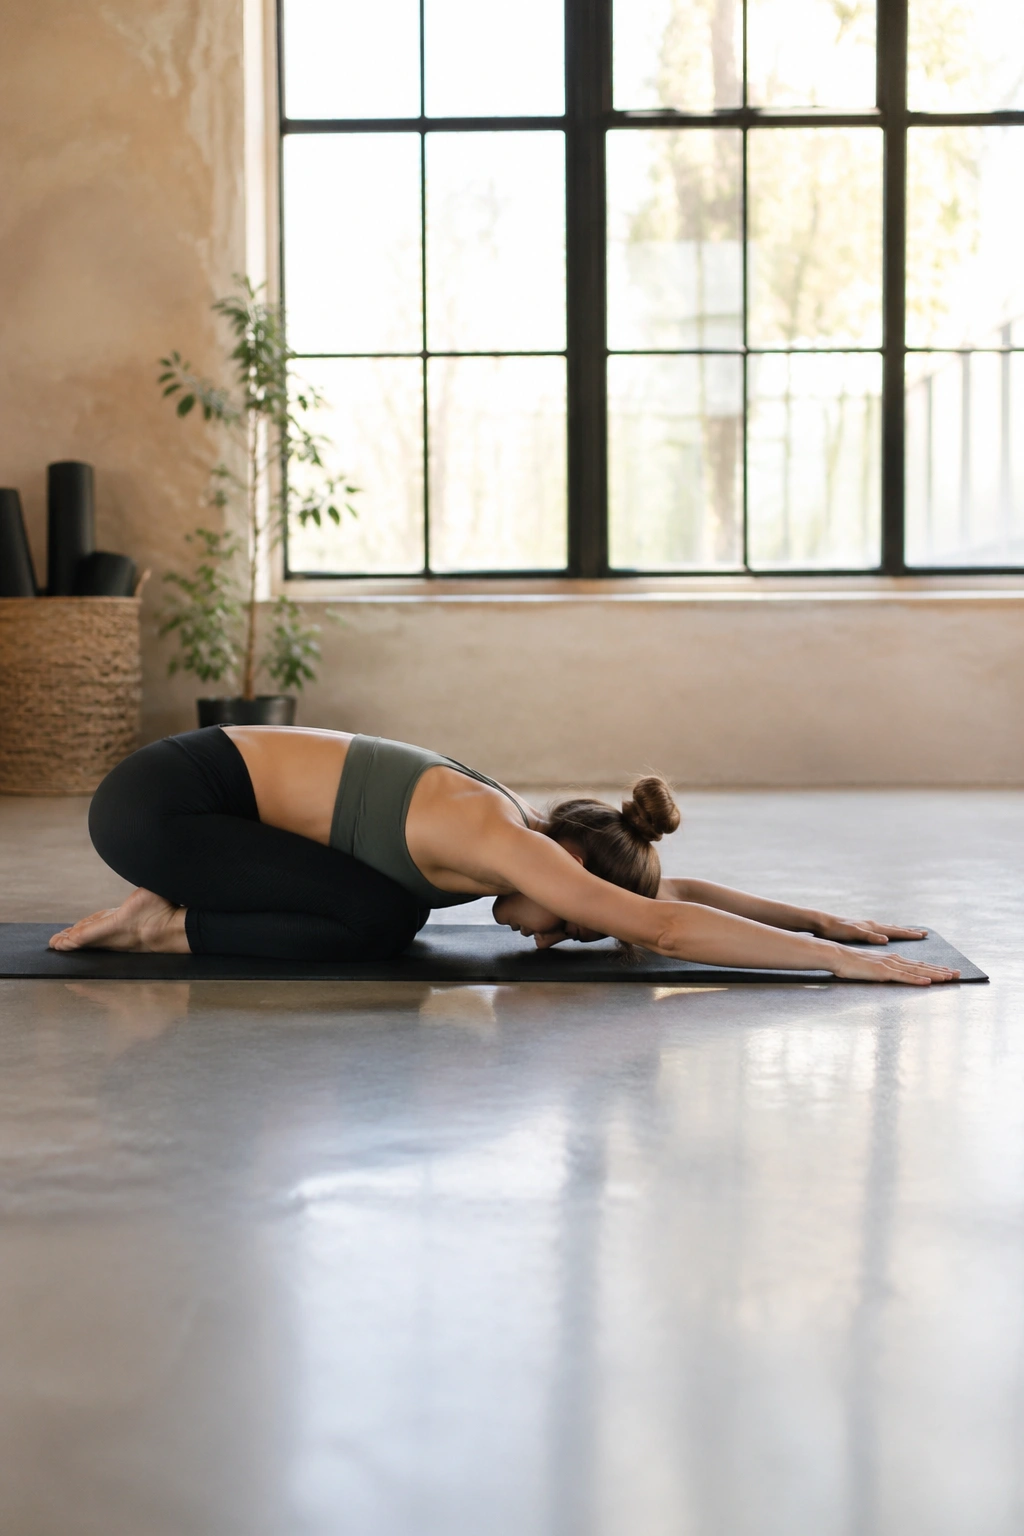
Can a push-up look graceful? Yes, if you don’t rush the return.
Walk the hands out, hold a long plank, lower with control for 3 slow counts, press back up, then drop the knees and sit into Child’s Pose for one breath before repeating. Keep the elbows angled back, not flared straight out. Three to five reps is enough for most people before form starts to wobble.
The reset matters. A lot. The pause in Child’s Pose keeps the shoulders from tightening up and gives the rib cage a chance to settle. Without that beat, the movement can turn into a frantic upper-body grinder, which is the opposite of what you want here.
One sentence can say it cleanly: the push-up should feel long, not rushed.
If full push-ups are too much, take the knees down from the start and keep the body in one line from head to knees. You’ll still get the arm, chest, and core work without cheating the shape.
13. Hundred on the Reformer With Straps
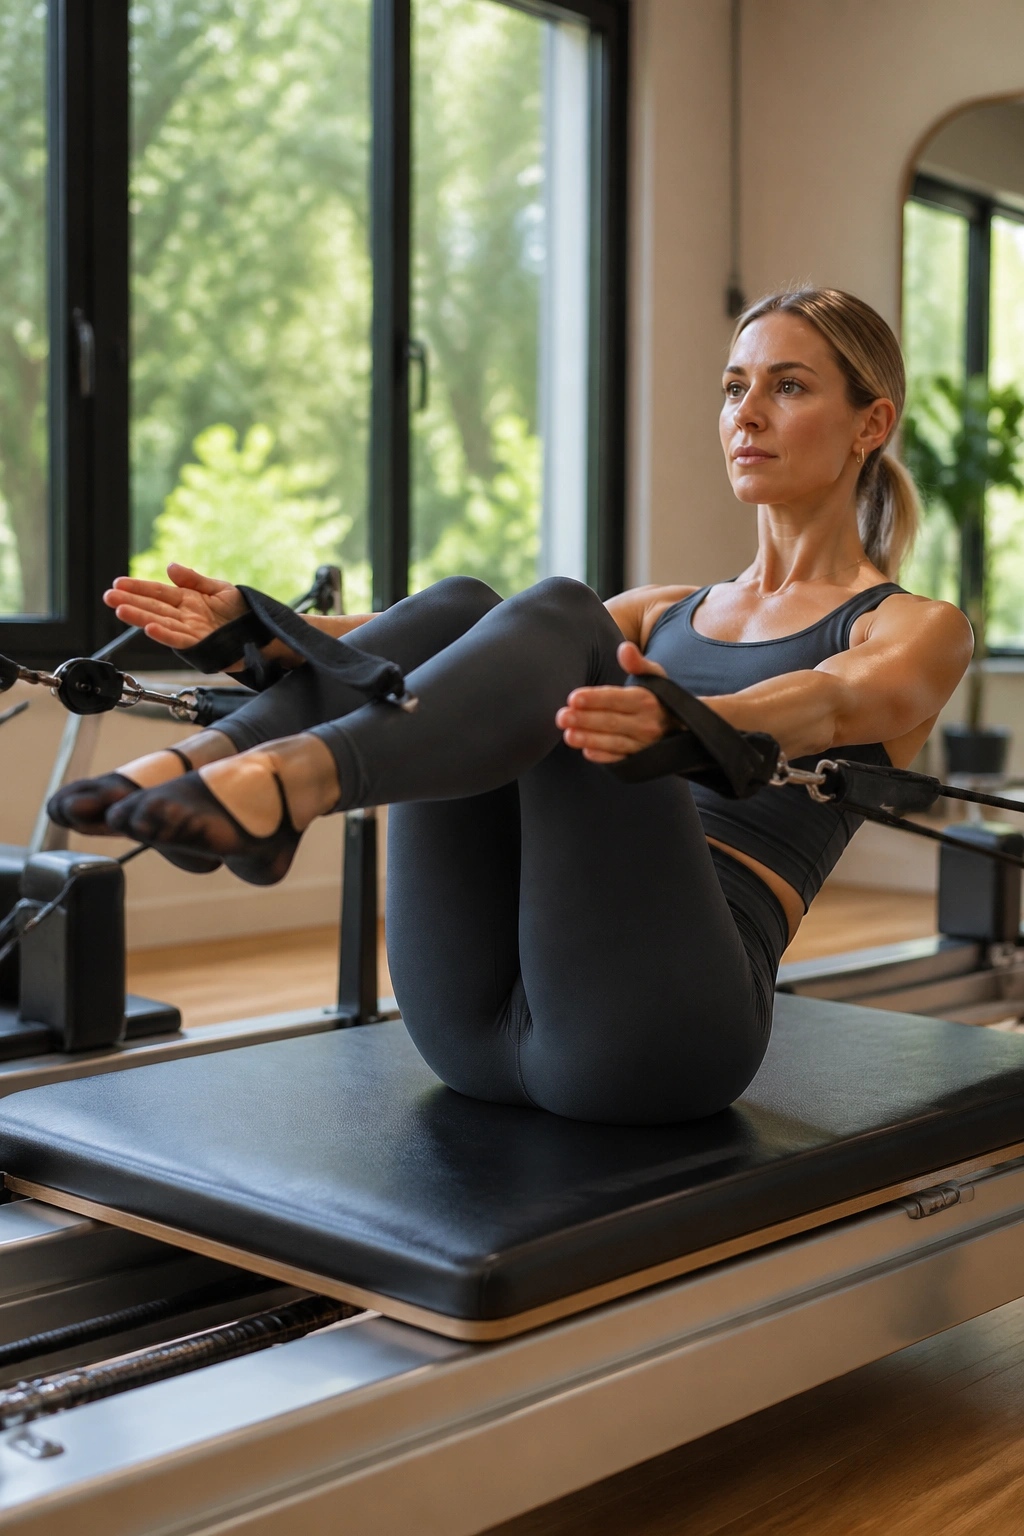
The reformer version of the Hundred feels different in the best way. The straps give you more feedback, and the springs make the arms work without turning the movement into a sloppy pump.
Hold the straps, curl up, and keep the legs in tabletop or long at a low angle if your back stays happy. Pump the arms for 10 counts of 5 in and 5 out, just like the mat version, while the carriage stays still under the feet. The trick is to keep the shoulders broad and the wrists neutral. Let the straps assist the line, not yank it.
What changes here is the chest. The springs encourage a wider opening across the collarbones, which helps the upper body look lifted instead of compressed. That matters when you’re chasing long lean sculpted lines and don’t want the shoulders folded forward from all the core work.
If the neck feels overworked, lower the head or rest the feet on the footbar. Form first. Always.
14. Kneeling Side-Kick Series
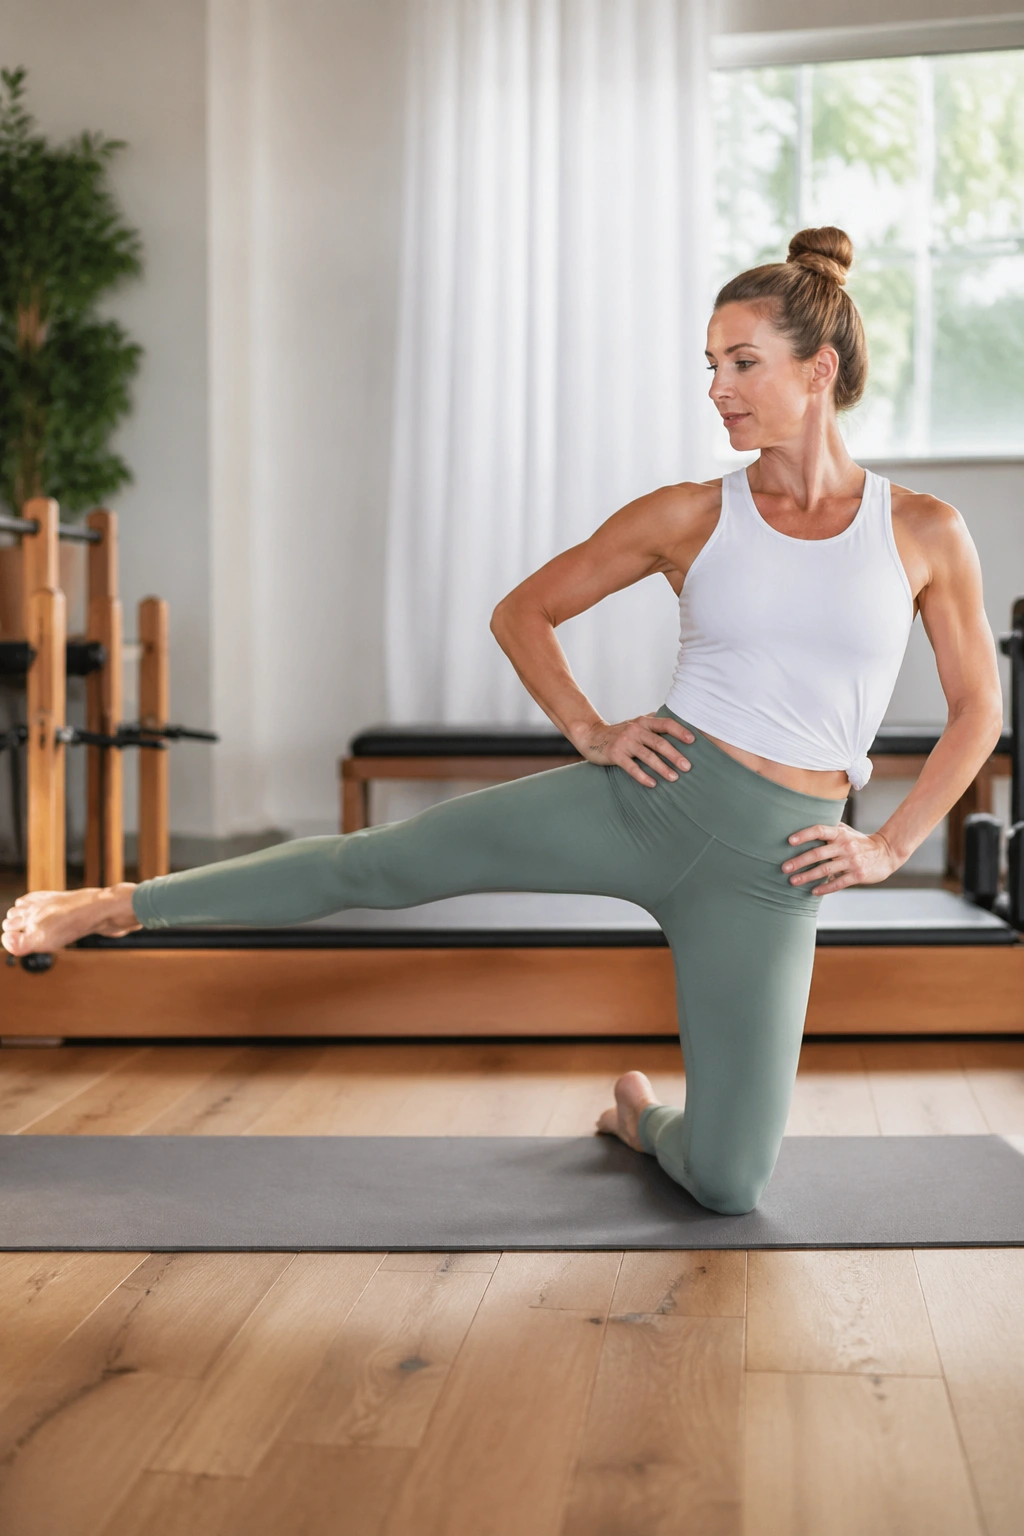
A kneeling side-kick series is one of those slightly awkward setups that pays off fast. The knees give you support, but the standing hip still has to work hard to keep the body from leaning.
Set one knee down on the mat and extend the other leg to the side or slightly behind, depending on the version you’re using. Lift and lower the free leg in small, exact ranges for 8 to 12 reps, then hold the top for 3 slow breaths. A light ankle weight or mini band can make the work more obvious, though it isn’t required.
The point here isn’t a huge leg swing. The point is a quiet pelvis. If the torso tilts, the standing side misses the whole party. Keep the ribs over the hips, the standing foot rooted, and the lifted leg precise.
A simple payoff: the glute medius works, the waist braces, and the standing leg learns to stabilize. That combination helps the whole lower body look cleaner when you walk, not just when you exercise.
15. Kneeling Arm Reach With Light Weights
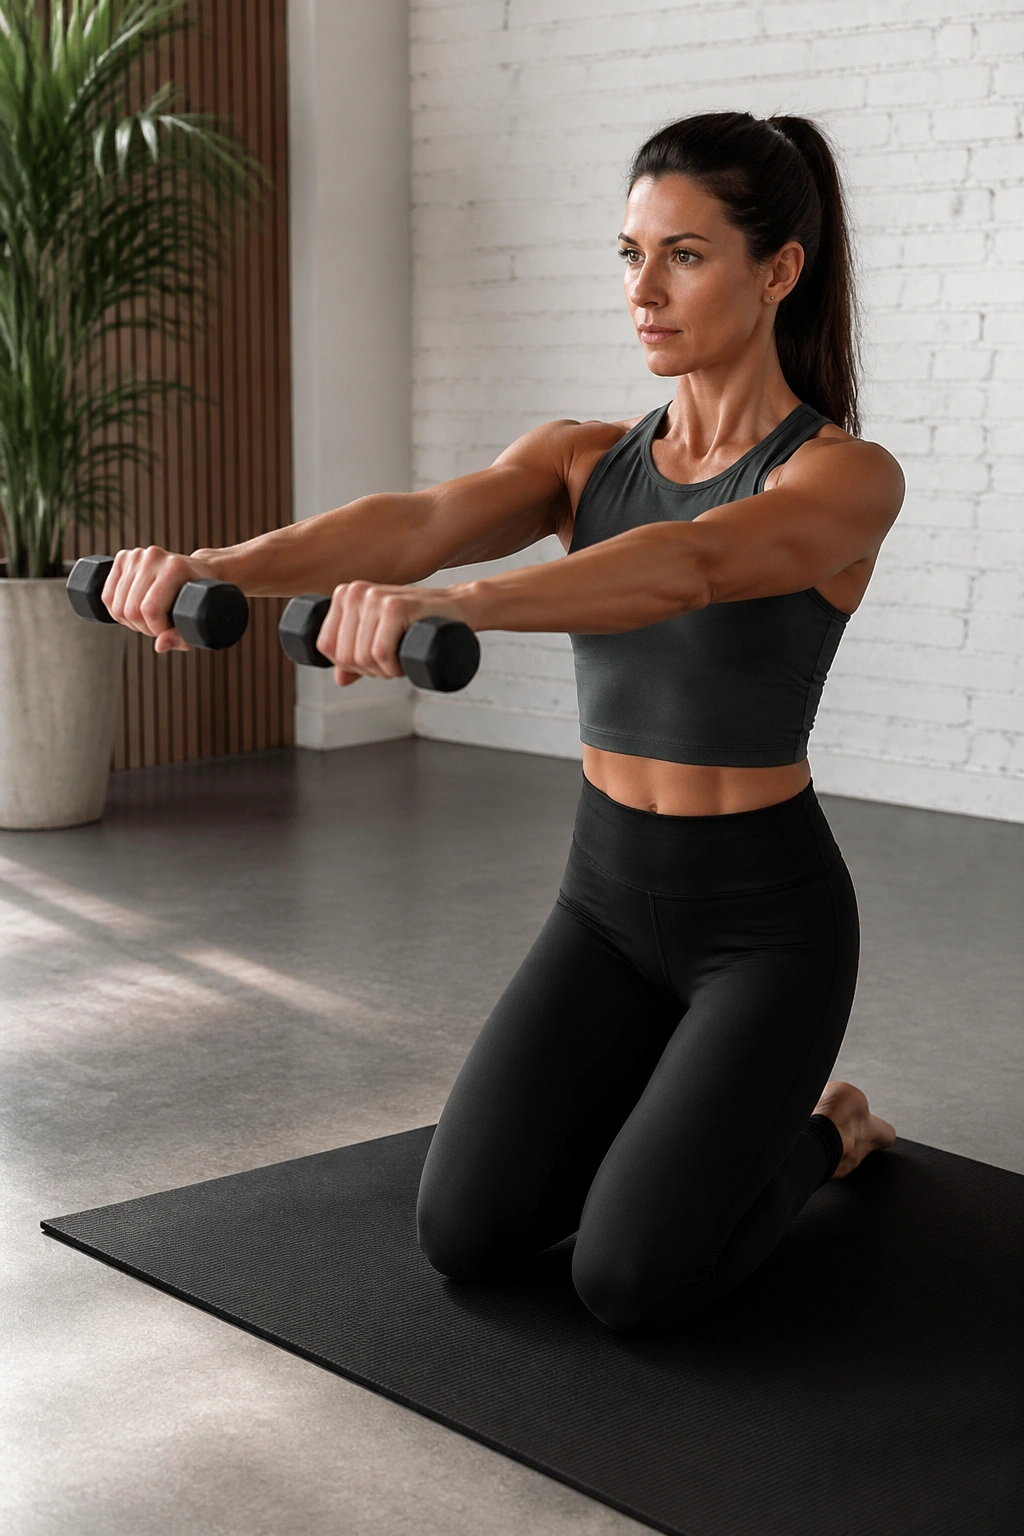
The upper body can change the whole silhouette, and this is one of my favorite ways to remind people of that. Kneeling work lets you isolate the shoulders and arms without letting the lower body cheat.
Hold one- to three-pound weights, or go barefoot with no weights if your shoulders are sensitive. Reach both arms forward, then open them slightly wide, then sweep them down by the ribs. Keep the hips stacked over the knees and the spine tall. Eight forward reaches and 8 controlled circles is enough to start. More than that and the shoulders may start shrugging.
The best part is the shape it trains through the upper back. The shoulder blades glide instead of pinching together, which gives the arms a more lifted look and helps posture too. Small circles are tougher than they sound. Small ones. Not giant ones that look impressive and do nothing.
If your lower back arches while you reach, tuck the tail slightly and shorten the range. The exercise should feel crisp, not loose.
16. Long Spine Stretch on the Reformer
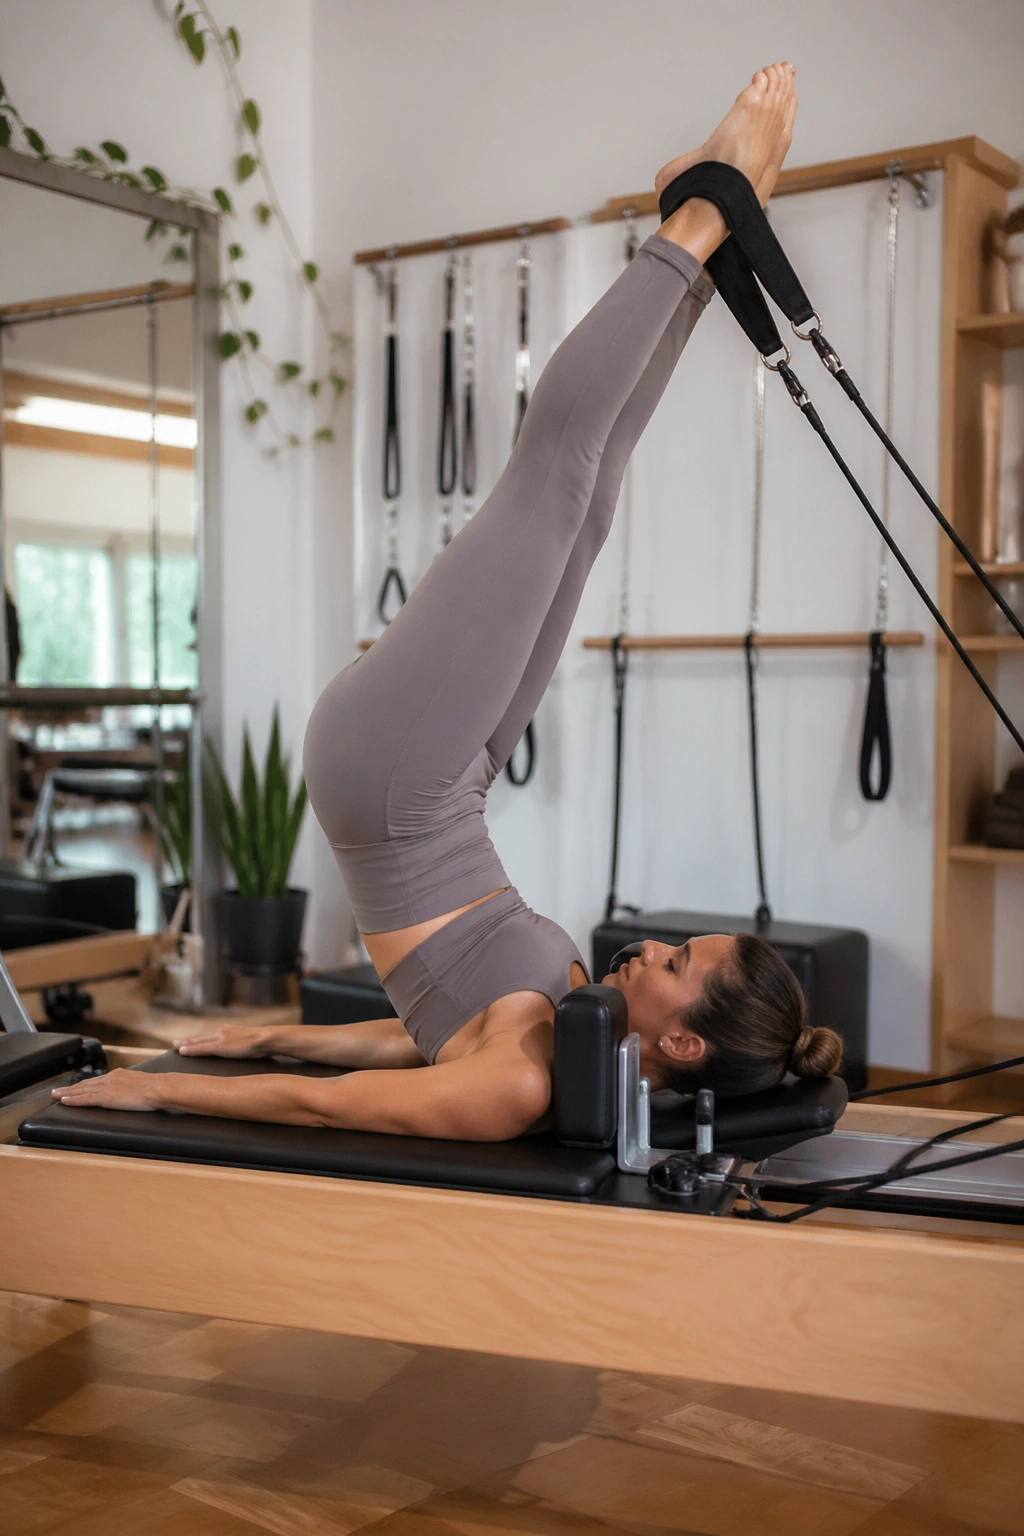
The Long Spine Stretch is one of the cleaner reformer exercises for creating that lifted, extended feeling through the back of the body. It looks elegant because it demands control at every inch.
Set up on the reformer with the straps on the feet, legs pressing to the ceiling, and the carriage open just enough to begin. Roll the spine up and over, then articulate back down with the carriage staying quiet until the very last moment. Five slow reps can be enough if each one is exact.
Compared with the mat roll-up, this version adds spring resistance and a stronger hamstring demand. The feet want to stay organized. The pelvis wants to stay square. The ribs want to stay calm. If any one of those falls apart, the line disappears fast.
A useful cue: think of the legs reaching up while the waist folds, not the whole body folding in one lump. That image keeps the movement long instead of jammed. The first time you get it right, the back of the body feels unbelievably organized.
17. Wall Roll-Down and Calf Raise Sequence
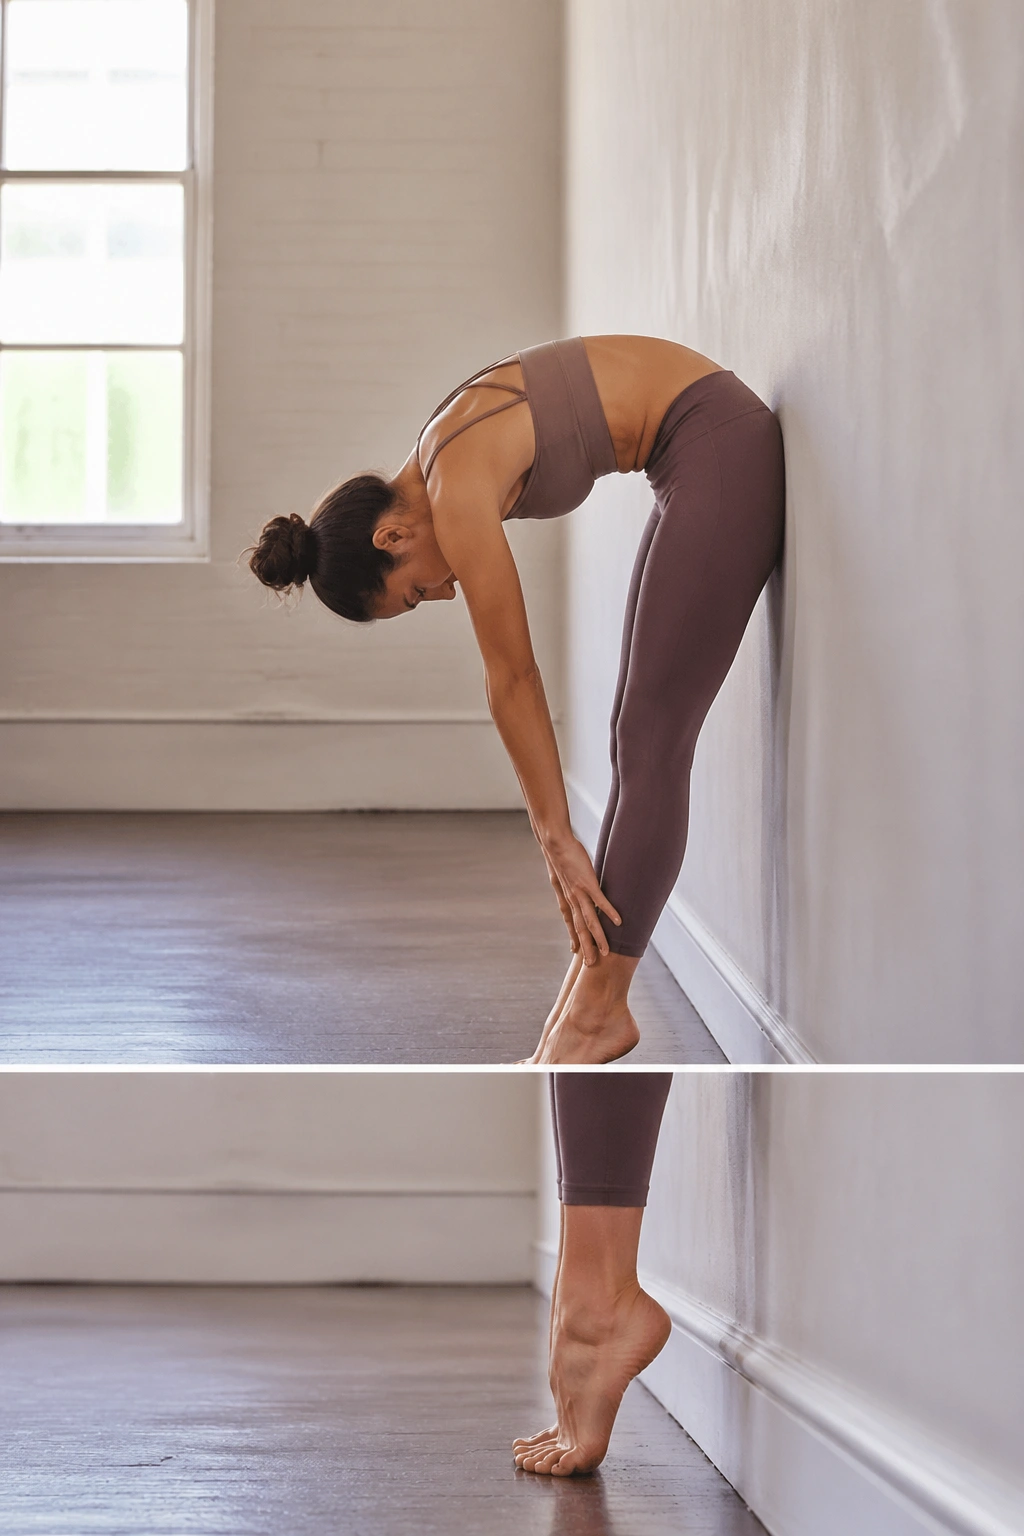
Not every sculpting move has to happen on the floor. A wall gives you a brutal amount of feedback, which is why I like it.
Stand with your back near the wall and roll down one vertebra at a time until the hands hover near the shins. Pause there for a breath, then roll back up. Add 12 slow calf raises at the top, keeping the ankles straight and the weight centered over the big toe, second toe, and heel. Repeat the full sequence 6 to 8 times.
The wall helps you feel rib position, which is half the battle. People often think they need more abdominal effort when what they need is better stacking. Once the ribs stop flaring, the waist looks longer and the neck looks less crowded. That’s a very Pilates kind of fix.
And the calf raises? They sharpen the lower line. A lot of people forget the feet, then wonder why the posture never quite changes. The feet are the base. Ignore them and the rest gets messy.
18. Crisscross With Tempo Hold
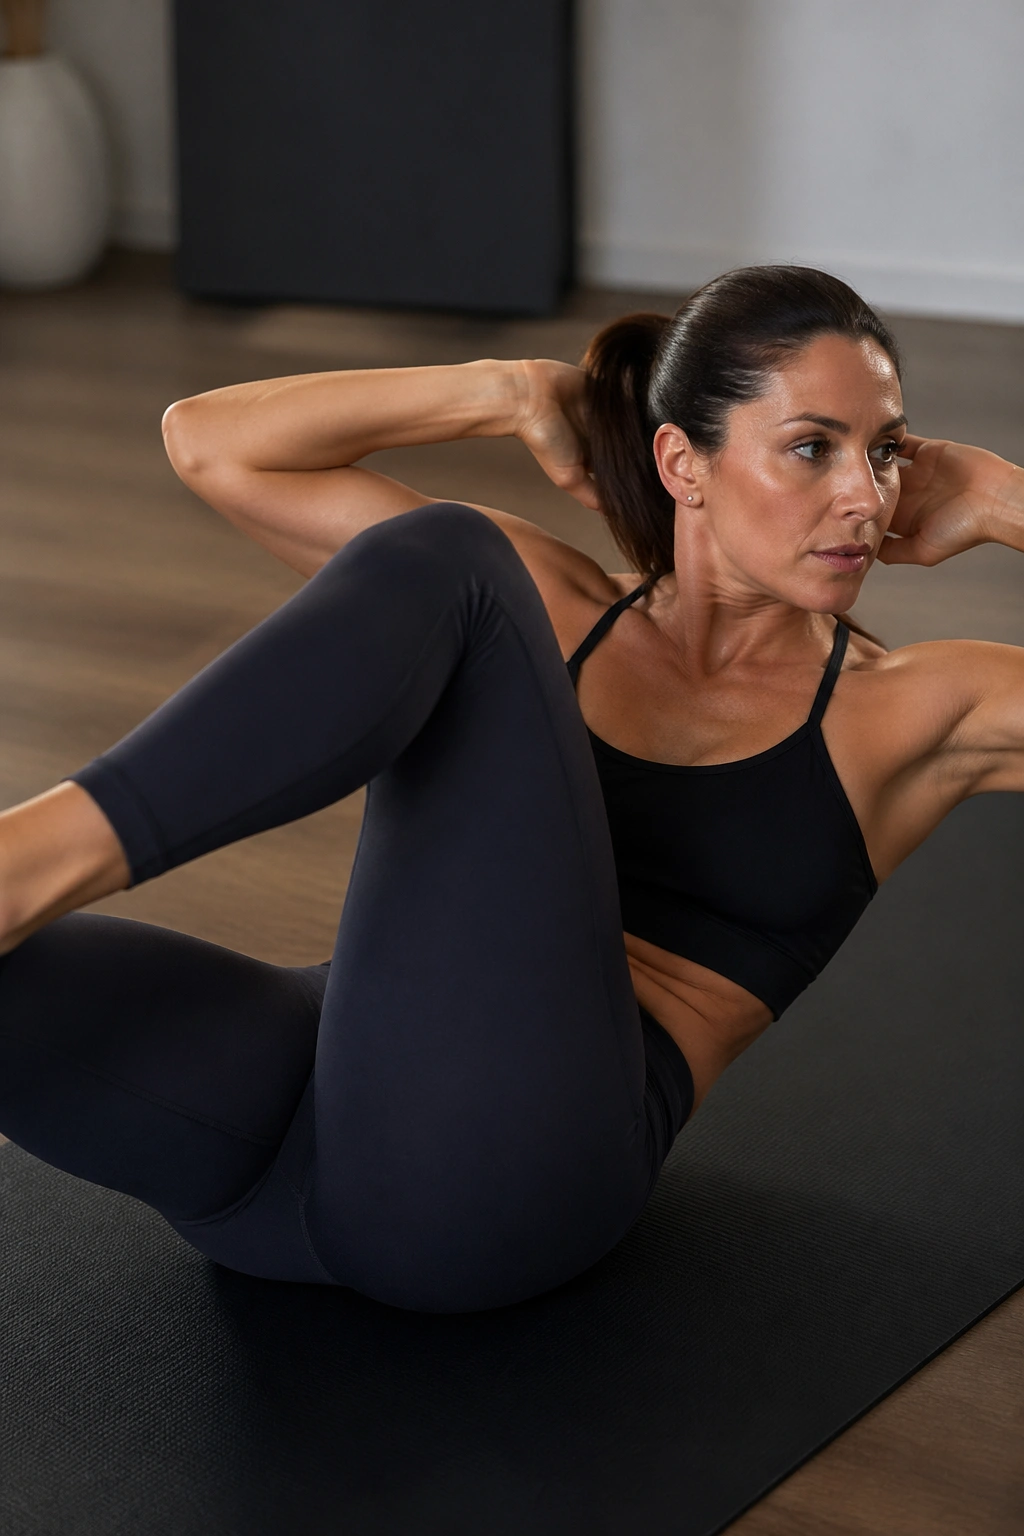
Crisscross is a classic for a reason, but speed ruins it fast. The hold makes the whole thing worth doing.
Lie curled up, one knee in, the other leg extended, and rotate the torso toward the bent knee. Hold the twist for 2 counts, then switch sides slowly without letting the ribs flare or the elbows yank the head forward. 6 to 8 reps per side is plenty if the tempo stays honest.
Why It Feels Different When Done Well
The obliques work in a lengthened position, which is a big part of the “long” in long lean sculpted lines. The rotation should come from the rib cage, not a frantic elbow chase. If your neck gets tense, widen the elbows and shrink the twist.
A Small Rule That Helps
Keep the down leg stable. If it starts drifting around like a windshield wiper, the core is not steering anymore. Slow down, reset, and make the lower body boring. Boring is good here.
19. Bridge on Heels With Hamstring Bias
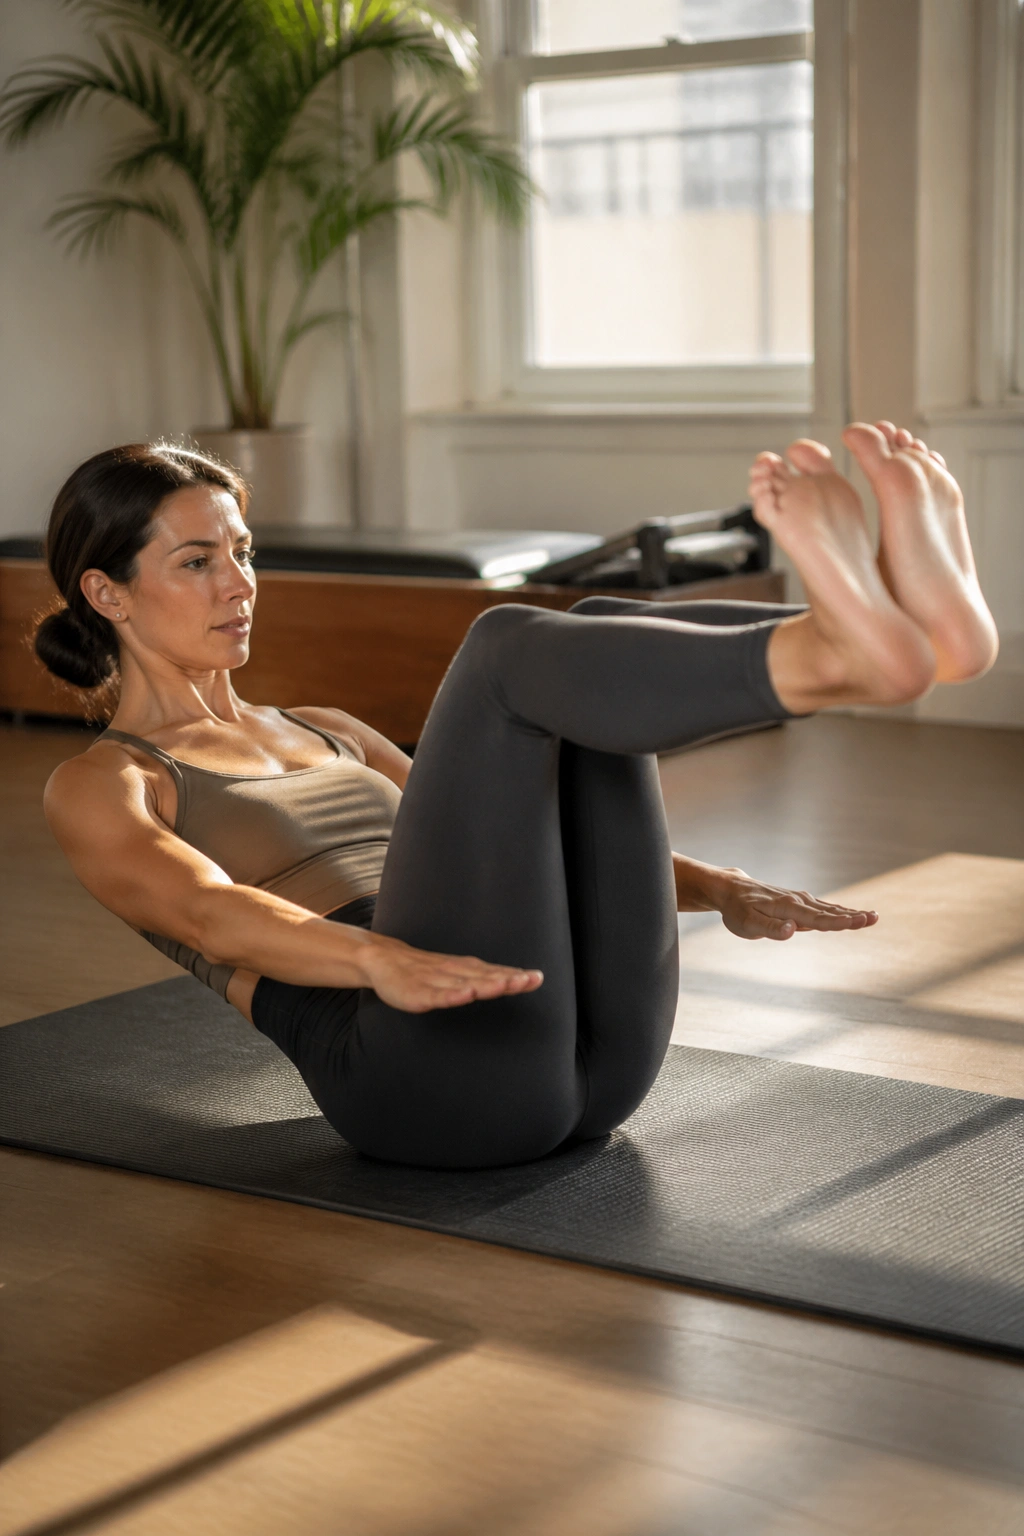
Most bridges lean glute-heavy. This version shifts more toward the hamstrings, which changes the feel and the line.
Place the heels close enough that the toes can lift off the floor. Press through the heels, lift the hips, and hold for 5 to 8 seconds at the top before lowering with control. Do 6 to 10 reps depending on how steady your hamstrings feel. If they cramp, move the feet a little farther away and soften the range.
The heel position is the trick. It makes the back of the legs do more of the work and takes some of the load off the low back. That matters if your hips tend to take over the moment you bridge. The shape stays longer, and the pelvis tends to stay more level.
A good bridge should feel like the back of the body is lifting you, not the spine is arching you. Small difference. Big payoff.
20. Swimming Series for the Back Body
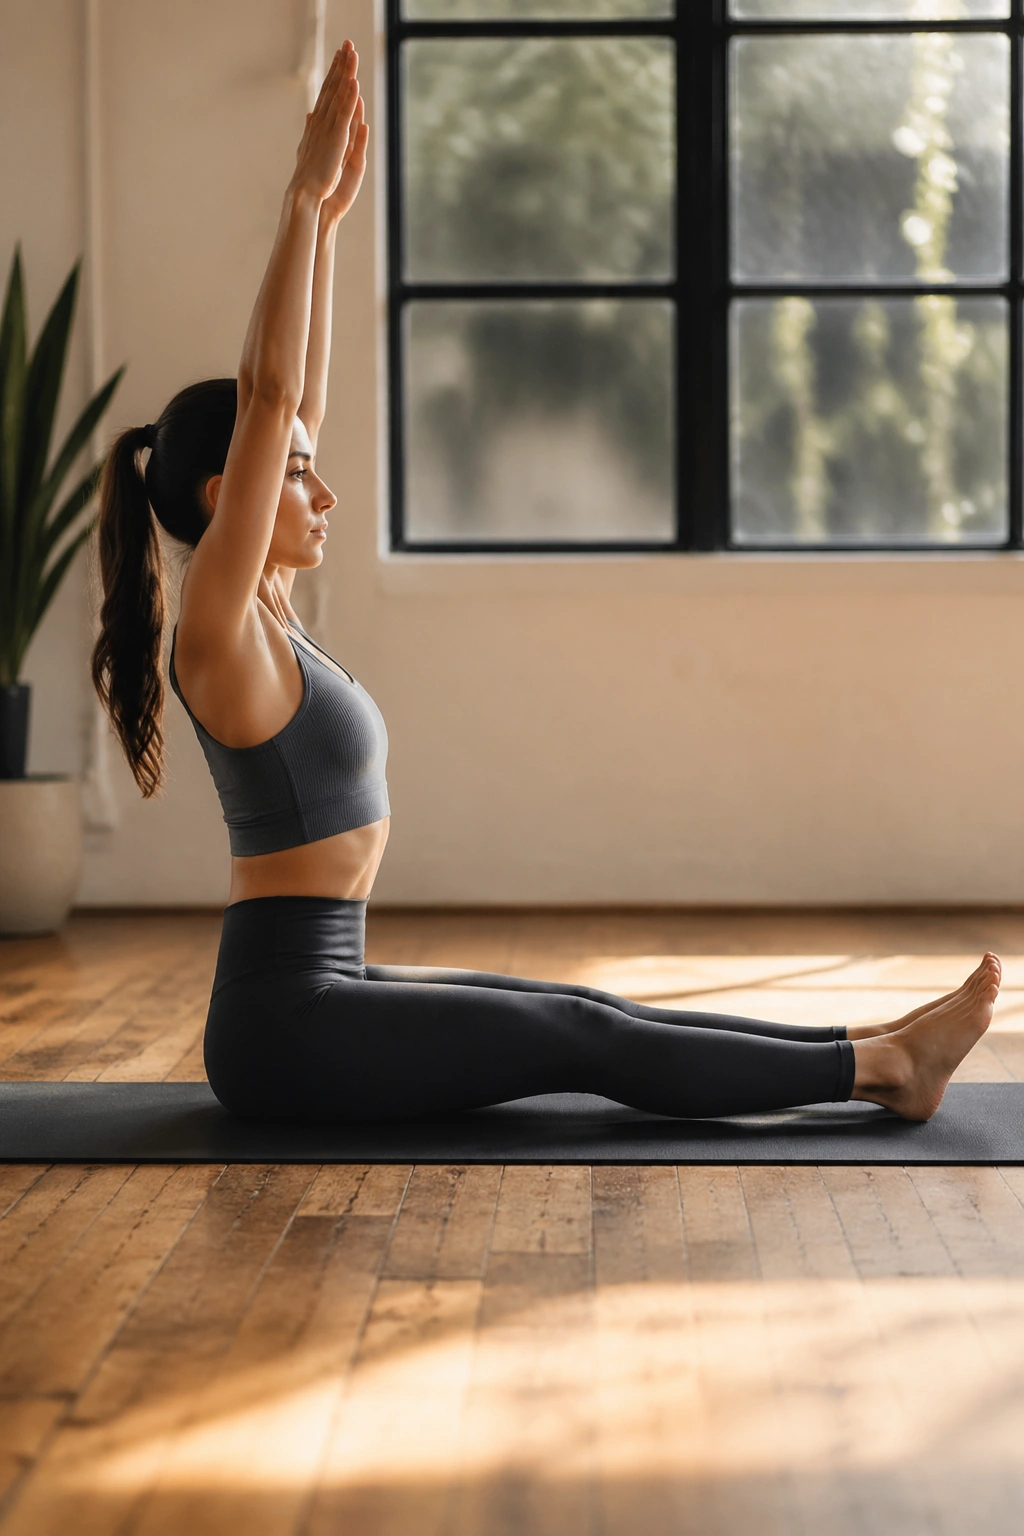
Swimming looks modest until you’re three breaths in and your whole back starts talking. That is exactly why it belongs here.
Lie face down, reach the arms long, and lift opposite arm and leg in a quick, alternating rhythm for 20 to 30 seconds. Keep the head aligned with the spine, not jammed upward. The lifts are small. Tiny, even. Big kicks and wild arm swings steal the work from the backline.
The swimming pattern trains the glutes, upper back, and posterior shoulders in one shot. It also teaches endurance, which helps the body hold its shape outside the studio. When the back of the body gets stronger, the front of the torso tends to look longer and more open. That’s the visual people want, even if they don’t always know why.
A blunt note: if your lower back is gripping, lower the limbs and shorten the hold. You are not trying to impress anyone with range. You are trying to keep the line clean.
21. Standing Balance Series With Cross-Body Reach
Stand on one leg and things get honest fast. No mat. No springs. No hiding.
Lift one knee to hip height, reach the opposite arm overhead, then add a slow cross-body reach as the lifted leg extends a few inches. Hold the balance for 3 to 5 breaths on each side, then switch. If that’s too much, keep one toe tapping the floor lightly as a kickstand while you work the reach.
- Stand tall through the crown of the head.
- Keep the standing hip level.
- Reach through the fingertips, not the shoulder.
- Put the lifted foot down before the pelvis wobbles.
The cross-body shape teaches the trunk to stabilize while the limbs move away from center. That’s a lovely thing for posture, and it looks clean in motion. It also helps the ankles, which get ignored too often in Pilates conversations.
No need to rush this one. Stillness is the challenge.
22. Eight-Minute Full-Body Finisher
If you want one short sequence that stitches everything together, this is the one I’d keep nearby. It hits the front line, side body, back body, and balance work without feeling bloated or random.
Move through the following with almost no rest:
- 20 Hundred pumps
- 6 slow roll-ups
- 8 single-leg stretch switches per side
- 8 side kicks each side
- 20-second forearm plank knee hovers
- 6 bridge marches
- 30 seconds of swimming
- 3 standing balance holds per side
The pace matters. Keep the transitions tidy and the reps controlled. If a move starts to fall apart, trim the count and clean up the shape instead of grinding through extra junk reps. That’s a better use of time, and it keeps the workout in the Pilates lane instead of turning it into a rushed circuit.
This is the kind of routine I like when I want Pilates workouts for long lean sculpted lines without a lot of setup. It asks for breath, balance, and precision in one short block. No gimmicks. No noise. Just enough work to make your body feel organized again.
