



That sharp, stabbing sensation running from your lower back, down through your glute, and potentially into your leg or foot is one of the most frustrating symptoms of pregnancy. It often feels less like a simple ache and more like a lightning bolt, especially when you try to roll over in bed or stand up after sitting for a few minutes. Sciatica occurs during pregnancy because the piriformis muscle—a small, flat muscle deep in your buttocks—can become tight or inflamed, often due to changes in posture, the shifting weight of your baby, or the softening of ligaments caused by relaxin.
When that muscle tightens, it puts pressure directly on the sciatic nerve, the longest nerve in your body. It is a classic case of mechanical compression. While you might want to reach for a heating pad or just stay in bed, movement is often the most effective way to provide lasting relief. You need to create space and length in the tight tissues surrounding the nerve without straining your joints, which are already dealing with an increased workload. These movements focus on gentle release, blood flow, and pelvic stability.
1. Seated Piriformis Stretch
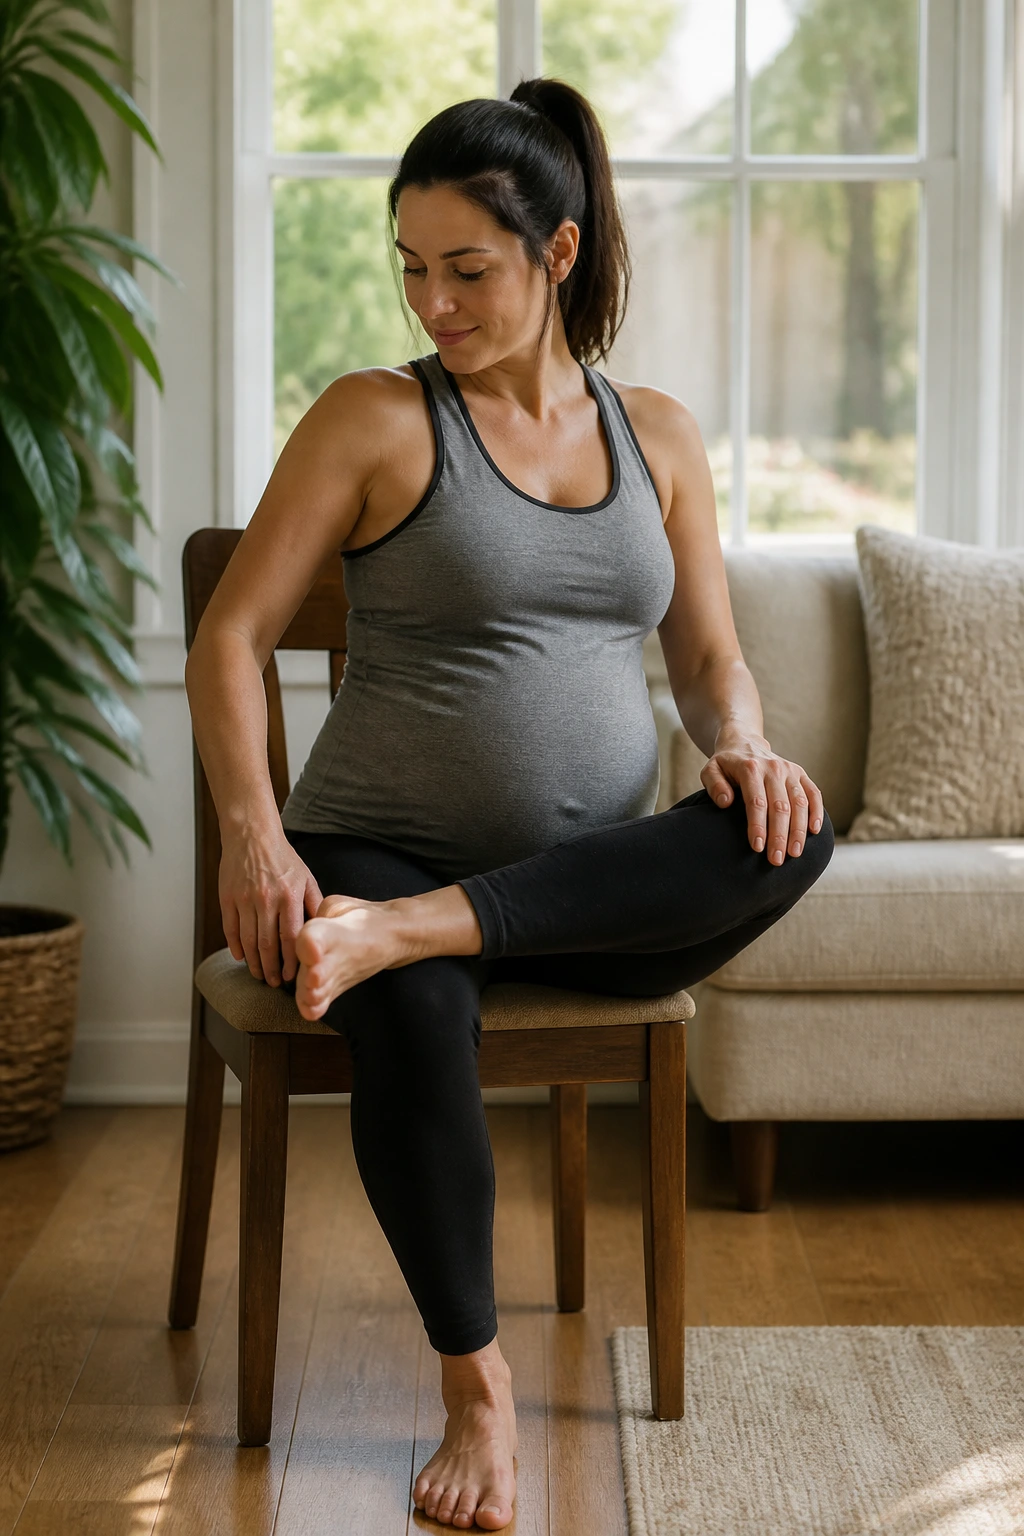
The piriformis muscle is the most common culprit for sciatic pain. When you are pregnant, your center of gravity shifts forward, causing your pelvis to tilt and your lower back to arch. This puts constant tension on the piriformis, causing it to press against the sciatic nerve. Sitting down to address this muscle is often much more comfortable than trying to balance on one leg.
Why This Targets the Nerve
By sitting, you remove the element of balance, allowing your nervous system to relax enough to let the muscle lengthen. When your nervous system feels secure, it stops sending signals for the muscles to contract protectively. You want to focus on the sensation of “opening” rather than “stretching” to the point of discomfort.
How to perform this stretch:
- Sit on a sturdy chair with both feet flat on the floor, about hip-width apart.
- Cross your right ankle over your left knee, creating a “figure-four” shape with your legs.
- Keep your spine tall; do not slouch, as rounding your back can put extra pressure on your discs.
- Slowly lean your torso forward from your hips, keeping your chest open and your neck long.
- Breathe deeply into the tightest part of your glute; you should feel a deep, dull release rather than a sharp, nerve-like pain.
- Hold for 30 seconds, then switch to the left side.
2. Cat-Cow Pose
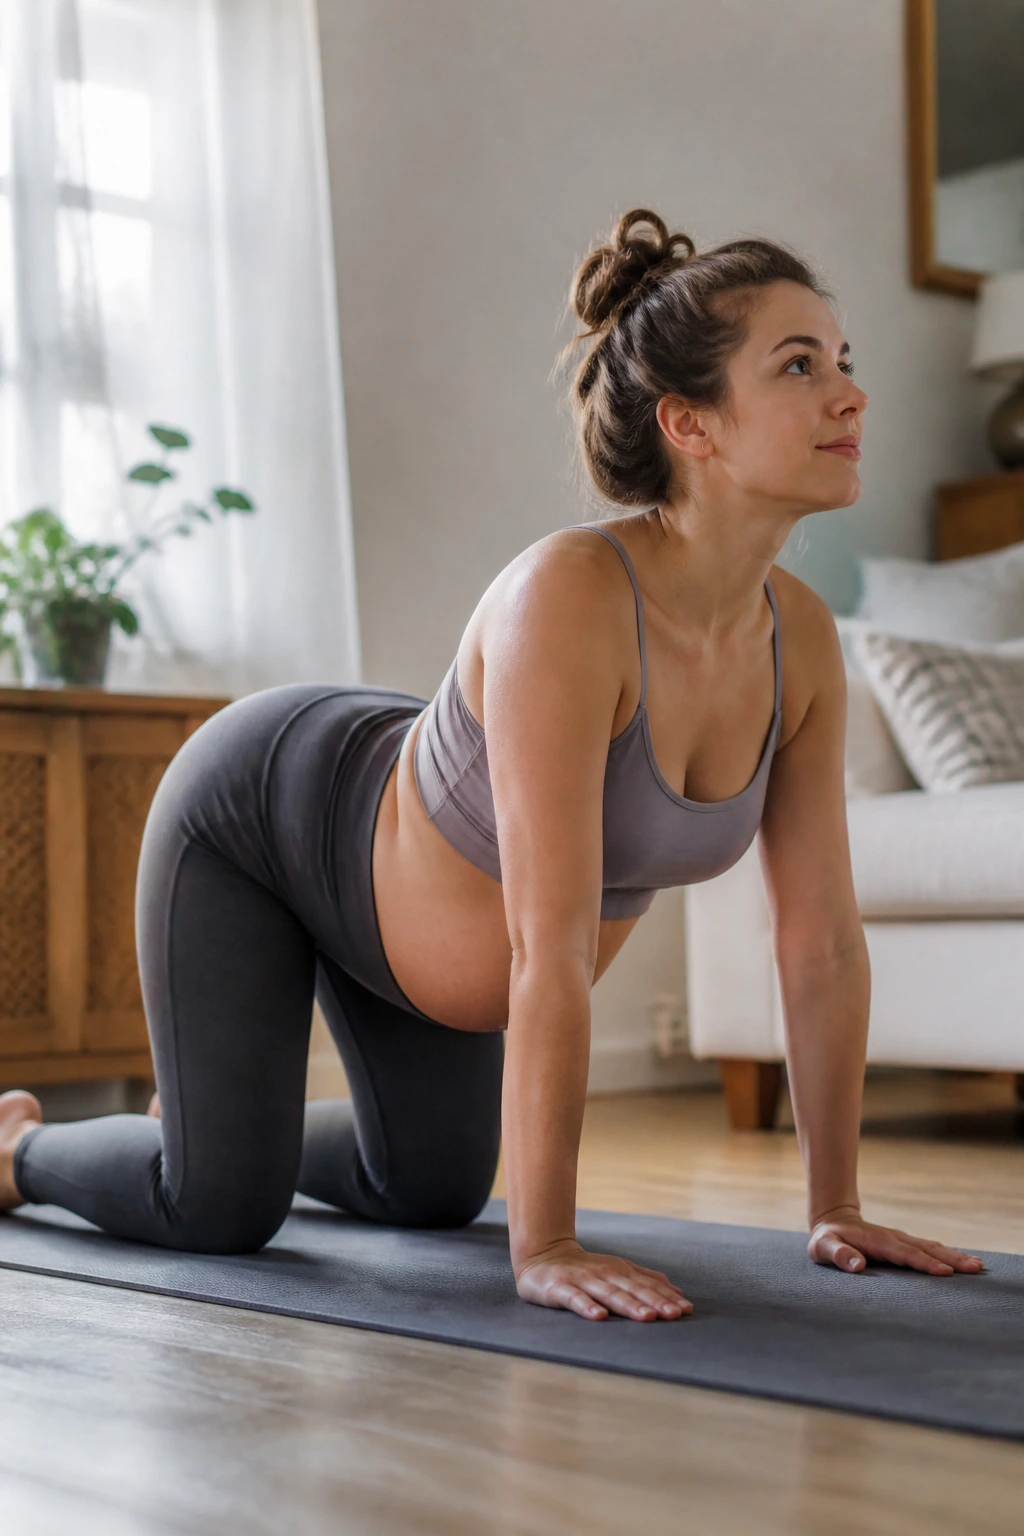
This classic movement is widely recommended because it does double duty: it relieves back pain while also encouraging your baby to move into a better position for labor. During pregnancy, your abdominal muscles are stretched thin, and your spine loses some of its natural support. Cat-Cow helps re-establish that rhythm and mobility.
The Mechanics of the Move
When you move into “Cow” (dropping the belly), you gently stretch the abdominal wall. When you move into “Cat” (rounding the back), you create space between the vertebrae in your lower back. This movement helps flush stagnant fluid and encourages better blood flow to the lumbar region where the sciatic nerve originates.
Guidelines for safety:
- Start on your hands and knees in a tabletop position; make sure your wrists are directly under your shoulders and your knees under your hips.
- As you inhale, drop your belly toward the floor, look slightly forward, and broaden your collarbones. Do not force your back into a deep arch; just let it sag gently.
- As you exhale, tuck your chin toward your chest and round your spine toward the ceiling, pushing the floor away with your hands.
- Move slowly. The slower you move, the more you will notice the tension along your lower back and glutes.
- Repeat this for 10 to 15 cycles, syncing your breath with the movement.
3. Child’s Pose with Wide Knees
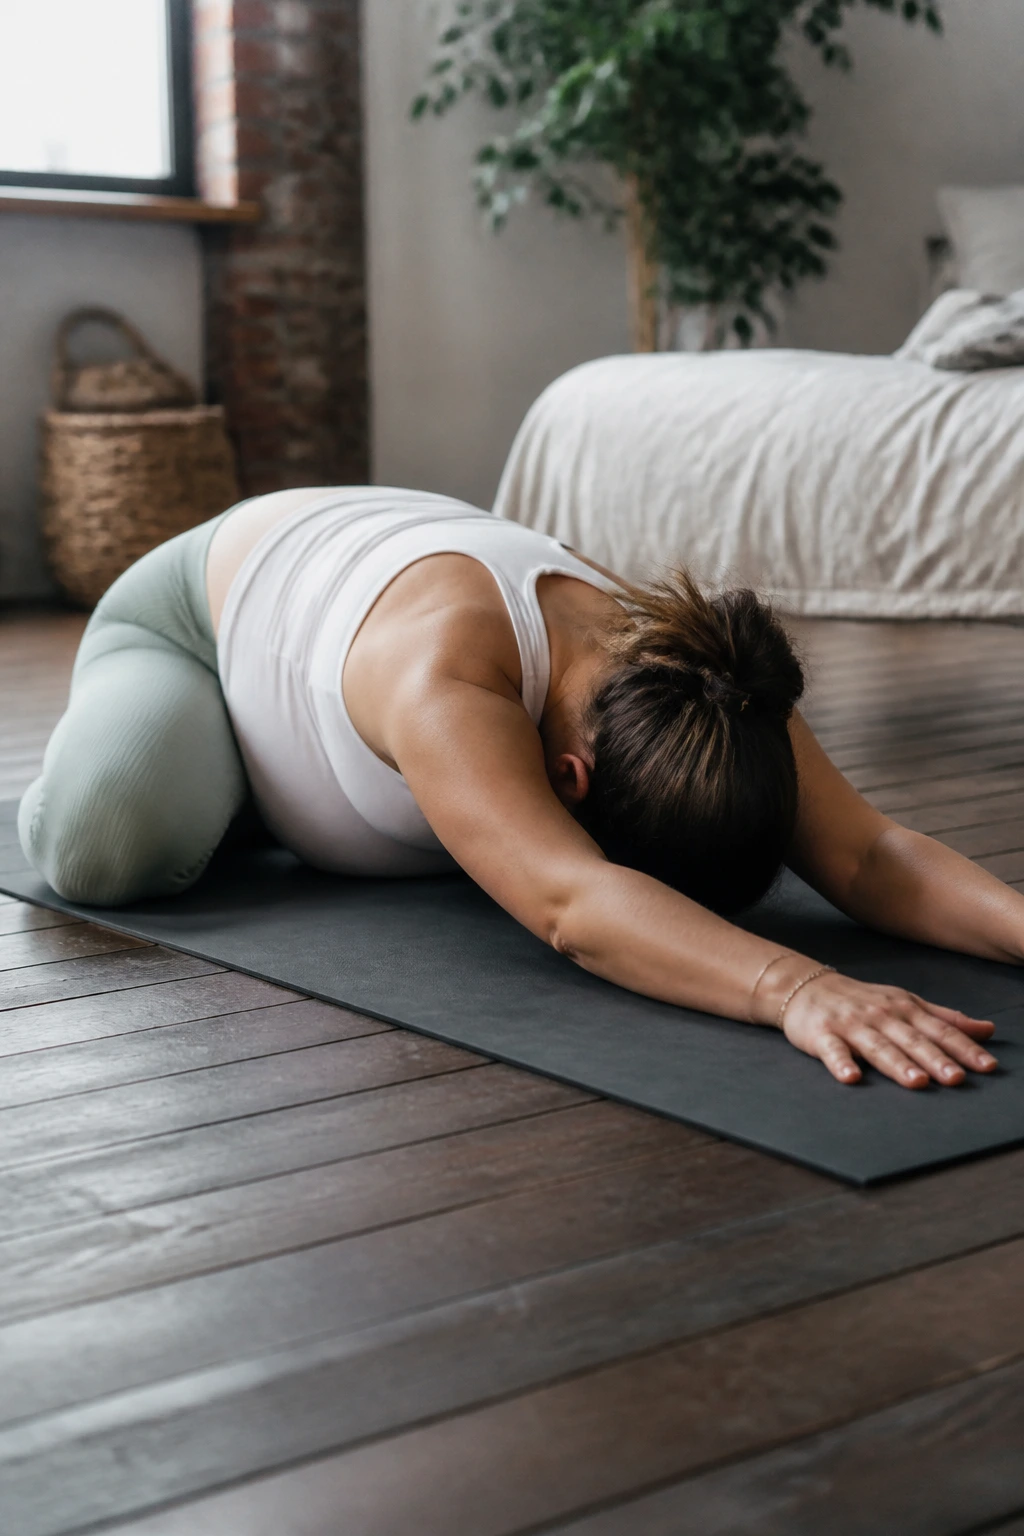
You need a position that allows your pelvis to open without restriction. A standard Child’s Pose is great, but as your belly grows, you will need to adjust your stance to accommodate your size. This modification provides deep hip relief and can be incredibly soothing after a long day of standing or walking.
Why It Works for Sciatica
This pose allows the pelvic floor muscles to relax completely. When the pelvic floor is tense, it often contributes to hip and glute tightness. By opening the knees wide, you give your belly space to hang between your thighs, which removes the pressure from your abdominal wall and lets your lower back stretch out fully.
Step-by-step instructions:
- Kneel on a soft surface, like a yoga mat or carpet, and bring your big toes together to touch.
- Separate your knees as wide as you feel comfortable—they should be wide enough to let your belly rest between them.
- Sit your hips back onto your heels.
- Walk your hands out in front of you as far as you can, resting your forehead on the floor or a cushion if it doesn’t reach.
- If your shoulders feel tight, try keeping your elbows bent and tucked in close to your head.
- Hold this position for as long as you feel comfortable, focusing on deep belly breaths.
4. Supported Wall Squat
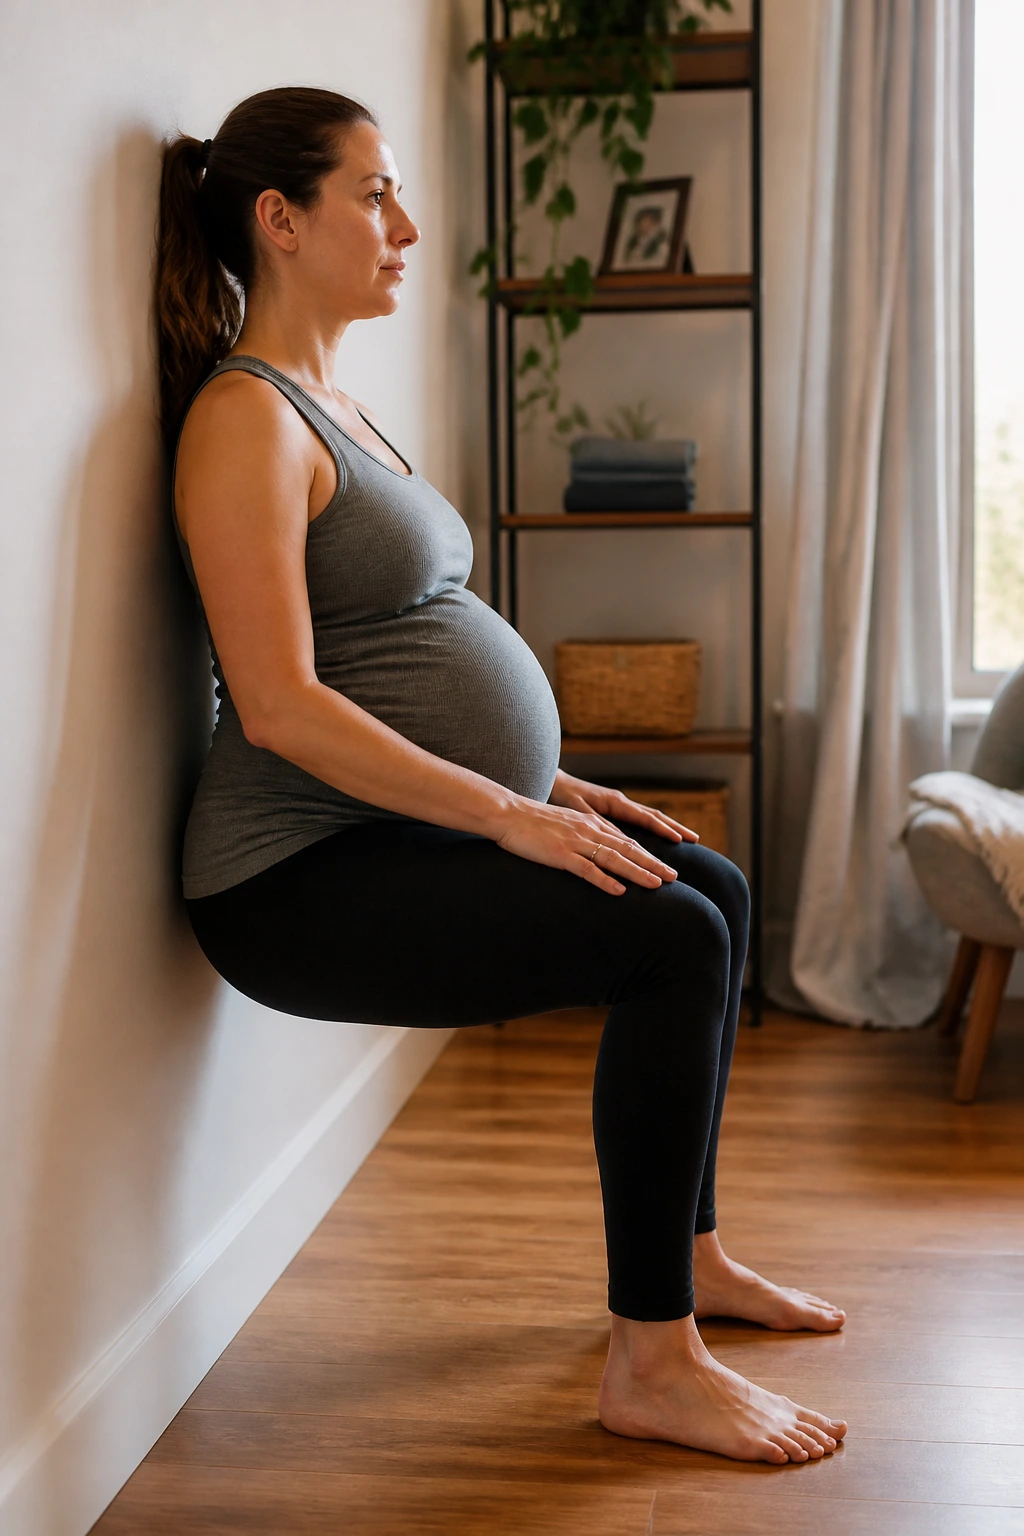
Deep squats are excellent for pelvic floor health, but they can be taxing on the knees and hips if you are not used to them. Using a wall for support allows you to reap the benefits of the squat—hip opening and lower back decompression—without the risk of falling or overexerting your muscles.
The Benefit of the Support
The wall acts as an anchor. It lets you lean back and relax your upper body, which is a major signal to your nervous system that it is safe to release tension in the glutes and lower back. This is also a fantastic way to stretch the muscles surrounding the sciatic nerve without having to get down on the floor.
How to execute:
- Stand with your back against a wall, feet about two feet away from the baseboard.
- Slowly slide down into a comfortable squat, keeping your feet shoulder-width apart.
- If your knees feel pain, do not go down as deep; even a shallow squat is effective.
- Keep your feet flat on the floor and your heels pressed into the ground.
- Place your hands on your thighs for support and focus on pushing your hips slightly forward into the wall.
- Stay in this position for 30 to 60 seconds.
5. Standing Hamstring Stretch
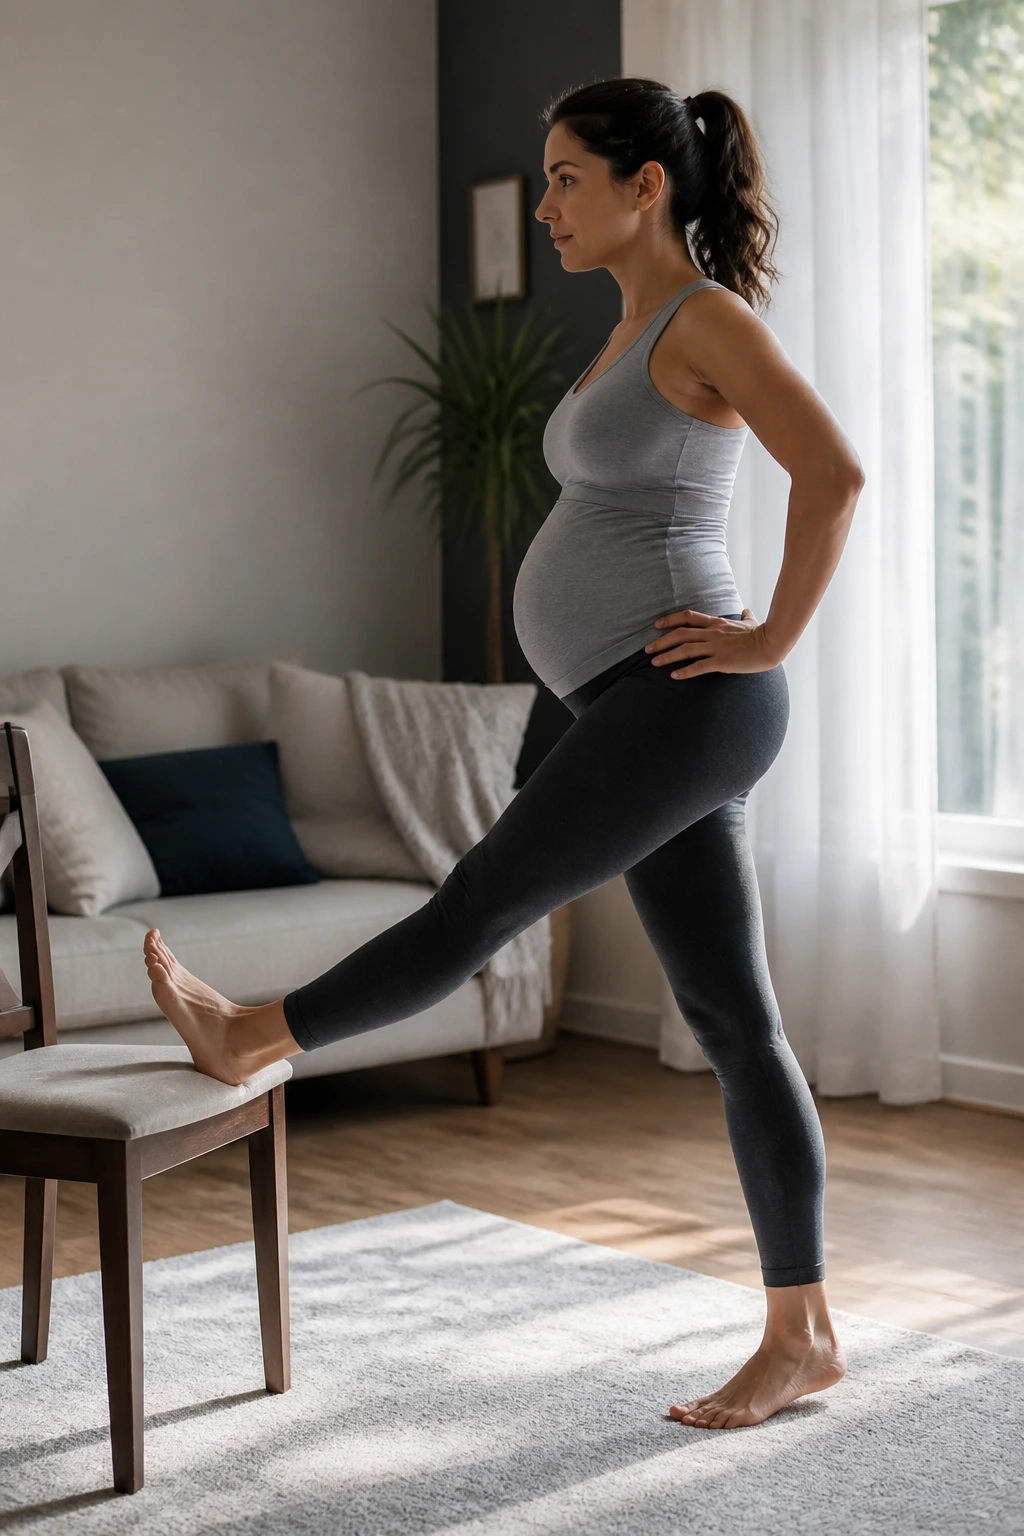
Tight hamstrings are a major contributor to sciatic pain. When these muscles at the back of your thighs are tight, they pull on the pelvis, which in turn compresses the lower back and exacerbates nerve issues. Keeping them loose is key. You do not need to be flexible to get the benefits; you just need to be consistent.
The Right Way to Stretch
Avoid bending forward from the waist with a rounded back, as this can irritate the nerve rather than soothe it. Instead, focus on keeping your back straight—think “flat back”—as you hinge forward. Using a chair or a stair for support is a smart way to maintain proper posture while getting a great stretch.
Executing the move:
- Stand facing a sturdy chair or a bottom step.
- Place your right heel onto the seat of the chair, keeping your right leg straight but not locked.
- Keep your left foot on the floor.
- Engage your core and hinge forward slightly from your hips, keeping your chest lifted.
- You will feel a stretch through the back of your right thigh and potentially down into your calf.
- Hold for 30 seconds on each side. If you feel shooting pain, stop immediately and reduce the angle of the stretch.
6. Lying Knee-to-Chest
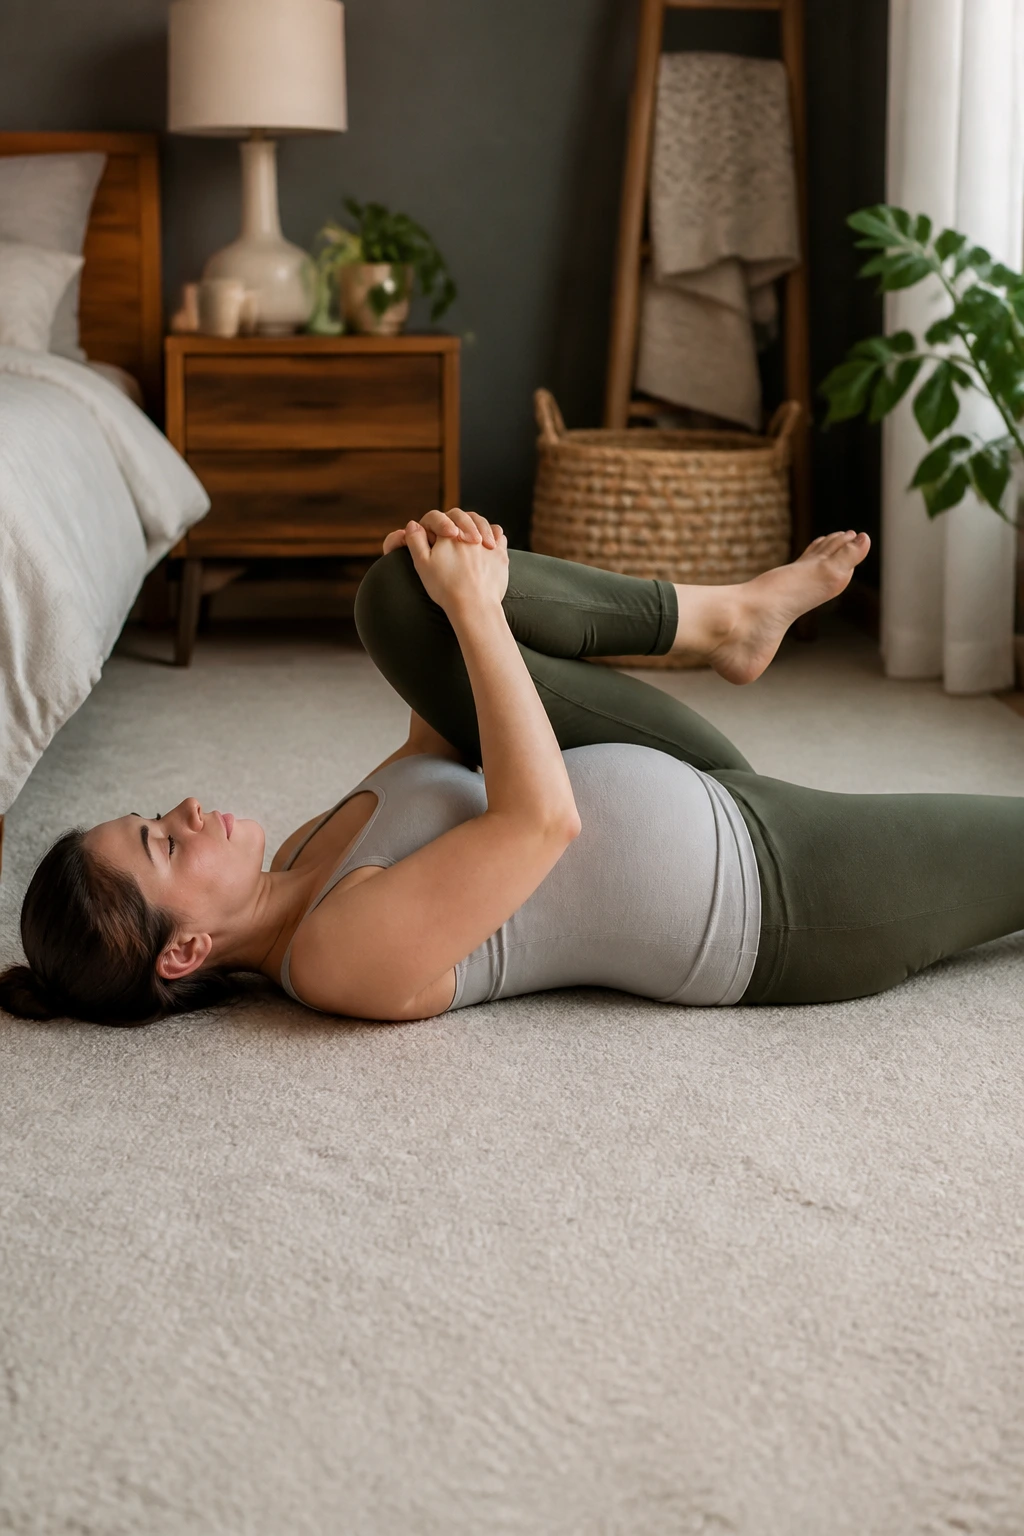
Sometimes, you just need to get off your feet. Lying down changes the pressure dynamics of your spine entirely. The Knee-to-Chest stretch is gentle, requires almost no effort, and is perfect for doing right before bed or immediately upon waking up. It helps neutralize the curve of your lower back.
Why This Is Effective
When you pull one knee toward your chest, you create a slight pelvic tilt that pulls the lumbar spine toward the floor. This provides a soft, passive stretch for the lower back and glutes. It effectively “unglues” the tight muscles that have been holding tension all day, giving the sciatic nerve a little more breathing room.
Step-by-step guidance:
- Lie on your back on a flat, comfortable surface.
- Gently pull your right knee toward your chest, holding it with both hands.
- Keep your left leg flat on the floor, or if that is uncomfortable for your back, bend the left knee and keep the foot on the floor.
- Draw the knee in until you feel a gentle stretch in your glute and lower back.
- Keep your shoulders relaxed and pressed into the ground.
- Hold for 30 seconds, then release and repeat with the left leg.
7. Pelvic Tilts
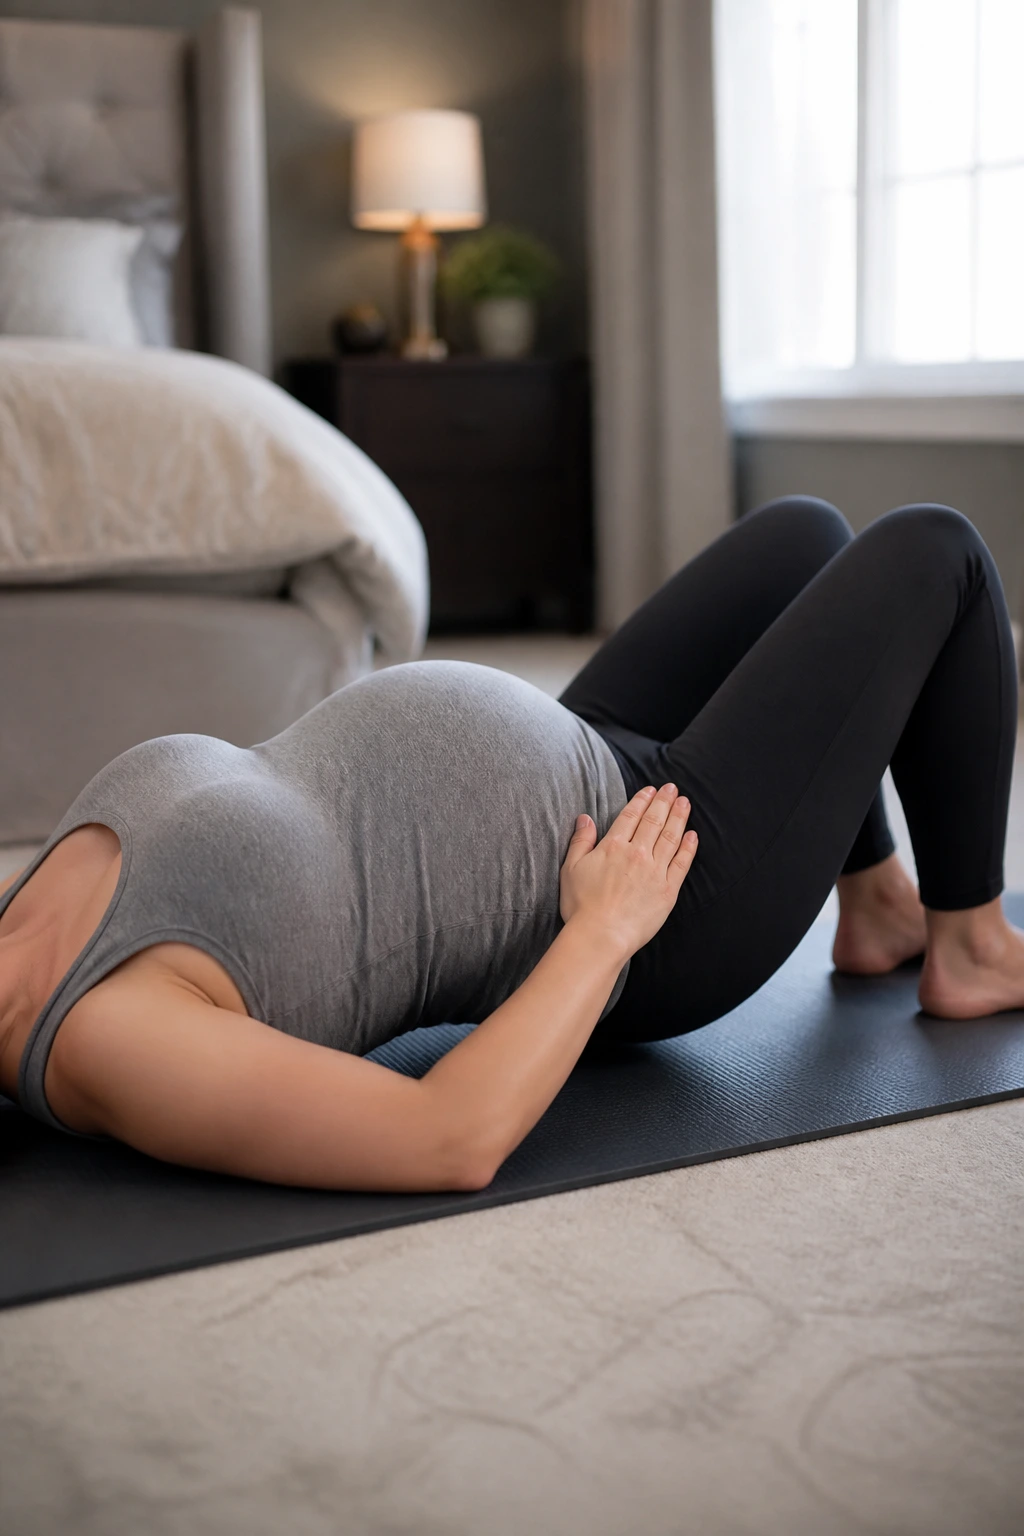
These are often taught in prenatal classes, and for good reason. Pelvic tilts are less of a “stretch” and more of a “mobilization” exercise. They help reset the pelvis to a neutral position, which takes the strain off the muscles that are pulling on the sciatic nerve.
The Role of Movement
Your pelvis acts as a foundation. During pregnancy, the ligaments loosen and shift. If your pelvis is stuck in an anterior tilt (a big arch in your back), it compresses the nerves. If it is stuck in a posterior tilt (tucked under), it can cause other issues. Pelvic tilts help you find the middle ground where your muscles are balanced.
How to perform the tilt:
- Lie on your back with your knees bent and feet flat on the floor.
- Place your hands on your hips or your belly.
- As you exhale, gently tilt your pelvis toward your face, flattening the small of your back against the floor.
- As you inhale, gently rock your pelvis forward, creating a small arch in your lower back.
- Do this movement slowly and rhythmically.
- Focus on the control of the muscles, not the range of motion.
8. Supine Figure-Four Stretch
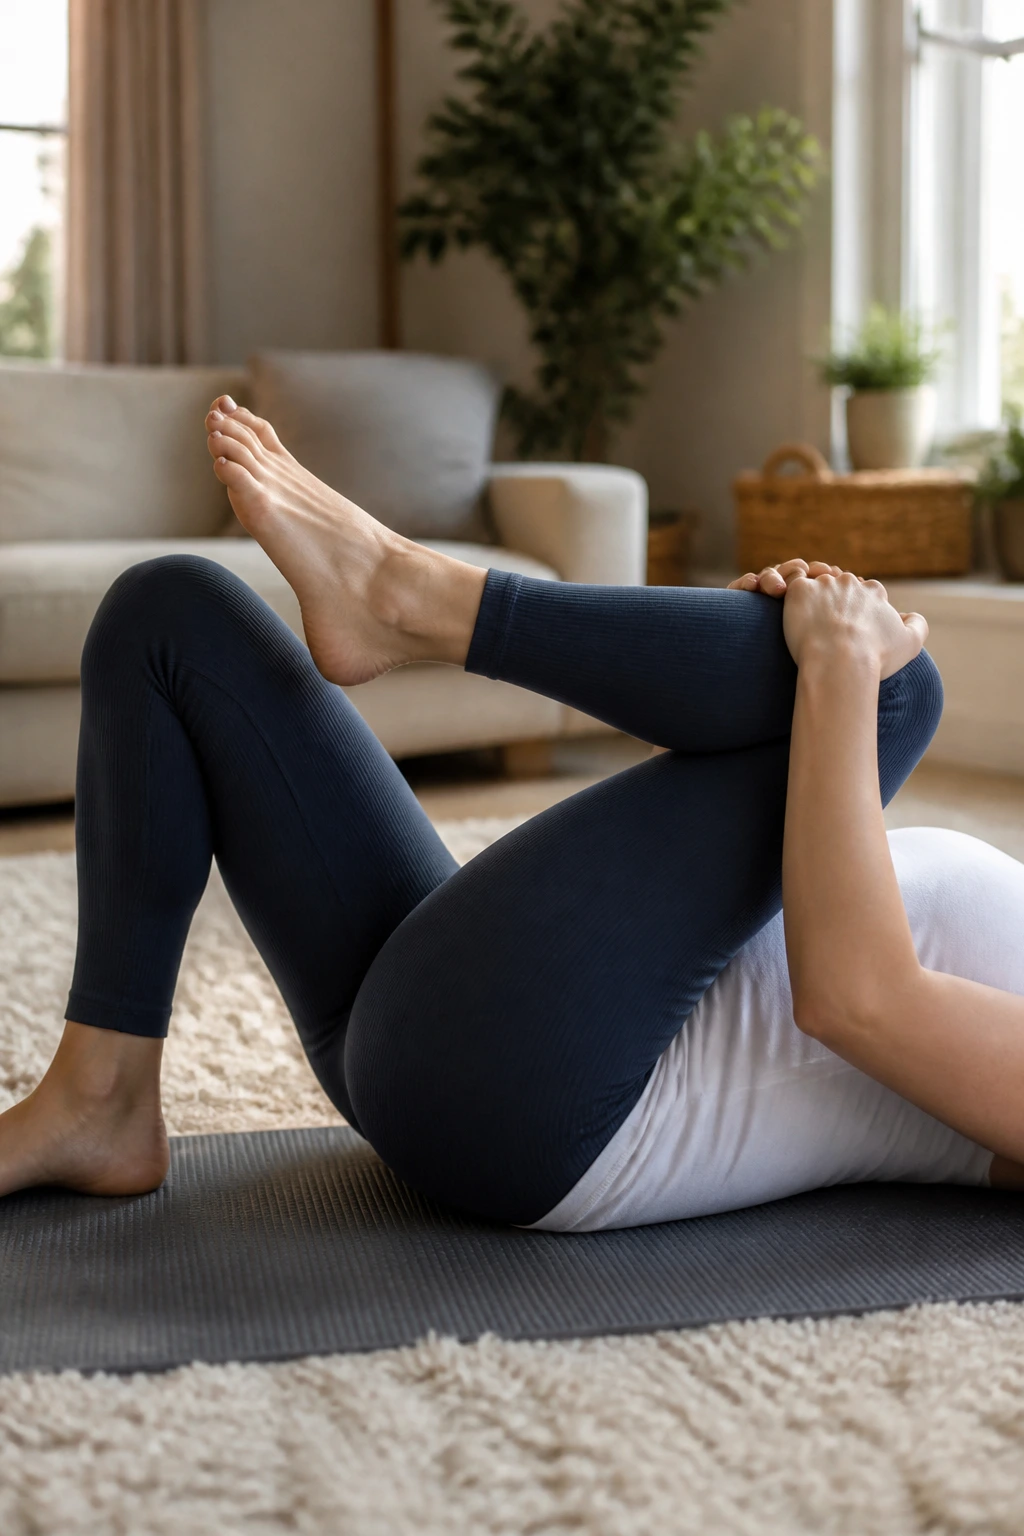
This is the floor-based version of the seated piriformis stretch mentioned earlier. Lying on the floor allows your spine to be fully supported, which often makes this version even more effective for releasing deep-seated glute tension. It is a fantastic way to release the piriformis muscle without any strain on your joints.
Why It’s Superior for Some
Because you are lying down, you can use your hands to gently pull your leg closer to your body, giving you control over the depth of the stretch. It also lets you use your own body weight to anchor your hips, preventing you from shifting or compensating in a way that might aggravate the nerve.
Detailed instructions:
- Lie on your back with your knees bent and feet on the floor.
- Cross your right ankle over your left knee.
- Reach through the opening between your legs and grab the back of your left thigh with both hands.
- Gently pull your left leg toward your chest.
- You should feel a deep stretch in the right glute.
- If you cannot reach your thigh comfortably, use a towel or a strap wrapped around your left thigh to help you pull.
- Keep your head and neck resting on the floor.
9. Butterfly Stretch
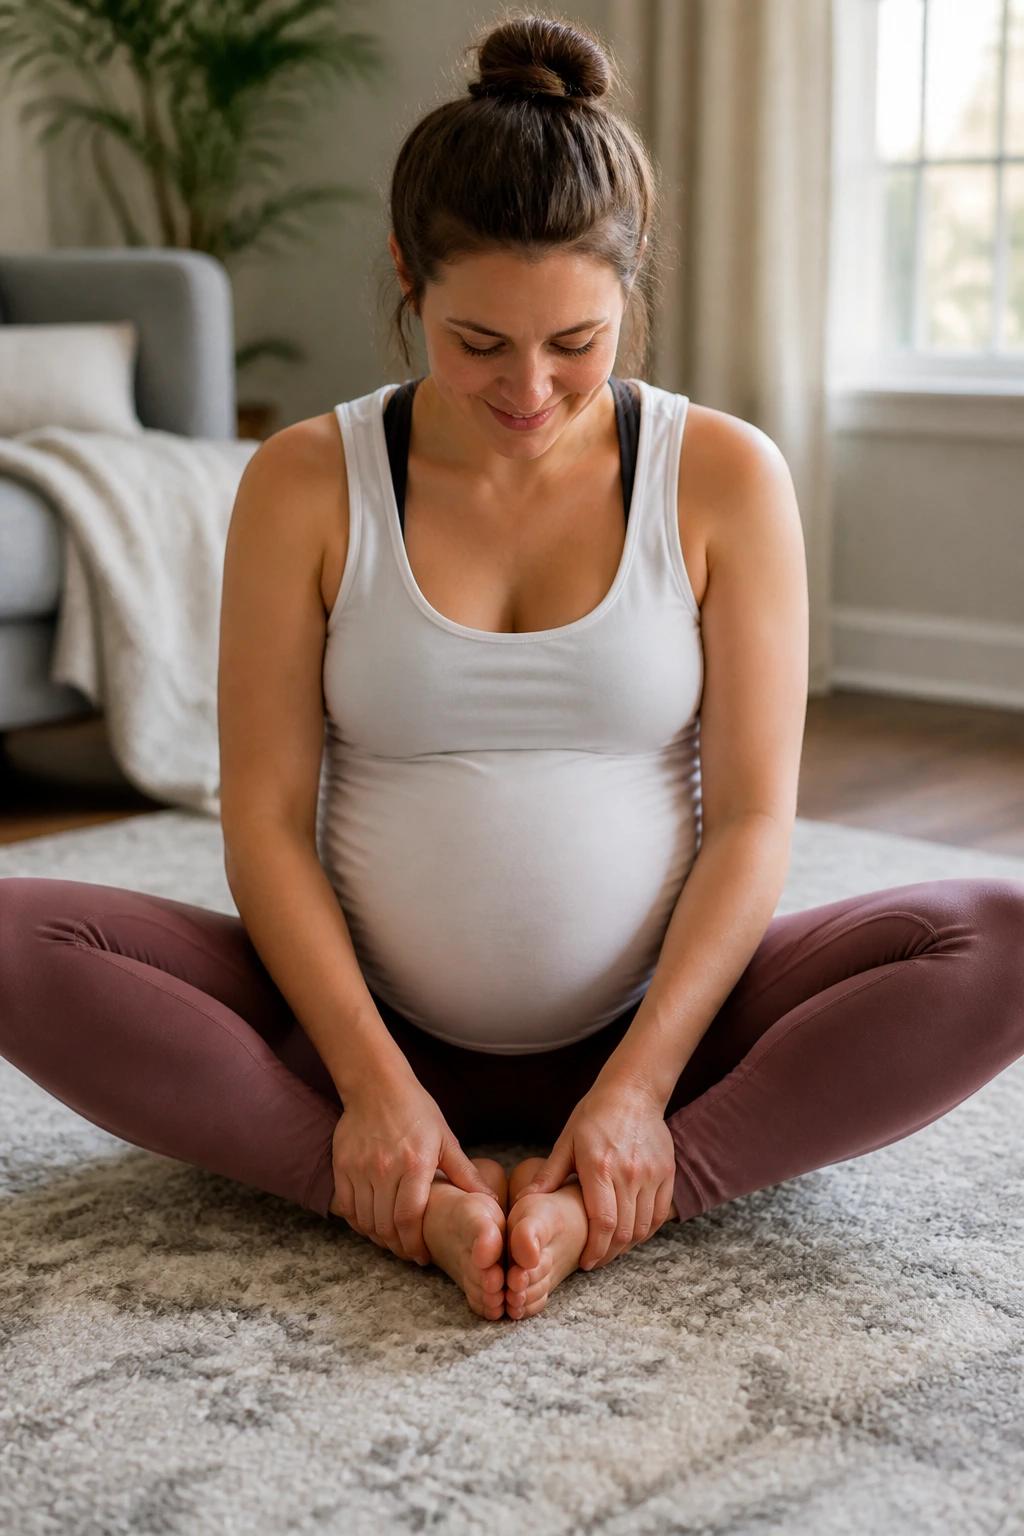
Tight inner thighs (adductors) can affect how your pelvis sits, and in turn, how your hips are aligned. When the inner thighs are tight, they can pull on the pelvic floor and the sit bones, creating a chain reaction of tension that eventually reaches the sciatic nerve. The Butterfly stretch is a simple way to open up these muscles.
Getting the Most from the Pose
Don’t worry about getting your knees to touch the floor. The goal is to feel a gentle release in the inner thighs. If you have significant hip pain, do this against a wall for support to ensure you stay upright and don’t collapse into your lower back.
Step-by-step:
- Sit on the floor with your feet together, knees out to the sides.
- Hold onto your feet or ankles.
- Keep your spine tall and lean forward just slightly—you do not need to go very far to feel this.
- Think about lengthening your spine upward, as if a string is pulling the top of your head toward the ceiling.
- Breathe deeply into your hips.
- If your knees feel uncomfortable, place blocks or pillows under them for support.
10. Standing Calf Stretch
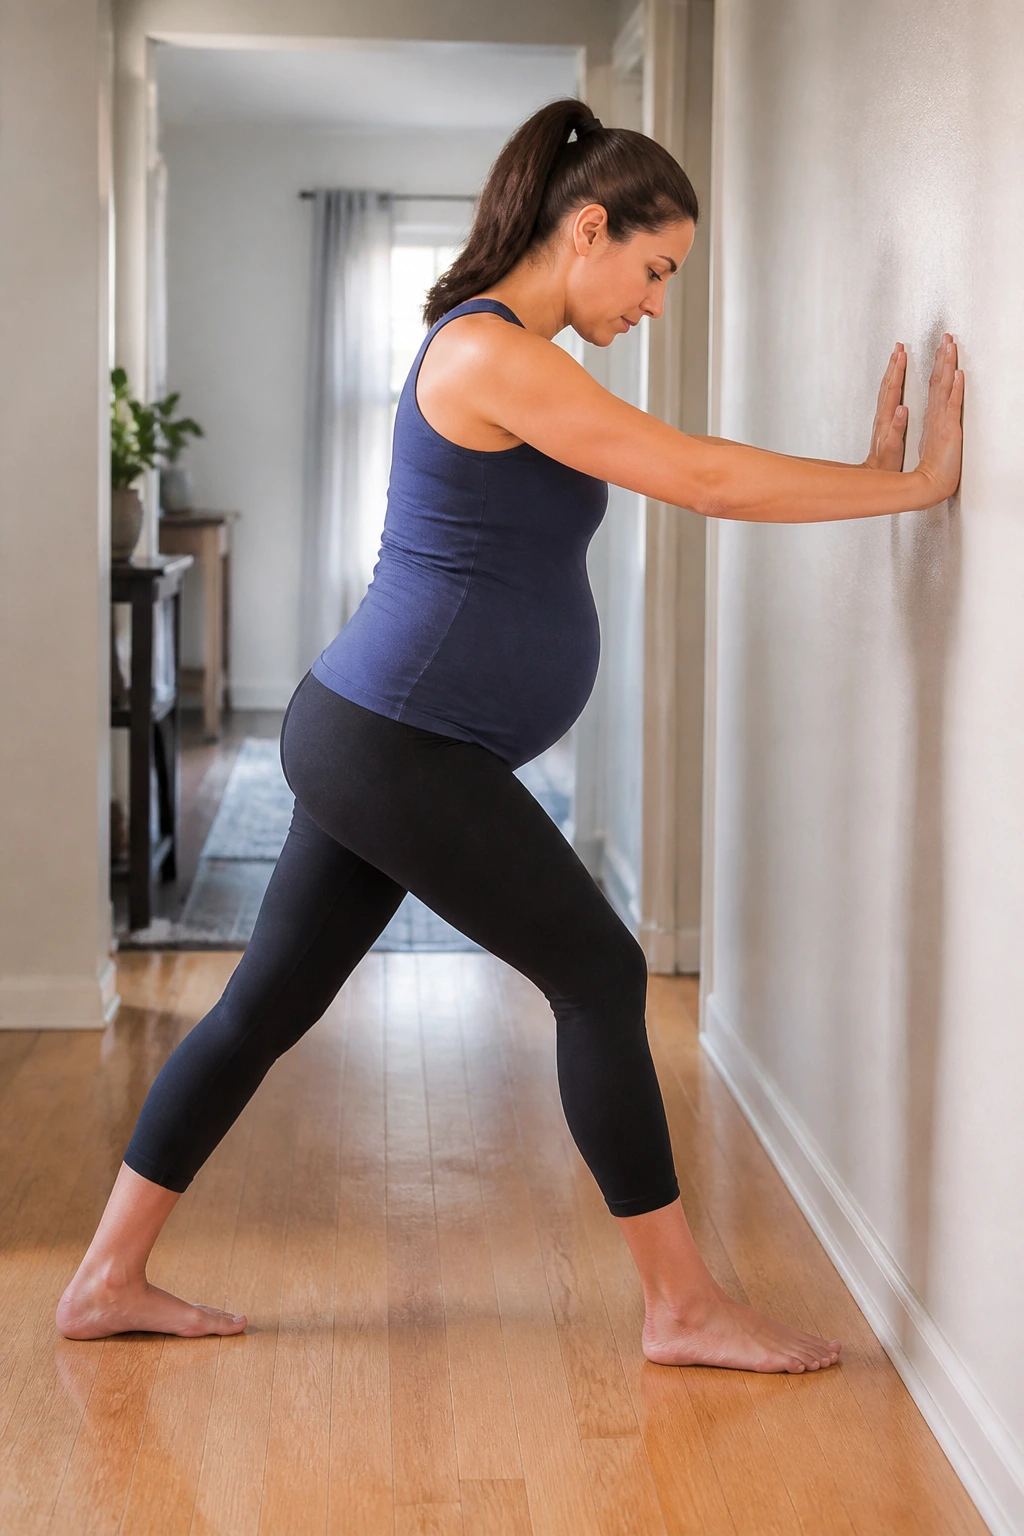
You might be wondering why we are stretching the calves to help the sciatic nerve. The sciatic nerve runs all the way down the leg to the foot. If your calf muscles are tight—which is common during pregnancy due to weight gain and fluid retention—they can create tension that pulls on the entire posterior chain of your leg, including the nerves.
Why It Matters
When your calves are tight, your ankle mobility is limited, which changes your gait. A changed gait means you are walking in a way that might be placing uneven pressure on your hips and lower back. Stretching the calf can indirectly help alleviate the tension pulling on the nerves in the upper leg.
Technique for success:
- Stand facing a wall, about arm’s length away.
- Place your hands on the wall for balance.
- Step your right foot back and press your right heel firmly into the floor.
- Keep your right leg straight and lean your body weight forward slightly toward the wall.
- You will feel a stretch in your calf.
- Hold for 30 seconds, then switch. Keep your toes pointing straight forward, not angled out, for the best stretch.
11. Hip Circles
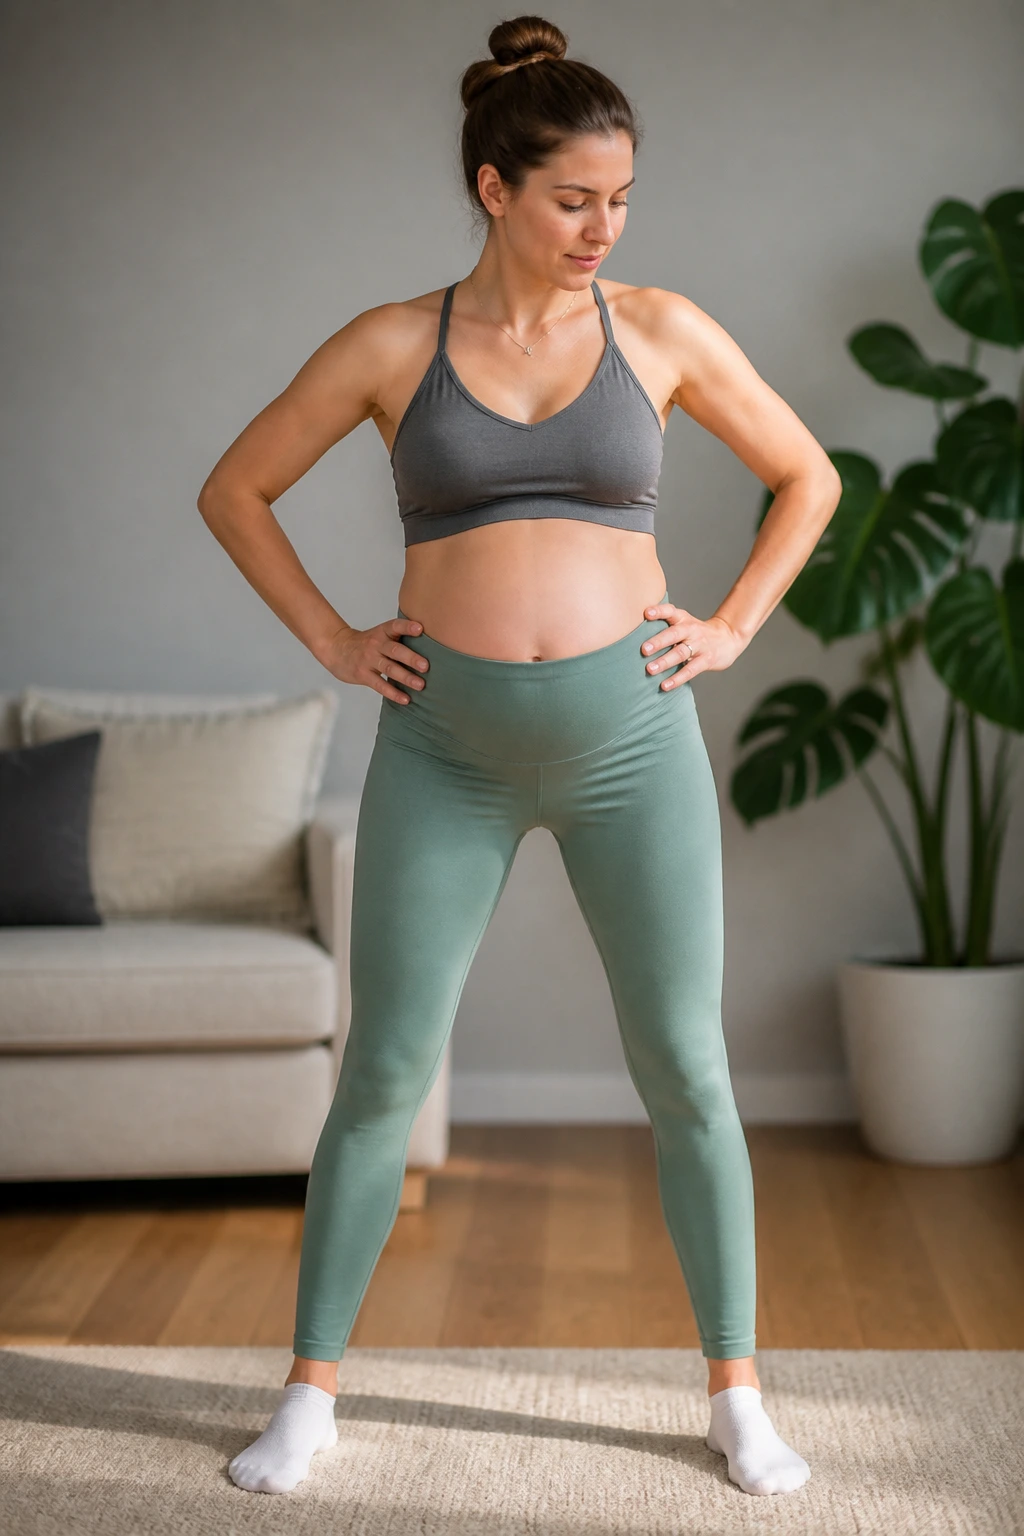
Sometimes the best medicine is gentle, rhythmic movement. Hip circles are excellent for lubricating the hip joints and encouraging the muscles around the pelvis to release stored tension. This is a very low-impact way to mobilize the area without holding a static stretch that might be too intense.
Why They Work
Static stretches are great, but sometimes your body needs motion to “unlock” areas of tightness. Hip circles allow you to explore your range of motion without forcing it. They help loosen the muscles around the hip socket, which in turn takes the pressure off the piriformis muscle that is compressing your sciatic nerve.
How to do it:
- Stand with your feet shoulder-width apart, knees slightly bent.
- Place your hands on your hips.
- Begin to slowly move your hips in a circular motion, as if you are hula-hooping.
- Make the circles small at first, and then gradually make them larger.
- Do 10 circles in one direction, then switch to the other.
- Keep your breathing steady and focus on the sensation of your hips swinging smoothly.
12. Gate Pose
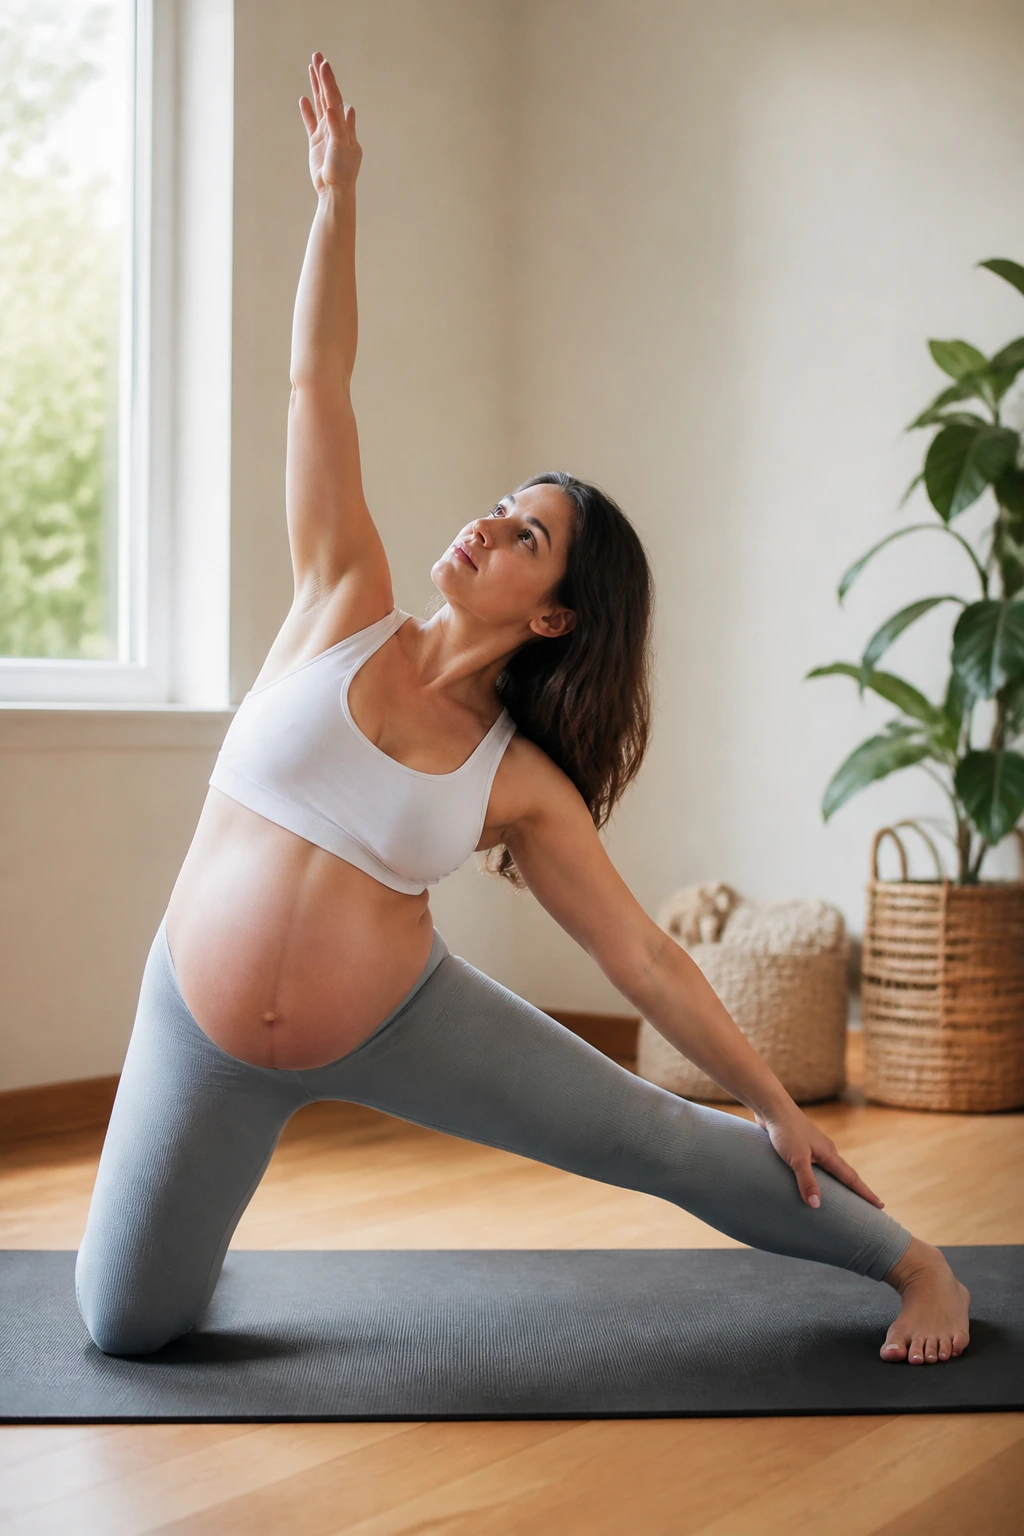
This is a gentle lateral stretch that opens up the side body, the obliques, and the hip. During pregnancy, we often focus on forward and backward movements, but the side body becomes very tight as your belly expands. Stretching the sides can help relieve some of the compression happening in the lower back.
The Benefit of Lateral Motion
The sciatic nerve can be irritated by tightness in the quadratus lumborum (the muscle in your lower back/side). This muscle often gets very tight during pregnancy. Gate Pose allows you to create space between your ribcage and your pelvis, giving those tight muscles a chance to release.
Step-by-step instructions:
- Kneel on the floor on a yoga mat.
- Extend your right leg out to the side, foot flat on the floor.
- Inhale and reach your left arm up toward the ceiling.
- Exhale and lean your body toward the right, sliding your right hand down your right leg.
- Keep your chest facing forward—do not turn toward the floor.
- You should feel a stretch along your left side and into your hip.
- Hold for 30 seconds, then switch sides.
13. Bird-Dog
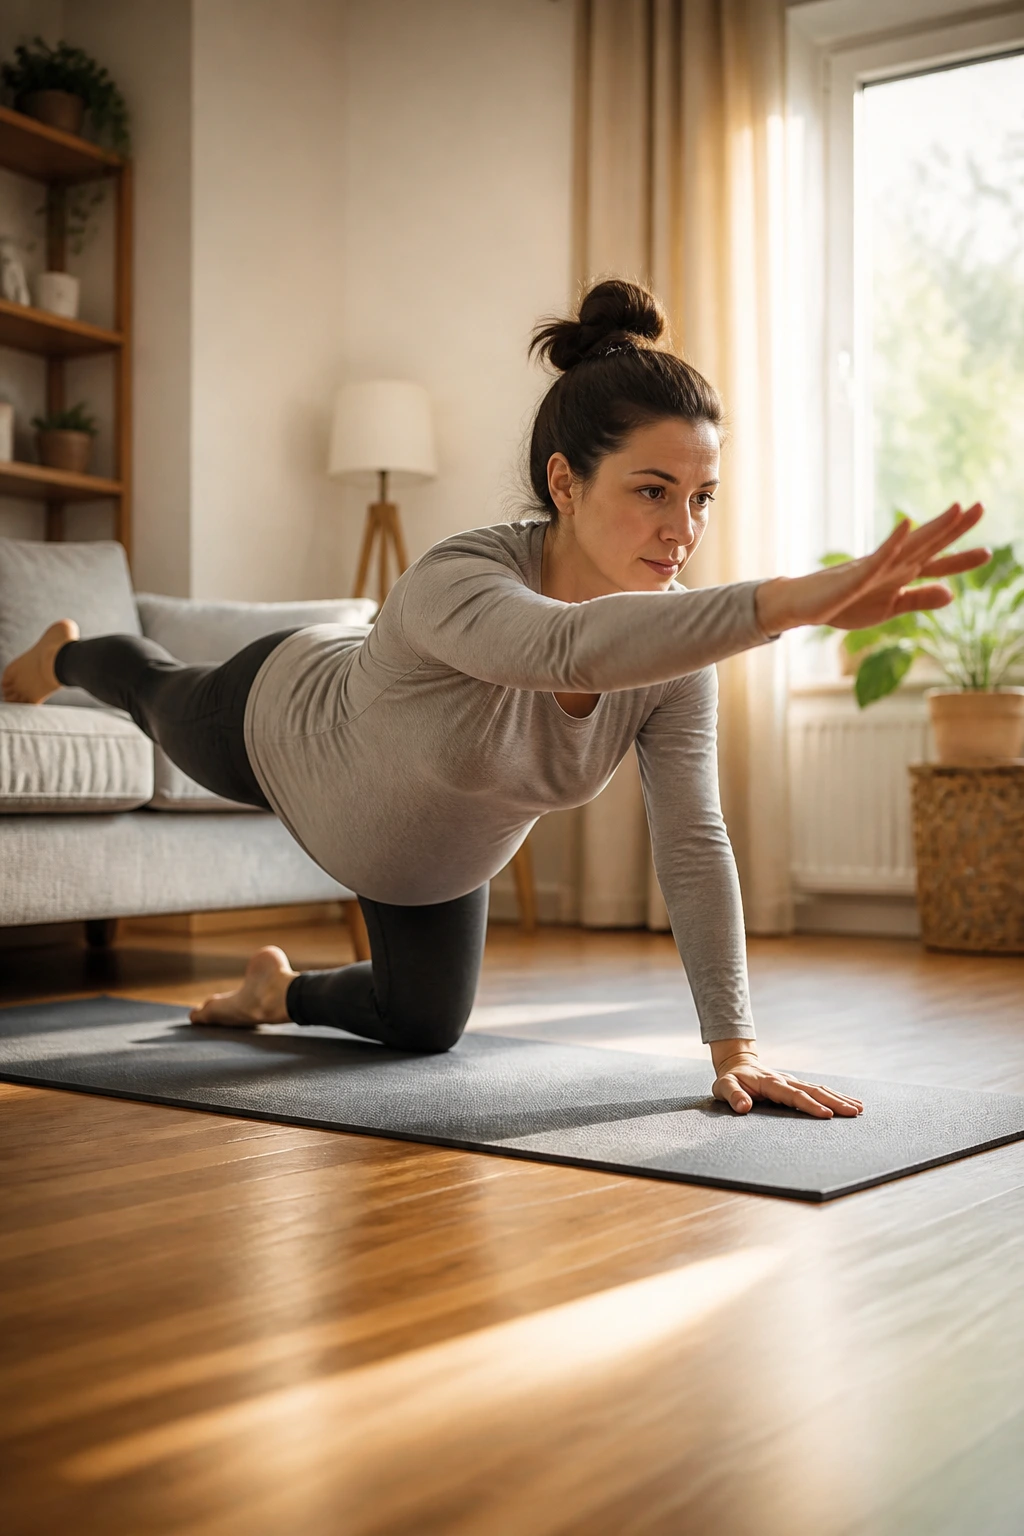
Stability is just as important as flexibility. Sometimes, sciatic pain is caused by muscle weakness. The Bird-Dog exercise helps stabilize your core and your back. When your core muscles are engaged, they act like a corset, supporting your spine and taking the load off your lower back and glutes.
Why It’s a Top Pick
This is a “functional” movement, meaning it mimics the type of stability you need for daily life. It strengthens the muscles that support your spine without putting excessive pressure on the sciatic nerve. It is one of the most effective ways to build a foundation that prevents pain from returning.
How to perform it:
- Start on your hands and knees in a tabletop position.
- Engage your core—imagine pulling your belly button gently toward your spine.
- Extend your right arm forward and your left leg backward simultaneously.
- Keep your back flat like a table; do not let your hips rotate or your back arch.
- Hold for a count of 5 seconds, then return to the start.
- Repeat on the other side. Do 5 to 10 reps total. Focus on length, not height.
14. Glute Bridges
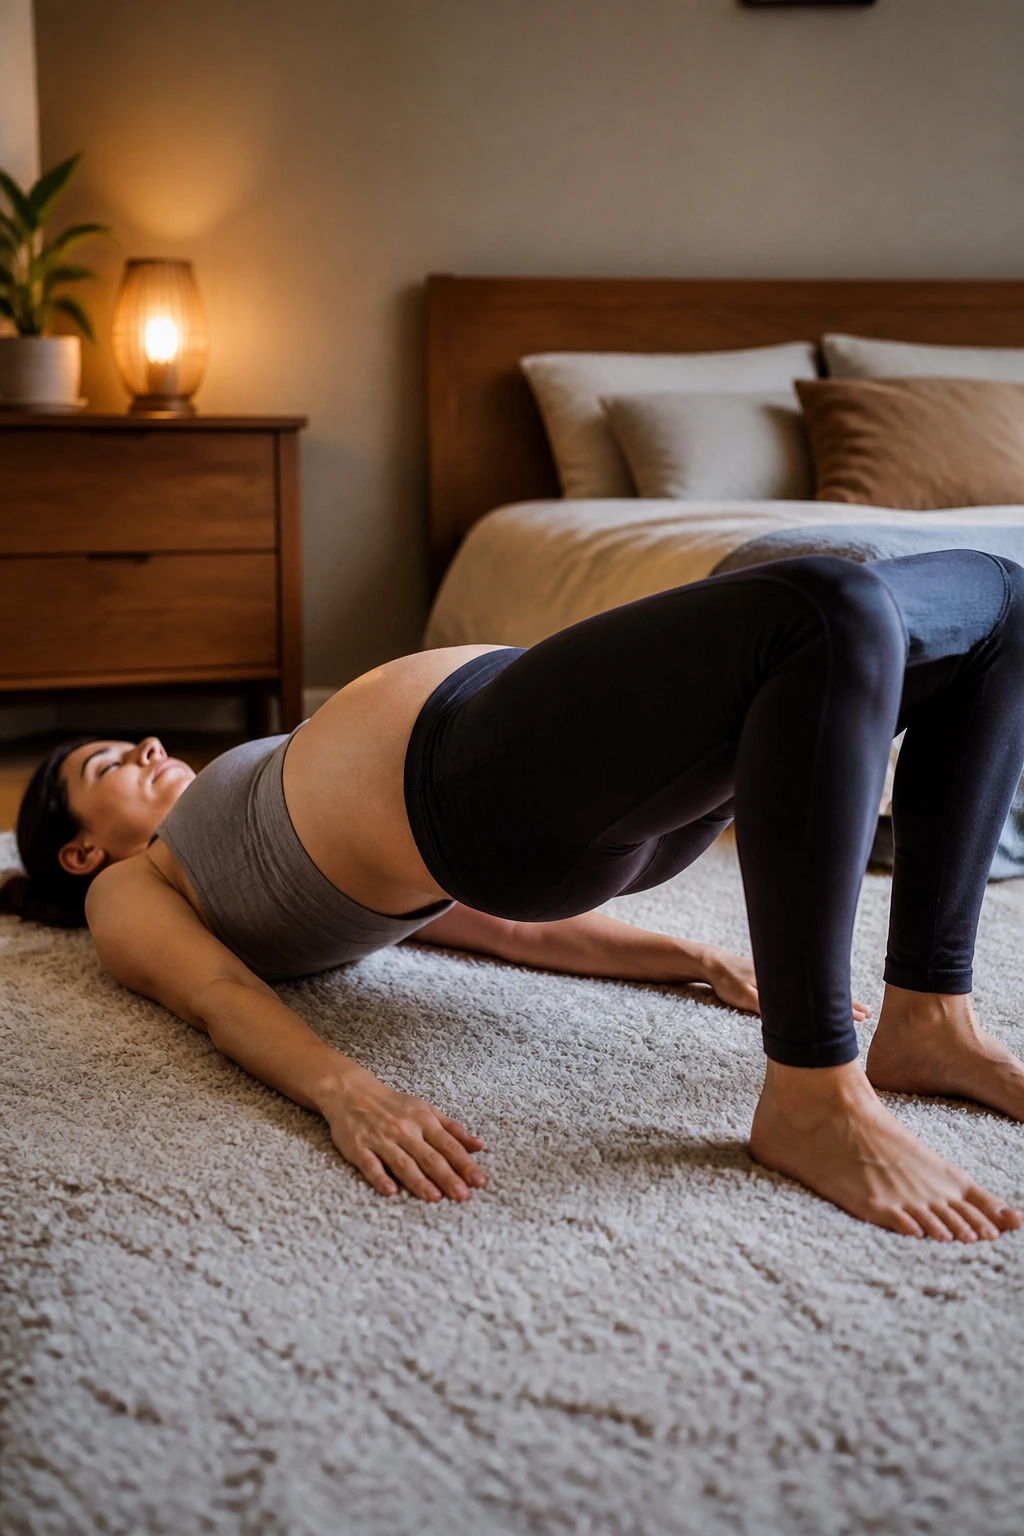
The glutes often become inactive or “sleepy” during pregnancy because of the postural changes we mentioned earlier. Weak glutes can force the lower back and other muscles to overcompensate, leading to nerve compression. Glute bridges help “wake up” these muscles and provide support for the pelvic region.
The Strengthening Connection
By strengthening the glutes, you are creating a muscular cushion that protects your sciatic nerve. Think of it as building armor. When your glutes are strong, they handle the load of your body weight instead of passing that stress on to your lower back and the sensitive nerve structures.
Steps to success:
- Lie on your back with knees bent and feet flat on the floor, hip-width apart.
- Engage your core and squeeze your glutes.
- Slowly lift your hips toward the ceiling.
- Go only as high as your comfort allows; do not arch your back excessively.
- Pause at the top for a second, feeling your glutes working.
- Lower your hips back down slowly.
- Repeat 10 to 12 times.
15. Supported Forward Fold
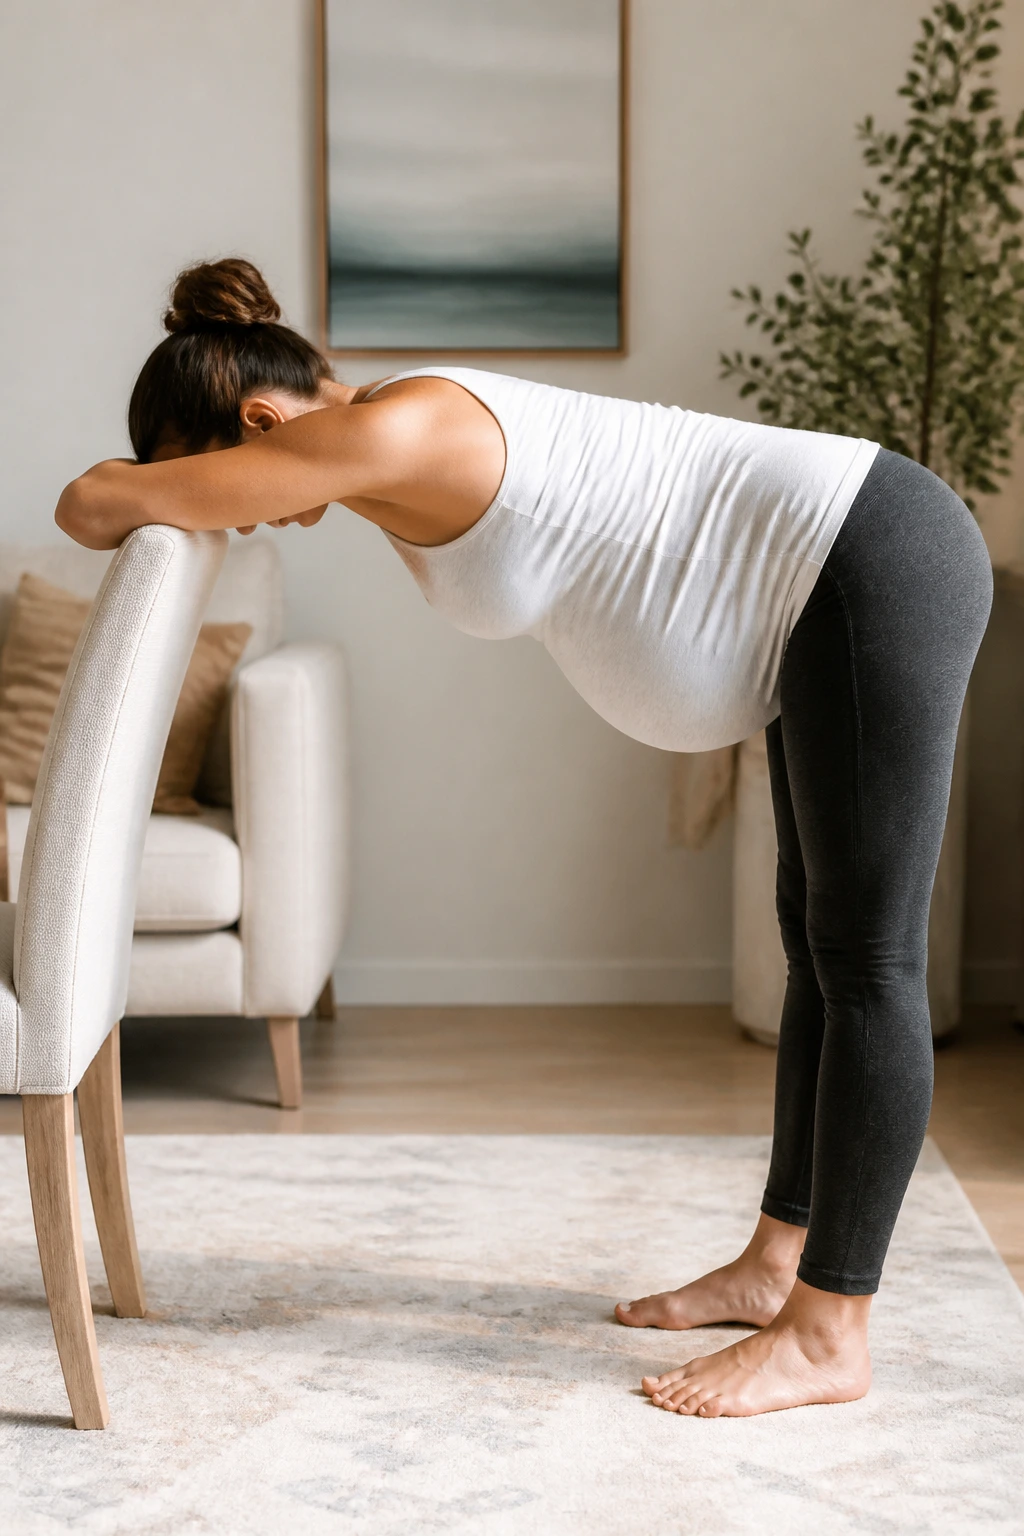
Sometimes, you just need a deep, restorative stretch. This version of a forward fold uses a prop (like a chair, a bolster, or a stack of pillows) to ensure that your back stays neutral and your weight is supported. It allows the back of your legs and your lower back to stretch fully without requiring a high level of flexibility.
Why This Is Effective
This pose promotes blood flow to the lower extremities and helps release the muscles that are tight from carrying the extra weight of pregnancy. It is calming and helps reset the nervous system, which is crucial for managing chronic pain. The support ensures you do not overstretch, which can actually cause the nerves to tighten up in defense.
How to execute:
- Stand facing a chair or a table.
- Place your hands or forearms on the support.
- Step your feet back until your body forms an “L” shape.
- Soften your knees and let your head hang between your arms.
- Think about lengthening your spine from your tailbone to the crown of your head.
- Breathe deeply into your back.
- Stay here for a minute or two, letting gravity do the work of creating space in your hips and lower back.
Final Thoughts
Dealing with sciatic pain while pregnant is exhausting, but it is rarely something you just have to “live with.” Most of the time, the discomfort is a clear signal that your body is holding tension in the wrong places and needs a little help finding alignment again. The stretches we have covered here are meant to be gentle, supportive, and accessible. You do not need to do all fifteen every single day. Start by picking three or four that feel the best for your body, and perform them slowly.
Consistency matters more than intensity. A gentle five-minute stretching routine performed daily will serve you far better than a single intense session once a week. Listen to your body—it will tell you exactly which movements it needs. If you ever feel shooting pain or numbness that lingers after you stop moving, back off and focus on the gentler, supported movements like the Pelvic Tilts or the Child’s Pose.
If the pain ever becomes unbearable, affects your ability to walk, or is accompanied by changes in sensation in your pelvic area, do not hesitate to contact your doctor or a prenatal physical therapist. They can offer personalized assessments that go beyond general stretches. Your comfort matters, and sometimes a few sessions with a professional can make a massive difference in how you feel throughout your pregnancy. Be kind to yourself as you navigate these physical changes—your body is doing incredible work.
