



That gnawing, stiff feeling in your front hips after a long day at a desk or a grueling leg session isn’t just “tightness”—it’s a warning. The psoas muscle is the only muscle in the human body that connects the upper body to the lower body, spanning from your lumbar spine to the top of your femur. When it gets locked short, it pulls on your lower back, shuts down your glutes, and changes the way you walk. Most people treat this as a simple flexibility issue, hammering away at their quads without realizing the psoas requires a much more nuanced, gentle approach. You cannot “force” a psoas release; you have to invite it.
Many of us spend hours folded at the waist. Your psoas is essentially in a shortened, contracted state from the moment you sit down to breakfast until you stand up to go to bed. When you finally try to stand upright or perform a compound lift, that muscle is still stuck in “short mode.” This creates a domino effect: the lumbar spine overcompensates, the pelvis tilts forward, and suddenly, you are dealing with chronic lower back pain or knee issues. It is not enough to just stretch; you need to understand how to lengthen the tissue while simultaneously signaling your nervous system that it is safe to let go.
The following movements are designed to address this. They range from active, engagement-heavy lunges that build heat to passive, gravity-assisted holds that prioritize deep release. Whether you are a dedicated athlete or someone who spends too much time in a chair, you will find that a consistent, thoughtful practice changes your entire posture.
1. Low Lunge (Anjaneyasana)
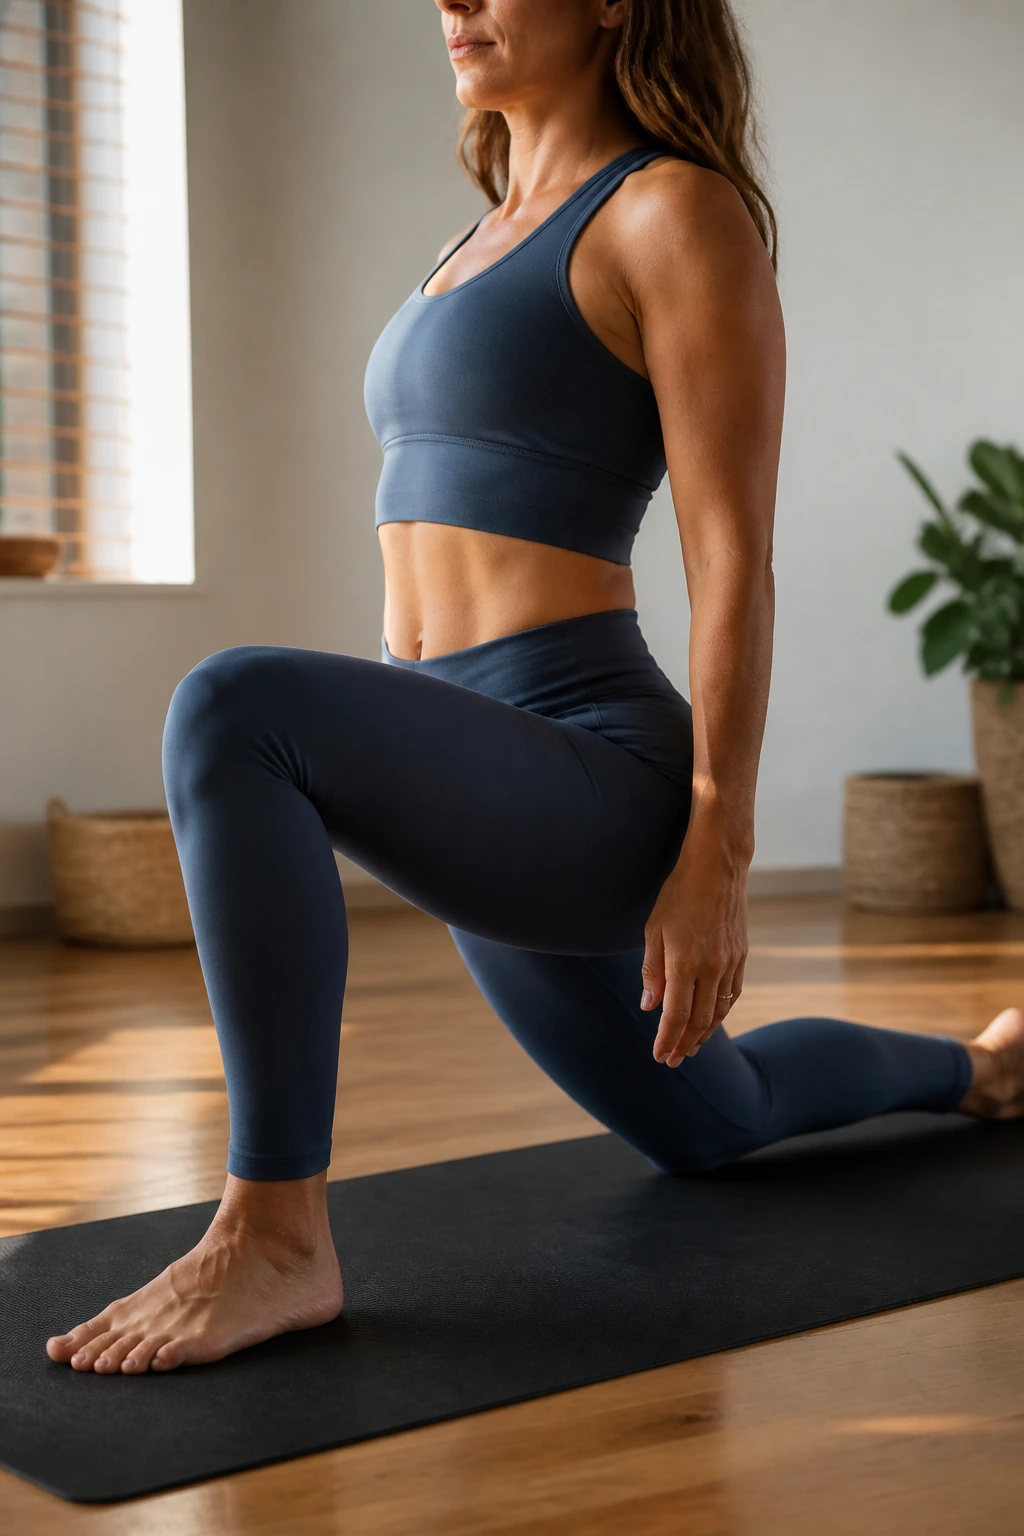
This is the foundation for almost every effective psoas stretch. It looks simple, but the secret lies in what you do with your pelvis, not how far forward you lunge. If you simply dump your weight forward, you are likely just pinching the joint capsule in your hip rather than lengthening the muscle fiber. You want to prioritize an upright, tall spine throughout the entire duration of the hold.
The Anatomy of the Tuck
The most critical cue for this movement is the posterior pelvic tilt. Start in a low lunge with your back knee on the ground. Instead of arching your back to get deeper, I want you to actively squeeze your glute on the back leg and draw your tailbone toward your front heel. You should feel an immediate, intense sensation running right through the front of the hip. If you aren’t feeling it, you aren’t tucking enough.
How to Maximize the Stretch
- Square your hips: Ensure your front hip is pulling back slightly and your back hip is driving forward.
- Reach for the sky: Take your arm on the same side as the back leg and reach it straight up to the ceiling, then lean slightly toward the opposite side. This adds a lateral component that targets the psoas connection point higher up in the torso.
- Hold time: Stay for at least one minute on each side. The muscle needs time to receive the signal that it is safe to lengthen.
2. Pigeon Pose
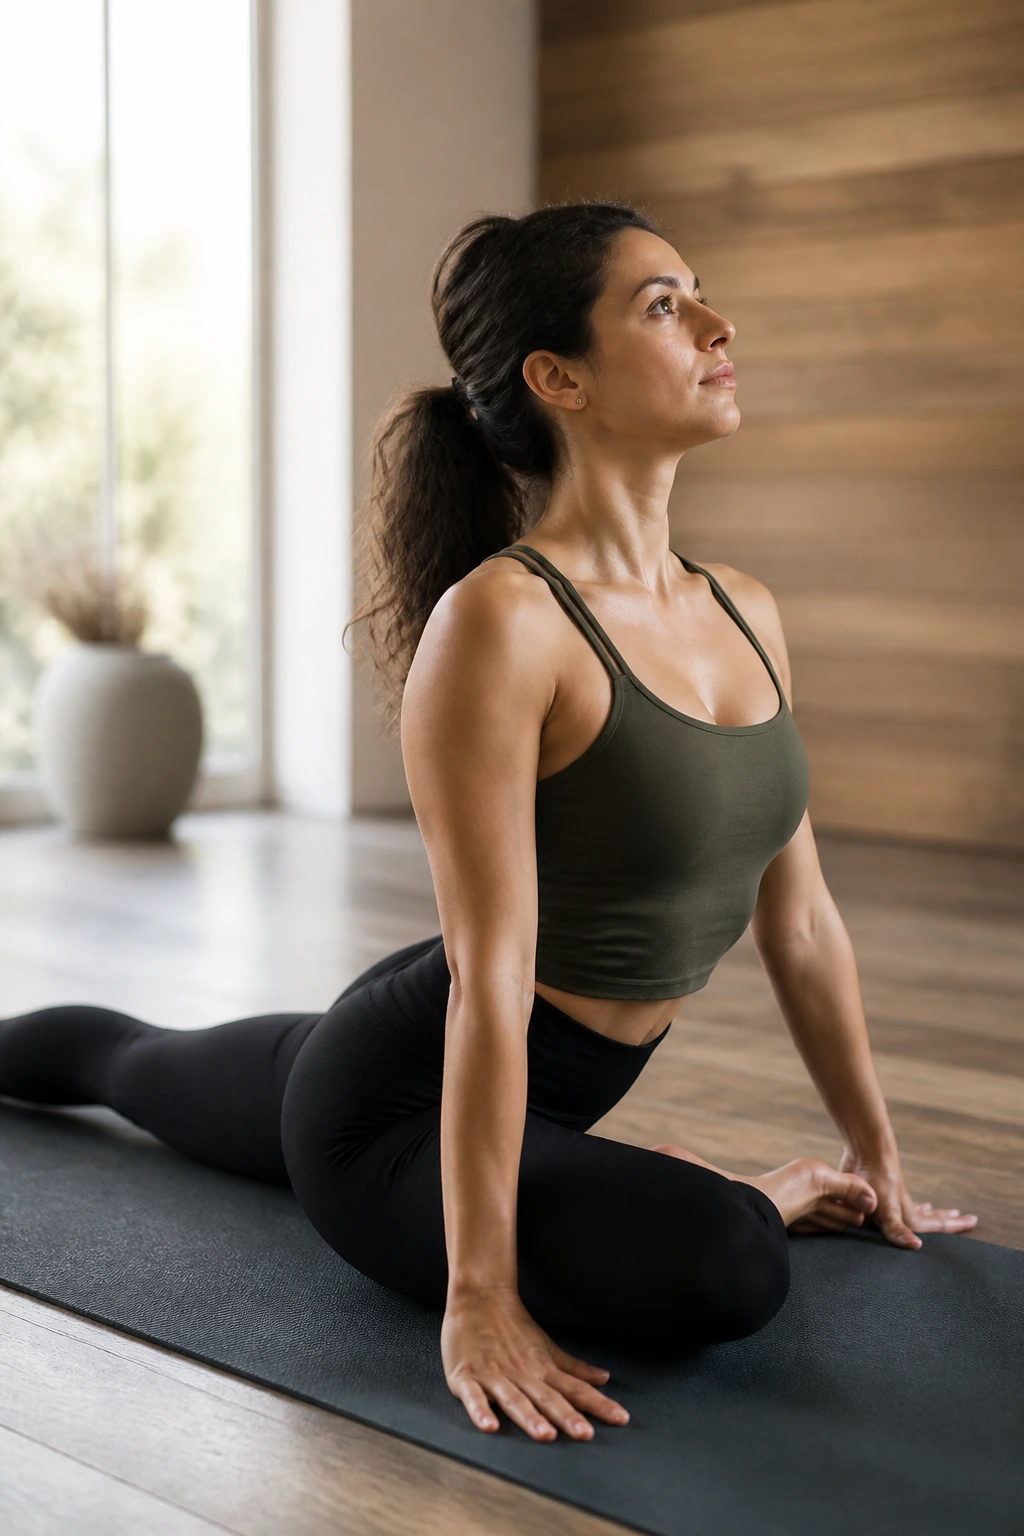
Pigeon pose is often misunderstood as purely a glute stretch, but it is a powerhouse for the psoas if you set it up correctly. By bringing the knee forward and the hip down, you create a unique environment where the back leg must be fully extended. This extension is exactly what the psoas craves.
Why It’s Unique
Unlike a lunge, where your body weight is distributed between two feet, Pigeon traps the leg in a position of external rotation. This forces the front hip to open while simultaneously challenging the psoas on the back leg to stay active and extended. It is a double-sided benefit that few other stretches provide.
Keys to Success
- Support the hip: If your front hip is hovering inches off the ground, place a block or a folded blanket underneath it. The goal is relaxation, not a battle against gravity.
- Active back leg: Do not let the back leg go limp. Keep the top of your foot pressing into the floor and keep the leg engaged, almost as if you are trying to drag your back knee toward your front heel. This engagement prevents your pelvis from twisting and keeps the focus directly on the hip flexor chain.
- Listen to the knee: If you feel any sharp, shooting pain in your knee, back out immediately. You should feel this in the outer hip and the front hip flexor, not the joint itself.
3. Lizard Lunge
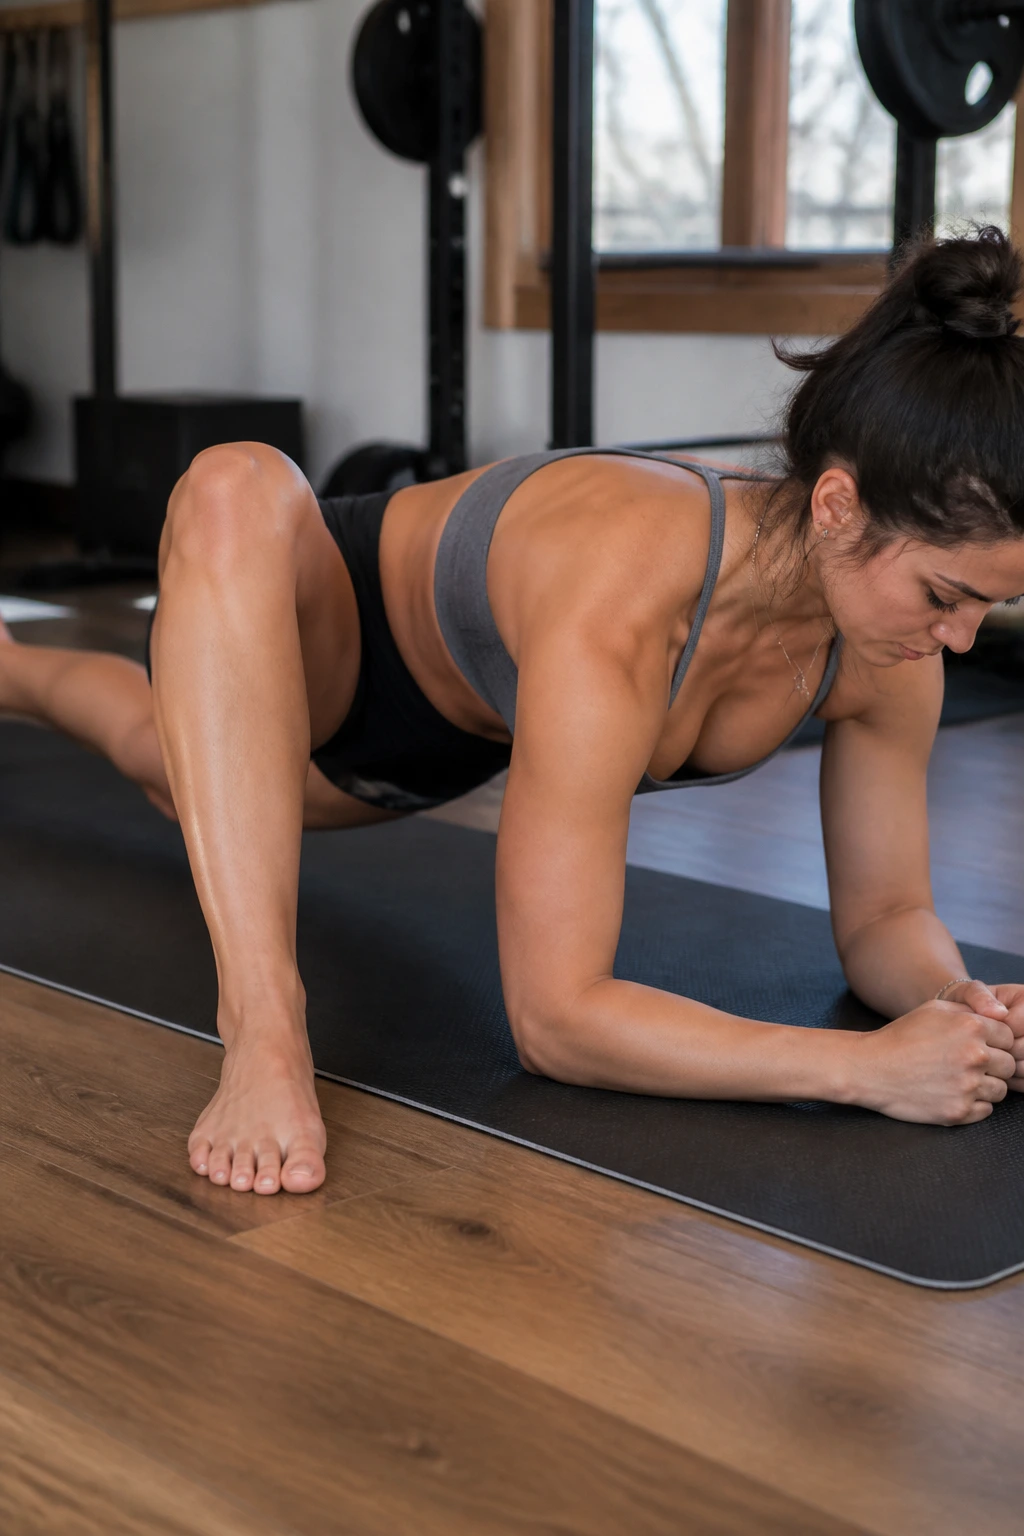
Lizard lunge takes the classic low lunge and drops you deeper into the hip, allowing for more intense access to the deeper layers of the pelvic stabilizers. This is a favorite among runners and weightlifters because it mimics the bottom of a deep squat position but allows for more stability and control.
The Deep Dive
Once you are in your low lunge, walk your front foot out toward the edge of your mat and bring both hands to the inside of your foot. If you have the mobility, try to bring your forearms down to the floor or a yoga block. This drop in height changes the angle of the stretch, shifting the pull from the superficial muscles into the deeper psoas and the adductors of the inner thigh.
Common Mistakes
- Rounding the spine: Keep your chest proud and open. When you round your back to reach the floor, you lose the tension necessary to stretch the psoas.
- Ignoring the back leg: Even in Lizard, the back leg is doing work. Keep that back glute active.
- Forcing the depth: If you cannot reach the floor, do not struggle. The stretch is just as effective with straight arms. Use blocks to raise the floor to you.
4. Half-Kneeling Hip Flexor Stretch
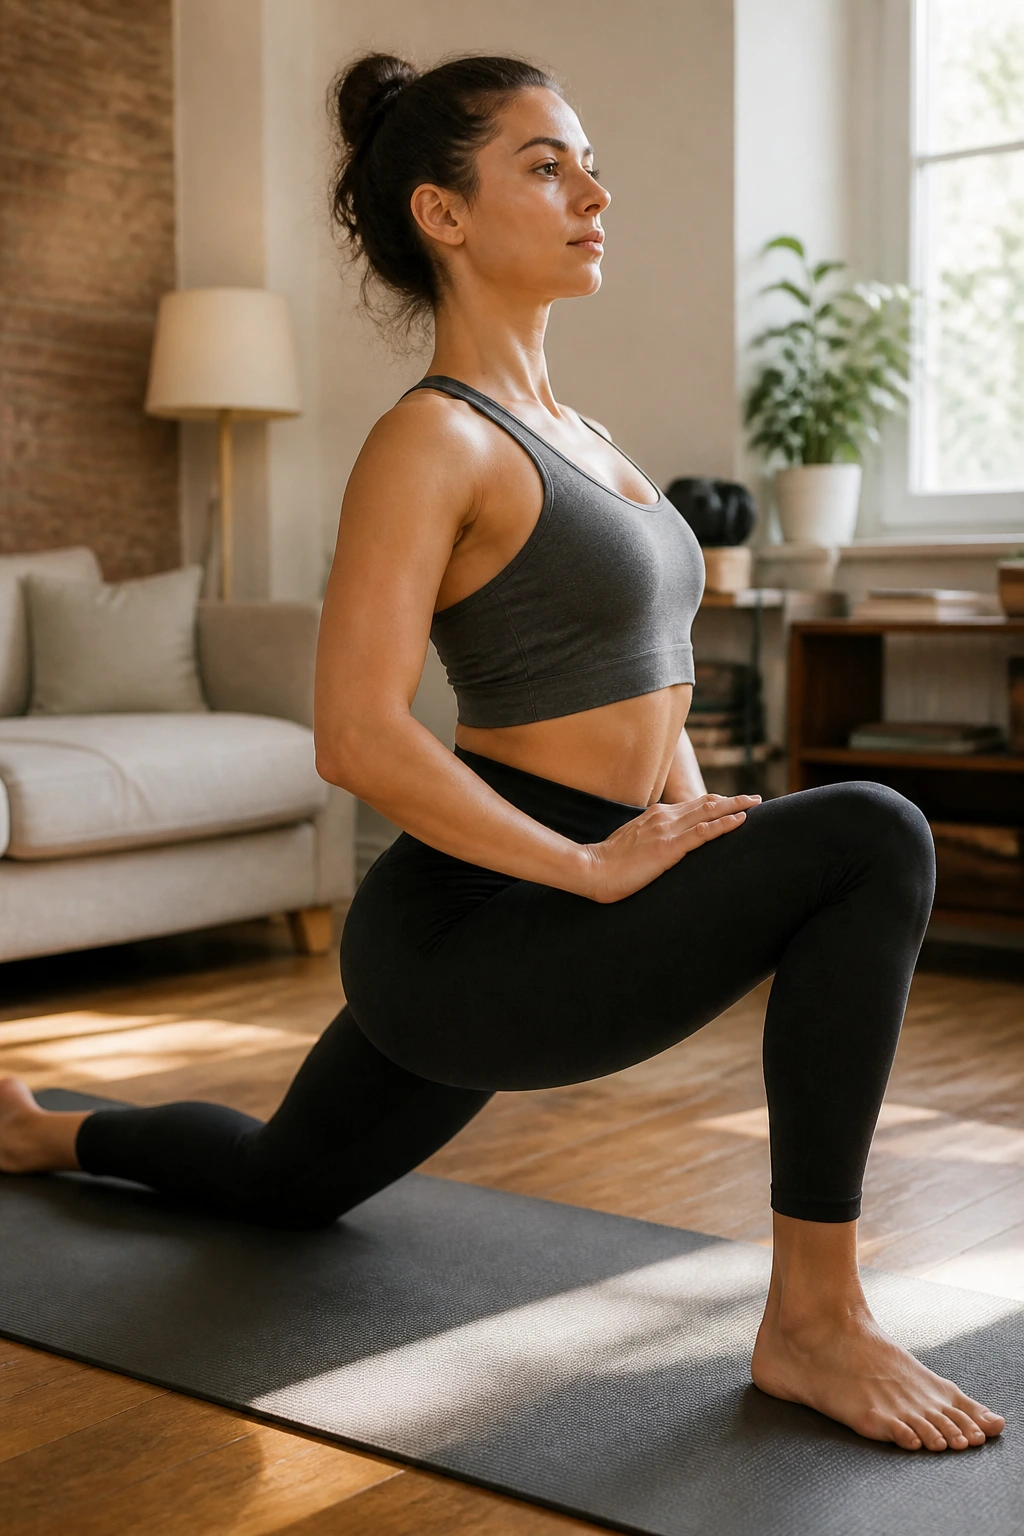
This is arguably the most controlled stretch in this list. By removing the balance challenge of a traditional lunge, you can pour all of your focus into the pelvic alignment and the lengthening of the psoas. It is the perfect option for those who feel shaky in standard lunges and want to focus purely on the anatomy.
Why This Variation Works
By keeping the torso perfectly upright and the front knee at a 90-degree angle, you isolate the psoas from the rest of the hip flexor group. This removes the influence of the quads, which often take over the work in other variations.
The Protocol
- Kneel with one knee on the floor.
- Step the other foot forward so your shin is vertical.
- Keep your hands on your hips to monitor your pelvic tilt.
- Gently push your hips forward—just an inch or two—while keeping your glutes clenched tight.
- You are looking for a sensation of “opening” the front of the hip, not a pulling sensation in the lower back. If you feel lower back strain, you have gone too far forward. Stop, reset, and focus on the glute squeeze.
5. Butterfly Pose (Baddha Konasana)
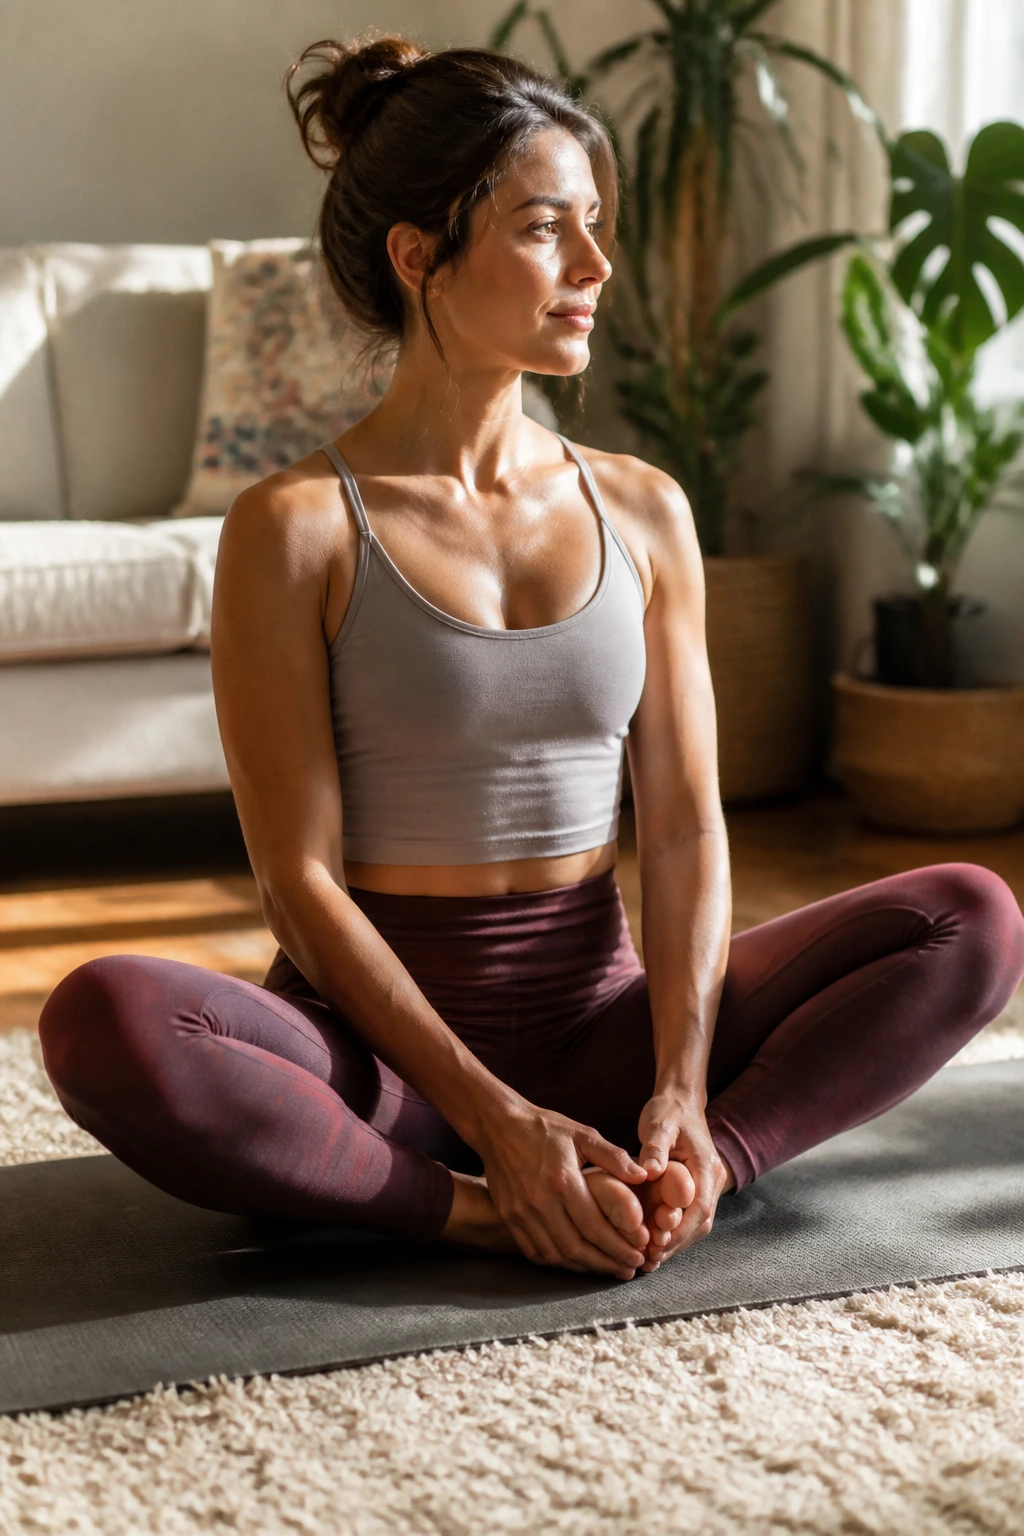
While this is typically viewed as an inner-thigh (adductor) stretch, it plays a vital role in psoas release. Often, the psoas tightens because it is fighting against the adductors. By opening the inner thighs and stabilizing the pelvis, you allow the psoas to “breathe” and relax into its natural position.
The “Less Is More” Approach
Many people try to force their knees to the floor in this pose. This is a mistake. The closer your feet are to your pelvis, the more you engage the hips; the further away they are, the more you target the lower back and psoas.
Enhancing the Psoas Connection
- Sit with a tall spine, propped up against a wall if necessary to keep your back straight.
- Hold your feet and use your elbows to gently guide your knees down—do not push.
- Breathe deeply into the lower belly. As you exhale, imagine the psoas muscles on both sides softening, like a rope loosening after being under high tension.
- This is a passive stretch. The goal is to stay here for two to three minutes, allowing gravity to do the heavy lifting.
6. Bridge Pose
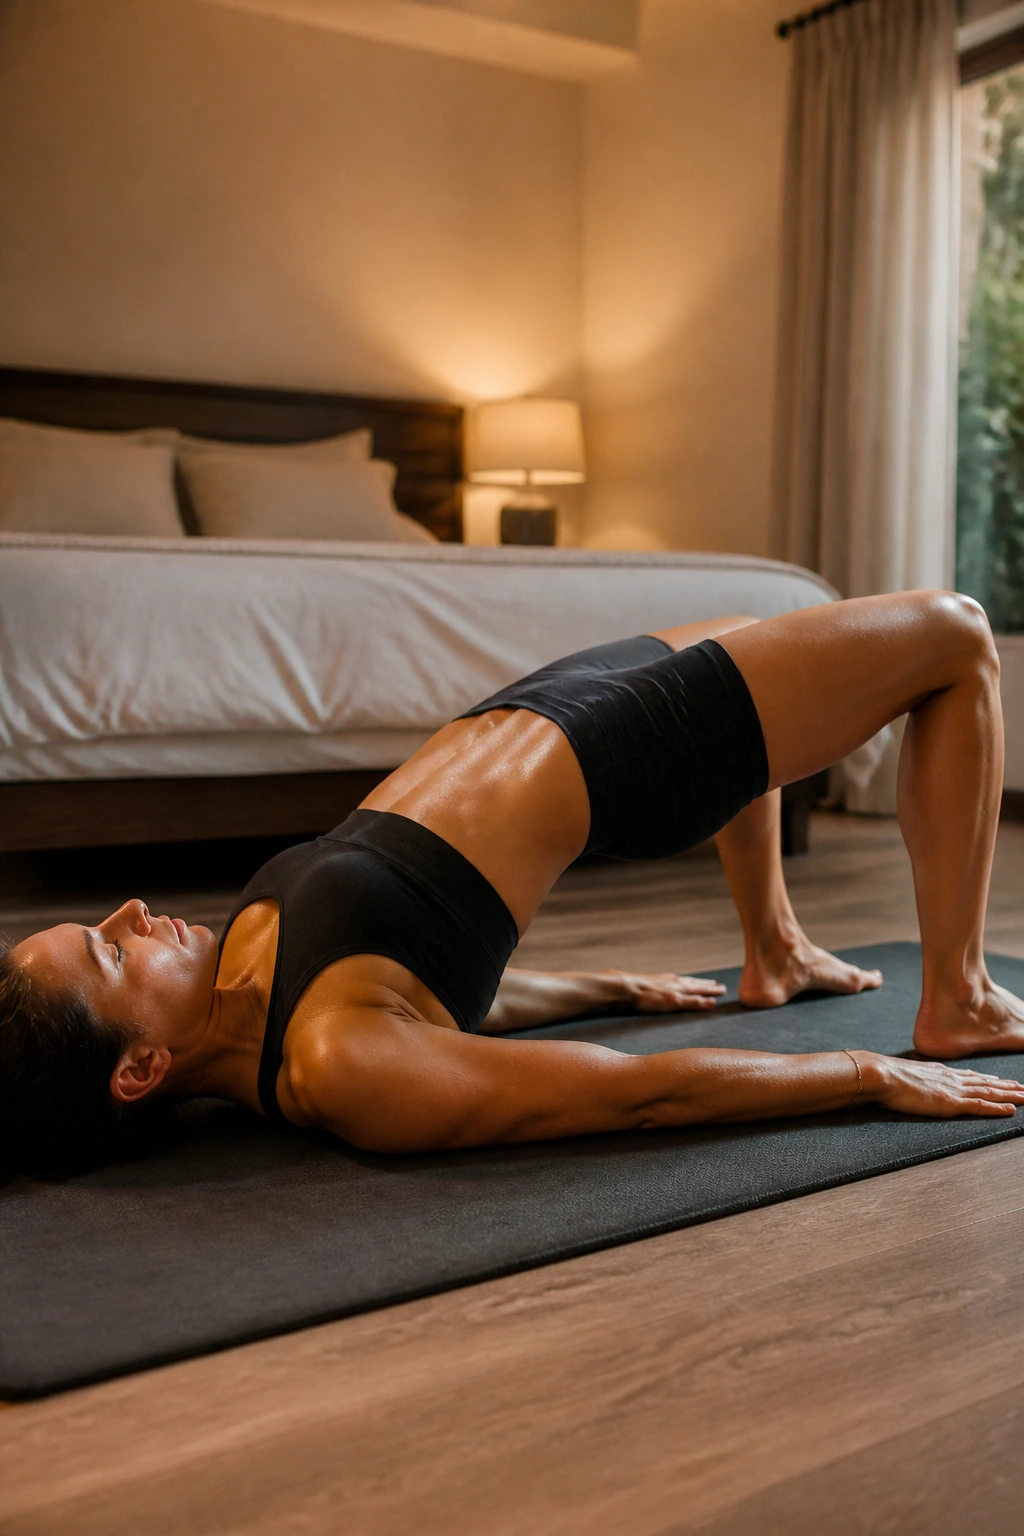
Bridge pose might seem like a strengthening exercise, but it is one of the most effective ways to release a tight psoas. This is based on the principle of reciprocal inhibition: when you fire the antagonist muscle (the glutes), the brain sends a signal to the agonist muscle (the psoas) to relax.
The Mechanism
You cannot get a tight psoas to release if your glutes are dormant. By lifting into a bridge, you are waking up the backside of the body. When those glutes contract hard at the top of the movement, the psoas is physically forced to disengage. It is a biological bypass that works better than any static stretch.
Technique Notes
- Lie on your back, feet hip-width apart.
- Drive through your heels to lift your hips.
- Squeeze your glutes at the top as hard as you can for three seconds.
- Lower slowly. Repeat this for 10-15 repetitions.
- You will notice that by the end of the set, your hips feel naturally more open and less “locked” than they did when you started.
7. Cow Face Pose (Gomukhasana)
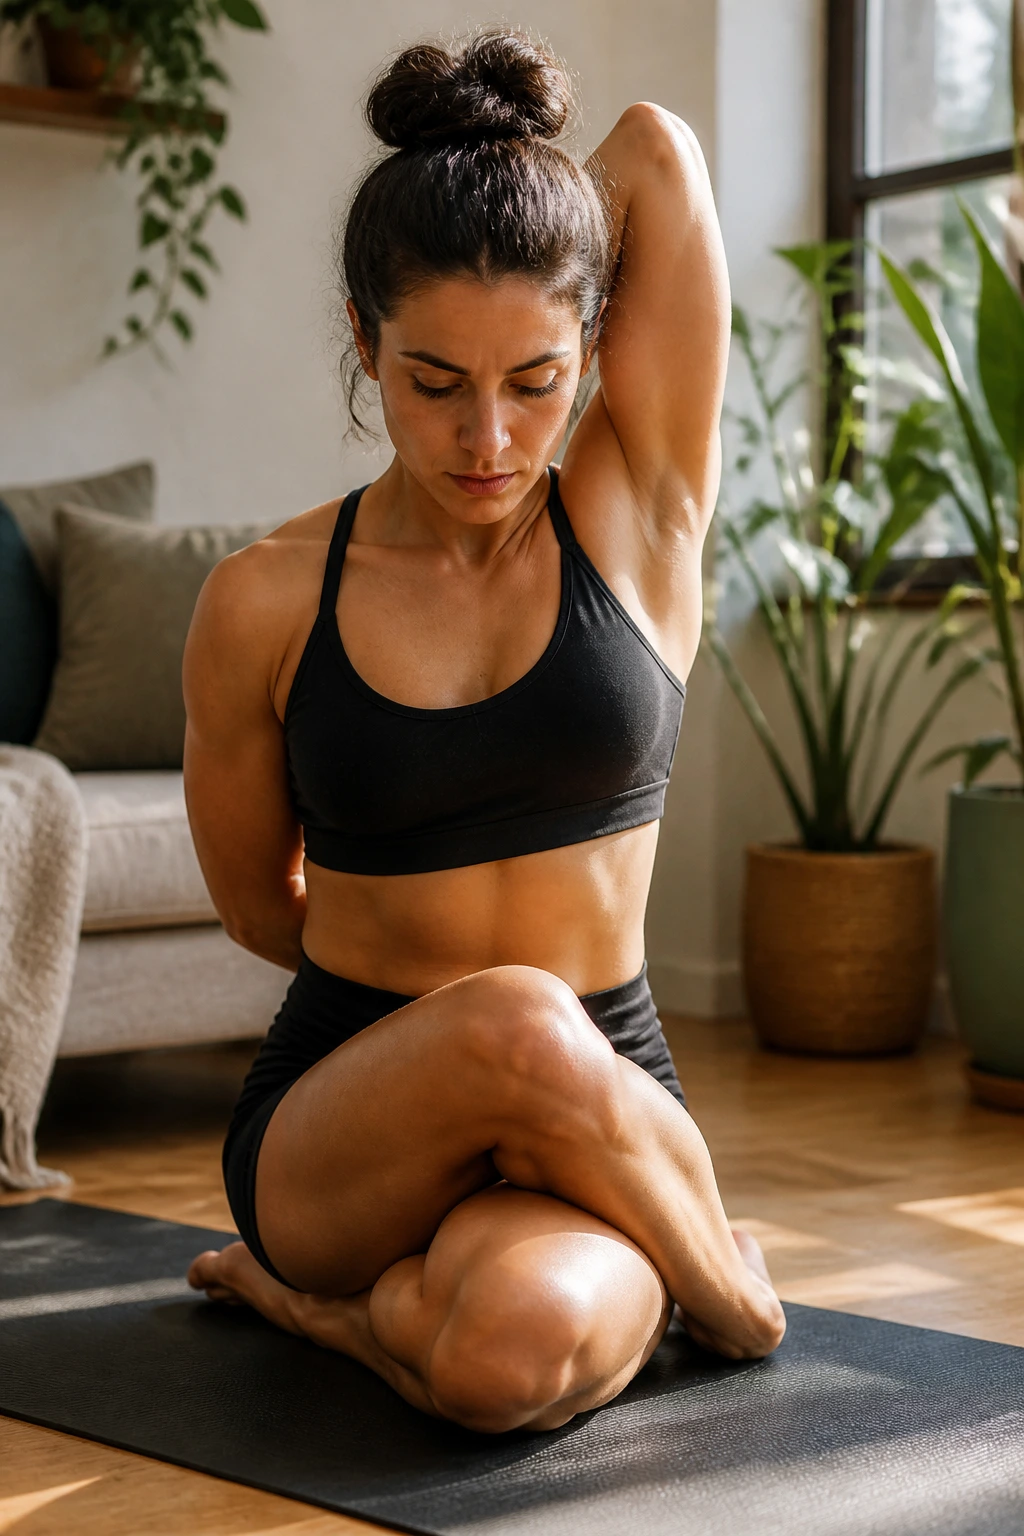
This pose is intense. It involves stacking the knees, which forces a deep internal rotation on one hip and external rotation on the other. This cross-body tension helps to realign the pelvis and release the tension that accumulates in the deep hip rotators, which often refer pain to the psoas.
Why It’s Challenging
Gomukhasana is not a passive stretch for most people. If your hips are very tight, you will feel this immediately. The key is to acknowledge the discomfort without tensing up. Tension is the enemy of flexibility.
Implementation
- Start in a seated position.
- Cross one leg over the other, aiming to stack your knees.
- If you can’t stack them, cross your ankles and use a folded blanket to sit on. Elevating your hips makes this significantly more accessible and reduces the torque on your knees.
- Fold forward slowly, keeping your spine long. This forward fold acts as a “release valve” for the psoas, as it helps to deactivate the lumbar tension that accompanies hip tightness.
8. Standing Quad Stretch with Pelvic Tilt
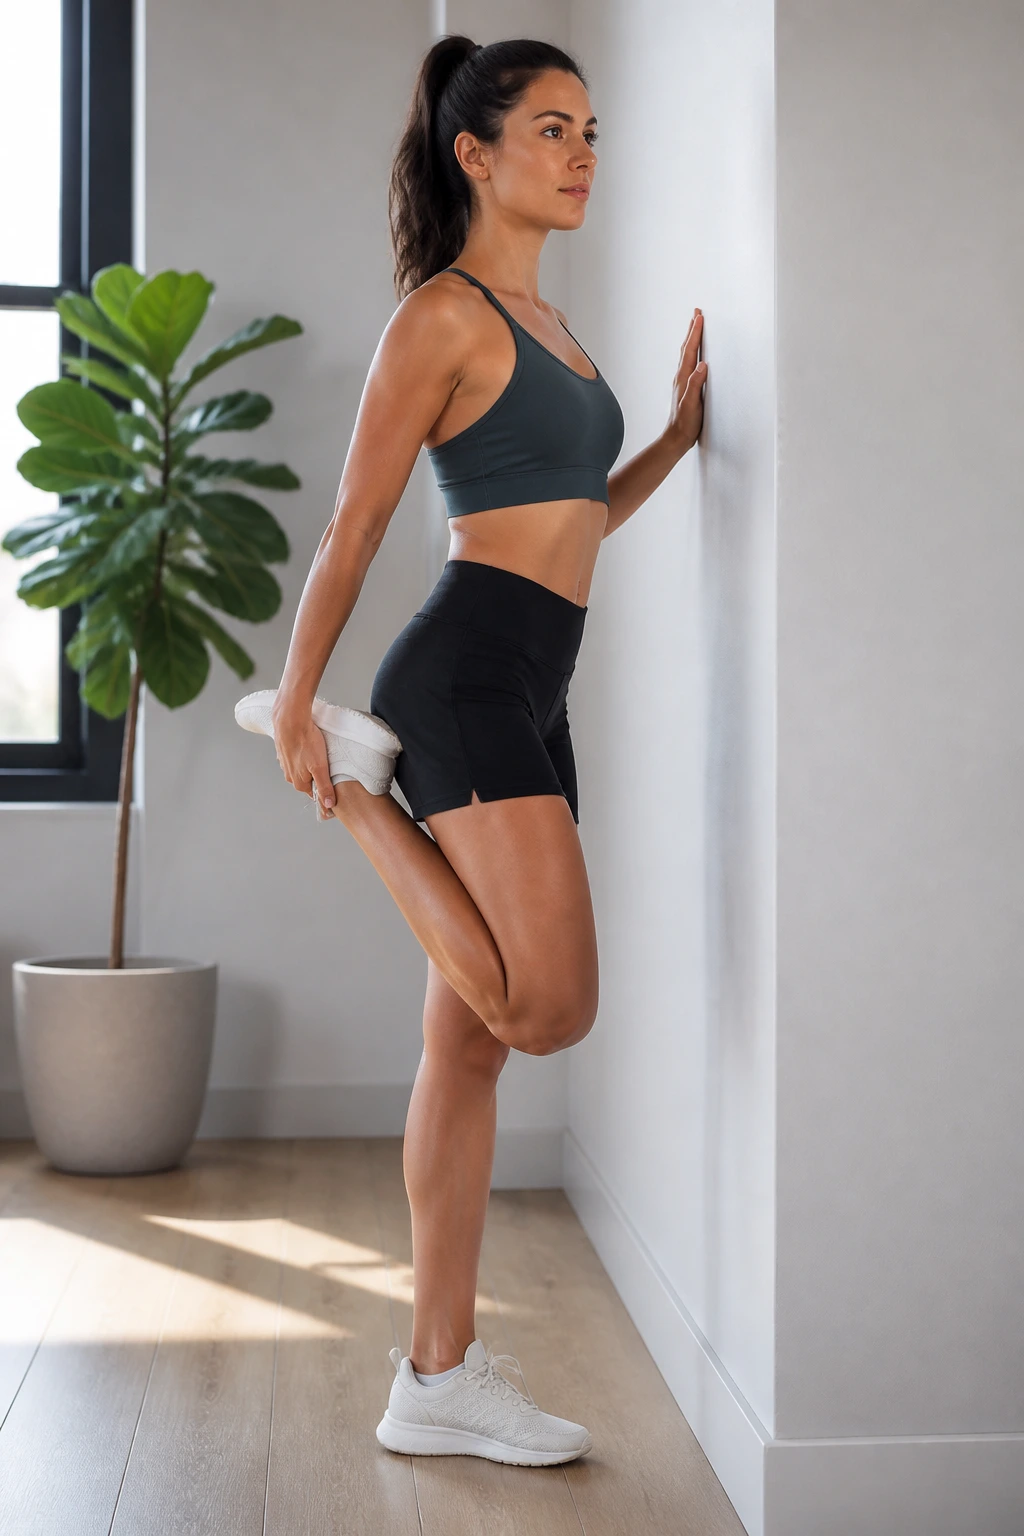
The standard “grab your foot and pull” quad stretch is often ineffective because it ignores the psoas entirely. By adding a simple, specific movement—the pelvic tilt—you transform a basic leg stretch into a potent psoas release.
Elevating the Standard Stretch
Stand on one leg, holding onto a wall for balance if you need it. Grab your other ankle and pull your heel toward your glute. Now, here is the crucial step: pull your navel toward your spine and tuck your tailbone under.
The Sensation
Most people feel a mild quad stretch. But once you perform that tuck, the sensation moves from the muscle belly of the quad up into the attachment point at the hip. That is the psoas. You don’t need to pull your foot hard; you just need to tilt your pelvis. Keep your knees close together to ensure you aren’t rotating the hip outward, which would bypass the psoas.
9. Supine Psoas Release (Constructive Rest)
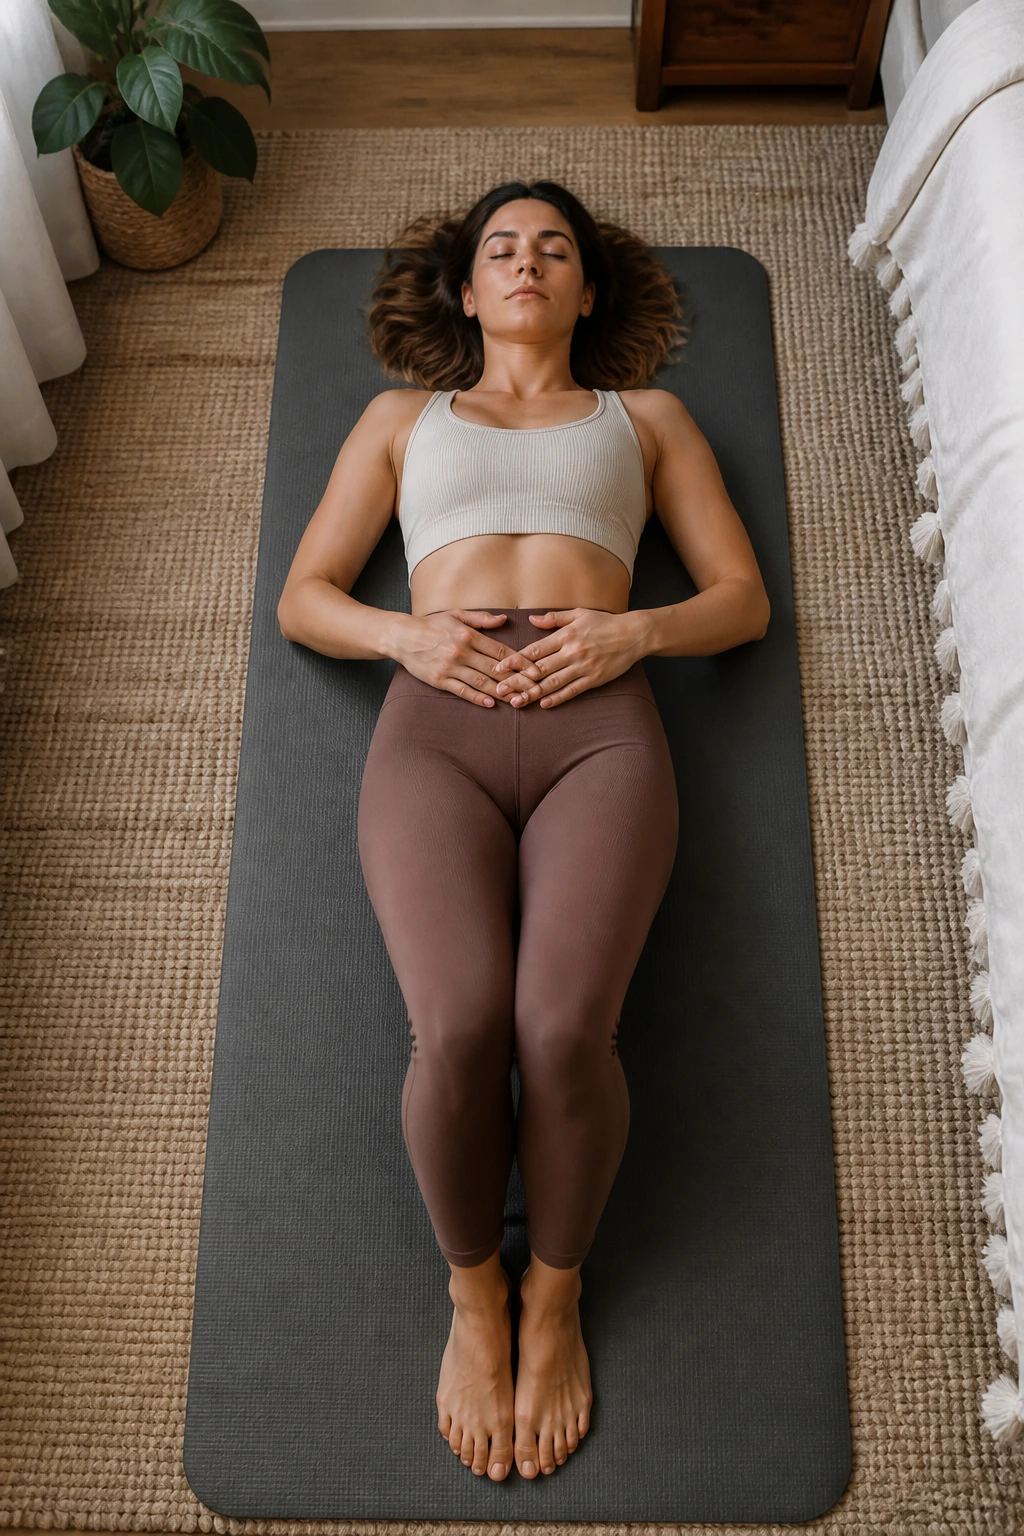
This is the “gold standard” for anyone dealing with chronic, deep-seated psoas tension. It requires zero active effort. It is purely about letting go. If you only do one thing from this entire list, let it be this.
Why It’s Superior
Most stretches involve gravity pulling you into a position. Constructive rest uses gravity to unwind the muscle. It allows the psoas to return to its resting length without the interference of your nervous system trying to protect you.
How to Perform It
- Lie on your back with your feet flat on the floor, knees bent.
- Walk your feet out to the edges of the mat and let your knees knock together to touch.
- Place your arms out in a “T” or resting on your belly.
- Close your eyes and focus on your breath.
- Stay here for five to ten minutes. You might feel a subtle shifting or releasing sensation in the hip joints. This is the nervous system recalibrating the tone of the muscle. It is incredibly effective for resetting after a long workday.
10. Warrior I
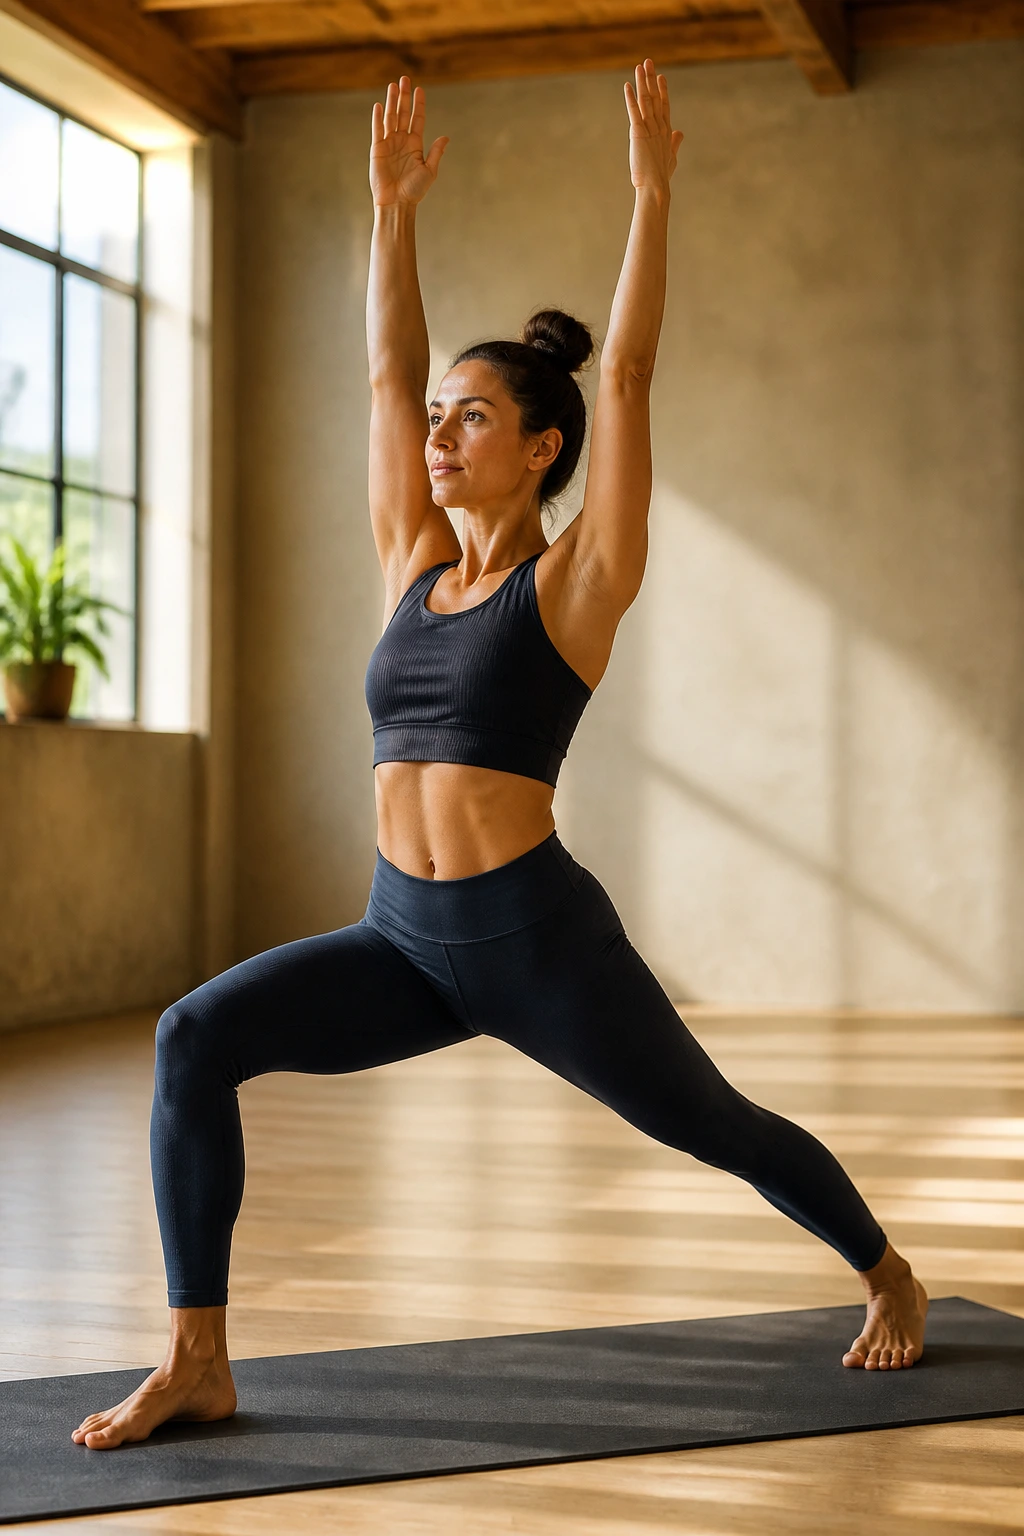
Warrior I is an active pose, but it is an excellent way to integrate psoas lengthening into a dynamic movement flow. Unlike the deeper lunges, Warrior I forces the back leg into a straight position with the heel grounded, which changes the angle of pull on the psoas.
The Active Stretch
Because you have to stabilize your entire body in this position, your psoas is forced to work in an “eccentric” fashion—lengthening while under tension. This is highly beneficial for athletic performance, as it teaches the muscle to remain long and functional, rather than short and rigid.
Alignment Check
- Your back foot should be turned out at about a 45-degree angle.
- Your front knee should be bent, but do not let it cave inward.
- The most important detail: keep your hips squared to the front. If your back hip is pulling back, you will lose the stretch. Imagine your hip bones are headlights—point them straight ahead.
11. Gate Pose (Parighasana)
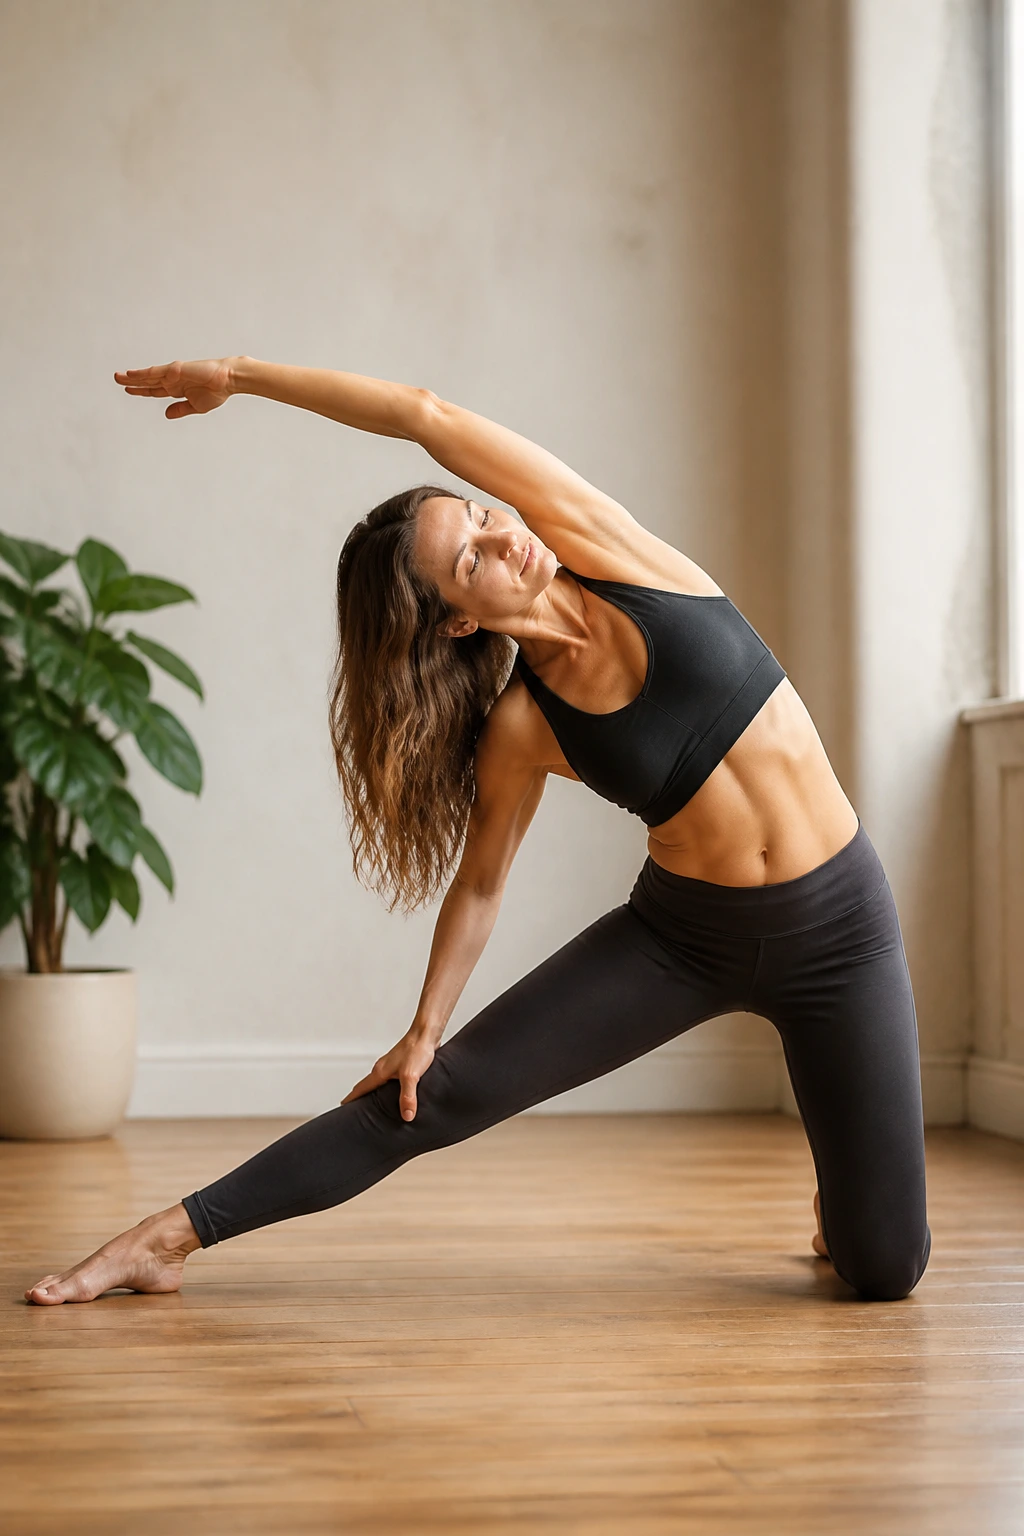
The psoas doesn’t just flex the hip; it also plays a role in lateral flexion (side-bending) of the spine. When you combine a deep side stretch with an open hip position, you access the upper attachments of the psoas that are often neglected in standard forward-facing lunges.
Why Lateral Stretches Matter
We live our lives moving forward and backward. We almost never move side-to-side. This lack of lateral movement makes the obliques and the upper psoas fibres stiff. Gate pose corrects this by opening the entire side body from the knee to the ribcage.
The Execution
- Kneel on one knee, extending the other leg out to the side.
- Reach your arm over your head toward the extended leg.
- As you reach, focus on pushing the hip of your kneeling leg forward slightly.
- Breathe into the ribs on the side you are stretching. You will feel a deep, expansive sensation that travels all the way from your hip up through your waist.
12. Chair Pigeon
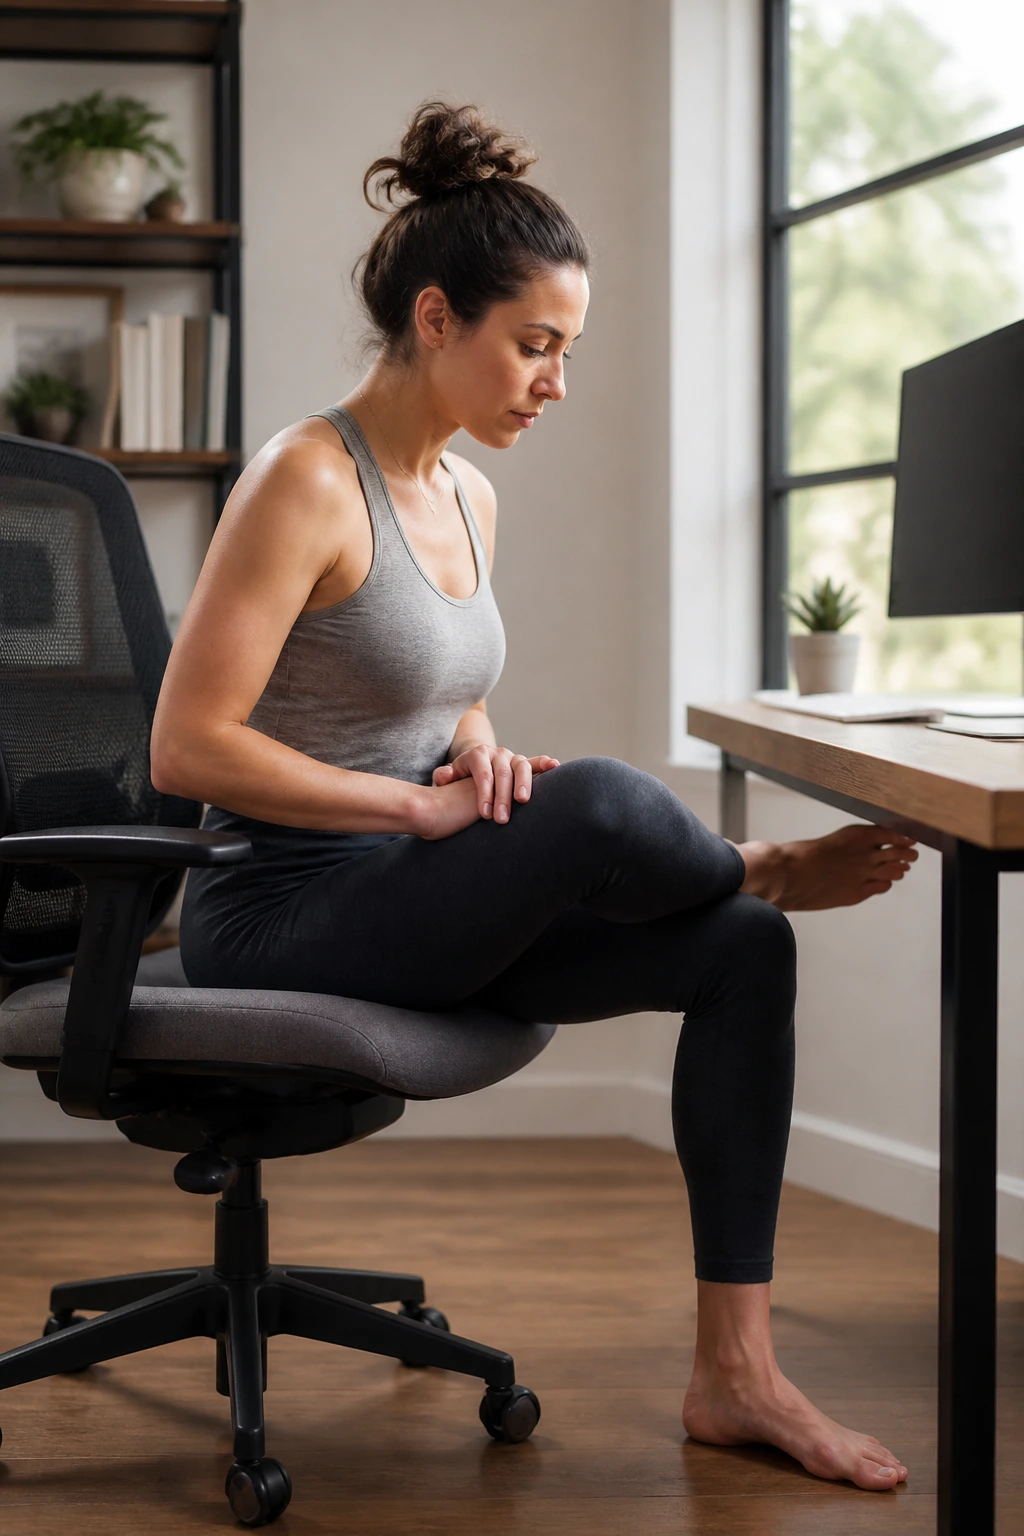
You don’t need a yoga mat to release your hips. Chair Pigeon is a modification of the floor-based Pigeon pose that can be done at your desk or while waiting for coffee. It is arguably the most practical, “real-world” stretch on this list.
Integrating Mobility into Daily Life
If you sit for a living, you need to break up the cycle of shortening. Chair Pigeon allows you to do exactly that without having to get down on the floor. It is subtle, discrete, and highly effective for maintaining range of motion throughout the day.
How to Do It Properly
- Sit on the edge of a sturdy chair.
- Cross your right ankle over your left knee.
- Keep your right foot flexed (this protects the knee joint).
- Sit up very tall, maintaining a neutral spine.
- Lean your torso forward slightly—just until you feel the tension in the hip. Do not collapse your chest. The deeper you sit, the more the hip releases.
- Hold for 60 seconds per side.
13. Runner’s Lunge with Twist
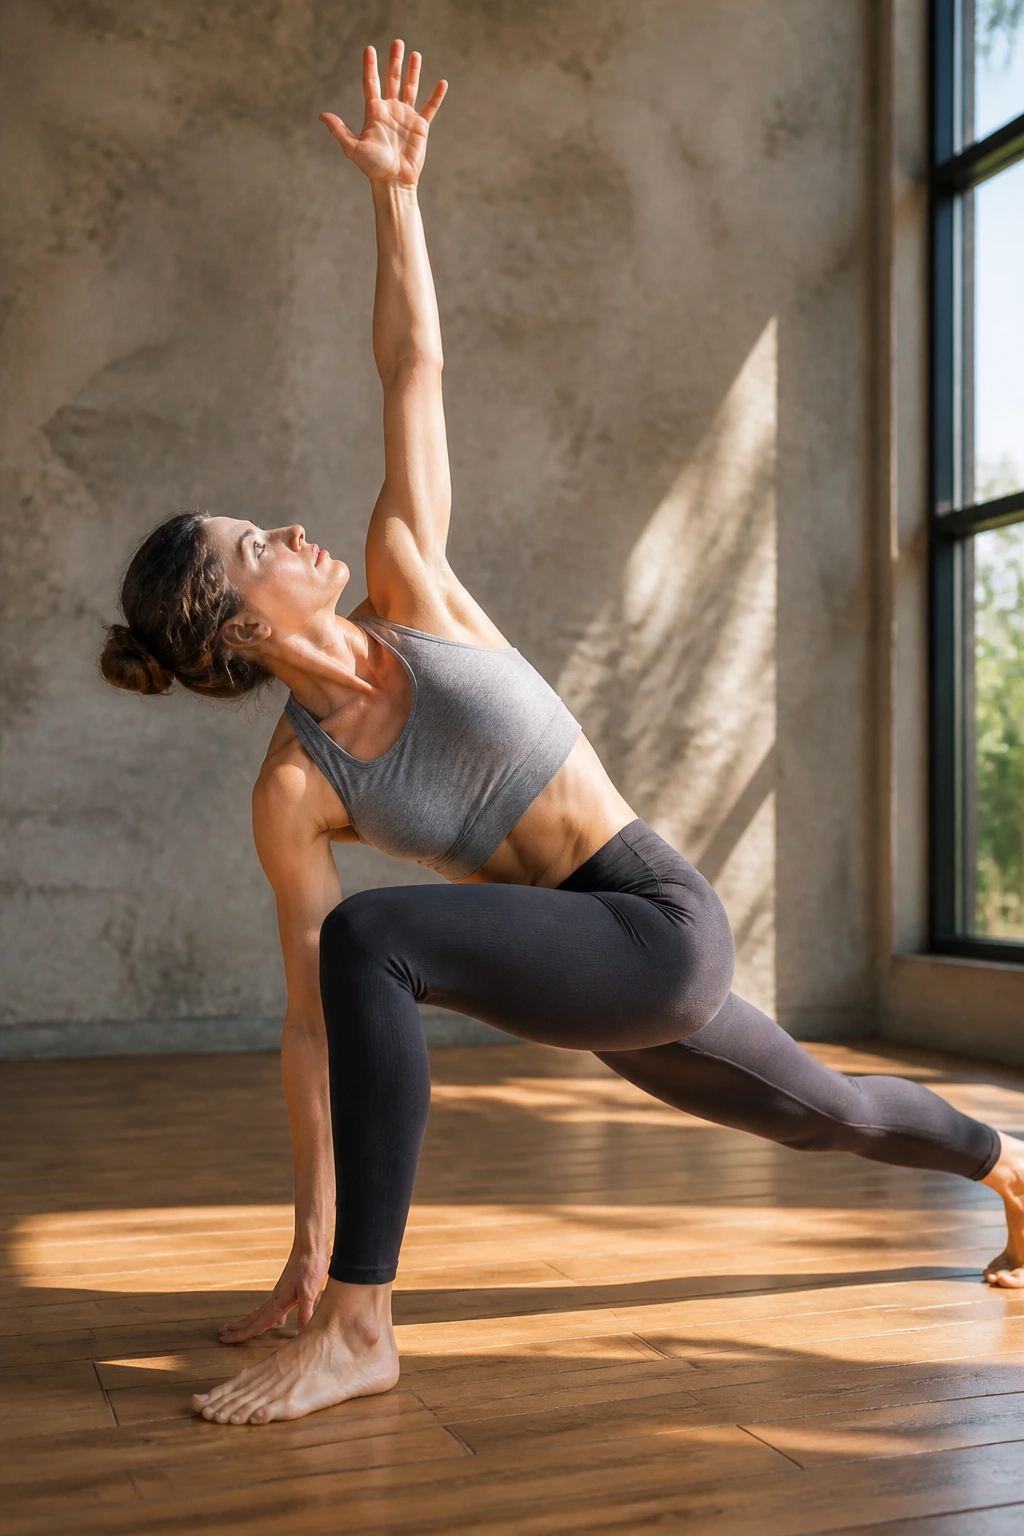
This variation adds a thoracic (upper back) rotation to the standard lunge. By rotating the torso, you are effectively wringing out the spine and providing a different vector of tension for the psoas. It’s a multi-planar stretch that addresses the fact that hips don’t move in a vacuum.
The Power of Rotation
When you twist, you force the stabilizing muscles around the hips to engage in a new way. This constant shifting prevents the body from “bracing” against the stretch. It keeps the nervous system guessing, which often helps the muscles relax more deeply.
Steps to Take
- Get into a deep lunge.
- Place the hand opposite to your front leg on the floor (or a block).
- Reach the other hand up to the ceiling, opening your chest to the side.
- Keep the back leg straight and strong.
- Look up toward your top hand. This rotation helps to unlock the hip flexors by engaging the core muscles that stabilize the spine.
14. Happy Baby Pose
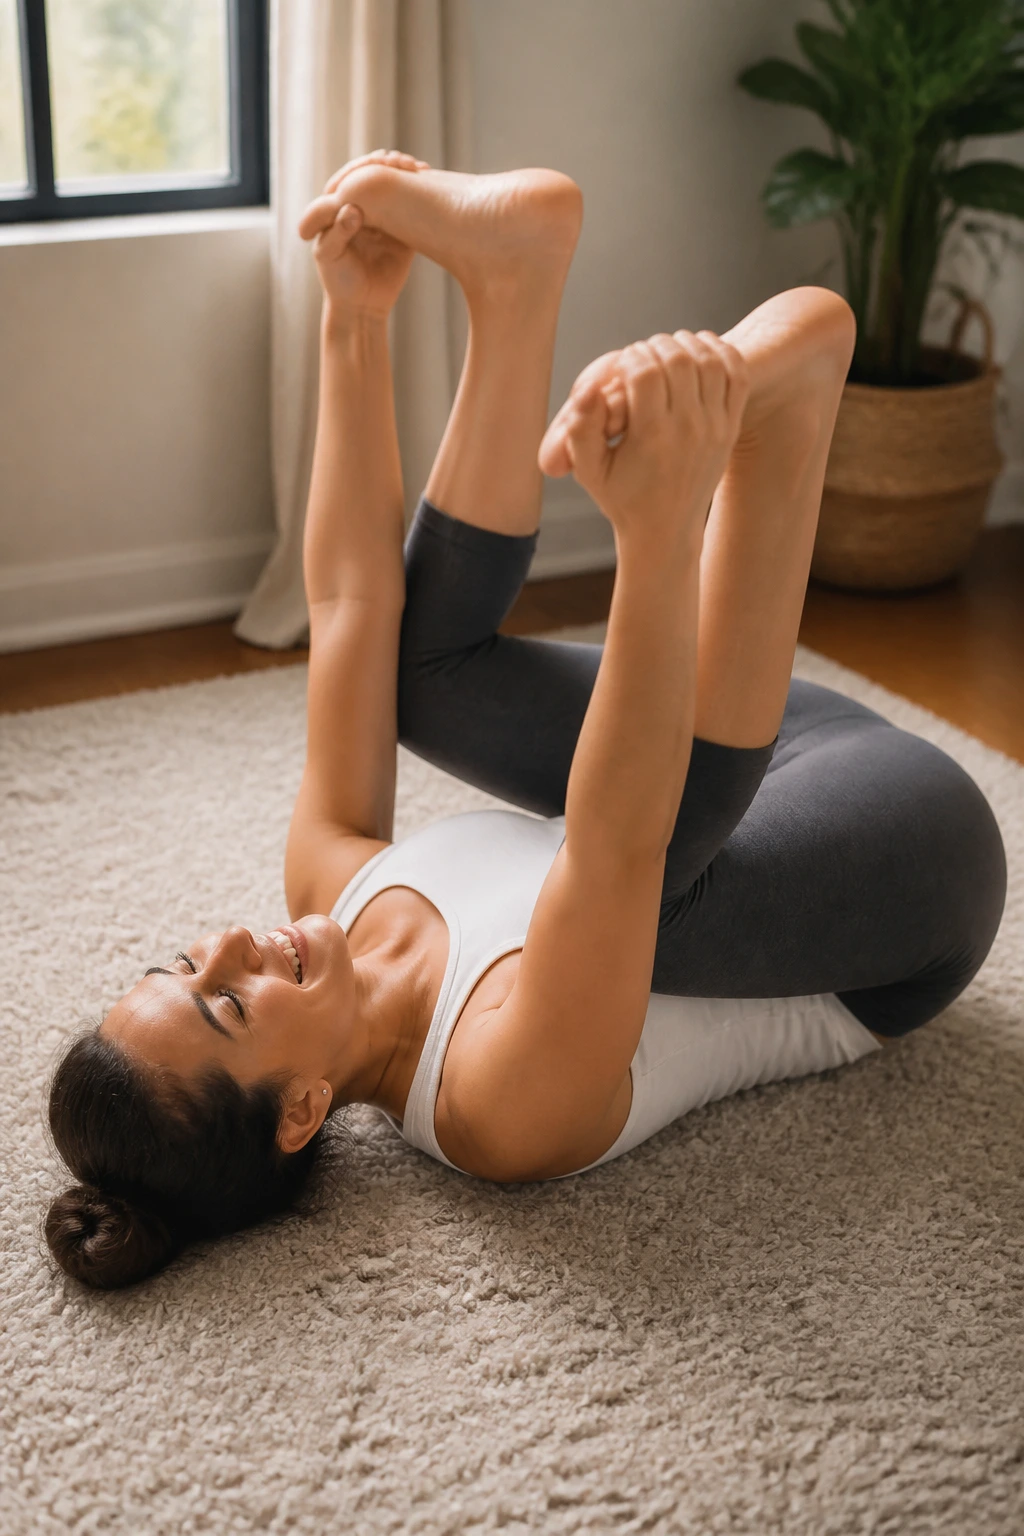
This is the ultimate “un-doing” pose. By pulling your knees toward your armpits and holding the outside of your feet, you are placing your hips into deep external rotation and flexion. This position naturally helps to decompress the lower back, which is almost always the site of referred pain from a tight psoas.
Why It’s Relaxing
There is a primal comfort to this pose. It forces you to lie flat on your spine, neutralizing the lumbar curve and allowing the back of the pelvis to connect fully with the floor. The psoas, which is attached to the lumbar vertebrae, can finally stop pulling the spine into an arch.
Tips for Success
- Keep your sacrum on the floor. Do not lift your bum off the ground to reach your feet.
- If you can’t reach your feet, hold your shins or use a strap around your feet.
- Rock gently from side to side to massage the muscles along the spine. This gentle movement encourages the psoas to soften further.
15. Supported Bridge with Block
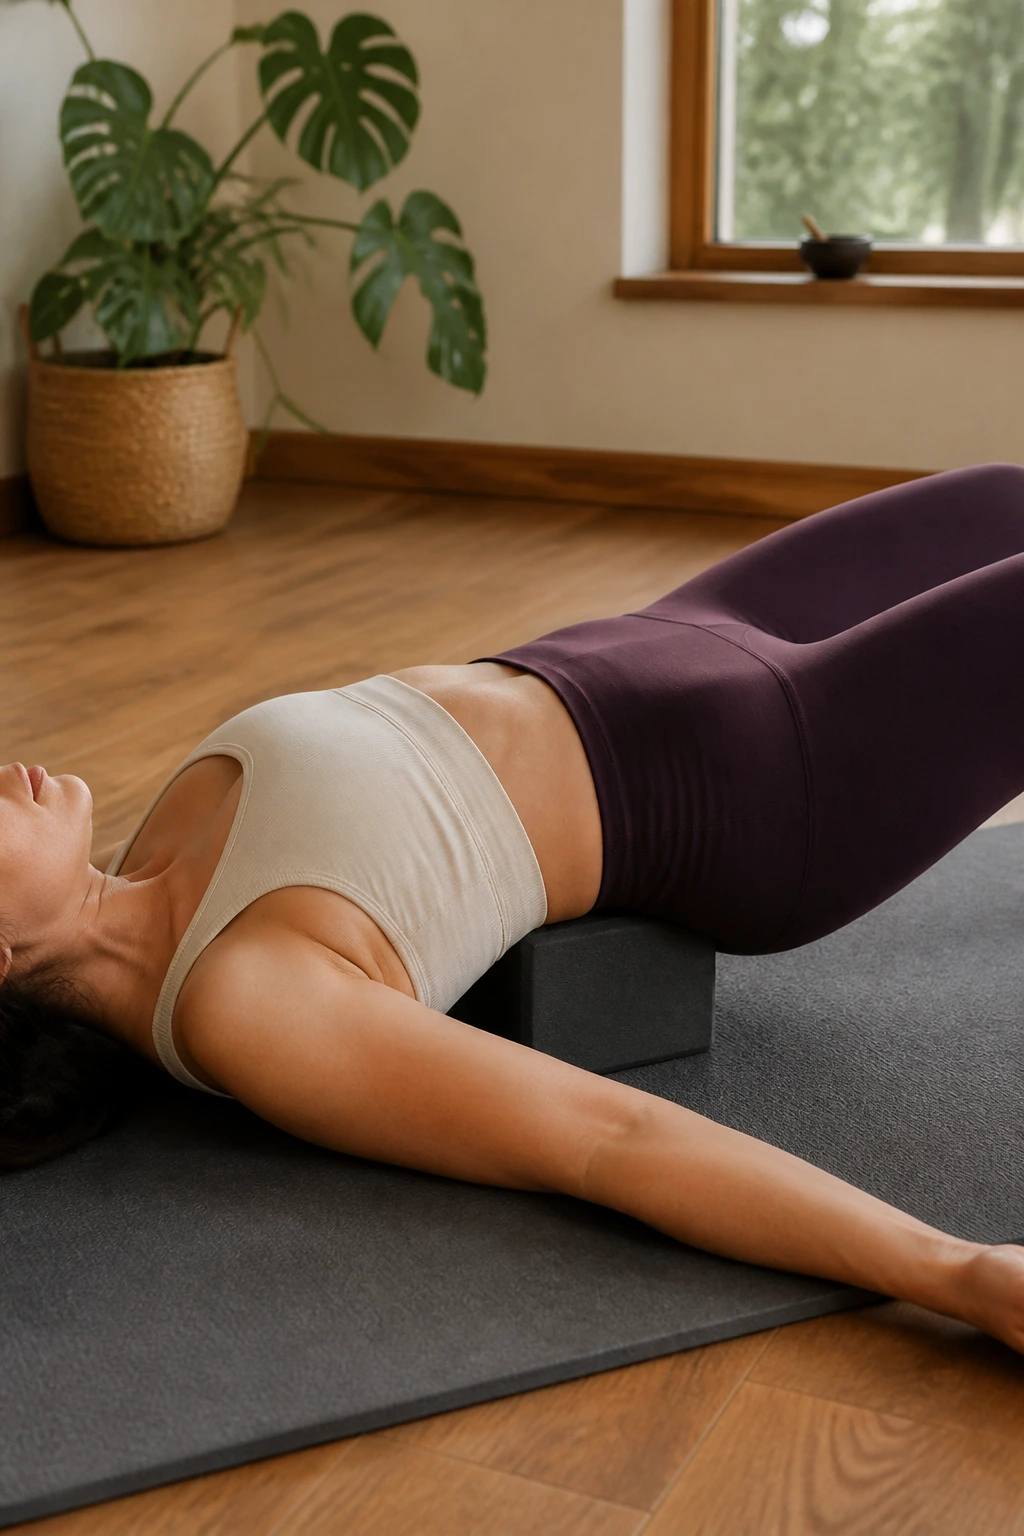
We began this list with active lunges and we end with a restorative variation of the bridge. Using a block underneath your sacrum turns the bridge pose from a strength move into a passive release, allowing the psoas to hang in gravity-assisted extension for as long as you like.
The Restorative Advantage
This is the inverse of sitting. If sitting is “closed,” this is “open.” By elevating the hips, you are creating a gentle stretch that requires zero muscular effort. This is essential for the nervous system to switch from the “fight or flight” response—which tightens the psoas—to the “rest and digest” state.
How to Execute
- Lie on your back, knees bent, feet flat.
- Lift your hips and place a yoga block (or a thick book) horizontally under your sacrum—the bony triangle at the base of your spine.
- Make sure the block is under your bone, not your lower back.
- Extend your legs out straight if it feels comfortable.
- Let your feet flop open.
- Stay for three to five minutes. This is essentially “decompression therapy” for your hips.
Final Thoughts
Consistency beats intensity every single time when it comes to psoas health. You do not need to spend an hour every day doing all fifteen of these movements. In fact, if you only choose three—perhaps the low lunge, the constructive rest, and the bridge—and perform them with focus for five minutes a day, you will see more progress than if you randomly do all of them once a week.
Remember that your psoas is not just a muscle; it is a barometer for your stress levels and your physical activity. If you are stressed, your psoas is tight. If you are sedentary, your psoas is tight. It is constantly reacting to your environment. By dedicating a small amount of time to these releases, you are not just fixing tight hips; you are training your body to return to a neutral, relaxed state. Treat your hips with patience, listen to the feedback they give you, and avoid the temptation to force your way into depth. The results will come naturally.
