



When you finish a tough training session, your muscles are often tight, fatigued, and holding onto a significant amount of metabolic waste. That heavy, constricted feeling isn’t just in your head; it’s a physical reality of muscle fibers that have been put through high-intensity contraction cycles. While your first instinct might be to collapse onto the couch, spending just a few minutes performing targeted movements can be the difference between waking up feeling rejuvenated or feeling like you were hit by a truck.
Recovery isn’t passive. It is an active process that requires you to signal to your nervous system that the work is finished. By slowly transitioning from a state of sympathetic nervous system arousal—the “fight or flight” mode triggered by exercise—to a parasympathetic, restorative state, you significantly improve blood flow, reduce stiffness, and prevent the long-term postural issues that stem from chronic tightness. This isn’t about pushing your flexibility limits to the max; it’s about gentle, rhythmic release.
The goal here is consistency rather than intensity. You do not need to be a gymnast to see the benefits of these movements. In fact, if you force a deep stretch, you might trigger the stretch reflex, which causes the muscle to contract as a protective mechanism. That is exactly what you want to avoid. Instead, focus on finding the edge of tension, holding steady, and breathing through the tightness until your body signals that it can safely release the hold.
1. Cat-Cow Stretch
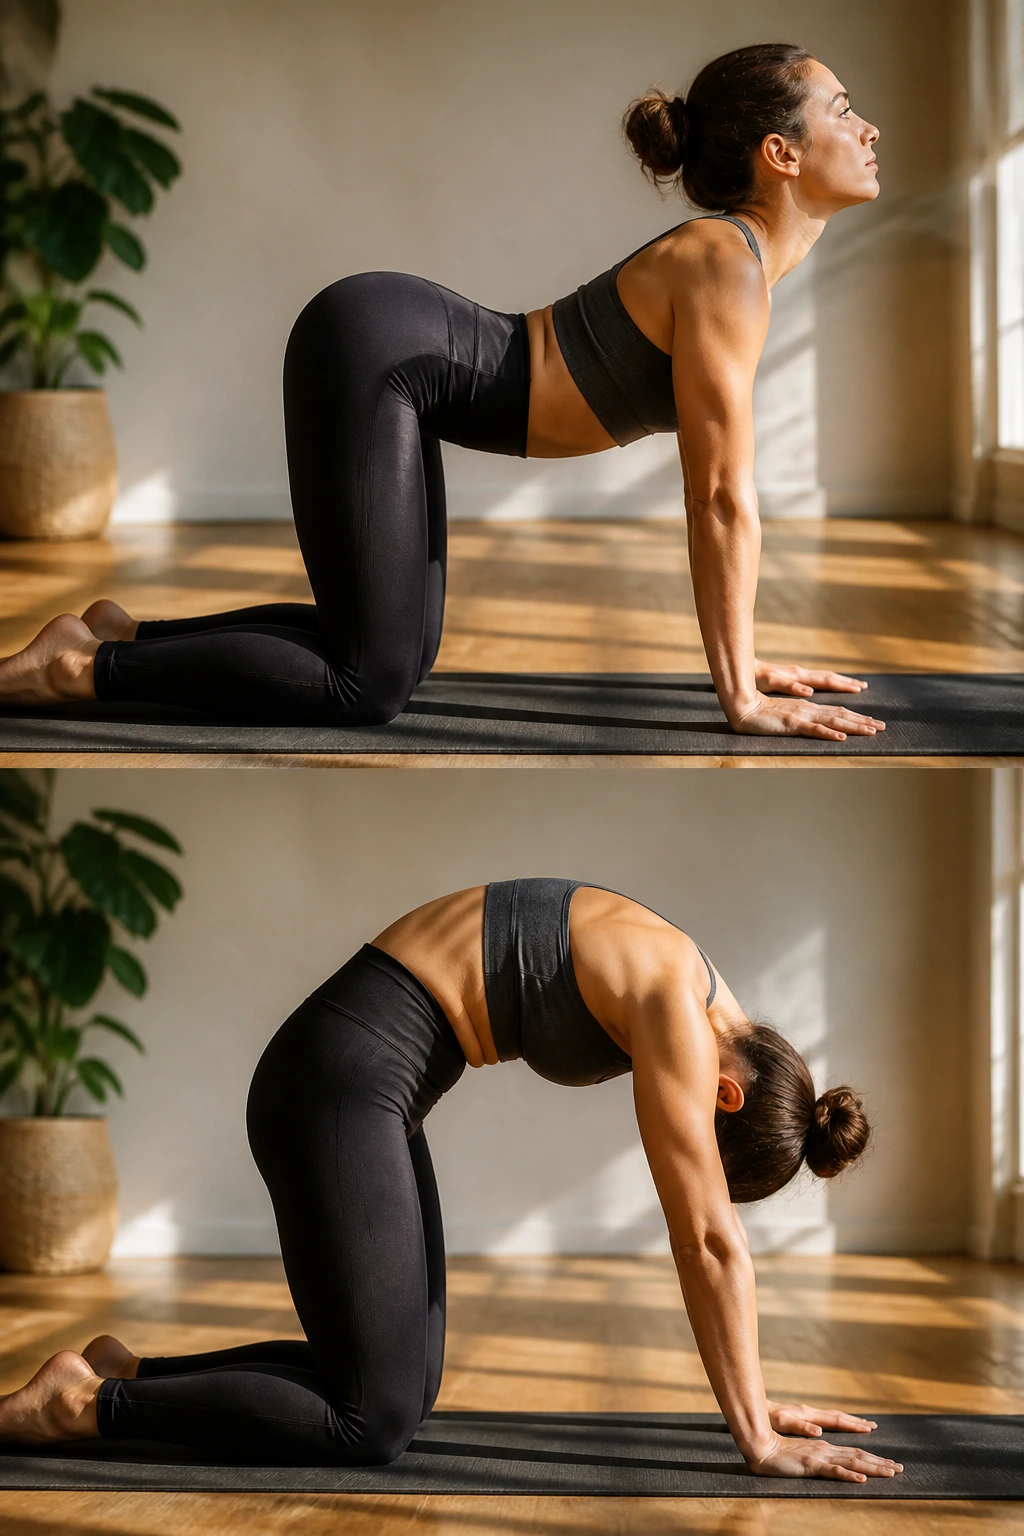
This is one of the most effective movements to reset the spine after a workout, particularly if you have been doing heavy compound lifts or high-impact cardio. By moving the spine through flexion and extension, you are actively decompressing the vertebrae and waking up the muscles that line the back.
The Mechanics of the Movement
Start on your hands and knees in a tabletop position, with your wrists directly under your shoulders and your knees under your hips. As you inhale, drop your belly toward the floor, lift your chin and chest, and gaze up toward the ceiling. This is the Cow pose. As you exhale, tuck your chin toward your chest, round your back toward the ceiling, and pull your belly button in toward your spine. This is the Cat pose.
Why It Works for Post-Workout Recovery
- It increases blood flow to the spinal discs.
- It gently stretches the abdominal wall, which often tightens up during heavy breathing.
- The rhythmic nature of the movement helps downshift your heart rate.
Pro tip: Do not rush this. Move at the pace of your breath. If you have an inhale that lasts three seconds, your movement should take three seconds. The goal is to synchronize the two, creating a meditative flow that eases mental fatigue alongside physical soreness.
2. Child’s Pose
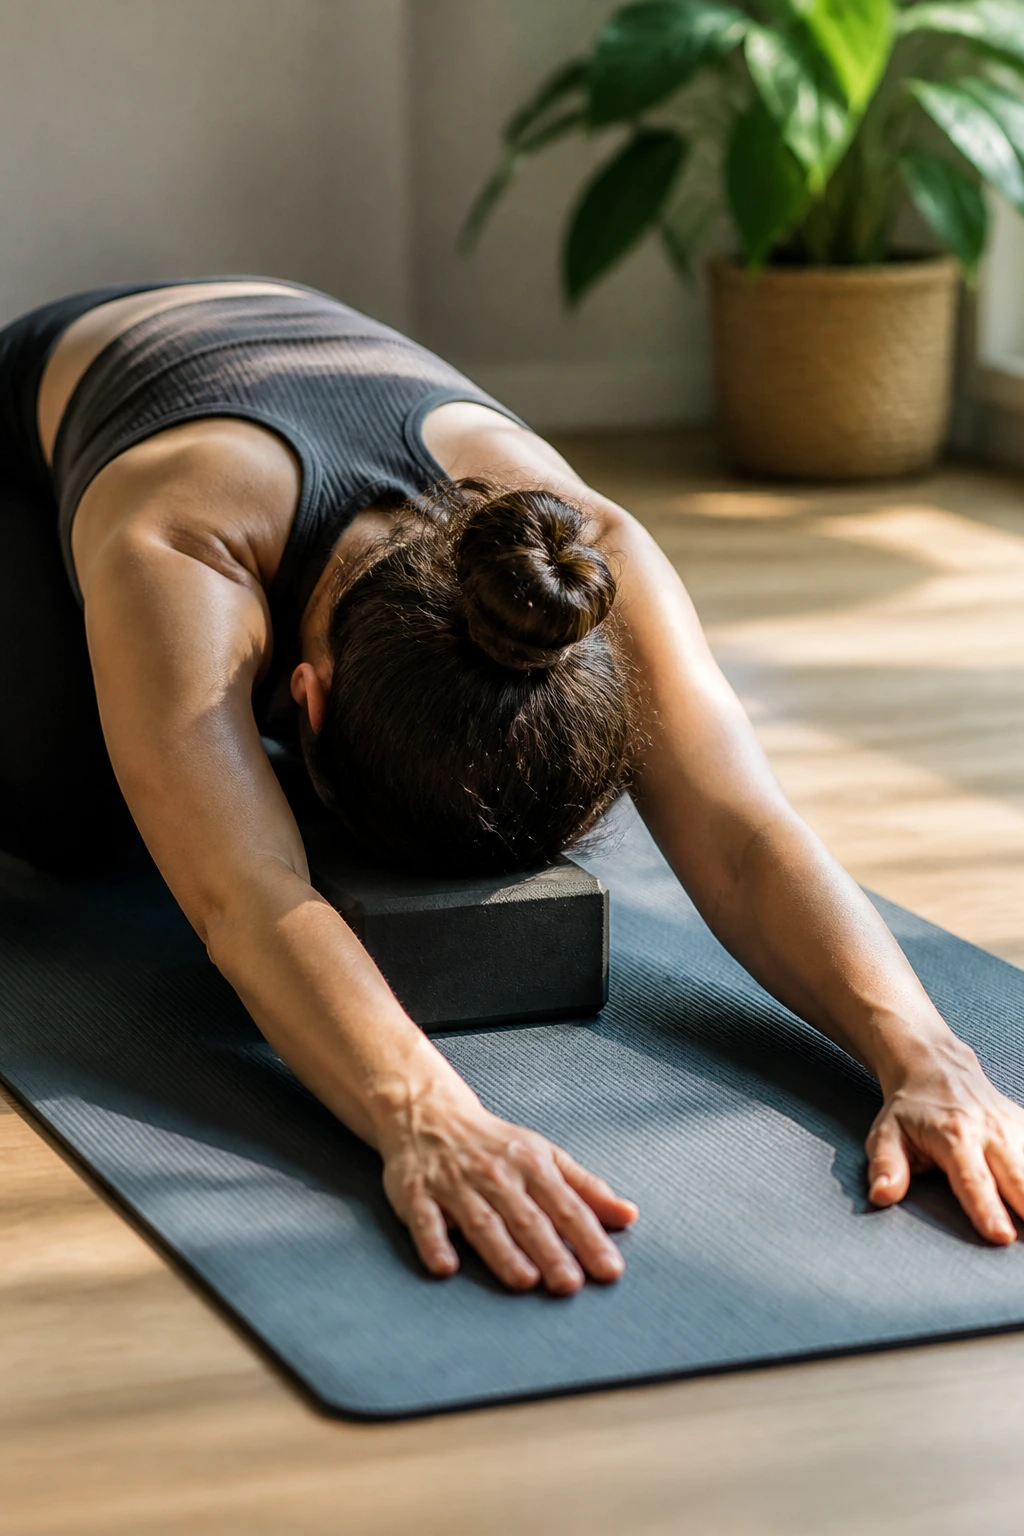
After any session that involves significant time on your feet, your lower back and hips are often crying out for attention. The Child’s Pose is the universal resting posture for a reason: it creates a gentle, passive elongation of the entire posterior chain, from the heels to the base of the skull.
It is particularly useful for calming the mind. When you fold forward, your internal focus shifts, which can be a powerful tool for stress management after a grueling workout. To get the most out of it, bring your big toes together and separate your knees as wide as you feel comfortable. Walk your hands forward until you feel a pull in your lats and middle back.
If you have tight hips, you might find that your glutes won’t sink all the way back to your heels. This is completely normal. Simply place a cushion or a rolled-up towel between your calves and glutes to bridge the gap. Rest your forehead on the floor or a yoga block, allowing the weight of your head to do the work. Stay here for at least ten deep, slow breaths.
3. Standing Forward Fold
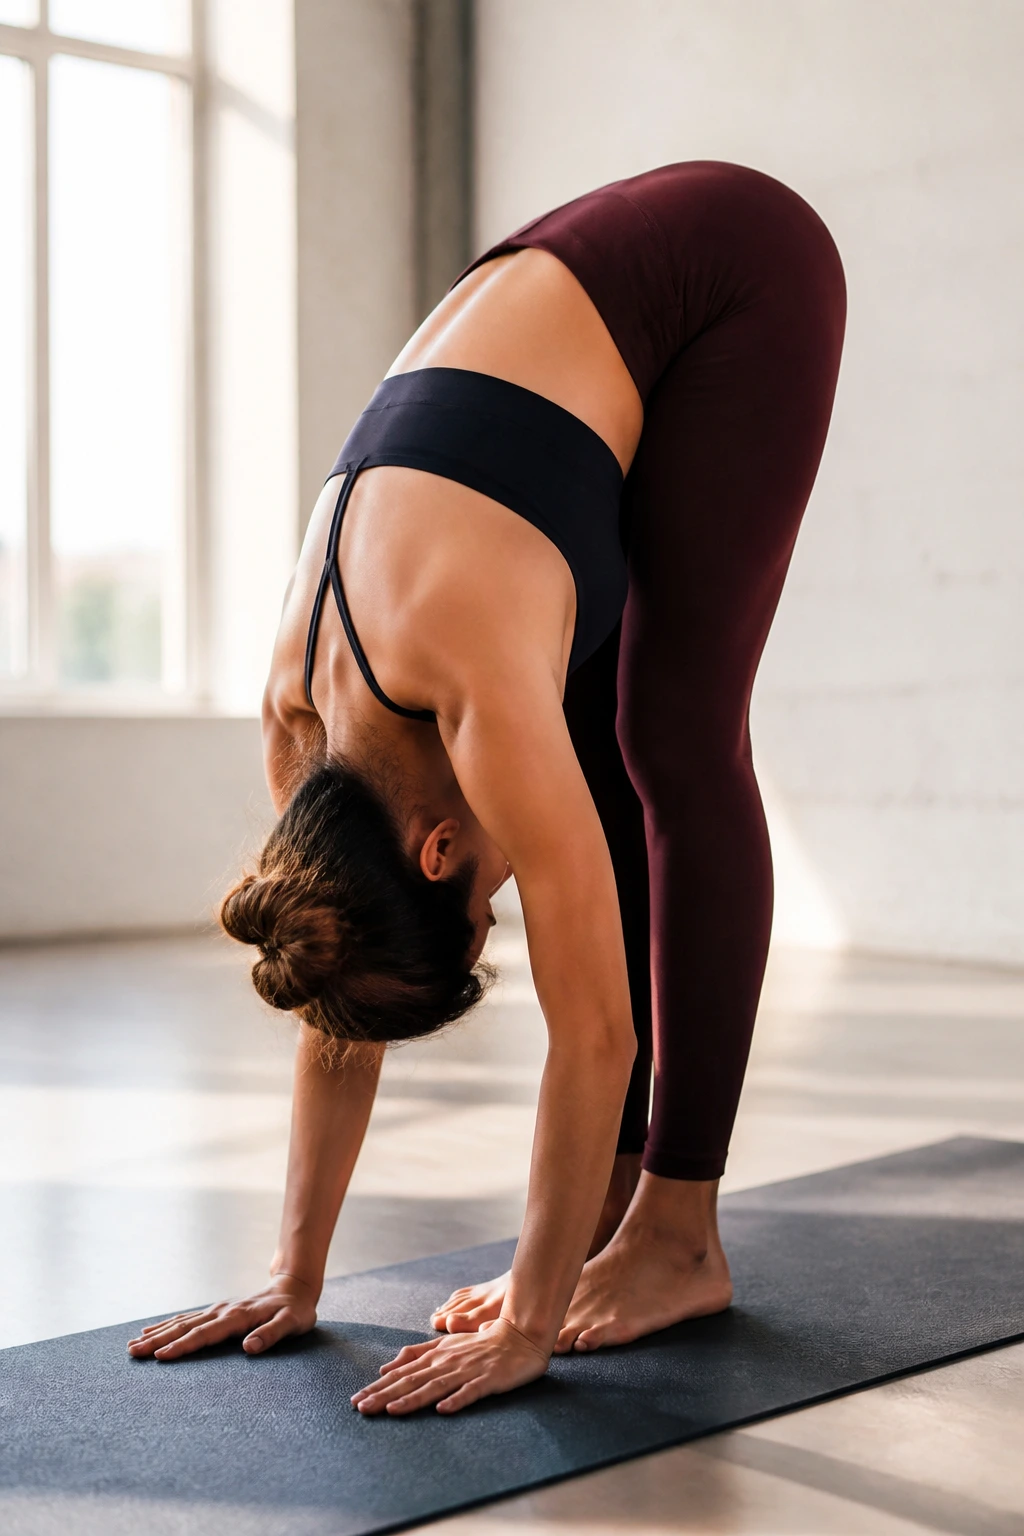
You spend most of your day—and most of your workout—standing or sitting upright. Reversing gravity by folding forward at the hips is a simple way to take the pressure off your lumbar spine while providing a deep, satisfying stretch to your hamstrings.
Stand with your feet hip-width apart and a slight bend in your knees. This is crucial—locking your knees can put unnecessary strain on your tendons and prevent your pelvis from tilting properly. Hinge at your hips, keeping your back long, and let your torso hang heavy toward the floor.
How to Maximize the Stretch
- Let your head hang completely loose, as if you are a ragdoll.
- Clasp your opposite elbows with your hands to add a bit of gentle, weighted traction.
- Gently sway from side to side to address different angles of the hamstrings.
This movement is excellent for those who do a lot of running or cycling, where the hamstrings are under constant tension. Focus on breathing into the back of your legs. With every exhale, try to relax your muscles just a fraction more. Do not worry about touching your toes; the goal is the sensation of lengthening, not the distance of your hands.
4. Quad Stretch
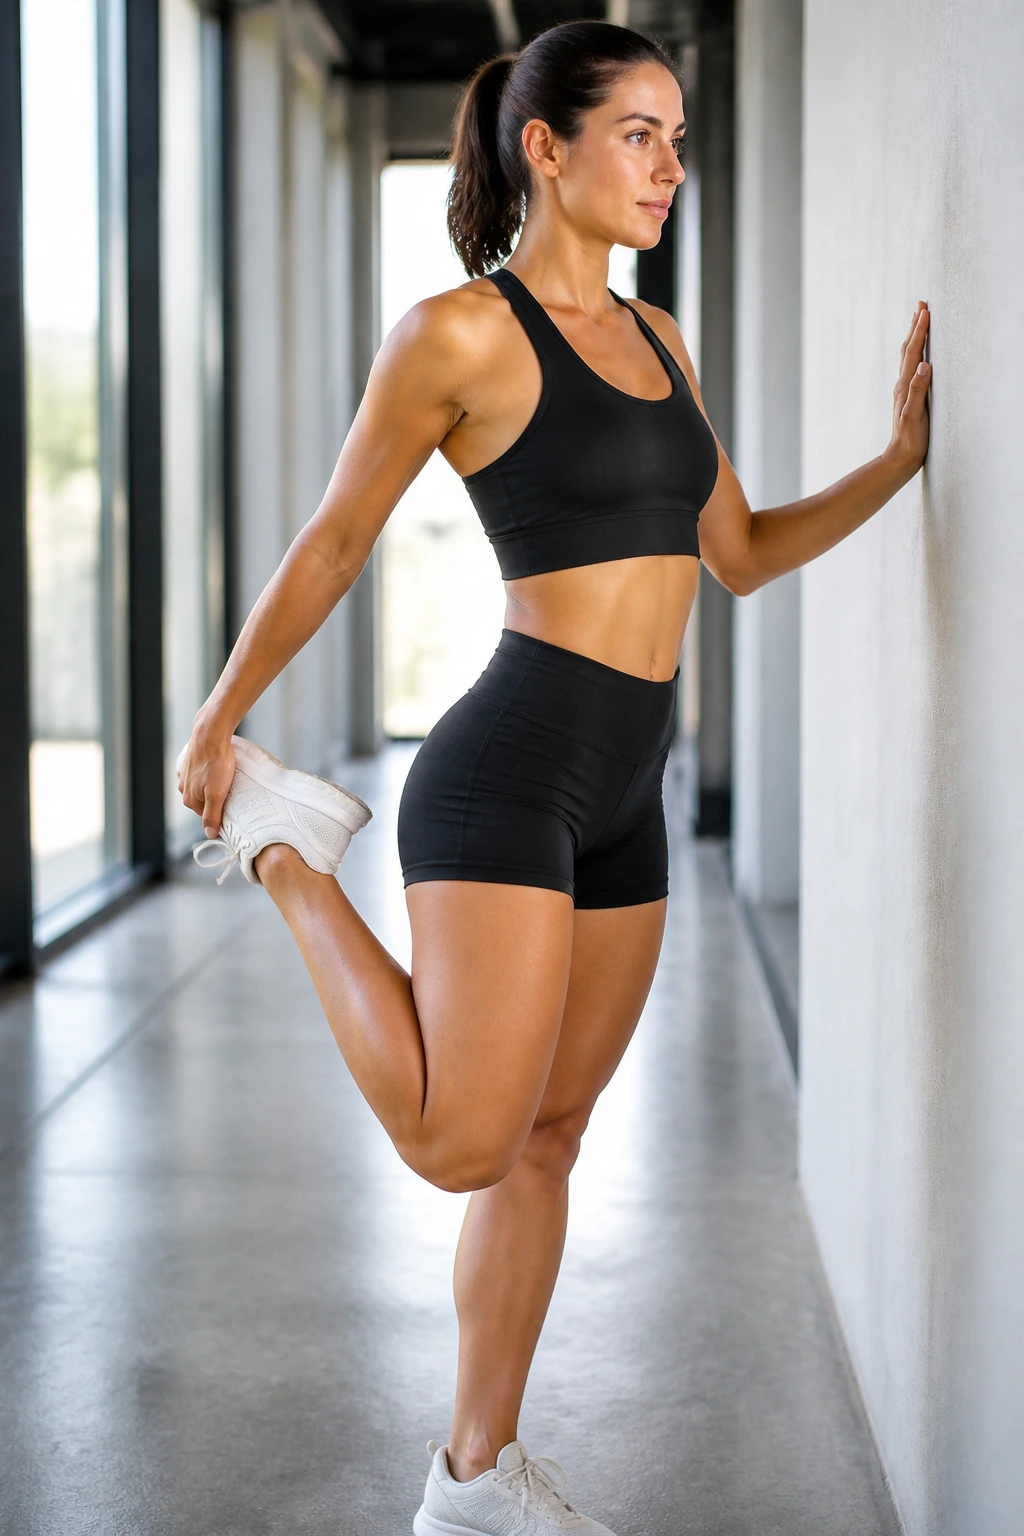
Tight quadriceps can pull on your pelvis, leading to lower back pain. If you’ve been doing squats, lunges, or running, your quads are almost certainly locked short. This standing stretch is straightforward, but most people perform it with poor form, which negates the benefit.
Stand on one leg, holding onto a wall or a sturdy piece of equipment for balance if necessary. Bend your other knee, bringing your heel toward your glute, and grab your ankle with your hand. The key detail here is to keep your knees side-by-side. If your bent knee drifts forward, you are missing the stretch.
To intensify the feeling, push your hip forward slightly while pulling your heel toward your glute. You should feel a deep, clean pull along the front of your thigh. Keep your core tight—avoid arching your lower back to compensate for the tightness in your hip flexors. Hold for 30 seconds on each side, then switch.
5. Figure-Four Stretch
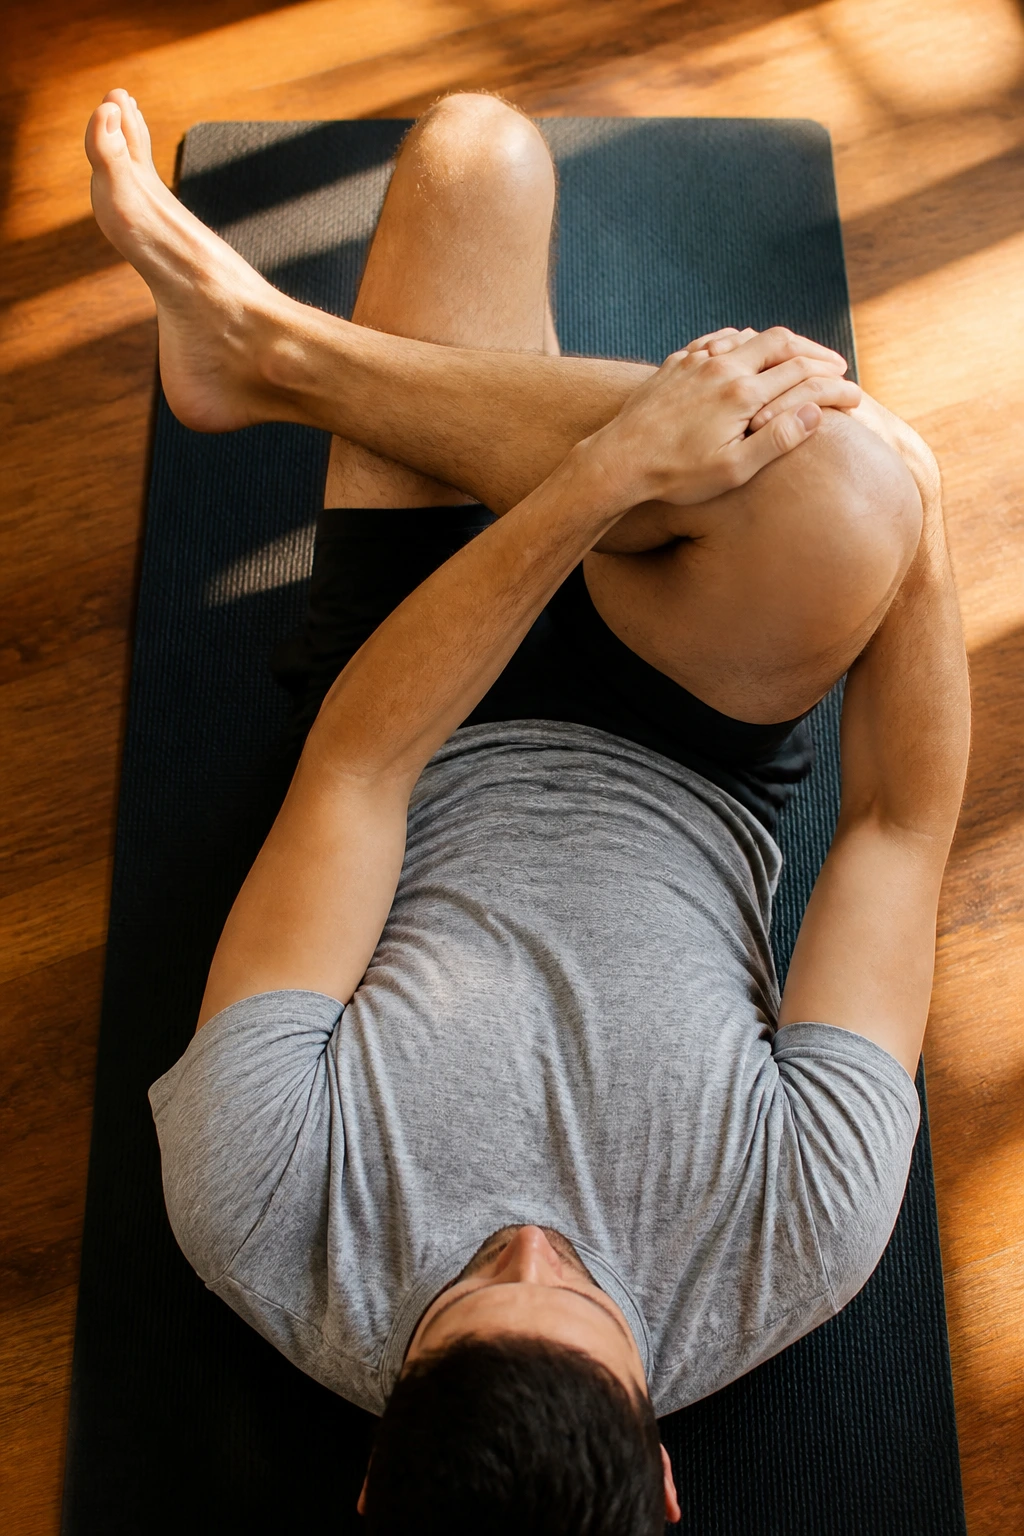
This is the gold standard for anyone dealing with tight hips or sciatic-like discomfort. It targets the gluteus medius and the piriformis, two deep muscles that are often neglected but heavily used in almost every athletic movement.
Lie on your back with both knees bent and feet flat on the floor. Take your right ankle and cross it over your left knee. You will immediately feel a stretch in your right hip. To deepen it, lift your left foot off the floor and grab the back of your left thigh with both hands. Gently pull your left leg toward your chest.
You are effectively using your own body as a lever to stretch the tight hip. Keep your head and shoulders relaxed on the ground; do not strain your neck to pull your leg closer. If you have very tight hips, just placing the ankle over the knee while lying down might be enough. Always listen to your body, and never force a position if it causes sharp or shooting pain.
6. Pigeon Pose
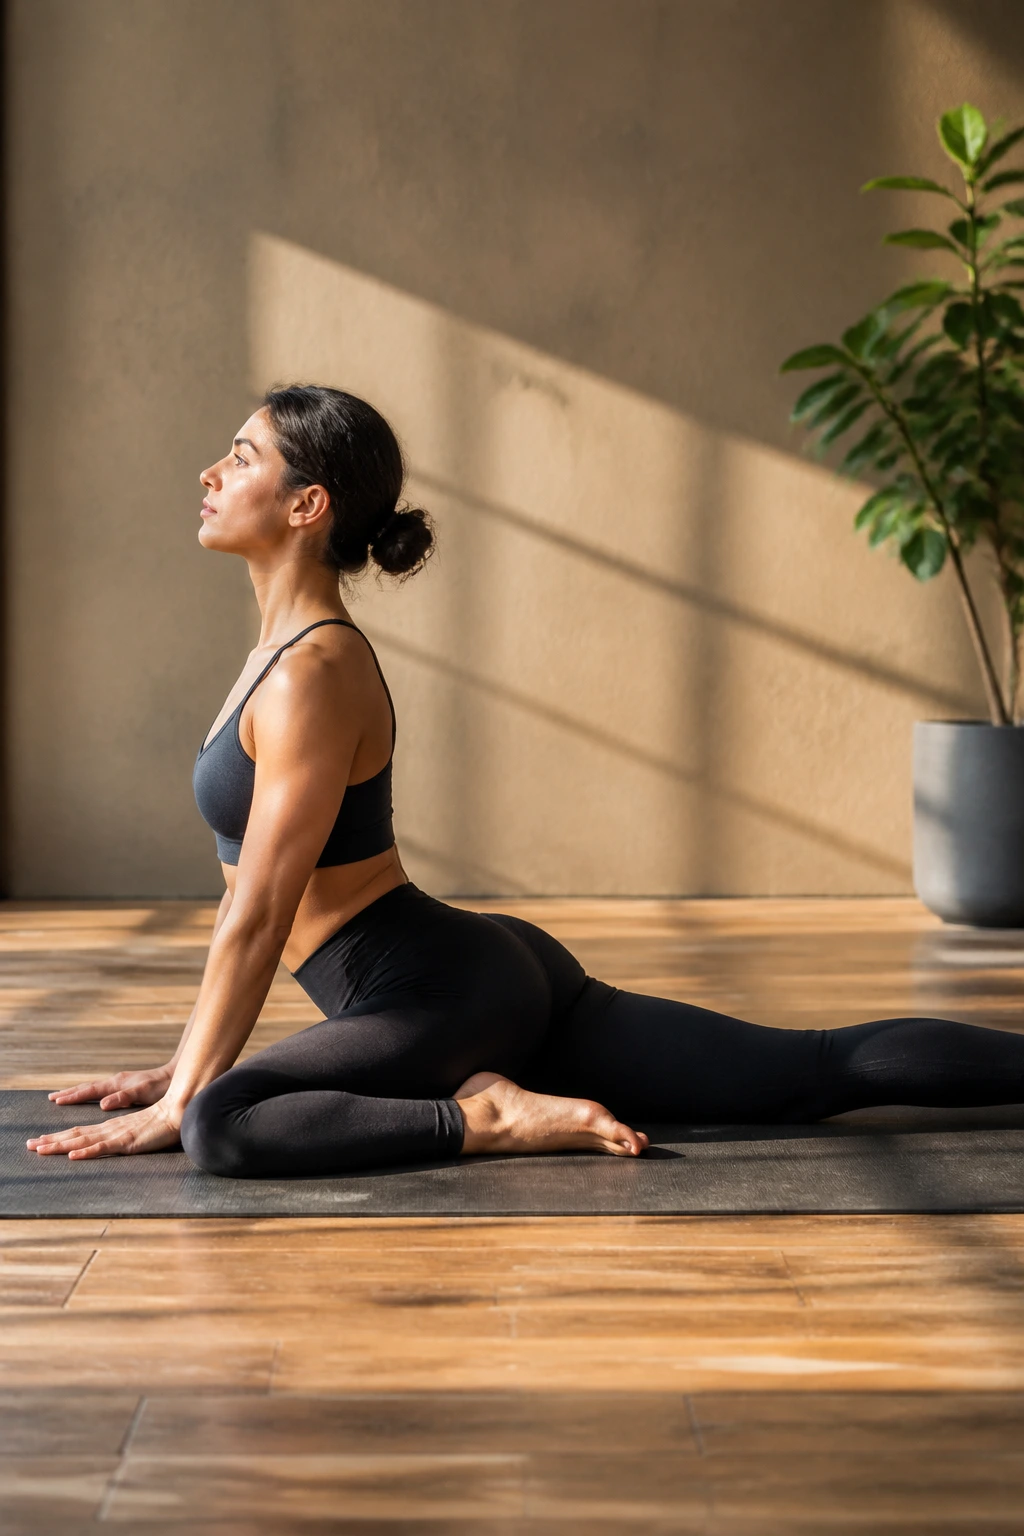
Pigeon pose is an intense hip opener. It is best saved for the end of your recovery routine when your muscles are already warm and slightly more pliable. It stretches the hip rotators and can be a game-changer for those who spend hours sitting at a desk.
Step-by-Step Execution
- Start in a downward-facing dog or tabletop position.
- Bring your right knee forward and place it behind your right wrist.
- Angle your right shin so your foot is near your left hip; the exact angle depends on your mobility.
- Extend your left leg straight back behind you, lowering your hips toward the floor.
Make sure your hips are square to the front. If you feel like you are rolling over onto your right side, place a folded blanket or a block under your right glute to level your pelvis. If you want to increase the stretch, walk your hands forward and fold your torso over your front leg. This is a very deep stretch, so be gentle and patient.
7. Cross-Body Shoulder Stretch
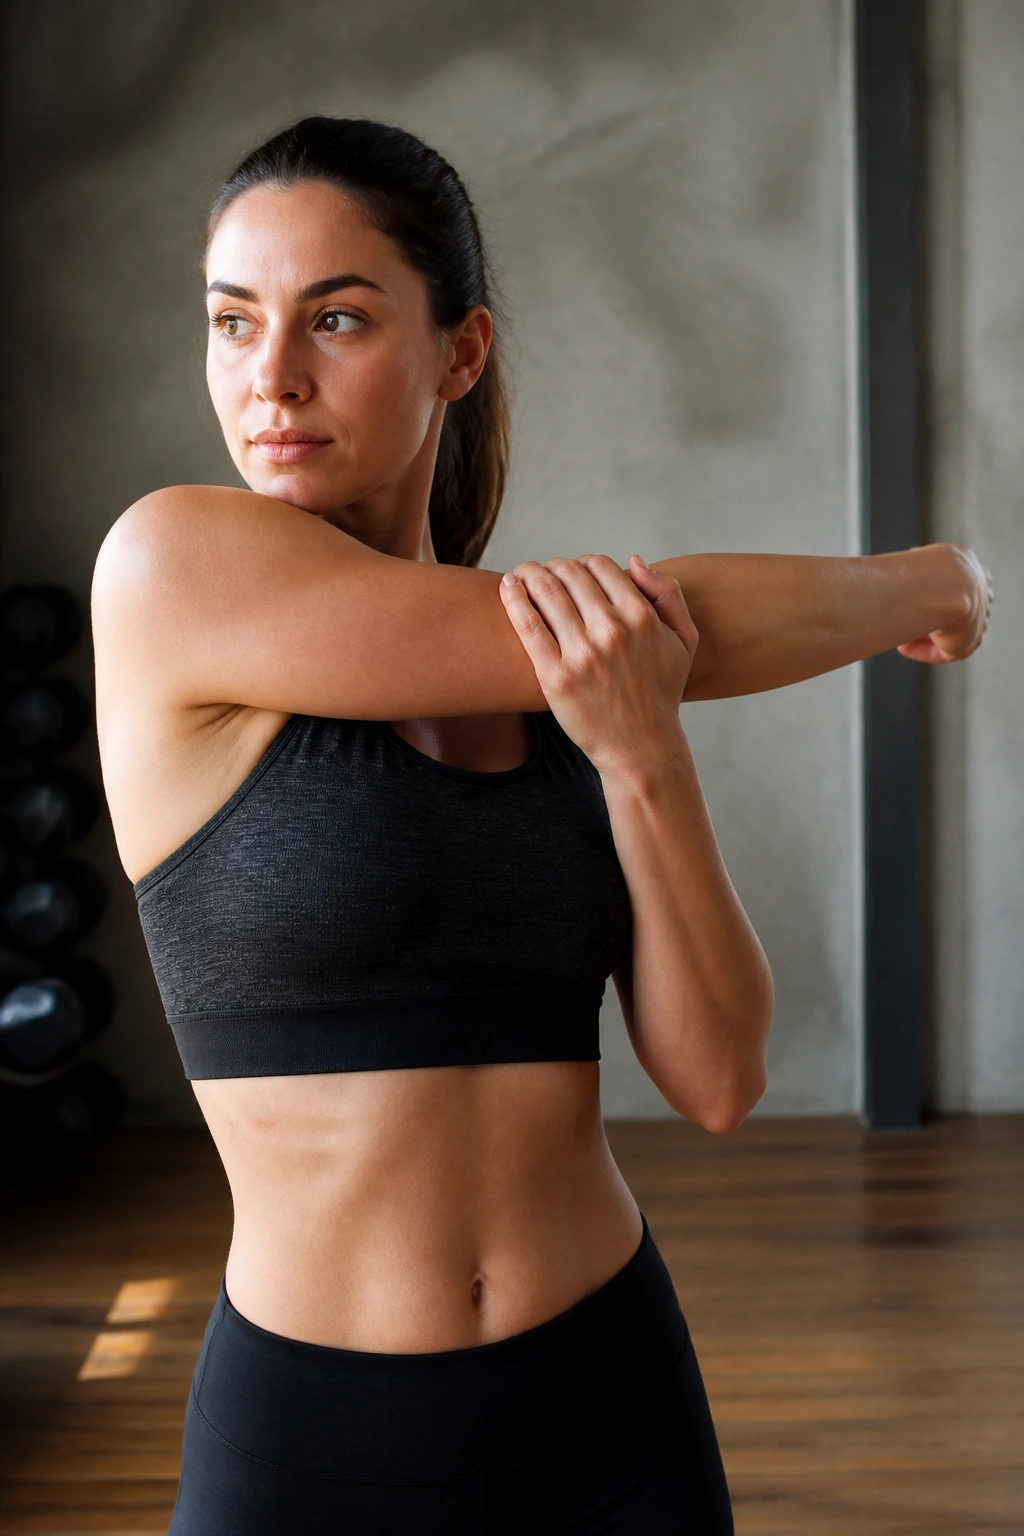
Shoulder tension is common, especially after upper-body workouts or sessions involving heavy overhead work. This stretch hits the rear deltoid and the back of the shoulder capsule, areas that often get tight from poor posture or repetitive pushing motions.
Bring your right arm across your chest, keeping it straight. Use your left hand to gently pull the right elbow toward your chest. Do not just pull the arm; try to keep your shoulder down and away from your ear. If your shoulder shrugs up toward your neck, you are not getting the intended stretch.
Try to rotate your torso slightly away from the arm being stretched to increase the intensity. Hold this for 20 to 30 seconds per side. It is a subtle move, but if you have ever felt that nagging “knot” between your shoulder blade and spine, you will appreciate how much relief this simple cross-body pull can provide.
8. Overhead Triceps Stretch
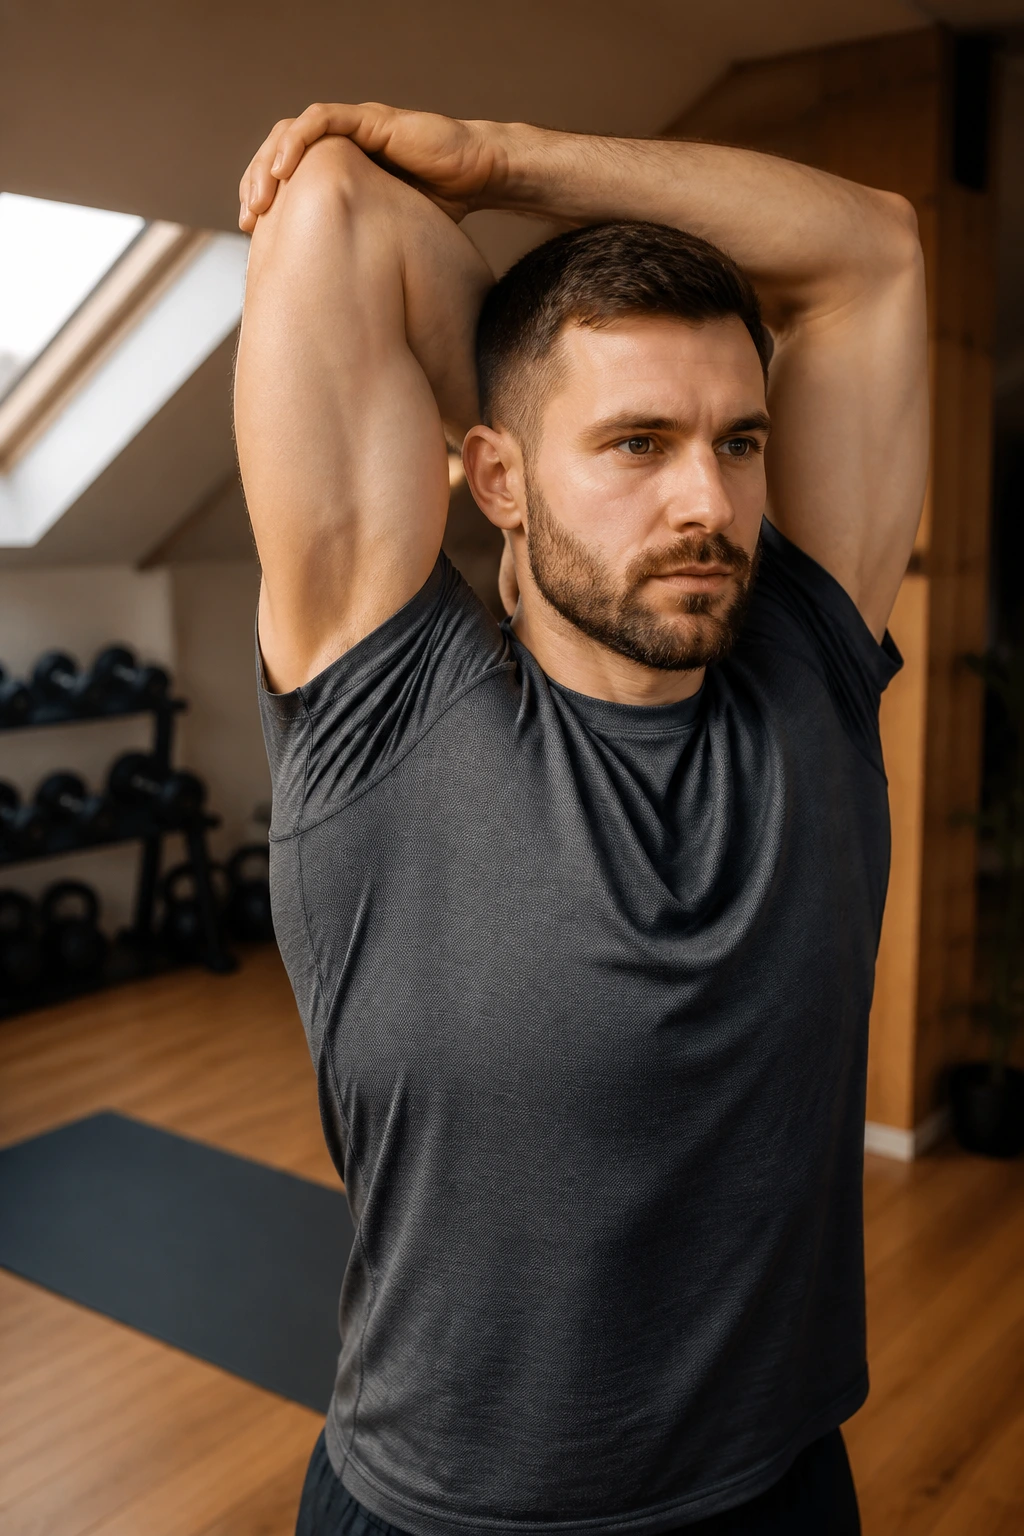
Many people focus on their pecs and lats but completely ignore the triceps. If you have been doing dips, push-ups, or overhead presses, your triceps are likely tight. This stretch is simple but highly effective for regaining range of motion in the elbow and shoulder.
Raise your right arm overhead and bend at the elbow, so your hand drops behind your head toward the space between your shoulder blades. Use your left hand to gently push down on your right elbow. Keep your chest lifted and your core engaged; avoid overarching your lower back to reach further.
If you feel tight in the ribcage, this stretch is also a fantastic way to open up the latissimus dorsi—the large muscles on the sides of your back—which often contribute to a rounded-shoulder posture. Keep your head neutral; try not to let your chin poke forward as you pull your elbow back.
9. Neck Release
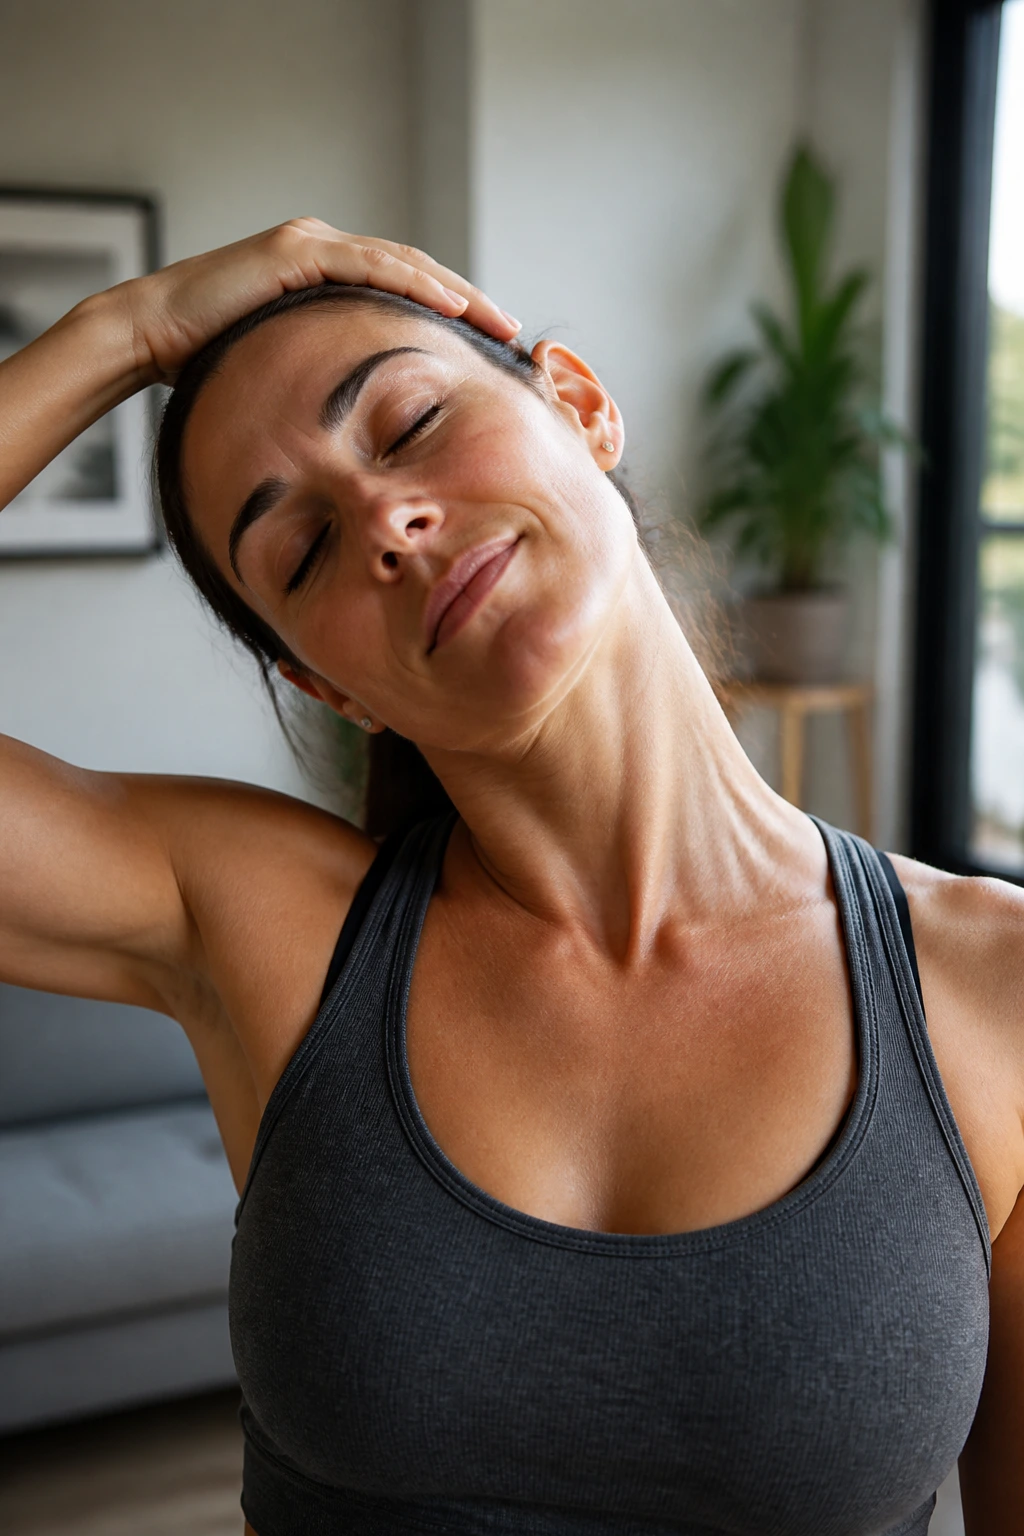
We carry an incredible amount of stress in our neck and trapezius muscles. After a hard workout, the muscles in your upper back and neck are often overworked, leading to stiffness and headaches. This simple release can be done anywhere, anytime.
Sit or stand tall. Drop your right ear toward your right shoulder. Do not lift your shoulder to meet your ear; let the shoulder drop away from your head. To increase the stretch, gently place your right hand on your head and apply very light pressure—just the weight of your hand is usually sufficient.
If you want to target different angles, tilt your chin slightly toward your chest or slightly toward the ceiling. You will feel the stretch shift across the different fibers of the trapezius. Perform this on both sides, moving slowly and deliberately. Never jerk or force your neck into a position.
10. Chest Opener
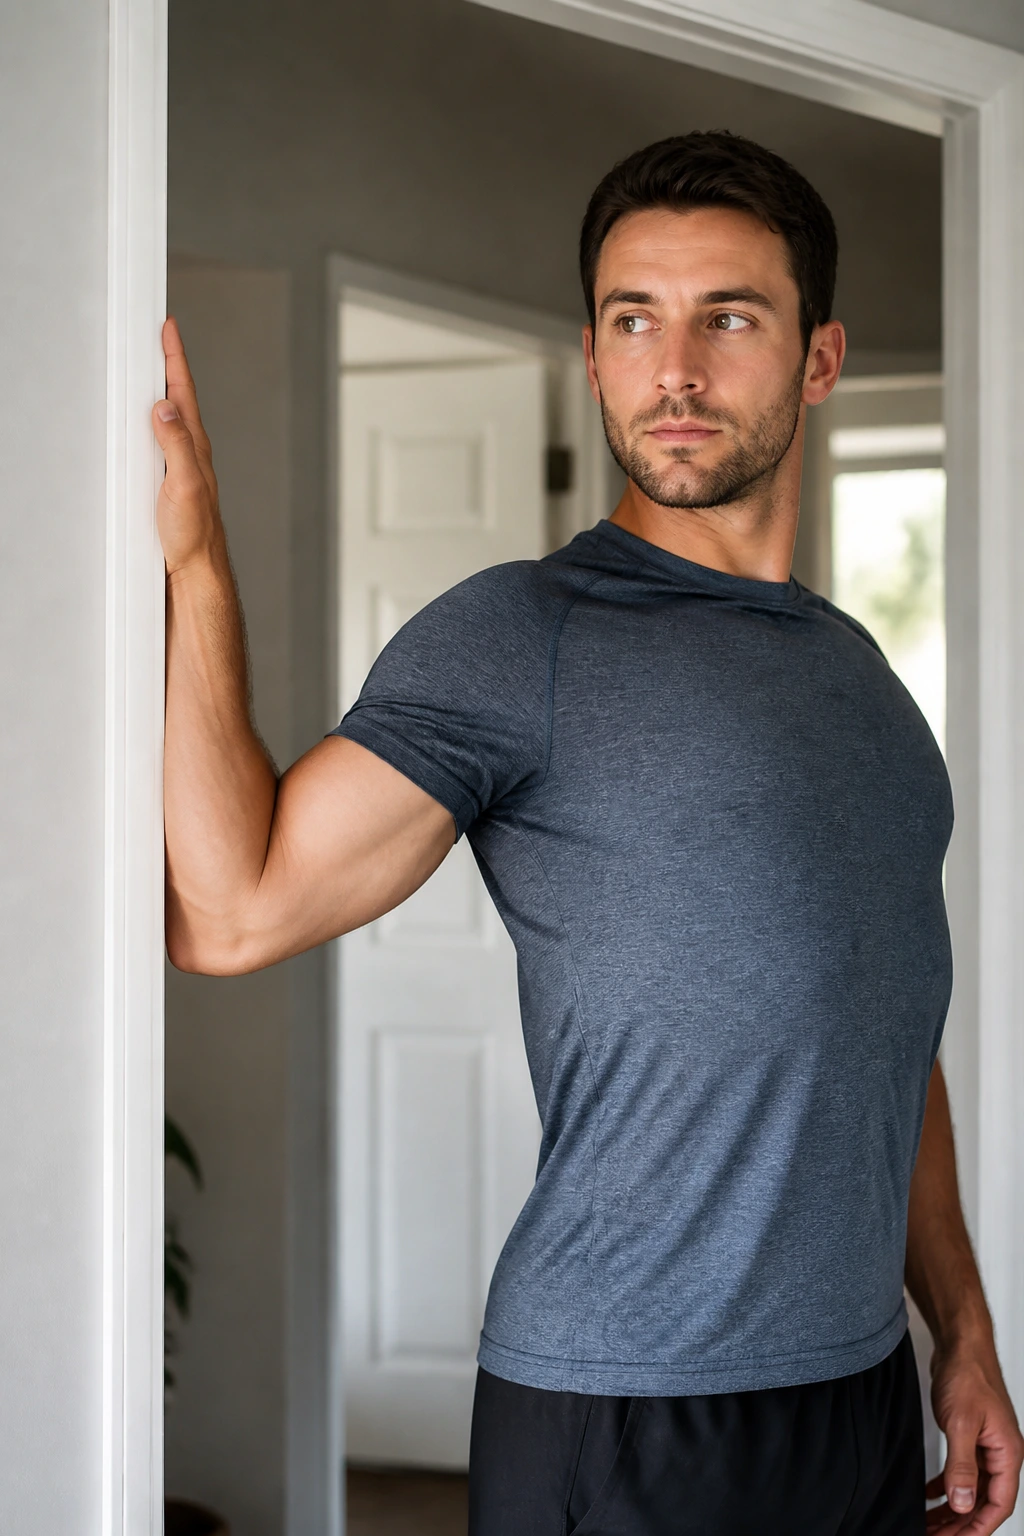
If you work at a desk or do a lot of pushing exercises, your chest muscles are likely tight, pulling your shoulders forward. A tight chest actually hinders your shoulder mobility and can limit your performance in the gym. This wall-based stretch is the most effective way to address it.
Find a doorway or a wall corner. Place your forearm against the wall, with your elbow at shoulder height or slightly higher. Step your same-side foot through the doorway or move your body slightly forward so that your chest is stretched open. You should feel this across the front of your shoulder and your pectoral muscle.
Hold this position and take deep, full breaths. You might notice your chest feels “stuck” at first; that is the fascia and muscle tissue resisting the stretch. As you hold, you should feel the tissue soften and lengthen. Remember to do both sides. It is a simple movement, but it is one of the most transformative for improving daily posture.
11. Butterfly Stretch
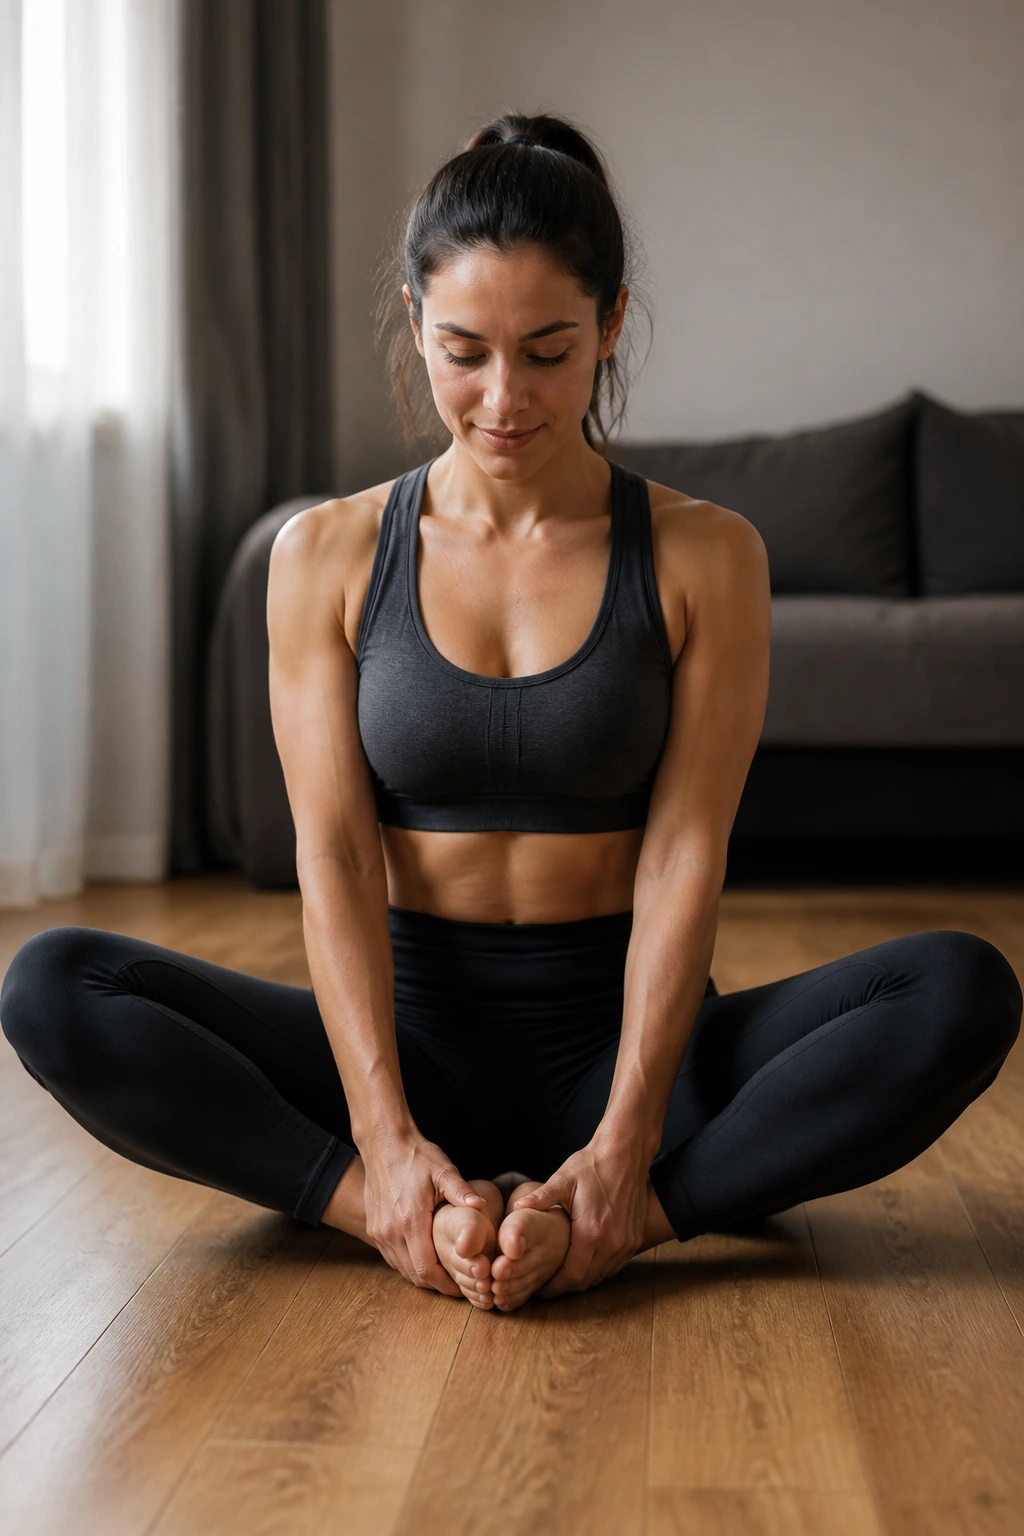
This classic seated stretch is essential for opening the inner thighs (adductors) and the hip area. It is a fantastic choice for those who do a lot of lateral movement or wide-stance squatting, as it releases the muscles that often get tight from inner-leg fatigue.
Sit on the floor with your knees bent and the soles of your feet touching. Let your knees fall open to the sides. Hold onto your ankles or feet and sit up as tall as you can. For a deeper stretch, lean forward from the hips, keeping your spine straight. Avoid rounding your back to get your forehead to your feet.
If your knees are very high, you are not “failing”—you are just tight. You can place blocks or books under your knees to support them until your flexibility improves. Focus on using your glutes to gently press the knees toward the floor rather than just using your hands to pull.
12. Lunge with Twist
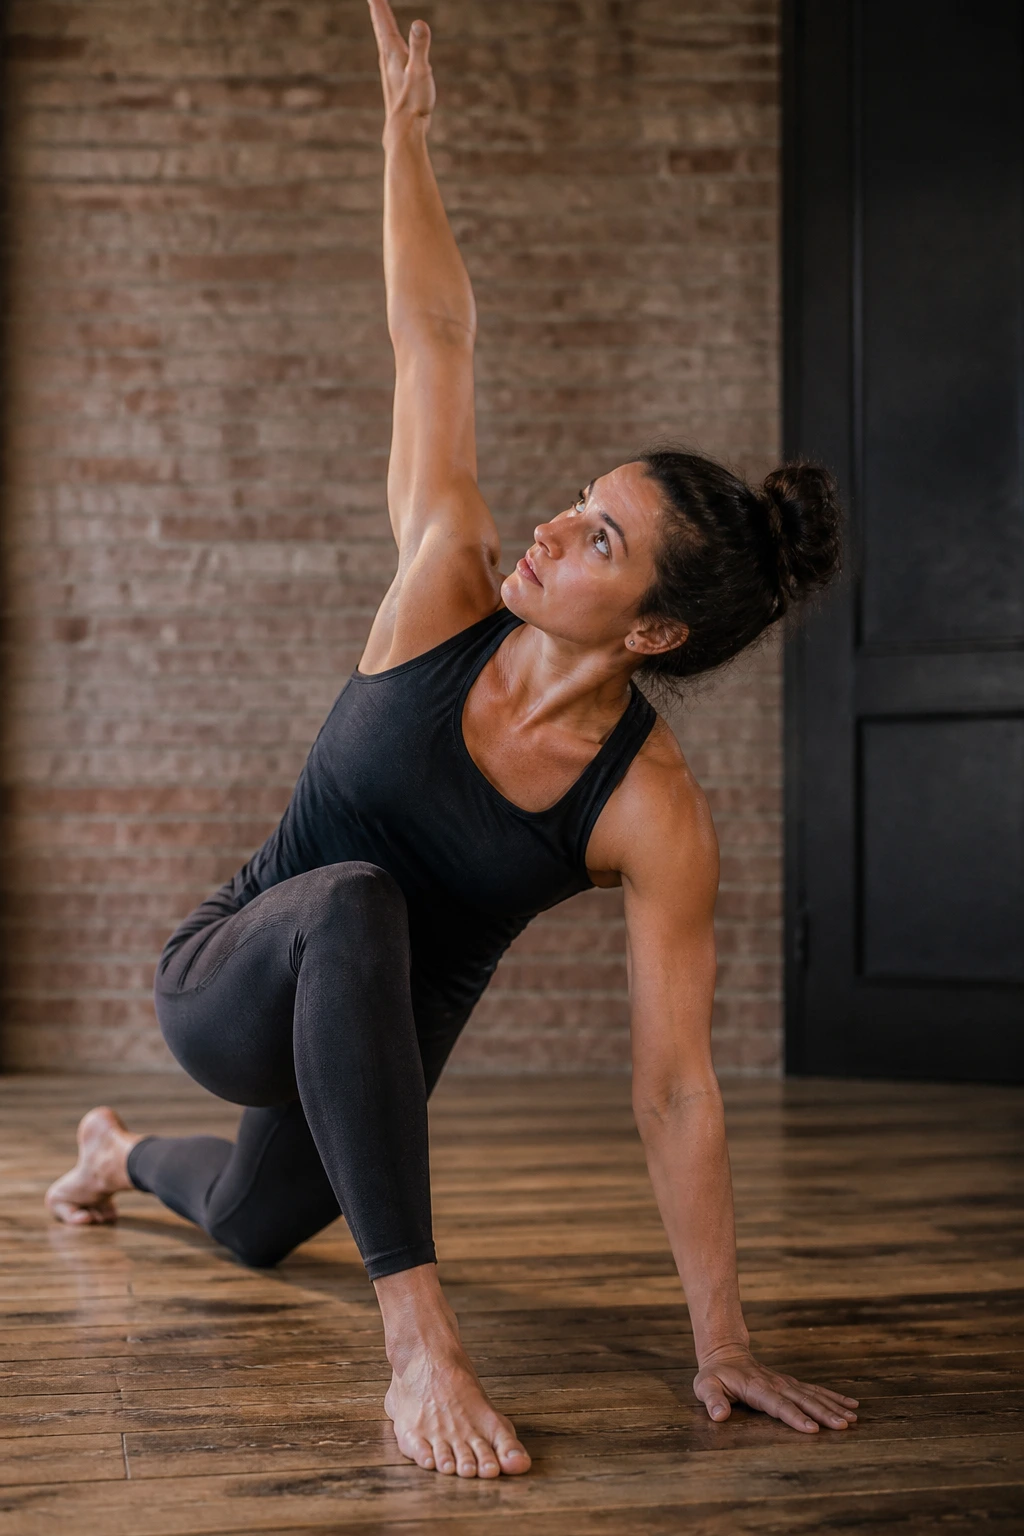
Lunges engage the hip flexors, which are notoriously tight in anyone who spends time sitting. Adding a rotation to the lunge stretches the hip flexor while also mobilizing the thoracic spine—the upper back—which is often stiff and immobile.
Step your right foot forward into a deep lunge, with your back left knee resting on the floor. Keep your torso upright. Now, place your left hand on the floor inside your right foot and reach your right arm toward the ceiling, twisting your torso to the right. Look toward your right hand.
You will feel this in the front of your left hip and through your mid-back. This is a “bang for your buck” movement that hits multiple tight areas at once. Ensure your front knee does not cave inward; keep it aligned with your toes. This one can be tricky for balance, so take your time and stabilize yourself before you initiate the rotation.
13. Downward Dog
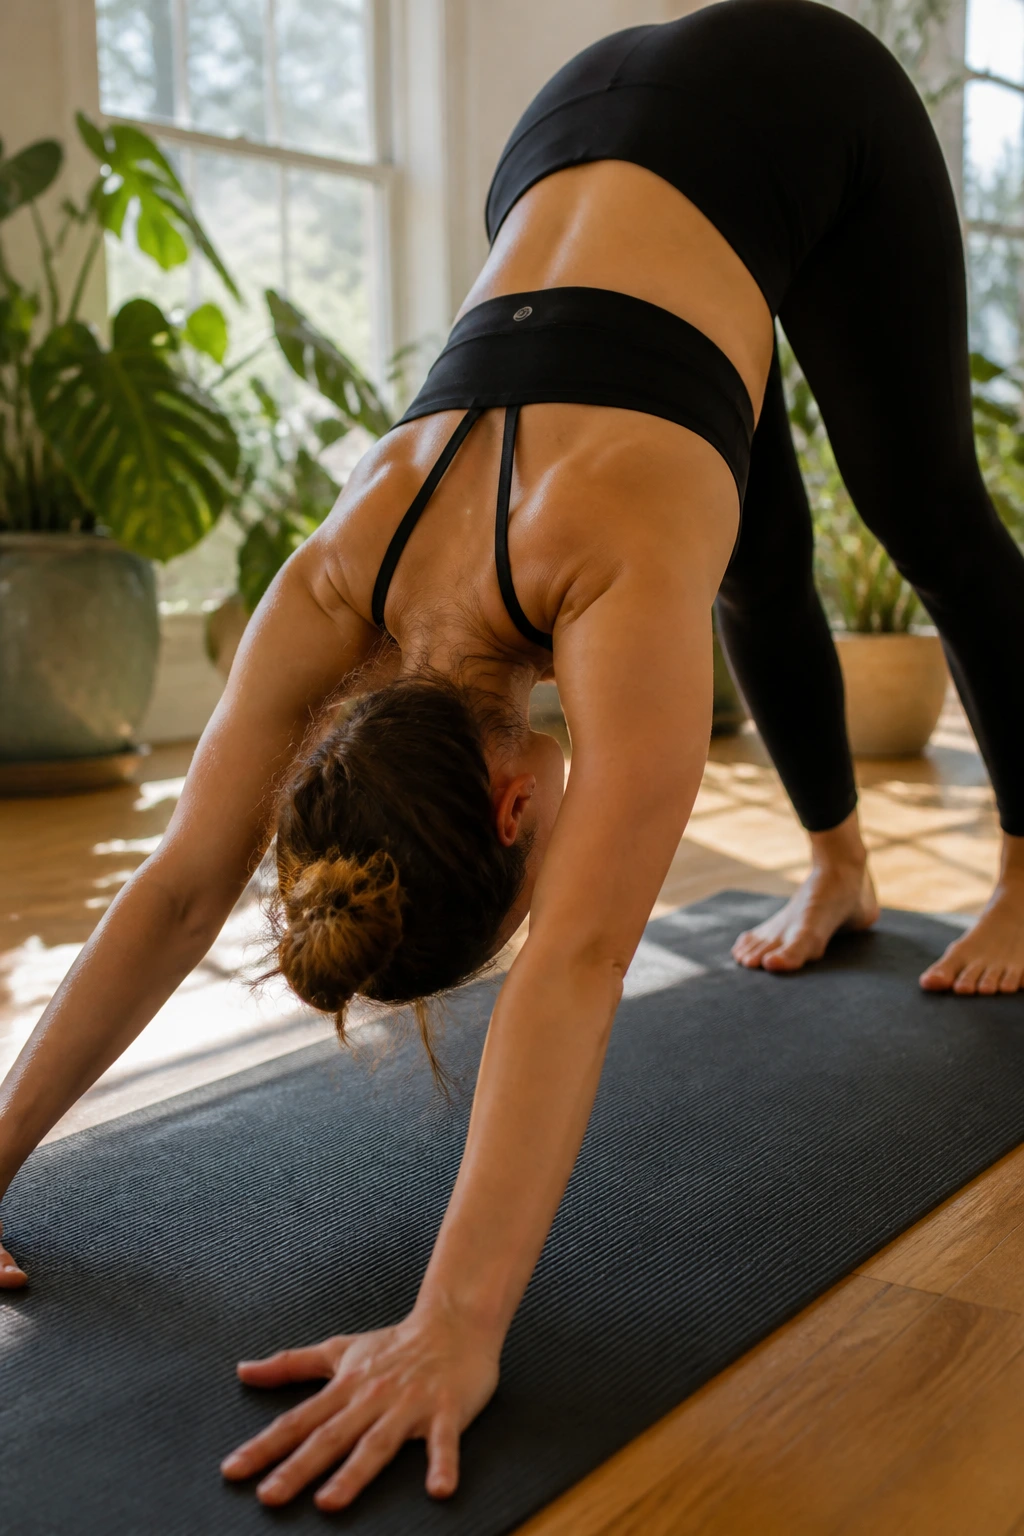
The Downward Dog is a full-body recovery staple. It provides a complete stretch to the posterior chain—the calves, hamstrings, glutes, and back—while simultaneously opening the chest and shoulders. It is, essentially, a total-body reset.
Start in a plank position, then lift your hips toward the ceiling. Keep your hands shoulder-width apart and your feet hip-width apart. Press through your palms, lengthening your spine. Aim to get your heels toward the floor, but do not sacrifice a straight spine to get them there; it is better to have bent knees and a long back than straight legs and a rounded spine.
“Pedal” your feet by bending one knee while pressing the other heel into the floor. This dynamic movement helps loosen the calves and achilles tendons. This is one of the best positions to hang out in after a workout because it allows you to feel gravity working for you, pulling your tight tissues into a lengthened state.
14. Calf Stretch against Wall
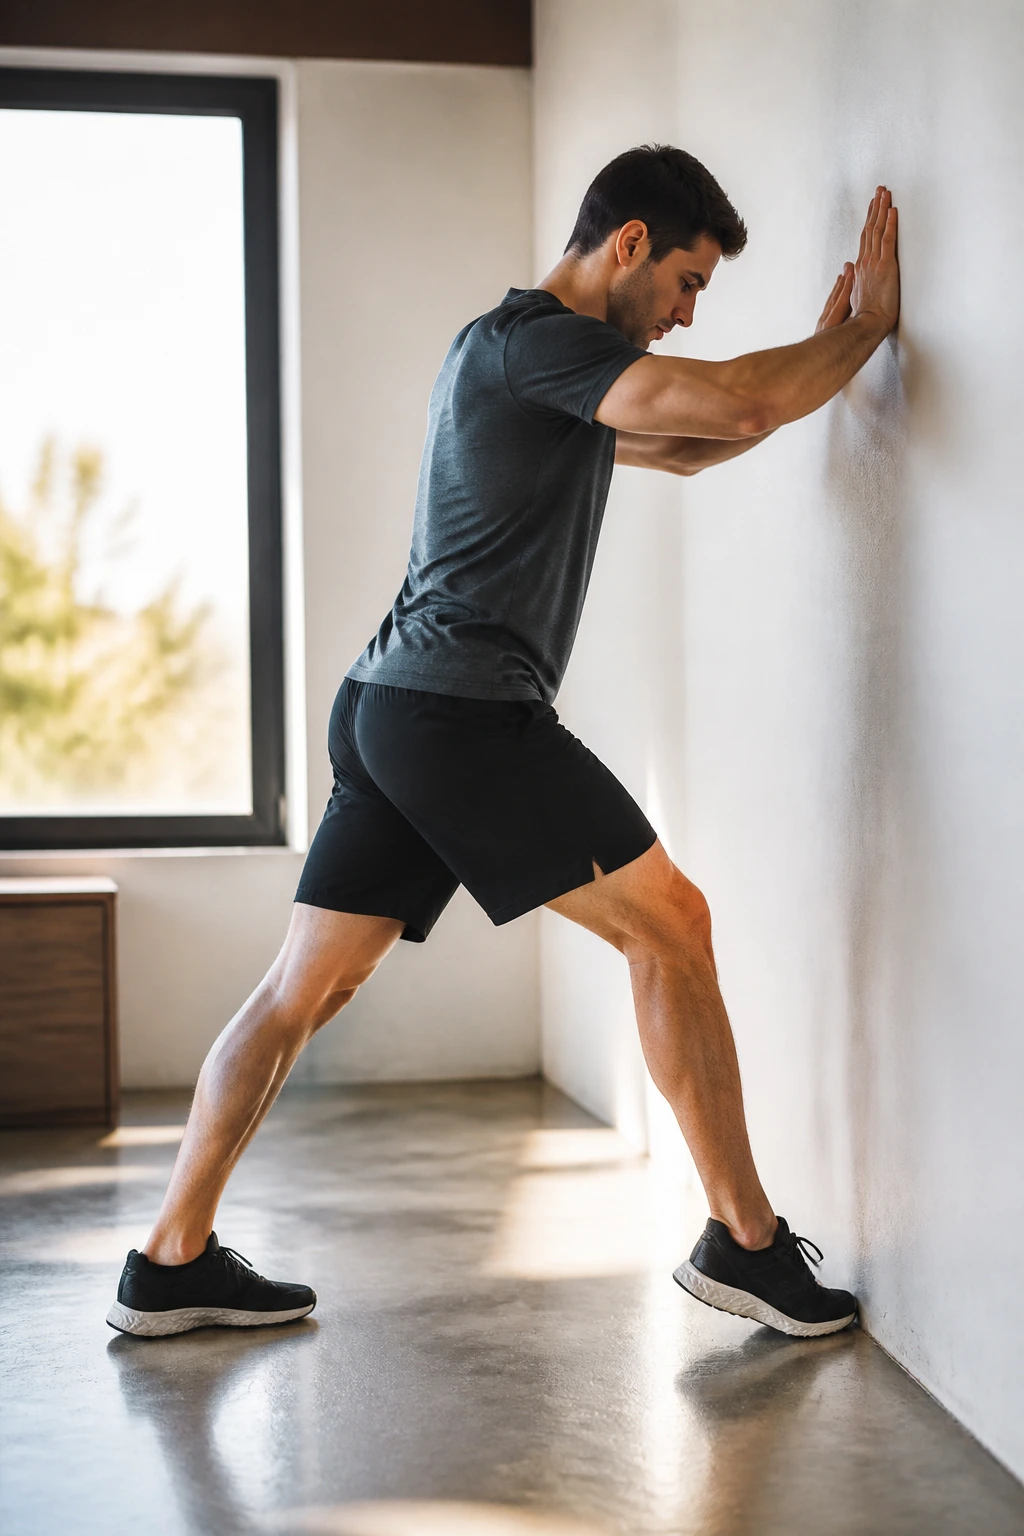
Calf tightness is a frequent culprit in foot pain and limited squat depth. If you run or jump, your calves are under constant load. Stretching them against a wall is much more effective than doing it on a flat surface because you can control the angle and intensity.
Stand facing a wall. Place the ball of your right foot against the wall, with your heel on the floor. Lean forward, keeping your leg straight, until you feel the stretch in your calf. To get deeper into the soleus—the smaller muscle under the gastrocnemius—bend your knee slightly while keeping your heel on the ground.
You will notice a distinct difference in sensation depending on whether your leg is straight or bent. It is worth spending time in both variations. Hold for at least 30 seconds per side. This is an area that most people ignore until they get a cramp, but regular attention here goes a long way toward injury prevention.
15. Cobra Stretch
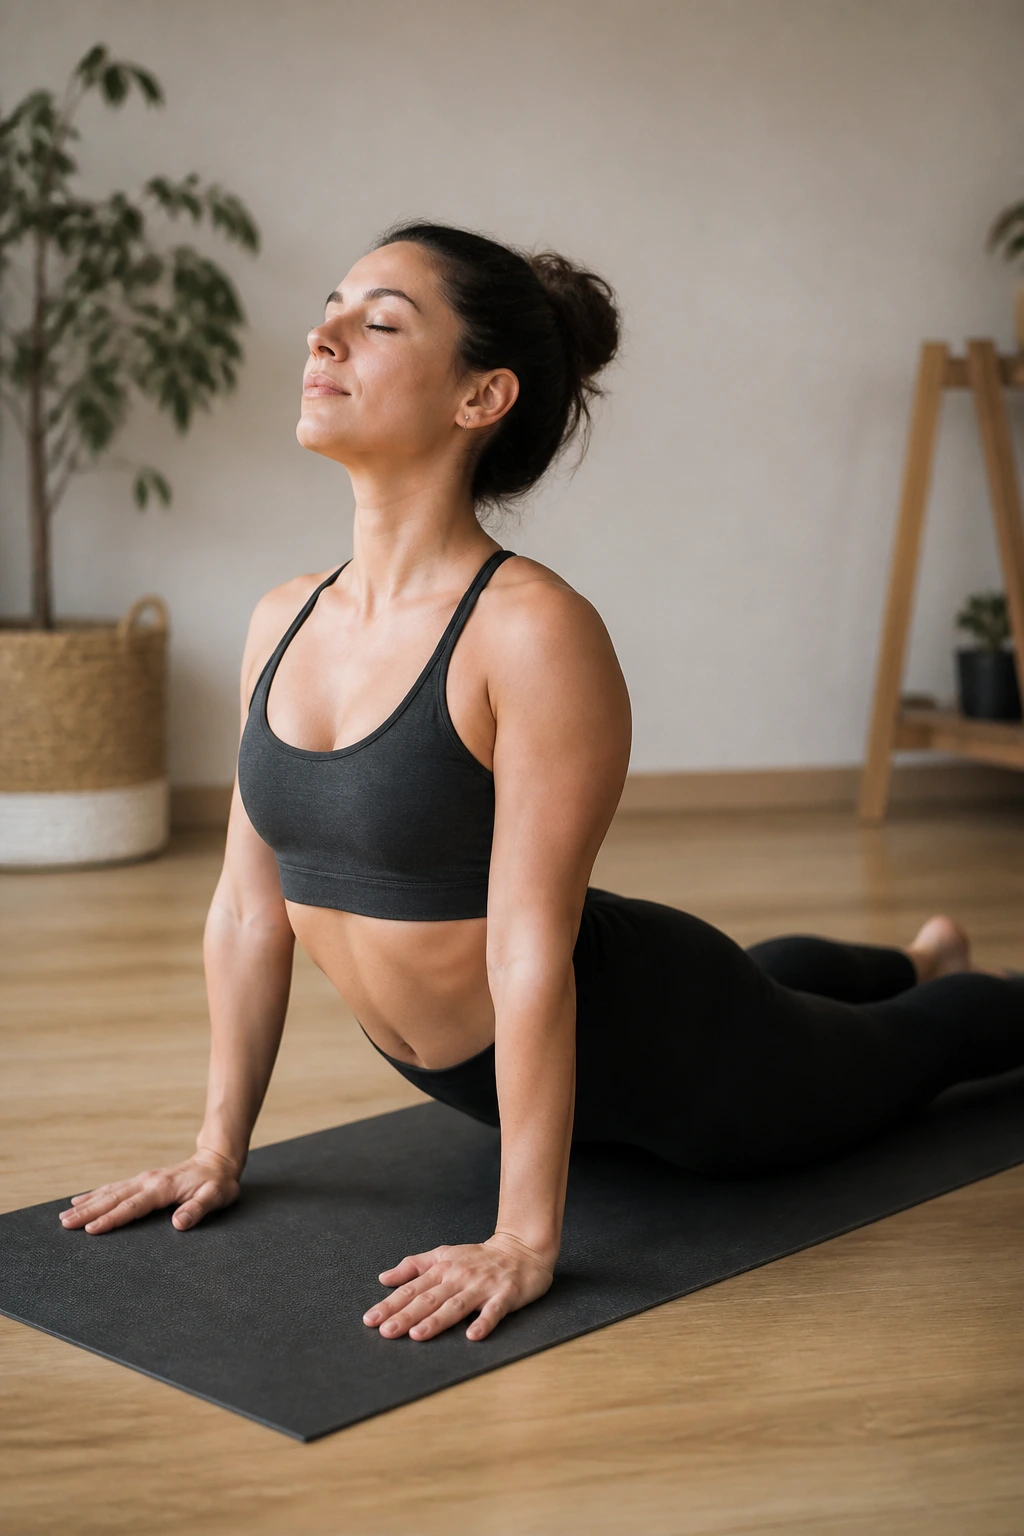
This is the antidote to a “crunched” posture. If you’ve been doing sit-ups, leg raises, or just slumping over a steering wheel, your abdominals are likely tight. The Cobra stretch elongates the entire front of the body, from your pelvic floor to your throat.
Lie face-down on the floor with your legs extended behind you. Place your hands under your shoulders. Slowly push your chest off the floor, using your back muscles as much as your arms. Keep your shoulders down and away from your ears—do not let them bunch up toward your neck.
Look forward or slightly upward. You do not need to lock your arms out fully; that can put too much pressure on the lower back. Go only as high as feels comfortable for your spine. If you feel any pinching in your lower back, lower yourself slightly. The goal is an opening sensation, not a compression.
16. Wrist Extensor Stretch
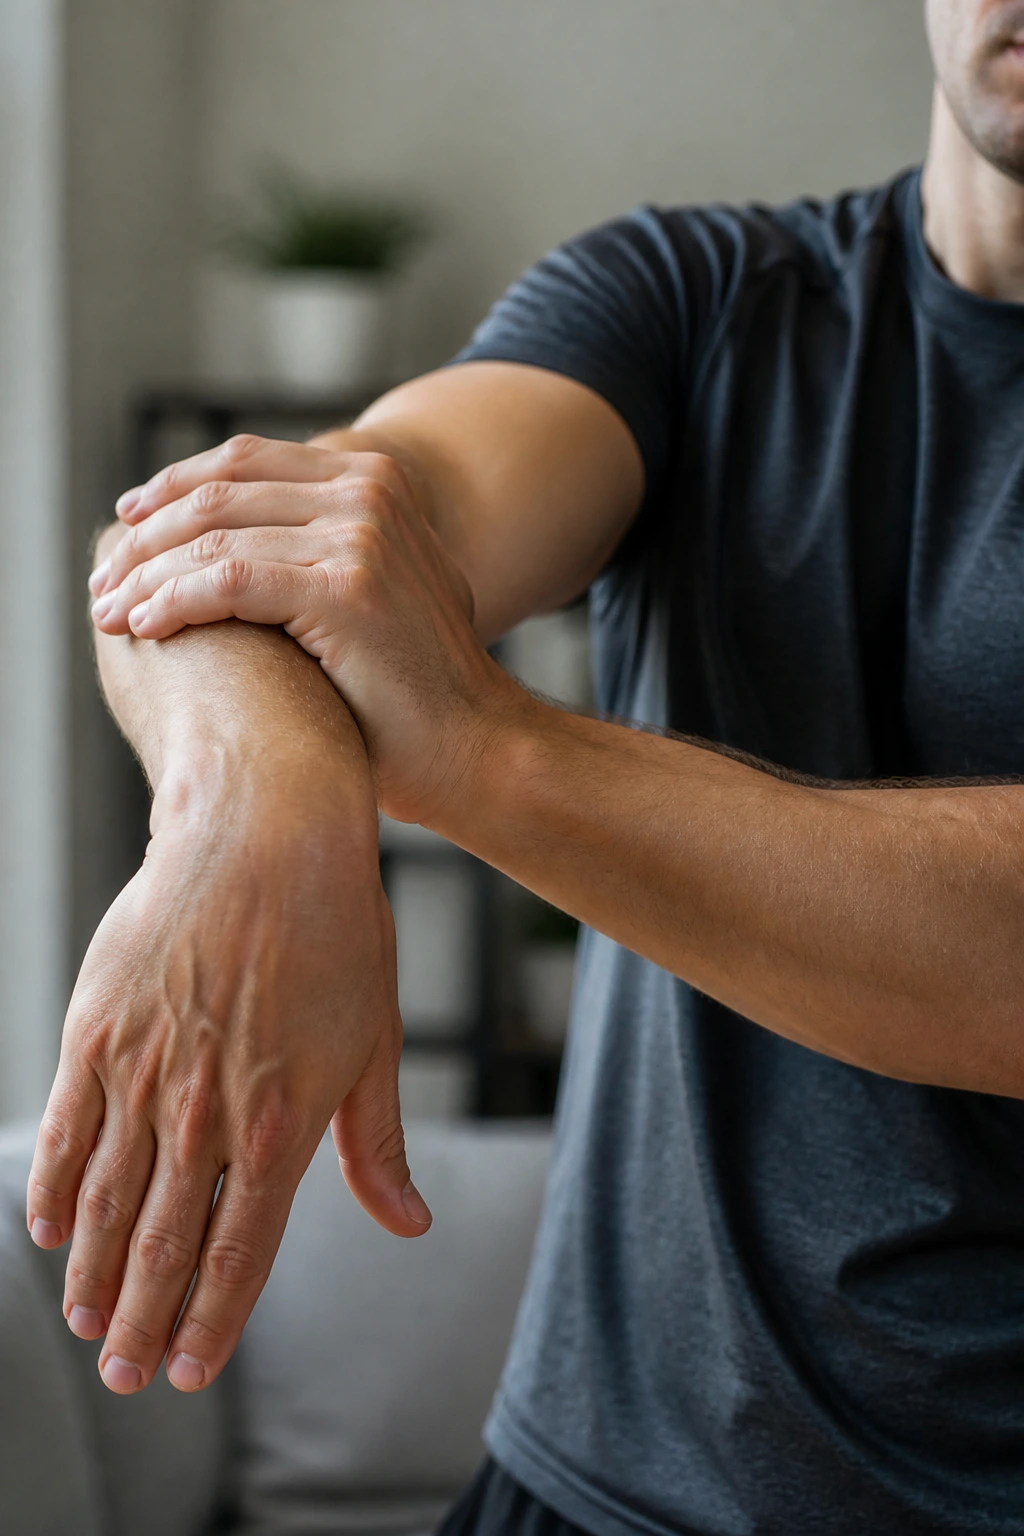
We often overlook our forearms, but they work hard during almost every pulling and gripping exercise. Whether you are lifting weights, doing pull-ups, or even just typing at a computer, your forearm extensors and flexors get significant use.
Extend your right arm in front of you, palm facing down. Use your left hand to gently pull your right fingers back toward your body. You will feel a stretch along the top of your forearm. Hold this for 20 seconds, then rotate your hand so your palm faces up, and use your left hand to pull your fingers down toward your body to stretch the flexors.
This is a great preventative stretch for anyone who deals with wrist discomfort or forearm tightness. It only takes a minute to do both sides, but your wrists and elbows will thank you, especially if you have a high-volume training week planned.
17. Reclined Spinal Twist
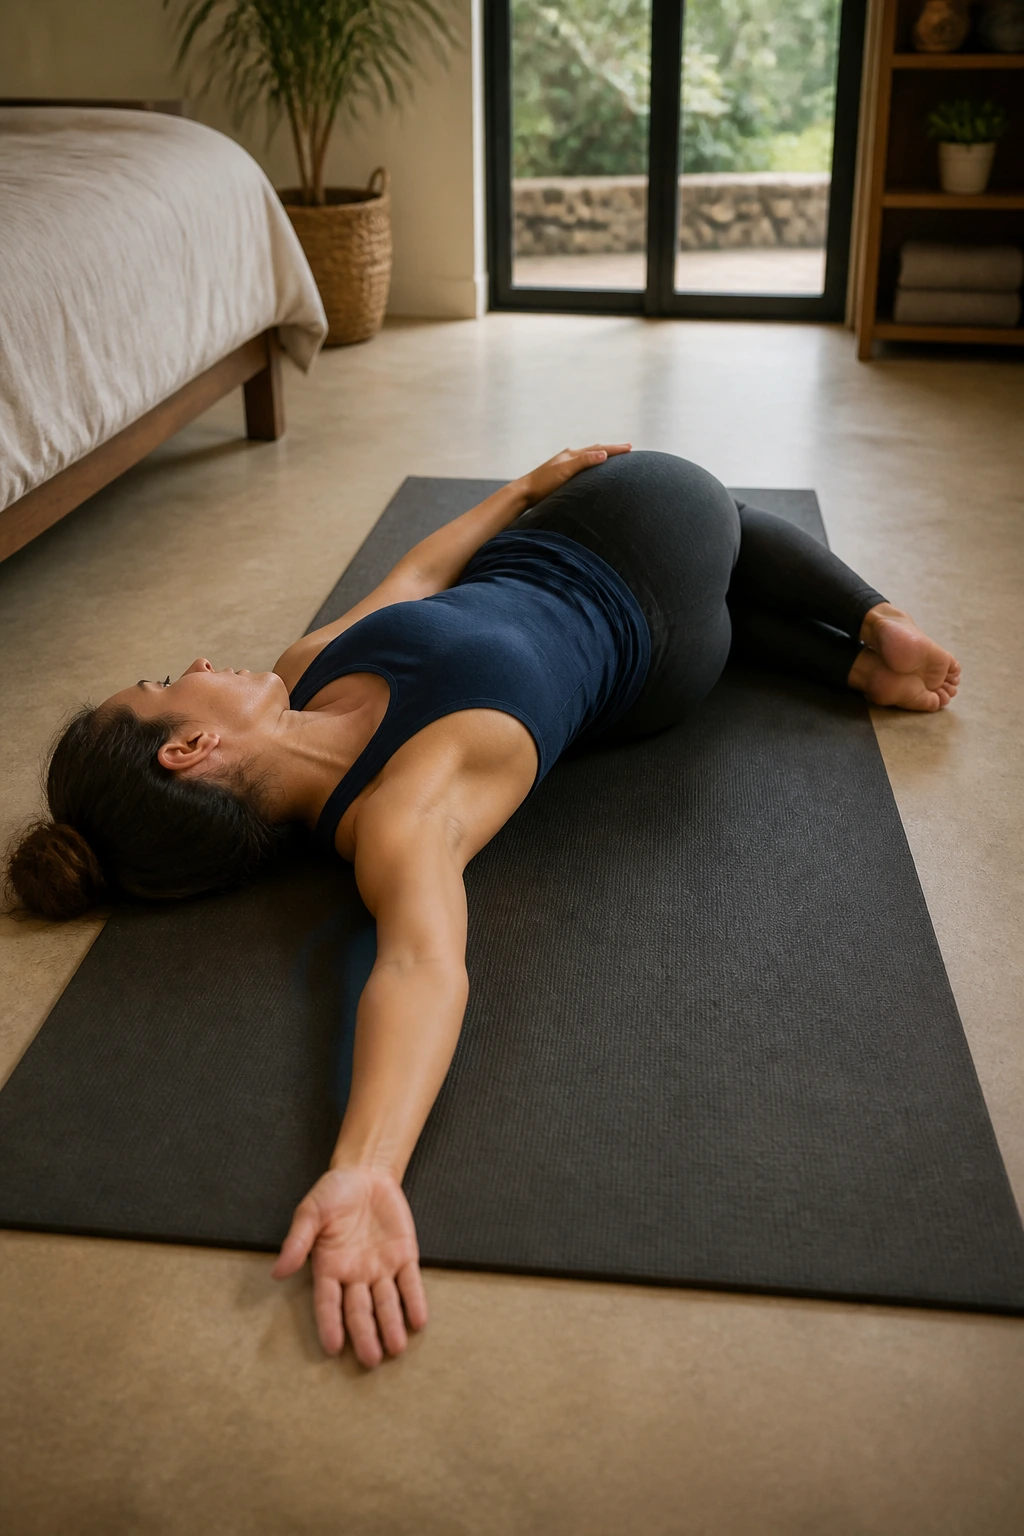
This move is perfect for the very end of your routine, right before you prepare to leave the gym or go to sleep. It helps release the lower back and obliques, which are frequently compressed during heavy lifting and athletic maneuvers.
Lie on your back, bring your knees into your chest, and then let both knees fall to the right side, toward the floor. Extend your left arm out to the side and look toward your left hand. Try to keep both shoulders pressed firmly against the floor. If your left shoulder lifts, just bring your knees a little higher.
Breathe deeply. With every exhale, allow gravity to pull your knees closer to the floor and your chest deeper into the mat. This is a passive stretch, meaning you should not be trying to force any part of your body. Just let go. It is incredibly relaxing and signals to your body that the work is truly done.
18. Wide-Legged Seated Forward Fold
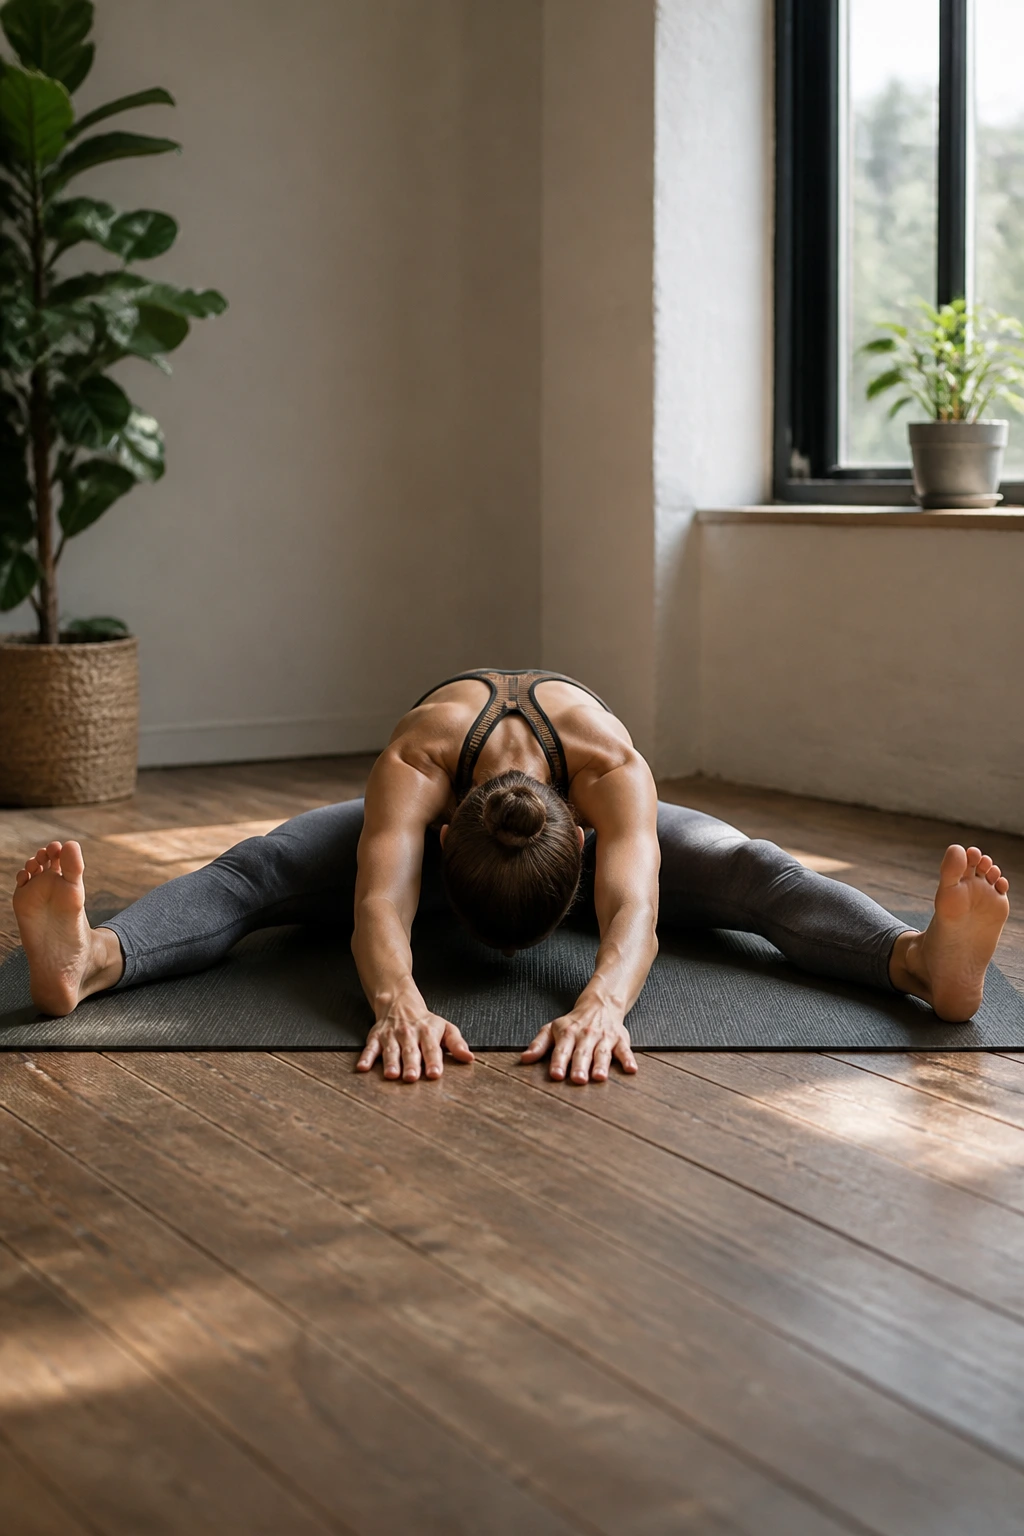
This position targets the hamstrings and the inner thighs while also providing a gentle stretch to the lower back. It is particularly effective after leg days where you’ve hit multiple muscle groups, as the wide stance allows for a different angle of pull than a standard forward fold.
Sit on the floor and spread your legs as wide as they will comfortably go. Keep your toes pointed toward the ceiling to keep your legs active. Keep your spine long—imagine a string pulling the crown of your head toward the ceiling—and hinge forward from your hips.
Walk your hands forward as far as you can while keeping your back straight. If you feel your back rounding, stop there. The stretch is in the hips and hamstrings, not the upper back. Take slow, deep breaths. This pose is wonderful for grounding the nervous system and is a great time to do a quick mental check-in about how your body feels overall.
19. Standing Side Bend
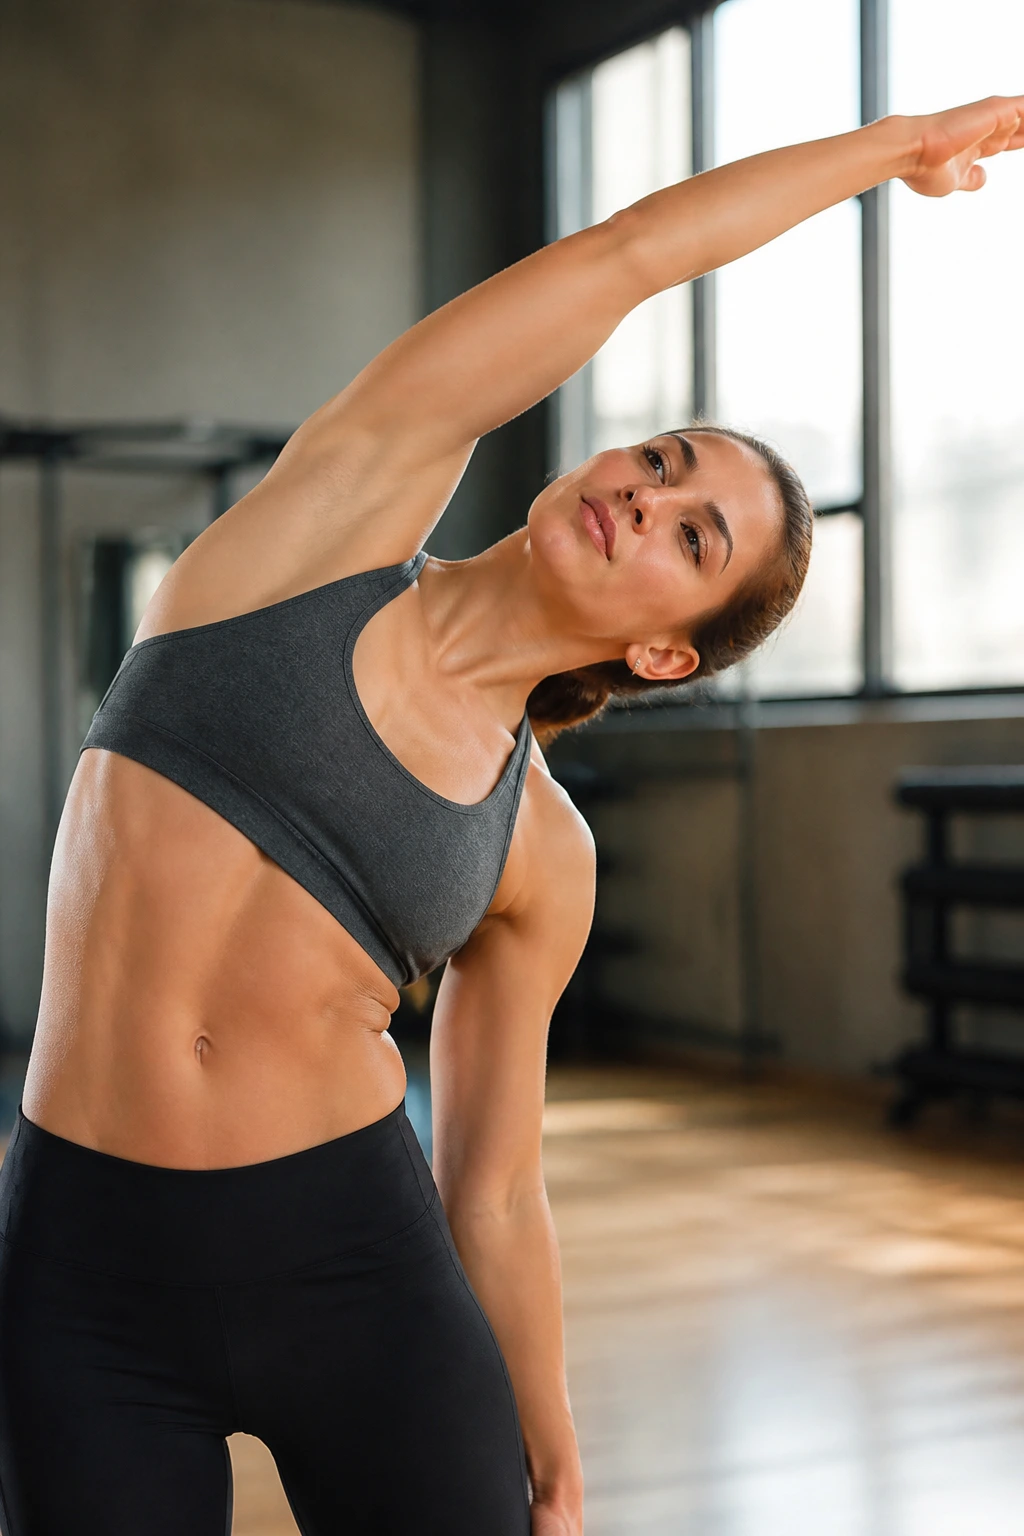
Our spines are designed to flex, extend, and rotate, but we often forget to move them laterally. The side bend targets the lats, the obliques, and the intercostal muscles between your ribs, which can become tight after heavy breathing during cardio or bracing during heavy lifts.
Stand with your feet hip-width apart. Reach your right arm straight up toward the ceiling. Inhale, and as you exhale, lean your entire torso to the left. Keep your weight even on both feet; do not shift your hips to the right. You should feel a long, satisfying stretch all the way from your right hip to your right armpit.
Don’t just lean your neck; keep your head in line with your arm. Imagine you are reaching up and over a giant ball. This stretch helps create more space in the ribcage, which can actually help you breathe more deeply and efficiently in your next session.
20. Seated Glute Stretch
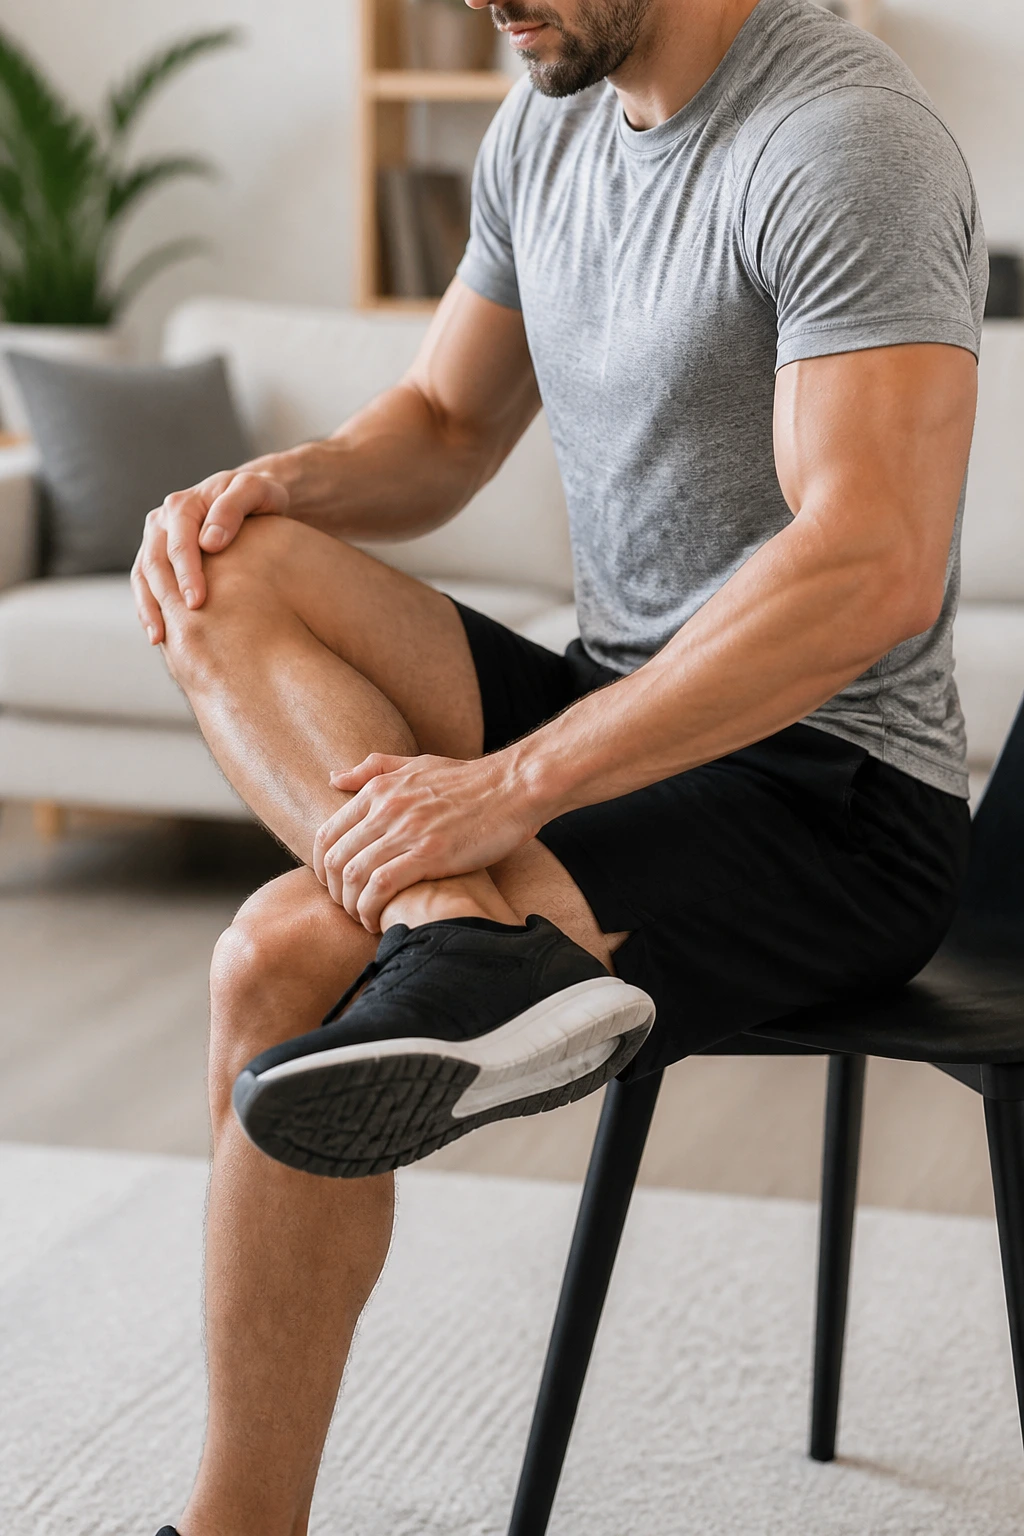
Sometimes you need a deeper release for the glutes that doesn’t involve lying on your back. The seated version allows you to easily control the intensity, making it perfect for after a workout where your hips feel particularly locked up.
Sit on the edge of a chair or a bench. Cross your right ankle over your left knee, just like the Figure-Four stretch. Sit up tall, puffing your chest out slightly. While keeping your back completely straight, hinge forward at the hips, bringing your torso toward your legs.
You will feel this instantly in the glute of the crossed leg. Because you are upright, you can adjust the angle of your torso to find the “sweet spot” of tension. It is a very functional, controlled stretch that effectively targets deep muscle fibers without requiring a mat or floor space. Hold this and switch legs.
Final Thoughts on Recovery
The twenty movements listed here are not a mandatory checklist to be completed in one sitting. Think of them as a toolkit. After a leg-heavy day, prioritize the quad, glute, and calf stretches. If your workout was centered on pulling or pressing, focus on the shoulder, chest, and wrist stretches.
Your body is the only equipment you have that needs to last a lifetime. Taking ten minutes to systematically release the tension you’ve built up is not an inconvenience; it is a vital part of your training. Muscles that are chronically tight are muscles that are prone to injury, and a body that never recovers is a body that eventually stalls.
Listen to the feedback your body gives you. Some days you might need more time in the Child’s Pose to quiet your mind. Other days, your hamstrings might demand extra attention in the forward fold. Flexibility is fluid, and your recovery routine should be just as adaptable. Stay patient, stay consistent, and give your body the time it needs to rebuild.
