



The plain push-up gets boring fast, and that is exactly when it starts becoming useful. Once you stop treating it like one move and start treating it like a family of push-up variations at home, the exercise gets a lot smarter.
A kitchen counter, a wall, a couch, and a backpack can take you from easy to brutal without leaving the house. That matters if your wrists complain, your shoulders get cranky, or you want a stronger chest and triceps without chasing a pile of equipment.
Good push-up work is about angle, tempo, load, and range of motion. A wall push-up and a decline push-up both count as push-ups, but they ask very different things from your chest, shoulders, triceps, and core.
The list below runs from kinder versions to the ones that punish sloppy form. Use the easier options to build clean reps, then move up when your body stops cheating.
1. Wall Push-Ups for a Gentle Starting Point
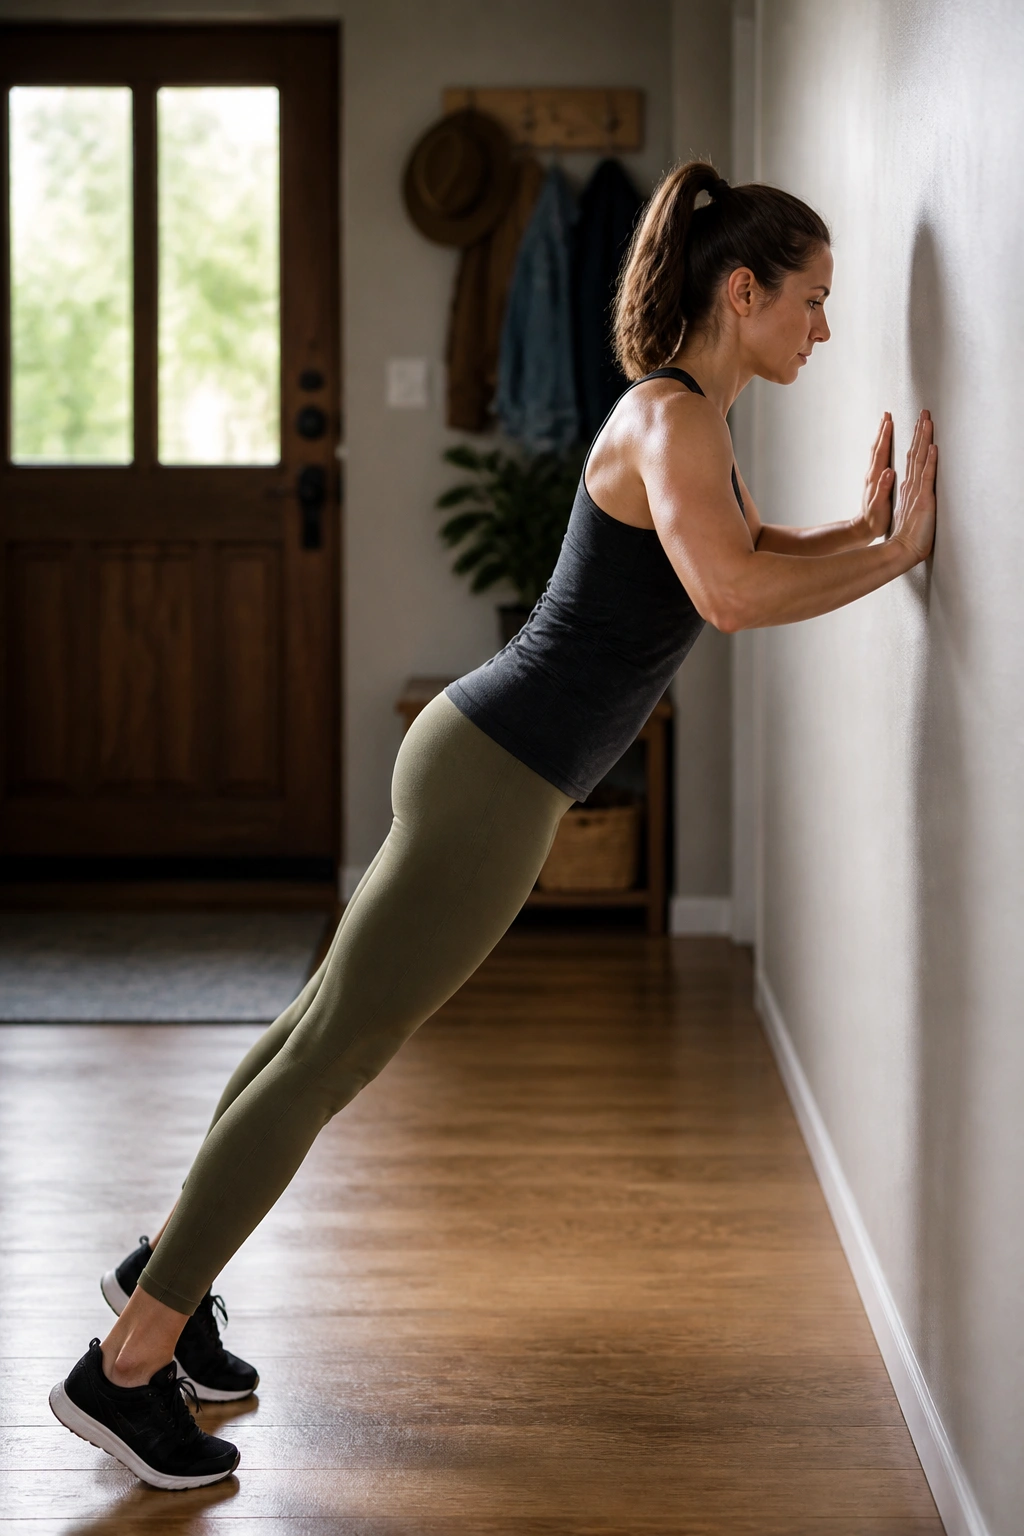
A wall push-up is not “too easy” if you’re using it the right way. It teaches the same body line, the same bracing, and the same elbow path you need on the floor, only with far less load.
Why the wall works
Stand close enough that your hands land at chest height on the wall, then walk your feet back until your body makes a straight line from head to heels. The farther your feet are from the wall, the harder it gets. Simple.
Here’s what to watch:
- Place your hands a little wider than shoulder width.
- Keep your ribs down so your lower back does not sag.
- Bend your elbows at about a 30 to 45 degree angle from your torso.
- Lower until your nose or chest nearly touches the wall.
- Push back hard and finish with straight elbows, not a shrugged-up neck.
Best use: warm-ups, beginner strength work, and people rebuilding pressing strength after a long break.
If you can do 20 clean wall reps without rushing, move your feet farther back or switch to an incline version. That tiny change matters more than people think.
2. Incline Push-Ups on a Couch or Counter
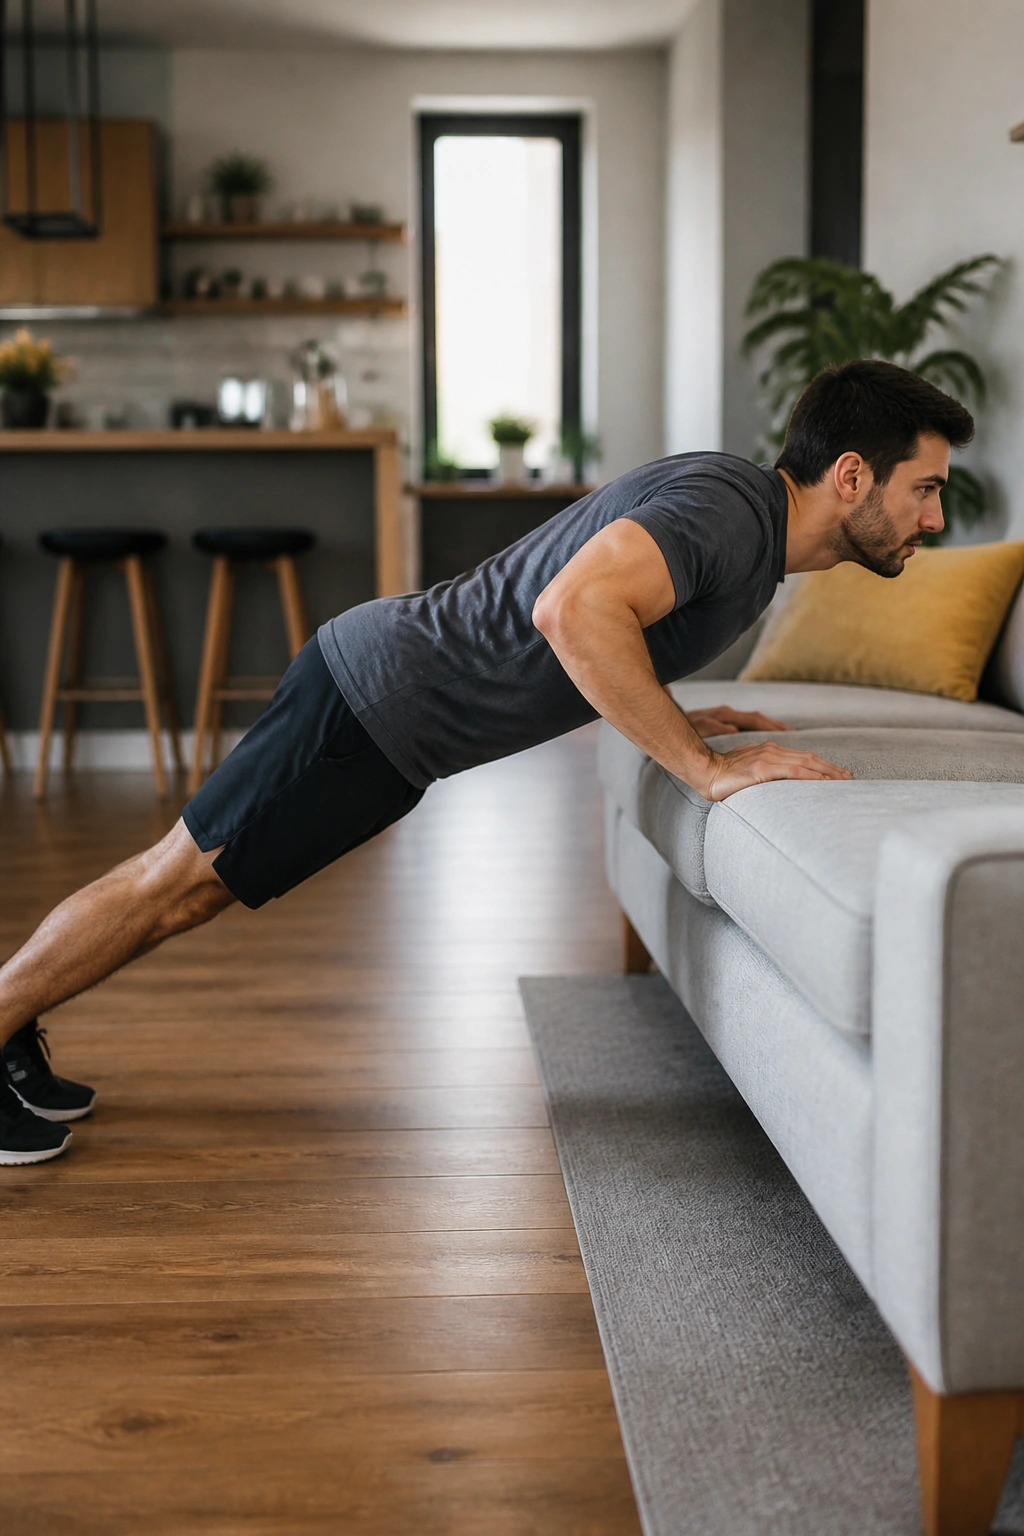
A countertop push-up looks harmless until you lower the surface a few inches and feel your chest start doing real work. That is the trick: the lower the incline, the more bodyweight you own.
The couch, a sturdy coffee table, or a step all work. Pick the surface that lets you keep a straight line from your head to your heels without sagging through the middle. A lot of people get lazy here and turn the movement into a half-plank with bent hips. Don’t.
Use this version when wall push-ups feel stale but the floor still feels like a wall of concrete. It builds confidence fast because you can actually see and feel your chest getting closer to the surface with each rep. That visual feedback helps.
If your hands slide, use a surface with grip or put a yoga mat under them. A wobbly table is a bad idea. Stability matters more than pride.
3. Knee Push-Ups When You Need a Shorter Lever
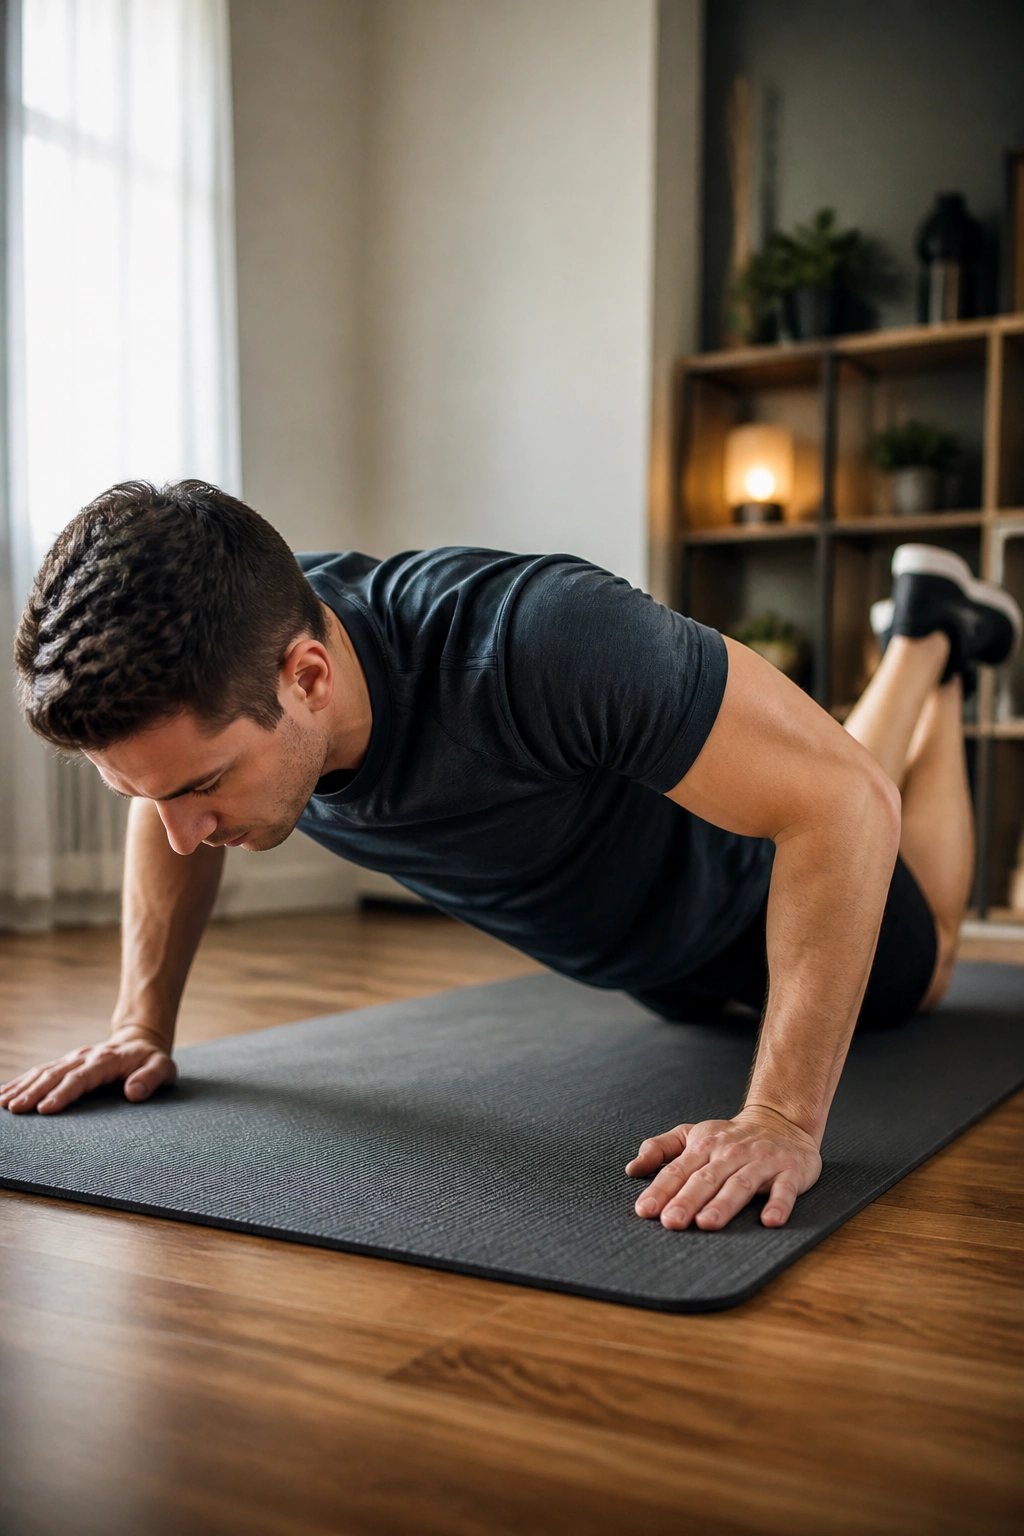
Knee push-ups get mocked for no good reason. They shorten the lever, yes, but that does not make them useless. It makes them a bridge.
The important part is body shape. Keep your body in a straight line from your knees to your head, squeeze your glutes, and avoid folding at the hips like a broken folding chair. If your lower back sags, the movement stops training the right pattern.
What to feel
You should feel the chest and triceps working, not your lower back taking over. If the rep feels too easy, slow the lowering phase to 3 seconds. That changes the whole feel without needing a single piece of equipment.
A good rule: if you can bang out 25 sloppy knee reps, the set is too loose to matter. Fewer clean reps beat a mountain of sloppy ones every time. One hard set done right is worth far more than three rushed sets.
4. Standard Push-Ups as the Baseline
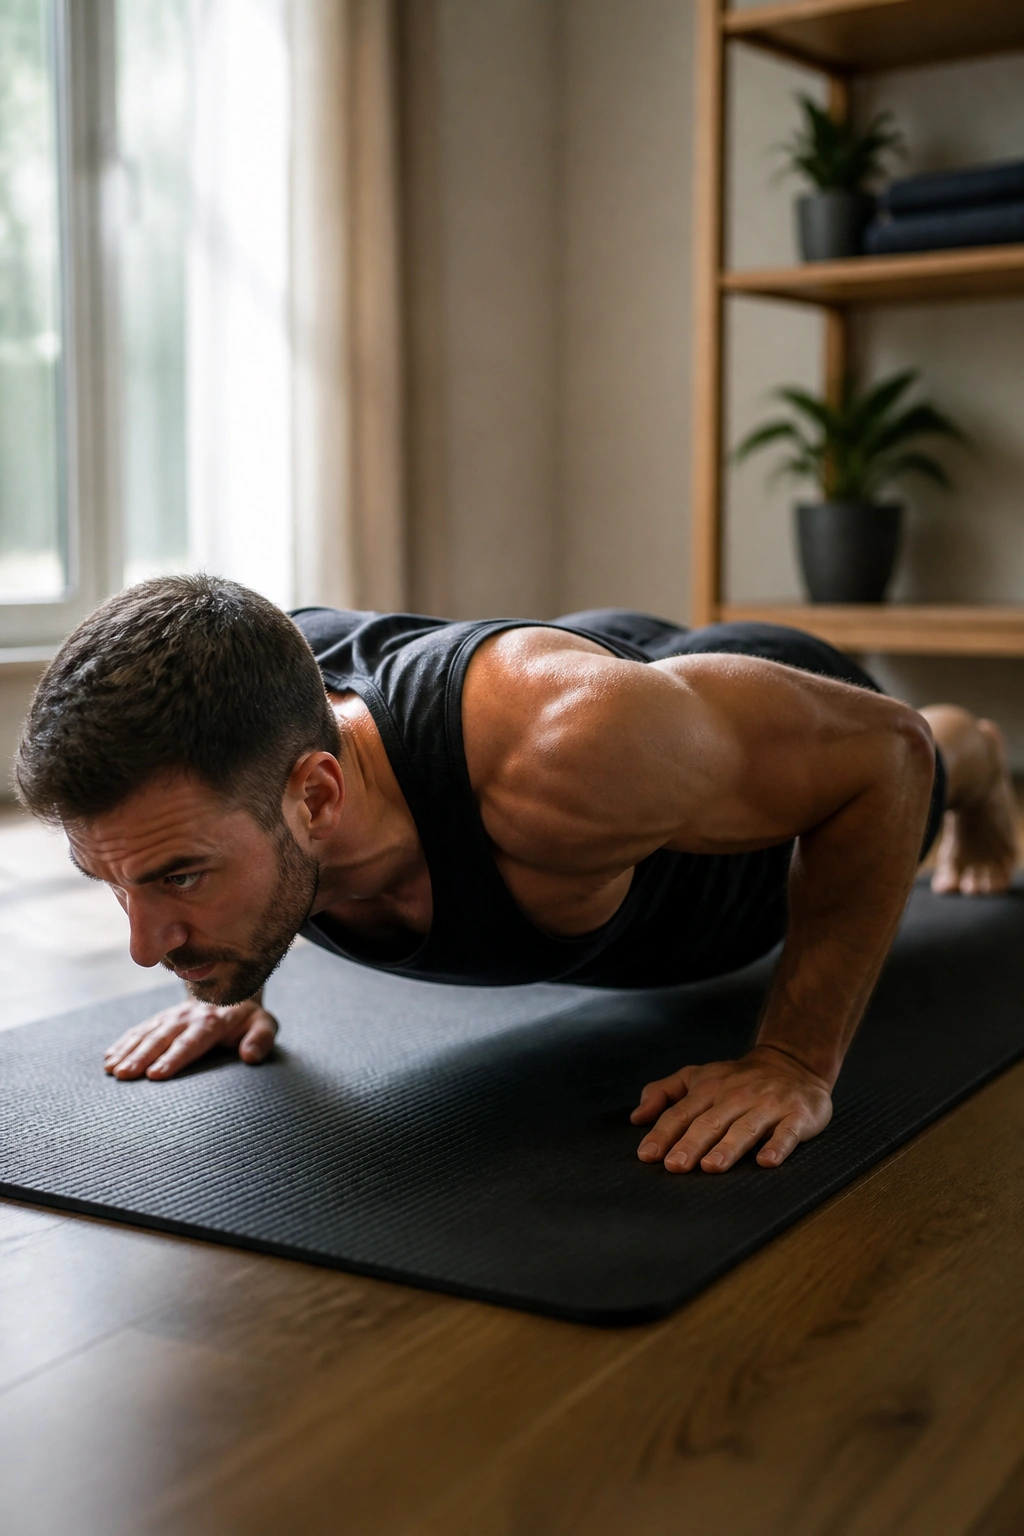
The standard push-up is the reference point for everything else. If your form is solid here, the rest of these push-up variations at home become easier to understand, because you can feel how each change shifts the load.
Hands go just outside shoulder width. Feet stay together or close together. The body moves as one piece. Chest comes down first, not the hips, not the face, and definitely not the neck. You want your ribs tucked and your glutes squeezed enough to keep the line from your shoulders to your heels tight.
One clean rep should look boring. That is a compliment.
Common fixes that matter
- Keep your elbows from flaring straight out.
- Lower until your chest is close to the floor.
- Press the floor away instead of thinking about “lifting” your body.
- Stop reps before your hips start sneaking up.
A lot of people chase higher numbers and lose the shape of the rep. I’d rather see 8 honest reps than 20 half-reps with a sagging middle.
5. Wide Push-Ups for More Chest Emphasis
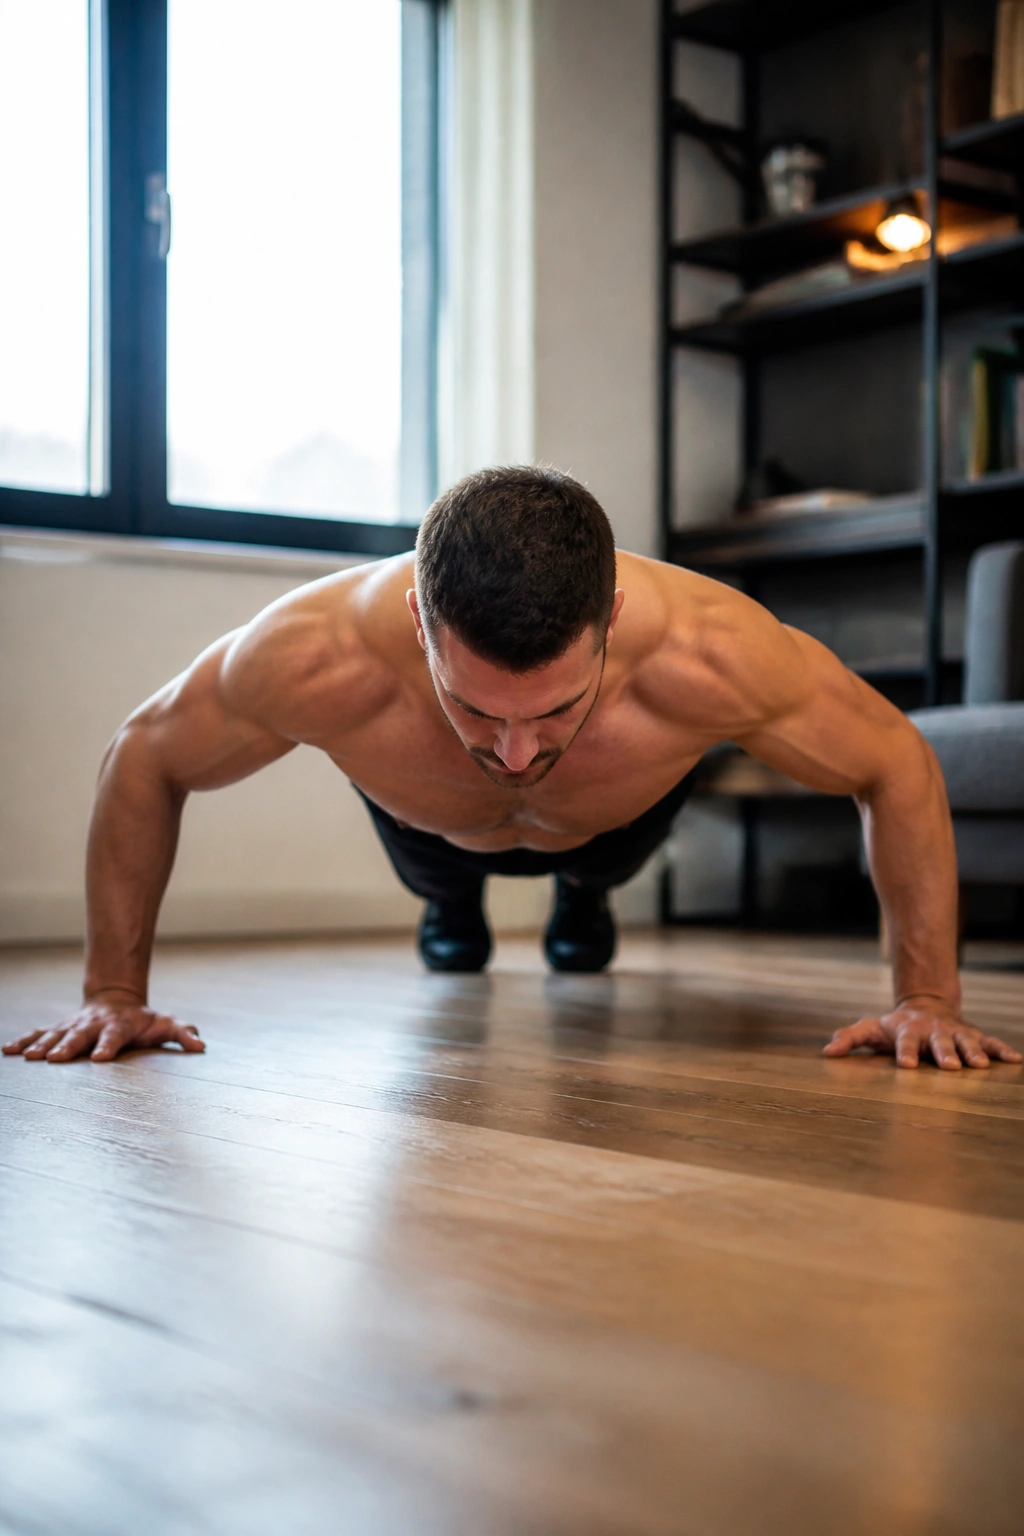
Wide push-ups shift some work away from the triceps and toward the chest, but they are not a chest-only cheat code. They still need a stiff torso, and they still punish sloppy shoulder control.
The wider hand position usually feels strongest when your hands land a little outside shoulder width, not way out near your ears. Go too wide and the shoulders tend to complain. Go a little wide and the chest gets more room to help on the press.
This is a good choice if standard reps feel like too much triceps and not enough chest. The movement pattern is similar, but the burn lands differently, especially near the bottom when the pecs are stretched.
Wide push-ups also tell on poor control fast. If your elbows dump outward and your chest collapses, the set goes nowhere useful. Small changes in hand width are enough. You do not need circus-level hand placement to feel the difference.
6. Close-Grip Push-Ups for Triceps Work
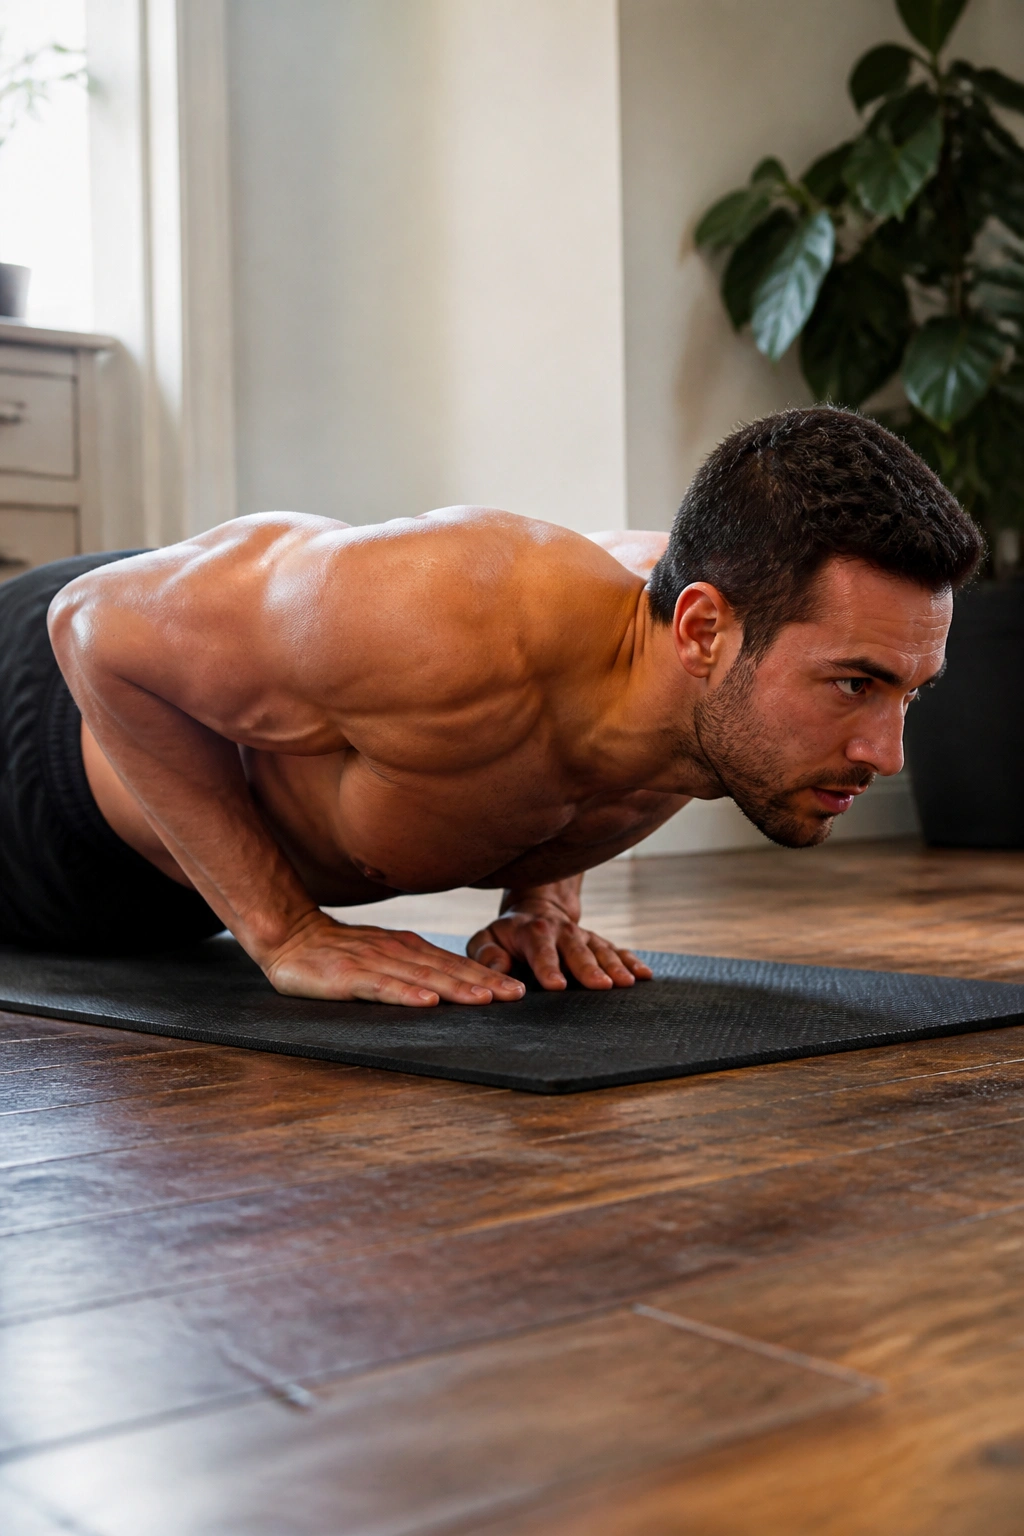
Want a simple way to make push-ups feel heavier without changing the surface? Bring your hands closer together.
How to keep it useful
Your hands can sit under your shoulders or just inside them. From there, keep your elbows tracking back instead of flaring wide. That makes the triceps work harder and keeps the shoulders from getting shoved into a bad position.
The chest still helps, of course. But the inner hand position shifts the load enough that most people notice the back of the arms first. If you have weak triceps, this version is honest in a hurry.
A few good cues:
- Keep your wrists stacked under your forearms.
- Brace your abs before every rep.
- Lower under control for 2 to 3 seconds.
- Stop if the wrists or elbows start barking.
If you’re coming from standard push-ups, expect this one to cut your rep count. That’s normal. Harder does not always mean better, but it does mean different.
7. Diamond Push-Ups When You Want a Tougher Triceps Hit
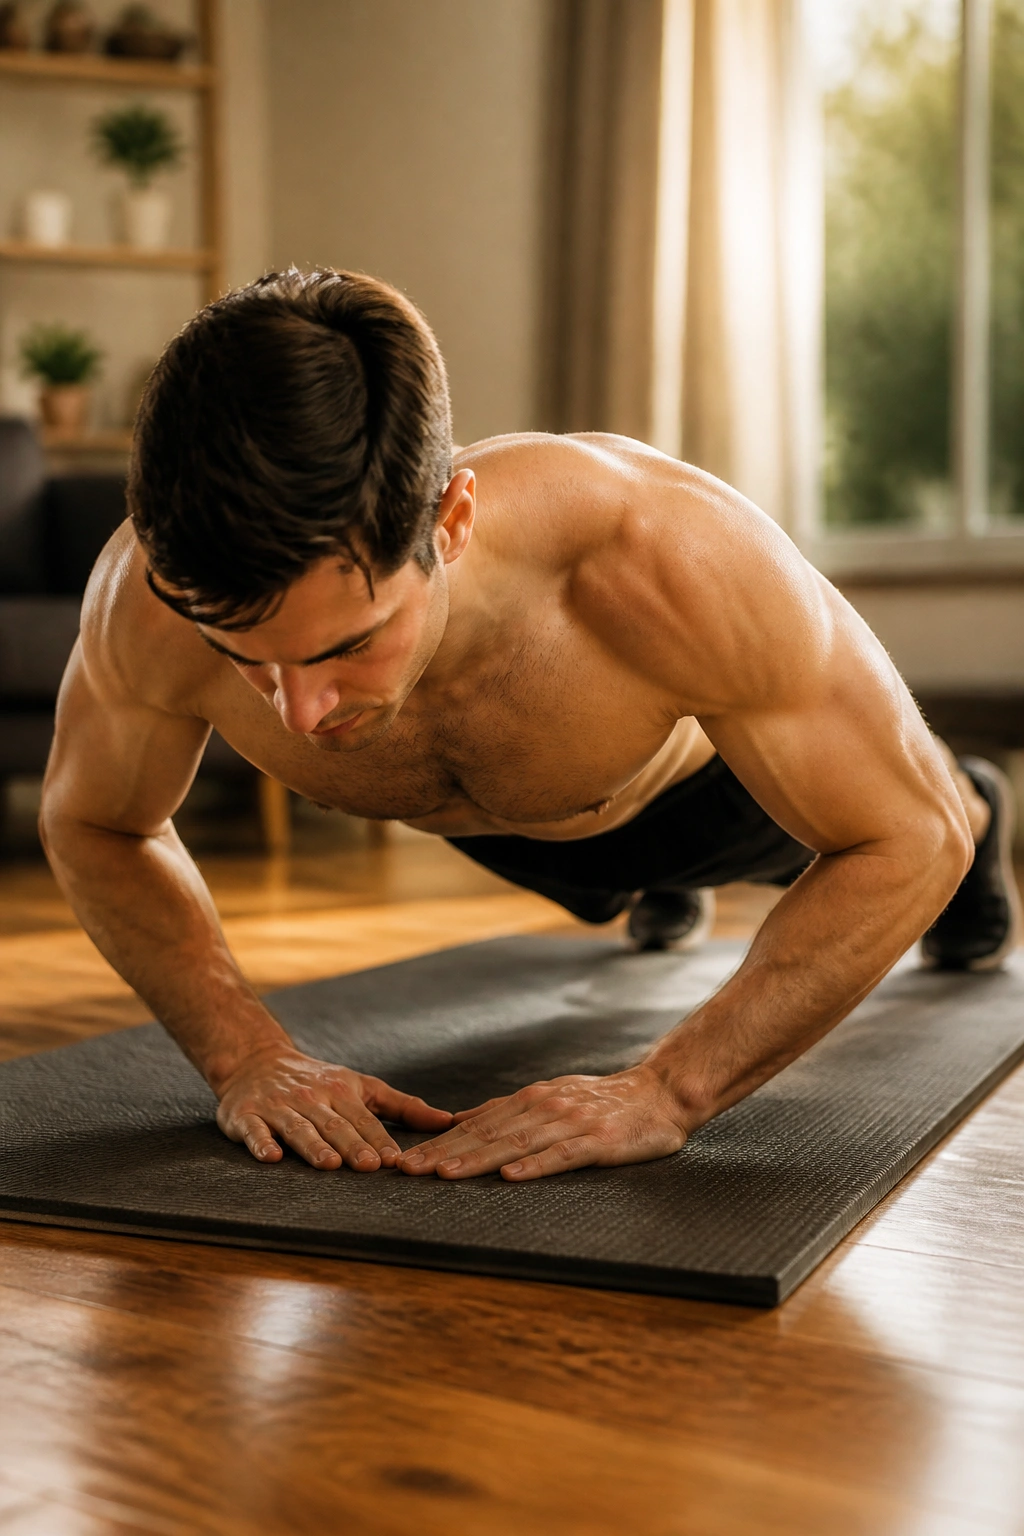
Diamond push-ups are the version most people brag about before they try them. Then the wrists light up and the reps disappear. That is not a flaw; it is the point.
The hand shape narrows the base and forces more elbow extension work from the triceps. Your hands can touch at the thumbs and index fingers, though I prefer a slightly looser diamond if your wrists are fussy. A perfect tiny diamond is not worth pain.
What to watch for
Diamond push-ups get ugly when the elbows flare and the shoulders creep forward. Keep your chest proud, lower with control, and let the elbows skim close to the ribs. If the bottom position feels jammed, widen the hands by an inch or two.
A lot of people chase this variation too early. That is a mistake. Build close-grip strength first, then try diamonds for lower-rep sets. Three clean reps are better than ten grim ones with wrist pain.
8. Decline Push-Ups for Upper Chest and Shoulders
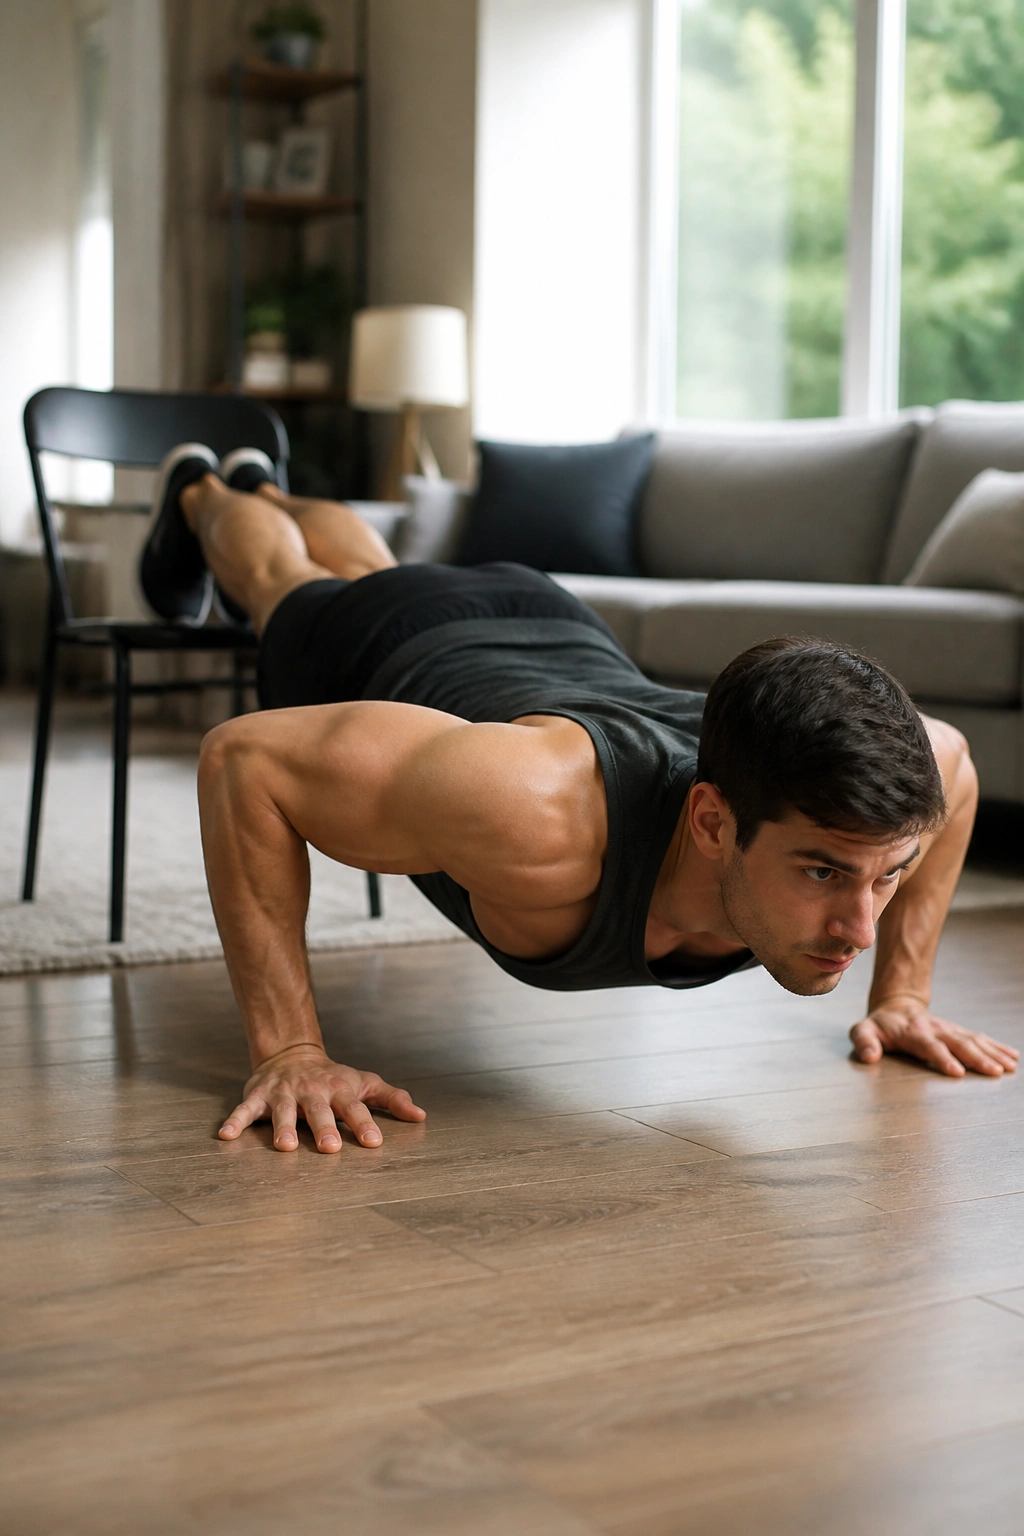
Feet up, hands on the floor, and the whole exercise changes. Decline push-ups shift more of your bodyweight toward the upper chest and front shoulders, which makes them feel closer to a tough pressing drill than a standard floor push-up.
Use a sturdy chair, a step, or the edge of a couch for the feet. Start low. One or two steps is often enough. People love making this harder than it needs to be, then wonder why their shoulders are fried before the chest even wakes up.
The higher the feet, the more demanding the rep becomes. That is true, but “higher” is not the same thing as “better.” If your hips fold or your neck cranes upward, drop the height and clean up the line first.
This version is especially good when standard push-ups stop feeling challenging after 15 or 20 reps. A modest decline can bring the difficulty right back without needing any weights.
9. Staggered-Hand Push-Ups to Shift Your Weight Side to Side
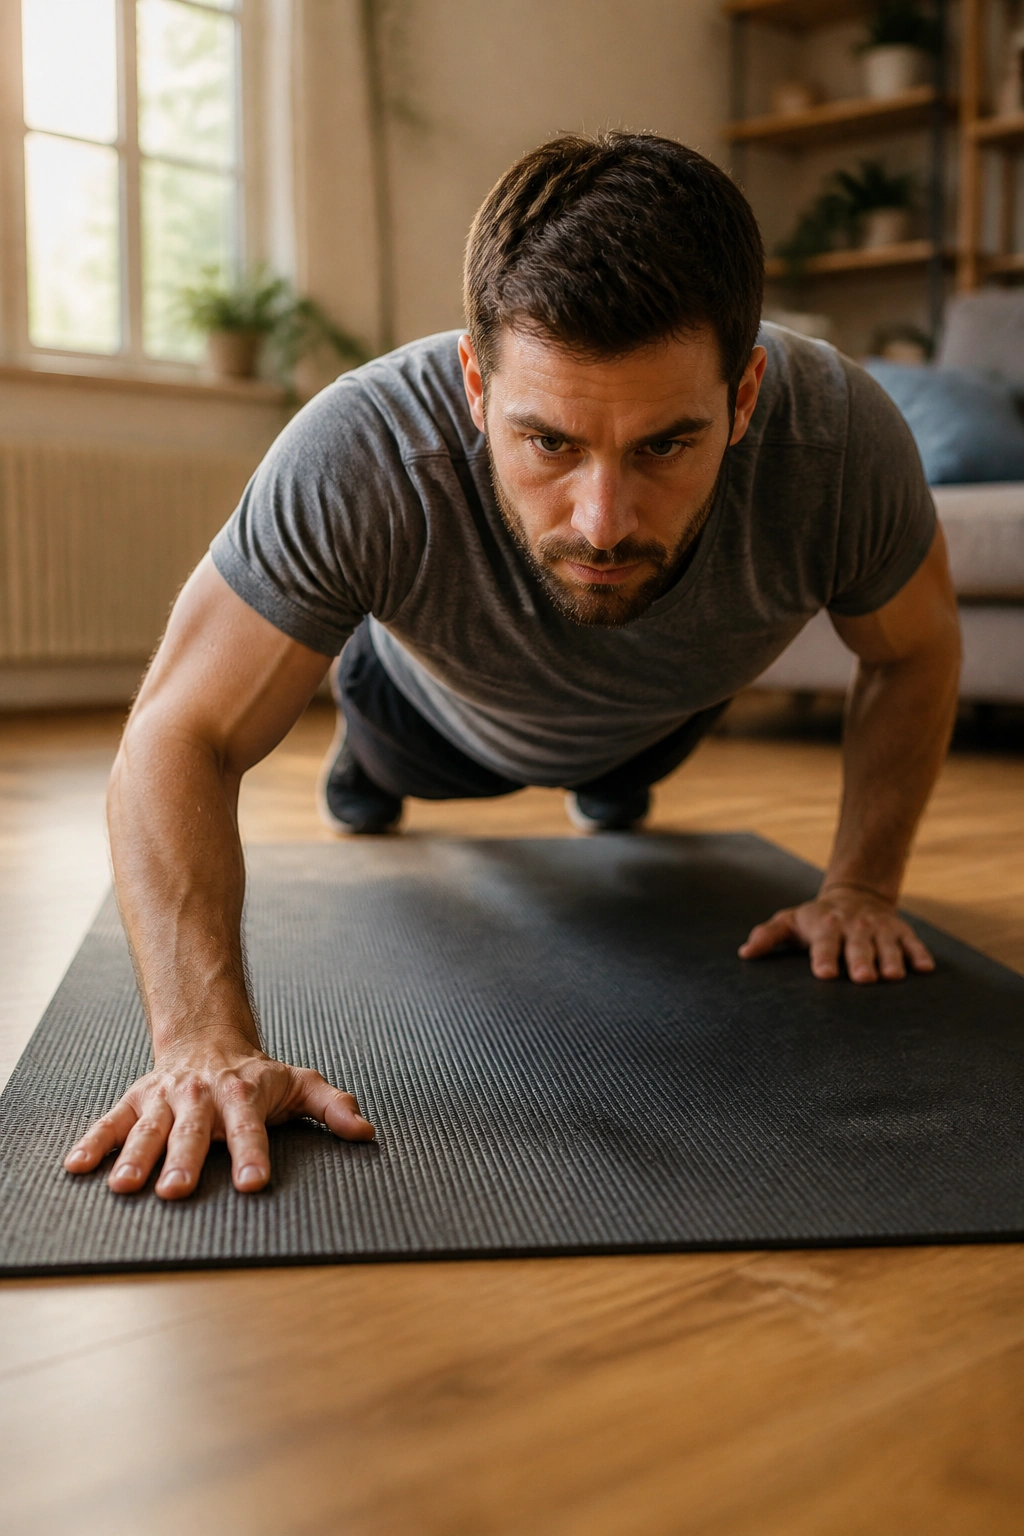
A staggered-hand push-up looks a little odd, and that is part of why it works. One hand sits a few inches forward of the other, which changes how your body handles the load from side to side.
This is a nice middle step before one-arm progressions. You will feel one side of the chest and triceps doing more work on each rep, but the movement still gives you enough support to stay honest. That makes it a smart at-home builder, not just a show-off exercise.
How to use it
Try 5 reps with the right hand forward, then switch and do 5 with the left hand forward. Keep the front hand and back hand only a few inches apart. If you spread them too far, the movement gets sloppy and the shoulder twist gets weird.
A small offset is enough. You are not trying to create a circus trick. You are teaching your body to handle uneven load without losing position.
10. Shoulder-Tap Push-Ups for Core Control

Shoulder-tap push-ups make your core earn its keep. After each rep, or at the top of each rep depending on how you set them up, you lift one hand to tap the opposite shoulder while the rest of the body tries not to wiggle.
That little tap tells you a lot. If your hips swing side to side, the core is losing the fight. If your feet have to spread wide just to survive the set, that’s fine at first. Better wide and stable than narrow and sloppy.
Quick setup
- Start in a solid high plank.
- Place your feet a bit wider than standard push-up stance.
- Do one push-up.
- At the top, tap the opposite shoulder with one hand.
- Alternate sides and keep the hips as still as you can.
This version is not about speed. It’s about owning your center line. A slower set with quiet hips is worth far more than a fast set where your pelvis wobbles like a loose shopping cart.
11. Pause Push-Ups for Real Bottom-End Strength
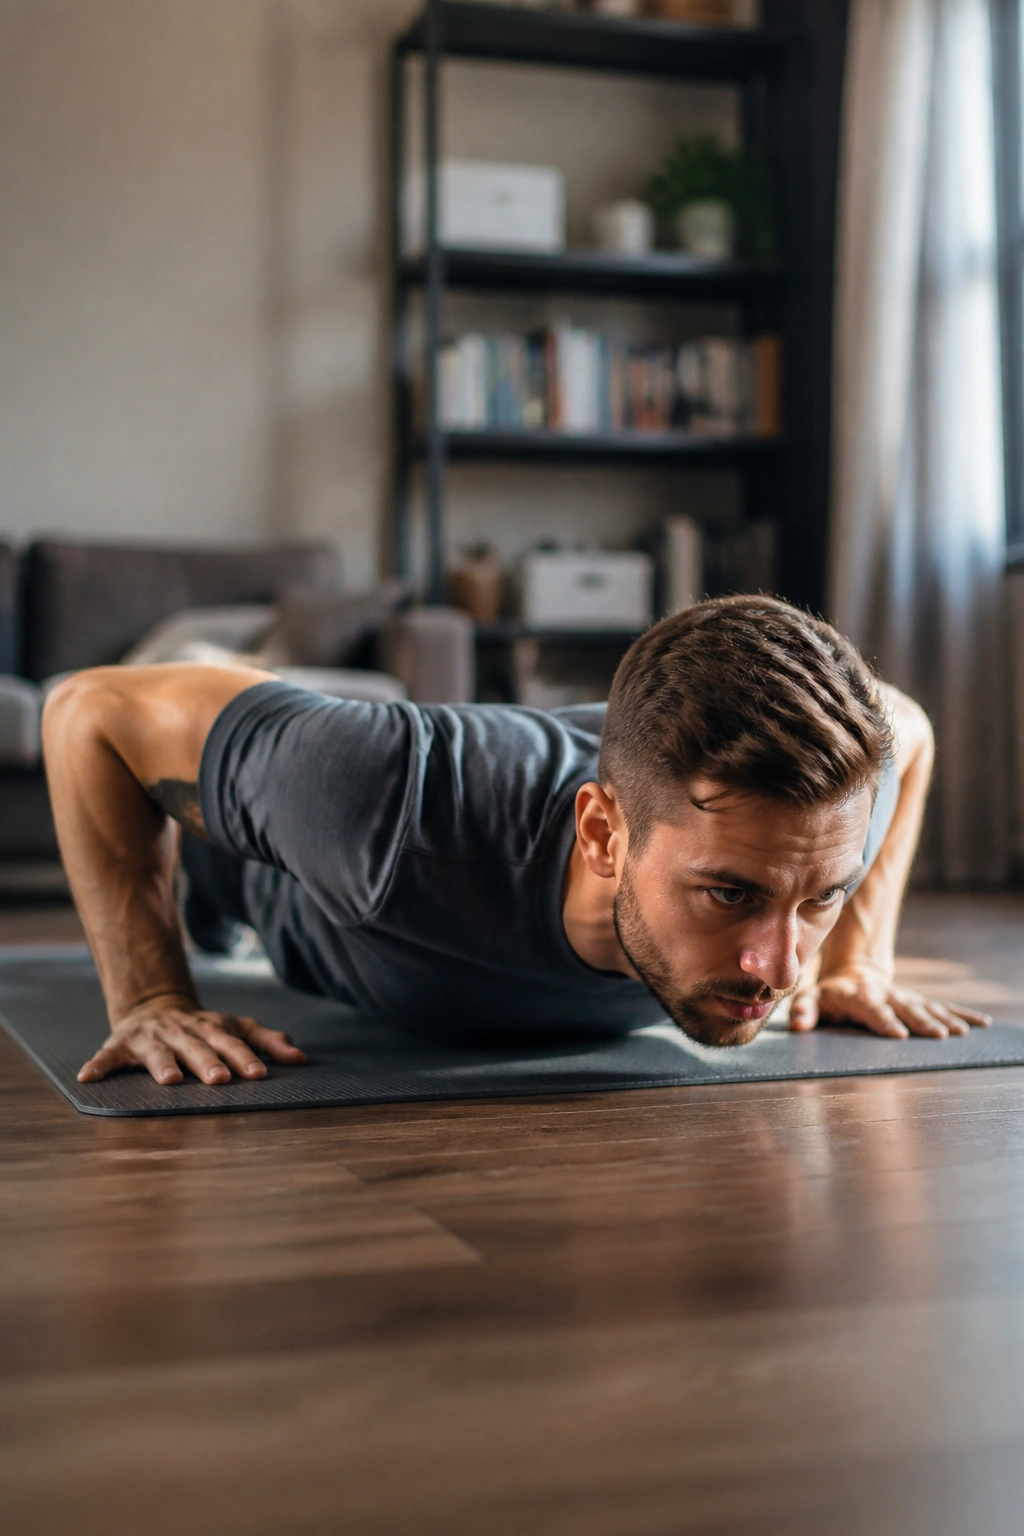
A pause push-up is one of my favorites because it exposes every weak spot. You lower down, stop dead for 1 to 3 seconds an inch above the floor, then press up without bouncing.
That pause kills momentum. Good.
It also makes the rep feel cleaner, because you can’t hide behind a fast drop. If you bottom out with your chest flat and your shoulders pinched, the pause will feel awful. That’s feedback, not punishment.
You can use a 1-second pause for most work, or stretch it to 2 or 3 seconds when you want a serious strength cue. Keep the body tight during the hold. Do not rest your belly on the floor and call it a pause.
This version pairs well with standard push-ups in the same workout. Use the pause reps first, when you’re fresh, then finish with regular reps. The standard set will feel easier afterward. That’s the point.
12. Tempo Push-Ups for Slow, Clean Reps
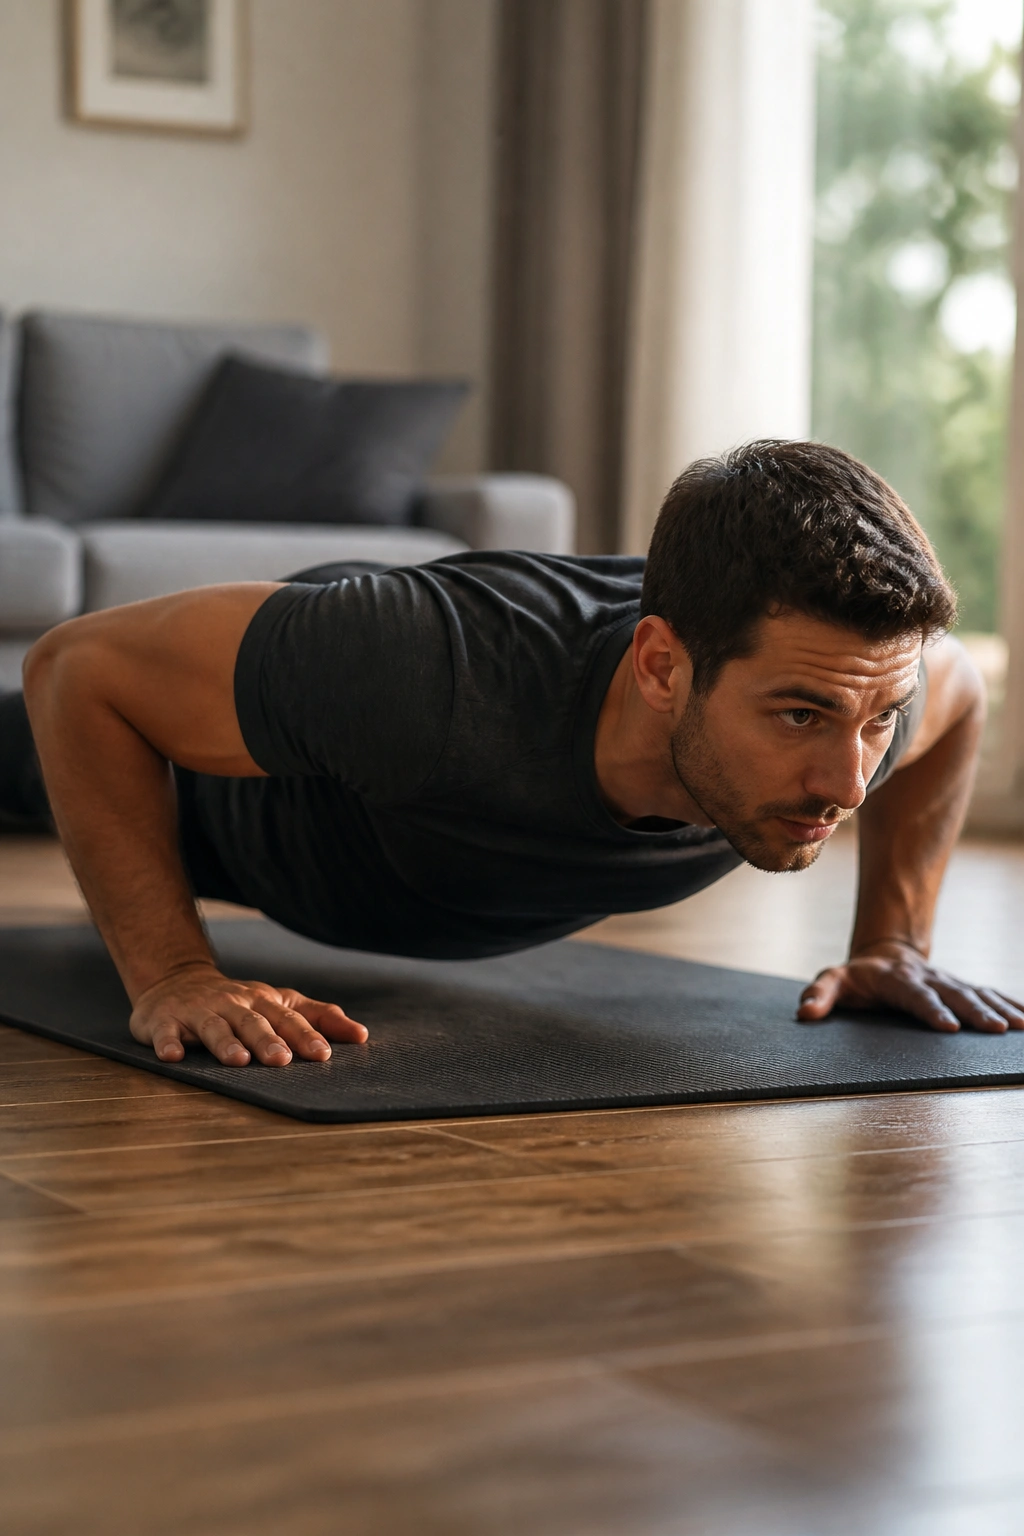
Counting the tempo changes the exercise more than most people expect. A 3-1-1 tempo means 3 seconds down, 1 second at the bottom, 1 second up. A 4-0-1 tempo is even more demanding on control.
Why the slow version works
Slow push-ups force you to own the whole path, not just the start and finish. You feel the chest stretch, the shoulders stabilize, and the triceps finish the press without a sloppy bounce off the floor.
A good tempo rep should look calm. No diving. No jabbing. No collapsing. If your breathing turns ragged halfway through the set, that’s normal, because slow reps are sneaky hard.
Try this with a standard push-up or an incline version if the floor is still too much. You may need fewer total reps, and that’s fine. Five slow, perfect reps often beat fifteen rushed ones that look like a dare gone wrong.
13. Pike Push-Ups for Shoulder Strength
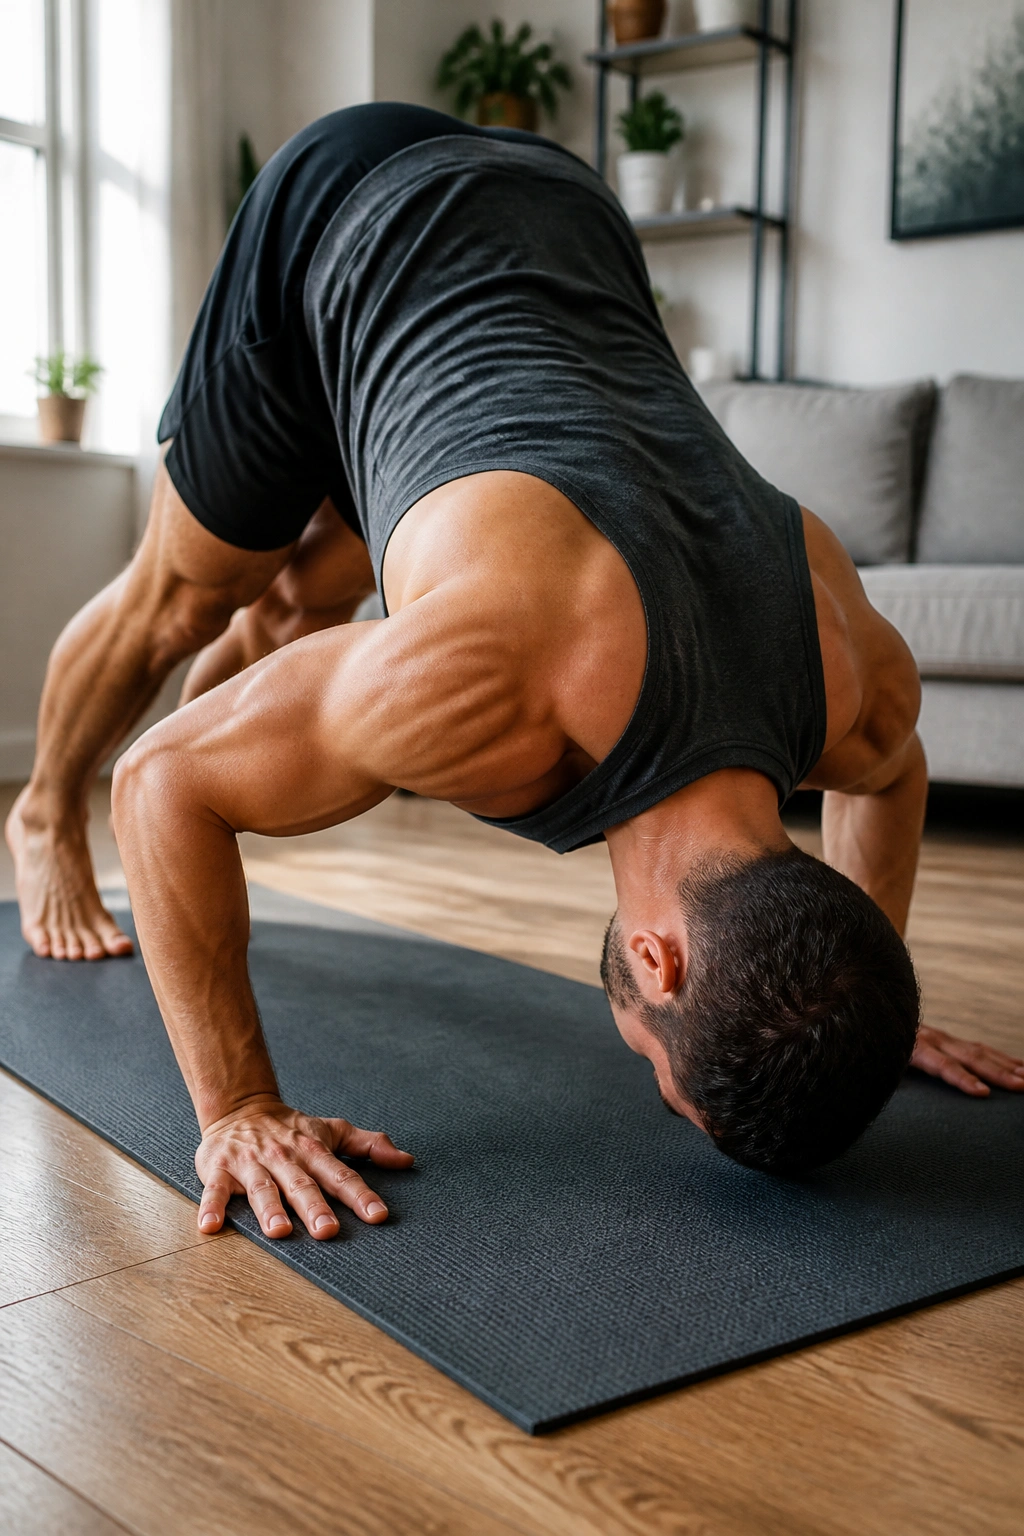
Pike push-ups are what happen when the shoulders take over the party. Your hips rise high, your head travels toward the floor, and the movement starts to feel much more like an overhead press than a chest press.
The shape matters. Hands stay on the floor, feet stay planted, and your body makes a rough inverted V. From there, bend the elbows and lower the head toward the floor or a yoga mat. Keep the forearms angled enough that the shoulders can track comfortably.
Why they matter
Chest push-ups are great, but the front delts often need more direct work. Pike push-ups fill that gap without dumbbells. They also teach better shoulder control, which carries over to handstands, wall walks, and harder bodyweight pressing.
If the floor is too deep, raise your hands on a sturdy book stack or a low step. And if your neck feels jammed, shorten the range first. No heroics. Shoulders tend to give honest bills later.
14. Spiderman Push-Ups for Core and Hip Mobility
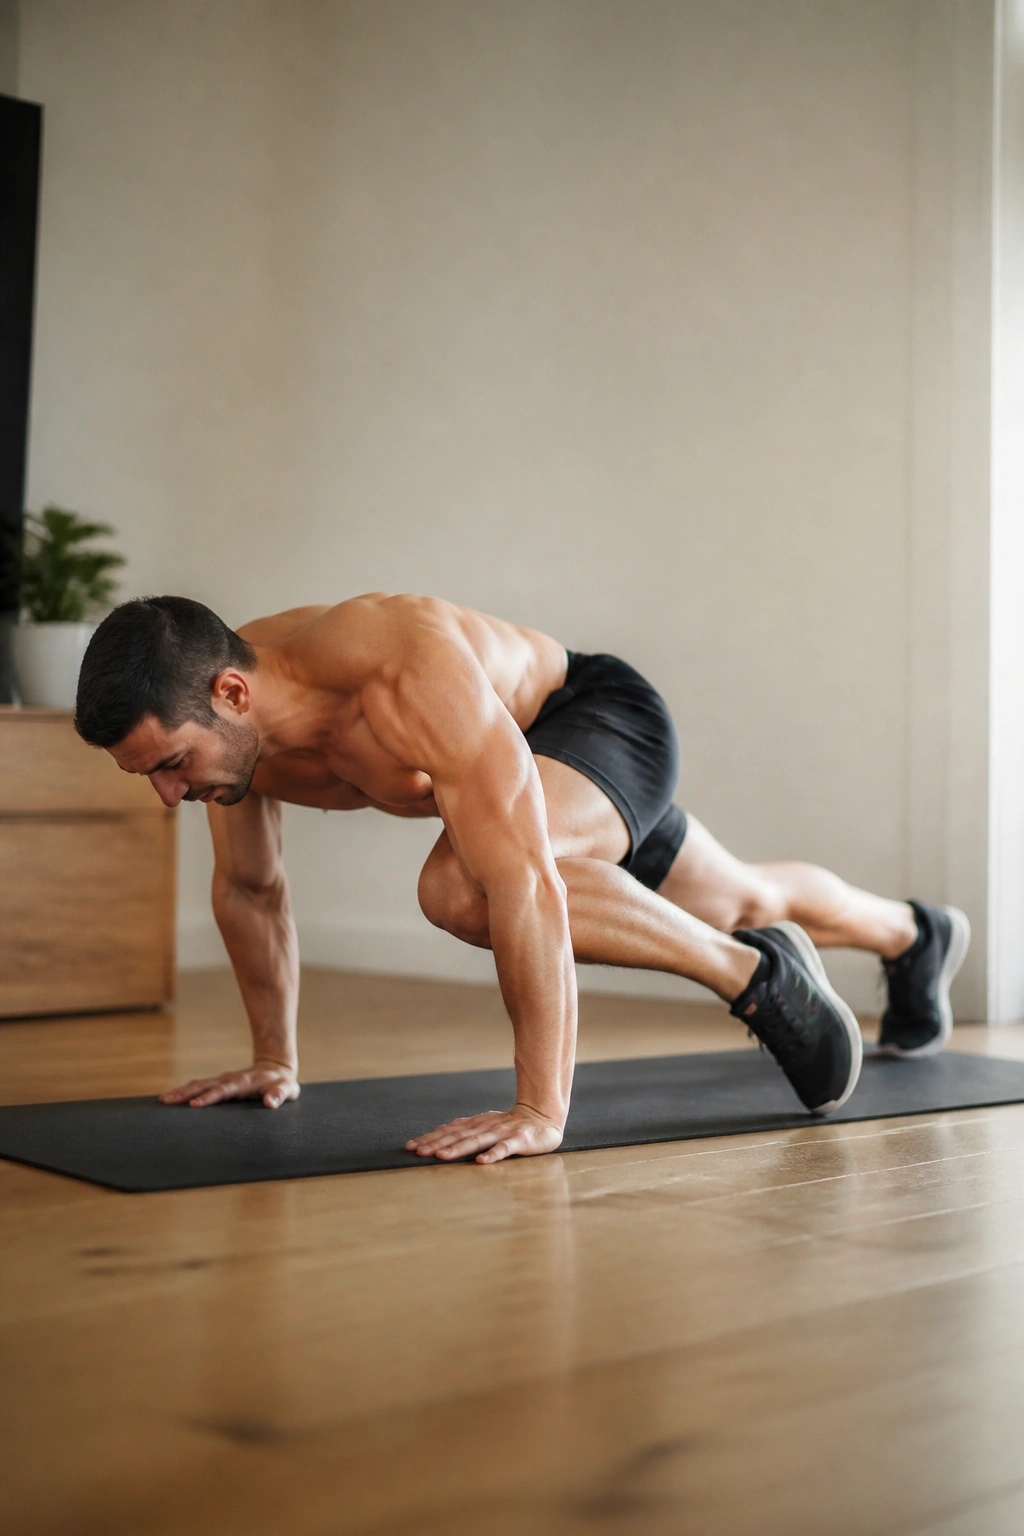
A Spiderman push-up adds a knee drive on the way down, usually bringing one knee toward the same-side elbow. The movement makes your trunk work harder while your hips and shoulders coordinate the whole mess.
That sounds dramatic, but the rep is simple. Lower into the push-up, pull one knee up as you descend, press back up, then switch sides on the next rep. The goal is not speed. The goal is control.
What changes when you add the knee drive
You’ll feel the obliques, hip flexors, and core stabilize the body while the chest still handles the press. It also makes the movement more dynamic, which is useful if floor reps feel stale and you want something that wakes up the whole front side of the body.
Keep the knee drive close to the body. If the leg swings wildly out to the side, the rep turns into noise. Tight, controlled, and deliberate is the better look here.
15. Archer Push-Ups for Serious Side-to-Side Strength

Archer push-ups are where things start to feel athletic in a hurry. One arm bends deeply while the other stays straighter, so your weight shifts heavily onto one side before you push back to center.
Unlike a regular push-up, the load is not shared evenly. That asymmetry is the whole trick. It gives you a taste of one-arm strength without forcing you to catch your bodyweight on a single hand.
How to do them well
Set your hands much wider than a standard push-up. Lower toward one side, keeping the other arm straighter, then press back up and alternate. Your feet can stay spread for balance. They should.
A clean archer push-up feels controlled, not rushed. If the shoulder on the working side caves inward, stop the set. That joint hates sloppy reps. Start with a small shift, then increase the depth as your control improves.
This is not a beginner move. It’s a bridge.
16. Typewriter Push-Ups for Constant Tension
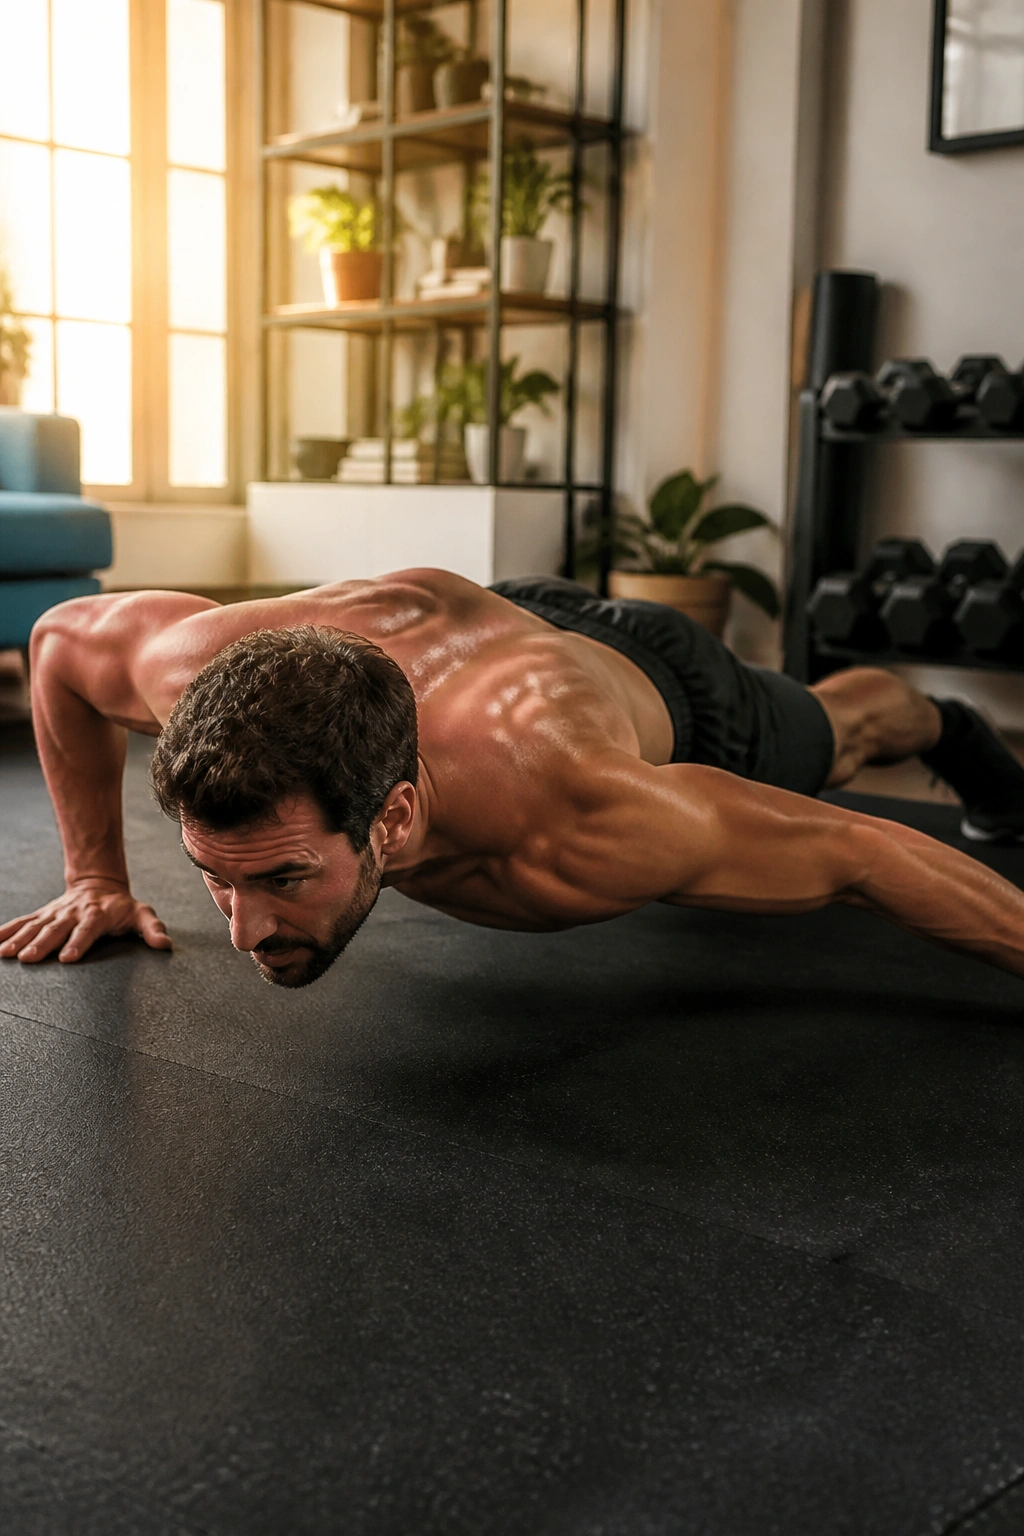
Typewriter push-ups take the archer idea and slow it down even more. Instead of pressing immediately back to the center, you stay low and shift your chest from one side to the other like a slow slide across a bar.
That long low position is nasty in a useful way. Your chest, shoulders, and triceps stay under tension the whole time. There’s nowhere to hide.
You will probably need to cut the range short at first. That’s fine. Move a few inches side to side while staying as low as you can control. The movement should feel deliberate and heavy, not sloppy and dragged around by momentum.
This one demands strong wrists and solid shoulder stability. If your elbows complain or your lower back starts sagging, back off to archer push-ups first. Earn the right to crawl low.
17. Explosive Push-Ups for Power
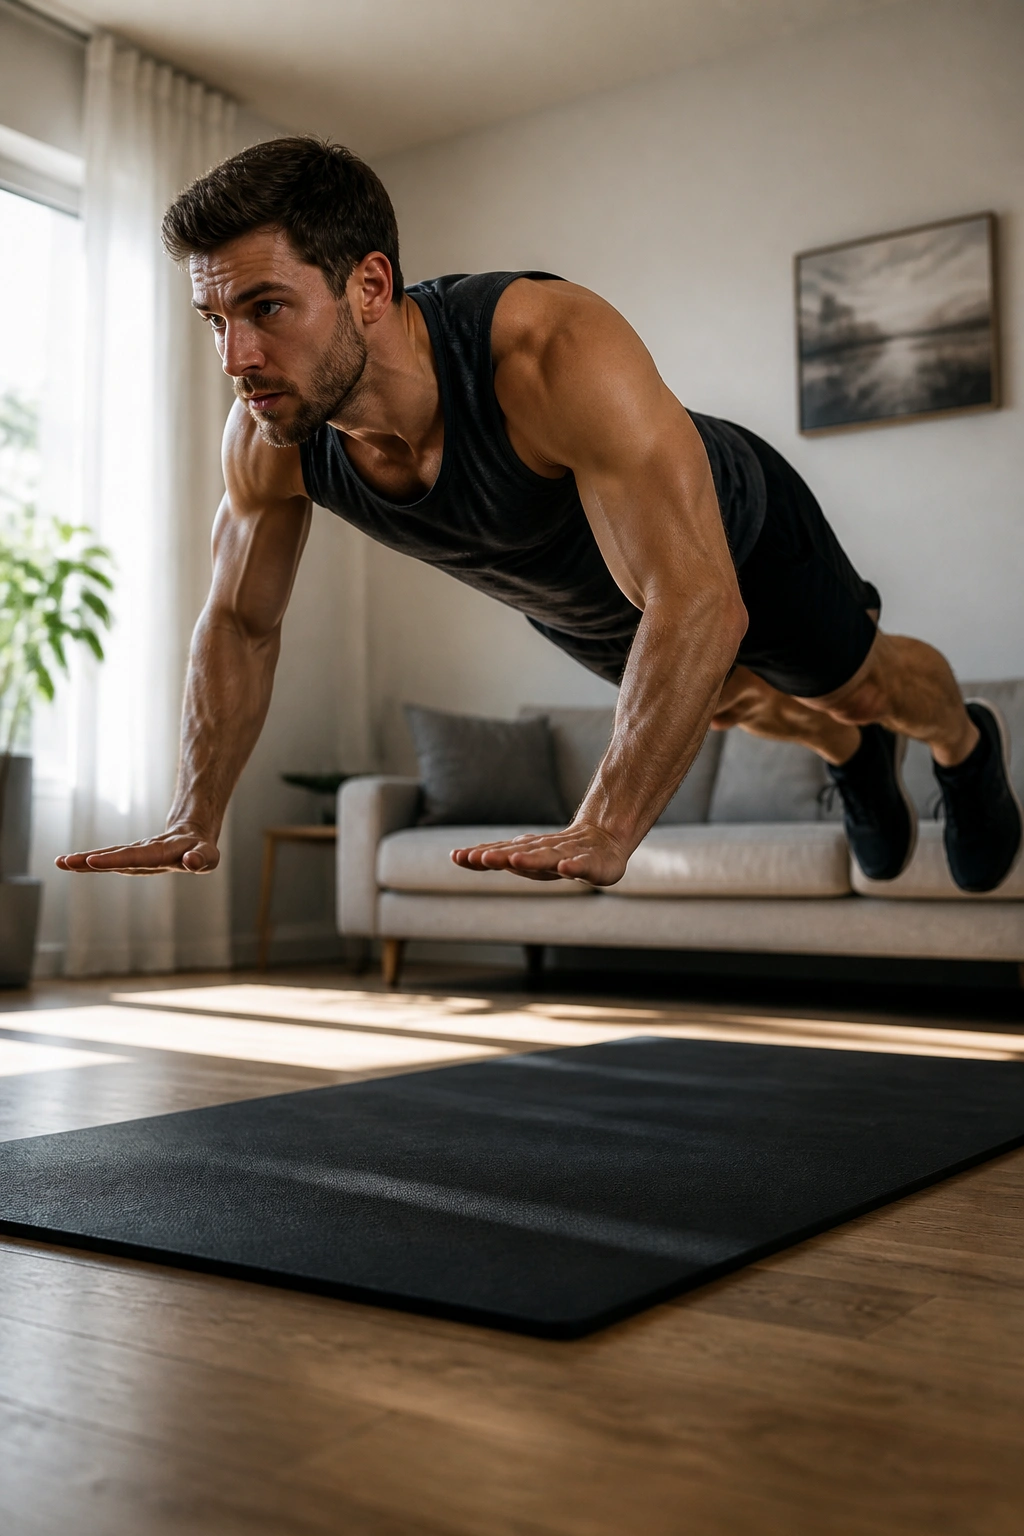
Explosive push-ups are about speed, not grind. Press the floor hard enough that your hands leave the ground, even if it is only for a split second. A clap is optional. Air time is the real point.
The rep has to stay crisp. If your hips sag or your head shoots forward, the speed is coming from bad mechanics. That is a poor trade. Start with a small pop off the floor and land softly with bent elbows.
A few ground rules
- Use a mat or a non-slip floor.
- Keep reps low, usually 3 to 5 at a time.
- Rest more between sets than you would for regular push-ups.
- Stop the moment the landings get noisy.
Explosive work is useful if you want power, not just endurance. It also teaches you to push with intent, which carries over to every other variation here. Hard press, soft landing. That’s the game.
18. Hand-Release Push-Ups for Full Range of Motion

Hand-release push-ups start with the chest on the floor. At the bottom, you briefly lift the hands off the ground, then place them back down and press. It sounds small. It isn’t.
That tiny hand lift removes any bounce and makes sure every rep starts from a dead stop. You get a clean reset at the bottom, which is great for people who cheat the lower half of the push-up without meaning to.
The chest should touch the floor. The hands should come off for a second. The press should begin from a tight body line, not from a wiggly shrug. If you lose the brace on the way down, the rep turns into a flop.
This version works well for strength endurance and honest range of motion. It’s also a sneaky way to make a standard push-up feel harder without changing hand width or foot position.
19. T Push-Ups for Rotation Control
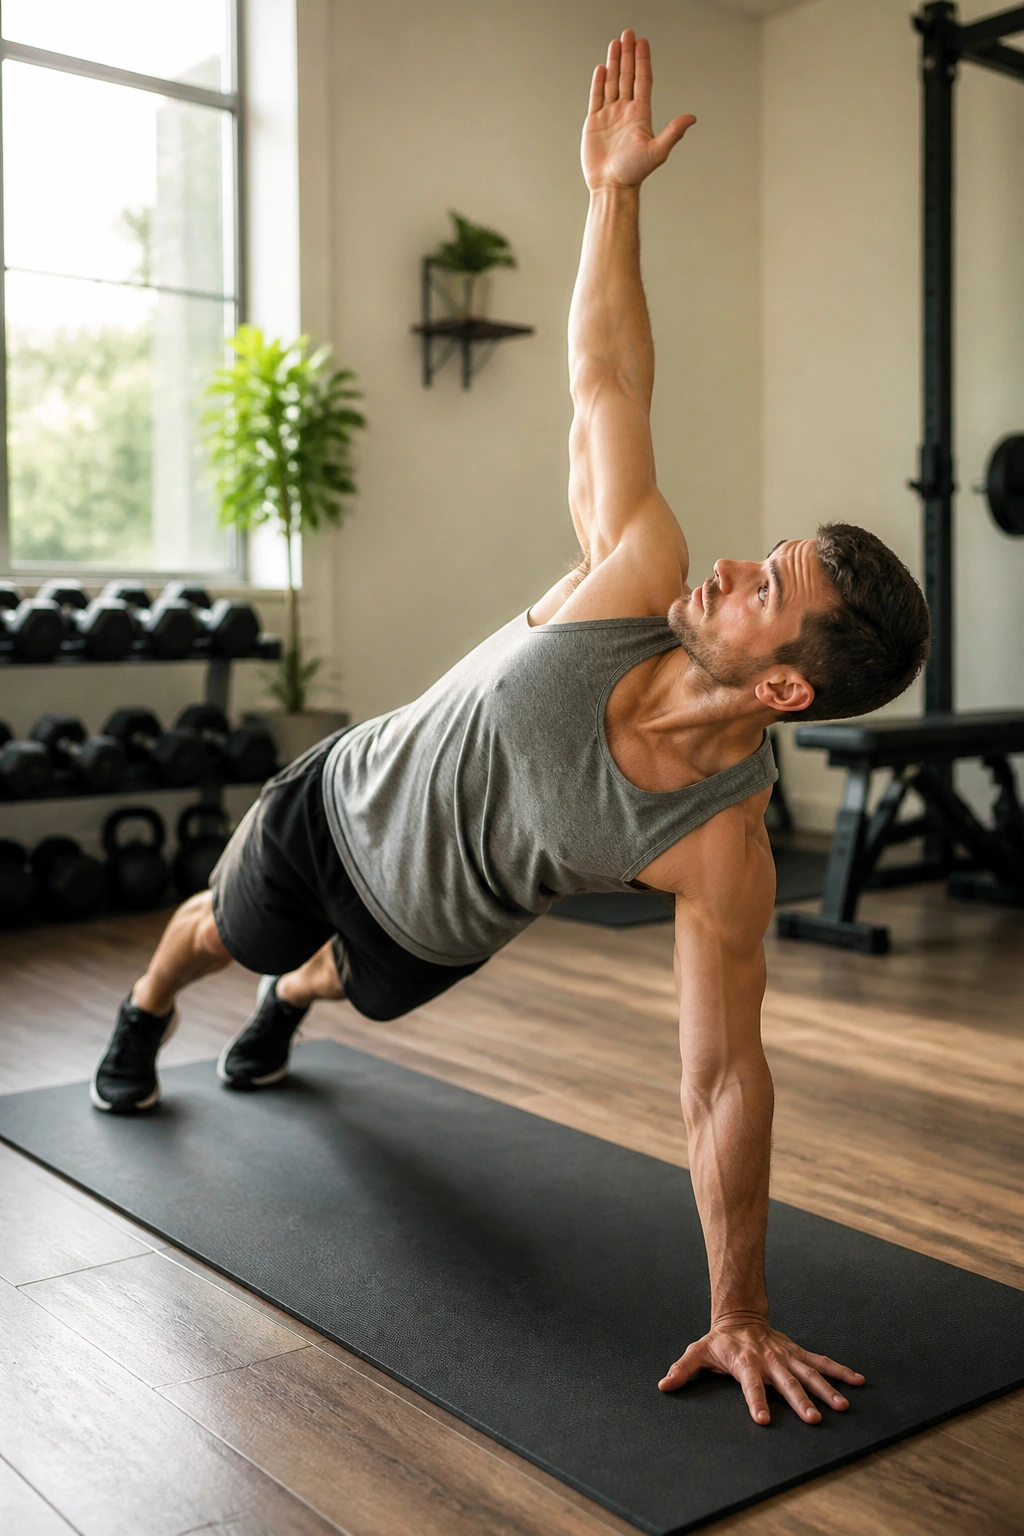
T push-ups mix pressing with rotation, which means your shoulders and core have to cooperate instead of freelancing. After the push-up, you rotate onto one hand and stack the other arm toward the ceiling, forming a rough “T” with your body.
It sounds flashy. It’s not fluff. The rotation asks the obliques, glutes, and shoulder stabilizers to keep the body from folding like a wet towel.
Why they’re worth keeping around
A regular push-up trains straight-line pressing. The T version teaches you to stay organized while turning, which is handy for athletes and for anyone whose shoulders feel better when movement is not perfectly rigid.
Keep the feet planted and slightly wider than shoulder width to make the rotation less ugly. Move slowly enough that you can actually control the side plank position at the top. If your hips drop, the rep loses most of its value.
One rep each side is enough to start. More is not always smarter here.
20. Backpack Push-Ups for Easy Home Loading
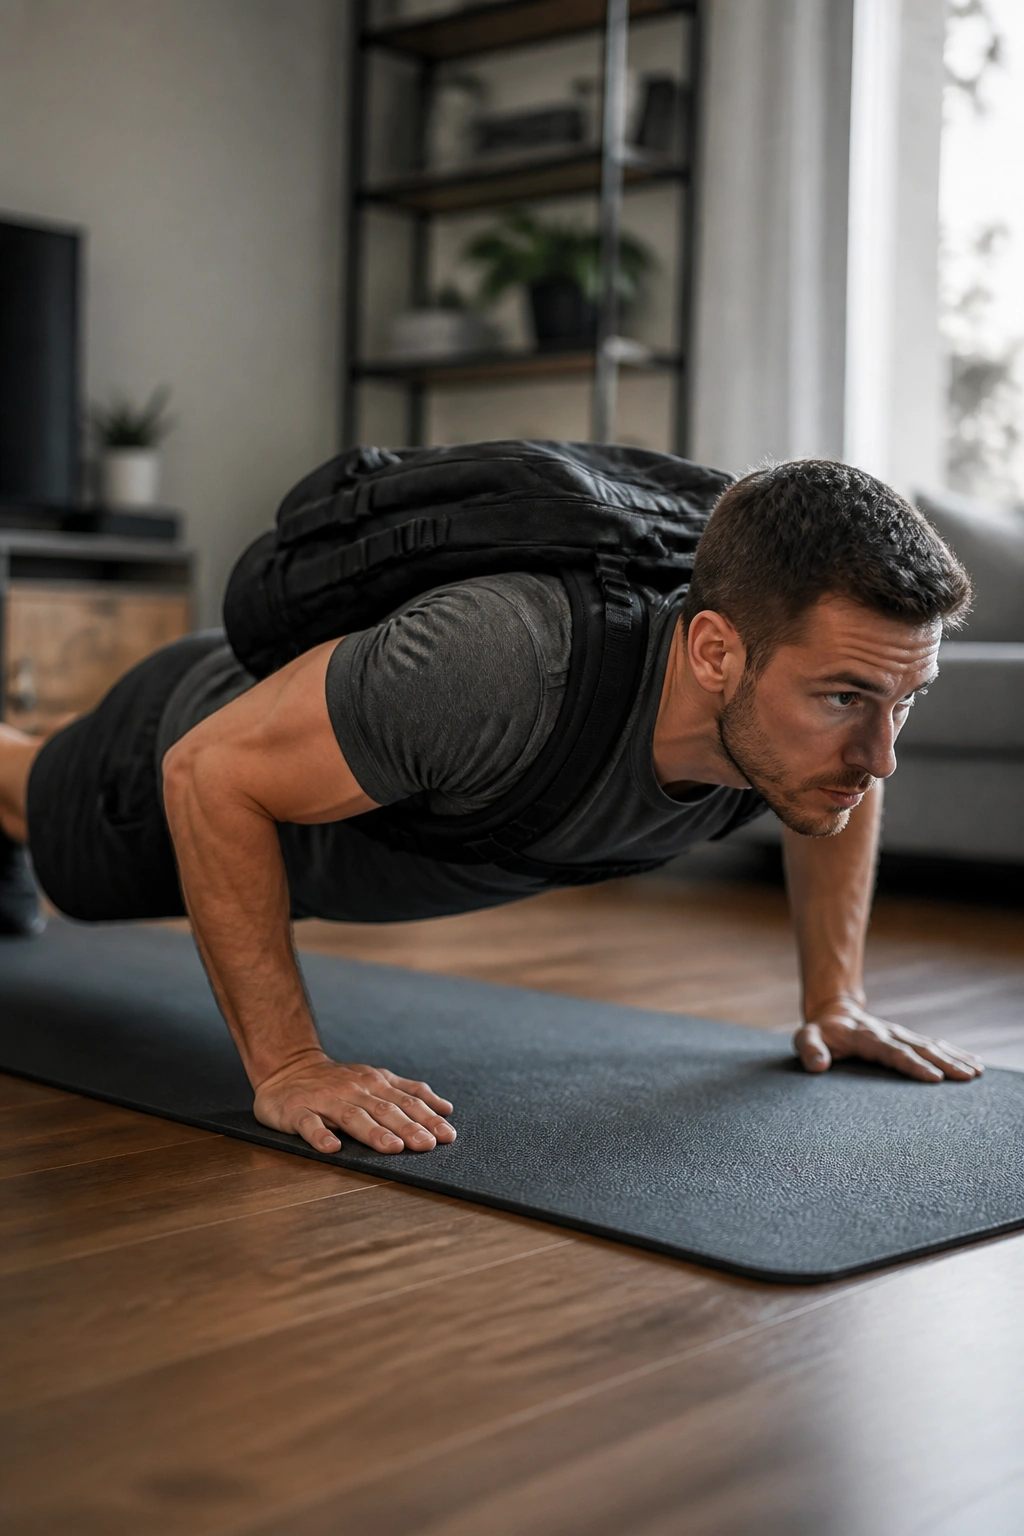
When bodyweight starts to feel too light, put a backpack on and keep going. That is the cheapest way to add load to push-up variations at home, and it works better than people expect if the bag sits tight on your upper back.
Use books, water bottles, or anything dense that won’t flop around. A loose backpack swinging side to side turns the rep into nonsense. Tight straps matter. The weight should stay glued to your torso.
How to keep the load useful
Start with 5 to 10 pounds and see how your standard push-up changes. If you can still do 12 to 15 clean reps without form breaking, add a little more weight next time. That is a cleaner progression than chasing endless reps.
- Keep the backpack centered between your shoulder blades.
- Tighten the straps so it doesn’t bounce.
- Lower under control and avoid flaring the ribs.
- Stop the set when your hips start to sag or the neck cranes forward.
This is the version I like for long-term home training, because it keeps the movement honest without getting fancy. Once you can press your own bodyweight with control, load the pattern and keep building.
