



Some days pregnancy yoga feels like a gentle reset. Other days it feels like the only thing between you and a cranky lower back is a mat, a wall, and ten quiet minutes.
That’s why pregnancy yoga flows safe for every trimester work so well when they’re built with a little common sense. You do not need dramatic backbends, deep twists, or sweaty power sequences to feel better. You need space for your ribs, support for your pelvis, and movements that don’t ask your balance to do more than it can handle.
Early pregnancy can bring nausea and fatigue. Middle pregnancy often brings more energy, but also a belly that changes your center of gravity fast. Later on, the goal shifts again: less floor time on your back, fewer balance surprises, more prop support, more patience. The best prenatal flows respect that messiness instead of pretending every body feels the same from week to week.
A good rule hangs over the whole practice: no breath-holding, no forcing, no pose that gives you a sharp pull, pressure, dizziness, or a weird heavy feeling low in the pelvis. Keep a chair, blocks, a wall, and a folded blanket nearby. You’ll use them more than you think.
1. Cat-Cow and Pelvic Tilts on Hands and Knees
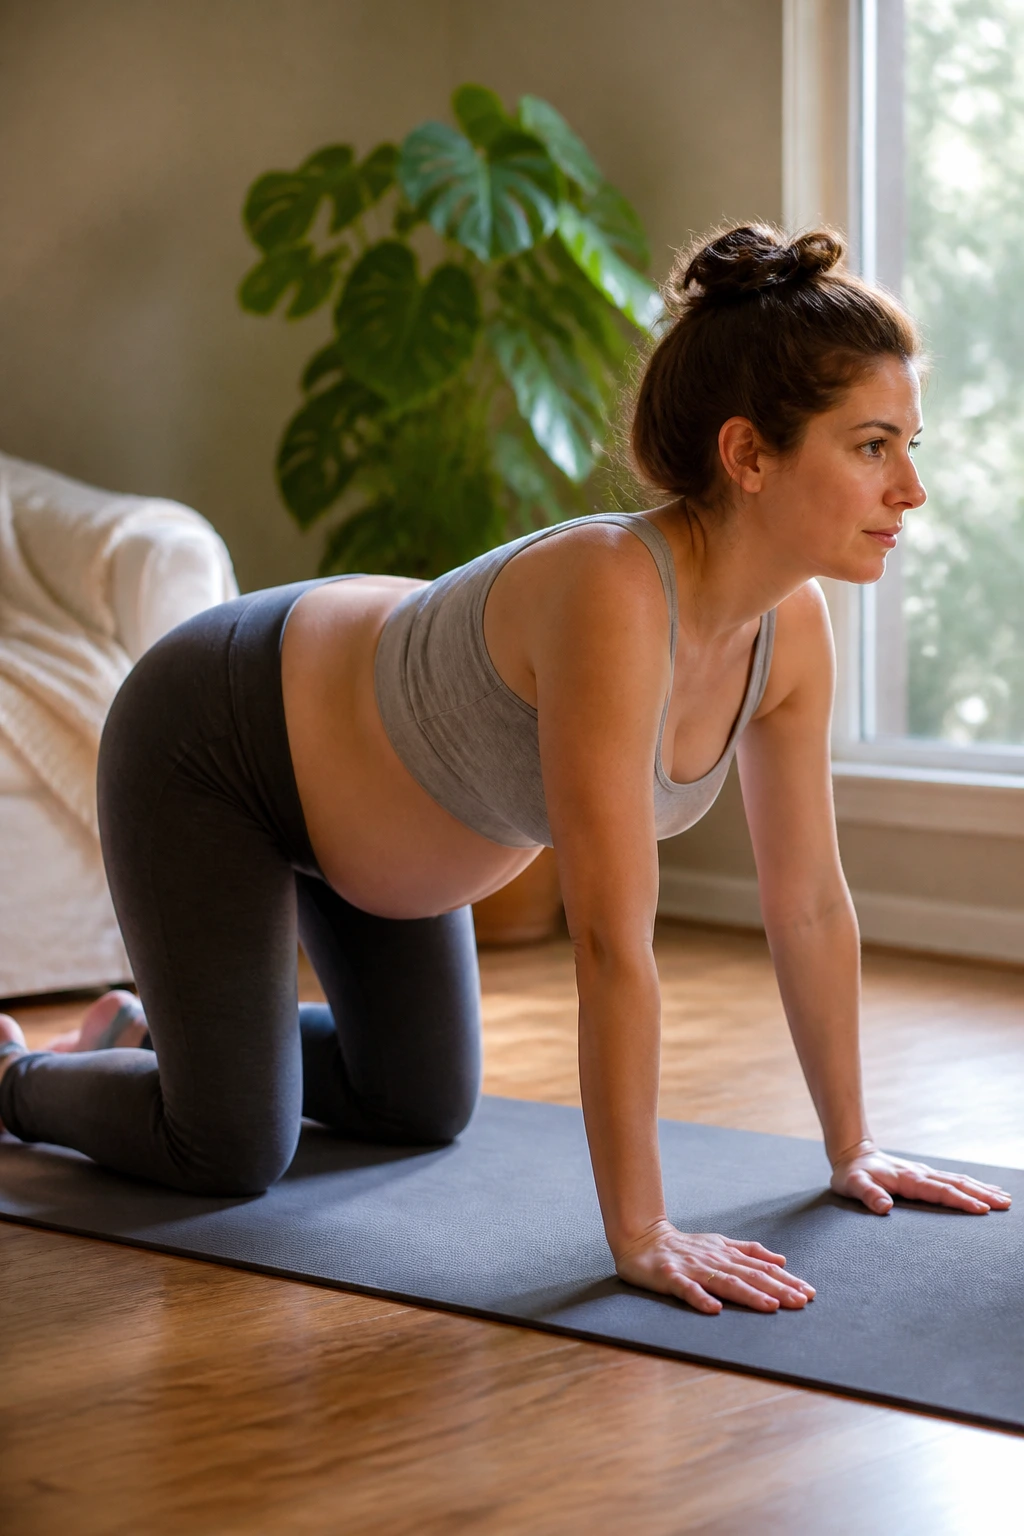
If your lower back feels like it has been carrying grocery bags all day, start here. Cat-cow is the prenatal flow I reach for first because it wakes up the spine without demanding strength or balance, and it gives your belly room to move.
Why It Works
On hands and knees, your weight spreads out instead of dumping into your hips or low back. That alone can feel like relief. The movement also helps you notice where you’re gripping — ribs, shoulders, jaw — and that matters more than it sounds.
Add pelvic tilts, and you get a cleaner connection between breath and spine. Inhale as the tailbone tips back and the chest opens. Exhale as the belly gently draws up and the spine rounds. Keep the range small. Tiny is fine. Tiny is often better.
- Start on hands and knees with wrists under shoulders and knees under hips.
- Inhale for cat pose, lifting the chest and tailbone.
- Exhale for cow pose, rounding the spine and letting the head hang.
- Repeat for 6 to 8 slow rounds.
- Then do 8 small pelvic tilts, keeping the elbows soft and the neck long.
Tip: If your wrists are sore, make fists, come down to forearms, or place your hands on yoga blocks.
2. Knees-Wide Child’s Pose with Side Reaches
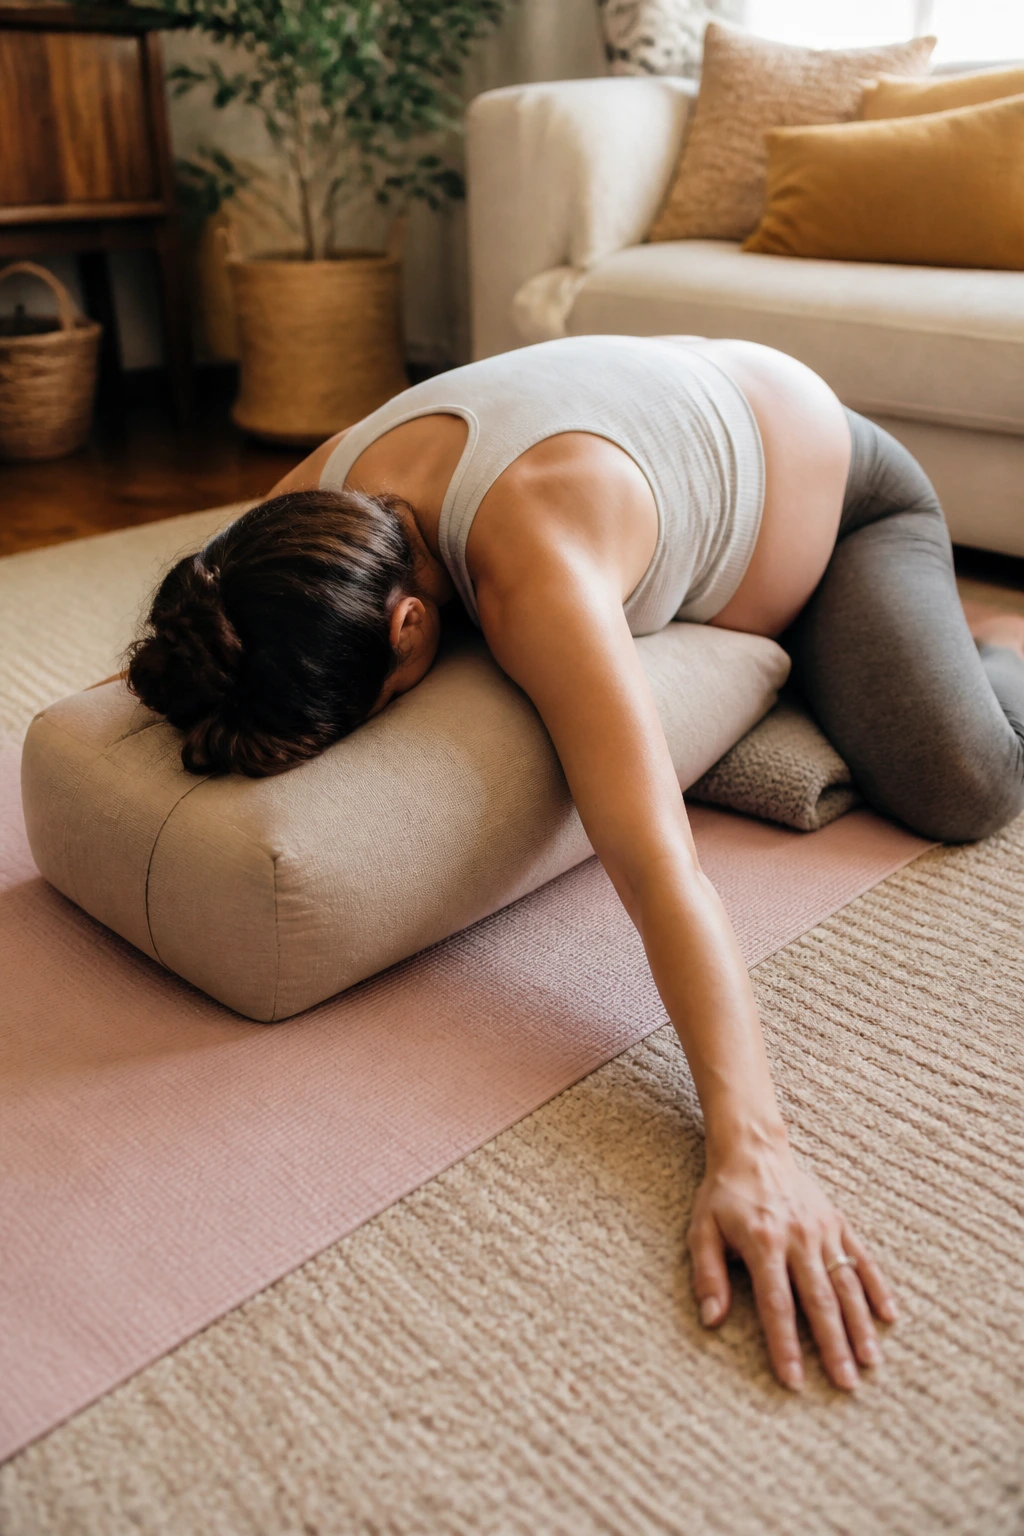
A wide-knee child’s pose fixes more than people expect. It gives the back a break, opens the outer hips, and lets the ribs expand on both sides, which can feel wonderful when breathing gets a little more effortful.
The trick is padding. A folded blanket under the knees and a bolster under the chest can turn this from “ugh” into “ahh” fast. If your belly is already making the floor feel too close, stack pillows until you can rest without strain. There’s no prize for getting lower.
Reach both arms forward for a few breaths, then walk the hands to the right and breathe into the left side body. Come back through center. Switch sides. Those side reaches are small, but they do a lot for the muscles between the ribs, which get tight when posture starts changing.
One sentence is enough here: nothing about this pose should feel cramped.
3. Standing Side-Body Openers at the Wall
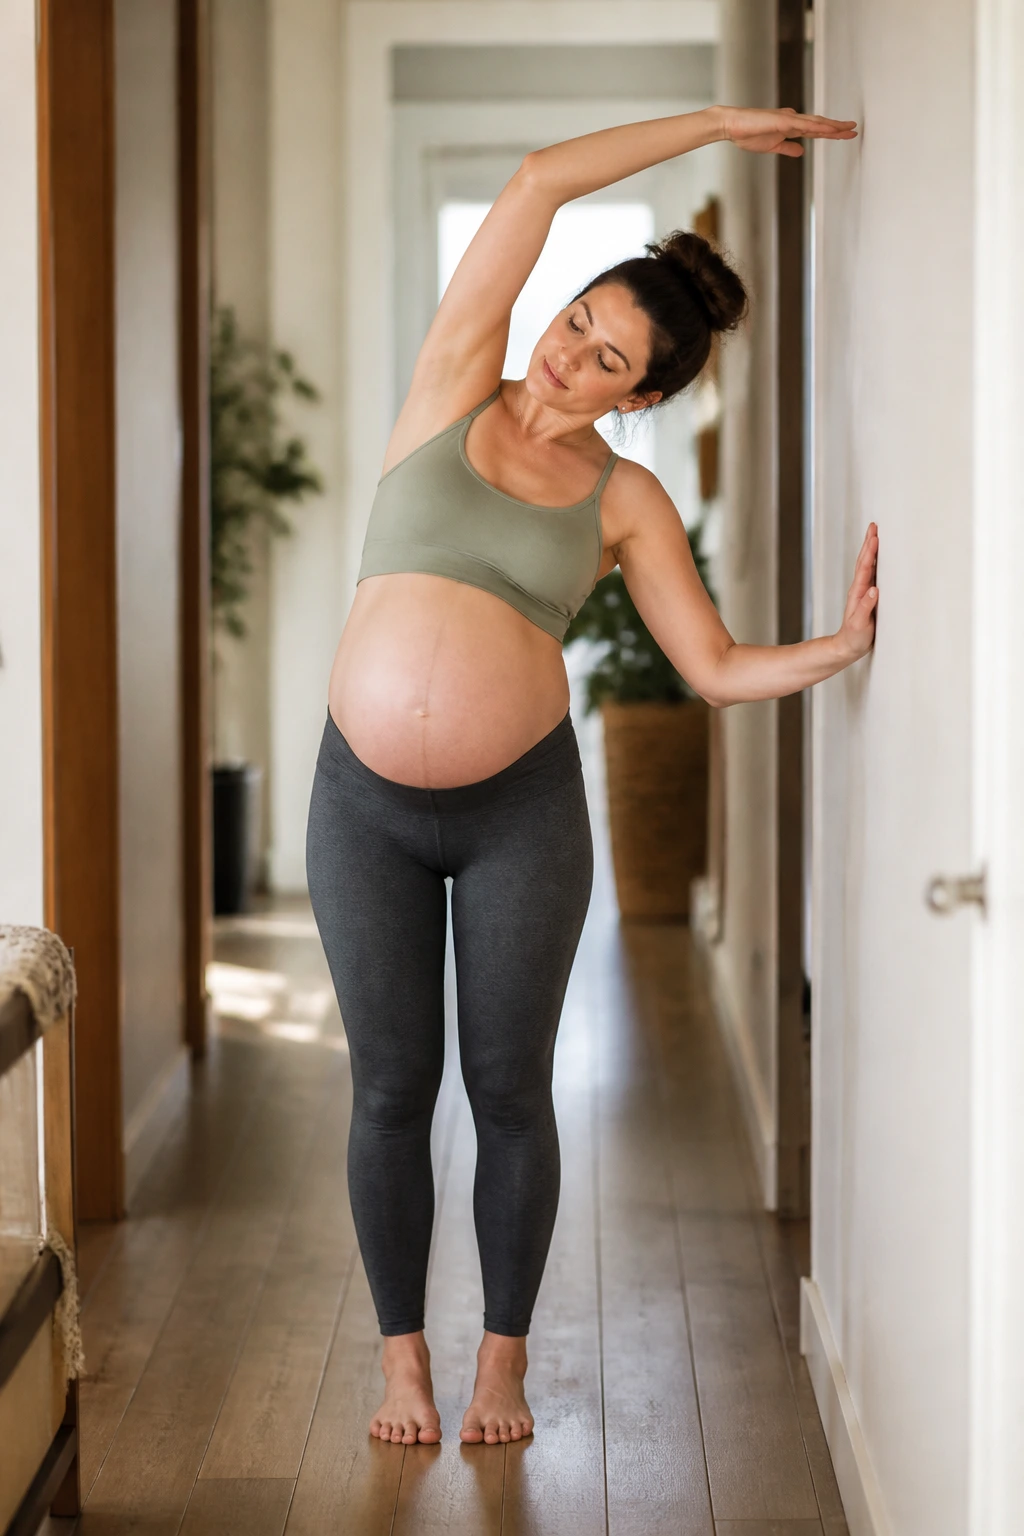
Why do wall-based side stretches feel so good when everything else feels compressed? Because they give you room without making you work for it. This is one of the safest ways to open the ribs in every trimester, especially on days when lying on the floor sounds like too much trouble.
How to Use It
Stand with your left side near a wall. Keep your left hand lightly on the wall for balance, let the right arm float overhead, and arc the torso a few inches to the left. Do not collapse forward. Think long, not deep. Breathe into the right ribs for three to five slow breaths, then switch sides.
If one arm overhead feels pinchy in the shoulder, keep that hand on the hip and just lengthen the side waist. That still counts. You’re after space, not shape.
- Hold each side for 3 to 5 breaths.
- Keep both feet planted.
- Let the hips stay level.
- Move the arm only as far as the shoulder allows.
- Use the wall to steady yourself, not to lean hard into it.
How to get the most from it: Exhale into the stretch, then come out slowly and feel where the side body opens without forcing. That feedback matters more than range.
4. Wall-Supported Low Lunge Hip Flow
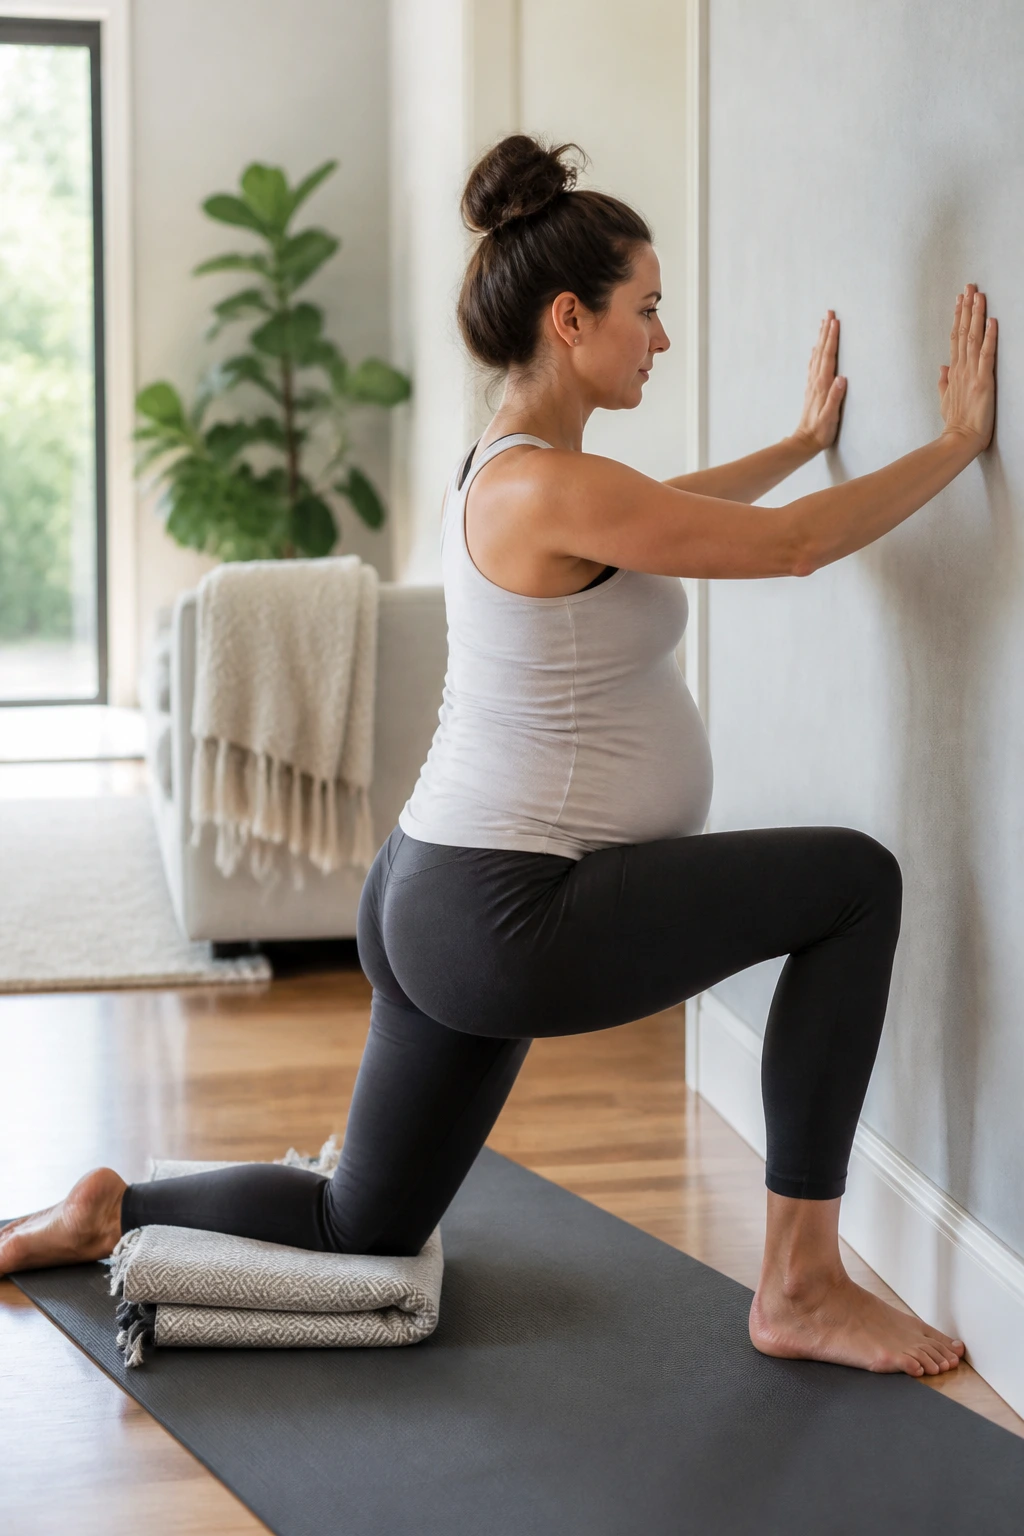
The person who says, “My hips feel stuck,” usually needs something like this. A low lunge with wall support is a quiet hip opener, not a dramatic stretch, and that is exactly why it works so well during pregnancy.
Set a folded blanket under the back knee and place both hands on the wall or on blocks. Step one foot forward into a short lunge. Keep the front knee bent but not jammed forward, and let the pelvis tip just a little until you feel the front of the back thigh wake up. Breathe there. Then rock back an inch and forward an inch, slowly, for 4 to 6 rounds.
- Use a short stance so you can keep your balance.
- Keep the front foot flat.
- Pad the back knee well.
- Hold for 4 to 5 breaths before switching sides.
- Stop if you feel pinching in the front of the pelvis.
Some people like to add a gentle arm sweep overhead on the inhale. Fine, if it feels smooth. Skip it if it makes you wobble. The benefit comes from the steady opening in the hip flexors, not from how fancy the shape looks.
5. Warrior II with Short Stance and Slow Arm Sweeps
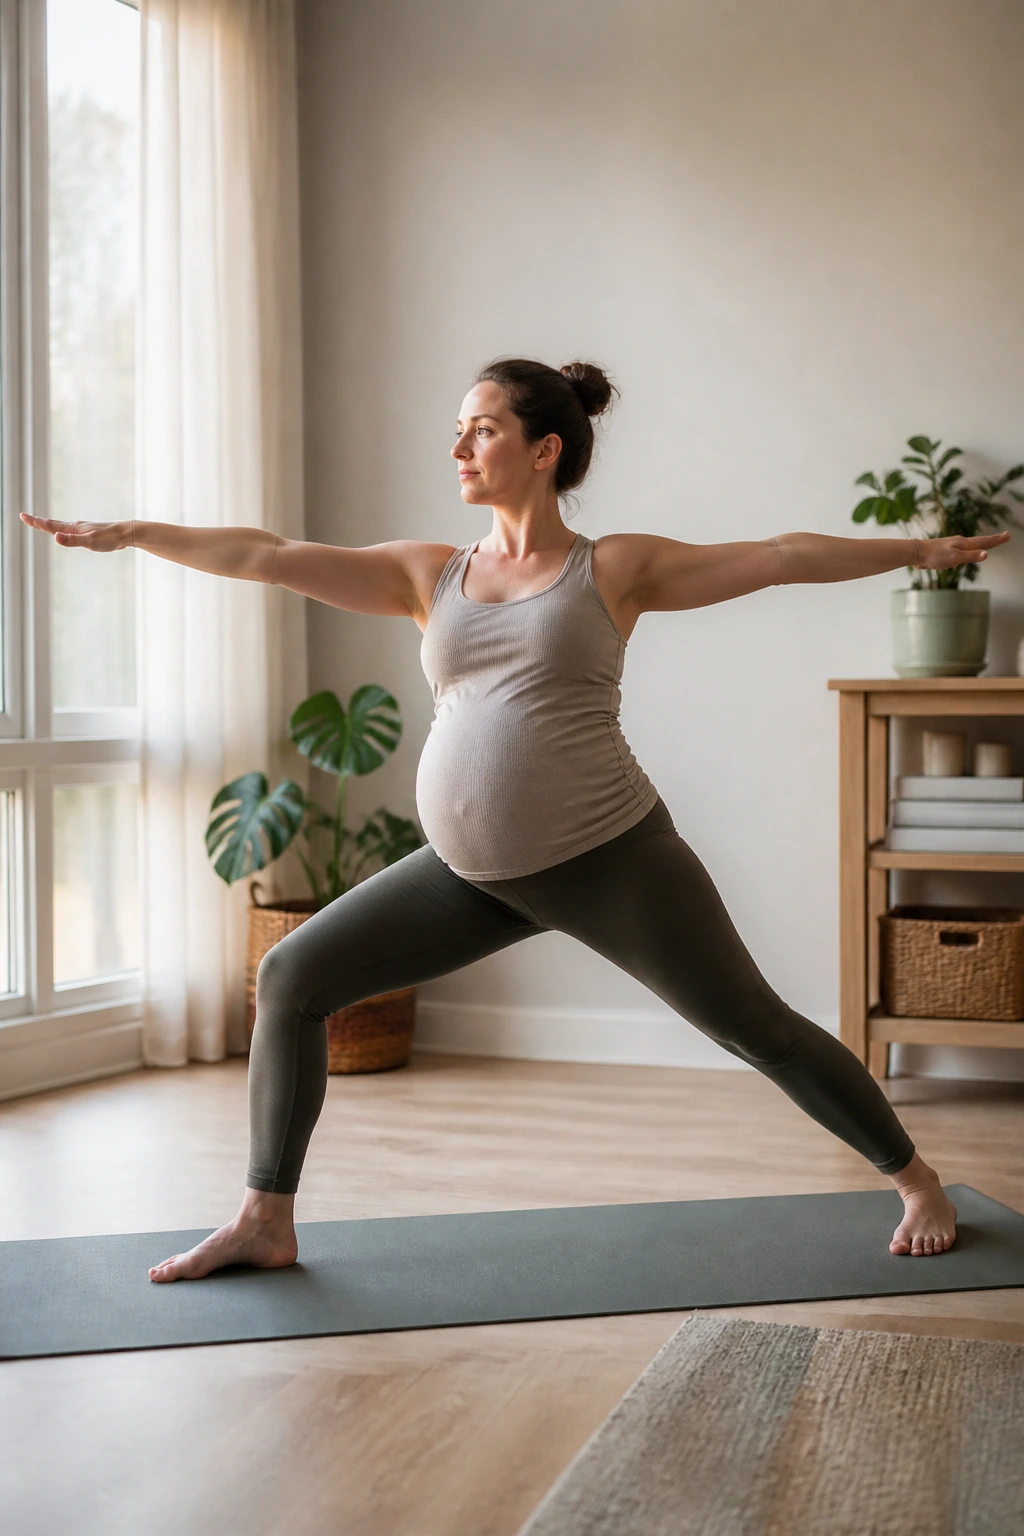
Warrior II gets better when it gets smaller. A long stance can make balance feel theatrical in a way pregnancy does not need. The short-stance version is calmer, kinder on the pelvis, and far easier to hold with a growing belly.
Stand with your feet a little wider than hip width, turn the front toes out slightly, and angle the back foot in just enough to feel grounded. Bend the front knee only as far as you can keep it stacked over the ankle. Arms come out to the sides, but not stiffly. Let the shoulders drop away from the ears. Then breathe.
I like to use slow arm sweeps here: hands open wide on the inhale, then draw back to the starting line on the exhale. That little rhythm keeps the pose from turning rigid. It also reminds you not to clench your jaw, which happens more often than people admit.
If your balance is off, keep the back heel a little closer to the wall. If your belly feels pulled, shorten the stance another inch. Warrior II should feel strong, not strained.
6. Goddess Squat with Heel Lifts
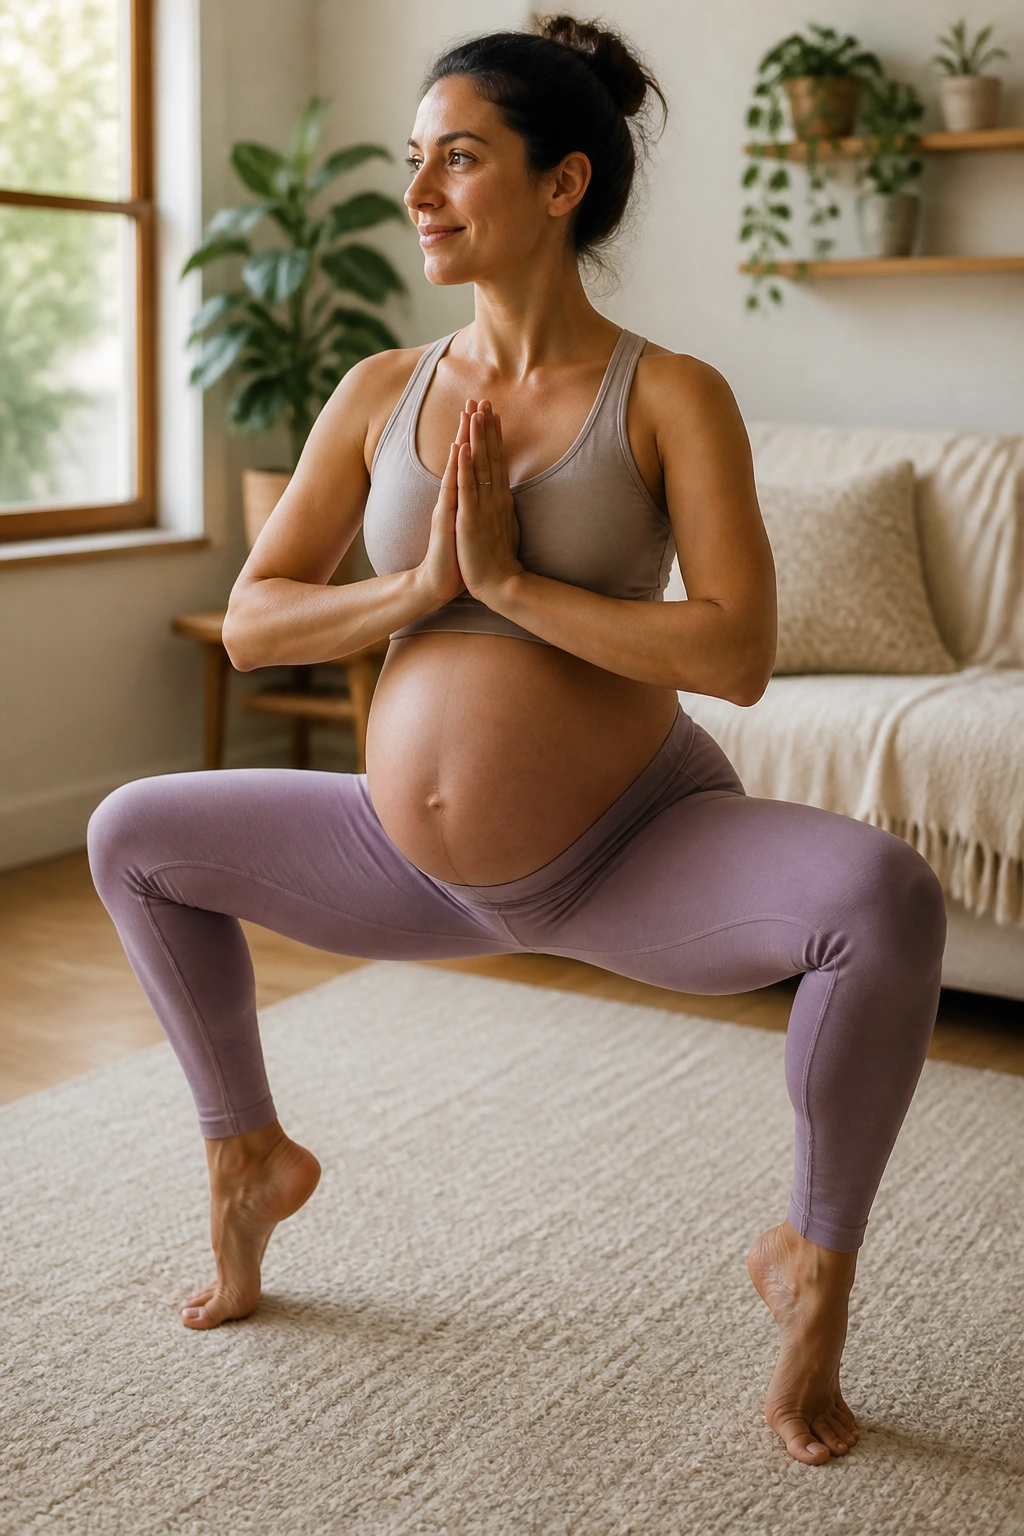
Unlike a deep squat, goddess pose lets you stay upright and spacious. That matters. The wide stance opens the inner thighs without dumping pressure into the belly, and the heel lifts add a small dose of calf and ankle work that feels surprisingly useful when your feet are tired.
Set your feet wide, toes turned out about 30 to 45 degrees, and bend the knees only as much as you can while keeping the chest lifted. Think of sitting into a tall stool, not sinking into a hole. Once you find the shape, inhale to lengthen the spine and exhale to press lightly through the feet.
A few slow heel lifts can wake up the calves and improve your sense of grounding. Do 6 to 10 lifts, then pause and notice how the legs feel. If your knees are sensitive, reduce the bend and keep the movement tiny. That is not failure. That is smart.
What makes it kinder on the knees: the feet stay wide, the torso stays upright, and you get to control the depth every single time.
7. Bird Dog Flow for a Quiet Core
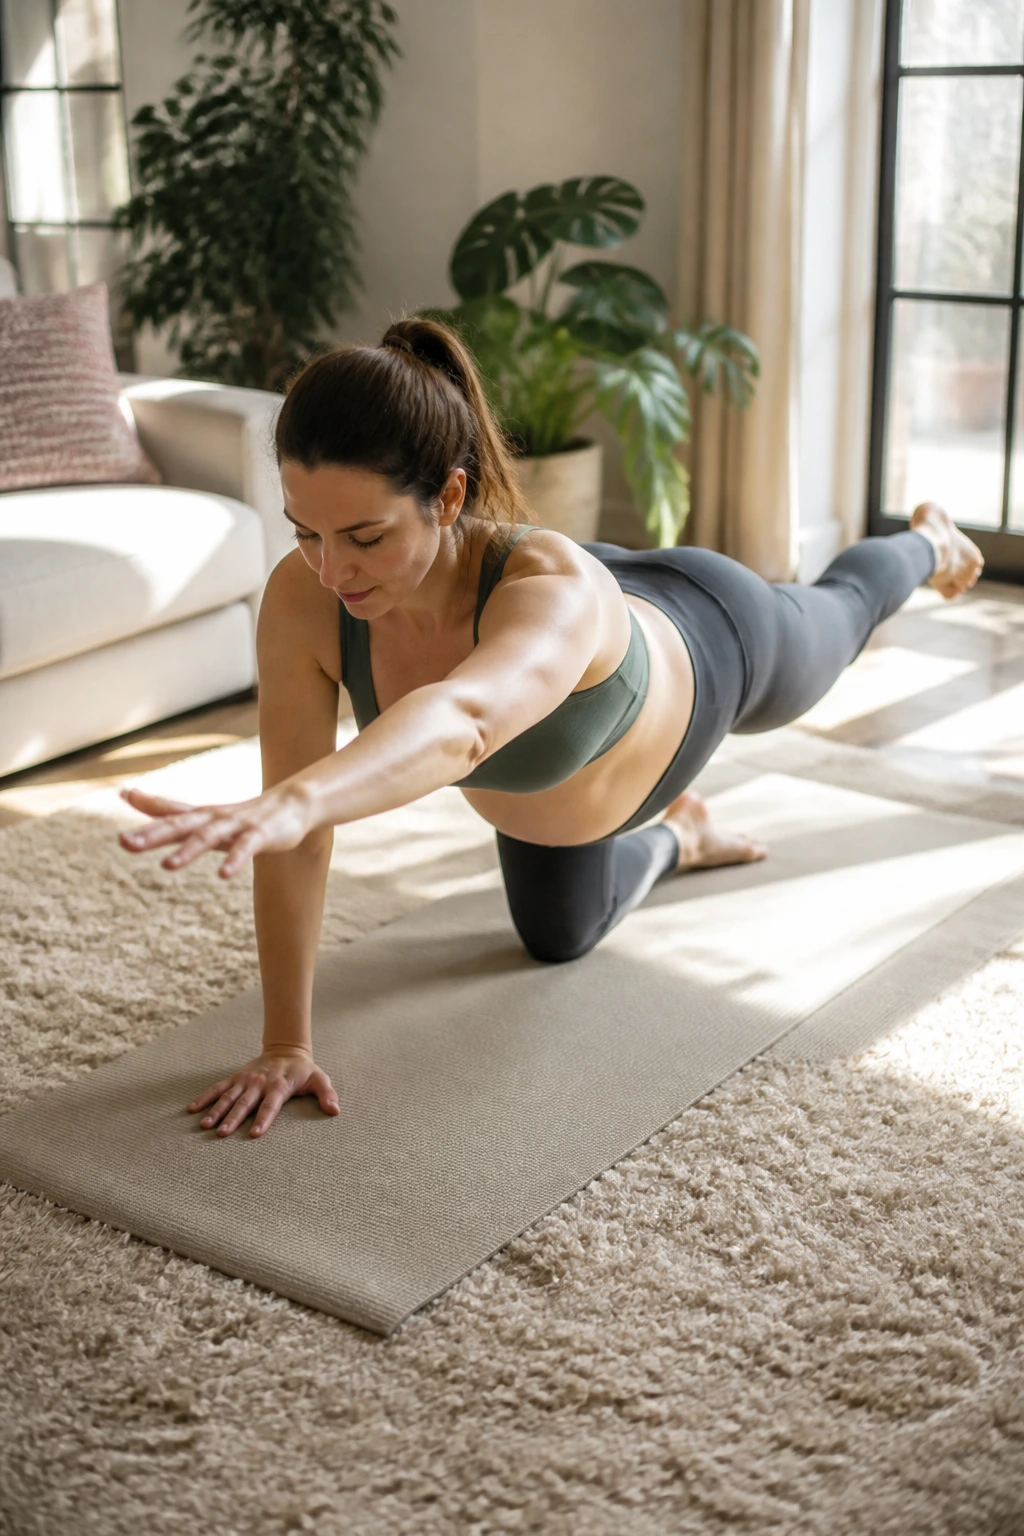
When your core starts to feel disconnected, bird dog is a clean way to rebuild that connection without crunches or fast transitions. The movement is slow enough to stay controlled, but active enough to wake up the deep stabilizers along your back and belly.
How to Keep It Steady
Come onto hands and knees, then check your setup. Hands under shoulders. Knees under hips. If the floor feels hard, slide a blanket under them. Reach one leg back only as far as you can keep the pelvis level, then add the opposite arm if that still feels steady. A breath in to prepare, a breath out to reach, a breath in to hold, and a breath out to return.
- Do 4 to 6 reps per side.
- Keep the hips square.
- Reach long, not high.
- Move slowly enough that you could stop at any second.
- Skip the arm reach if that makes the ribs flare.
One small cue matters a lot: exhale before you extend. That simple timing helps the belly stay supported without bracing hard.
8. Seated Figure-Four and Hip Circles
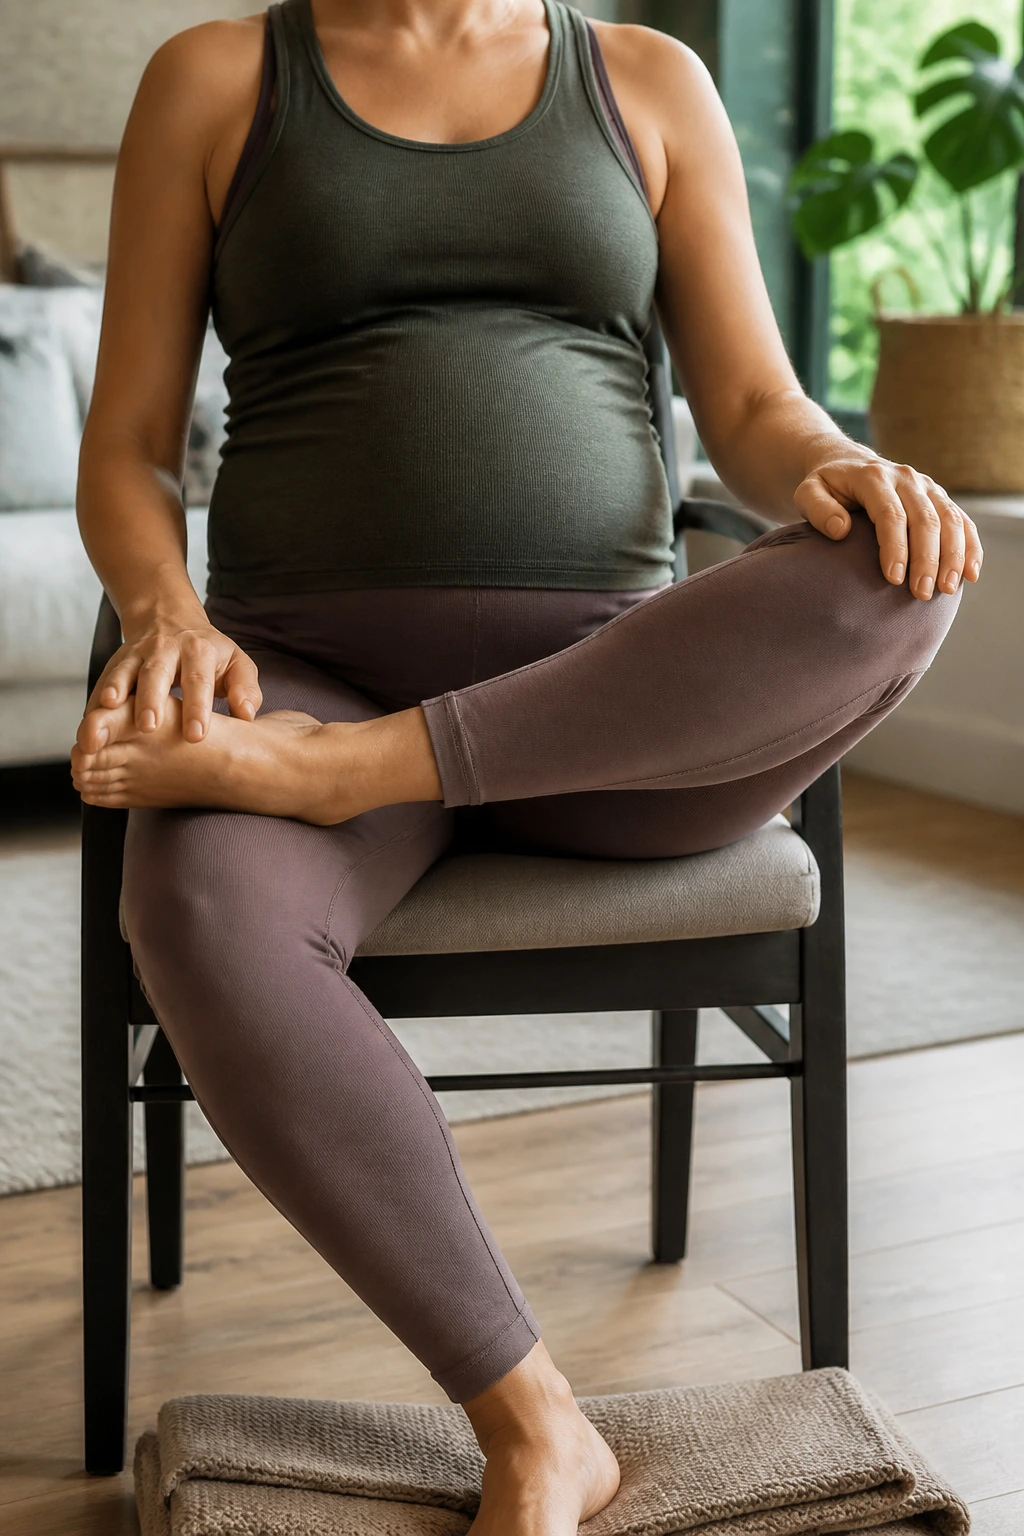
You do not need a huge stretch to get real relief in the hips. Sometimes a small seated sequence does more than a dramatic one because it lets the joint settle instead of fighting back.
Sit on a folded blanket or the edge of a sturdy chair. Cross one ankle over the opposite thigh only if it feels easy; if it doesn’t, keep both feet flat and make gentle circles with the knees instead. Let the spine stay tall, then shift your weight a few inches side to side. After that, circle the hips slowly, making each circle no bigger than a dinner plate.
Tiny circles count.
If the figure-four shape irritates the knees, stop using it. Try a seated ankle-over-ankle stance instead, or keep the foot on the floor and just work the hip circles. For some bodies, especially if the pelvic joints are grumpy, less range is the smarter choice.
I like this flow on days when the hips feel heavy but not exactly painful. It’s soft, but it doesn’t feel lazy. That distinction matters.
9. Chair Yoga Forward Fold and Shoulder Roll Sequence
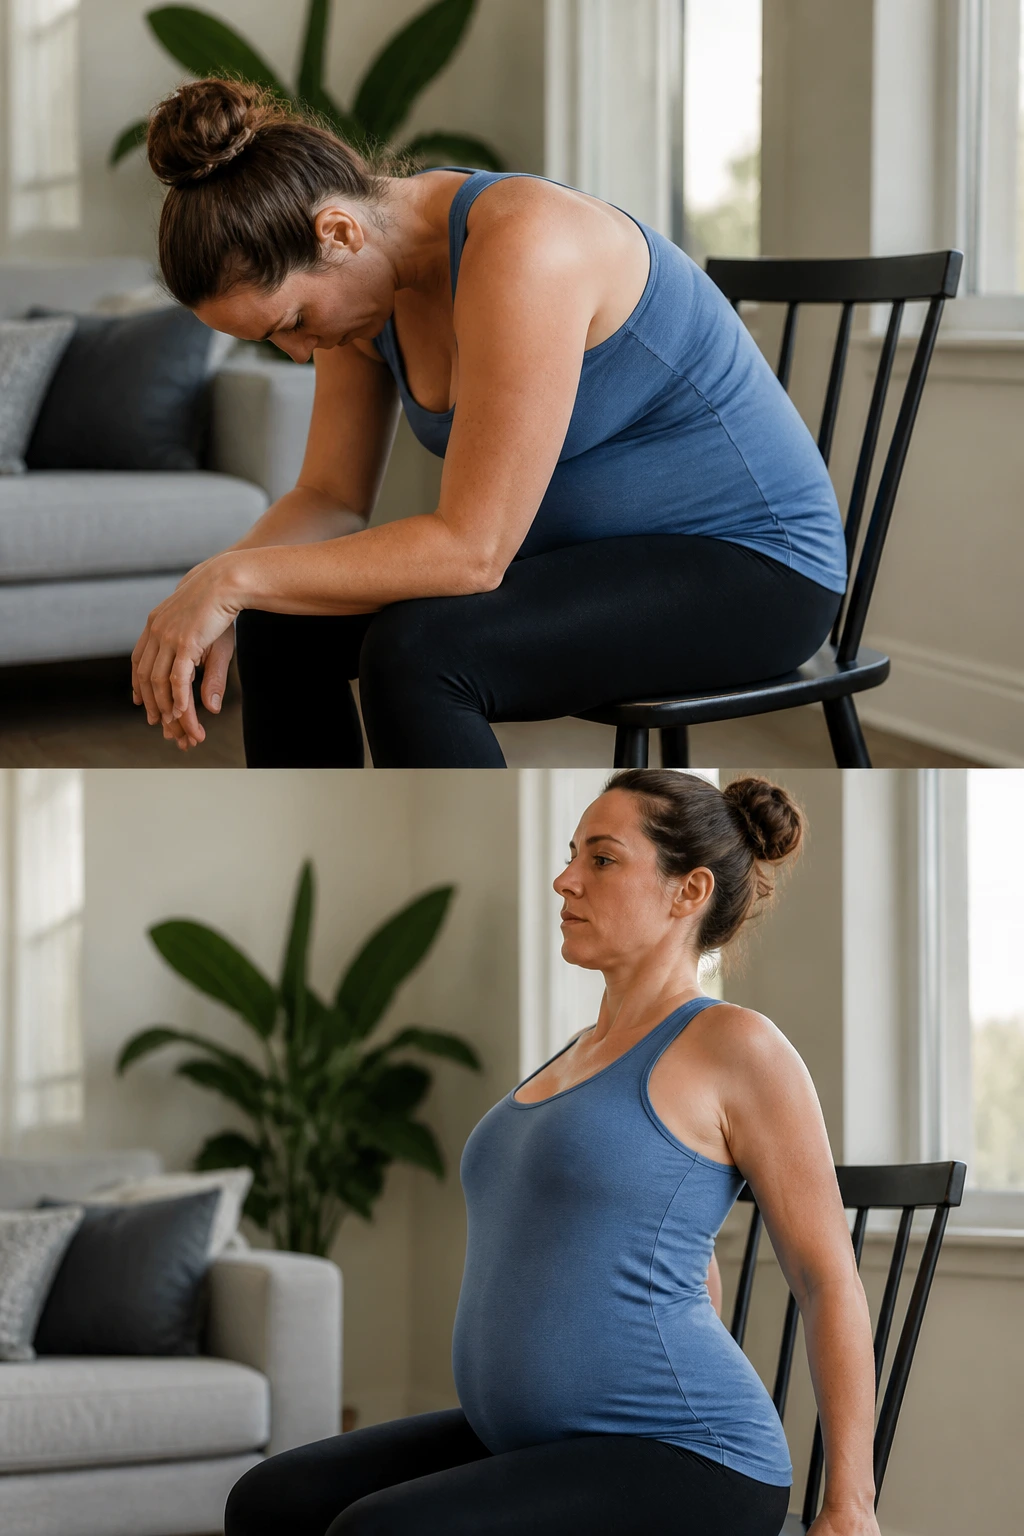
What if you are tired, nauseated, or stuck in a waiting room and still want to move? Chair yoga gives you a whole little flow without needing floor space, and that alone makes it worth keeping around.
How to Use It
Sit near the front edge of a chair with both feet flat. Inhale to lengthen the spine. Exhale and hinge forward from the hips until your forearms can rest on your thighs, or until your chest can settle onto a pillow on a table if you have one nearby. Then come back to upright and roll the shoulders backward 6 to 8 times.
- Keep the feet rooted.
- Let the belly stay soft.
- Move slowly through 3 to 5 rounds.
- Add ankle pumps if your feet are swollen.
- Keep the neck free; do not let the chin jam down.
This sequence works because it gives your upper back a break while keeping the body supported. It is also one of the easiest prenatal yoga flows to repeat during the day. No mat required. No elaborate setup. Just a chair and a few breaths.
10. Supported Crescent Lunge with Hands on Blocks
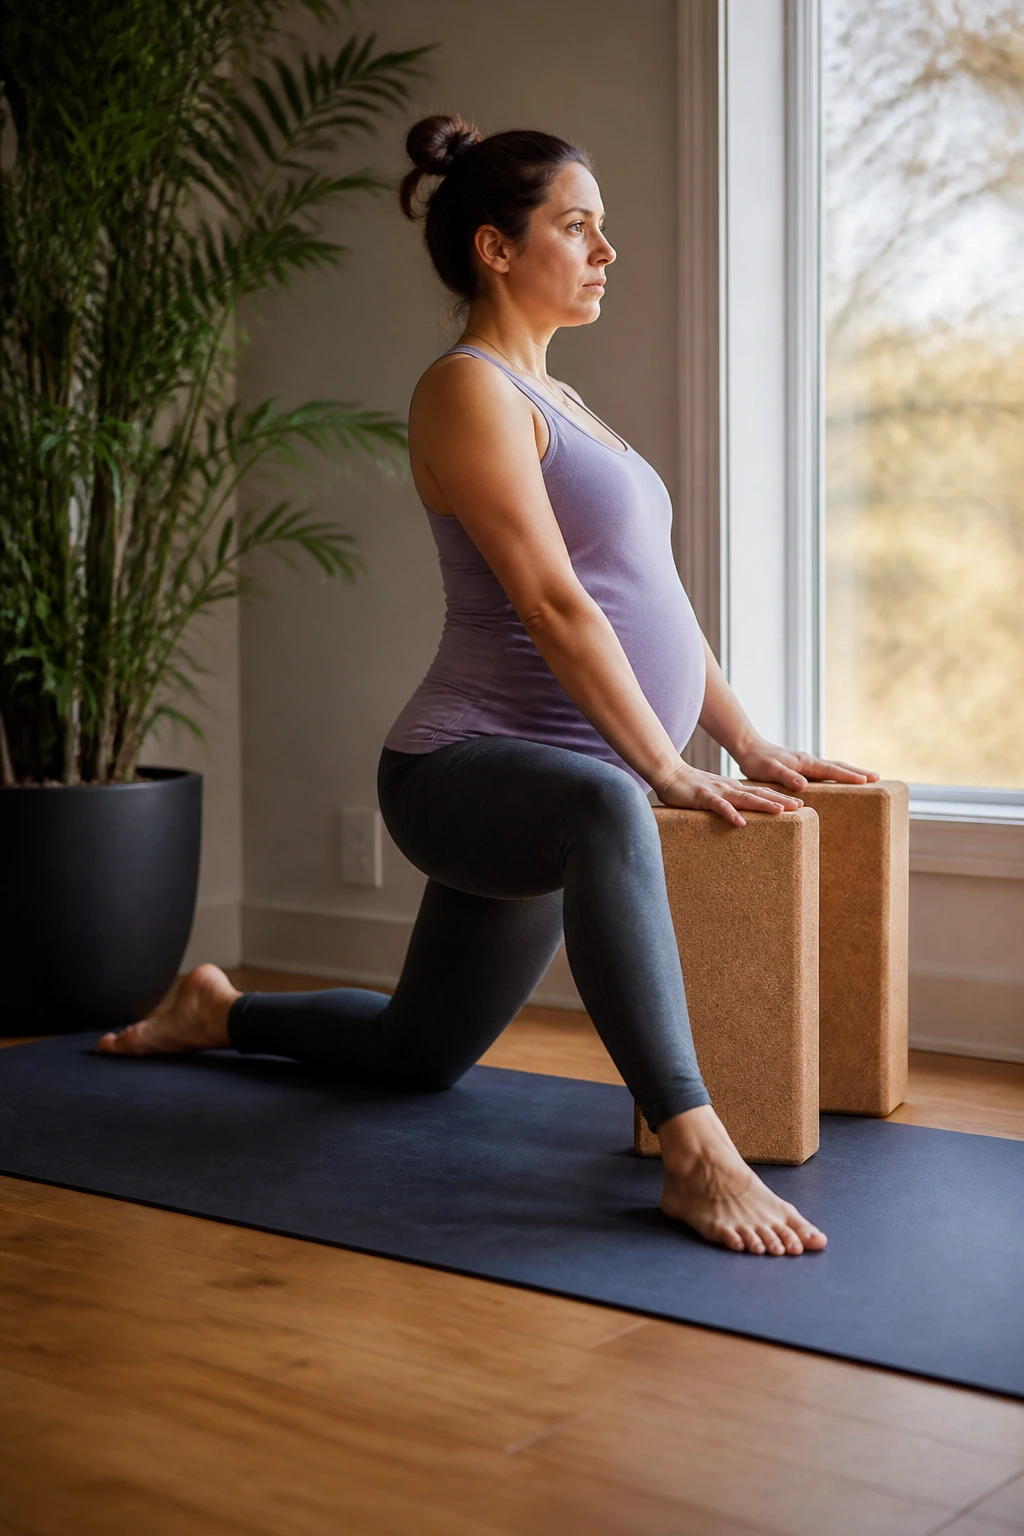
Picture the stretch you do after sitting too long, then make it steadier and kinder on the hips. That is the vibe of a supported crescent lunge, and it’s a smart one for building leg strength without creating a circus act on the mat.
Set both hands on blocks at their highest setting. Step one foot forward and one back, but keep the stance short enough that you can breathe comfortably. Lift the back heel only if that feels smooth; if not, keep it down and treat it like a low lunge. The point is space through the front of the hip and a little heat in the legs, not a huge range.
- Hold for 3 to 5 breaths per side.
- Keep the front knee tracking over the ankle.
- Stay upright through the chest.
- Use the blocks so the shoulders don’t collapse.
- Switch sides before the standing leg shakes too hard.
If you feel any pulling low in the pelvis, widen the stance or swap to a wall-supported lunge instead. That one change often makes the pose much happier.
11. Side-Lying Leg Lift Series for Glutes and Outer Hips
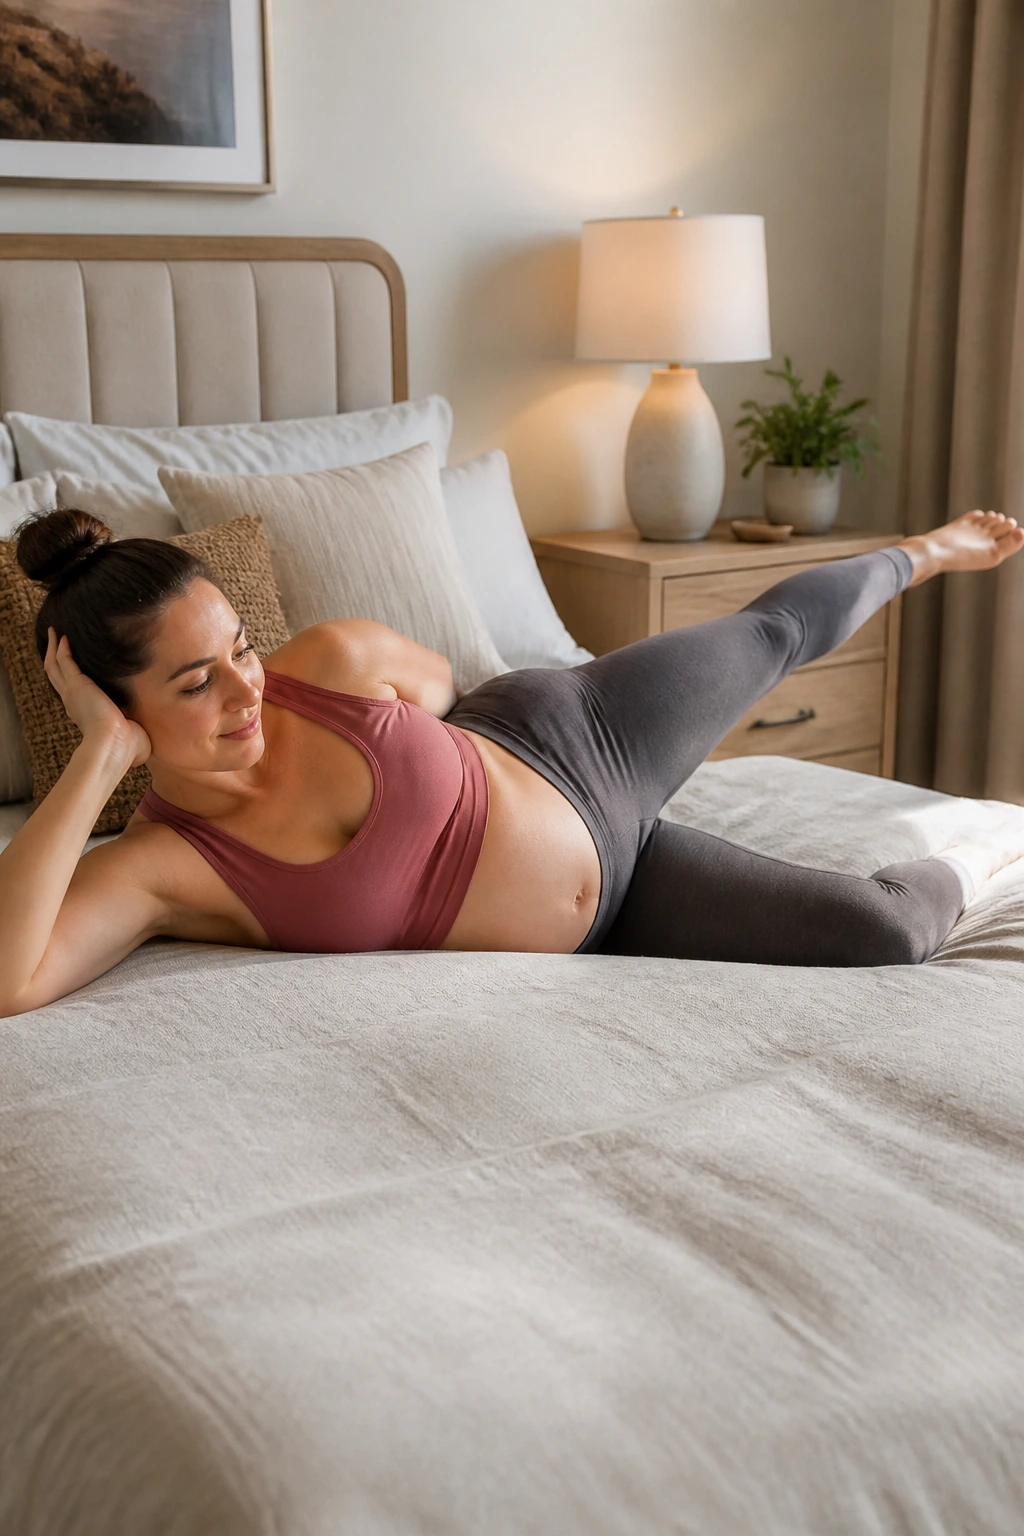
Side-lying work does something a lot of standing poses cannot do: it lets your body unload while the glutes still do honest work. That makes it a useful prenatal strength sequence, especially when balance feels off or your back wants a break from standing.
Lie on your left side with a pillow under your head and another between your knees if needed. Keep the bottom leg bent or straight, whichever helps your pelvis settle. The top leg can lift 8 to 12 inches on the inhale, then lower slowly on the exhale. Add small circles after a few lifts if the outer hip likes them.
A lot of people overdo this part. Don’t. Small, clean lifts beat big wobbly ones because they actually recruit the side glute instead of letting momentum do the work.
If lying on one side creates pressure in the hip, stack another blanket under your waist. If the top hip rolls backward, bring the chest a little more forward. Those tiny adjustments make the difference between useful work and random flopping around.
12. Wall Angels and Chest Openers Against a Wall
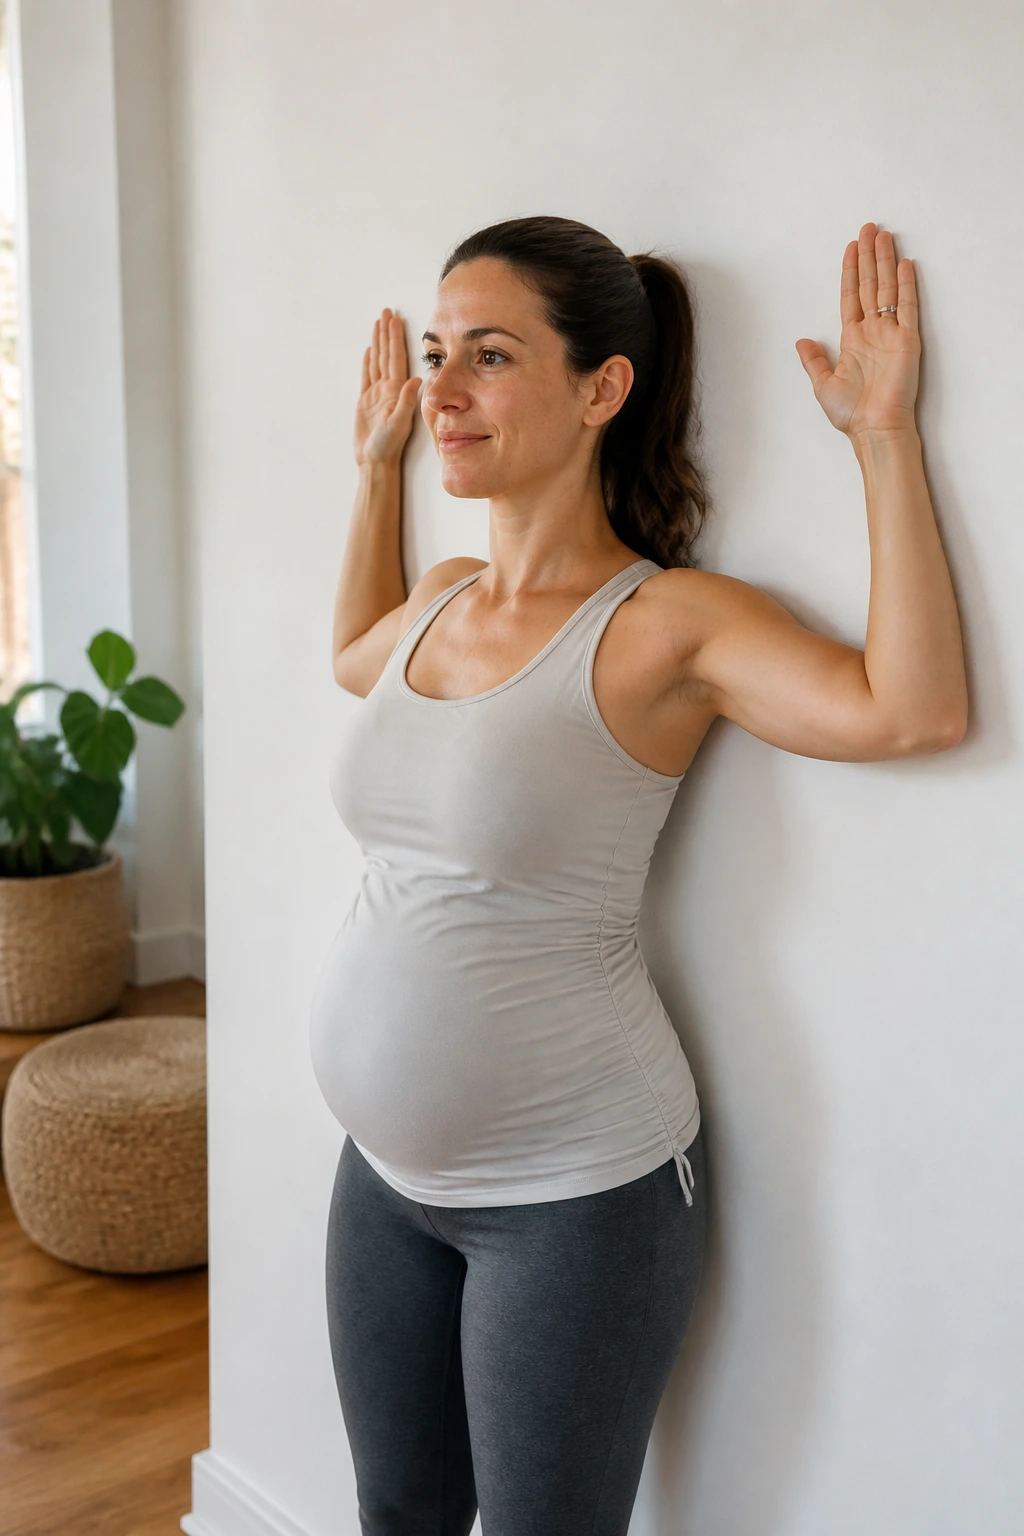
Unlike a deep backbend, wall work opens the chest without asking the lower back to do all the heavy lifting. That is why wall angels are such a good prenatal posture reset when your shoulders round forward and your upper back starts to feel glued together.
Stand with your back near a wall, feet a few inches out from it so you can keep the ribs calm. Bring the arms into a cactus shape, elbows bent, then slide the backs of the hands up and down the wall if that range feels easy. If not, keep the movement smaller and lower. The goal is to feel the shoulder blades glide, not to pin everything flat.
A short version works fine: 6 slow reps, pause, then 6 more. On the last rep, let the hands float away from the wall and notice whether the chest feels more open.
What to watch for: if the low back arches hard or the ribs pop forward, reduce the range. The wall is there to give you feedback, not to force you into a shape.
13. Modified Sun Salutation A Without the Rush
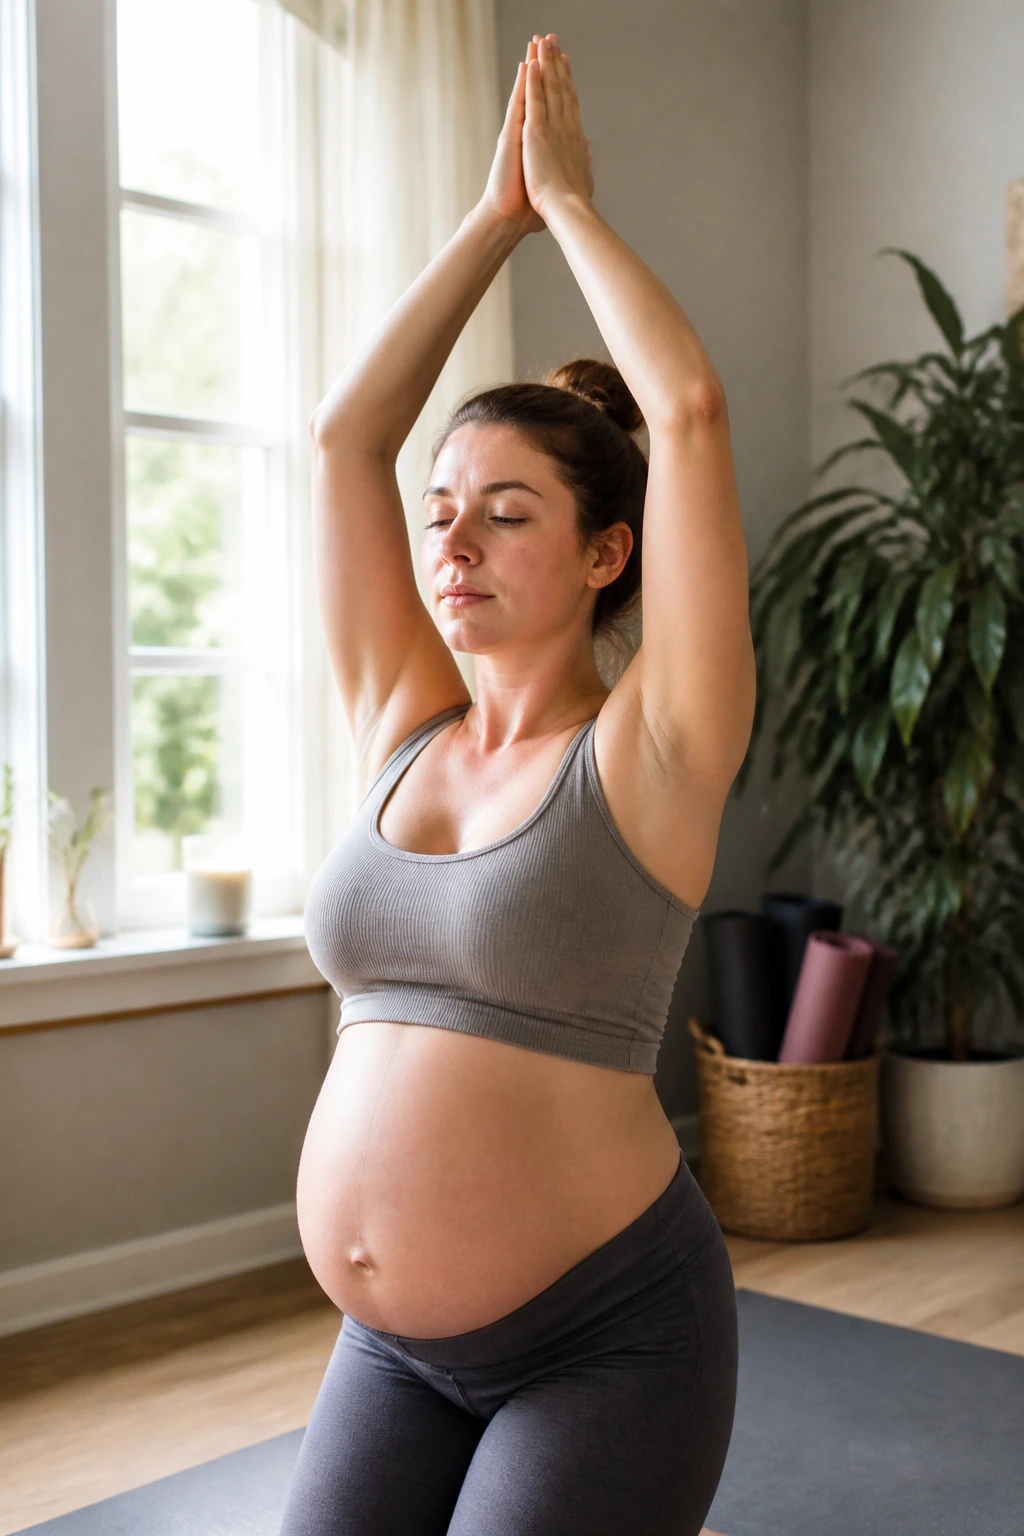
Five slow rounds can wake up the whole body without leaving you breathless. This prenatal version of Sun Salutation A keeps the shape of the flow but removes the parts that get sloppy fast — no jumping, no rushing, no long stay on the floor.
Start in mountain pose. Inhale the arms up. Exhale the hands to the thighs and hinge forward only as far as your belly and hamstrings allow. Inhale halfway up with hands on shins or blocks. Exhale step one foot back into a short lunge. Bring the back knee down if that feels better. Inhale return to standing. Repeat on the other side.
Best Edits If You Get Tired
- Keep the hands on blocks the whole time.
- Swap the forward fold for a hands-on-thighs half fold.
- Replace any plank with a wall push or skip it.
- Move through 3 rounds on a rough day, 5 rounds on a stronger one.
- Step, don’t hop.
The best part is the rhythm. It gives structure without pressure. And because you stay out of long floor holds, it remains workable across trimesters with the usual pregnancy modifications.
14. Wide-Knee Kneeling Flow for Back Relief
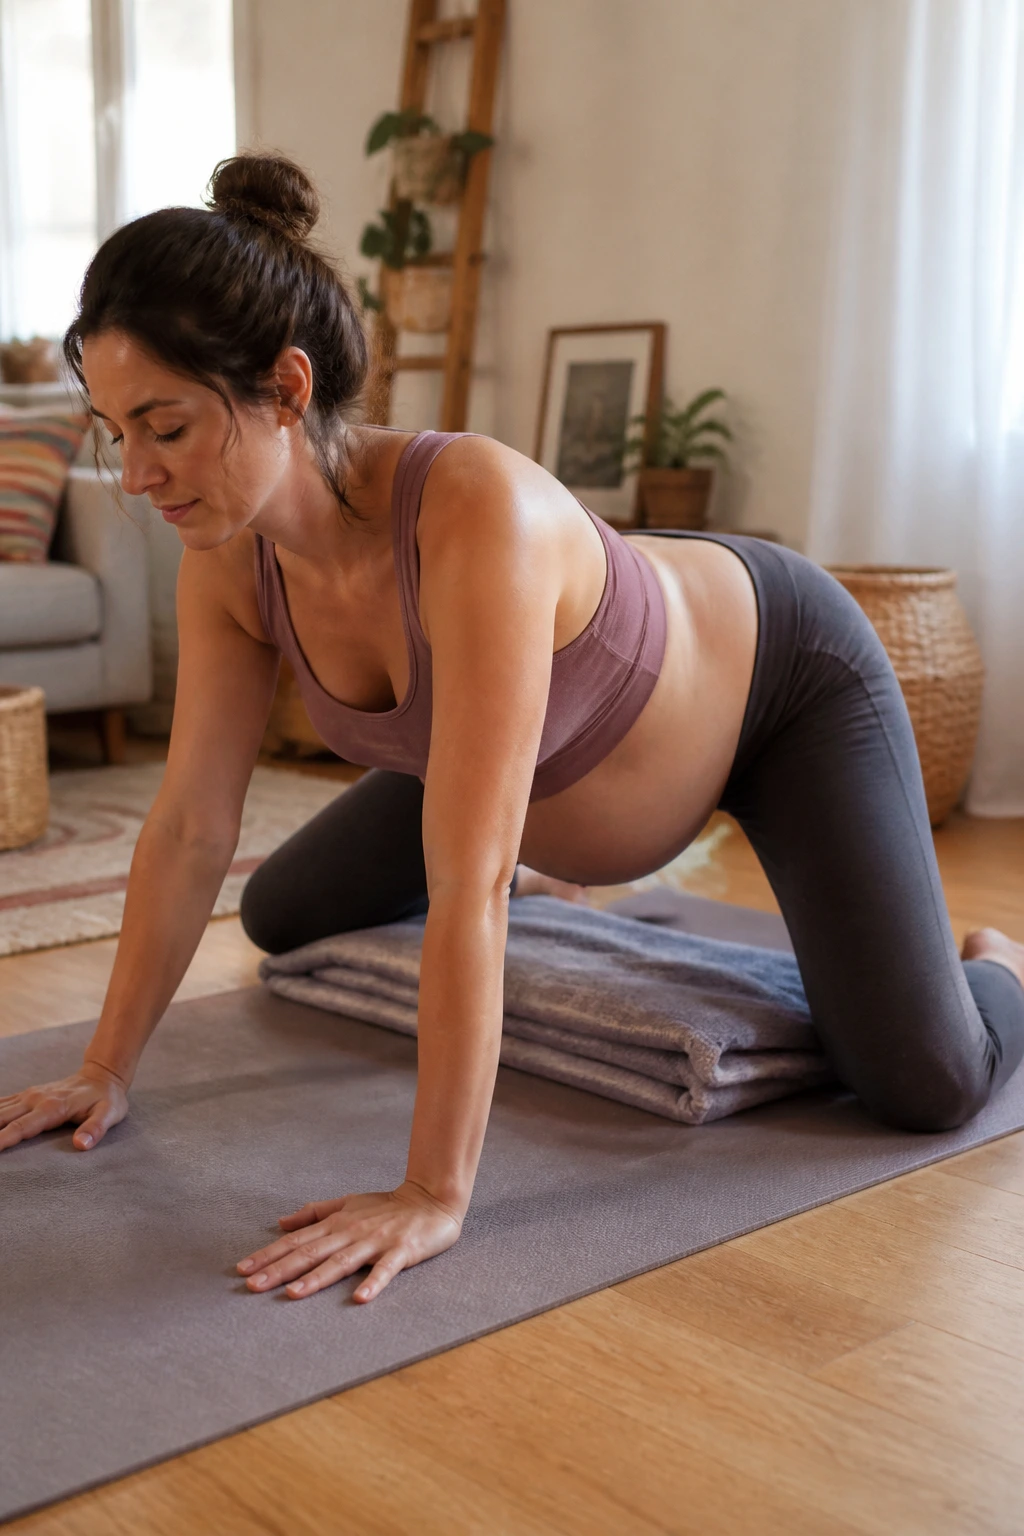
Sometimes the best prenatal flow is the one that looks almost boring. Wide-knee kneeling gives the spine room, the pelvis support, and the nervous system a chance to settle, which is a decent trade on days when your back feels noisy.
Come onto hands and knees, then slide the knees wider than hip width. Keep a folded blanket under them if needed. From there, move between a tiny cat-cow, a neutral hold, and a few slow hip circles. If your shoulders are tense, add gentle scapular push-backs: press the floor away a little, then soften. That wakes up the upper back without turning the whole thing into a strength drill.
No one gets bonus points for discomfort.
If kneeling hurts the knees, stop and use a wall or chair instead. If the belly feels crowded, bring the hands onto a bolster so the chest can rest a little higher. The sweet spot is the place where breathing gets easier within one or two rounds. If that does not happen, change the setup.
15. Side-Lying Rest and Breath Sequence
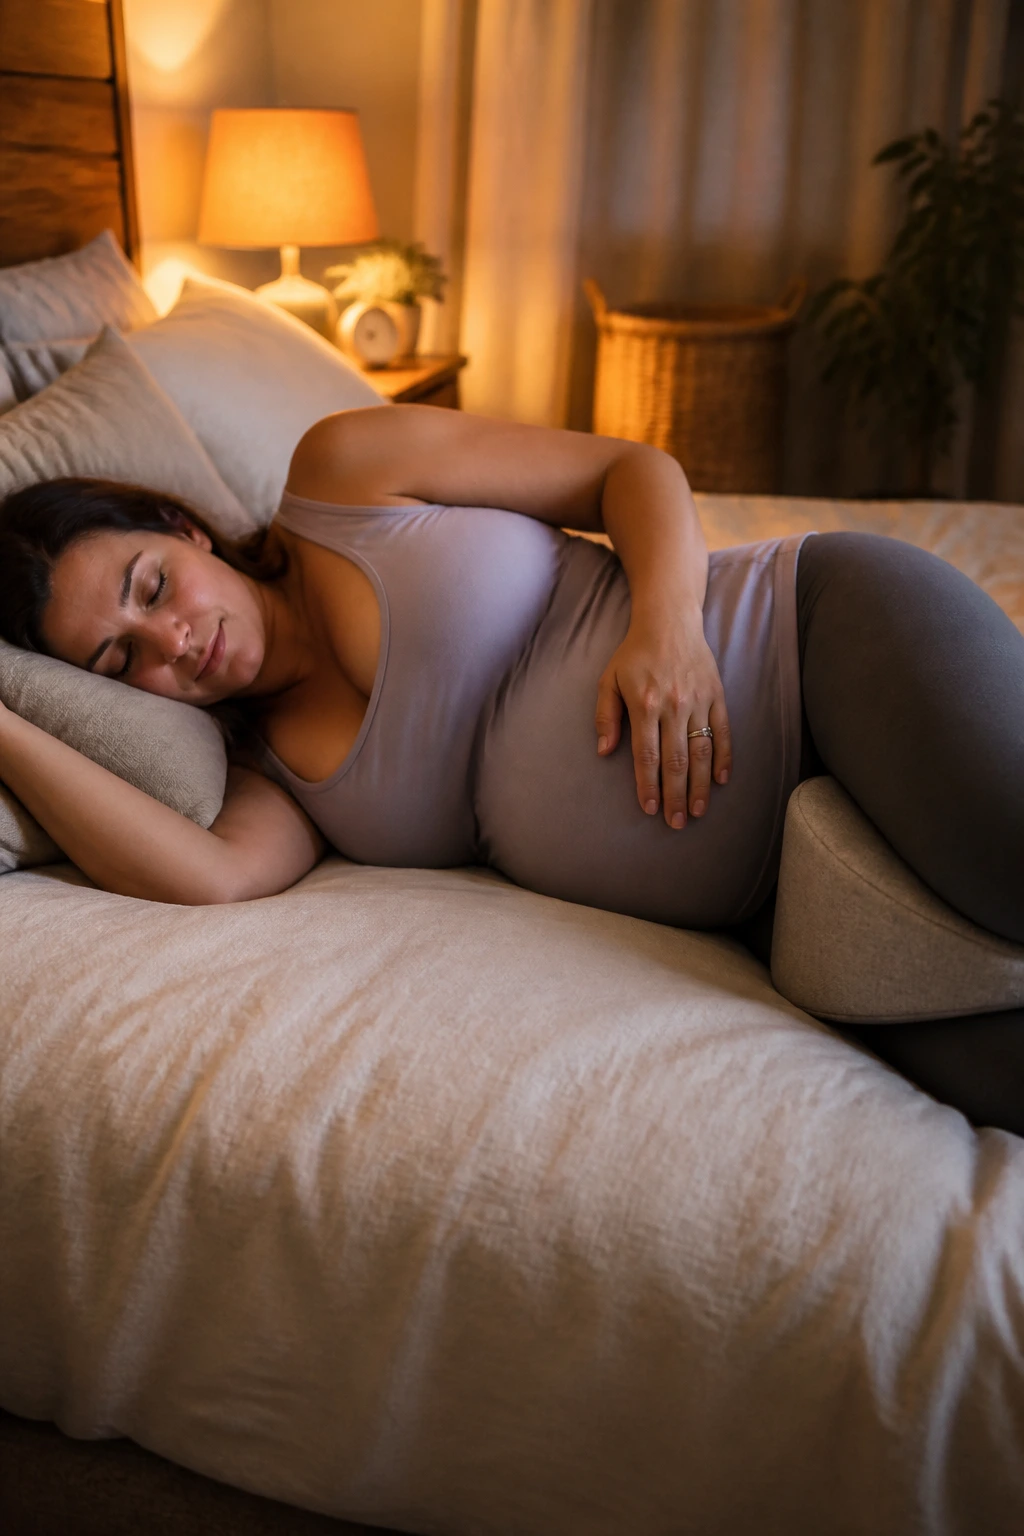
Nothing feels more honest than settling onto your side after a long day on your feet. A side-lying rest sequence is the closest thing prenatal yoga has to a reset button, and it matters just as much as the stronger flows.
Lie on your left side if that’s comfortable, or the right if that feels better for your body. Put a pillow under the head, another between the knees, and maybe a folded blanket under the belly if you want more support. Let one hand rest on the ribs and the other on the upper chest. Inhale quietly through the nose for a count of 4, then exhale for 6 without forcing the air out.
After a few breaths, float the top arm overhead, then bring it back down. Roll the shoulder once. That’s enough. If you want more, add a very small leg lengthening on the top side, but keep the movement soft.
This is the flow I’d pick when the day has been long, the pelvis feels heavy, and you still want to end with something that feels like care instead of effort. If you only have eight minutes, choose this one.
