



After hip surgery, the best post hip surgery workouts for recovery are usually the ones that look almost too small to matter. Ankle pumps, quad sets, glute squeezes, and careful walking can feel plain compared with the dramatic idea of “getting back in shape,” but plain is exactly what healing asks for.
That’s the part people miss. Early hip recovery is not about proving anything. It’s about keeping blood moving, teaching sleepy muscles to wake up, and reminding the joint how to accept weight without getting angry about it later.
A surgeon’s plan always wins here. Hip replacement, labral repair, arthroscopy, and fracture repair can all come with different limits on bending, twisting, and load, so the order of progress matters more than the exercise names themselves. Pain that stays mild and settles quickly is one thing; sharp pain, catching, sudden swelling, or a limp that gets worse is a different story.
The list below starts with the safest early movements and works toward standing strength, balance, walking, and low-impact cardio. Some of these belong in the first days after surgery. Others belong later, after your PT says the joint is ready for more work. That’s the real rhythm of hip surgery rehabilitation: boring, repeatable, and a little bit stubborn.
1. Ankle Pumps to Keep the Swelling Moving
Ankle pumps are the kind of exercise people want to skip because they do not look like much. They’re still worth doing. When the hip is sore and walking feels like a task, moving the ankle helps keep blood flowing through the lower leg, and that matters more than it seems on day one.
Lie on your back or sit with the leg supported, then pull the toes toward you and point them away in a slow rhythm. A common starting dose is 15 to 20 pumps, then a short rest, then another round. If your leg feels stiff, do fewer and repeat them more often.
What to Feel
The motion should come from the ankle, not the whole leg.
The calf may wake up a little. That’s fine. What you do not want is cramping, knee tension, or a hard effort in the hip itself. Keep it smooth and easy.
- Move both feet if one hip was operated on; the unoperated side often helps set a calm rhythm.
- Keep the toes relaxed instead of clawing them.
- Pause for a second at the end of each point and flex.
- Repeat them during long sitting periods, especially if you’re told to stay off your feet for chunks of the day.
One good rule: if the movement feels like work for the hip, you’re doing too much. Ankle pumps should feel almost stupidly easy.
2. Quad Sets to Wake Up the Thigh
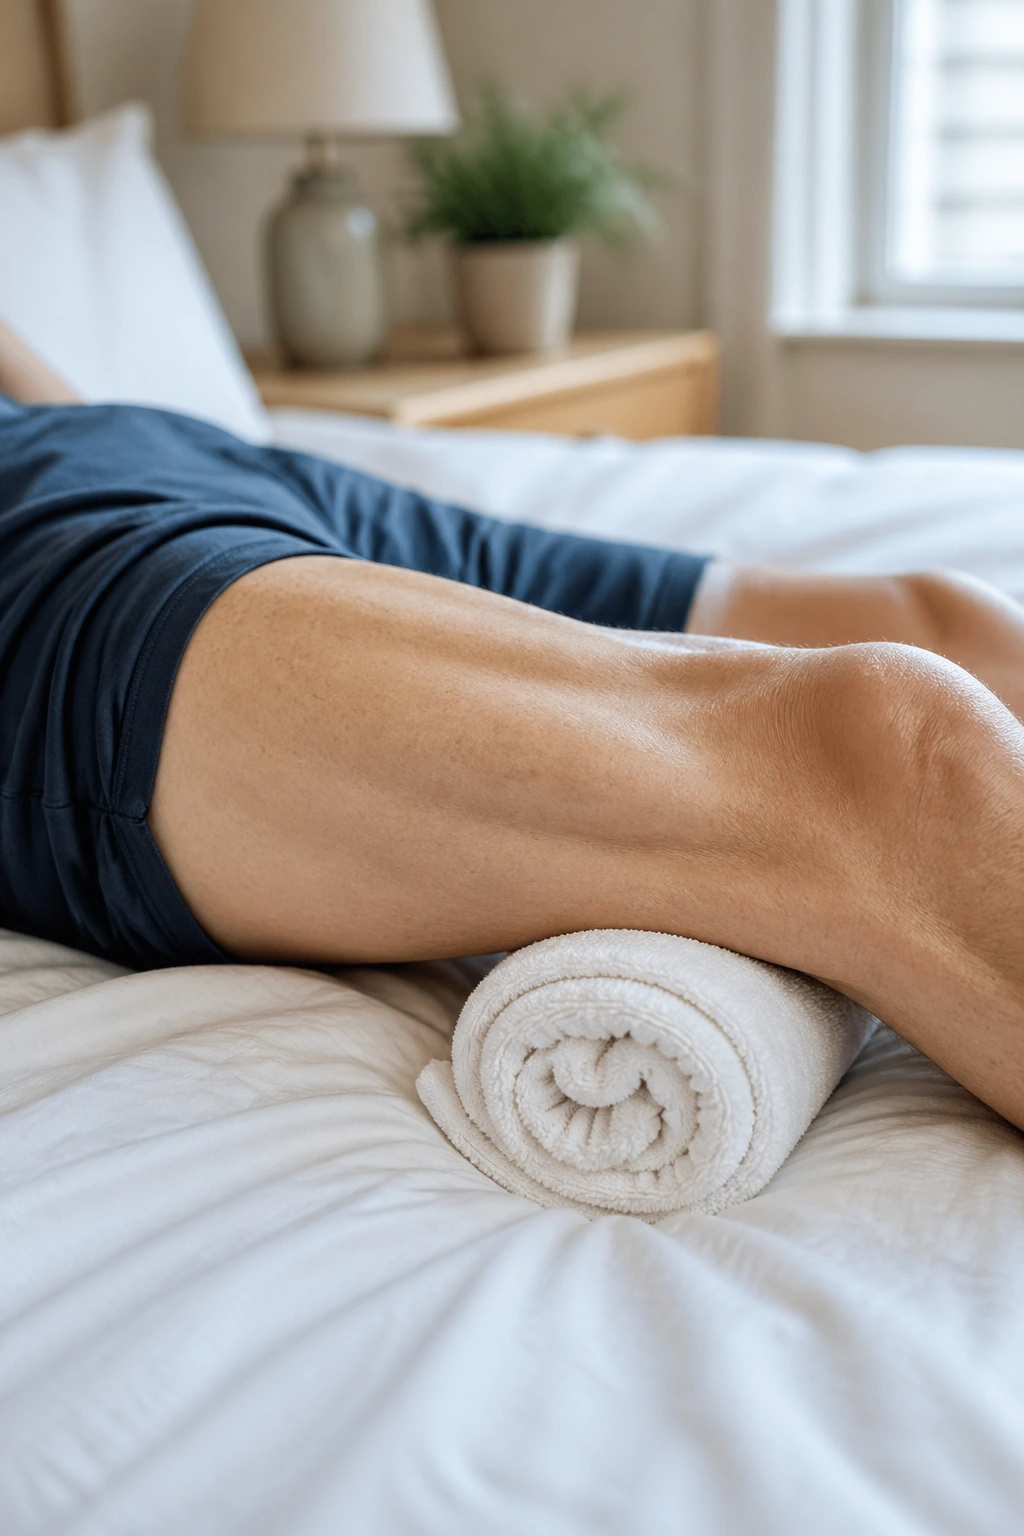
Why bother with the thigh when the surgery was on the hip? Because the whole leg works as a unit, and a weak front thigh makes standing, stepping, and walking feel sloppy. Quad sets are one of the first exercises physical therapists reach for because they teach the front of the leg to tighten without bending the hip.
Place a rolled towel under the knee if that feels comfortable. Tighten the thigh muscle so the knee presses gently downward, hold for 3 to 5 seconds, then relax all the way. Ten reps is a fair starting point, though some people do more in short spurts throughout the day.
What Makes Them Useful
The movement is tiny. That’s the point.
You are not trying to lift the whole leg. You’re teaching the quadriceps to “turn on” again after anesthesia, swelling, and guarded movement have made everything feel disconnected. That little knee press can help with leg control during the first weeks of walking.
Common Slip-Ups
- Pressing so hard that the hip tightens.
- Holding your breath.
- Rushing through the squeeze like it’s a chore.
- Letting the knee pop upward instead of staying settled.
A good quad set feels firm but controlled. The thigh should wake up, not revolt.
3. Glute Squeezes for Early Hip Stability

A lot of people think glute work belongs later, after walking looks normal again. I disagree. The glutes are part of the hip system from the start, and if they stay sleepy, the body tends to compensate with the back, the thigh, or a weird side lean that looks harmless until it doesn’t.
Lie down or sit upright, squeeze the buttocks together, hold for 3 to 5 seconds, then release fully. That last part matters. Letting the muscle go completely is what makes the next squeeze cleaner. Ten to fifteen reps is enough to begin with.
Why This Helps More Than People Expect
The glutes help stabilize the pelvis. They also support push-off during walking and help keep the operated side from feeling wobbly when you stand up. If you’ve ever stood after surgery and felt like the leg was not entirely yours, glute squeezes are part of fixing that.
Keep It Honest
Do not clench your stomach so hard that your shoulders rise. Do not arch the lower back. And don’t turn the squeeze into a full-body tense-up.
Boring is fine.
A clean, small squeeze beats a dramatic one every time.
If the incision area pulls or the hip feels pinchy, shorten the hold and make the squeeze gentler.
4. Heel Slides for Gentle Range of Motion

Heel slides are one of those recovery moves that look almost too gentle to count. They count. Carefully bending and straightening the hip helps bring back range of motion without asking the joint to do anything flashy, and that’s exactly what early healing needs.
Lie on your back with the leg straight. Slowly slide the heel toward your body until you feel a mild stretch or reach the limit your surgeon or PT gave you, then slide it back out. Eight to twelve slow reps is a sensible starting range. The heel should stay in contact with the surface the whole time.
What Good Motion Feels Like
The thigh should move smoothly, not jerk. The pelvis should stay quiet. If you feel the low back arching or the knee pointing wildly outward, shorten the slide and keep the motion smaller.
When to Back Off
A front-of-hip pinch is a sign to reduce the bend. So is a sharp tug near the incision, especially if the wound area is still tender. A little stiffness is normal. Pinching is not the same thing.
Some patients rush heel slides because the motion looks easy. It isn’t about range for the sake of range. It’s about controlled motion that leaves the joint calm afterward.
5. Seated Marches to Rebuild Hip Control

Sit tall in a firm chair and lift one knee a few inches, then lower it with control. Alternate sides for 8 to 12 reps per leg. That’s the whole move, and it’s more useful than it looks because seated marching bridges the gap between bed exercises and full standing work.
The point here is control. You are training the hip flexors, the lower abdominals, and the nervous system to coordinate a small lift without wobbling the whole torso. If you lean backward to get the knee up, the exercise loses most of its value.
How to Make It Safer
Keep both feet on the floor between reps. Sit near the front of the chair so the hip does not have to bend from a slouched position. Use your hands on the chair if the first few lifts feel shaky.
If the operated hip feels tight, make the lift smaller. That is not a failure. It is a smarter rep.
What to Watch For
- Torso rocking.
- A hard tug in the front of the hip.
- The foot drifting outward instead of lifting straight up.
- Breath-holding.
Seated marches are a good sign that the hip is starting to accept movement again without panic.
6. Standing Weight Shifts to Trust the Operated Leg
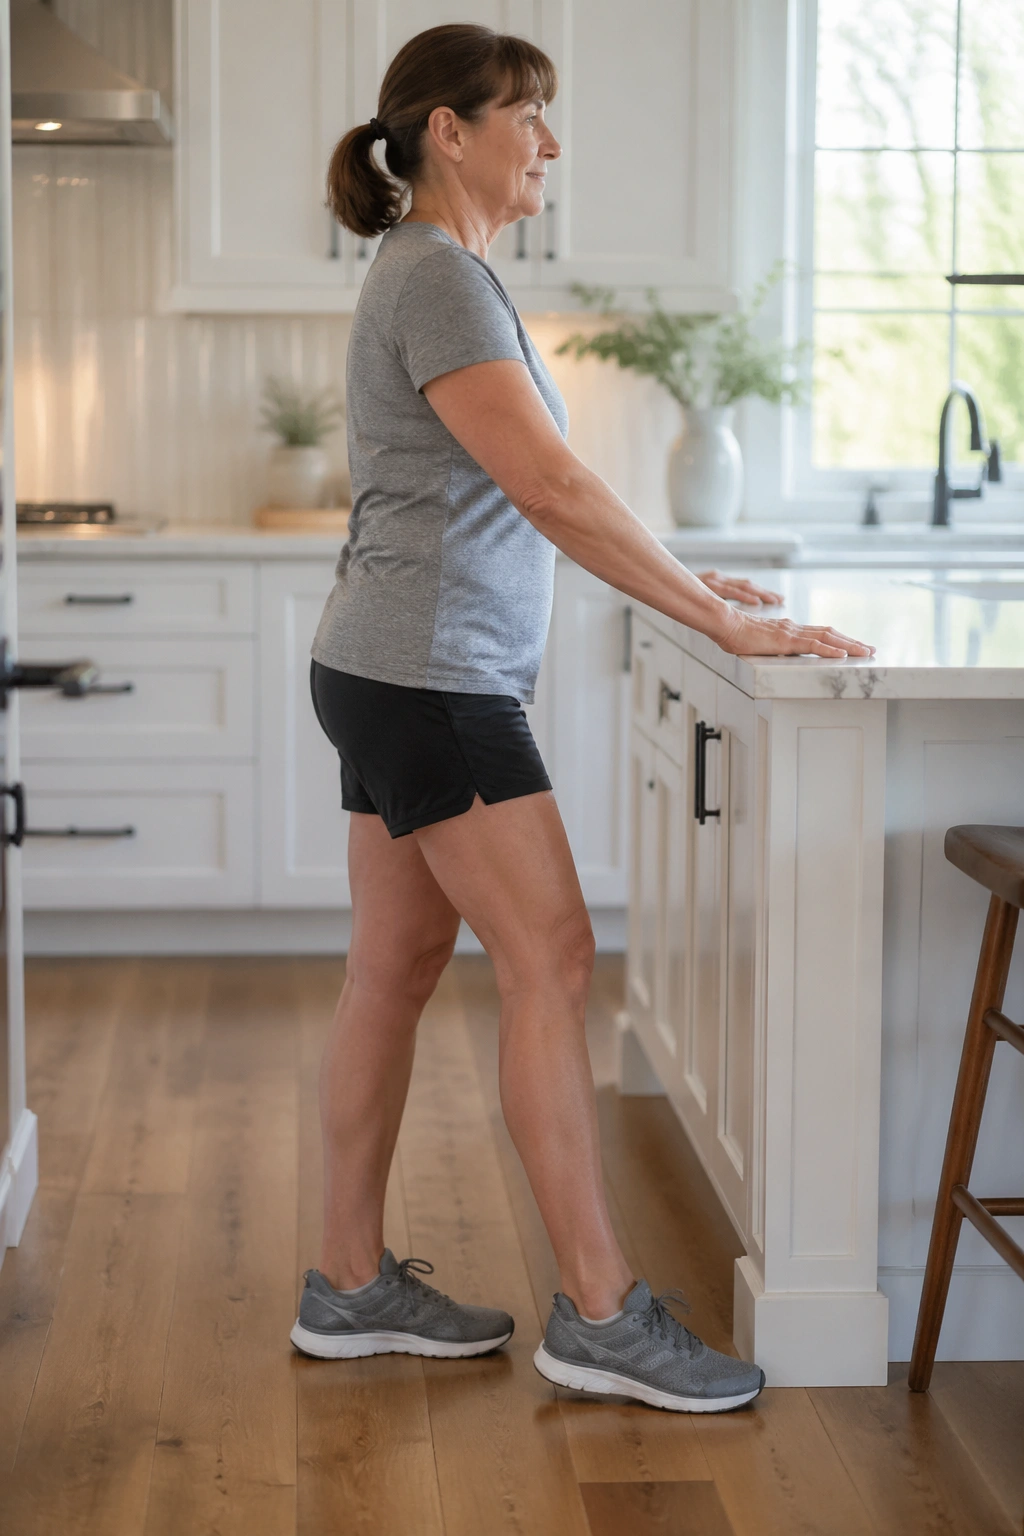
Before anyone starts talking about “normal walking,” the body has to trust the operated leg enough to stand on it. Weight shifts are a clean way to build that trust without forcing a full step too soon.
Stand at a counter or sink with both feet under you. Gently move your weight side to side, then forward and back, keeping the feet planted. Start with 20 to 30 seconds and build from there. The movement is tiny. The lesson is big.
What You’re Teaching
The operated leg has to learn that pressure on the foot is safe. That sounds simple, but after surgery people often protect the leg by leaning away from it or dumping all their weight onto the other side. The result is a limp that becomes a habit.
Good Cues
Feel the whole foot on the floor. Big toe, little toe, heel.
Keep the hips level.
Let the upper body stay quiet.
If you look in a mirror, the shoulders should not swing like a pendulum. Small weight shifts should look calm, almost dull. That’s a win.
A lot of people skip this because it doesn’t feel like a workout. It is. It’s just a quiet one.
7. Sit-to-Stand Reps for Post Hip Surgery Recovery
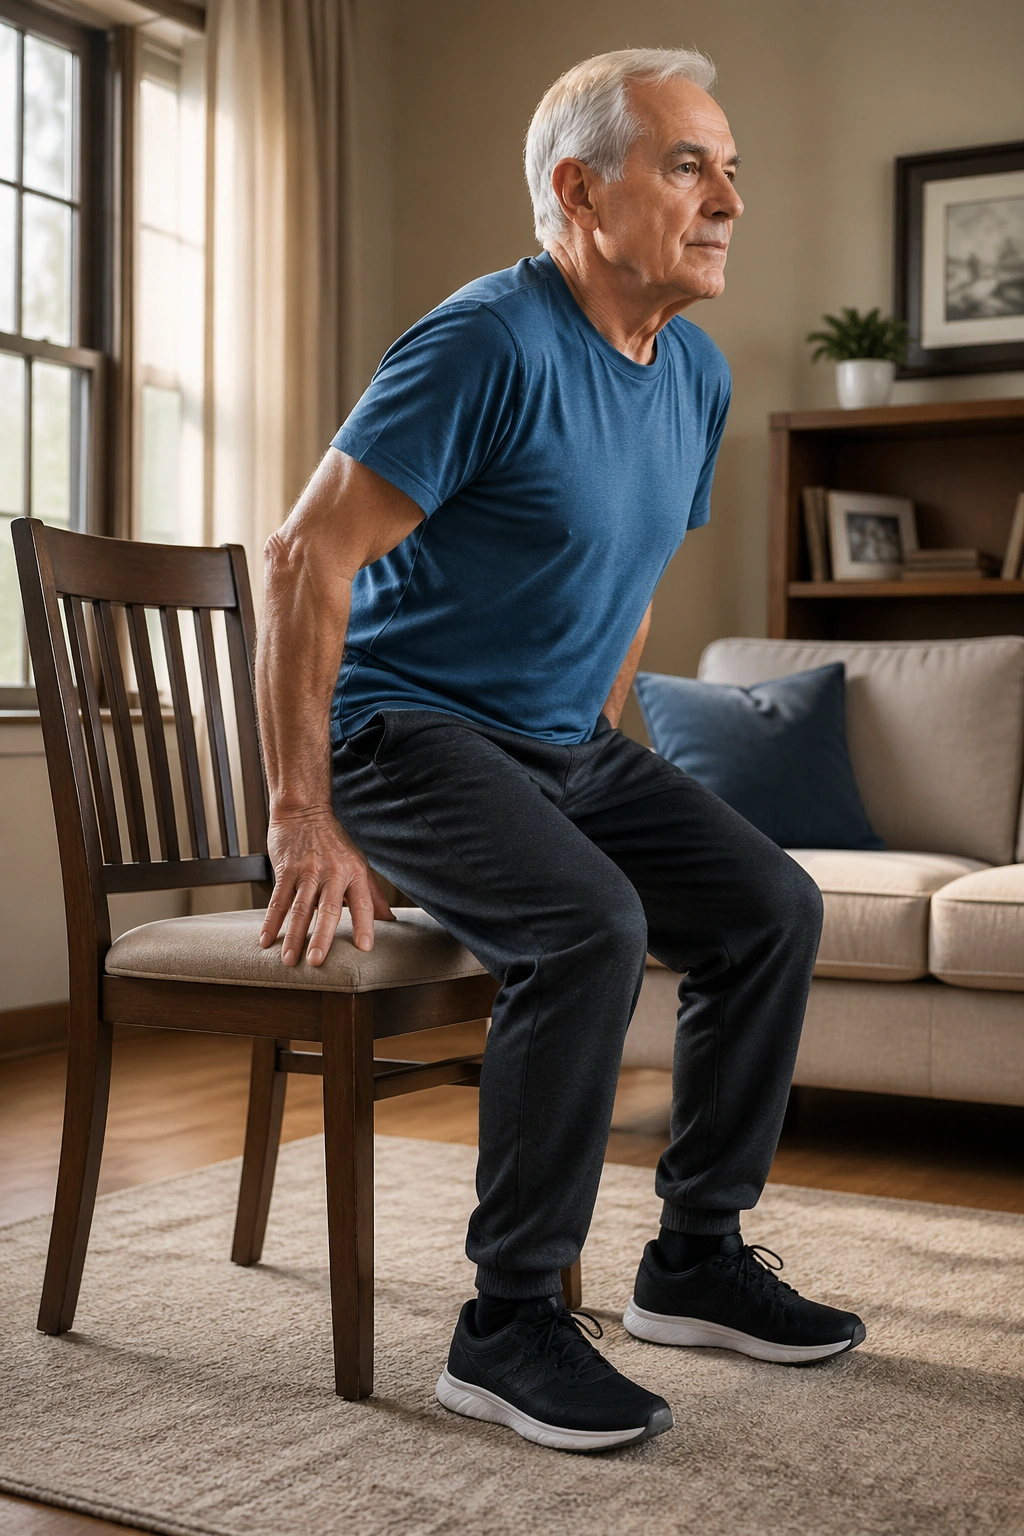
If I had to pick one exercise that tells the truth about hip recovery, this would be near the top. Sit-to-stands show you whether the legs, hips, and balance are starting to work together again, and they map directly to daily life.
Use a firm chair with a seat height that does not force a deep bend. Plant both feet, lean forward a little, stand up, then sit back down slowly. Five to ten reps is plenty at first. If needed, use your hands on the chair or armrests. That’s not cheating; it’s a smart starting point.
Why It Matters
The exercise trains the same pattern you use to get out of bed, leave the couch, and rise from the toilet. Recovery gets a lot more real when those moments stop feeling awkward.
Keep the Form Clean
Do not drop into the chair. Lower yourself under control.
Do not let the knees cave inward.
Do not twist when you stand.
If the hip feels weak on the first few reps, raise the chair with a cushion or folded towel. A slightly higher seat can turn a frustrating move into a useful one.
Use control, not speed.
That’s the whole game here.
8. Supported Mini Squats to Build Load Tolerance
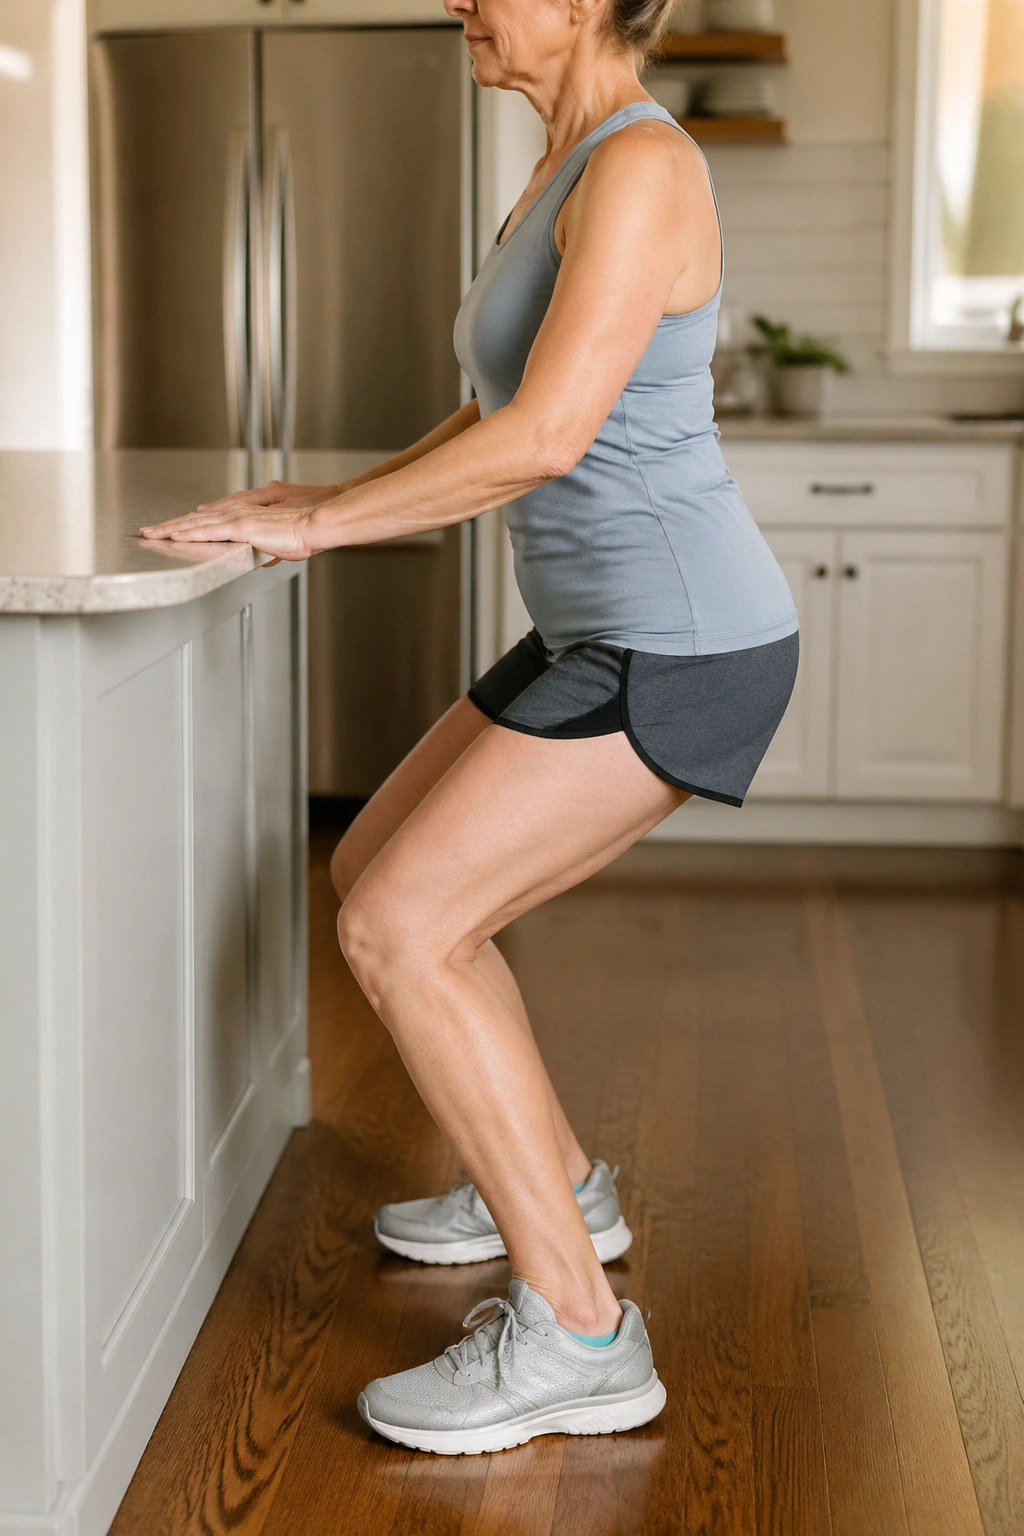
Mini squats are what you graduate to when sit-to-stands start feeling familiar and you want a little more leg work without going deep. Stand at a counter, hold lightly for support, and bend the knees and hips only a small amount — think quarter squat, not gym squat. Eight to twelve reps works well for many recovery plans.
The depth matters more than the rep count. Going too low usually turns the move into a hip-flexion fight, and the point is to build strength while keeping the joint calm.
What Makes Them Different From Sit-to-Stands
Sit-to-stands are about a real-life pattern. Mini squats are about repeated load. They let you practice holding your body over your feet while the thighs and glutes do the work.
A Few Details That Save Trouble
- Keep the chest open, not collapsed.
- Let the knees track over the second toe.
- Stop before the hips tuck under.
- Rise smoothly instead of snapping upright.
If you feel a pinch at the front of the hip, the squat is too deep. If you feel the movement in your lower back more than your legs, shorten it and slow down. Tiny adjustments make a big difference here.
9. Side-Lying Clamshells for the Outer Hip
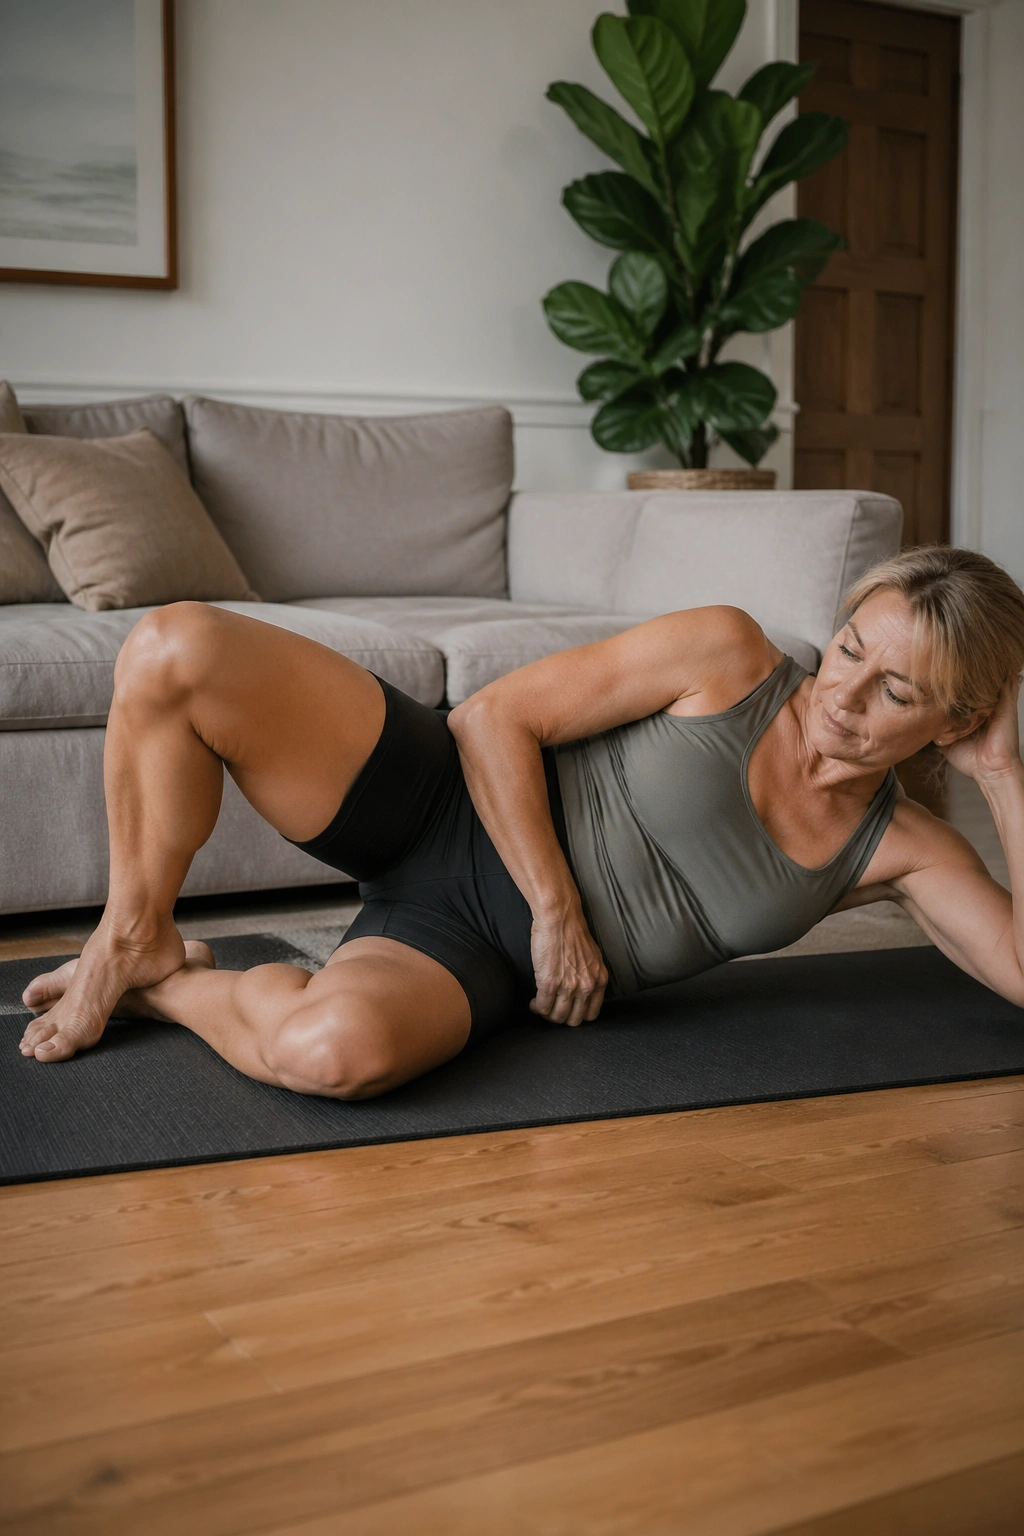
Clamshells are one of the best exercises for the outer hip, but they’re not always an early move. Some people can do them comfortably once side-lying is allowed; others need to wait because the surgical area, incision, or hip precautions make the position annoying. Your plan comes first.
Lie on your side with knees bent and feet together. Keeping the pelvis still, lift the top knee a few inches, then lower it slowly. Ten to fifteen reps is a good start. No rolling backward. That ruins the exercise fast.
Why the Outer Hip Matters
The glute medius helps keep the pelvis from dropping when you walk. If it’s weak, the body often sways or leans. That side-to-side wobble is one of the most common things people notice after hip surgery, and clamshells help clean it up.
A Small Warning
Do not turn this into a big open-and-close movement. Bigger is not better here. The range should stay modest, and the pelvis should feel stacked, not twisted.
If you want more resistance later, a light mini-band can help, but only when the basic version feels controlled. Rushing to a band too early usually turns the move into a sloppy hip flexor exercise, which is the opposite of helpful.
10. Standing Hip Abduction for Side-Glute Strength

Stand tall, hold a counter, and move one leg out to the side a few inches before bringing it back under you. That is standing hip abduction, and it’s one of the cleaner ways to wake up the side of the hip without loading the joint too aggressively.
The torso should stay quiet. The leg moves. If the whole body leans to the side to “help,” the glute is not doing enough of the job. A slow set of 8 to 12 controlled reps is enough to start.
Why It Works
The side glute keeps the pelvis level during walking. Without it, you get a hip drop, a hitch in the step, or the kind of compensated gait that makes recovery take longer than it needs to.
What Good Reps Look Like
- Toes stay forward or only slightly turned out.
- The leg lifts only as high as you can control.
- The standing hip does not jut sideways.
- The lowering phase is slow, not dropped.
That slow return is where a lot of the value sits. It’s easy to lift a leg. It’s harder to lower it without cheating.
If the motion pinches the outside of the hip, use a smaller range and keep the knee slightly bent.
11. Standing Hip Extension for Push-Off Power
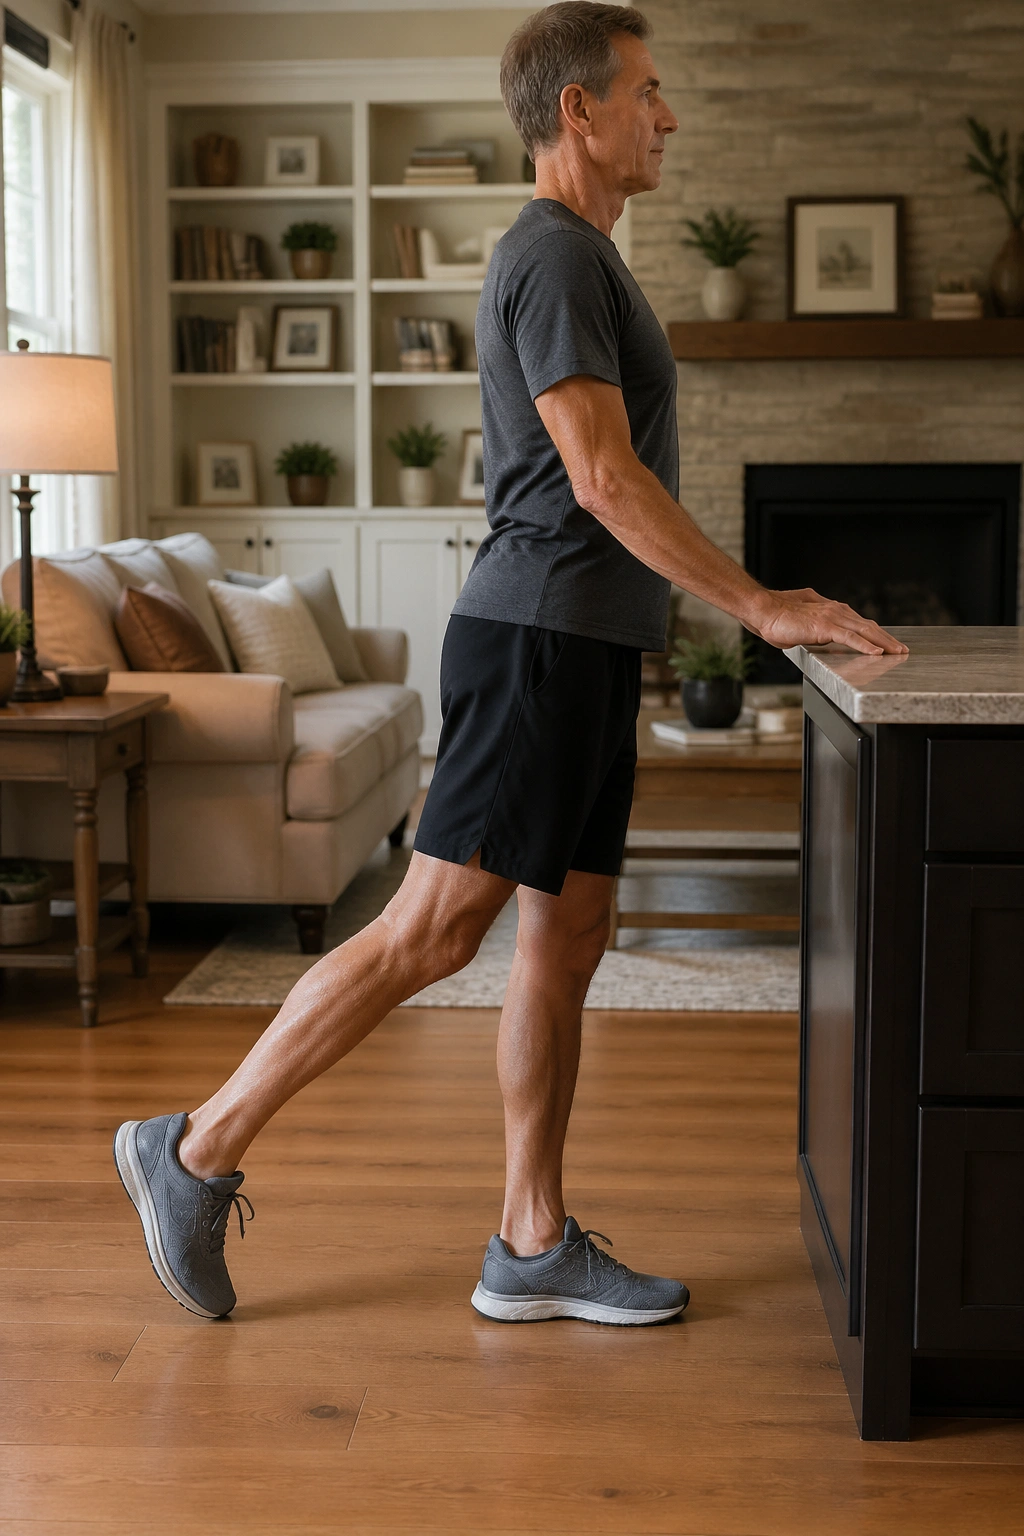
Walking is not just about putting the leg down. It’s also about pushing backward behind you, and that’s where standing hip extension earns its place in recovery. It helps bring the glutes and hamstrings back into the walking pattern without asking for a deep bend.
Hold a counter, keep the torso upright, and move the leg gently backward a few inches. Squeeze the glute, then return with control. Start with 8 to 12 reps. The motion should stay small and tidy.
Unlike a Big Kick, This Should Feel Quiet
A lot of people turn hip extension into a low-back arch. That’s wrong. The leg should move back; the spine should not turn into a hinge.
The exercise is especially useful if your walking still looks short and shuffly. The glute needs a reminder that push-off exists.
Don’t Chase Range
You are not trying to fling the leg behind you. Too much movement can tug on the front of the hip or make the back arch. A small, deliberate extension is cleaner and safer.
If the movement feels awkward, soften the knee a little and cut the range in half. Most people do better with less motion than they think.
12. Supported Single-Leg Balance for Stability
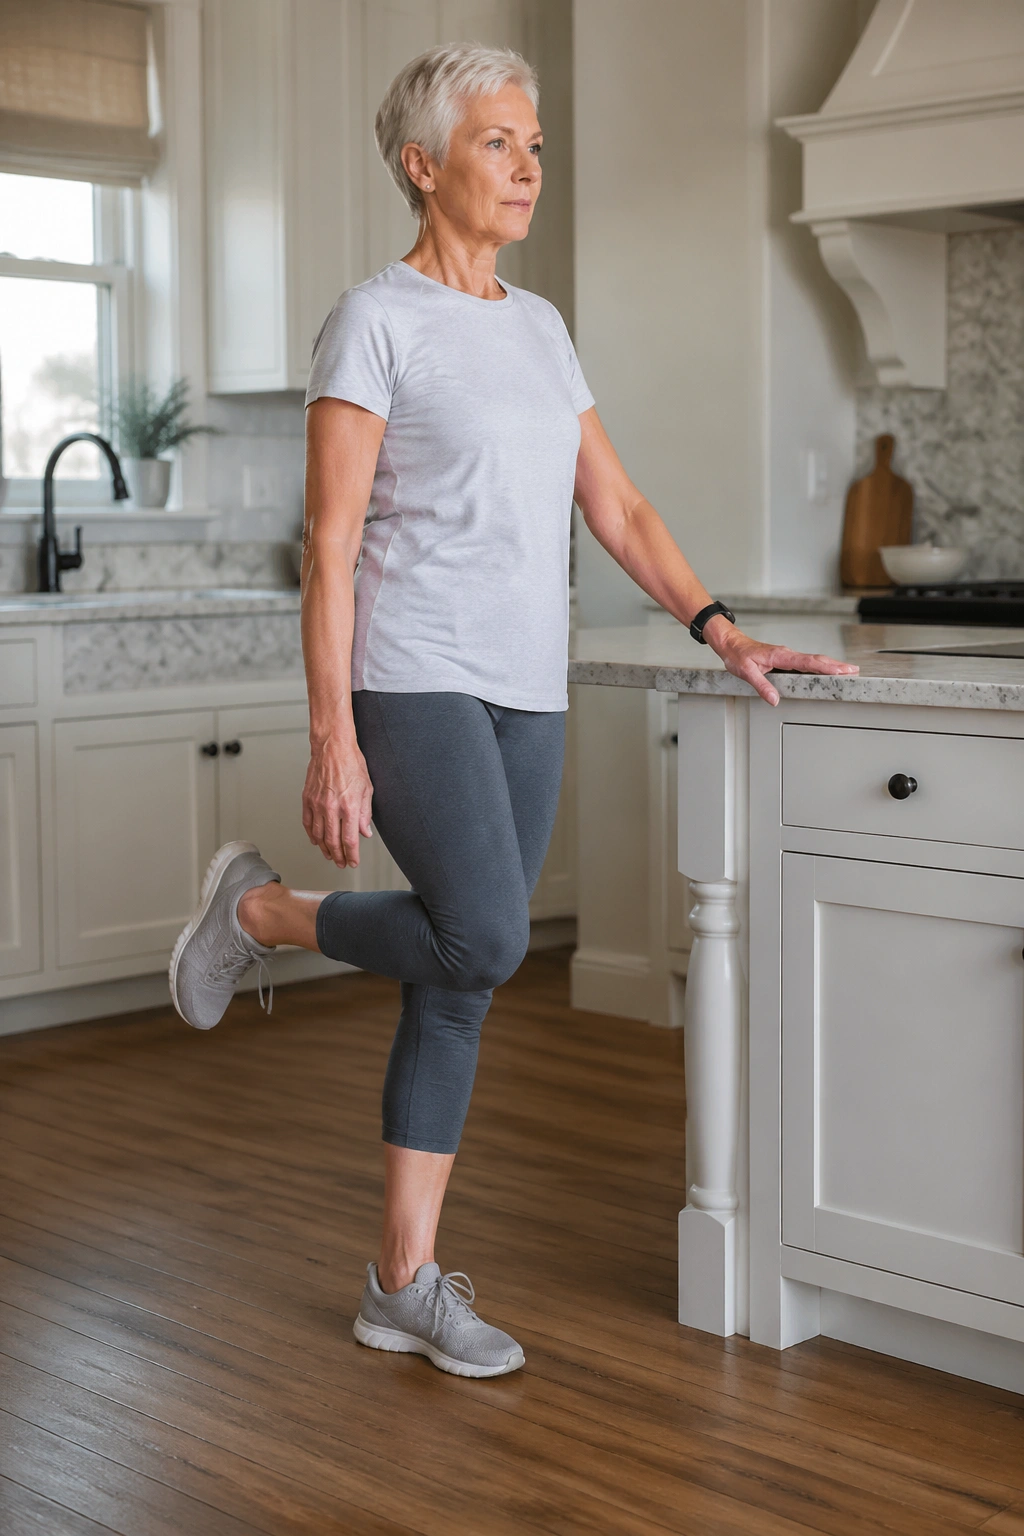
Take the time to stand on one leg with a hand hovering over a counter. Do not rush this part. Balance training is where recovery starts to look real, because the body has to keep the pelvis quiet while the foot, ankle, and hip figure out how to cooperate.
Start with 10 to 20 seconds on each side, using as much hand support as needed to feel safe. The goal is not to wobble dramatically. The goal is to learn how to steady the body before the wobble gets big.
What This Trains
Single-leg balance wakes up the hip stabilizers, the ankle, and the core at the same time. It also helps with curb steps, getting dressed, and that awkward moment when you have to stand on one leg to put a sock on.
Progress It Slowly
- Keep the gaze level.
- Use one finger on the counter before removing the hand entirely.
- Start on a hard floor before trying a cushion.
- Stop if the hip tightens into a painful clench.
The first few attempts may feel embarrassingly shaky. Fine. That’s normal. A steadier stance usually shows up after several short sessions, not one heroic try.
13. Step Taps and Low Step-Ups for Stair Readiness
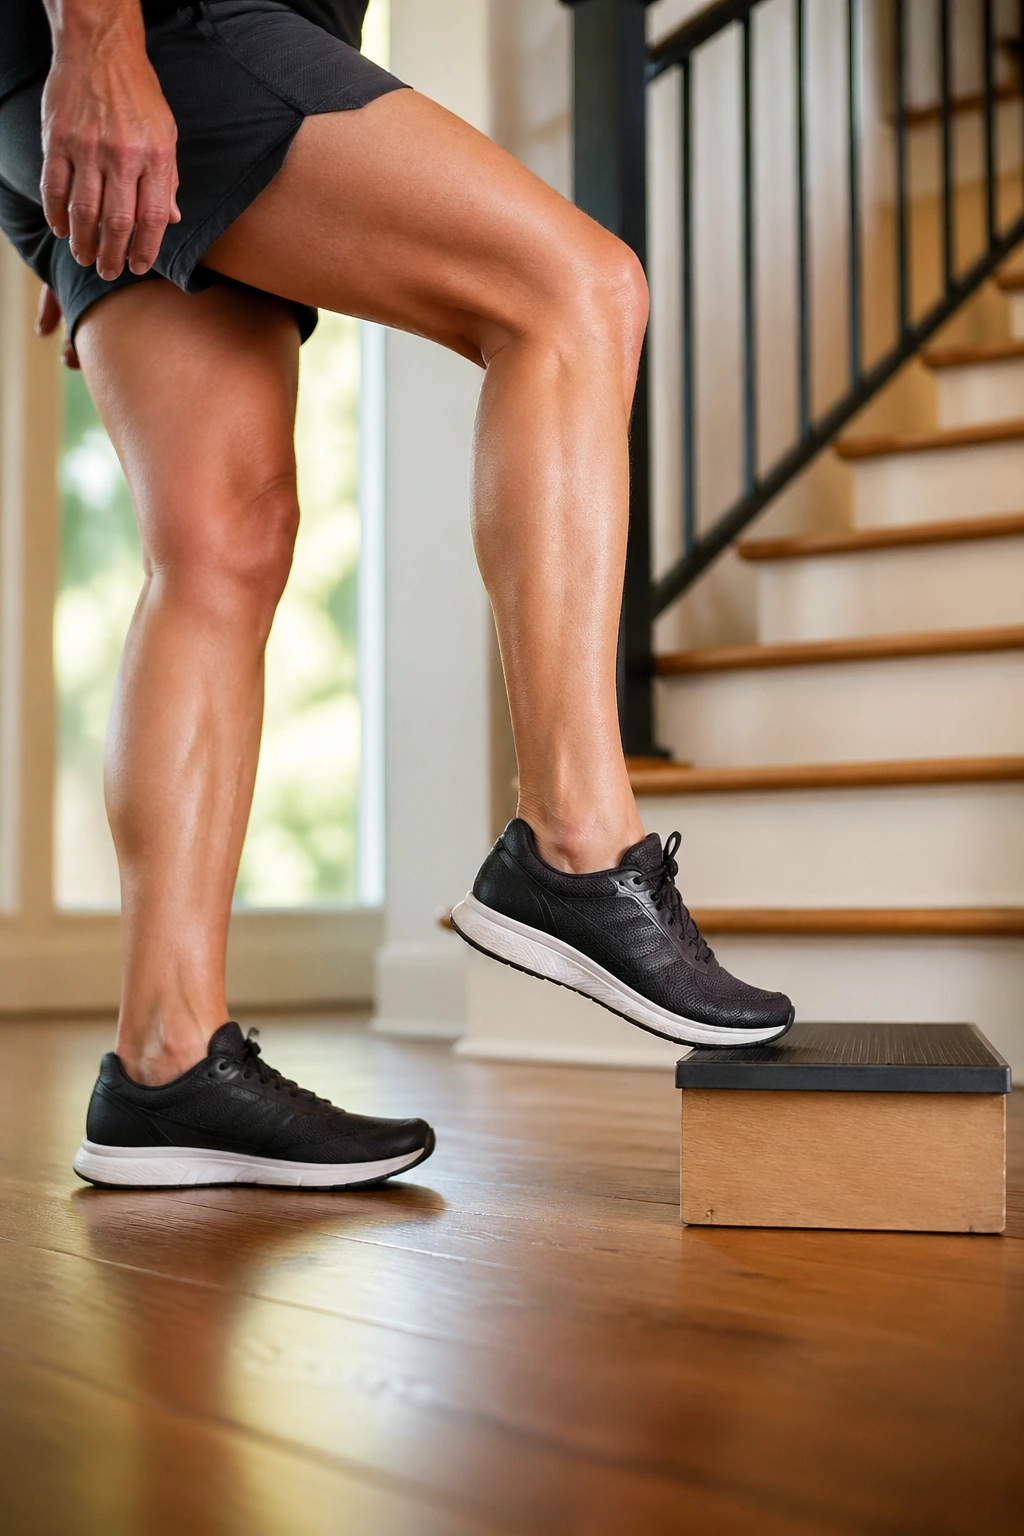
Stairs are where hip recovery gets honest. Flat ground can hide a lot. Steps do not. That’s why step taps and low step-ups deserve their own place in the progression.
Use a very low step at first, often 2 to 4 inches, or the bottom stair if that’s what your PT has cleared. Tap the healthy foot or operated foot to the step without launching your whole body. Later, step all the way up and down in slow control.
Why Start Low
A small step keeps the hip from folding too deeply while still training the muscles needed for daily life. It also reveals whether the leg is ready to accept a little more load without pain or a hitch.
Form Notes That Matter
Keep the knee aligned over the foot.
Avoid pushing off the back leg too much.
Lower under control, not in a clunk.
Hold the railing if you need to.
If you notice the pelvis hiking up or the torso leaning far forward, the step is too high. Drop it down and clean up the motion first. Fancy stairs come later.
14. Walking Intervals for Gait and Endurance
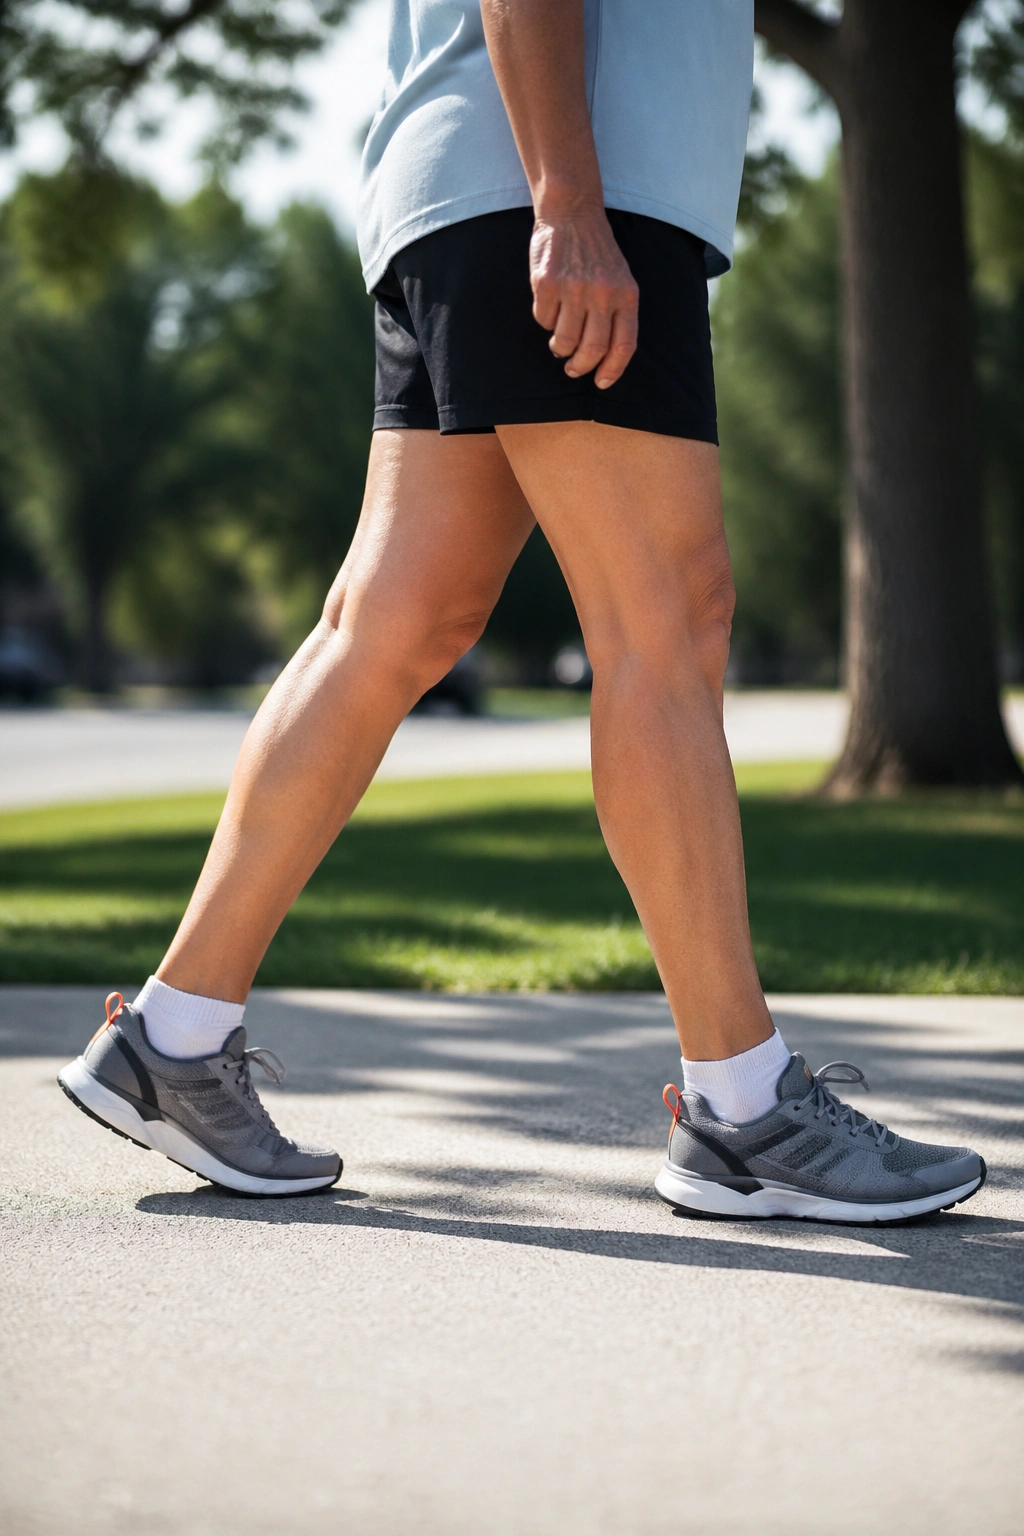
Walking is the most underestimated recovery exercise there is. It sounds too normal to matter, which is exactly why people blow past it or try to do too much too soon. Short, frequent walks usually help more than one long stroll that leaves you limping.
Start with a walk that feels almost too short — maybe 2 to 5 minutes — then rest. Repeat that pattern a few times if it goes well. The target is smooth steps, not mileage. A limp means the body is compensating, and compensation teaches the wrong pattern.
What Clean Walking Looks Like
The steps should feel even. The torso stays upright. The operated leg should land without a clumsy thud or a sharp grab in the hip.
Signs You’re Pushing Too Hard
- The limp gets worse as you continue.
- The hip feels hot or swollen later.
- The stride gets shorter and shorter.
- You start leaning to one side to protect the joint.
If that happens, cut the next walk short. Recovery is full of this kind of correction. It is not failure; it’s information.
Short walks done well beat a heroic walk done badly. Every time.
15. Stationary Bike Sessions for Low-Impact Cardio
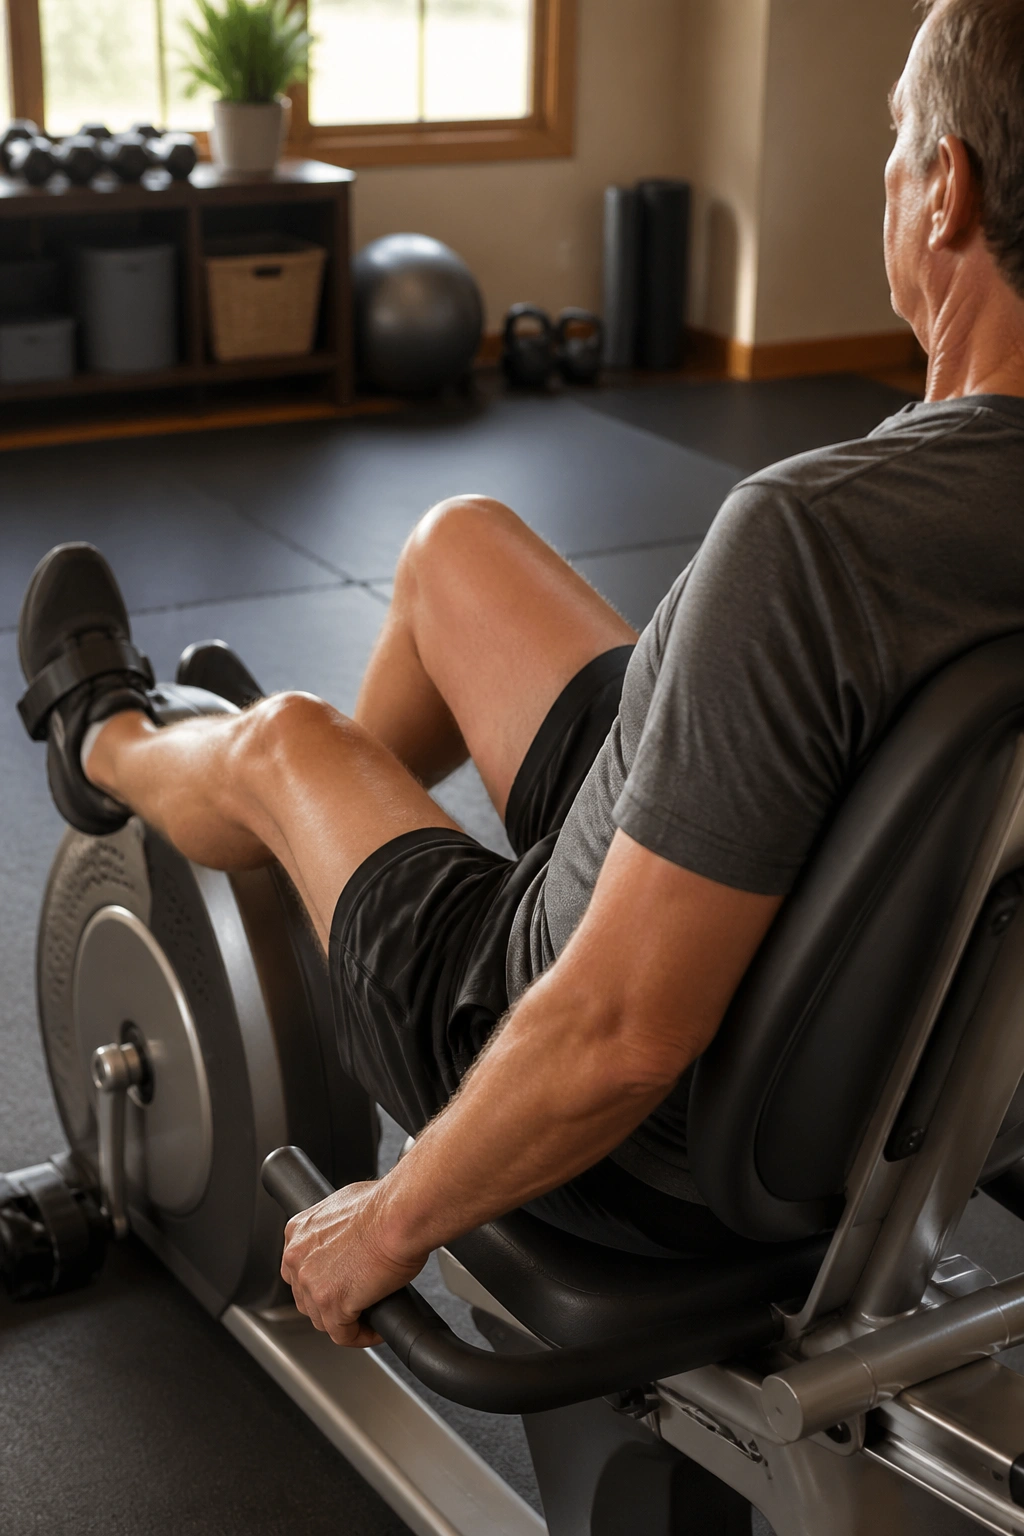
A stationary bike can be a gift during hip recovery because it gives you movement without the pounding of normal cardio. A recumbent bike is often easier early on because the seat supports the back and usually asks for less hip bend. An upright bike can come later once bending feels comfortable and the incision has settled enough to tolerate the position.
Start with low resistance and a short time, maybe 5 to 10 minutes, then build slowly. If the full pedal stroke feels too tight, raise the seat a little. The knees should not jam up toward the chest.
What to Pay Attention To
The motion should feel smooth and circular. If you feel pinching in the front of the hip, stop and adjust the seat height before trying again. A choppy pedal stroke usually means the setup is off, not that your hip is doomed.
Recumbent vs Upright
Recumbent bikes tend to be friendlier in the early phase because they reduce the need to lean forward. Upright bikes can be useful later for more normal mechanics and a bit more core demand. Neither one should feel like a race.
A few easy minutes on the bike can loosen stiffness, improve circulation, and help you feel more like a person again. That counts for more than people admit.
Final Thoughts
Recovery after hip surgery usually responds better to restraint than ambition. The best work is often the work you can repeat tomorrow without a flare-up tonight.
If you want a simple priority list, start with ankle pumps, sit-to-stands, and walking. Those three cover circulation, strength, and gait, which are the three pillars that keep showing up no matter what kind of hip procedure you had.
Keep a close eye on how the hip feels the next morning. That one detail tells you more than a single “good” session ever will. If the joint stays calm, you’re probably on the right track.
