



The first time you try to sit up after having a baby, your midsection can feel unfamiliar—soft where it used to feel firm, stretched across the lower belly, and oddly disconnected from the rest of your body. That’s why postpartum workouts for tightening loose skin get searched so often. Most women are not chasing some fake “bounce back” fantasy; they want their core to feel supportive again, their clothes to sit better, and their body to stop feeling like it’s working in separate pieces.
Loose postpartum skin is not only a skin issue. The abdominal wall has been stretched, the connective tissue between the rectus muscles may be thinner or wider, your ribs may still sit flared, and the glutes and upper back that help hold your posture together are often underworked right when you need them most. Add sleep loss, feeding posture, and long hours carrying a baby on one hip, and the whole torso can start to collapse forward.
Exercise will not erase stretch marks or make extra skin vanish like shrink wrap.
What it can do is rebuild the layer under that skin, improve blood flow, help your posture, and teach your body how to manage pressure again so the belly looks and feels more supported. That matters. A lot more than internet before-and-after photos admit.
I also think a lot of postpartum fitness advice is careless. If you jump straight into hard planks, bicycle crunches, burpees, or long runs while you are still leaking, seeing doming through the midline, or feeling heaviness in the pelvic floor, you can make yourself feel worse, not better. The American College of Obstetricians and Gynecologists has long noted that gentle movement often returns gradually after an uncomplicated birth, but “gradually” is doing a lot of work in that sentence.
Start lower than your ego wants. Your body will thank you for it.
Why postpartum workouts for tightening loose skin work from the inside out
Loose skin sits on top of a whole support system. When that support system is weak, the skin often looks looser than it would if the muscles underneath were doing their job. That is one reason postpartum exercise can change the look of your midsection even when the skin itself has not changed much yet.
The first shift comes from muscle tone under the skin. Rebuilding the deep core, glutes, back, and hips can make the lower belly sit flatter and feel less heavy. Not flat in the airbrushed sense—more like your torso is stacked and supported instead of hanging forward.
The second shift is pressure control. Pregnancy changes how the diaphragm, abdominal wall, and pelvic floor work together. If you hold your breath during effort, push outward through the belly, or bear down every time you stand, lift, or squat, the tissue in the center of the abdomen keeps taking the hit. Better breathing and better pressure management help the midsection feel tighter because the load is spread where it belongs.
There’s also body composition. If you want to lose body fat after birth, strength work and walking are far more useful than punishing ab circuits. Slow changes tend to leave the skin looking better than fast drops in weight, which can make laxity stand out more.
And posture matters more than people think. A rib cage that stays tipped up and a pelvis that drifts forward can make the stomach push out even when the abdominal muscles are not weak in some dramatic way. Fix the stack, and the whole front of the body changes shape.
What stretched postpartum skin can change — and what may stay
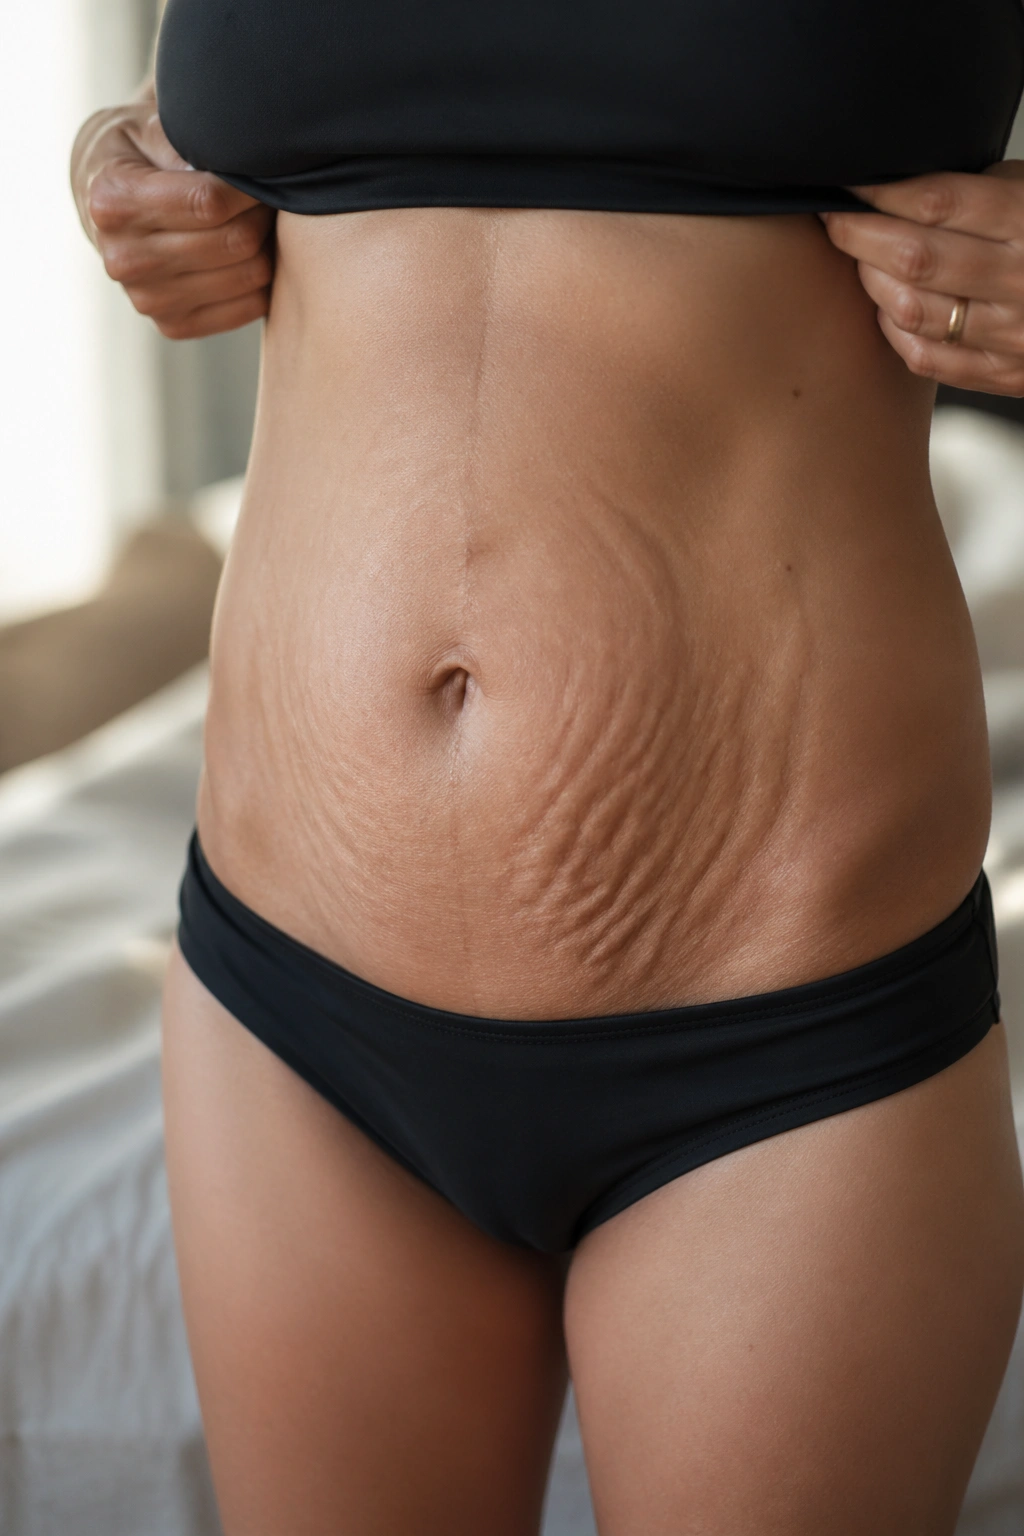
Some of the advice floating around about loose skin is nonsense.
Creams can make skin feel better. Massage can help tissue move better. Good training can improve muscle tone and how the belly sits. None of those things can promise that stretched skin will return to its exact pre-pregnancy look, especially after a large baby, twins, multiple pregnancies, a big weight swing, or a strong family tendency toward stretch marks.
Skin remodels slowly. Stretch marks often fade from dark pink or purple to silvery lines over time, but they do not usually disappear. A “c-section shelf” may improve as swelling drops and scar tissue softens, though a tethered scar can still create a fold or ledge above the incision. If that scar feels stuck, a pelvic floor or women’s health physical therapist can be useful once you are cleared for hands-on work.
I wince a little when I see plans built around 200 crunches a day. Crunches can strengthen the abs in some people, sure, but they are a lousy first tool when the deeper issue is poor pressure control, a healing pelvic floor, or doming along the linea alba. More effort is not always smarter effort.
There is a harder truth here too: some extra skin may remain even after you get stronger. That does not mean the workouts failed. It means pregnancy asked a lot from your tissue, and tissue answers in its own way.
When to start postpartum workouts for tightening loose skin
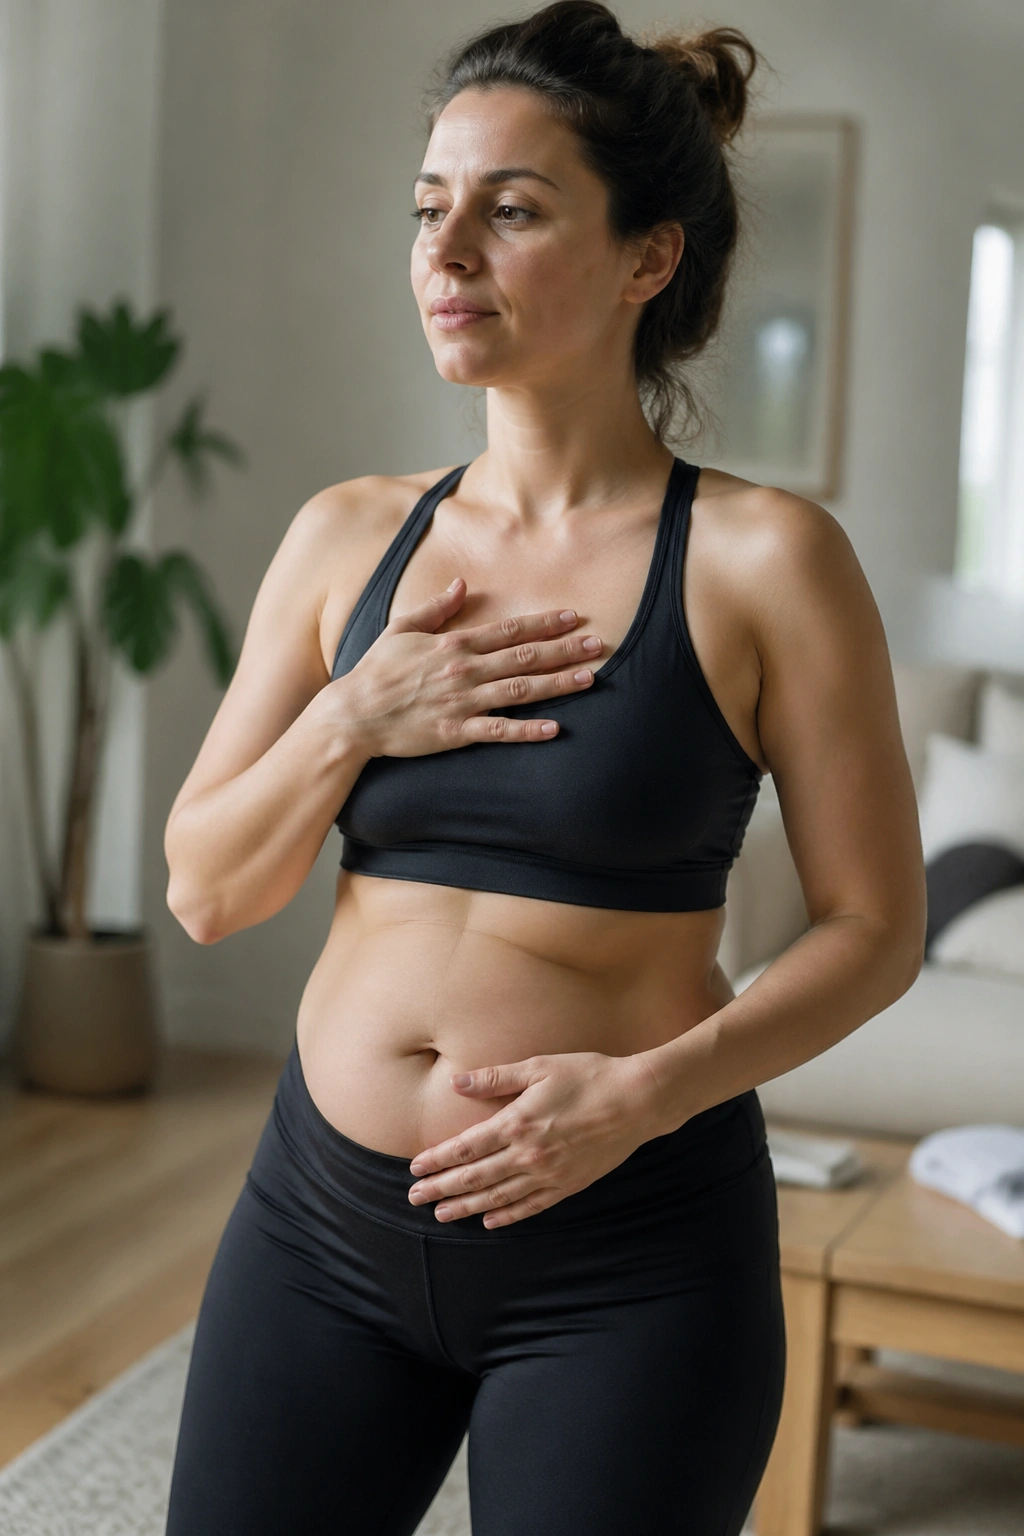
How soon can you begin? Earlier than a lot of women are told for gentle work, later than social media likes to pretend for harder work.
After an uncomplicated vaginal birth, light walking, breathing drills, and gentle pelvic floor awareness are often brought back gradually once you feel steady and your clinician is comfortable with it. After a cesarean, a third- or fourth-degree tear, heavy bleeding, infection, high blood pressure issues, or wound concerns, the runway is different. You may need more healing time and more supervision before loading the core on purpose.
A useful rule: your body should feel calmer after the session, not more irritated by the end of the day. If bleeding gets brighter or heavier, if you feel dragging or pressure in the vagina, if urine leakage starts or worsens, or if your belly forms a firm ridge down the middle during the movement, scale back.
Pause and get checked if you notice:
- Heaviness or bulging in the pelvic floor during or after exercise
- Sharp pain around the incision, abdomen, low back, or pelvis
- Doming or coning down the center of the stomach
- Bleeding that picks up after activity instead of settling
- Dizziness, chest pain, or shortness of breath that feels out of proportion
- Leakage that did not happen before the workout
If you had a cesarean, one small trick helps a lot early on: place a folded towel or your hands across the incision for support when coughing, laughing, rolling, or doing your first core drills. Tiny detail. Big difference.
1. 360 Breathing With Rib Expansion
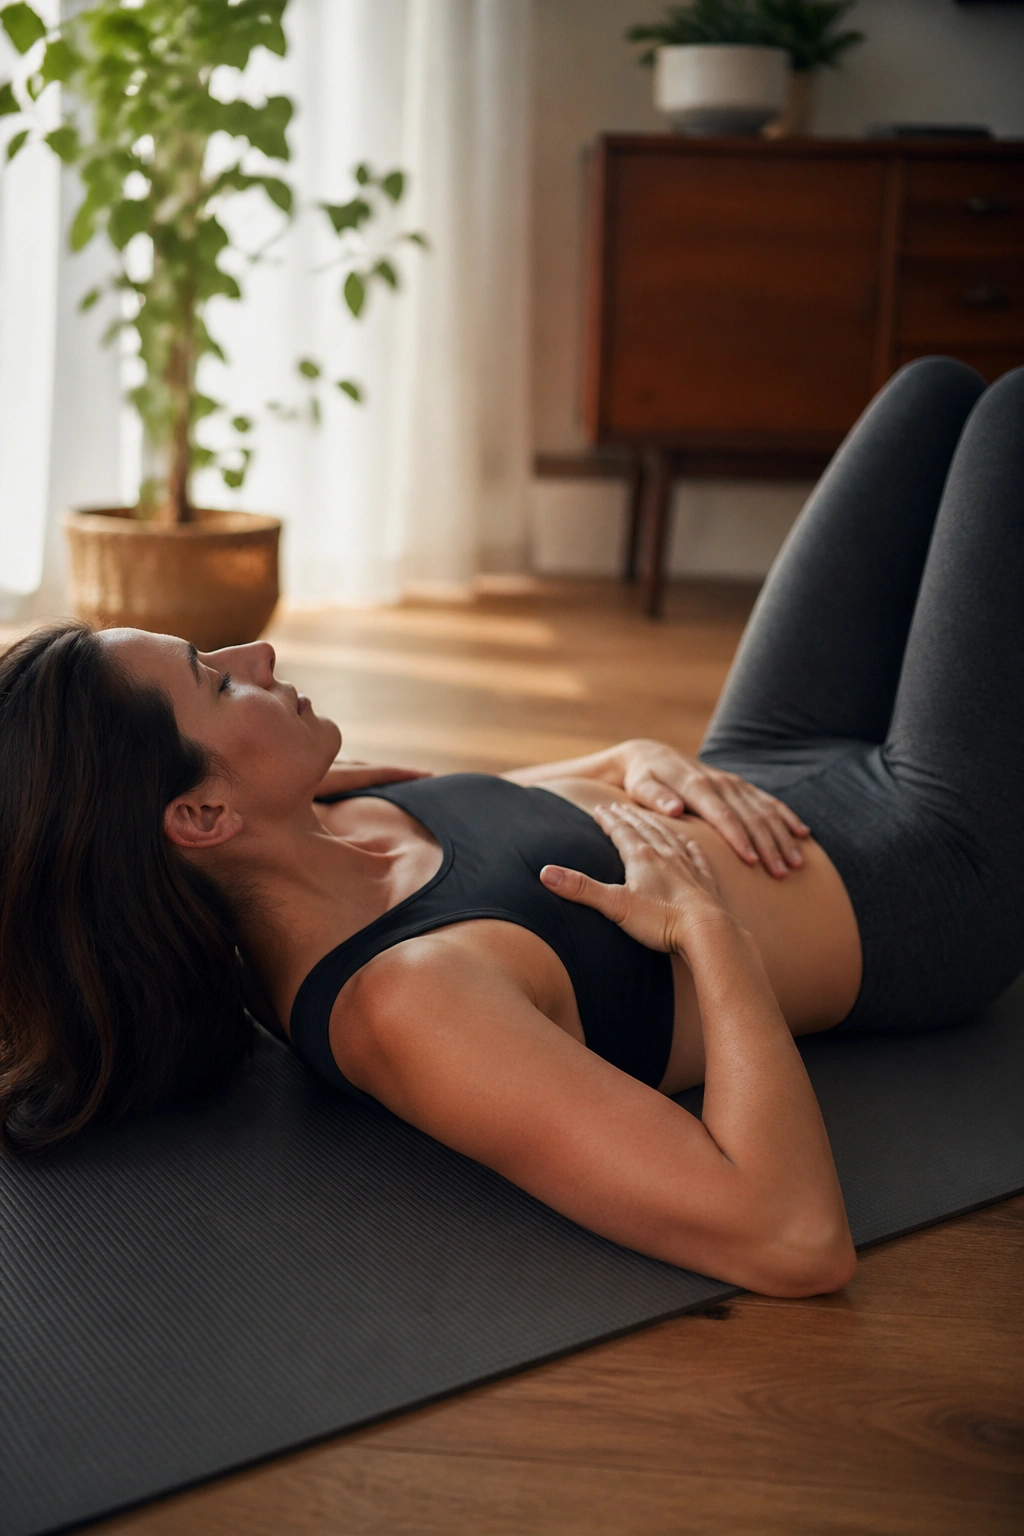
If your breath is stuck in your chest, your core will stay a step behind.
This drill looks almost too easy, which is part of why people skip it. Don’t. Pregnancy often leaves the ribs flared and the upper chest doing more work than it should. A good 360 breath teaches the diaphragm to move down, the rib cage to widen, and the pelvic floor and deep abs to respond in sync instead of fighting each other.
How to do it
Lie on your back with knees bent and feet flat, or sit tall in a chair if the floor feels rough. Place one hand on the side ribs and the other low across the belly. Inhale through your nose for about 4 seconds and try to expand into the sides and back of the rib cage, not only the front. Exhale through pursed lips for 5 to 6 seconds and feel the lower belly gently draw inward.
Quick cues that help
- Let the ribs widen sideways, almost like an umbrella opening
- Keep the neck and jaw soft
- Think “zip up gently” on the exhale, not “suck in hard”
- If you had a cesarean, support the incision with a pillow or towel if needed
Do 5 to 8 breaths, rest, then repeat once or twice. I like this at the start of every postpartum session because it gives you a pressure check before harder movements show you the same thing less politely.
Best use: 1 to 3 times a day, especially before core work, walking, or lifting the baby carrier.
2. Supine Pelvic Tilts
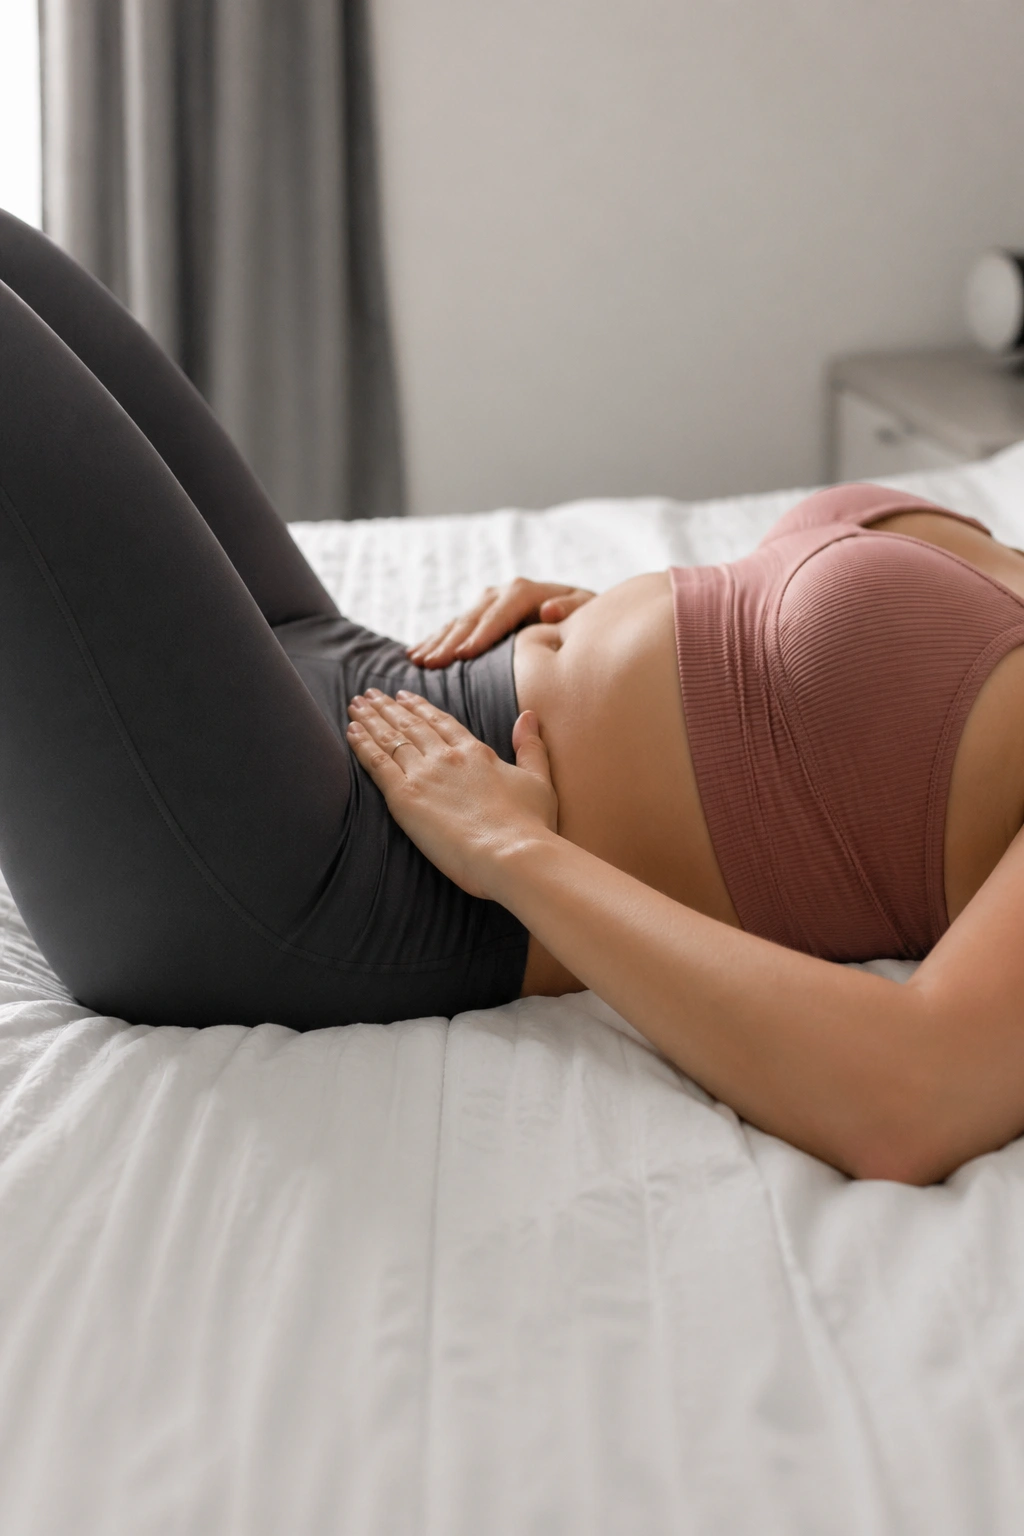
Picture your lower back hovering off the floor while your ribs stay popped up. That posture shows up all over postpartum life—while feeding, standing, carrying, and trying to do ab work. A supine pelvic tilt helps you find the back of the pelvis again without forcing a big crunch.
Lie on your back with knees bent and feet hip-width apart. Let the spine settle naturally first. Then exhale and gently tip the pelvis so the lower back moves a little closer to the floor. Inhale and return to neutral. The motion is small. If it looks dramatic, you are probably using your glutes or feet too much.
What I like about this drill is how clean the feedback is. When it’s done well, you feel the lower abs turn on and the rib cage quiet down. When it’s done badly, you feel your quads gripping, your feet pressing hard, or your low back shoving into the floor like you are trying to win an argument with the mat.
Use 2 sets of 8 to 10 slow reps. Exhale on the tilt, inhale on the release. If the front of the belly domes, reduce the range. If the move feels like nothing, slide your fingertips just inside the front hip bones and you’ll often feel the deep core wake up.
Small move. Useful move.
3. Heel Slides
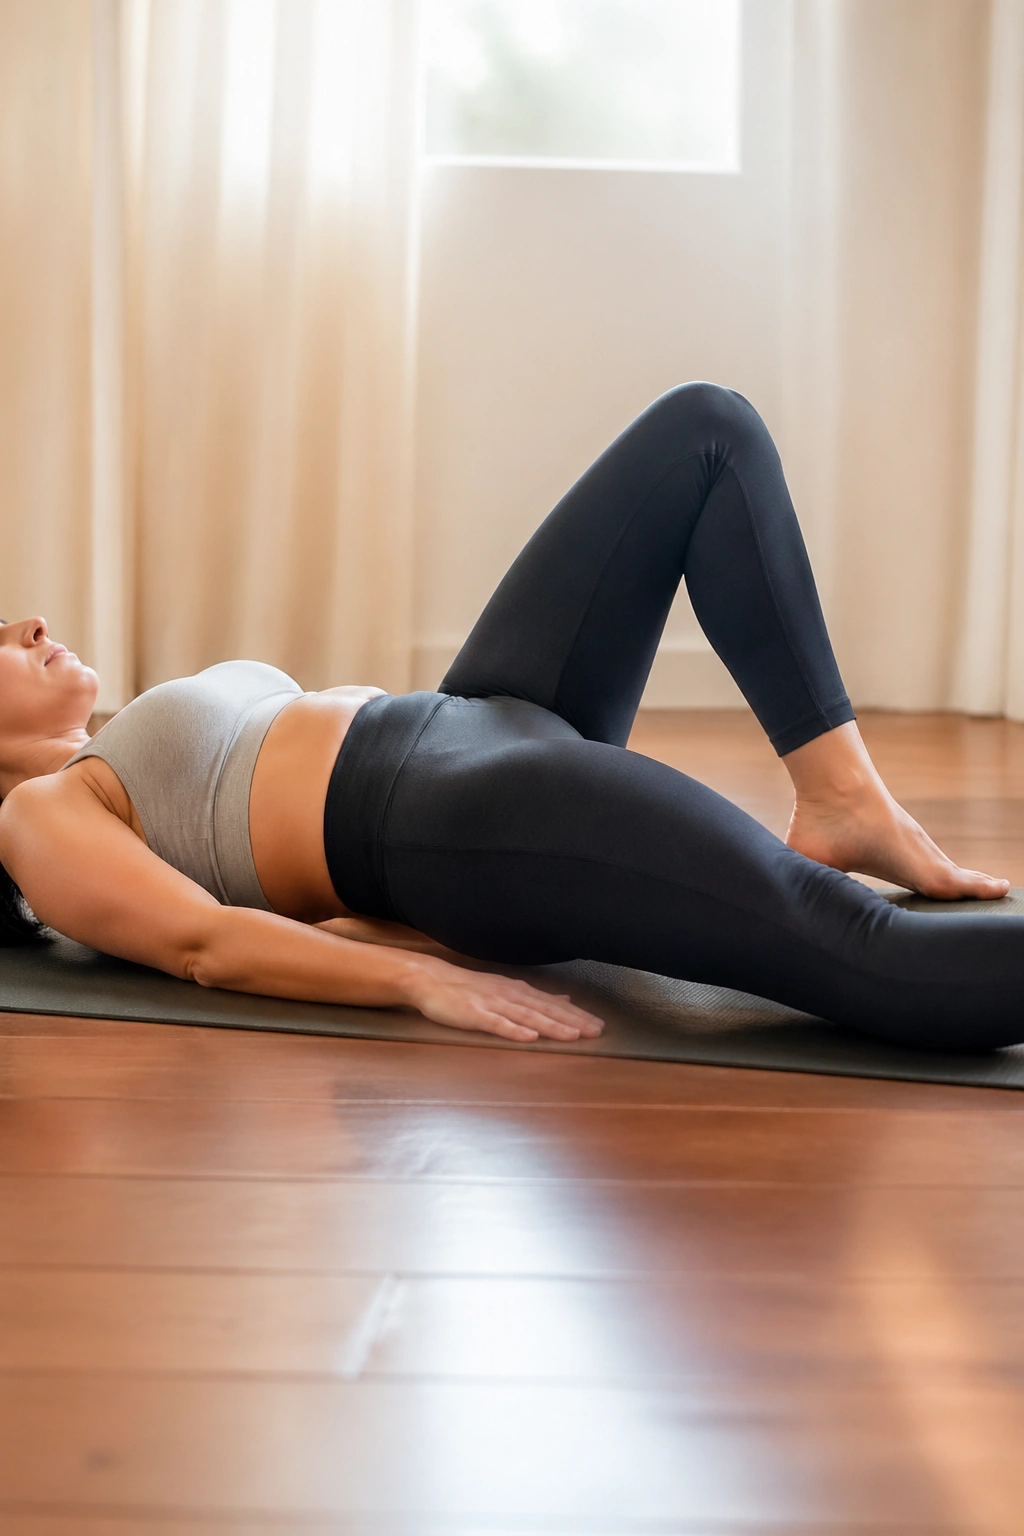
Can you move one leg without your belly pushing upward or popping forward? Heel slides answer that question fast.
This is an anti-extension drill, which means your trunk stays steady while the leg moves. That matters postpartum because many women can create tension lying still, then lose it the second a leg lifts, straightens, or drags away. Loose skin often looks more pronounced when the belly is repeatedly pushed outward under load, so this exercise helps teach control where it counts.
The setup
Lie on your back with one knee bent and the other foot flat beside it. Exhale, let the lower ribs settle, and gently brace the low belly. Slide one heel away along the floor until the leg is almost straight, then inhale and bring it back in. Move slowly enough that the pelvis does not rock.
What to watch for
- Stop the slide before the stomach domes
- Keep both front hip bones level
- If the incision feels tuggy after a cesarean, shorten the slide
- Start with 6 to 8 reps per side
A towel under the heel can make the motion smoother on carpet. If this still feels too tough, slide only halfway out. If it feels easy and your belly stays quiet, pause for 1 second with the leg long before returning.
The beauty of heel slides is that they look boring and expose everything. I mean that as praise.
4. Glute Bridges
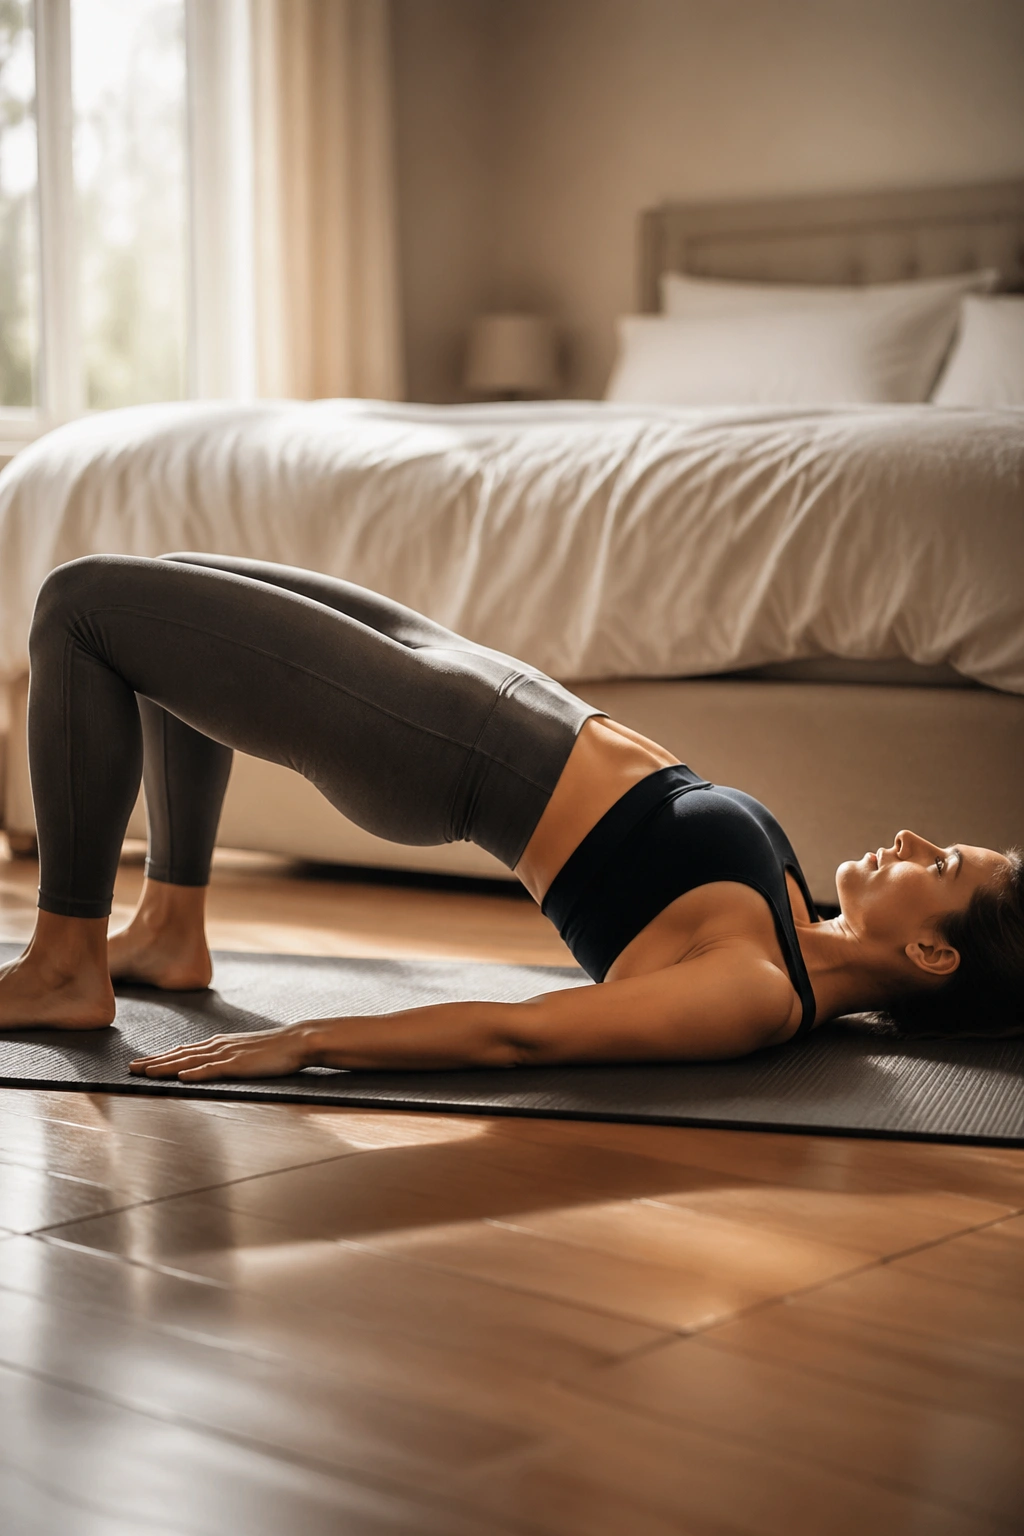
Your glutes matter more here than your abs do.
When the glutes are sleepy, the pelvis often tips forward, the low back grabs extra work, and the belly sits farther out front. A good glute bridge helps restore hip extension, gives the back a break, and changes the posture that makes the lower abdomen look heavier than it is.
Lie on your back with knees bent and heels about 8 to 10 inches from your hips. Exhale, feel the ribs settle, then press through the heels and lift your hips until your body forms a line from shoulders to knees. Pause for 2 seconds. Lower over 3 seconds.
The usual mistake is turning this into a backbend. If your ribs flare and your chest shoots up first, you’ve lost the point. Think “lift from the hips”, not “arch as high as possible.” A little hamstring work is fine. A cramp means you may need to bring the feet slightly farther away or reduce the height.
A few quick details:
- Try 2 or 3 sets of 8 to 12 reps
- Keep the knees in line with the second toe
- Exhale on the lift, inhale on the way down
- Add a light mini-band above the knees only after the basic version feels solid
This one also earns points for real life. Stronger glutes make standing, climbing stairs, and carrying the baby less of a whole-body negotiation.
5. Dead Bug Heel Taps
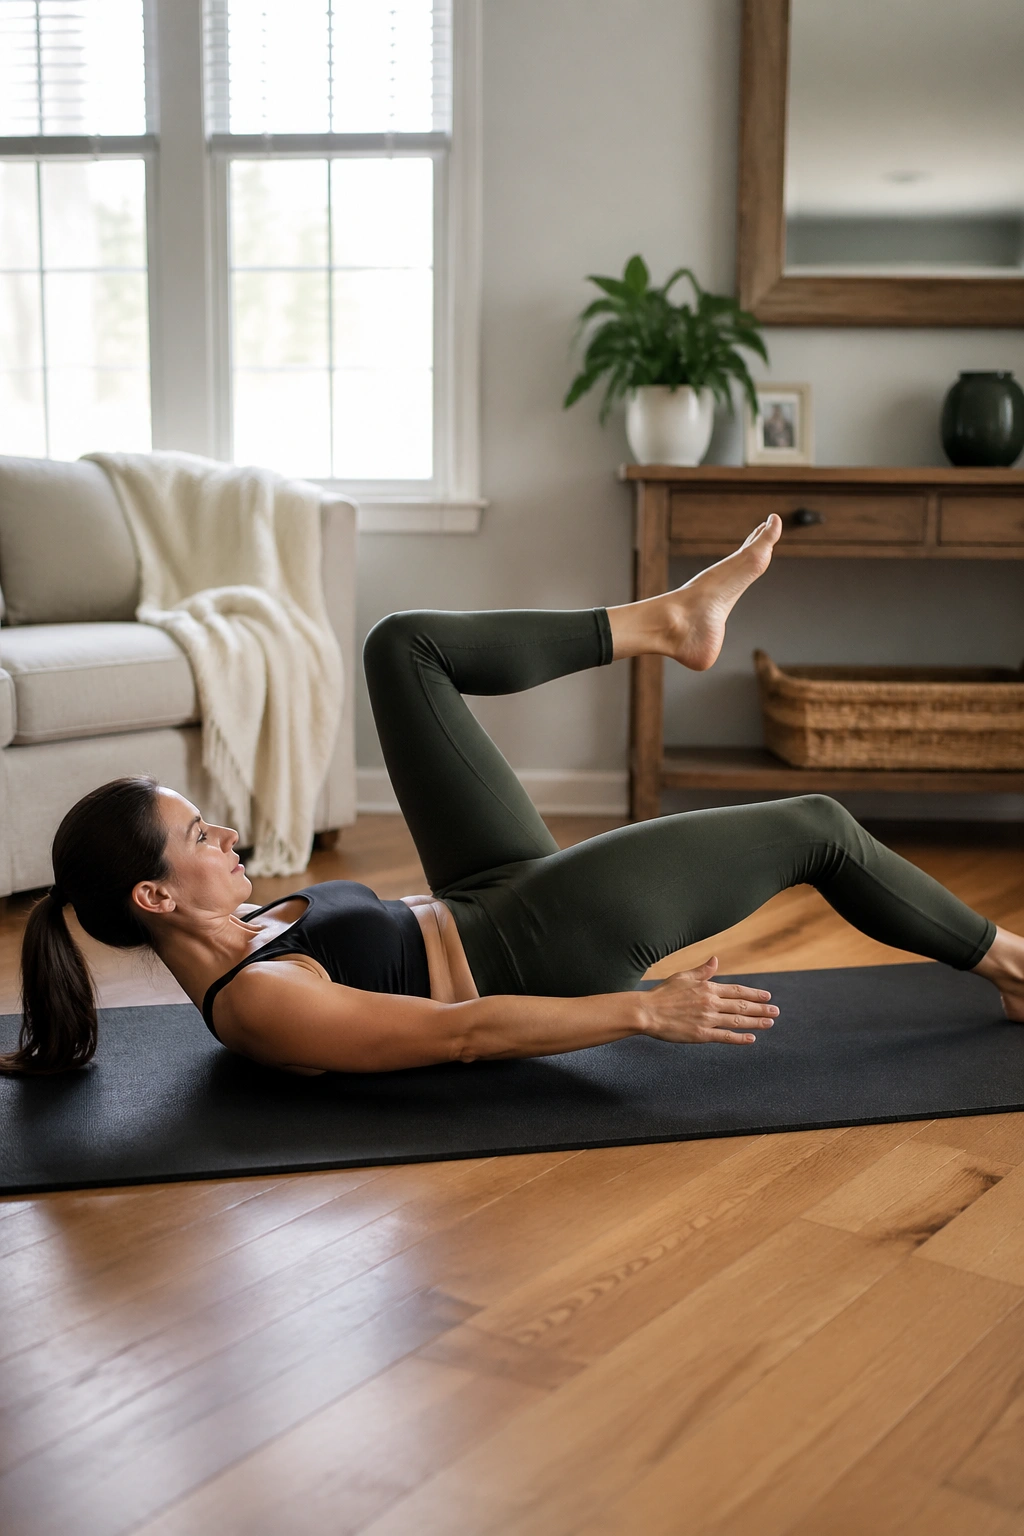
This one looks tame until you do it the right way.
A dead bug heel tap trains the deep core to hold the trunk steady while the legs move, which is exactly the skill that starts to disappear during pregnancy and the early weeks after birth. It is one of my favorite mid-stage postpartum exercises because it tells you, without any drama, whether your pressure control is getting better.
Start on your back. Bring one leg up at a time to tabletop so the knees and hips are bent to about 90 degrees. If that already makes your belly dome, keep one foot on the floor and use a marching version first. Exhale, brace gently, and lower one heel toward the floor until it taps. Bring it back up and switch sides.
Why it works
The point is not the tap. The point is keeping the trunk quiet while the limbs move. You are teaching the abdominal wall to resist excessive rib flare and back arching, which helps the midline feel more supported over time.
How to get more from it
Move slowly enough that each rep lasts about 3 seconds down and 2 seconds up. Start with 5 or 6 taps per side. If you feel the low back arch hard or see a cone through the center, shorten the range or return to heel slides for another week or two.
There is a stubborn myth that postpartum core work has to feel brutal to count. Dead bugs are a nice rebuttal to that nonsense.
6. Side-Lying Clamshells
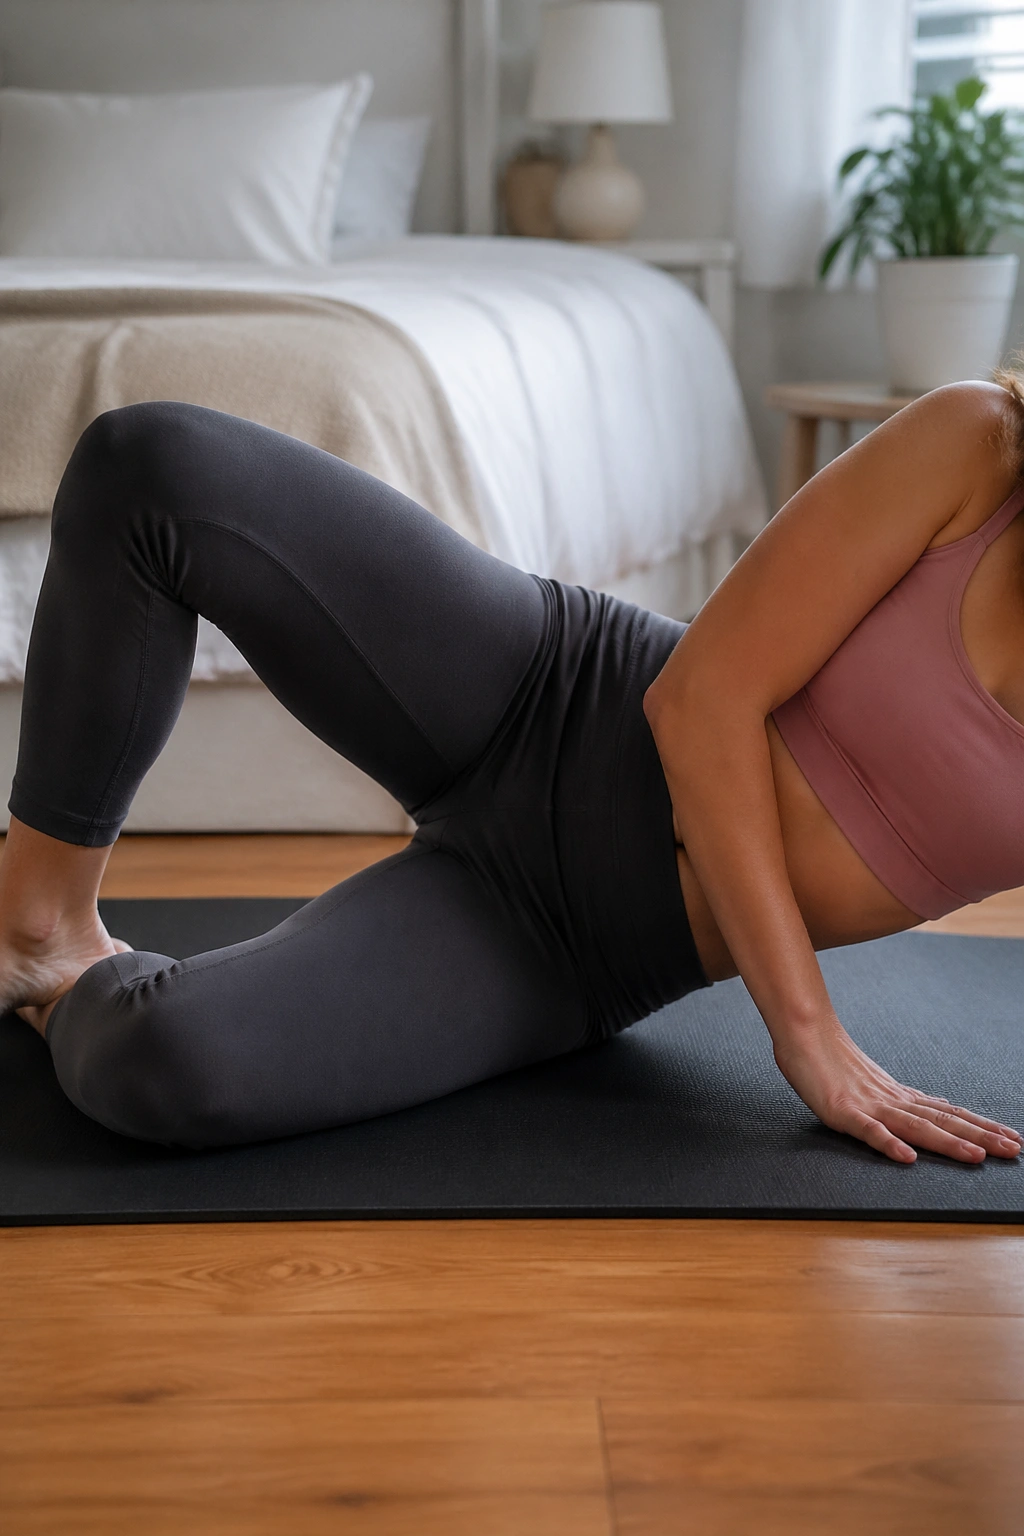
If you spend half your day standing on one leg while bouncing a baby on one hip, your outer glutes are probably begging for attention.
A side-lying clamshell trains the glute medius, the muscle on the side of the hip that helps control pelvic drift. That sounds technical. Here’s the plain-English version: when that muscle is weak, the pelvis wobbles more during walking, stairs, squatting, and all the one-sided holding that postpartum life seems built around.
Lie on your side with hips stacked, knees bent, and heels in line with the torso. Keep the feet together and open the top knee without rolling the pelvis backward. The range is smaller than most people think. You should feel the side of the butt working, not the low back twisting.
Aim for 12 to 15 reps per side, then rest and repeat once more. A mini-band above the knees can raise the challenge later. Early on, body weight is enough if you hold the top for 1 second.
The reason I like clamshells in a loose-skin routine is indirect but real. Better hip control improves gait and pelvic position, which improves trunk stacking, which changes how the abdomen sits. No single rep tightens skin. The body works more like a chain than that.
Also, this one is easy to fit into nap-time chaos. Floor, pillow, 3 minutes. Done.
7. Bird Dog Holds
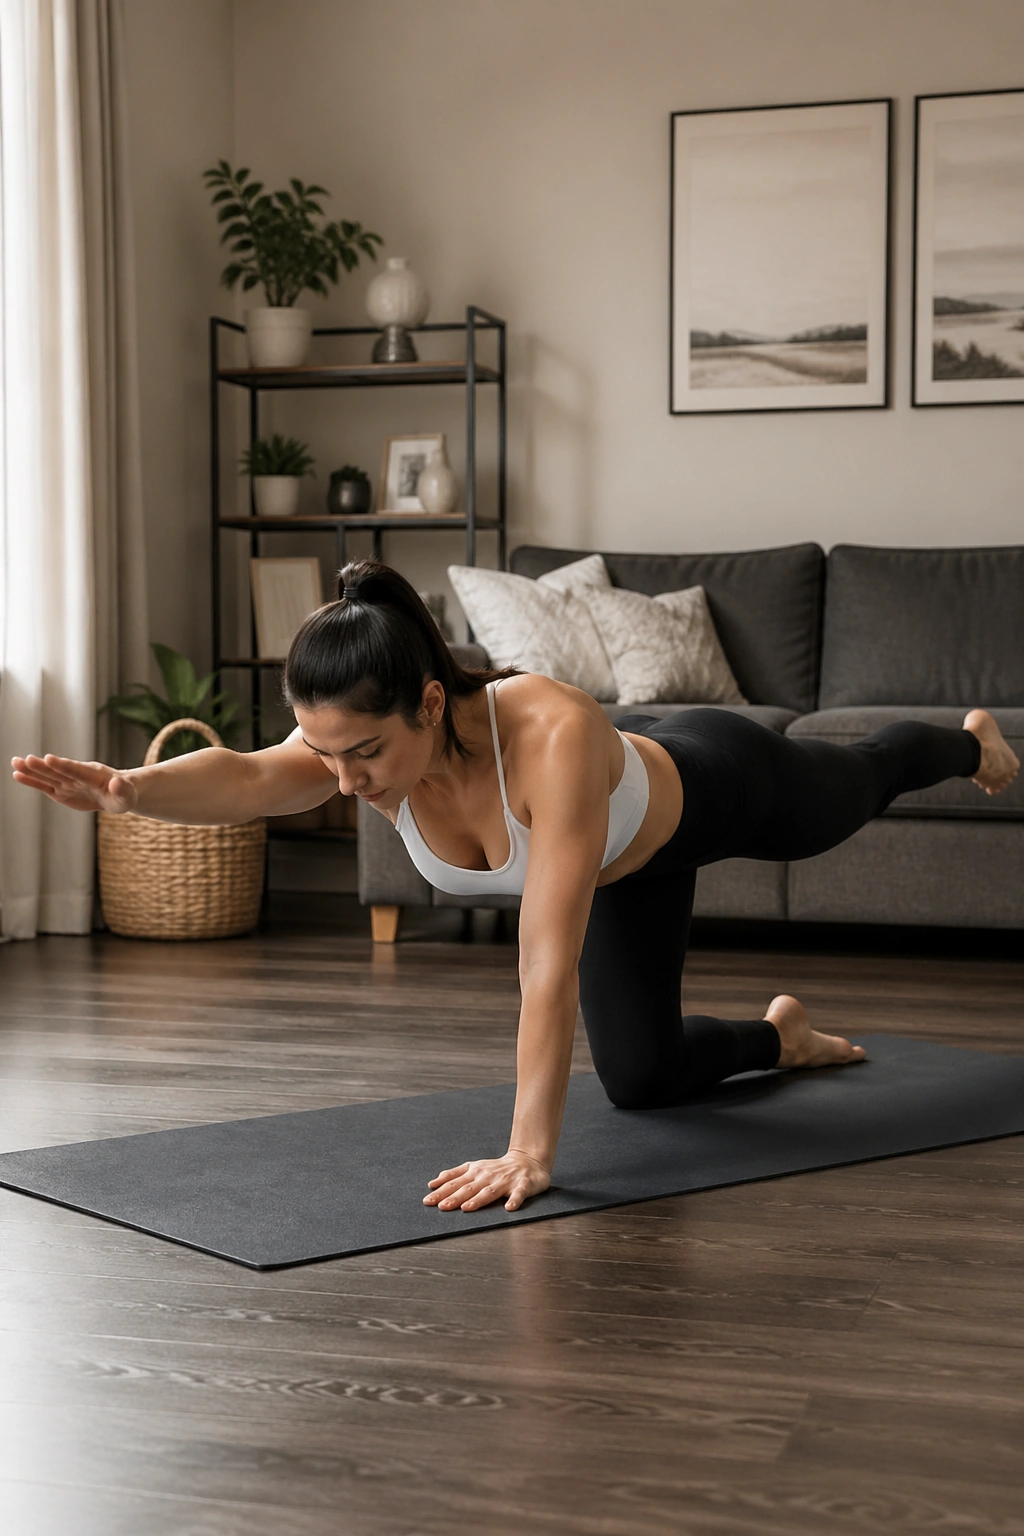
Slow beats flashy.
A bird dog hold builds cross-body stability—glute on one side, shoulder and trunk on the other—without forcing a hard crunch or long front plank. It is one of the cleanest ways to train the core in the position you use all day when reaching, turning, and carrying.
Set up on hands and knees with wrists under shoulders and knees under hips. Exhale first. Then slide one leg straight back along the floor until the toes touch, lift it an inch or two, and hold. If that feels stable, reach the opposite arm forward. Hold for 3 to 5 breaths, then switch sides.
A few cues matter here:
- Keep the hips square to the floor
- Think long, not high, with the leg
- Do not let the belly sag toward the mat
- If the arm makes you lose control, keep both hands down and train the leg only
I tell postpartum clients to imagine balancing a glass of water across the low back. That image usually fixes the movement faster than a long anatomy speech.
Start with 4 to 6 holds per side. If the wrists hate quadruped work, roll up the front edge of the mat or do the drill on fists. If the center of the abdomen domes, shorten the reach. Your ego can cope.
8. Chair Squats
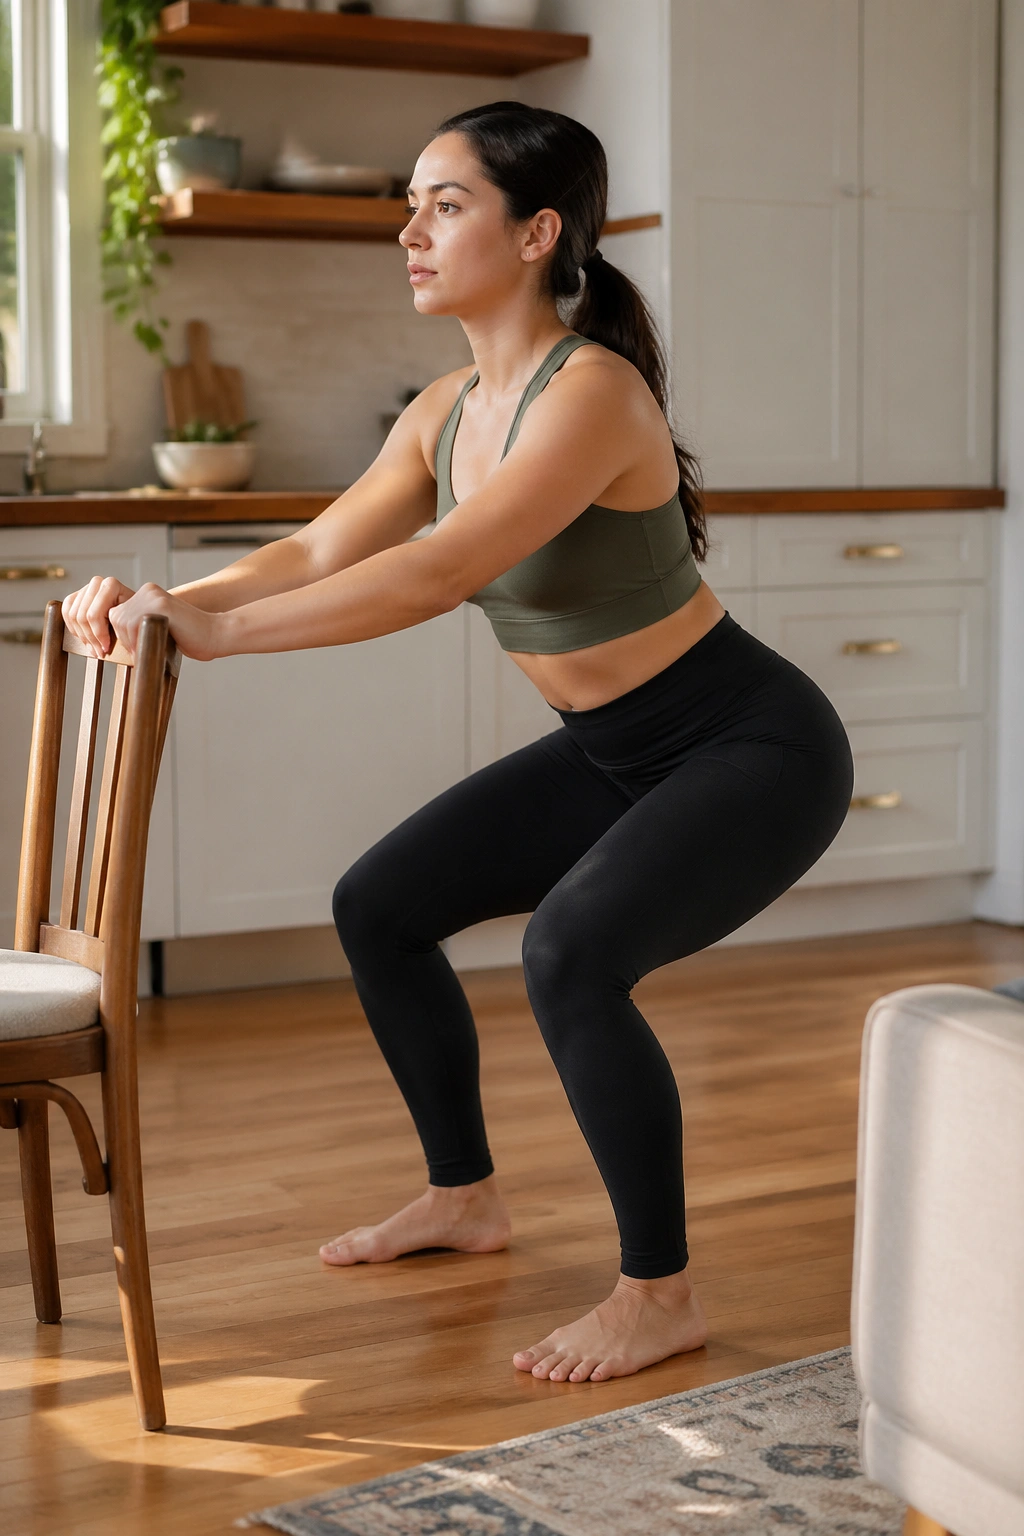
Unlike floor-based core drills, chair squats teach you to manage pressure while standing up from real life.
That matters because postpartum strength is not measured only by what happens on a mat. It shows up when you stand from the couch with a sleeping baby on your chest, lower yourself onto the toilet without collapsing, or pick up a laundry basket without your belly pushing outward. Chair squats bridge that gap better than a lot of “ab” exercises.
Use a sturdy chair or bench. Sit tall near the front edge with feet about shoulder-width apart. Lean forward from the hips, exhale, and stand up without rocking back for momentum. Sit back down with control. If needed, tap the chair and stand again. If the movement feels easy, pause for 1 second just before you sit.
Try 2 or 3 sets of 8 to 12 reps. The exhale on the way up helps the pelvic floor and abdominal wall handle the load. Watch the knees; they should track over the middle toes, not dive inward. If you feel pressure low in the pelvis, use a taller seat and reduce the depth.
I like chair squats because they tell the truth. If you can breathe, brace, and stand with control, your core is showing up where you need it most.
9. Wall Push-Ups
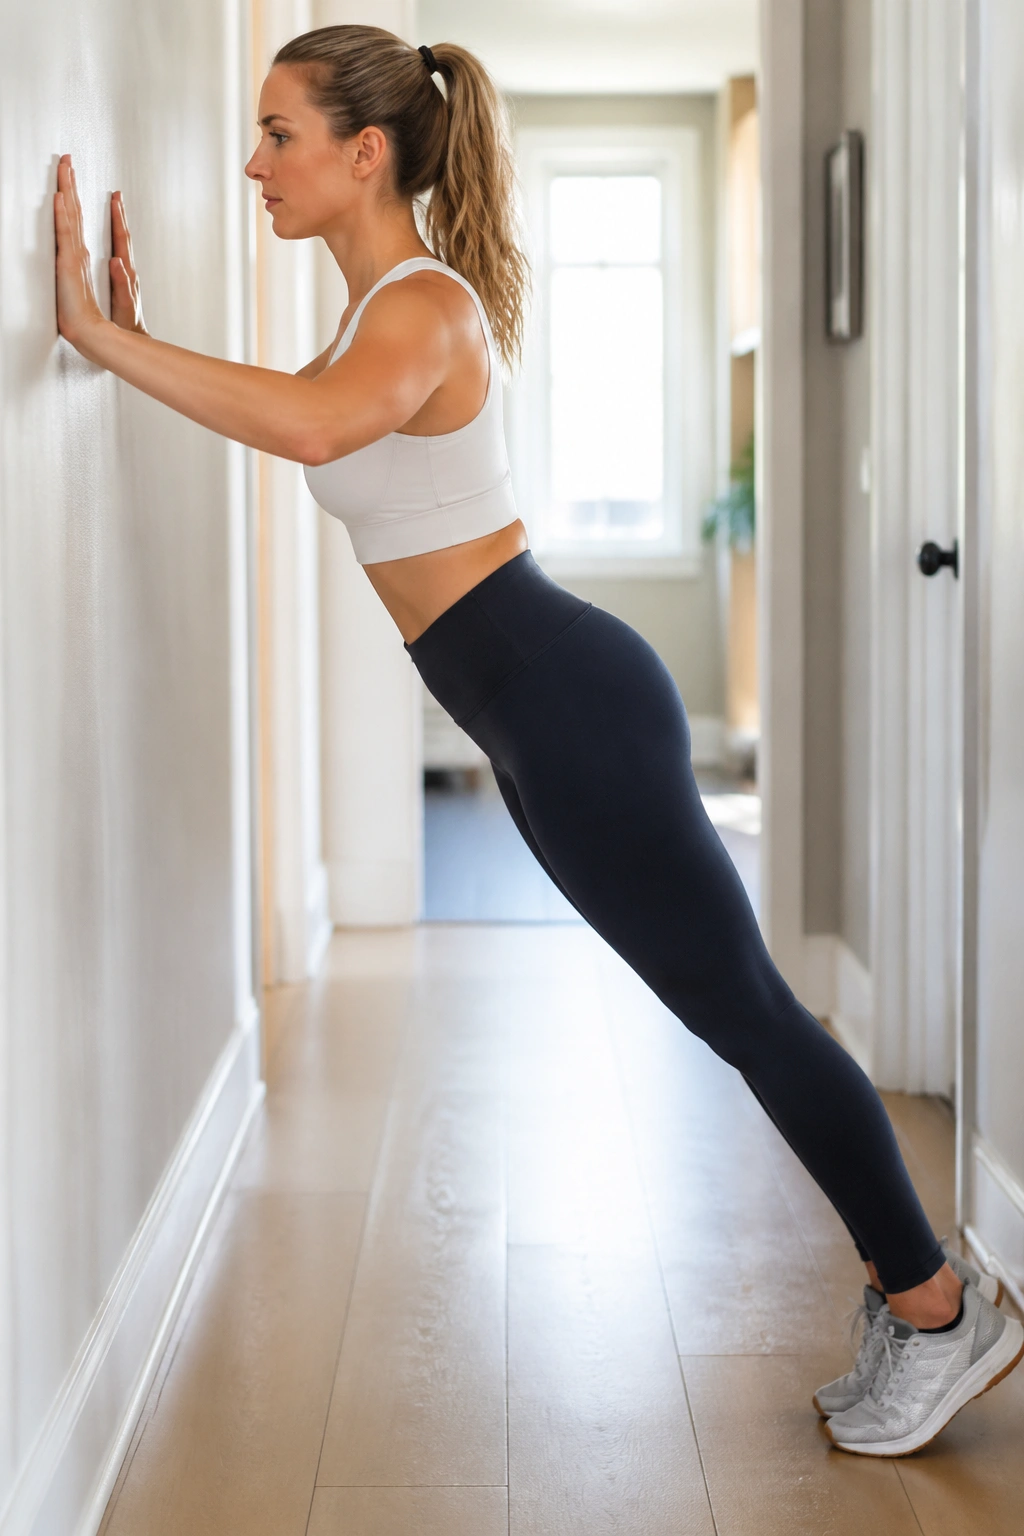
Push-ups for a postpartum belly? Yes, and I will defend that pick every time.
A wall push-up trains the chest, shoulders, serratus, and trunk together, which helps rebuild upper-body strength without dumping too much load into the front of the abdomen. New mothers often spend hours rounded forward feeding, rocking, typing one-handed, or staring down into a stroller. Strengthening the upper body in a stacked position helps pull the torso back into better alignment.
Set up the angle
Stand facing a wall with hands slightly wider than shoulder width at chest height. Walk the feet back until your body forms a straight line from head to heels. Bend the elbows and lower the chest toward the wall, then exhale and press away.
Make it easier or harder
- Easier: stand more upright
- Harder: move to a kitchen counter or sturdy table
- Start with 8 to 12 reps for 2 sets
- Keep the ribs from jutting forward as you press
The sneaky value here is in the serratus anterior, the muscle that helps the shoulder blade glide around the rib cage. When that muscle gets stronger, posture often improves and overhead work feels less sloppy. You also need a steady trunk to do a wall push-up well, so the core gets trained without a pile of strain.
If your belly domes at the wall, step closer and try again. That’s information, not failure.
10. Stroller Walking Intervals
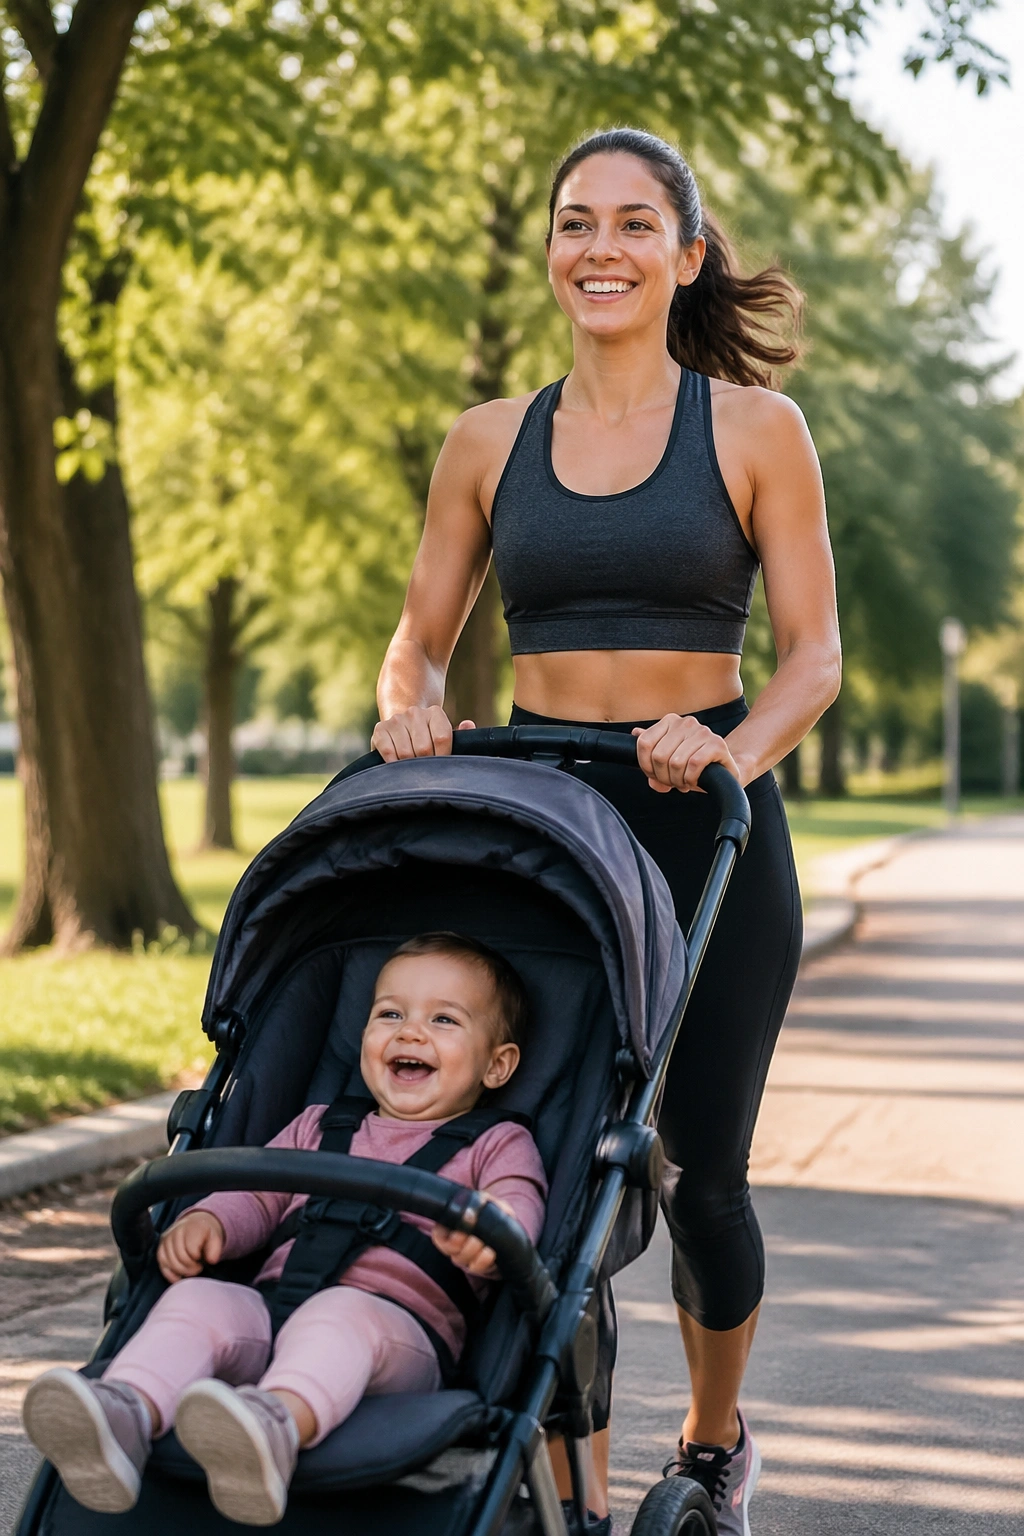
Ten minutes counts.
Walking is one of the most useful postpartum workouts around, and it gets dismissed because it is not flashy. A brisk stroller walk raises your heart rate, helps circulation, supports fat loss when that is part of the goal, and loads the core in a gentle upright position. It also improves mood, which matters more than people admit when recovery and identity are both in flux.
Here is the version I like most: walk easy for 2 minutes, then walk briskly for 1 minute. Repeat that pattern for 20 to 30 minutes. “Brisk” means you can still speak in short sentences, but singing would be annoying. If you are at the beginning, start with 10 to 15 minutes and build.
Posture decides whether this helps or irritates you. Do not hang on the stroller handles like a shopping cart. Keep the hands light, the ribs stacked over the pelvis, and the stride short enough that you are not leaning from the low back. Hills can wait until flat-ground walking feels smooth and symptom-free.
I’m fond of this one because it fits real life. Shoes on, baby clipped in, go outside, breathe. Not glamorous. Still one of the best choices on the list.
11. Resistance-Band Rows
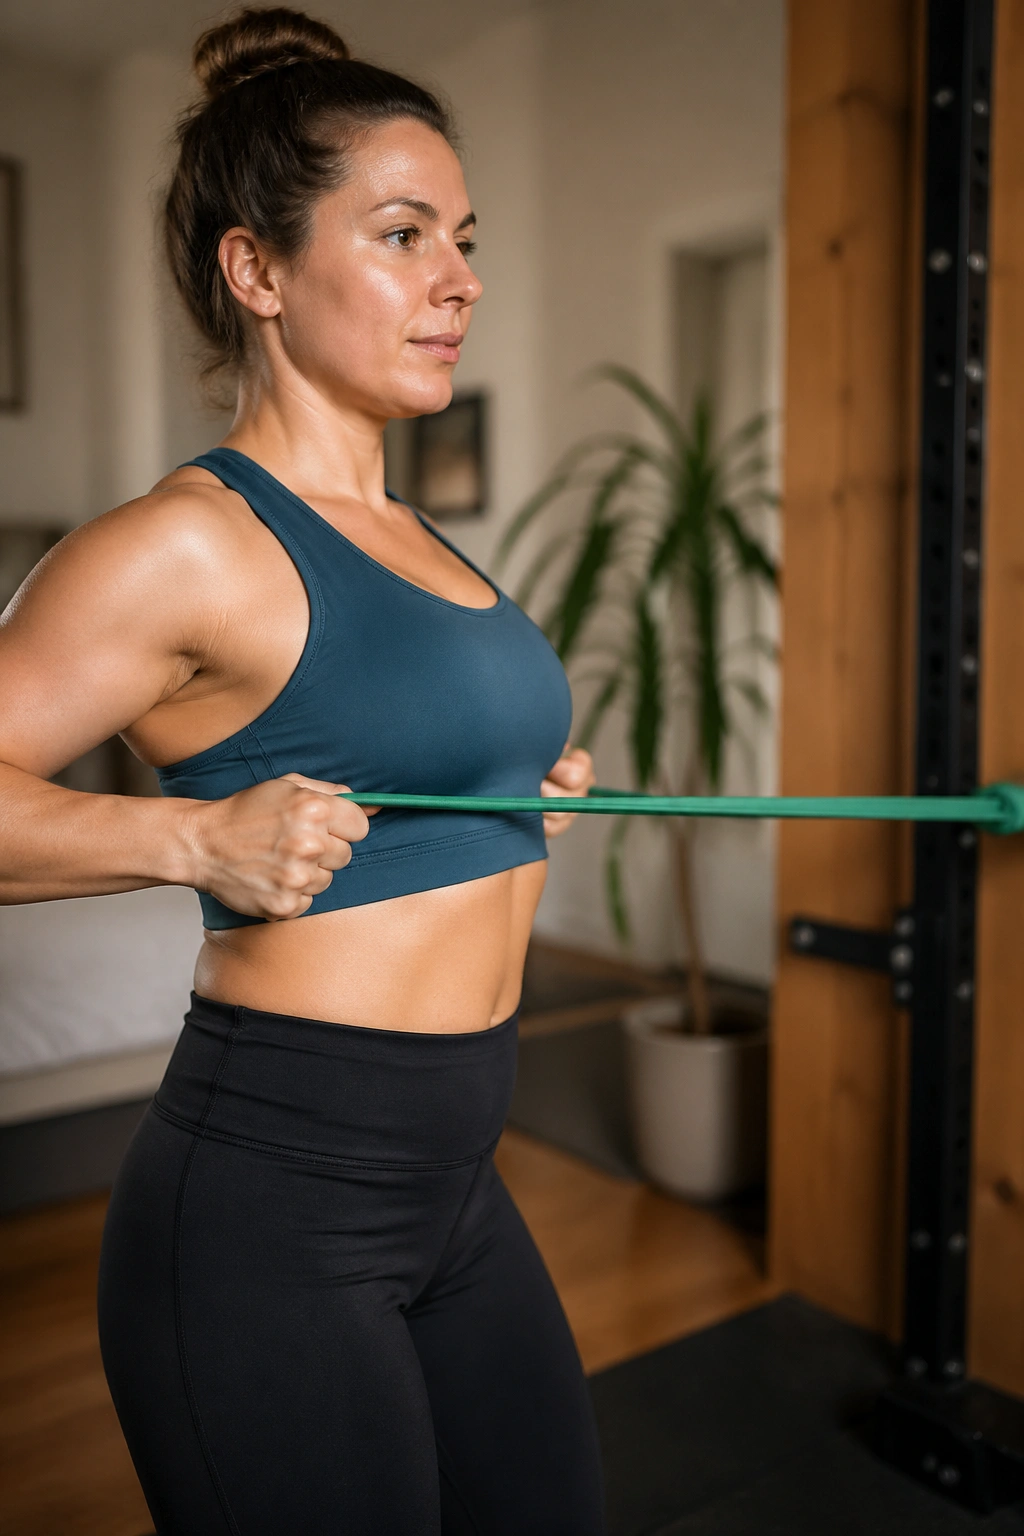
A stronger upper back can make your stomach look different before your skin changes much at all.
When the chest collapses and the shoulders roll forward, the rib cage tends to flare and the belly drifts out in front. Resistance-band rows help reverse that posture by building the mid-back muscles that keep the torso better stacked. New moms usually need this more than they think.
Anchor a band around chest height. Stand tall or sit on the floor with legs extended if that feels steadier. Pull the handles or ends of the band toward your ribs, pause for 1 second, then return with control over 2 to 3 seconds.
A few cues make the row land where it should:
- Pull the elbows toward the back pockets
- Keep the neck long instead of craning the chin forward
- Exhale as the band comes in
- Start with 10 to 15 reps for 2 or 3 sets
If you feel this more in the upper traps than the mid-back, lower the shoulders and think about squeezing the area between the shoulder blades without puffing the chest hard upward. It takes a rep or two to find.
Rows and wall push-ups make a strong pair. One opens the front. One strengthens the back. Together they do a lot for the slumped posture that makes the abdomen hang forward.
12. Step-Ups
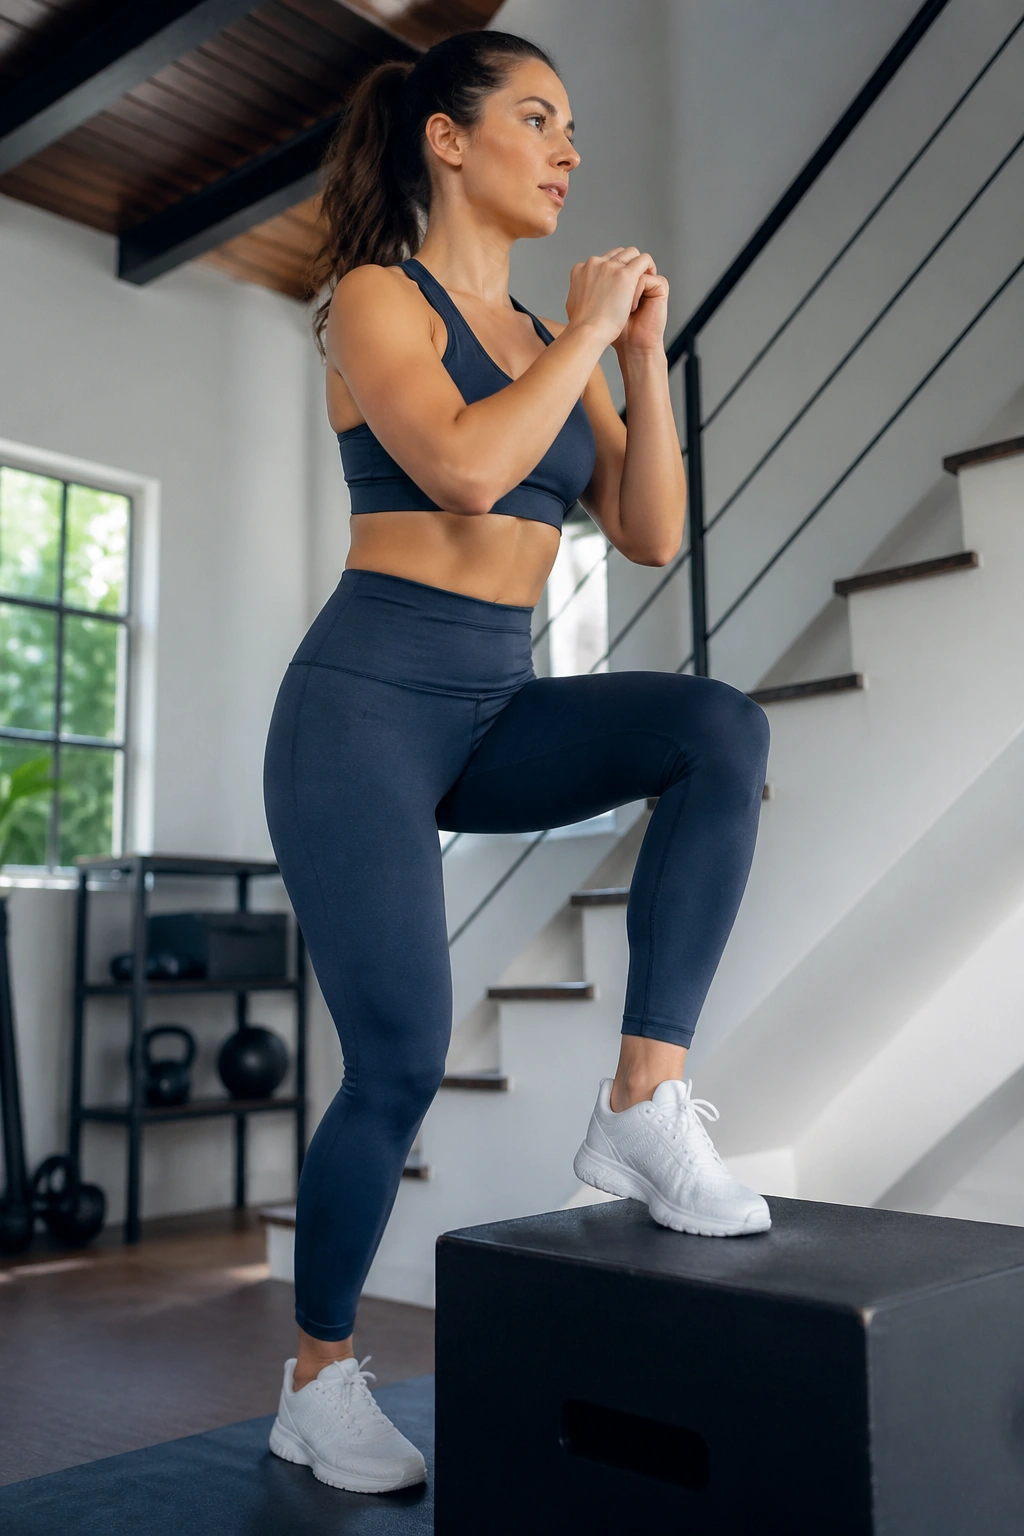
If stairs leave your legs shaking, step-ups belong in your week.
A step-up trains the glutes, quads, and deep core in a pattern that carries straight into daily life. It is one-sided, which is useful postpartum because asymmetry sneaks in fast. One leg does more work getting out of bed. One hip takes the baby more often. One side carries the diaper bag. You may not notice the imbalance until the pelvis starts tugging back.
Why this one matters
Step-ups teach you to accept weight on one leg while keeping the trunk under control. That helps with walking speed, stair climbing, and the whole “carry a child while doing another task” circus.
How to do it well
Use a low step, box, or bottom stair—4 to 8 inches is enough early on. Place the whole foot on the step. Exhale and drive through the heel to stand up. Lower slowly so you are not dropping onto the trailing foot. Try 6 to 10 reps per side for 2 sets.
The trap here is cheating off the back leg. You want the working leg to do the lift. Light fingertip support on a wall or railing is fine. Wobbling like crazy is not a badge of honor.
When these get easier, hold a light dumbbell at your side on the same side as the working leg. Not on day one. Later.
13. Modified Side Planks
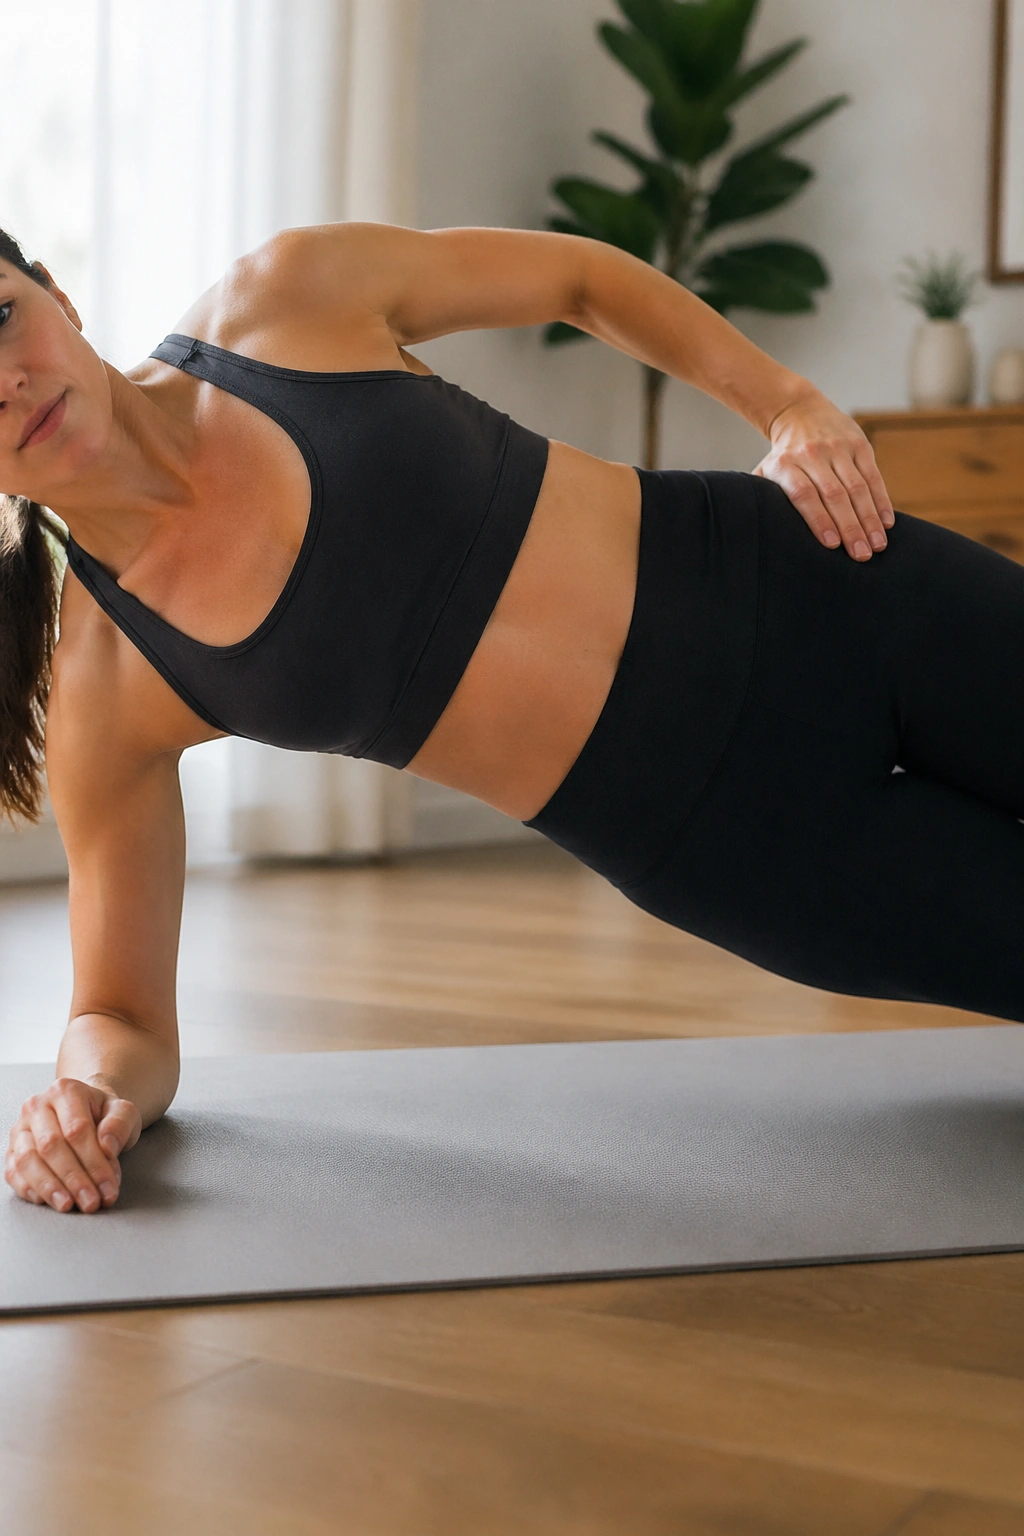
Front planks get all the attention. Postpartum, modified side planks often earn their spot sooner.
They train the obliques, side body, shoulder, and hip in a way that supports the abdominal wall without the same front-loaded pressure you get from a full plank. For women with lingering diastasis or coning, side-plank variations often feel cleaner and more productive than hammering away at standard plank holds.
Set up on your side with the forearm on the floor, elbow under shoulder, knees bent, and feet behind you. Exhale and lift the hips until the body forms a straight line from shoulders to knees. Hold for 10 to 20 seconds, lower, rest, and repeat.
What you want to feel is the underside waist and the glute on the bottom side. What you do not want is shoulder shrugging, neck strain, or the top hip rolling backward. If the shoulder gets cranky, place a folded towel under the forearm or bring the hand to an elevated surface like a couch arm for a gentler angle.
I like these because they make the waist feel active again. Not squeezed smaller—supported. There’s a difference, and postpartum bodies usually know it when they feel it.
14. Suitcase Carries
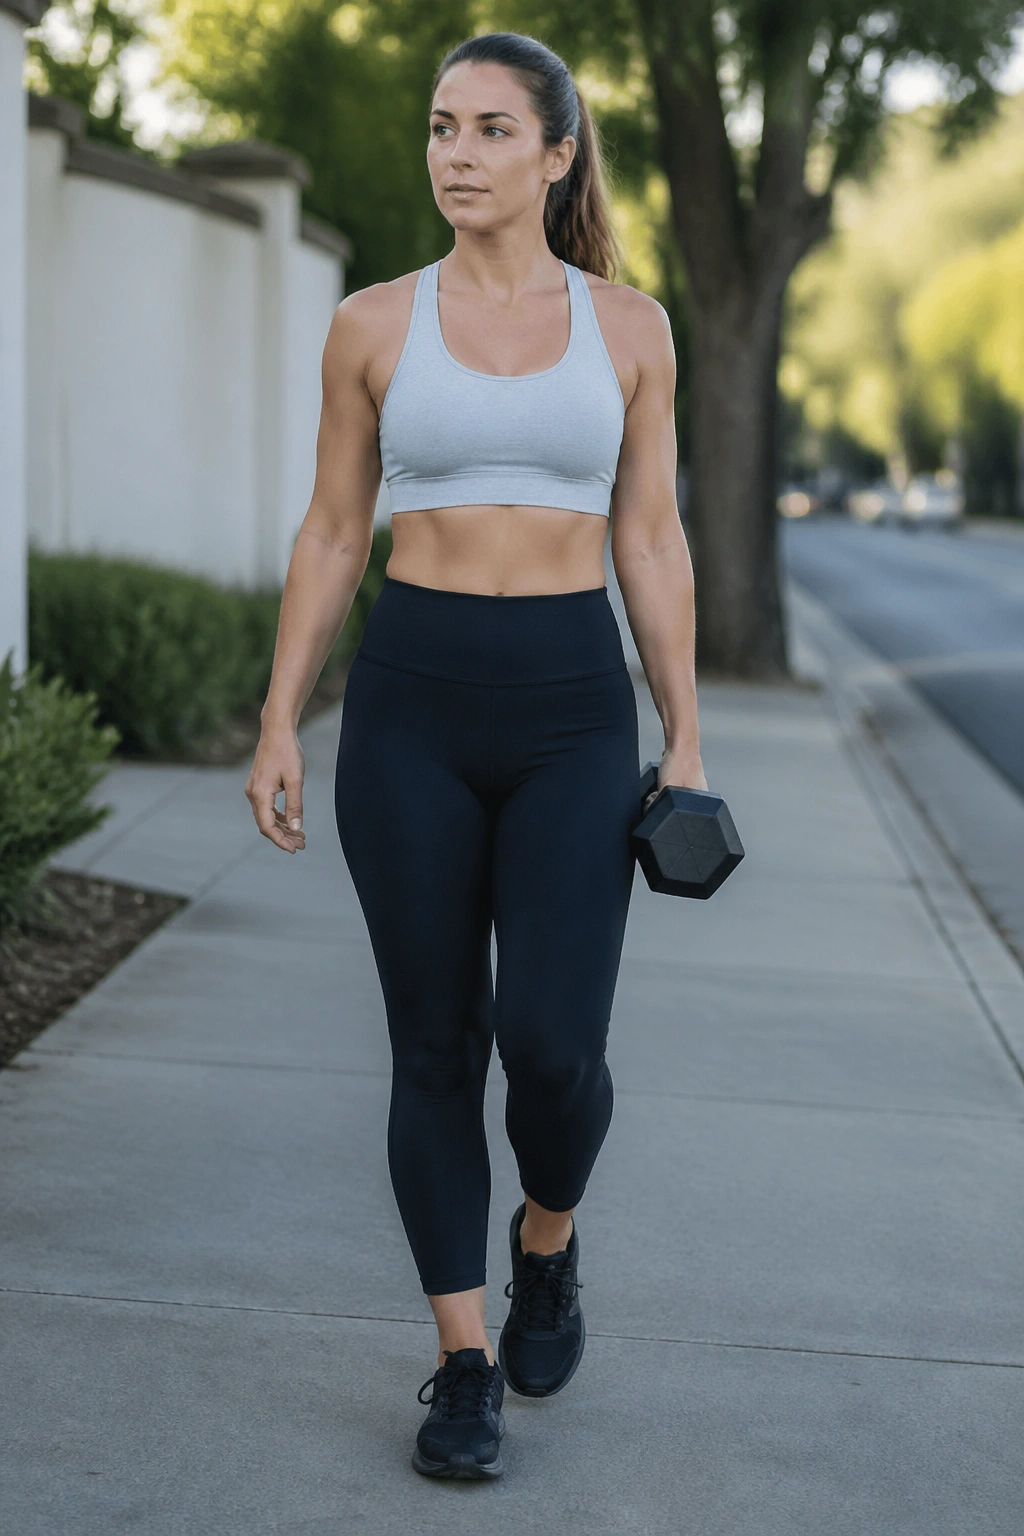
You are already doing carries all day. The smart move is learning how to do them on purpose.
A suitcase carry means holding one weight in one hand while you walk without leaning, twisting, or letting the ribs flare. That is almost identical to carrying a baby seat, grocery bag, or overloaded tote, except the load is chosen instead of random. It is one of the most useful functional core drills for postpartum women who feel lopsided all the time.
Pick a dumbbell or kettlebell you can hold without gripping for dear life—5 to 15 pounds is a sensible starting range for many women who are cleared for strength work. Stand tall, hold the weight at one side, and walk 20 to 30 slow steps. Switch hands and repeat.
Use this checklist:
- Keep the shoulders level
- Let the arm hang; do not clamp it to the body
- Walk tall instead of leaning away from the weight
- Breathe the whole time
This lights up the obliques, deep core, grip, and glutes in a way crunches can’t touch. If you had a cesarean and the incision still feels sensitive under load, start lighter and shorter. You should feel challenged, not braced like a statue.
One quiet bonus: suitcase carries teach you how to carry your baby without turning your spine into a question mark.
15. Pallof Press Holds
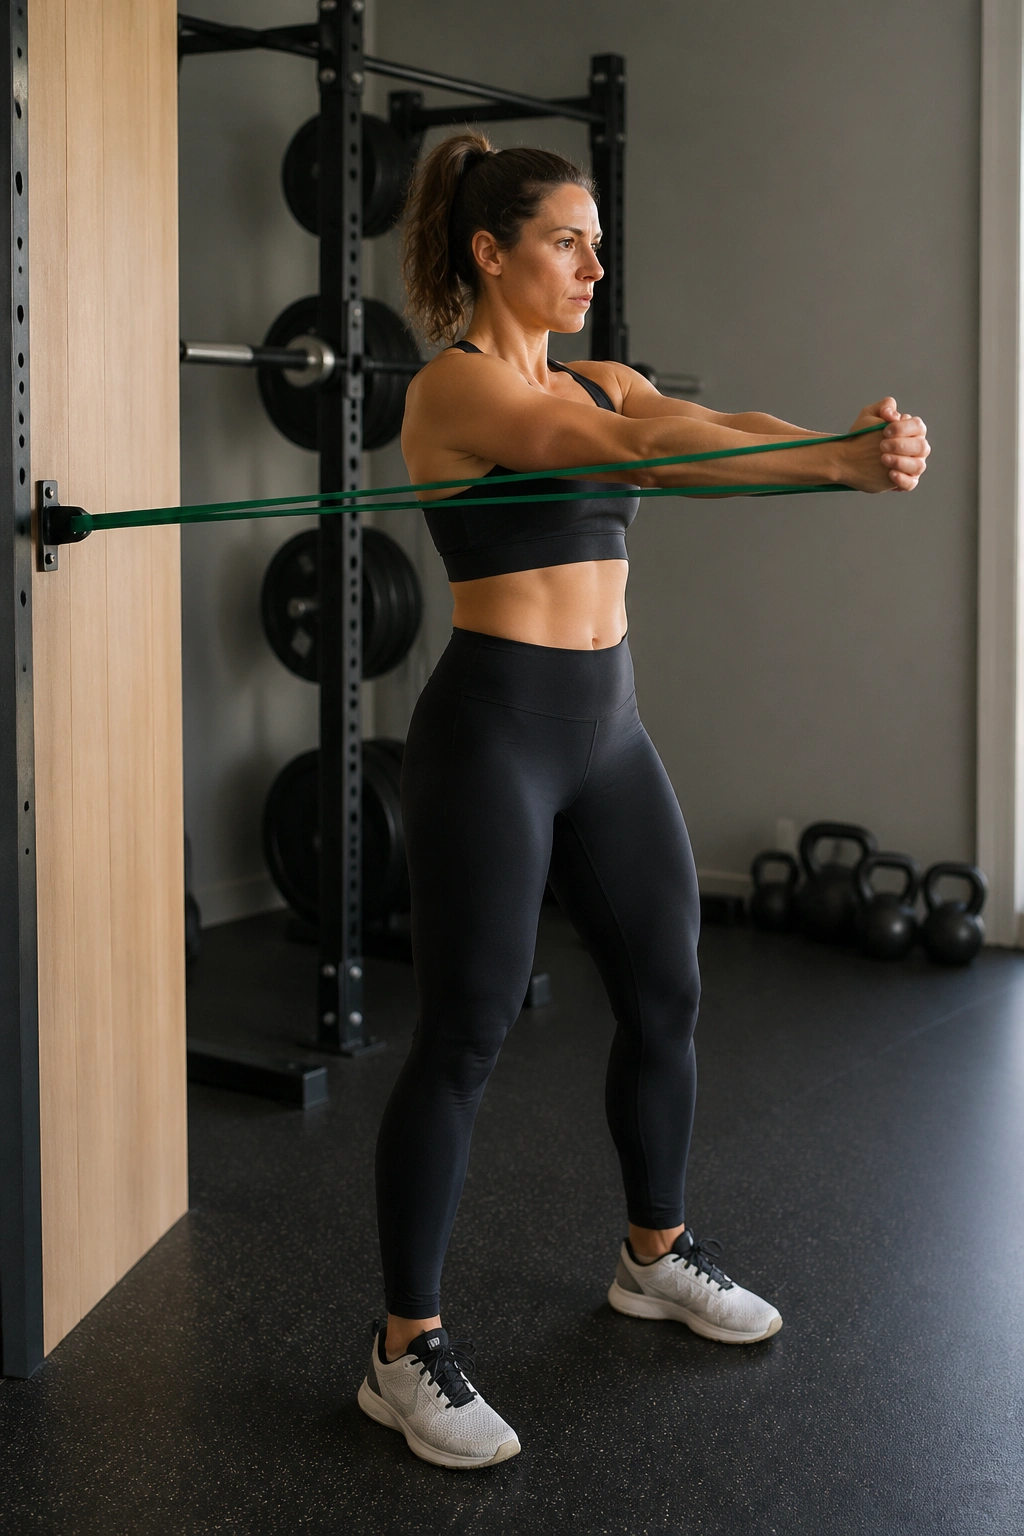
If you want your waist stronger without a pile of spinal flexion, the Pallof press is a smart finisher.
This is an anti-rotation move. A band tries to twist you, and your trunk resists that twist. It trains the obliques, transverse abdominis, and the little stabilizers around the ribs and pelvis that help the belly feel held in rather than pushed out.
Anchor a resistance band around chest height. Stand sideways to the anchor point with feet hip-width apart. Hold the band at your chest, exhale, and press it straight out in front of you. Hold for 2 to 3 seconds, then bring it back in. Do 8 to 10 reps per side.
A few form details matter
Do not rotate toward the band. Do not lean away from it either. Knees stay soft, ribs stacked, chin level. The farther you stand from the anchor, the harder it gets.
When to progress
Once the standing version feels stable, try a half-kneeling position with the inside knee down. That adds a hip-stability demand and often exposes whether one side of the trunk is still lagging.
I like ending sessions with this because it ties together everything the earlier drills teach: breathing, pressure control, posture, and resisting unwanted movement. It is not flashy. It works.
A 20-minute postpartum routine built from these 15 workouts
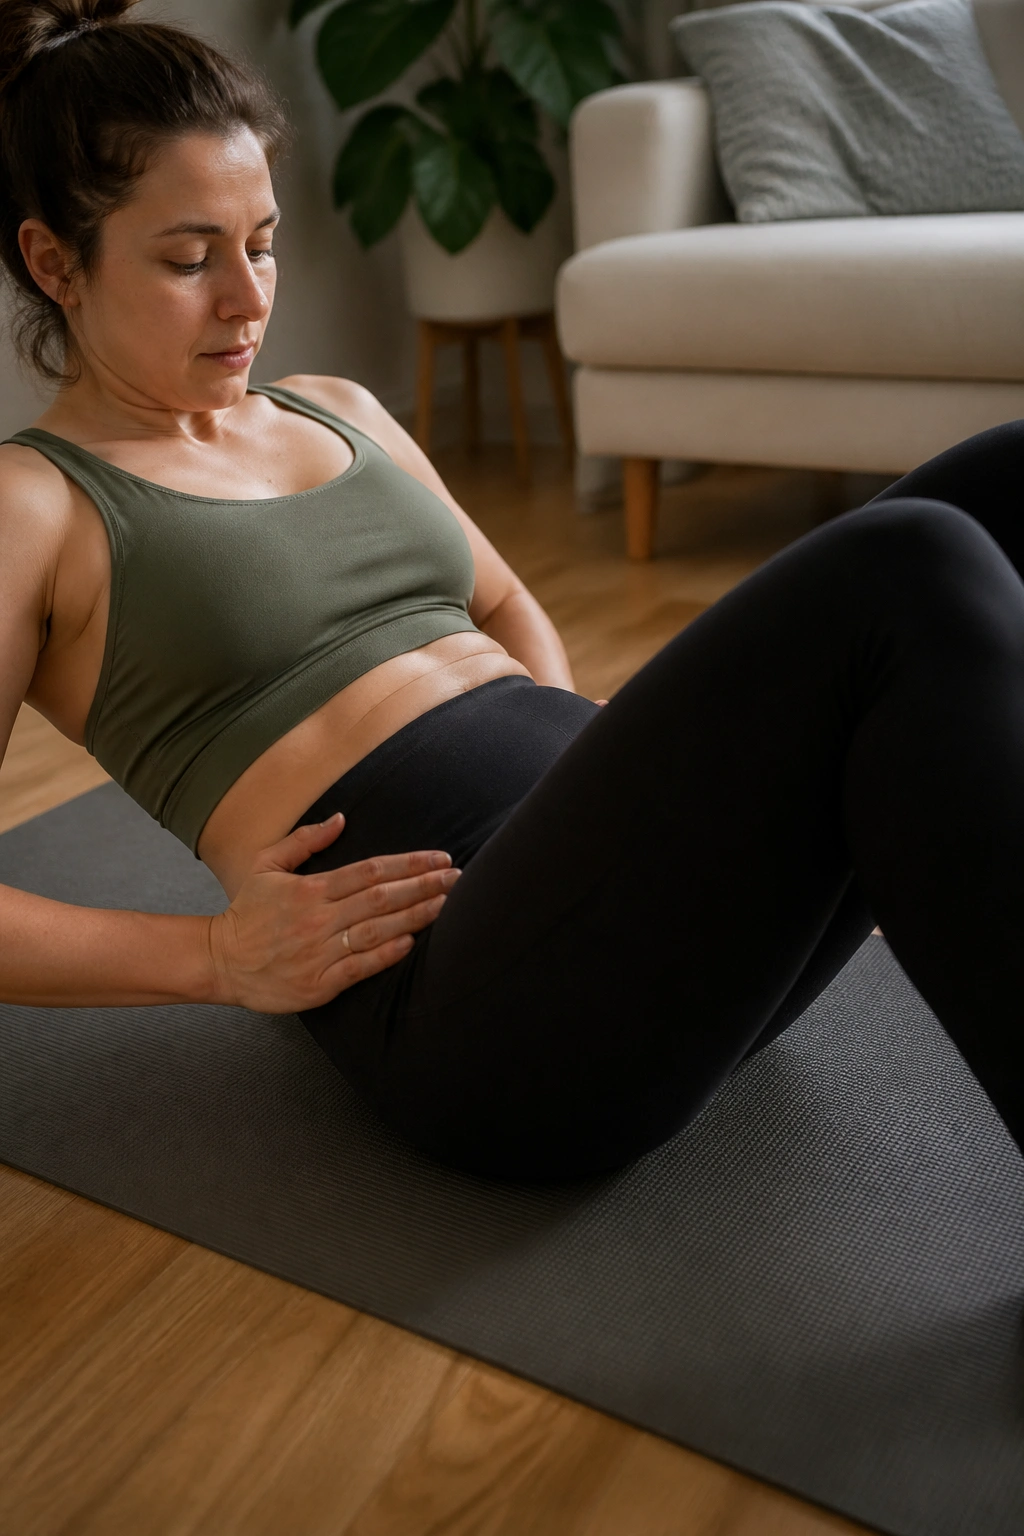
If you stare at a list like this and wonder how it is supposed to fit into a sleep-deprived week, here is a simple way to do it. Pick 5 or 6 moves per session, train 2 or 3 nonconsecutive days each week, and walk on the days between if energy allows.
Session A
- 360 breathing: 2 rounds of 5 breaths
- Pelvic tilts: 2 sets of 10
- Heel slides: 2 sets of 6 per side
- Glute bridges: 2 sets of 10
- Band rows: 2 sets of 12
- Easy stroller walk: 10 to 20 minutes
Session B
- 360 breathing: 1 round
- Bird dog holds: 4 holds per side
- Chair squats: 2 sets of 10
- Wall push-ups: 2 sets of 8 to 12
- Clamshells: 2 sets of 12 per side
- Suitcase carries: 2 walks per side
Session C
- Dead bug heel taps: 2 sets of 5 per side
- Step-ups: 2 sets of 8 per side
- Modified side planks: 2 holds per side
- Pallof press: 2 sets of 8 per side
- Stroller walk intervals: 15 to 25 minutes
Rest about 30 to 60 seconds between strength sets. If night feeds wrecked your sleep, cut the volume before you cut the quality. Five clean reps beat twelve sloppy ones.
Protein, hydration, and scar care that support firmer-looking skin
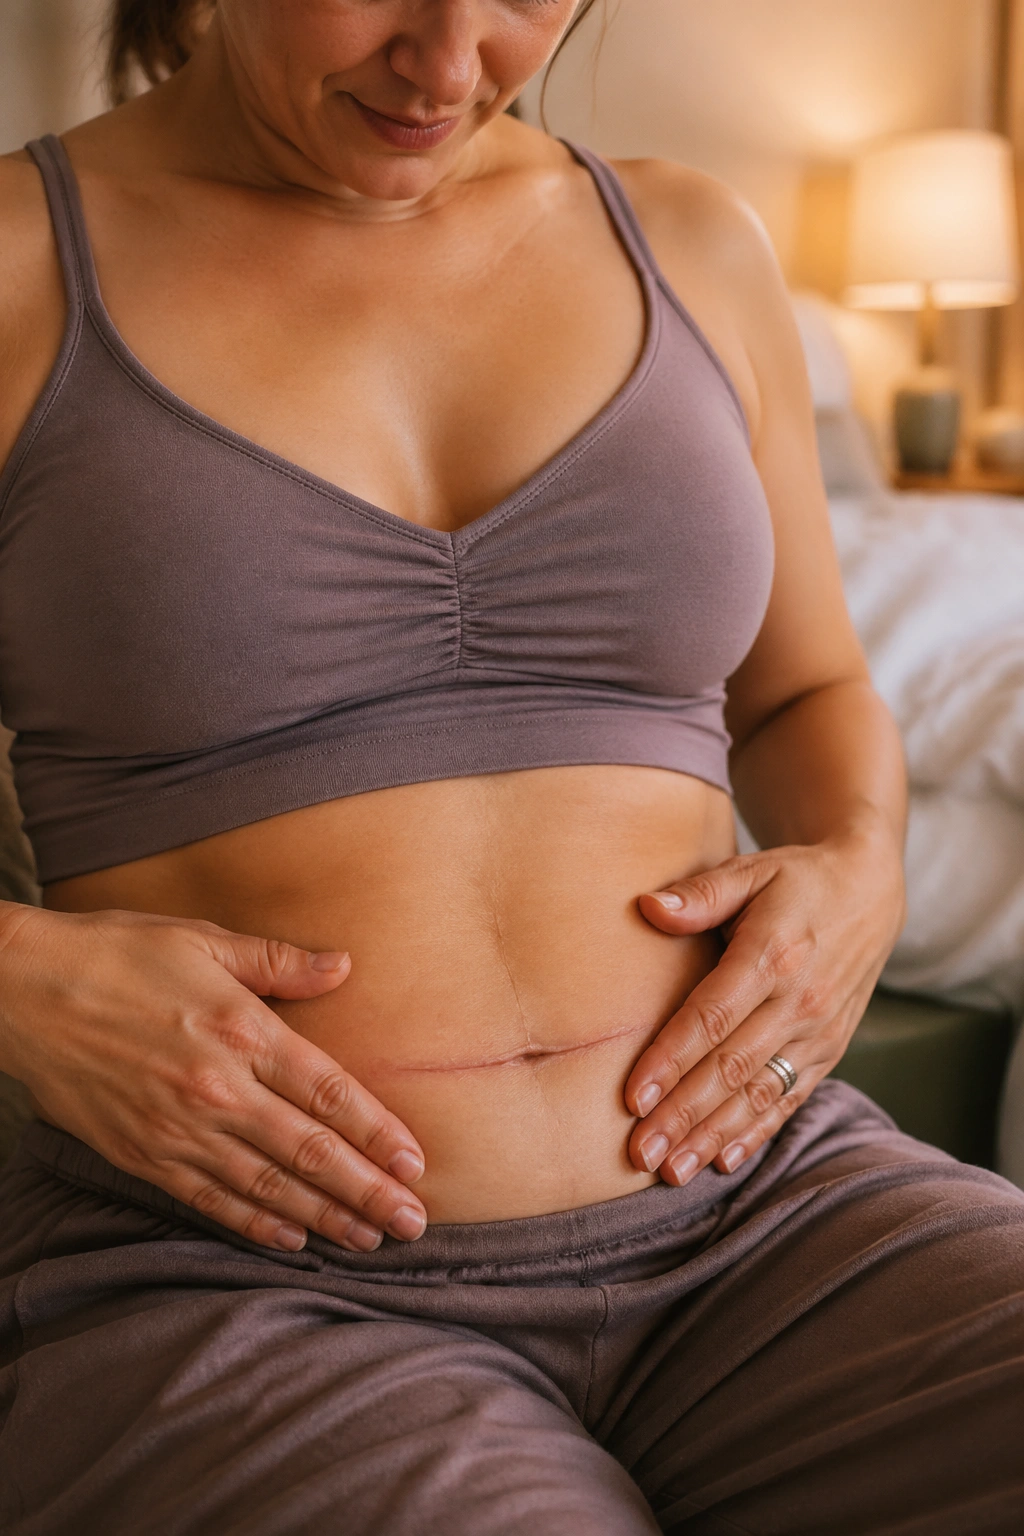
Training helps. Recovery decides how much of that help you get to keep.
Protein matters because rebuilding muscle under loose skin takes raw material. A practical target for many postpartum women is 20 to 30 grams of protein per meal from food like eggs, Greek yogurt, cottage cheese, fish, chicken, tofu, tempeh, beans, or a protein shake you tolerate well. Collagen powder is optional. A decent meal usually does more work than a trendy tub.
Hydration matters too, though not because water “tightens” skin on command. Well-hydrated tissue tends to feel and move better, and breastfeeding can leave you drained fast. Keep a bottle near the nursing chair or the spot where you feed most often. The boring habit is the useful one.
Rapid fat loss can make loose skin look harsher. Slower changes usually treat the tissue more kindly. Pair the workouts with walking, regular meals, enough fiber, and strength progression before you start chasing hard calorie cuts.
If you had a cesarean, scar mobility deserves attention once the incision is fully closed and your clinician clears you for it. A scar that feels stuck to the layers below can create pulling, numbness, or a shelf above the incision. Gentle massage, desensitization, and hands-on help from a pelvic floor physical therapist can make a bigger visual difference than people expect.
Sleep? Postpartum sleep is messy, and I’m not going to insult you with a lecture. Still, even an extra 30 to 45 minutes across a day can help recovery, appetite control, and training quality. Little margins matter here.
Final Thoughts
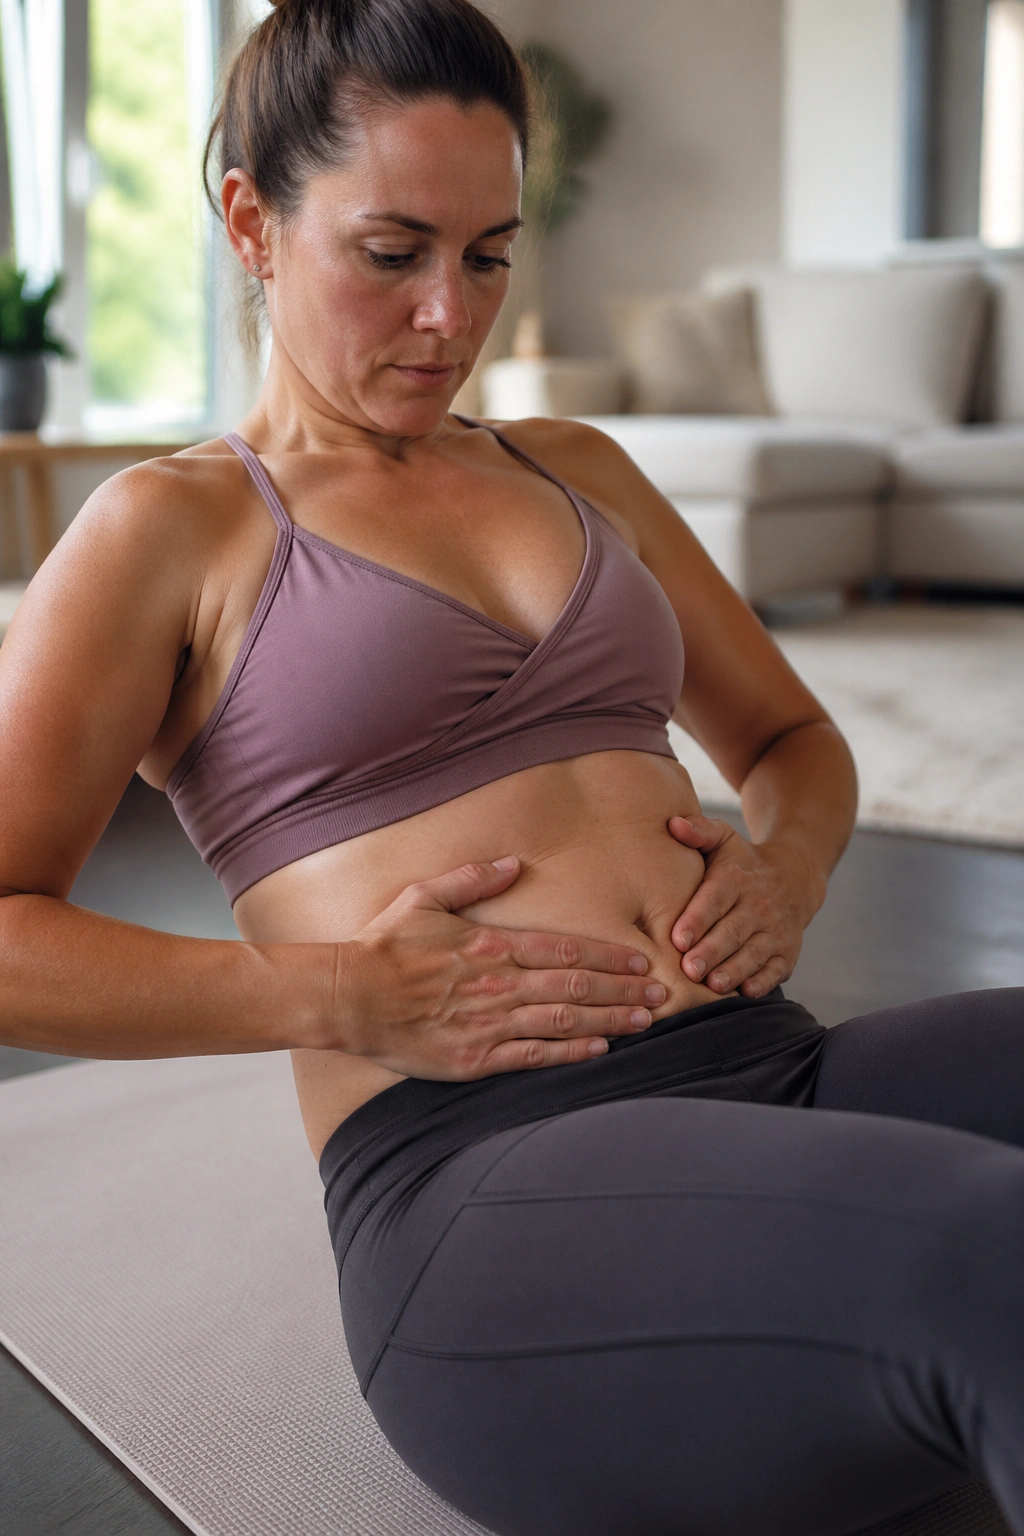
Loose skin after pregnancy carries more emotion than most fitness articles admit. It is not only about how your stomach looks in leggings. It is about whether your body feels like home again.
The workouts above work best when you treat them like rebuilding drills, not punishment. Start with breath and pressure control. Add strength where you need support most—glutes, hips, back, obliques, deep core. Walk more than the internet says is exciting. Progress when the body stays quiet, not when your patience runs out.
And if one move gives you heaviness, leakage, pain, or doming, that is not your body being difficult. It is your body giving you useful feedback. Listen to it, train around it, and stack one good week on top of the next. That is how postpartum strength comes back.
