



Postpartum core workouts with baby do not need to look like a gym class you barely have time for. Most days, the smarter move is smaller: breathe well, stack your ribs over your pelvis, and rebuild control before you chase intensity.
That matters more than people think. After pregnancy and birth, the core is not only your abs. It’s your diaphragm, deep abdominal wall, obliques, low back, and pelvic floor working together again — sometimes politely, sometimes not. If you feel doming down the midline, leaking, pelvic heaviness, or pain around a C-section incision, that is your body asking for a smaller step.
Babies make this both easier and harder. Easier, because you’re already on the floor, holding, rocking, feeding, and carrying. Harder, because sleep loss makes every bridge and march feel a little more dramatic than it should. So the best postpartum core exercises with baby are the ones that fit real life: safe, brief, repeatable, and calm enough to do before the next diaper change.
Start with the moves that teach pressure control first. The tougher stuff earns its place later.
1. Diaphragmatic Breathing With Baby on Your Chest
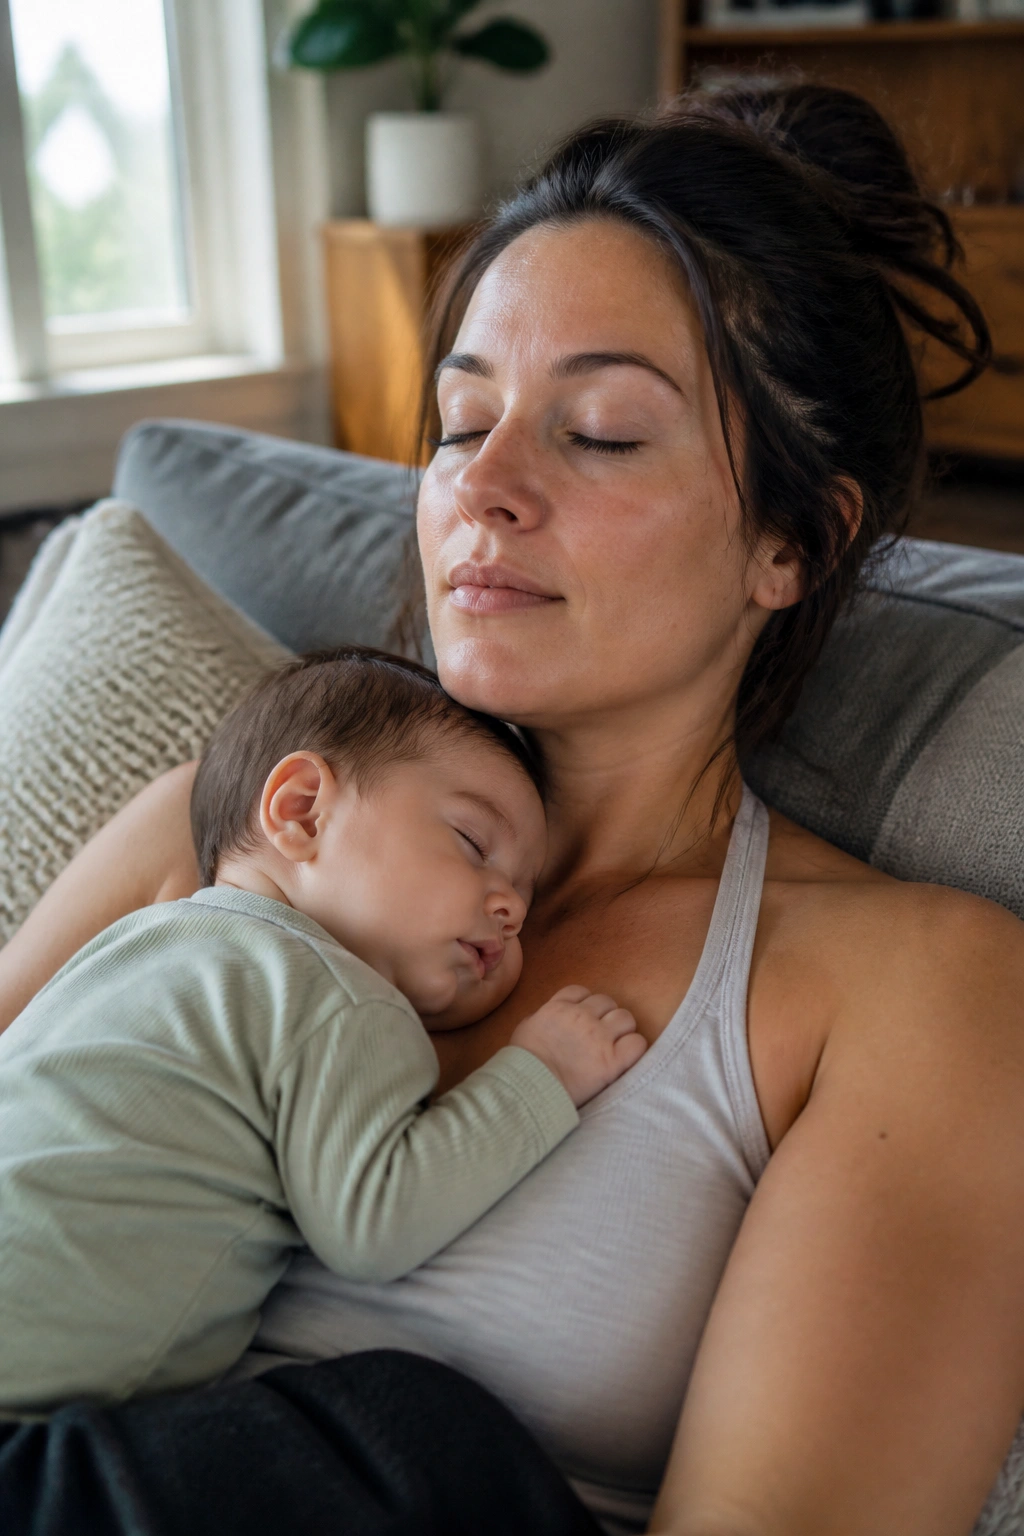
Breathing sounds too simple to matter. It isn’t.
This is where postpartum core recovery starts, because your deep abs and pelvic floor respond to pressure changes long before they respond to fancy exercises. Sit upright on the couch or recline against pillows, hold baby securely against your chest, and let your ribs widen on the inhale. On the exhale, let your lower belly soften inward a little, not yank back hard.
Why breathing comes first
The goal is not a huge belly inhale and a dramatic belly squeeze on the way out. Think of it as a quiet reset.
- Inhale through your nose for 3 to 4 seconds
- Exhale through your mouth for 4 to 6 seconds
- Keep your shoulders relaxed
- Let your ribs move before your shoulders do
Do 5 breaths for 3 rounds, especially before any floor work. If your jaw clenches, you’re probably trying too hard. Don’t.
Pro tip: If baby starts squirming, stop and resettle first. A calm hold matters more than a perfect breath pattern.
2. Pelvic Tilts on the Floor
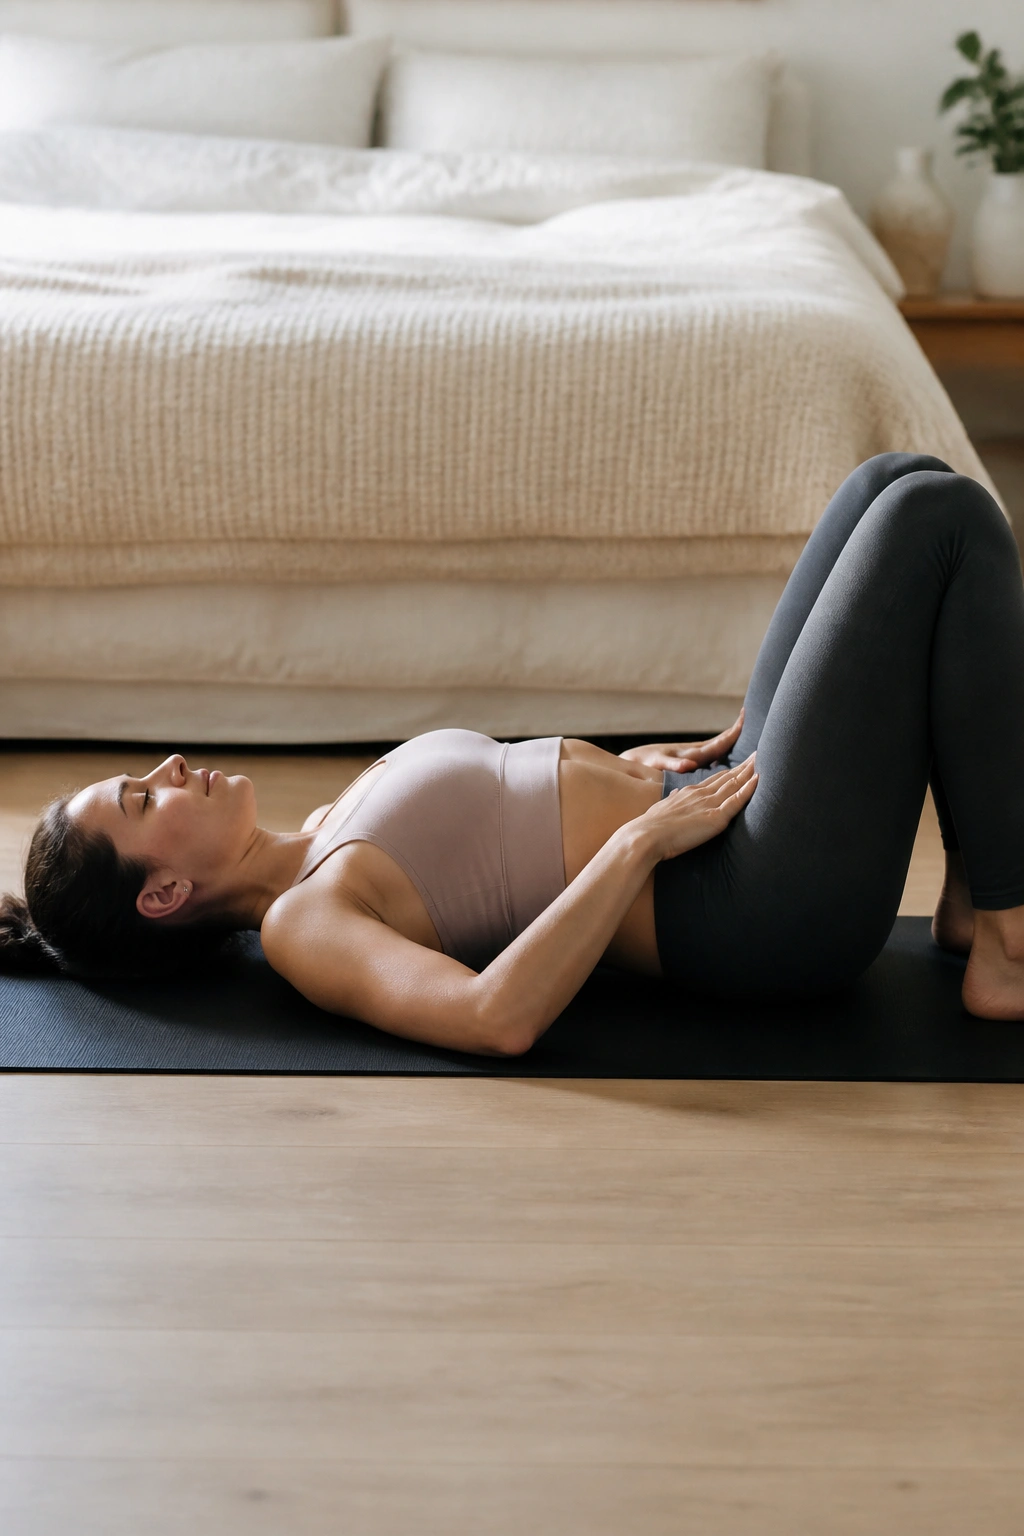
A tiny pelvic tilt can wake up a sleepy core faster than a hundred rushed crunches. That’s the part most people miss.
Lie on your back with knees bent and feet on the floor, or do it on a firm bed if getting down is already enough work for the day. Exhale gently and tip your pelvis so your low back presses a little flatter into the mat. Inhale and return to neutral. The movement should be small, almost boring, and that’s exactly why it works.
How to keep the tilt tiny
If you push your back hard into the floor, you’ve gone too far. You want control, not force.
- Move about 1 to 2 inches
- Keep the rib cage quiet
- Let the exhale start the motion
- Stop if you feel pressure downward
Try 8 to 10 reps. If baby is lying on a blanket beside you, this is a nice one to do while making eye contact and talking through the movement like you’re narrating a very serious sport.
3. Heel Slides for Low-Pressure Core Activation
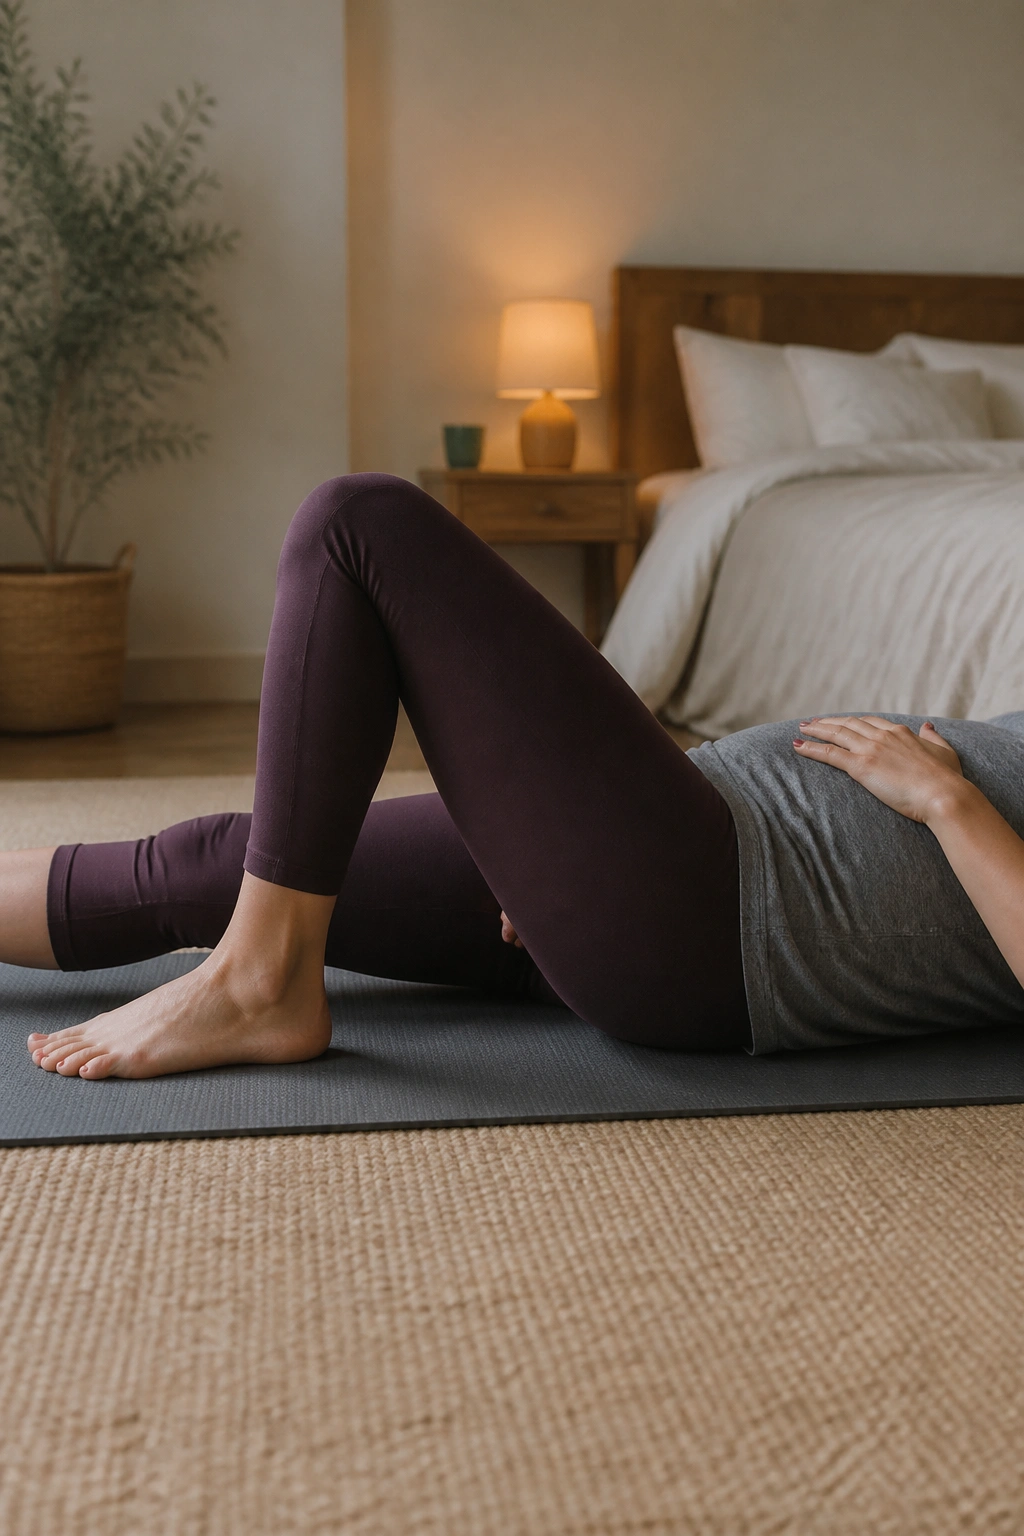
Heel slides are the exercise version of “can you keep everything steady while one leg moves?” That’s the whole test.
I like this one early in postpartum work because it trains the abdominal wall without asking for a big lift or a strong brace. Lie on your back with knees bent. As you exhale, slowly slide one heel away from your body until you feel the lower belly want to flare or the low back want to arch. Slide it back in with control. Baby can be nearby on a mat, which keeps the whole scene pleasantly ordinary.
What to watch for
The movement should stay smooth. No jerking. No rib flare.
- Slide one heel out slowly for 3 seconds
- Keep both hips level
- Return on the exhale
- Do 6 reps per side
If you see a ridge along the midline of your abdomen, shorten the range. Smaller is better here. A lot better.
4. Bent-Knee Marches
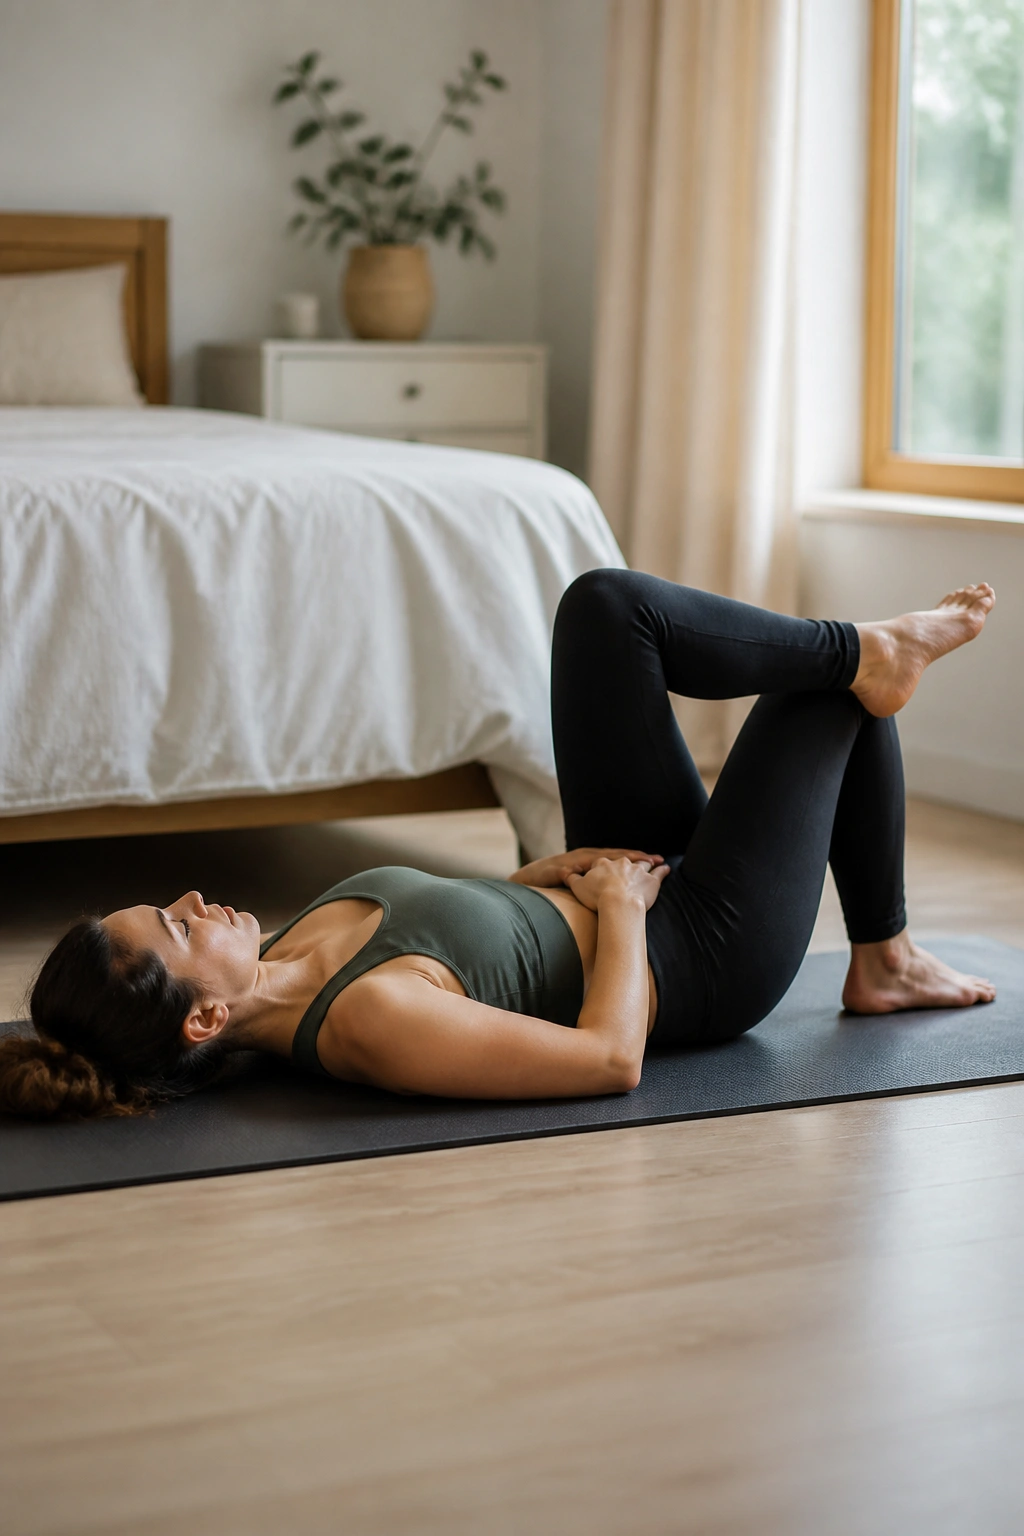
Can you lift one foot without your belly jumping up? That’s the whole game.
Bent-knee marches build on the heel slide and ask for a little more control. Start on your back with both knees bent. Exhale, gently brace, and lift one foot just an inch or two off the floor. Set it down. Then switch sides. If your midsection feels wobbly, keep the lift low enough that you could still whisper to someone without changing your face.
When to stop the march
If you feel doming, pelvic pressure, or a weird tug at the incision, go back to heel slides for a few days.
- Keep the lift low
- Move one leg at a time
- Exhale on the lift
- Do 5 to 8 reps per side
A good march feels quiet. That word again. Quiet. Not flashy, not sweaty, not impressive on paper. Quiet.
5. Glute Bridge Holds
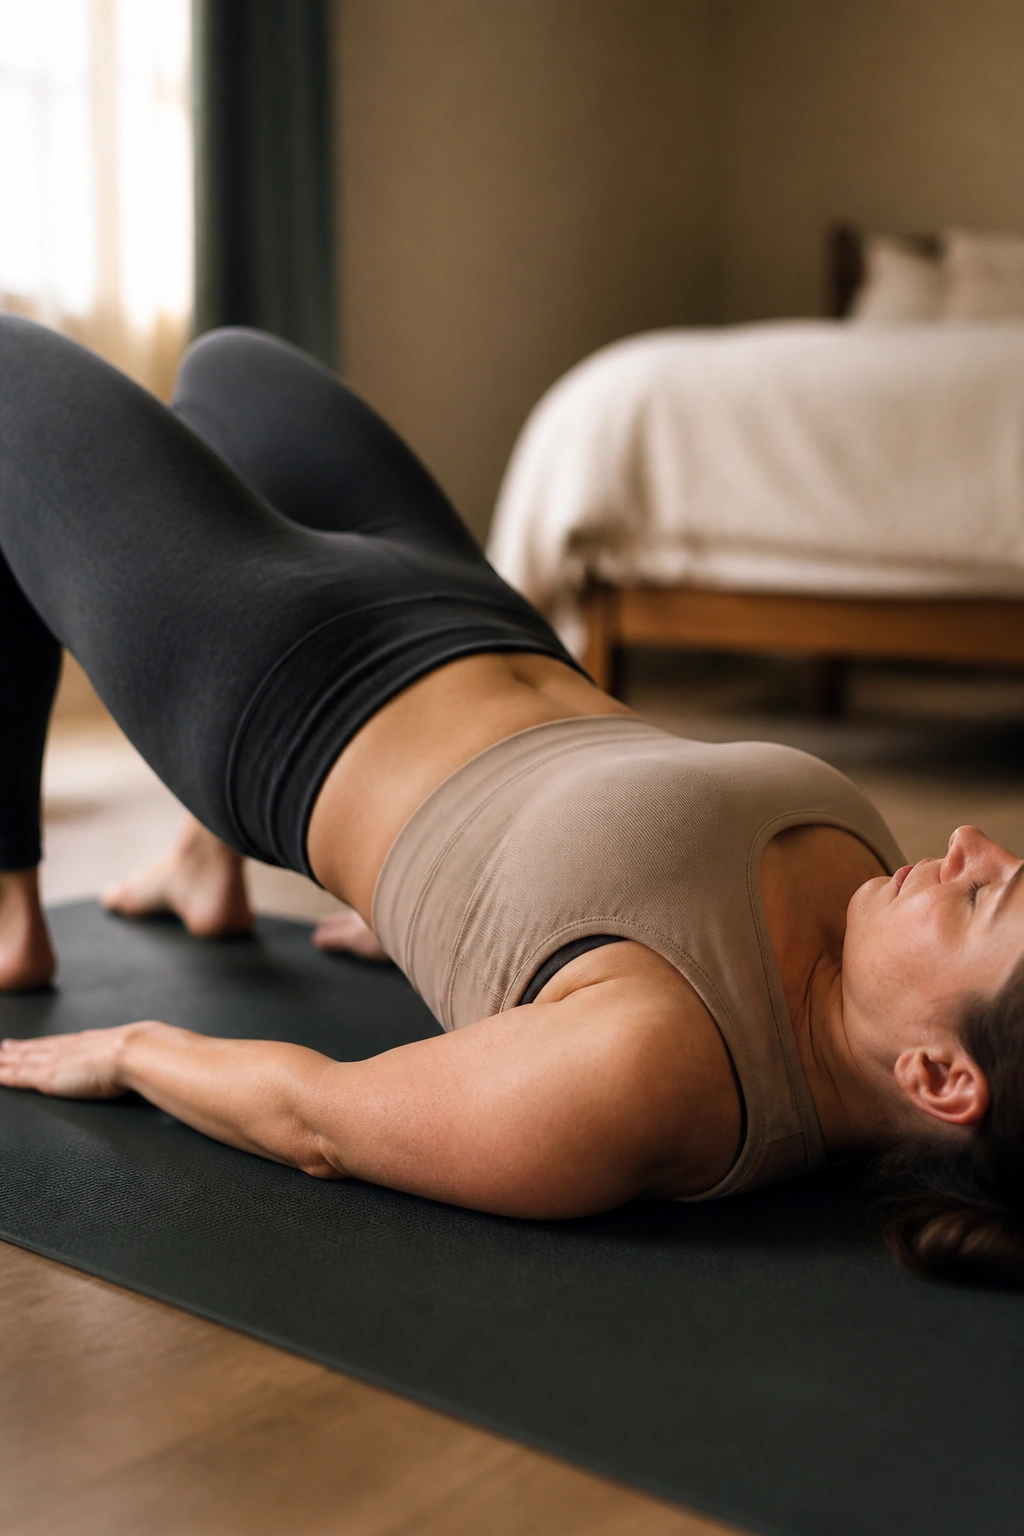
Good bridges feel boring in the best possible way.
They strengthen your hips and backside, which helps your core because the body likes teamwork more than isolated effort. Lie on your back with knees bent, feet hip-width apart, and exhale as you lift your hips a few inches. Pause at the top for 3 to 5 seconds, then lower with control. The lift should come from your glutes and hamstrings, not from throwing your lower back into the job.
If you had a C-section, don’t rush this one. Wait until the incision feels settled and you can bridge without tugging or pain. And if the top of the movement makes your ribs pop forward, lower the height. A smaller bridge is still a bridge.
Do 6 to 8 reps. If the first set feels shaky, that’s normal. Your body is relearning a pattern, not proving a point.
6. Dead Bug Arm Reaches
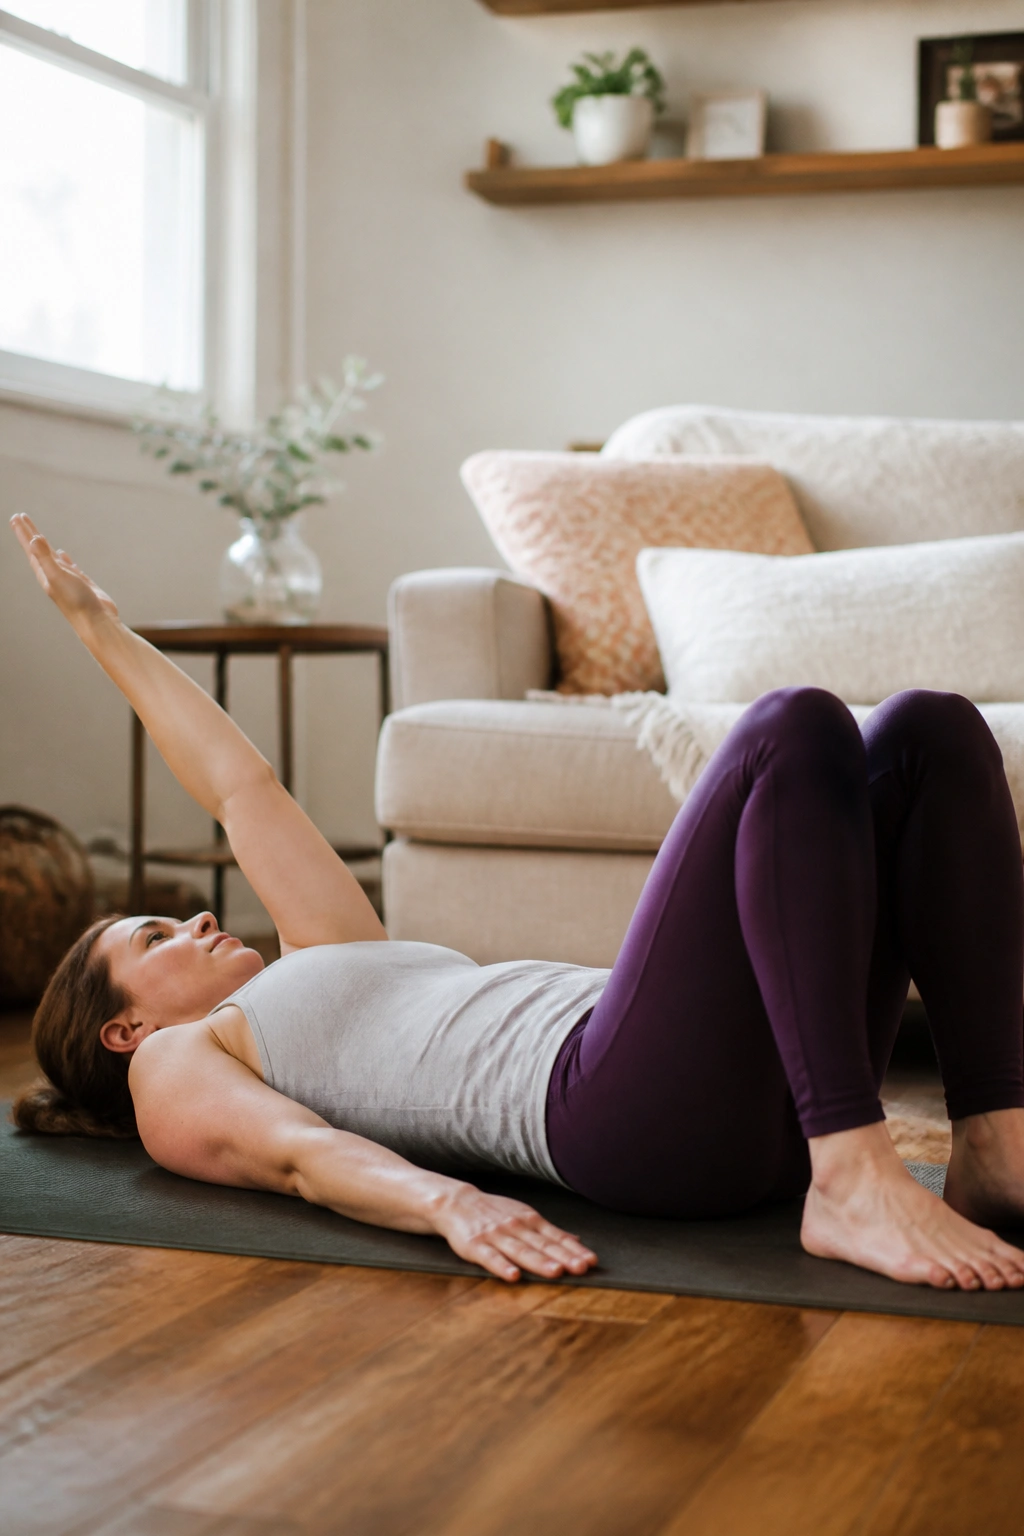
Unlike full dead bugs, the arm-only version is kinder to a tired abdominal wall.
That matters if your belly domes as soon as your legs start moving. Lie on your back, knees bent, feet planted. Reach one arm overhead as you exhale, keeping your ribs from lifting. Bring it back. Then switch sides. Baby can be on a blanket nearby, which is helpful because your eyes will probably keep checking that little face anyway.
Why it’s different
This version gives you core training without asking your pelvis to stay perfectly still under a lot of load.
- Keep both feet on the floor
- Reach slowly, not fast
- Exhale as the arm goes overhead
- Do 6 reps per side
If the lower back arches, reduce the reach. If the neck tightens, lower the shoulder sooner. Little fixes like that matter more than perfect form in a photo.
7. Bird Dog With a Pause
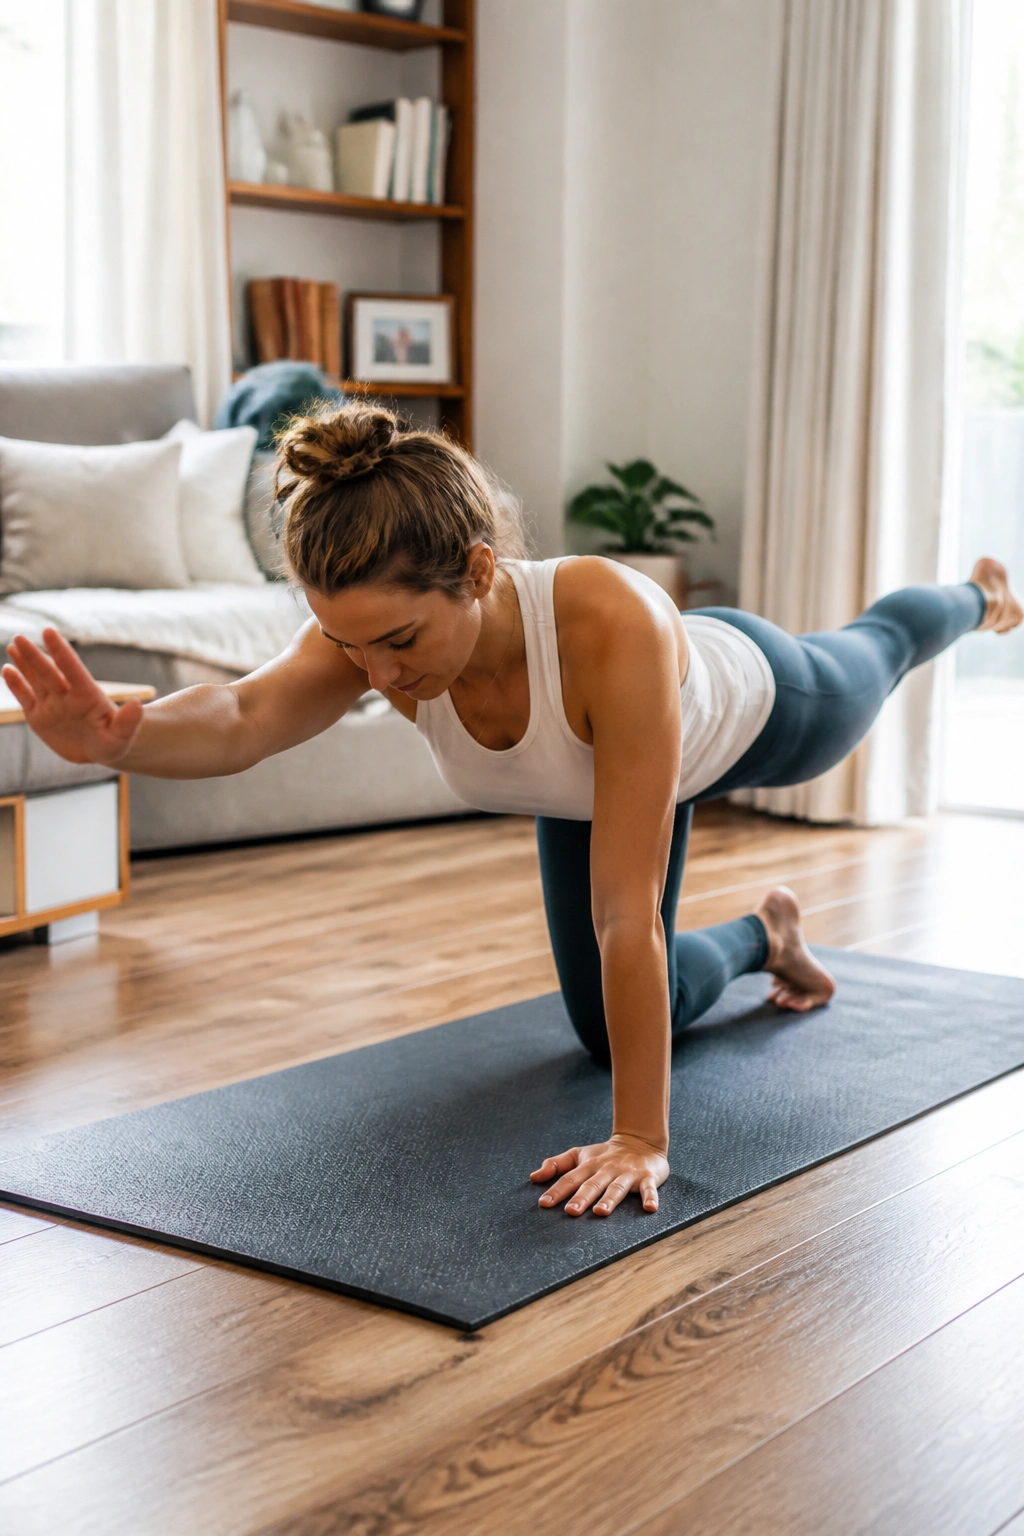
A bird dog should feel like balance, not a fight.
Start on hands and knees with wrists under shoulders and knees under hips. Extend one leg back and the opposite arm forward. Hold for 2 to 3 seconds, then bring everything back in slowly. The real work is not the reach itself. It’s keeping your hips square and your trunk steady while the limbs move.
What a steady bird dog feels like
You should feel pressure spread evenly through your hands and kneecaps. The belly should stay flat, not cone upward.
- Reach long, not high
- Keep your chin tucked slightly
- Hold the pause before switching
- Do 5 to 6 reps per side
If your wrists hate the floor, put your hands on a couch or a sturdy ottoman. That small change makes the exercise far more doable, and there’s no prize for suffering on a bad wrist angle.
8. Quadruped Rock-Backs
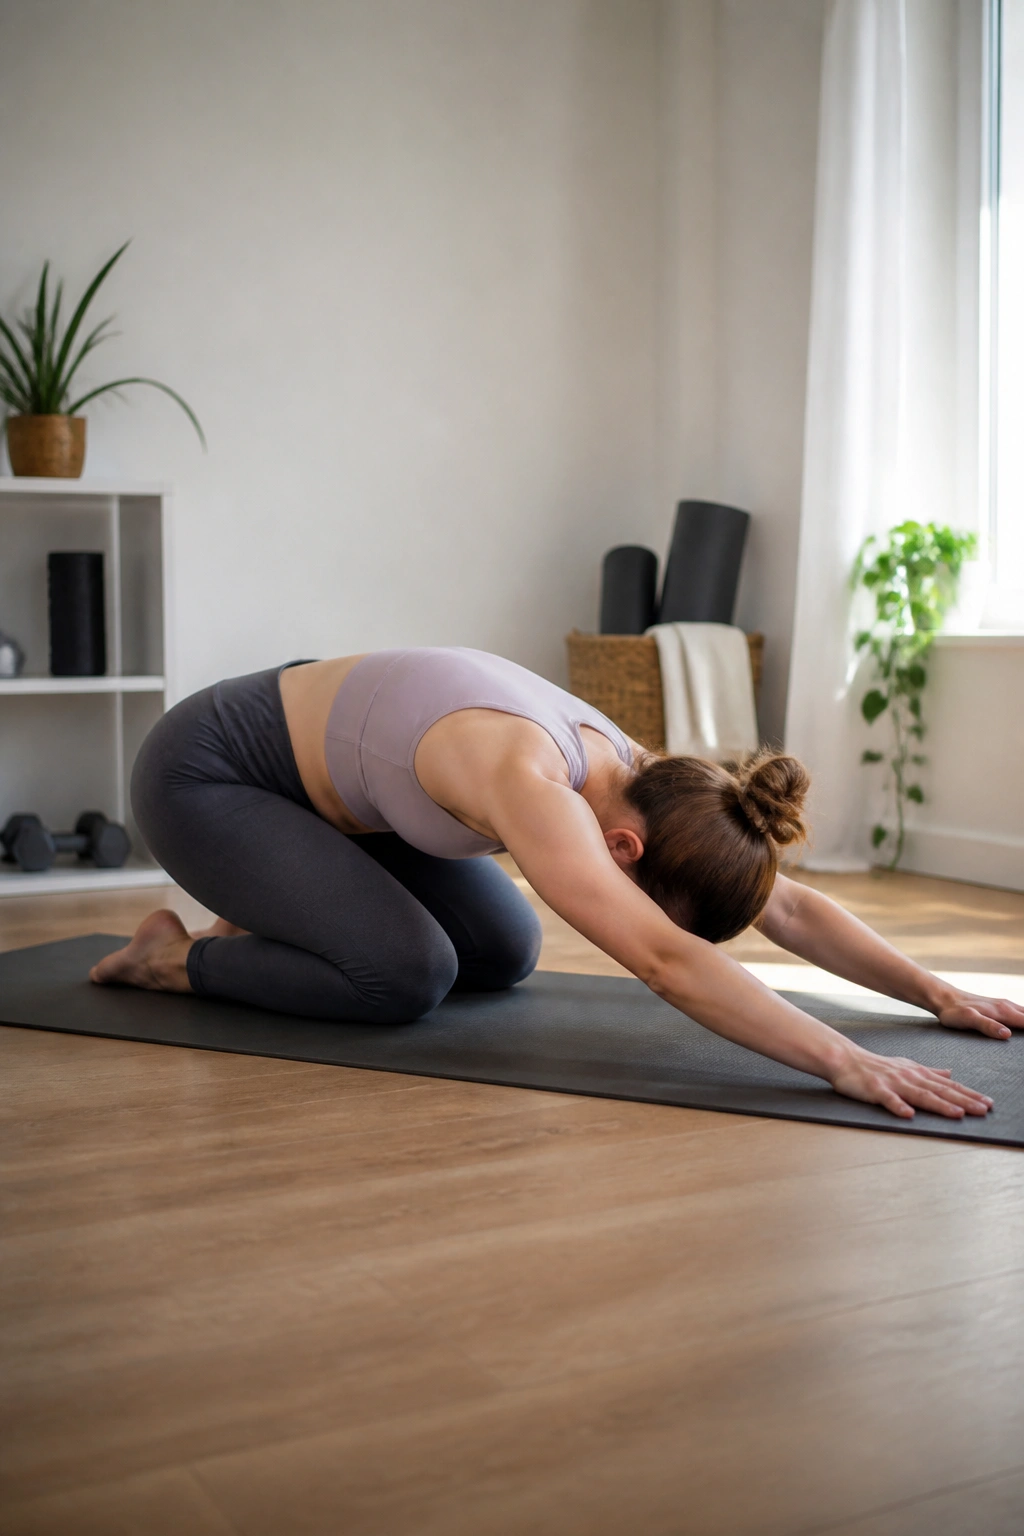
Baby fussing on the mat? Rock-backs fit that exact kind of day.
Get on hands and knees and slowly send your hips back toward your heels, then return to the start. The motion is small, easy to repeat, and useful when your belly feels guarded or your back feels stiff from carrying a baby all day. It also gives your ribs and hips a chance to move without a load on top of them.
If your C-section scar feels tight, keep the range short and smooth. If your low back pinches, widen your knees a little. Those tiny adjustments usually solve more than force ever does.
Try 8 to 10 slow rocks. Breathe on the way back, breathe on the way forward. The rhythm matters.
9. Side-Lying Oblique Reaches
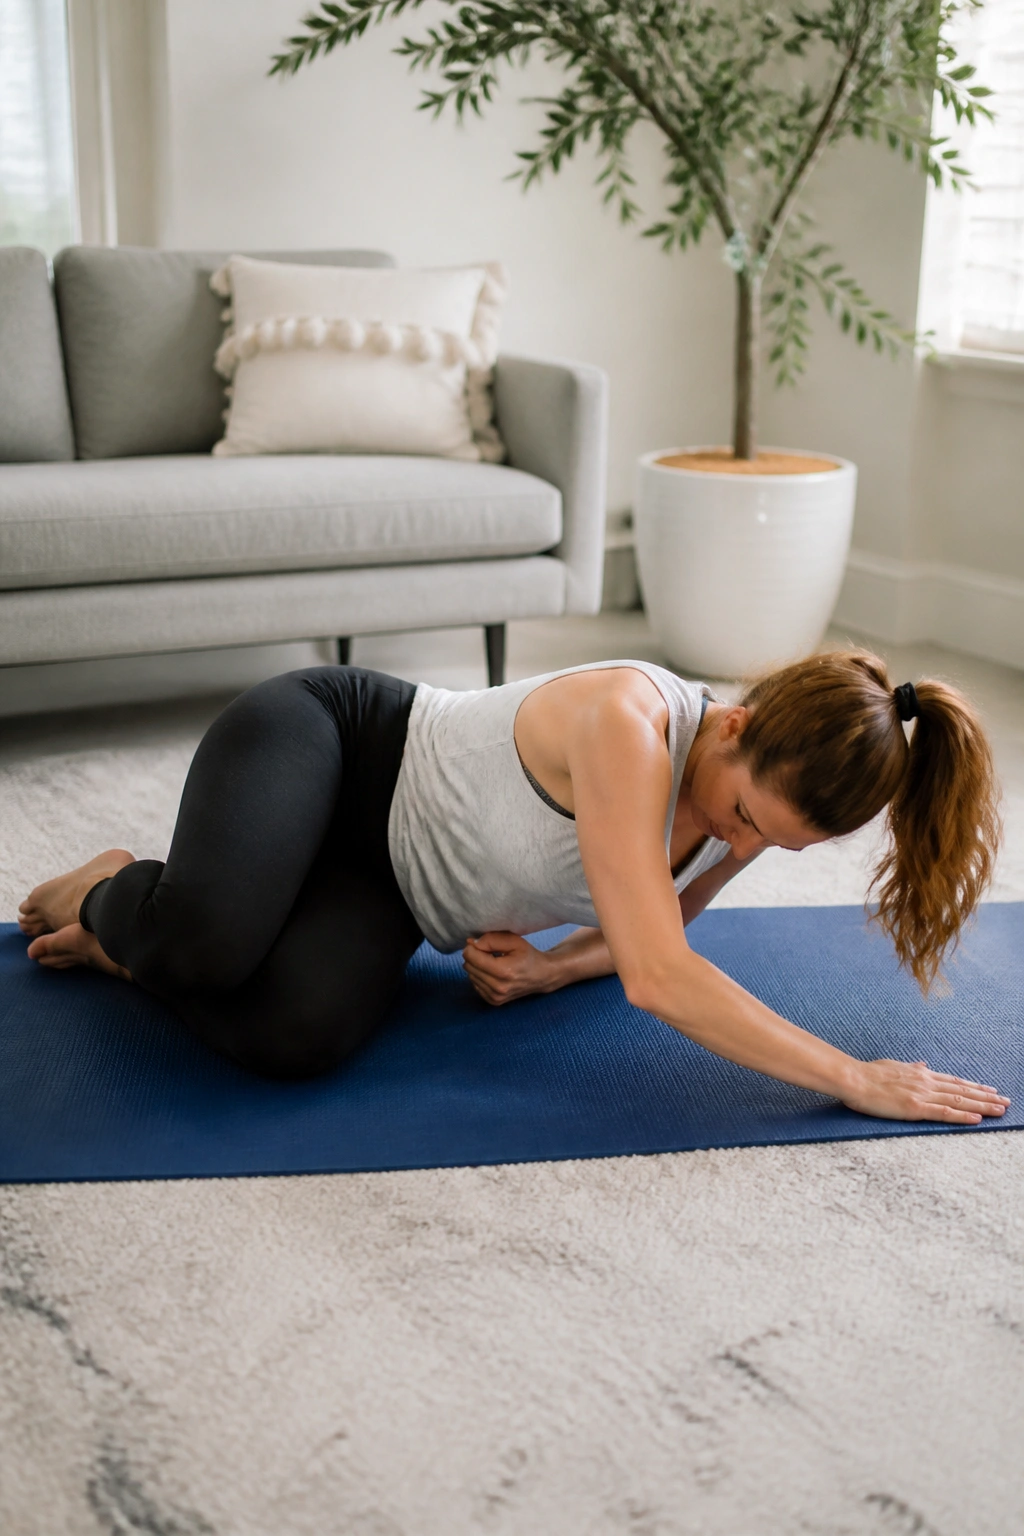
Unlike crunches, this one asks the side waist to work without yanking your neck around.
Lie on your side with knees bent. Reach your top arm forward, then thread it under your rib cage as you exhale, like you’re reaching for something under the couch. Open it back up on the inhale. You’ll feel the obliques wake up in a much cleaner way than with a sit-up, and the neck stays out of it.
A small move with a big payoff
Side-lying work is underrated after birth because it’s gentle on the pelvic floor and easy to modify.
- Keep the ribs stacked
- Move through the upper back
- Exhale on the reach-under
- Do 6 to 8 reps per side
This one is also kind to people who spend half the day curled around a nursing pillow. Your body has already been folded up enough. A little rotation is usually welcome.
10. Seated Core Brace Holds
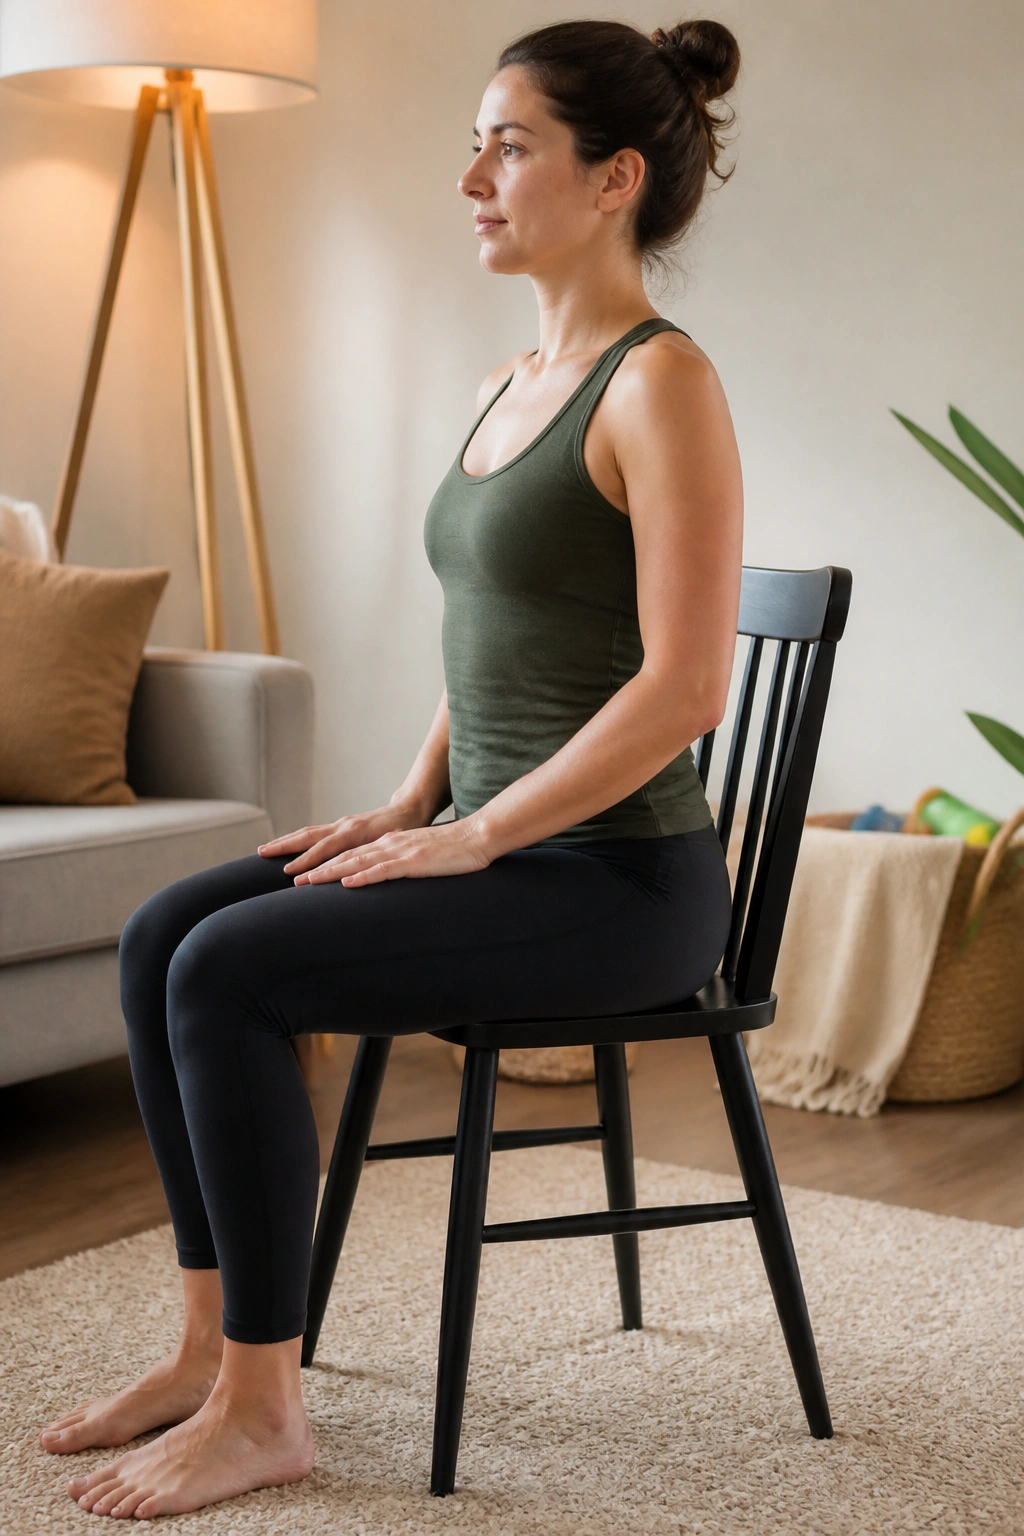
What if getting to the floor is the hard part? Use a chair.
Sit tall on a firm chair or the edge of the couch with both feet planted. Breathe in, then exhale and gently draw the lower ribs down while feeling the low belly firm up a little. Hold that brace for 5 seconds, then fully release. The release matters. A lot. You’re teaching control, not constant tension.
If you like, hold baby in a secure lap position while seated, but only if you can stay upright without slumping. A saggy spine turns this into a nap pose, and that’s not the point.
Do 8 reps. Easy? Good. That means you can use it more often.
11. Wall Press Marches
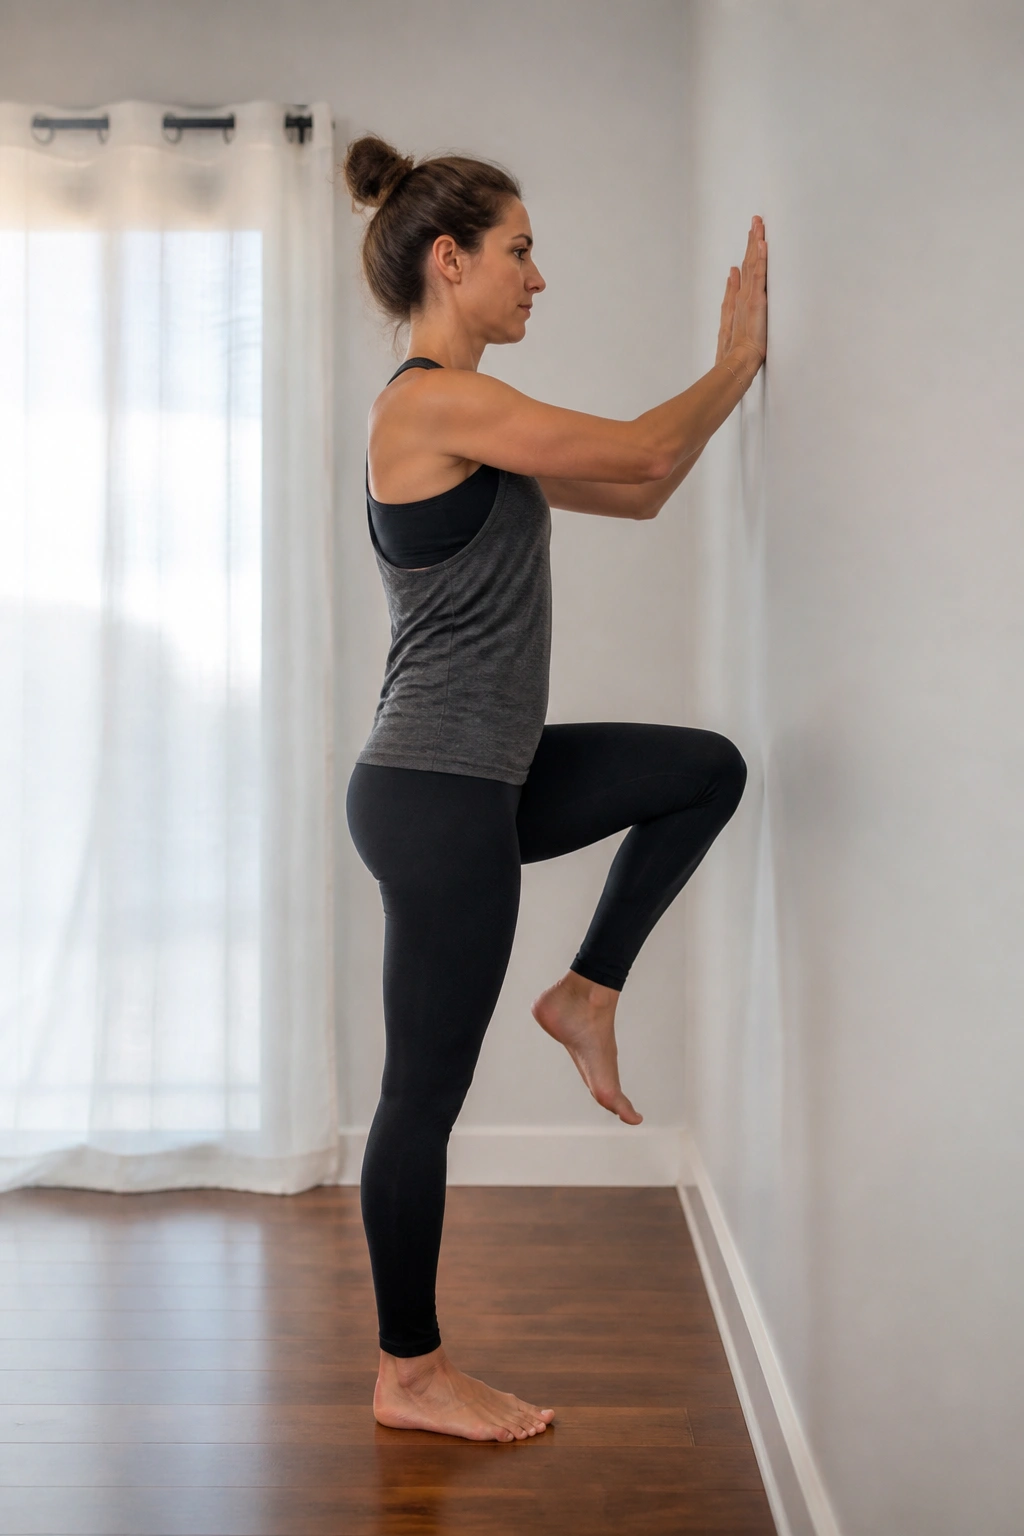
The wall makes bracing easier to feel.
Stand facing a wall, place your forearms against it, and walk your feet back until your body forms a long line. Exhale, press gently into the wall, and lift one knee just a little. Set it down, then switch. This gives your core a standing challenge without the complexity of floor moves, which is handy on days when baby has already used up your whole attention span.
How to set it up
- Forearms shoulder-width apart
- Ribs stacked over pelvis
- One knee lifts at a time
- Stop before the low back arches
Do 6 to 8 marches per side. If you feel pressure in the pelvic floor, shorten the stance and reduce the knee lift. The wall is there to help, not to win.
12. Standing Knee Drives in a Baby Carrier
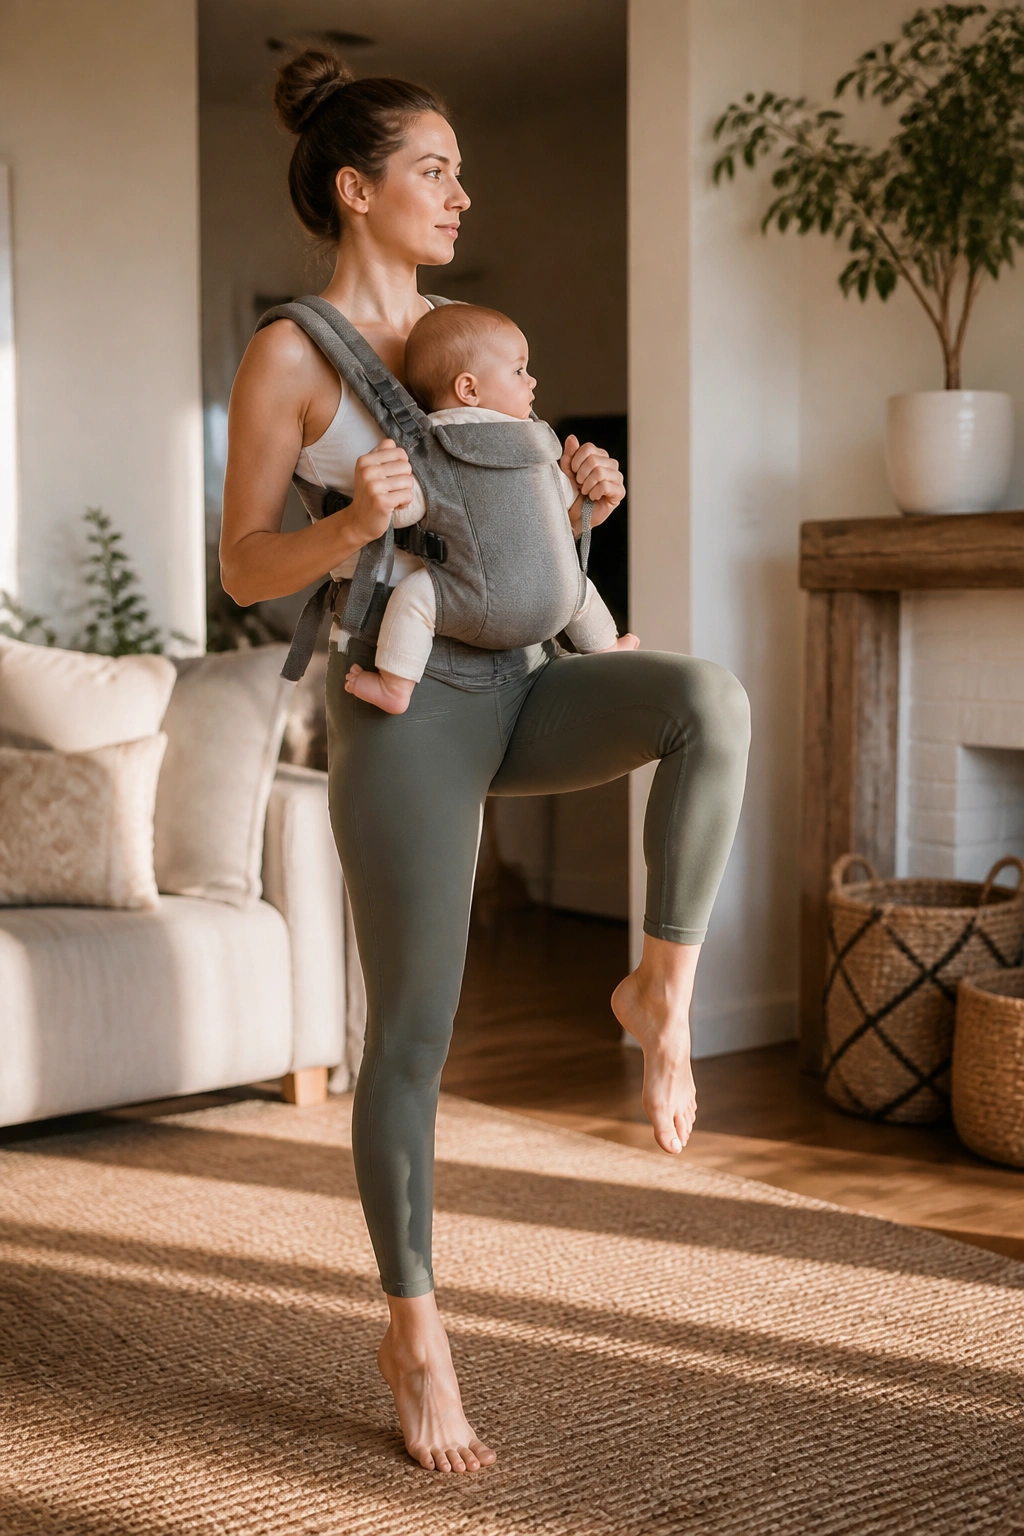
If you can walk the hallway with baby in a carrier, you can train your core.
That’s the truth most postpartum plans dance around. Stand tall, shoulders relaxed, and lift one knee while you exhale. Lower it slowly, then switch sides. The carrier adds a bit of load, so the deep abs have to organize around movement again, which is useful in a very normal, very real-life way.
Straight talk: carrier fit matters. If baby is slumped, too low, or hanging on one side, fix that first. A crooked carry makes the exercise messier and less useful.
Do 8 reps per side. Keep the motion smooth, not bouncy. This should feel like controlled marching, not a dance routine.
13. Suitcase Carries With a Diaper Bag
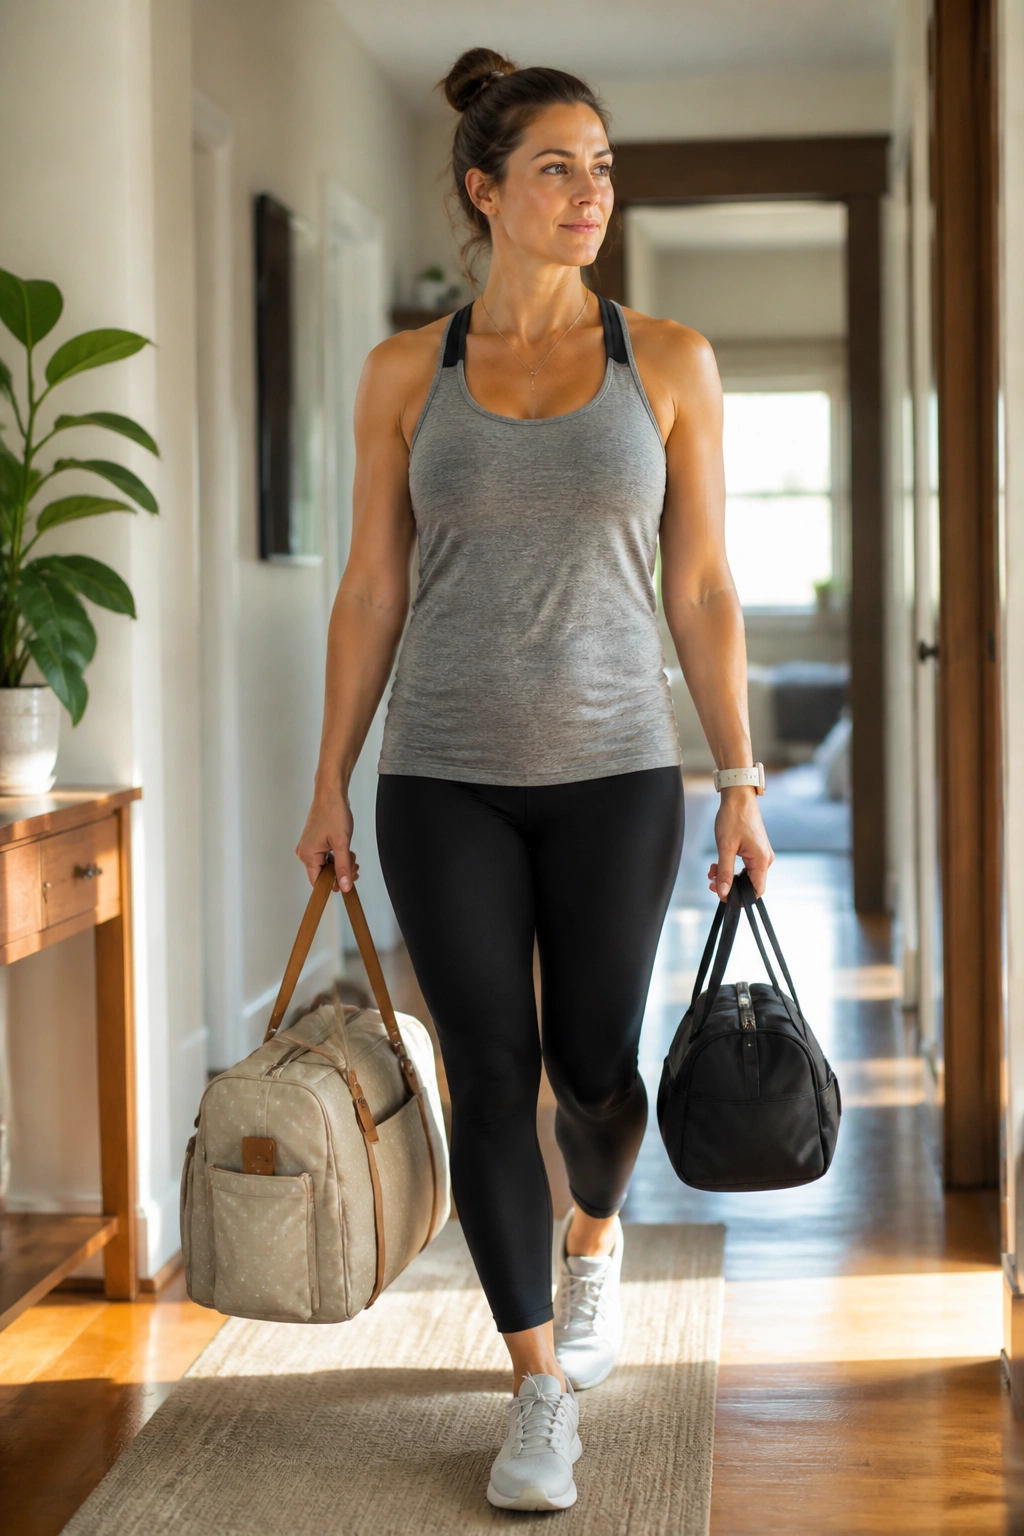
This one looks ordinary, which is why people skip it. They shouldn’t.
Hold a diaper bag, a light grocery bag, or a small water jug in one hand and walk 20 to 30 steps while keeping your ribs level and your torso tall. Then switch hands. Your obliques have to work to stop you from leaning, and that’s excellent postpartum training because real life is full of uneven loads.
A diaper bag on one side, baby on the other, and your shoulders trying to creep up around your ears — that is the exact moment to slow down and reset. Boring mechanics. Useful mechanics.
Do 2 to 3 trips per side. If your grip gives out before your core does, use a lighter object and keep the walk clean.
14. Half-Kneeling Band Presses
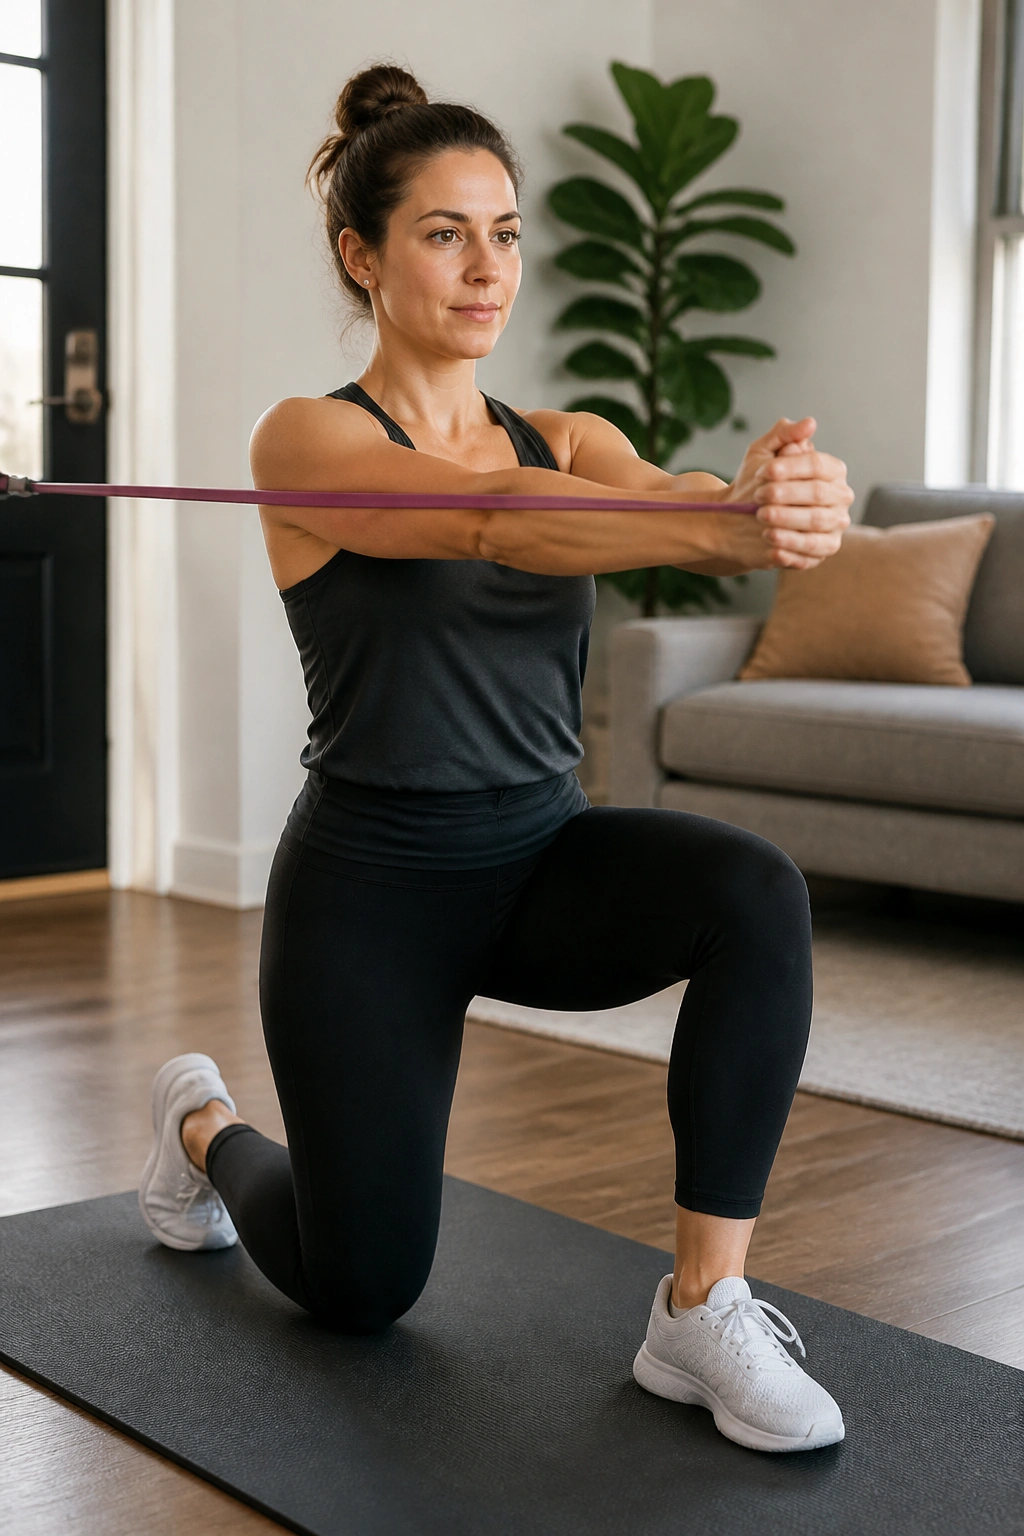
Set your knee and rib cage first. Everything else gets easier after that.
Kneel on one knee with a cushion under it, keep the other foot flat in front, and hold a resistance band at chest height. Press the band straight out, pause, then bring it back in with control. Half-kneeling makes the core fight rotation, which is exactly what you want when your body is learning to stay organized again.
How to keep it honest
If your hips twist, the band is too heavy or your stance is too narrow.
- Keep the front ribs soft
- Squeeze the back-side glute lightly
- Press straight forward
- Do 6 to 10 reps per side
This is a strong choice for people who feel fine on their feet but lose control when one side has to work harder than the other. Which is most of us, honestly.
15. Modified Side Plank From Knees or Wall
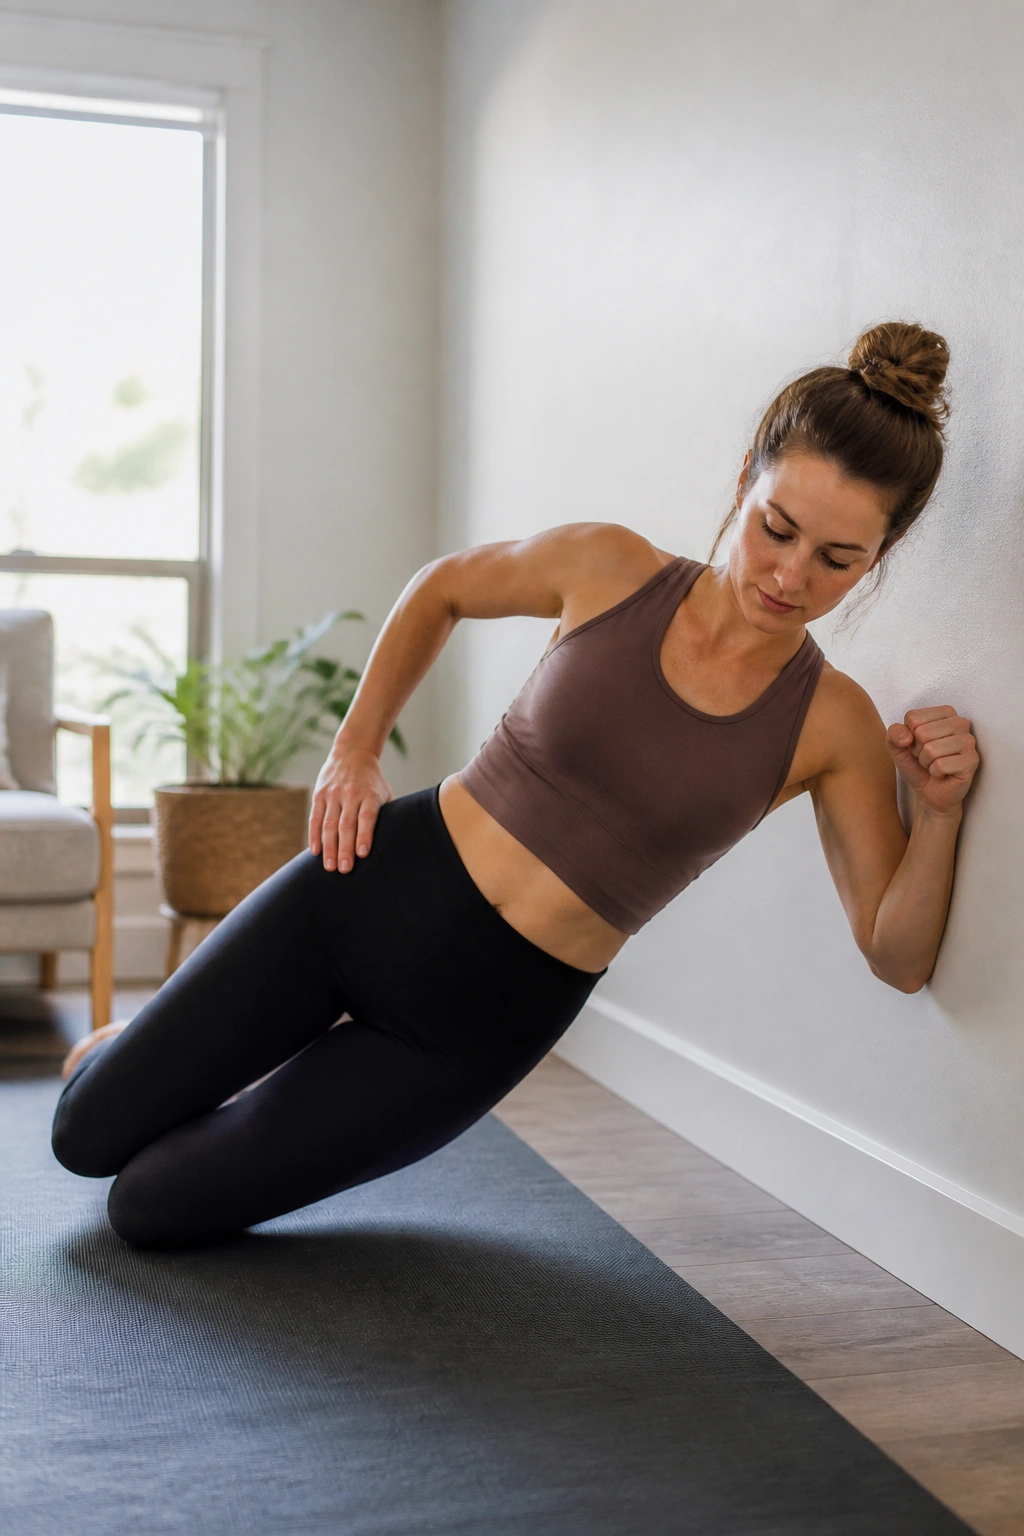
Side planks do not have to be a macho test.
Start with the wall version if the floor feels too sharp or your body is still getting used to load. Press your forearm into a wall, step your feet out, and lean your body into a straight line. Or come to the floor on your knees and hold a short side plank for 10 to 15 seconds. The side body should work hard, but your breath should stay available.
Wall version or floor version?
Use the wall if you see doming, feel unstable, or just want a cleaner start. Use the floor if you can keep the shoulder stacked and the ribs from drifting forward.
Do 2 to 3 holds per side. If you can’t breathe, shorten the hold. If your neck starts doing the job, you’ve gone past the useful range.
16. Sit-to-Stand Reps With an Exhale
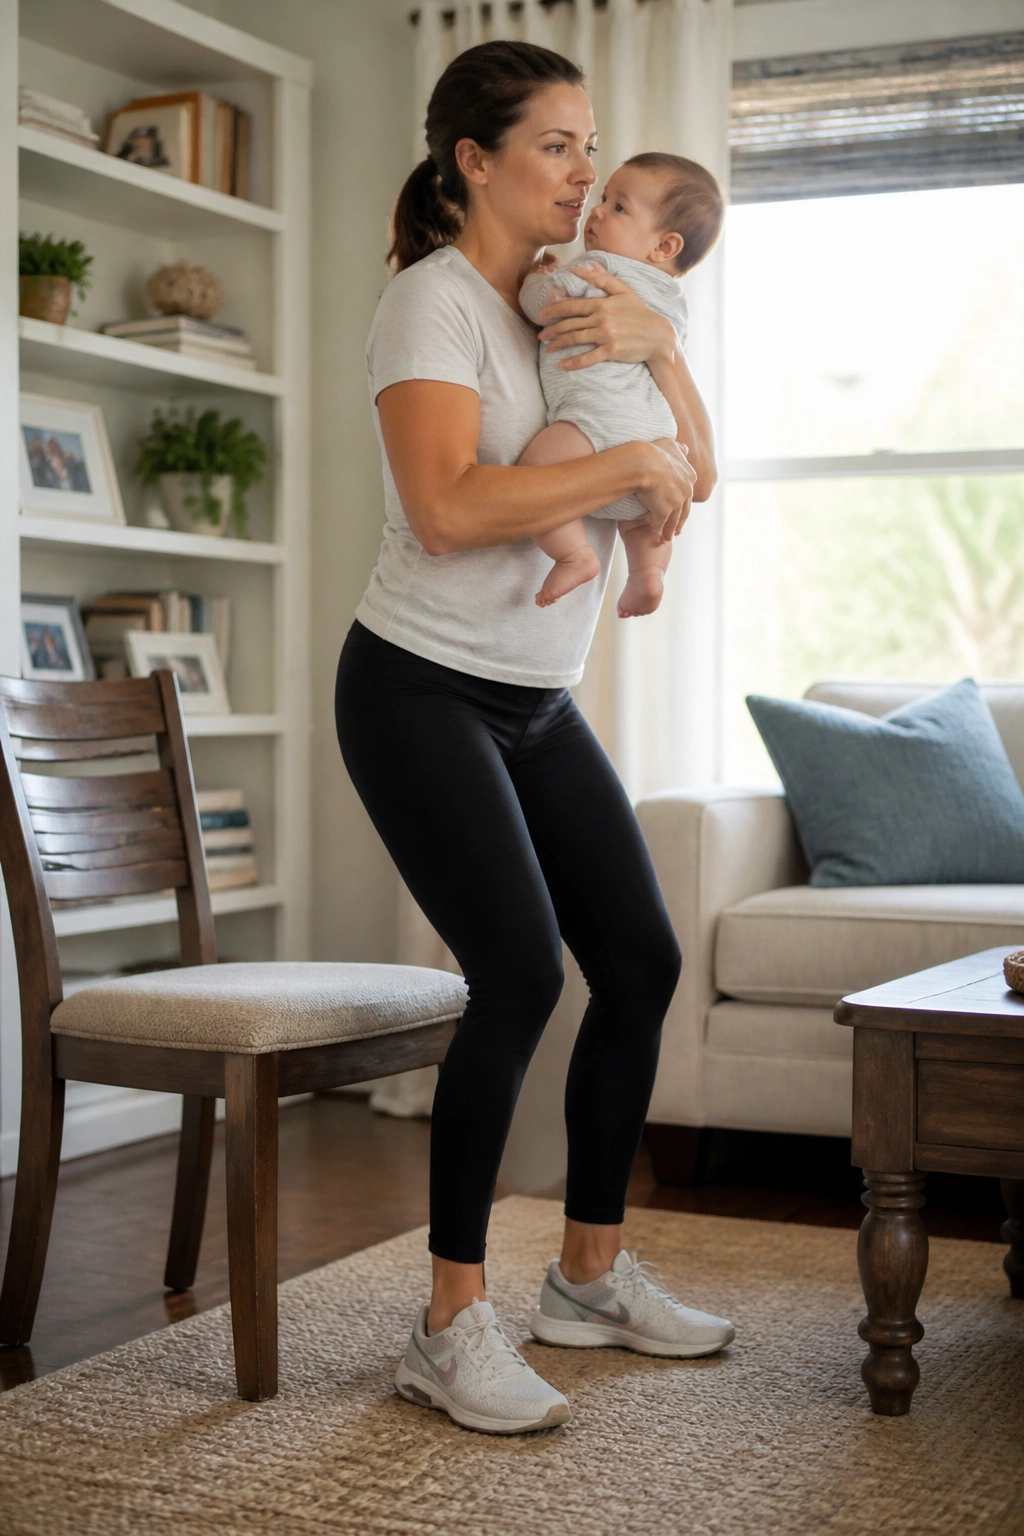
Standing up from a chair while holding a baby is a daily event. Turn it into training.
Sit on a firm chair with feet under your knees, exhale as you stand, and keep the chest from popping forward. Lower back down with control. The move trains your core to manage pressure during a common life task, which makes it more useful than a lot of flashy floor work that never makes it into the rest of your day.
Use a baby carrier if you want to add the challenge without juggling a sleepy baby in your arms. That’s the safer route. If you do hold baby, keep the reps slow and stop the moment your balance feels off.
Try 8 to 10 reps. You should feel your legs, yes, but also the deep belly working to keep you stacked.
17. Tall-Kneeling Chop and Lift
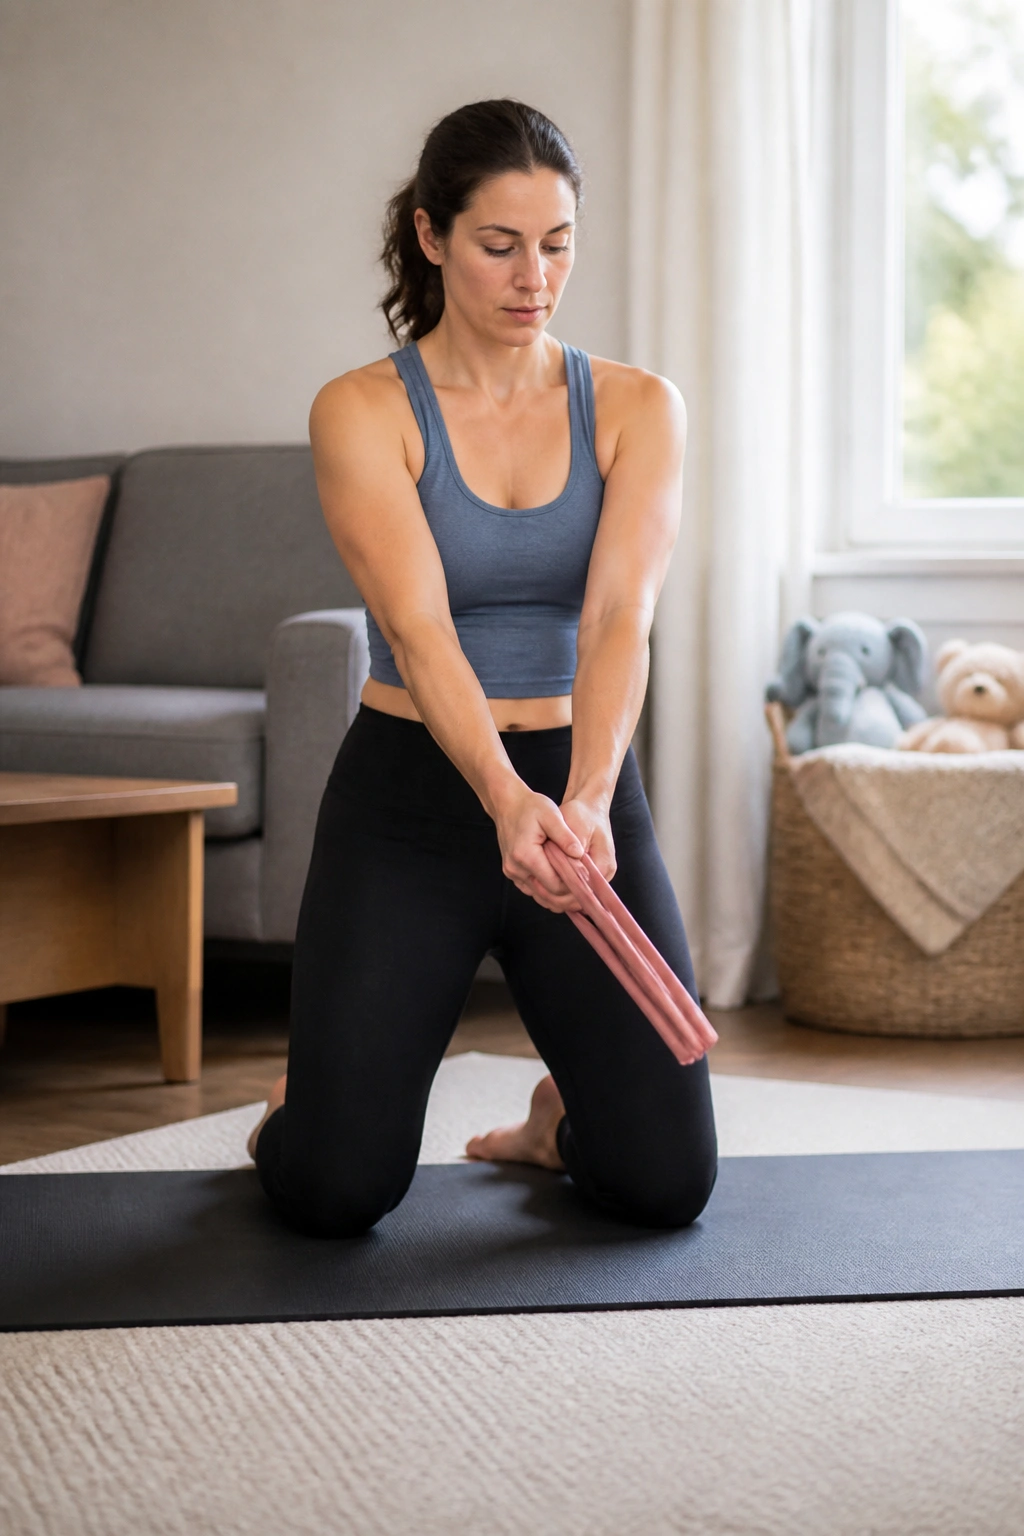
Chop down, then lift back up. That simple pattern wakes up the obliques fast.
Come into tall kneeling on a padded surface, hold a light band or even a folded towel, and move your hands diagonally across your body. Chop down toward one hip as you exhale, then bring the hands back up and across. The torso should stay tall the whole time. If you bend and twist from the low back, it stops being a core drill and turns into a shruggy mess.
Why this one earns its place
Tall kneeling removes the leg drive that can hide weak core control. You can’t cheat as much.
- Keep your glutes lightly on
- Move from the rib cage, not the neck
- Use a very light load at first
- Do 6 reps each direction
If your knees complain, fold a thick towel under them. Simple fix. No drama.
18. Incline Plank on the Couch
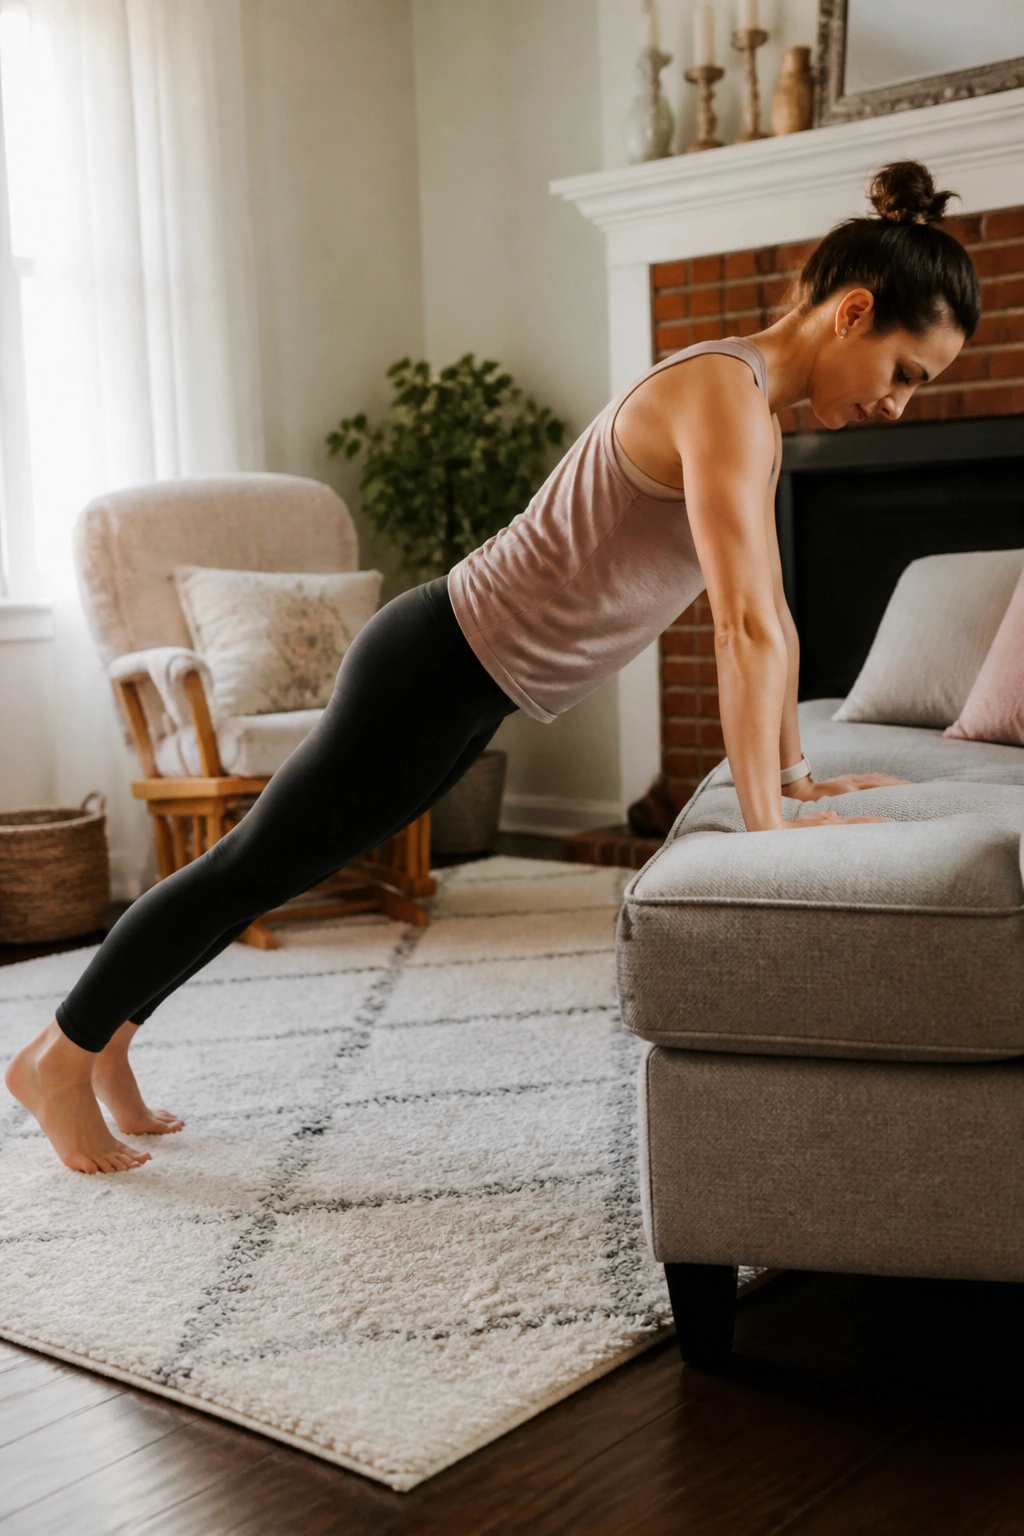
Start with a wall or couch edge, not the floor, if your core is still shaky.
Place your hands on a sturdy couch, walk your feet back, and hold a straight line from head to heels. Keep the ribs from flaring and the belly from doming. Hold for 10 to 15 seconds, then step back in and rest. Baby can be on a play mat nearby, which is enough; you do not need to turn this into a performance.
A good incline plank feels firm through the center and calm through the neck. If your low back dips, raise the surface. If your abdomen cones outward, shorten the hold or go back to wall presses for a few more days.
Do 3 to 5 holds. Clean reps beat long, sloppy ones every time.
The real win with postpartum core work is not variety. It’s repetition done well. Pick 3 or 4 of these, keep them gentle for a week or two, and build only when your body stays quiet: no doming, no leaking, no heavy pressure, no sharp pain. That’s the language that matters.
And if the schedule gets messy — because it will — use the breathing drill, a march, and one standing move. That’s enough for a hard day.
