



Postpartum core workouts can feel awkward in a way nobody warns you about. One day you’re trying to sit up in bed without using your hands, and the next your stomach feels less like a flat muscle wall and more like a system that needs to relearn its job.
That does not mean your core is broken. It usually means the deep support team — diaphragm, pelvic floor, transverse abdominis, and the smaller stabilizers along your spine — has to start working together again instead of bracing in panic. That coordination matters more than brute strength.
Crunches can wait. So can hard planks, aggressive twisting, and anything that makes your midline dome, your pelvis feel heavy, or your incision tug if you had a C-section. The smarter early work is quieter than people expect: breathing, position changes, gentle load, and exercises that teach pressure control before they ask for power.
If a movement creates pain, leakage, bulging, or that dragging sensation in the pelvis, back off and make it easier. A pelvic floor physical therapist is worth finding if you want specific help, because the postpartum body does not always follow neat timelines. The 22 workouts below move from the gentlest reset to stronger standing work, so you can pick the level that matches where your body actually is.
1. The 90/90 Breathing Reset
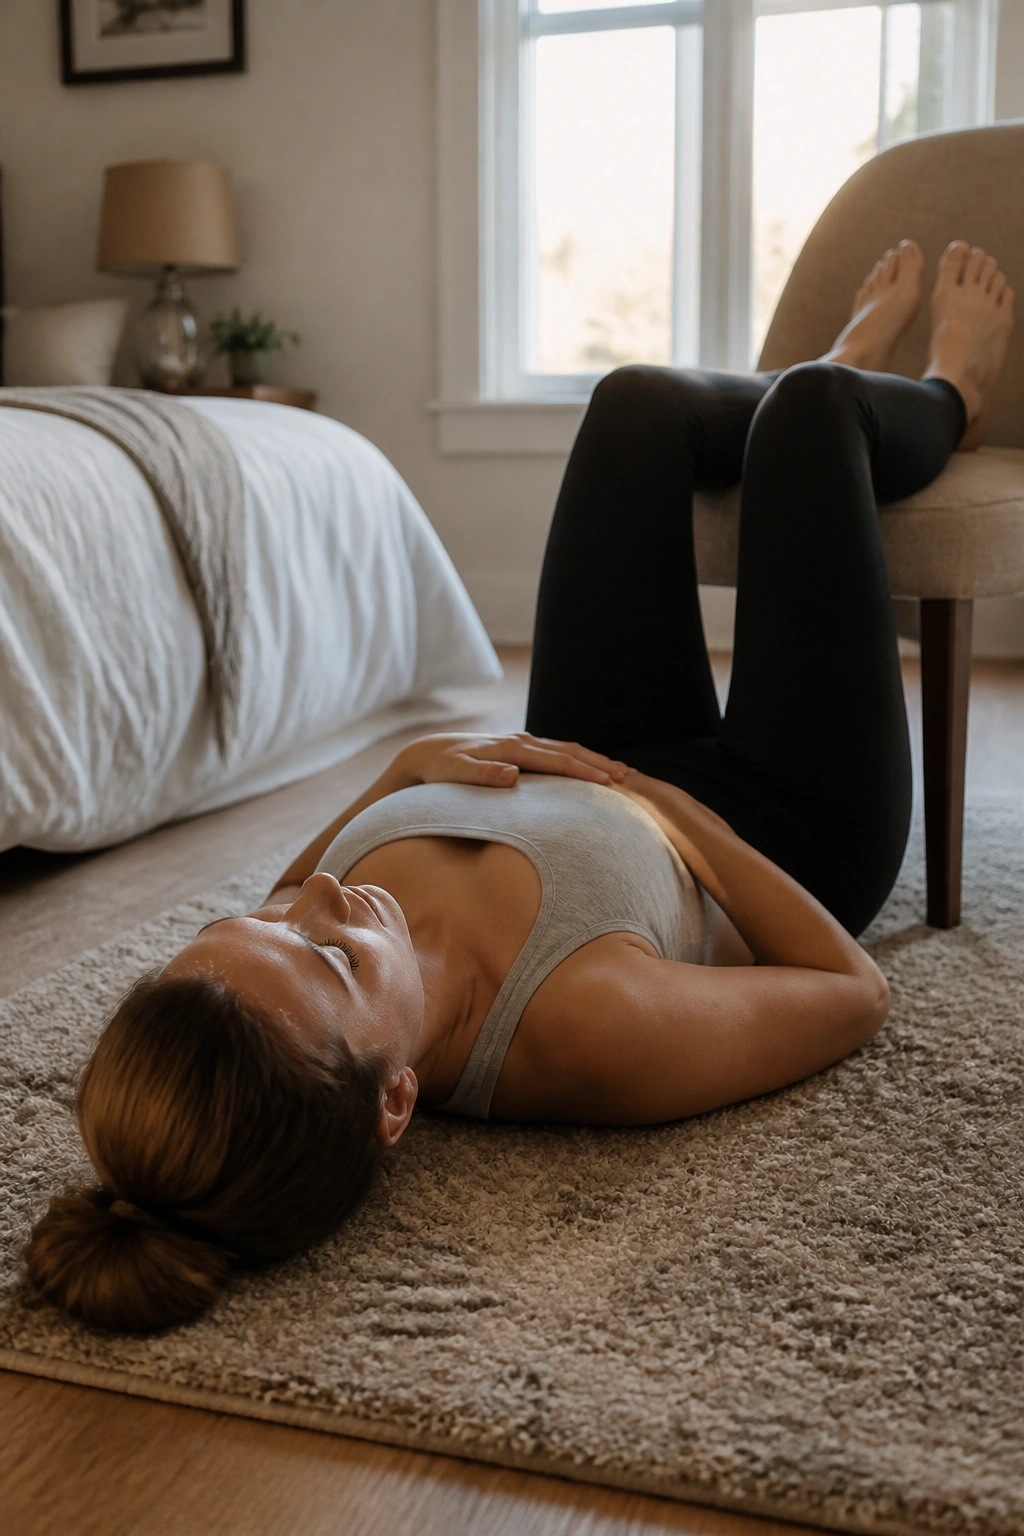
This is where I’d start almost every time. It looks almost too simple, which is exactly why people skip it, and then wonder why later exercises feel messy.
Lie on your back with your calves resting on a chair, couch, or bed so your hips and knees are bent at about 90 degrees. Inhale through your nose and let the air spread into the sides and back of your ribs. Then exhale slowly through your mouth until your ribs soften down and your lower belly gently narrows.
Why It Helps
The point is not to suck your stomach in hard. The point is to let pressure move where it belongs instead of pushing straight forward into the abdominal wall.
A good rep feels like your ribs lower, your neck relaxes, and your pelvic floor responds with a subtle lift on the exhale. If you feel gripping in your jaw or a hard brace in your abs, you’re pushing too much.
- Do 5 to 8 breaths
- Rest for 20 to 30 seconds
- Repeat for 2 rounds
- Keep your shoulders heavy and your face loose
Small tip: if your lower back arches off the floor, bring your feet a little closer to you or place them lower on the chair.
2. Pelvic Tilts on the Floor
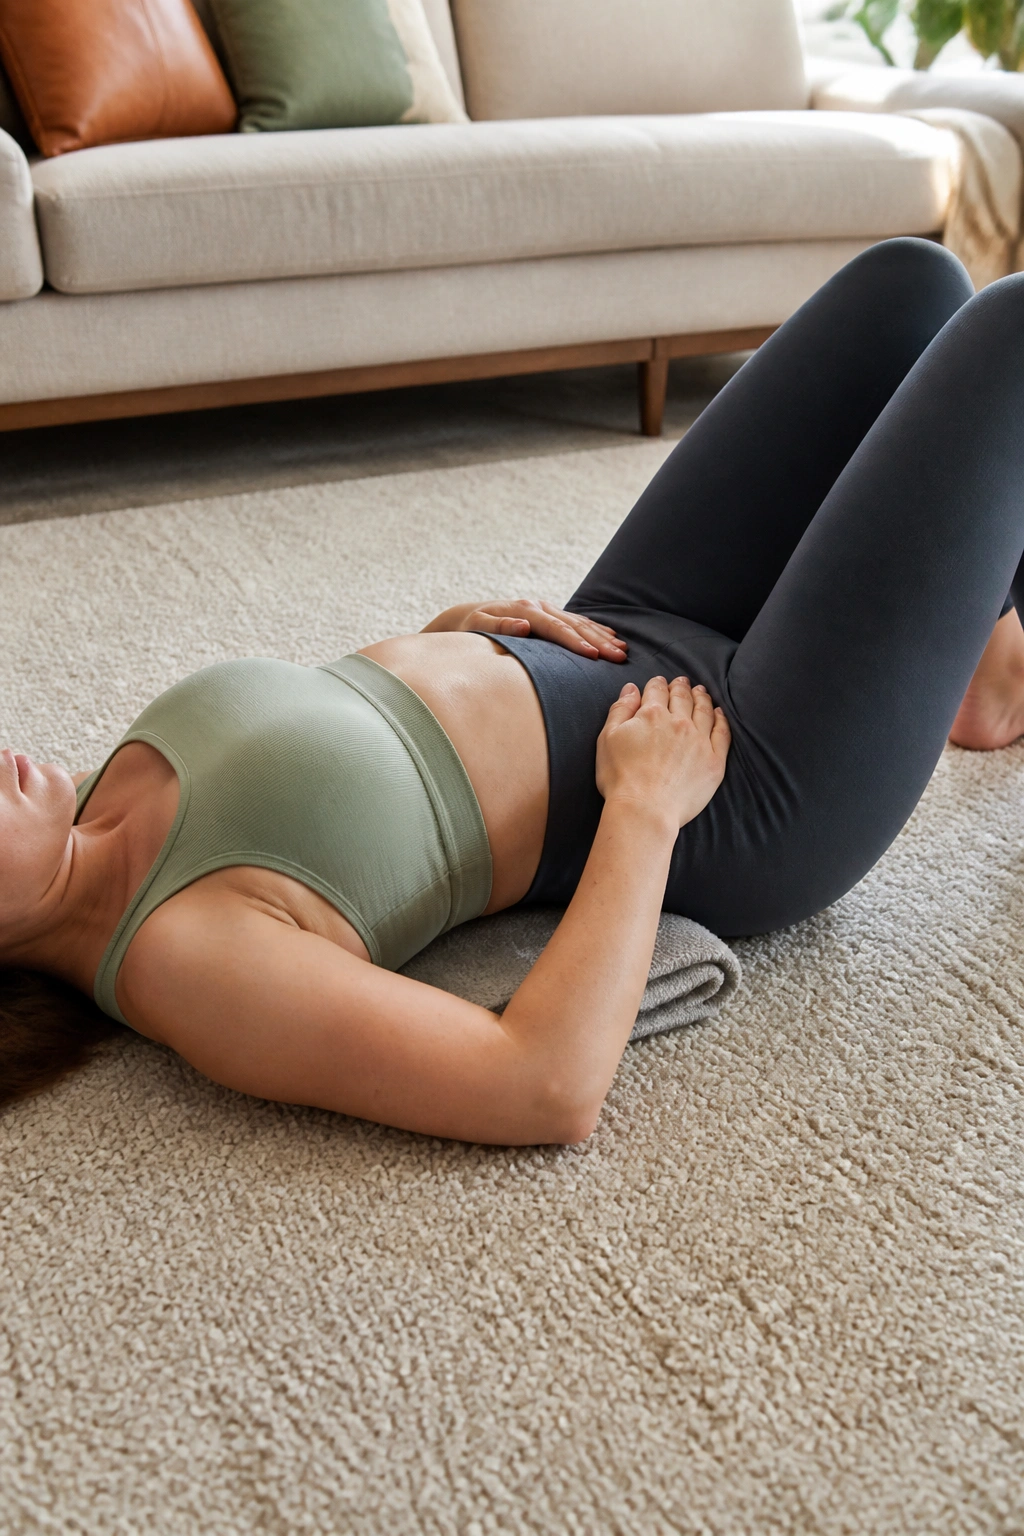
Why bother with a move that barely looks like exercise? Because pelvic tilts teach your abdomen and pelvis to move without drama, and that matters more than fancy shapes.
Lie on your back with knees bent and feet flat. On the exhale, gently tilt your pelvis so your lower back presses toward the floor. On the inhale, release it back to neutral. The motion is tiny. Really tiny.
What to Feel
Your glutes should not take over. Your abs should not clamp down like you’re trying to protect yourself from a punch.
You want a soft, controlled rocking motion — almost like your pelvis is a bowl of water and you’re tipping it just enough to shift the water, not spill it. That kind of control is useful before any stronger core work.
How to Use It
- 8 to 12 slow reps
- Pause for 1 second at the tilt
- Keep the ribs relaxed
- Stop if the movement makes your midsection dome
If the floor feels too flat or too hard, do the same motion with your knees on a folded blanket. It changes more than people think.
3. Heel Slides That Keep the Belly Flat
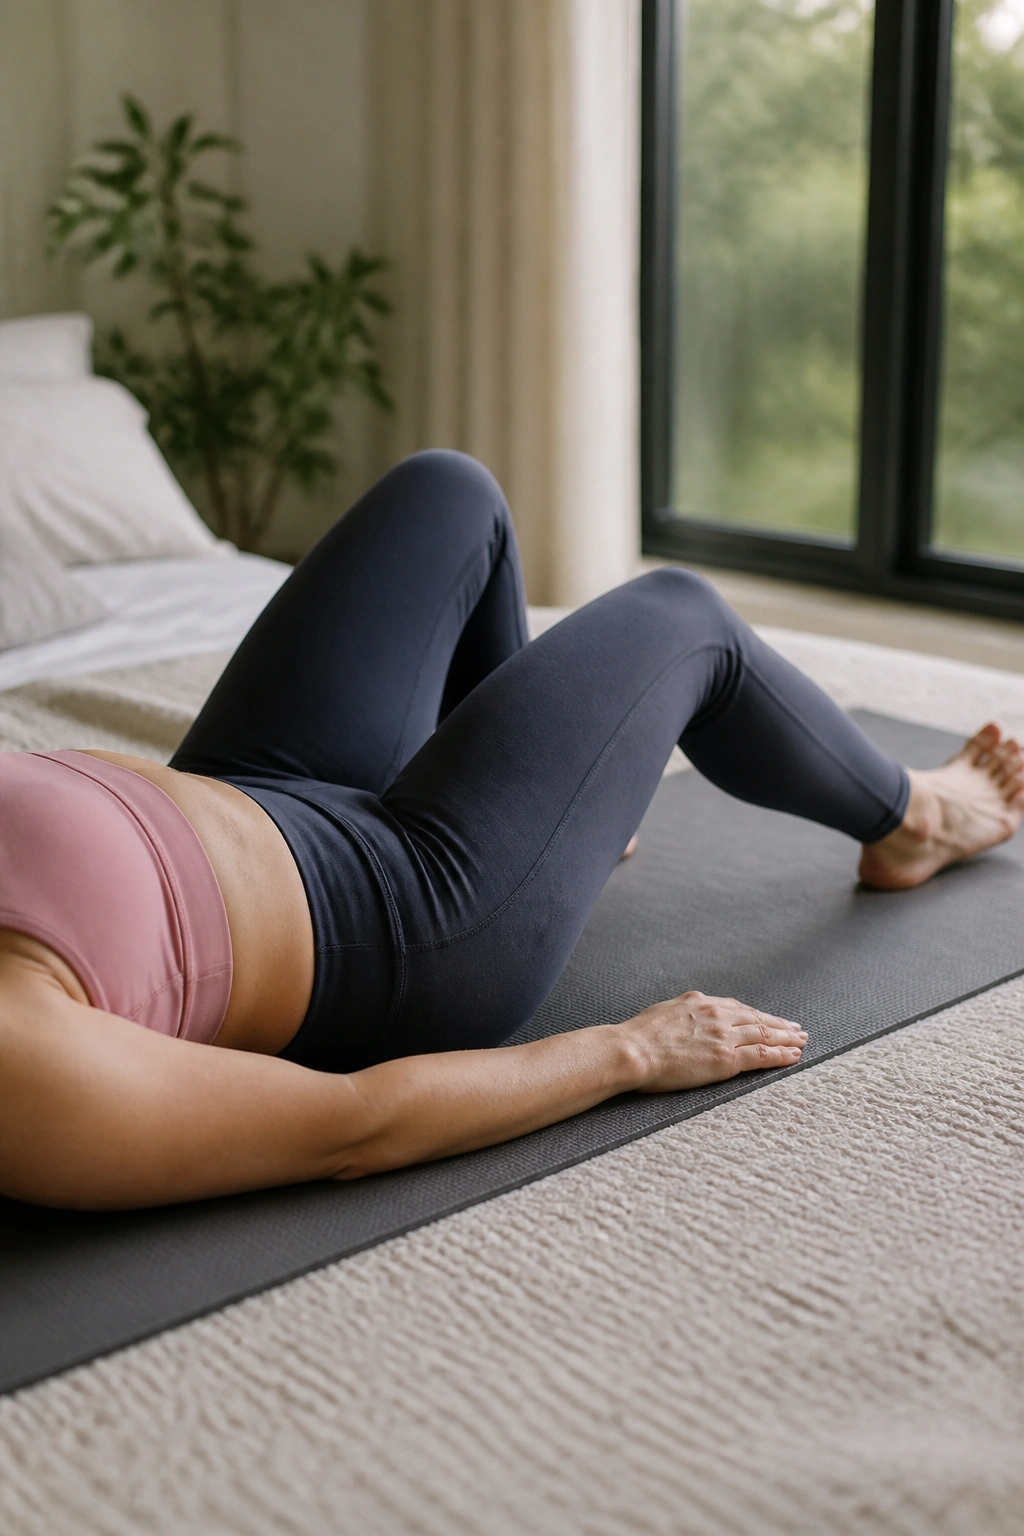
A heel slide is one of those postpartum core workouts that looks boring until you do it with honest control. Then it gets interesting fast.
Lie on your back with both knees bent. Exhale, keep your ribs soft, and slowly slide one heel away from your body until the leg is almost straight. Inhale as you bring it back. The torso should stay quiet the whole time.
If your belly pops up in the middle, the slide is too long or too fast. Shorten it. No shame in that.
The Mechanism
This move asks the deep core to hold the trunk steady while one leg moves. That’s a real-life skill, not a gym trick. You use it every time you get out of bed, reach for a diaper, or shift a car seat with one hand.
- Slide one leg at a time
- Keep the heel in light contact with the floor
- Use 6 to 8 reps per side
- Slow the return even more than the slide out
A tiny slide done cleanly beats a big slide that makes your abdomen bunch and bulge.
4. Toe Taps for Quiet Core Control
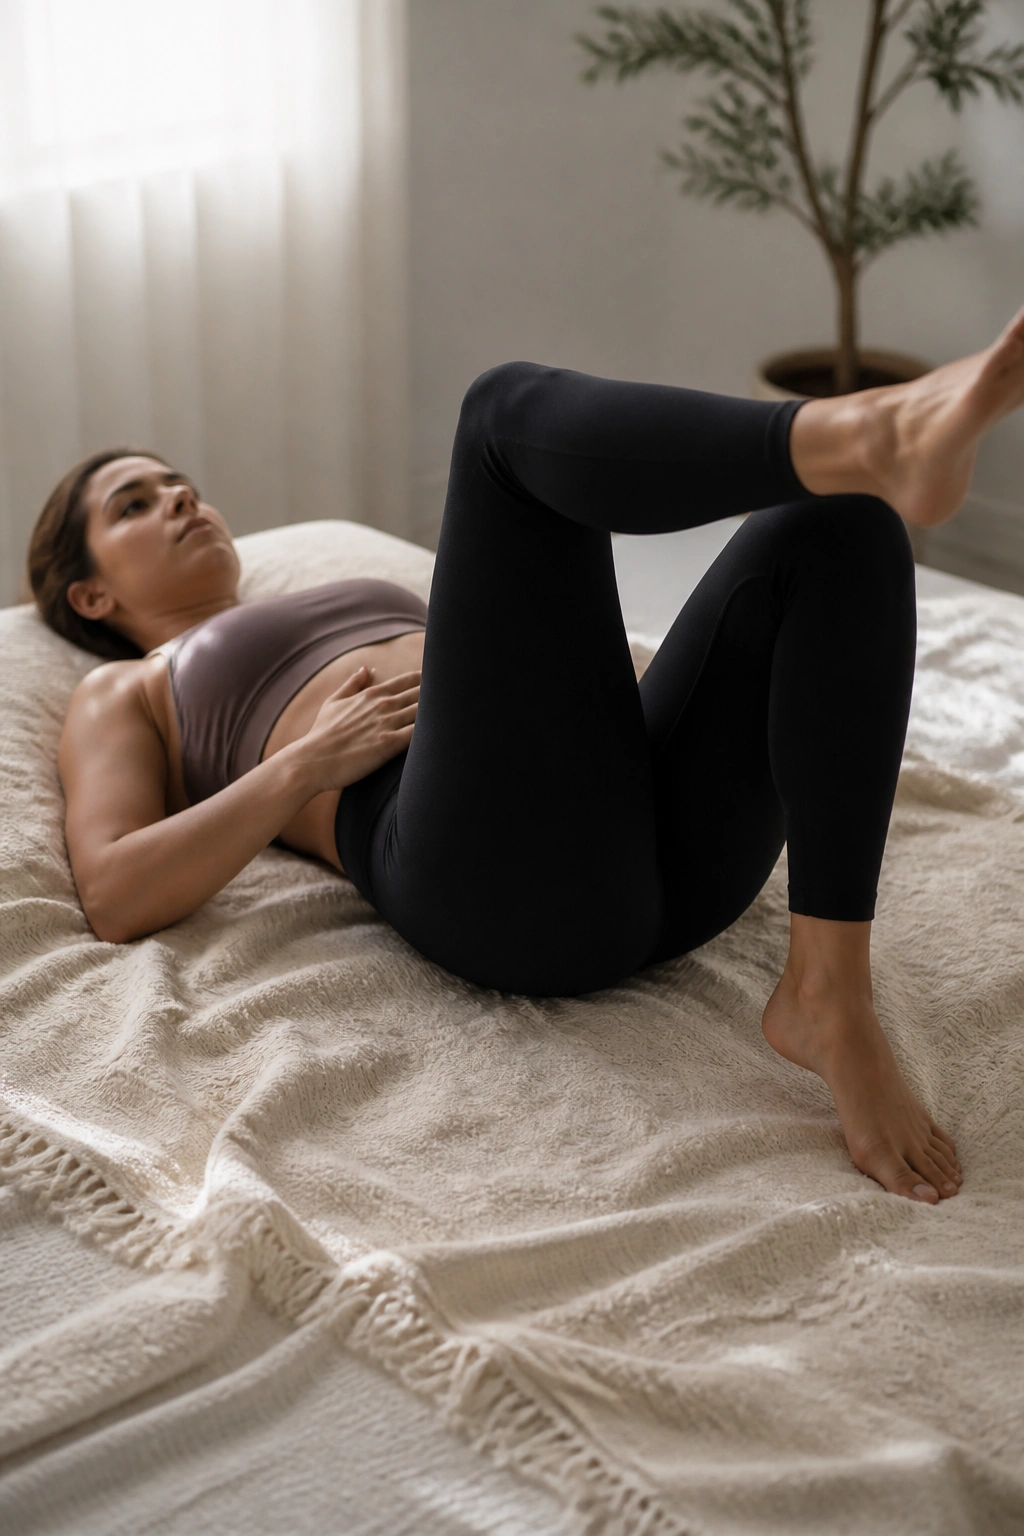
Toe taps are where many people first notice whether their core can truly hold steady. There is nowhere to hide here.
Start on your back with your knees bent to tabletop if that feels good and your spine stays calm. If tabletop is too much, keep one foot on the floor and tap the other leg instead. Lower one toe to the floor on an exhale, then bring it back up without letting your low back arch.
Speed is the trap. Fast reps make the abs look busy but do almost nothing for control.
Take your time. The lower back should stay long, your ribs should stay stacked, and the movement should feel small enough that you could talk through it.
A useful dose is 6 to 10 taps per side. If you feel pulling at the center line or a pressure shift downward, reduce the range immediately. That is your body saying the load has moved past “helpful” and into “too much.”
5. Arms-Only Dead Bugs
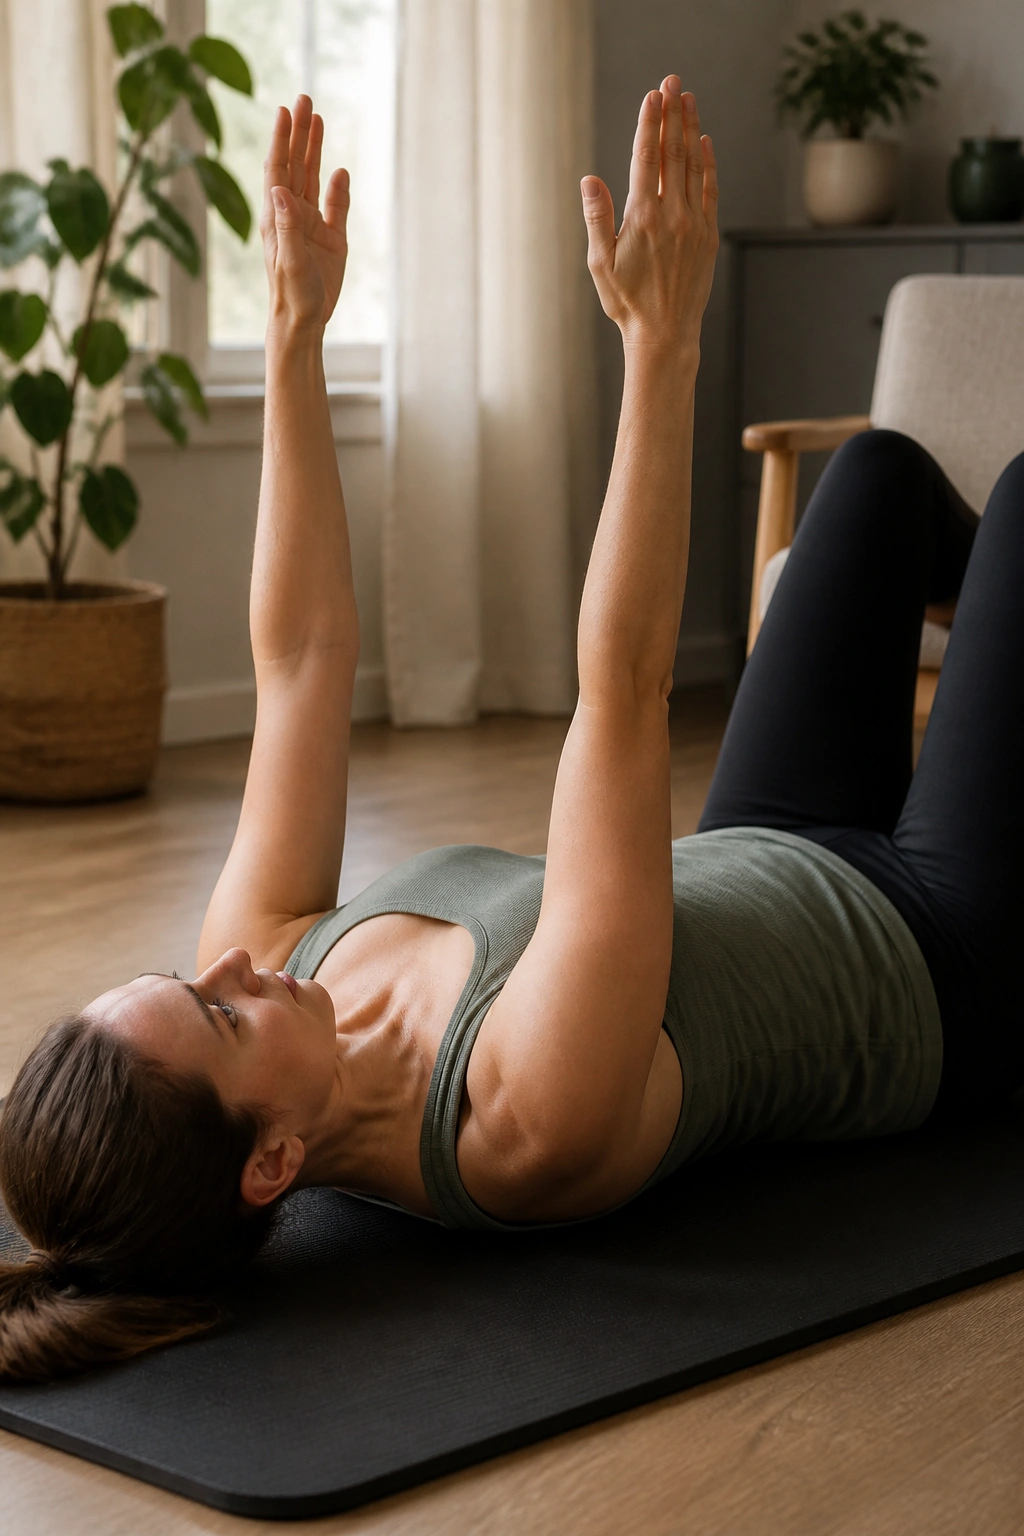
Unlike the full dead bug, this version keeps the legs quiet while the trunk learns to hold its shape. That makes it a good bridge exercise if full leg work still causes doming or pelvic pressure.
Lie on your back with knees bent and feet on the floor, or with your legs supported on a chair if that feels better. Reach both arms toward the ceiling. On the exhale, lower one arm overhead while keeping the ribs from flaring. Bring it back, then switch sides.
Who It’s Best For
This is a smart choice if floor work feels shaky or if you want a calmer way to wake up the deep core before trying harder drills. It also works nicely on days when you’re tired and do not want to overthink things.
Use 6 to 8 reaches per side and keep the motion slow enough that your ribcage doesn’t pop up. The torso should look almost boring from the side. That’s the point.
If you want one rule here, make it this: the arm moves, the trunk stays quiet.
6. Glute Bridge Holds With Rib Control
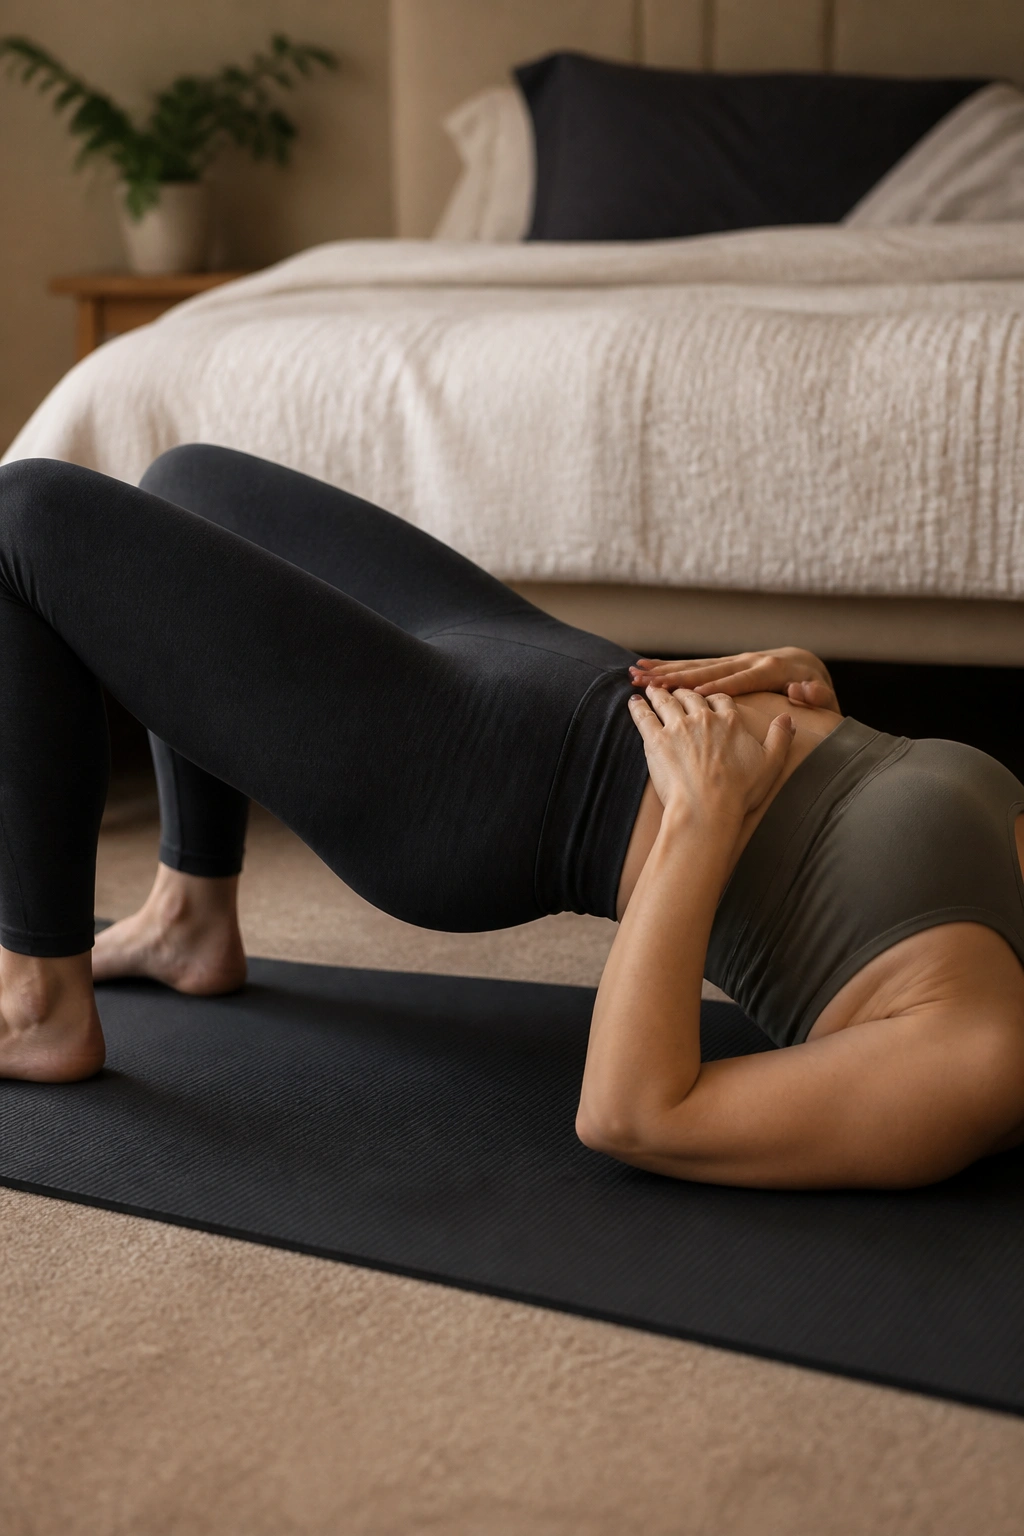
A bridge is not a butt exercise alone. In postpartum work, it becomes a pressure-control drill that happens to wake up the glutes.
Lie on your back with knees bent and feet about hip-width apart. Exhale, gently knit the ribs down, and lift your hips until your body makes a long line from shoulders to knees. Hold for 20 to 30 seconds, then lower with control.
If your hamstrings cramp, your feet are probably too far away. Bring them closer. If your low back feels pinched, lift less high and keep the exhale longer.
I like bridges because they teach the body to stack the ribcage over the pelvis while the hips do useful work. That pattern shows up everywhere — standing up, carrying a baby, pushing a stroller, even reaching into a low drawer.
Do 3 holds. Rest between them. A clean bridge that feels steady is better than a high bridge that turns into a backbend.
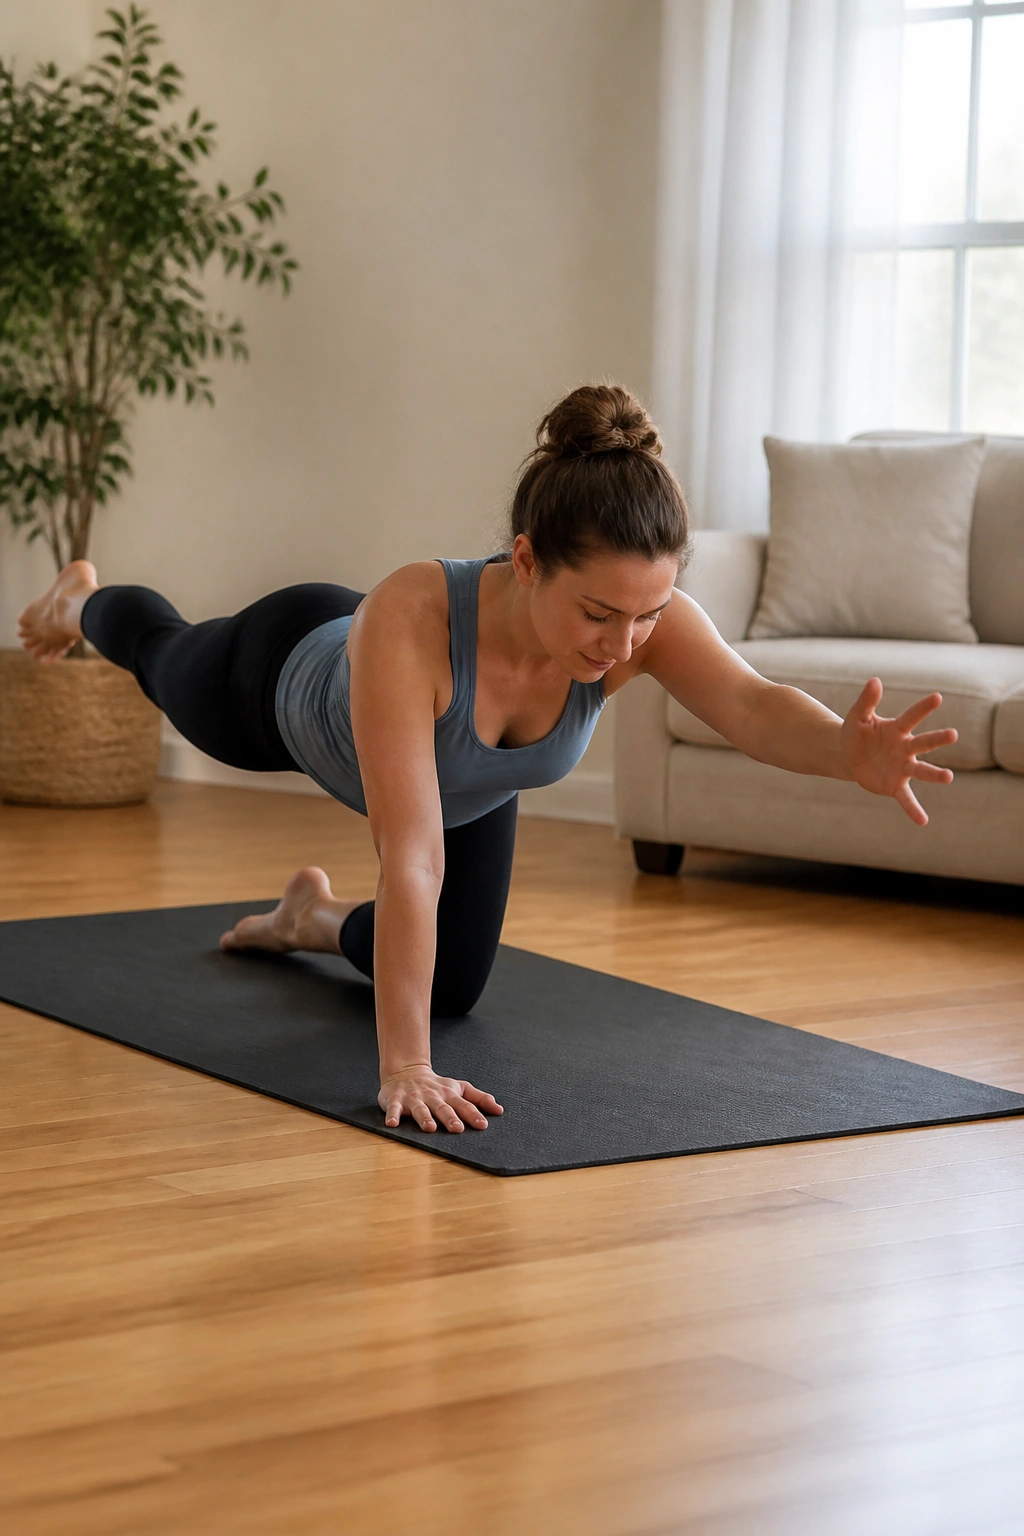
7. Bird Dog Reaches on Hands and Knees
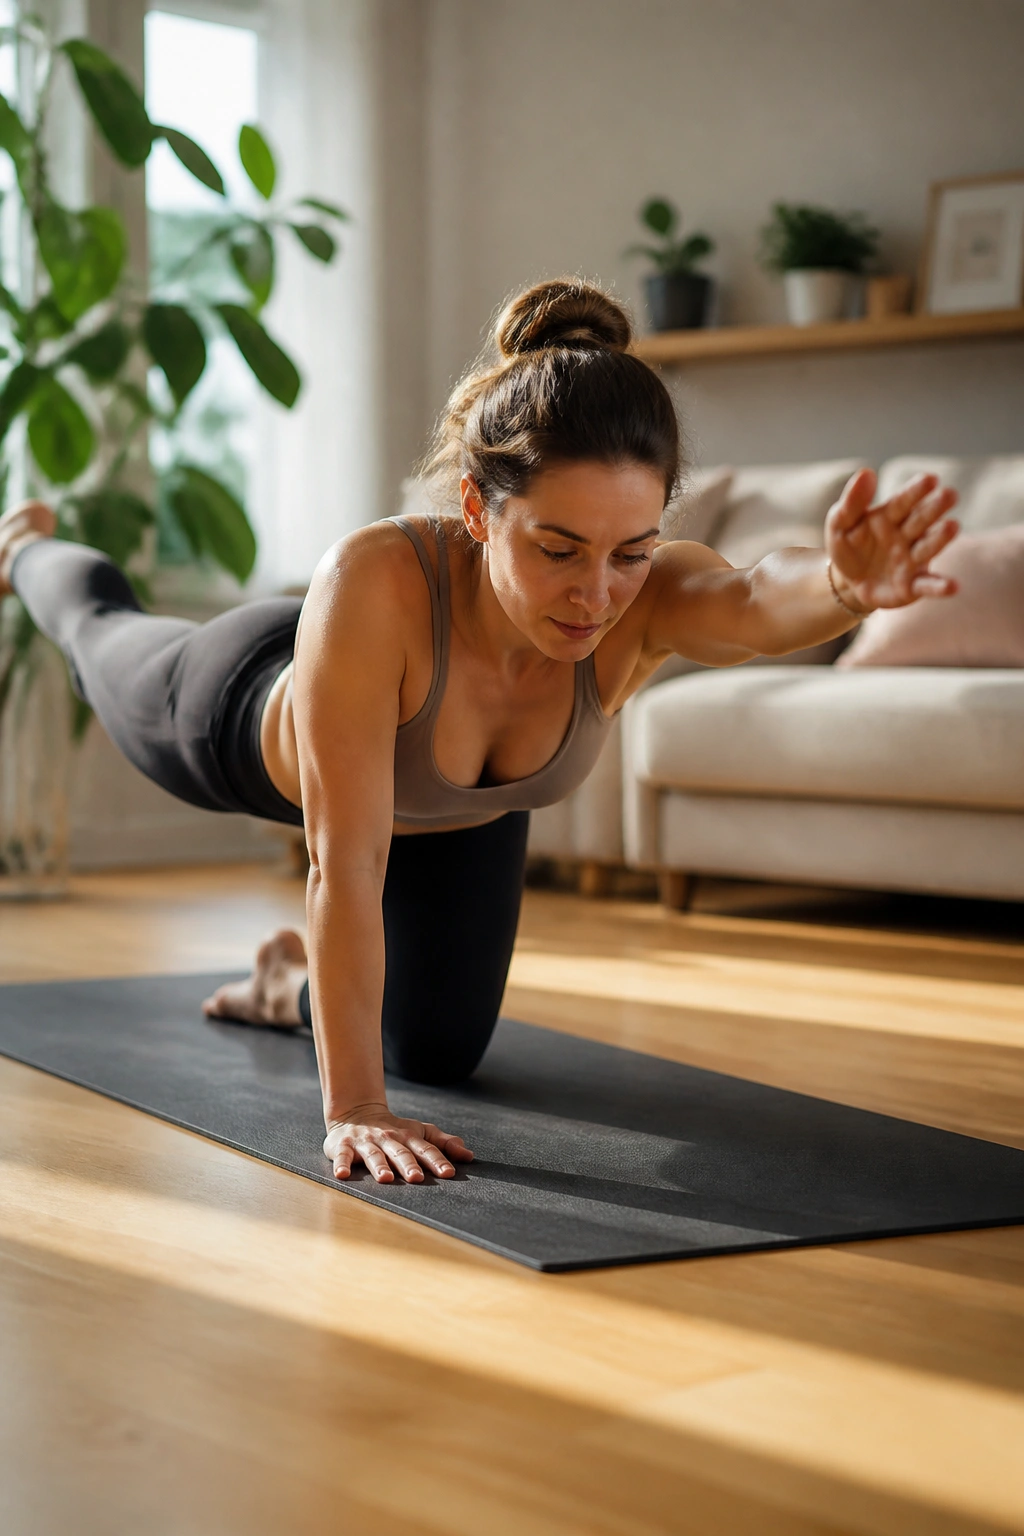
Bird dog is one of those moves that looks easy right up until your pelvis starts wobbling like a table with one short leg.
Get on hands and knees with your hands under your shoulders and knees under your hips. Exhale, reach one leg back and the opposite arm forward, and pause for 2 seconds before returning. Keep the hips level. If one side of the body lifts or twists, shorten the reach.
What Makes It Useful
This move trains cross-body stability. That matters because the trunk never works in isolation. When you carry a baby on one hip or twist to grab a bottle from the counter, your body has to resist rotation while something else moves.
- Reach long, not high
- Keep the belly from dropping
- Use 5 to 8 reps per side
- Rest the knee on a folded towel if the floor feels hard
If the full version feels shaky, do arm-only or leg-only bird dogs first. Nothing breaks because you step down a level.
8. Side-Lying Clamshells With a Rib Brace
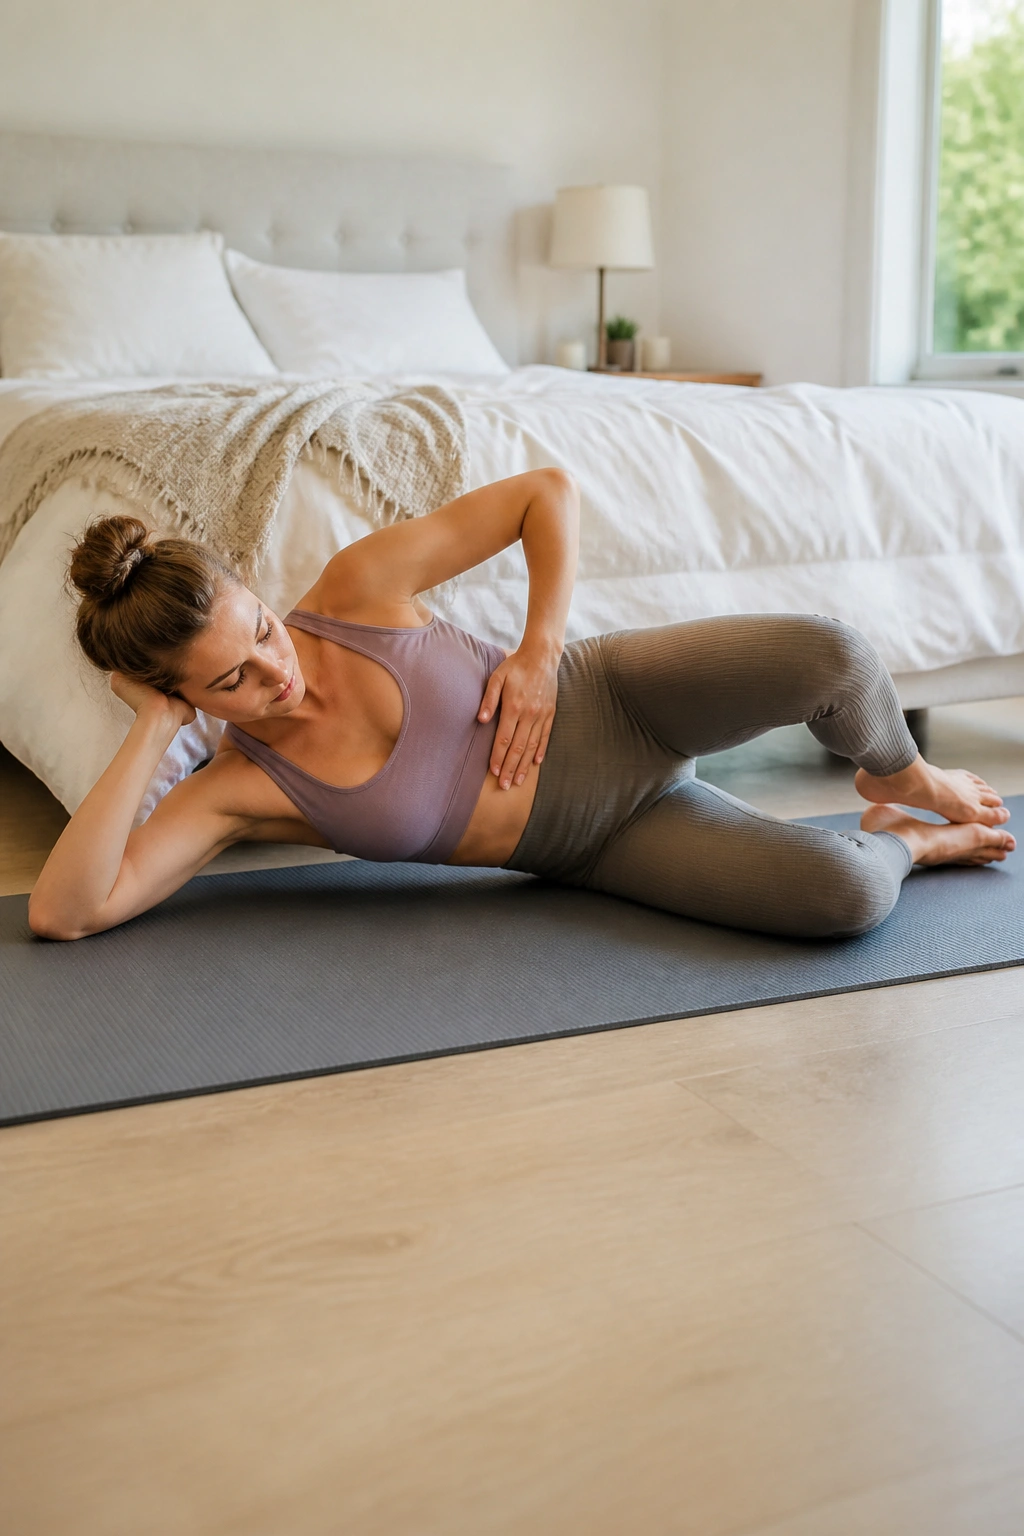
If side planks feel like too much, clamshells give you a friendlier way to wake up the side body and the muscles that help keep your pelvis steady.
Lie on one side with your hips and knees bent, heels lined up, and your head supported. Keep your pelvis stacked so you do not roll backward. Exhale, then lift the top knee a few inches while keeping the feet together. Lower slowly.
The trick is not opening the knee wide. It’s keeping the movement small and clean while the trunk stays quiet.
Why This One Earns Its Keep
The side glutes help stabilize the pelvis every time you walk, climb stairs, or stand on one leg to pull on pants. That support can matter a lot in the months after birth, especially if one side of your body feels weaker or less organized than the other.
Try 10 to 15 reps per side. Pause for a beat at the top.
If you want a little more challenge, slide a mini band above the knees. If that makes you squeeze your low back or shift backward, ditch the band. Plain and controlled wins.
9. Seated Marches That Train Upright Support
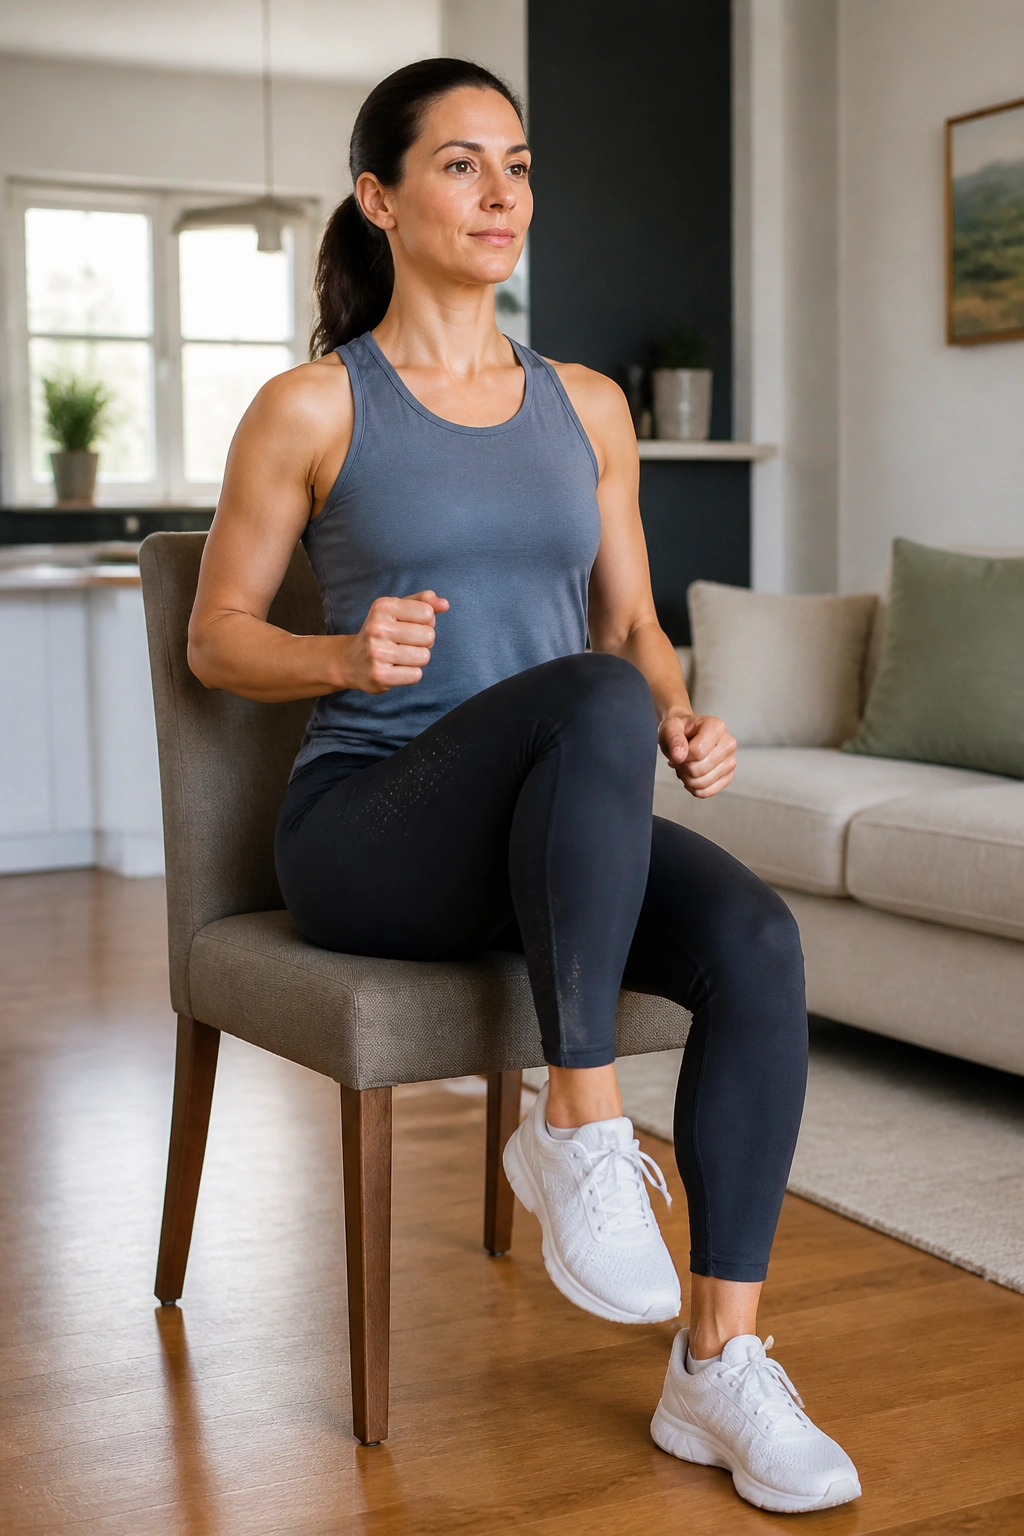
Why train your core while sitting? Because that is how real life happens half the day after a baby arrives.
Sit tall on a firm chair with both feet on the floor. Exhale and lift one knee just an inch or two, then lower it slowly. Alternate sides while keeping the torso steady and the shoulders relaxed.
How to Turn It Into a 2-Minute Reset
- Sit close to the front of the chair
- Keep your ribs from flaring forward
- Lift the knee on the exhale
- Hold the torso still, even if the legs feel easy
This is a surprisingly useful drill if you feel pressure when standing work is too much. It teaches the trunk to stay organized in a position most people spend a lot of time in anyway.
Use 10 to 20 marches total. If you can do that without breath-holding or belly bulging, you’re building a base you can actually trust later.
10. Wall Press Anti-Extension Holds
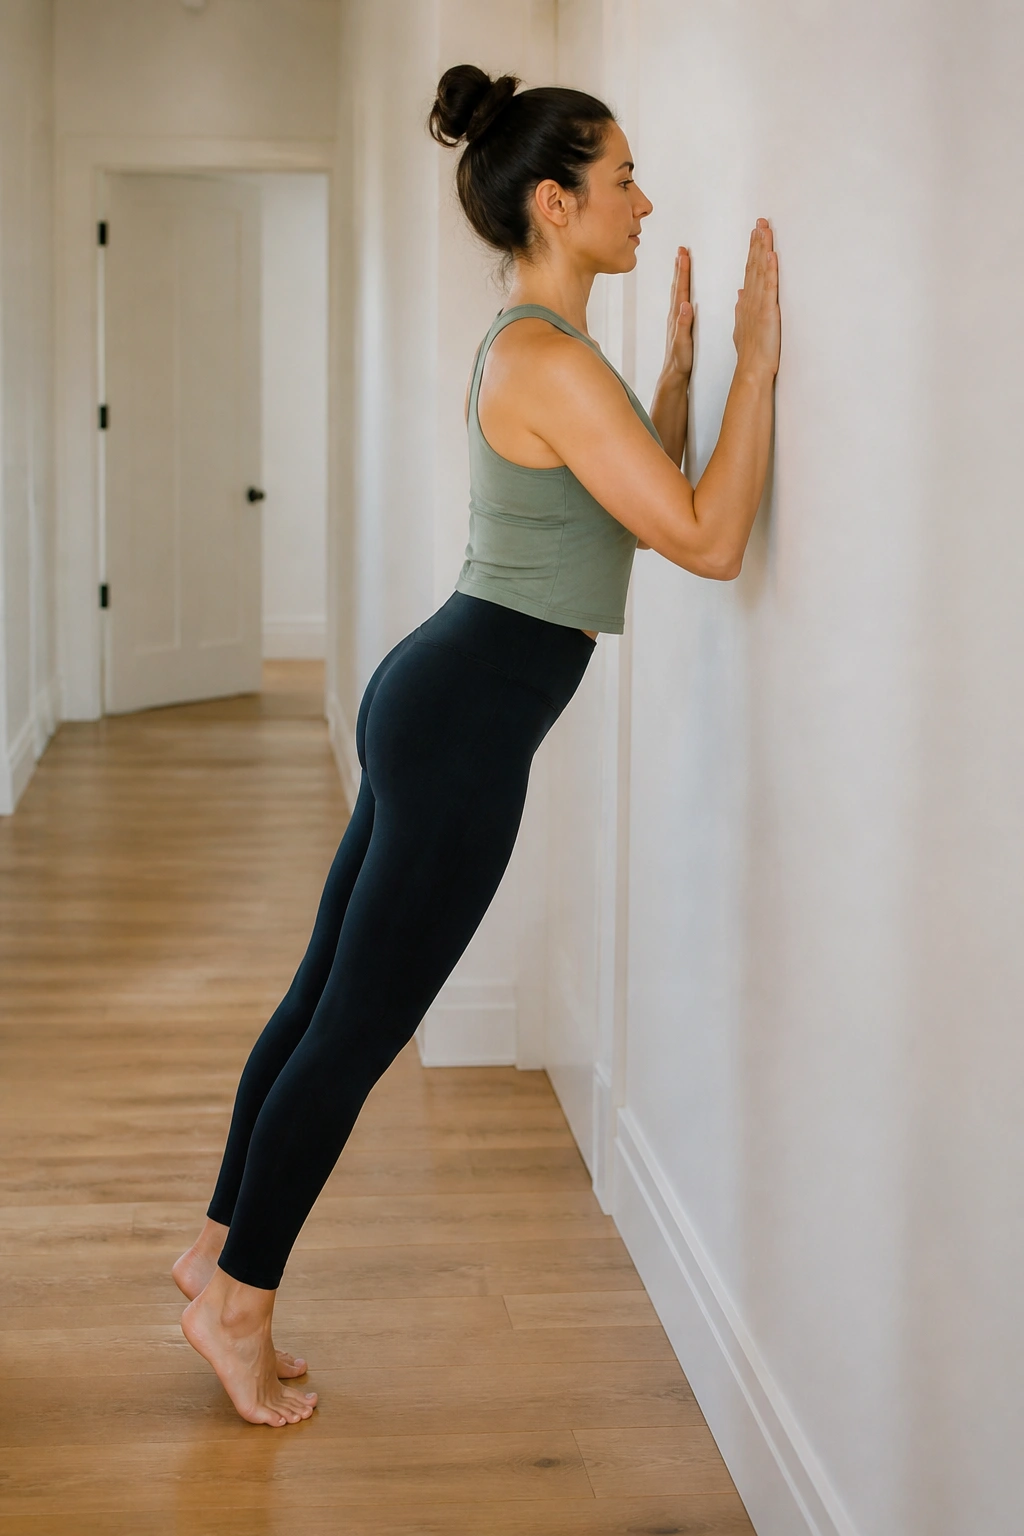
A wall can teach better core control than a mat if the mat makes you overdo the bracing.
Stand facing a wall with your forearms on it, elbows about shoulder height, and take one small step back. Lean in slightly so your body forms a straight line from head to heels. Exhale and press your forearms into the wall without letting your ribs pop forward.
This is an anti-extension drill, which is a plain way of saying your body is resisting the urge to arch. That’s useful if you tend to flare your ribs when you push, lift, or stand for a while.
Hold for 10 to 20 seconds, breathe quietly, then rest. Repeat 3 to 5 times.
If your lower back takes over, move your feet closer to the wall. If your shoulders shrug, lower the pressure a notch. The point is to feel steady, not heroic.
11. Quadruped Rock-Backs With an Exhale
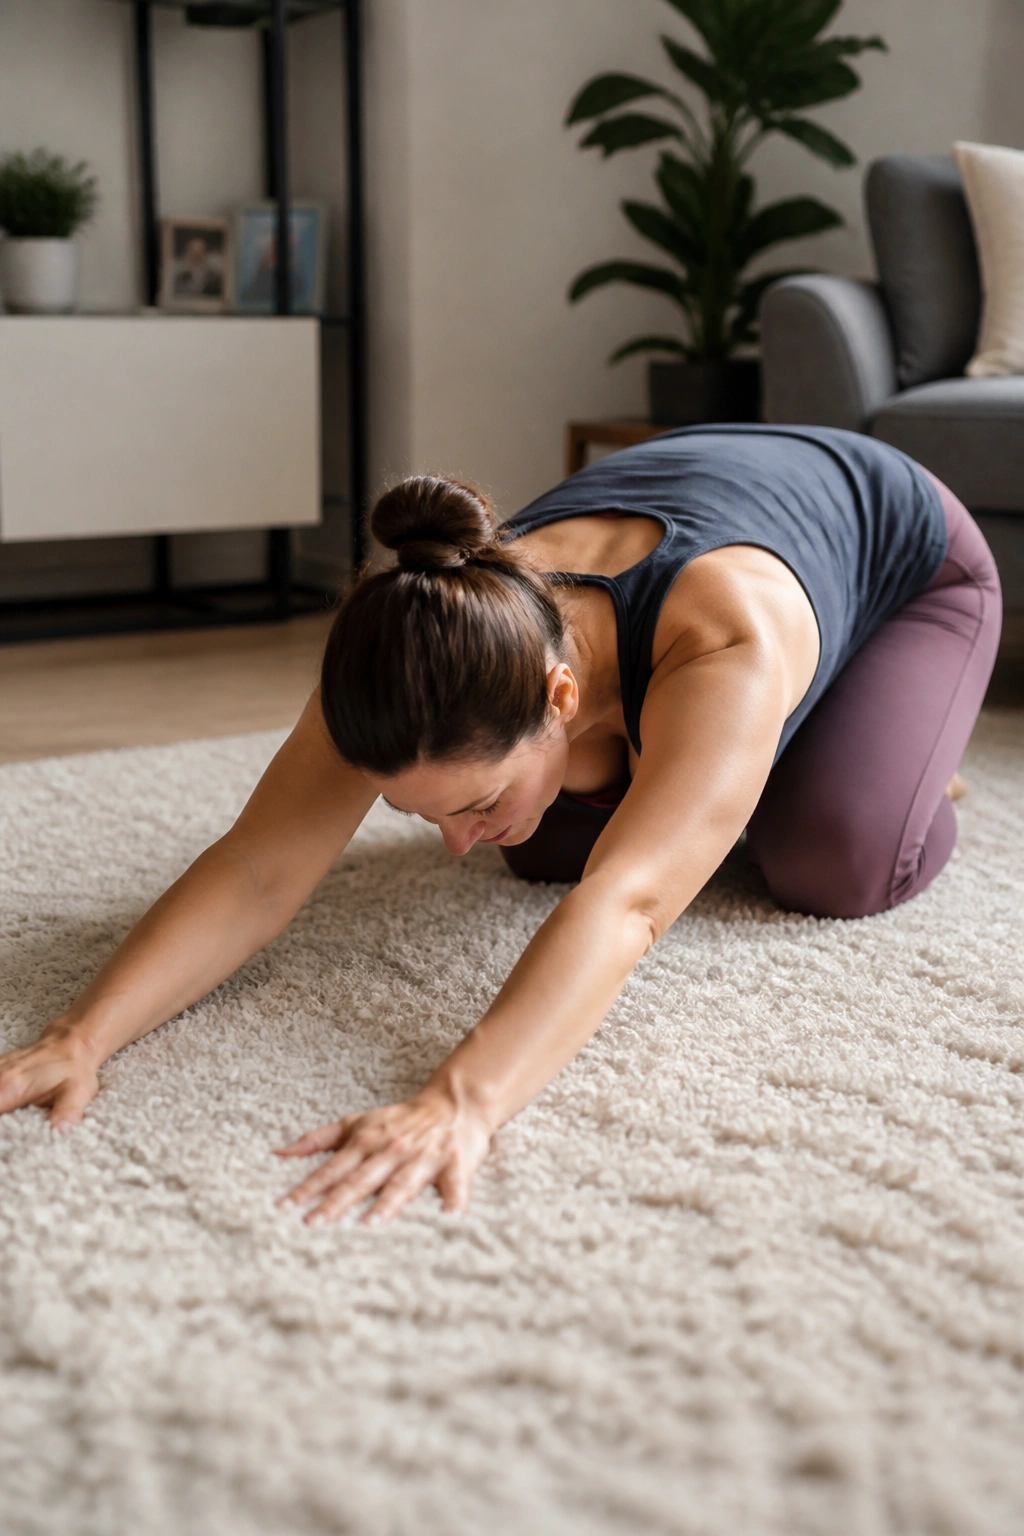
Some days the floor feels like the only place you can train without everything turning into a fight. Rock-backs are a good fit for those days.
Start on hands and knees. As you exhale, sit your hips back toward your heels while keeping your arms long. Inhale as you return to the start. The movement should be smooth, and the belly should stay calm.
Key Details
- Hands under shoulders
- Knees under hips
- Rock back only as far as you can keep control
- Put a folded towel under the knees if the floor is hard
- Use 8 to 10 reps
This drill is useful because it teaches the trunk to manage pressure while the hips move. It also tends to feel kinder on the body when standing work is still too spiky.
A small range is enough. Do not chase depth. If you rock back and feel your midline bulge or your incision tug, shorten the movement and slow the exhale.
12. Modified Curl-Ups That Check for Doming
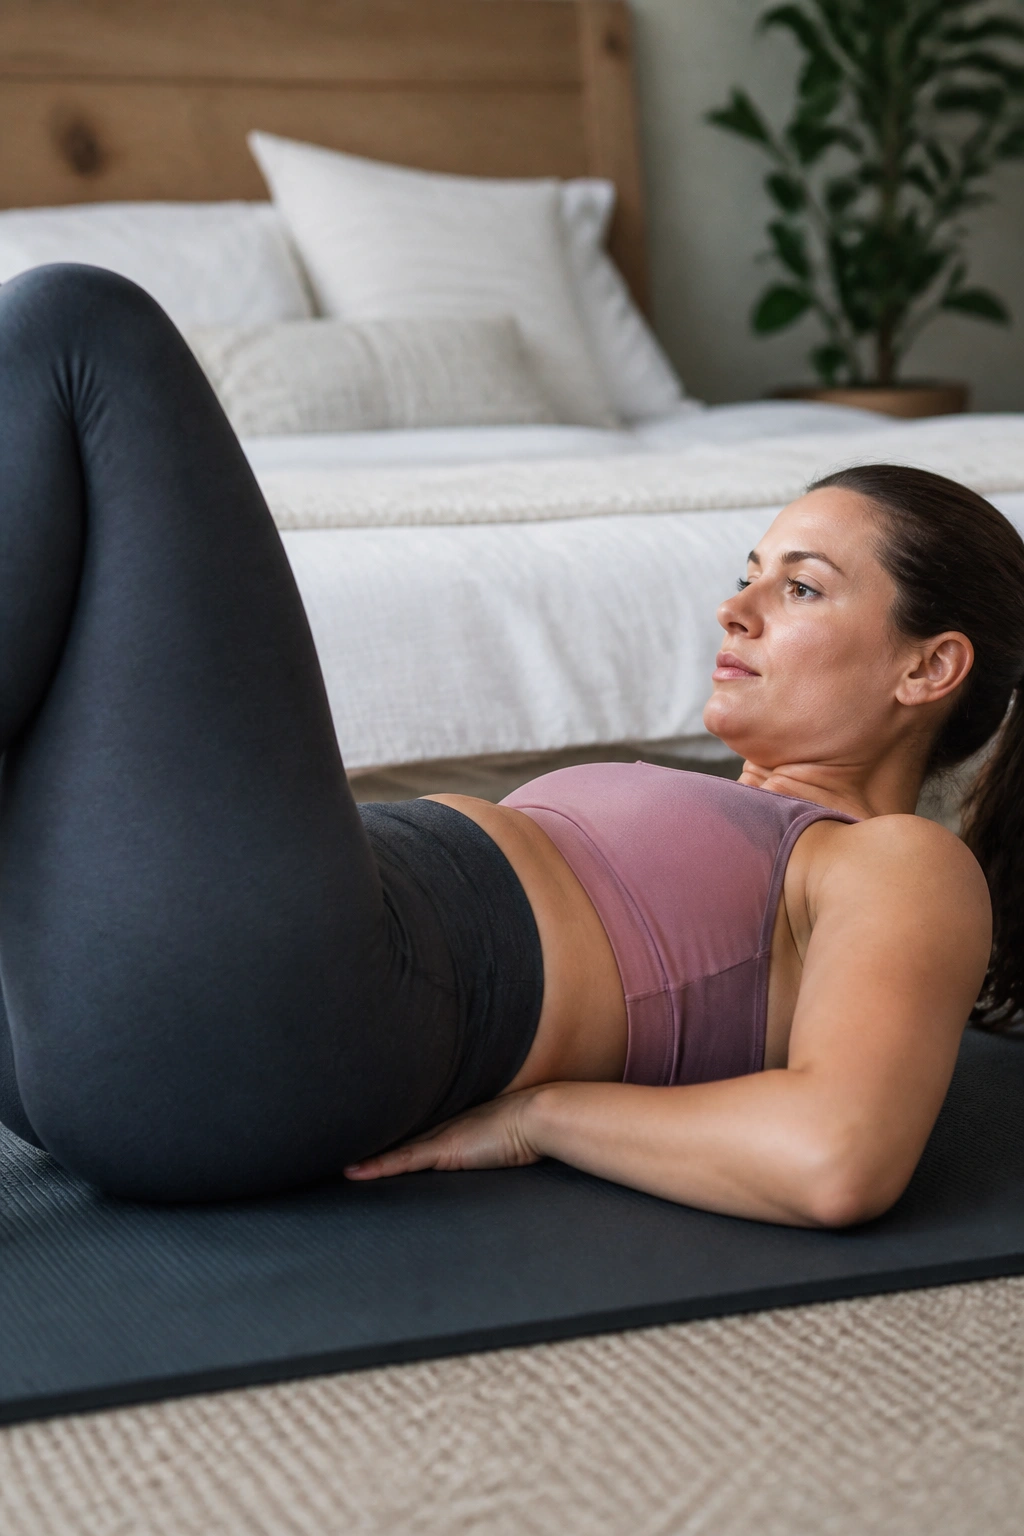
A full crunch is usually too aggressive early on. A small curl-up can still be useful if the midline stays flat and the neck does not do all the work.
Lie on your back with one knee bent and the other leg straight. Place your hands under the natural curve of your lower back, not to flatten it hard, but to feel that the spine stays neutral. Lift your head and shoulder blades just a few inches, then lower back down.
What Makes This Different From Crunches
The lift is tiny. That matters. You are not trying to sit up. You are trying to see whether your trunk can create a small amount of tension without doming or bearing down.
This is one of those postpartum core exercises that has a lot of value when you’re ready for a little more challenge but not ready for full flexion work. If you feel pressure, see a ridge down the midline, or notice your breath lock up, go back to easier drills.
- Use 3 to 5 reps per side
- Hold the top for 2 to 3 seconds
- Keep the chin slightly tucked
- Stop if your belly bulges or your pelvic floor feels heavy
13. Side Planks From the Knee
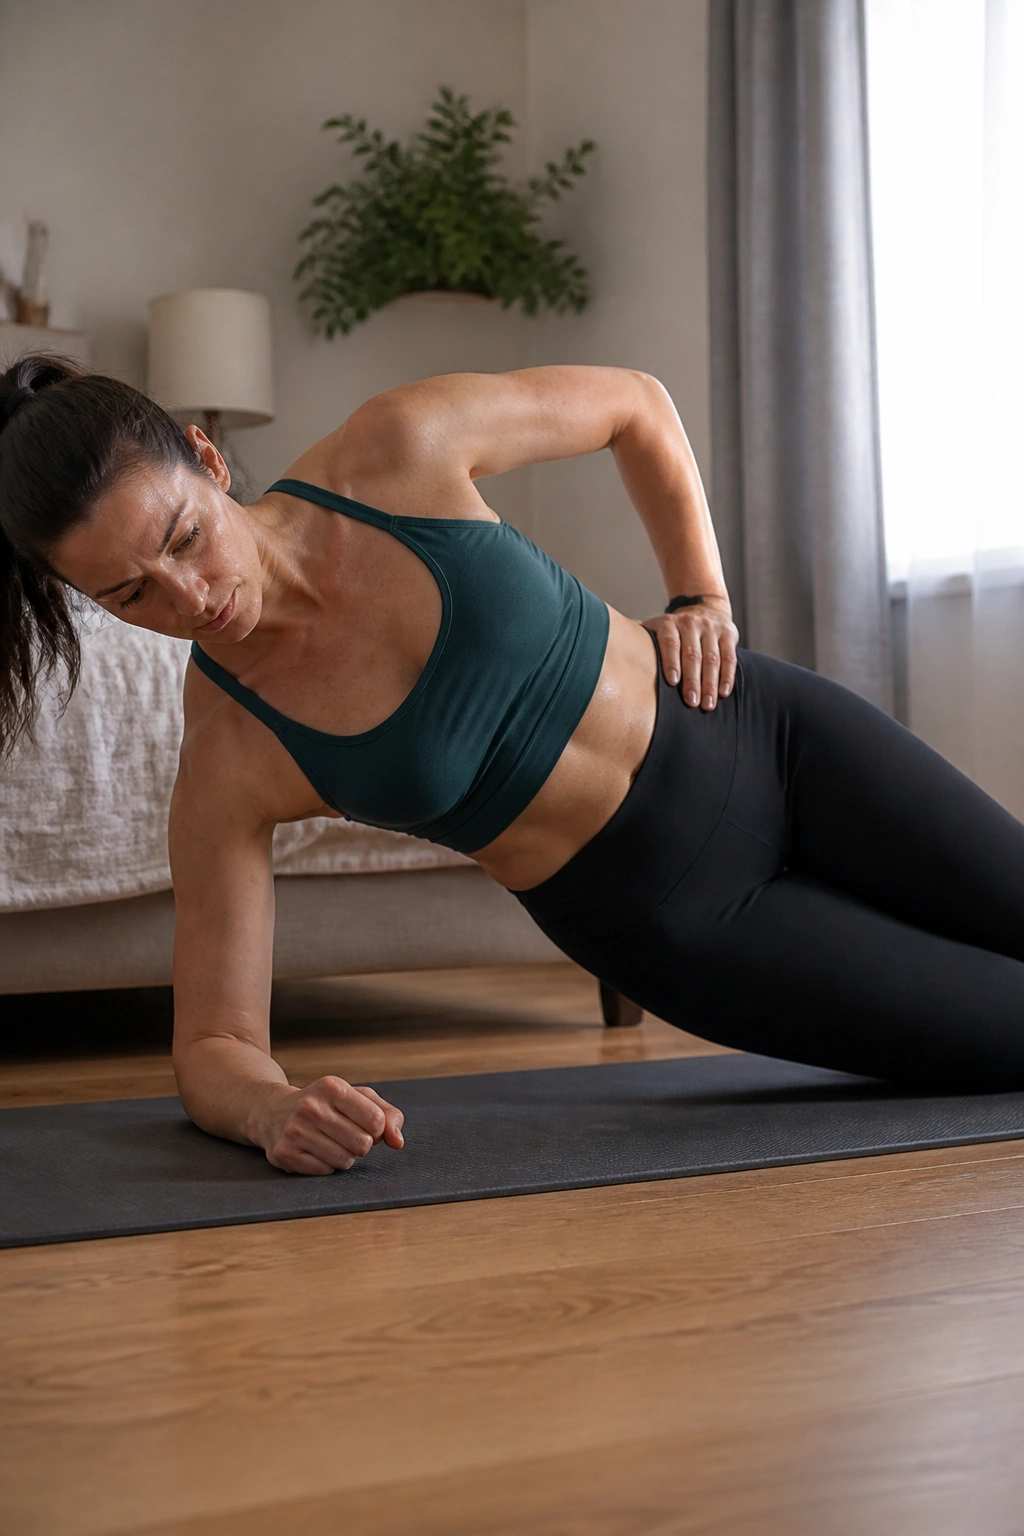
Side planks are not banned after birth. The knee version is the one that earns its keep.
Set up on one forearm with your elbow under your shoulder, knees bent, and hips stacked. Lift your hips so your body makes a straight line from shoulder to knee. Hold for 10 to 20 seconds, then lower with control.
The whole exercise is about side-body support. If your waist collapses, your shoulder creeps up, or your ribs twist toward the floor, the hold is too hard right now.
Setup Matters More Than Brute Force
Keep your top shoulder open and your neck long. You should feel the side of the trunk working, not a kink in the neck or a pinch in the low back.
If the floor version feels rough, do a standing side press against a wall first. That gives you the same anti-side-bend work with less load.
Two or three holds per side is enough. Clean tension is the goal. Hanging on for a long time with bad shape does not buy you much.
14. Half-Kneeling Pallof Press
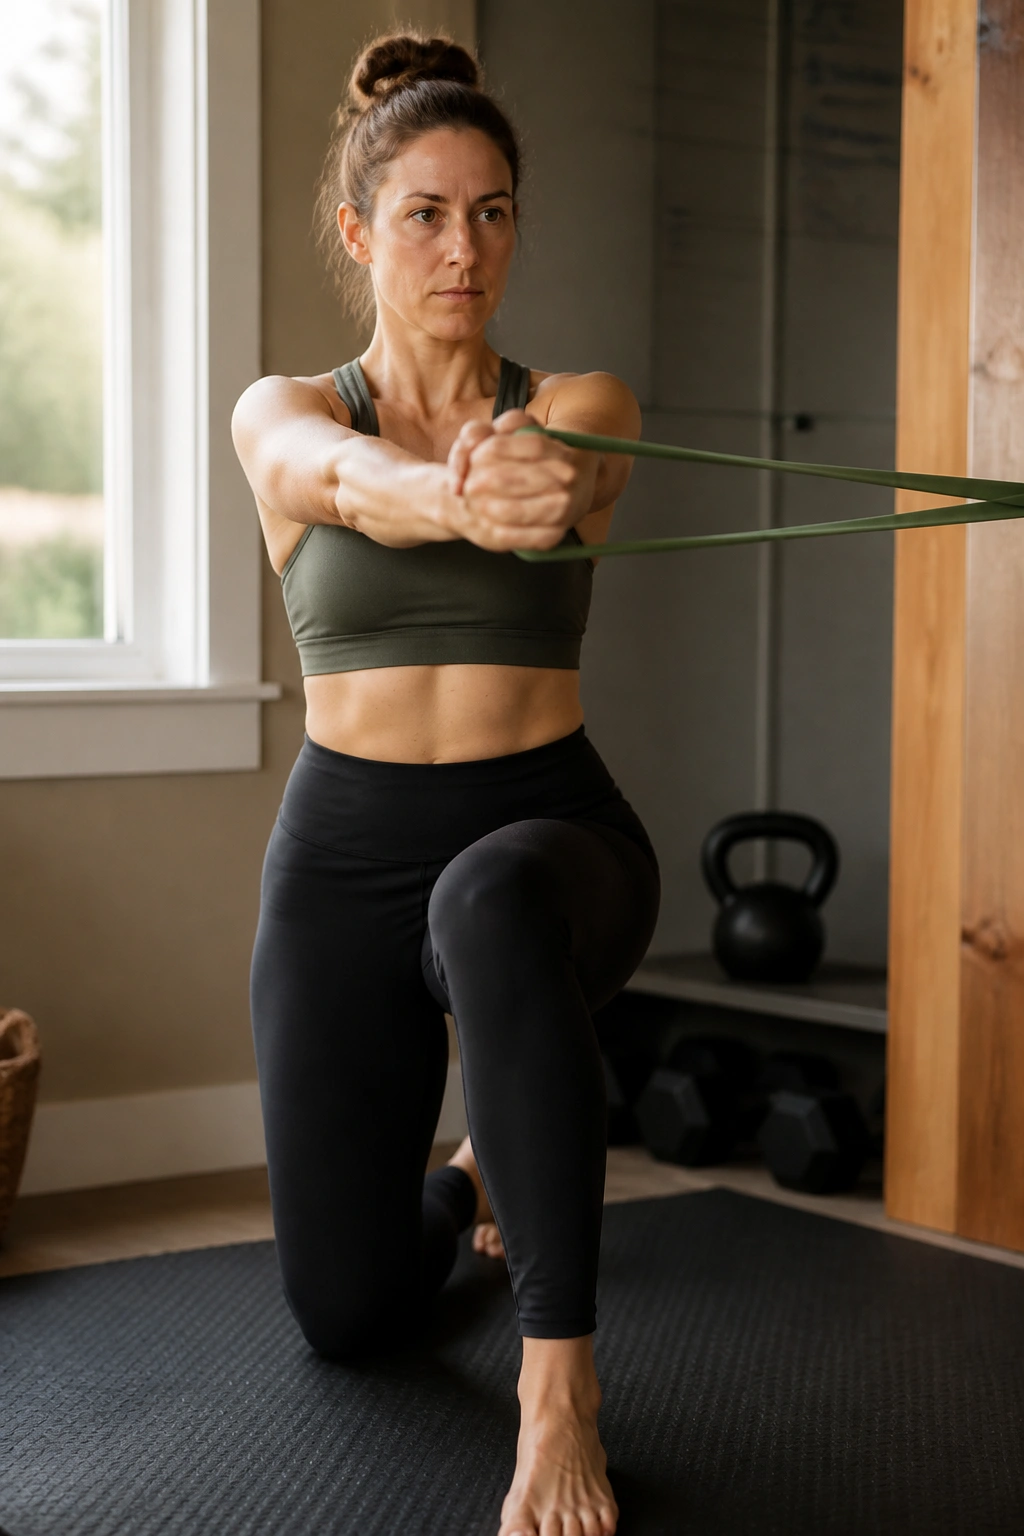
This one looks almost too tidy, which is probably why I like it. A half-kneeling Pallof press asks your core to resist rotation while your arms move, and that is a very real postpartum skill.
Set up a resistance band at chest height. Kneel on one knee with the other foot planted in front, both hips facing forward. Hold the band at your chest, exhale, and press it straight out. Bring it back slowly without letting the torso twist.
The beauty of this drill is that it teaches your ribs and pelvis to stay lined up while force comes from the side. That matters when you reach across a car seat, turn while holding a baby, or twist in a hurry.
Do 6 to 10 presses per side. Keep the movement slow and the stance stable.
If your low back arches, tuck the pelvis slightly. If the band feels too light, step a little farther from the anchor. Small changes make a big difference here.
15. Suitcase Carries With One Heavy Weight
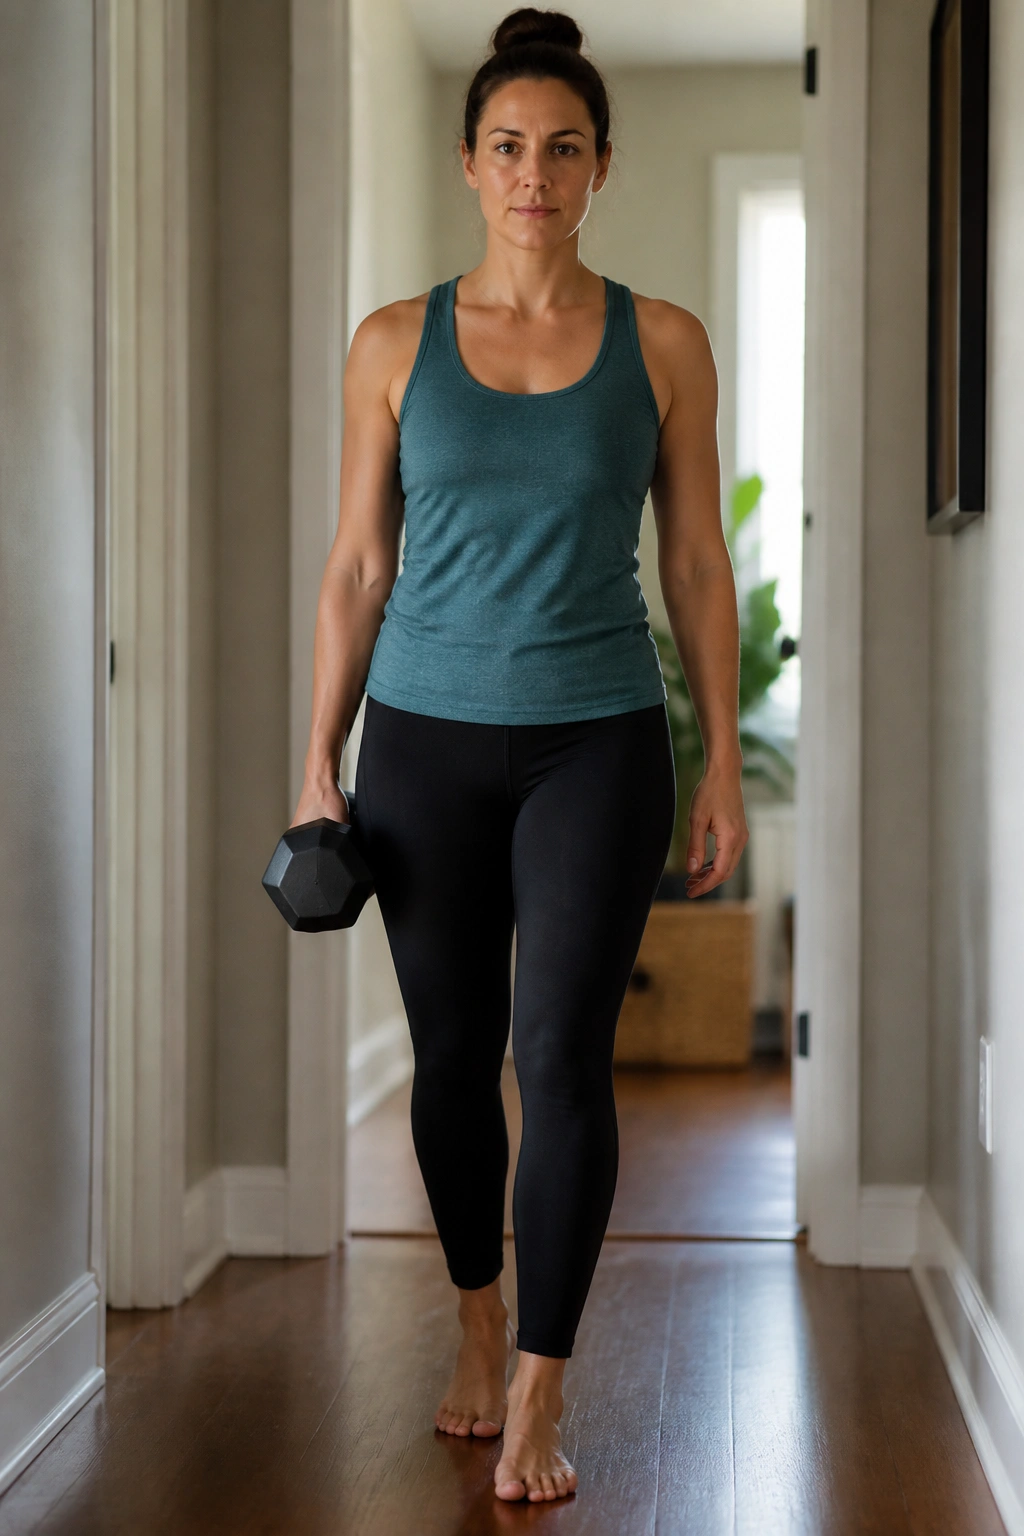
If you’ve ever carried a car seat in one hand and a diaper bag in the other, you’ve already lived this movement pattern. Suitcase carries just make it deliberate.
Hold one dumbbell or kettlebell at your side and walk in a straight line for 20 to 40 steps. Keep your ribs level, your shoulder relaxed, and your body from leaning toward the weight. Switch sides and repeat.
Why It Works So Well
A carry forces the trunk to stay upright under a real load. That is more useful than it sounds. Walking with one heavy side object asks the obliques, diaphragm, and pelvic floor to coordinate in a way floor drills can’t quite match.
- Start light enough to keep perfect posture
- Walk slowly, not stiffly
- Switch hands each round
- Stop if you feel pelvic pressure or back pain
This is a strong move for later postpartum rehab, not the first thing most people should do. But once you can keep a level torso, it pays off fast. It feels like life practice.
16. Marching Bridge Holds
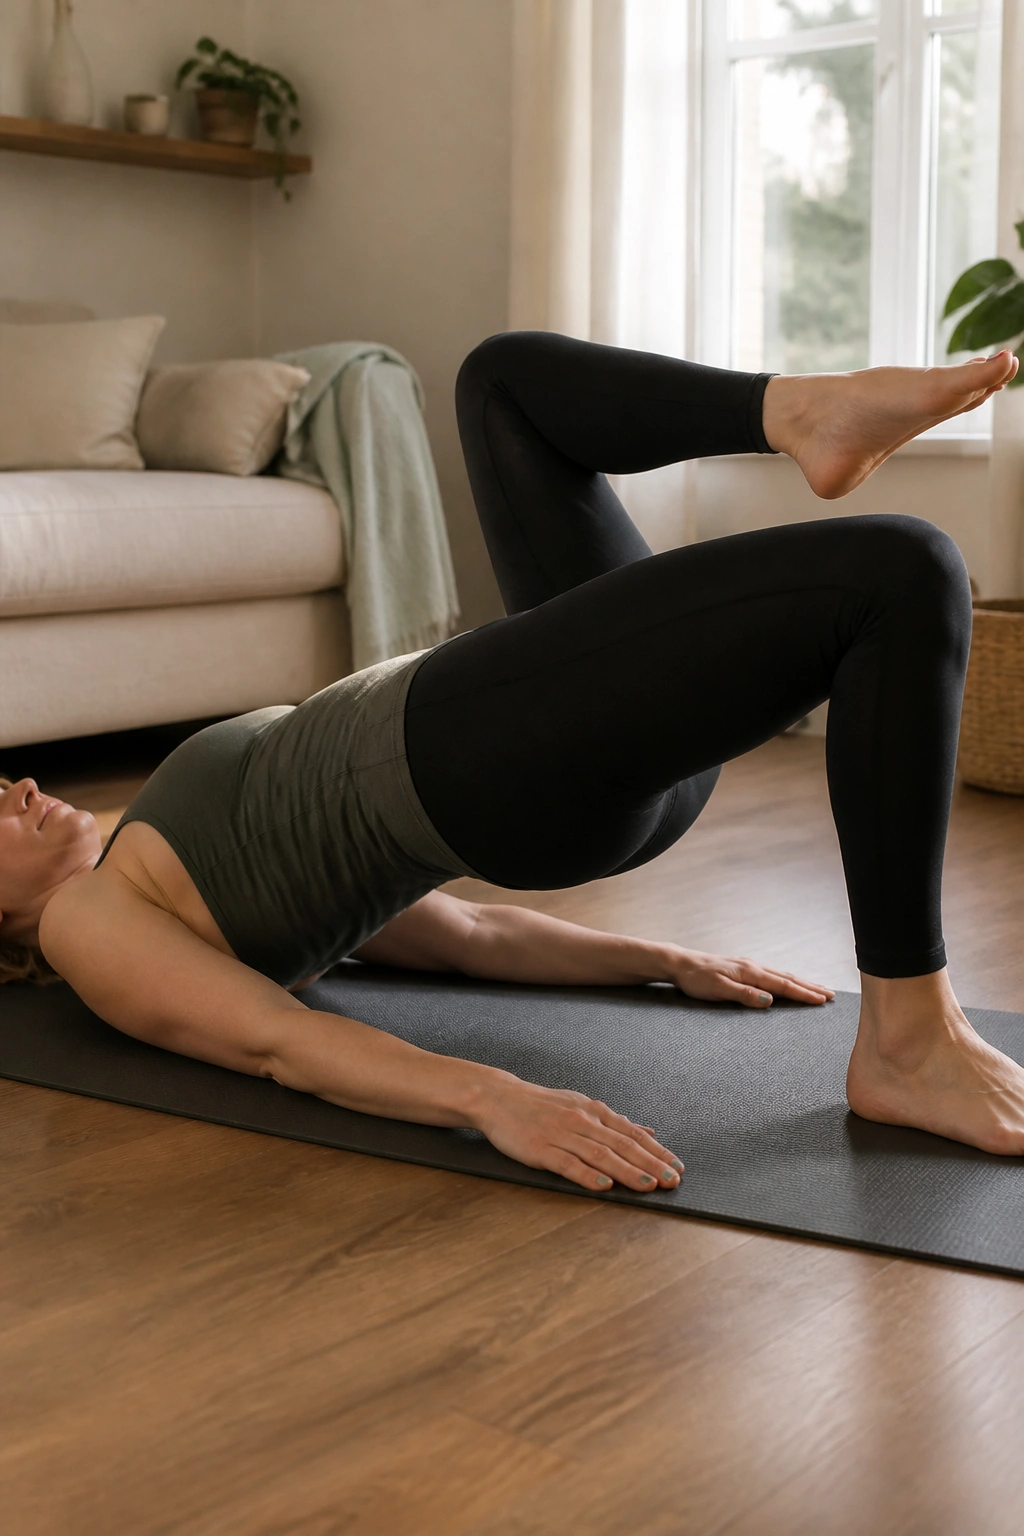
Can a bridge get harder without adding weight? Yes. Marching makes it honest.
Lift into a standard bridge, then keep the hips level while one foot floats an inch off the floor. Set it down and switch sides. The lifted leg does not need to come high. It only needs to move without turning the bridge into a swayback.
The point is to force the trunk and pelvis to stay steady while one side changes. That is a great bridge between basic floor work and the standing drills that come later.
Use 6 to 8 marches total or hold the bridge and breathe through 3 to 5 slow breaths. If the hips drop or the low back tightens, take out the march and keep the hold simple.
A bridge that stays square is useful. A bridge that turns into a wobble is just frustration with a nicer name.
17. Standing Hip Hinges With a Long Exhale
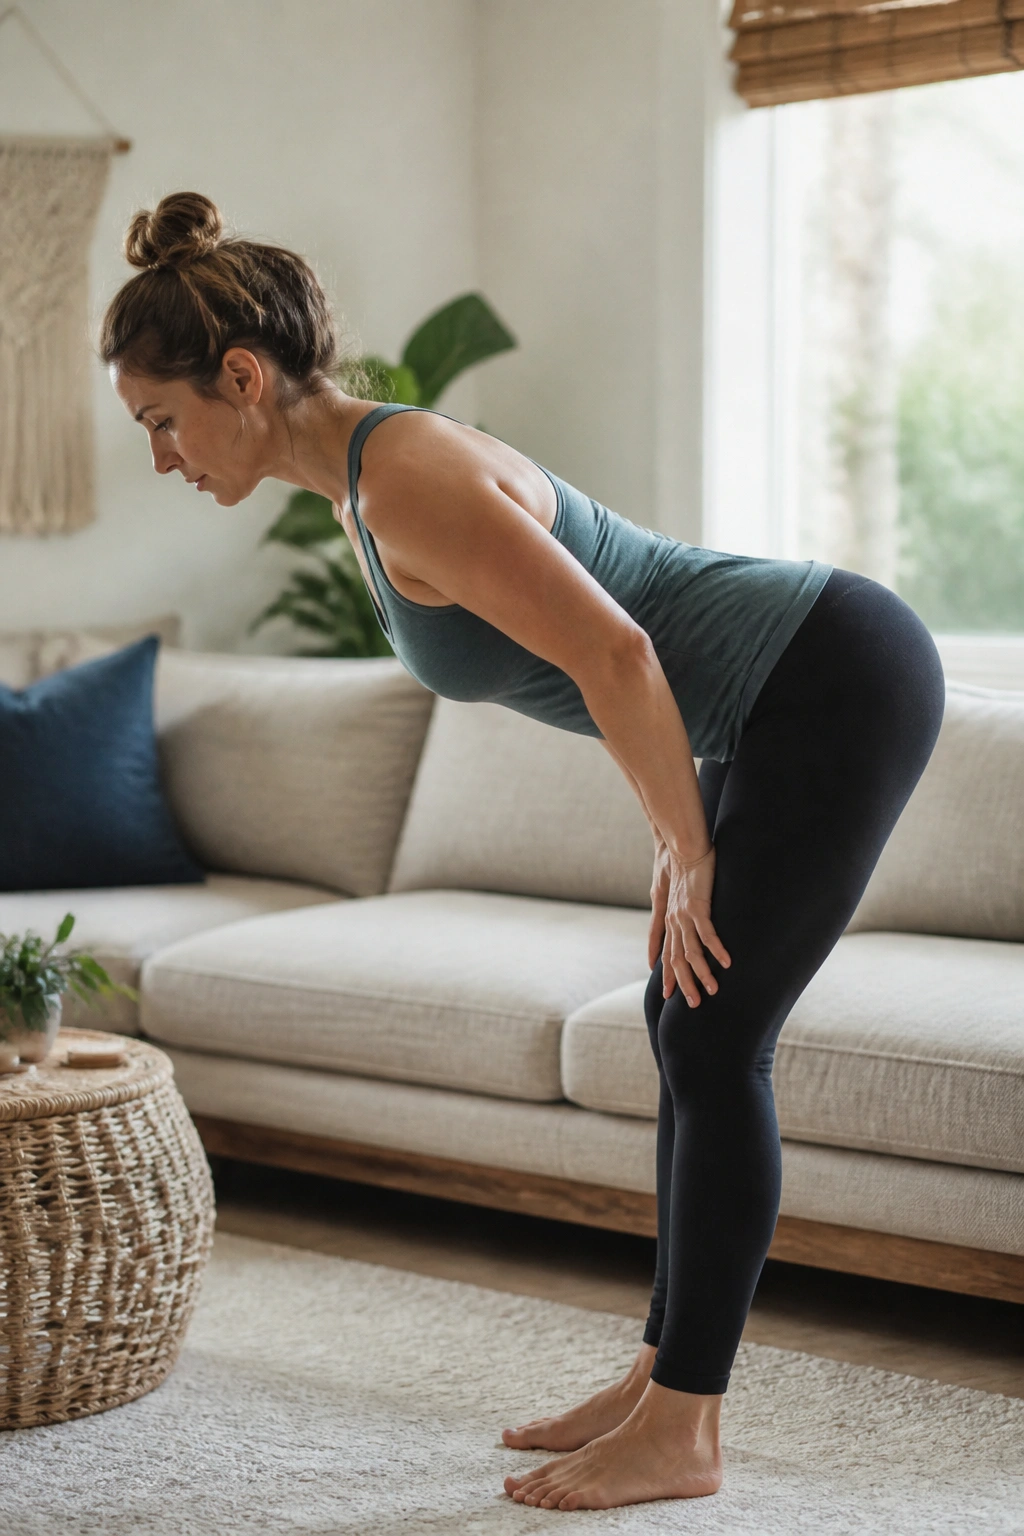
At some point, postpartum core work has to leave the floor. This is one of the cleanest ways to do it.
Stand with feet about hip-width apart, knees soft, and hands on your thighs or a broom handle along your back for feedback. Send the hips back as if you’re closing a car door with your backside, then exhale as you stand tall again. Keep the ribs from flaring.
The hinge teaches the trunk to stay steady while the hips move, which shows up constantly in daily life. Picking up a laundry basket. Reaching into a crib. Lowering yourself onto the couch without dropping straight down.
Try 8 to 10 reps and move slowly enough that your weight stays over the middle of the foot. If your lower back feels like it is doing the whole job, shorten the hinge.
No need for a huge range. A neat hinge beats a big sloppy one.
18. Low Step-Ups With a Soft Brace
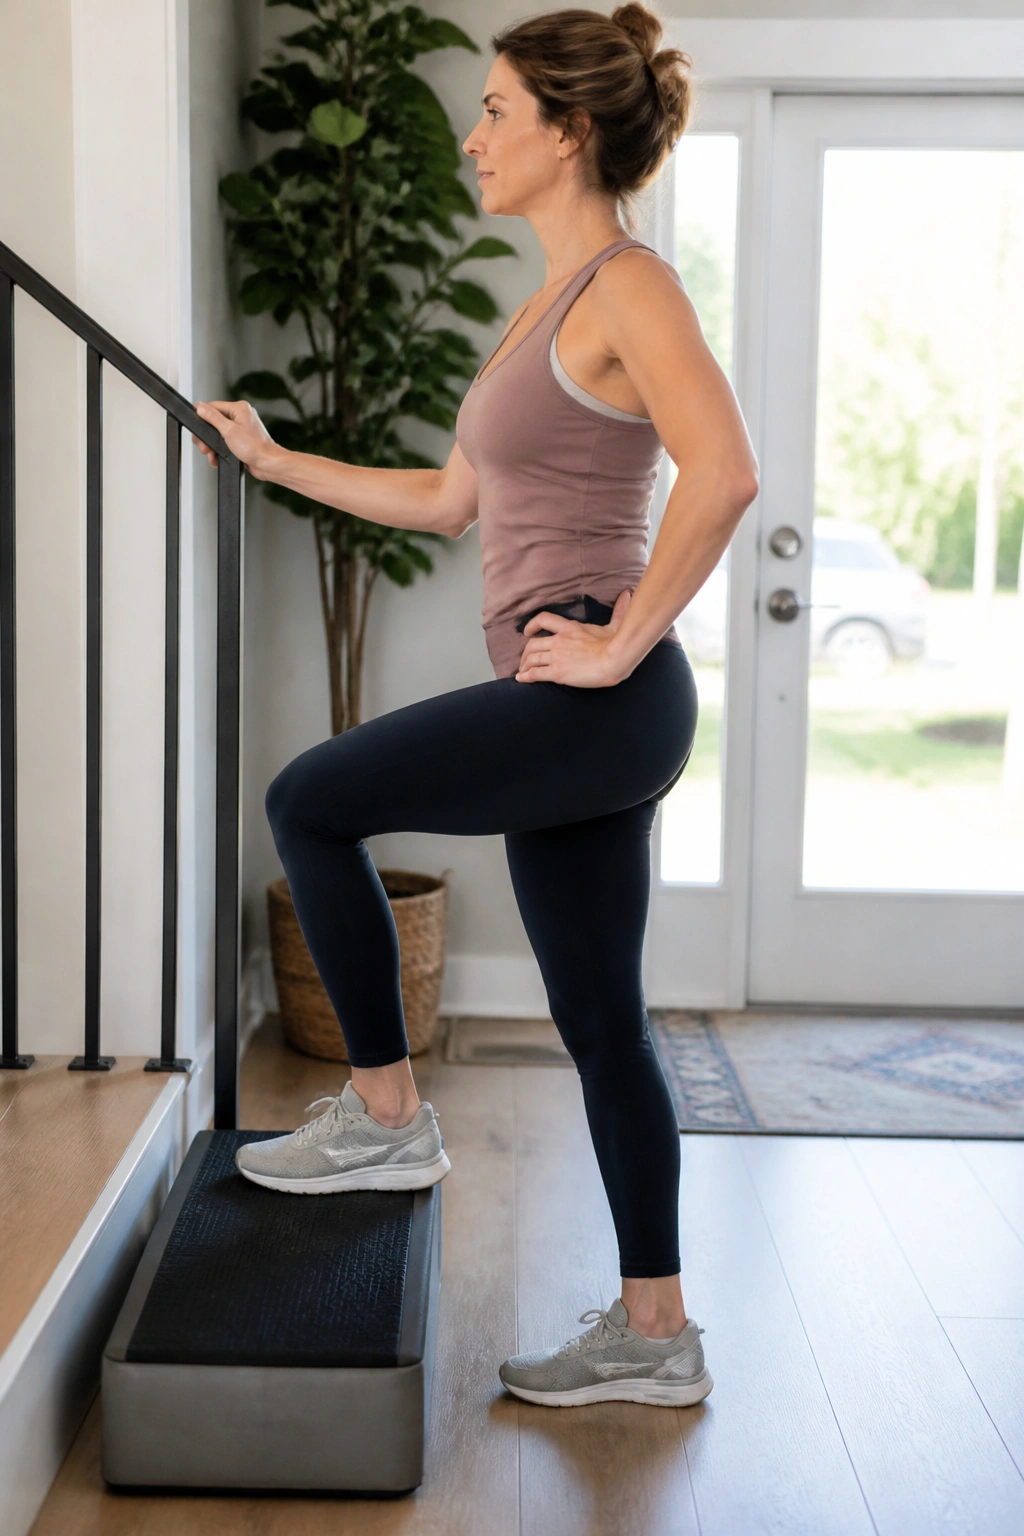
Unlike squats, step-ups expose side-to-side wobble fast. That makes them useful, even if they are a little humbling.
Use a low step — think 4 to 8 inches, not a stair you have to attack. Place one foot on the step, exhale, and press through the whole foot to rise. Lower with control. Keep the torso tall and the pelvis level.
This is a more functional core drill than it gets credit for. Your trunk has to stay organized while one leg does the work, and that’s the exact pattern you use when climbing stairs, stepping over a toy, or getting into a car.
What to Watch For
If the knee caves inward, make the step lower. If the torso lunges forward, slow down. If you feel pressure in the pelvic floor, stop and go back to a gentler option.
Use 6 to 8 reps per side. Hold a wall or rail if needed. I’d rather see good shape with support than a wobbly no-support version.
19. Split-Stance Rows That Resist Rotation
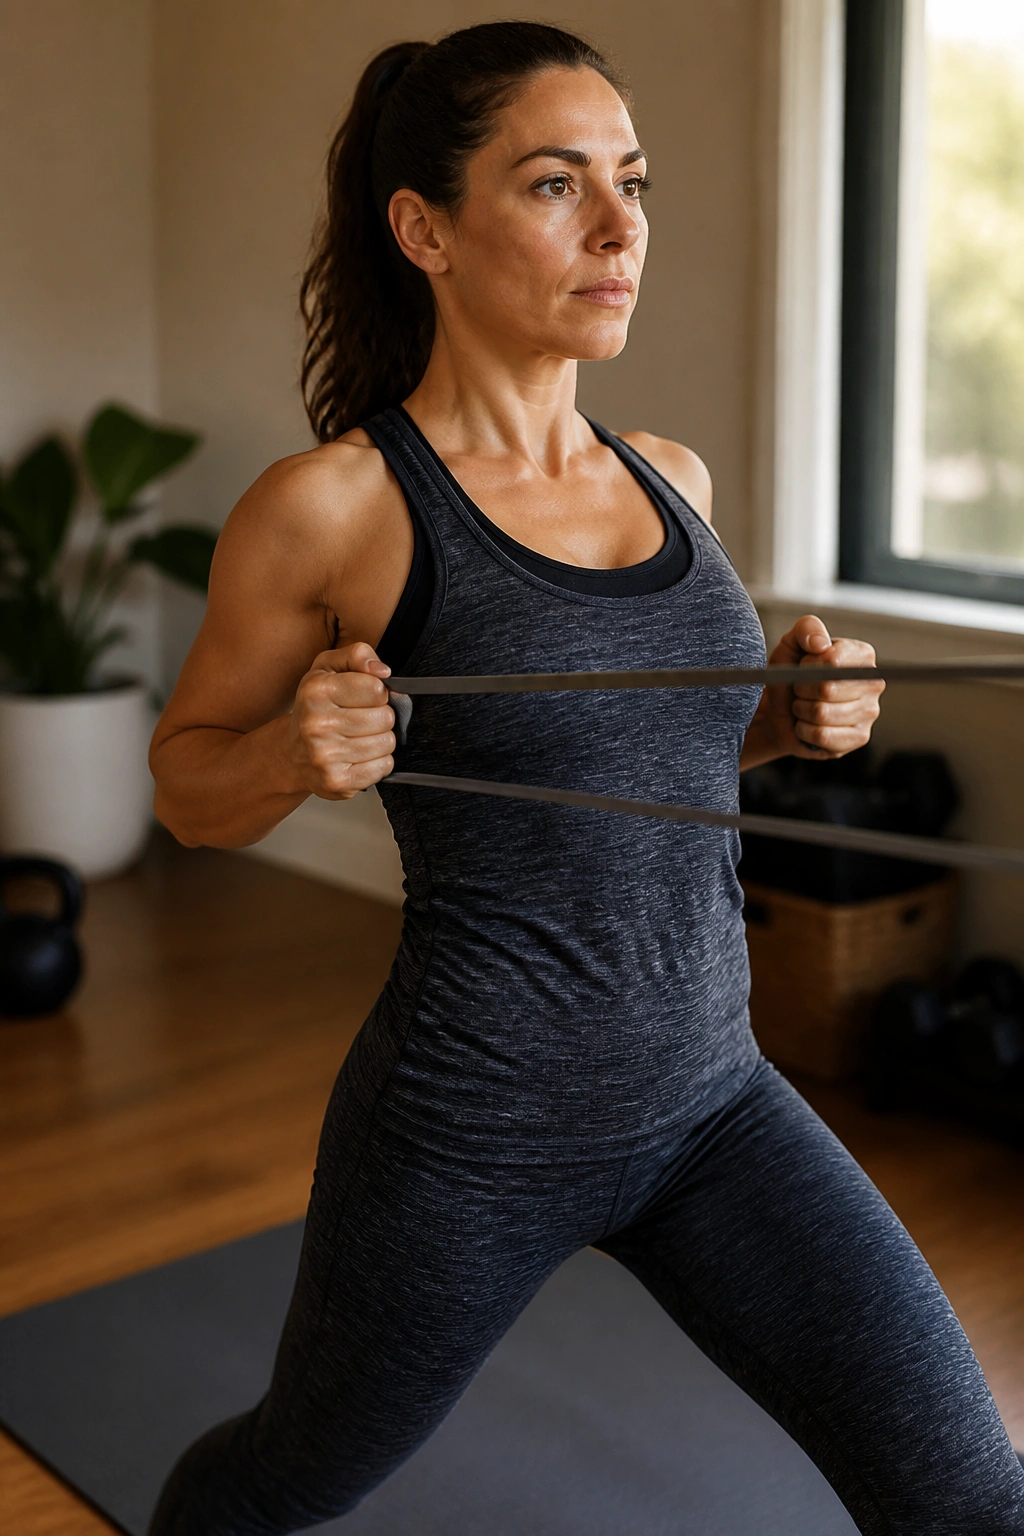
Rows often get treated like a back exercise, but the split stance makes your core do the real work.
Set up a resistance band at chest height. Step one foot forward and the other back, like the beginning of a lunge. Keep your hips square, then pull the band toward your ribs without letting your torso twist. Exhale as you pull, return slowly, and repeat.
What to Feel
Your back should work. Your arms should work. The trunk should keep the whole setup from turning into a swivel chair.
That anti-rotation demand matters in postpartum life because so much of the day happens one-sided — carrying a baby on one hip, reaching into a stroller, twisting in the car. This exercise teaches your trunk not to collapse when force arrives from the side.
- Use 8 to 12 reps per side
- Keep the front foot grounded
- Stand tall through the crown of the head
- Lower the resistance if the ribs flare
If you want a version without a band, do a split-stance isometric hold and squeeze your shoulder blades back for a slow count of three. Same lesson, less moving parts.
20. Bear Hover Breathing
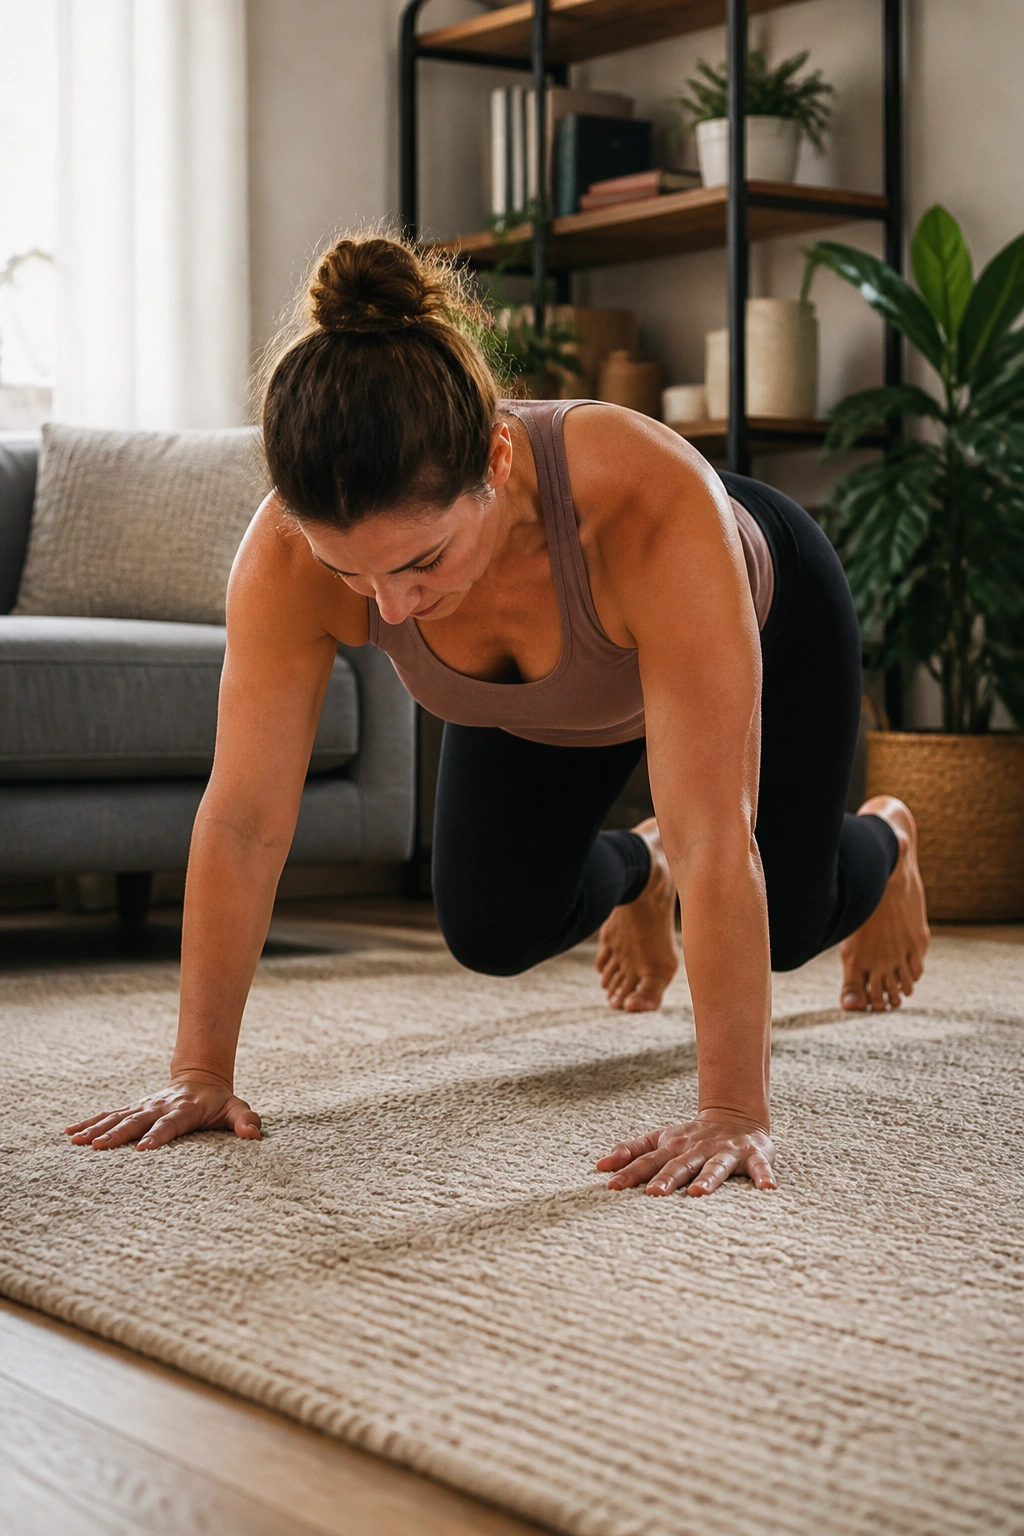
Why bother with a hover if lying down already feels like enough? Because this drill asks the core to hold pressure against gravity without letting the low back sag.
Start on hands and knees. Tuck the toes, lift the knees just an inch off the floor, and hold the position for 3 to 5 breaths. The back should stay flat, the neck long, and the weight spread between hands and feet.
This is an advanced movement compared with the rest of the list. Keep it brief. Ten seconds of honest work beats thirty seconds of flailing.
If the wrists dislike the setup, do it on fists or on a bench. If the belly domes, lower the knees and stay in a hover only long enough to keep shape. There is no medal for pushing through bad form.
I like this one as a checkpoint. If bear hover breathing feels smooth, a lot of the easier drills you did earlier are probably paying off.
21. Dead Bug Reach-and-Hold Progressions
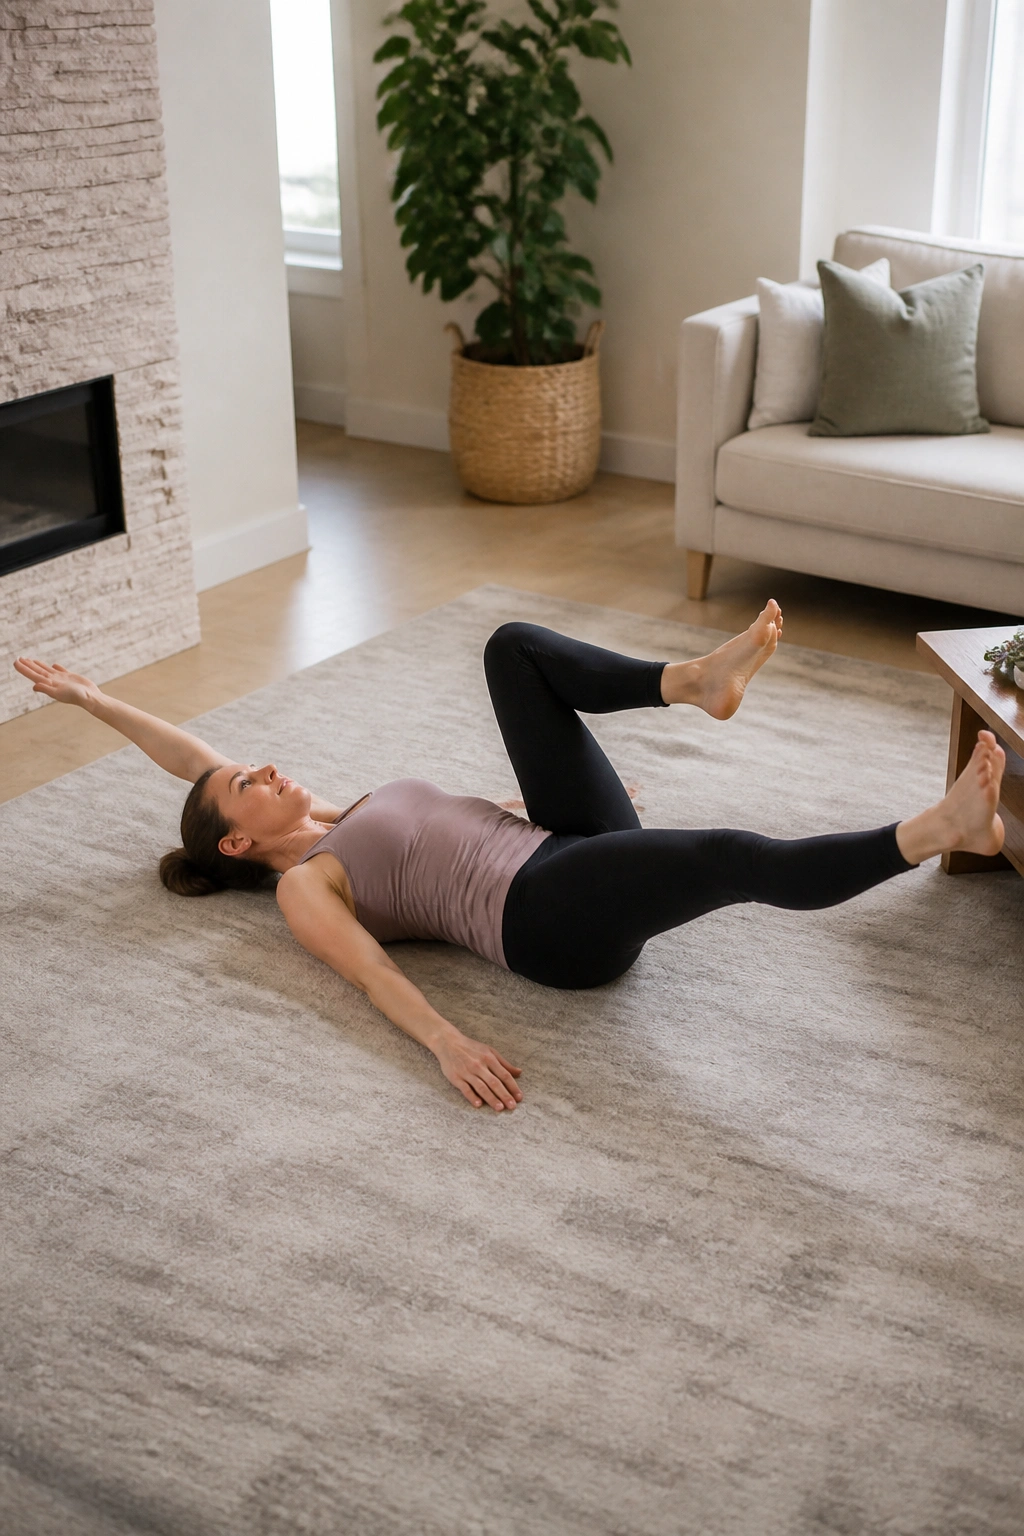
This is the move when arms-only dead bugs stop feeling like enough.
Lie on your back with knees bent, or place your legs in tabletop if you can keep the trunk calm. Reach one arm overhead while extending the opposite leg away from you just a few inches. Hold for 2 seconds, return, then switch sides. The range does not need to be large.
How to Progress It
- Start with one arm and one heel slide
- Add the opposite arm only when the pelvis stays quiet
- Move to a longer leg reach only if the low back stays down
- Use 4 to 6 reps per side
The appeal here is control, not heat. If the ribs flare or the belly bulges, shorten the reach. If the neck starts doing the work, stop and shake it out.
A dead bug that stays organized can carry you a long way. A dead bug that turns into a back arch is just a pretty way to overdo it.
22. A 12-Minute Postpartum Core Circuit
Some days you do not need a perfect program. You need something short enough to finish before the next feeding, text, or nap window disappears.
Use this as a repeatable postpartum core workout on busy days:
- 90/90 breathing reset — 5 slow breaths
- Heel slides — 6 reps per side
- Bird dog reaches — 5 reps per side
- Suitcase carry or wall press — 20 seconds per side
Run the circuit for 2 rounds with 20 to 30 seconds of rest between moves. If you do not have a weight for the carry, swap in the wall press and keep the pressure light. If the floor work feels fine but standing work feels off, keep the standing part very small and clean.
The biggest win here is repeatability. A modest session you can do three times a week usually beats a heroic one-off that leaves you sore, cranky, and less likely to come back tomorrow.
That’s the real standard. Not how hard it feels on one day. How well your body handles the next one.
