



If your shoulders creep toward your ears every time you lift your arms, Pilates moves for upper back strength can do more for you than another chest stretch ever will. A stronger upper back helps your shoulder blades glide the way they are supposed to, gives your neck a break, and makes everyday stuff—carrying bags, sitting at a laptop, reaching into a cabinet—feel less irritating.
Most people miss the target at first. They hear “upper back” and start yanking their shoulder blades together as hard as they can, which usually means the neck tightens, the ribs flare, and the low back takes over. Good Pilates back work feels different: wide collarbones, heavy ribs, the back of the bra line or mid-rib area quietly switching on, and a sense that the breastbone is reaching forward rather than the chin jutting up.
That small difference changes everything.
A well-taught upper-back series is not about making giant shapes. It is about better scapular control, steadier thoracic extension, and endurance in the muscles that hold you upright when gravity wins the argument. Some of these moves look almost too modest to matter. Try them with clean form and eight slow reps can humble you fast.
Why Pilates Moves for Upper Back Strength Matter Beyond Standing Taller
Posture is the obvious reason people look for upper-back Pilates exercises, but it is not the only one. Your upper back is part of how your shoulders work, how your ribs move when you breathe, and how your head balances over the rest of you. When that area is weak or sleepy, the body borrows from somewhere else—usually the neck, front shoulders, or low back.
A lot of shoulder discomfort starts one step upstream. The shoulder blade is meant to glide over the rib cage, not clamp down like a vice. For that to happen, the serratus anterior, middle trapezius, lower trapezius, rhomboids, and deep spinal extensors all need some say in the motion. If one group drops out, another group shouts.
You can see it in class without trying. Arms go overhead, ribs pop forward. The person is trying hard, but the effort is landing in the wrong neighborhood.
There is a breathing piece here too. Better thoracic movement gives the rib cage more room to expand at the back and sides, which often makes Pilates breathing feel less forced. People sometimes chase “core control” by pulling the front ribs down harder and harder. A stronger upper back helps you hold the ribs with support, not stiffness.
How to Practice Pilates Moves for Upper Back Strength Without Feeding Neck Tension
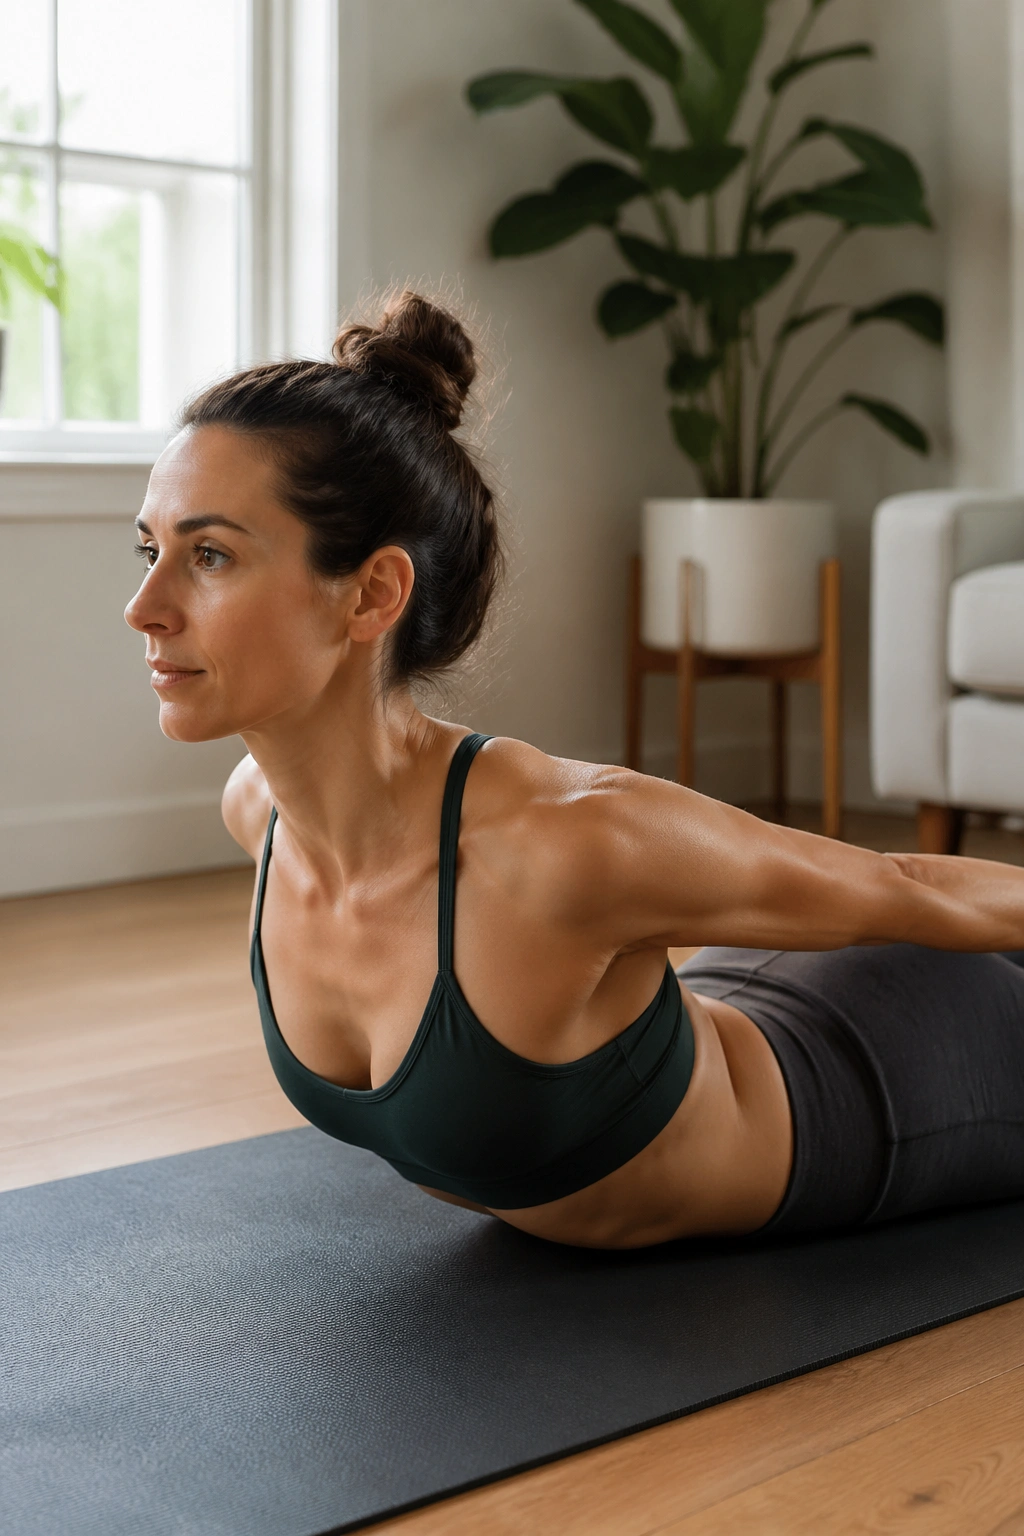
The fastest way to ruin upper-back work is to let the neck do the lifting. You want length first, effort second.
Stack the ribs before the arms move
Whether you are kneeling, prone, or in plank, set your trunk before chasing range. Think of the front ribs melting inward and the back ribs getting broad. Not jammed down. Not squeezed. More like the rib cage is settling so the shoulder blades have a steadier surface to move on.
Let the shoulder blades move, but not wander
This part matters. Shoulder blades are meant to slide, rotate, and wrap. They are not meant to be pinned in place for every rep. In rowing-style movements, they can glide toward the spine. In plank and wall work, they should spread and wrap around the ribs. Freeze them and you lose the whole point.
Keep the lift lower than you think
Most people go too high in prone extension. If your eyes are straining upward and the back of your neck feels crunchy, lower the shape by 30 percent. The best reps often look almost boring from across the room. Up close, they feel sharp and organized.
A few cues that help:
- Reach long before you lift. That light traction idea turns on the back line without jamming the spine.
- Exhale on the effort when you need rib control; inhale into the back ribs when you need width.
- Stop at the first sign of pinching in the front of the shoulder.
- Pick 6 to 10 quality reps over 20 sloppy ones.
- If your jaw is clenched, you have already drifted off course.
Small Setup Tweaks That Wake Up the Right Muscles
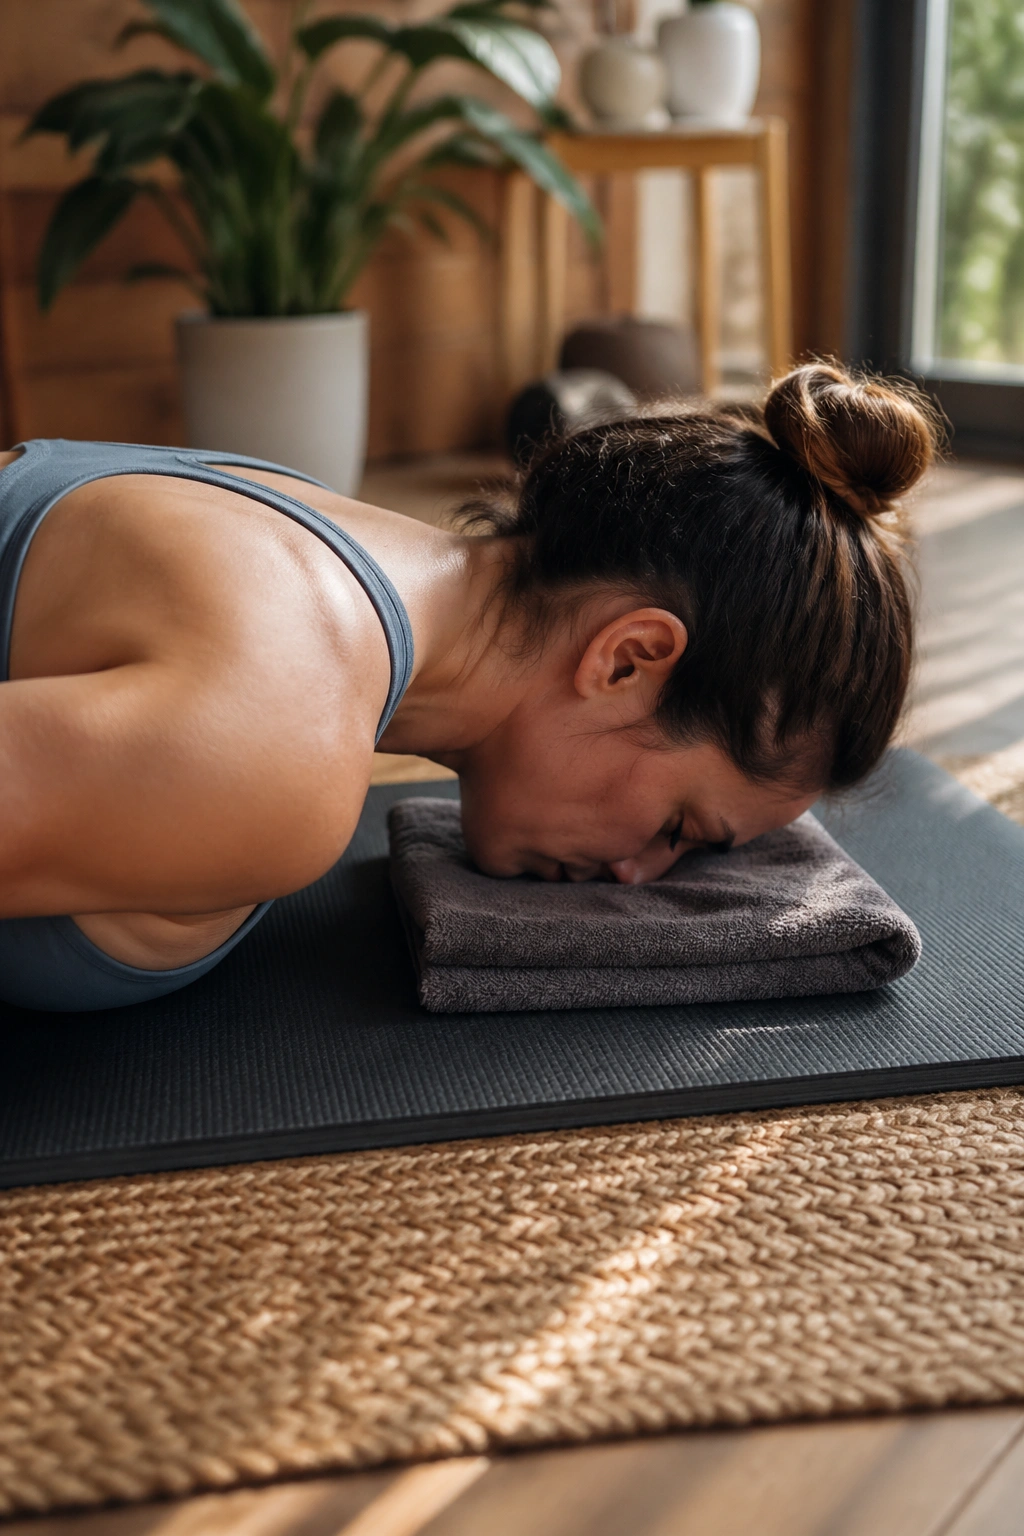
Tiny changes in setup can shift a move from “I felt that in my neck” to “there it is.” Pilates people love the big choreography, but the boring setup details do a lot of the heavy lifting.
A folded hand towel under the forehead can be gold in prone work. It gives you a home base for the head, which cuts down on the urge to crane the neck. Thumbs-up arm positions often help people find the lower traps and rear shoulders more cleanly than palms-down positions, though both have a place.
Tempo changes things too. Hold the top of a lift for 2 to 3 seconds, then lower slower than you lifted. That eccentric phase—the lowering part—tells the upper back it cannot switch off the moment the hard part ends.
One more trick: reduce load before you reduce intent. Use a lighter band. Bend the elbows. Work one arm at a time. Keep the cueing sharp.
Messy reps teach messy patterns.
1. Quadruped Scapula Glides
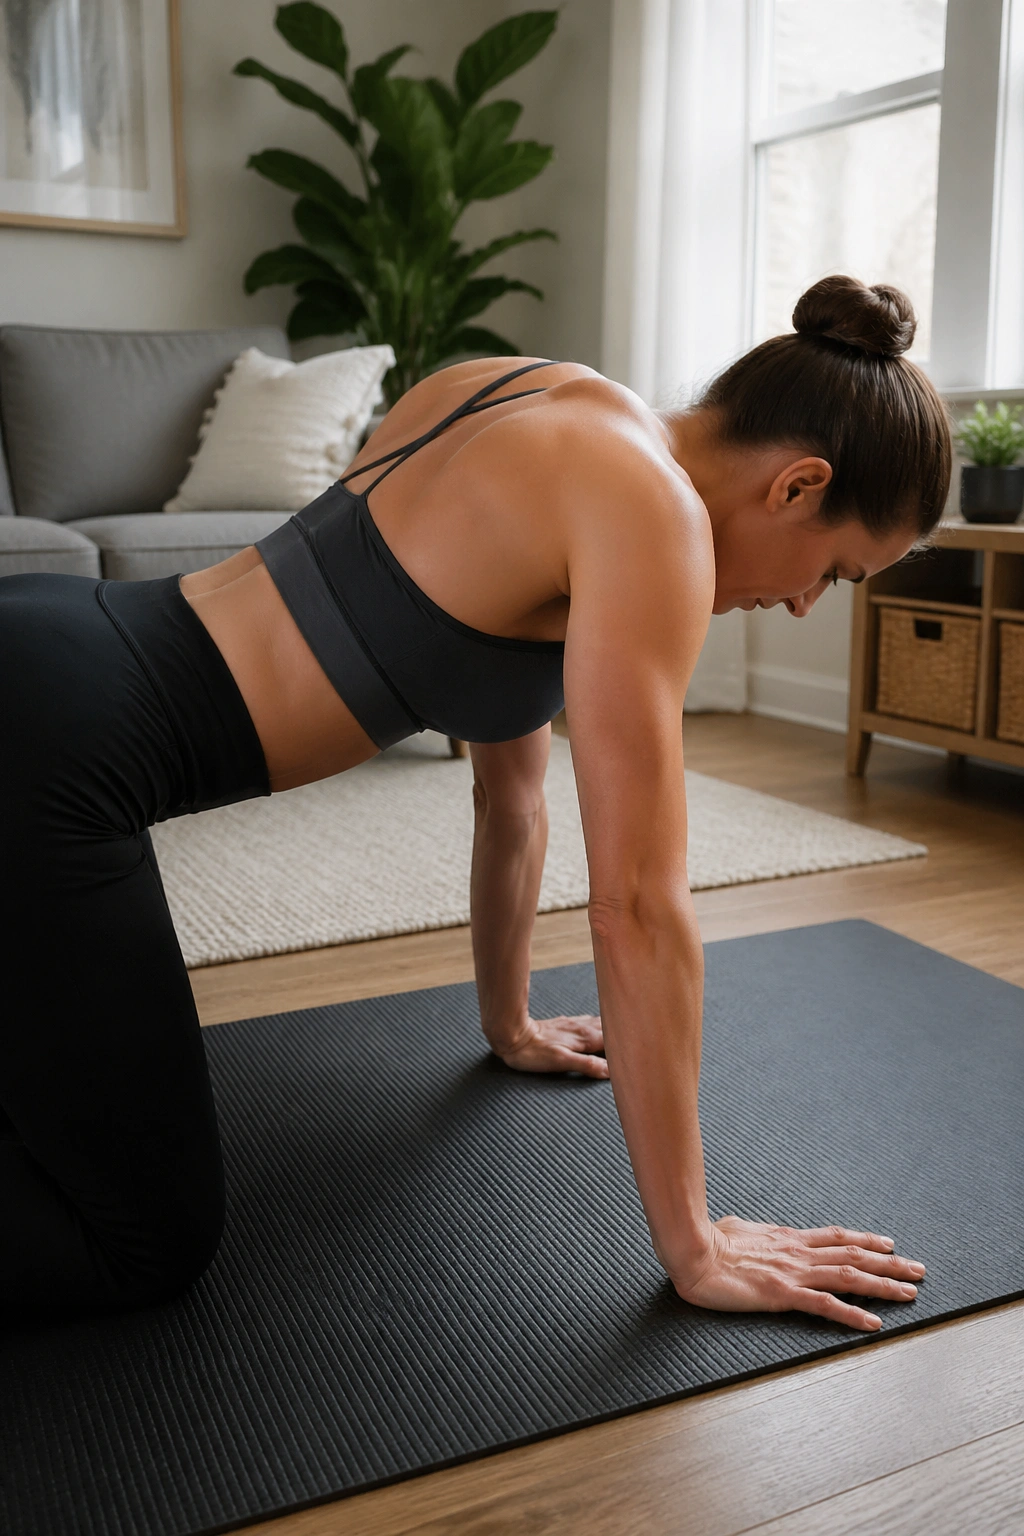
Start on hands and knees with your wrists under your shoulders and knees under your hips. Keep the elbows straight, head in line with the spine, and let the chest drop a little between the arms without collapsing the low back. Then press the floor away until the upper back rounds gently between the shoulder blades.
This move looks almost too small to count. It counts.
Why your shoulder blades love this one
Quadruped scapula glides teach protraction and retraction without elbow bending, which means the shoulder blades have to do the work instead of the arms cheating. You are training the serratus anterior to wrap the blades onto the rib cage and the mid-back muscles to control the return. That matters for planks, push-ups, overhead reach, and any Pilates arm work where the neck likes to jump in early.
Quick form notes
- Inhale as the chest softens between the arms.
- Exhale as you press the mat away and spread the upper back.
- Keep your belly lightly lifted so the low back does not sag.
- Aim for 8 to 12 slow reps.
- Your gaze stays down, a few inches ahead of your fingertips.
Best cue: imagine the space between your shoulder blades breathing open, then narrowing, without your collarbones collapsing.
2. Breast Stroke Prep
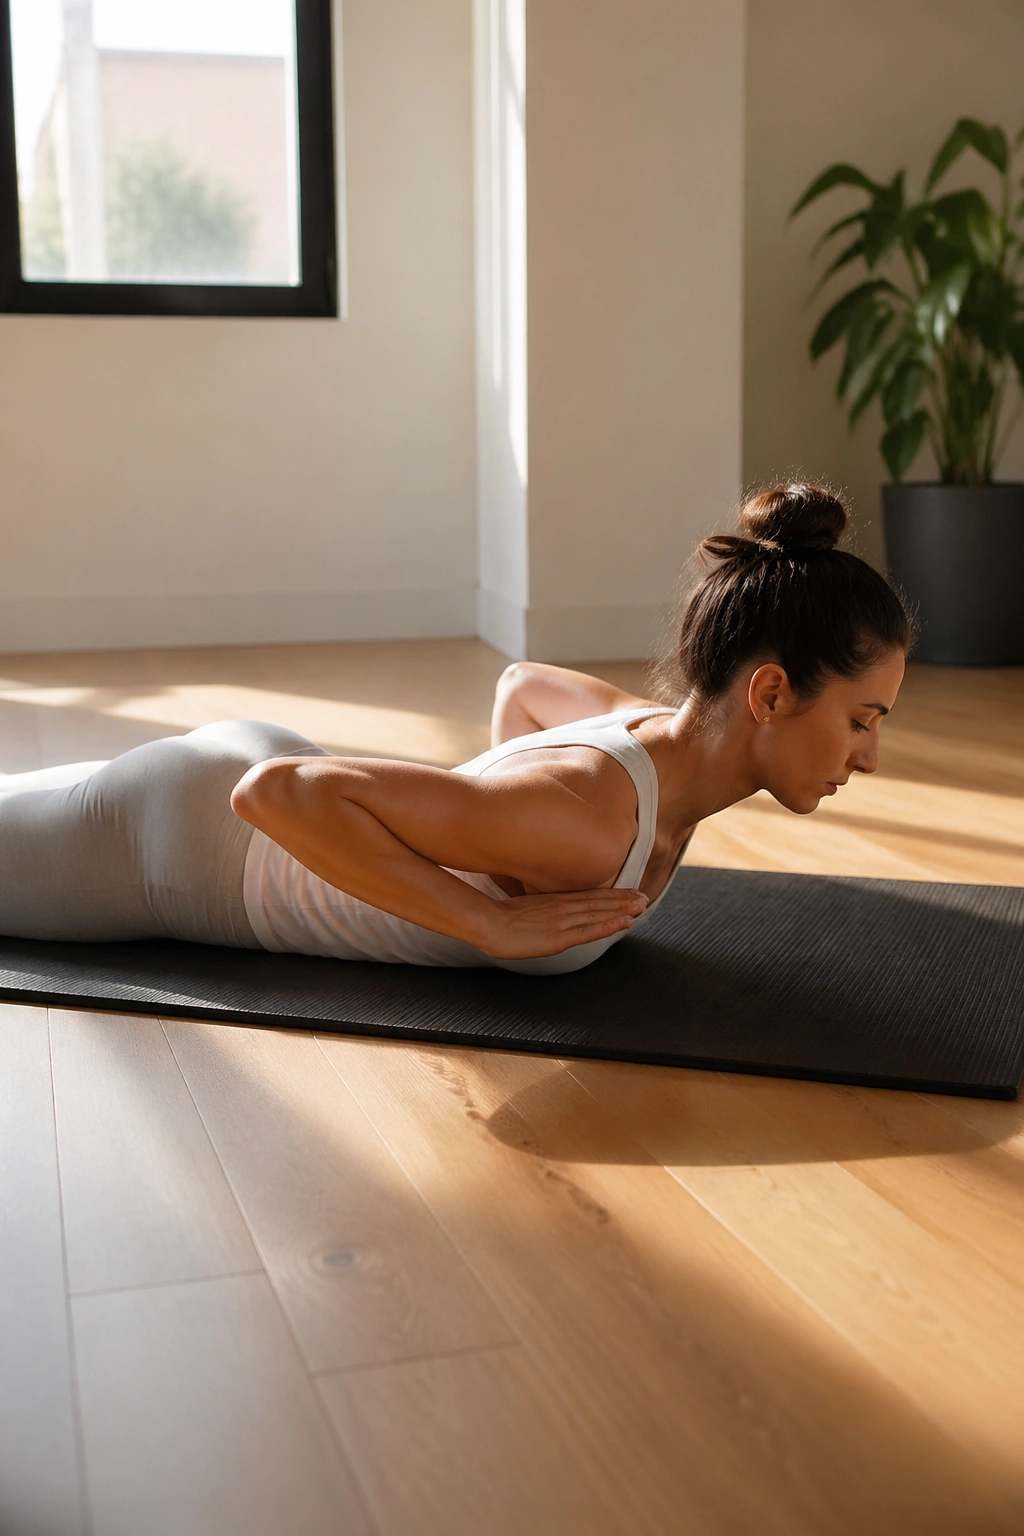
If you only do one prone extension drill, make it this one. Breast Stroke Prep teaches the upper back to initiate extension before the low back barges in, and that skill carries into almost every stronger back exercise in Pilates.
Lie on your stomach with your forehead hovering or resting lightly, hands beside the shoulders, elbows angled back. Press the tops of the feet into the mat, lengthen the legs, and on an inhale let the breastbone slide forward as the head and chest lift a few inches. Then lower with control.
The shape should stay modest. Think “long diagonal” rather than “big backbend.” The bottom ribs usually stay close to the mat, and the back of the neck remains long. If the elbows wing out or the shoulders crawl toward the ears, reset and make the lift smaller.
This one is a workhorse because it trains thoracic extension with scapular support. You are asking the upper spine to extend, the shoulder blades to settle on the back, and the trunk to stay organized while the front body opens. Try 5 to 8 reps, holding the top for one breath when you can do it without strain.
A clean Breast Stroke Prep can make a messy Swan look better within one session.
3. Dart
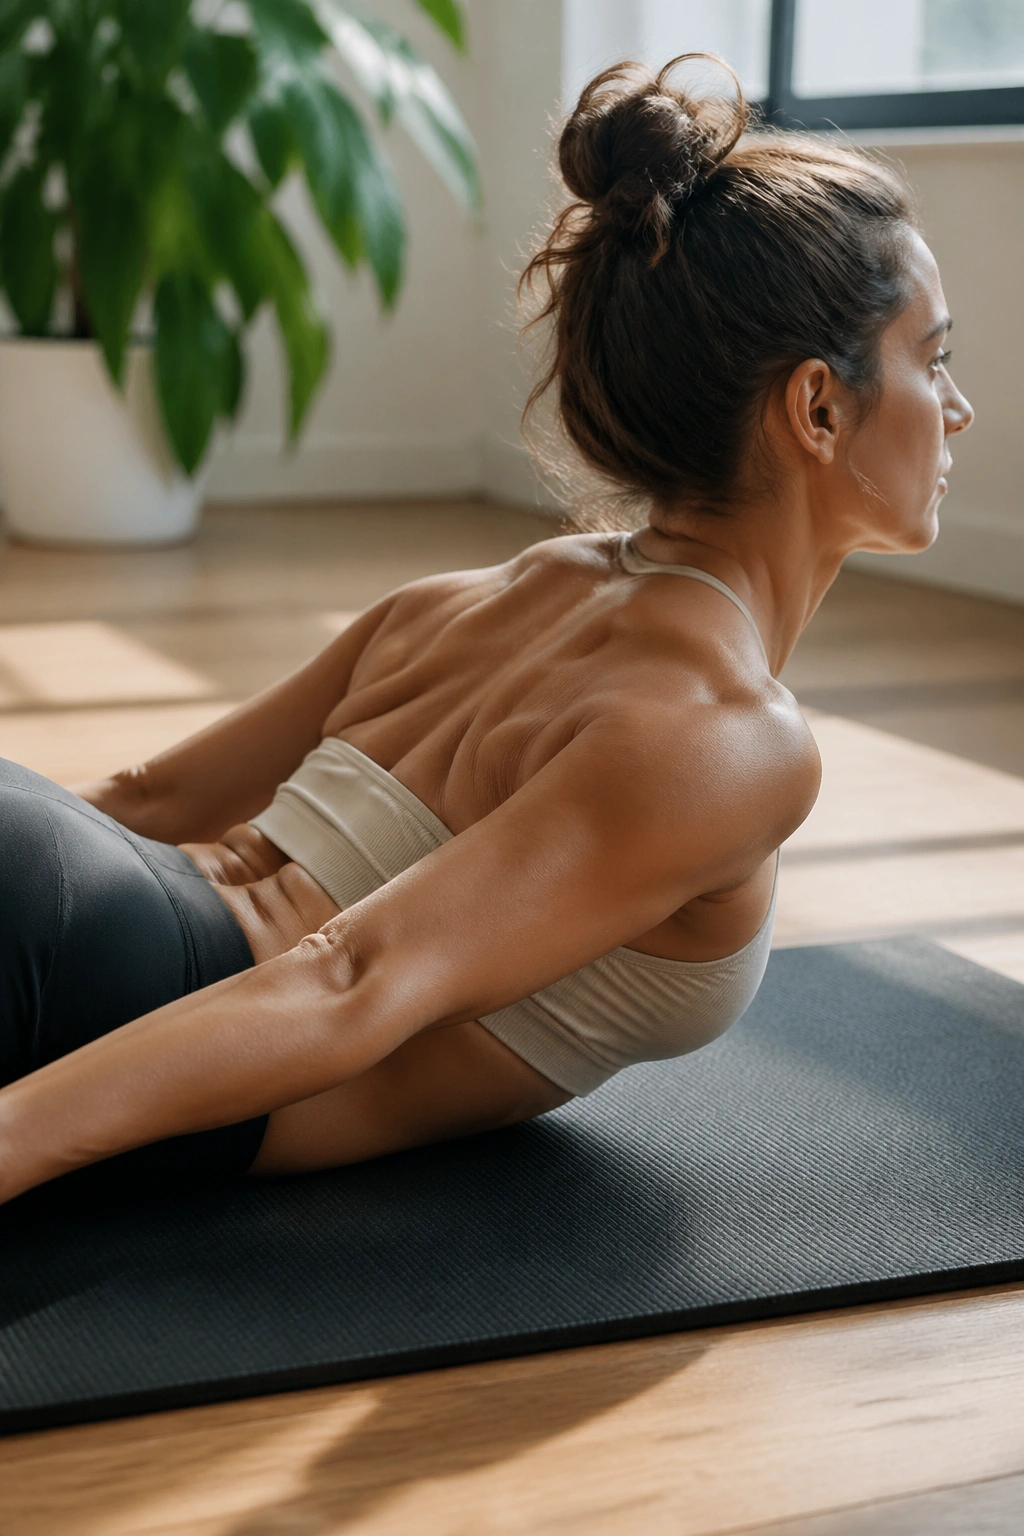
Why does such a small lift make the upper back shake? Because Dart strips away momentum. No hands pushing, no wide arm circle, no dramatic range—just the back line doing its job.
Lie prone with your arms long by your sides, palms facing in or down. Reach the fingertips toward your feet, lengthen the crown of the head forward, and float the head, chest, and hands a few inches off the mat. The legs stay long and active, but the spotlight is on the upper back, not on kicking the legs up.
Dart is one of the cleanest ways to feel the mid-traps, lower traps, rear shoulders, and spinal extensors work together. Because the arms are by your sides, many people can find the lift without shoulder pinching. The trick is to keep the throat soft and the gaze angled toward the front edge of the mat, not the wall.
How to place it in your practice
Use Dart early in a session for 6 to 10 reps with a 2-second hover at the top. If you tend to overuse your low back, keep your pubic bone heavy and think of the sternum gliding forward as much as up. When done well, Dart feels broad across the upper chest and warm between the shoulder blades—not sharp, not compressed, and not necky.
4. Prone T Lift
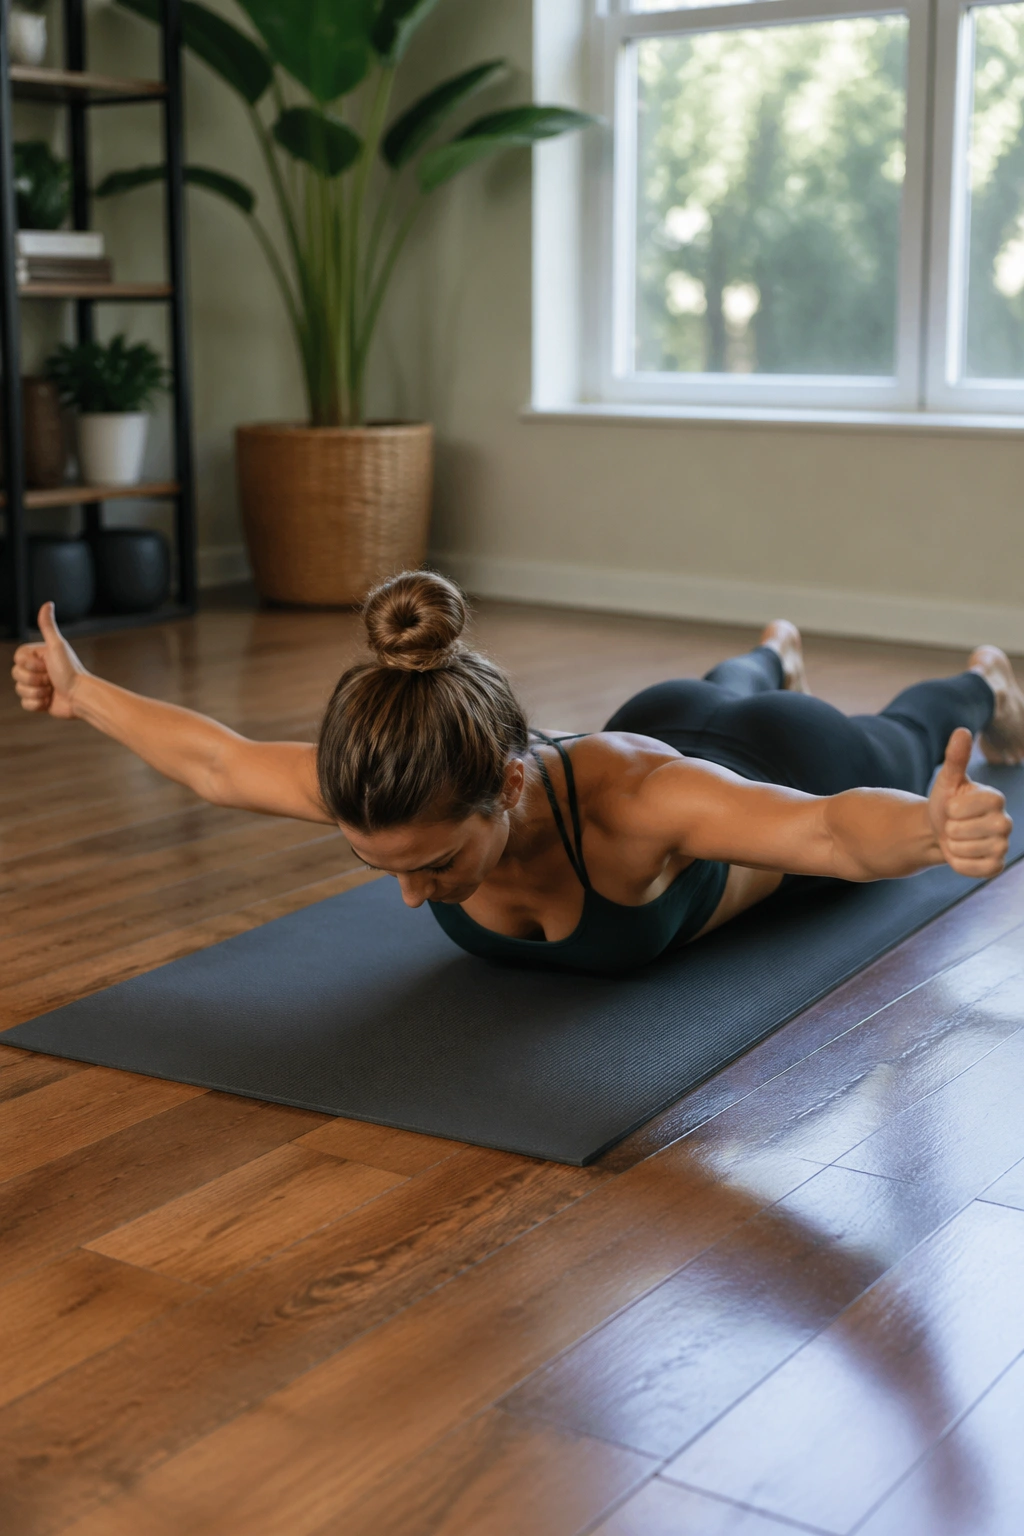
Picture the moment your arms move out to the sides and your neck decides it wants top billing. That is the whole challenge of the Prone T. Done lazily, it becomes a shrug. Done well, it is a clean hit for the mid-back.
Lie on your stomach with the arms out in a T shape, either slightly in front of the shoulders or directly out to the sides. Thumbs can point up to give the shoulder joint a friendlier angle. On the exhale, float the arms and upper chest a little off the mat, keeping the collarbones wide.
You are asking the middle trapezius, posterior deltoids, and rhomboids to manage the lift without letting the upper traps take over. That balance is harder than it sounds.
A few details matter here:
- Lift the arms only as high as you can keep the shoulders away from the ears.
- Hold for 1 to 2 seconds at the top.
- Think of the shoulder blades sliding slightly toward the spine, not pinching as hard as possible.
- Stay with 6 to 8 reps; fatigue gets sloppy fast.
- If the front of the shoulder feels jammed, move the arms a bit forward into a soft Y-T angle.
When people rush this one, it looks bigger and works less. Slow it down and the right muscles show up.
5. Prone W Lift
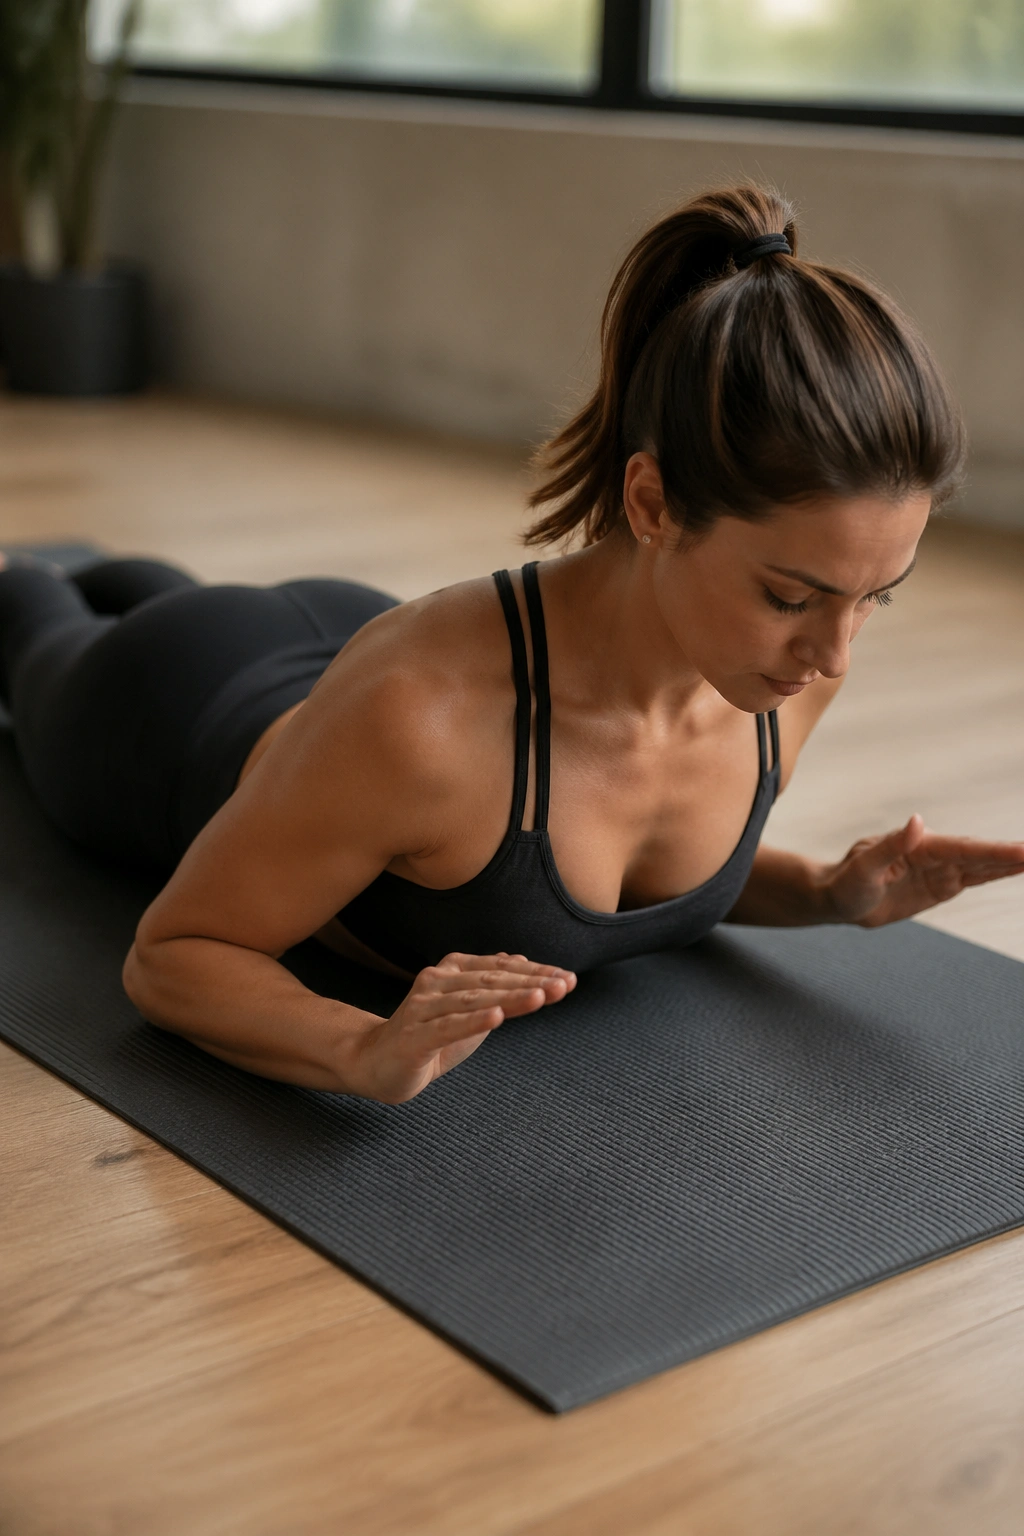
Bent elbows change the game. In a W shape, with elbows bent and upper arms angled down from the shoulders, you shorten the lever and give the rotator cuff and lower trapezius a better chance to organize the shoulder.
Set up on your stomach with your forehead down, elbows bent, and hands hovering near the floor. The upper arms should not be jammed high beside the shoulders. A lower, wider W usually feels cleaner. Exhale, float the hands and forearms, and lift the upper chest slightly while the shoulder blades draw down the back.
This is one of the best patterns for people who shrug through rowing motions. The bent-elbow setup makes it easier to find scapular depression and external rotation—two things the upper back loves and the neck hates. You are not cranking the shoulder blades together. You are teaching them to settle and support.
Stay patient with the range. A two-inch lift done with a quiet neck beats a dramatic version every time. Try 8 slow reps, or hold the top for three breaths if you want more endurance work.
The payoff shows up later in Pulling Straps, Breast Stroke Arms, and plank variations. Once your body learns this “W” organization, bigger shapes stop feeling so chaotic.
6. Swan Prep
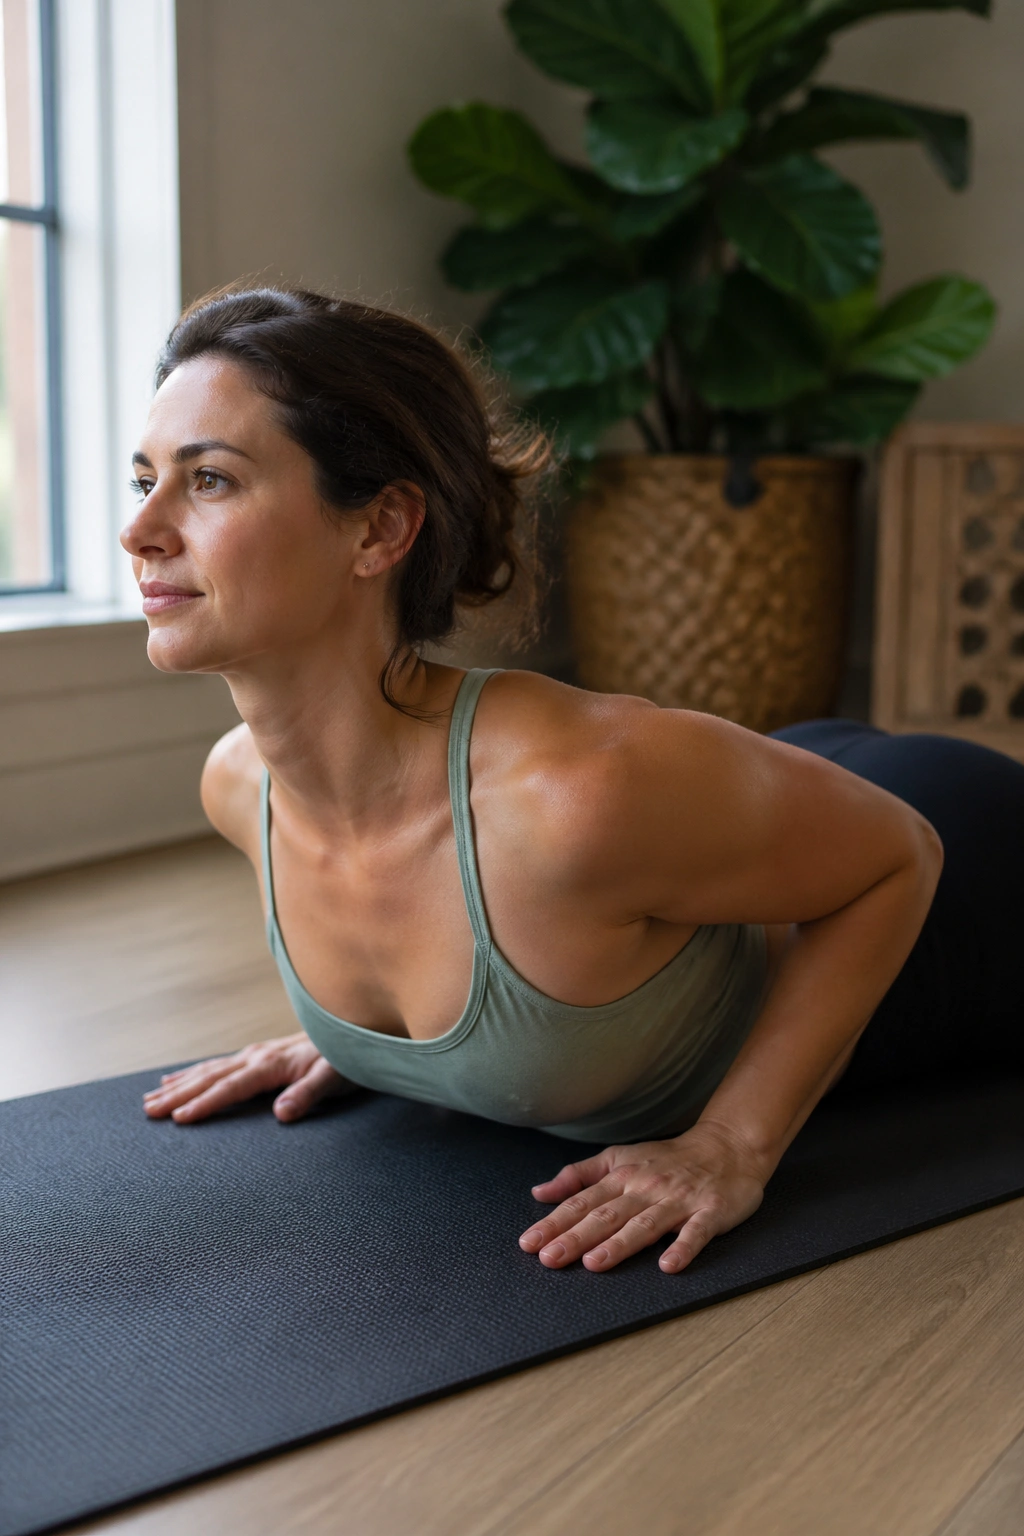
Unlike a full Swan, which can tempt people into a low-back hinge and an eye-line that shoots to the ceiling, Swan Prep keeps the load honest. That is why I rate it higher for building upper-back strength.
Lie prone with your hands under or slightly in front of your shoulders. Press the tops of the feet down, lengthen through the legs, and on the inhale begin lifting the head and chest by reaching the sternum forward. The hands may help a little, but they are not meant to shove you into a backbend.
The upper back should feel like it is opening across the chest while the ribs stay organized. If your navel area peels off the mat early, you have gone too high. If the elbows lock and the shoulders crowd the ears, same problem.
Swan Prep is strongest as a thoracic extension drill with support from the arms, not as a flexibility stunt. Keep it in the small-to-medium range for 5 to 6 careful reps. People who sit bent over a screen for hours usually notice this one fast—sometimes because it feels relieving, sometimes because they realize how little the thoracic spine wants to move.
Who benefits most? Anyone who can do Breast Stroke Prep cleanly but loses shape when the hands start helping. Swan Prep bridges that gap.
7. Swimming Prep
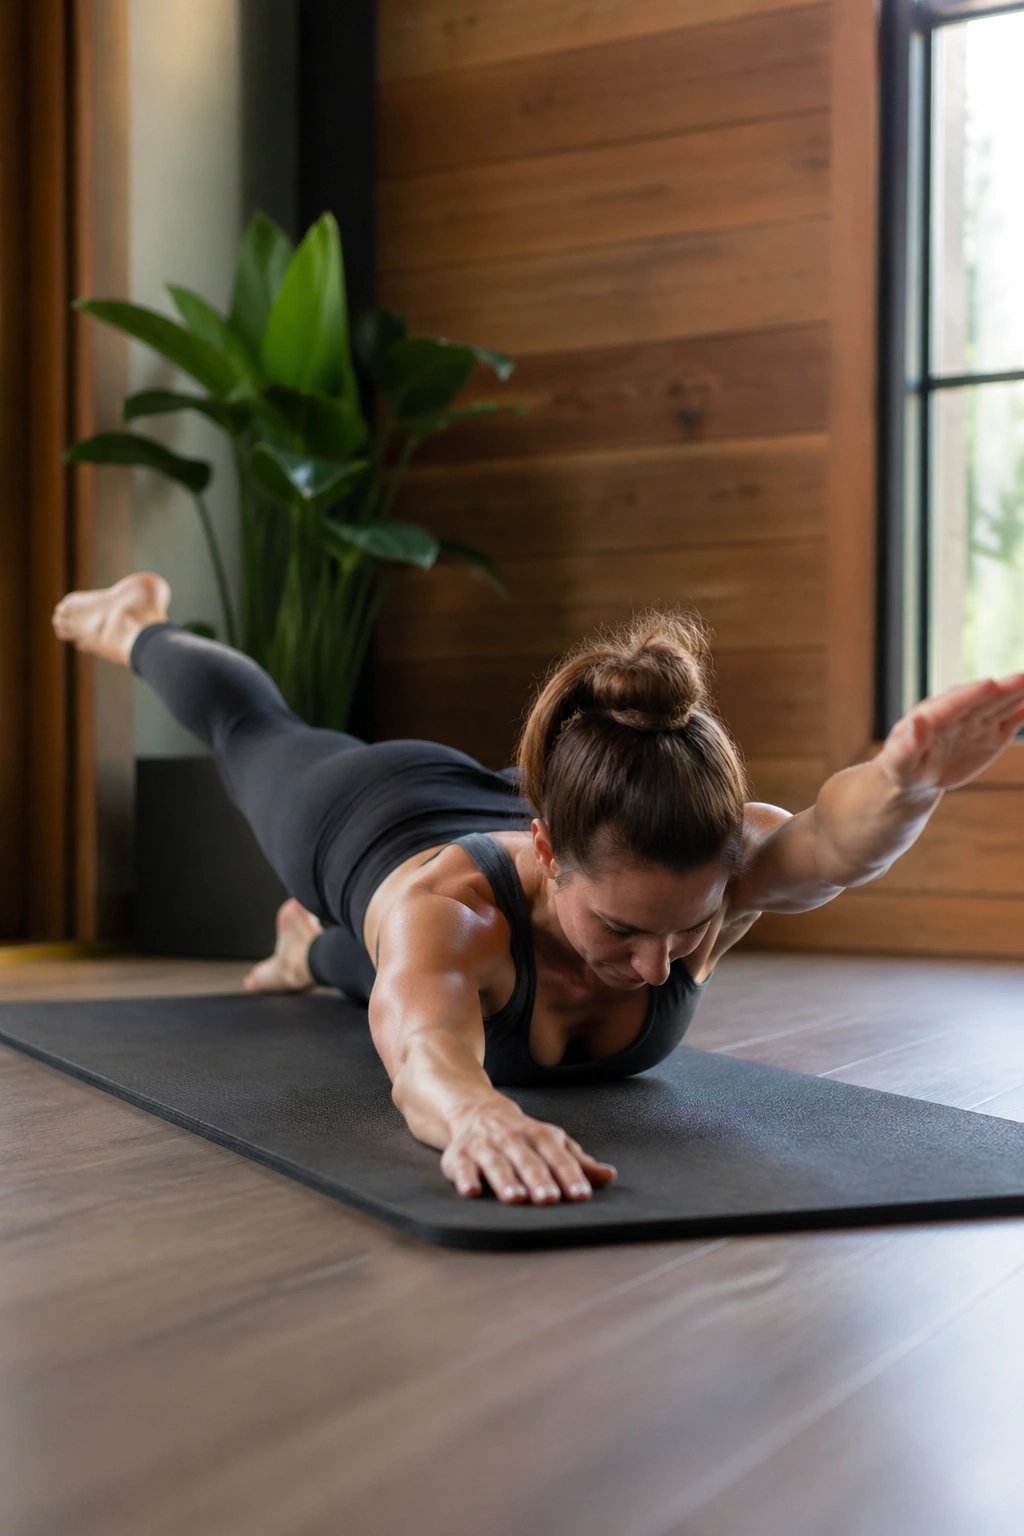
Swimming Prep is where cross-body control starts to show. You are not only lifting into extension; you are holding the trunk steady while one arm or one leg changes the balance.
Begin on your stomach with the arms long overhead. Lift into a low extension, then keep one arm reaching forward while the opposite leg reaches back. Lower, switch sides, and repeat. If that is too much, keep the legs down and alternate only the arms.
What makes it harder than it looks
Overhead arm position increases the challenge on the lower traps, serratus anterior, and the muscles that keep the shoulder blade from winging off the rib cage. Add the opposite leg and the trunk has to resist wobbling. The movement is tiny, but the demand is not.
Good reps look like this
- The chest stays broad, not pinched.
- The lifted arm reaches long before it rises.
- The low back does not jam to create height.
- Each side gets 5 to 8 reps.
- Your breathing stays steady enough that the rib cage does not stiffen.
A good tweak: start with your hands slightly wider than shoulder width if overhead reach makes your shoulders feel crowded. Narrower is not always smarter.
8. Chest Expansion With a Band
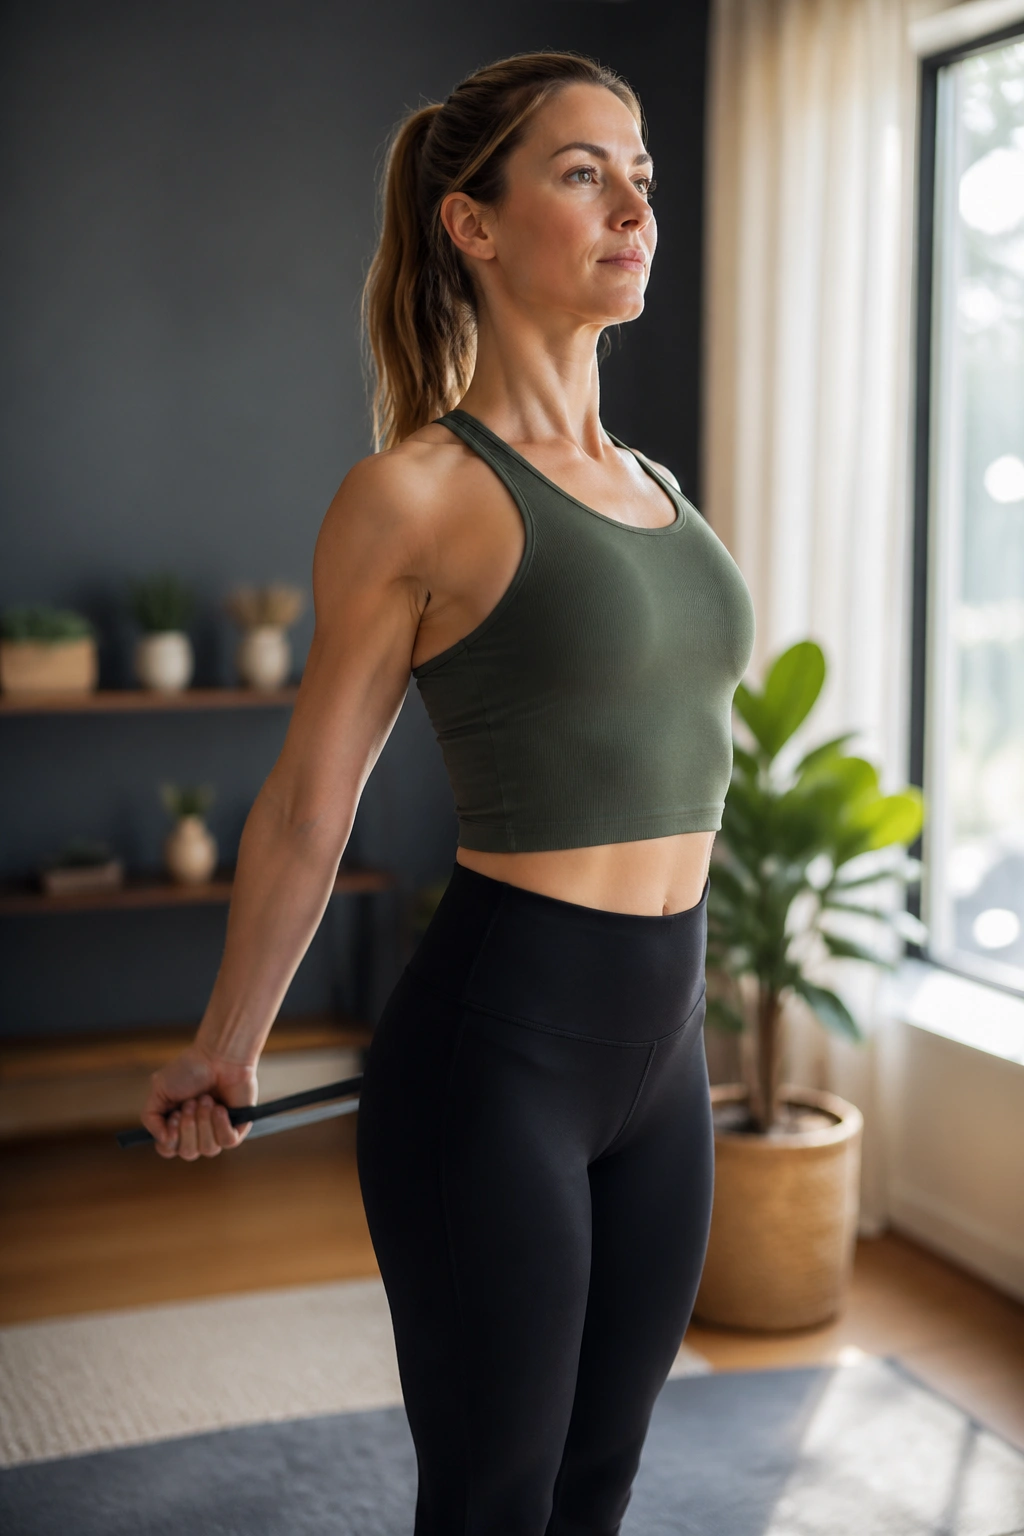
This upright move punches above its weight. A light resistance band and clean posture can teach the upper back more than a heavier load dragged through a messy row.
Stand or kneel tall with the band held in both hands, arms straight in front of the thighs or slightly forward. Pull the band back by reaching the knuckles toward the floor and slightly behind you, opening the chest without poking the ribs forward. Pause. Return with control.
The magic is in the pause. Chest Expansion asks for scapular depression, shoulder extension, and trunk stability at once. That means the lower traps and back of the shoulders need to work while the front ribs stay contained. If the chin lifts or the lower back arches to fake more range, you lose the point.
Use a band light enough that you can own the end range for 1 to 2 seconds. Aim for 8 to 12 reps. This one fits well after prone work because it transfers that back-body awareness into an upright position, where most people actually need it.
Desk-bound shoulders usually complain during the first few reps, then settle as the pattern improves. That is a clue, not a problem.
9. Pulling Straps on the Mat
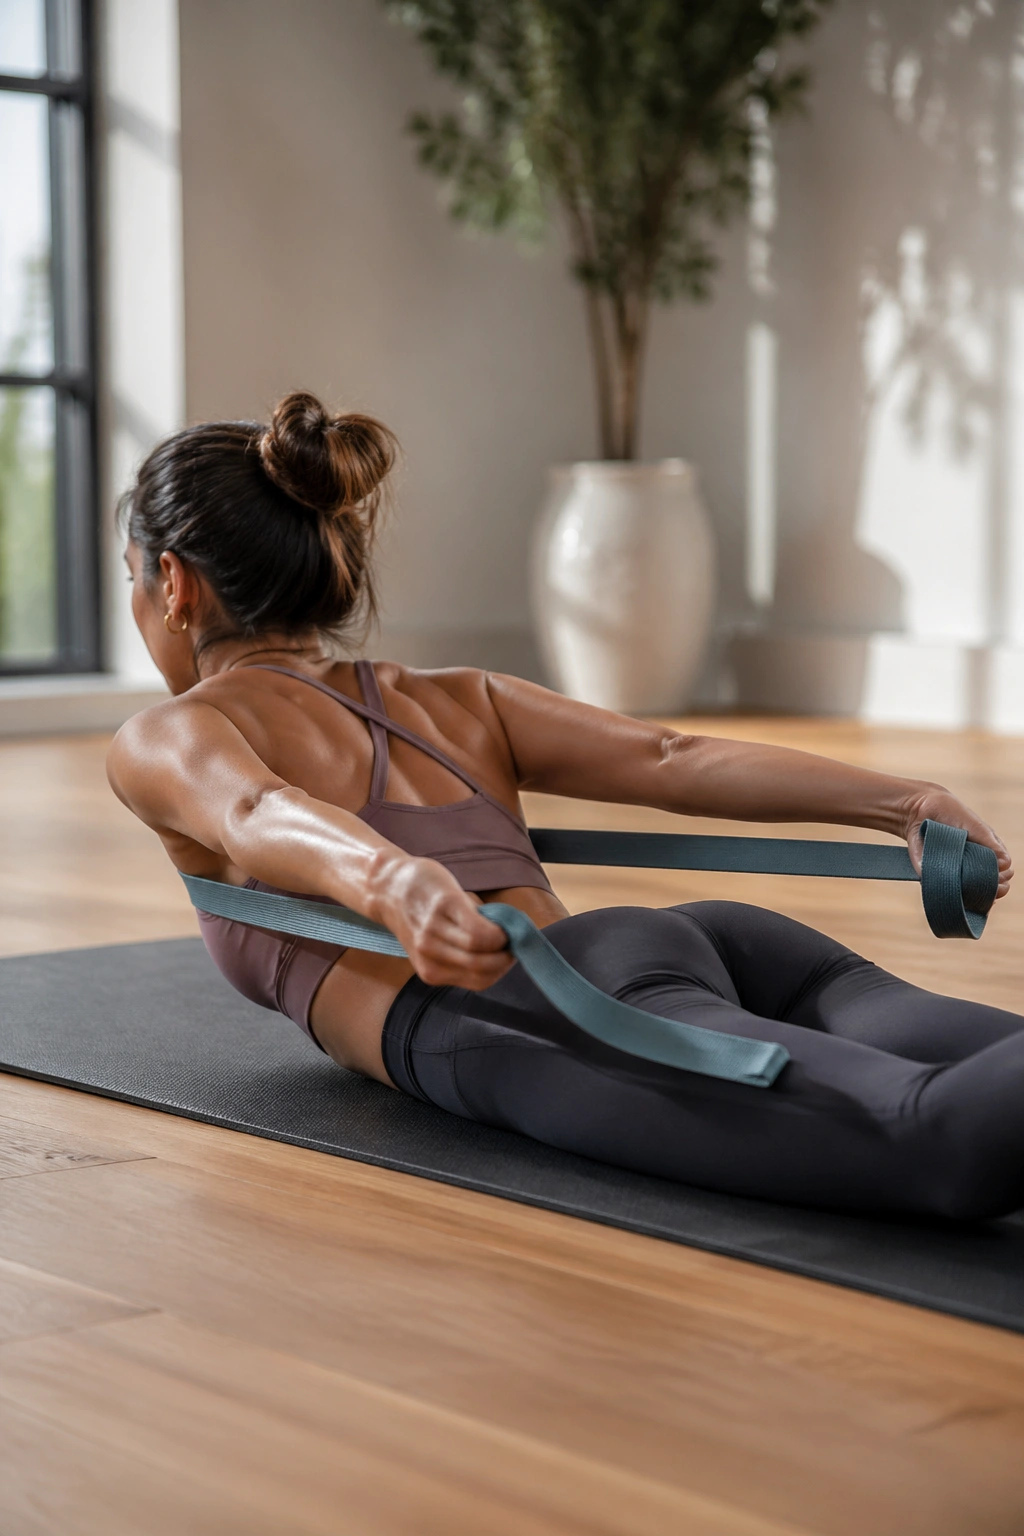
Pulling Straps is a reformer classic for good reason. On the mat, you can mimic the same pattern with a light band, a towel pulled taut, or even no prop at all if your body awareness is solid.
Lie on your stomach with the arms reaching forward or slightly out in front, holding the band if you are using one. Float the head and chest into a low extension, then pull the arms back toward the hips while keeping the shoulders broad. Return the arms forward without dropping the trunk right away.
The key question here is not “How far back can I pull?” It is “Can I pull without my neck gripping and my ribs spilling forward?” That is the whole test.
Setup that keeps the move in the upper back
Start with a lighter band than you think you need. Reach long through the fingertips before you pull. Keep the elbows soft if straight arms make the shoulders cranky. Then look for the work around the mid-back, rear shoulders, and the muscles that anchor the shoulder blades down and back.
Try 6 to 10 reps. If the chest drops each time the arms return forward, break it into two parts: hold the extension and only move the arms for a few reps. Control first. Range later.
10. Breast Stroke Arms
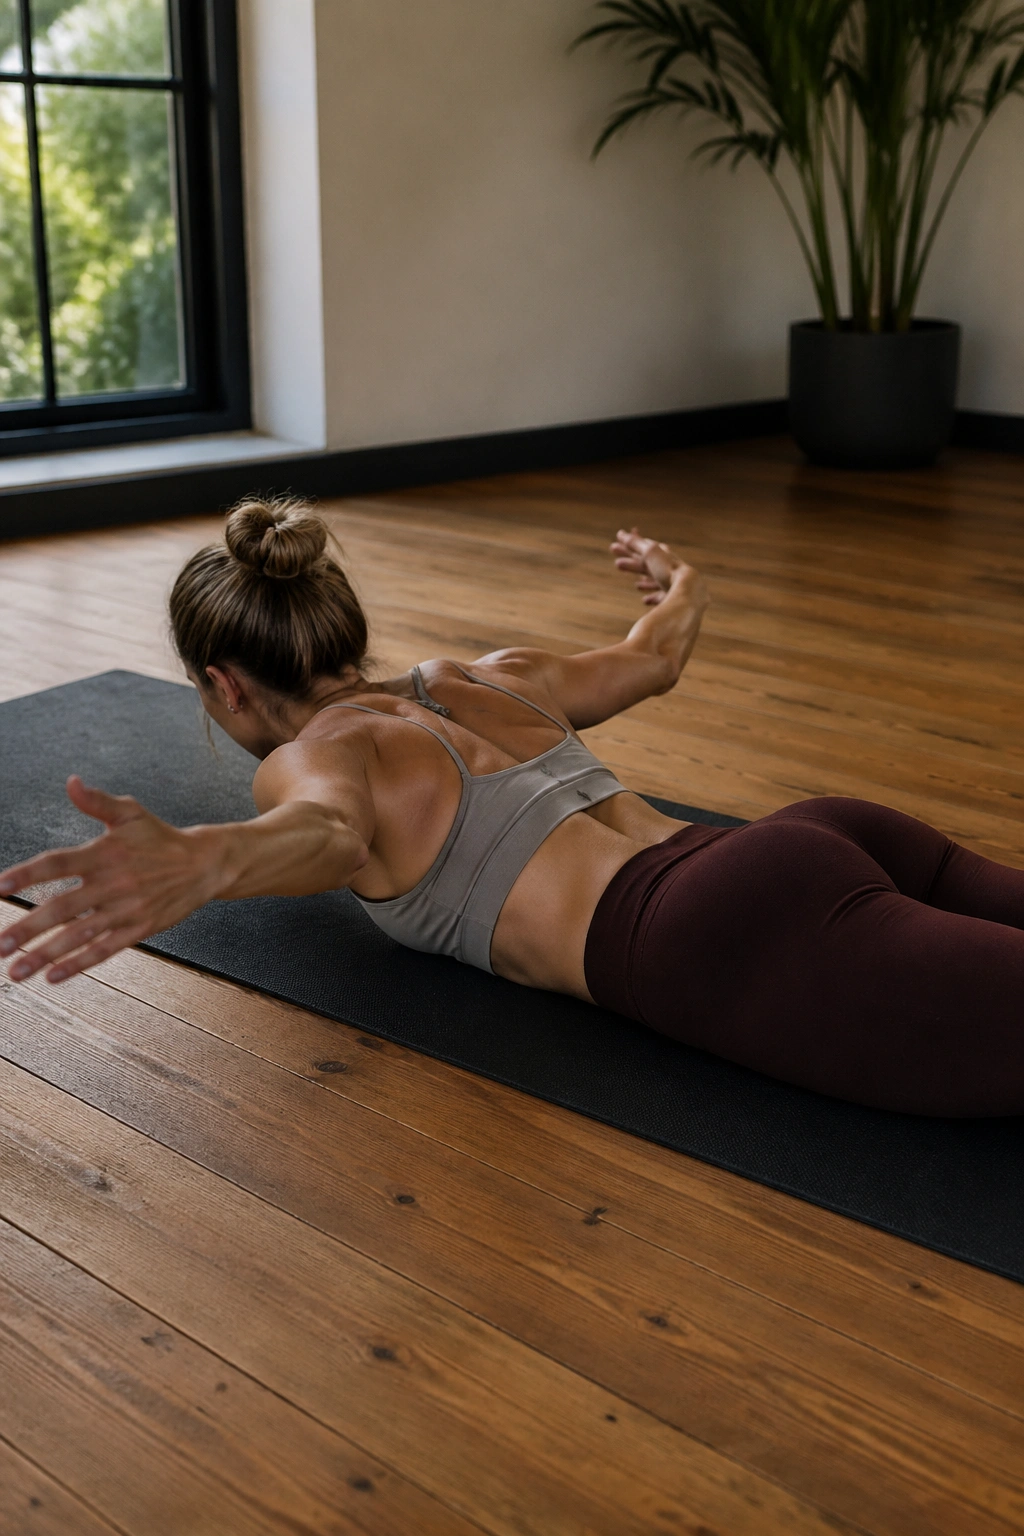
This move is a quiet beast when you do not let momentum steal it. You begin prone, lift into extension, sweep the arms back, then circle them around and forward while trying to keep the upper back long and supported the whole time.
The challenge is not the arm circle by itself. The challenge is holding thoracic extension and scapular organization while the arm position keeps changing. That moving target is why Breast Stroke Arms builds more useful upper-back endurance than static holds alone.
A few cues make it cleaner:
- Start from a low extension, not your biggest one.
- Sweep the arms by your sides first, palms toward the body.
- Circle them out and forward only as far as you can keep the neck quiet.
- Do 4 to 6 slow cycles rather than racing through 10.
- If the front ribs shove down or up to control the movement, shorten the circle.
There is a grace to this move when it clicks, but do not chase grace. Chase organization. The pretty version shows up later.
11. Wall Angel Slide
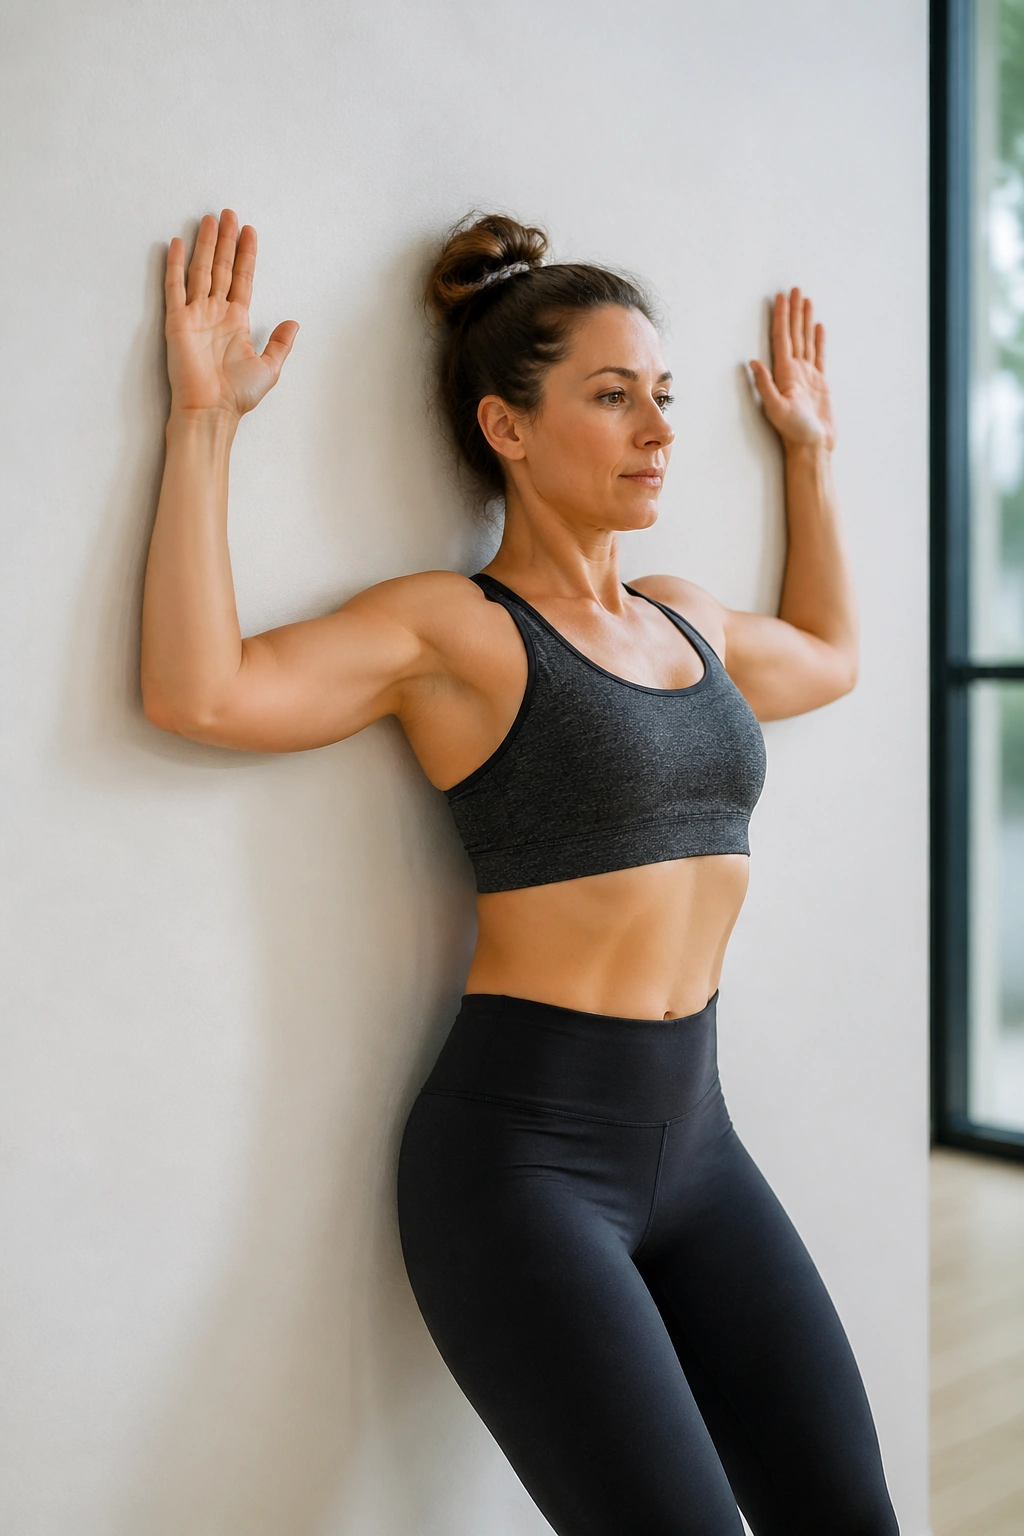
Your ribs may try to spring forward the second your arms move overhead. The wall will tell you right away.
Stand with your back against a wall, knees soft, feet a few inches forward, and the back of the rib cage lightly connected to the wall. Bring the arms into a goalpost shape. Forearms and hands might touch the wall, or they might not. No gold star for forcing contact.
Slide the arms upward only as far as you can keep the ribs from flaring and the shoulders from shrugging. Then slide back down. That is it. The wall gives you feedback on spinal position, and the slow overhead path asks the serratus, lower traps, rotator cuff, and upper back extensors to coordinate the motion.
A lot of people discover one side is stingier. Normal. Work inside the better pattern, not the bigger one.
Wall Angel Slides are one of the cleanest ways to train upper-back support in a vertical posture, which matters if your prone work is strong but your standing posture falls apart by lunchtime. Keep the movement smooth and stay with 6 to 8 reps. If your lower back arches off the wall, reduce the range.
There is no prize for getting your whole hand flat against the wall. The prize is moving overhead with less neck effort and more back-body support.
12. Plank Plus
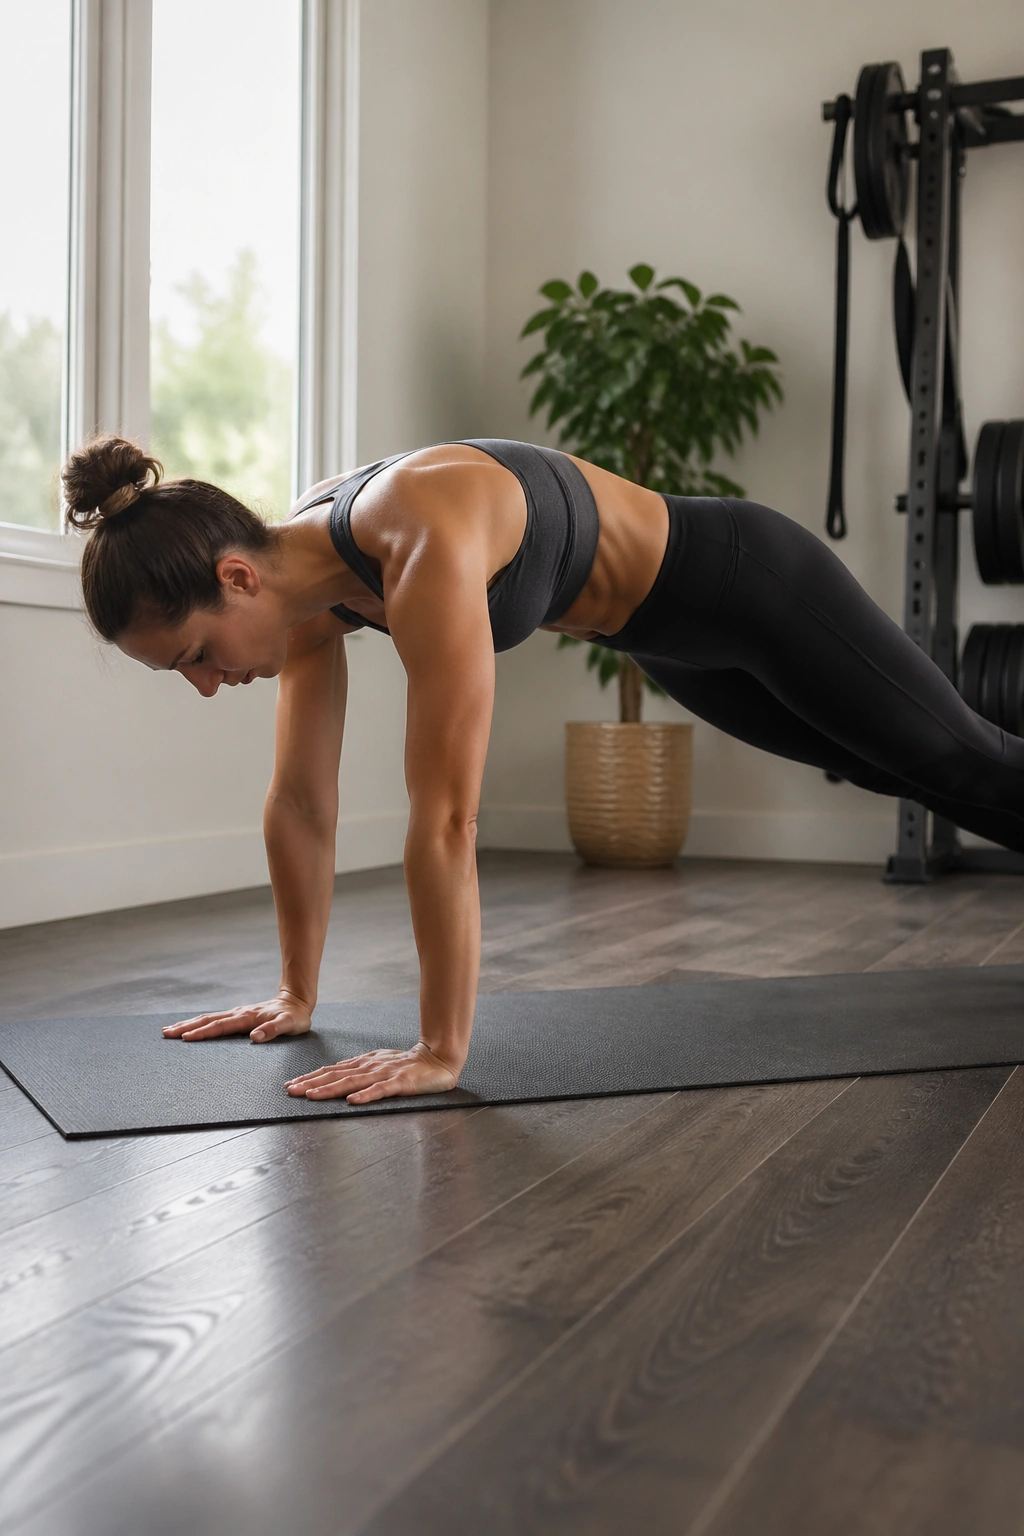
Unlike a standard plank, where many people hang between the shoulder blades and call it core work, Plank Plus finishes with an active push through the floor. That extra inch changes the shoulder girdle completely.
Set up in a long line from heels to head, either on your hands or forearms. Once you are stable, press the floor away until the upper back domes slightly and the shoulder blades spread. Do not round your whole spine. Think of the movement living high between the blades.
This is serratus anterior training dressed up as a plank variation. And serratus matters for upper-back strength because it keeps the shoulder blades anchored to the rib cage during arm-bearing work. When it is asleep, the neck and upper traps take the overtime shift.
Who should lean into this one? Anyone who feels shaky in planks, push-ups, side planks, or overhead arm work. Start with 8 small pulses or hold the “plus” position for 15 to 25 seconds. If your wrists complain, elevate the hands on a bench or wall.
The plank itself is not the headline here. That last little press is.
13. Leg Pull Front
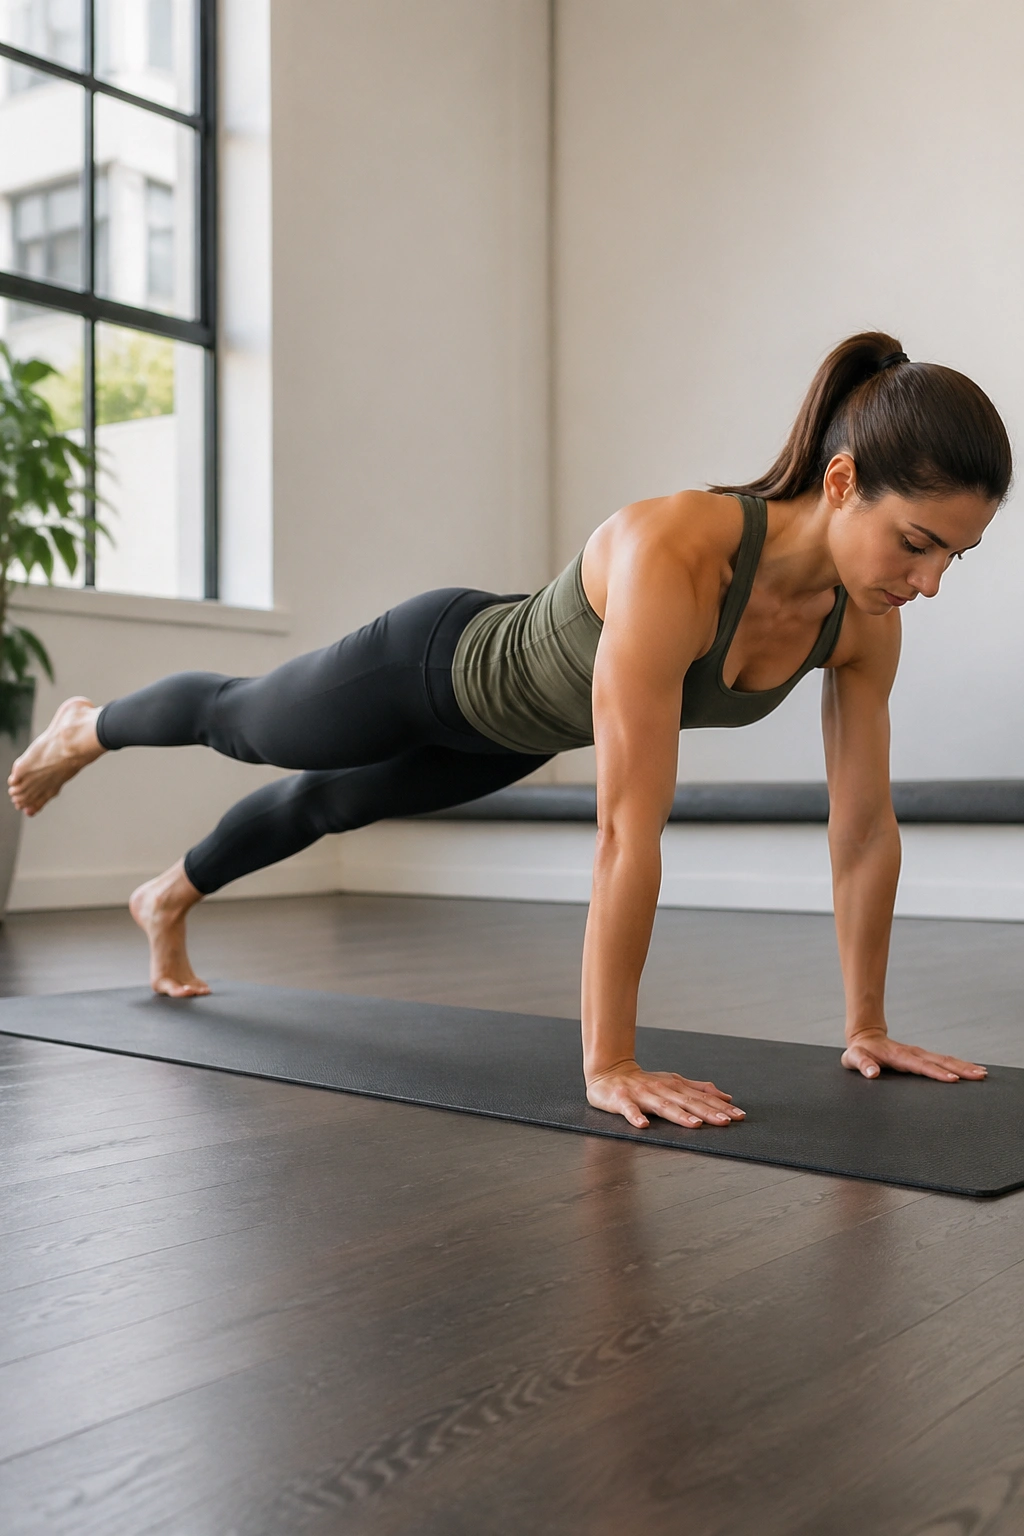
Leg Pull Front asks the upper back to stay broad and stable while the body shifts weight and one leg lifts. It is more demanding than it looks because the support shoulder has to resist collapse without shrugging.
From a strong plank, engage the “plus” feeling from the previous move, then float one leg a few inches off the mat without hiking the hip. Set it down and switch sides. The trunk should stay long and steady, with the breastbone reaching forward and the shoulder blades wrapped on the ribs.
Why this move feels different from a plank
Plank Plus is mostly about creating scapular support. Leg Pull Front keeps that support while adding single-leg load, anti-rotation, and more shoulder endurance. That combination lights up the serratus, mid-back, and the muscles around the shoulder blade in a more athletic way.
Quick coaching notes
- Start with 4 to 6 leg lifts per side.
- Keep the lifted leg low; higher usually means sloppier.
- Push the floor away the whole time.
- If your pelvis rocks, widen your feet.
- A long neck beats a high leg every time.
One smart regression: perform the same pattern with your hands on a wall or countertop. You still get the shoulder work without the full bodyweight load.
14. Side Plank With Threaded Reach
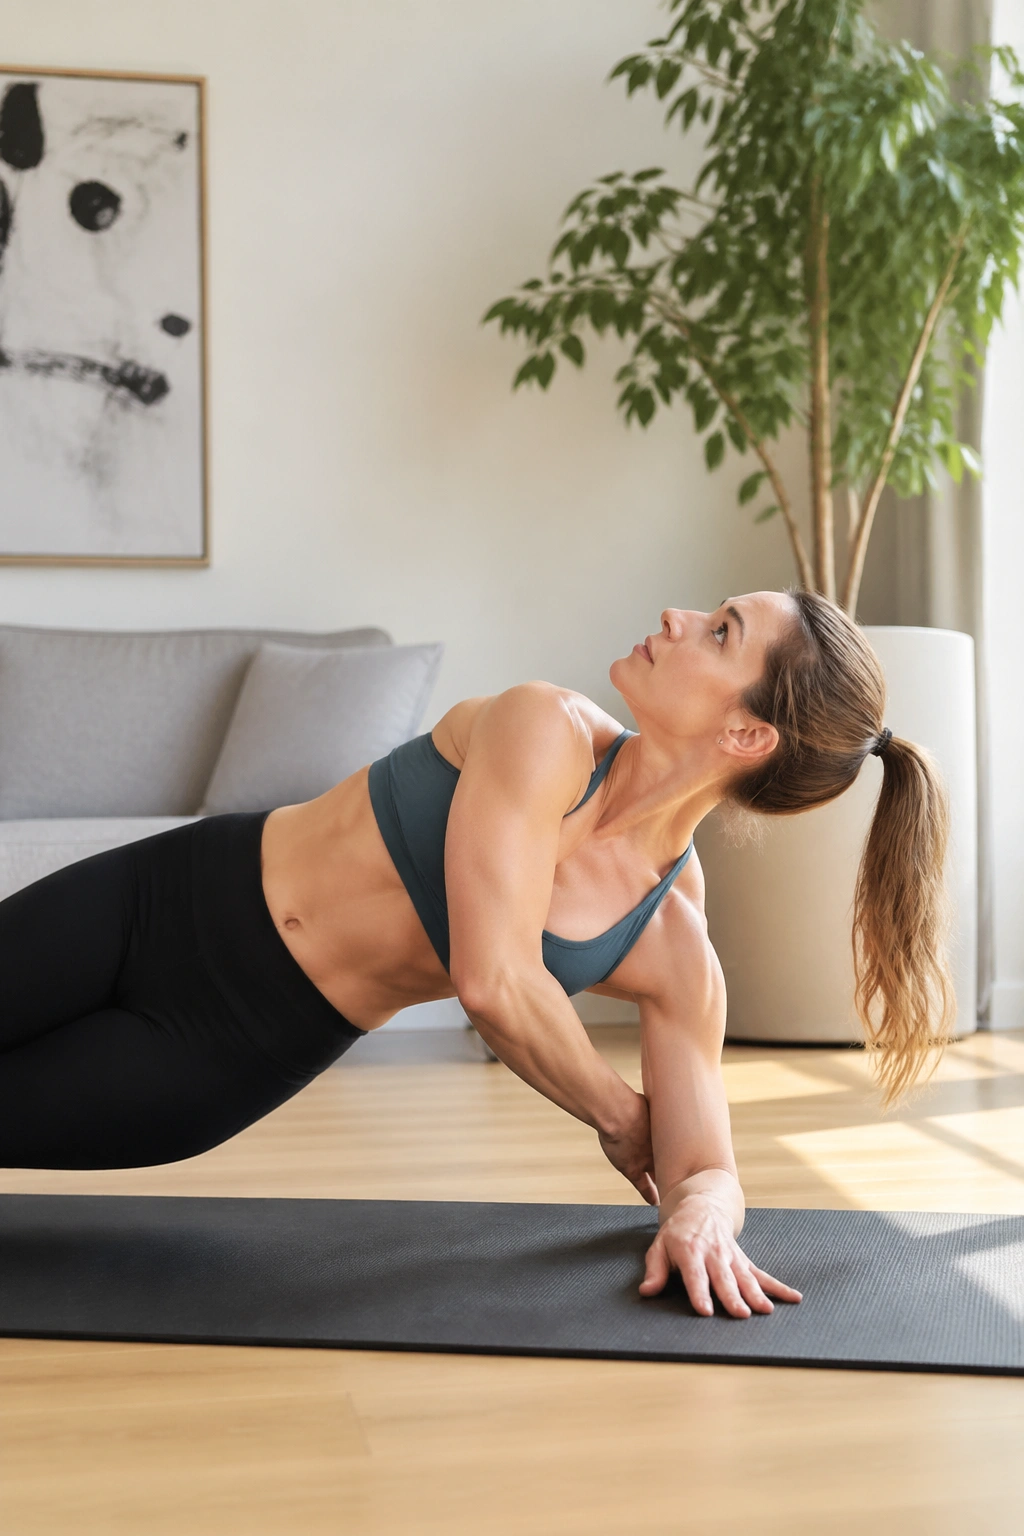
Side plank is often sold as an oblique move, which undersells it. The support shoulder and upper back are working hard the whole time, especially when you add a threading reach that asks the shoulder blade to control rotation.
Set up on one forearm or hand, knees bent or legs straight. Lift into side plank, then reach the top arm under your rib cage as the upper trunk rotates a little. Open back up without losing height through the underside waist.
The support side is where the upper-back strength story gets good. You are training scapular stability, serratus support, and endurance around the shoulder girdle while the trunk moves above it. The top arm adds rotation, which makes the support side organize even more sharply.
Keep the range modest. A small thread and reopen is enough if you can keep the chest broad and the support shoulder away from the ear. Try 5 to 8 reps per side. If the move turns into a neck fight, drop to a knee-supported version and focus on the lift through the bottom waist.
Side plank has a way of exposing side-to-side differences you did not know were there. Useful information.
15. Back Support Prep
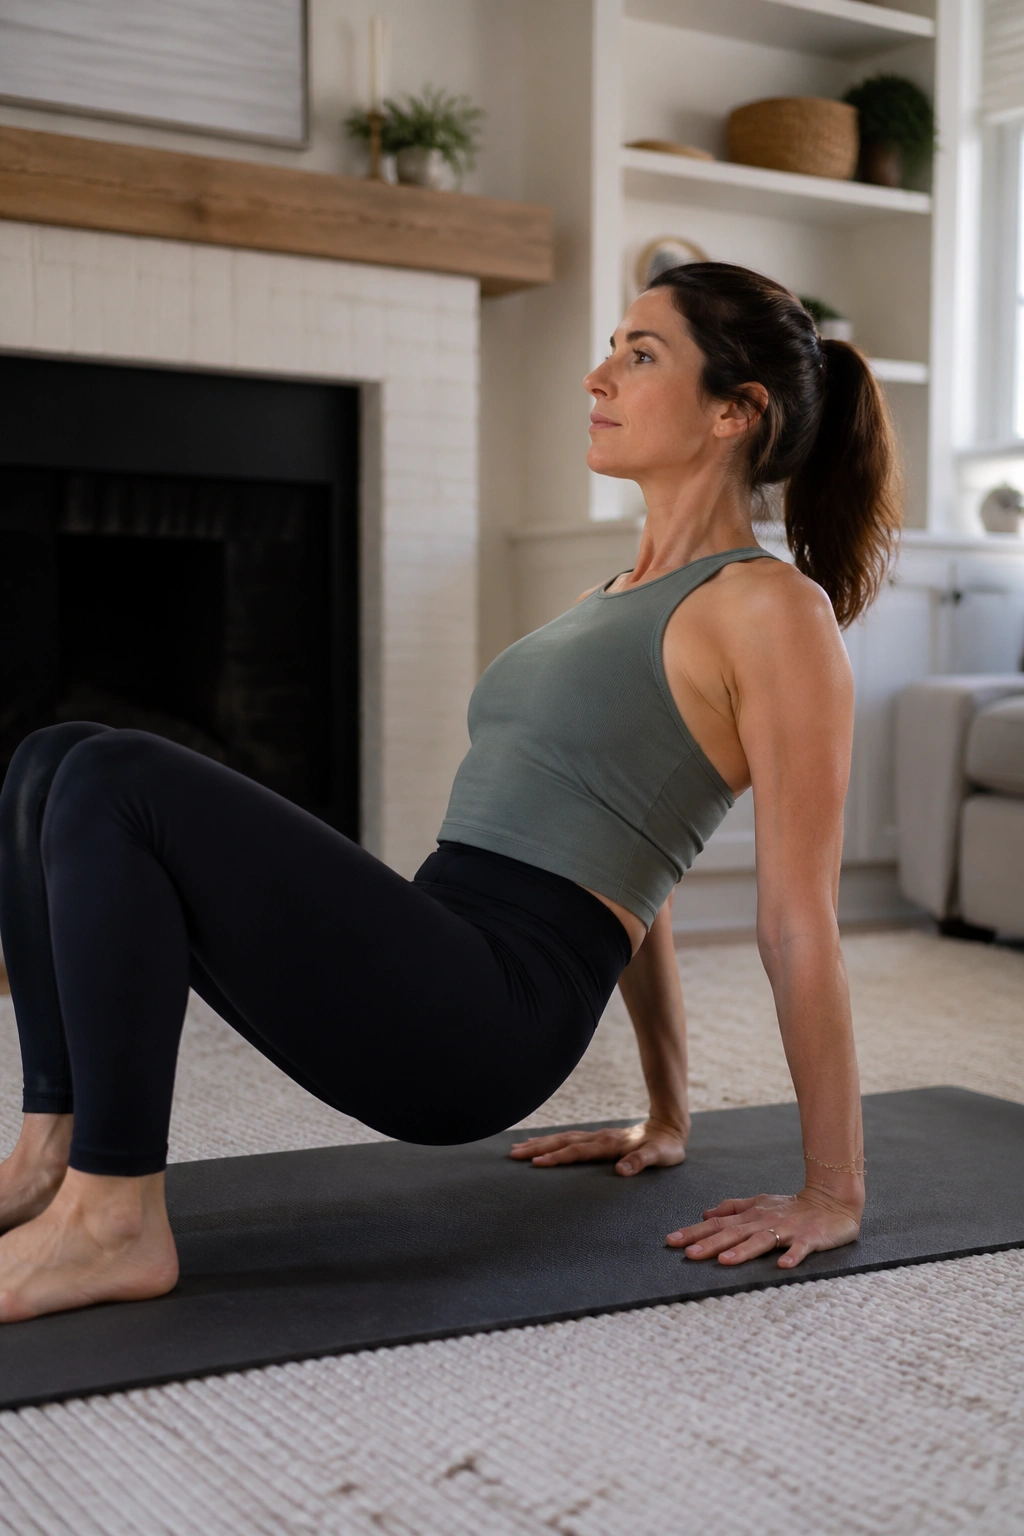
Can you load the upper back behind you without the shoulders rolling forward? Back Support Prep answers that question fast.
Sit with your knees bent, feet flat, and hands on the mat behind your hips with fingers facing out or slightly back—whatever your wrists and shoulders tolerate best. Press into the hands, broaden across the chest, and lift the sternum. Stay there, or lift the hips into a low reverse tabletop if your shoulders allow it.
This move strengthens the posterior shoulder, scapular stabilizers, and upper-back extensors in a position many people avoid. It also asks for front-body opening without dumping into the low back. That mix makes it a sharp finishing move after prone and plank work.
How to build the shape without collapsing
Begin with the chest lift only. Press the floor away, feel the shoulder blades settle on the back, and keep the throat soft. Once that feels steady, add a small hip lift for 5 to 8 reps, or hold for 10 to 20 seconds. If the front of the shoulder feels pinchy, turn the fingers outward more, reduce the height, or stay seated and work the chest lift alone.
Back Support Prep is not flashy. It is one of those moves that feels awkward until it does not, and then you notice your shoulders sit better in everything else.
Final Thoughts
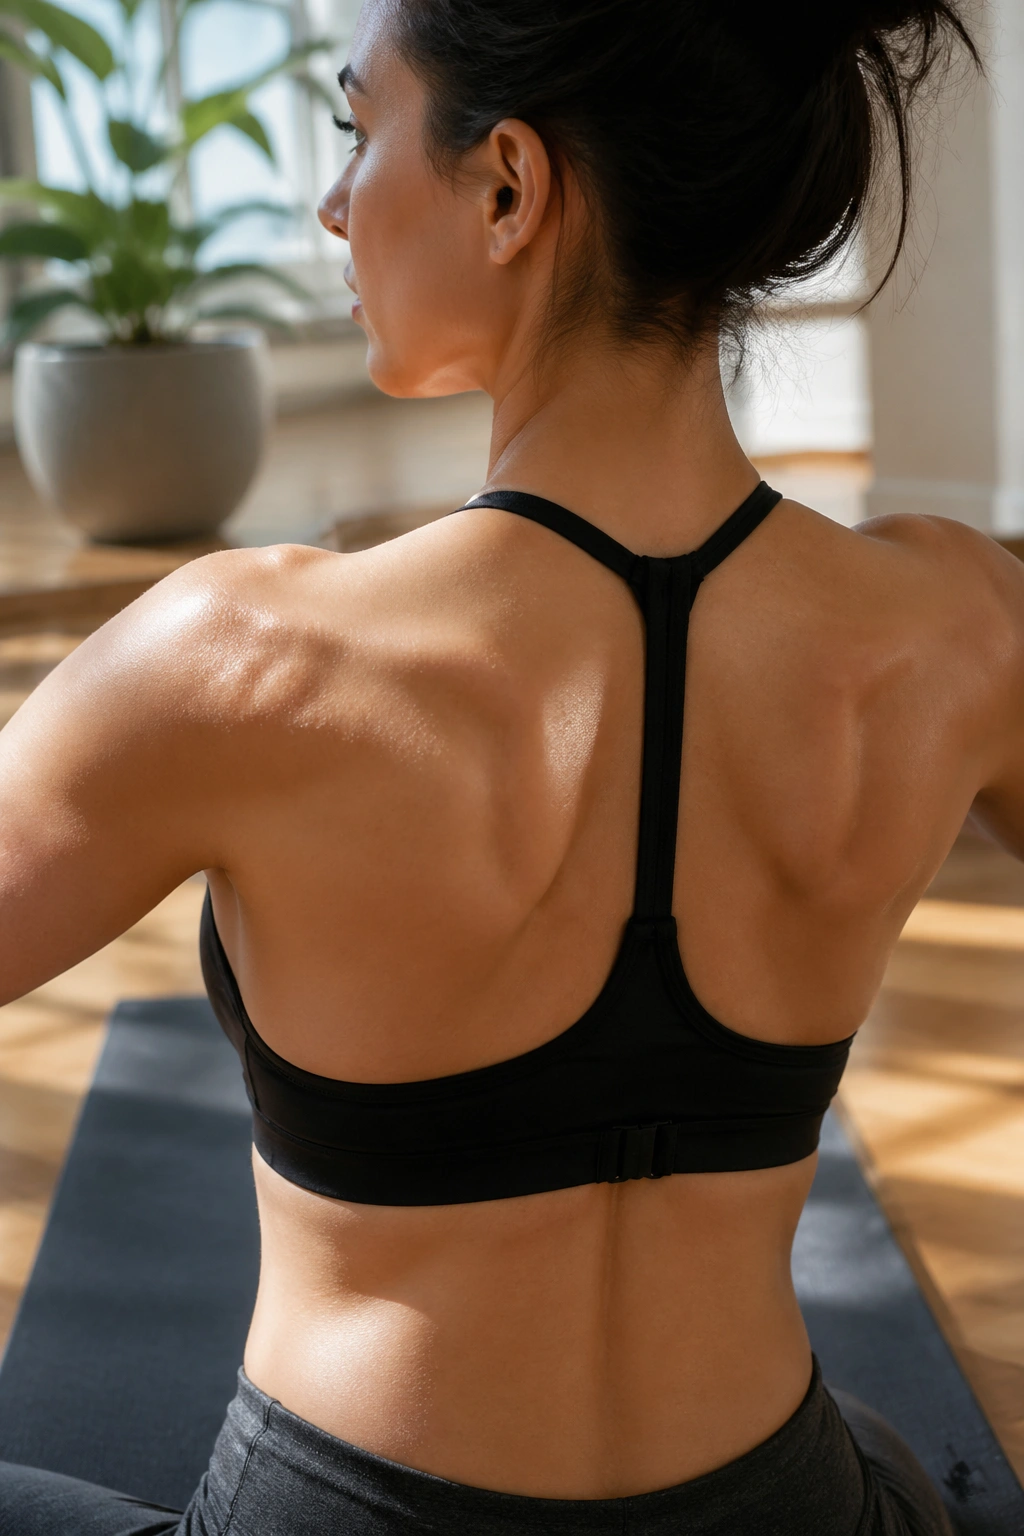
Upper-back strength in Pilates is less about brute force and more about placing the effort in the right place. When the shoulder blades glide well and the thoracic spine can extend without drama, your neck stops volunteering for jobs it never wanted.
Pick 4 to 6 of these moves and repeat them two or three times a week before you chase the full list. A short sequence done with sharp attention will do more than a marathon session full of shrugging and rib flaring.
Judge progress by different markers than soreness. Look for a quieter neck, steadier planks, cleaner overhead reach, and that subtle feeling of being lifted from the back of the body instead of hanging from the front. That is when upper-back work starts paying rent.
