



The fastest way to irritate a sore back is to treat every core move like a sit-up contest. That old “burn equals progress” idea falls apart the moment your lower back starts talking back to you.
Back-friendly core work is usually quieter than people expect. Fewer big crunches. More control. More breathing. More keeping the ribs, pelvis, and hips from yanking in opposite directions like they’re in a small argument.
That’s the real shift here: you are not trying to “blast abs.” You’re trying to build trunk stability, reduce strain on the lumbar spine, and teach the body how to move without that familiar pinch, grab, or stiff after-feeling the next day. If pain shoots down the leg, brings numbness, or spikes when you cough, sneeze, or bear down, that’s not a normal workout issue. Get assessed.
Start small. Stay strict. The first exercise looks almost too easy, which is usually a good sign when the back has been complaining.
1. 90/90 Breathing With a Gentle Brace
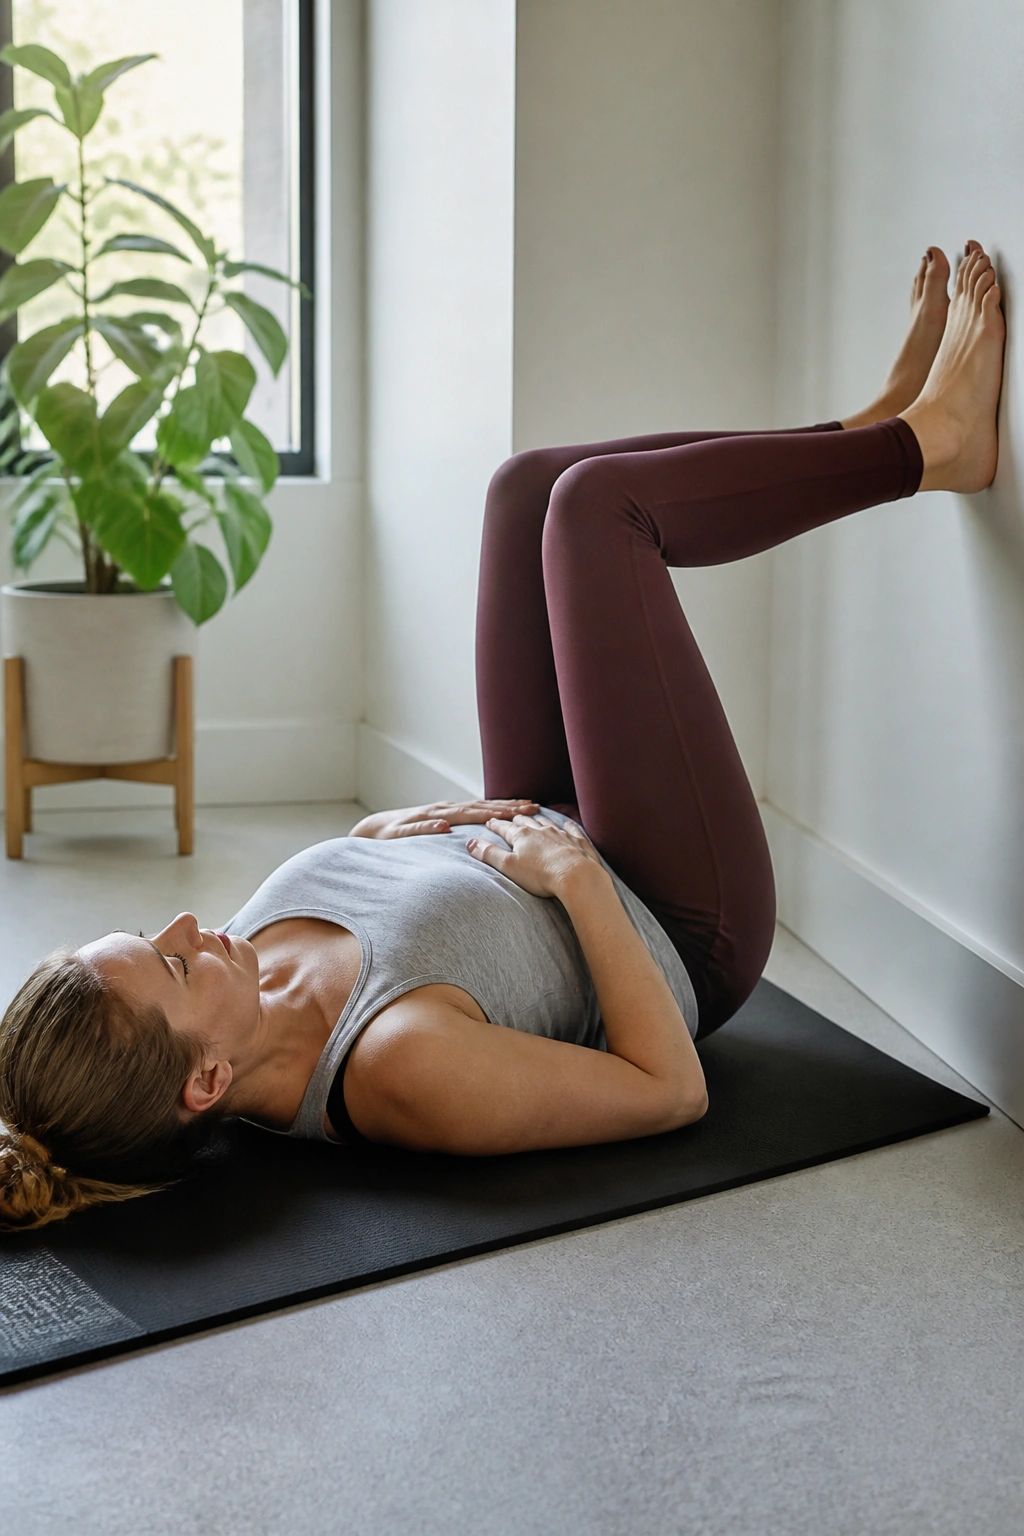
This is where a lot of good back rehab starts, even though it doesn’t look like “exercise” in the gym sense. Lie on your back with your feet up on a wall, bench, or chair so your hips and knees are bent around 90 degrees. Let your lower back rest on the floor without jamming it flat. Then exhale slowly through your mouth and feel your ribs soften down.
That long exhale matters. A tight, guarded back often comes with a rib flare and shallow breathing, and that makes every other core drill harder than it needs to be. After the exhale, breathe in through your nose without lifting your shoulders. You want a quiet, 20 to 30 percent brace, not a hard stomach punch.
What to feel
- Your ribs drop a little on the exhale.
- Your low back feels heavy, not crushed.
- Your neck stays loose.
- Your belly firms without holding your breath.
Do not suck in hard or jam the lower back flat. The goal is a calm brace, not a military pose. Four to five breaths is enough to start.
2. Posterior Pelvic Tilts on the Floor
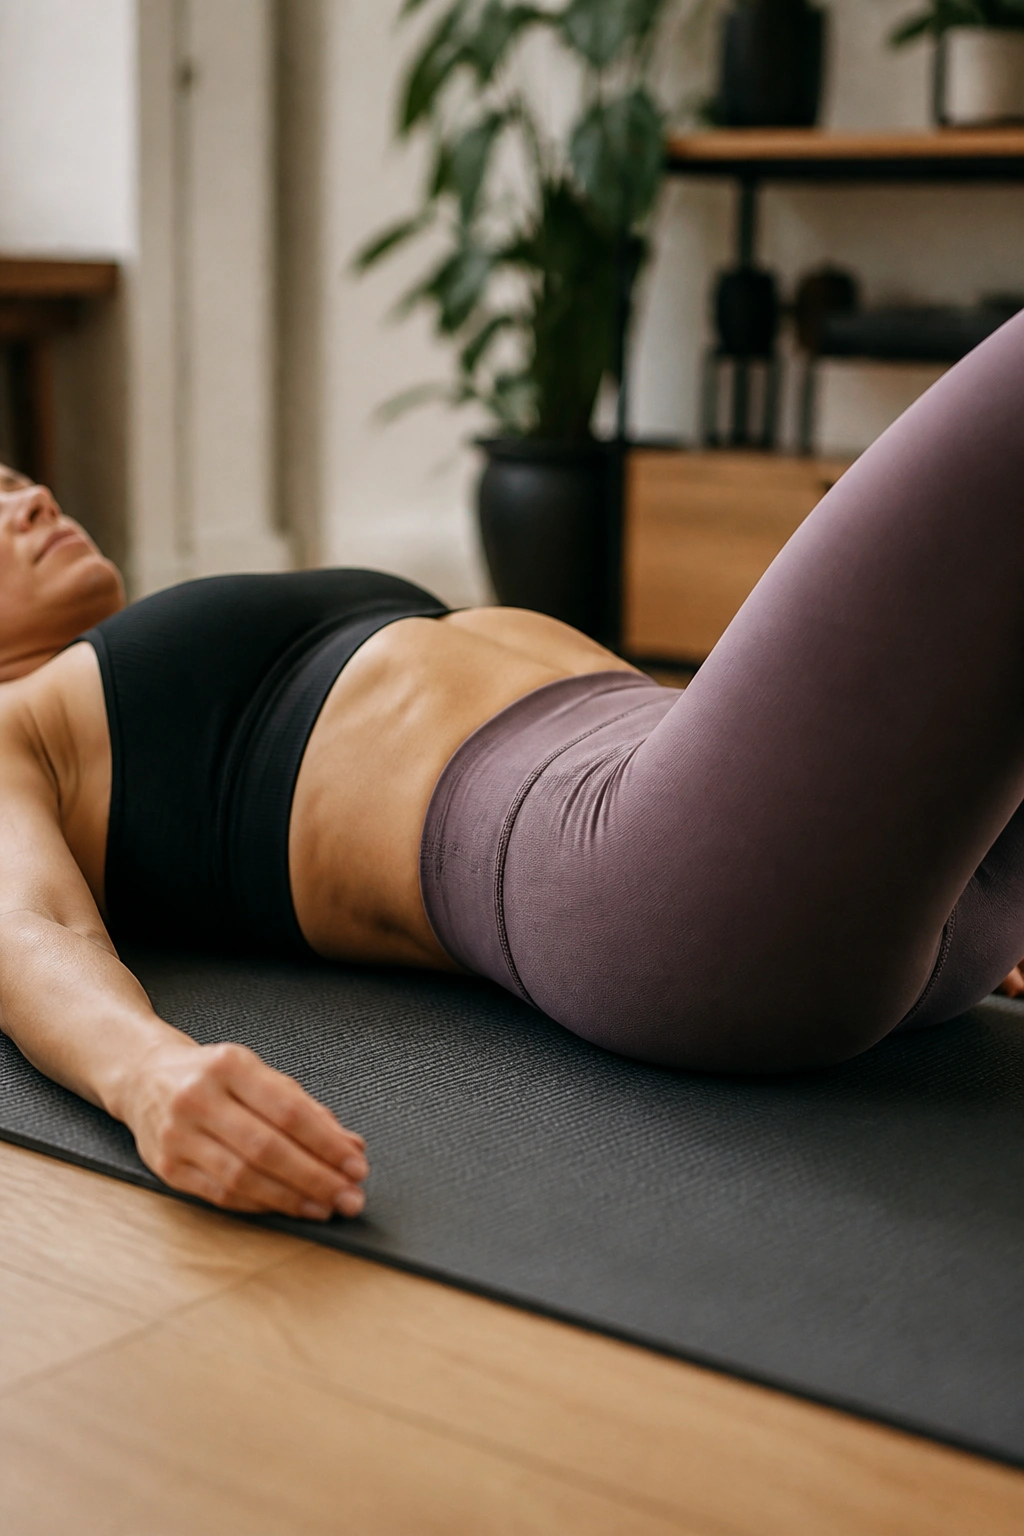
A posterior pelvic tilt sounds technical, but the move is simple: rock your pelvis backward so the small of your back gently presses into the floor, then return to neutral. Tiny motion. That’s the point.
This is one of the better “wake up the trunk” drills for people whose backs hate sudden movement. It teaches you where neutral is, which sounds boring until you realize half of back pain rehab is learning not to live at the edge of extension all day. If your lower back arches when you stand, walk, or lie down, this drill gives you a cleaner starting position.
How to do it
- Lie on your back with knees bent and feet flat.
- Exhale, then tip your pelvis so your low back settles toward the floor.
- Hold for 2 to 3 seconds.
- Release back to the middle.
That’s it. Eight to twelve slow reps is plenty.
One sentence is enough here: small range, big payoff.
3. Modified Curl-Up
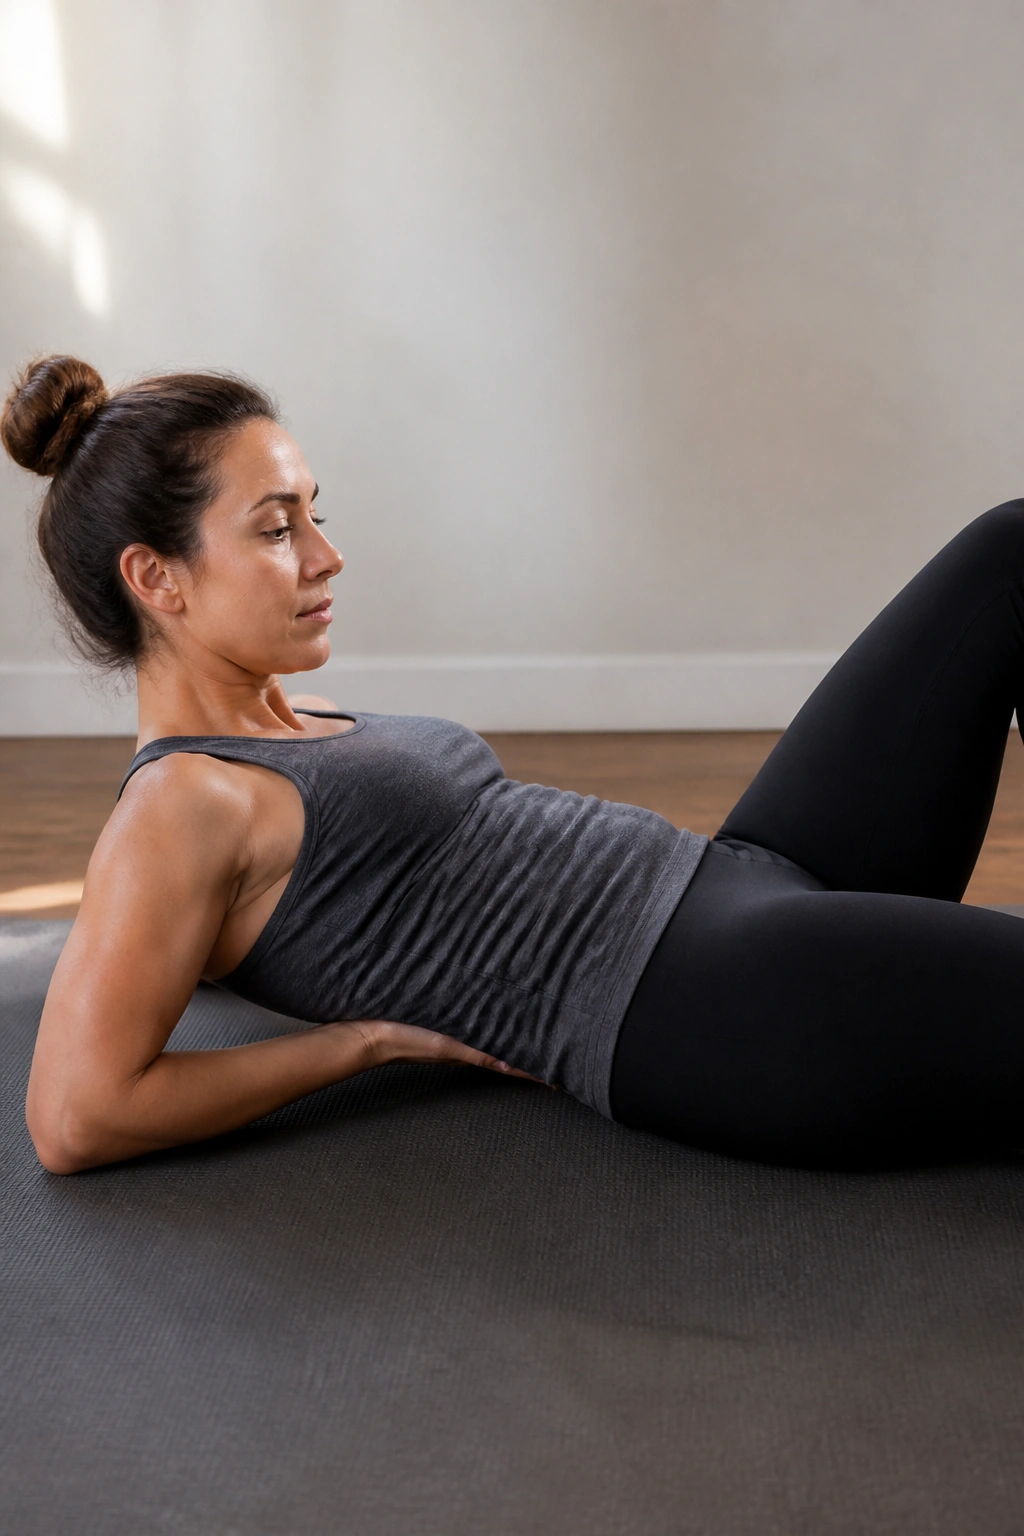
This is the anti-sit-up. Same neighborhood, completely different attitude.
The modified curl-up keeps the spine in a safer, more neutral shape while still asking the front of the trunk to work. Lie on your back, bend one knee, and keep the other leg straight. Slide both hands under the natural curve of your lower back so you can feel whether it changes. Then lift your head and shoulders just an inch or two, hold for 5 to 10 seconds, and lower with control.
If you’ve ever done full sit-ups and felt your back get cranky halfway through the set, this version will probably feel more honest. It is not flashy. It does not need to be. The point is to build endurance in the abs without turning the lumbar spine into a hinge.
A few things that matter
- Keep the lift small.
- Keep the chin slightly tucked.
- Keep breathing.
- Stop before the neck takes over.
If your back arches or your hips start to yank, the lift is too big. Shrink it. This one works best when it looks almost boring.
4. Heel Slides
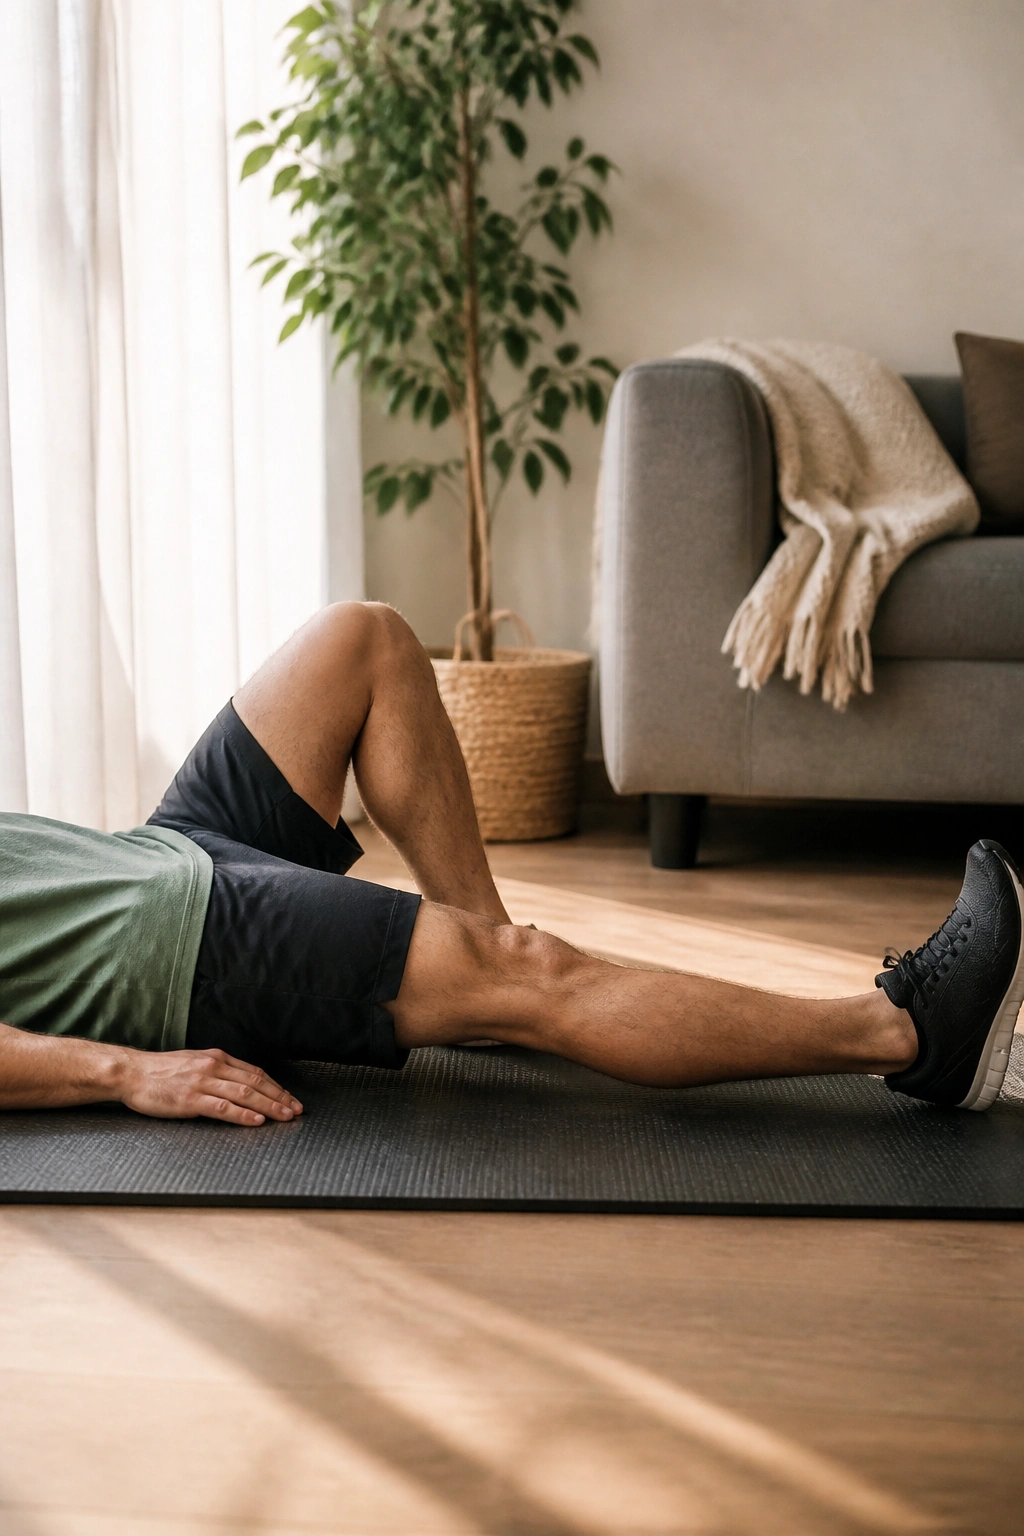
Heel slides are one of those exercises people skip because they look too basic. Then they try them correctly and realize their core has to do more than they thought.
Lie on your back with knees bent, feet on the floor, and set a light abdominal brace. Slowly slide one heel away from you until the leg is almost straight, then drag it back in. The back should stay quiet. The pelvis should not rock, and the ribs should not flare.
Why this one matters
Heel slides train the trunk to stay steady while the legs move. That’s a real-life skill. Walking, climbing stairs, getting out of a car — all of that asks for trunk control while the limbs do their thing. If your lower back tends to steal motion from the hips, this exercise helps clean that up.
Use 6 to 10 reps per side, slow enough that you can notice if the low back lifts. If it does, shorten the slide. If the move feels easy, pause the heel an inch off the floor before bringing it back.
Tiny change. Big lesson.
5. Dead Bug Heel Taps
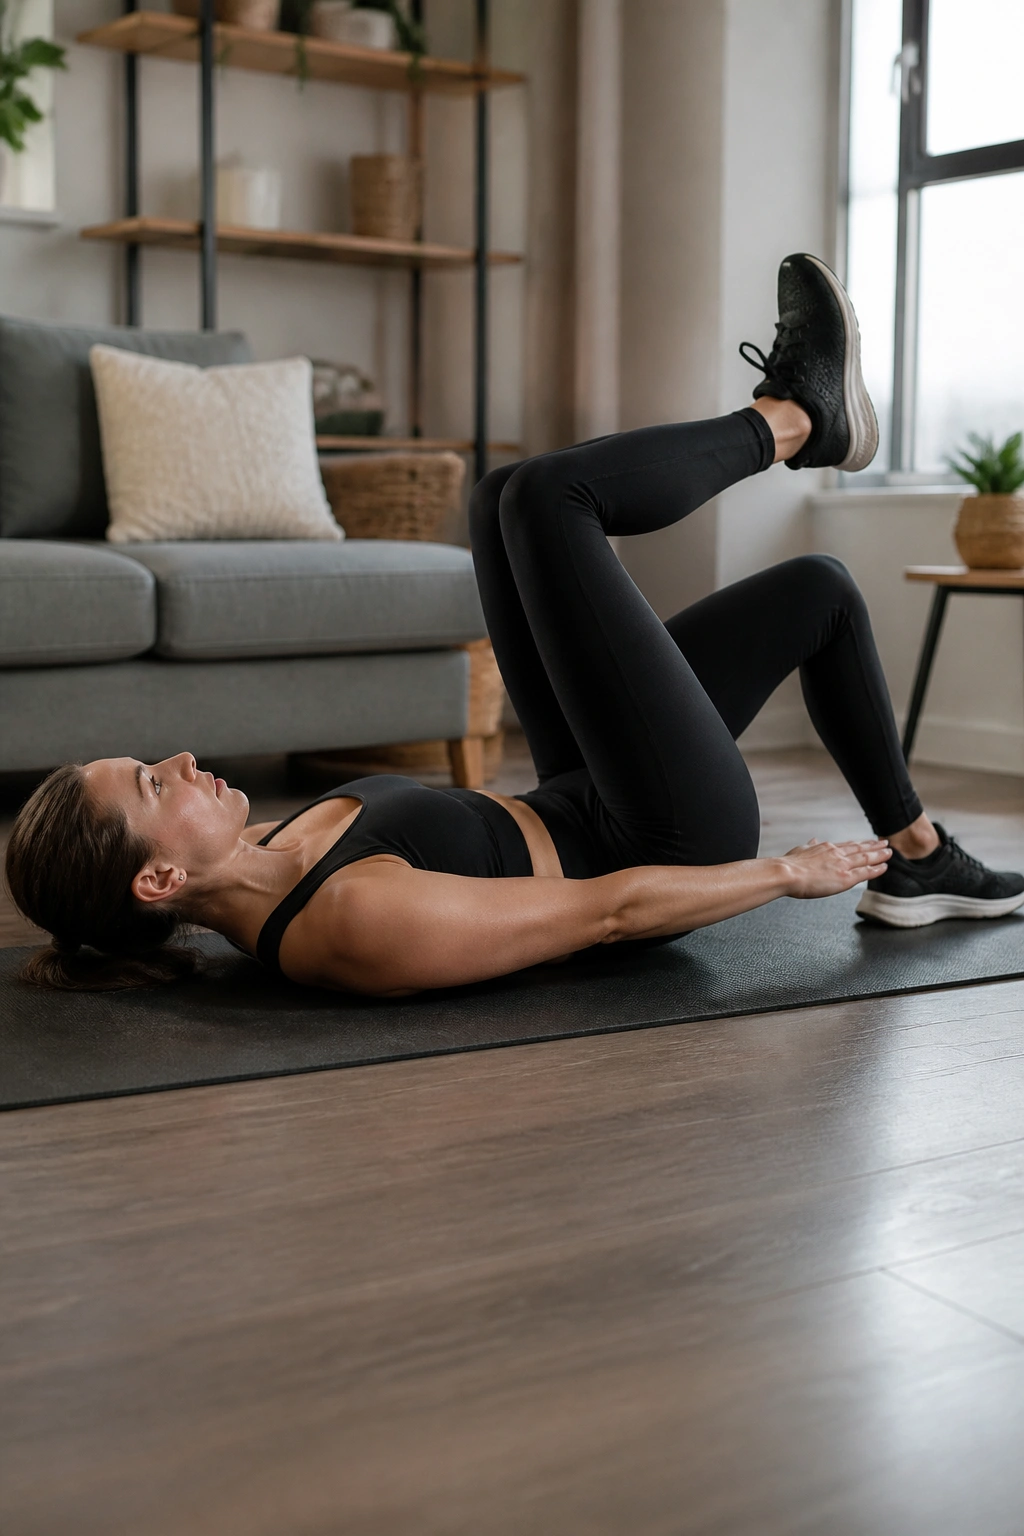
The dead bug has earned its place because it does a lot without forcing the spine into ugly positions. The heel-tap version keeps the load manageable while teaching anti-extension control — meaning your back resists arching when the legs move.
Start on your back with both knees lifted over the hips. Brace lightly, then tap one heel to the floor and bring it back up. Switch sides. If your back starts to arch or your ribs pop open, raise the legs higher or tap to a book, block, or thicker mat so the range stays honest.
How to keep it useful
- Move one leg at a time.
- Exhale as the heel reaches down.
- Keep the lower back from lifting.
- Keep the movement slow enough to feel the control, not the rush.
A lot of people make this harder by lowering too far, too fast. That usually turns into hip flexor drama and a back that feels grumpy later. Better to do eight clean reps than sixteen sloppy ones.
Good dead bugs feel smooth. Messy ones feel like your torso is waving a white flag.
6. Bird Dog with a Pause
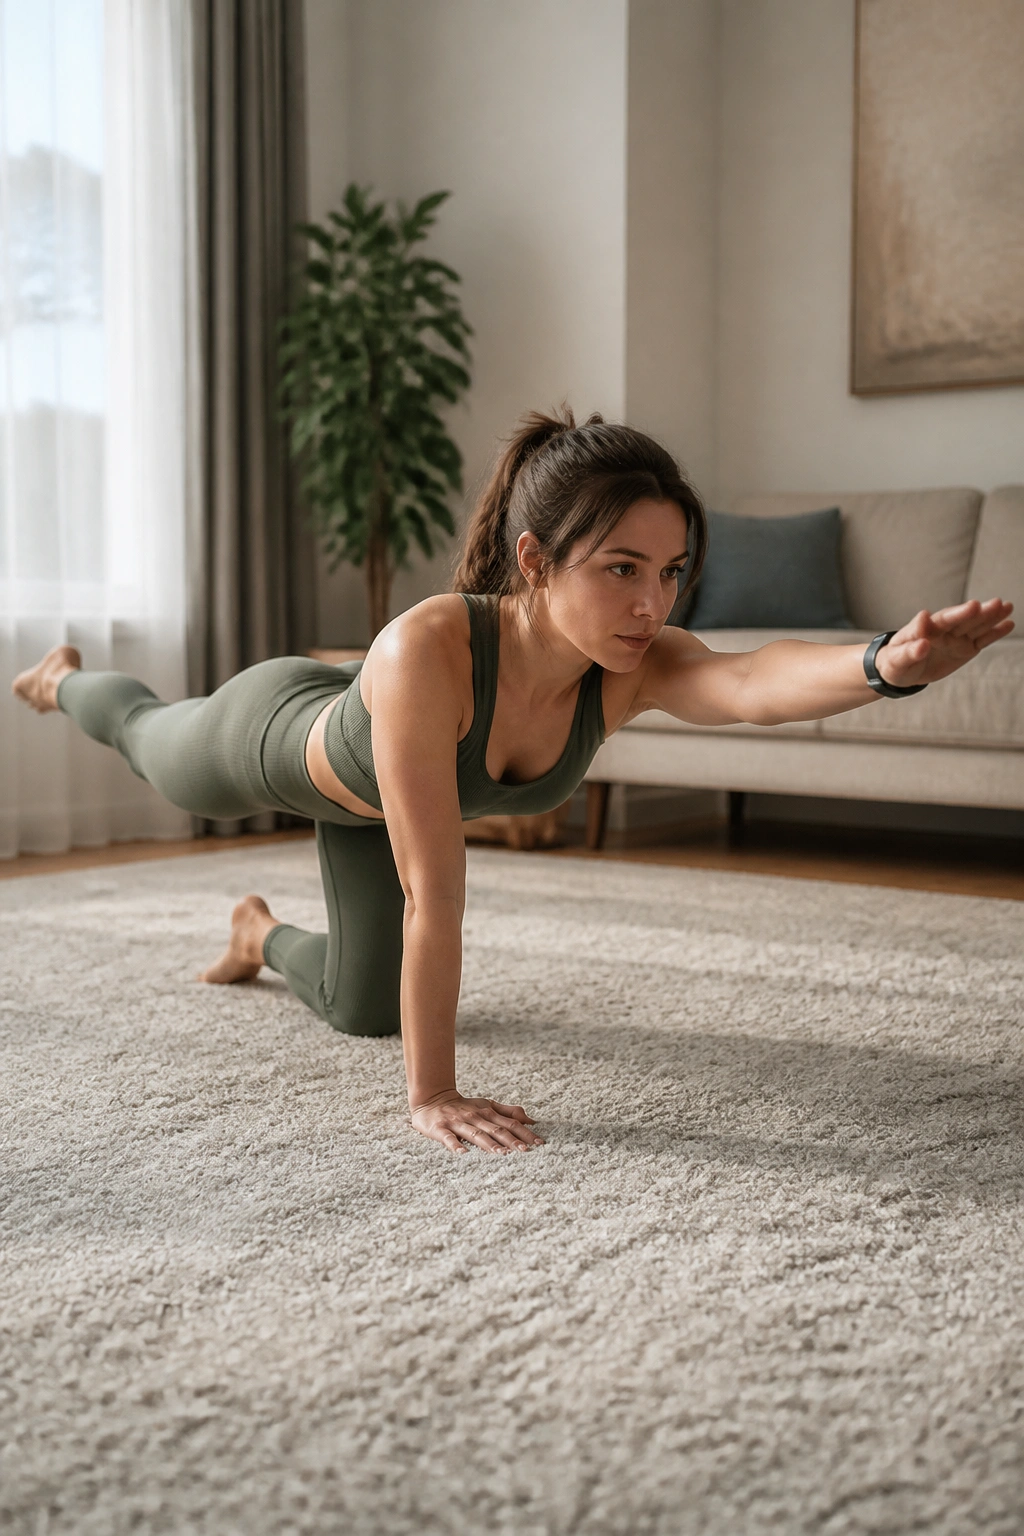
If I had to pick one drill that looks easy and secretly isn’t, bird dog would be near the top. Hands under shoulders, knees under hips, extend one arm and the opposite leg, then hold.
The trick is not lifting high. People love to fling the leg up until the lower back sways and the pelvis twists. That’s the exact opposite of what you want. The extension should be long, not dramatic. Reach through the heel and fingertips, hold for 3 to 5 seconds, and come back under control.
What makes it back-friendly
Bird dog trains cross-body stability. The spine has to resist rotation while the limbs move, which is exactly the kind of control many backs need more of. It also asks the glutes to help instead of letting the lumbar area do all the work.
How to get it right
- Keep the hips level.
- Imagine balancing a glass of water on your lower back.
- Pause before you lose shape.
- Lower with control, not a drop.
If your shoulders feel shaky, leave the arms out and just extend the leg. That’s still work. No need to get heroic.
7. Quadruped Rock Backs
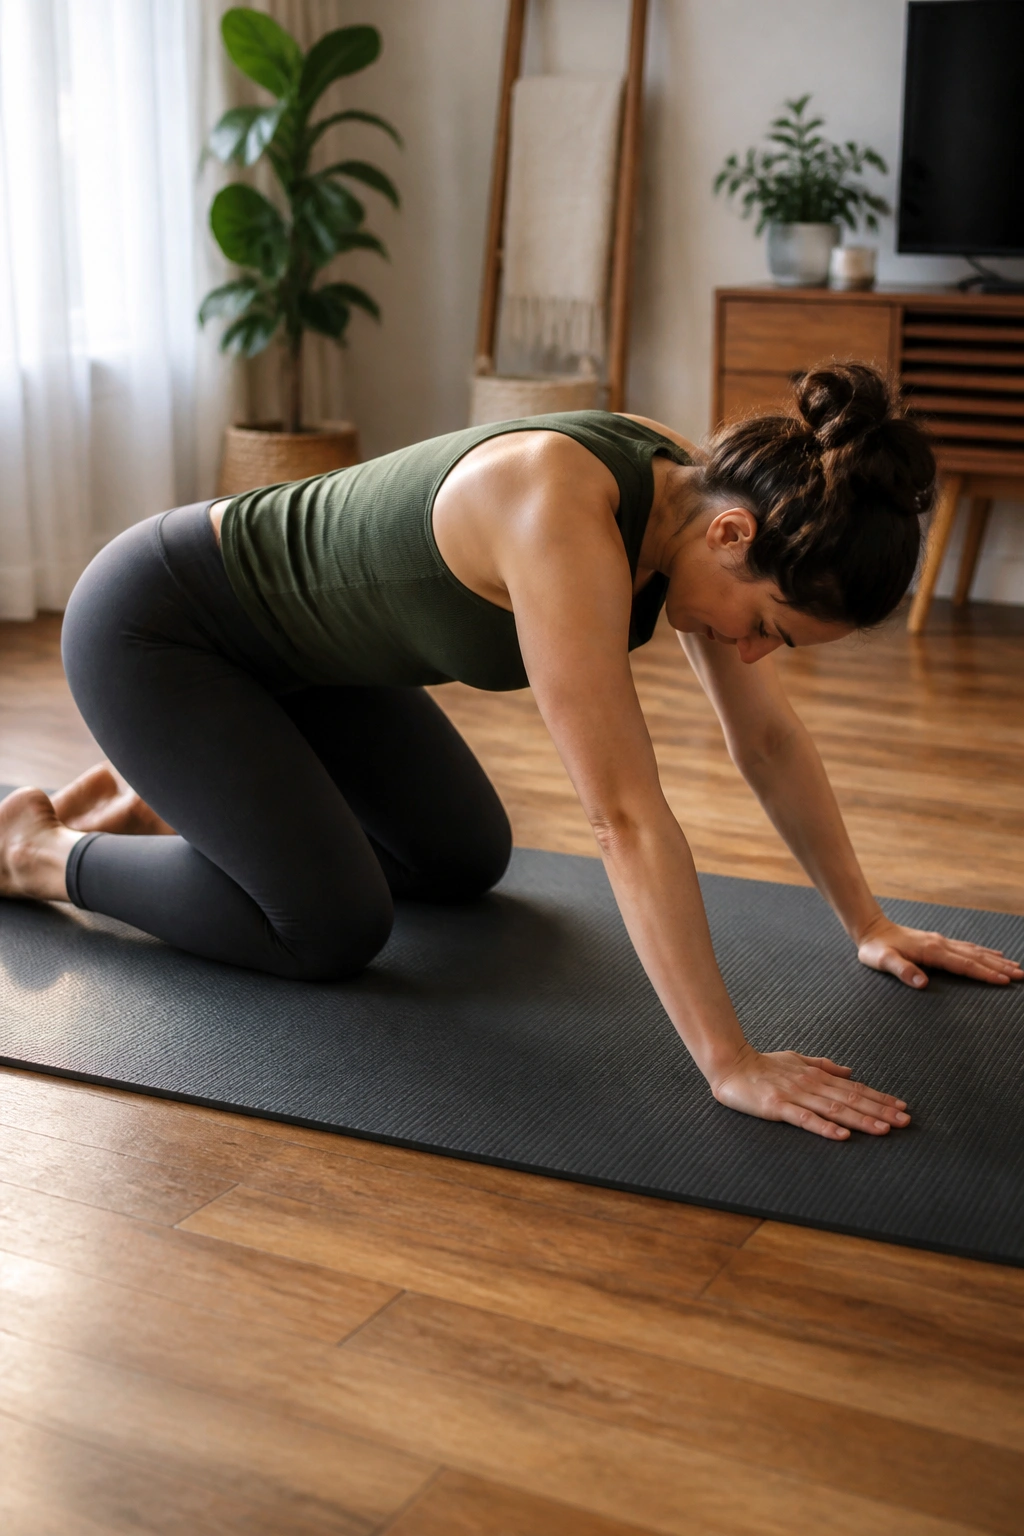
This one feels almost like a reset button. Get on hands and knees, keep a neutral spine, and slowly rock your hips back toward your heels. Stop when you feel a mild stretch or a comfortable limit, then come forward again.
For a stiff back, this can feel oddly relieving because it gives the hips some motion without asking the spine to bend and twist aggressively. It also helps you notice where your body starts to guard. Sometimes the hamstrings are the limiter. Sometimes the hips. Sometimes the back decides to take over early. Rock backs show you.
If kneeling on the floor bothers your knees, put a folded towel under them or do the movement with your hands on a bench. That still counts.
Use it when
- Your back feels tight after sitting.
- You want a gentle warm-up before core work.
- You need a break between more demanding exercises.
One short cue matters here: keep the ribs from collapsing. That helps the spine stay long while the hips do the moving.
8. Side Plank from the Knees
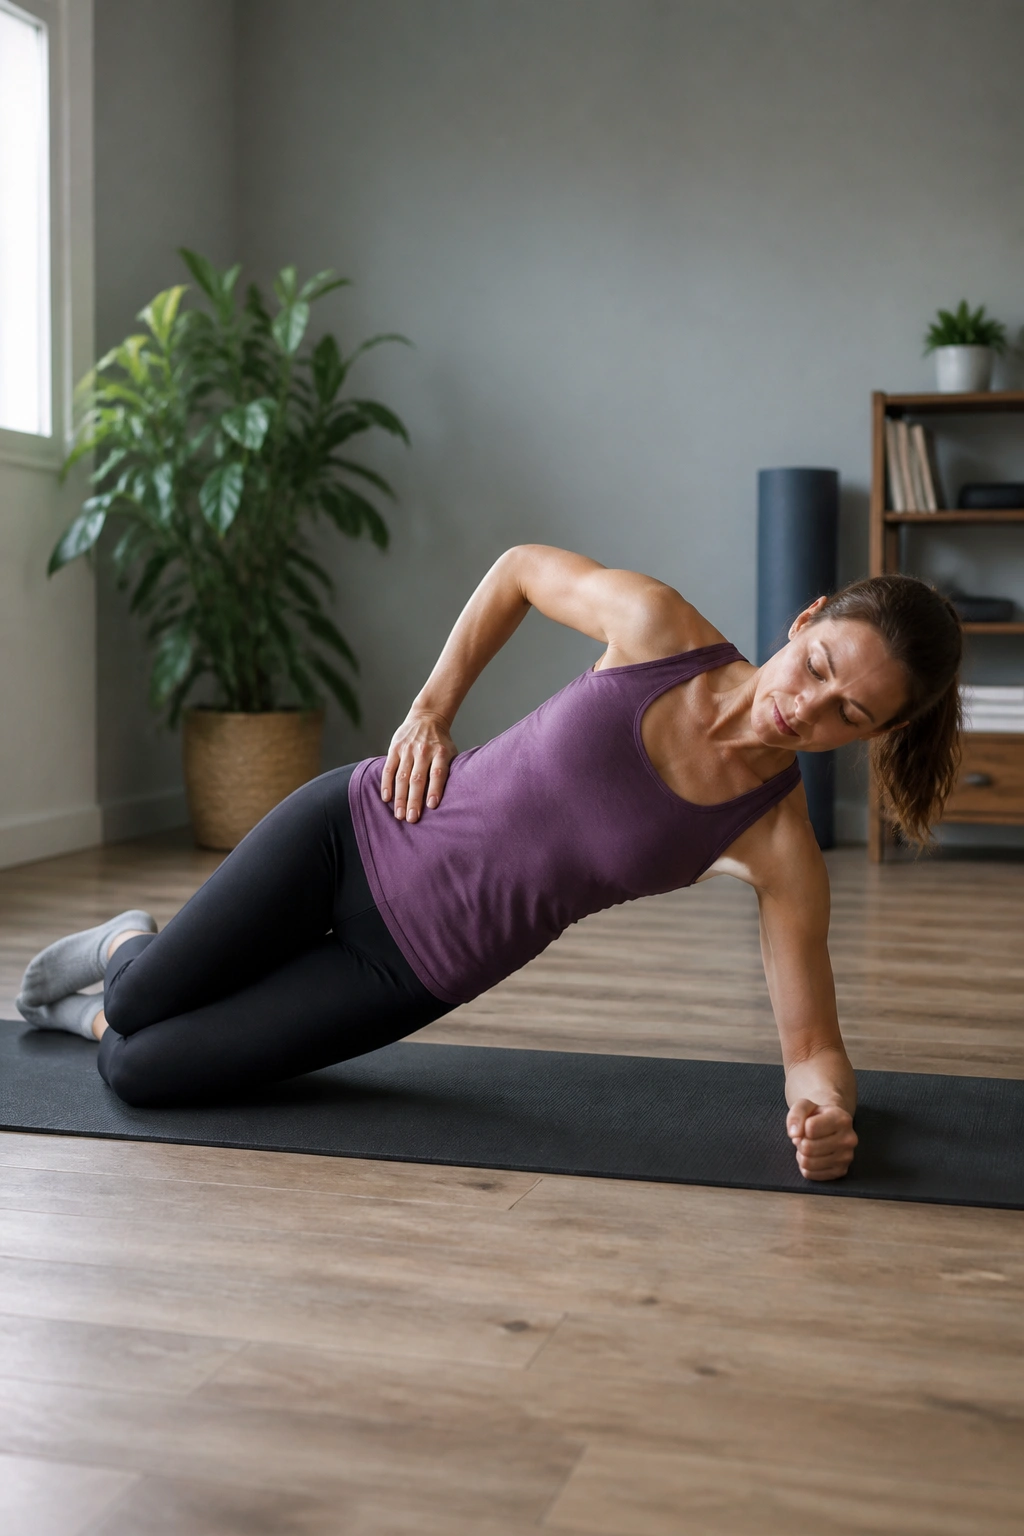
Side planks are excellent for the obliques, the deep side muscles of the trunk, but full version side planks can be too much for a sensitive back or a tired shoulder. The knee-supported version keeps the load in a friendlier range.
Set your elbow under your shoulder, bend the knees, and lift the hips so your body forms a straight line from head to knees. Hold 10 to 20 seconds at first. Breathe. Do not let the top shoulder roll forward or the hips sink.
Why this one earns a spot
Side planks train lateral stability. That means the trunk resists bending sideways, which helps in walking, carrying groceries, standing on one leg, and getting up from the floor without wobbling like a folding chair.
If the position feels fine but the shoulder complains, move to a wall side plank. If the back complains, reduce the hold time. If the neck tightens, check that the head isn’t drifting forward.
Short holds beat long grimacing ones. Every time.
9. Wall Plank
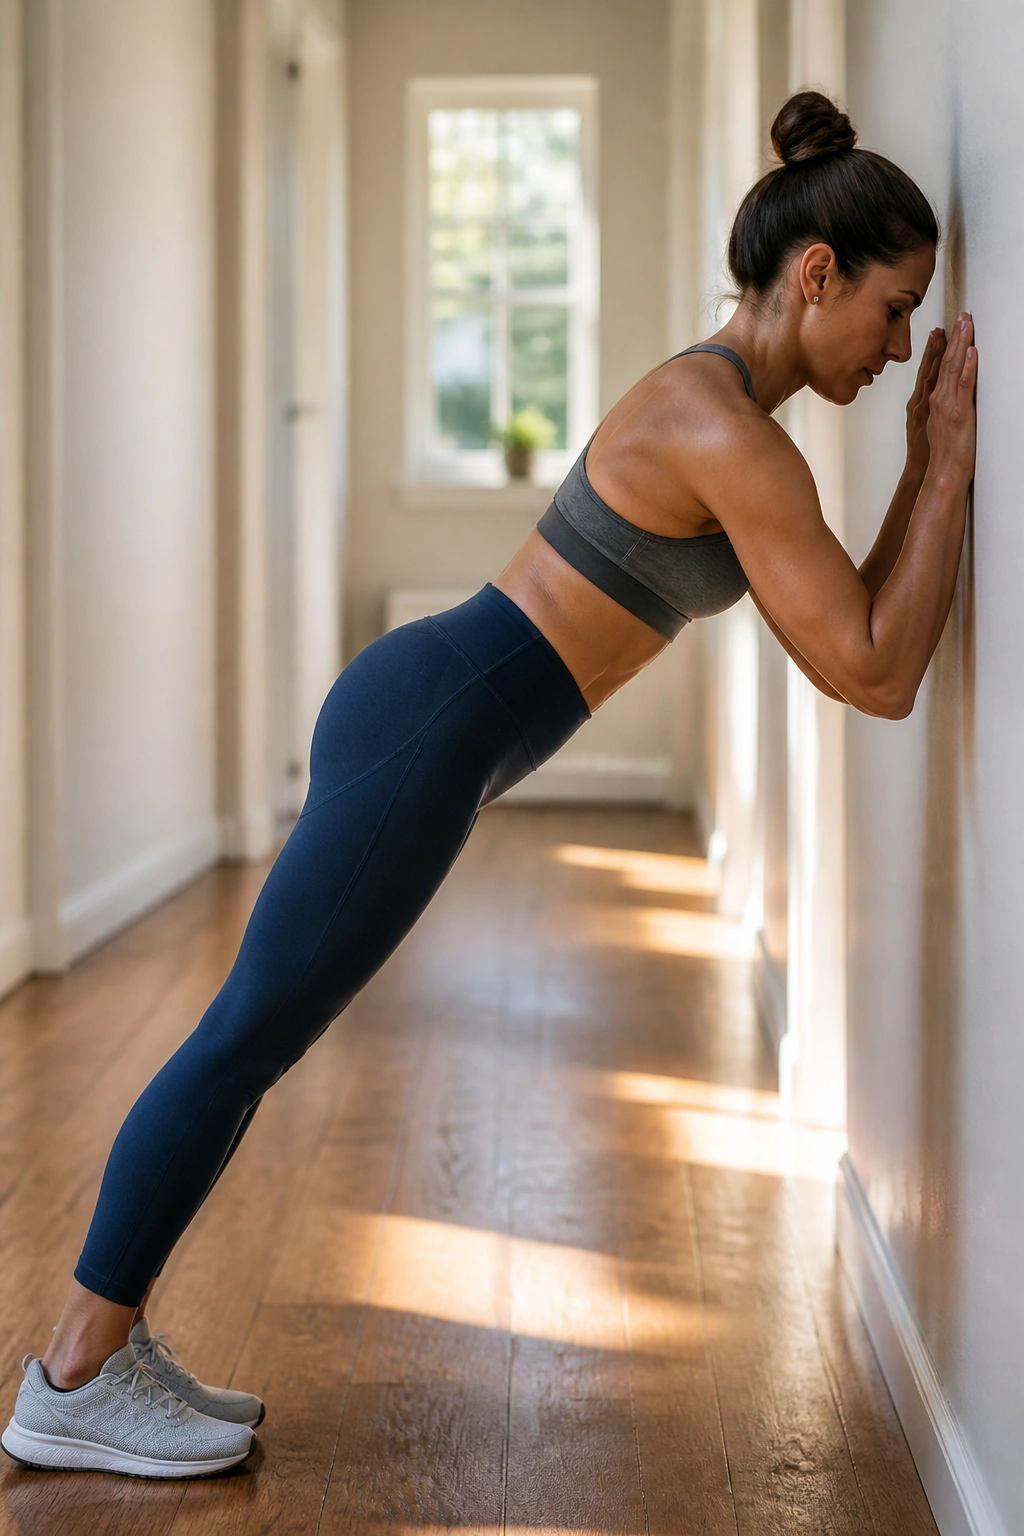
A wall plank is a low-drama way to build plank strength without dropping to the floor. Put your forearms or hands on a wall, walk your feet back, and make a straight line from ankles to head. You should feel your abs, glutes, and shoulders working together.
This version is especially useful on days when getting down on the ground feels like too much trouble. It also helps you keep the brace while breathing, which matters more than people think. A plank where you hold your breath is a plank that teaches the wrong lesson.
Make it better
- Keep the elbows or hands at chest height.
- Step the feet back until the load feels moderate, not crushing.
- Hold 15 to 30 seconds.
- Stop if the low back sags.
If the back pinches, move your feet closer to the wall. More distance is not always better. Sometimes the cleaner angle is the smarter one.
Wall planks are plain. That’s fine. Plain works.
10. Incline Forearm Plank
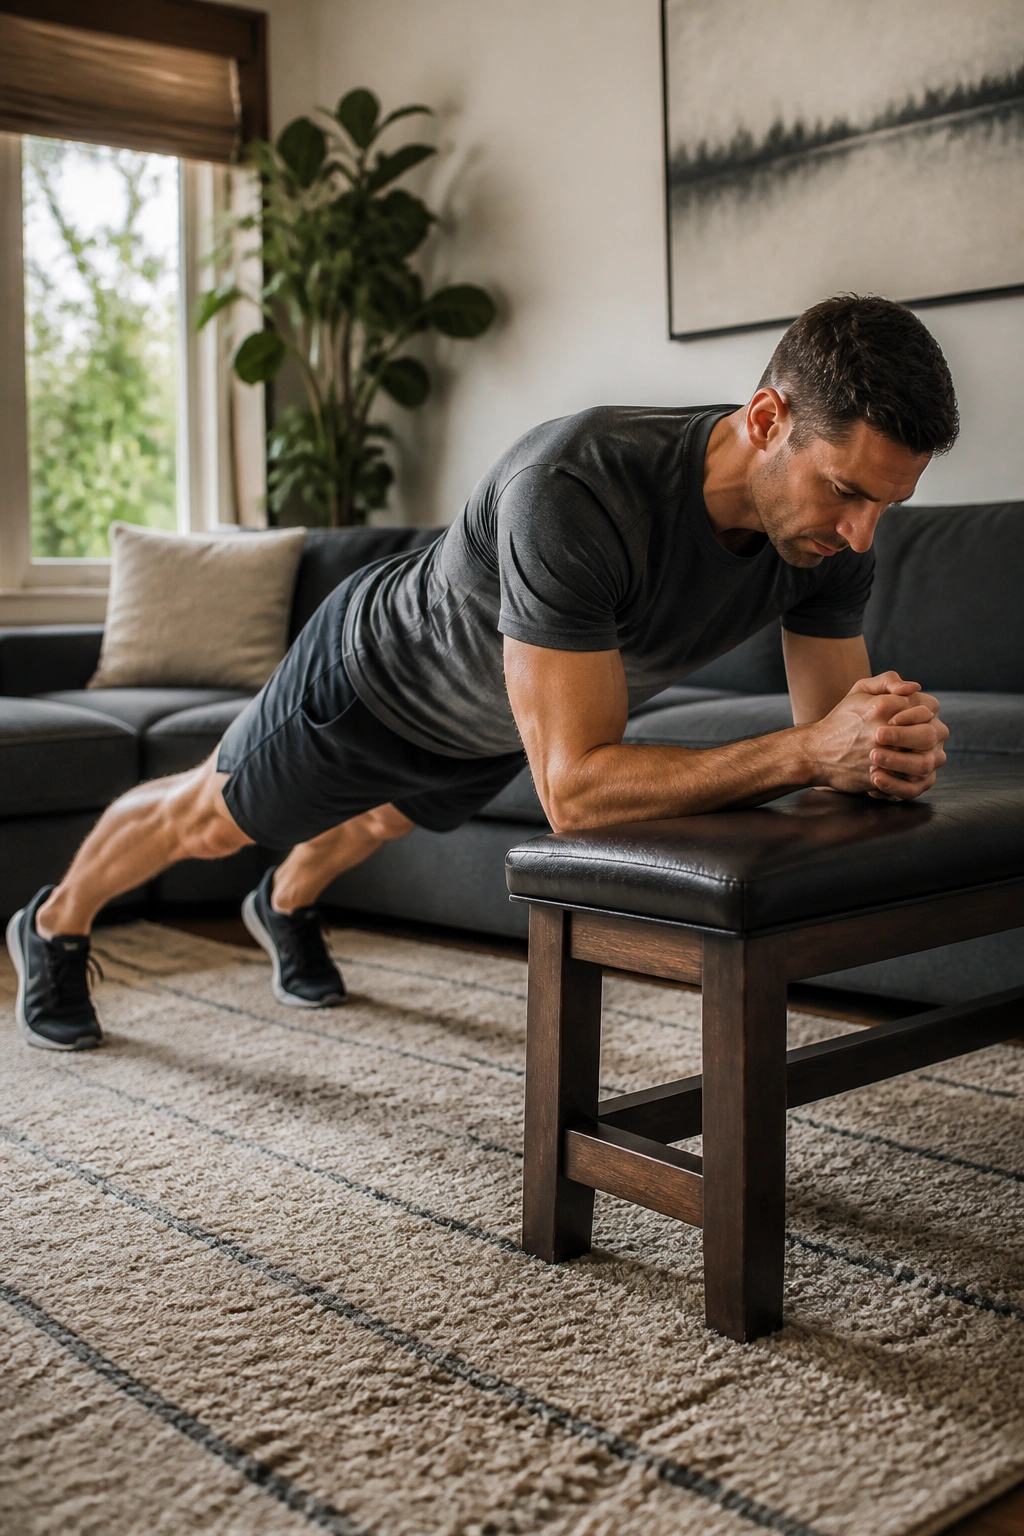
Think of this as the middle ground between a wall plank and a floor plank. Put your forearms on a bench, couch, sturdy table, or countertop, then step your feet back and hold a long body line. The incline reduces the load, which often makes the exercise much friendlier for people with back pain.
The key is to avoid turning it into a hanging lower-back stretch. Squeeze the glutes lightly. Draw the ribs down. Keep the neck in line with the spine. A good incline plank feels like your whole trunk is sharing the work instead of dumping it into the low back.
Best way to progress it
Start with 10-second holds and add time before you lower the surface. That progression is cleaner than chasing shakiness on the floor. If your back starts to complain, raise the incline again. No shame in that. The body does not hand out medals for using the hardest version on day one.
If you want one cue to remember, make it this: long body, quiet ribs.
11. Glute Bridge Hold
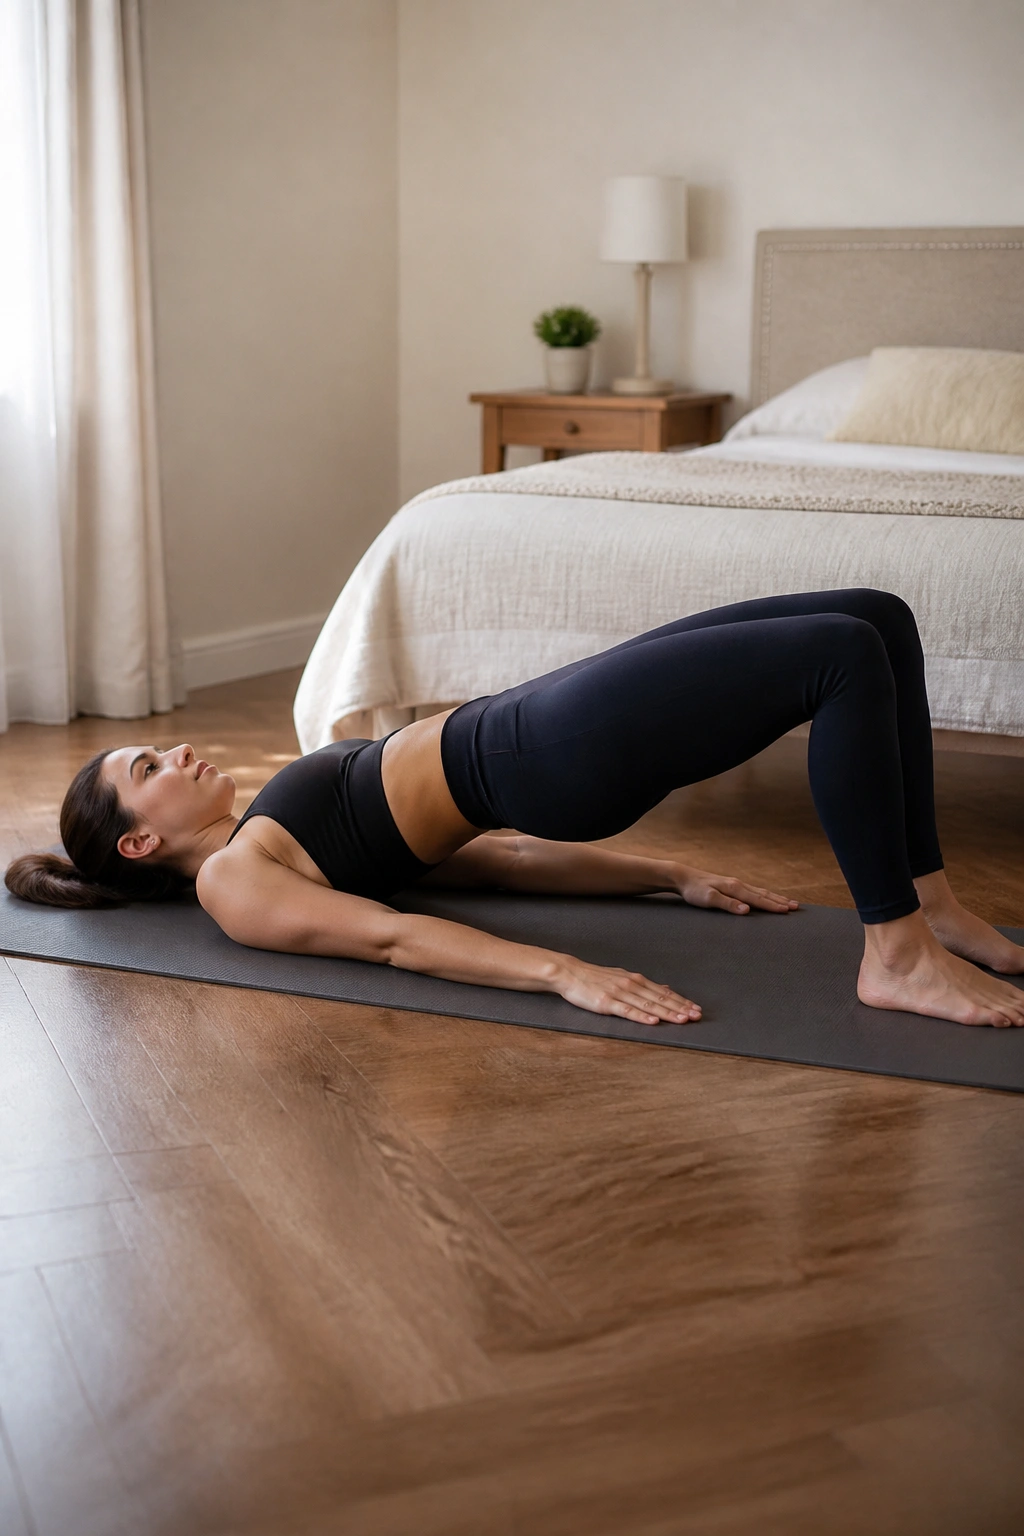
The glute bridge is partly a core exercise and partly a lesson in not letting the back do the hips’ job. Lie on your back with knees bent and feet flat. Exhale, brace lightly, then press through your heels and lift your hips until your body makes a straight line from shoulders to knees.
Hold for 5 to 10 seconds, lower, and repeat. The lift does not need to be high. If you crank the hips upward to the ceiling, the low back often takes over and the glutes disappear, which defeats the point. A modest bridge with the ribs down is usually better than a giant one with a hitch in the spine.
A few useful fixes
- If hamstrings cramp, move the feet a little farther away.
- If you feel the back more than the glutes, lower the bridge height.
- If you lose the brace, shorten the hold.
This one is a staple for a reason. It brings the posterior chain online, and backs tend to like that.
12. Bridge March
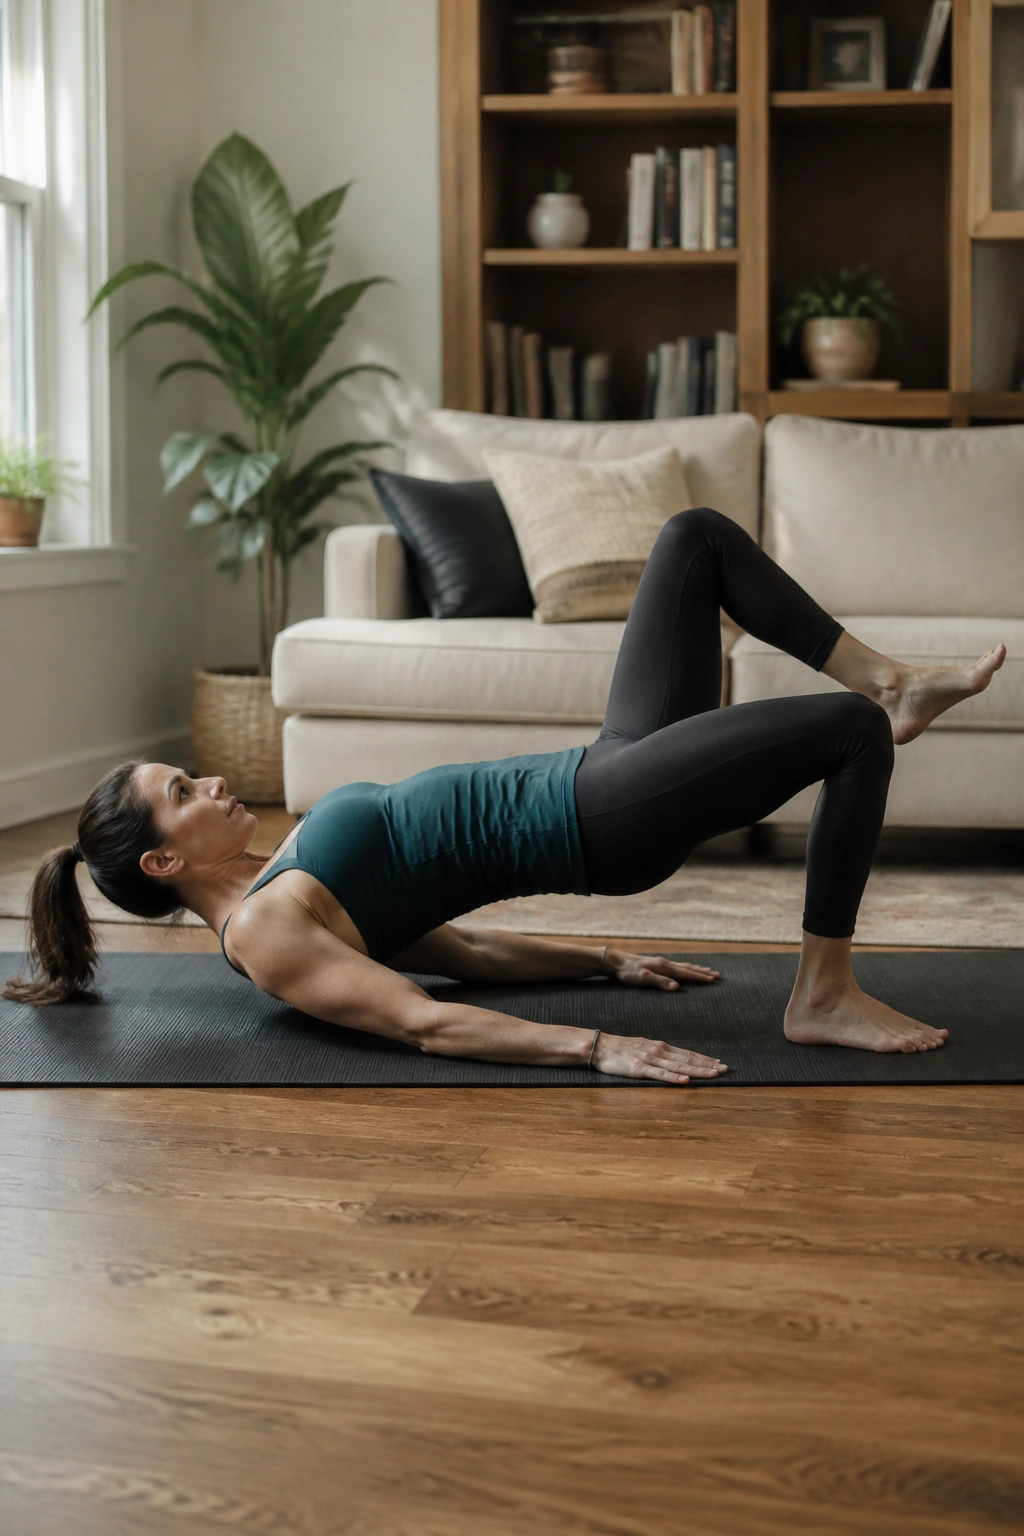
Once a plain bridge feels solid, bridge marching adds a little anti-rotation challenge. Lift into a standard bridge, then slowly raise one foot an inch or two and set it back down. Switch sides.
The goal is not to see how high the knee can go. The goal is to keep the pelvis from wobbling while one leg leaves the floor. If your hips tilt or the bridge drops, the march is too ambitious. Make it smaller. Or just tap one toe and return.
How to keep it clean
- Hold the bridge first before marching.
- Move one leg at a time.
- Keep the standing heel rooted.
- Breathe through the whole set.
Bridge marching is one of those sneaky exercises that feels mild for the first 20 seconds, then makes you realize the trunk is paying attention. That’s the good part. Use 4 to 6 marches per side to start.
13. Pallof Press Hold
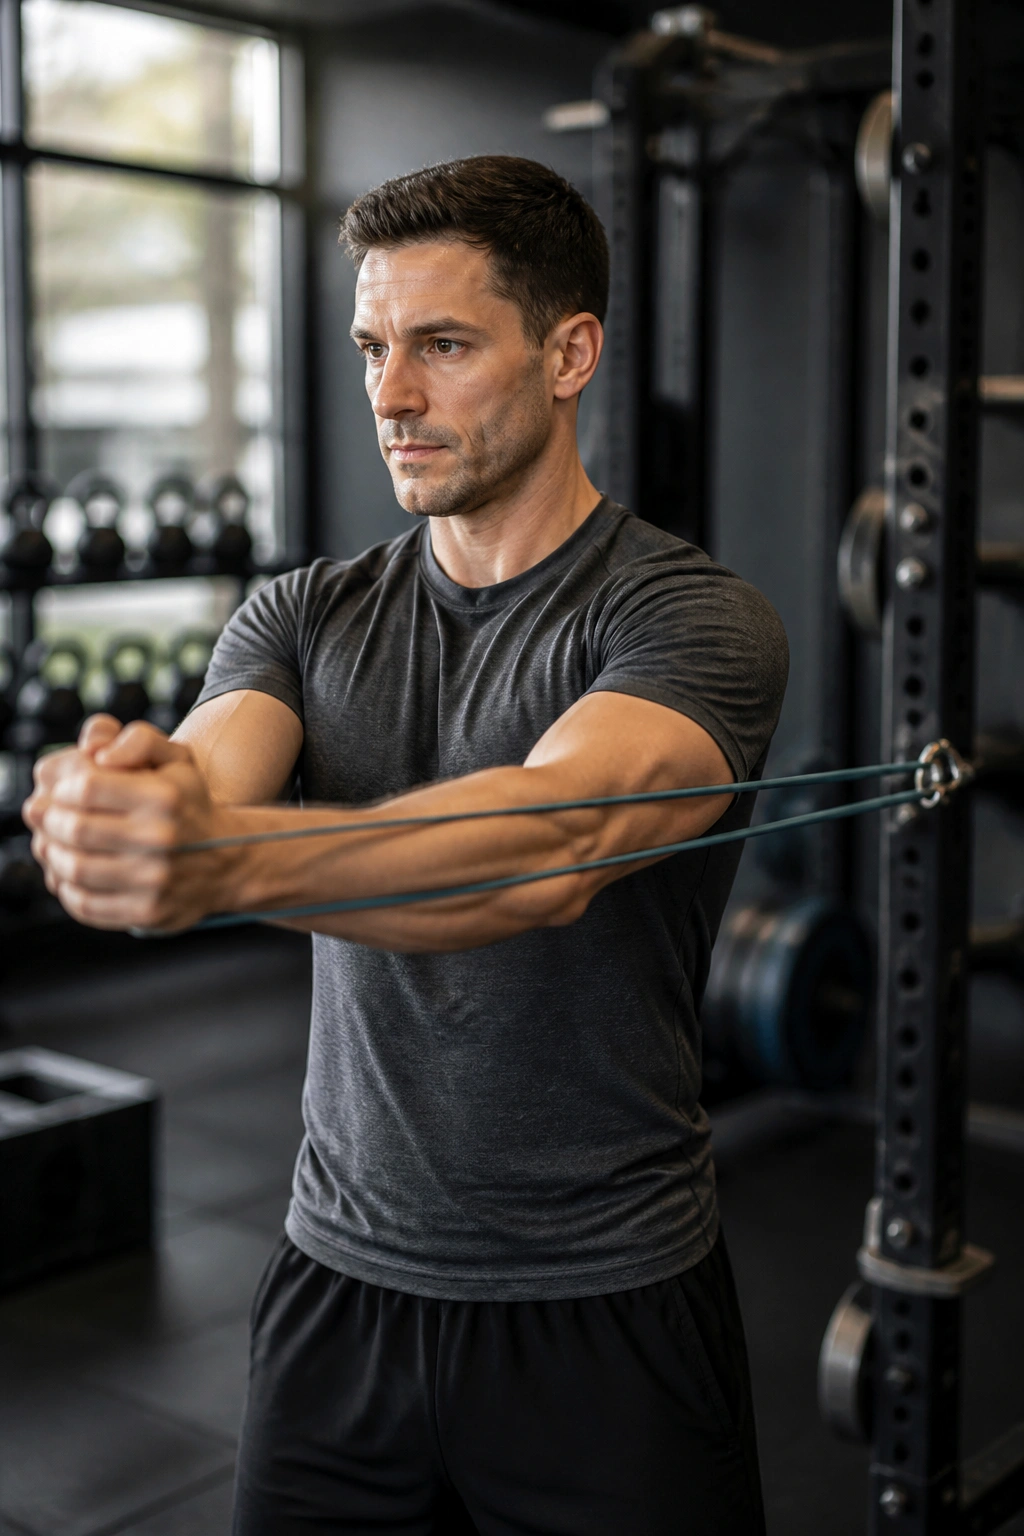
If your back hates twisting, the Pallof press is worth its weight in gold. Anchor a resistance band or cable at chest height, stand sideways to it, and hold the handle at your chest. Press straight out, keep the torso from turning, hold for a few seconds, then bring it back.
That’s the whole game: resist rotation. Not flashy. Very useful.
Why it helps
The spine does not need a ton of repeated twisting when it is already irritated. What it often needs is a better ability to resist twist under load. The Pallof press trains exactly that. It also teaches you to keep the ribs stacked over the pelvis, which carries over to lifting, carrying, and even standing still without sinking into one hip.
If standing feels too much, do it half-kneeling. That narrows the base of support and often makes the trunk work harder without increasing back strain. Hold the press for 5 to 8 seconds. A few clean reps are enough.
Do not rotate toward the band. That little cheat steals the whole benefit.
14. Standing March With a Brace
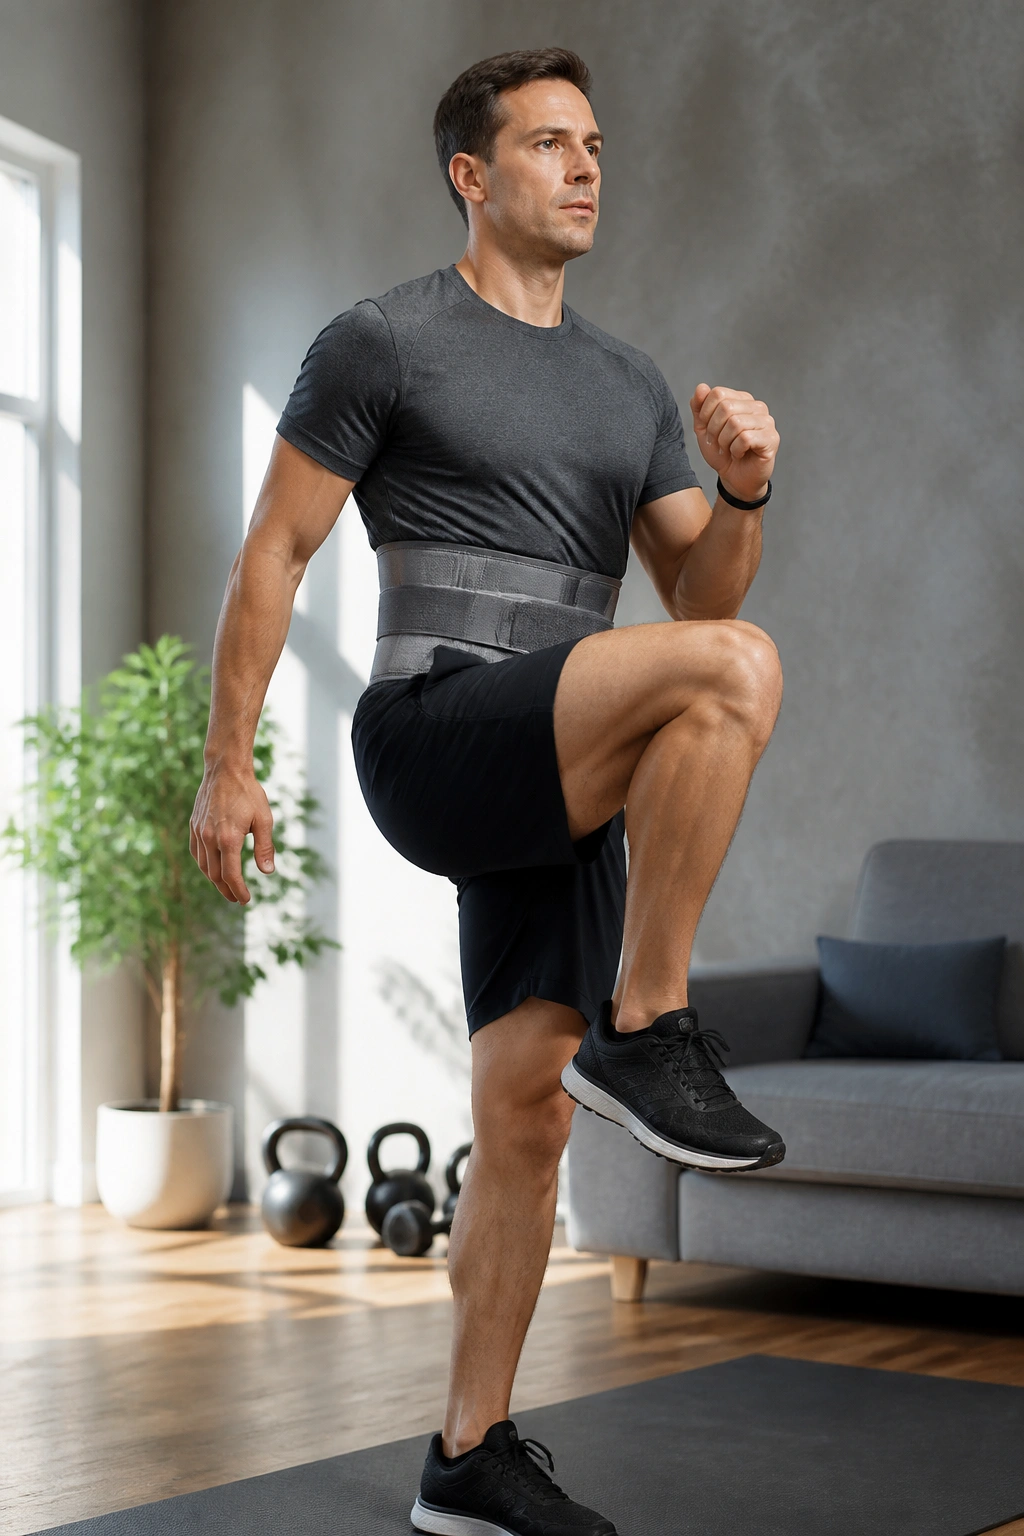
Sometimes the best core exercise is the one that looks like walking in place, because that’s closer to real life than most people expect. Stand tall, set a light brace, and march slowly without letting the pelvis sway side to side.
This drill is gold for carryover. It links core control, hip flexor action, and posture in a very simple pattern. If your back tends to ache after standing around too long, marching with control can wake up the system without loading it heavily.
Helpful cues
- Keep your chest relaxed.
- Lift the knee only as high as you can while staying steady.
- Imagine the zipper of your pants staying centered.
- Use a wall or countertop for light support if needed.
A short set of 20 to 30 seconds works well. If one side feels shakier, slow down and keep going. That’s useful information, not a failure.
Sometimes the boring drill is the one that fixes the day.
15. Suitcase Carry

Pick up one dumbbell, kettlebell, or even a heavy grocery bag and walk. That’s a suitcase carry. The trick is to not lean toward or away from the weight. Your body should stay tall and level while one side works hard to keep you from tipping.
This is one of the cleanest core exercises for back pain because it teaches the trunk to fight side-bending under load. That’s the kind of strength that matters when you carry a laundry basket, child, backpack, or awkward bag of dog food from the car.
Start here
- Use a light-to-moderate weight.
- Walk 20 to 40 feet.
- Switch sides.
- Keep the steps smooth.
If you feel your shoulder hunching up to your ear, the load is too heavy. If you lean, it’s too heavy. If you hold your breath, it’s too heavy. There’s a theme here.
Suitcase carries should look calm, even when they’re doing a lot behind the scenes.
16. Half-Kneeling Band Chop
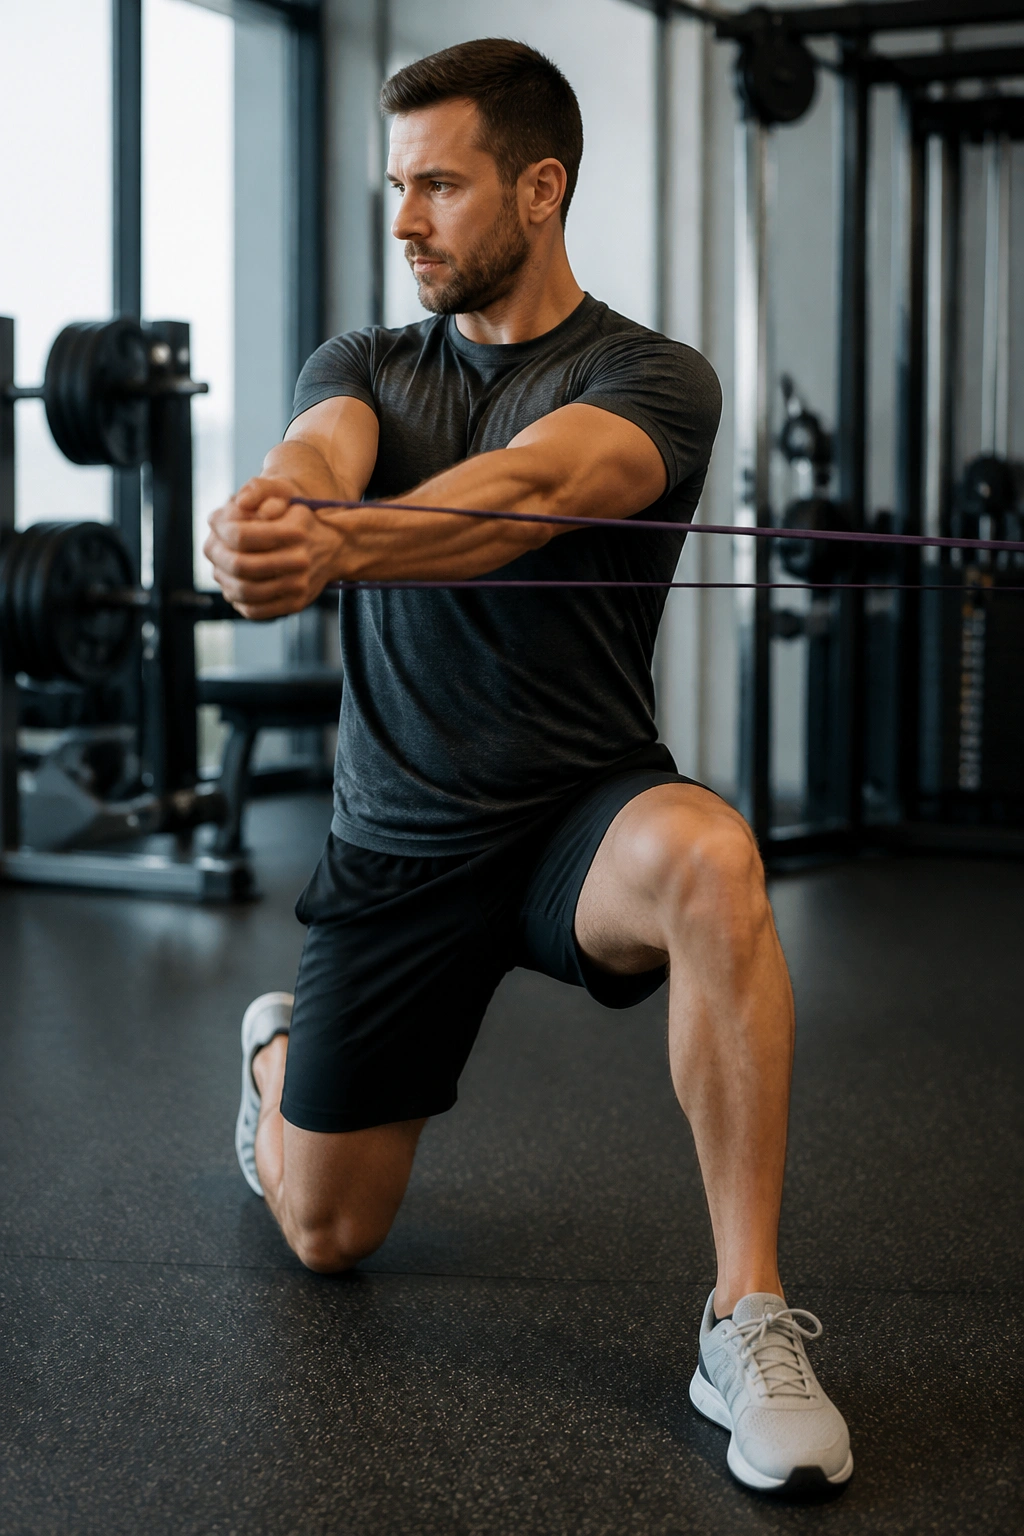
A half-kneeling band chop is a smart way to train the trunk without asking the spine to twist wildly. Set one knee on the floor, the other foot in front, and anchor a band high or low depending on the direction you want. Pull the band across your body in a controlled arc while keeping the hips square.
The half-kneeling position reduces cheating. It also makes the hips and ribs work together instead of letting the lower back spin off on its own. That makes it useful for people who feel okay with the floor but not okay with standing twist work.
Why half-kneeling helps
One knee down narrows the stance and makes balance a little more honest. Your core has to organize the movement instead of letting momentum do the job. The lift and the chop both work, but the chop is usually easier to keep tidy if your back is sensitive.
Keep the motion smooth. Eight slow reps is enough. No yanking. The band should feel controlled from start to finish.
17. Hip Hinge Wall Tap
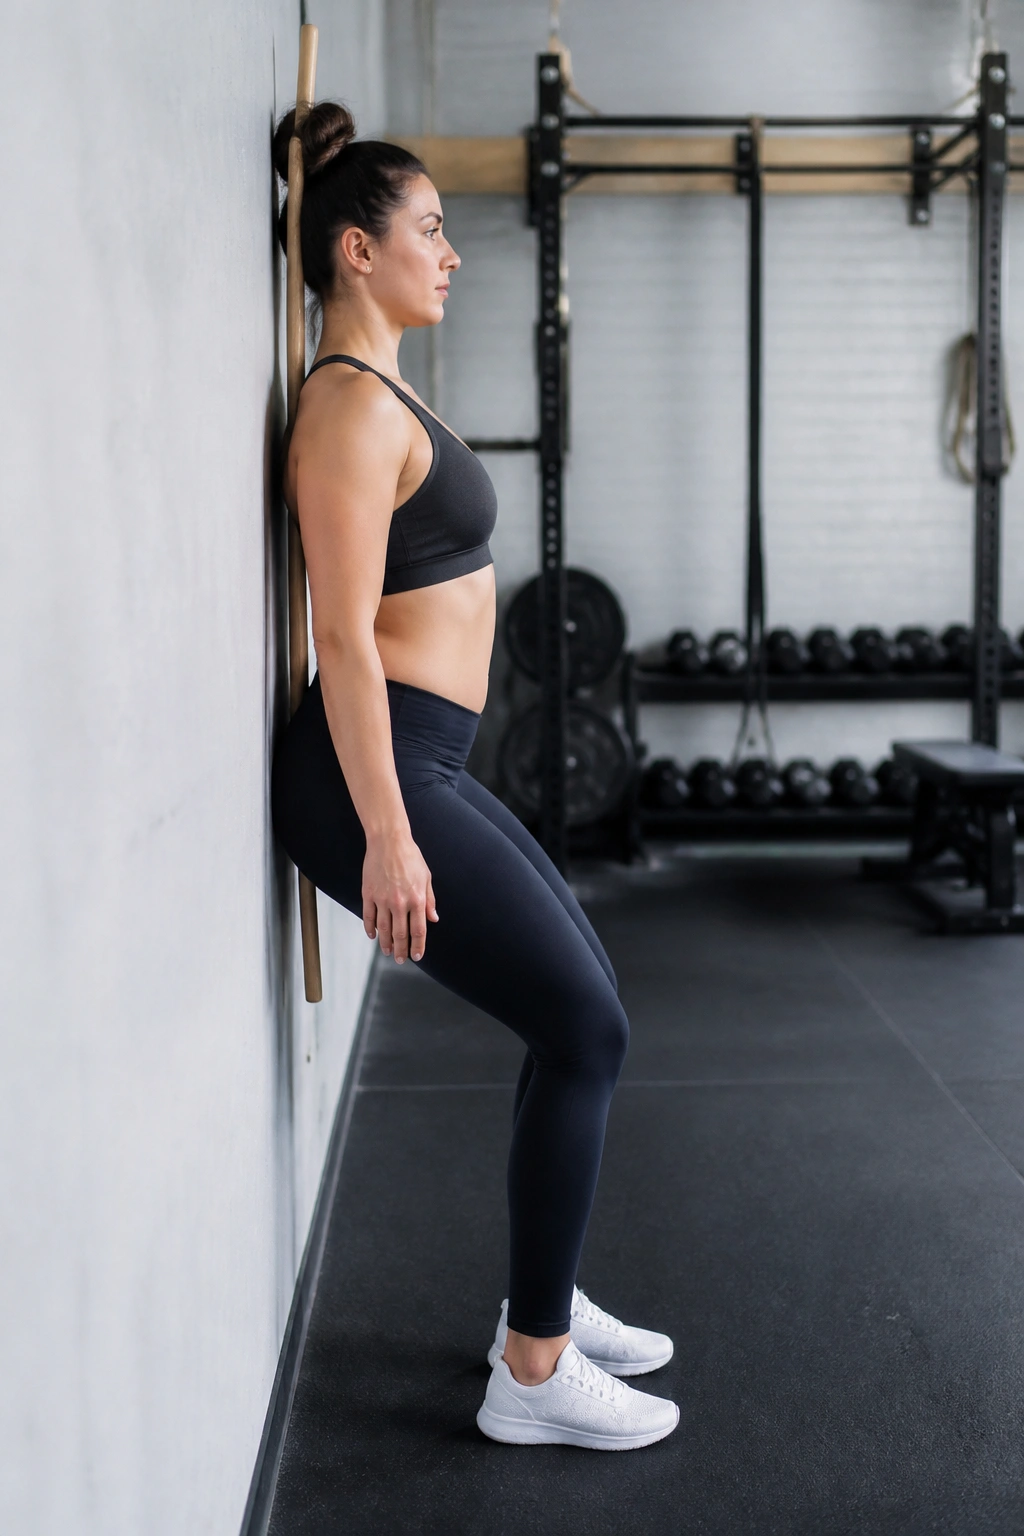
Not every helpful core drill looks like an ab exercise. The hip hinge wall tap teaches you how to bend at the hips while keeping the spine in a stronger position, which is a huge deal for back pain.
Stand about 6 to 8 inches from a wall with your back to it. Soften the knees, push the hips back, and tap the wall with your glutes. Return to standing. If you do it right, the trunk stays braced and the movement comes mostly from the hips.
Why this matters
A lot of backs get annoyed because the hips are not sharing enough of the load. People round their spine to pick up a pan, bag, or box, then wonder why the low back objects. The hinge teaches the body a cleaner pattern before you ask it to carry real weight.
Use a broomstick or dowel along your head, upper back, and tailbone if you want feedback. It should stay in contact with all three points during the hinge. That makes the drill brutally honest in the best way.
18. Seated Band Press-Out
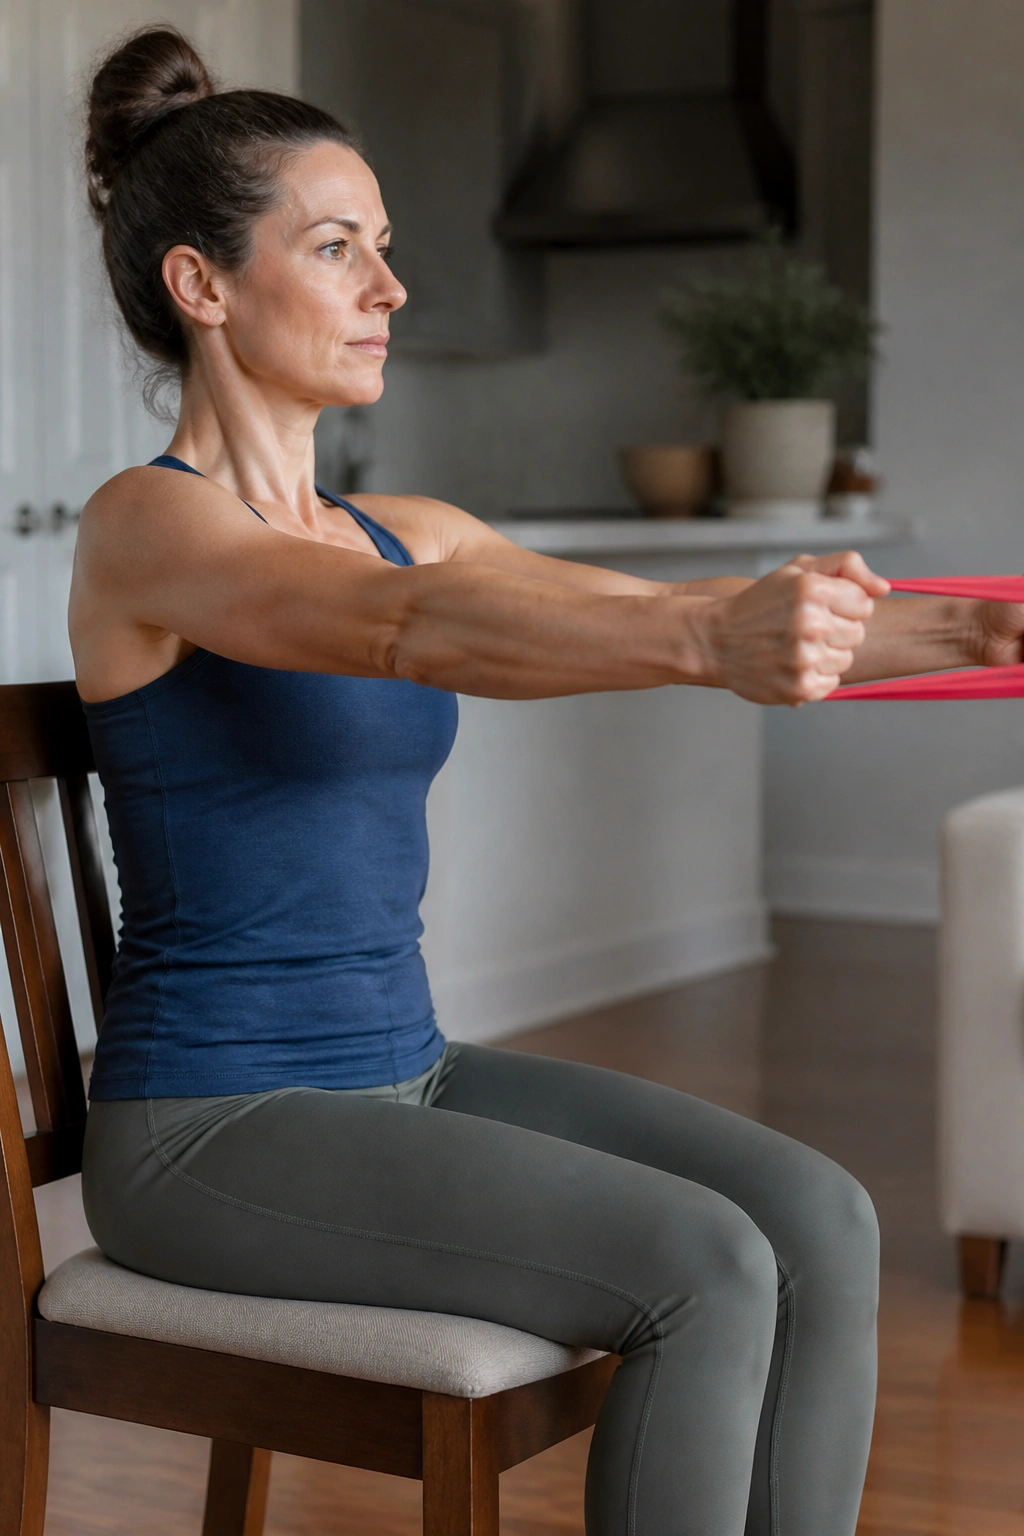
This is the quiet finish. Sit tall on a sturdy chair, hold a resistance band or press your palms together out in front of your chest, and extend the arms without letting the ribs flare or the torso twist. Hold the position for a few seconds, then bring the hands back.
It is a small drill, but it has a useful job: teach the trunk to stay organized when the hips are not doing much. That makes it a decent option for flare-up days, travel days, or any stretch of time when getting down to the floor feels like a hassle.
Make it worth doing
- Sit on both sit bones, not slumped backward.
- Keep the feet planted.
- Exhale as you press out.
- Stop if the shoulders creep up.
If sitting itself bothers your back, skip this one. That’s fine. Use the hinge or the wall plank instead. The point is to keep some core work in the day without poking the sore spots.
Final Thoughts
Back pain rarely likes brute force. It tends to respond better to clean control, smaller ranges, and exercises that teach the torso to stay steady while the hips and arms move around it.
If you want a simple starting point, pick four or five moves: 90/90 breathing, modified curl-up, bird dog, side plank from the knees, and suitcase carries. That mix hits breathing, anti-extension, anti-rotation, and side stability without asking the back to do too much too soon.
Progress by making the reps cleaner, the holds a little longer, or the incline a little lower. Do not chase pain. Chase control. That’s the part most people skip, and it’s usually the part that changes how your back feels when you stand up, walk the stairs, or lift something off the floor.
