



Low-intensity home workouts for sore joints usually work better than the kind of exercise that makes you grit your teeth. When knees, hips, shoulders, or wrists are stiff, the goal is not to prove anything. It is to move enough that the joint gets warmer, the muscles wake up, and the next hour feels less cranky.
A five-minute chair drill can beat a 30-minute battle with your own body. That sounds modest. It is. But joints often settle down when they get gentle repetition, a little support from a wall or countertop, and a range of motion that never crosses into sharp pain.
The details matter more than people think. A slow sit-to-stand from a chair is a different animal from a full squat; a wall push-up is not a floor push-up with better marketing. Same family, different load, and your joints notice the difference fast.
Keep the discomfort mild — around 2 or 3 out of 10, if you like a number — and stop if something feels hot, swollen, catching, or sharp. Start with the easiest move here, then build a short routine from there. The first one is about as friendly as exercise gets.
1. Seated Marching: A Low-Intensity Home Workout for Sore Knees and Hips
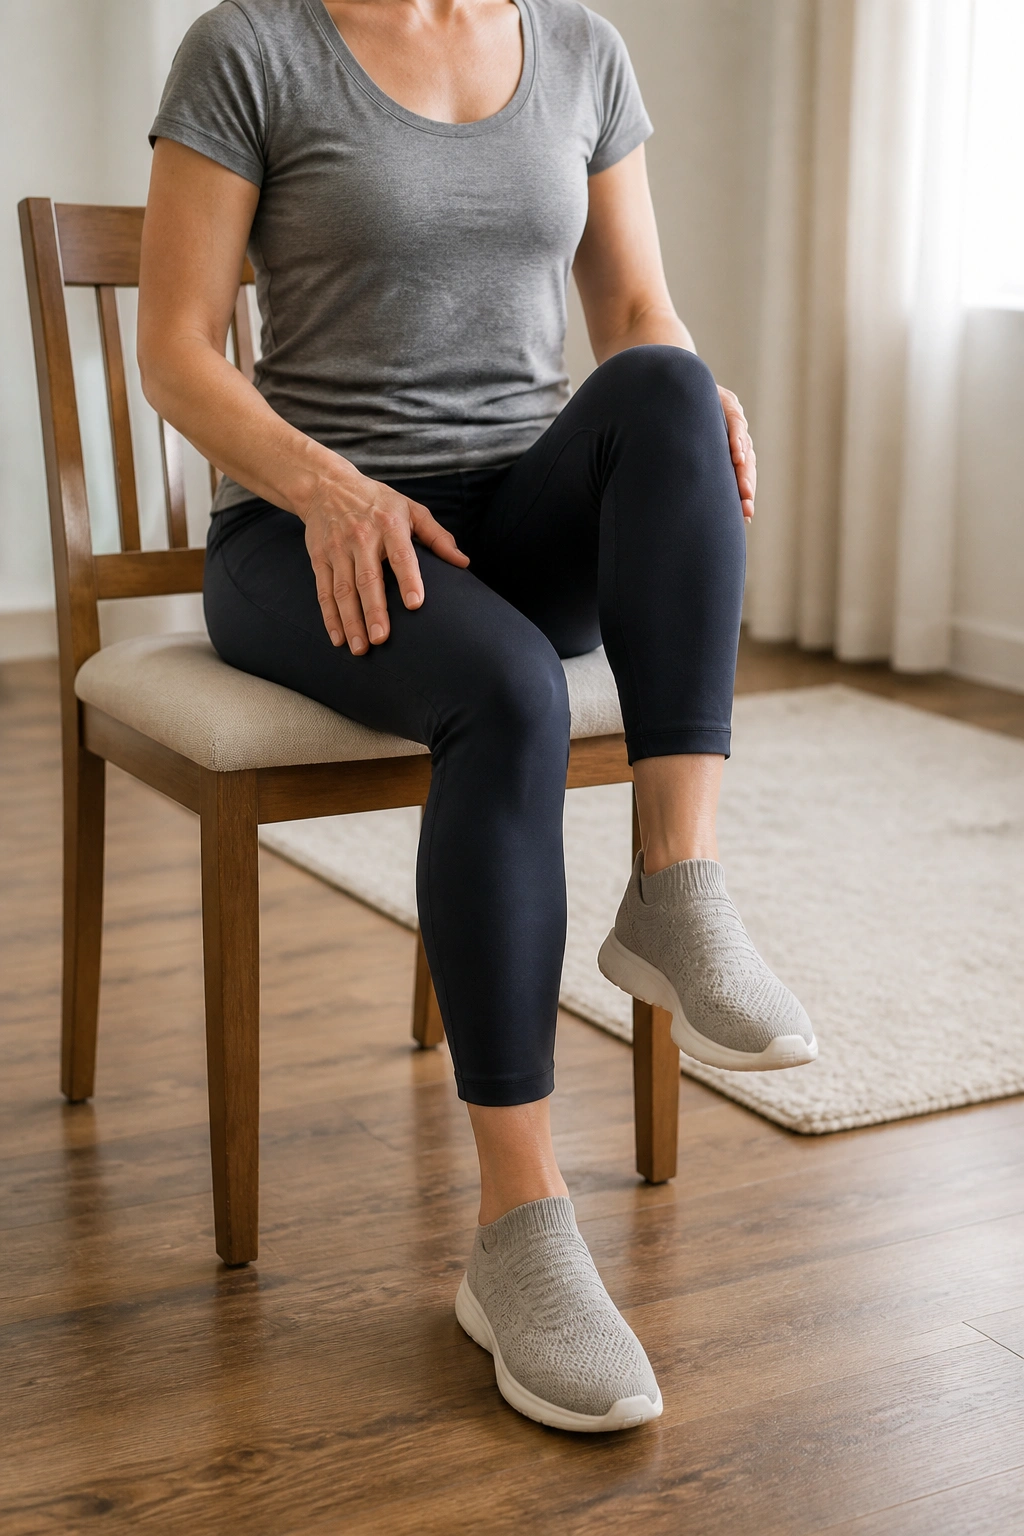
A chair can do more than hold you up. It can give sore joints a place to move without demanding that your knees or hips carry your whole body weight.
Seated marching is one of those plain little drills that looks almost too simple to matter. Then you do it for 45 seconds and realize your hip flexors were asleep, your lower abdomen had gone slack, and your circulation was begging for a nudge.
Why It Works
The lift comes from the hip, not the knee. That is the whole trick.
When you march one leg at a time, you warm the muscles that help you stand, walk, and climb stairs without asking the joint to absorb impact. Keep the lift low — 1 to 2 inches is enough — and the motion stays friendly to people who hate deep bending.
- Sit near the front edge of a sturdy chair with both feet flat.
- Lift one knee slowly, then lower it before switching sides.
- Aim for 20 to 40 seconds per set, or 10 to 20 lifts per side.
- Keep your hands light on the chair or on your thighs so the torso stays tall.
How to Keep It Easy
If your hips pinch, make the lift smaller. If your back starts to round, sit a little taller and slow down. No one gets bonus points for speed.
My favorite version is a gentle march paired with steady breathing: exhale on the lift, inhale on the lower. It turns a basic drill into a quiet reset, which is often what sore joints need most.
2. Wall Push-Ups for Sore Shoulders and Wrists
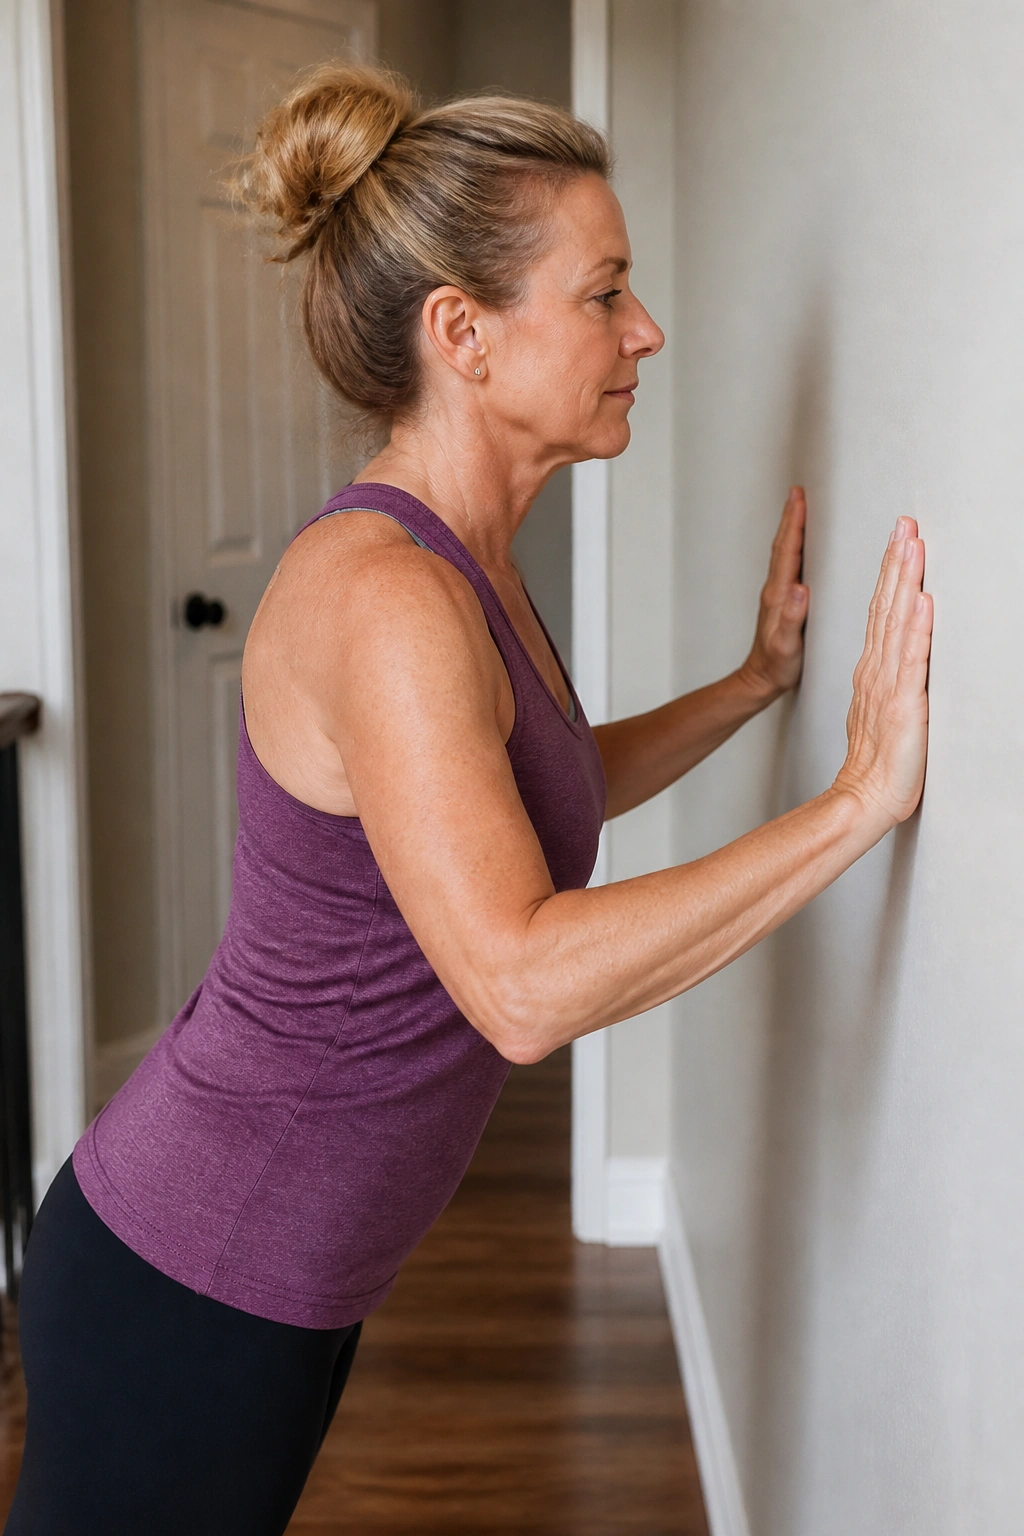
Wall push-ups look plain. That is the point. They give you the pushing pattern of a regular push-up without the wrist angle, floor load, or shoulder strain that can make sore joints complain.
A lot of shoulder discomfort comes from being weak in the muscles that stabilize the front of the body, not from being unable to move at all. Wall push-ups let you work through a clean range while keeping your chest, shoulders, and elbows in a line you can control.
Stand about arm’s length from a wall and place your hands at chest height. If your shoulders are touchy, put them a little higher. A higher hand position reduces the load and usually feels kinder right away.
Lower your chest toward the wall for 5 to 8 slow reps, keeping your elbows at about a 30- to 45-degree angle from your sides. Then press the wall away until your arms are straight, but do not lock your elbows hard. That little bend at the top keeps the movement smoother.
No floor work needed.
If your wrists hate extension, wall push-ups usually feel better than kneeling or full push-ups. If the shoulders pinch at the bottom, stop higher and keep the range smaller. I would rather see a short, easy set done well than a deep set that makes you wince for the rest of the day.
3. Heel Raises at the Counter for Ankles, Calves, and Knee Support
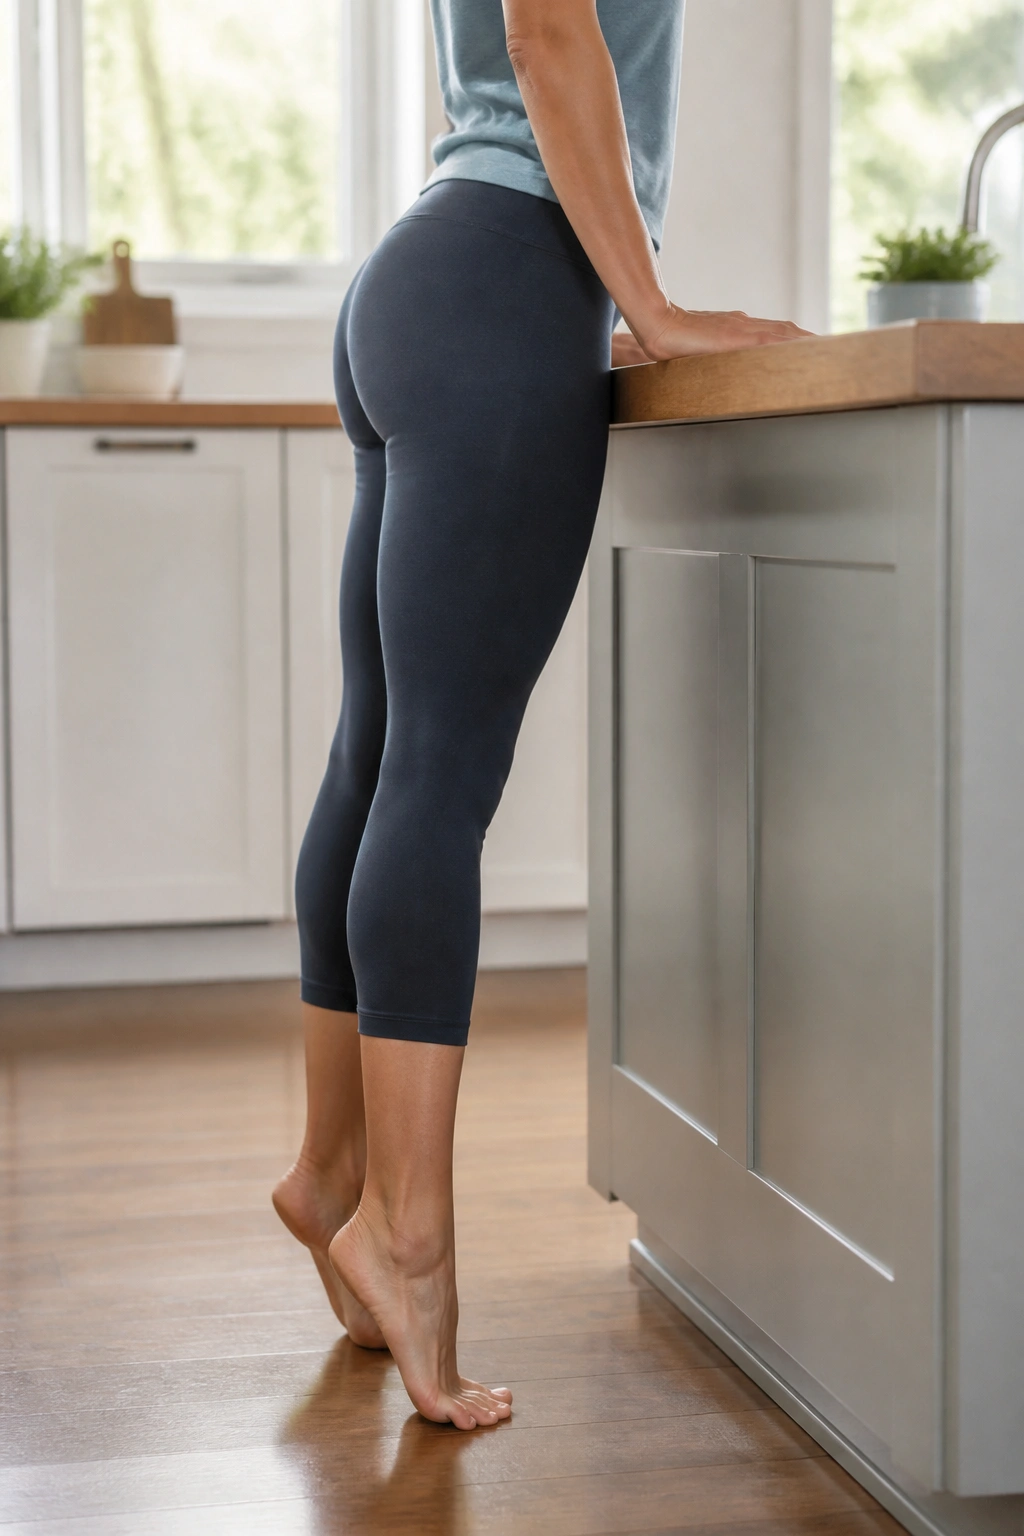
Can calf raises help sore knees? Usually, yes.
The ankle and calf are part of the same chain that carries you through a step, and weak or stiff lower legs can make the knees do extra work. Heel raises are one of those boring exercises that quietly improve the way standing and walking feel.
How to Use It
Stand behind a counter or sturdy table and hold it lightly. Rise onto the balls of your feet over 2 seconds, pause at the top for 1 second, then lower for 3 seconds so you do not just drop back down.
Do 8 to 15 reps with both feet first. If that feels easy and your balance is solid, try one foot at a time. The one-foot version is a lot harder than it looks.
If the calves cramp, shorten the range and slow the breathing. If the ankles wobble, keep both hands on the counter. There is no rule that says balance work has to be dramatic.
What to Watch For
The heel should lift straight up, not drift inward or outward. That tiny detail matters more than it seems, especially if your knees tend to cave when you stand up.
A small set of heel raises before a walk or after a long stretch of sitting can take the edge off that stiff, heavy feeling in the lower legs. It is not flashy. It works anyway.
4. Indoor Walk Intervals That Warm Stiff Joints Without Beating Them Up
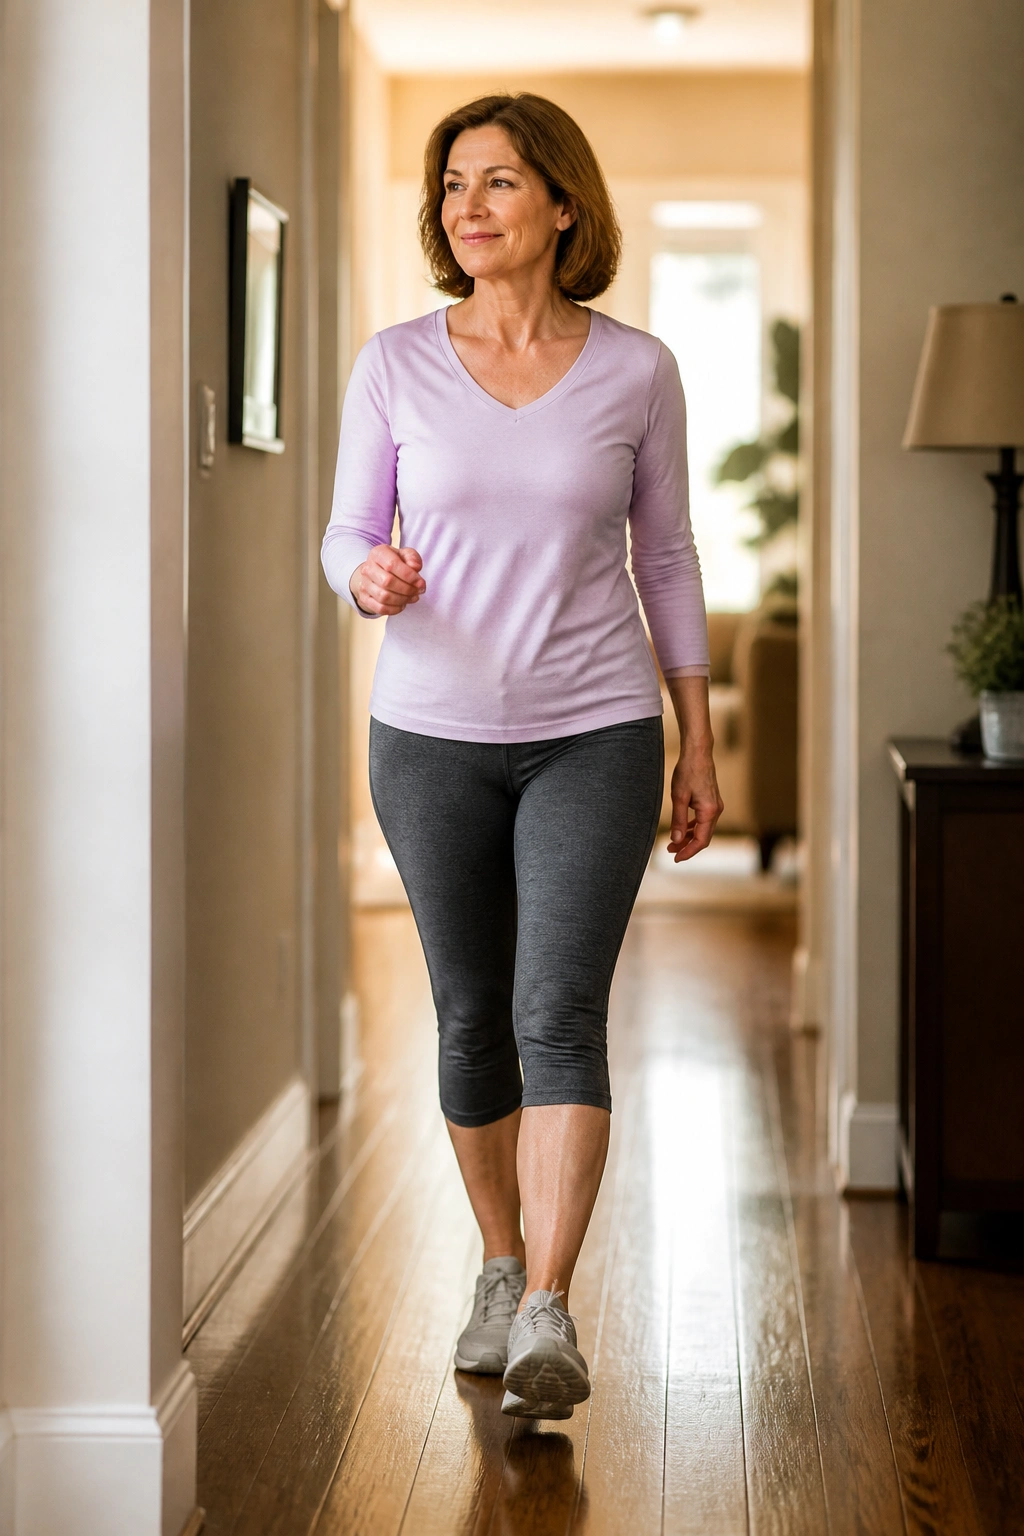
A lap around the kitchen might not look like exercise to anybody else. On a day when your knees feel rusty after sitting, it can be a small miracle.
Indoor walking is one of the cleanest low intensity home workouts for sore joints because it adds rhythm without impact. You are not jumping, twisting, or sinking into deep angles. You are just giving the hips, knees, ankles, and feet a chance to remember how they work together.
Try 1 minute of easy walking, then 30 seconds of slower walking, and repeat that pattern 5 to 8 times. Keep your steps quiet. If your feet slap the floor, shorten the stride a little and soften the knees.
- Walk the hallway, kitchen, or living room loop.
- Keep your shoulders loose and your hands relaxed.
- Turn around slowly instead of pivoting hard on one foot.
- Wear supportive shoes if the floor is hard; go barefoot only if the surface is safe and your feet like it.
The point is not pace. The point is to stay warm enough that the joints stop sounding like creaky hinges. If you want a useful rule, this is it: you should be able to talk in full sentences the entire time.
5. Bird Dog on the Floor for a Quiet Core and a Happier Low Back
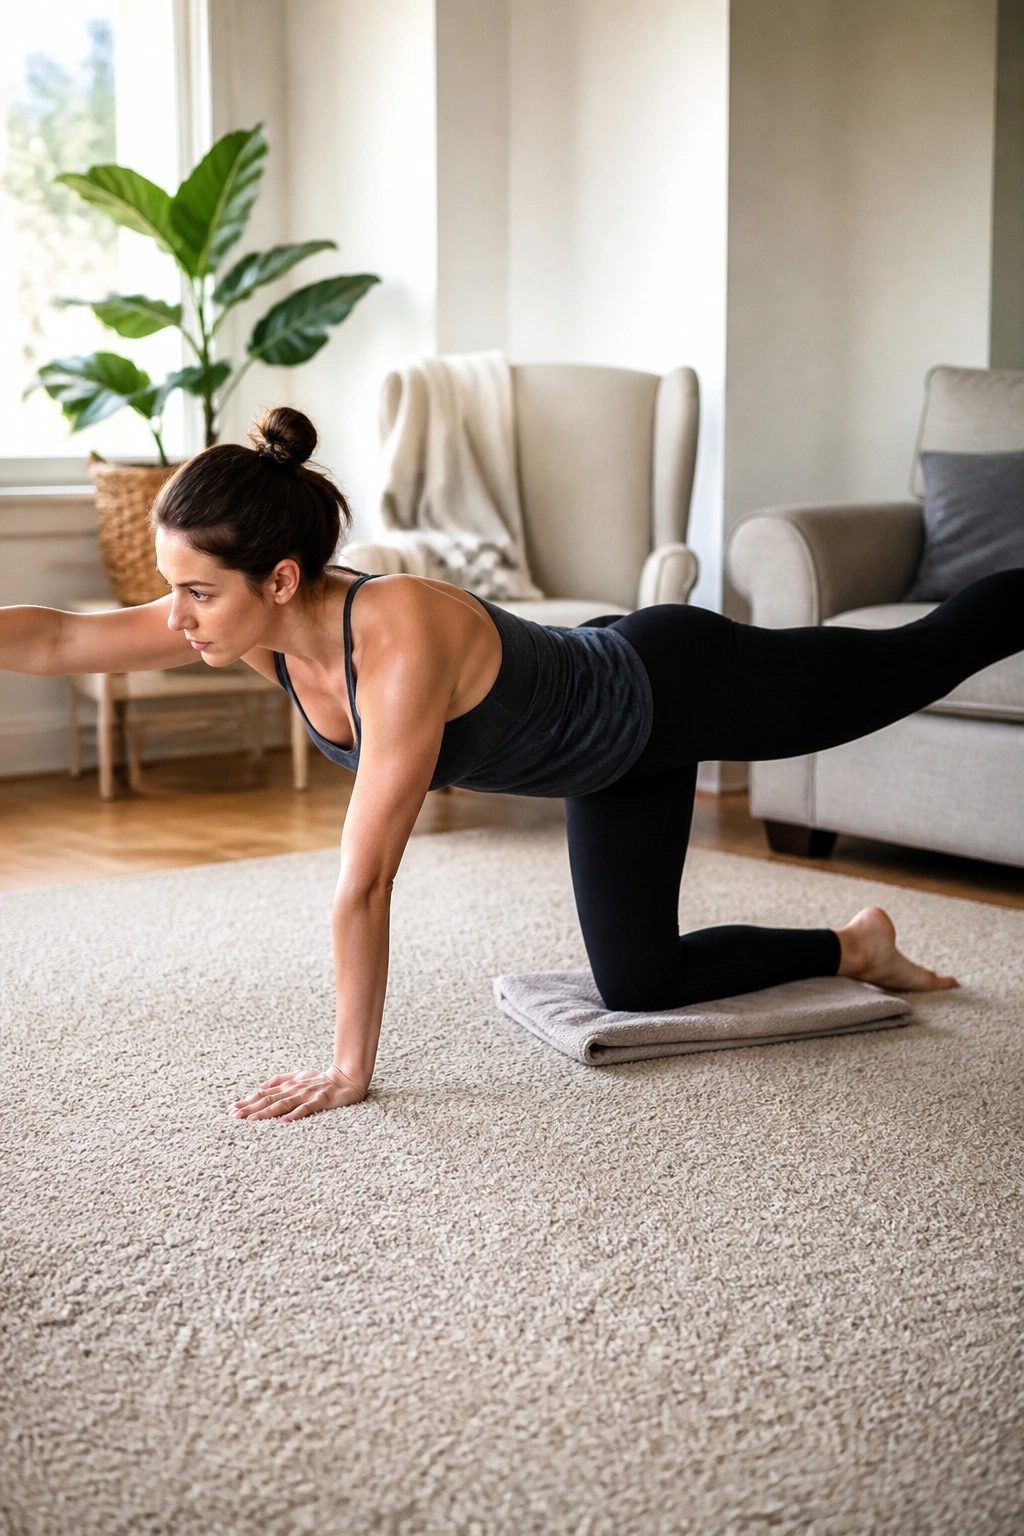
Bird dog is one of those floor moves that feels almost too calm until your low back starts acting up. Then it earns its place fast.
It works because it asks your trunk to stay steady while one arm and the opposite leg reach away from center. That cross-body pattern is useful for balance, posture, and the kind of core stability that keeps hips and backs from taking every little strain.
Get on hands and knees with a folded towel under the knees if the floor feels hard. Reach one leg straight back until the heel is level with the hip, and extend the opposite arm forward until it feels long, not strained. Hold for 3 to 5 seconds, then return with control.
That is enough. Seriously.
Do 6 to 8 reps per side and keep the motion small if your back is sensitive. The goal is a steady spine, not a giant reach. If the wrists ache, shift a little more weight back toward the knees and keep the palms planted with fingers spread wide. If the knees hate the floor even with padding, skip this one for now and come back later.
When bird dog is done well, it feels almost quiet. That quiet is the good part.
6. Sit-to-Stand Reps From a Chair
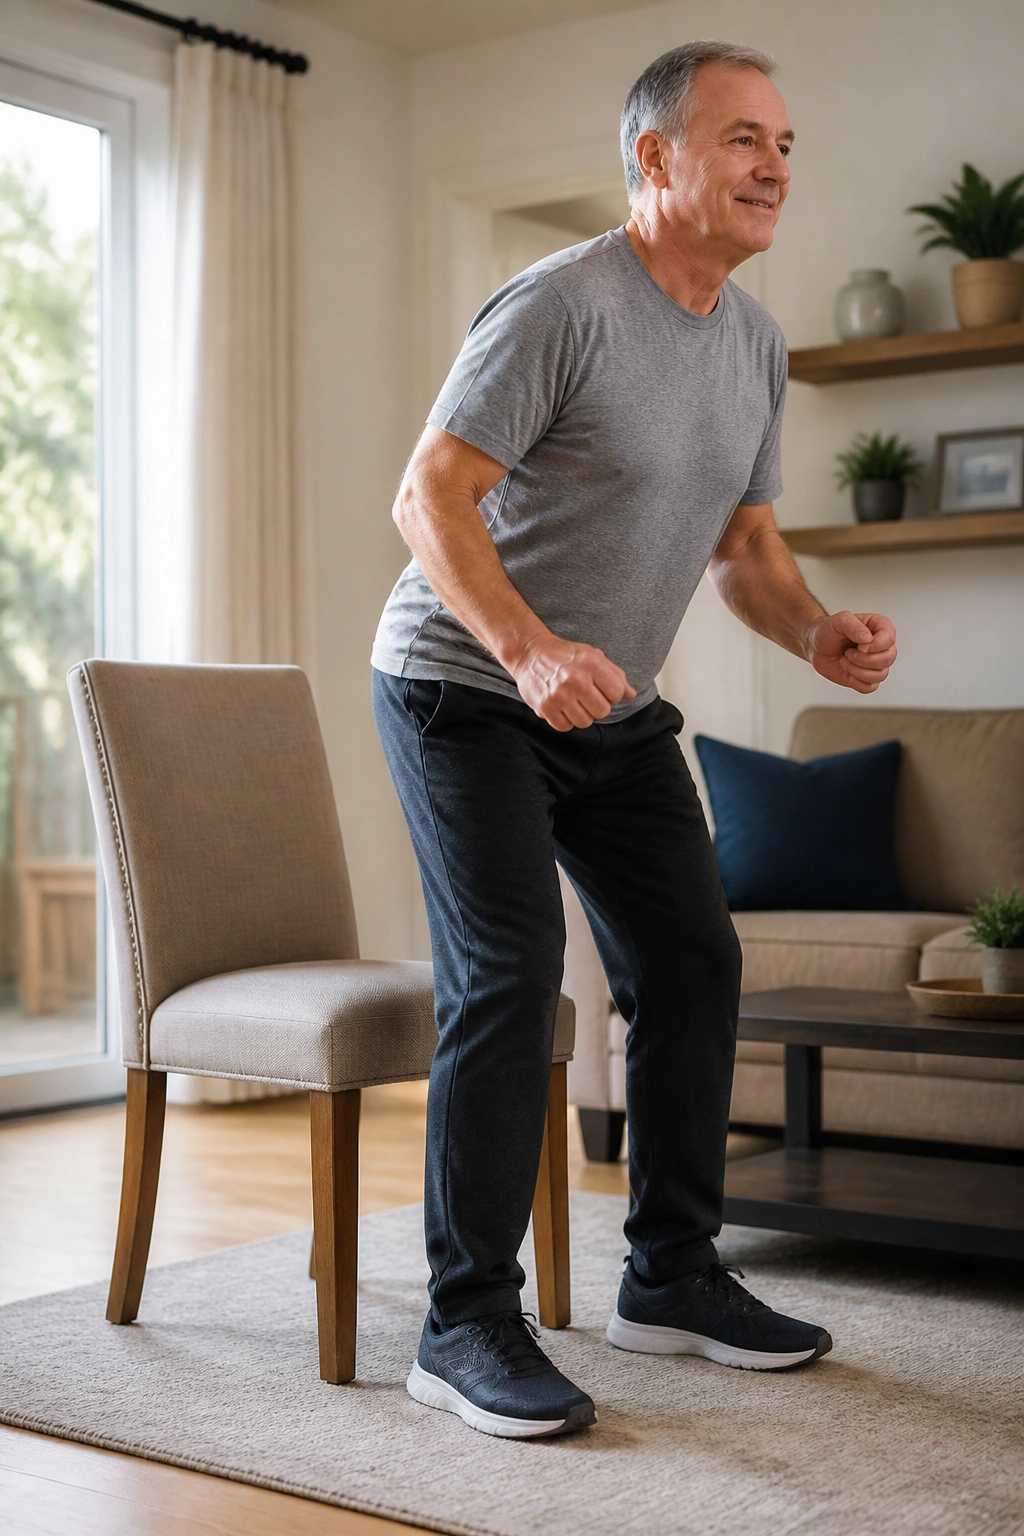
Unlike a deep squat, a sit-to-stand gives you a clear bottom and a clear top. That matters when knees are grumpy because the chair tells you exactly how far to go.
I like this move for sore joints because it trains real life. You sit down, stand up, and do it again without collapsing into a hard angle or bouncing at the bottom. The chair keeps the depth honest.
Sit on a firm chair with your feet about hip-width apart and your heels under your knees. Lean forward slightly from the hips, press through the feet, and stand up in one smooth motion. Then lower yourself back down for 2 to 3 slow seconds.
Do 5 to 10 reps. If that feels too easy, make the lowering phase slower before you chase extra reps. Slower down is harder than people expect, and it loads the thighs and glutes without needing more depth.
A higher chair is kinder than a low one. Use your hands on your thighs if you need to, especially on the first few reps.
This is one of the few exercises I would recommend before most others for people whose knees feel stiff after sitting. It is practical, it is easy to scale, and it teaches your legs to share the work again.
7. Seated Cat-Cow as a Low-Intensity Home Workout for a Stiff Back
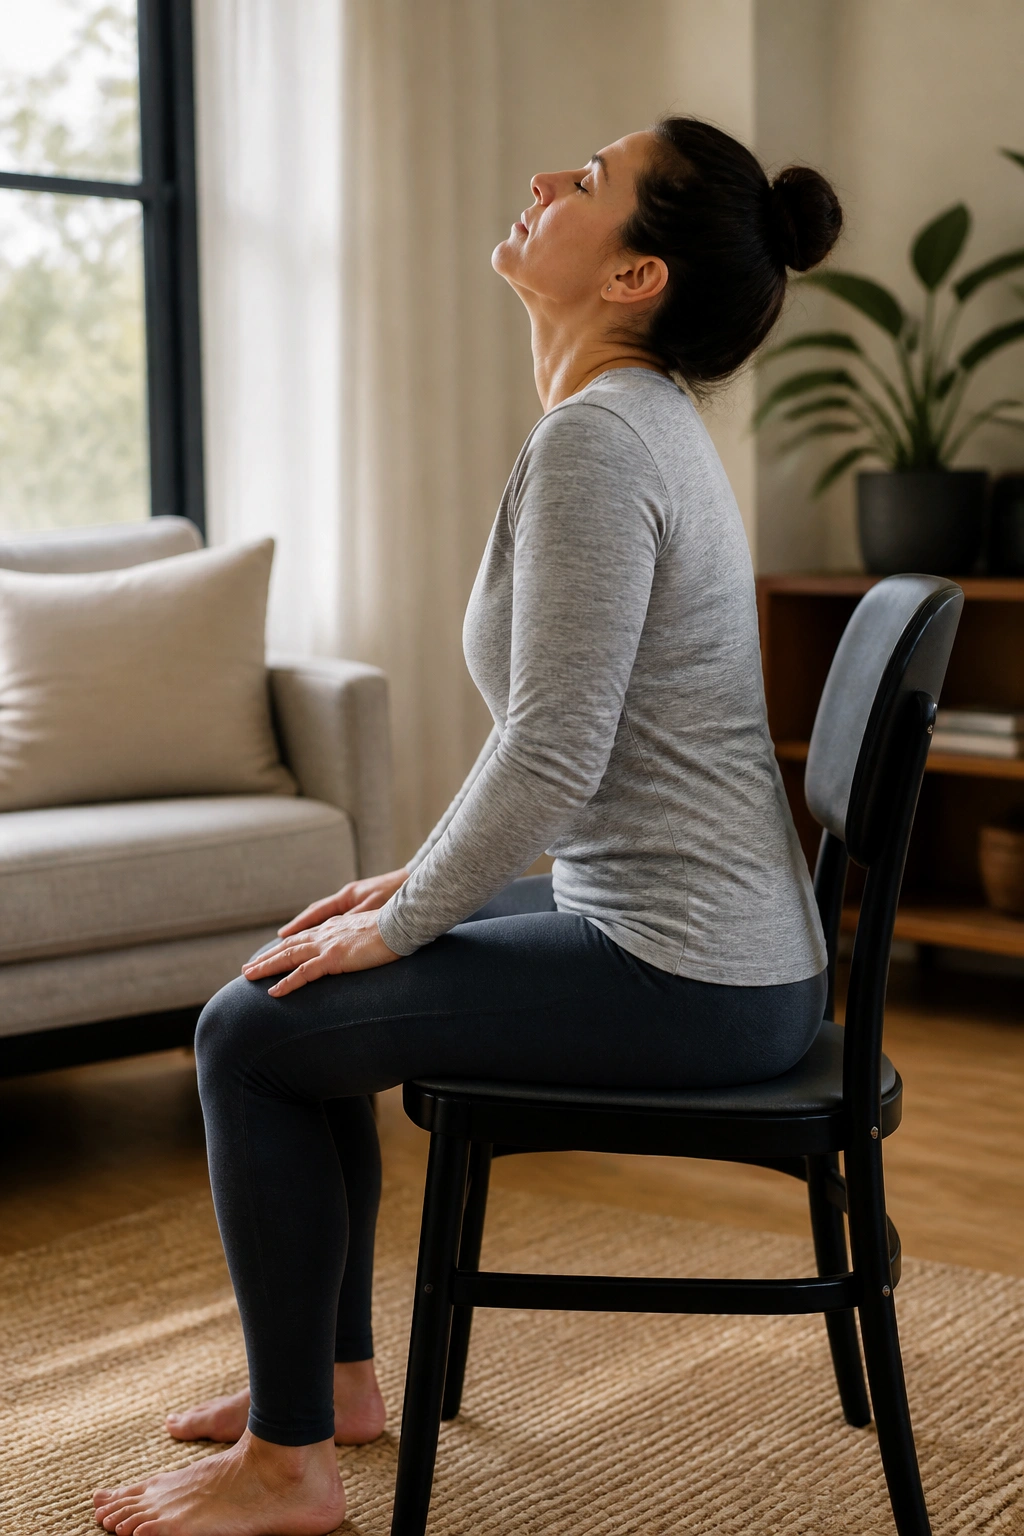
A stiff back usually likes motion more than a hard stretch.
Seated cat-cow gives the spine a slow wave without asking the hips or knees to do much. If your mornings start with that stuck, compressed feeling through the lower back, this is a very reasonable place to begin.
Why It Works
Sit near the front of a chair with your feet flat and your hands on your thighs. On the inhale, let the chest lift a little and the lower back arch gently. On the exhale, round the spine slightly and tuck the chin a touch.
- Move through 5 to 8 slow rounds.
- Keep the range small if the back is sensitive.
- Do not force the shoulders up toward the ears.
- Stop before any pinch in the low back or neck.
How to Keep It Easy
Think of the motion as a ripple, not a collapse. The pelvis moves a little, the ribs follow, then the head.
If full cat-cow feels like too much, just do the pelvis and rib cage. That smaller version still wakes things up. And if your back likes a little warmth first, even better — this move tends to feel smoother after a minute or two of marching in place.
8. Resistance Band Rows for Sore Shoulders and Between-the-Shoulder-Blade Tension
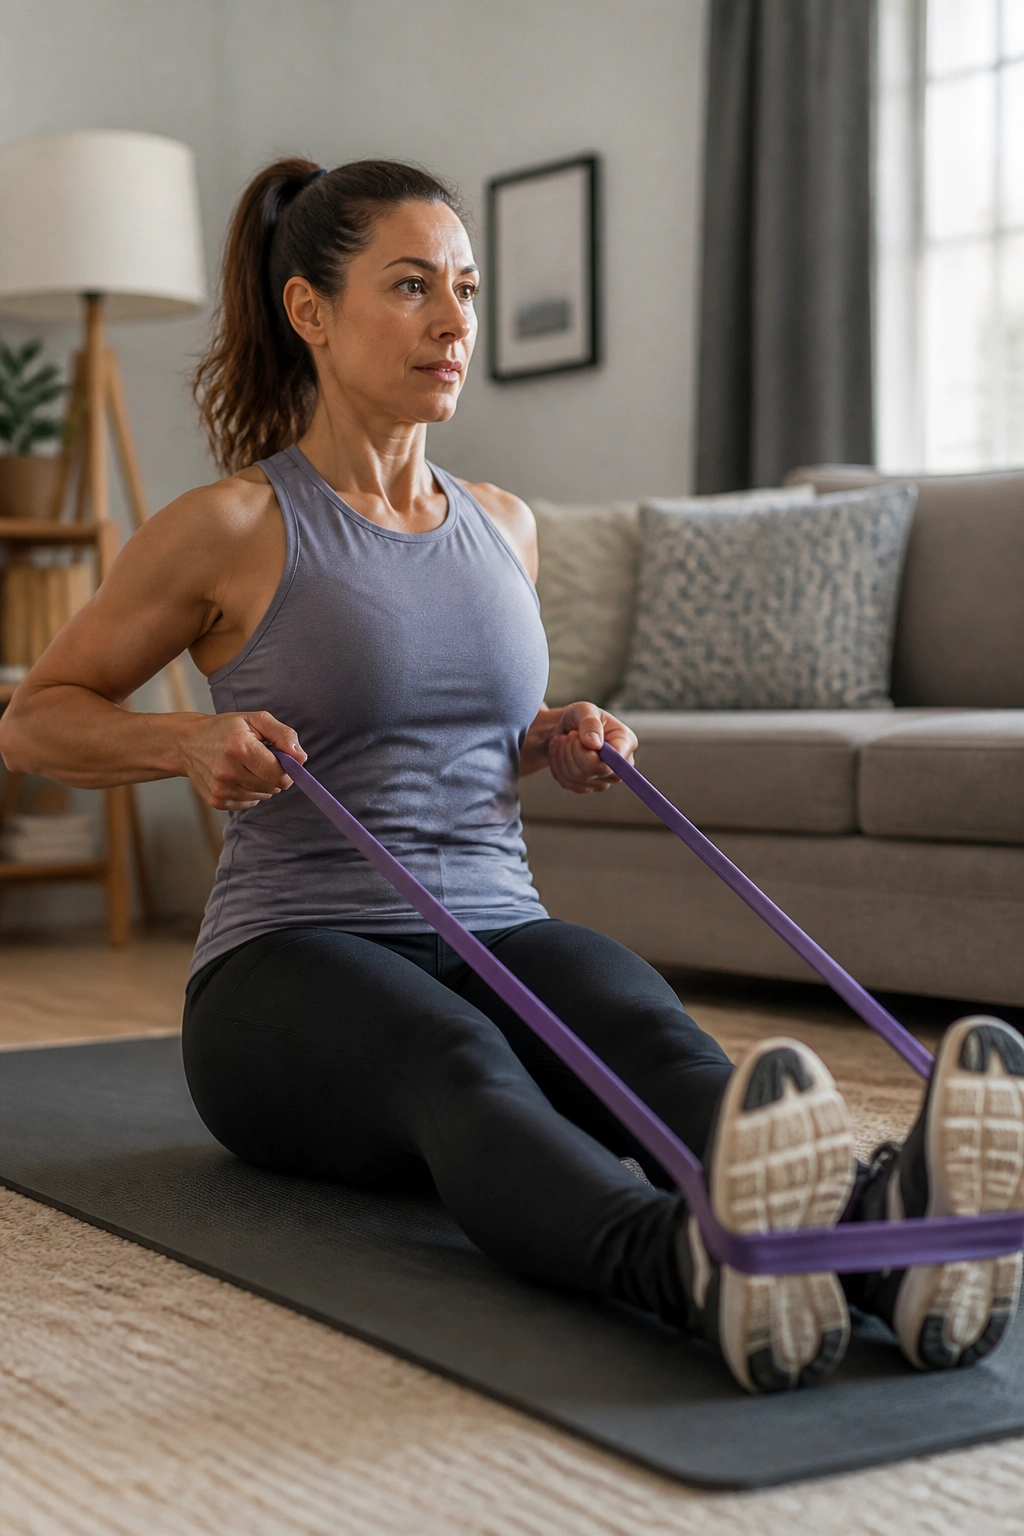
Rows are the missing piece for a lot of cranky shoulders. People spend all day reaching forward — typing, driving, carrying bags — and then wonder why the upper back feels folded in half.
A light resistance band row pulls the shoulder blades back into work without asking for overhead motion or heavy loading. It is a plain strength move, but it hits the spot when the upper back feels dull, tight, or overly rounded.
Sit tall with the band looped around both feet, one end in each hand. Pull your elbows back close to your sides until the hands reach your waist, then pause for 1 second before returning slowly. Keep the shoulders down. If they hike up, the neck takes over, and that is not what you want.
Do 8 to 12 reps. Use a band that feels light to moderate, not one that makes your face clench on rep three. That is a common mistake. People grab too much resistance and end up feeding the exact tension they were trying to reduce.
If your grip is sore, hold the band with a towel wrapped around each end for a little extra thickness. Small change. Big relief. The move should feel like the mid-back is doing the work while the neck stays out of the argument.
9. Glute Bridges on the Floor for Hips That Feel Stuck
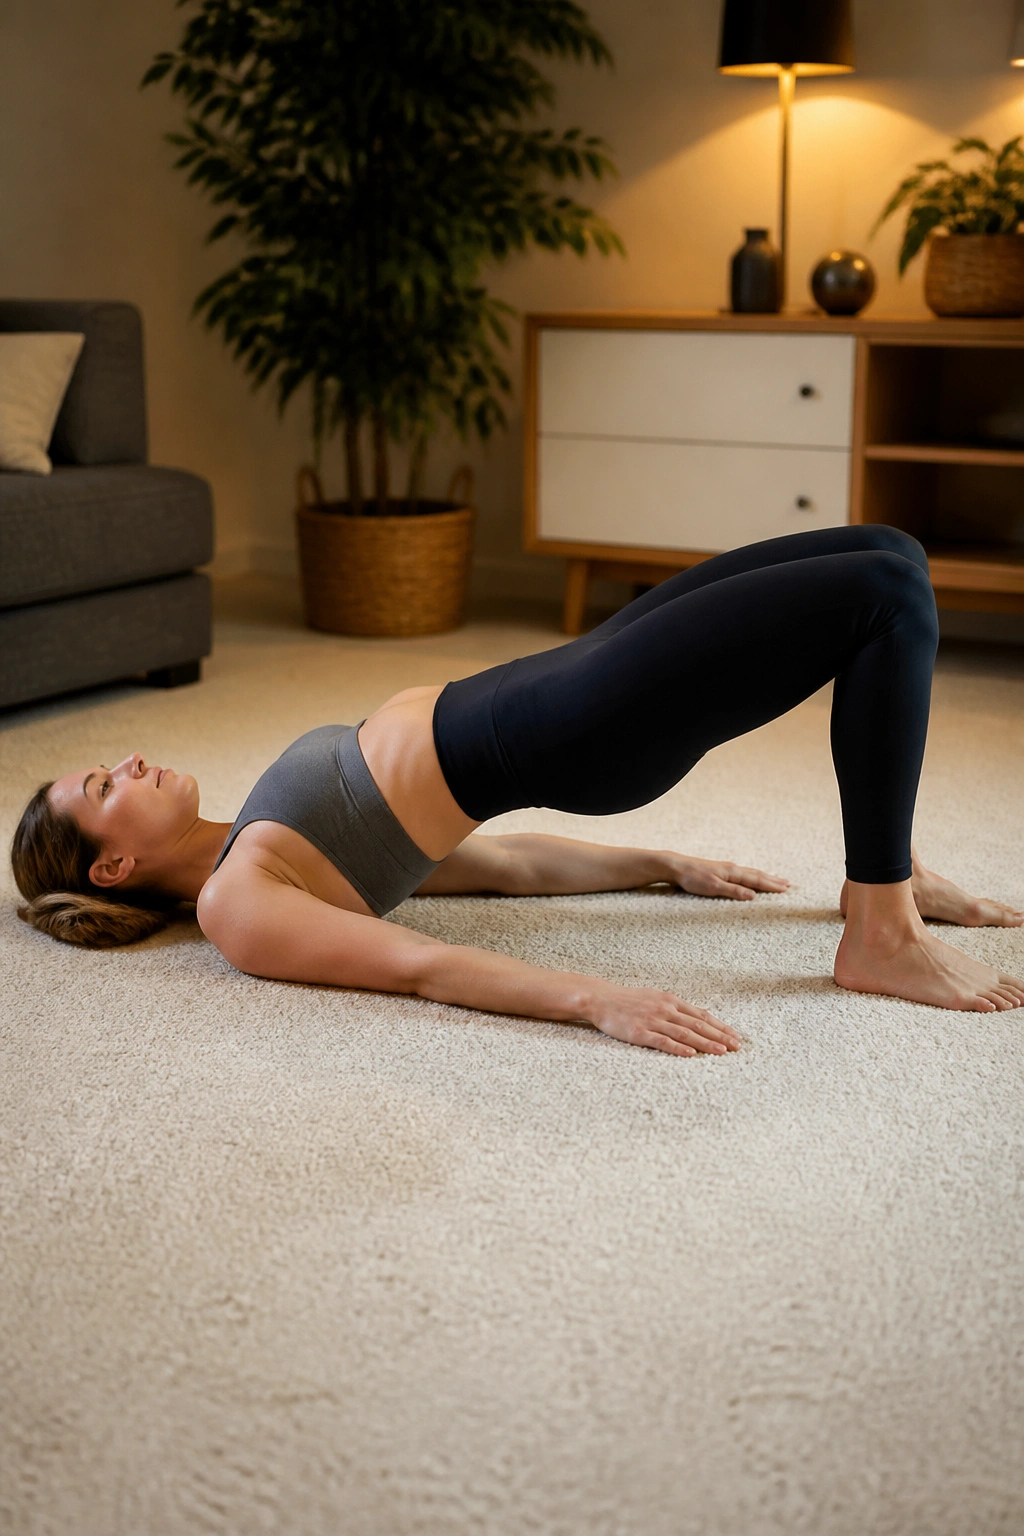
Why do glute bridges show up in so many joint-friendly routines? Because they often help where people feel the strain most: hips, knees, and lower back.
The glutes are meant to be part of the load-bearing team. When they are underused, the low back and knees can pick up slack that they were never meant to carry all day. Glute bridges ask the hips to extend without impact, which makes them a smart choice for sore joints.
How to Use It
Lie on your back with knees bent and feet flat, about hip-width apart. Press through the heels and lift the hips until your body forms a gentle line from shoulders to knees. Hold for 2 seconds, then lower with control.
Do 8 to 12 reps. If your hamstrings cramp, move the feet a little farther from your hips. If the lower back feels pinchy, lift less high and focus on squeezing the glutes at the top instead of chasing height.
What to Watch For
The ribs should not flare up. Keep them soft.
A bridge that rises only a few inches can still do useful work. I would rather see a clean, medium-height bridge than a huge arch that turns into a back bend. If you’re dealing with hip stiffness, this move often feels better than a squat because the floor gives you a safe starting point and a gentle finish.
10. Side Steps With a Mini Band for Hip Stability and Knee Tracking
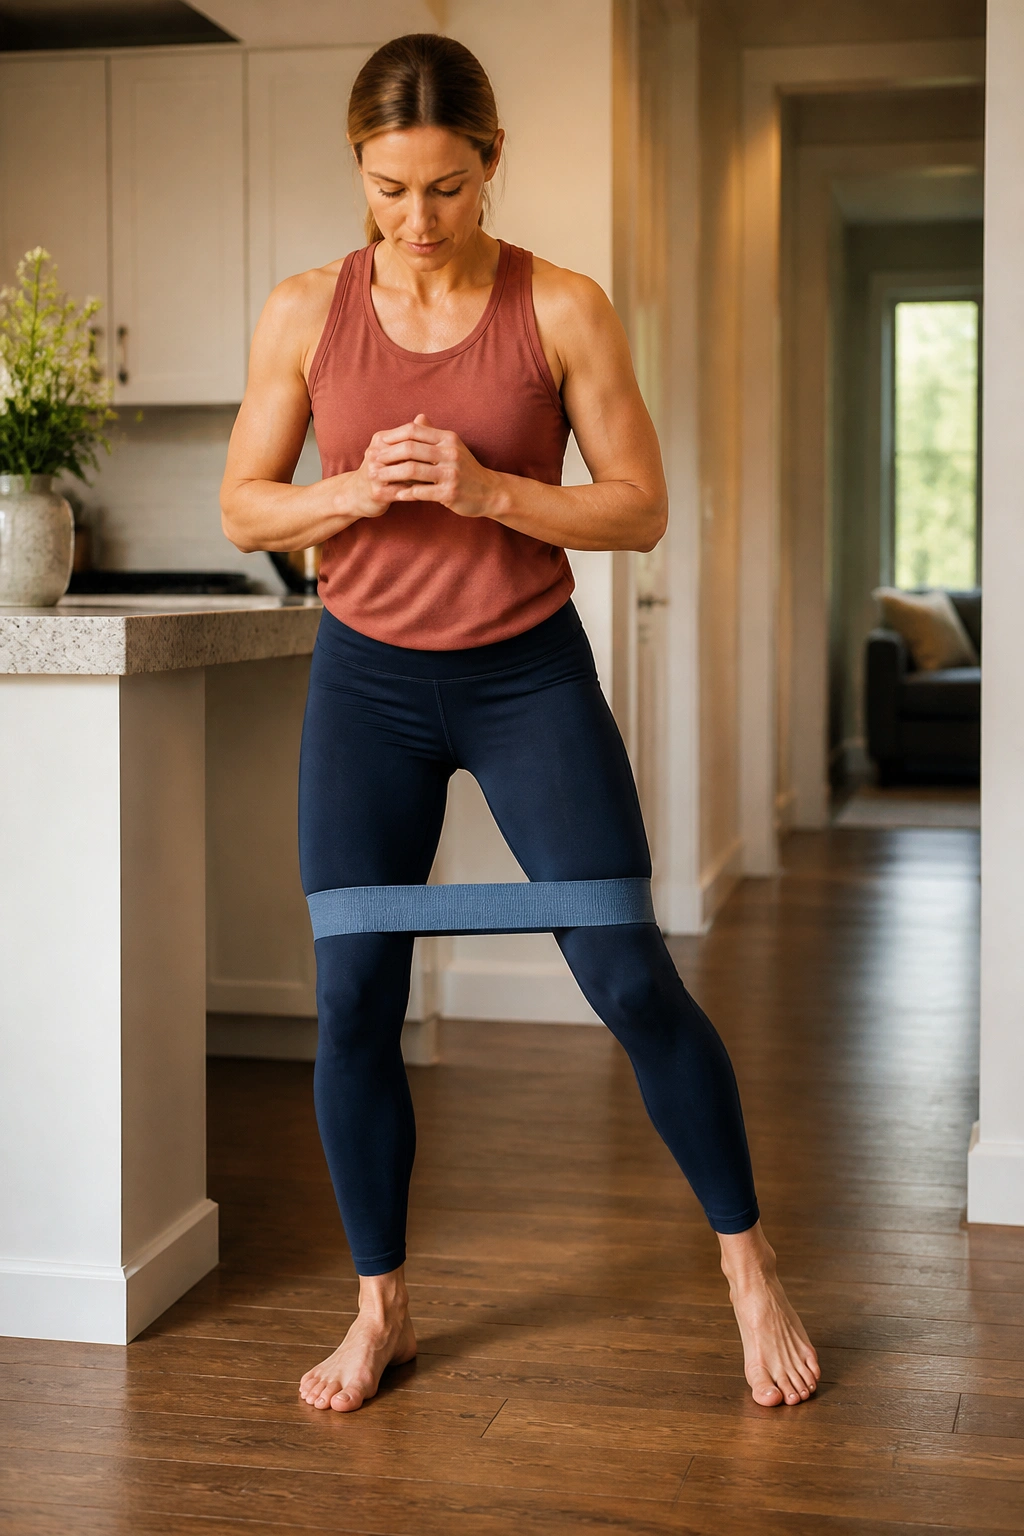
Picture a kitchen counter, a loop band above the knees, and a few tiny steps to the side. That is all it takes.
Side steps look almost laughably small until you notice how much your outer hips have to work to keep your knees from caving inward. For sore joints, that control matters. Hip stability often helps the knees feel less chaotic, especially on stairs or when rising from a chair.
Put a light mini band above the knees if your ankles are sensitive, or around the ankles if you want a little more challenge and your joints are calm enough for it. Take 6 to 10 small steps in one direction, then return the same number back.
- Keep the feet parallel and the knees softly bent.
- Stay tall through the chest instead of leaning from the waist.
- Step only as far as you can without the band snapping your knees inward.
- Use the counter for balance, not for pulling yourself around.
The steps should be controlled and quiet. No stomping. No swaying. If your hips burn a little, that is the point. If the knees ache, shorten the stride and move the band higher on the legs.
This is one of the best low impact home workouts for sore hips because it works the side muscles that most people neglect until something starts hurting.
11. Arm Circles and Wall Angels for Tight Shoulders
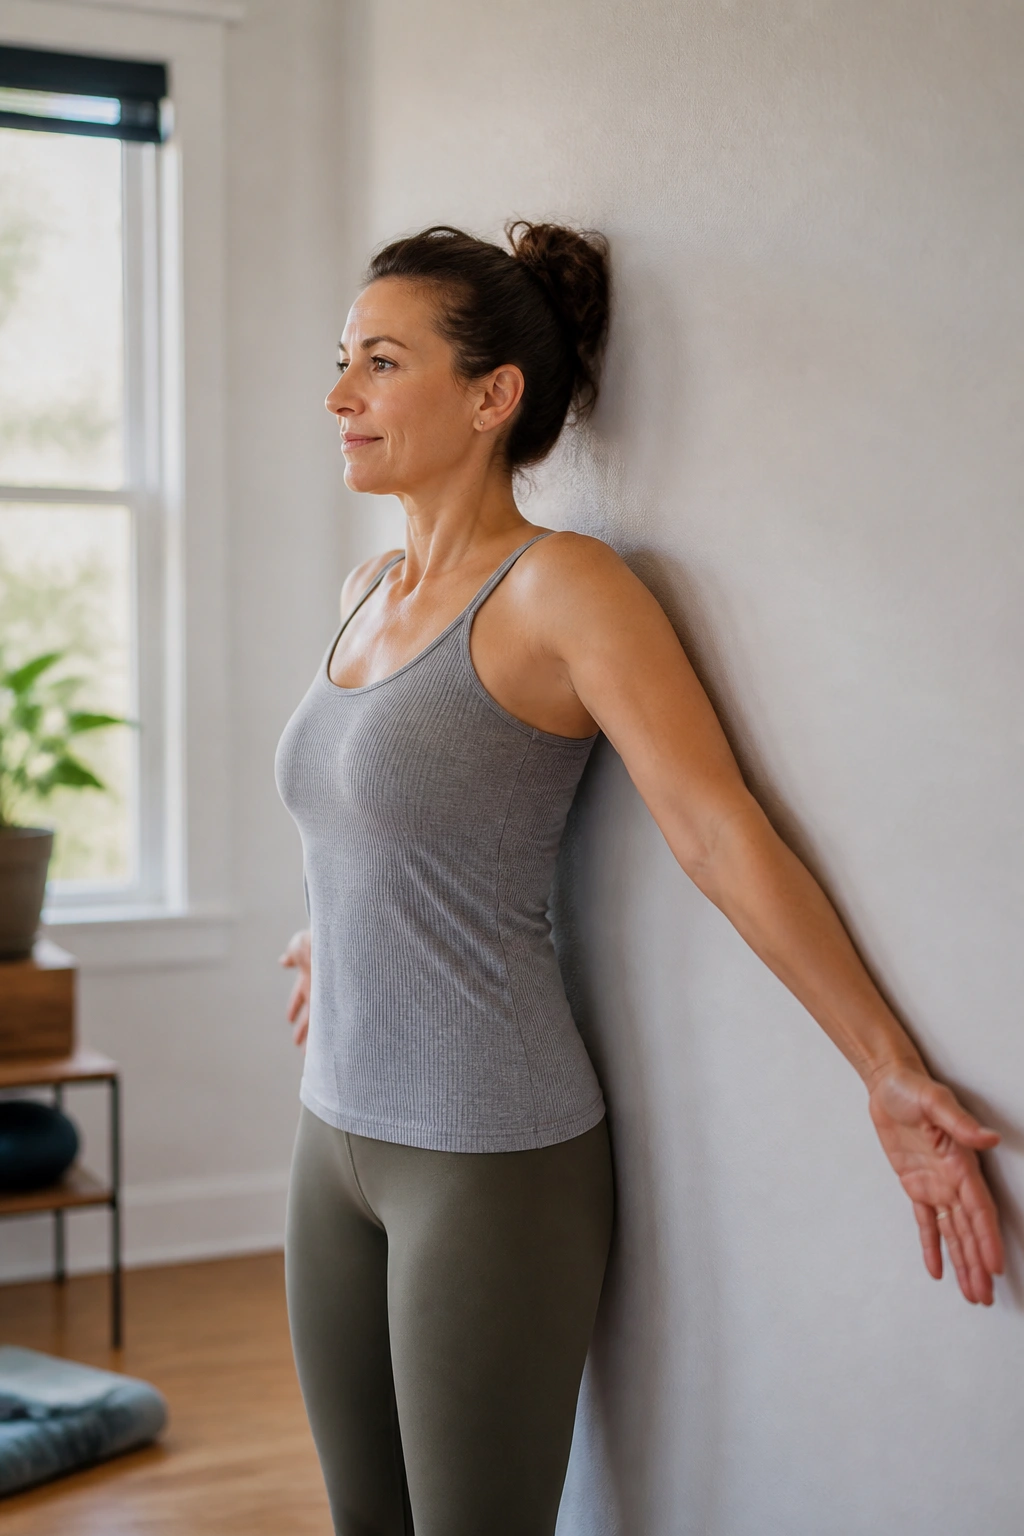
Shoulders usually feel better after a few small circles and a wall slide than after a hard stretch.
That is because the shoulder joint likes movement in more than one direction. When the upper back and shoulder blades get involved, the whole area tends to move more smoothly. Arm circles and wall angels are simple, but they can take some of the bite out of that frozen, pulled-forward feeling.
Start with tiny arm circles at your sides. Go forward for 20 to 30 seconds, then backward for another 20 to 30 seconds. Keep the circles small enough that they feel smooth, not forced. After that, stand with your back against a wall and slide the arms up and down like a slow snow angel, keeping your ribs from flaring.
If overhead motion pinches, stay below shoulder height. That is not failure. That is smart scaling.
The wall part is where people get honest about posture. If the lower back arches, the ribs usually pop up, and the shoulders stop gliding cleanly. A slight bend in the elbows is fine. A little gap between the wrists and wall is fine too. You are trying to train a better path, not to become a human measuring stick.
One short round often loosens the whole upper body more than people expect.
12. Heel Slides on the Floor for Knees That Hate Deep Bends
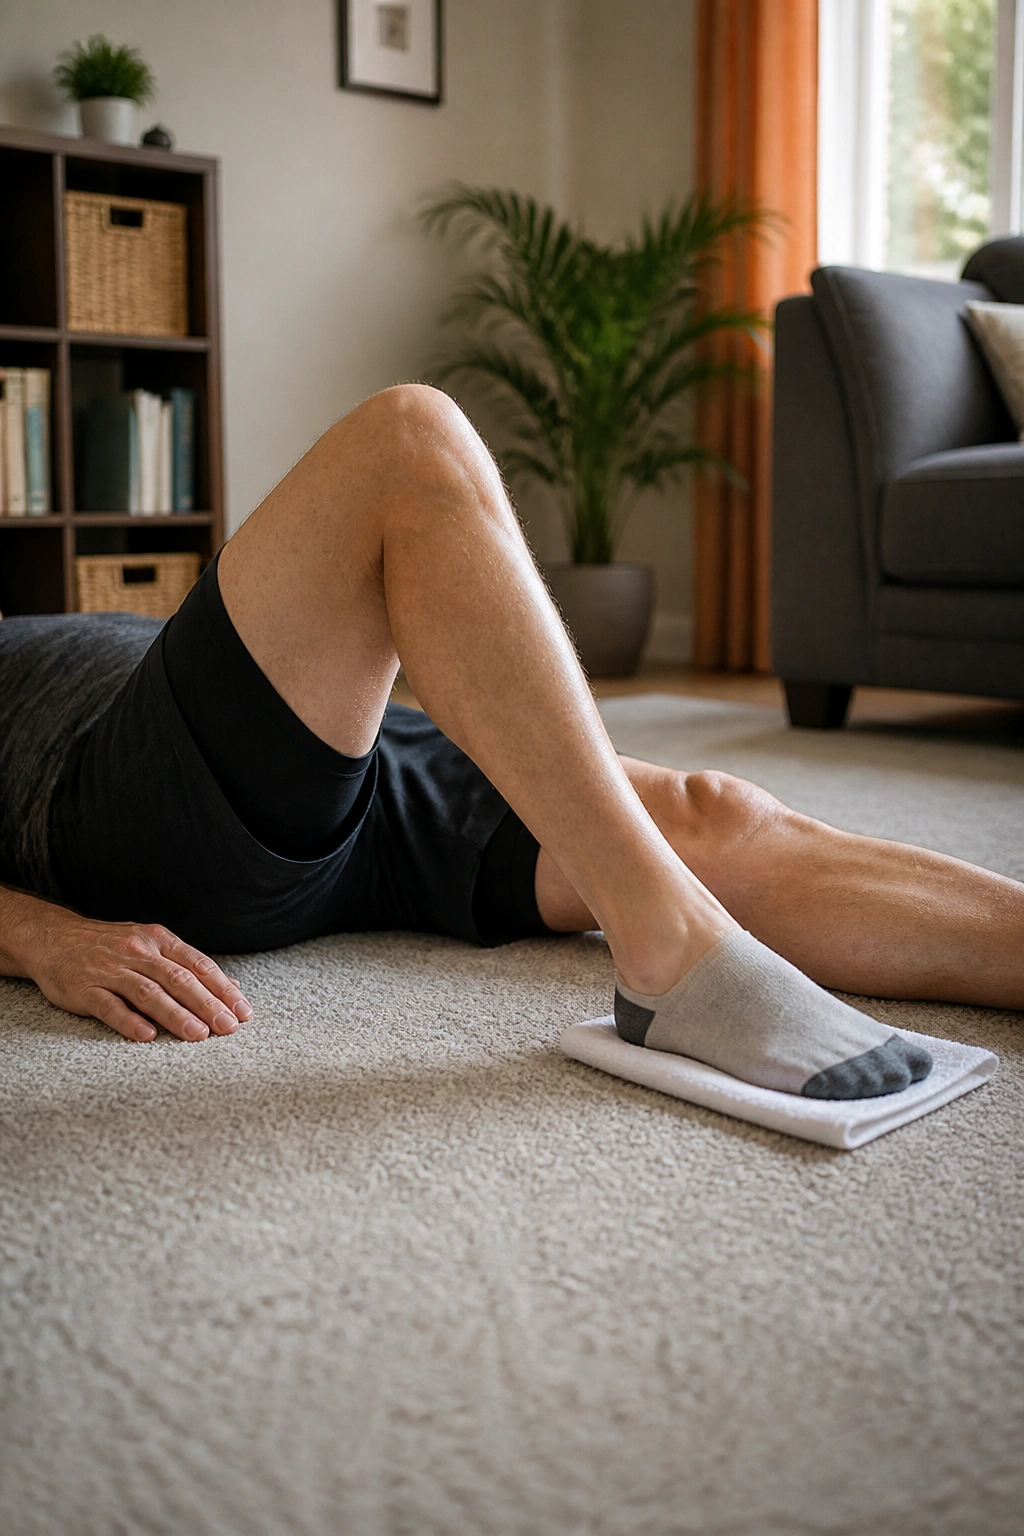
Heel slides are the opposite of deep knee bends. That is exactly why they belong in a sore-joint routine.
Instead of loading the knee with body weight, you slide the heel toward you and let the joint move through a smaller, easier range. It is useful on days when the knees feel rusty, especially after sitting for a long stretch or waking up stiff.
Lie on your back with one leg straight and the other leg extended. Slide the heel of the bent leg toward the hips until the knee feels comfortably bent, then glide it back out again. A towel under the heel on a smooth floor makes the movement much easier.
Do 8 to 10 slow slides per leg. Pause for a second at the bent position, then extend smoothly. If the knee catches or feels sharp, shorten the slide immediately.
I like this move before sit-to-stands because it wakes up the knee without asking it to bear weight yet. If you have a warm pack, a shower, or even a few minutes of easy walking first, the slides often feel smoother.
13. Standing Weight Shifts for Balance Without the Wobble
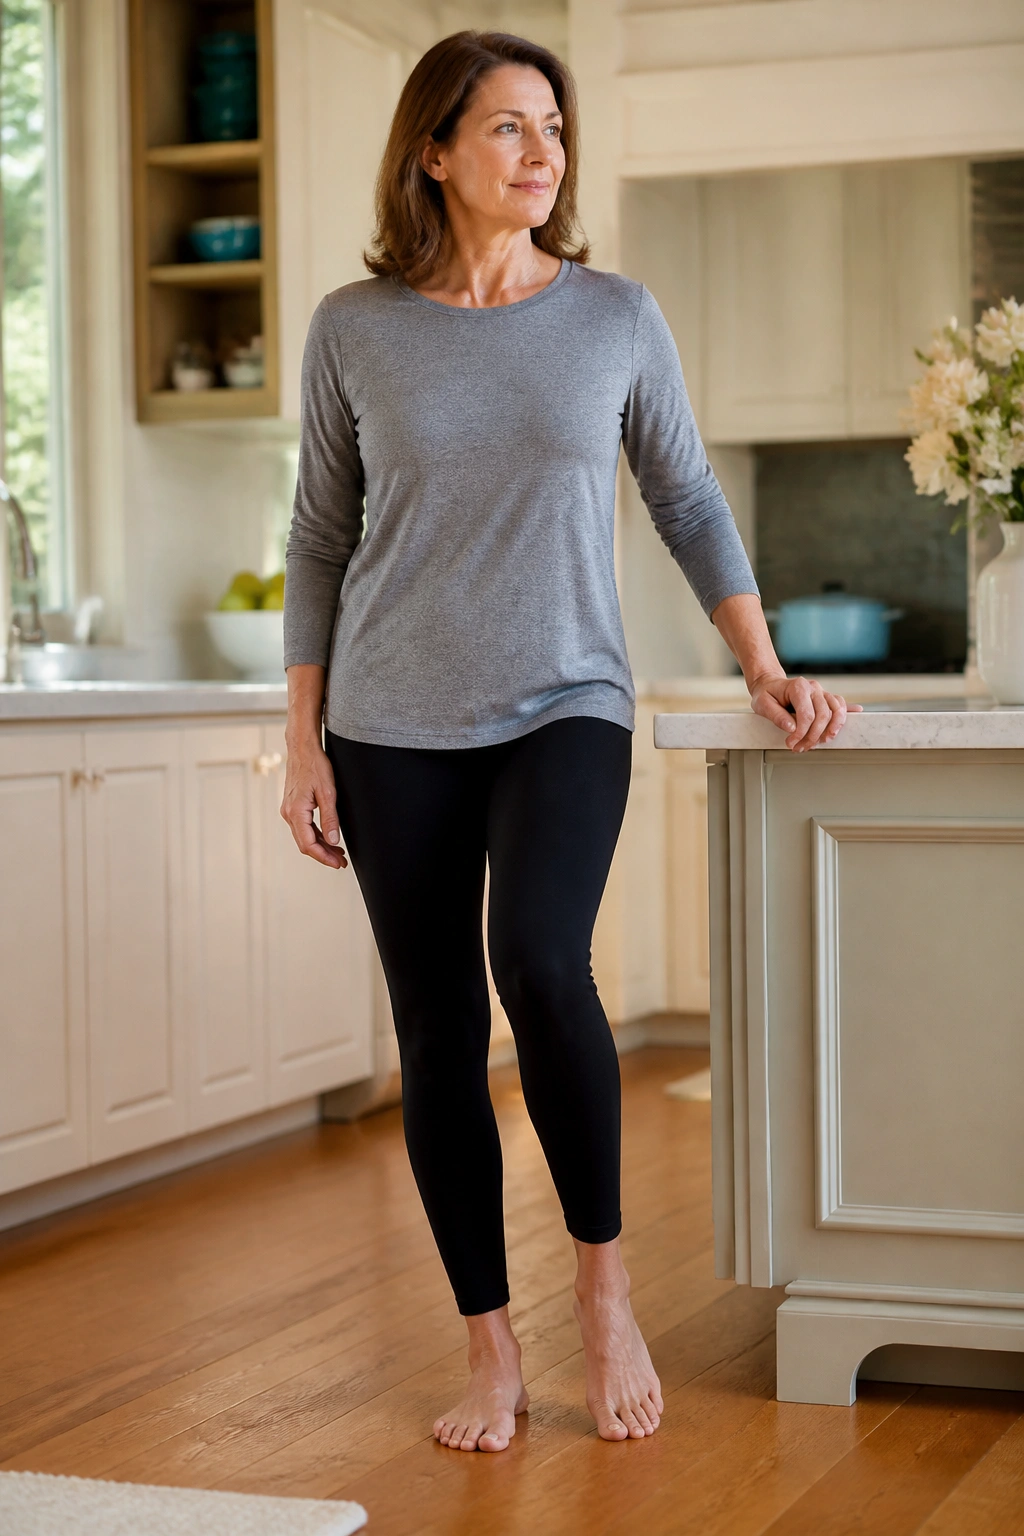
Balance drills do not need a yoga mat or a brave face.
Standing weight shifts are a quiet way to wake up the ankles, hips, and feet while teaching the body how to trust one leg at a time. That trust matters for sore joints because poor balance often makes every step feel guarded.
Why It Works
Stand near a counter with your feet hip-width apart. Shift about 70 percent of your weight onto one leg, then ease back to center and shift to the other side. Keep the shoulders level and the hips from tilting.
- Do 10 to 20 shifts per side.
- Hold the counter lightly with one or two fingers if needed.
- Keep the knees soft, not locked.
- Let the foot stay flat; do not rock onto the outer edge.
How to Keep It Easy
Start small. If the shift feels huge, make it tiny.
You can build this into everyday life without turning it into a workout scene. Stand while the kettle heats, while the toast browns, while you wait for the next song. That little practice adds up. Once the motion feels smooth, reduce the hand support, but keep the eyes open and the breathing easy. Closed-eye balance work is a different drill, and it is not the first place I would start with sore joints.
14. Ankle Pumps and Toe Taps to Wake Up Feet, Calves, and Lower Legs
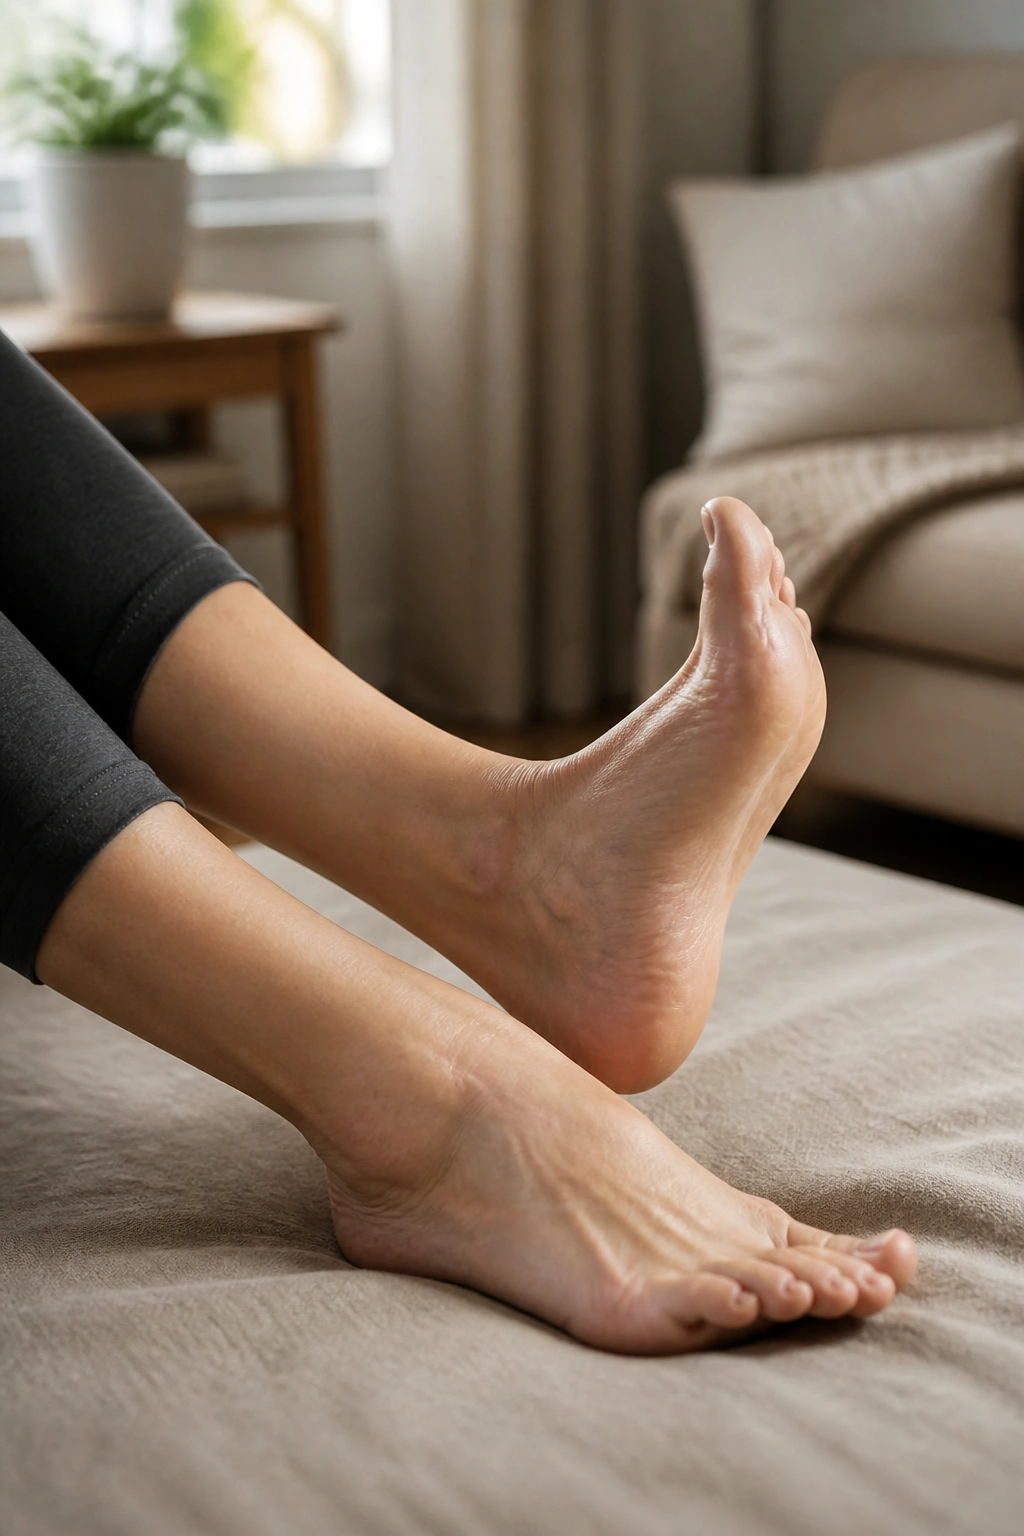
Feet need attention, too.
People think of sore joints as knees and shoulders, maybe hips. Then they sit for hours, the ankles stiffen, the calves tighten, and every stand-up feels heavier than it should. Ankle pumps and toe taps are almost ridiculously simple, but they are useful when you want movement without standing or kneeling.
Lie on your back or sit in a chair with one leg supported. Pull the toes toward your shins, then point them away. Do that for 20 slow pumps on each side. After that, tap the toes lightly up and down for another 20 reps.
If the feet cramp, cut the range in half and move more gently. If you notice swelling, do the pumps with the legs elevated on a cushion or sofa arm so gravity is working with you instead of against you.
The whole thing takes a minute or two. That is the beauty of it. It is a reset, not a performance. I like it after long sitting because it wakes up the lower legs before they get a chance to stiffen into that heavy, wooden feeling that makes the first few steps annoying.
Tiny movement. Real payoff.
15. Chair Yoga Cooldown to Finish Without Stirring Up Sore Joints
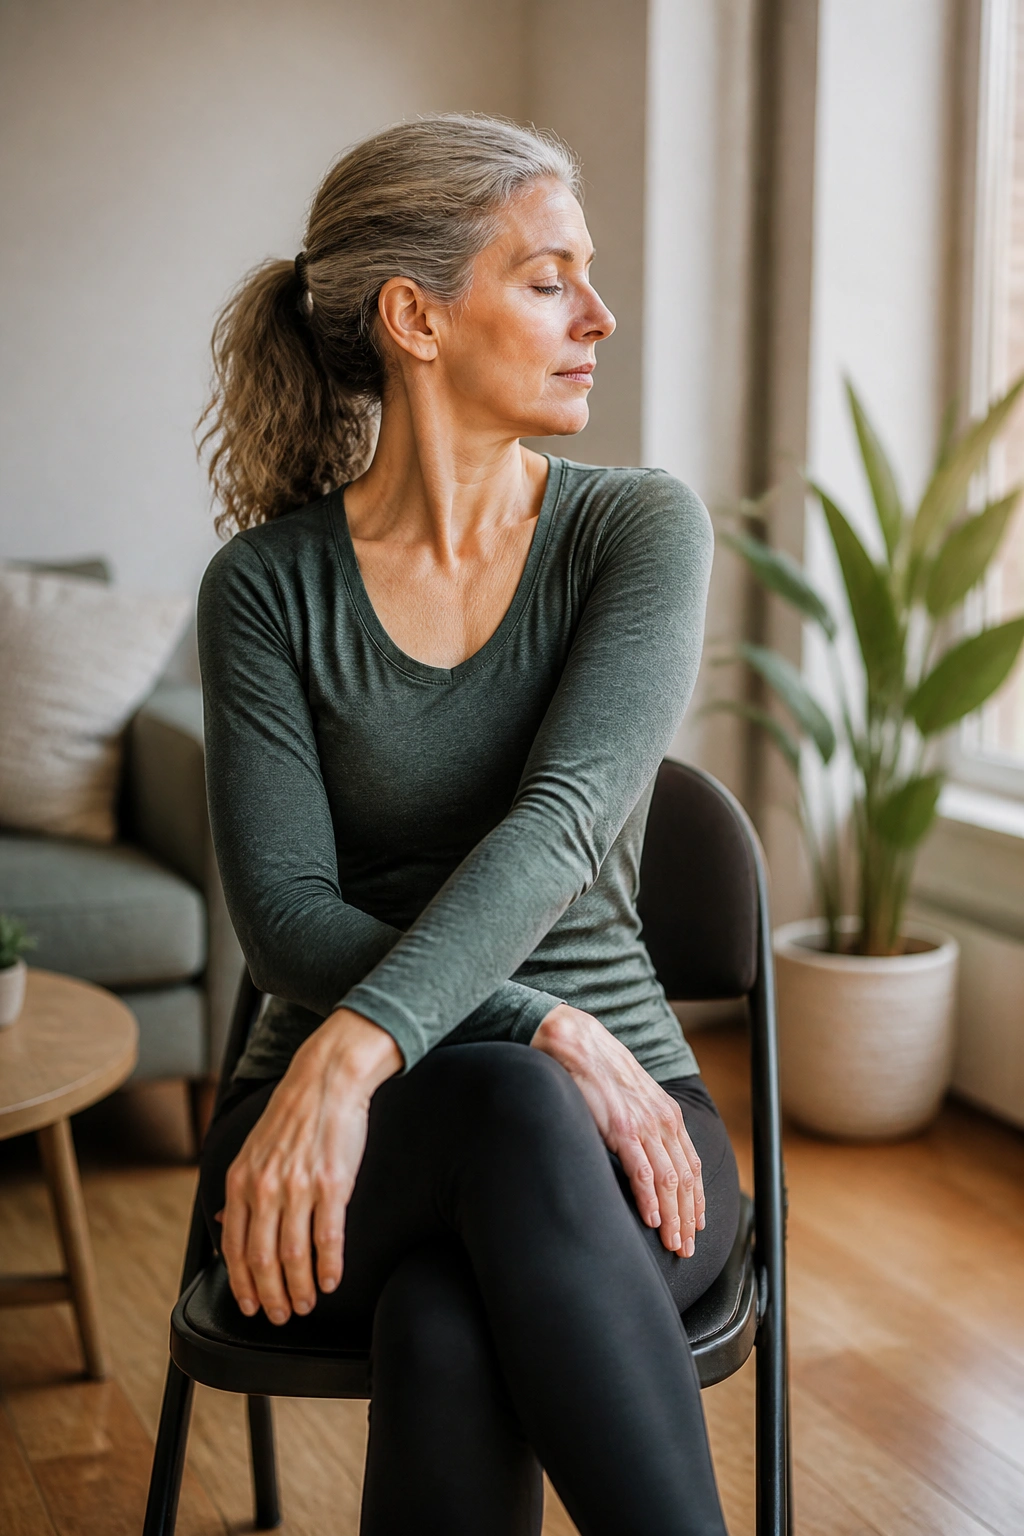
The last five minutes matter more than most people think.
Unlike a sweaty finish, a gentle chair cooldown tells the nervous system the session is over and nothing bad is happening. That matters when joints are sensitive, because a sudden stop can leave everything feeling abrupt and tense again.
Sit tall and start with slow neck turns, looking over one shoulder and then the other for 3 breaths each side. Add wrist circles if the hands have been carrying the load, and roll the ankles if the lower body feels tight. Then try a seated figure-four stretch only if the hips allow it, keeping the range mild and the breath steady.
If the back likes a small forward fold, hinge from the hips with a long spine and stop well before the hamstrings tug hard. If that does not feel good, skip it. I would rather have you leave a stretch out than force a decent-looking pose that irritates the joints later.
This is a nice place to check in with your body without making it a whole event. Which spots feel looser? Which ones still feel dry? That little scan helps you choose the next workout better, whether it is chair marching, wall push-ups, or a short walk through the house.
Finish here when you want the joints quieter, not more ambitious.
