



A firmer body at home does not come from doing endless tiny movements with pink dumbbells and hoping for the best. It comes from making your muscles work against real resistance, then repeating that work often enough for your body to adapt. That’s the honest version, and it’s also the useful one.
These firming exercises for women at home are built around that idea. They focus on big, practical moves that shape the legs, glutes, arms, shoulders, and core without requiring a gym floor, a machine, or a perfect setup. A chair, a mat, a backpack with books, and a little floor space are enough to get serious work done.
There’s one thing worth saying up front: “firming” is not a magic category. What people usually want is a little more muscle in the right places, a little less softness over time, and better posture so the whole body looks tighter and feels stronger. That means squats, hinges, pushes, pulls, lunges, and core work. Not endless crunches. Not random burnout circuits that leave you sore but unchanged.
Pick four or five of the exercises below for a session, do 2 to 4 sets, rest 30 to 60 seconds between sets, and make the last two reps feel honest. Not sloppy. Honest. That’s where the change starts.
1. Squat to Chair
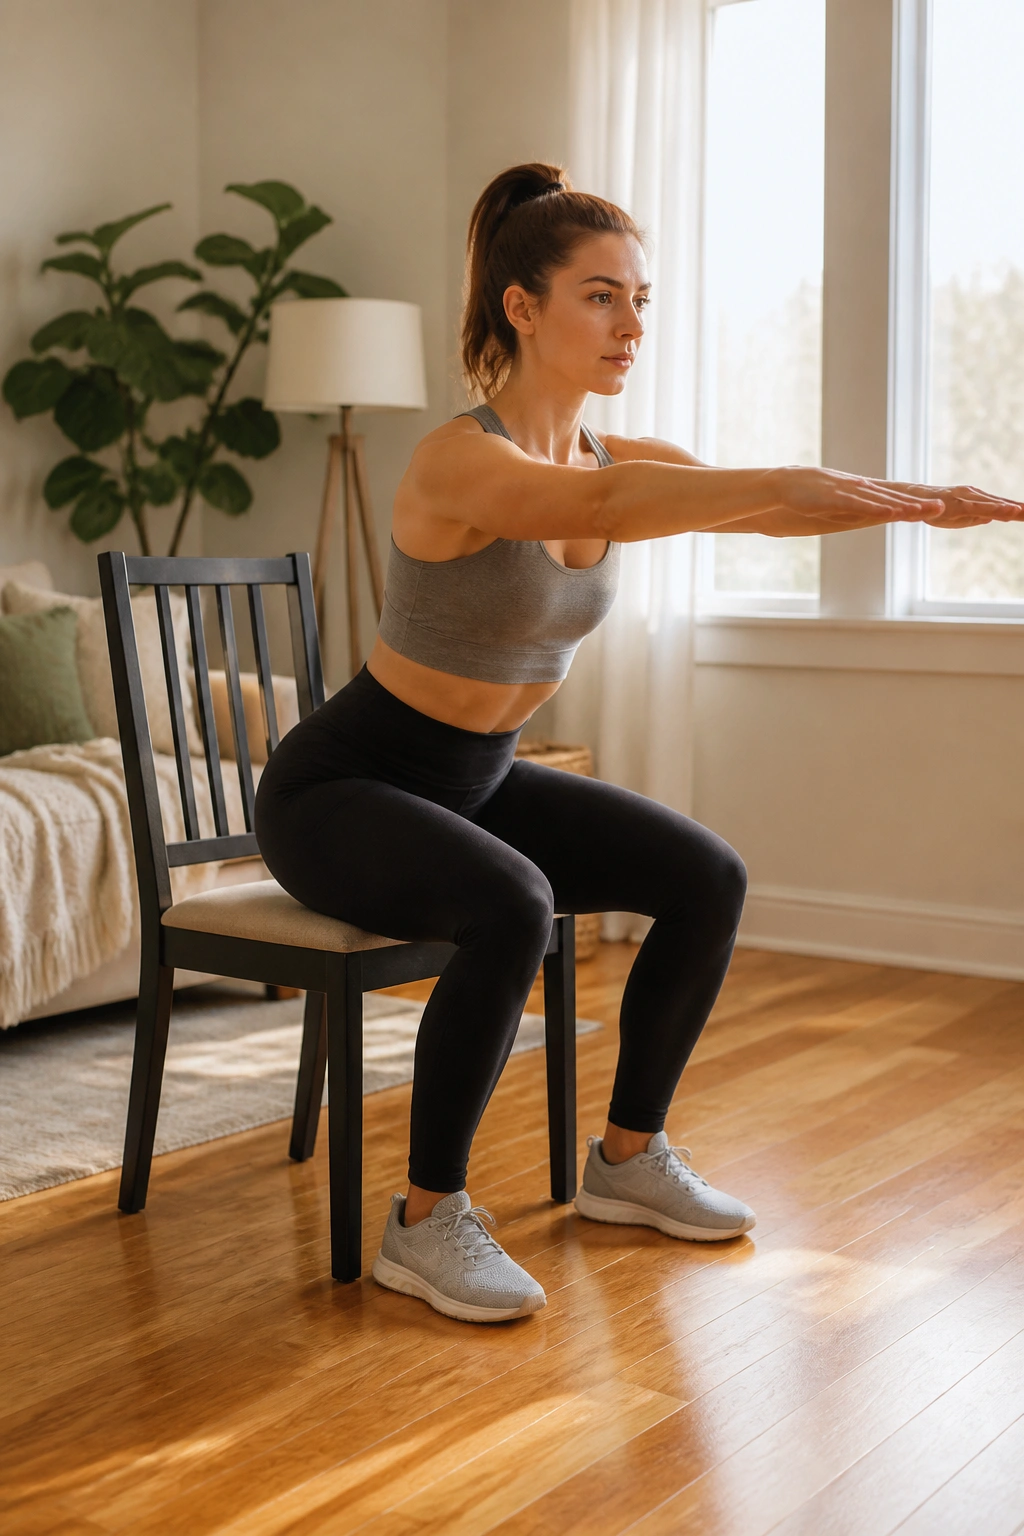
A chair squat is one of the cleanest places to start because it teaches you how to sit back, load your legs, and stand up with control. It works the glutes, quadriceps, and inner thighs, and it gives you a target so your depth stays consistent from rep to rep.
Set a sturdy chair behind you, stand with your feet about hip- to shoulder-width apart, and lower until you lightly tap the seat. Then drive through your heels and stand tall. The touch should be light, not a full drop. If you plop down, you’ve lost the point.
What to feel
- Your heels stay heavy.
- Your chest stays open.
- Your knees track in line with your toes.
- Your hips move back first, not straight down.
If you want more challenge, hold a backpack against your chest or slow the lowering phase to 3 seconds. That tiny pause on the chair makes the move much harder than people expect. It’s a good thing.
2. Reverse Lunge
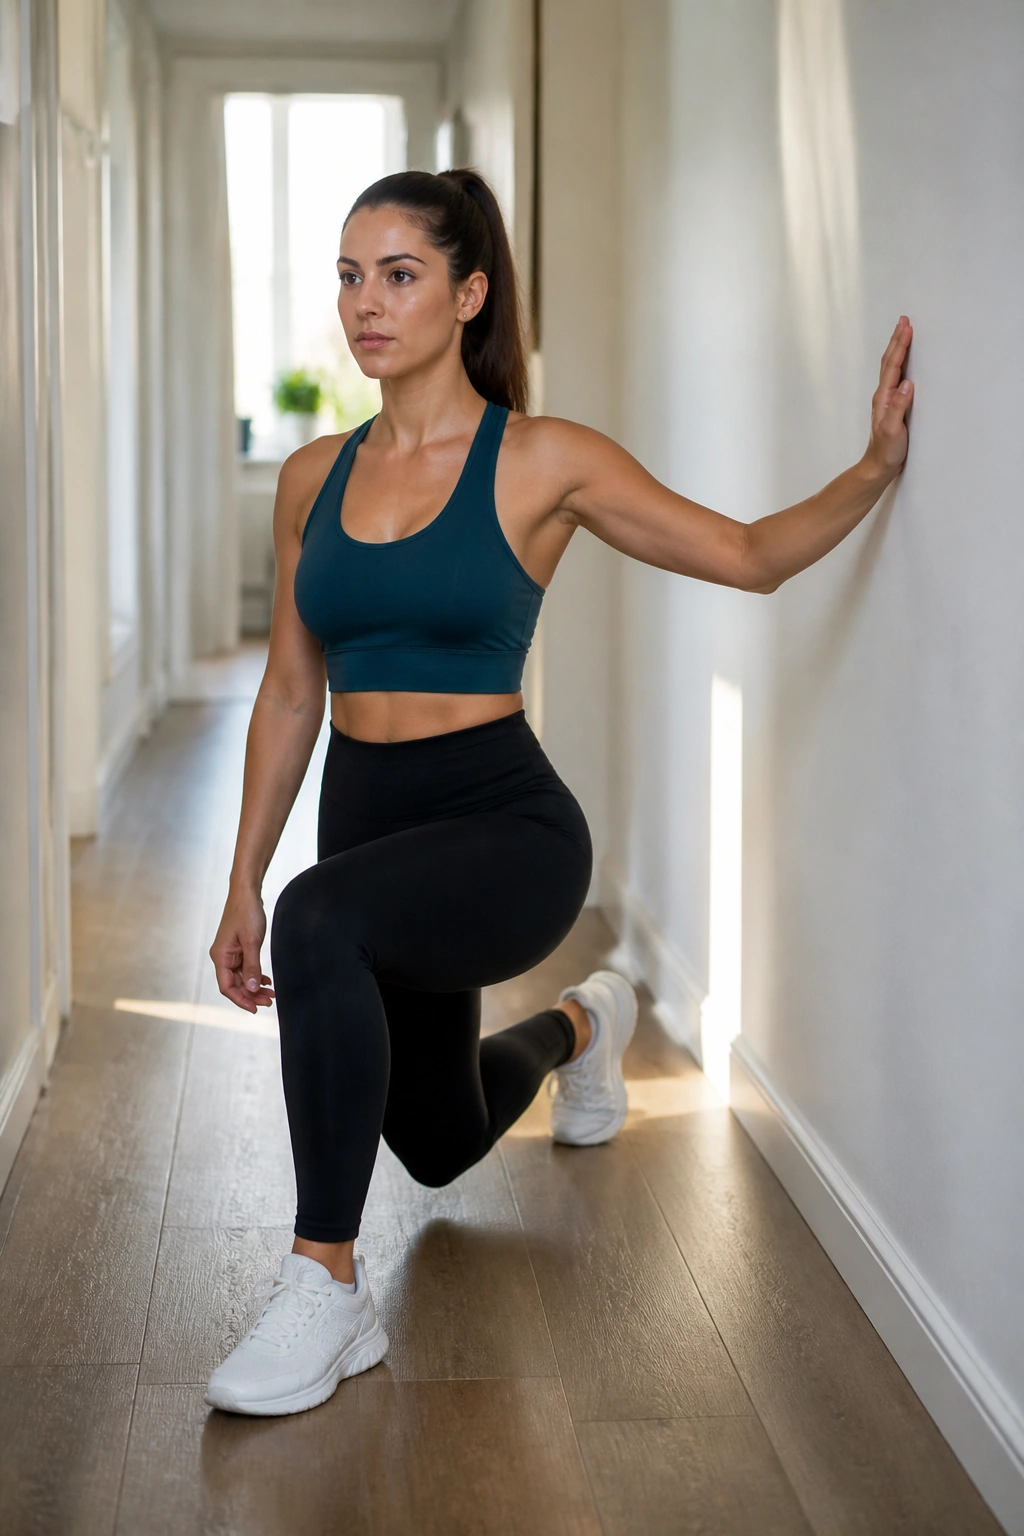
Forward lunges get attention, but reverse lunges are usually kinder on the knees and easier to control at home. They hit the glutes, quads, hamstrings, and balance muscles, which makes them a solid choice when you want shape and stability, not just a quick leg burn.
Step one leg back, lower until both knees bend comfortably, then press through the front heel to come back up. Keep your front foot flat. Keep your torso tall. If you lean far forward, the glute work drops off and the move turns messy.
Use a wall, counter, or chair for fingertip support if balance is shaky. That is not cheating. It’s smart. Once the motion feels smooth, add dumbbells or water bottles, then work up to 8 to 12 reps per leg.
3. Glute Bridge
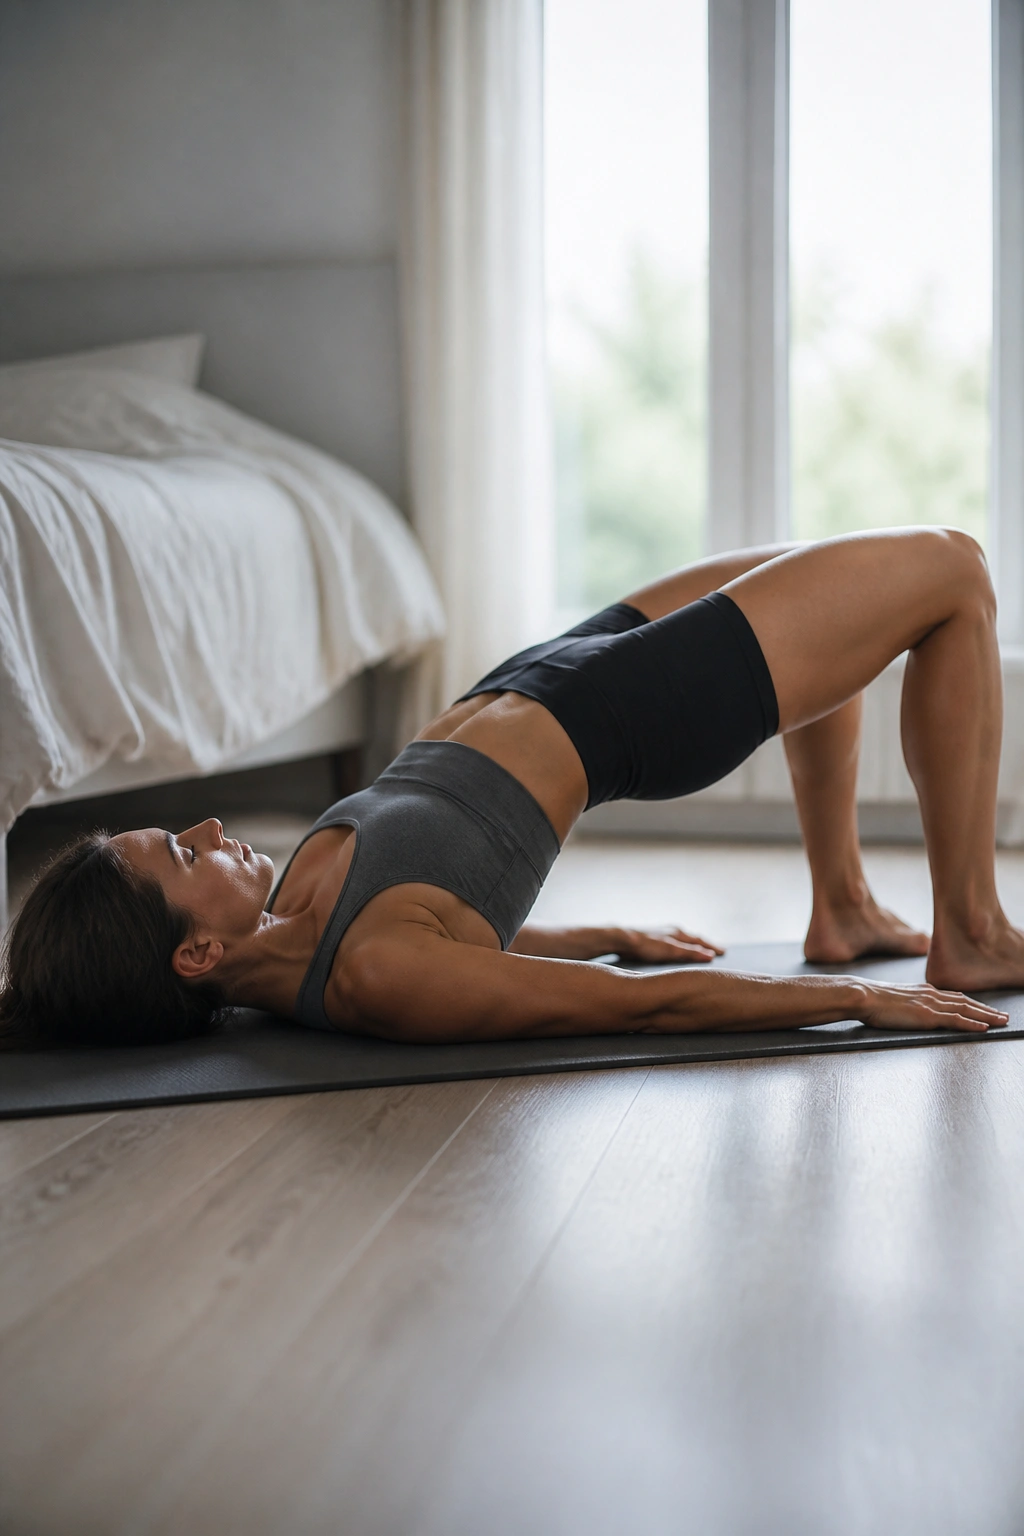
If your glutes are sleepy, this is the wake-up call. The glute bridge is simple on paper and surprisingly effective in practice because it teaches hip extension without asking your lower back to do all the work.
Lie on your back with your knees bent and feet flat, about a foot from your hips. Brace your abdomen, squeeze your glutes, and lift your hips until your body forms a straight line from shoulders to knees. Pause for 1 to 2 seconds at the top, then lower with control.
Why it works
The bridge trains the rear chain in a way most home workouts miss. That includes the glutes and hamstrings, which matter for leg shape, hip support, and the way your lower body feels when you walk upstairs or stand for long periods.
Keep it honest
Do not arch your lower back to fake height. If the ribs flare and the hips crank upward, the glutes usually stop doing their share. A loop band above the knees can make the outside of the hips work harder, and a single-leg version turns the dial up fast.
4. Romanian Deadlift with Dumbbells or a Backpack
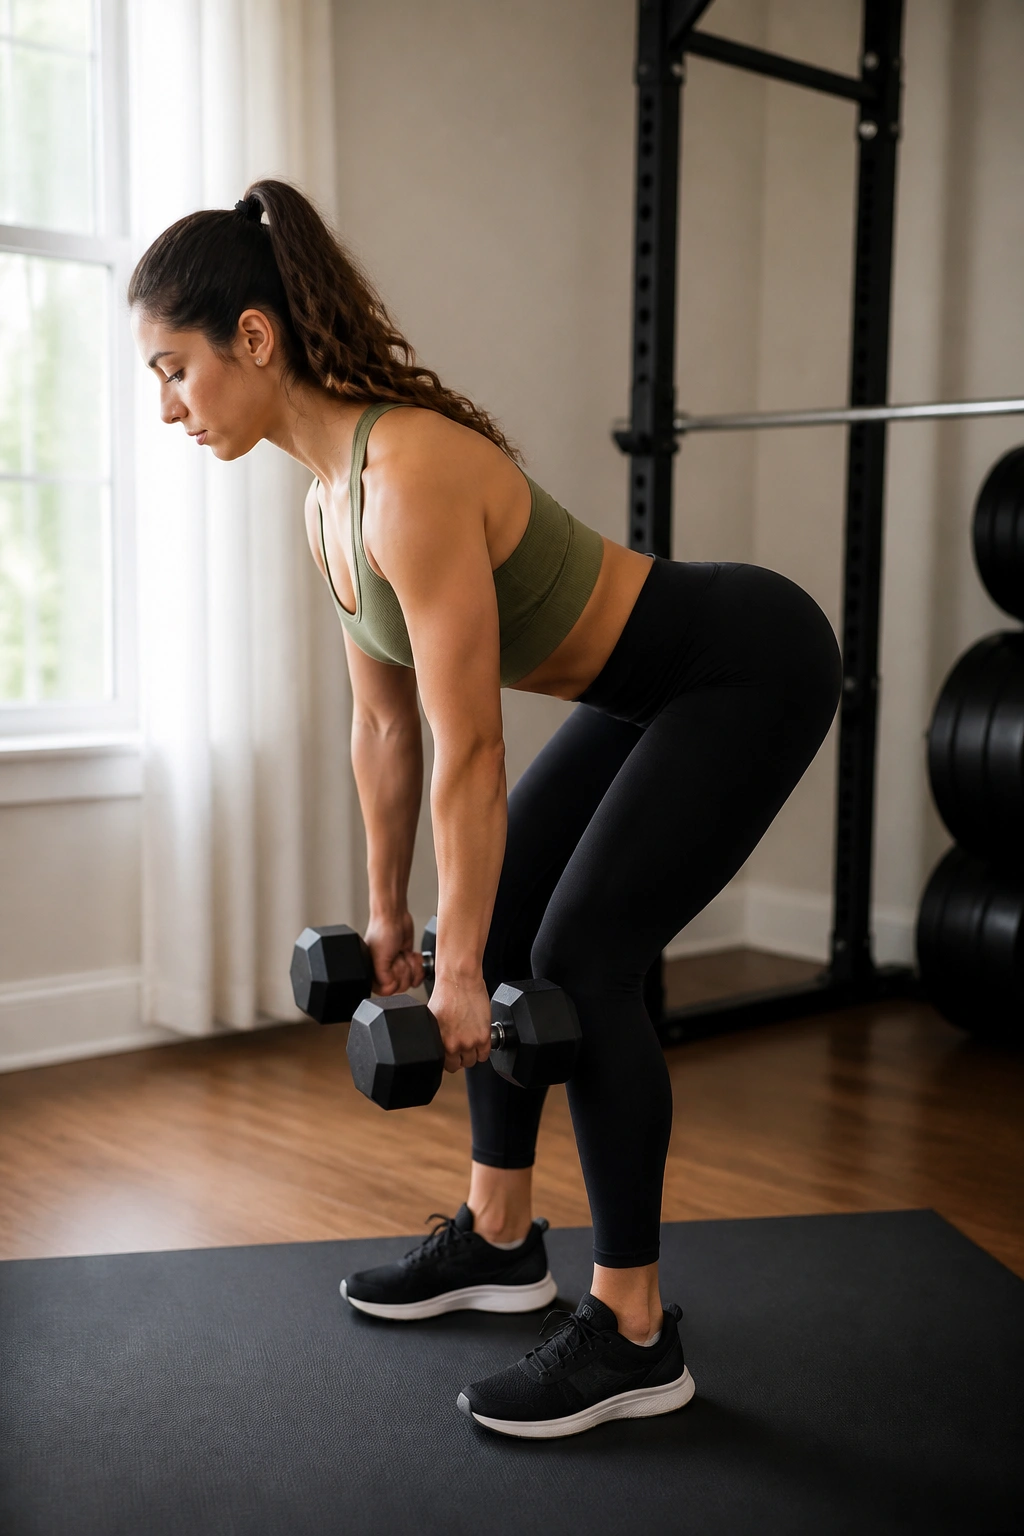
This is the move people skip because it looks less flashy than a squat, and that’s a mistake. The Romanian deadlift, or hip hinge, is one of the best home exercises for the hamstrings, glutes, and lower back support muscles when it’s done well.
Hold two dumbbells, water jugs, or even a loaded backpack in front of your thighs. Keep a soft bend in your knees, push your hips back, and slide the weight down your legs until you feel a stretch in the back of your thighs. Then stand by driving the hips forward, not by leaning back.
The key sensation is a pull, not a strain. If you feel this mainly in your lower back, you’re probably bending too much at the waist instead of hinging from the hips. That’s the common mess-up. Fix that first, and the exercise becomes much more useful.
Aim for 8 to 12 slow reps. If you like control, count 3 seconds on the way down and 1 second on the way up. It’s a humbling little rule.
5. Push-Up from Wall or Floor
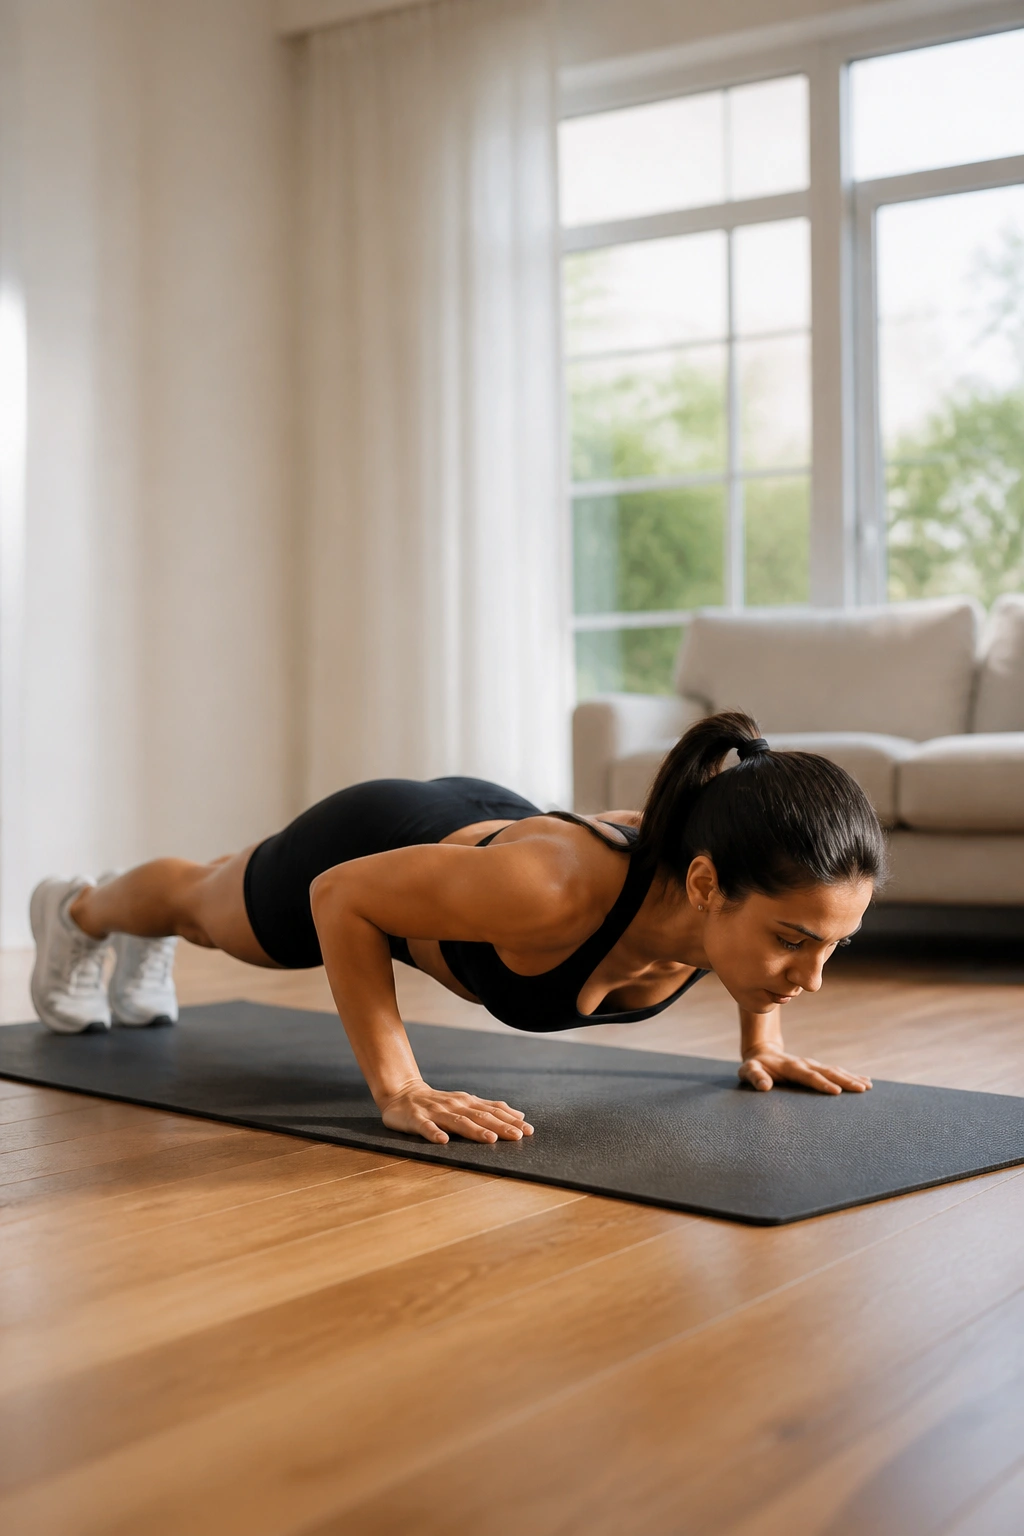
People assume push-ups are just for the chest, but a good push-up hits the arms, shoulders, chest, and core at the same time. That makes it a very efficient firming move, especially when you want the upper body to look stronger without spending twenty minutes on isolation work.
Start with a wall push-up if floor push-ups feel like a grind. Place your hands at chest height on the wall, step your feet back, and keep your body in one straight line as you lower toward the surface. If that gets easy, move to a counter, then a bench, then the floor.
The lower you go, the more demanding it becomes. Simple. But don’t chase depth by sagging your middle or jutting your chin forward. Keep your ribs tucked, your neck long, and your elbows angled a bit back rather than flared straight out.
A solid target is 6 to 10 controlled reps. If your form falls apart at rep 4, stop at 4. Bad reps do not count as bonus work.
6. Bent-Over Row with Bands or Dumbbells
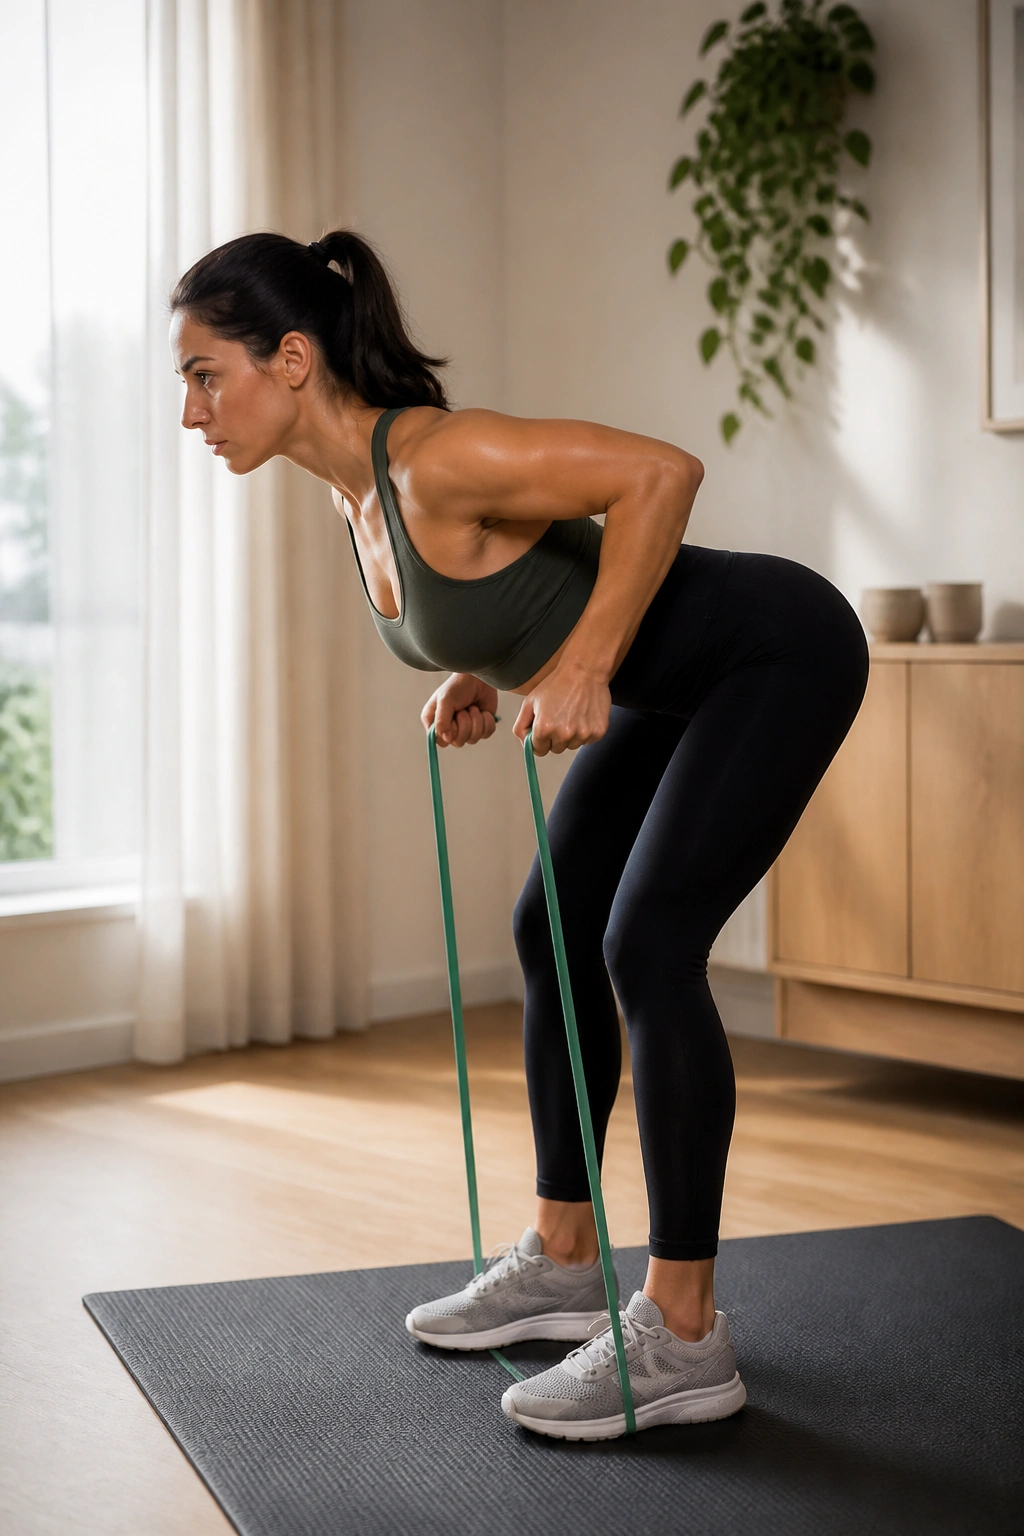
If you want better posture and a more toned look through the back, rows deserve a regular spot in your routine. They train the upper back, rear shoulders, and biceps, and they help balance out all the pushing and phone-hunched posture most people live with.
Stand with feet about hip-width apart, hinge at the hips, and let the weights hang under your shoulders. Pull the elbows back toward your pockets, pause for a second, then lower with control. The shoulder blades should move, but they should not shrug up toward your ears.
What makes this one matter
A strong back changes how your clothes sit. It also helps the shoulders stay in a better position when you do push-ups, presses, and everyday carrying. That matters more than people think.
A few good cues
- Keep your spine long.
- Brace your stomach before each pull.
- Don’t jerk the weight.
- Use a backpack, band, or two water bottles if that’s what you’ve got.
Rows are one of those exercises that look plain and work hard. I respect that.
7. Shoulder Press
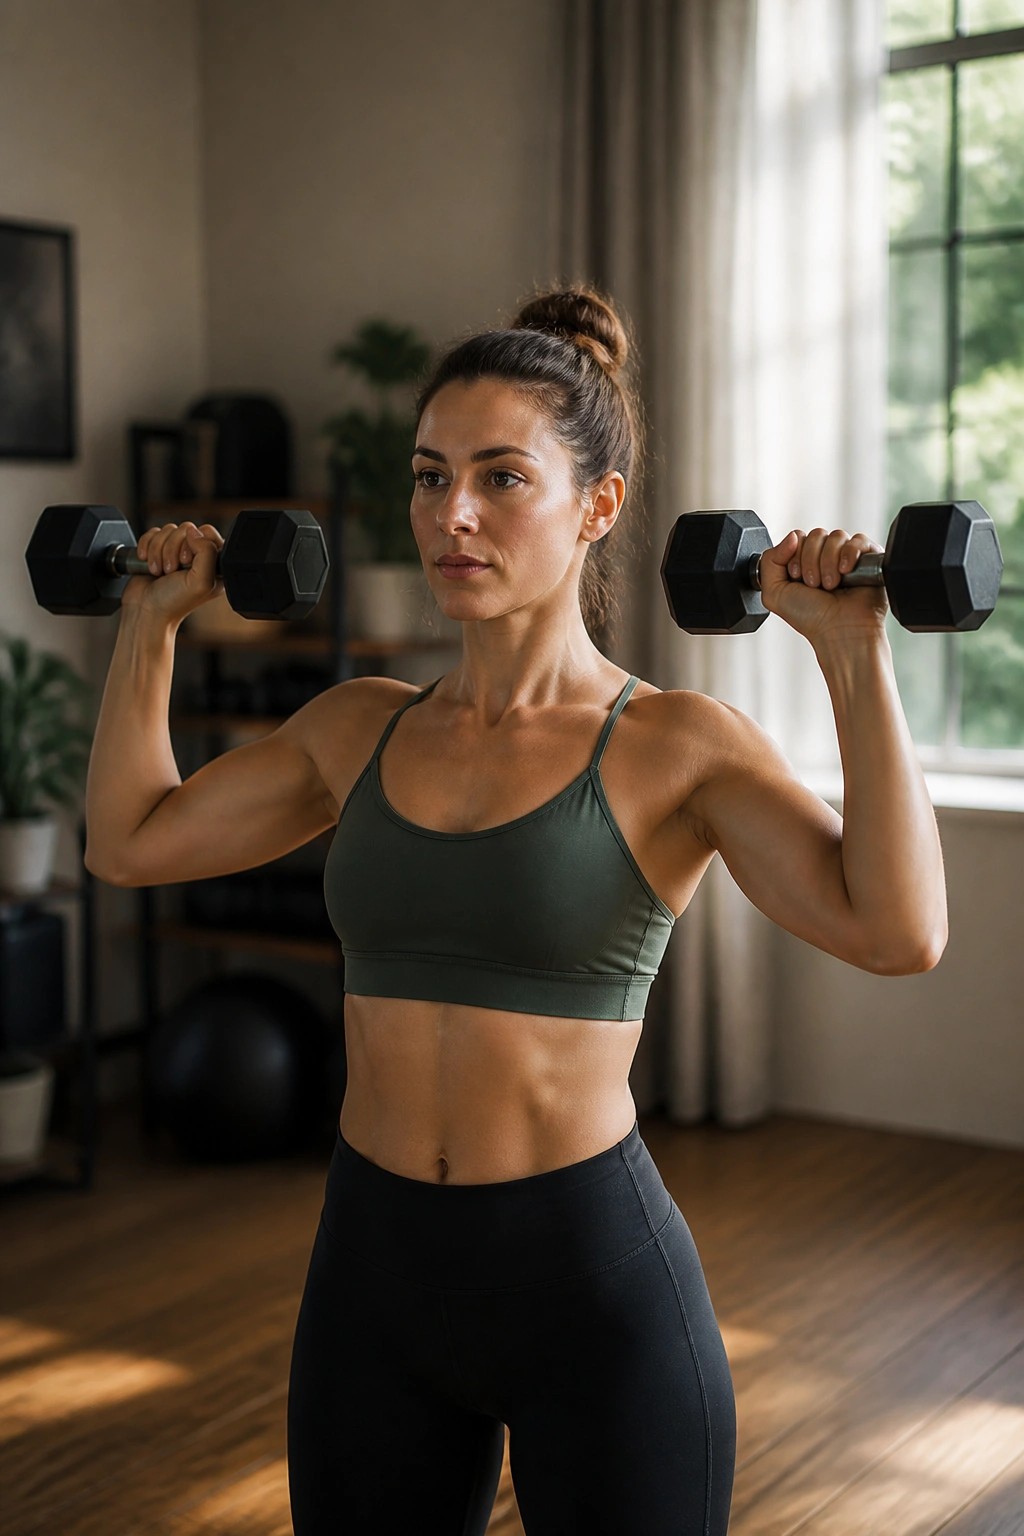
Shoulder presses are one of the quickest ways to give the upper body a firmer shape because they work the deltoids and triceps while forcing your core to stay steady. If your shoulders feel weak in daily life, this move pays off faster than most arm-only exercises.
You can do it seated or standing. Hold dumbbells, cans, or water bottles at shoulder height, palms facing forward or slightly in. Press the weight overhead until your arms are straight but not locked, then lower under control. Keep your ribs down so you don’t turn the press into a standing backbend.
If one side is weaker, you’ll know immediately. That’s useful. It tells you what your body is actually doing instead of what you think it’s doing.
Start with 2 to 3 sets of 8 to 12 reps. If your neck starts creeping upward and your shoulders feel jammed, the load is too heavy or your range is too large. Back off a little. Better form beats heavier weight every time here.
8. Dead Bug
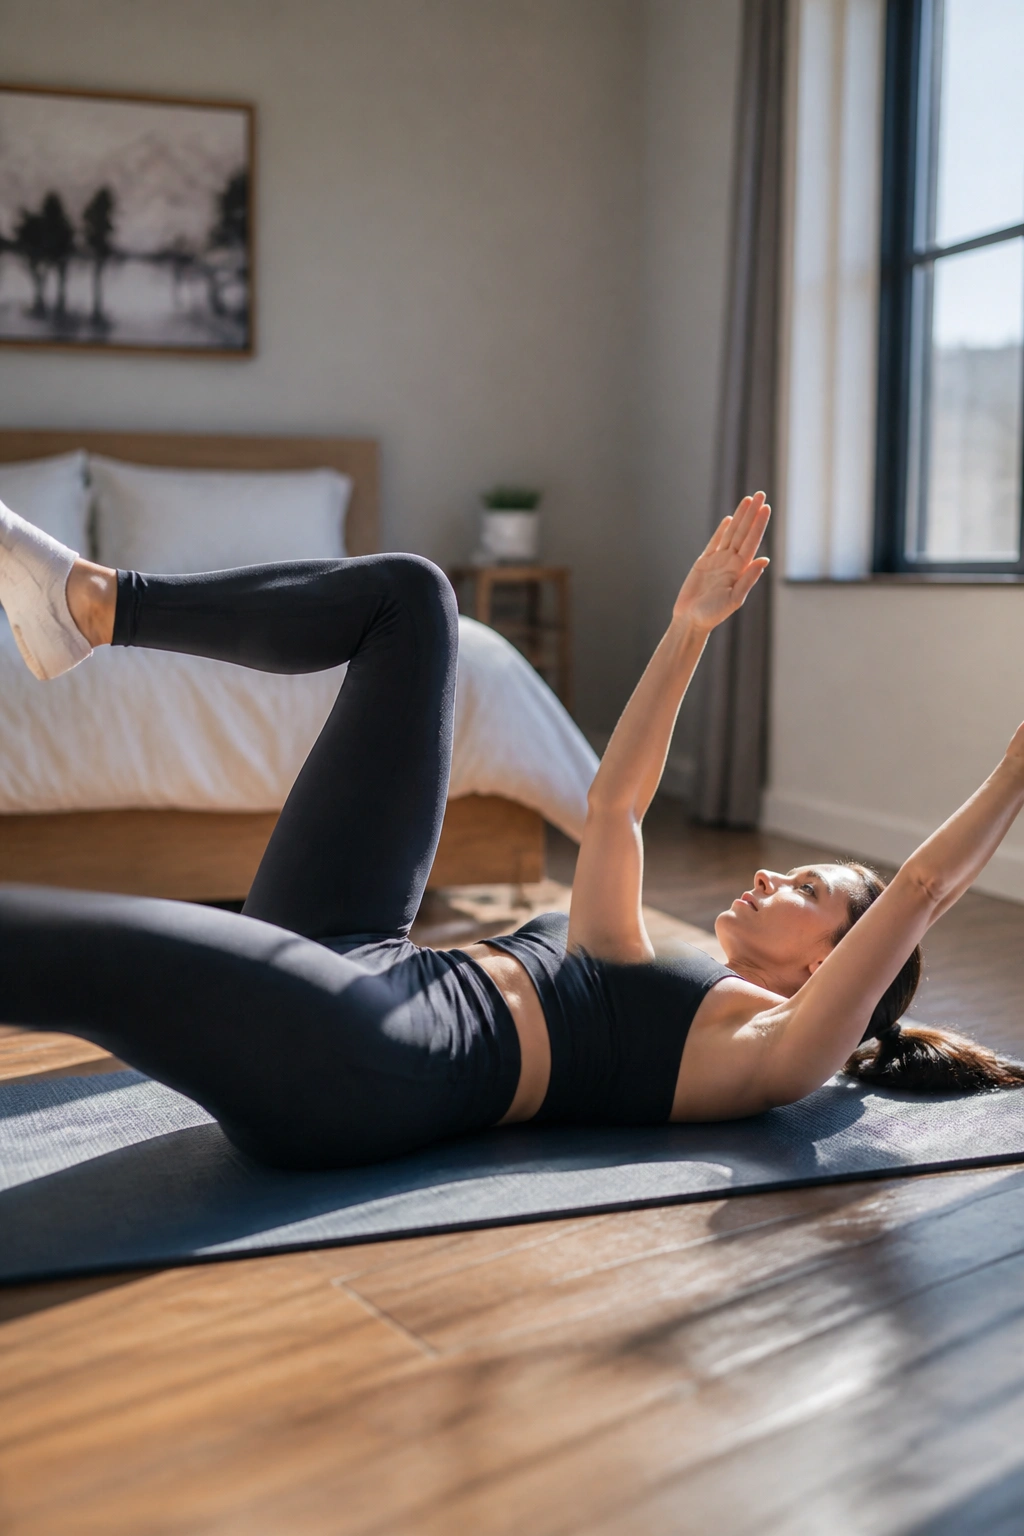
The dead bug looks almost too easy until you try to keep your lower back from lifting off the floor. That is the whole point. It trains deep core control, hip stability, and coordination without relying on fast twisting or momentum.
Lie on your back with your arms pointed toward the ceiling and your knees bent at 90 degrees. Flatten your lower back gently into the floor, then extend one arm and the opposite leg away from the center of your body. Return to start and switch sides.
What to watch for
Your back should stay quiet. If it arches, shorten the leg reach. If your shoulders tense up, relax the arms a little. If you hold your breath, the move gets harder than it needs to be.
Breathe out as you extend. Breathe in as you return. That small rhythm helps the core stay braced without turning the exercise into a fight. Eight reps per side is a good starting point, and slow beats fast here by a mile.
9. Plank Shoulder Tap
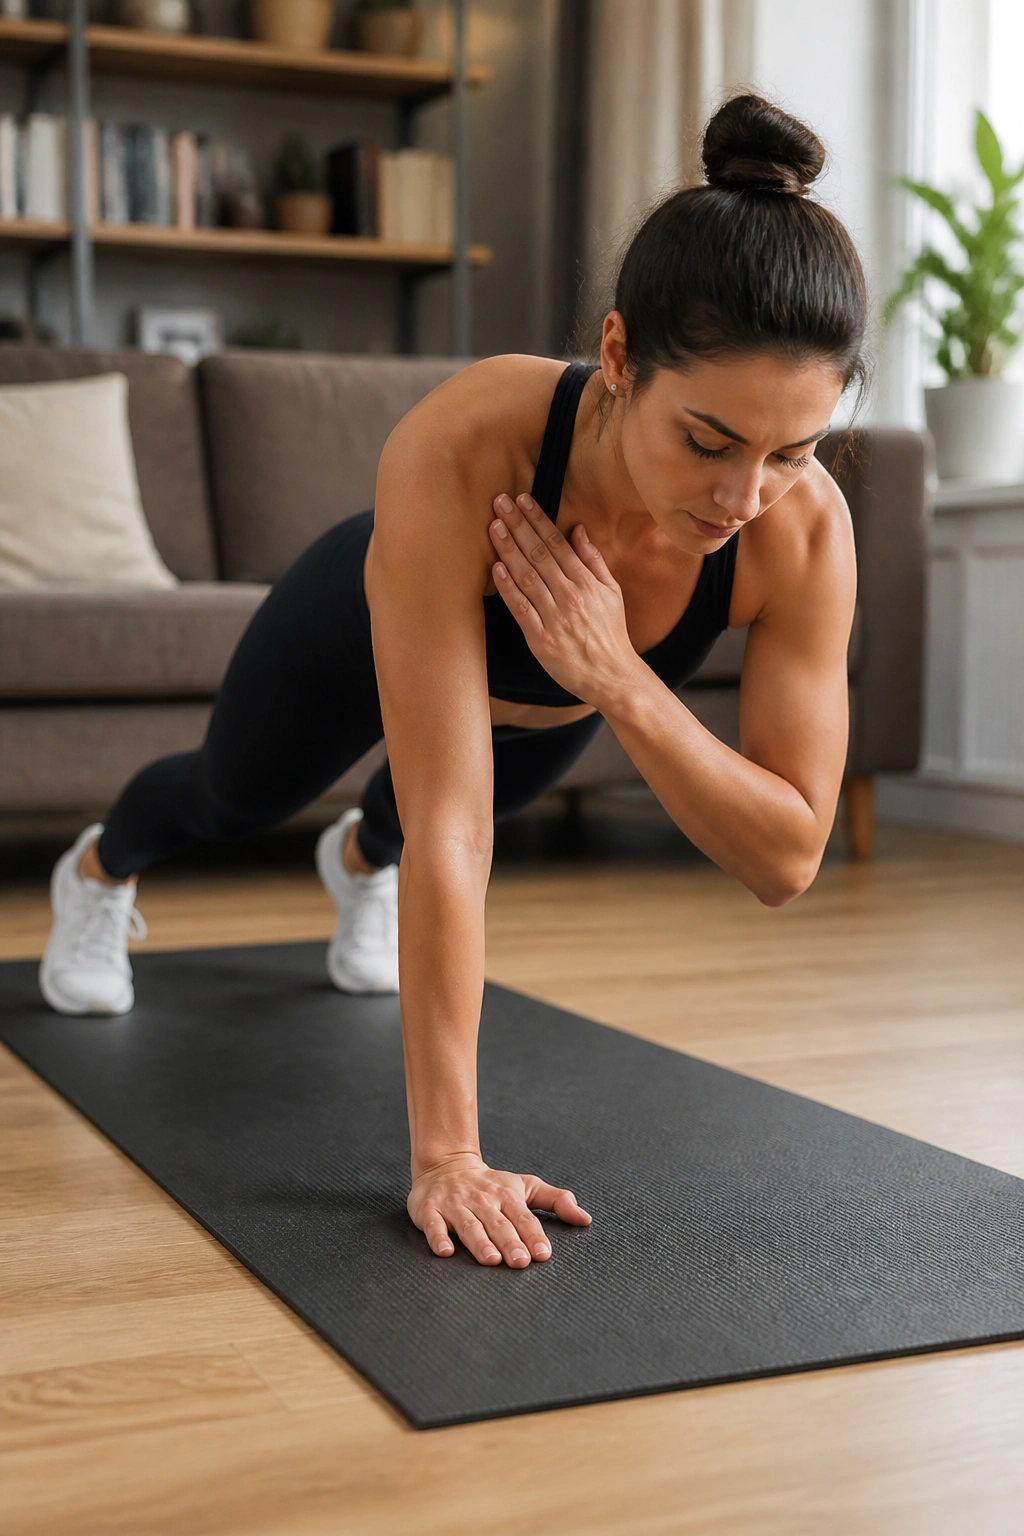
A shoulder tap plank is one of the better home exercises for the waistline area because it challenges your body to resist twisting. That anti-rotation work hits the core, shoulders, triceps, and stabilizers in a way a regular plank does not.
Set up in a high plank with your hands under your shoulders and your feet a little wider than hip-width. Tap one shoulder with the opposite hand, then switch sides without rocking your hips. The wider your feet, the easier it gets. The narrower they are, the more your body has to fight for balance.
How to make it worth doing
- Move slowly.
- Keep your hips square to the floor.
- Press the floor away with the planted hand.
- Stop if your lower back starts swaying.
You can do this on a bench or couch if the floor version feels too hard. That elevated version still works the core; it just takes some body weight off the wrists and shoulders. Try 8 to 12 taps per side and keep the motion quiet. No swinging. No drama.
10. Side-Lying Leg Lift
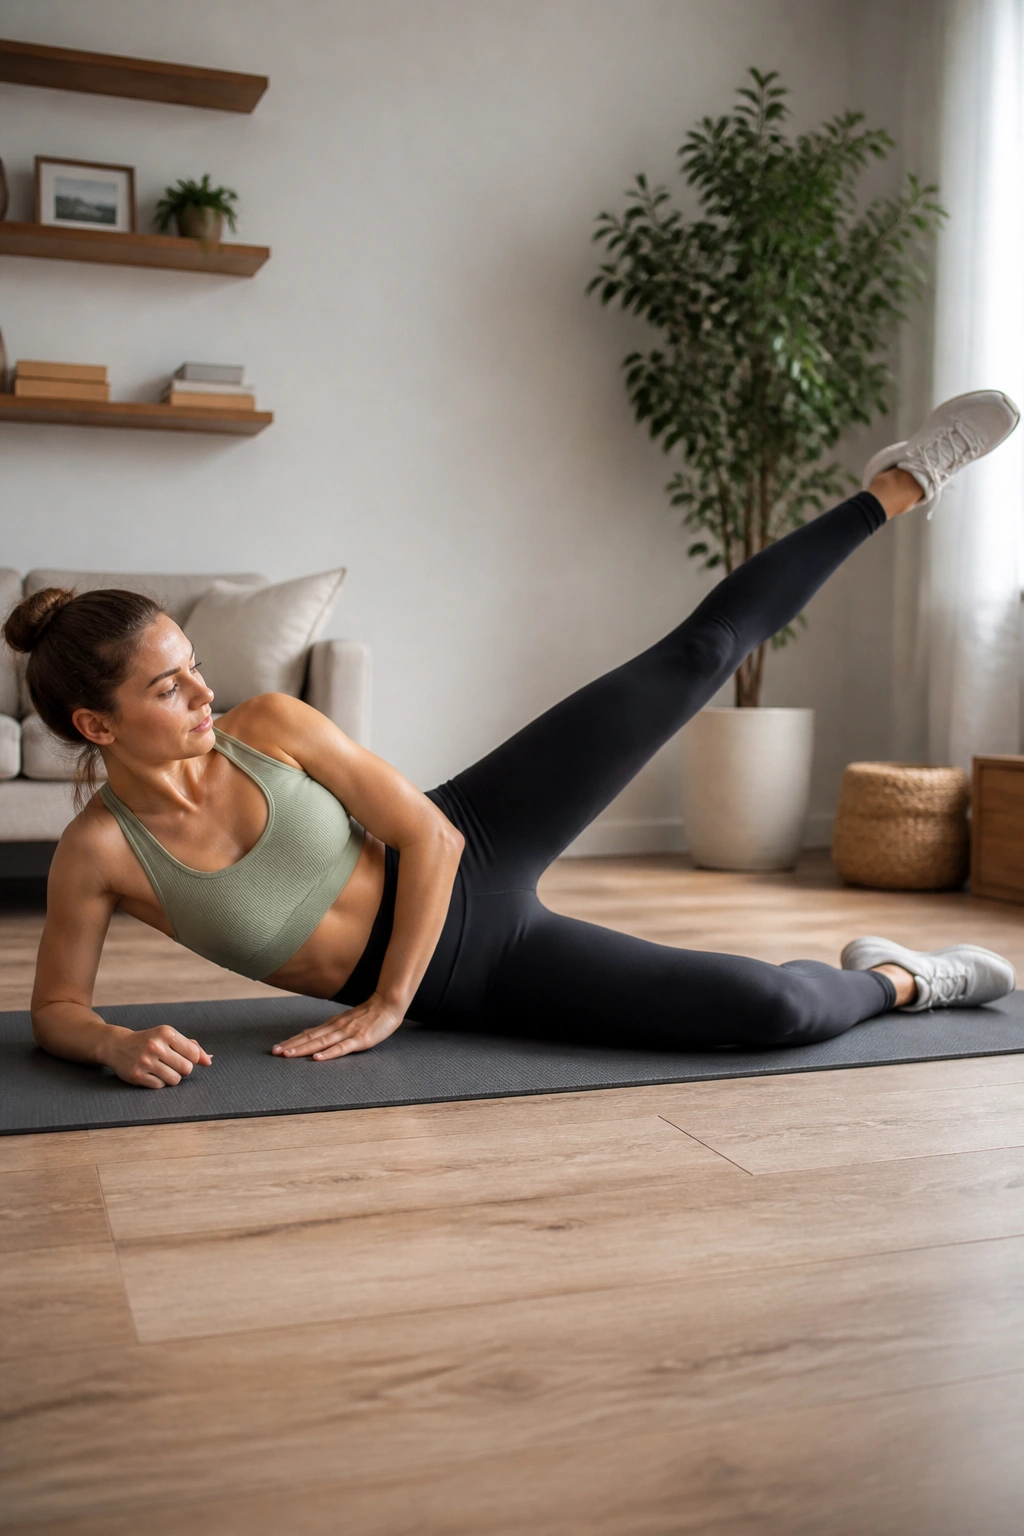
This one gets dismissed because it looks small. Then people do it properly and change their mind. Side-lying leg lifts hit the outer glutes and hip stabilizers, which are important for shaping the side of the hips and keeping the pelvis steady when you walk, climb, or lunge.
Lie on one side with your bottom leg bent for support and your top leg straight. Point the toes slightly down, lift the top leg 12 to 18 inches, pause briefly, and lower slowly. Keep the movement controlled. If the leg starts swinging, the exercise gets easier and less useful.
A light loop band above the knees makes this much tougher without needing heavier weights. It’s also one of the few exercises where a smaller range of motion can actually feel better if the outer hip is tight. Don’t force height. Chasing height usually invites hip flexor cheating.
Do 12 to 20 reps per side. Burn is normal. Sharp pain is not.
11. Curtsy Lunge
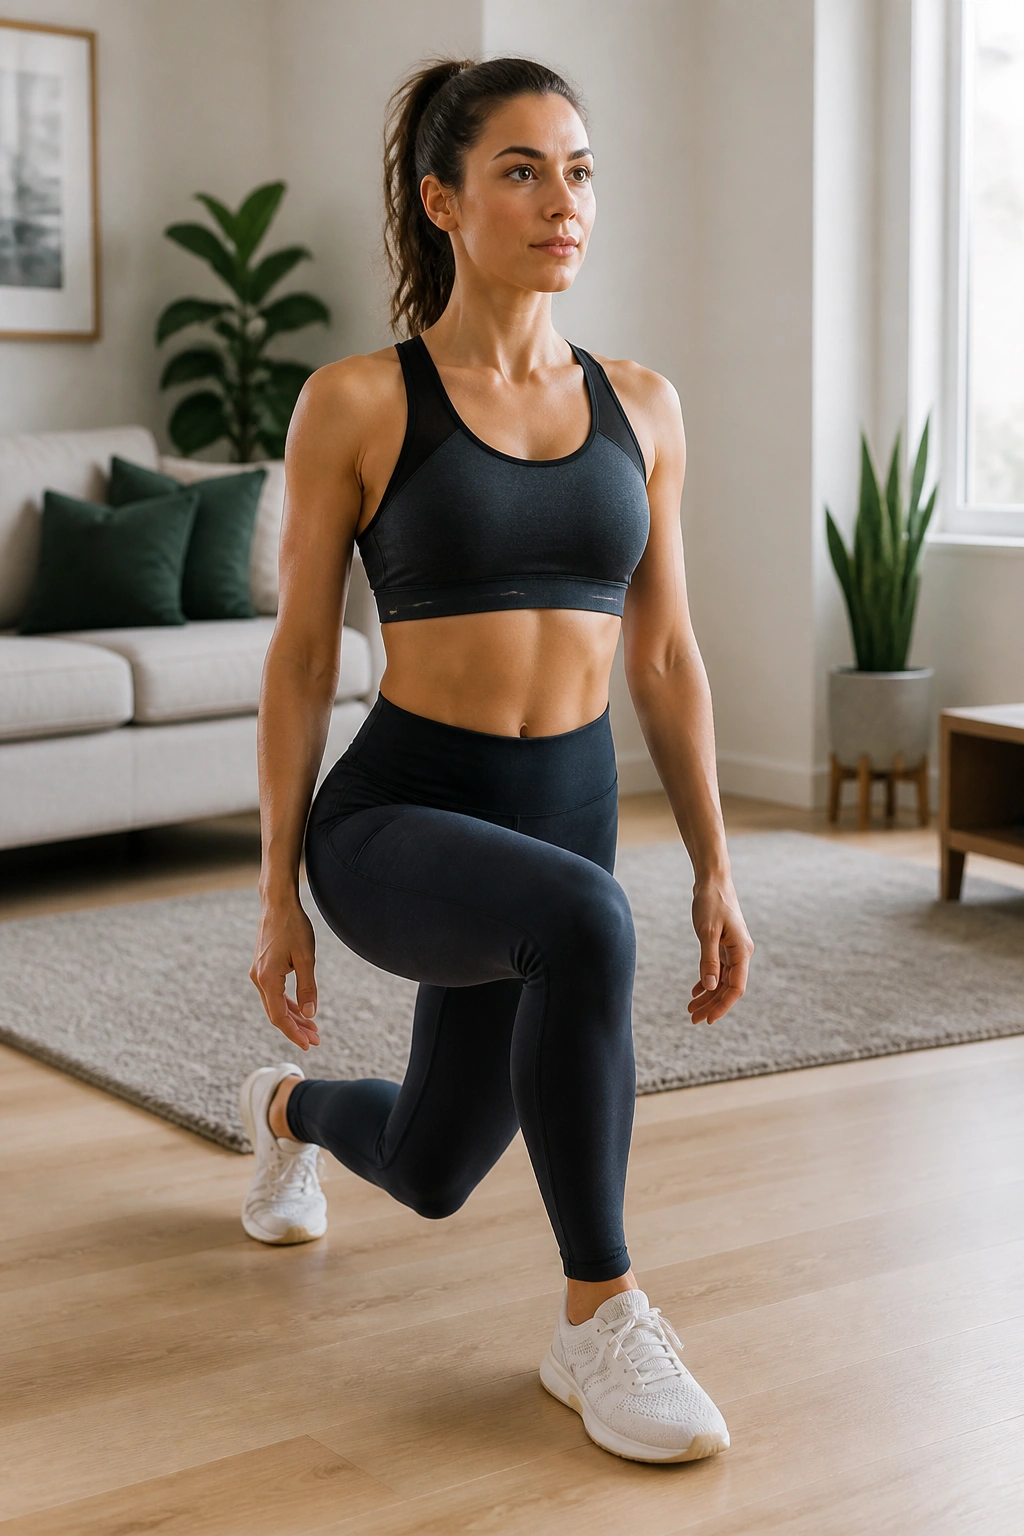
Curtsy lunges are a little more awkward than standard lunges, and that awkwardness is part of why they work. The crossed-back angle challenges the glutes, outer hips, and thighs in a different plane of motion, which can help the lower body look and feel more balanced.
Step one leg diagonally behind the other, lower with control, and keep most of your weight in the front heel. Rise through the front leg and reset before the next rep. Your torso should stay fairly upright, and your knees should feel tracked and supported, not twisted.
Not every body loves this move. If your knees complain, shorten the step or swap it for a lateral lunge. That is a reasonable change, not a failure. The goal is useful work, not winning a contortion contest in your living room.
Use bodyweight first. Then add light dumbbells or a backpack if the pattern feels smooth and stable. Eight to 10 reps per side is enough to make it count.
12. Triceps Dip on a Chair
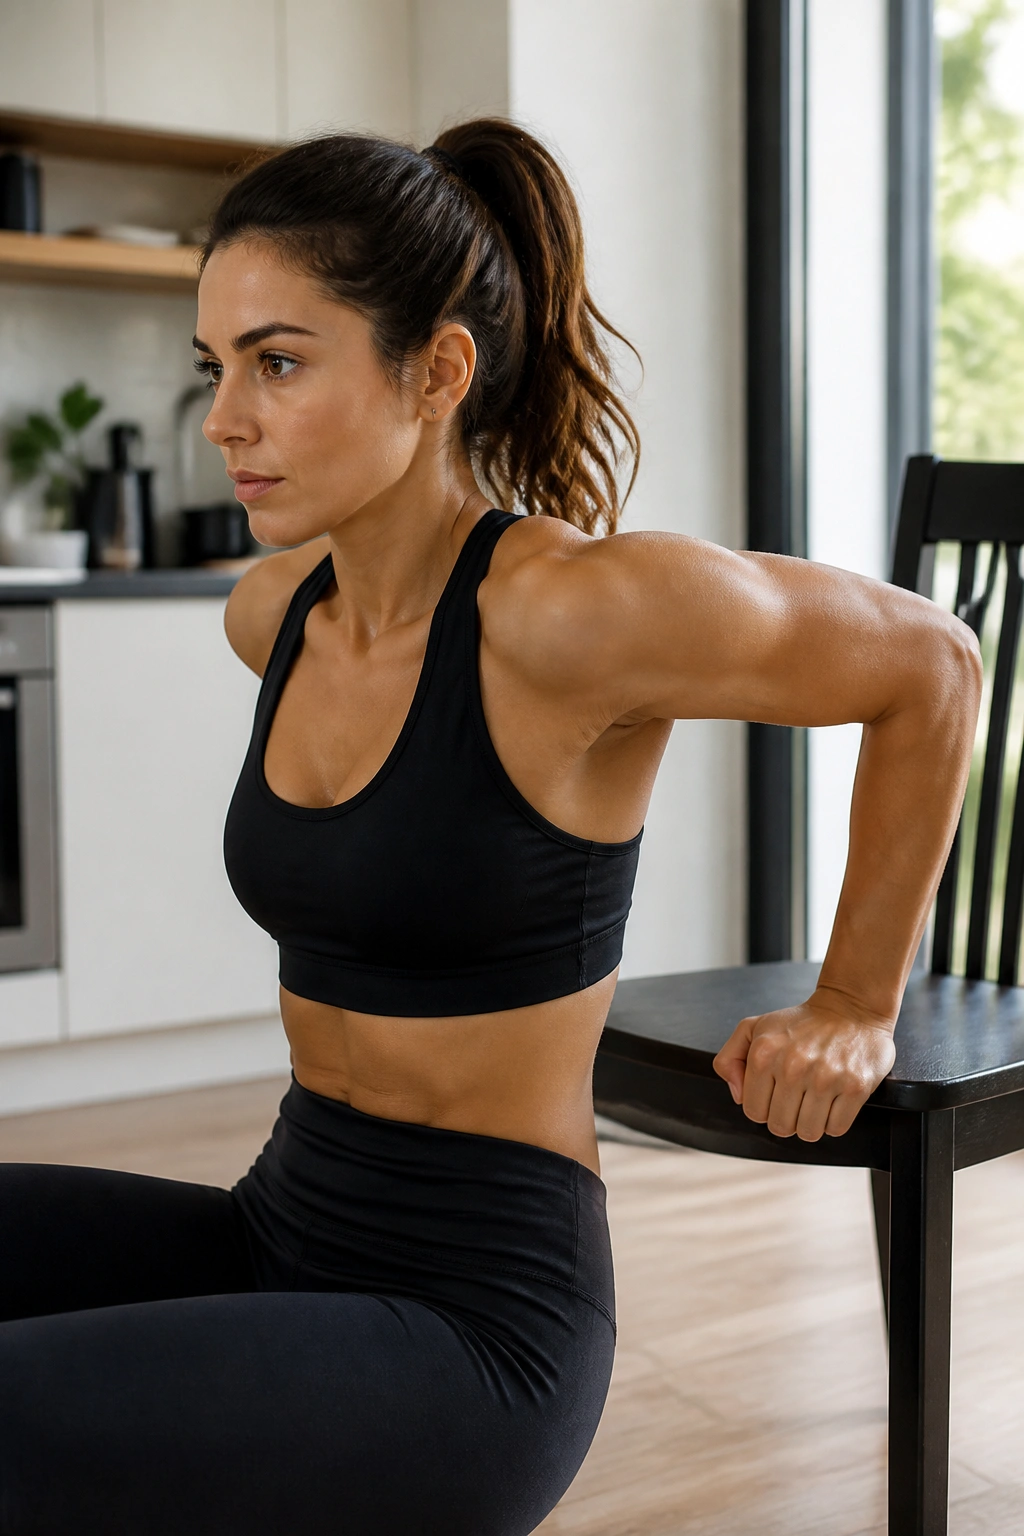
The backs of the arms are one of the places people notice firmness first, which is probably why triceps dips stay popular. A chair dip works the triceps and front shoulders and gives you a fast upper-arm burn if your setup is stable.
Sit on the edge of a strong chair or bench, place your hands beside your hips, and walk your feet forward. Slide your hips off the edge, bend your elbows, and lower until your upper arms are about parallel to the floor. Press back up without letting the shoulders shrug toward your ears.
A small warning
If the chair is wobbly, do not use it. If your shoulders feel pinchy at the bottom, shorten the range or skip this exercise for something friendlier like close-grip push-ups against a wall.
That said, when the form is clean, dips are effective. Keep the elbows pointing back, not flaring wide, and make the lowering phase slow enough that you can feel the triceps taking over. Ten good reps matter more than twenty rushed ones.
13. Step-Up on Stairs or a Stable Bench
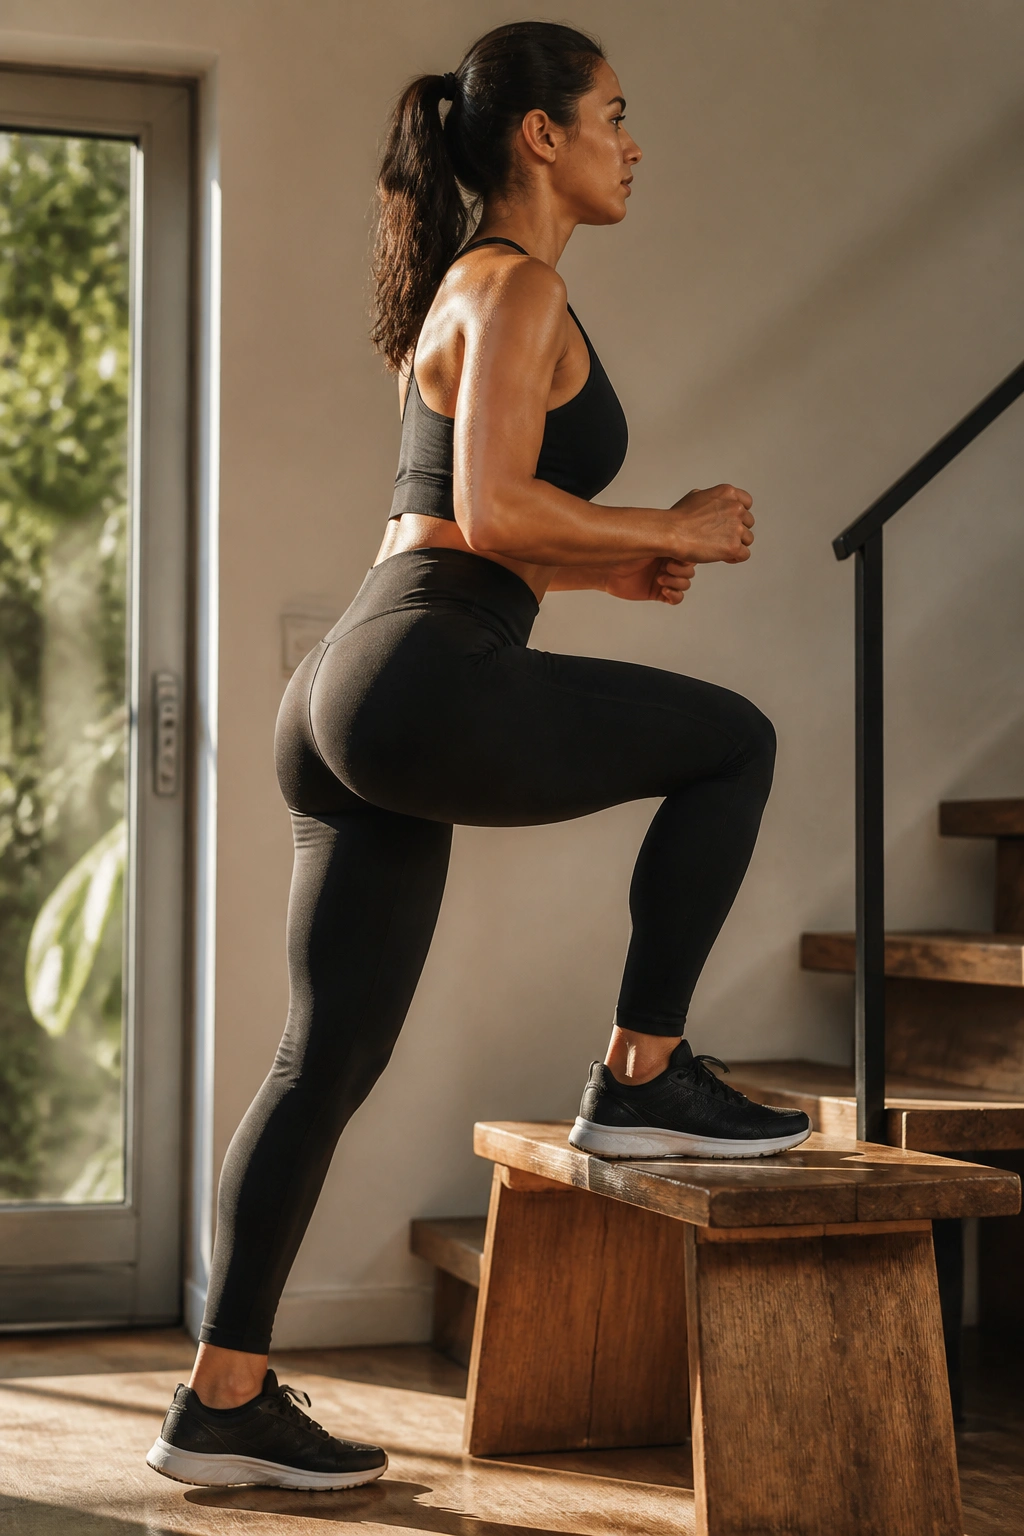
Step-ups are one of the most underrated firming exercises because they feel simple but load the glutes, quads, and balance muscles in a very real way. They also translate well to everyday life. Stairs are not glamorous, but they are useful.
Place one foot fully on a stair, sturdy box, or strong bench. Lean slightly forward from the hips, drive through the planted heel, and stand all the way up before stepping back down with control. The working leg should do most of the job. Don’t push off the floor with the trailing foot and pretend it counts.
You can hold dumbbells at your sides, wear a backpack, or start with bodyweight only. If your knee caves inward on the way up, slow down and reduce height. That wobble is usually a sign the load is too much or the step is too high.
I like step-ups for people who want legs that look firmer without living in lunge land. They’re direct. No nonsense.
14. Bicycle Crunch
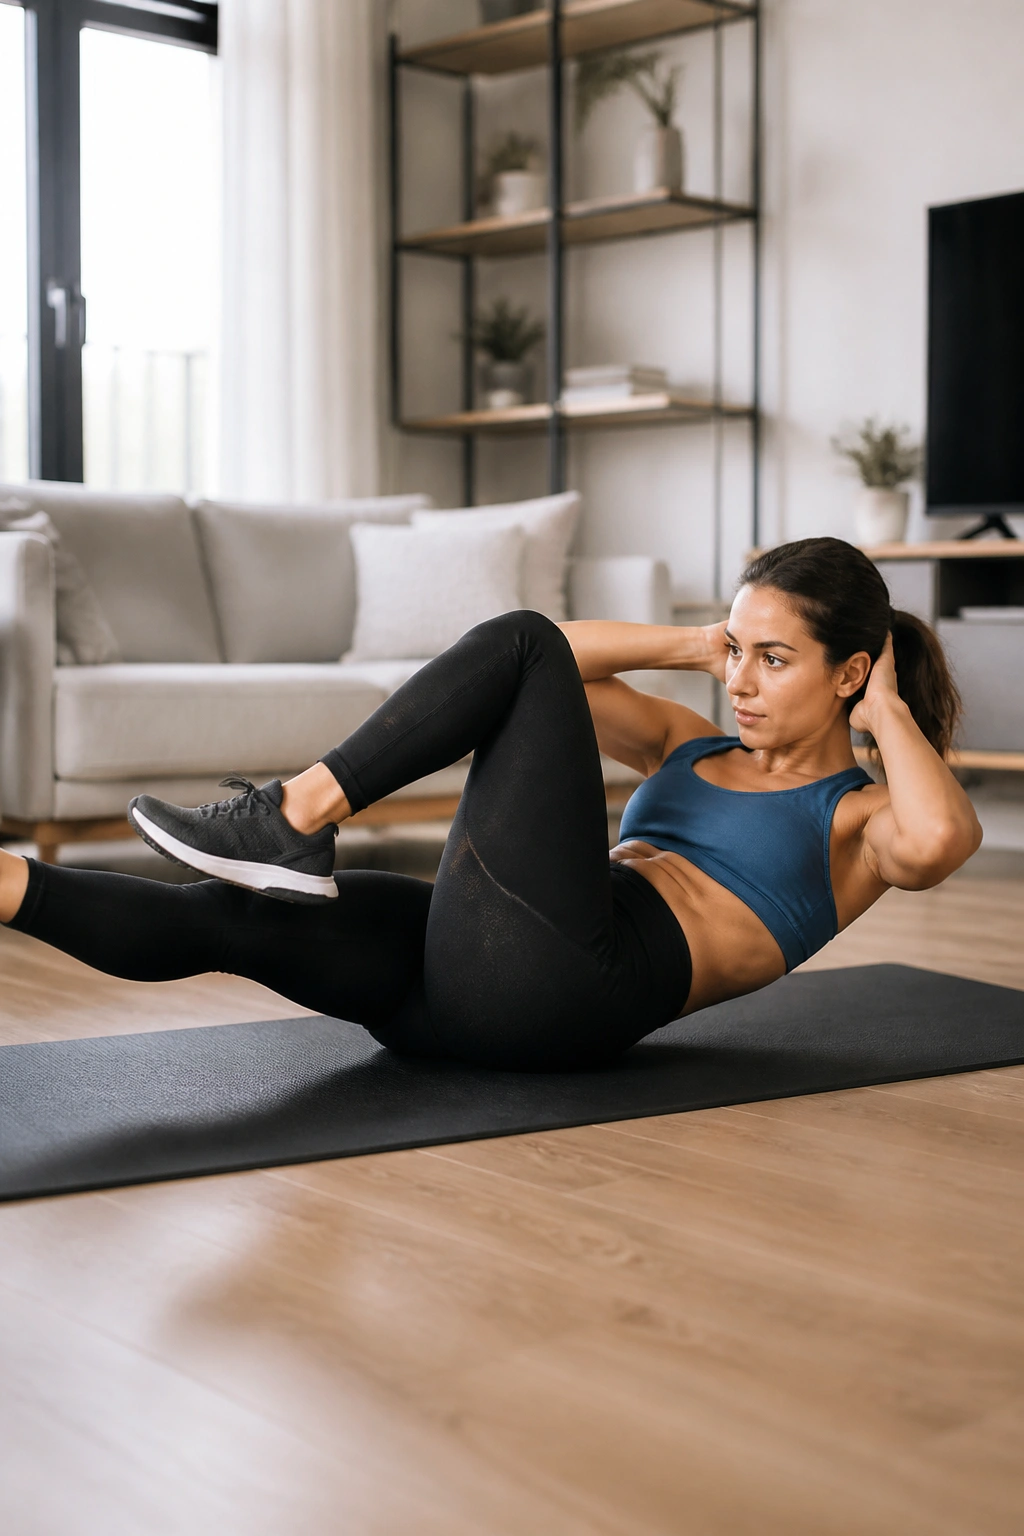
Bicycle crunches have a bad reputation because people whip through them like they’re trying to win a speed contest. Done slowly, they’re a strong core and oblique exercise that can help tighten the midsection and improve torso control.
Lie on your back, lift your shoulders slightly off the floor, and bring one elbow toward the opposite knee while the other leg extends out. Then switch sides. The twist should come from the ribs and torso, not from yanking your neck. Keep the movement controlled enough that you can feel the abs doing the work.
The mistake that ruins it
If your elbows are flying and your lower back is arching hard, the exercise turns sloppy fast. Shorten the range. Slow the tempo. Think about keeping your chest open and your abs braced.
Fifteen to 20 controlled reps per side is plenty for most people. You should finish feeling worked, not like you got folded in half by a bicycle you never asked for.
15. Wall Sit with Calf Raise
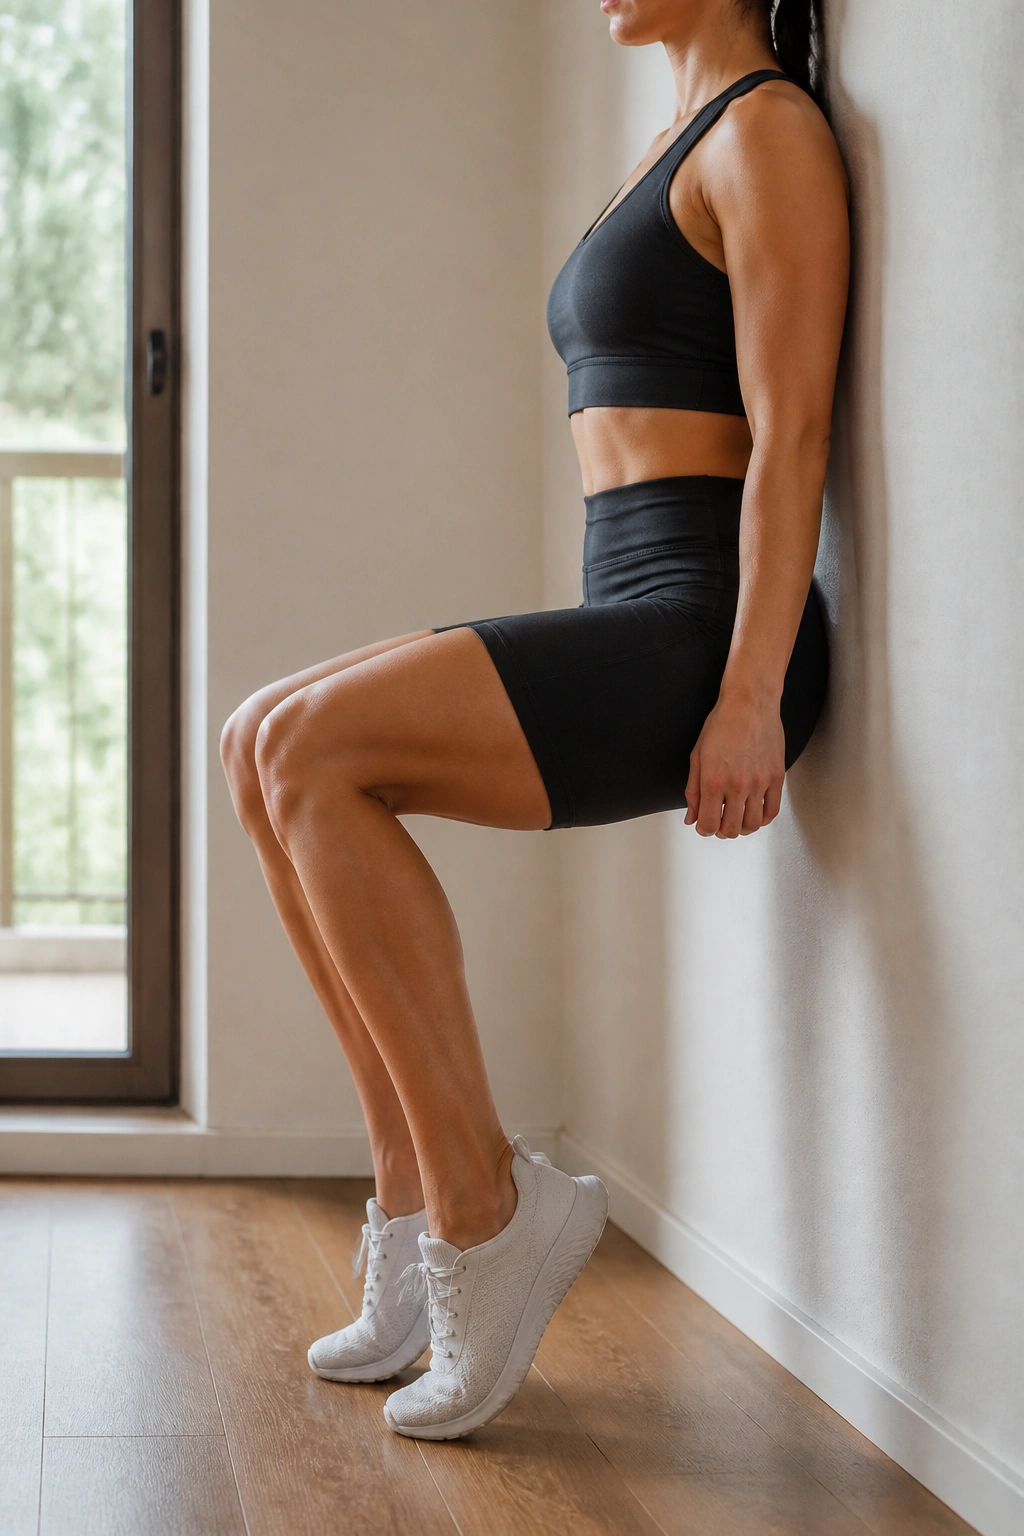
Wall sits are a little boring, and I mean that in the best way. They build leg endurance, thigh strength, and mental patience, which matters more than people admit. Pairing the hold with calf raises makes the lower legs join the party too.
Slide your back down a wall until your knees are close to 90 degrees, feet a comfortable distance in front of you. Hold that position and keep your ribs stacked over your hips. If you want the calf raise version, lift your heels slowly, lower them, and keep the thighs steady the whole time.
This is a smart finisher because it forces a deep, sustained burn without complicated setup. Start with 20 to 30 seconds, then build toward 45 seconds or a full minute if your form stays clean. Add 10 to 15 calf raises before standing up.
A wall sit is not flashy. It works anyway. That’s often the better deal.
A home workout built around these moves does not need to be long to be effective. A short session with real effort beats a longer one where you drift through the reps and call it fitness. Use a chair, a backpack, a band, a mat, and a little patience, then keep coming back to the same basics until they stop feeling basic.
If you want the simplest way to organize them, pair one squat or lunge, one hinge, one push, one pull, and one core move in the same workout. That gives you the kind of balanced work that changes how your body feels in clothes and out of them. Not overnight. Not magically. Just steadily, which is usually the part people skip.
