



Resistance band ab workouts can look almost too easy from the outside. Then the band starts pulling you off line, your ribs want to flare, and your hips start doing that annoying little wiggle that tells on you fast. That’s the whole trick: a good core move is not just about bending forward. It’s about resisting movement, holding your trunk steady, and keeping your pelvis and ribs stacked while the band keeps changing the angle of the fight.
That is why bands are so useful for a tight core. They load your midsection in ways crunches alone do not. Some moves train anti-rotation, some make your obliques brace hard, and a few teach your abs to stay locked in while your arms or legs move around them.
Crunches are fine. They just get old.
A long loop band, a mini band, and a door anchor cover most of the work here. You do not need fancy gear, and you definitely do not need to yank every rep like you’re trying to win a tug-of-war with the floor. Slow reps, crisp bracing, and clean body positions do more for your core than frantic speed ever will. Start with the first press, because that one sets the tone for everything else.
1. Standing Resistance Band Pallof Press
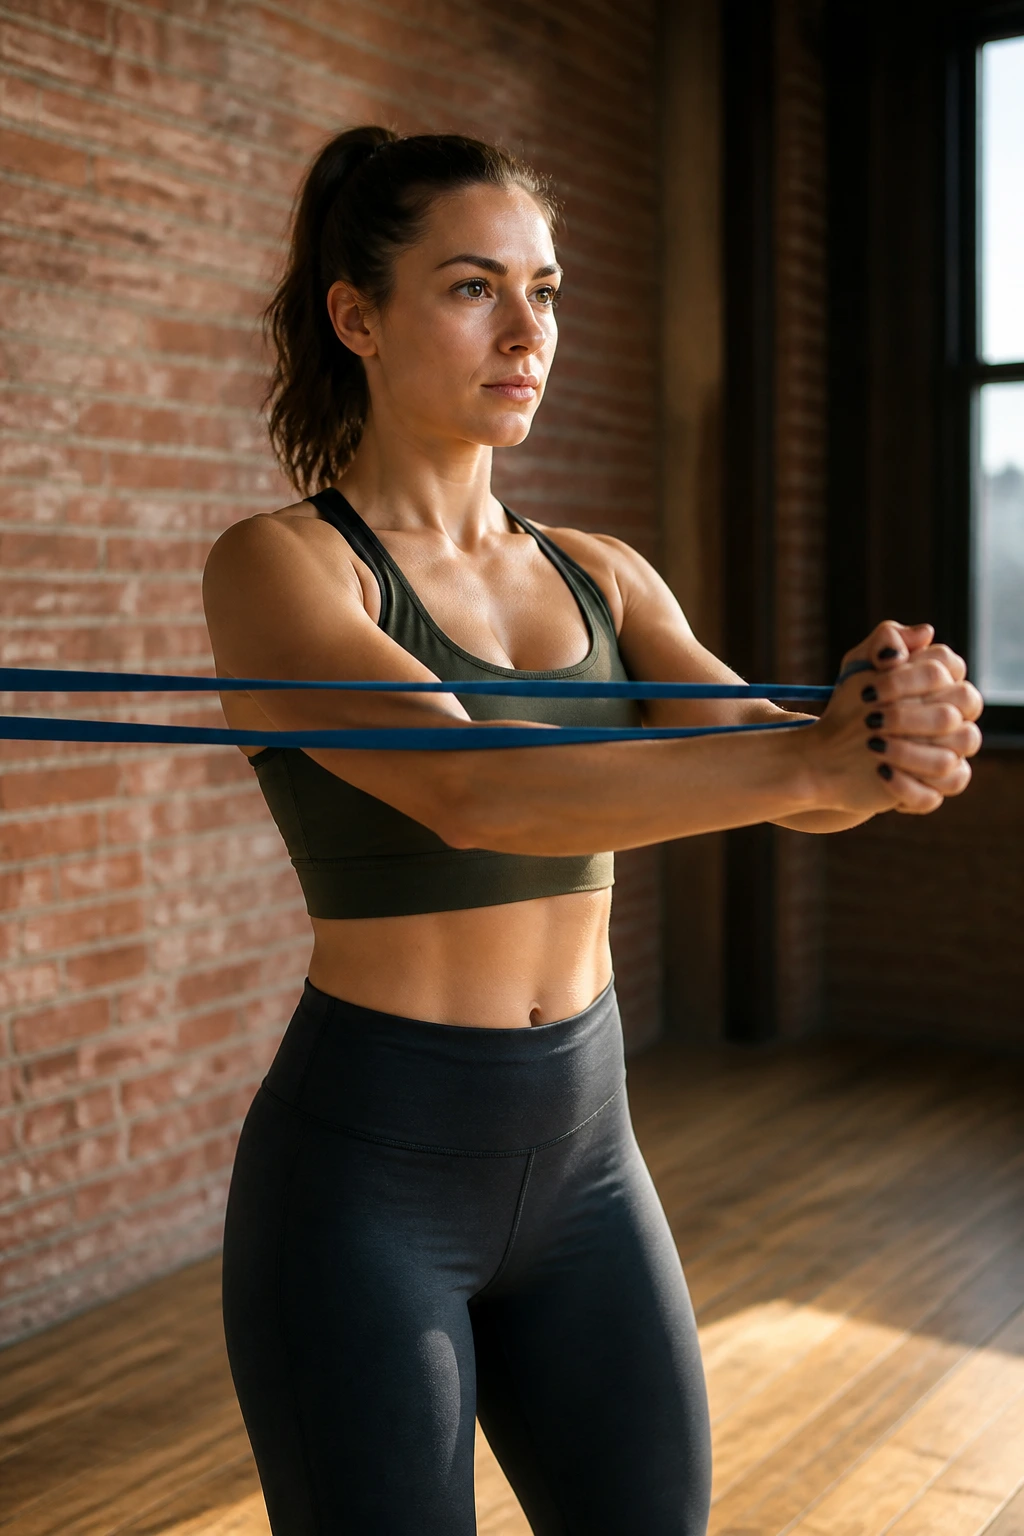
The standing Pallof press is one of those exercises that looks calm and feels sneaky. You stand tall, press the band straight out from your chest, and fight the urge to rotate toward the anchor point. That quiet fight is what lights up your deep core, especially the obliques and the muscles that keep your ribs from flaring.
Why it works
A lot of ab work wants you to curl. This one asks you to stay still. That makes it a favorite when you want core stability instead of just a burn in the front of the abs.
Keep your feet about hip-width apart, soften your knees, and brace before each press. The band should try to twist you. You should not let it win.
- Anchor the band at chest height.
- Press both hands straight out for 1 to 2 seconds.
- Hold 2 to 3 seconds with your arms extended.
- Do 8 to 12 reps per side.
Tip: If your shoulders creep up, the band is too heavy.
2. Half-Kneeling Pallof Press
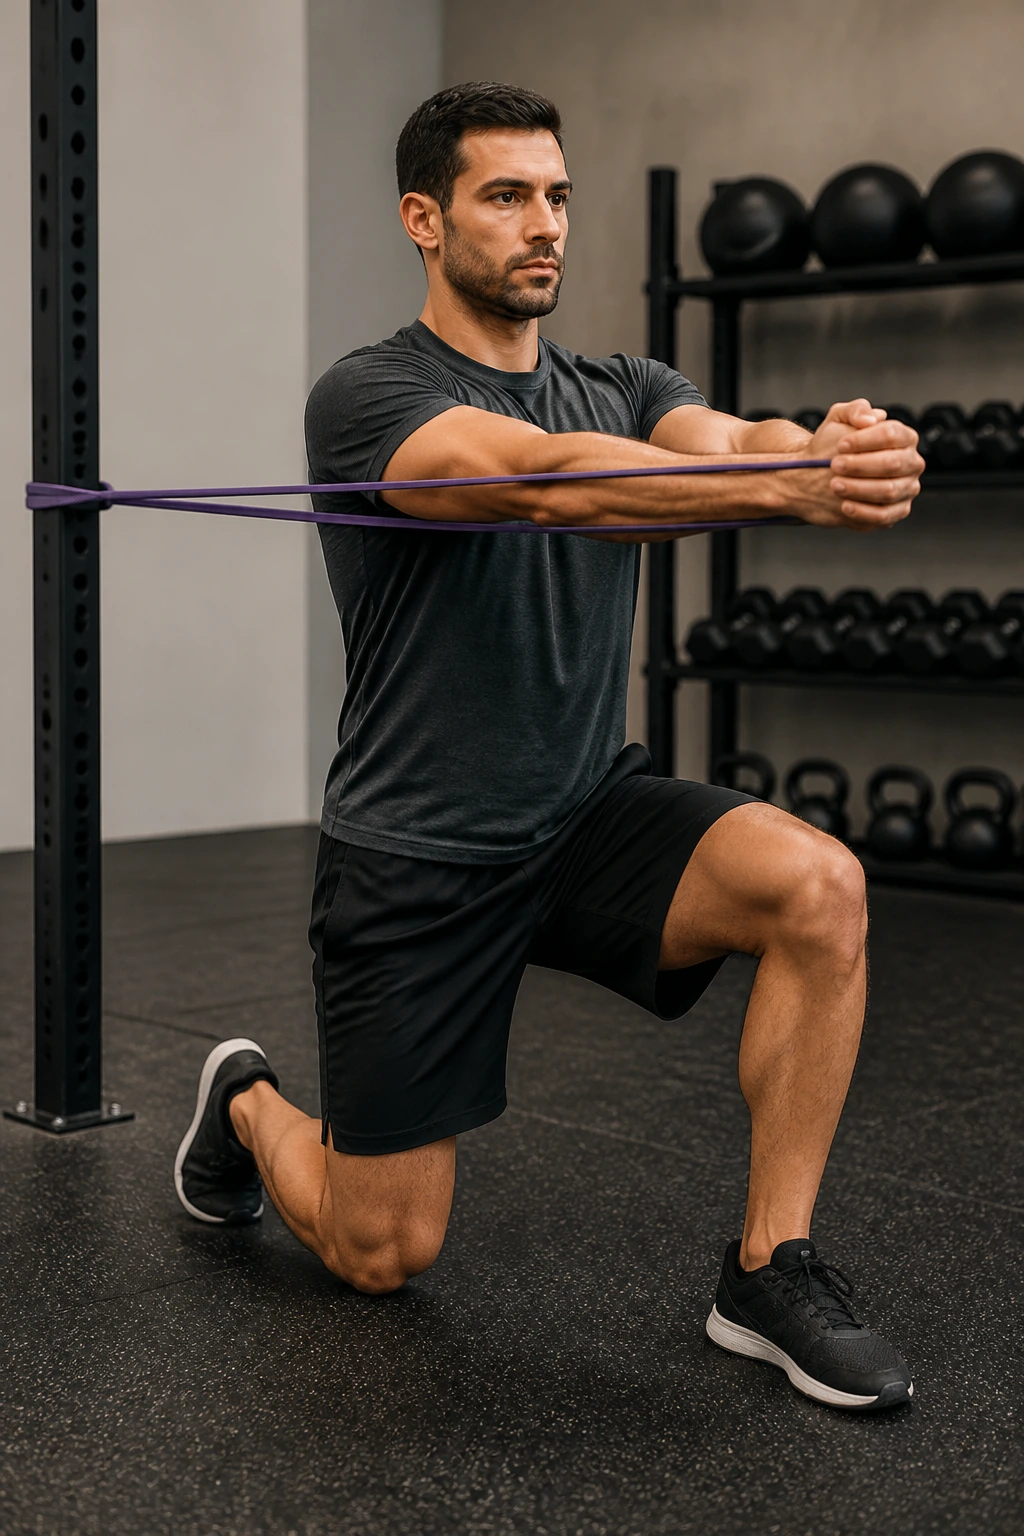
Half-kneeling is the Pallof press’s stricter cousin. One knee on the floor removes a lot of help from your legs, so your trunk has to do the real work. It also makes side-to-side cheating painfully obvious. Good. You want that feedback.
This version is especially useful if you tend to arch your back when standing core work gets hard. The kneeling position helps you feel ribs down, glutes lightly squeezed, spine tall.
What to watch for
Do not lean toward the band. That tilt shows up fast and steals the whole point of the move. Keep your front foot flat, back knee padded, and press the band from your sternum straight out to full extension.
A clean set feels boring in the best way. Nothing swings. Nothing twists. Your abs stay on duty the whole time.
- Set the band at chest height.
- Kneel with the inside knee down.
- Press for 8 to 10 reps per side.
- Use a 2-second pause on every extension.
Pro tip: Squeeze the glute on the down-knee side. It helps keep your pelvis from drifting.
3. Pallof Press With Overhead Reach
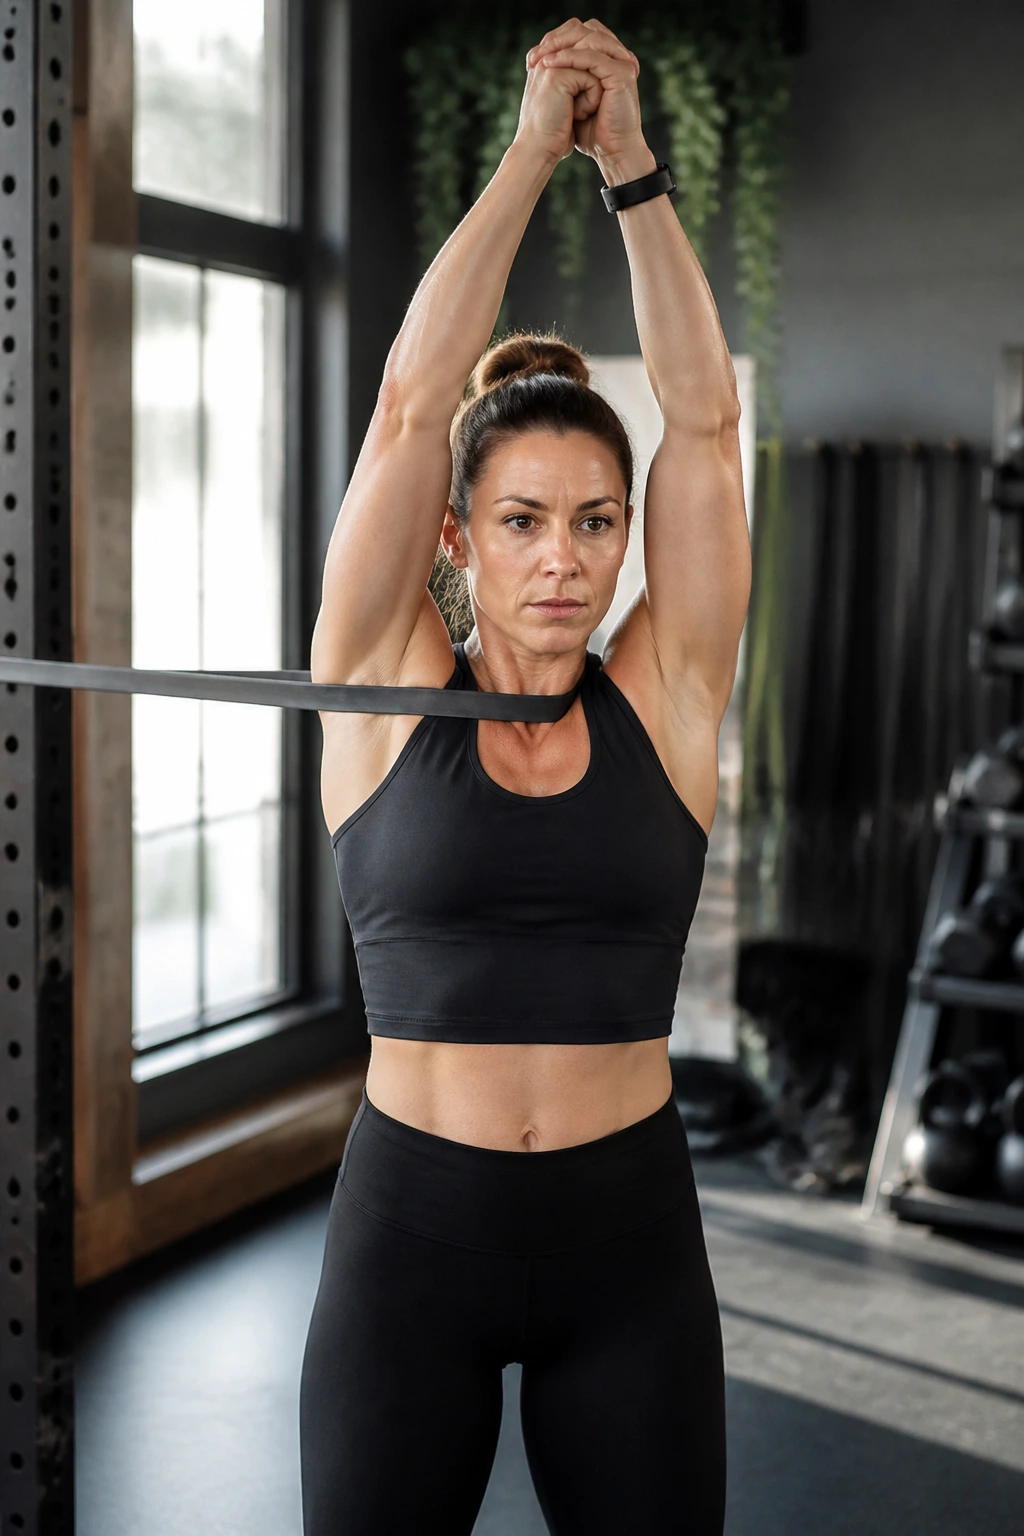
Once the standard press feels easy, the overhead reach makes the job harder in a good way. You press the band out, then take your arms up overhead without letting your rib cage pop forward. That extra reach gives the band more leverage against your trunk.
Why does that matter? Because your core has to keep your torso from turning into a little arch. The abs, obliques, and lower back all have to cooperate. If one part gives up, you feel it.
Start light. Seriously. People grab a heavy band here and then spend the whole set fighting a sway they cannot control.
How to use it
Press out, lock in your brace, and raise your hands slowly until your biceps are near your ears. Then bring the band back to chest height before the next rep. Keep your ribs stacked over your pelvis the whole time.
- 6 to 8 slow reps per side is plenty.
- Hold the overhead position for 2 seconds.
- Step closer to the anchor if your body starts turning.
What makes it harder
The overhead angle changes the line of pull. That is why it feels tougher than a normal press even when the band is the same. Tiny detail. Big difference.
4. Band Dead Bug
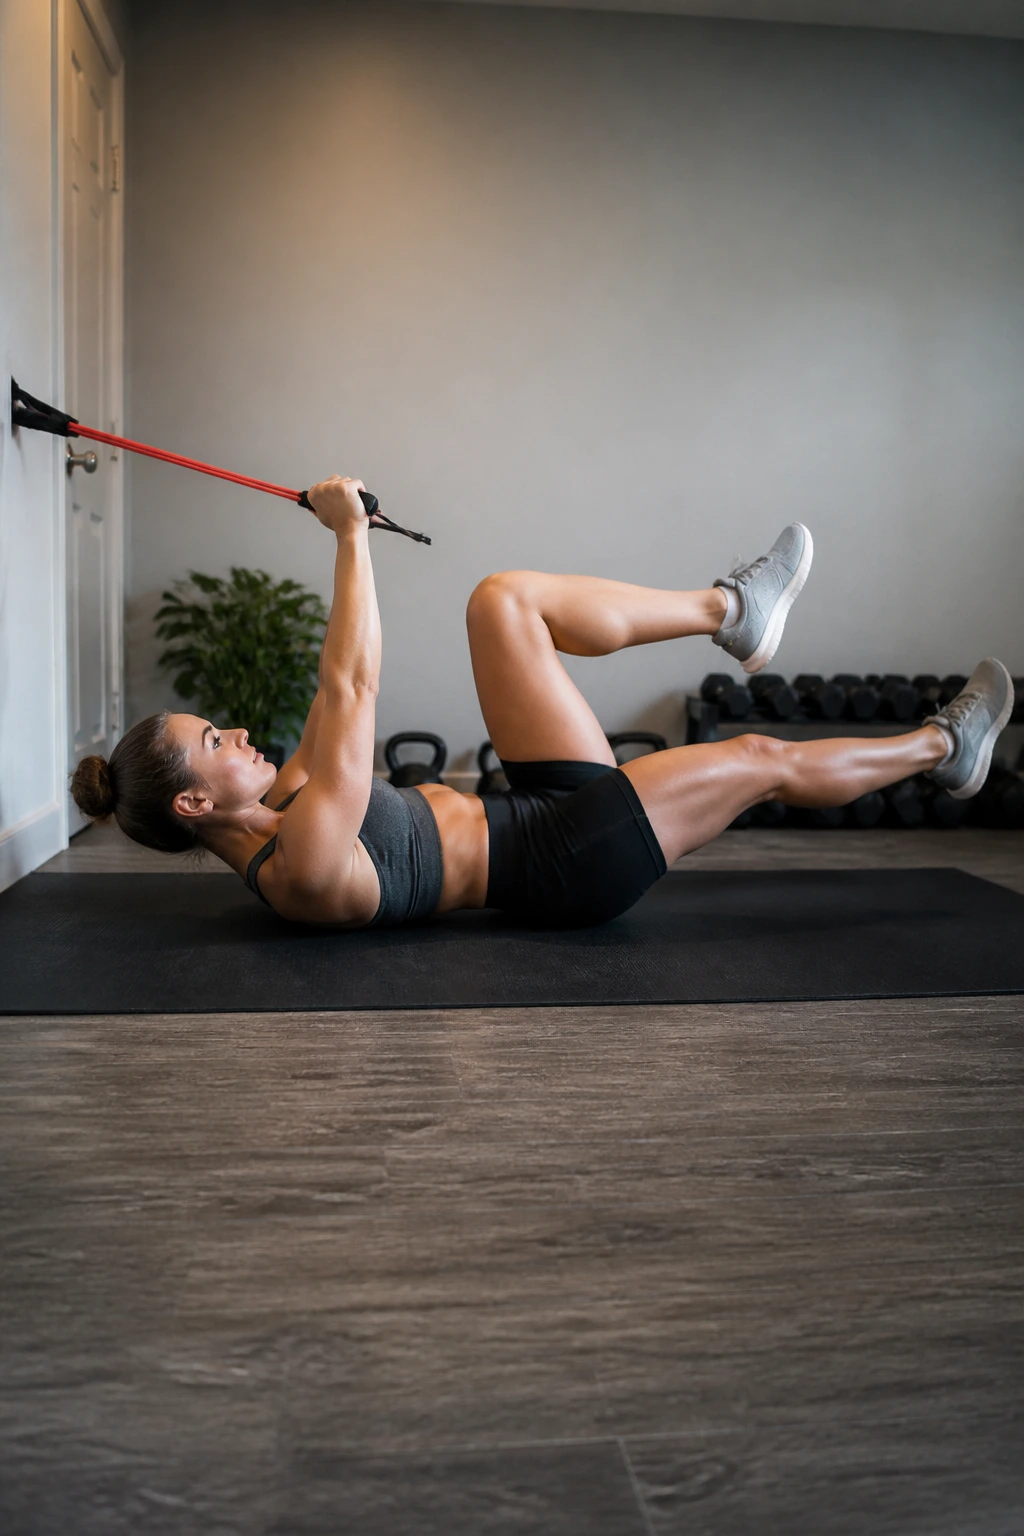
The band dead bug is one of the best ways to train your lower abs without punishing your neck. You lie on your back, brace hard, and move opposite arm and leg while the band adds tension that tries to pull you out of position. If your low back pops off the floor, the set is too aggressive.
This move works because the trunk has to stay quiet while the limbs move. That is exactly the kind of control most people miss when they only do crunches.
Keep your knees bent at 90 degrees, arms up, and exhale as you extend. The exhale helps set the brace. Not dramatic. Just enough to feel the lower belly tighten.
- Press one heel out slowly.
- Reach the opposite arm back without arching.
- Return with control, not momentum.
- Do 6 to 10 reps per side.
Watch this: If your hip flexors start doing all the work, shorten the range and slow down.
5. Resistance Band Reverse Crunch
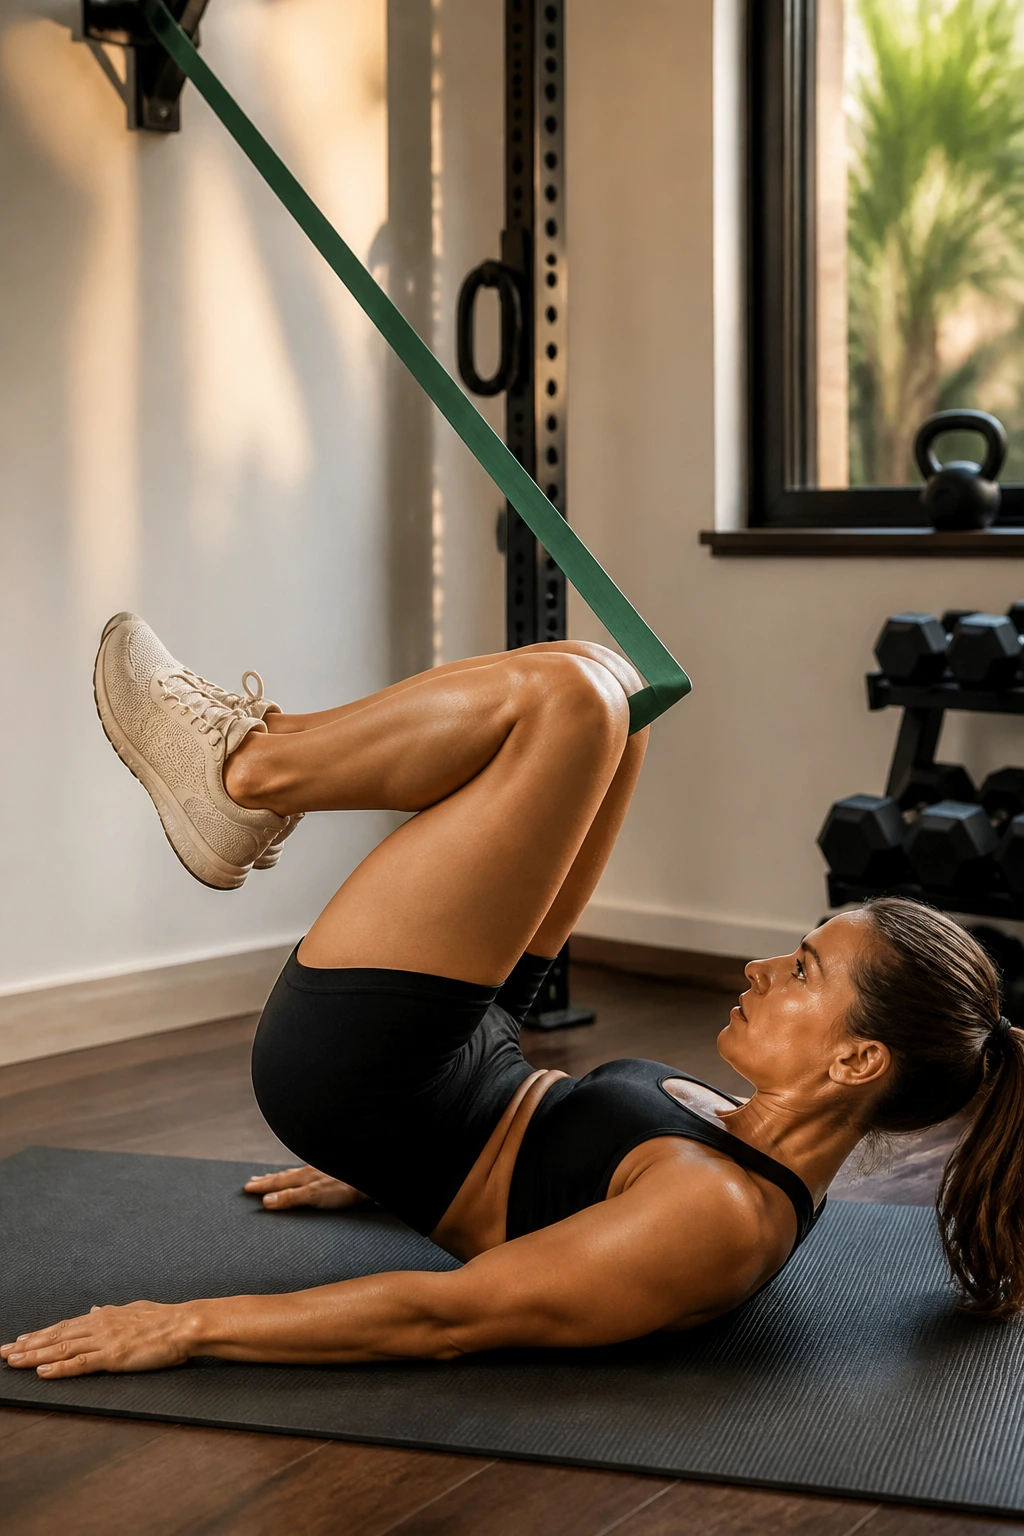
The reverse crunch has a simple job: curl the pelvis toward the ribs without swinging the legs around like a pendulum. Add a band, and the exercise gets more honest. The resistance helps keep tension in the abs through the whole range instead of letting the movement coast.
I like this one because it targets the lower portion of the rectus abdominis without making people haul on their necks. Clean, compact reps beat big sloppy ones here.
Set up with the band anchored overhead or held in a way that gives you light downward tension. Bring your knees in, then curl your tailbone off the floor a few inches. A tiny lift done well is worth more than a dramatic flail.
Form cue
Think “knees in, hips up, slow down.” That’s the whole game.
- 10 to 15 reps
- 2-second lower on each rep
- Stop if your lower back starts to pinch
A lot of people rush the drop. Don’t. The lowering phase is where control shows up.
6. Band Bicycle Crunch
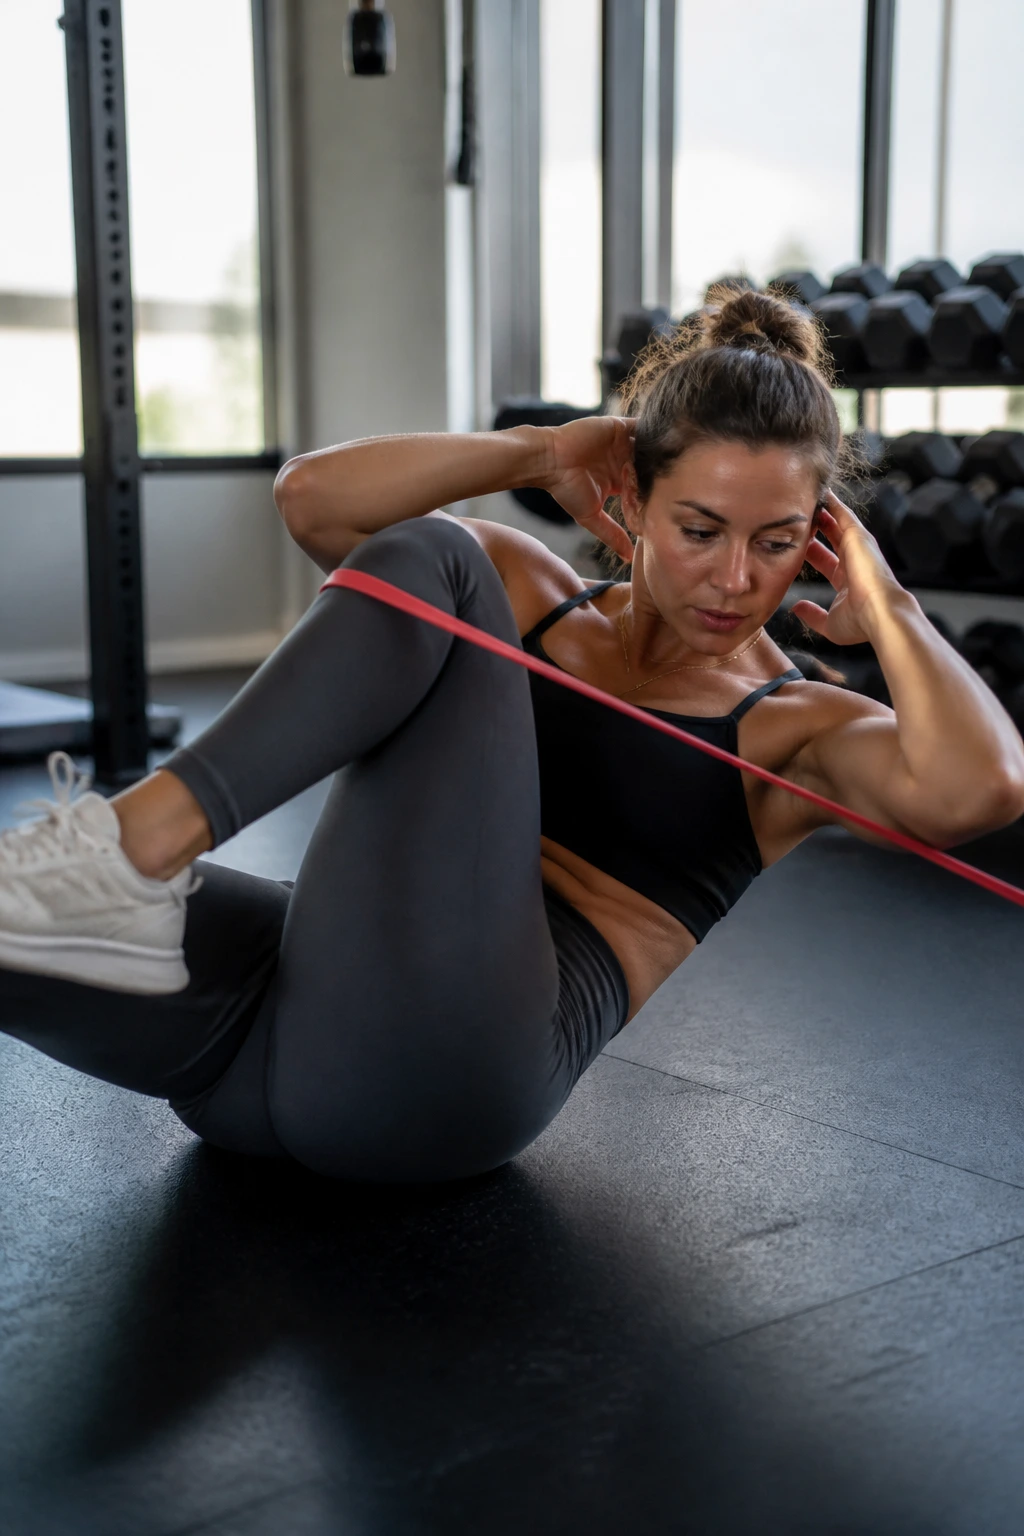
Bicycle crunches get a better reputation when they’re done with control instead of speed. The band adds resistance to the rotation, so your obliques have to work harder to turn and return with purpose. Done right, this one hits the side abs hard without turning into a neck wrestling match.
Keep your elbows wide and your ribs down. If you try to touch elbow to knee by cranking your neck forward, you miss the point and annoy your upper back for nothing.
What makes this one different
The band gives you a little fight on both the twist and the return. That makes the exercise more demanding than the old-school no-resistance version, especially on the slow way back.
A crisp rep looks like this: rotate, pause, return under control, switch sides. Nothing needs to be fast.
- 8 to 12 reps per side
- Smooth tempo
- Keep your chin lightly tucked
Best use: Put this near the middle of a workout, not at the end when your form is already falling apart.
7. High-to-Low Woodchop
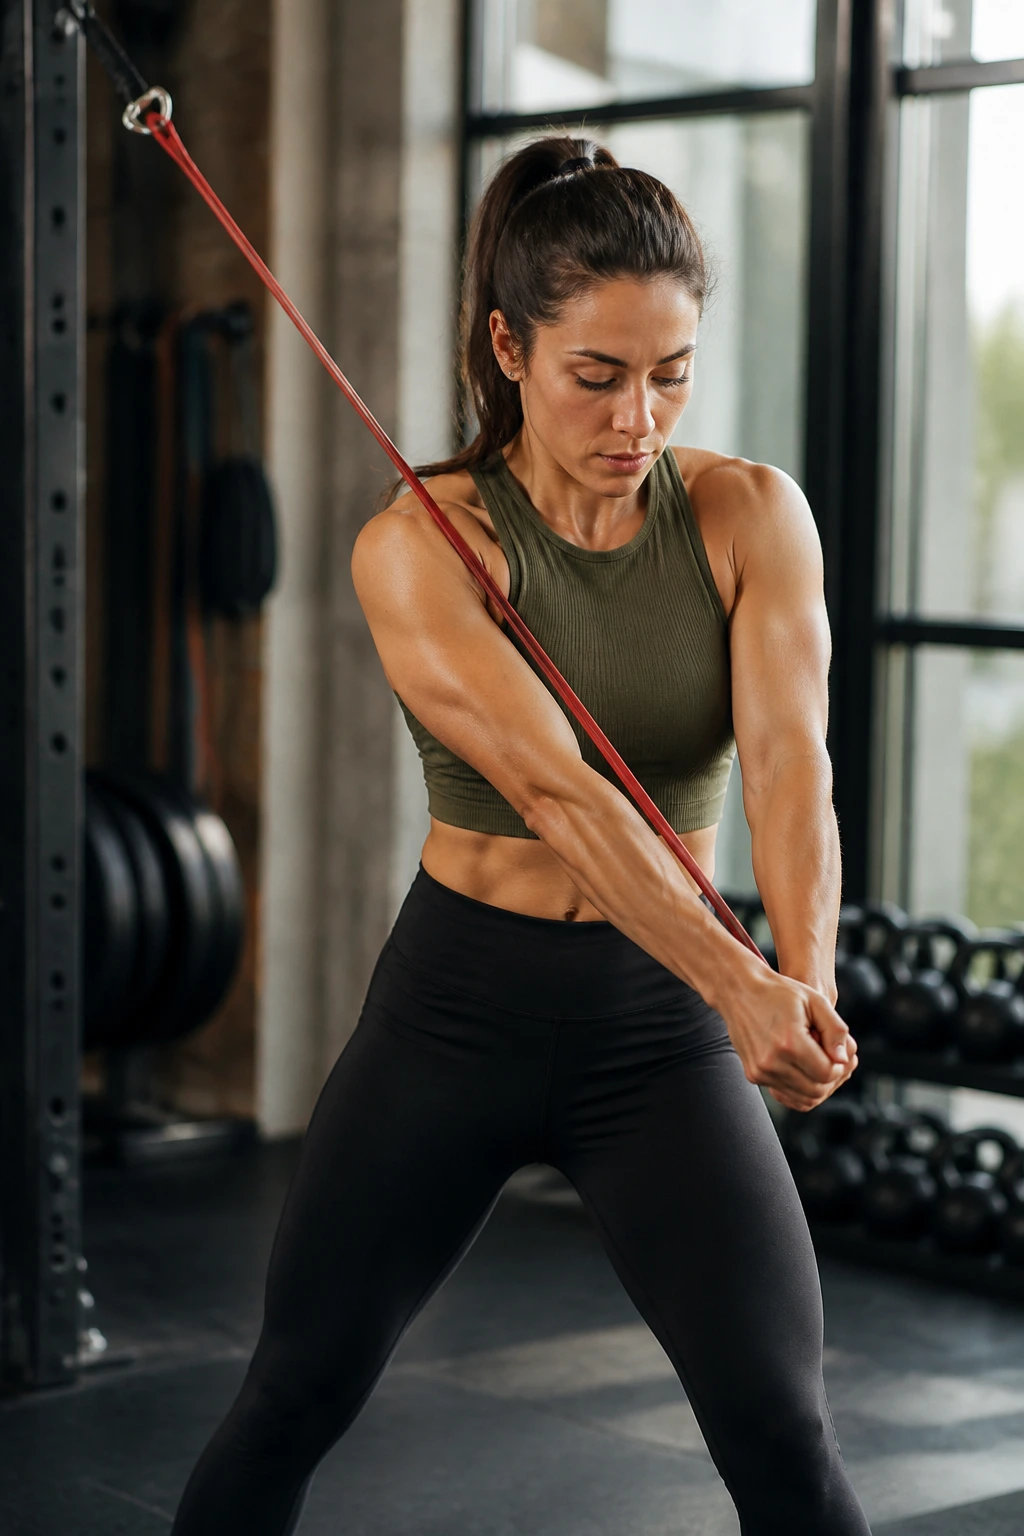
The high-to-low woodchop feels athletic because it is athletic. You start high, pull the band down across your body, and let your trunk rotate just enough to own the movement without collapsing into it. This is one of the better resistance band ab workouts for the obliques when you want a standing move that feels more like real-life power.
Think of the motion as a diagonal slice, not a yank. The band should move in a clean line from above one shoulder down toward the opposite hip.
How to do it well
Pivot through the feet a little, but keep the torso in control. The hips help, the abs guide, and the shoulders stay relaxed. Too much arm pulling turns the whole thing into a back exercise.
- Anchor high.
- Pull 8 to 10 reps per side.
- Pause near the hip for 1 second.
- Reset fully before each rep.
The finish position should feel tight, not crunched.
8. Low-to-High Lift
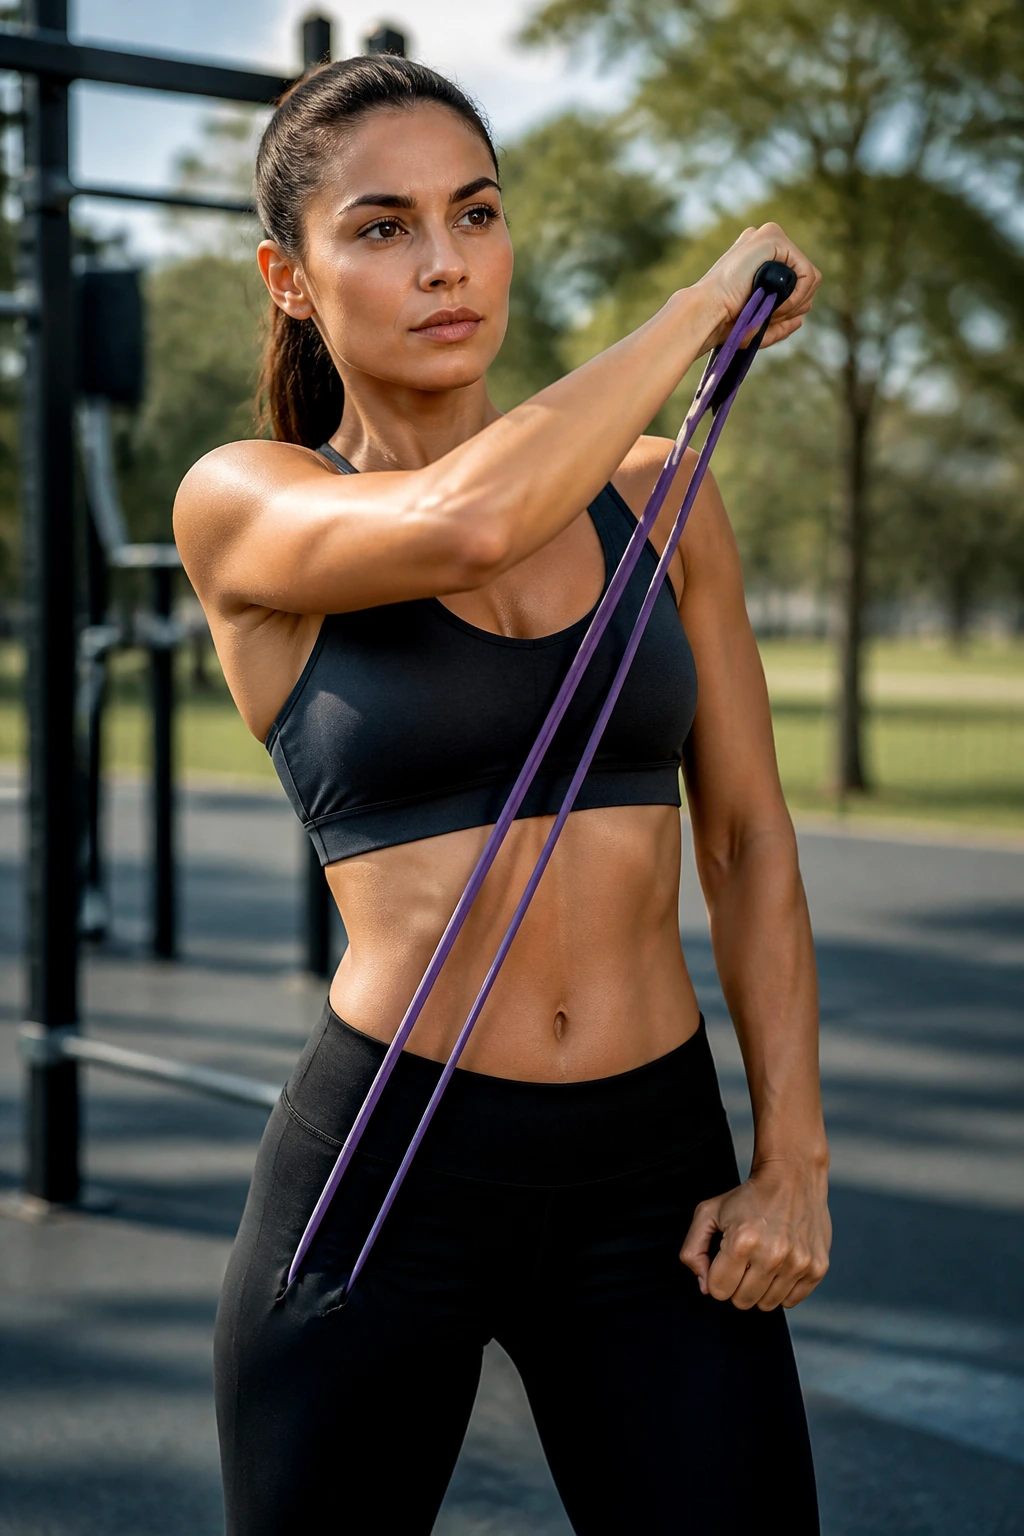
The low-to-high lift is the woodchop’s upward cousin, and it hits the core from a different angle. Instead of driving down, you pull from low near your hip and finish high across the body. That upward path asks your obliques and deep core to stabilize while your arms travel through a longer arc.
It is a good move for people who like standing work and hate getting on the floor every other minute. Fair enough.
The key is not to over-rotate. You are lifting through the torso, not throwing your shoulders around like a tennis serve.
What you should feel
A clean set leaves your midsection warm on the side that is doing the lifting. If you mainly feel it in your biceps, the band is doing the work you meant for your abs to do.
- 8 to 12 reps per side
- Use a light to medium band
- Keep the movement slow on the way back
Small trick: Exhale as the band comes up. It helps keep the brace locked in.
9. Standing Cross-Body Chop to Knee Drive
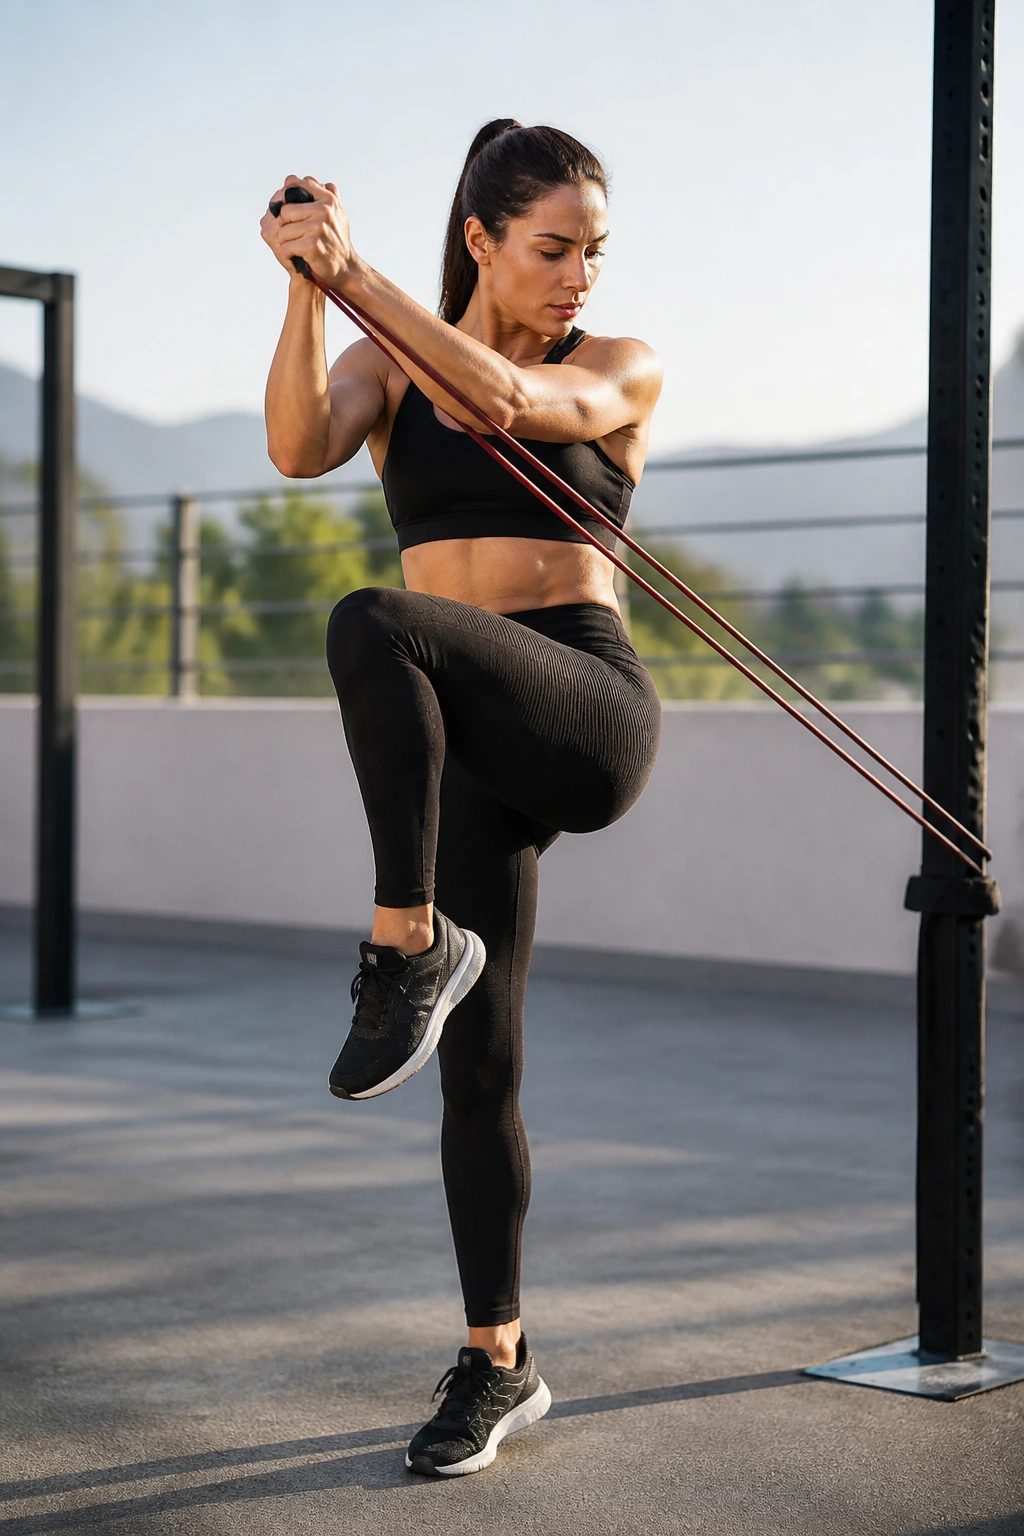
This one looks simple and feels more connected than it first appears. You chop the band across the body, then drive the opposite knee up as the hands finish low. That pairing turns the drill into a full trunk-and-hip coordination move, which is great for a core that needs to handle movement instead of just stillness.
The knee drive is not a kick. It’s a controlled lift. If you swing it, the abs stop doing the work and the hip flexors take over.
A good rep has a rhythm
Chop. Brace. Knee lifts. Reset. The band and the leg should arrive together, not in separate little bursts.
- 6 to 8 reps per side
- Use a light band first
- Keep the standing leg soft, not locked
The interesting part here is the transfer between upper and lower body. That transfer is where a lot of people lose control, and that’s also where the core learns fast.
10. Plank Band Pull-Through
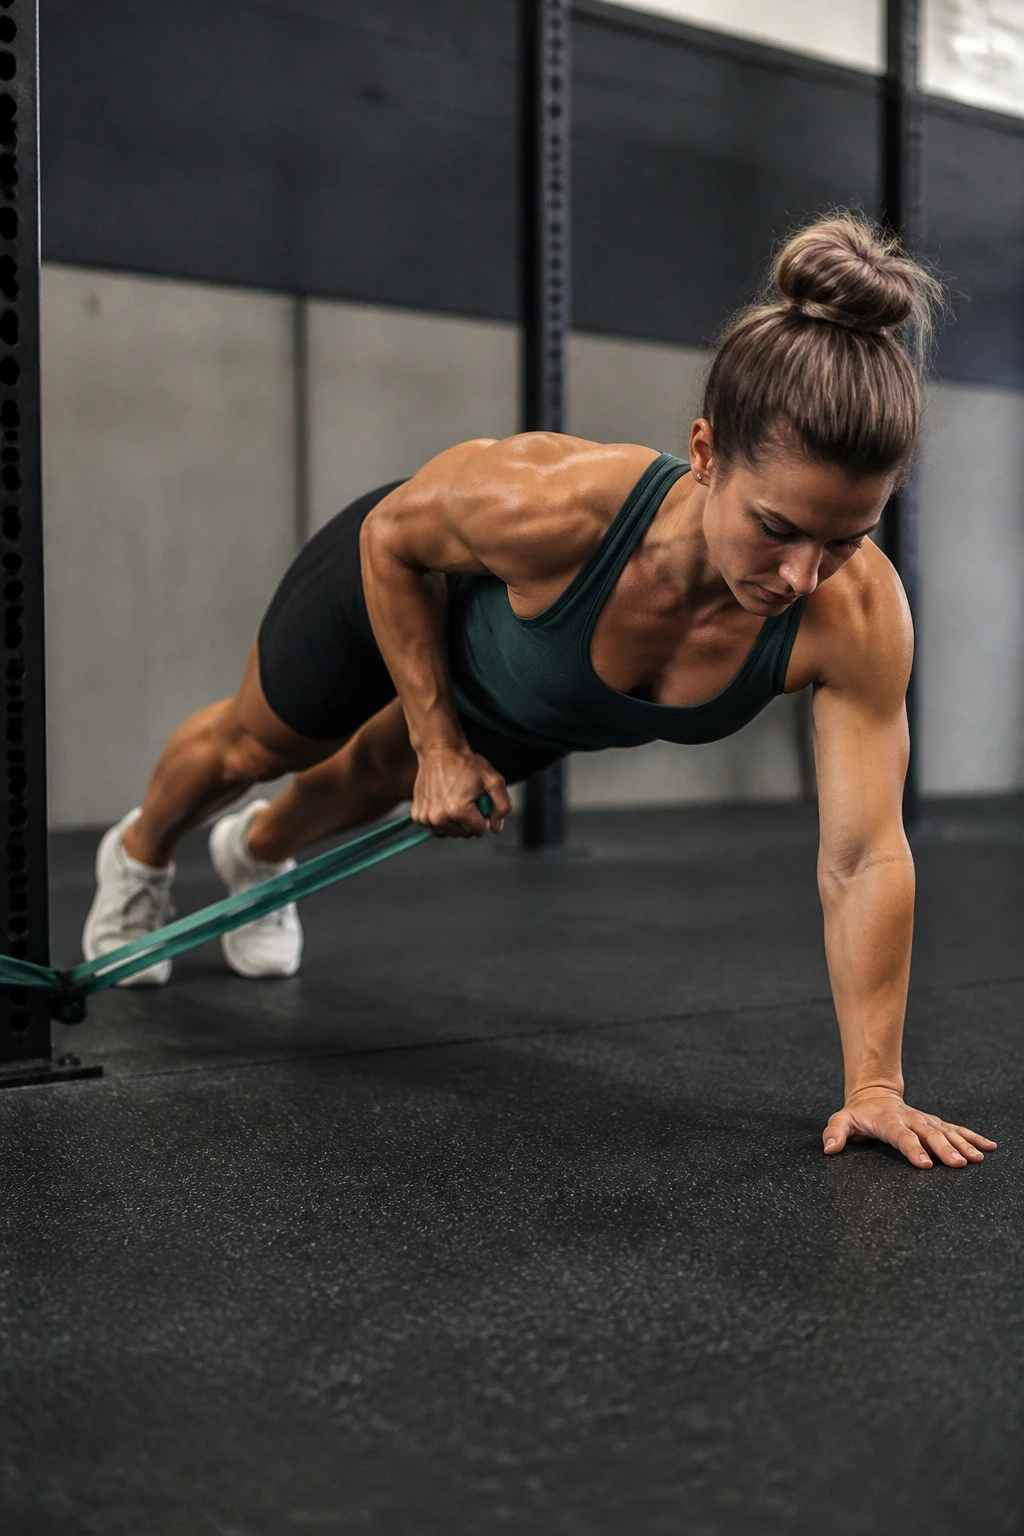
A plank already asks your abs to hold a stiff line. Add a band pull-through, and now your core has to resist motion while one hand moves something across the floor. Nasty in the best way.
Set up in a strong plank with the band beside you. Reach one hand under your torso, drag the band to the other side, then switch. The hips want to swivel. Don’t let them.
Keep the floor quiet
Your shoulders should stay level. Your feet should stay planted. If your body looks like it’s on a boat in rough water, the band is probably too heavy or your plank is already collapsing.
- 6 to 10 drags total
- Hips square to the floor
- Feet a little wider than hip-width if needed
This is a small move with a big payoff. It teaches your trunk to stay calm while one arm creates chaos.
11. Plank Band Row
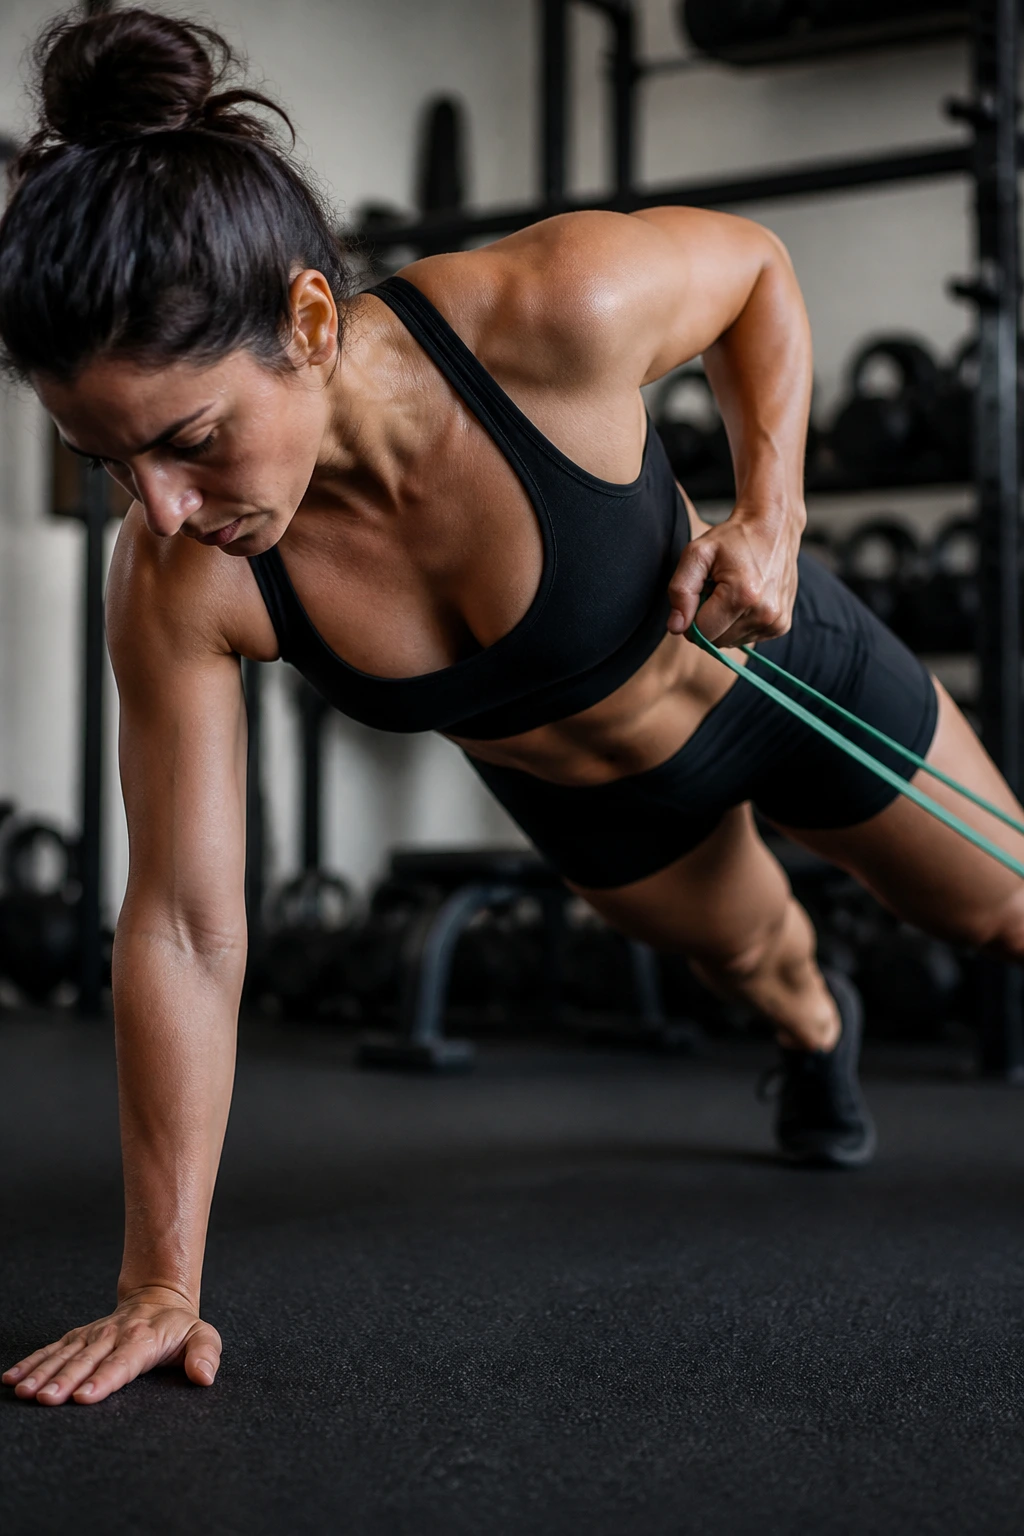
The plank row takes the same anti-rotation idea and adds upper-back work. One arm rows while your abs stop your body from twisting open. That makes it a smart two-for-one move if you want a tight core and stronger posture at the same time.
A lot of people rush this and turn it into a swaying mess. Slow down. The row should look boring from the outside.
How to keep it clean
Set your feet wide enough that you can row without spinning. Pull the band toward your ribs, pause for a beat, then lower it under control. Keep your hips low and your glutes on.
- 6 to 8 rows per side
- 1-second pause at the top
- Use a band you can row without jerking
If your lower back sags, you’re done. End the set there.
12. Mountain Climber With Mini Band
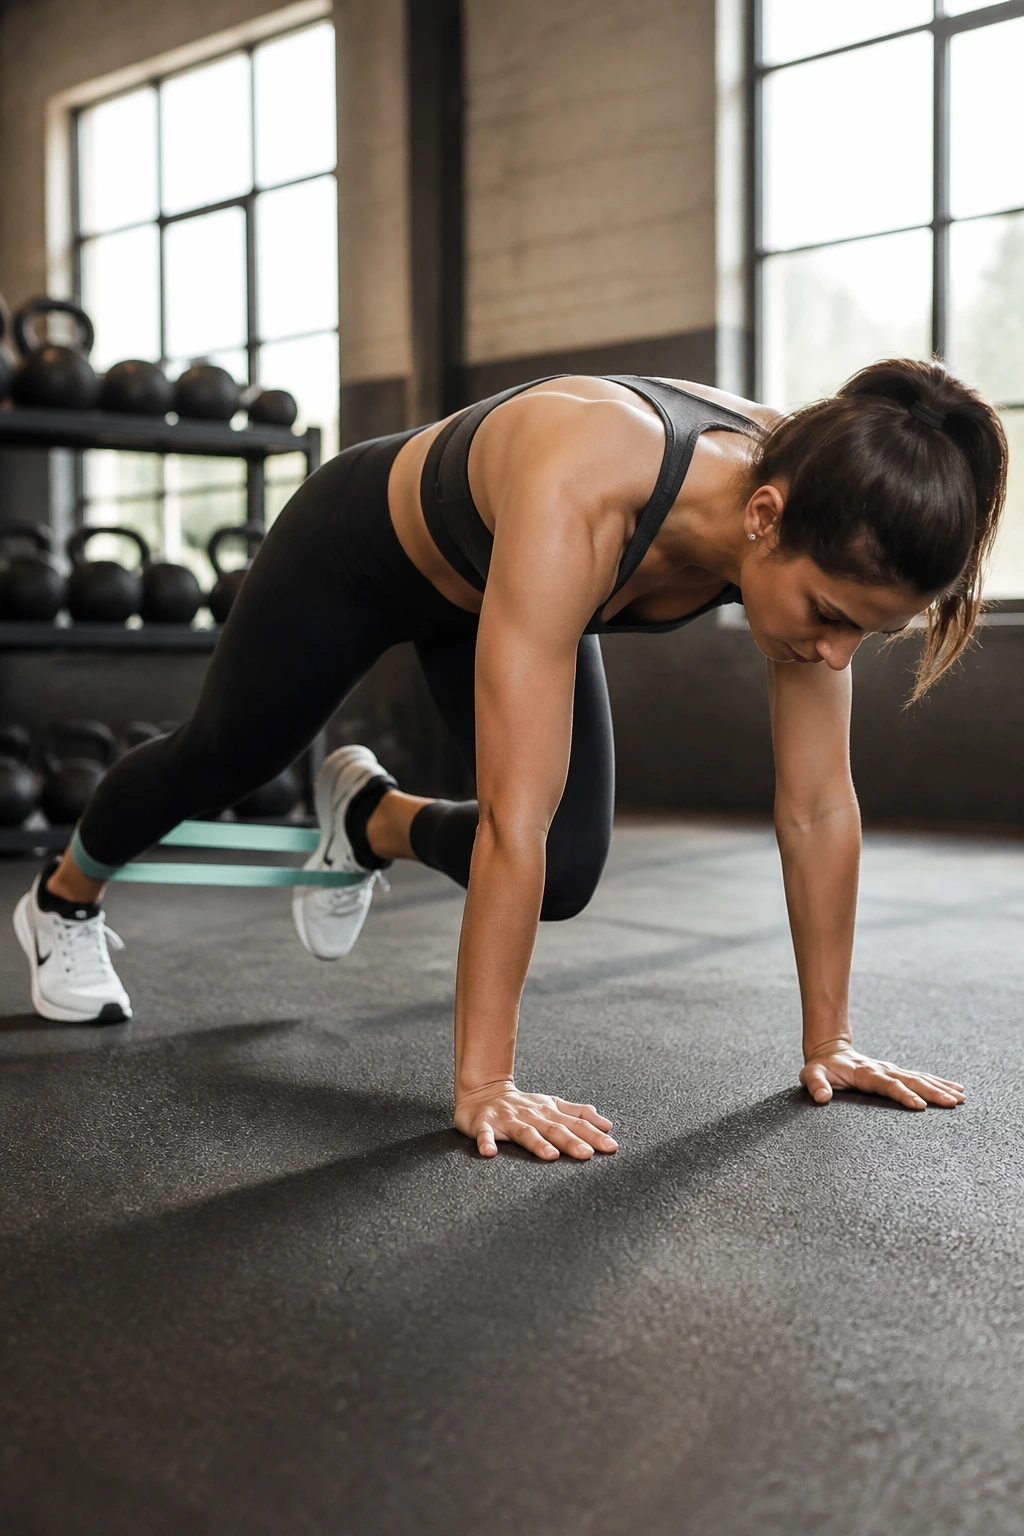
Mountain climbers are usually sold as a cardio move, but with a band around the feet or just above the ankles, they become a core drill with a nasty stability demand. The band keeps asking your legs to drift apart, so your abs have to hold the center of the body steady while the knees move.
The trick is to move the knees without bouncing the hips. If your shoulders are doing all the bracing, your core is not getting the job.
What to feel
Your lower abs should turn on before the pace gets fast. Once the rhythm gets sloppy, stop and reset instead of chasing speed.
- 20 to 30 seconds
- Keep the hips low
- Drive the knees under the body, not wide
This one is simple and ugly in the best way. You’ll know quickly whether your core is actually doing the job.
13. Hollow Body Band Pulldown
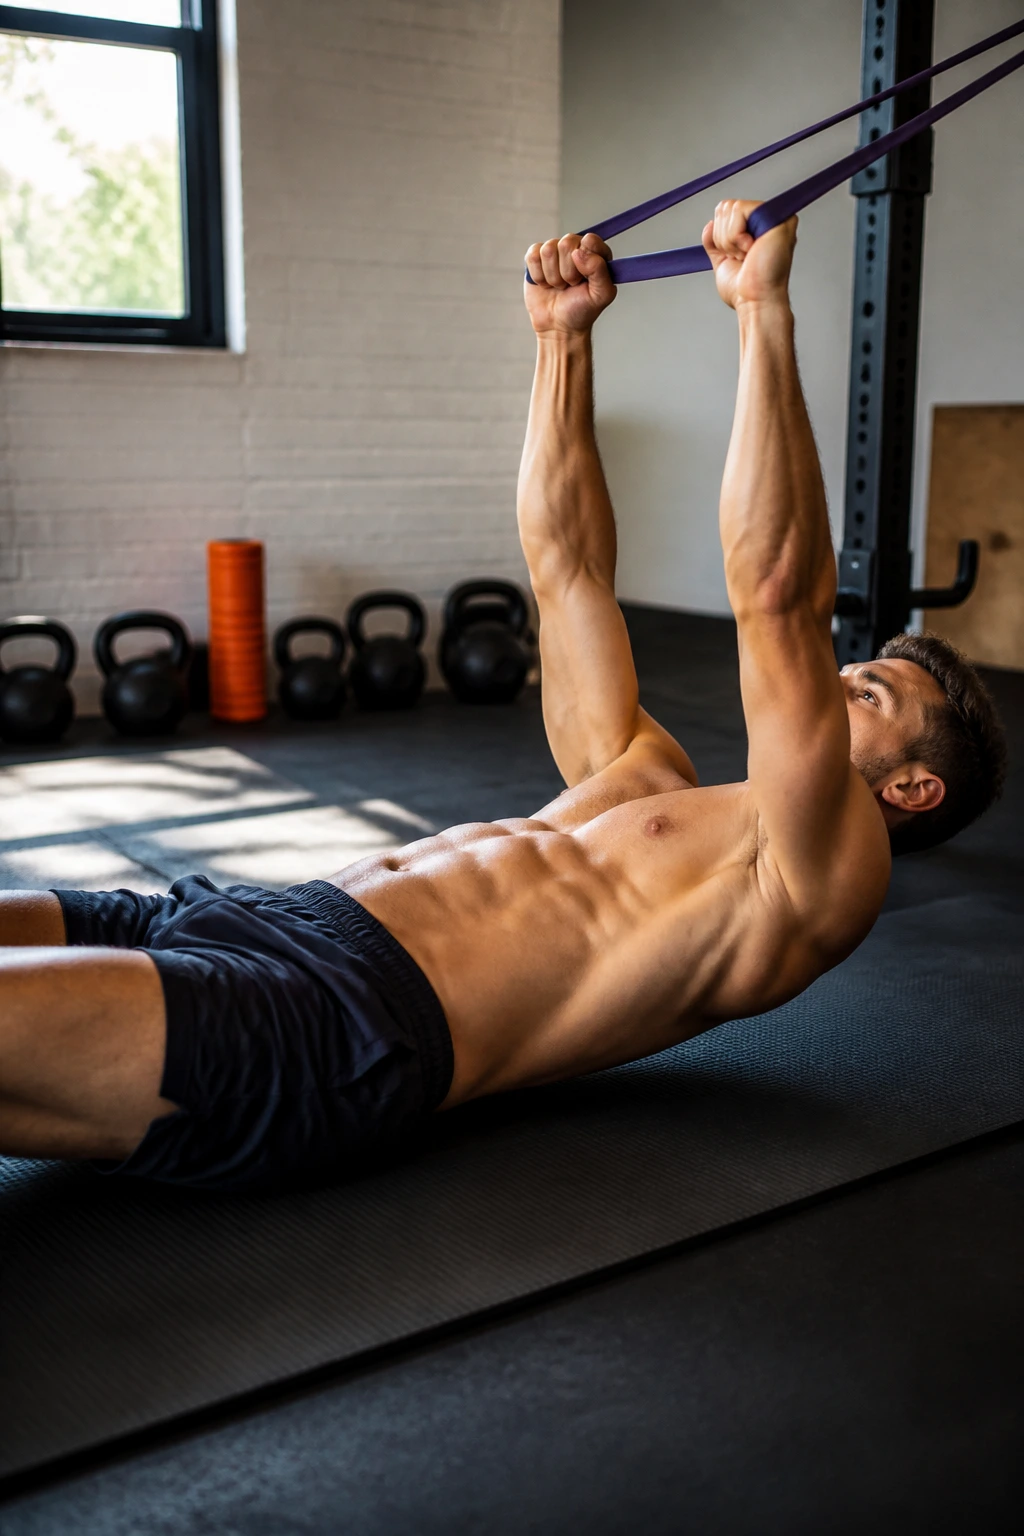
The hollow body pulldown is a strong move for anyone who wants a flatter-looking midsection under tension, because it demands a hard brace while your arms work overhead. Lying in a hollow position takes discipline. You cannot fake it for long.
Anchor the band overhead or hold it in a way that creates downward pull, then keep your low back pressed toward the floor as your arms move. If your ribs pop up, the set is over.
Why this one stands out
The hollow position is brutal on the abs because the body has to stay long and tight at the same time. Add a band, and now the lats and core have to cooperate.
- 6 to 10 slow reps
- Knees bent to make it easier
- Straighten the legs only if your low back stays glued down
Hard truth: If the hollow hold is broken, the pulldown is broken too.
14. Suitcase March With Band
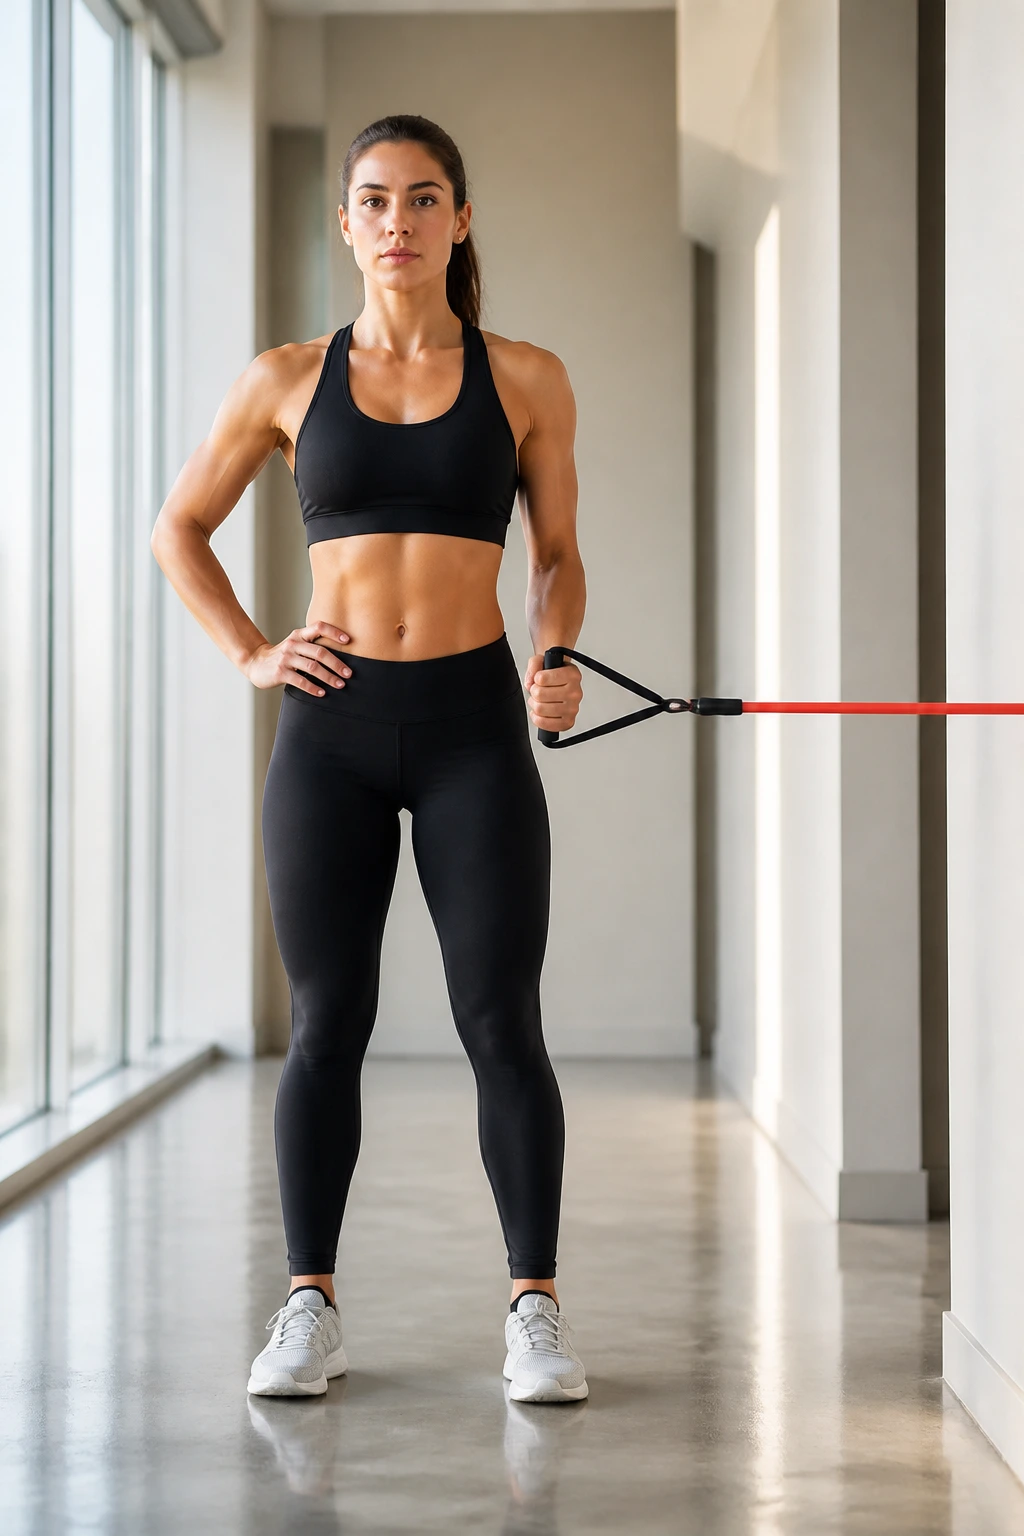
Imagine carrying a heavy bag in one hand and trying not to lean. That is the suitcase march. With a band pulling from one side, the body has to resist side bend and rotation every time one foot leaves the floor.
This is a sneaky one. It looks almost too ordinary to matter, then your obliques start complaining three steps in.
Keep your chest tall and your stride short. The point is not speed. The point is staying vertical while one side tries to drag you down.
How to make it productive
Take controlled marching steps for 20 to 30 seconds, then switch sides. If you feel your shoulder hiking up, relax it and reset.
- Hold the band in one hand
- March in place or walk slowly
- Keep the pelvis level
The more still your torso stays, the better this works. Simple. Harsh. Useful.
15. Band Bird Dog Row
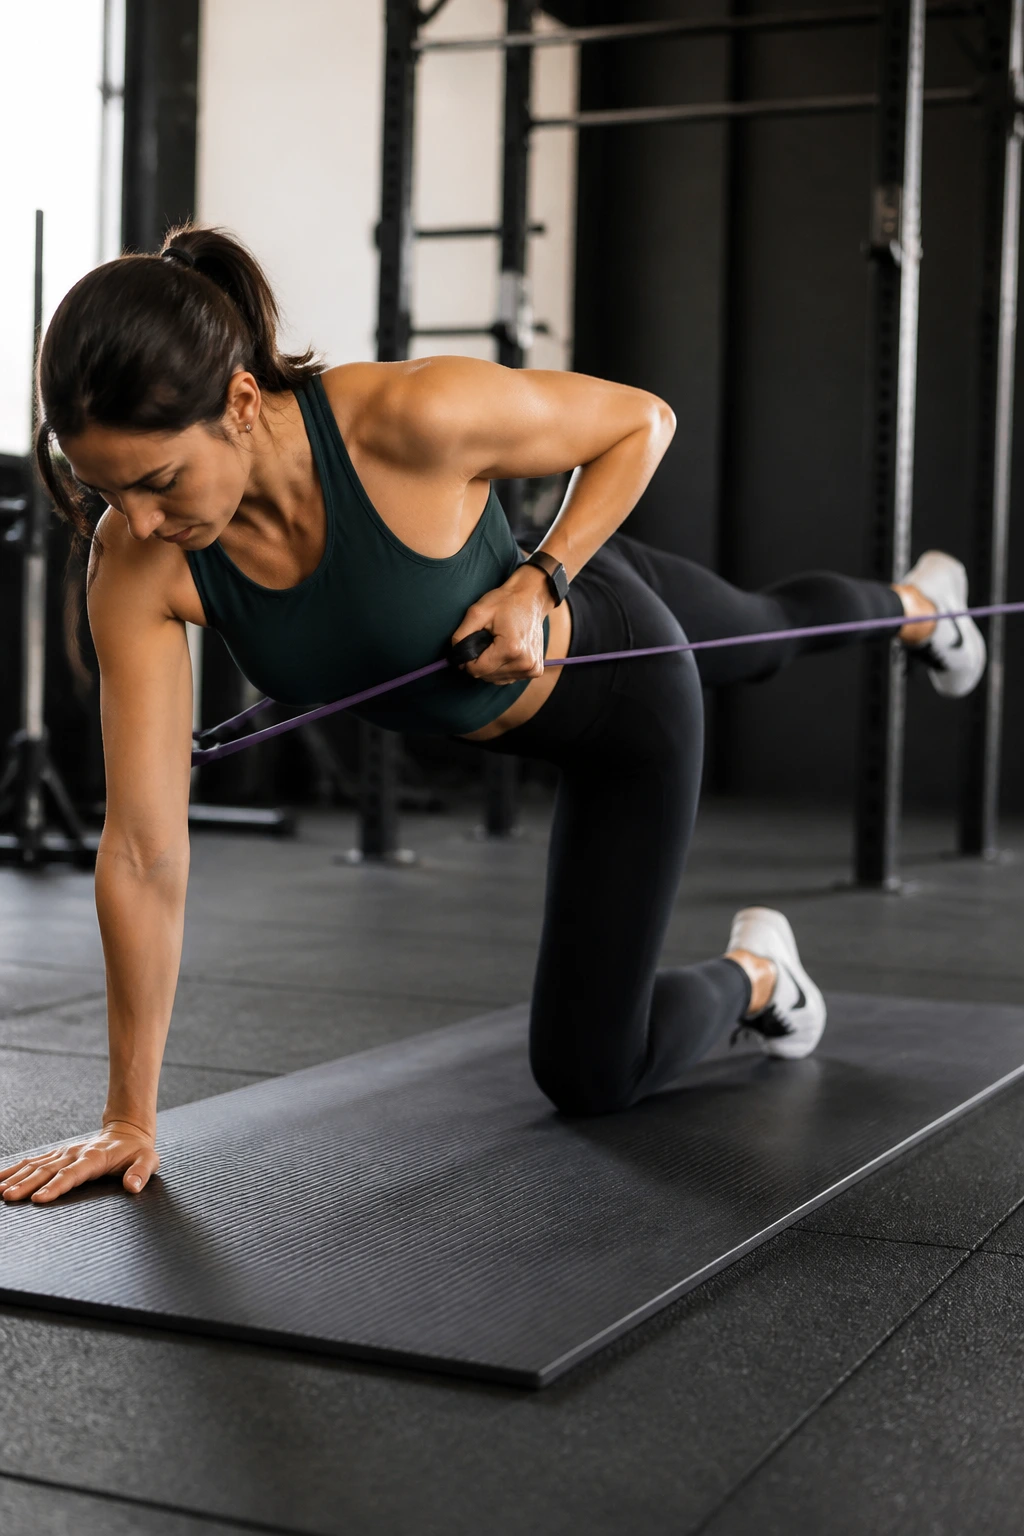
The bird dog row combines spinal stability with a little upper-body pull. On hands and knees, you extend one leg back and row the band with the opposite arm. That cross-body demand forces your core to keep the trunk from spinning while the limbs do their thing.
I like this one for people who want a core move that feels controlled instead of punishing. It’s kinder on the body than a lot of floor drills, but it still asks for real precision.
A cleaner rep
Reach long through the heel, keep the neck neutral, and row without shifting your weight. If your balance gets wobbly, shorten the extension and slow the row.
- 6 to 8 reps per side
- Hold the reach for 2 seconds
- Keep the ribs tucked in
The best version looks almost too smooth. That is the point.
16. Standing Side Bend With Band
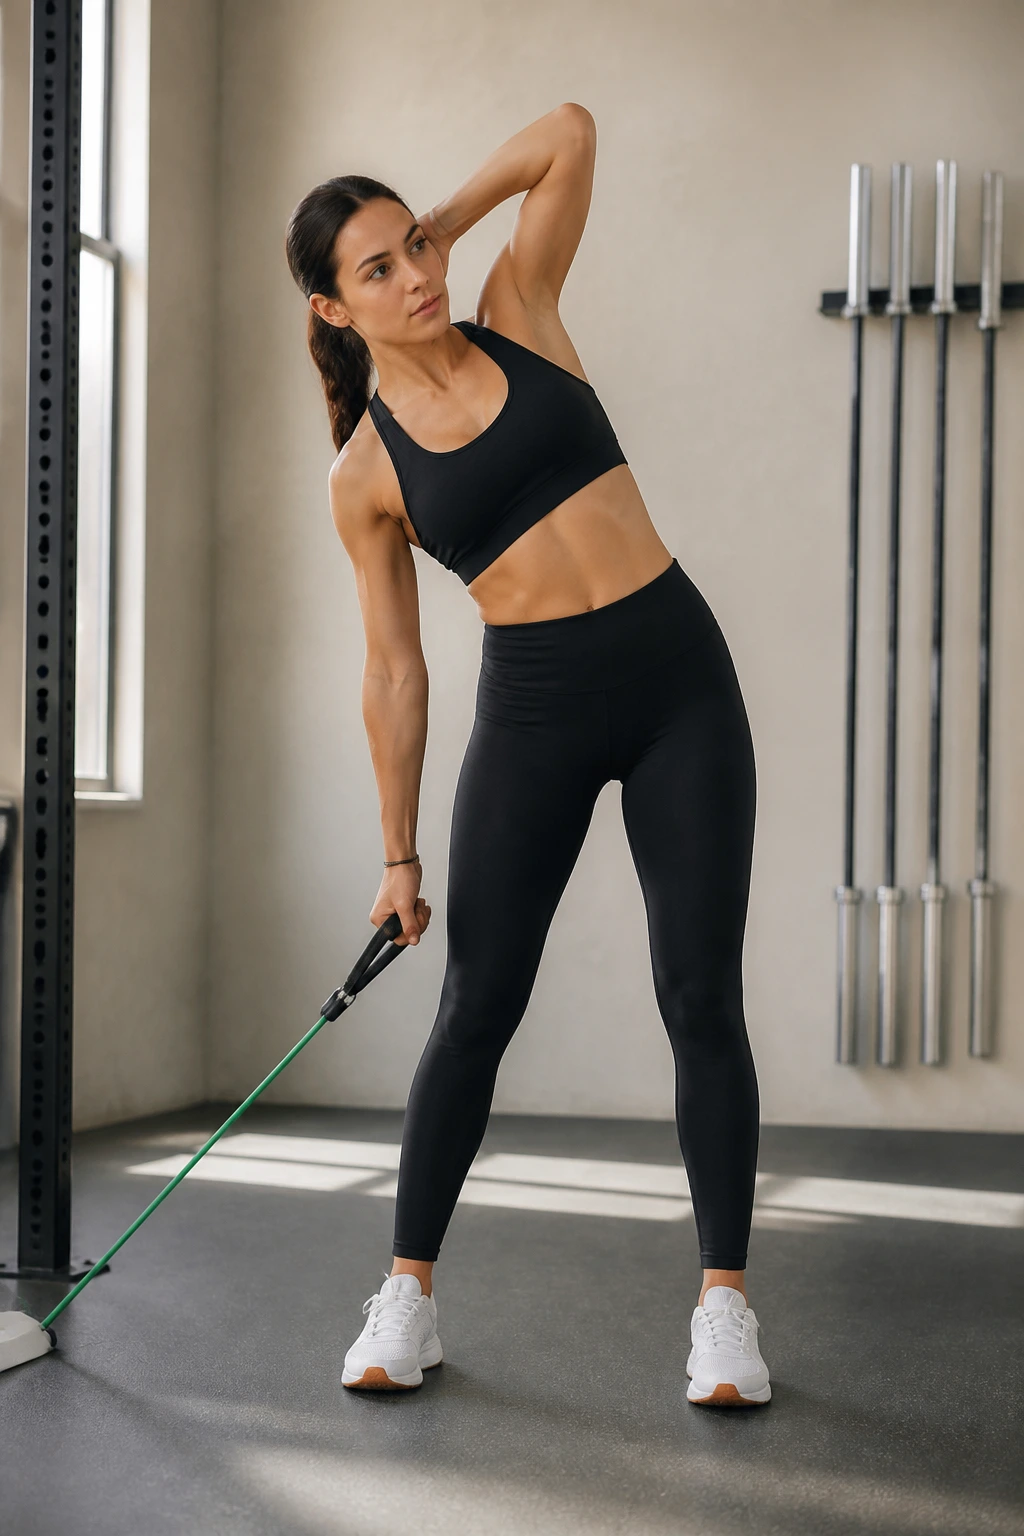
The standing side bend is not flashy, and I mean that as a compliment. It isolates the obliques in a direct way, especially when you keep the movement tight and controlled. One hand holds the band low, the other side shortens slightly, and the waistline of the body has to work against the pull.
Do not turn this into a big sway. That’s the easiest mistake to make, and it steals the work from the side abs.
How to feel it where you want it
Move only through a small range. Lean a few inches, come back to center, and stop before your shoulder starts rolling forward. The movement should come from the torso, not the hip.
- 10 to 12 reps per side
- Slow tempo
- Keep both feet planted
This is a good finisher when your core already feels tired and you want a direct oblique hit.
17. Seated Band Knee Tuck
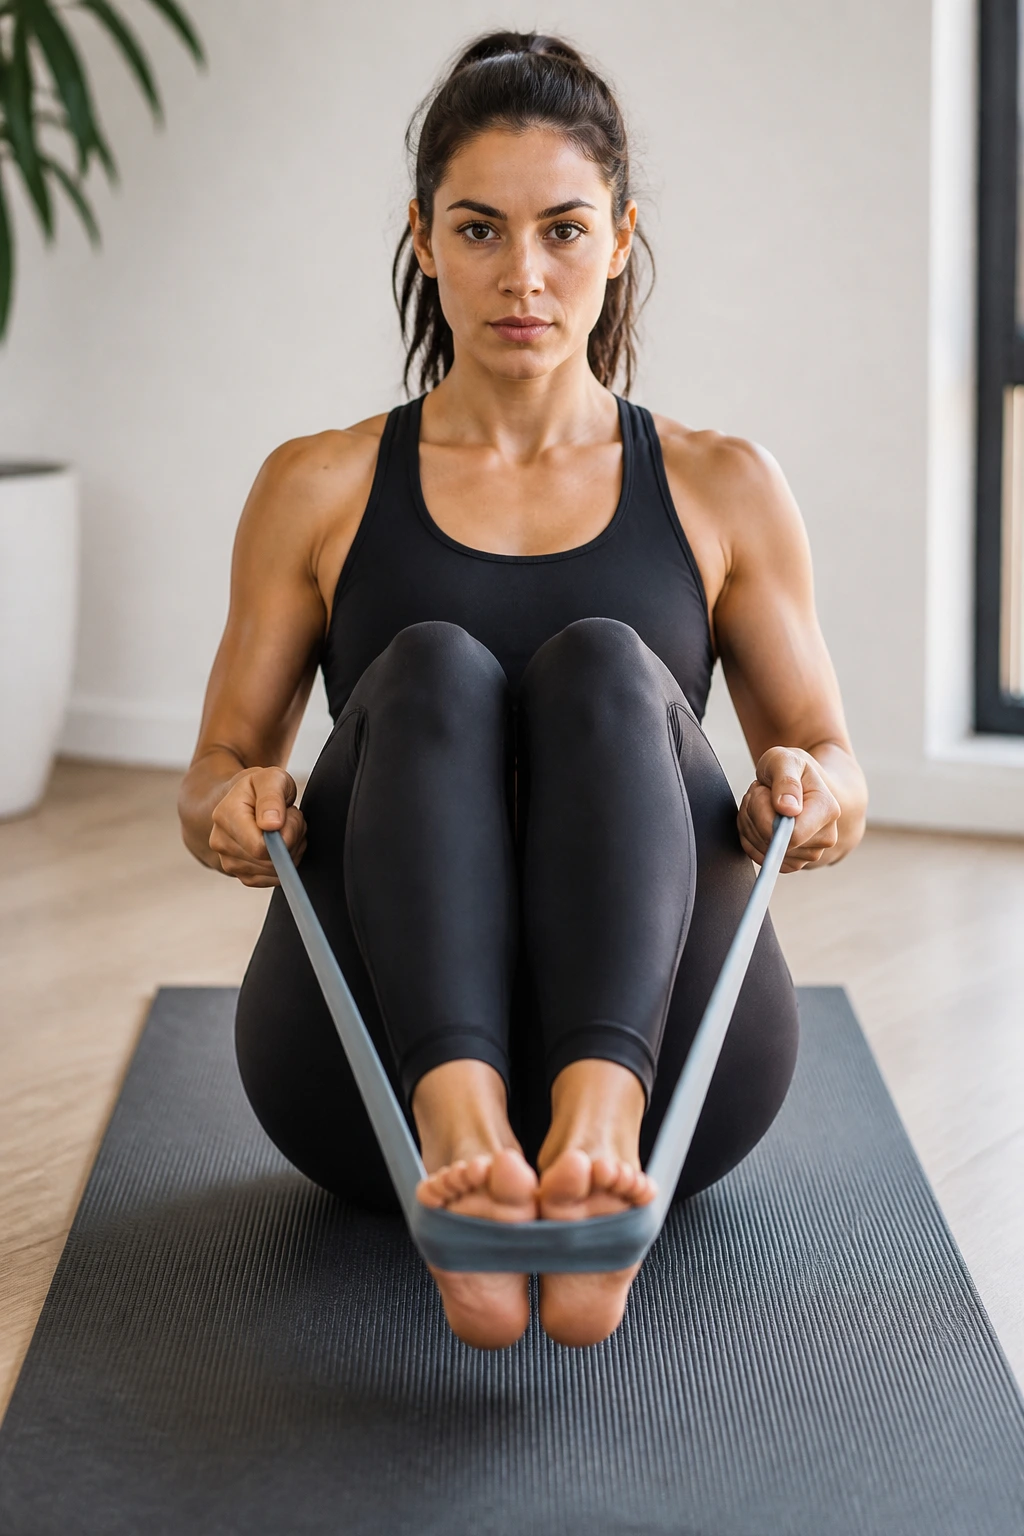
Seated knee tucks with band resistance bring the lower abs into the conversation fast. Sit tall, brace, and pull the knees in against the band’s pull. The torso stays slightly leaned back, but not so far that your lower back starts doing the work instead.
The nice part is the range of motion is easy to control. The hard part is keeping the chest open while the abs stay tight. That balance matters.
A useful cue
Think “tall spine, short waist.” Bring the knees in without slumping. If you round your shoulders and curl into a ball, the exercise changes into something else.
- 8 to 15 reps
- Hold the tuck for 1 second
- Use a medium band only if you can control the return
This one burns fast. That’s fine. Let the burn come from control, not speed.
18. Bear Plank Band Drag
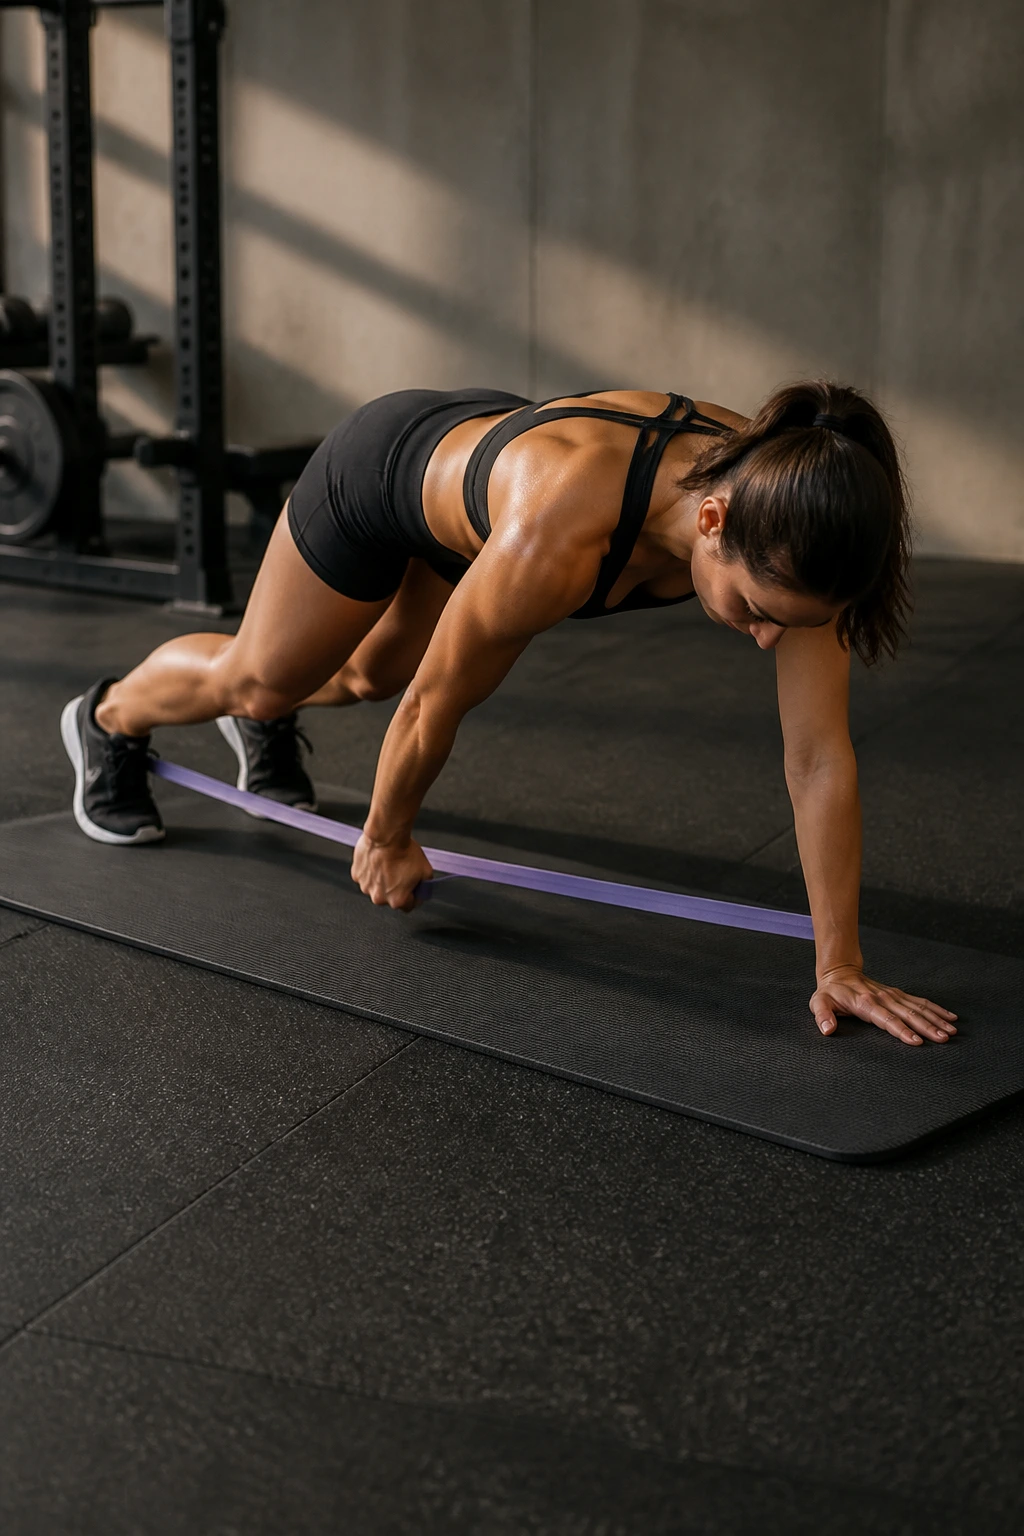
Bear plank band drags are mean. In a good way. You hover on hands and toes with knees off the floor, then drag a band across under the body while trying not to rock side to side. The core has to stabilize the pelvis, ribs, and shoulders at the same time.
It is one of the best choices here if you want your abs to work hard under a true bracing demand. There’s nowhere to hide. The second your hips shift, you feel it.
What makes it so effective
The bear position shortens the leverage just enough to keep the challenge high without turning the drill into a full plank collapse. That gives you a strong dose of anti-rotation and anterior core work.
- 5 to 8 drags per side
- Knees hover 1 to 2 inches off the floor
- Keep the back flat and the neck long
Use a light band. Heavy here is usually sloppy. Sloppy is not the point.
Final Thoughts
The best resistance band ab workouts do two things at once: they make your midsection work, and they teach it to stay put when the rest of the body is moving around. That’s the part a lot of people miss. A tight core is not only about flexing hard; it’s about bracing well, and bands are excellent at exposing whether you can do that.
Mix standing anti-rotation moves with floor drills, and don’t chase speed too early. A clean 8-rep set with a band that challenges you is worth more than a fast set of thirty where your hips swing all over the place.
Pick three or four of these exercises, keep the band tension honest, and work them with control for a few weeks. Your abs will feel different. So will your posture.
